- DL manuals
- Vega
- Measuring Instruments
- VEGASON 62
- Operating Instructions Manual
Vega VEGASON 62 Operating Instructions Manual
Summary of VEGASON 62
Page 1
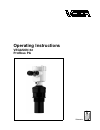
Operating instructions vegason 62 profibus pa ultrasonic.
Page 2: Content
Content 1 about this document 1.1 function . . . . . . . . . . . . . . . . . . . . . . . . . . . . . 4 1.2 target group . . . . . . . . . . . . . . . . . . . . . . . . . . 4 1.3 symbolism used . . . . . . . . . . . . . . . . . . . . . . . 4 2 for your safety 2.1 authorised personnel . . . . . . . . ...
Page 3
6.6 saving the parameter adjustment data . . . . . . . 39 7 setup with pactware™ and other adjustment programs 7.1 connect the pc via vegaconnect 3 . . . . . . 40 7.2 connect the pc via vegaconnect 4 . . . . . . 41 7.3 parameter adjustment with pactware™. . . . . . 42 7.4 parameter adjustment with p...
Page 4: 1 About This Document
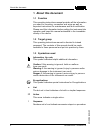
1 about this document 1.1 function this operating instructions manual provides all the information you need for mounting, connection and setup as well as important instructions for maintenance and fault rectification. Please read this information before putting the instrument into operation and keep ...
Page 5: 2 For Your Safety
2 for your safety 2.1 authorised personnel all operations described in this operating instructions manual must be carried out only by trained specialist personnel authorised by the operator. During work on and with the device the required personal protection equipment must always be worn. 2.2 approp...
Page 6
During the entire duration of use, the user is obliged to determine the compliance of the required occupational safety measures with the current valid rules and regulations and also take note of new regulations. 2.5 safety approval markings and safety tips the safety approval markings and safety tip...
Page 7
You can view all software histories on our website www.Vega. Com. Make use of this advantage and get registered for update information via e-mail. 2.8 safety instructions for ex areas please note the ex-specific safety information for installation and operation in ex areas. These safety instructions ...
Page 8
L make sure that the cable gland is tight and strain-relieved. The outer diameter of the connection cable must be adapted to the cable gland. Tighten the pressure screw of the cable gland carefully. L cover unused openings for cable glands tightly l mount the instrument in such a way that the sensor...
Page 9: 3 Product Description
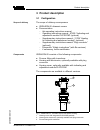
3 product description 3.1 configuration the scope of delivery encompasses: l vegason 62 ultrasonic sensor l documentation - this operating instructions manual - operating instructions manual - 27835 "indicating and adjustment module plicscom" (optional) - supplementary instructions manual - 31708 "he...
Page 10
3.2 principle of operation vegason 62 is an ultrasonic sensor for continuous level measurement. It is suitable for liquids and solids in virtually all industries, particularly in the water and waste water industry. The transducer of the ultrasonic sensor transmits short ultrasonic pulses to the meas...
Page 11
3.3 operation vegason 62 can be adjusted with different adjustment media: l with indicating and adjustment module l with the suitable vega dtm in conjunction with an adjustment software according to the fdt/dtm standard, e.G. Pactware™ and pc l the simatic adjustment program pdm the entered parameter...
Page 12
L storage and transport temperature see "supplement - technical data - ambient conditions" l relative humidity 20 … 85 % storage and transport temperature 12 vegason 62 • profibus pa product description 28785 -en -080125.
Page 13: 4 Mounting
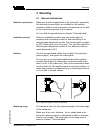
4 mounting 4.1 general instructions make sure that the wetted parts of the instrument, especially the seal and process fitting, are suitable for the existing process conditions such as pressure, temperature etc. As well as the chemical properties of the medium. You can find the specifications in chapte...
Page 14
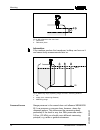
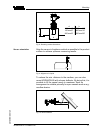
1 2 fig. 3: min. Distance to the max. Level 1 dead band 2 reference plane information: if the medium reaches the transducer, buildup can form on it and cause faulty measurements later on. 1 3 2 100% 0% fig. 4: measuring range (operating range) and max. Measuring distance 1 full 2 empty (max. Measuri...
Page 15
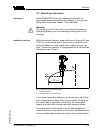
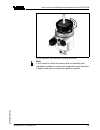
4.2 mounting instructions screw vegason 62 into the mounting socket with an appropriate spanner applied to the hexagon of the process fitting. Max. Torque see chapter "technical data". Warning: the housing must not be used to screw the instrument in! Applying tightening force can damage internal part...
Page 16
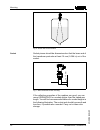
Fig. 6: vessel with conical bottom socket pieces should be dimensioned so that the lower end of the transducer protrudes at least 10 mm (0.394 in) out of the socket. Ca. 10 mm fig. 7: recommended socket mounting if the reflective properties of the medium are good, you can mount vegason 62 on sockets ...
Page 17
D d h 100 mm/4" 150 mm/6" 200 mm/8" 300 mm/12" 400 mm/16" 500 mm/20" h fig. 8: deviating socket dimensions align the sensor in liquids as vertical as possible to the product surface to achieve optimum measuring results. Fig. 9: alignment in liquids to reduce the min. Distance to the medium, you can ...
Page 18
The ultrasonic sensor should be installed at a location where no installations cross the ultrasonic beam. Vessel installations such as for example, ladders, limit switches, heating spirals, struts etc. Can cause false echoes superimposed on the useful echo. Make sure when planning your measuring sit...
Page 19
Fig. 12: agitators do not mount the instruments in or above the filling stream. Make sure that you detect the product surface, not the inflowing product. Fig. 13: inflowing liquid through the action of filling, stirring and other processes in the vessel, dense foams which considerably damp the emitted s...
Page 20
If there are strong air currents in the vessel, e.G. Due to strong winds in outdoor installations or air turbulence, e.G. By cyclone extraction you should mount vegason 62 in a standpipe or use a different measuring principle, e.G. Radar or guided radar (tdr). By using a standpipe (surge or bypass tu...
Page 21
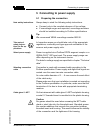
5 connecting to power supply 5.1 preparing the connection always keep in mind the following safety instructions: l connect only in the complete absence of line voltage l if overvoltage surges are expected, overvoltage arresters should be installed according to profibus specifications tip: we recommend...
Page 22
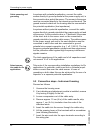
In systems with potential equalisation, connect the cable screen directly to ground potential at the power supply unit, in the connection box and at the sensor. The screen in the sensor must be connected directly to the internal ground terminal. The ground terminal outside on the housing must be con...
Page 23
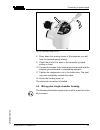
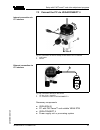
Fig. 15: connection steps 6 and 7 8 press down the opening levers of the terminals, you will hear the terminal spring closing 9 check the hold of the wires in the terminals by lightly pulling on them 10 connect the screen to the internal ground terminal and the external ground terminal to potential ...
Page 24
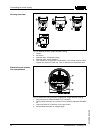
5 5 5 5 1 2 4 3 fig. 16: material versions, single chamber housing 1 plastic 2 aluminium 3 stainless steel, investment casting 4 stainless steel, electro-polished 5 filter element for air pressure compensation of all material versions. Blind stopper with version ip 66/ip 68, 1 bar for aluminium and ...
Page 25
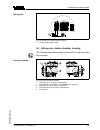
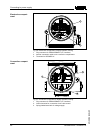
I2c display 1 1 2 5 6 7 8 fig. 18: wiring plan, single chamber housing 1 voltage supply/signal output 5.4 wiring plan, double chamber housing the following illustrations apply to the non-ex as well as to the ex-ia version. 1 2 3 4 5 fig. 19: double chamber housing 1 housing cover, connection compart...
Page 26
1 3 2 display 1 2 5 6 7 8 i2c fig. 20: electronics compartment, double chamber housing 1 plug connector for vegaconnect (i²c interface) 2 internal connection cable to the connection compartment 3 terminals for vegadis 61 3 1 2 display 1 2 i²c fig. 21: connection compartment, double chamber housing 1...
Page 27
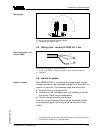
I2c 1 1 2 fig. 22: wiring plan, double chamber housing 1 voltage supply/signal output 5.5 wiring plan - version ip 66/ip 68, 1 bar + - 1 2 fig. 23: wire assignment, connection cable 1 brown (+) and blue (-) to power supply or to the processing system 2 shielding 5.6 switch on phase after vegason 62 ...
Page 28: Adjustment Module Plicscom
6 set up with the indicating and adjustment module plicscom 6.1 short description the indicating and adjustment module is used for measured value display, adjustment and diagnosis. It can be mounted in the following housing versions and instruments: l all sensors of the plics ® instrument family, in...
Page 29
Fig. 24: installation of the indicating and adjustment module note: if you intend to retrofit the sensor with an indicating and adjustment module for continuous measured value indication, a higher cover with an inspection glass is required. Set up with the indicating and adjustment module plicscom ve...
Page 30
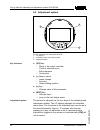
6.3 adjustment system 1.1 2 3 1 fig. 25: indicating and adjustment elements 1 lc display 2 indication of the menu item number 3 adjustment keys l [ok] key: - move to the menu overview - confirm selected menu - edit parameter - save value l [->] key to select: - menu change - list entry - select editi...
Page 31
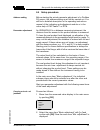
6.4 setup procedure before starting the actual parameter adjustment of a profibus pa sensor, the address setting must first be carried out. You will find a detailed description in the operating instructions manual of the indicating and adjustment module or in the online help of pactware™ or dtm. As veg...
Page 32
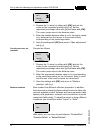
Min. Adjustment 0.00 % = 5.000 m(d) 4.000 m(d) 3 prepare the % value for editing with [ok] and set the cursor to the requested position with [->]. Set the requested percentage value with [+] and save with [ok]. The cursor jumps now to the distance value. 4 enter the suitable distance value in m for ...
Page 33
Through this additional selection, the sensor is adapted perfectly to the product and measurement reliability, partic- ularly in products with bad reflective properties, is considerably increased. Enter the requested parameter via the appropriate keys, save your settings and jump to the next menu ite...
Page 34
The vessel is displayed correctly. If the volume should not be displayed in percent but e.G. In l or kg, a scaling can be also set in the menu item "display". Linearisation curve linear enter the requested parameter via the appropriate keys, save your settings and jump to the next menu item with the...
Page 35
[ok] and select in the below menu "create new". Enter the actual distance from the sensor to the product surface. All false signals in this area are detected by the sensor and saved after confirming with [ok]. Note: check the distance to the product surface, because if an incorrect (too large) value ...
Page 36
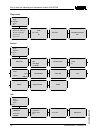
Function reset value sensor address max. Adjustment 0 m(d) min. Adjustment meas. Range end in m(d) 3) medium liquid vessel form not known damping 0 s linearisation linear channel pv lin. % sensor-tag sensor displayed value pa-out additional pa value secondary value 1 % out-scale-unit % pv-out-scale ...
Page 37
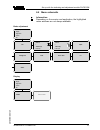
6.5 menu schematic information: depending on the version and application, the highlighted menu windows are not always available. Basic adjustment 1 ▶ basic adjustment display diagnostics service info 1.1 sensor address 000 1.2 min. Adjustment 000.0 % = 10.000 m(d) 1.245 m(d) 1.3 max. Adjustment 100....
Page 38
Diagnostics 3 basic adjustment display ▶ diagnostics service info 3.1 pointer distance min.: 0.580 m(d) dist. Max.: 16.785 m(d) t-min.: 30.6 °c t-min.: 4.5 °c 3.2 meas. Reliability 36 db sensor status ok 3.3 curve selection echo curve 3.4 echo curve presentation of the echo curve service 4 basic adj...
Page 39
6.6 saving the parameter adjustment data it is recommended noting the adjusted data, e.G. In this operating instructions manual and archive them afterwards. They are hence available for multiple use or service purposes. If vegason 62 is equipped with an indicating and adjustment module, the most imp...
Page 40: Adjustment Programs
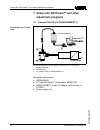
7 setup with pactware™ and other adjustment programs 7.1 connect the pc via vegaconnect 3 ~ = power supply vegaconnect 3 pactware / tm >pa 2 3 1 fig. 26: connection of the pc directly to the sensor via i²c interface 1 rs232 connection 2 vegason 62 3 i²c adapter cable for vegaconnect 3 necessary comp...
Page 41
7.2 connect the pc via vegaconnect 4 2 1 fig. 27: connection of the pc directly to the sensor via i²c interface 1 usb cable 2 sensor 1 2 open twist usb lo ck fig. 28: connection directly to the sensor 1 i²c bus (com.) interface 2 i²c connection cable of vegaconnect 4 necessary components: l vegason ...
Page 42
7.3 parameter adjustment with pactware™ further setup steps are described in the operating instructions manual "dtm collection/pactware™" attached to each cd and which can also be downloaded from our homepage. A detailed description is available in the online help of pactware™ and the vega dtms. Not...
Page 43
8 maintenance and fault rectification 8.1 maintenance when used as directed in normal operation, vegason 62 is completely maintenance free. 8.2 remove interferences the operator of the system is responsible for taken suitable measures to remove interferences. Vegason 62 offers maximum reliability. Nev...
Page 44
? Wrong presentation of the measured value in simatic s5 l simatic s5 cannot interpret the number format ieee of the measured value à insert converting component from siemens ? In simatic s7 the measured value is always presented as 0 l only four bytes are consistently loaded in the plc à use functi...
Page 45
? E 017 l adjustment span too small à carry out a fresh adjustment and increase the distance between min. And max. Adjustment ? E 036 l no operable sensor software à carry out a software update or send the instrument for repair ? E 041 l hardware error, electronics defective à exchange instrument or...
Page 46
Information: when loading on site, first of all the order data must be downloaded from the internet (see operating instructions manual "oscillator"). The oscillators are adapted to the respective sensor and differ in their signal output or in their power supply. You can find a suitable oscillator in th...
Page 47: 9 Dismounting
9 dismounting 9.1 dismounting steps warning: before dismounting, be aware of dangerous process con- ditions such as e.G. Pressure in the vessel, high temperatures, corrosive or toxic products etc. Take note of chapters "mounting" and "connecting to power supply" and carry out the listed steps in rev...
Page 48: 10 Supplement
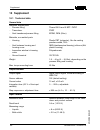
10 supplement 10.1 technical data general data materials, wetted parts - process fitting thread g2 a and 2 npt: pvdf - transducer pvdf - seal transducer/process fitting epdm, fkm (viton) materials, non-wetted parts - housing plastic pbt (polyester), alu die-casting powder-coated, 316l - seal between h...
Page 49
Reference conditions to measuring accuracy (similar to din en 60770-1) reference conditions according to din en 61298-1 - temperature + 18 … +30 °c (+64 … +86 °f) - relative humidity 45 … 75 % - air pressure 860 … 1060 mbar/86 … 106 kpa (12.5 … 15.4 psi) other reference conditions - reflector ideal r...
Page 50
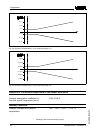
8 m 4 m 3 m 2 m 7 m 6 m 5 m 1 m 10 mm 16 mm 4 mm -4 mm -10 mm -16 mm fig. 29: deviation vegason 62 in mm, measuring range in m 26.247 ft 13.123 ft 9.843 ft 6.562 ft 22.966 ft 19.685 ft 16.404 ft 3.28 ft 0.394 in 0.63 in 0.157 in -0.157 in -0.394 in -0.63 in fig. 30: deviation vegason 62 in inch, mea...
Page 51
Process conditions vessel pressure -20 … 200 kpa/-0.2 … 2 bar (-2.9 … 29 psi) process temperature (transducer temperature) -40 … +80 °c (-40 … +176 °f) vibration resistance mechanical vibrations with 4 g and 5 … 100 hz 8) electromechanical data - version ip 66/ip 67 and ip 66/ip 68; 0.2 bar cable en...
Page 52
Electromechanical data - version ip 66/ip 68, 1 bar cable entry - single chamber housing 1 x ip 68 cable gland m20 x 1.5; 1 x blind stopper m20 x 1.5 - double chamber housing 1 x ip 68 cable gland m20 x 1.5; 1 x blind stopper m20 x 1.5; 1 x blind stopper m 16 x 1.5 connection cable - wire cross-sect...
Page 53
Supply voltage with lighted indicating and adjustment module - non-ex instrument 12 … 32 v dc - eex-ia instrument 12 … 24 v dc power supply by/max. Number of sensors - dp/pa segment coupler max. 32 (max. 10 with ex) - vegalog 571 ep card max. 15 (max. 10 with ex) electrical protective measures prote...
Page 54
10.2 profibus pa instrument master file the instrument master file (gsd) contains the characteristic data of the profibus pa instrument. These data are, e.G. The permissible transmission rates as well as information on diagnostics values and the format of the measured value outputted by the pa instrumen...
Page 55
M(d) % lin% min-max adjustment linearization profibus pa-output primary value secondary value 1 secondary value 2 target mode failure mode alarms scaling source for scaling t i damping sensor characteristics pa-out tb fb select additional cyclic value fig. 31: vegason 62: block diagram with ai (pa-o...
Page 56
L short for profibus master supporting only one "identifier format" byte, e.G. Allen bradley l long for profibus master only supporting the "identifier format" byte, e.G. Siemens s7-300/400 examples of telegram configuration in the following you will see how the modules can be combined and how the append...
Page 57
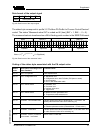
Data format of the output signal byte4 byte3 byte2 byte1 byte0 status value (ieee-754) fig. 35: data format of the output signal the status byte corresponds to profile 3.0 "profibus pa profile for process control devices" coded. The status "measured value ok" is coded as 80 (hex) (bit7 = 1, bit6 … 0 = ...
Page 58
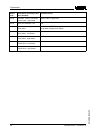
Status code description according to pro- fibus standard possible cause 0 x 52 uncertain - sensor; conversion not accurate - high limited sensor value > upper limit 0 x 80 good (non-cascade) - ok ok 0 x 84 good (non-cascade) - active block alarm static revision (fb, tb) changed (10 sec. Active, after...
Page 59
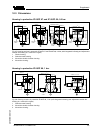
10.3 dimensions housing in protection ip 66/ip 67 and ip 66/ip 68; 0.2 bar 112mm (4 13 / 32 ") 117mm (4 39 / 64 ") 116mm (4 9 / 16 ") 120mm (4 23 / 32 ") ~ 69mm (2 23 / 32 ") ø 77mm (3 1 / 32 ") ~ 69mm (2 23 / 32 ") ~ 116mm (4 9 / 16 ") ~ 87mm (3 27 / 64 ") ø 77mm (3 1 / 32 ") ø 84mm (3 5 / 16 ") ø ...
Page 60
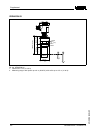
Vegason 62 1 2 153mm (6 1 / 32 ") 20mm ( 25 / 32 ") 63mm (2 31 / 64 ") ø 50mm (1 31 / 32 ") ø 74mm (2 58 / 64 ") 60mm (2 23 / 64 ") g2a / 2"npt fig. 39: vegason 62 1 dead zone: 0.4 m (1.312 ft) 2 measuring range: with liquids up to 8 m (26.25 ft), with solids up to 3.5 m (11.48 ft) supplement 60 veg...
Page 61
10.4 industrial property rights vega product lines are global protected by industrial property rights. Further information see http://www.Vega.Com . Only in u.S.A.: further information see patent label at the sensor housing. Vega produktfamilien sind weltweit geschützt durch gewer- bliche schutzrech...
Page 62
Supplement 62 vegason 62 • profibus pa 28785 -en -080125.
Page 63
Supplement vegason 62 • profibus pa 63 28785 - en -080125.
Page 64
Vega grieshaber kg am hohenstein 113 77761 schiltach germany phone +49 7836 50-0 fax +49 7836 50-201 e-mail: info@de.Vega.Com www.Vega.Com printing date: iso 9001 all statements concerning scope of delivery, application, practical use and operating conditions of the sensors and processing systems co...

