- DL manuals
- Ableton
- Software
- Live
- Reference Manual
Ableton Live Reference Manual
Summary of Live
Page 1
Ableton reference manual version 8.
Page 2
Live version 8.0.2 for windows and mac os may, 2009 created by bernd roggendorf, gerhard behles, robert henke, awi, reiner rudolph, stefan haller, stefan franke, frank hoffmann, andreas zapf, ralf suckow, gregor klinke, matthias mayrock, friedemann schautz, ingo koehne, jakob rang, pablo sara, nicho...
Page 3
1 chapter 1 welcome to live 1.1 the ableton team says: thank you live is the result of musicians wanting a better way to create, produce and perform music using a computer. A great deal of effort has been put into making live easy and fun to use, yet at the same time capable of helping you create mu...
Page 4
Chapter 1. Welcome to live 2 1.2 what's new in live 8? 1.2.1 new warping engine live's warping engine has been dramatically overhauled, with more accurate transient detection and a redesigned interface that allows you to drag the waveform along a xed timeline. new transient loop and envelope con...
Page 5
Chapter 1. Welcome to live 3 live's interface can be magni ed to maximize visibility via the zoom display slider. a preview tab in the browser provides a visual overview of the previewed le's contents, and allows you to scrub in the waveform or midi display. when multiple tracks are selected, ...
Page 6
Chapter 1. Welcome to live 4 1.2.6 online collaboration tools share live sets with other users via a shared web area at ableton.Com. 1.2.7 controllers support for the apc40 (ableton performance controller), a dedicated controller for ableton live. 1.2.8 more improvements macro controls now automat...
Page 7
5 chapter 2 first steps when you install live and run it for the rst time, you will be presented with an authorization dialog. Please see the chapter on authorizing live should you have questions or concerns during the authorization process. If you do not (yet) own live, you can still try out all of...
Page 8
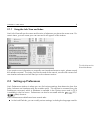
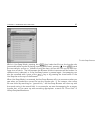
Chapter 2. First steps 6 2.1.1 using the info view and index live's info view tells you the name and function of whatever you place the mouse over. For certain items, you can create your own text and it will appear in this window. The info view and its show/hide button. If you require more informati...
Page 9
Chapter 2. First steps 7 text display and the color scheme, or skin, for the live user interface. This is also where you can adjust the size of objects displayed on the screen: the zoom display slider allows you to zoom live's screen to any percentage between 50% and 200% of the standard interface s...
Page 10
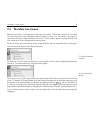
Chapter 2. First steps 8 2.3 the main live screen most of your work in live happens in the main live screen. This screen consists of a number of views, and each view manages a speci c aspect of your live set, which is the type of document that you create and work on in live. Since screen space is us...
Page 11
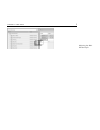
Chapter 2. First steps 9 adjusting the main window split..
Page 12
10 chapter 3 authorizing live live is protected against illegal use by a copy protection scheme. This scheme has been designed to meet the highest security standards while avoiding hassles for our customers. If you nd this procedure to be an inconvenience, please understand that the copy protection ...
Page 13
Chapter 3. Authorizing live 11 3.1 copy protection faqs 3.1.1 can i use live or other ableton products without a serial number? If you do not (yet) own live or its add-on products, you can still try them out, but saving and exporting will be disabled. If trying live or another product raises your in...
Page 14
Chapter 3. Authorizing live 12 to use live on more than one computer at a time, you may require a secondary license or a site license. Ableton offers these licenses at special rates. 3.1.4 can i play my set from a computer that is not authorized? Even if live is not authorized, you can still load an...
Page 15
13 chapter 4 live concepts this chapter introduces the essential concepts of live. We advise you to read this chapter early in your live career, as a solid understanding of the program's basic principles will help you fully exploit live's potential for your music-making. 4.1 live sets the type of do...
Page 16
Chapter 4. Live concepts 14 selecting the library bookmark in live's file browser will take you to the live library of creative tools. Depending on what content you have installed, there may be a number of demo sets here, and double-clicking a live set's name in the browser will open that live set. ...
Page 17
Chapter 4. Live concepts 15 the arrangement and session view selectors. The arrangement view and the session view interact in useful ways. One can, for instance, improvise with session clips and record a log of the improvisation into the arrangement for further re nement. This works because arrangem...
Page 18
Chapter 4. Live concepts 16 a scene in the session view. The exclusivity of clips in a track also implies that, at any one time, a track will either play a session clip or an arrangement clip, but never both. So, who wins? When a session clip is launched, the respective track stops whatever it is do...
Page 19
Chapter 4. Live concepts 17 signals are generated by input devices such as midi or usb keyboards 1 . It takes an instrument to convert midi signals into audio signals that can actually be heard. Some instruments, such as live's simpler, are for chromatic playing of one sound via the keyboard. Other ...
Page 20
Chapter 4. Live concepts 18 samples are dragged in from live's file browsers. Live offers many options for playing samples in exciting new ways, allowing you to create an abundance of new sounds without actually changing the original sample all the changes are computed in real time, while the sample...
Page 21
Chapter 4. Live concepts 19 sound using extreme warp settings. 4.6 midi clips and midi files a midi clip contains musical material in the form of midi notes and controller envelopes. When midi is imported from a midi le , the data gets incorporated into the live set, and the original le is not refer...
Page 22
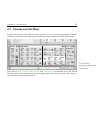
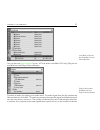
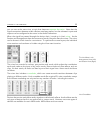
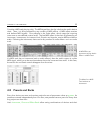
Chapter 4. Live concepts 20 4.7 devices and the mixer a track can have not only clips but also a chain of devices for processing signals. Double- clicking a track's title bar brings up the track view, which shows the track's device chain. The track view displaying a midi track's device chain. Live's...
Page 23
Chapter 4. Live concepts 21 live's built-in devices are available from the device browser. You can also use plug-in devices in live. Vst and audio units (mac os x only) plug-ins are available from the plug-in device browser. Plug-in devices are available from the plug-in device browser. Consider an ...
Page 24
Chapter 4. Live concepts 22 you can use at the same time, a topic that deserves separate discussion . Note that the signal connections between audio devices are always stereo, but the software's inputs and outputs can be con gured to be mono in the audio preferences. When the signal has passed throu...
Page 25
Chapter 4. Live concepts 23 consider a midi track playing a clip. The midi signal from the clip is fed into the track's device chain. There, it is rst processed by any number of midi effects. A midi effect receives and delivers midi signals. One example is the scale effect, which maps the incoming n...
Page 26
Chapter 4. Live concepts 24 settings as a single preset. This feature allows for the creation of powerful multi-device creations and effectively adds all the capabilities of live's midi and audio effects to the built-in instruments. 4.9 routing as we have seen, all tracks deliver signals, either aud...
Page 27
Chapter 4. Live concepts 25 4.10 recording new clips audio tracks and midi tracks can record their input signal and thereby create new clips . Recording is enabled on a track by pressing its arm button. With multiple tracks selected, pressing any of their arm buttons will arm all of them. You can al...
Page 28
Chapter 4. Live concepts 26 4.11 automation envelopes often, when working with live's mixer and effects, you will want the controls' movements to become part of the arrangement. The movement of a control across the arrangement timeline is called automation ; a control whose value changes in the cour...
Page 29
Chapter 4. Live concepts 27 an envelope for clip transposition. 4.13 midi and key remote to liberate the musician from the mouse, most of live's controls can be remote-controlled via an external midi controller. Remote mappings are established in midi map mode , which is engaged by pressing the midi...
Page 30
Chapter 4. Live concepts 28 4.14 saving and exporting saving a live set saves everything it contains, including all clips, their positions and settings, and settings for devices and controls. An audio clip can, however, lose the reference to its corresponding sample if it is moved or deleted from di...
Page 31
Chapter 4. Live concepts 29 midi sequences with matching instruments and effects, e.G., a midi drum pattern with the associated impulse and effects settings; different regions or loops referencing the same source le; variations of a sample loop created by applying warp markers , clip envelopes...
Page 32
Chapter 4. Live concepts 30 enjoy the essential instrument collection , a multi-gigabyte library of meticulously sampled and selected instruments..
Page 33
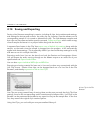
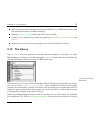
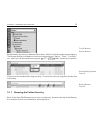
31 chapter 5 managing files and sets various types of les are used in making music with live, from those containing midi and audio , to more program-speci c les such as live clips and live sets . This chapter will explain everything you need to know about working with each of these le types in live....
Page 34
Chapter 5. Managing files and sets 32 the file browser selector buttons. Each browser can point to a different disk location, which live will remember across sessions. The browser display is divided into columns corresponding to name , date, live pack, etc., which you can show and hide using the (pc...
Page 35
Chapter 5. Managing files and sets 33 library is this browser's root. The browser root can easily be changed: the topmost browser item, called parent folder, will move the browser root up one step up in the disk hierarchy when double-clicked. The file browser's parent folder item. You can also set t...
Page 36
Chapter 5. Managing files and sets 34 file browser's selector button will do the same. 5.1.2 browser bookmarks using bookmarks, you can quickly save and recall frequently used folder locations in the browser. Clicking in the browser's title bar will open the bookmark menu. The bookmark menu. The boo...
Page 37
Chapter 5. Managing files and sets 35 activating browser search mode. After entering your search terms, begin the search by clicking the go button or pressing return on your computer keyboard. The search field and go button. Live will search the entire browser root for your search terms. The results...
Page 38
Chapter 5. Managing files and sets 36 automatic rescanning for new searches can be activated and deactivated in the file/folder preferences. While a search/rescan is going on, the adjacent search button is labeled stop. Rescanning happens in the background, and you can keep making music while live d...
Page 39
Chapter 5. Managing files and sets 37 the rotating ring means that a search is in progress. For mouse-free searching, we suggest the following sequence of shortcuts: 1) ctrl f (pc) / f (mac) to open the search eld; 2) type your search terms; 3) return to go ; 4) to jump to the search results; 5) and...
Page 40
Chapter 5. Managing files and sets 38 the preview switch. Hint: you can preview les even when the preview switch is not activated by pressing return or . Click on a sample le (or use and ) to select it. Click in the tab's scrub area to make playback jump to that point. (note that it is not possible ...
Page 41
Chapter 5. Managing files and sets 39 to learn how to set up live for cueing, please refer to the relevant section of the mixing chapter. 5.1.5 adding clips from the browser there are several ways to add clips to a live set: files can be dragged and dropped from the file browsers into tracks in th...
Page 42
Chapter 5. Managing files and sets 40 rename les and folders using the edit menu's rename command or the ctrl r (pc) / r (mac) shortcut. Cancel renaming with the esc key. create folders by opening the context menu with (pc) / ctrl (mac), and then selecting the create folder command. delete les...
Page 43
Chapter 5. Managing files and sets 41 the hot-swap browser. While in hot-swap mode, pressing the return key loads that le into the impulse slot (presumably while impulse is playing incoming midi notes); pressing , then return loads the next sample, and so on. Instead of using the keys, we can also c...
Page 44
Chapter 5. Managing files and sets 42 5.2 sample files a sample is a le that contains audio data. Live can play both uncompressed le formats (wav, aif, rex and sound designer ii for mac) and compressed le formats (mp3, aac, ogg vorbis, ogg flac and flac). A note on using variable bit rate (vbr) les:...
Page 45
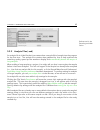
Chapter 5. Managing files and sets 43 preferences for the decoding and web cache. 5.2.2 analysis files (.Asd) an analysis le is a little le that live creates when a sample le is brought into the program for the rst time. The analysis le contains data gathered by live to help optimize the stretching ...
Page 46
Chapter 5. Managing files and sets 44 the analysis le's name is the same as that of the associated sample, with an added .Asd extension. Live puts this analysis le in the same folder as the sample. Samples that have an .Asd le are displayed like this in the browser. Samples without an .Asd le look l...
Page 47
Chapter 5. Managing files and sets 45 which signal will be rendered? The rendered track chooser. The export dialog's rendered track chooser offers several options for which audio signal to render: master the post-fader signal at live's master output. If you are monitoring the master output, you ca...
Page 48
Chapter 5. Managing files and sets 46 audio rendering options audio rendering options. The export dialog offers several audio rendering options: normalize if this is activated, the sample resulting from the render process will be normalized (i.E., the le will be ampli ed so that the highest peak a...
Page 49
Chapter 5. Managing files and sets 47 created. convert to mono if this is activated, live will create a mono le instead of a stereo le. dither options if you are rendering at a bit depth lower than 32-bit, choose one of the dither modes. Dithering adds a small amount of noise to rendered audio, ...
Page 50
Chapter 5. Managing files and sets 48 waiting for external devices to become silent. skip by default, live will wait for ten seconds before starting a real-time render. This should allow any sound from external devices to fade out, but if you need more time (for example, if you're waiting for a lo...
Page 51
Chapter 5. Managing files and sets 49 rendering video video rendering options. In addition to settings for audio rendering, the export dialog provides additional options for rendering video: create video file if this is activated, a video le will be created in the same directory as your rendered a...
Page 52
Chapter 5. Managing files and sets 50 for more information about working with video in live, see the chapter on video. 5.3 midi files a midi le contains commands that prompt midi compatible synthesizers or instruments, such as live's simpler , to create speci c musical output. Midi les are exported ...
Page 53
Chapter 5. Managing files and sets 51 5.4 live clips individual clips can be exported to disk in the live clip format for easy retrieval and reuse in any project. Because they only contain references to samples on disk (rather than the audio data itself), live clips are very small, which makes it ea...
Page 54
Chapter 5. Managing files and sets 52 could create a number of variations from the same audio clip by using different warp, pitch, envelope and effect settings, and store them all as separate live clips. In the browser, you could then independently sort and preview these clips, even though they are ...
Page 55
Chapter 5. Managing files and sets 53 set will be completely reconstructed, including their clips in the session and arrangement view, their devices, and their automation. Session view drop area for importing live sets. Arrangement view drop area for importing live sets. If you prefer to import indi...
Page 56
Chapter 5. Managing files and sets 54 unfolded set. Of the three tracks contained in the set shown in the following gure, two contain session view clips. These can be accessed by unfolding the tracks: revealing the session view clips contained in a set. You can browse, preview and import session vie...
Page 57
Chapter 5. Managing files and sets 55 midi mappings . The template live set, template.Als, is located in live's preferences folder and can be copied or deleted from there. The easiest way to locate this folder is to search your disk for template.Als. In addition to the template set that loads by def...
Page 58
Chapter 5. Managing files and sets 56 the sample reference list's hot-swap button. edit a referenced sample using an external application (which can be chosen in the preferences' file/folder tab). Clicking the edit button will open the referenced sample in the external application. The sample will...
Page 59
Chapter 5. Managing files and sets 57 5.6.1 projects and live sets you can manually create a project by clicking (pc) / ctrl (mac) in the browser and selecting create project from the context menu. Usually, live takes care of this automatically. When you save a live set under a new name or in a new ...
Page 60
Chapter 5. Managing files and sets 58 a second version of the live set has been added to the project. The tango project now contains two live sets, and its samples/recorded folder contains the samples used by both of them. And now for something completely different: we choose the file menu's new com...
Page 61
Chapter 5. Managing files and sets 59 the piece evolves towards something entirely different, and we feel that it should live in a project of its own. So, we save as... Under a new name and in some location outside the current project, say the desktop: a new project was added by saving a live set ou...
Page 62
Chapter 5. Managing files and sets 60 5.6.2 projects and presets by default, new instrument and effect presets are stored in the live library , making them available to any project. At times however, it may make more sense to save a preset with the current project. You might, for example, want to ke...
Page 63
Chapter 5. Managing files and sets 61 command from the file menu, and then click the manage project button. The file manager will present you with an overview of the project's contents and tools for: locating samples that the project is missing ; collecting external samples into the project ; listin...
Page 64
Chapter 5. Managing files and sets 62 double-click the live pack le (.Alp), drag it into the live main window, or locate it via the file menu's install live pack command. A list of the currently installed factory live packs is available from the preferences' library tab. Here you can select live pac...
Page 65
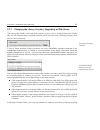
Chapter 5. Managing files and sets 63 5.7.1 changing the library location, upgrading an old library the library can reside in the hard drive location of your choice. In the preferences' library tab, you will nd the library location chooser, which contains a list of library locations that you've used...
Page 66
Chapter 5. Managing files and sets 64 or moving any content from the previous location. Live will then offer to install any default packages to the new location. if the target location is a library that was made with an older version of live, you will be warned about possible compatibility issues....
Page 67
Chapter 5. Managing files and sets 65 the file manager's list of missing samples. 5.8.1 manual repair to manually x a broken sample reference, locate the missing sample in the file browser, drag it over to the file manager and drop it on the respective line in the list of missing les. Note that live...
Page 68
Chapter 5. Managing files and sets 66 automatic repair options in the file manager. search folder includes a user-de ned folder, as well as any sub-folders, in the search. To select the folder, click the associated set folder button. search project includes this set's project folder in the searc...
Page 69
Chapter 5. Managing files and sets 67 5.9 collecting external samples to prevent a live set from containing broken sample references , live provides the option of collecting (i.E., copying) them into the set's project folder . This is accomplished via the file manager: choose the manage files comm...
Page 70
Chapter 5. Managing files and sets 68 separated by location (the library, installed by factory live packs, other projects and else- where sample collections from external drives, for example), the file manager provides: a sample count and the associated disk space used; a show button that will l...
Page 71
Chapter 5. Managing files and sets 69 live's file manager, you can nd missing samples and collect external samples not only for the current live set but also for: the library choose the manage files command from the file menu; then click the manage library button. the current live project choose...
Page 72
Chapter 5. Managing files and sets 70 last but not least, you can nd the unused samples for all projects found in a speci c folder (and its sub-folders): (pc) / ctrl (mac) on a folder in the file browser and choose the manage projects command, then see the unused samples section. Live inspects each ...
Page 73
Chapter 5. Managing files and sets 71 5.13.2 how can i save presets into my current project? As long as you're working in a project (meaning that you've saved your current live set), every device in the device browser will show a current project sub-folder. You can copy presets from other browser lo...
Page 74
Chapter 5. Managing files and sets 72 5.13.6 can i use my own folder structure within a project folder? You can organize your les any way you want within a project, but you'll need to use the file manager to relink the les that you've moved around: 1) in live's browser or via your operating system, ...
Page 75
73 chapter 6 arrangement view the arrangement view displays the arrangement, which contains music laid out along a song timeline, like a multitrack tape. A piece of music in the arrangement view. The arrangement view is a powerful editing tool that easily lets you combine and arrange midi, loops, so...
Page 76
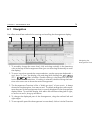
Chapter 6. Arrangement view 74 6.1 navigation live offers several fast methods for zooming and scrolling the arrangement display: 1 3 4 5 6 2 navigating the arrangement view. 1. To smoothly change the zoom level, click and drag vertically in the beat-time ruler at the top of the arrangement view (yo...
Page 77
Chapter 6. Arrangement view 75 and drag downwards to zoom in around that part. Note that you can also drag horizontally to scroll the display. Using this method, you can zoom and scroll to focus around any part of the arrangement with just one mouse motion. 6. To have the arrangement display follow ...
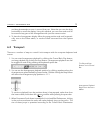
Page 78
Chapter 6. Arrangement view 76 menu setting. While the mouse is held down over the scrub area, a portion of the arrangement the size of the chosen quantization setting will be repeatedly played. With small quantization settings, or a setting of none, this allows you to scrub through the music. When ...
Page 79
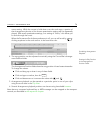
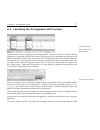
Chapter 6. Arrangement view 77 6.3 launching the arrangement with locators using locators to launch play in the arrangement. Locators can be set at any point in the arrangement. This can be done in real time during playback or recording with the set locator button, and will be quantized according to...
Page 80
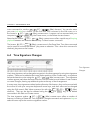
Chapter 6. Arrangement view 78 menu command (or use the ctrl r (pc) / r (mac) shortcut). You can also enter your own info text for a locator via the edit info text command in the edit menu or in the locator's (pc) / ctrl (mac) context menu. Locators can be removed with your computer's or delete key,...
Page 81
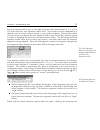
Chapter 6. Arrangement view 79 any time signature with a one- or two-digit numerator and a denominator of 1, 2, 4, 8 or 16 can be used as a time signature marker value. The numbers must be separated by a delimiter such as a slash, comma, period, or any number of spaces. These marker values can also ...
Page 82
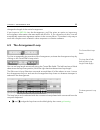
Chapter 6. Arrangement view 80 changes the length of the entire arrangement. If you import a midi le into the arrangement, you'll be given an option to import any time signature information that was saved with the le. If you choose to do this, live will automatically create time signature markers in...
Page 83
Chapter 6. Arrangement view 81 and shift the loop brace left/right in steps the size of its length. the ctrl (pc) / (mac) modi er used with the arrow left and right keys shortens or lengthens the loop by the current grid setting . the ctrl (pc) / (mac) modi er with the arrow up and down keys dou...
Page 84
Chapter 6. Arrangement view 82 6.7 audio clip fades and crossfades the beginning and end of audio clips in the arrangement view have adjustable volume fades. Additionally, adjacent clips on the same audio track can be crossfaded. To access the fades for an audio track's clips: 1. Unfold the track by...
Page 85
Chapter 6. Arrangement view 83 menu. Crossfaded clips. Selecting a fade handle and pressing the delete key deletes the fade, unless the create fades on clip edges option is enabled in the record/warp/launch preferences. In this case, pressing delete returns the fade handle to a default length of 4 m...
Page 86
Chapter 6. Arrangement view 84 6.8 selecting clips and time with the exception of moving and resizing clips, arrangement editing in live is selection- based: you select something using the mouse, then execute a menu command (e.G., cut, copy, paste, duplicate) on the selection. This editing method le...
Page 87
Chapter 6. Arrangement view 85 holding while clicking extends an existing selection in the same track or across tracks. You can also hold and use the arrow keys to manipulate the selection. Clicking the loop brace to select the loop for editing. 6.9 using the editing grid to ease editing, the curs...
Page 88
Chapter 6. Arrangement view 86 the current spacing between adjacent grid lines is displayed in the lower right corner of the arrangement view or clip view. You can hold down the alt (pc) / (mac) modi er while performing an action to bypass grid snapping. If the grid is already disabled, this modi er...
Page 89
Chapter 6. Arrangement view 87 insert silence inserts as much empty time as is currently selected into the arrangement, before the selection. 6.11 splitting clips the split command can divide a clip or isolate part of it. To split a clip in two halves, do the following: 1. Unfold the track; 2. In ...
Page 90
Chapter 6. Arrangement view 88 consolidating several clips into a new clip. Suppose you have, by editing or improvising, come up with a layout of clips that sound good in arrangement loop mode . Selecting that part of the arrangement, for instance by using the edit menu's select loop command, and th...
Page 91
89 chapter 7 session view in live's arrangement view , as in all traditional sequencing programs, everything happens along a xed song timeline. For a number of applications, this is a limiting paradigm: when playing live, or when djing, the order of pieces, the length of each piece and the order o...
Page 92
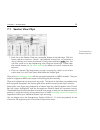
Chapter 7. Session view 90 7.1 session view clips the controls for a session view clip. 1. Each clip in the session view has a triangular button at the left edge. Click the button with the mouse to launch clip playback at any time, or pre-select a clip by clicking on its name, and launch it using th...
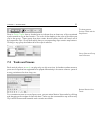
Page 93
Chapter 7. Session view 91 the arrangement position fields and the stop button. Slots in group tracks show a shaded area to indicate that at least one of the contained tracks contains a clip at that location. The color of the shading is the color of the left-most clip in the group. These group slots...
Page 94
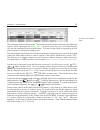
Chapter 7. Session view 92 a scene in the session view. The horizontal rows are called scenes. The scene launch buttons are located in the rightmost column, which represents the master track . To launch every clip in a row simultaneously, click on the associated scene launch button. This can be very...
Page 95
Chapter 7. Session view 93 tempo and time signature changes can coexist within a single scene name, and can appear in any position as long as they are separated from each other by at least one character. For example, 2/4+108 bpm , 72 bpm;7/8 and 60 bpm chorus 3/4 are all scene names that will cause ...
Page 96
Chapter 7. Session view 94 ... Monitoring the input... A microphone icon appears in an audio track that is set to monitor its input . A keyboard icon appears in a midi track under these same circumstances. ... Playing the arrangement. If the track is playing clips from the arrangement, a miniature d...
Page 97
Chapter 7. Session view 95 7.4.1 select on launch by default, clicking a session view clip's launch button also selects the clip, since you will typically want the clip view to show the newly launched clip. However, some power-users don't want the current focus (e.G., a return track's devices) to di...
Page 98
Chapter 7. Session view 96 7.5 recording sessions into the arrangement your session view playing can be recorded into the arrangement, allowing for an improvi- sational approach to composing songs and scores. The control bar's record button. When the record button is on, live logs all of your action...
Page 99
Chapter 7. Session view 97 arrangement playback does not resume until you explicitly tell live to resume by clicking the back to arrangement button, which lights up to remind you that what you hear differs from the arrangement. The stop all clips button. To disable all arrangement clips simultaneous...
Page 100
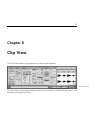
98 chapter 8 clip view the clip view is where clip properties can be set and adjusted. The clip view. The clip view is opened by clicking on the clip overview or double-clicking a clip in the session or arrangement view..
Page 101
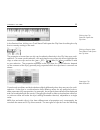
Chapter 8. Clip view 99 clicking the clip overview opens the clip view. In the session view, clicking on a track status field opens the clip view for editing the clip that is currently running in the track. Clicking a session view track status field opens the clip view. The properties of more than o...
Page 102
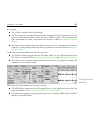
Chapter 8. Clip view 100 in common: the clip box contains basic clip settings. the envelopes box and the envelope editor manage the clip's envelopes, which are used to modulate the effects, mixer, and clip or midi controls. Clip envelopes and their associated clip view components are covered in ...
Page 103
Chapter 8. Clip view 101 the clip view for a midi clip. To make best use of the screen real estate, you can show or hide the launch, envelopes, and sample or midi boxes using the clip view box selector in the clips box. You can also toggle between the sample display/midi editor and the envelope edit...
Page 104
Chapter 8. Clip view 102 8.1 the clip box the clip box. 8.1.1 clip activator switch using this switch, you can deactivate a clip so that it does not play when launched in the session view or during arrangement playback. Clips can also be activated/deactivated directly from the session or arrangement...
Page 105
Chapter 8. Clip view 103 8.1.3 clip signature using the clip signature elds, you can specify the time signature of a midi or audio clip. This setting is relevant only for display; it does not affect playback. Please note that clip signature is completely separate from the project's time signature, a...
Page 106
Chapter 8. Clip view 104 8.1.5 clip offset and nudging to jump within a playing clip in increments the size of the global quantization period, you can use the nudge buttons in the clip box. Using the nudge buttons to jump through a clip. These buttons can also be mapped to keys or midi controllers ....
Page 107
Chapter 8. Clip view 105 8.2 the sample box 8.2.1 warp controls the sample box warp controls. When the warp switch is off, live plays the sample at its original, normal tempo, irrespec- tive of the current live set tempo. This is useful for samples that have no inherent rhythmic structure: percussio...
Page 108
Chapter 8. Clip view 106 8.2.2 sample loop/region and display zooming and scrolling the clip zoom/scroll area. Zooming and scrolling in the sample display work much like they do in the arrangement view . When warp is disabled, zooming and scrolling can be done anywhere in the sample display. When wa...
Page 109
Chapter 8. Clip view 107 to have the sample display follow the play position and scroll automatically, turn on the follow switch, or use the follow command from the options menu. The follow switch. Playing and scrubbing clips the section of the sample that plays when a clip is launched is set with t...
Page 110
Chapter 8. Clip view 108 you can also adjust the clip start and end numerically using the respective value elds to the left of the sample display. For warped clips, these elds display values as bars-beats- sixteenths; for unwarped clips, the display is in minutes-seconds-milliseconds. Notice that yo...
Page 111
Chapter 8. Clip view 109 cannot be looped. You can click and drag to change the position and length of the loop brace in the sample display, or you can type exact values into the loop length and position elds to the left of the display. The clip loop controls. The loop brace can be selected with the...
Page 112
Chapter 8. Clip view 110 setting the clip to run into a loop. The loop length and position elds are equipped with set buttons, which can be used to create loops spontaneously during playback: playing the clip and then clicking the set loop position button moves the beginning of loop to the current...
Page 113
Chapter 8. Clip view 111 8.2.3 clip pitch and gain the clip pitch and gain controls. The transpose control shifts the clip pitch in semitones. The detune eld ne-tunes the clip in cents (100 cents = one semitone). The clip gain slider, calibrated in db, changes the clip gain. 8.2.4 destructive sample...
Page 114
Chapter 8. Clip view 112 8.2.5 saving default clip settings with the sample the save default clip button. The save default clip button saves the current clip's settings with the sample. With multiple clips selected, this button will save them all simultaneously. Once saved, live will restore the cur...
Page 115
Chapter 8. Clip view 113 this reason, we have provided a legacy hi-q mode option, which is enabled by default in the options menu whenever you load an old set that has hi-q enabled for any clips. Simply disable this option if you wish to use the new mode. 8.2.7 clip start and end fades the clip fade...
Page 116
Chapter 8. Clip view 114 8.2.8 clip ram mode the ram mode switch. If the ram mode switch is on, live is loading the audio referenced by the clip into the computer's memory rather than reading it from disk in real time. Ram mode can help with these problems: your computer's hard disk is too slow to...
Page 117
Chapter 8. Clip view 115 processed/reverse. Until the set is saved, new samples remain at the location speci ed by the temporary folder . There are a few rules for the reversing process. First, any warp markers will remain xed to their positions in the sample. This means that a warp marker on the do...
Page 118
Chapter 8. Clip view 116 be retained. The warp markers will be retained only if the new sample has the exact same length as the old sample. The sample display's (pc) / ctrl (mac) context menu includes the manage sample file command. This opens the file manager for the current set with the sample ref...
Page 119
Chapter 8. Clip view 117 8.3.2 bank and program change live can send midi bank/program change messages to external devices and plug-ins that support midi program change messages. According to the settings in these controls, launching a clip also sends its bank/program change message. If you are usin...
Page 120
118 chapter 9 tempo control and warping unlike music stored on tape or in a traditional digital audio workstation, the music in live remains elastic at all times. Live is capable of time-warping samples while streaming them from disk so as to synchronize them to the current live set's tempo. This ha...
Page 121
Chapter 9. Tempo control and warping 119 in hundredths of a bpm allows for enough precision to adjust to live performers or other unsynchronized sources. You can have an external sequencer (or drum machine) play along with live or have live play along with the sequencer. The respective settings are ...
Page 122
Chapter 9. Tempo control and warping 120 although live can be easily synchronized to external midi devices , you may nd yourself in situations in which you need to adjust to sources that aren't locked to one tempo, such as live musicians or turntables. As long as your set's tempo is basically the sa...
Page 123
Chapter 9. Tempo control and warping 121 preferences. If the auto-warp long samples preference is on, live assumes that long samples contain music that should be played in sync with the live set's tempo. If you would rather have live default to playing long samples as they are, disengage this prefer...
Page 124
Chapter 9. Tempo control and warping 122 warp markers are set in the clip view's sample display by double-clicking within the sam- ple. They can then be dragged or moved with the arrow keys to different points in time. Warp markers can also be deleted by double-clicking them, or by pressing the comp...
Page 125
Chapter 9. Tempo control and warping 123 transient markers. As you mouse over transients, temporary pseudo warp markers appear. These have the same shape as regular warp markers, but they're grey. Double-clicking or dragging a pseudo warp marker creates an actual warp marker or, if there are no warp...
Page 126
Chapter 9. Tempo control and warping 124 9.2.3 using warp markers in the following sections, we will look at a couple of applications for time-warping samples. Warping is, of course, an optional property of clips. Syncing straight loops when you import a sample that represents a well-cut musical loo...
Page 127
Chapter 9. Tempo control and warping 125 you can eliminate silence after the actual loop end by placing a warp marker at the sample's right edge. Setting the warp markers for a poorly cut loop. Syncing odd-length loops if you import a sample that contains a seven-bar loop, live initially assumes the...
Page 128
Chapter 9. Tempo control and warping 126 if a single event in a percussion loop comes late, just pin a warp marker to it and drag the marker to the correct beat position. You may want to pin the adjacent events as well, to avoid affecting neighboring regions in the sample. Using warp markers to mani...
Page 129
Chapter 9. Tempo control and warping 127 auto-warp's results in the clip view. As long as auto-warp made the correct set of informed guesses, the clip will be ready to play in perfect sync with the live set's tempo. However, if auto-warp does not quite do what you want, you can control its results. ...
Page 130
Chapter 9. Tempo control and warping 128 using the context menu to direct auto-warp. Directing auto-warp is also relatively simple when you have imported a perfectly cut loop. You can tell auto-warp to work accordingly using the warp as ...-bar loop command. Live will propose a loop length that make...
Page 131
Chapter 9. Tempo control and warping 129 the four warp from here commands provide various ways of resetting warp markers to the right of the selected grid marker or warp marker, leaving warp markers to the left untouched. These commands are also available from the start marker. warp from here runs...
Page 132
Chapter 9. Tempo control and warping 130 9.2.4 quantizing audio in the previous section, you learned how to adjust the timing of events in audio les by manually dragging warp markers along the timeline. But it is also possible to automatically snap the entire sample to the grid at once by using the ...
Page 133
Chapter 9. Tempo control and warping 131 the warp modes are different varieties of granular resynthesis techniques. Granular resyn- thesis achieves time compression and expansion by repeating and skipping over parts of the sample (the grains ). The warp modes differ in the selection of grains, as we...
Page 134
Chapter 9. Tempo control and warping 132 the transient envelope slider applies a volume fade to each segment of audio. At 100, there is no fade. At 0, each segment decays very quickly. Long envelope times can help to smooth clicks at the end of segments, while short times can be used to apply rhythm...
Page 135
Chapter 9. Tempo control and warping 133 9.3.5 complex mode complex mode is a warping method speci cally designed to accommodate composite signals that combine the characteristics covered by other warp modes; it works well for warping entire songs, which usually contain beats, tones and textures. Co...
Page 136
Chapter 9. Tempo control and warping 134 although rex les are audio les, they can quickly be transformed into playable instruments via the slice to new midi track command, which is available in the create menu or the (pc) / ctrl (mac) context menu for the clip. Warp markers/parameters, clip envelope...
Page 137
135 chapter 10 editing midi notes and velocities a midi clip in live contains notes and controller data for playing a midi instrument. This instrument can be a virtual instrument in a midi track's device chain or an external synth fed via the track's output routing . The midi clip provides the devic...
Page 138
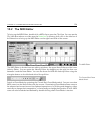
Chapter 10. Editing midi notes and velocities 136 10.2 the midi editor to bring up the midi editor, double-click a midi clip to open the clip view. You can use the clip view box selector to make sure the notes box is showing, then click in the title bar of the notes box to bring up the midi editor o...
Page 139
Chapter 10. Editing midi notes and velocities 137 previewing midi notes. Provided your midi track's device chain contains an instrument , activating the preview switch in the midi editor allows you to hear notes as you select and move them. If the midi track is armed, activating preview also allows ...
Page 140
Chapter 10. Editing midi notes and velocities 138 the midi editor has both vertical and horizontal navigation. Along the horizontal axis lies a time ruler, which shows note position along a musical timeline. The vertical axis contains the note ruler, displaying octaves c0 c10, and a representation o...
Page 141
Chapter 10. Editing midi notes and velocities 139 it always shows the complete contents of the selected midi clip. The black rectangular outline represents the part of the clip that is currently displayed in the editor above. To scroll, click within the outline and drag left or right; to zoom in and...
Page 142
Chapter 10. Editing midi notes and velocities 140 10.4 editing midi 10.4.1 non-destructive editing you can always return your midi clip to its previous state by using the edit menu's undo command. Furthermore, if the midi clip being edited originated in a midi le on your hard drive, none of your edi...
Page 143
Chapter 10. Editing midi notes and velocities 141 use the loop/region markers to select a speci c region of the clip to play. 10.4.3 grid snapping most functions in the midi editor are subject to grid snapping . You can hold down the alt (pc) / (mac) modi er while performing an action to bypass grid...
Page 144
Chapter 10. Editing midi notes and velocities 142 clicking and dragging in the background selects a timespan. To select all of the notes that begin during the timespan, press return . After placing the insert mark, you can manipulate it using your computer keyboard. press or to move the insert m...
Page 145
Chapter 10. Editing midi notes and velocities 143 you can also use the ctrl (pc) / alt (mac) modi er to click and drag copies of notes to a new location. If you click and drag to move notes but then decide that you would like to copy them instead, you can press the ctrl (pc) / alt (mac) modi er even...
Page 146
Chapter 10. Editing midi notes and velocities 144 cut time cuts a selection of time from the midi clip, thereby moving any notes on either side of the cut area closer together in the timeline. A gap between midi notes has been cut by first selecting it, then executing the cut time command. paste...
Page 147
Chapter 10. Editing midi notes and velocities 145 quantizing midi notes. Using the options presented here, you can select either the current grid size or a speci c meter value for quantization and set either the note start or end (or both) to be quantized. Quantizing the note end will stretch the no...
Page 148
Chapter 10. Editing midi notes and velocities 146 as in the note editor, you can select multiple velocity markers to change by clicking with the modi er held down. Tip: to set a group of notes so that they all have the same velocity, select their markers in the velocity editor, drag them up or down ...
Page 149
Chapter 10. Editing midi notes and velocities 147 movement, live will remember the change and use your new velocity on any notes that you draw afterward. Note-off velocity by default, the velocity editor allows you to adjust note-on velocities. But you can toggle the editor to show note-off velociti...
Page 150
Chapter 10. Editing midi notes and velocities 148 when multiple notes are selected in the note editor, the stretch notes command becomes available from the context menu, if you invoke it with (pc) / ctrl (mac). Note stretch markers will then appear in the note editor, allowing notes to be scaled pro...
Page 151
149 chapter 11 using grooves the timing and feel of each clip in your set can be modi ed through the use of grooves. Live's library includes a large selection of grooves, which appear as .Agr les in the browser. Groove files in the browser. The easiest way to work with library grooves is to drag and...
Page 152
Chapter 11. Using grooves 150 the browser while the clip plays. The hot-swap groove button. Grooves can be applied to both audio and midi clips. In audio clips, grooves work by adjusting the clip's warping behavior , and thus only works on clips with warp enabled. 11.1 groove pool once you've applie...
Page 153
Chapter 11. Using grooves 151 the groove pool. 11.1.1 adjusting groove parameters grooves in the groove pool appear in a list, and offer a variety of parameters that can be modi ed in real time to adjust the behavior of any clips that are using them. You can also save and hot-swap grooves via the bu...
Page 154
Chapter 11. Using grooves 152 to every voice in your clip, so notes that originally occurred together will now be randomly offset both from the grid and from each other. velocity adjusts how much the velocity of the notes in clips will be affected by the velocity information stored in the groove l...
Page 155
Chapter 11. Using grooves 153 or groove pool into a midi track. This will create a new midi clip, which you can then edit , as you would with any other midi clip. You can then convert the edited clip back into a groove, via the process below. 11.2.1 extracting grooves the timing and volume informati...
Page 156
Chapter 11. Using grooves 154 the voice that you want to independently groove. In this example, we'd extract the snare chain, creating a new clip and track that contained only the snare notes. Then we could apply a different groove to this new clip. 11.3.2 non-destructive quantization grooves can be...
Page 157
155 chapter 12 launching clips the live session view is set apart by the fact that it gives you, the musician, a spontaneous environment that encourages performance and improvisation. An important part of how you take advantage of the session view lies within how you con gure your various session vi...
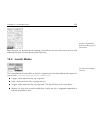
Page 158
Chapter 12. Launching clips 156 use the clip view box selector to bring up the launch box. Note that you can edit the launch settings of more than one clip at the same time by rst selecting the clips and then opening the clip view. 12.2 launch modes the clip launch mode chooser. The launch mode choo...
Page 159
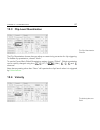
Chapter 12. Launching clips 157 12.3 clip-level quantization the clip quantization chooser. The clip quantization chooser lets you adjust an onset timing correction for clip triggering. To disable clip quantization, choose none. To use the control bar's global quantization setting, choose global. Gl...
Page 160
Chapter 12. Launching clips 158 the velocity amount control allows you to adjust the effect of midi note velocity on the clip's volume: if set to zero, there is no in uence; at 100 percent, the softest notes play the clip silently. For more on playing clips via midi, see the respective section . 12....
Page 161
Chapter 12. Launching clips 159 same group after the clip plays. A group is de ned by clips arranged in successive slots of the same track. Tracks can have an unlimited number of groups, separated by empty slots. 3 1 2 the follow action controls. 1. The follow action time control de nes when the fol...
Page 162
Chapter 12. Launching clips 160 play first clip launches the rst (top) clip in a group. Play last clip launches the last (bottom) clip in a group. Play any clip plays any clip in the group. Play other clip is similar to play any clip, but as long as the current clip is not alone in the group, no cli...
Page 163
Chapter 12. Launching clips 161 2 3 creating a group with the two clips. 3. Set up follow actions for the rst clip. You will want to make follow action time equal to the clip's length. Set the follow action a chooser to play next clip, with a chance setting of 1, leaving follow action b alone. Now t...
Page 164
Chapter 12. Launching clips 162 the default setting for follow action is actually a 1:0 chance that nothing happens after the follow action time, which means that there is effectively no follow action. But now, imagine a group consisting of one single clip. Follow action a is set to play clip again,...
Page 165
Chapter 12. Launching clips 163 12.6.5 mixing up melodies and beats you can let follow actions perform unpredictable remixes and solos for you: use a clip containing a beat or melody, and copy it so that there are several instances of it forming a group. Alternatively, you can use several different ...
Page 166
164 chapter 13 routing and i/o in the context of live, routing is the setup of the tracks' signal sources and destinations (i.E., their inputs and outputs). Most routing happens in the mixer's track in/out section, which offers, for every track, choosers to select a signal source and destination. Th...
Page 167
Chapter 13. Routing and i/o 165 for every track that can play clips, the in/out section has the same layout: the upper chooser pair ( audio/midi from ) selects the track's input. Audio tracks have an audio input, and midi tracks have a midi input. Return tracks receive their input from the respect...
Page 168
Chapter 13. Routing and i/o 166 audio and midi track arm buttons. to permanently monitor the track's input, regardless of whether the track is armed or clips are playing, choose in. This setting effectively turns the track into what is called an aux on some systems: the track is not used for recor...
Page 169
Chapter 13. Routing and i/o 167 reached via the input and output channel choosers' con gure... Option. Note that the audio preferences also provide access to the channel con guration dialogs, which determine which inputs and outputs are used, and whether they are available to live as mono or stereo ...
Page 170
Chapter 13. Routing and i/o 168 you can con gure which midi ports are made available to live using the midi ports section of the midi/sync preferences. All available input and output ports are listed here. For live's tracks to receive/send midi from/to a speci c midi port, the corresponding switch i...
Page 171
Chapter 13. Routing and i/o 169 otherwise been assigned to remote-control elements of the live interface. To prevent this, you can turn the computer midi keyboard off when it is not needed. 13.3.3 connecting external synthesizers routing midi to an external synthesizer is straightforward: the output...
Page 172
Chapter 13. Routing and i/o 170 2. Midi messages that are used for remote-controlling live's user-interface ele- ments ; 3. Midi messages coming from and going to live's midi tracks. Midi messages that are mapped to remote-control live's user-interface elements are eaten up by the remote control ass...
Page 173
Chapter 13. Routing and i/o 171 4. The output channel chooser presents you with a list of the instruments that you currently have in your reason rack; select the instrument you want to address. 5. Select reason from the audio track's input type chooser. 6. From the audio track's input channel choose...
Page 174
Chapter 13. Routing and i/o 172 13.5 resampling live's master output can be routed into an individual audio track and recorded, or resampled. Resampling can be a fun and useful tool, as it lets you create samples from what is currently happening in a live set that can then be immediately integrated....
Page 175
Chapter 13. Routing and i/o 173 two ways to route track a into track b. Both approaches result in track a's output being fed into track b. Approach 1 leaves track b's in/out settings alone, and we can, at any time, add more tracks that feed their output into track b. This is the method of choice for...
Page 176
Chapter 13. Routing and i/o 174 tap points for track routing. pre fx taps the signal that is coming directly from a track, before it has been passed on to the track's device chains (fx) or mixer. Therefore, changes that are made to the tapped track's devices or mixer have no effect on the tapped s...
Page 177
Chapter 13. Routing and i/o 175 routing points in racks tap points for every chain in a track. If a track has one or more instrument or effect racks in its device chain, internal routing points (pre fx, post fx and post mixer) will also be available for every chain within the rack. If a track contai...
Page 178
Chapter 13. Routing and i/o 176 13.6.2 making use of internal routing this section presents several internal routing examples in more detail. Post-effects recording let's say that you are feeding a guitar into live, building up a song track by track, overlaying take onto take. It is certainly powerf...
Page 179
Chapter 13. Routing and i/o 177 recording midi as audio when working with midi and complex software instruments, it is sometimes more useful to record the resulting audio than the incoming midi. A single midi note can prompt, for example, native instruments' absynth to produce something that sounds ...
Page 180
Chapter 13. Routing and i/o 178 creating submixes submixing the individual drums of a drum kit. Suppose we have the individual drums of a drum kit coming in on separate tracks for multitrack recording. In the mix, we can easily change the volumes of the individual drums, but adjusting the volume of ...
Page 181
Chapter 13. Routing and i/o 179 feeding an additional midi track into an existing midi track to reuse its instrument. This is accomplished by setting the new midi track's output type chooser to pad. Note that the output channel chooser now offers a selection of destinations: we can either feed the n...
Page 182
Chapter 13. Routing and i/o 180 midi is played by an instrument that is out of the mix. This can be easily remedied by cutting the clips from the pad track and pasting them into a third track that can be independently muted (and that can hold its own midi effects). The original pad track now acts as...
Page 183
Chapter 13. Routing and i/o 181 most plug-in instruments, however. Soloing a track that taps one of impulse's sample slots will still allow you to hear the output of that slot. Using multi-timbral plug-in instruments many plug-in instruments support multi-timbral operation. A multi-timbral instrumen...
Page 184
Chapter 13. Routing and i/o 182 2. Insert an external instrument device on another midi track. 3. Select the track that contains the instrument in the rst midi to chooser on the external instrument device. 4. Select the midi channel to route to in the second chooser on the external instrument device...
Page 185
Chapter 13. Routing and i/o 183 routing a speech signal into a vocoder's sidechain input. Some vocoder plug-ins include a built-in synthesizer to generate the carrier signal. In this case, the only difference from the above procedure is that the vocoder instrument is dragged into a midi track. Feedi...
Page 186
Chapter 13. Routing and i/o 184 using an auxiliary midi track to layer instruments. Perhaps you wonder why this works, given that the string track's output is audio and not midi. When routing midi in from another track, we are tapping the midi at the latest possible stage, which is after any midi ef...
Page 187
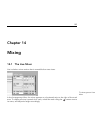
185 chapter 14 mixing 14.1 the live mixer live includes a mixer section that is accessible from two views: the arrangement view mixer. In the arrangement view, the mixer appears as a horizontal strip to the right of the track area. To display all mixer controls for a track, unfold the track using th...
Page 188
Chapter 14. Mixing 186 the session view mixer. The session view is a standard vertical mixer layout. You'll likely nd the session view mixer more intuitive than the arrangement mixer, which comes in handy when you work with automation . Note that the tab key toggles between the arrangement and sessi...
Page 189
Chapter 14. Mixing 187 let's look at the mixer controls: 1 2 1 3 6 5 4 4 5 6 3 2 the mixer controls. 1. The meter shows the track's rms (average) and peak output level. While moni- toring, however, it shows the input level. 2. The volume control adjusts the track's output level. With multiple tracks...
Page 190
Chapter 14. Mixing 188 14.1.1 session mixer features the session mixer's possibilities. The mixer section of the session mixer has several additional features that are not visible by default. The mixer is resizable, and dragging upwards on the top of the mixer will extend the height of the track met...
Page 191
Chapter 14. Mixing 189 14.2 audio and midi tracks audio and midi tracks in live are for hosting and playing clips, as explained earlier . You can add new audio and midi tracks to your live set's mixer at any time using the appropriate create menu commands. Tracks can also be created by double-clicki...
Page 192
Chapter 14. Mixing 190 particular knob or slider parameter (volume, for example), this difference will be maintained as you adjust the parameter. If you drag a track's title bar to the browser it will be saved as a new set. If a track contains audio clips, live will manage the copying of the referen...
Page 193
Chapter 14. Mixing 191 than master. ) you can also use a group track purely as a folder track by rerouting the outputs of the contained tracks to some other destination. ...And in arrangement view. Once a group track has been created, tracks can be dragged into or out of the group. Deleting a group ...
Page 194
Chapter 14. Mixing 192 in a return track lets it receive audio from any number of tracks and add echoes to them. The send controls and pre/post toggle. A clip or group track's send control regulates how much of the track's output feeds the associated return track's input. What's more, even the retur...
Page 195
Chapter 14. Mixing 193 the crossfader and selector. The crossfader is accessed via the session view's mixer selectors. It features seven different crossfade curves so that you can choose the one that ts your style the best. To change the curve, (pc) / ctrl (mac) on the crossfader, then select an ent...
Page 196
Chapter 14. Mixing 194 transition dipped intermediate constant power slow fade slow cut fast cut a+b power level crossfader response crossfader curve properties. The crossfader can be mapped to any continuous midi controller (absolute or incremental) . In addition to the crossfader's central slider,...
Page 197
Chapter 14. Mixing 195 each track has two crossfade assign buttons, a and b. The track can have three states with respect to the crossfader: if neither assign button is on, the crossfader does not affect the track at all. if a is on, the track will be played unattenuated as long as the crossfade...
Page 198
Chapter 14. Mixing 196 in order to set live up for cueing, you must be using an audio interface with at least four dedicated outputs (or two dedicated stereo outputs). The respective settings are accessible in the session view mixer. Make sure you have the mixer and in/out options checked in the vie...
Page 199
Chapter 14. Mixing 197 14.7 track delays a track delay control is available for every track in live. The control allows delaying or pre- delaying the output of tracks in milliseconds in order to compensate for human, acoustic, hardware and other real-world delays. This section of the interface can b...
Page 200
198 chapter 15 recording new clips this chapter is about recording new clips from audio and midi input signals. Note that this is a different kind of recording than the capturing of session clips into the arrangement . For successful audio recording, please make sure the audio preferences are set up...
Page 201
Chapter 15. Recording new clips 199 the track in/out section in the arrangement (left) and session view (right). Audio tracks default to recording a stereo signal from the external input pair 1/2. Midi tracks default to recording all midi that is coming in through the active external input devices ....
Page 202
Chapter 15. Recording new clips 200 if you are using a natively supported control surface, arming a midi track will automatically lock this control surface to the instrument in the track. Clicking one track's arm button unarms all other tracks unless the ctrl (pc) / (mac) modi er is held. If multipl...
Page 203
Chapter 15. Recording new clips 201 1. Recording commences when the control bar's record button is activated and the play button is pressed. 2. Recording creates new clips in all tracks that have their arm button on. 3. When the overdub switch is on, the new clips contain a mix of the signal already...
Page 204
Chapter 15. Recording new clips 202 3 4 1 2 recording a new clip into the session view. 1. Set the global quantization chooser to any value other than none to obtain correctly cut clips. 2. Activate the arm button for the tracks onto which you want to record. Clip record buttons will appear in the e...
Page 205
Chapter 15. Recording new clips 203 15.3.3 overdub recording midi patterns live makes pattern-oriented recording of drums and the like quite easy. Using live's impulse instrument and the following technique, you can successively build up drum patterns while listening to the result. Or, using an inst...
Page 206
Chapter 15. Recording new clips 204 15.3.4 midi step recording the midi editor allows you to record notes with the transport stopped by holding down keys on your controller or computer midi keyboard and advancing the insert mark according to the grid settings. This process, known as step recording, ...
Page 207
Chapter 15. Recording new clips 205 15.4 recording in sync live keeps the audio and midi you have recorded in sync, even when you later decide on a different song tempo. In fact, live allows you to change the tempo at any time before, after and even during recording. You could, for instance, cheat a...
Page 208
Chapter 15. Recording new clips 206 15.5 recording quantized midi notes if you will be recording midi, you have the option of automatically quantizing midi notes while recording. The record quantization chooser in the edit menu allows selecting the meter subdivisions with which your recorded notes w...
Page 209
Chapter 15. Recording new clips 207 15.7 setting up file types the following preferences from the record/warp/launch tab are relevant to the sample les that are created by recording: the sample le type you would like live to create can be chosen from the file type chooser in the record/warp/launch...
Page 210
Chapter 15. Recording new clips 208 the scene up/down buttons. One key is used to jump to the next scene... A track launch button. ... And another key to start and end recording in the respective track. You can also map the step recording navigators. The step recording arrows. This allows you to, fo...
Page 211
209 chapter 16 working with instruments and effects every track in live can host a number of devices. These devices can be of three different sorts: midi effects act upon midi signals and can only be placed in midi tracks. audio effects act upon audio signals and can be placed in audio tracks. T...
Page 212
Chapter 16. Working with instruments and effects 210 devices in the track view. To save space in the track view, a device can be collapsed by double-clicking on its title bar or by choosing fold from its (pc) / ctrl (mac) context menu. Devices can be folded. To learn about a particular device and ho...
Page 213
Chapter 16. Working with instruments and effects 211 16.1 using the live devices the live device browser. Click on the device browser selector to access the palette of live's built-in devices. You will notice that midi effects, audio effects and instruments each have their own folders in the browser...
Page 214
Chapter 16. Working with instruments and effects 212 midi and audio track arm buttons this is how you would play live instruments through effects on a track, for example, or use a midi keyboard's input to play a track's instrument. Note that you can easily move from this setup into recording new cli...
Page 215
Chapter 16. Working with instruments and effects 213 a midi track's device chain can contain all three device types. To remove a device from the chain, click on its title bar and press your computer's or delete key, or select delete from the edit menu. To change the order of devices, drag a device b...
Page 216
Chapter 16. Working with instruments and effects 214 devices in live's tracks have input and output level meters. These meters are helpful in nding problematic devices in the device chain: low or absent signals will be revealed by the level meters, and relevant device settings can then be adjusted, ...
Page 217
Chapter 16. Working with instruments and effects 215 presets in the device browser. You can browse and load presets quickly with the computer keyboard: scroll up and down using the and keys. close and open device folders using the and keys. press return to load a device or preset. The hot-swap...
Page 218
Chapter 16. Working with instruments and effects 216 saving presets you can create and save any number of your own presets in the device browser. The save preset button. Click the save preset button to save a device's current settings (including any custom info text ) as a new preset. You will be re...
Page 219
Chapter 16. Working with instruments and effects 217 for all of live's instruments, midi effects and audio effects (including the various types of racks ). If you have already saved a default preset for a particular device, live will ask you before overwriting it. To specify how live behaves when dr...
Page 220
Chapter 16. Working with instruments and effects 218 tracks or following instruments. Please see the previous section, using the live devices , for details. The plug-in device browser. Audio units and vst plug-ins are browsed and imported using the plug-in device browser, which is accessed via its s...
Page 221
Chapter 16. Working with instruments and effects 219 live is running, so that newly installed devices become immediately available in the plug-in device browser. You can also rescan if you believe that your plug-in database has somehow become cor- rupted. Holding down the alt (pc) / alt (mac) modi e...
Page 222
Chapter 16. Working with instruments and effects 220 the x-y control eld can be used to control two plug-in parameters at once and is therefore especially well-suited for live control. To assign any two plug-in parameters to the live panel x-y eld, use the drop-down menus directly beneath it. Showin...
Page 223
Chapter 16. Working with instruments and effects 221 plug-in con gure mode the con gure button. Con gure mode allows you to customize live's panel to show only the plug-in parameters that you need to access. To do this: enter con gure mode by pressing the con gure button in the device's header. ...
Page 224
Chapter 16. Working with instruments and effects 222 adjusting a parameter in the plug-in's oating window creates temporary entries for that parameter in the clip envelope and automation choosers, as well as the choosers in the panel's x-y eld. These entries are removed when you adjust another par...
Page 225
Chapter 16. Working with instruments and effects 223 16.2.2 plug-in performance options the cpu preferences contain a plug-in buffer size setting for balancing plug-in latency and performance. Here you can set the number of samples processed at any one time by the plug-in. Higher settings may result...
Page 226
Chapter 16. Working with instruments and effects 224 2. Once you have selected a vst custom folder and live has scanned it, the path will be displayed. Note that, on windows, live may have found a path in the registry without the need for browsing. 3. Make sure that the use vst plug-in custom folder...
Page 227
Chapter 16. Working with instruments and effects 225 system folder on mac os x) selected in live's file/folder preferences. The alias can point to a different partition or hard drive on your computer. Live will scan the set vst plug-in folder as well as any alias folders contained therein. Some vst ...
Page 228
Chapter 16. Working with instruments and effects 226 the vst program/bank load button (left) and save button (right). Vst programs and banks can be imported from les. Clicking the vst program load button brings up a standard le-open dialog for locating the desired le. Windows only: please select fro...
Page 229
Chapter 16. Working with instruments and effects 227 on the use audio units option activates audio units plug-ins so that they appear in live's plug-in device browser. Note that you can always turn this option off later if you decide not to use audio units. Activating audio units plug-ins. Audio uni...
Page 230
Chapter 16. Working with instruments and effects 228 device delay compensation is on by default and does not normally have to be adjusted in any way. However, live sets that were created with live 4 or earlier will open without device delay compensation. To manually turn latency compensation on (or ...
Page 231
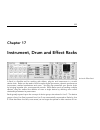
229 chapter 17 instrument, drum and effect racks an audio effect rack. A rack is a exible tool for working with effects, plug-ins and instruments in a track's device chain. Racks can be used to build complex signal processors, dynamic performance instruments, stacked synthesizers and more. Yet they ...
Page 232
Chapter 17. Instrument, drum and effect racks 230 17.1 an overview of racks 17.1.1 signal flow and parallel device chains in any of live's tracks, devices are connected serially in a device chain, passing their signals from one device to the next, left to right. By default, the track view displays o...
Page 233
Chapter 17. Instrument, drum and effect racks 231 the macro controls are a bank of eight knobs, each capable of addressing any number of parameters from any devices in a rack. How you use them is up to you whether it be for convenience, by making an important device parameter more accessible; for de...
Page 234
Chapter 17. Instrument, drum and effect racks 232 on one of the title bars to reveal the group and group to drum rack commands in the context menu. Note that if you repeat one of these commands again on the same device, you will create a rack within a rack. You can also group multiple chains within ...
Page 235
Chapter 17. Instrument, drum and effect racks 233 an instrument, drum or effect rack is being used. 2. Macro controls 3. Chain list. In drum racks, this view can include both drum chains and return chains. 4. Devices 5. Racks are also identi able by their round corners, which bracket and enclose the...
Page 236
Chapter 17. Instrument, drum and effect racks 234 navigate racks quickly via a context menu. 17.4 chain list the chain list in an audio effect rack. As signals enter a rack, they are rst greeted by the chain list. We will therefore also choose this point for our own introduction. The chain list repr...
Page 237
Chapter 17. Instrument, drum and effect racks 235 or arrangement view track will give that track focus; its track view will open, allowing you to drop your chain into place. Since the track view can show only one device chain at a time, the chain list also serves as a navigational aid: the list sele...
Page 238
Chapter 17. Instrument, drum and effect racks 236 auto select in a drum rack. When the auto select switch is activated, every chain that is currently processing signals becomes selected in the chain list. In drum racks, this feature will select a chain if it receives its assigned midi input note. In...
Page 239
Chapter 17. Instrument, drum and effect racks 237 17.5.1 signal flow through zones to understand how zones work, let's examine the signal ow in a midi effect rack. Our midi effect rack resides in the device chain of a midi track, and therefore processes midi signals. We will assume that it contains ...
Page 240
Chapter 17. Instrument, drum and effect racks 238 17.5.2 key zones the key zone editor. When the key button is selected, the key zone editor appears to the right of the chain list, illustrating how each chain maps to the full midi note range (nearly 11 octaves). Chains will only respond to midi note...
Page 241
Chapter 17. Instrument, drum and effect racks 239 spans the top of the editor. Otherwise, the functionality here is identical to that of the key zone editor. Velocity zone fade ranges attenuate the velocities of notes entering a chain. 17.5.4 chain select zones the chain select editor. Activating th...
Page 242
Chapter 17. Instrument, drum and effect racks 240 is not attenuated, allowing the chain's effects (like long reverb tails or delays) to fade out according to their own settings. Let's consider how we can make use of chain select zones in a performance situation: making preset banks using chain selec...
Page 243
Chapter 17. Instrument, drum and effect racks 241 crossfading preset banks using fade ranges crossfading between effects presets using chain select zones. Taking the previous example one step further, we can tweak our chain select zones to produce a smooth transition between our presets. To accompli...
Page 244
Chapter 17. Instrument, drum and effect racks 242 2 3 1 4 the chain list in a drum rack. 1. In addition to the standard selectors found on all racks, drum racks have four additional controls in the view column. From top to bottom, these are the auto select button and toggles for the input/output, se...
Page 245
Chapter 17. Instrument, drum and effect racks 243 drum racks that are nested within other drum racks, both drum chains and return chains can route upwards to the returns of any of the drum racks that contain them. 17.6.1 pad view pad view. The pad view is unique to drum racks and offers an easy way ...
Page 246
Chapter 17. Instrument, drum and effect racks 244 a single pad, by creating a nested drum rack with all of its chains set to receive that pad's note. Dragging a pad to another pad swaps the note mapping between the pads. This means that any midi clips triggering the affected notes will now play the ...
Page 247
Chapter 17. Instrument, drum and effect racks 245 17.6.2 slicing although live automatically warps audio les to match your set's tempo, you can get even more exibility out of your loops via a process called slicing. Slicing involves dividing the audio into small chunks and assigning each chunk to a ...
Page 248
Chapter 17. Instrument, drum and effect racks 246 3. The drum rack's macro controls will be pre-assigned to useful parameters for the simplers, as determined by the settings in the selected slicing preset. In the factory slicing presets, these include basic envelope controls and parameters to adjust...
Page 249
Chapter 17. Instrument, drum and effect racks 247 using effects on slices because each slice lives in its own chain in the drum rack, you can easily process individual slices with their own audio effects. To process several slices with the same set of effects, multi-select their chains in the drum r...
Page 250
Chapter 17. Instrument, drum and effect racks 248 map buttons will appear beneath each macro control dial; the mapping browser will open. The following steps will get you started mapping: 1. Enable macro map mode by clicking the map mode button; 2. Select a device parameter for mapping by clicki...
Page 251
Chapter 17. Instrument, drum and effect racks 249 a button in its title bar, which will fold the rack's mixer in or out. Likewise, any nested chains within the rack will also have this button. This makes it easy to get an overview of your rack's hierarchy or hide it when you just want to work on you...
Page 252
Chapter 17. Instrument, drum and effect racks 250 17.8.1 extracting chains all chains can be dragged from their parent racks and placed into other tracks or racks, either from the chain list or from the session view mixer. A drum rack's return chains can also be extracted, and will create new return...
Page 253
251 chapter 18 automation and editing envelopes often, when working with live's mixer and devices, you will want the controls' movements to become part of the music. The movement of a control across the song timeline is called automation; a control whose value changes in the course of this timeline ...
Page 254
Chapter 18. Automation and editing envelopes 252 volume, pan and the track activator switch have been automated. 18.2 deleting automation to delete automation data, (pc) / ctrl (mac) on an automated control to open its context menu and select delete automation. The automation led disappears, and the...
Page 255
Chapter 18. Automation and editing envelopes 253 2. You can click on it to reactivate all automation and thereby return to the automa- tion state as it is written on tape. 18.4 drawing and editing automation in the arrangement view, automation curves can be viewed and edited as breakpoint envelopes....
Page 256
Chapter 18. Automation and editing envelopes 254 of the track's devices or none to hide the envelope. It also provides you with an overview of which devices actually have automation by showing an led next to their labels. You can make things clearer still by selecting show automated parameters only ...
Page 257
Chapter 18. Automation and editing envelopes 255 drawing an envelope. Drawing creates steps as wide as the visible grid, which you can modify using a number of handy shortcuts . For freehand drawing, you can hide the grid using the snap to grid options menu entry or the ctrl 4 (pc) / 4 (mac) shortcu...
Page 258
Chapter 18. Automation and editing envelopes 256 them. Holding down the ctrl (pc) / (mac) modi er while dragging switches to a ner resolution. click and drag a line segment between two breakpoints to move it vertically, without affecting the breakpoint's horizontal position. If the line segment is...
Page 259
Chapter 18. Automation and editing envelopes 257 to copy, cut, delete or duplicate automation from a track, independent of the associated clip, make sure the parameter you want to work with is in its own lane. Any edit commands applied to an envelope selection within a single lane will only apply to...
Page 260
258 chapter 19 clip envelopes every clip in live can have its own clip envelopes. The aspects of a clip that are in uenced by clip envelopes change depending upon clip type and setup; clip envelopes can do anything from representing midi controller data to modulating device parameters. In this chapt...
Page 261
Chapter 19. Clip envelopes 259 to work with clip envelopes, bring up the clip view's envelopes box by activating the rightmost clip view box selector panel. The envelopes box contains two choosers for selecting an envelope to view and edit. The clip view's envelopes box. The top menu is the device c...
Page 262
Chapter 19. Clip envelopes 260 1. Enclose the desired selection in the loop brace, and click the brace so that it is selected. This will execute the edit menu's select loop command, which selects all material in the loop. 2. Copy the envelope with ctrl c (pc) / c (mac). 3. Shift the loop brace to th...
Page 263
Chapter 19. Clip envelopes 261 19.2.2 changing pitch and tuning per note drop a sample loop from the browser into live and play it. Click on the transpose quick- chooser button. You can now alter the pitch transposition of individual notes in the sample as you listen to it. The fast way to do this i...
Page 264
Chapter 19. Clip envelopes 262 to scroll the display, hold down the ctrl alt (pc) / alt (mac) modi er while dragging. Pitch is modulated in an additive way. The output of the transposition envelope is simply added to the transpose control's value. The result of the modulation is clipped to stay in t...
Page 265
Chapter 19. Clip envelopes 263 the control chooser. The envelope editor appears with a vertical grid overlay. In envelope draw mode , set steps to non-zero values to hear the loop scrambled. What is going on? Imagine the audio is read out by a tape head, the position of which is modulated by the env...
Page 266
Chapter 19. Clip envelopes 264 file browsers, or the session or arrangement view, onto the clip view. All clip settings, including the envelopes, will remain unaltered; only the sample will be replaced. 19.3 mixer and device clip envelopes clip envelopes can be used to modulate mixer and device cont...
Page 267
Chapter 19. Clip envelopes 265 as you raise and lower the volume slider, you can observe the dot following your movement in a relative fashion. Modulating the track's send controls is just as easy. Again, the modulation is a relative percentage: the clip envelope cannot open the send further than th...
Page 268
Chapter 19. Clip envelopes 266 choose midi ctrl from a midi clip's device chooser and use the control chooser below it to select a speci c midi controller. You can create new clip envelopes for any of the listed controllers by drawing steps or using breakpoints. You can also edit clip envelope repre...
Page 269
Chapter 19. Clip envelopes 267 19.5.1 programming a fade-out for a live set let us start with a straightforward example. Suppose you are setting up a live set and wish to program a fade-out over eight bars to occur when a speci c clip is launched but all you have is a one-bar loop. 1 3 4 2 using a c...
Page 270
Chapter 19. Clip envelopes 268 effectively deletes the envelope data. To return to the previous state, please use the edit menu's undo command. 19.5.2 creating long loops from short loops let us take this a step further. For a different part of your set, you would like to use the same one-bar loop b...
Page 271
Chapter 19. Clip envelopes 269 note that the start/end markers and loop brace are subject to quantization by the zoom- adaptive grid , as is envelope drawing . 19.5.3 imposing rhythm patterns onto samples so far, we have been talking about imposing long envelopes onto small loops. You can also think...
Page 272
270 chapter 20 working with video live's exible architecture makes it the perfect choice for scoring to video. You can trim video clips to select parts of them and use warp markers to visually align music in the arrangement view with the video. You can then render your edited video le along with you...
Page 273
Chapter 20. Working with video 271 20.2 the appearance of video in live 20.2.1 video clips in the arrangement view a video clip in the arrangement view looks just like an audio clip, except for the sprocket holes in its title bar. A video clip with a quicktime marker. Live also displays a movie le's...
Page 274
Chapter 20. Working with video 272 20.2.2 the video window the video window is a separate, oating window that always remains above live's main window. It can be dragged to any location you like, and it will never get covered up by live. You can toggle its visibility with a command in the view menu. ...
Page 275
Chapter 20. Working with video 273 20.2.3 clip view soundtrack composers will want to note the tempo master option in live's clip view. When scoring to video, video clips are usually set as tempo masters, while audio clips are left as tempo slaves. These are, therefore, the default warp properties o...
Page 276
Chapter 20. Working with video 274 20.3 matching sound to video in live, it takes just a few steps to get started with video. Let's look at a common scenario matching a piece of music to edits or hit points in a video: 1. Make sure that live's arrangement view is visible. Your computer keyboard's ke...
Page 277
Chapter 20. Working with video 275 20.4 video trimming tricks commonly, composers receive movie les with a few seconds of blank space before the real beginning of the action. This pre-roll ( two-beep ) serves as a sync reference for the mixing engineer, who expects that the composer's audio les will...
Page 278
Chapter 20. Working with video 276 in the arrangement view, we select all materials (edit menu/select all), then drag the entire composition a few seconds to the right: the video clip and the final clip of music. Now, we click on the video clip's title bar (to deselect everything else), then drag th...
Page 279
277 chapter 21 live audio effect reference live comes with a selection of custom-designed, built-in audio effects. The working with instruments and effects chapter explains the basics of using effects in live. 21.1 auto filter the auto filter effect. The auto filter effect provides classic analog lt...
Page 280
Chapter 21. Live audio effect reference 278 there are four different lter types: lowpass, highpass, bandpass and notch. For each type, the x-y controller adjusts frequency (to adjust, click and drag on the x-axis) and q (also called resonance; to adjust, click and drag on the y-axis). You can also c...
Page 281
Chapter 21. Live audio effect reference 279 periodic fashion. The respective amount control sets how much the lfo affects the lter. This can be used in conjunction with or instead of the envelope follower. The rate control speci es the lfo speed. It can be set in terms of hertz, or synced to the son...
Page 282
Chapter 21. Live audio effect reference 280 auto pan offers lfo-driven manipulation of amplitude and panning for creating automatic panning, tremolo and amplitude modulation, and beat-synchronized chopping effects. Auto pan's lfos modulate the amplitude of the left and right stereo channels with sin...
Page 283
Chapter 21. Live audio effect reference 281 the interval control de nes how often beat repeat captures new material and begins re- peating it. Interval is synced to and set in terms of the song tempo, with values ranging from 1/32 to 4 bars. The offset control shifts the point de ned by interval for...
Page 284
Chapter 21. Live audio effect reference 282 beat repeat includes a combined lowpass and highpass lter for de ning the passed fre- quency range of the device. You can turn the lter on and off, and set the center frequency and width of the passed frequency band, using the respective controls. The orig...
Page 285
Chapter 21. Live audio effect reference 283 to set both delay lines to delay 1's delay time, turn on the link button ( = ). This is especially useful if you want to change both delays with a single gesture. The modulation x-y controller can impart motion to the sounds. To change the modula- tion rat...
Page 286
Chapter 21. Live audio effect reference 284 a compressor reduces gain for signals above a user-settable threshold. Compression re- duces the levels of peaks, opening up more headroom and allowing the overall signal level to be turned up. This gives the signal a higher average level, resulting in a s...
Page 287
Chapter 21. Live audio effect reference 285 maximizing tool in the master channel. Less is often more here. Because compression reduces the volume of loud signals and opens up headroom, you can use the output slider so that the peaks once again hit the maximum available headroom. The output meter sh...
Page 288
Chapter 21. Live audio effect reference 286 cise, and so works well for limiting tasks where you need to ensure that there are absolutely no signals over the set threshold. Rms is closer to how people actually perceive loudness and is usually considered more musical. Opto mode, because of its non-li...
Page 289
Chapter 21. Live audio effect reference 287 are the same signal. But by using sidechaining, it is possible to compress a signal based on the level of another signal or a speci c frequency component. To access the sidechain parameters, unfold the compressor window by toggling the button in its title ...
Page 290
Chapter 21. Live audio effect reference 288 mixing a voiceover sidechaining is commonly used for so-called ducking effects. For example, imagine that you have one track containing a voiceover and another track containing background music. Since you want the voiceover to always be the loudest source ...
Page 291
Chapter 21. Live audio effect reference 289 21.6 corpus the corpus effect. Corpus is an effect that simulates the acoustic characteristics of seven types of resonant objects. Developed in collaboration with applied acoustics systems, corpus uses physical modelling technology to provide a wide range ...
Page 292
Chapter 21. Live audio effect reference 290 real-world mallet instruments such as a marimbas and glockenspiels behave. At 100%, the resonance is muted immediately at note off, regardless of the decay time. You can hide or show the sidechain parameters by toggling the button in corpus's title bar. Th...
Page 293
Chapter 21. Live audio effect reference 291 marimba, a specialized variant of the beam model, reproduces the characteristic tuning of marimba bar overtones which are produced as a result of the deep arch-cut of the bars. string simulates the sound produced by strings of different materials and s...
Page 294
Chapter 21. Live audio effect reference 292 inharm. (inharmonics) adjusts the pitch of the resonator's harmonics. At negative values, frequencies are compressed, increasing the amount of lower partials. At positive values, frequencies are stretched, increasing the amount of upper partials. This para...
Page 295
Chapter 21. Live audio effect reference 293 21.7 dynamic tube the dynamic tube effect. The dynamic tube effect infuses sounds with the peculiarities of tube saturation. An in- tegrated envelope follower generates dynamic tonal variations related to the level of the input signal. Three tube models, a...
Page 296
Chapter 21. Live audio effect reference 294 to volume changes in the input signal. Together, they shape the dynamic nature of the distortions. Note that if envelope is set to zero, they will have no effect. Cut or boost the device's nal signal level with the output dial. Aliasing can be reduced by e...
Page 297
Chapter 21. Live audio effect reference 295 low cut (cuts frequencies below the speci ed frequency); low shelf (boosts or cuts frequencies lower than the speci ed frequency); bell curve (boosts or cuts over a range of frequencies); notch (sharply cuts frequencies within a narrow range); hi...
Page 298
Chapter 21. Live audio effect reference 296 21.9 eq three the eq three effect. If you have ever used a good dj mixer you will know what this is: an eq that allows you to adjust the level of low, mid and high frequencies independently. Each band can be adjusted from -in nite db to +6 db using the gai...
Page 299
Chapter 21. Live audio effect reference 297 controls are set to 0.00 db. This is typical behavior for this kind of lter, and is part of eq three's unique sound. If you need a more linear behavior choose 24 db mode or use the eq eight. 21.10 erosion the erosion effect. The erosion effect degrades the...
Page 300
Chapter 21. Live audio effect reference 298 21.11 external audio effect the external audio effect. The external audio effect is a bit different than live's other effects devices. Instead of processing audio itself, it allows you to use external (hardware) effects processors within a track's device c...
Page 301
Chapter 21. Live audio effect reference 299 latency settings in samples, which ensures that the number of samples you specify will be retained even when changing the sample rate. If your external device connects to live via an analog connection, you will want to adjust your latency settings in milli...
Page 302
Chapter 21. Live audio effect reference 300 delay 3 to the right channel. The pan controls at the right can override the delay channels' outputs; otherwise each delay outputs on the channel from which it derives its input. Each delay channel's lter has an associated on switch, located to the left of...
Page 303
Chapter 21. Live audio effect reference 301 21.13 flanger the flanger effect. Flanger uses two parallel time-modulated delays to create anging effects. Flanger's delays can be adjusted with the delay time control. The feedback control sends part of the output signal back through the device input, wh...
Page 304
Chapter 21. Live audio effect reference 302 adjusting the hipass control will cut low frequencies from the delayed signal. The dry/wet control adjusts the balance between the processed and dry signals. Set it to 100 percent if using flanger in a return track. Hi-quality mode can be toggled on or off...
Page 305
Chapter 21. Live audio effect reference 303 the drive button enables a distortion effect, while the slider below it controls the level of the distortion. Drive is only available in ring mode. Enabling the wide button creates a stereo effect by inverting the polarity of the spread value for the right...
Page 306
Chapter 21. Live audio effect reference 304 21.14.1 frequency shifter tips frequency shifting and ring modulation can produce some very interesting sounds. Here are some tips for using the frequency shifter device. Drum tuning tuning sampled acoustic drums can be tricky. Using a sampler's transposit...
Page 307
Chapter 21. Live audio effect reference 305 21.15 gate the gate effect. The gate effect passes only signals whose level exceeds a user-speci ed threshold. A gate can eliminate low-level noise that occurs between sounds (e.G., hiss or hum), or shape a sound by turning up the threshold to where it cut...
Page 308
Chapter 21. Live audio effect reference 306 normally, the signal being gated and the input source that triggers the gate are the same signal. But by using sidechaining, it is possible to gate a signal based on the level of another signal. To access the sidechain parameters, unfold the gate window by...
Page 309
Chapter 21. Live audio effect reference 307 source. Randomizing pitch and delay time can create complex masses of sound and rhythm that seem to bear little relationship to the source. This can be very useful in creating new sounds and textures, as well as getting rid of unwelcome house guests, or te...
Page 310
Chapter 21. Live audio effect reference 308 grain delay now also has a dry/wet control; it can be routed to the vertical axis of the x-y controller. 21.17 limiter the limiter effect. The limiter effect is a mastering-quality dynamic range processor that ensures that the output does not exceed a spec...
Page 311
Chapter 21. Live audio effect reference 309 and sets an appropriate release time automatically. The meter gives a visual indication of how much gain reduction is being applied to the signal. Note that any devices or channel faders that appear after limiter may add gain. To ensure that your nal outpu...
Page 312
Chapter 21. Live audio effect reference 310 audio that are the length of the originally recorded material. The play button plays back the current state of looper's buffer without recording any new material. The stop button stops playback. The behavior of the transport controls changes depending on w...
Page 313
Chapter 21. Live audio effect reference 311 empty record play overdub stopped clear undo/redo click doubleclick hold diagram of looper's multi-purpose transport button behavior looper's multi-purpose transport button is optimized for use with a midi footswitch. To assign a footswitch, enter midi map...
Page 314
Chapter 21. Live audio effect reference 312 speci ed time and then switch to play or overdub, as determined by the button next to this chooser. song not running: if looper's record length chooser is set to the default x bars, looper will make a guess about the tempo of the material you've recorded...
Page 315
Chapter 21. Live audio effect reference 313 will then swap this behavior; the original material will play forward again, while the material that was overdubbed while reverse was enabled will play backwards. Engaging the reverse button is subject to the quantization chooser setting. Feedback sets the...
Page 316
Chapter 21. Live audio effect reference 314 2. Record at least one pass of material into looper. 3. Create another audio track. 4. In the new track's top audio from and audio to choosers, select the track containing the looper. 5. In the new track's bottom audio from and audio to choosers, select in...
Page 317
Chapter 21. Live audio effect reference 315 21.19.1 dynamics processing theory to understand how to use the multiband dynamics device, it helps to understand the four different methods of manipulating dynamics. When we use the term compression, we're typically talking about lowering the level of sig...
Page 318
Chapter 21. Live audio effect reference 316 original dynamic range larger dynamic range downward expansion (common) original dynamic range larger dynamic range upward expansion (uncommon) downward and upward expansion. To summarize: downward compression (common): make loud signals quieter upward...
Page 319
Chapter 21. Live audio effect reference 317 hz, the mid band from 500 hz to 2000 hz and the high band from 2000 hz up to whatever your soundcard or sample rate supports. Each band has activator and solo buttons. With the activator button disabled for a given band, its compression/expansion and gain ...
Page 320
Chapter 21. Live audio effect reference 318 between displaying the time (attack and release), below (threshold and ratio) and above (threshold and ratio) for each band. For the above thresholds, attack de nes how long it takes to reach maximum compression or expansion once a signal exceeds the thres...
Page 321
Chapter 21. Live audio effect reference 319 basic multiband compression by using only the upper thresholds, multiband dynamics can be used as a traditional down- ward compressor. Adjust the crossover points to suit your audio material, then apply down- ward compression (by dragging down in the upper...
Page 322
Chapter 21. Live audio effect reference 320 21.20 overdrive the overdrive effect. Overdrive is a distortion effect that pays homage to some classic pedal devices commonly used by guitarists. Unlike many distortion units, it can be driven extremely hard without sacri cing dynamic range. The distortio...
Page 323
Chapter 21. Live audio effect reference 321 21.21 phaser the phaser effect. Phaser uses a series of all-pass lters to create a phase shift in the frequency spectrum of a sound. The poles control creates notches in the frequency spectrum. The feedback control can then be used to invert the waveform a...
Page 324
Chapter 21. Live audio effect reference 322 lfos will be perfectly out of phase (180 degrees apart), so that when one reaches its peak, the other is at its minimum. Spin detunes the two lfo speeds relative to each other. Each lter frequency is then modulated using a different lfo frequency, as deter...
Page 325
Chapter 21. Live audio effect reference 323 time, click and drag up or down in the delay time eld, or click in the eld and type in a value. The feedback parameter controls how much of the right channel output signal returns to the delay line input. The feedback loop also includes a lter that can col...
Page 326
Chapter 21. Live audio effect reference 324 21.23 redux the redux effect. Nostalgic for the famed low-resolution sound quality of the ensoniq mirage, fairlight cmi or commodore-64 computer? Redux returns us to the dark ages of digital by reducing a signal's sample rate and bit resolution. The downsa...
Page 327
Chapter 21. Live audio effect reference 325 turning off bit reduction results in modest cpu savings. 21.24 resonators the resonators effect. This device consists of ve parallel resonators that superimpose a tonal character on the input source. It can produce sounds resembling anything from plucked s...
Page 328
Chapter 21. Live audio effect reference 326 resonators provides two different resonation modes. Mode a provides a more realistic sounding resonation, while mode b offers an effect that is especially interesting when resonator i's note parameter is set to lower pitches. The brightness of the resultin...
Page 329
Chapter 21. Live audio effect reference 327 predelay controls the delay time, in milliseconds, before the onset of the rst early re ection. This delays the reverberation relative to the input signal. One's impression of the size of a real room depends partly on this delay. Typical values for natural...
Page 330
Chapter 21. Live audio effect reference 328 other (this is also a property of the diffusion in real rooms). The lowest setting mixes the output signal to mono. 21.25.4 diffusion network the diffusion network creates the reverberant tail that follows the early re ections. The decay time control adjus...
Page 331
Chapter 21. Live audio effect reference 329 21.26 saturator the saturator effect. Saturator is a waveshaping effect that can add that missing dirt, punch or warmth to your sound. It can coat input signals with a soft saturation or drive them into many different avors of distortion. An x-y grid helps...
Page 332
Chapter 21. Live audio effect reference 330 period. drive determines how much the input signal will be in uenced by the waveshaper parameters. Setting drive to zero will negate the effect entirely. lin works together with the curve and depth parameters to alter the linear portion of the shaping ...
Page 333
Chapter 21. Live audio effect reference 331 21.27 simple delay the simple delay effect. The simple delay provides two independent delay lines, one for each channel (left and right). To refer delay time to the song tempo, activate the sync switch, which allows using the delay time beat division choos...
Page 334
Chapter 21. Live audio effect reference 332 fade creates a crossfade between the old and new delay times. This sounds similar to time stretching if the delay time is gradually changed. Fade mode is the default option. jump immediately jumps to the new delay time. Note that this will cause an aud...
Page 335
Chapter 21. Live audio effect reference 333 the avg slider allows you to specify how many blocks of samples will be averaged for each update of the display. With a setting of one, each block is shown. This results in much more activity in the display, which can be useful for nding the spectrum of sh...
Page 336
Chapter 21. Live audio effect reference 334 21.29 utility the utility effect. Utility can perform some very useful tasks, especially in combination with other devices. The mute button simply silences the incoming signal when enabled. Note: the active/mute controls of a track are always placed at the...
Page 337
Chapter 21. Live audio effect reference 335 21.30 vinyl distortion the vinyl distortion effect. The vinyl distortion effect emulates some of the typical distortions that occur on vinyl records during playback. These distortions are caused by the geometric relationships between the needle and the rec...
Page 338
Chapter 21. Live audio effect reference 336 the volume control adjusts the amount of gain applied to the noise. 21.31 vocoder the vocoder effect. A vocoder is an effect that combines the frequency information of one audio signal (called the carrier) with the amplitude contour of another audio signal...
Page 339
Chapter 21. Live audio effect reference 337 external allows you to select any available internal routing points from the choosers below. This is the option you'll want for classic robot voice applications. modulator uses the modulator itself as the carrier. This essentially outputs a resynthe- s...
Page 340
Chapter 21. Live audio effect reference 338 bandwidth, you increase the overlap of the lter bands. A bandwidth of 100% is the most accurate, but higher or lower settings can create interesting effects. The precise/retro switch toggles between two types of lter behavior. In precise mode, all lters ha...
Page 341
Chapter 21. Live audio effect reference 339 1. Insert vocoder in the track that contains your vocal material. You can either use a clip that contains a prerecorded voice clip or, to process a live vocal signal, connect a microphone to a channel on your audio hardware and choose this as the input sou...
Page 342
340 chapter 22 live midi effect reference live comes with a selection of custom-designed, built-in midi effects. The working with instruments and effects chapter explains the basics of using effects in live. 22.1 arpeggiator the arpeggiator effect. Live's arpeggiator effect takes the individual midi...
Page 343
Chapter 22. Live midi effect reference 341 controlled by the device, which also provides a full complement of both classic and original arpeggiator features. Arpeggiators are a classic element in eighties synth music. The name originates with the musical concept of the arpeggio, in which the notes c...
Page 344
Chapter 22. Live midi effect reference 342 pinky up and pinky updown . Thumb up and thumb updown . Play order places notes in the pattern according to the order in which they are played. This is therefore only recognizable when more than one chord or note has been played. In addition to the arpeggia...
Page 345
Chapter 22. Live midi effect reference 343 can be added to the pattern simply by playing them. Notes can also be removed from the pattern in this scenario by playing them a second time, allowing the gradual buildup and rearrangement of the pattern over time. Tip: if you want the pattern to stop play...
Page 346
Chapter 22. Live midi effect reference 344 the dynamics of arpeggiator are controlled using the velocity section. With velocity set to on and target set to 0, for example, the sequence will gradually fade out, eventually reaching 0 velocity. The decay control sets the amount of time arpeggiator take...
Page 347
Chapter 22. Live midi effect reference 345 note that no two notes of the same pitch can contribute to the chord, and that selecting the same shift value twice (e.G., +8 semitones on both shift 2 and shift 3) will result in the latter control appearing disabled, indicating that it is a duplicate and ...
Page 348
Chapter 22. Live midi effect reference 346 decay time this is the time needed for an incoming note's velocity to decay to zero. The decay begins immediately from the moment the device receives a midi note on message. The value at the time of note off will become the velocity of the output midi note....
Page 349
Chapter 22. Live midi effect reference 347 22.5 random the random effect. Random adds an element of the unknown to the otherwise commonplace pitch parameter. The chance control de nes the likelihood that an incoming note's pitch will be changed by a random value. You can think of it as being somethi...
Page 350
Chapter 22. Live midi effect reference 348 c3 once will trigger c3, and each successive c3 will trigger the next semitone higher until the device reaches c4, at which point it will start over at c3. But with chance set to 100 percent, choices set to 2 and scale set to 2, incoming c3s will alternate ...
Page 351
Chapter 22. Live midi effect reference 349 mapping will take effect. Outside of the range de ned by these controls, the scale effect will be inapplicable, and the led light will ash to indicate that some notes are not being processed by the effect, but are playing at their unaltered pitch. 22.7 velo...
Page 352
Chapter 22. Live midi effect reference 350 gate mode removes incoming notes altogether if their velocities are outside of the range. You will see the little led below the x-y display ash when a note is blocked by gating. in fixed mode, the out hi velocity de nes all outgoing note velocities, reg...
Page 353
351 chapter 23 live instrument reference live comes with a selection of custom-designed, built-in instruments. The working with instruments and effects chapter explains the basics of using instruments in live. The boxed version of live 8 ships with the essential instrument collection, a multi-gigaby...
Page 354
Chapter 23. Live instrument reference 352 analog is a virtual analog synthesizer, created in collaboration with applied acoustics sys- tems. With this instrument, we have not attempted to emulate a speci c vintage analog synthesizer but rather to combine different features of legendary vintage synth...
Page 355
Chapter 23. Live instrument reference 353 these sources can be independently routed to two different multi-mode lters, which are each connected to an ampli er. Furthermore, the signal ow can be run through the lters in series or in parallel. Analog also features two low-frequency oscillators (lfos) ...
Page 356
Chapter 23. Live instrument reference 354 the shape chooser selects the oscillator's waveform. The choices are sine, sawtooth, rectan- gular and white noise. When rectangular is selected, the pulse width parameter is enabled in the display, which allows you to change the pulse width of the waveform....
Page 357
Chapter 23. Live instrument reference 355 oscillator whose frequency is set by the ratio slider. At 0%, the frequency of the internal oscillator and the audible oscillator match, so sync has no effect. As you increase the ratio, the internal oscillator's rate increases, which changes the harmonic co...
Page 358
Chapter 23. Live instrument reference 356 23.1.4 filters display and shell parameters for the two filters. Analog's two multi-mode lters come equipped with a exible routing architecture, multiple saturation options and a variety of modulation possibilities. As with the oscillators, all parameters ca...
Page 359
Chapter 23. Live instrument reference 357 the three sym options apply symmetrical distortion, which means that the saturation be- havior is the same for positive and negative values. The asym modes result in asymmetrical saturation. For both mode types, higher numbers result in more distortion. Driv...
Page 360
Chapter 23. Live instrument reference 358 23.1.6 envelopes analog's envelope parameters. In addition to the pitch envelopes in the oscillator sections, analog is equipped with inde- pendent envelopes for each lter and ampli er. All four of these envelopes have identical controls, which are housed en...
Page 361
Chapter 23. Live instrument reference 359 normally, each new note triggers its own envelope from the beginning of the attack phase. With legato enabled, a new note that is played while another note is already depressed will use the rst note's envelope, at its current position. Enabling the free swit...
Page 362
Chapter 23. Live instrument reference 360 analog's two lfos can be used as modulation sources for the oscillators, lters and ampli- ers. As with the other sections, each lfo has independent parameters. The lfo 1 and lfo 2 switches in the shell toggle the respective lfo on and off, while the rate kno...
Page 363
Chapter 23. Live instrument reference 361 the volume control in the shell adjusts the overall output of the instrument. This is the instrument's master level, and can boost or attenuate the output of the ampli er sections. The vib switch turns the vibrato effect on or off, while the percentage slide...
Page 364
Chapter 23. Live instrument reference 362 priority to the most recently played notes, cutting off the oldest notes as necessary. The octave, semi and tuning controls function as coarse and ne tuners. Octave transposes the entire instrument by octaves, while semi transposes up or down in semitone inc...
Page 365
Chapter 23. Live instrument reference 363 23.2 collision the collision instrument. Collision is a synthesizer that simulates the characteristics of mallet percussion instruments. Created in collaboration with applied acoustics systems, collision uses physical modeling technology to model the various...
Page 366
Chapter 23. Live instrument reference 364 in addition to serving as organizational aids, collision's tabs contain leds that light up to indicate that their contained sections are active. Disabling unused sections can save cpu. 23.2.2 excitator tab the excitator tab contains parameters for the mallet...
Page 367
Chapter 23. Live instrument reference 365 the color knob sets the frequency of the noise component. At higher values, there are less low frequencies in the noise. This parameter has no effect if noise is set to 0. The mallet section can be toggled on or off via the switch next to its name. The noise...
Page 368
Chapter 23. Live instrument reference 366 decay phase to the release of the key. When this slider is set to 0, there is no sustain phase. With it set to 100, there is no decay phase. Finally, the release time is set with the r (release) slider. This is the time it takes for the envelope to reach zer...
Page 369
Chapter 23. Live instrument reference 367 tuning section resonator tuning parameters. The tune and fine knobs function as coarse and ne tuning controls. Tune moves up or down in semitone increments, while fine adjusts in increments of one cent (up to a maximum of one quarter tone (50 cents) up or do...
Page 370
Chapter 23. Live instrument reference 368 the type chooser allows you to select from seven types of physically modeled resonant objects: beam simulates the resonance properties of beams of different materials and sizes. marimba, a specialized variant of the beam model, reproduces the characteris...
Page 371
Chapter 23. Live instrument reference 369 the radius of the pipe or tube. As the radius increases, the decay time and high frequency sustain both increase. At very large sizes, the fundamental pitch of the resonator also changes. The decay and material/radius parameters can also be controlled with t...
Page 372
Chapter 23. Live instrument reference 370 mixer section resonator mixer. Each resonator has its own volume and pan controls. Pan can also be modulated by note pitch via the k (key) slider below the knob. The bleed control mixes a portion of the original oscillator signal with the resonated signal. A...
Page 373
Chapter 23. Live instrument reference 371 sawtooth down and two types of noise. The rst noise type steps between random values while the second uses smooth ramps. The switch next to the waveform chooser toggles the lfo's rate between frequency in hertz and tempo-synced beat divisions. Depth sets the...
Page 374
Chapter 23. Live instrument reference 372 the global section collision's global section. The global section contains the parameters that relate to the overall behavior and perfor- mance of collision. The volume knob acts as collision's master output control. Collision contains a built-in limiter tha...
Page 375
Chapter 23. Live instrument reference 373 mallet noise resonator 2 resonator 1 resonators in 1 + 2 (parallel) con guration. The voices chooser sets the available polyphony. Since each voice that's used requires additional cpu, you may need to experiment with this chooser to nd a good balance between...
Page 376
Chapter 23. Live instrument reference 374 try using the noise excitator, particularly with long envelope times, to create washy, quasi-granular textures. These parameters can also be used to simulate special acous- tic effects such as bowed vibraphones or crystal glasses. experiment with the res...
Page 377
Chapter 23. Live instrument reference 375 23.3.2 accessing the drum machines after installation, the drum machines presets are accessed through live's device browser, in exactly the same way as live's other built-in instruments. You will nd them as categorized presets within the drum rack folder. Dr...
Page 378
Chapter 23. Live instrument reference 376 parameters can be tweaked to values not possible with the real instruments to get some truly amazing new sounds that still retain a warm acoustic quality. The full version of electric is not included with the standard version of live, but is a special featur...
Page 379
Chapter 23. Live instrument reference 377 the noise subsection simulates the impact noise caused by the mallet striking the fork. The decay knob adjusts how long it takes for this noise to fade to silence, while the pitch control sets the center frequency. Level adjusts the overall volume of the noi...
Page 380
Chapter 23. Live instrument reference 378 hardness of the dampers, producing a brighter sound. The overall amount of damper noise is adjusted with the level control. The att/rel knob adjusts whether or not damper noise is present when the dampers are applied to the fork or when they are released. Wh...
Page 381
Chapter 23. Live instrument reference 379 the volume knob sets electric's overall output level. The voices chooser sets the available polyphony. Since each voice that's used requires additional cpu, you may need to experiment with this chooser to nd a good balance between playability and performance...
Page 382
Chapter 23. Live instrument reference 380 allows you to easily integrate external (hardware) synthesizers, rewire devices and multi- timbral plug-ins into your projects. It sends midi out and returns audio. The two midi to choosers select the output to which the device will send midi data. The top c...
Page 383
Chapter 23. Live instrument reference 381 slider allows you to set your latency compensation amount in either milliseconds or samples. If your external device connects to live via a digital connection, you will want to adjust your latency settings in samples, which ensures that the number of samples...
Page 384
Chapter 23. Live instrument reference 382 loaded into impulse's sample slots can be time-stretched, ltered and processed by enve- lope, saturation, pan and volume components, nearly all of which are subject to random and velocity-based modulation. 23.6.1 sample slots drag and drop samples into any o...
Page 385
Chapter 23. Live instrument reference 383 23.6.2 start, tune and stretch the start control de nes where impulse begins playing a sample, and can be set up to 100 ms later than the actual sample beginning. The transposition control adjusts the transposition of the sample by +/- 48 semitones, and can ...
Page 386
Chapter 23. Live instrument reference 384 23.6.5 pan and volume each sample has volume and pan controls that adjust amplitude and stereo positioning, respectively. Both controls can be modulated: pan by velocity and a random value, and volume by velocity only. 23.6.6 global controls the parameters l...
Page 387
Chapter 23. Live instrument reference 385 23.7.1 latin percussion installation latin percussion is installed separately from the main live installation. To install, drag the latin percussion live pack into the live application window, either from your operating system or from live's browser. After y...
Page 388
Chapter 23. Live instrument reference 386 to navigate to the selected conga preset folder. Then drag the entire folder to the drum rack's pad view. This will replace all of the currently loaded conga components, leaving all other pads alone. You can also unfold these preset folders to access individ...
Page 389
Chapter 23. Live instrument reference 387 23.8.1 general overview the interface of operator consists of two parts: the display surrounded on either side by the shell. The shell offers the most important parameters in a single view and is divided into eight sections. On the left side, you will nd fou...
Page 390
Chapter 23. Live instrument reference 388 operator's global display. Typically, fm synthesis makes use of pure sine waves, creating more complex waveforms via modulation. However, in order to simplify sound design and to create a wider range of possible sounds, we designed operator to produce a vari...
Page 391
Chapter 23. Live instrument reference 389 built-in waveforms the oscillators come with a built-in collection of basic waveform types sine, sawtooth, square, triangle and noise which are selected from the wave chooser in the individual oscillator displays. The rst of these waveforms is a pure, mathem...
Page 392
Chapter 23. Live instrument reference 390 offers an option to toggle normalize on or off. When enabled, the oscillator's overall output level is maintained as you draw additional harmonics. When disabled, additional harmonics add additional level. Note that the volume can become extremely loud if no...
Page 393
Chapter 23. Live instrument reference 391 the phase of each oscillator can be adjusted using the phase control in its display. With the r (retrigger) button enabled, the waveform restarts at the same position in its phase each time a note is triggered. With r disabled, the oscillator is free-running...
Page 394
Chapter 23. Live instrument reference 392 23.8.3 lfo section operator's lfo parameters. The lfo in operator can practically be thought of as a fth oscillator. It runs at audio rates, and it modulates the frequency of the other oscillators. It is possible to switch lfo modulation on or off for each i...
Page 395
Chapter 23. Live instrument reference 393 display's amt envelope . 23.8.4 envelopes operator has seven envelopes: one for each oscillator, a lter envelope, a pitch envelope and an envelope for the lfo. All envelopes feature some special looping modes. Addition- ally, the lter and pitch envelopes hav...
Page 396
Chapter 23. Live instrument reference 394 mode, an envelope will restart after the beat time selected from the repeat chooser. In beat mode, the repeat time is de ned in fractions of song time, but notes are not quantized. If you play a note a bit out of sync, it will repeat perfectly but stay out o...
Page 397
Chapter 23. Live instrument reference 395 23.8.5 filter section operator's filter section. Operator's lters can be very useful for modifying the sonically rich timbres created by the oscillators. And, since the oscillators also provide you with the classic waveforms of analog synthesizers, you can v...
Page 398
Chapter 23. Live instrument reference 396 adjusted with the dry/wet control. With this set to 0%, the shaper and drive parameters are bypassed. 23.8.6 global controls the global section contains parameters that affect operator's overall behavior. Additionally, the global display area provides a comp...
Page 399
Chapter 23. Live instrument reference 397 23.8.7 glide and spread operator's pitch section. Operator includes a polyphonic glide function. When this function is activated, new notes will start with the pitch of the last note played and then slide gradually to their own played pitch. Glide can be tur...
Page 400
Chapter 23. Live instrument reference 398 interpolation and antialias modes in the global display can also be turned off to conserve cpu resources. Note that turning off the oscillators will not save cpu power. 23.8.9 finally... Operator is the result of an intense preoccupation with fm synthesis an...
Page 401
Chapter 23. Live instrument reference 399 algorithm an oscillator can modulate other oscillators, be modulated by other oscillators, or both. The algorithm de nes the connections between the oscillators and therefore has a signi cant impact on the sound that is created. Voices this sets the maximum ...
Page 402
Chapter 23. Live instrument reference 400 osc crossfade a/c crossfades the volumes of the a and c oscillators based on the value of the modulation source. Osc crossfade b/d crossfades the volumes of the b and d oscillators based on the value of the modulation source. Osc feedback modulates the amoun...
Page 403
Chapter 23. Live instrument reference 401 spread if spread is turned up, the synthesizer uses two detuned voices per note, one each on the left and right stereo channels, to create chorusing sounds. Spread is a very cpu-intensive effect. Transpose this is the global transposition setting for the ins...
Page 404
Chapter 23. Live instrument reference 402 with low resonance settings. The 24 db lter modes attenuate the ltered frequencies to a much greater degree than the 12 db modes. The ladder and svf lters provide additional lter architectures. Filter frequency (freq) this de nes the center or cutoff frequen...
Page 405
Chapter 23. Live instrument reference 403 lfo waveform select from among several typical lfo waveforms. Sample and hold creates random steps, and noise supplies bandpass- ltered noise. All waveforms are band- limited to avoid unwanted clicks. Lfo range the lfo covers an extreme frequency range. Choo...
Page 406
Chapter 23. Live instrument reference 404 osc coarse frequency (coarse) the relationship between oscillator frequency and note pitch is de ned by the coarse and fine parameters. Coarse sets the ratio in whole numbers, creating a harmonic relationship. Osc fine frequency (fine) the relationship betwe...
Page 407
Chapter 23. Live instrument reference 405 brighter sound, while higher values result in more high-end roll-off and a more prominent fundamental. With repeat off, partials above the 16th, 32nd or 64th harmonic are truncated. Osc frequency the frequency of an oscillator can be modulated by note veloci...
Page 408
Chapter 23. Live instrument reference 406 envelope initial level (initial) this sets the initial value of the envelope. Envelope peak level (peak) this is the peak level at the end of the note attack. Envelope sustain level (sustain) this is the sustain level at the end of the note decay. The envelo...
Page 409
Chapter 23. Live instrument reference 407 context menu parameters certain operations and parameters in operator are only available via the (pc) / ctrl (mac) context menu. These include: copy commands for oscillators the (pc) / ctrl (mac) context menu of the oscillator's shell and envelope display pr...
Page 410
Chapter 23. Live instrument reference 408 after you have installed the libraries of your choice, you will need to authorize them. Further details can be found at the ableton website 3 . 23.9.2 using the orchestral presets after installation, the orchestral instruments are accessed through live's dev...
Page 411
Chapter 23. Live instrument reference 409 23.10 sampler the sampler instrument. Sampler is a sleek yet formidable multisampling instrument that takes full advantage of live's agile audio engine. It has been designed from the start to handle multi-gigabyte instrument libraries with ease, and it impor...
Page 412
Chapter 23. Live instrument reference 410 captures an instrument at multiple points within its critical sonic range. This typically means capturing the instrument at different pitches as well as different levels of emphasis (played softly, moderately, loudly, etc.). The resulting multisample is a co...
Page 413
Chapter 23. Live instrument reference 411 which are mounted automatically upon inserting and can be browsed as usual with live's file browser. Here are the steps: 1. Insert the akai-formatted sample cd. 2. On a mac, click on the title bar of live's file browser and select all volumes. On a pc, navig...
Page 414
Chapter 23. Live instrument reference 412 23.10.3 the zone tab the key zone editor. Clicking on the zone tab toggles the display of sampler's zone editor, which offers a hands- on interface for mapping any number of samples across three types of ranges. The zone editor opens in its own dedicated vie...
Page 415
Chapter 23. Live instrument reference 413 zone editor view (key/vel/sel) these buttons toggle the display of the key zone, velocity zone and sample select editors. The sample layer list all samples contained in the currently loaded multisample are listed here, with each sample given its own layer. F...
Page 416
Chapter 23. Live instrument reference 414 velocity zones the velocity zone editor. Velocity zones determine the range of midi note on velocities that each sample will respond to. The timbre of most musical instruments changes greatly with playing intensity. Therefore, the best multisamples capture n...
Page 417
Chapter 23. Live instrument reference 415 found in racks , in that only samples with sample select values that overlap the current value of the sample selector will be triggered. The sample select editor, when toggled, appears alongside the sample layer list. The editor has a scale of 0-127, similar...
Page 418
Chapter 23. Live instrument reference 416 snap snaps all start and end points to the waveform zero-crossings (points where the amplitude is zero) to avoid clicks. As with simpler, this snap is based on the left channel of stereo samples, so a small crossfade value may be necessary in some cases to c...
Page 419
Chapter 23. Live instrument reference 417 no sustain loop playback proceeds linearly until either the sample end is reached or the volume envelope completes its release stage. Sustain loop enabled playback proceeds linearly until loop end is reached, when it jumps immediately to loop start and conti...
Page 420
Chapter 23. Live instrument reference 418 the pitch of samples may shift within a loop, relative to the loop's duration. With detune, the pitch of these regions can be matched to the rest of the sample. Interpolation (interpol) this is a global setting that determines the accuracy of transposed samp...
Page 421
Chapter 23. Live instrument reference 419 the pitch envelope the pitch envelope modulates the pitch of the sample over time, as well as of the modulation oscillator, if it is enabled. This is a multi-stage envelope with initial, peak, sustain and end levels. The time needed to travel between the lev...
Page 422
Chapter 23. Live instrument reference 420 four different curves can be chosen for the waveshaper, and its overall intensity can be controlled with the amount slider. In addition, the signal ow direction can be adjusted with the button above the waveshaper area. With the triangle pointing up, the sig...
Page 423
Chapter 23. Live instrument reference 421 the modulation tab offers an additional loopable envelope, plus three lfos, all capable of modulating multiple parameters, including themselves. Each lfo can be free running, or synced to the live set's tempo, and lfos 2 and 3 can produce stereo modulation e...
Page 424
Chapter 23. Live instrument reference 422 23.11 session drums session drums is a multisampled library of acoustic drumkits recorded by chocolate audio. The collection consists of both stereo and multimic presets, programmed as drum racks for easy editing and performance possibilities. The stereo pre...
Page 425
Chapter 23. Live instrument reference 423 23.11.2 accessing the session drums presets after installation, the session drums presets are accessed through live's device browser, in exactly the same way as live's other built-in instruments. You will nd them as categorized presets within the drum rack f...
Page 426
Chapter 23. Live instrument reference 424 velocity sensitivity this macro adjusts the dynamic range of the drumkit. As you turn up this control, the kit will play louder at high velocity and softer at low velocities. In the stereo presets, the additional macros control tuning and decay times for t...
Page 427
Chapter 23. Live instrument reference 425 23.12 simpler the simpler instrument. Simpler is an instrument that integrates the basic elements of a sampler with a set of classic synthesizer parameters. A simpler voice plays a user-de ned sample section, which is in turn processed by envelope, lter, lfo...
Page 428
Chapter 23. Live instrument reference 426 23.12.2 sample controls simpler plays a speci c region or loop of the sample, as determined by a group of sample controls. The start and length controls work together to specify where simpler begins and ends its sweep of the sample. As the name implies, star...
Page 429
Chapter 23. Live instrument reference 427 vertically to zoom, and drag horizontally to pan different areas of the sample into view. 23.12.4 envelope simpler contains three classic adsr envelopes, as seen in most synthesizers, for shaping the dynamic response of the sample. Volume-, lter frequency-, ...
Page 430
Chapter 23. Live instrument reference 428 30 hz, or sync to divisions of the set's tempo. Lfos are applied individually to each voice, or played note, in simpler. The key parameter scales each lfo's rate in proportion to the pitch of incoming notes. A high key setting assigns higher notes a higher l...
Page 431
Chapter 23. Live instrument reference 429 the voices parameter sets the maximum number of voices that simpler can play simultane- ously. If more voices are needed than have been allocated by the voices chooser, voice stealing will take place, in which the oldest voice(s) will be dropped in favor of ...
Page 432
Chapter 23. Live instrument reference 430 23.13 tension the tension instrument. Tension is a synthesizer dedicated to the emulation of string instruments, and developed in collaboration with applied acoustics systems. The synthesizer is entirely based on physical modeling technology and uses no samp...
Page 433
Chapter 23. Live instrument reference 431 a hammer, a pick or a bow. The frequency of the oscillation is determined by the effective length of the string, which is controlled by the nger/fret interaction or termination. A damper can be applied to the strings in order to reduce the decay time of the ...
Page 434
Chapter 23. Live instrument reference 432 the modelled string can be played using different types of excitators in order to reproduce different types of instruments and playing techniques. The excitator is selected using the type chooser, and the choices available are bow, hammer, hammer (bouncing) ...
Page 435
Chapter 23. Live instrument reference 433 string into motion. The prot knob (for protrusion ) adjusts how much of the plectrum's surface area is placed under the string. Lower values results in a thinner, smaller sound, as there is less mass setting the string into motion. The stiffness, velocity an...
Page 436
Chapter 23. Live instrument reference 434 the string section tension's string section. The vibration of the string is the main component of a stringed instrument's sound. The effective length of the string is also responsible for the pitch of the sound we hear. The theoretical model of a resonating ...
Page 437
Chapter 23. Live instrument reference 435 the vibrato section tension's vibrato section. The vibrato section uses an lfo to modulate the string's pitch. As with all of tension's parameters, the controls in this section can be used to enhance the realism of a stringed instrument model or to create so...
Page 438
Chapter 23. Live instrument reference 436 the damper section tension's damper section. All string instruments employ some type of damping mechanism that mutes the resonating string. In pianos, this is a felt pad that is applied to the string when the key is released. In instruments such as guitars a...
Page 439
Chapter 23. Live instrument reference 437 the mass, stiffness and velocity parameters can be further modulated by note pitch, via the sliders below. The stiffness of the damper mechanism is adjusted with the damping knob, which affects the overall amount of vibration absorbed by the damper. Lower va...
Page 440
Chapter 23. Live instrument reference 438 adjusted with the fing mass and fing stiff knobs, which set the force the nger applies to the string and the nger's stiffness, respectively. The mass amount can be additionally modulated by velocity or note pitch via the sliders. The stiffness of the fret is...
Page 441
Chapter 23. Live instrument reference 439 the body section tension's body section. The role of the body or soundboard of a string instrument is to radiate the vibration energy from the strings. The body also lters these vibrations, based on its size and shape. In some instruments, such as guitars, t...
Page 442
Chapter 23. Live instrument reference 440 23.13.3 filter/global tab the filter/global tab contains the lter parameters for the instrument, as well as global controls. The filter section tension's filter section. Tension's filter section features a highly con gurable multi-mode lter that sits between...
Page 443
Chapter 23. Live instrument reference 441 the time it takes for the envelope to reach the sustain level after the attack phase is set by the decay knob. The sustain knob sets the level at which the envelope will remain from the end of the decay phase to the release of the key. When this knob is turn...
Page 444
Chapter 23. Live instrument reference 442 global and keyboard parameters tension's global and keyboard parameters. The remaining section contain all of the parameters that adjust how tension responds to midi data, as well as controls for performance parameters such as tuning and portamento. The keyb...
Page 445
Chapter 23. Live instrument reference 443 the error slider increases the amount of random tuning error applied to each note. Try very high values if you would like to relive your experiences from junior high school orchestra. The unison section allows you to stack multiple voices for each note playe...
Page 446
Chapter 23. Live instrument reference 444 to get a sense of what's possible, it may help to study how the presets were made. You'll soon realize that tension can do far more than just strings. 23.14 the essential instrument collection the boxed version of live 8 ships with the essential instrument c...
Page 447
Chapter 23. Live instrument reference 445 the eic presets are available in full and lite versions, allowing you to choose the right balance of delity and polyphony for your needs. The lite version reduces cpu, ram and disk requirements by reducing the number of zones and sample layers used. Both the...
Page 448
Chapter 23. Live instrument reference 446 special features of the guitar and bass banks the eic's guitar instruments have additional banks for single-key chords with strumming, and the pbass instrument has a similar bank for down- and up- strokes played with a pick. In all cases, lower octaves play ...
Page 449
447 chapter 24 max for live a generic max audio effect. Max for live, an add-on product co-developed with cycling '74 1 , allows users to extend and customize live by creating instruments, controllers, audio effects, and midi processors. After installing max for live, you will need to point to it in...
Page 450
Chapter 24. Max for live 448 the max editor chooser. Like all other live devices, max devices can have their own presets, which can be viewed and loaded by unfolding the device in the browser. What a max device actually does is dependent on its patch, which can be accessed by pressing the edit butto...
Page 451
449 chapter 25 sharing live sets live provides tools to collaborate with other live users by uploading and downloading live sets from ableton's web server. Any media les which are needed by your live sets are uploaded automatically, unless they are already on ableton's server. Likewise, any media le...
Page 452
Chapter 25. Sharing live sets 450 enter the set's name in the upload details window. If you are not already logged in to your ableton.Com account, you will then be prompted to enter your username and password. Log in to upload your set. After you have logged in, live will begin uploading your set, a...
Page 453
Chapter 25. Sharing live sets 451 tracks that contain an external instrument or external audio effect . The non-portable tracks dialog. Note that freezing is not always possible; group tracks , return tracks and the master track , for example, cannot be frozen. 25.2 downloading sets you can download...
Page 454
Chapter 25. Sharing live sets 452 25.3 the upload/download browser all les that you download from ableton's server are stored locally on your machine, in your cache . You can view any nished downloads or in-progress transfers via the upload/ download browser, which can be accessed via its selector. ...
Page 455
453 chapter 26 midi and key remote control to liberate the musician from the mouse, most of live's controls can be remote-controlled with an external midi controller and the computer keyboard. This chapter describes the details of mapping to the following speci c types of controls in live's user int...
Page 456
Chapter 26. Midi and key remote control 454 26.1 midi remote control live can be controlled remotely by external midi control surfaces, such as midi keyboards or controller boxes. Live also supports the akai apc40 , a topic that is covered in its own chapter , for completely mouse-free program opera...
Page 457
Chapter 26. Midi and key remote control 455 listed here, don't fret it can still be enabled manually in the next section, manual control surface support . Depending on the controller, live may need to perform a preset dump to complete the setup. If this is the case, the dump button to the right of y...
Page 458
Chapter 26. Midi and key remote control 456 control surfaces can follow device selection. In addition to following device selection, natively supported control surfaces can be locked to speci c devices, guaranteeing hands-on access no matter where the current focus is in your live set. To enable or ...
Page 459
Chapter 26. Midi and key remote control 457 note: some control surfaces do not support locking to devices. This capability is indicated for individual controllers in the control surface reference lesson. Select the lessons option from the view menu to access live's built-in lessons. 26.1.2 manual co...
Page 460
Chapter 26. Midi and key remote control 458 26.1.3 takeover mode midi controller takeover mode. When midi controls that send absolute values (such as faders) are used in a bank-switching setup, where they address a different destination parameter with each controller bank, you will need to decide ho...
Page 461
Chapter 26. Midi and key remote control 459 26.2 the mapping browser the mapping browser and selector. All manual midi, computer keyboard and macro control mappings are managed by the mapping browser. The mapping browser is hidden until one of the three mapping modes is enabled. It will then display...
Page 462
Chapter 26. Midi and key remote control 460 once your remote control setup has been de ned in the midi/sync preferences, giving midi controllers and notes remote control assignments is simple: 1. Enter midi map mode by pressing the midi switch in live's upper right-hand corner. Notice that assignabl...
Page 463
Chapter 26. Midi and key remote control 461 26.2.3 mapping to absolute midi controllers absolute midi controllers send messages to live in the form of absolute values ranging from 0 to 127. These values lead to different results depending on the type of live control to which they are assigned. A val...
Page 464
Chapter 26. Midi and key remote control 462 live to pan right, causing an abrupt jump in the track's panning. A pan knob sending relative messages would prevent this, since its incremental message to live would simply say, pan slightly to the left of your current position. There are four types of re...
Page 465
Chapter 26. Midi and key remote control 463 relative session view navigation notice that you can make not only absolute mappings to individual slots and scenes, but also relative mappings to move the highlighted scene and operate on the highlighted clips. In both midi map mode and key map mode , a s...
Page 466
Chapter 26. Midi and key remote control 464 clip view interface could potentially affect any clip in the live set. For this reason, we recommend mapping clip view controls to relative midi controllers to prevent undesirable jumps in parameter values. 26.2.5 computer keyboard remote control the key m...
Page 467
Chapter 26. Midi and key remote control 465 computer keystrokes for use with instruments..
Page 468
466 chapter 27 using the apc40 the apc40 (ableton performance controller) is a dedicated controller for ableton live, co- designed by ableton and akai professional 1 . This chapter will help you set up your apc40, and introduce its capabilities. 27.1 setup once the apc40 has been powered on and conn...
Page 469
Chapter 27. Using the apc40 467 setting up the apc40. 27.2 clip launch matrix the apc40's matrix of buttons gives you physical access to the clips in your session view . The matrix has 40 three-color buttons arranged in a ve-scene-deep-by-eight-track-wide grid. The color-coding system lets you know ...
Page 470
Chapter 27. Using the apc40 468 session view clip and navigation controls. Pressing a clip launch button triggers the clip in the corresponding clip slot in live. If the track is armed to record, pressing the button records a new clip. The buttons in the matrix light up in different colors so you kn...
Page 471
Chapter 27. Using the apc40 469 apc's button matrix are shown in live with a red border. The directional arrows and shift button increase the scope of the eight-by- ve grid: pressing up or down moves you up or down one scene at a time. Hold the shift button while hitting up or down to move ve scen...
Page 472
Chapter 27. Using the apc40 470 27.4 mixer section the apc40 features eight tracks, each with its own fader, solo/pre-cue, mute and record arm buttons. A master fader controls the master volume and a cue level knob controls cue volume , so you can pre-listen to a clip or the metronome without your a...
Page 473
Chapter 27. Using the apc40 471 27.5 device control the apc40 features eight endless dials and four control buttons that map to your devices automatically for exibility and speed on stage or in the studio. Device controls. The track selection buttons route the eight endless encoders to the rst devic...
Page 474
Chapter 27. Using the apc40 472 controls. For more information, see the control surface reference lesson. 27.6 transport and global buttons live's play, stop and global record buttons are all easily accessible, and four global buttons access live's functions, cleaning up your screen view onstage and...
Page 475
Chapter 27. Using the apc40 473 metronome turns the metronome on and off. 27.7 track control the track control section covers pan settings or send levels for whichever eight tracks are currently selected. It consists of eight endless dials with led rings and four buttons: pan, send a, send b and s...
Page 476
Chapter 27. Using the apc40 474 27.8 tempo control tap tempo and nudge left/right buttons are essential for live performance, helping you to stay in sync with turntables, other musicians or a live band, and correct timing issues quickly. Tempo control. As you hit the tap tempo button once every beat...
Page 477
Chapter 27. Using the apc40 475 27.9 crossfader the apc40's replaceable crossfader is an essential dj control, and is also handy for control- ling effect, volume and modulation curves. Crossfader. In live, you can set any track as an a or b destination, and then crossfade between the a and b selecti...
Page 478
Chapter 27. Using the apc40 476 27.10 customizing the apc40 controls you can change the assignment of all of the knobs, faders and buttons on the apc40 by enabling the remote switches in the midi/sync preferences, as described in the section on manual control surface setup . Setting up the apc40 for...
Page 479
477 chapter 28 synchronization and rewire 28.1 synchronizing via midi the midi protocol de nes two ways to synchronize sequencers, both of which are supported by live. Both protocols work with the notion of a sync master, which delivers a sync signal that is tracked by the sync slave(s). midi cloc...
Page 480
Chapter 28. Synchronization and rewire 478 are explained later in this chapter . With respect to midi timecode, live can only act as a midi sync slave, not a master. 28.1.1 synchronizing external midi devices to live live can send midi clock messages to an external midi sequencer (or drum machine). ...
Page 481
Chapter 28. Synchronization and rewire 479 the external sync switch. When live is synced to an external midi device, it can accept song position pointers from this device, syncing it not only in terms of tempo but in terms of its position in the song. If the master jumps to a new position within the...
Page 482
Chapter 28. Synchronization and rewire 480 pronounced percussive sounds. While listening to the output from both, adjust the sync delay control until both sounds are in perfect sync. Adjusting sync delay. 28.2 connecting via rewire live supports the rewire interface for connecting with another rewir...
Page 483
Chapter 28. Synchronization and rewire 481 resources than running a single program. 28.2.1 running live in rewire master mode the step-by-step procedure for sending midi to and receiving audio from a rewire slave program is presented in the routing chapter . 28.2.2 running live in rewire slave mode ...
Page 484
Chapter 28. Synchronization and rewire 482 time signature and tempo will be determined by the settings in the rewire master application. If your live set contains any tempo or time signature changes, they will be ignored. 28.2.3 more on rewire you can nd tutorials on connecting live to speci c rew...
Page 485
483 chapter 29 computer audio resources and strategies real-time audio processing is a demanding task for general-purpose computers, which are usually designed to run spreadsheets and surf the internet. An application like live requires a powerful cpu and a fast hard disk. This section will provide ...
Page 486
Chapter 29. Computer audio resources and strategies 484 fortunately, live supports multicore and multiprocessor systems, allowing the processing load from things like instruments, effects and i/o to be distributed among the available resources. Depending on the machine and the live set, the availabl...
Page 487
Chapter 29. Computer audio resources and strategies 485 29.1.2 cpu load from tracks and devices generally, every track and device being used in live incurs some amount of cpu load. However, live is smart and avoids wasting cpu cycles on tracks and devices that do not contribute anything useful. For ...
Page 488
Chapter 29. Computer audio resources and strategies 486 device or clip settings. On slower machines, you can unfreeze processor-intensive tracks one at a time to make edits, freezing them again when you are done. Many editing functions remain available to tracks that are frozen. Launching clips can ...
Page 489
Chapter 29. Computer audio resources and strategies 487 for frozen session clips, only two loop cycles are included in the frozen clip, which means that clips with unlinked clip envelopes may play back differently after two loop cycles when frozen. The samples generated by the freeze track command a...
Page 490
Chapter 29. Computer audio resources and strategies 488 do the following to avoid disk overload: reduce the amount of audio channels being written by choosing mono inputs instead of stereo inputs in the audio preferences' channel con guration dialog. use ram mode for selected clips. reduce the...
Page 491
489 chapter 30 audio fact sheet prior to the release of live 7, much of ableton's development effort was focused on carefully and objectively testing live's fundamental audio performance. As a result of this testing, we have implemented a number of low-level improvements to the audio engine. We have...
Page 492
Chapter 30. Audio fact sheet 490 we will never release an update unless it passes every test. 30.2 neutral operations procedures in live that will cause absolutely no change in audio quality are referred to as neutral operations. You can be sure that using these functions will never cause any signal...
Page 493
Chapter 30. Audio fact sheet 491 rendering to a le with the same bit depth as the original results in complete phase cancellation. rendering to a le with a higher bit depth than the original results in complete phase cancellation. rendering to a le with a lower bit depth than the original resu...
Page 494
Chapter 30. Audio fact sheet 492 30.2.4 summing at single mix points since version 7, live uses double precision (64-bit) summing at all points where signals are mixed, including clip and return track inputs, the master track and racks. Mixing in live is thus a neutral operation for signals mixed at...
Page 495
Chapter 30. Audio fact sheet 493 30.2.7 freeze, flatten when tracks are frozen , the audio les that are created are 32 bit, which ensures that they will not be lower quality than the audio heard prior to freezing. But there are some special cases involving freeze that result in non-neutral behavior ...
Page 496
Chapter 30. Audio fact sheet 494 30.2.8 bypassed effects bypassed effects in live are removed from the signal ow. This is true for both live's built-in effects devices and third-party vst and au plug-ins. Consequently, audio at the output of a bypassed effect is identical to the audio at the input. ...
Page 497
Chapter 30. Audio fact sheet 495 in all cases, output is rendered and compared with the output of an unsplit version of the same source. Phase cancellation testing of the two les con rms that they are identical. 30.3 non-neutral operations procedures in live that will cause a change in audio quality...
Page 498
Chapter 30. Audio fact sheet 496 sample rate that you plan to use in live, the les can be imported without any loss of quality. Rendering audio from live with a sampling rate other than the one that was used while working on the project is also a non-neutral operation, and may result in a loss of so...
Page 499
Chapter 30. Audio fact sheet 497 30.3.5 recording external signals (bit depth recording audio signals into live is a non-neutral operation if the bit depth set in live's preferences window is lower than that of the a/d converters used for the recording. This is not recommended. 30.3.6 recording inte...
Page 500
Chapter 30. Audio fact sheet 498 30.3.9 panning live uses constant power panning with sinusoidal gain curves. Output is 0 db at the center position and signals panned fully left or right will be increased by +3 db. In order to minimize this volume change, it may be helpful to narrow the overall ster...
Page 501
Chapter 30. Audio fact sheet 499 convert your rendered les in an of ine application that is optimized for these tasks, rather than in live. Please note that these practices, while ensuring optimal audio quality, disable some of live's functionality in particular, stretching and synchronization. 30.5...
Page 502
500 chapter 31 midi fact sheet in conjunction with our work on the audio engine, ableton has spent additional effort an- alyzing live's midi timing and making improvements where necessary. We wrote this fact sheet to help users understand the problems involved in creating a reliable and accurate com...
Page 503
Chapter 31. Midi fact sheet 501 environment would capture this incoming information with perfect timing accu- racy in relation to the timeline of the song as accurately as an audio recording. 2) playback refers to two related scenarios when dealing with daws. The rst in- volves sending midi note and...
Page 504
Chapter 31. Midi fact sheet 502 data into a plug-in's playback, for example. Jitter-free midi timing involves accurate conversion between different clocks within the system's components the midi interface, audio interface, and the daw itself. The accuracy of this conversion depends on a variety of f...
Page 505
Chapter 31. Midi fact sheet 503 for playback of hardware devices, live also generates timestamps that it attempts to com- municate to the midi interface drivers for scheduling of outgoing midi events. Windows mme drivers cannot process timestamps, however, and for devices that use these drivers, liv...
Page 506
Chapter 31. Midi fact sheet 504 31.5 tests and results our procedure for testing the timing of incoming midi events is represented in the following diagram: midi source midi splitter midi-to-audio converter live midi clip audio clip midi input test con guration. The output of a midi source (a keyboa...
Page 507
Chapter 31. Midi fact sheet 505 at 44.1 khz and 512 sample buffer, occasional events with +/- 6 ms occurred. In all cases, the majority of the jitter occurred at +/- 1 ms. interface c: for most of the tests, the maximum jitter was +/- 5 ms. At 96 khz and 512 sample buffer, there were a small numbe...
Page 508
Chapter 31. Midi fact sheet 506 31.6 tips for achieving optimal midi performance in order to help users achieve optimal midi performance with live, we have provided a list of recommended practices and program settings. use the lowest possible buffer sizes available on your audio hardware, thereby ...
Page 509
Chapter 31. Midi fact sheet 507 31.7 summary and conclusions ableton wrote this paper in order to help users understand a variety of related topics: the inherent problems in computer-based midi systems; our approach to solving these problems in live; additional variables that we cannot account...
Page 510
508 chapter 32 live keyboard shortcuts 32.1 showing and hiding views windows macintosh toggle full screen mode f11 ctrl f11 toggle session/arrangement view toggle track/clip view or f12 or ctrl f12 hide/show detail view ctrl alt l or f12 alt l or ctrl f12 hide/show info view ? ? Hide/show browser ct...
Page 511
Chapter 32. Live keyboard shortcuts 509 windows macintosh close window/dialog esc esc 32.2 accessing menus under windows, you can access each menu by pressing alt and the rst letter of the menu ( alt f for file, for instance). While a menu is open, you can use: to navigate the menu items; to open th...
Page 512
Chapter 32. Live keyboard shortcuts 510 32.4 browsing in addition to the shortcuts shown here, editing shortcuts can also be used in the browser. Windows macintosh scroll up/down open/close folders set selected folder as browser root return return load selected item from browser return or double- cl...
Page 513
Chapter 32. Live keyboard shortcuts 511 32.6 editing windows macintosh cut ctrl x x copy ctrl c c paste ctrl v v duplicate ctrl d d delete delete undo ctrl z z redo ctrl y z rename ctrl r r select all ctrl a a by holding down an additional modi er key, some of the above commands can also be applied ...
Page 514
Chapter 32. Live keyboard shortcuts 512 32.7 loop brace and start/end markers the loop brace and start/end markers must rst be selected before any of the following commands will apply to them. Windows macintosh move start marker to position click click nudge loop left/right move loop by loop length ...
Page 515
Chapter 32. Live keyboard shortcuts 513 32.9 arrangement view commands the shortcuts for zooming , snapping/drawing and loop/region settings also work in the arrangement view. See also the editing commands . Windows macintosh split clip at selection ctrl e e consolidate selection into clip ctrl j j ...
Page 516
Chapter 32. Live keyboard shortcuts 514 32.10 commands for tracks see also the editing commands . Windows macintosh insert audio track ctrl t t insert midi track ctrl t t insert return track ctrl alt t alt t rename selected track ctrl r r while renaming, go to next track group selected tracks ctrl g...
Page 517
Chapter 32. Live keyboard shortcuts 515 32.12 key/midi map mode and the computer midi keyboard windows macintosh toggle midi map mode ctrl m m toggle key map mode ctrl k k computer midi keyboard ctrl k k 32.13 zooming, display and selections windows macintosh zoom in + + zoom out - - drag/click to a...
Page 518
Chapter 32. Live keyboard shortcuts 516 32.14 clip view sample display the shortcuts for zooming and loop/region settings also work in the sample display. Windows macintosh quantize ctrl u u quantize settings... Ctrl u u move selected warp marker select warp marker ctrl scroll display to follow play...
Page 519
Chapter 32. Live keyboard shortcuts 517 32.16 grid snapping and drawing windows macintosh toggle draw mode ctrl b b narrow grid ctrl 1 1 widen grid ctrl 2 2 triplet grid ctrl 3 3 snap to grid ctrl 4 4 fixed/zoom-adaptive grid ctrl 5 5 bypass snapping while dragging alt 32.17 global quantization wind...
Page 520
Chapter 32. Live keyboard shortcuts 518 32.18 working with sets and the program windows macintosh new live set ctrl n n open live set ctrl o o close live set ctrl w w save live set ctrl s s save live set as... Ctrl s s quit live ctrl q q hide live h export audio/video ctrl r r export midi le ctrl e ...
Page 521
Chapter 32. Live keyboard shortcuts 519 32.20 using the context menu a context menu is available in live for quick access to many commonly used menu items. To access the context menu, (pc) / ctrl (mac) on the part of the interface where you would like to execute a particular command. It is worth not...
Page 522
520 index a ableton e-mail addresses sales . . . . . . . . . . . . . . . . . . . . . . . . . . . . . 11 technical support . . . . . . . . . . . . . . . . . . . 11 web addresses faqs . . . . . . . . . . . . . . . . . . . . . . . . . . . 482 tutorials . . . . . . . . . . . . . . . . . . . . . . . . . ...
Page 523
Index 521 testing and methodology . . . . . . . . . . 489 tips . . . . . . . . . . . . . . . . . . . . . . . . . . . . . . . . 498 audio les . . . . . . . . . . . . . . . . . . . . . See samples audio interface setup . . . . . . . . . . . . See audio preferences, see routing audio preferences . . . ...
Page 524
Index 522 clip gain slider . . . . . . . . . . . . . . . . . . . . . . . . 111 clip groove chooser . . . . . . . . . . . . . . . . . . . 103 clip launch button . . . . . . . . . . . . . . . . . . . . . . 90 clip name eld . . . . . . . . . . . . . . . . . . . . . . . . 102 clip nudge buttons . . . . ...
Page 525
Index 523 count-in for recording . . . . . . . . . . . . . . . . . . 206 count-in preference . . . . . . . . . . . . . . . . . . . 206 cpu . . . . . . . . . . . . . . . . . . . . . . . . . . . . . . . . . . . 483 cpu load meter . . . . . . . . . . . . . . . . . . . . . . . 484 cpu preferences . . . ...
Page 526
Index 524 e edit menu commands and automation . . . . . . . . . . . . . . 252 , 256 and exporting . . . . . . . . . . . . . . . . . . . . . . 45 and midi notes . . . . . . . . . . . . . . . . . . . . 141 and return tracks . . . . . . . . . . . . . . . . . . 192 and scenes . . . . . . . . . . . . . ....
Page 527
Index 525 full screen mode . . . . . . . . . . . . . . . . . . . . . . . . . 8 g gate effect . . . . . . . . . . . . . . . . . . . . . . . . . . . . . 305 gate mode . . . . . . . . . . . . . . . . . . . . . . . . . . . . 156 global quantization chooser . . . . . . . . . . . . 25 and session recordin...
Page 528
Index 526 l language preference . . . . . . . . . . . . . . . . . . . . . 6 latency and the external audio effect . . . . . . 298 latin percussion . . . . . . . . . . . . . . . . . . . . . . . . 384 launch box . . . . . . . . . . . . . . . . . . . . . . . 100 , 155 launch modes . . . . . . . . . . ....
Page 529
Index 527 midi exporting . . . . . . . . . . . . . . . . . . . . . . . . . . . 50 quantizing . . . . . . . . . . . . . . . . . . . . 144 , 206 sending bank/program changes . . . 117 midi clips . . . . . . . . . . . . . . . . . . . . . . . . . See clips midi controllers . . . . . . . .See control sur...
Page 530
Index 528 envelopes . . . . . . . . . . . . . . . . . . . . . . . . . 393 lter . . . . . . . . . . . . . . . . . . . . . . . . . . . . . . . 395 glide and spread . . . . . . . . . . . . . . . . . . 397 global controls . . . . . . . . . . . . . . . . . . . . 396 layout . . . . . . . . . . . . . . . ....
Page 531
Index 529 for midi notes during recording . . . 206 quantize menu command . . . . . . . . . 130 , 144 quick-chooser buttons . . . . . . . . . . . . . . . . . 259 r racks . . . . . . . . . . . . . . . . . . . . . . . . . . . . . . . . . . 229 auto select option . . . . . . . . . . . . . . . . 235 cha...
Page 532
Index 530 with external synthesizers . . . . . . . . . . 169 s sales . . . . . . . . . . . . . . . . . . . . . . . . . . See ableton sample box . . . . . . . . . . . . . . . . . . . . . . . . . . . . 100 sample collections .See essential instrument collection sample display . . . . . . . . . . . . ....
Page 533
Index 531 set locator command . . . . . . . . . . . . . . . . . . . 77 set song start time here command . . . . . 78 sets . . . . . . . . . . . . . . . . . . . . . . . . . . . See live sets sharing live sets . . . . . . . . . . . . . . . . . . . . . . . 449 shortcuts . . . . . . . . . . . See keyboa...
Page 534
Index 532 texture mode . . . . . . . . . . . . . . . . . . . . . . . . . . 132 time ruler format option . . . . . . . . . . . . . . 479 time signature and scene names . . . . . . . . . . . . . . . 92 , 96 time signature changes . . . . . . . . . . . . . . . . . . 78 toggle mode . . . . . . . . . . ....
Page 535
Index 533 in the arrangement view . . . . . . . . . . 271 matching sound to video . . . . . . . . . . 274 trimming tricks . . . . . . . . . . . . . . . . . . . . 275 window . . . . . . . . . . . . . . . . . . . . . . . . . . . 272 view menu commands crossfader option . . . . . . . . . . . . . . . . ...


