- DL manuals
- CAKEWALK
- Stereo System
- PRO AUDIO
- User Manual
CAKEWALK PRO AUDIO User Manual
Summary of PRO AUDIO
Page 1
Cakewalk pro audio user’s guide © ™.
Page 2
Information in this document is subject to change without notice and does not repre- sent a commitment on the part of twelve tone systems, inc. The software described in this document is furnished under a license agreement or nondisclosure agreement. The software may be used or copied only in accord...
Page 3
Table of contents table of contents preface . . . . . . . . . . . . . . . . . . . . . . . . . . . . . . . . . . . . . . . . Xvii about this book . . . . . . . . . . . . . . . . . . . . . . . . . . . . . . . . . . . . . . . . Xvii registering pro audio . . . . . . . . . . . . . . . . . . . . . . . . ...
Page 4
Iv changing the tempo . . . . . . . . . . . . . . . . . . . . . . . . . . . . . . . . 2-7 muting and soloing tracks . . . . . . . . . . . . . . . . . . . . . . . . . . . . 2-8 changing a track's instrument . . . . . . . . . . . . . . . . . . . . . . . 2-10 playing music on a keyboard . . . . . . . ....
Page 5
V table of contents adjusting the key/transposing a track (key+) . . . . . . . . . . .3-26 adjusting the note velocity (vel+) . . . . . . . . . . . . . . . . . . . . .3-27 adjusting the time alignment of a midi track (time+) . . . .3-28 other midi playback settings . . . . . . . . . . . . . . . . . ...
Page 6
Vi copying tracks . . . . . . . . . . . . . . . . . . . . . . . . . . . . . . . . . . . . . 5-4 erasing tracks . . . . . . . . . . . . . . . . . . . . . . . . . . . . . . . . . . . . . 5-5 arranging clips . . . . . . . . . . . . . . . . . . . . . . . . . . . . . . . . . . . . . . . . 5-5 displaying ...
Page 7
Vii table of contents using the controllers pane . . . . . . . . . . . . . . . . . . . . . . . . . . .6-36 the event list view . . . . . . . . . . . . . . . . . . . . . . . . . . . . . . . . . . . .6-42 event list overview . . . . . . . . . . . . . . . . . . . . . . . . . . . . . . . . .6-43 event l...
Page 8
Viii fades and crossfades . . . . . . . . . . . . . . . . . . . . . . . . . . . . . . . 7-35 audio effects . . . . . . . . . . . . . . . . . . . . . . . . . . . . . . . . . . . . . . . . . 7-37 mixing audio effects . . . . . . . . . . . . . . . . . . . . . . . . . . . . . . . . 7-38 adding parametri...
Page 9
Ix table of contents entering notes from the tab staff . . . . . . . . . . . . . . . . . . . . .8-33 you can enter notes or chords directly from the tab staff. . .8-33 single note editing from the tab staff . . . . . . . . . . . . . . . . .8-34 editing chords or groups of notes from the tab staff . ...
Page 10
X assigning the bank select method . . . . . . . . . . . . . . . . . . . . 10-9 assigning patch names . . . . . . . . . . . . . . . . . . . . . . . . . . . . 10-10 assigning note names . . . . . . . . . . . . . . . . . . . . . . . . . . . . . 10-12 assigning controller, rpn, and nrpn names . . . . ....
Page 11
Xi table of contents changing the wavedata folder . . . . . . . . . . . . . . . . . . . . . . .13-15 deleting unused audio files . . . . . . . . . . . . . . . . . . . . . . . . .13-16 compacting audio files . . . . . . . . . . . . . . . . . . . . . . . . . . . . .13-17 backing up projects with digit...
Page 12
Xii smpte/mtc sync and full chase lock . . . . . . . . . . . . . . . 15-11 troubleshooting smpte/mtc sync . . . . . . . . . . . . . . . . . . 15-13 midi machine control . . . . . . . . . . . . . . . . . . . . . . . . . . . . . . . . 15-14 16 programming with cal . . . . . . . . . . . . . . . . . . ....
Page 13
Xiii table of contents screen colors and wallpaper . . . . . . . . . . . . . . . . . . . . . . . . . . . . B-13 music notation for nonconcert key instruments . . . . . . . . . . . . . . . . . . . . . . . . . . . . . . . . . . . . . . . . . . B-16 appendix c: advanced setup . . . . . . . . . . . . . ...
Page 14
Xiv fx pitch shifter . . . . . . . . . . . . . . . . . . . . . . . . . . . . . . . . . . . . . F-4 fx time/pitch stretch . . . . . . . . . . . . . . . . . . . . . . . . . . . . . . . F-5 fx stereo parametric eq . . . . . . . . . . . . . . . . . . . . . . . . . . . . F-6 cfx 2-band eq . . . . . . . ....
Page 15
Xv table of contents add pattern to a song . . . . . . . . . . . . . . . . . . . . . . . . . . . . . . . . H-2 load song from a file . . . . . . . . . . . . . . . . . . . . . . . . . . . . . . . . H-3 save song to a file . . . . . . . . . . . . . . . . . . . . . . . . . . . . . . . . . . H-3 presets...
Page 16
Xvi.
Page 17: About This Book
Preface preface the cakewalk pro audio userÕs guide is designed to help you learn and use cakewalk pro audio version 9. In everyday language, this guide explains how pro audio works and how to use it to create, edit, produce, and perform. WeÕve made this userÕs guide easy to read and task- oriented,...
Page 18: Registering Pro Audio
Xviii of pro audio, be sure to turn to appendix g to see a summary of the new features in pro audio version 9. Registering pro audio please be sure to complete and return the registration card in your product package or to register your product on our world wide web site (www.Cakewalk.Com). If you d...
Page 19
1 introduction introduction cakewalk pro audio is a professional tool for authoring sound and music on your personal computer. ItÕs designed for musicians, composers, arrangers, audio and production engineers, multimedia and game developers, and recording engineers. Pro audio supports mp3, wave, rea...
Page 20: About Pro Audio
1-2 about pro audio pro audio is the ßagship product of the cakewalk line of integrated midi and digital audio sequencers for the windows platform. Pro audio has a comprehensive feature set that makes it the single most productive tool for sound and music authoring. Here are some of the ways you can...
Page 21: Pro Audio Basics
1-3 introduction sound and lets you choose from lower or higher sample rates as well. All audio effects are 32-bit ßoating point for faster processing and high- quality sound reproduction. Web authoring pro audio is the ideal tool for developing and producing music and sound for the world wide web, ...
Page 22
1-4 mouse button, you see a pop-up menu that provides quick access to many common operations. The project is the center of your work in pro audio. If youÕre a musician, a project might contain a song, a jingle, or a movement of a symphony. If youÕre a post-production engineer, a project might contai...
Page 23
1-5 introduction the track view is divided into two sections: the track pane and the clips pane. You can change the size of the two panes by dragging the vertical splitter bar that separates the two panes. The track pane lets you see and change the initial settings for each track. One trackÑthe curr...
Page 24
1-6 the clips pane shows the clips in your project on a horizontal timeline that helps you visualize how your project is organized. Clips contain markings that indicate their contents. The clips pane lets you select, move, cut and copy clips from place to place to change the arrangement of music and...
Page 25
1-7 introduction the console view: as in the track view, you can change track settings or record new music or sound in the console view. You may choose to use one view or the other, or the choice you make may depend on which project you are working on. Other views pro audio has a number of other vie...
Page 26
1-8 the piano roll view shows the notes from a track or track as they would appear on a player-piano roll. You can move the notes around, make them longer or shorter, and change their pitches by just dragging them with the mouse. You can also use the piano roll view to display and edit midi velocity...
Page 27
1-9 introduction the audio view displays the sound waves that make up one or more audio tracks of your project and provides tools to edit, arrange, and apply effects to audio events. The event list view displays the events in a project individually, so that you can make changes at a very detailed le...
Page 28
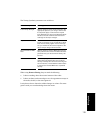
1-10 pro audio has several other views that are used for very speciÞc purposes: zoom controls many of the views contain zoom tools that let you change the horizontal and vertical scale of the view: view… how you use it… meter/key to change the meter (time signature) or key signature or to insert cha...
Page 29
1-11 introduction the zoom tools are used as described in the following table: lasso zoom is automatically disarmed after use. Double-click the lasso zoom button to make the selection stick.You can also zoom with the keyboard: layouts you may spend a lot of time making sure that all the views are la...
Page 30
1-12 working on a project much of your time in pro audio is spent recording and listening to your project or song as it develops. The transport toolbar, shown below, contains the most important tools and other pieces of information youÕll need to record and play back your project. Every project has ...
Page 31
1-13 introduction computers, sound, and music this section provides some background on the different ways that computers store and play sound and music. Computers work with sound and music in two different forms: midi and digital audio. Midi midi (short for musical instrument digital interface) is t...
Page 32
1-14 the primary disadvantage of midi is that the quality of the music a listener hears will vary depending on the midi equipment the listener is using. For example, midi usually sounds much better on an expensive synthesizer than it does on an inexpensive sound card. Digital audio digital audio is ...
Page 33: Installation and Setup
1-15 introduction installation and setup you can install pro audio on any computer that runs windows 95, 98 or nt and has a sound card or built-in sound module. If you want to hook up other devices, like a midi keyboard, an electric guitar, or a microphone, you need the right cables, and you need to...
Page 34
1-16 that's it! Now that your instruments are all set to go, you can restart your computer and turn on your keyboard, guitar, and microphone. Installing pro audio… pro audio is easy to install. All you need to do is choose the folder where the program and sample project Þles should be stored. Before...
Page 35
1-17 introduction uninstalling pro audio… when you installed pro audio, the setup program placed an uninstall icon in the start menu. To uninstall pro audio, click the start button and choose programs-cakewalk-cakewalk pro audio 9-uninstall cakewalk pro audio 9. You can also uninstall pro audio from...
Page 36: Starting Pro Audio
1-18 starting pro audio there are many different ways to start pro audio. Here are a few: ¥ click on the pro audio icon on your desktop. ¥ click on the start button, and choose cakewalk-cakewalk pro audio 9 from the programs menu. ¥ right-click on the desktop, and choose new-cakewalk song. When the ...
Page 37: Starting to Use Pro Audio
1-19 introduction if you donÕt want to see the quick start dialog box in the future, uncheck the box at the bottom of the dialog box, and click close. You can see the quick start dialog box later by choosing help-quick start. Starting to use pro audio this chapter has provided you with an overview o...
Page 38
1-20
Page 39
2 getting started getting started now that youÕve learned some of the basics, itÕs time to put that knowledge to work. The three tutorials in this chapter will give you some hands-on practice in playing, recording, and mixing your projects. If you want to learn more about any topic, youÕll Þnd refer...
Page 40: Tutorial 1—Playing A Song
2-2 tutorial 1—playing a song the Þrst tutorial teaches you the basics of playing midi with pro audio. You'll learn how to: ¥ open and play a project Þle ¥ make the song repeat automatically ¥ use markers ¥ speed or slow the tempo ¥ mute a track and play a track solo ¥ change a track's instrument ¥ ...
Page 41
2-3 getting started playing the song buttons in the large transport toolbar, shown in the following picture, can control most of pro audioÕs basic playback functions. If you donÕt see the large transport toolbar, then choose view-toolbars and check transport (large). Starting playback 1. To play the...
Page 42
2-4 the now time the now time is the current time in the song. In the clips pane of the track view, the now time is indicated by a vertical line. The now time is also shown in the transport toolbar, both in mbt (measure/beat/tick) format and in time code format (hour/minute/second/frame). During pla...
Page 43
2-5 getting started the current song contains several markers. LetÕs try starting playback from the marker labeled c: for more information about markers, see Òcreating and using markersÓ on page 5-17. Restarting the song automatically wouldnÕt it be easier to practice your solo if you didn't have to...
Page 44
2-6 when looping is enabled, the time ruler displays special ßag markers that indicate the loop start and end times. You can drag these markers to change the loop start and end times. To turn looping off, click the loop button again. Looping over a section of the song maybe you would like to practic...
Page 45
2-7 getting started changing the tempo if the song is having trouble keeping up with you (or if you're having trouble keeping up with the song!), you can easily speed up or slow down the song. There are two ways to do this: you can change the tempo, or you can change the tempo ratio, which determine...
Page 46
2-8 changing the tempo with the tempo ratio buttons by default, the tempo ratio buttons let you play the song at half or double tempo. Try this: setting the tempo ratios tempo ratios can be changed by shift-clicking on them and entering a new number in the dialog box. By default, tempo ratios are se...
Page 47
2-9 getting started note that the yellow mute indicator lights up in the status bar whenever a track is muted. This can be very helpful if there are muted tracks that arenÕt visible. Let's try using a different method to mute two tracks simultaneously: you can also mute or unmute tracks by using the...
Page 48
2-10 letÕs use a different method to solo all three percussion tracks: when you want to let the entire ensemble back into the song, click the solo indicator on the status bar to unsolo all the tracks, or select all soloed tracks and choose track-solo. As a third option, right-click, bring up the pop...
Page 49
2-11 getting started you can also change the patch by clicking in the patch Þeld and using the + and Ð keys to increment through the different patches. To do so: you may want to experiment with changing all the instruments used by the song. One thing you should know: changing the instrument on a per...
Page 50
2-12 channel 10, which in general midi is dedicated to percussion. The note determines the instrument, and the patch is irrelevant. Changing the patch in the console view itÕs easier to change a trackÕs patch in the console view. For example, to change the piano trackÕs patch, click the patch button...
Page 51
2-13 getting started routing midi data to the keyboard letÕs play the piano track on the midi keyboard. First, turn your keyboard on and make sure it is set up to receive midi input on channel one. Then, do the following: or, if you prefer, the procedure is a little easier in the console view: if yo...
Page 52
2-14 transposing percussion you may be wondering why we did not transpose the percussion tracks. As mentioned earlier, in general midi each note in the percussion channel is mapped to a particular percussion instrument: a snare, a kick drum, a cymbal, a triangle, and so on. Transposing the percussio...
Page 53
2-15 getting started transposing with key+ another way to transpose a track is to use the key+ column in the track view. For example, letÕs raise the sax track by an octave: transposing with the transpose midi effect one Þnal way to transpose a track is to use the transpose midi plug-in effect. Pro ...
Page 54: Digital Audio
2-16 if the song is playing, youÕll immediately hear the change. You can use this technique to adjust your effects in real time. To delete the transpose effect, click on it and press delete. That completes the Þrst tutorial. In the next tutorial, youÕll learn to record midi and digital audio tracks ...
Page 55
2-17 getting started recording midi letÕs record a new midi track in the song. If you have no midi device to connect to your computer, you can use cakewalkÕs virtual piano (included with pro audio) as a midi source. For more information about this tool, see Òvirtual pianoÓ on page 4-15. Setting up t...
Page 56
2-18 checking your midi device settings let's make sure that pro audio is set up to receive midi data from your instrument. Setting up playback during recording, pro audio will play the rest of the song as usual. Depending on what instrumental part of the song you are going to record, you may want t...
Page 57
2-19 getting started recording midi now you'll record a new track in the song. Do the following: listening to the recording letÕs play back your performance on your sound card. For an added dimension, weÕll open a few other views in the process. Do the following: 1. Make sure your instrument is turn...
Page 58
2-20 itÕs almost as easy to listen to your performance on your midi instrument. For instructions on how to play a track on a midi keyboard, refer to tutorial 1. The piano roll, staff, and event list views all show the same basic informationÑthe notes in track 8. The piano roll view displays the trac...
Page 59
2-21 getting started saving your work when you have something youÕd like to keep, you can save the project by doing the following: loop recording if you'd like to record several takes successively, you can set up pro audio to loop over the entire song, or just some section of it. Pro audio will reco...
Page 60
2-22 loop recording finally, let's record our takes: 3. Double-click in the source, port, channel, or patch column to open the track properties dialog box. 4. Set the source to midi omni. 5. Set the port to your sound card's midi synthesizer. 6. Set the channel to an unused channel or to the channel...
Page 61
2-23 getting started punch-in recording imagine that one of your takes was close to ideal, except for one or two notes in one measure. Rather than recording another full take, you'd prefer to keep the take but replace that measure. Punch-in recording lets you replace a section of a track. The way it...
Page 62
2-24 when auto punch is enabled, the time ruler displays special markers that indicate the punch in and punch out times. You can drag these markers to change the punch in and punch out times. Recording digital audio if your instrument is not midi-compatible, you must record your solo as digital audi...
Page 63
2-25 getting started setting up an audio track letÕs set up a track for digital audio. Checking the input levels before trying to record, you need to check and adjust the audio input levels. If your audio input is too low, it will be lost in the background noise. If it is too high, it will overload ...
Page 64
2-26 recording digital audio it's time to record! Listening to the recording let's play back your performance. Do the following: recording another take if you'd like to delete your performance and try again, do the following: alternatively, you could record your next attempt on a new track. 1. If yo...
Page 65
2-27 getting started loop and punch-in recording loop and punch-in work the same for digital audio recording as they did for midi recording. For more information, refer to the relevant sections preceding, or to Òloop recordingÓ on page 4-20 or Òpunch recordingÓ on page 4-22. Recording multiple chann...
Page 66
2-28 tutorial 3—audio editing and mixing the third tutorial teaches you how to edit digital audio and apply audio effects. You'll learn how to: ¥ stretch or compress music to Þt a certain period of time ¥ edit and rearrange audio data ¥ apply effects to audio data ¥ apply real-time effects in the co...
Page 67
2-29 getting started music your client likes the edited version of Òboston rainÓ as background music, but it is too long for the 20-second spot. There are two choices: you could fade the volume as you approach the 20-second mark, or you could speed the music to stretch it. In this tutorial, we'll us...
Page 68
2-30 stretching the music first, letÕs speed the music to Þt within 20 seconds. There are two ways the music can be made to Þt: by increasing the tempo or by keeping the tempo and changing the note start times and durations. It is usually advantageous when compressing or stretching music to change t...
Page 69
2-31 getting started saving your work because we are going to do some serious editing later in the tutorial, you may want to save your work as you go along: adding the announcer your next task is to record the announcer track. The procedure is similar to the one we used in the last tutorial, but you...
Page 70
2-32 checking the input levels before trying to record, you need to check and adjust the audio input levels. If your audio input is too low, it will be lost in the background noise. If it is too high, it will overload the input channel and be distorted/ clipped. You can do this by using the console ...
Page 71
2-33 getting started trimming the beginning of the announcer now weÕll see how to trim the beginning of the announcerÕs read. This will eliminate any unwanted silence at the beginning. Do the following: 3. Choose view-audio to open the audio view. The audio data in track 1 is displayed. 4. If select...
Page 72
2-34 the silence that existed before the announcer is now gone, and now we can move the remaining piece of voice-over so that it begins right at the start of the spot. Renaming audio events now that weÕve got the announcer starting in the right place, letÕs rename that audio event: 6. Right-click on...
Page 73
2-35 getting started editing the announcer now that the announcerÕs voice begins at the correct time, we will remove any pauses or breaths. This will allow us to Þt the entire read into the allotted time. To do so, we will split the audio and delete the silence in the same way that we trimmed the pr...
Page 74
2-36 combining audio events after you have moved the audio around and Þnished tightening pauses, you may want to have a single, continuous audio event instead of three separate ones. To do this: making it fit now that weÕve edited the announcer clip, letÕs see if it Þts in our allotted time. Unsolo ...
Page 75
2-37 getting started mixing the radio spot now letÕs go to the console view and Þnish the project. WeÕll apply real- time audio effects to the announcer track, then automate the faders in real time. Preparing the console before starting, let's make sure that the console view is set up correctly. App...
Page 76
2-38 real-time mixing control the console view is a live mixer. During playback, you can control the main volume and the volume and panning of each track. You can mute and solo tracks. You can turn routing to aux busses on and off and change the send levels. And, on midi tracks, you can control the ...
Page 77
2-39 getting started near the end of the spot, you may want to fade the music out. To do this: youÕve now automated your radio spot. Now letÕs listen to it again and watch the faders move automatically: saving the project if youÕve been good, you've been saving your work all along. So far, though, y...
Page 78
2-40 thatÕs it! YouÕve Þnished all three tutorials and learned quite a bit about how to use pro audio in the process. Now youÕre ready to move on. Here are some ways to proceed: ¥ keep reading. Chapters 3 through 9 cover the core features of pro audio in a lot more detail than youÕve seen here. ¥ le...
Page 79
3 pla yback controlling playback controlling playback is simple with pro audio. When you play your song, you have full control over the tempo or speed of playback, which tracks are played, which sound cards or other devices are used to produce the sound, and what the tracks sound like. In this chapt...
Page 80
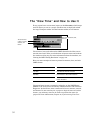
3-2 the “now time” and how to use it every project has a current time, known as the now time, which keeps track of where you are in a project. The now time is displayed in both the large transport toolbar and the position toolbar, in two formats: the measure, beat, and tick number (mbt) identiÞes th...
Page 81
3-3 pla yback here are some examples of times expressed in this format (assuming that zero is the start time): pro audio provides many ways to set the now time. Here are just a few: when entering a time in mbt format, the beat and tick values are optional. You can use a colon, space, or vertical bar...
Page 82
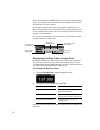
3-4 when entering a time in smpte format, you can enter a single number (hour), two numbers (hour and minutes), three numbers (hour, minutes, and seconds), or all four numbers. If you click in the time ruler while the snap grid is enabled, the now time will be snapped to the nearest point in the gri...
Page 83
3-5 pla yback other ways to set the now time there are a variety of commands and keyboard shortcuts you can use to set the now time: if your project has markers, you can use the marker toolbar to set the now time: for more information about markers, see Òcreating and using markersÓ on page 5-17. Com...
Page 84: Controlling Playback
3-6 controlling playback controlling playback is very simple, and you have your choice of tools, menu commands, and shortcut keys for most common operations. When you start playback, the now time updates continuously to show the current time. When you stop playback, the now time stops at the time yo...
Page 85
3-7 pla yback loops sometimes you want to listen to one portion of a project over and over, either so you can play along and rehearse or because you want to edit that section of the project while it is playing and hear the results as you make changes. Pro audio has a playback loop feature that makes...
Page 86
3-8 the loop/auto shuttle dialog box contains three additional settings that affect the details of how looping operates: with the default option settings, pro audio will play the loop over and over again, continuously. You can stop and resume playback at any point during the loop. If you start playb...
Page 87
3-9 pla yback to set up a playback loop… 1. Set the loop start and end times in one of the following ways: • drag the mouse between two points in the time ruler of the track, piano roll, staff, or audio view to select a range of times, then click in the loop/auto shuttle toolbar to copy the selectio...
Page 88: Track-By-Track Playback
3-10 track-by-track playback pro audio lets you play back any combination of tracks at one time by changing each trackÕs status. There are four different status settings for each track: while playback is in progress, you can mute and unmute tracks in any combination, which means you can hear only th...
Page 89
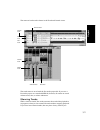
3-11 pla yback the status of each track is shown in the track and console views: the track status is saved with the pro audio project Þle. If you save a pro audio project as a standard midi Þle, however, all tracks are saved without mute, solo, or archive indicators. Silencing tracks when a track is...
Page 90
3-12 computer. Archived tracks, on the other hand, donÕt place any load on your computer. Therefore, if there are tracks you want to keep but donÕt need to play, you should archive them instead. Archived tracks are indicated by the letter a in the mute button that is displayed in the track and conso...
Page 91: Changing Track Settings
3-13 pla yback changing track settings each track in a project contains midi or audio information and has a variety of settings that determine how the track sounds. By changing these settings, you can change the sound of your project. For audio tracks, you control the volume, the stereo panning, and...
Page 92
3-14 the following parameters apply only to midi tracks: track settings are shown in the track paneÑthe left half of the track view. HereÕs what the track pane looks like: pan the stereo distribution of the output, ranging from 0 (hard left) to 127 (hard right); a value of 64 indicates sound that is...
Page 93
3-15 pla yback you can rearrange and resize the columns of the track pane as shown in the following: changing values in the track pane you can change the values in the track pane in a number of ways: ¥ move the highlight to the cell you want to change (using the mouse or the arrow keys), and type th...
Page 94
3-16 there are a few special shortcuts for setting certain parameters: you can also edit track properties in the track properties dialog box. To open this dialog box: ¥ move the highlight to the trackÕs source, port, chn, bank, or patch column, then press enter ¥ double-click in the trackÕs source, ...
Page 95
3-17 pla yback all track parameters are saved with a pro audio project. However, if you export a project to a standard midi Þle, several of the parameters (key+, vel+, time+, and chn) are applied to the midi data as the Þle is being exported. Other parameters, including source, port, mute, solo, and...
Page 96
3-18 used in pro audio may not match the port numbers that appear on your external multiport midi device. When pro audio is installed, a single midi output device is selectedÑ the best available midi synthesizer that pro audio can locate. This is usually an internal synthesizer on your computerÕs so...
Page 97
3-19 pla yback assigning tracks to ports you assign each track to a midi or an audio port using the port column in the track view. From then on, material on that track will be sent to the appropriate output device. In the preceding example, you could send tracks 1 through 8 to the midi synthesizer o...
Page 98
3-20 choosing the instrument sound (bank and patch) electronic keyboards and synthesizers often contain hundreds or thousands of different sounds. Each sound is known as a patch. The name comes from the early days of synthesizers, for which you physically rewired (using patch cords) the oscillators ...
Page 99
3-21 pla yback playback at the beginning of a song, the bank and patch settings for the track are set to these initial values. Many instruments have descriptive names for their banks and patches. Pro audio stores these names in an instrument deÞnition. For more information about instrument deÞnition...
Page 100
3-22 way to see and edit a bank/patch change is in the event list view. For more information, see Òthe event list viewÓ on page 6-42. When a track contains audio, pro audio interprets the patch as an indicator of the type of audio information contained in the track, such as vocals, drums, or woodwin...
Page 101
3-23 pla yback adding effects you can add both midi and audio effects directly from the track view. Cakewalk adds these effects in real-time, preserving your trackÕs original data. Double-click an effects cell to open the effects bin dialog. Right-click in the effects bin dialog to add an effect. Ad...
Page 102
3-24 in some projects you want the volume or panning of a track to change while playback is in progress. You can accomplish this using the console, piano roll, event list or studioware views. For more information, see chapter 9, mixing and effects patching, chapter 6, editing events and controllers,...
Page 103
3-25 pla yback the chn parameter in the track view redirects all events in the track to the speciÞed channel, ignoring the channel number stored with each event. If this parameter is left blank, all events in the track are sent to their original channels. This parameter does not affect the channel i...
Page 104
3-26 adjusting the key/transposing a track (key+) each midi note event has a key number, or pitch. On playback, the key offset (key+) sparameter transposes all notes in the track by the designated number of half-steps. The value can range from -127 to +127. A value of 12 indicates that notes will be...
Page 105
3-27 pla yback adjusting the note velocity (vel+) each midi note event has a velocity, which represents how fast (or how hard) the key was struck when the track was recorded. On playback, the velocity offset parameter adjusts the velocity data for all notes in the track by the designated amount. The...
Page 106
3-28 adjusting the time alignment of a midi track (time+) each event takes place at a known point in the project. On playback, the time offset (time+) parameter adjusts the times for midi events in the track by the designated amount. The value can be as small as a single clock tick or as large as yo...
Page 107
3-29 pla yback stored in the Þle. You can edit the time values in those views or use the edit-slide command. Other midi playback settings two other midi settings can affect what happens when you play back your project, as described in the following table: to set these options, choose options-project...
Page 108: Video Playback
3-30 video playback pro audioÕs insert-video file command lets you include an avi, mpeg or quicktime video in your project. This video is shown in real time as your project plays. You open the video view by choosing view-video. The video view displays the current time (as in the big time view) and t...
Page 109
3-31 pla yback to enable or disable video playback… 1. Open the video view by choosing view-video. 2. Right-click in the video view and choose animate . If your computer is not fast enough to play back video efficiently, you can get better performance by temporarily disabling video animation during ...
Page 110
3-32 make the video display as large as possible, but only enlarge by integral multiples choose integral stretch display the video in full screen mode choose full screen pro audio adjusts the video display according to the selected option. The stretch option is used to recalculate the video display ...
Page 111
4 recording recording a performance you can add sound or music to a pro audio project in many different ways. You can record your own material using a midi-equipped instrument, use a microphone or another audio input to record digital audio information, or import sound or music data from an existing...
Page 112: Creating A New Project
4-2 creating a new project you can add music and sound to an existing project or to a new project. Just as in any windows program, you open an existing project Þle using the file-open command and create a new project Þle using the file- new command. When you create a new pro audio project, there are...
Page 113
4-3 recording setting the time and key signatures by default, a new pro audio project is in 4/4 time and the key of c major. You can change these settings to any desired time signature or key. These settings apply to all the tracks in a project. You cannot set different time or key signatures for di...
Page 114
4-4 ¥ 3/4 (three beats per measure, each quarter note gets a beat) ¥ 6/8 (six beats per measure, each eighth note gets a beat) the top number of a meter, the number of beats per measure, can be from 1 through 99. The bottom number of a meter is the value of each beat. You can pick from a list of val...
Page 115
4-5 recording setting the metronome and tempo settings the metronome counts off each beat in a measure, so you can hear the tempo of your project. You can choose to have the metronome sound during recording, during playback, or both. When you start recording, pro audio can play one or more measures ...
Page 116
4-6 to set the tempo and metronome for a new project… 1. In the metronome toolbar, select the metronome during recording and metronome during playback options. 2. If you want to hear a count-in before recording begins, set the count-in to 1 or more. Select count-in measures or count-in beats . 3. Se...
Page 117
4-7 recording setting the audio sampling rate and bit depth each pro audio project has an audio sampling rate and a bit depth that indicates the level of accuracy with which audio data are stored. The same parameters are used for all the digital audio in a project. When you create a new project, if ...
Page 118
4-8 for more information, see Òimproving performance with digital audioÓ on page 13-20. By default, the bit depth of audio data is 16 bits. If your sound card supports 18, 20, 22, or 24 bit audio, you can choose to take advantage of these higher resolutions. If you are creating a new project that wi...
Page 119: Preparing to Record
4-9 recording in some projects you may need a different or an even more detailed timebase. For example, if you wanted to use eighth-note septuplets (7 eighth notes per quarter note) and represent them accurately, you would need to have a timebase that is divisible by 7, such as 168ppq. Pro audio use...
Page 120
4-10 modes to determine what happens to those clips. When you save your project, you also save whatever recording mode you choose together with that project: recording mode… how it works… sound on sound the new material is merged with any existing material. This means that any existing clips on the ...
Page 121
4-11 recording choosing a source to record into a track, you must choose a source for the music or sound to be recorded. Usually, you choose midi omni to record material from a midi instrument or the left or right channel of a digital audio device (such as a sound card) to record audio material, or ...
Page 122
4-12 when you choose midi omni as the input source for a track, pro audio merges material from all midi sources (ports) and instruments. This means you donÕt have to worry about port, channel, or other midi settings. Sometimes, you may want to record different midi channels into different tracks. To...
Page 123
4-13 recording while each track can have a different source, it is also possible for several tracks to have the same source. If you record the same material into several different tracks at once, the resulting material will be stored in linked clips. For more information about linked clips, see Òwor...
Page 124
4-14 arming tracks for recording pro audio lets you record any number of tracks at one time. You indicate the tracks you want to record by arming the tracks. You can arm a single track or several tracks at one time. Each track records material received though its own input source. Auto arming you mu...
Page 125: Recording Music From A Midi
4-15 recording recording music from a midi instrument once you have set your tempo, metronome, and source and armed one or more tracks, you are ready to start recording. Pro audio displays a clip containing the new material in the track window. To listen to the new material, set the now time to the ...
Page 126: Recording Audio
4-16 when you click the keys with the mouse or play notes using your computer keyboard, the virtual piano converts the information to midi data and sends it to pro audio. For complete information about the virtual piano, use the on-line help system. Recording audio there are a couple of other import...
Page 127
4-17 recording in the console view. To adjust the input levels, you must use your sound cardÕs software mixer program (or the windows 95, 98 or nt mixer) or an external hardware mixer for certain sound cards. The audio meters indicate the volume at which the audio will be recorded, in units called d...
Page 128
4-18 once you have set your sampling rate and input levels, you are ready to start recording. If the meters do not move, check your sound card softwareÕs mixer program and make sure that you have the proper source enabled for recording. When you record audio, pro audio stores each audio clip in a se...
Page 129
4-19 recording tuning an instrument pro audio has a built in chromatic tuner which analyzes any input signal from the sound card and displays the intonation (in cents) on the meter. The tuner automatically determines which string/pitch you are trying to tune, so that you can keep both hands on the i...
Page 130: Loop Recording
4-20 loop recording when recording a vocal or an instrumental section, you might want to record several different takes so that you can choose the one you like best. You might even want to record several takes to double a part or merge the best parts of each. Normally, to record each take you would ...
Page 131
4-21 recording to use loop recording… 1. Choose the source for the track(s) you want to record, and arm the track(s) for recording. 2. Set the loop start and end times in either the loop/auto shuttle dialog box or in the loop toolbar. 3. Choose realtime-record options , or click on the record toolba...
Page 132: Punch Recording
4-22 punch recording suppose you are happy with most of a track but want to replace one small sectionÑperhaps as small as a couple of notes. This is where punch recording comes in handy, because it lets you record new material only within a speciÞed range of times. For example, suppose you recorded ...
Page 133
4-23 recording after you punch record, choosing undo both discards any new material you recorded and restores the original material that had been deleted. You can also combine loop and punch recording to record several takes of a punch. Say you are working on that perfect take of a guitar solo and y...
Page 134: Step Recording
4-24 step recording sometimes you may want to record material from a midi instrument that is too difÞcult to play. One way to make this easier is to slow the tempo of the piece while you are recording until it is slow enough to play. Step recording is another method that lets you record from a midi ...
Page 135
4-25 recording midi data is recorded using step record even if the track is not armed, loop markers are ignored, and step record always uses the sound on sound (blend) record mode, regardless of the current record mode. You use the step record dialog box to perform step recording: the step size and ...
Page 136
4-26 provides you with more ßexibility. For example, with auto advance disabled, you do not even need to play the notes at a single step at the same time! You can play any number of notes one at a time, and they will all be recorded at the same step until you click the advance button. You can even r...
Page 137
4-27 recording step pattern recording the pattern option lets you deÞne a repeating rhythmic pattern of notes and rests so that you can use step recording more efÞciently. For example, suppose your project is in 4/4 time, and one track has a pattern that is two measures long: quarter notes in the Þr...
Page 138
4-28 here is one Þnal example based on 4/4 time, with a step size of eighth- note triplets (twelve steps per measure): 1 2 3 4 . 6 7 . 9 0 . 2 no matter how you enter a pattern, pro audio display the digits in sequence, with periods replacing digits at each step where a rest would occur. You can cre...
Page 139
4-29 recording here are some examples of when this feature might be useful: ¥ there are several performers, each playing a different midi instrument. By setting each instrument to transmit midi on a different channel, you can record each playerÕs performance into a separate track, even though they a...
Page 140: Importing Music and Sound
4-30 importing music and sound while recording is perhaps the most common way of adding material to a pro audio project, there are several other methods you can also use. Lets you import music into a project from several different types of digital data Þles, including midi Þles, audio Þles in wave (...
Page 141
4-31 recording importing material from another cakewalk project you use the edit-copy and edit-paste commands to import material from one project to another using the windows clipboard. The project that contains the material you want to import is the source project. The project into which the materi...
Page 142: Saving Your Work
4-32 saving your work like most windows programs, you use the file-save and file-save as commands to save your work. Normally, you save your projects in the standard project Þle format, with a Þle extension of . Wrk . This Þle contains all your midi data and all your project settings. Any digital au...
Page 143
4-33 recording if you have made changes to a project and then attempt to close the project, either by closing the track view or by choosing file-close, pro audio asks if you want to save the changes you have made. This prevents you from accidentally losing your work. You can tell whether changes hav...
Page 144
4-34 labeling your projects pro audio lets you attach subtitles, composer credits, copyright, and other information to your projects, as shown in the following table: to change the auto save settings. . . 1. Choose options-global and click the general tab. 2. To enable auto save, set either the numb...
Page 145
4-35 recording this information is shown in the file info window, which is displayed using the file-info command. If the file info window is open when you save a Þle, then this window is displayed automatically the next time the Þle is opened. This is useful if you: ¥ share Þles with others and want...
Page 146: Midi Input and Echo Controls
4-36 file statistics the file statistics dialog box displays the following information about the contents of the project Þle: midi input and echo controls pro audio gives you Þne control over a variety of midi settings. You can Þlter out midi input information to eliminate information you donÕt want...
Page 147
4-37 recording events, which can hold system exclusive messages up to 255 bytes. Leave the buffers setting at 128 unless you experience data not being recorded. For more information about sysx, see chapter 14, using system exclusive data. Midi echo pro audio lets you control the echo of midi data fr...
Page 148
4-38 if you choose the manual echo mode, you can control the routing and processing of midi echo data, as shown in the following table: local control as described on page a-5, you should normally disable the local control setting on your master keyboard to prevent notes from being doubled. Notes you...
Page 149
5 arranging arranging tracks and clips the track view makes it easy to arrange your songs and other projects. From one location, you can select, copy, move, and rearrange the parts of your project, using menu commands or drag-and-drop tools. You can add real-time audio and midi effects from the effe...
Page 150: Arranging Tracks
5-2 arranging tracks pro audio provides a variety of commands that let you work with the tracks in your project. Here are some of the things you can do: all the commands you use to arrange tracks work on selected tracks. The current track (the one containing the highlight) is always selected. You ca...
Page 151
5-3 arranging changing the order of tracks there are several ways you can change the order of tracks in the track view: ¥ drag a track to a new position in the track view. ¥ use the track-sort command to rearrange the tracks in order based on the track name, status, or other setting. ¥ insert new, b...
Page 152
5-4 copying tracks when you copy a track using the track-clone command, you can choose to copy the track properties, the clips and events in the track, or both. You can also choose the destination track. By default, pro audio copies the entire track to the next blank track. Pro audio also lets you c...
Page 153: Arranging Clips
5-5 arranging erasing tracks you can easily delete, or kill, an entire track, including all of the track properties and all of its clips and events. Sometimes, you only want to erase, or wipe, the contents of a track, leaving the track properties as they are. If you kill or wipe a track by mistake, ...
Page 154
5-6 displaying clips clips are displayed as rectangles in the clips pane. Their position and length show you at a glance their starting times and lengths. You can control four aspects of their appearance: ¥ color: by default, clips containing midi and audio information are drawn in different colors,...
Page 155
5-7 arranging zoom out ctrl-alt-o zoom all the way out ctrl-alt-shift-o undo zoom ctrl-alt-u turn on zoom lasso (use the zoom lasso to select the area to zoom to) ctrl-alt-z turn off zoom lasso ctrl-alt-z display now time in center of clips pane ctrl-alt-g to display clip names and contents… 1. Righ...
Page 156
5-8 selecting clips before you move, copy, edit, or delete clips you need to select them. There are several ways to select whole clips, as shown in the table: to change clip colors… 1. Select the clips whose color you want to change. 2. Right-click on one of the selected clips and choose properties ...
Page 157
5-9 arranging moving and copying clips you can copy or move clips using drag-and-drop editing or the cut, copy, and paste commands. If you copy or move clips into tracks that contain existing material, you need to let pro audio know how to combine the two. You have three options: when you use the ed...
Page 158
5-10 when you use drag-and-drop editing: ¥ you can set the above options every time you perform an edit, or you can set them once and have the same settings carry over automatically. Check or uncheck the ask this every time box to indicate your preference. ¥ if you drag to the edge of the clips pane...
Page 159
5-11 arranging to move clips using cut and paste… 1. Select the clips you want to move. 2. Choose edit-cut to display the cut dialog box. 3. Choose the options you want and click ok. Pro audio cuts the clips from the project and places them on the windows clipboard. 4. Click in the track pane to set...
Page 160
5-12 to move a clip to a specific start time… 1. Select the clip you want to move. 2. Right-click on the selected clip and choose properties . Pro audio opens the clip properties dialog box. 3. Enter a new start time, or use the spinners or keyboard to change the start time. 4. Click ok when you are...
Page 161: Working With Partial Clips
5-13 arranging working with partial clips pro audio lets you select, copy, move, and delete portions of a project even if they do not match clip boundaries. There are two ways to do this: ¥ directly select portions of one or more clips. ¥ select a range of times and one or more tracks. Pro audio aut...
Page 162
5-14 to clear the partial clip selection… you can clear the time-restricted selection in any of the following ways: ¥ click in an empty area of the clips pane to completely clear the selection. ¥ choose edit-select none or press the num-5 key (the number 5 on the numeric keypad-num lock must be off)...
Page 163: Markers and The Snap Grid
5-15 arranging markers and the snap grid pro audio has a collection of features you can use to simplify and speed the work you do arranging your projects. Here are a few of the most important things you can do: ¥ show gridlines on measure boundaries in the track view. ¥ deÞne and use a snap grid to ...
Page 164
5-16 you can also use the grid to move clips by a certain interval, rather than snap them to the interval. Moving by an interval can be useful during drag-and-drop operations, if your events are not exactly aligned with measure or note boundaries. In addition to choosing a standard note duration for...
Page 165
5-17 arranging creating and using markers markers are a way of associating a name with a time point in your project. You use markers to name sections of a song, to mark hit points in a Þlm score, or simply to provide a shortcut for working with any time point in a project. Markers make it easy to: ¥...
Page 166
5-18 to display the marker view, choose view-markers or click on the views toolbar. From the markers view, you can use the file-print and file-print preview commands to print a listing of markers. You can add markers while playback is stopped or while playback is in progress (on the ßy). When you ad...
Page 167
5-19 arranging 3. The time is set to the now time. If you want, use the spinners to change the time or type in a new marker time. 4. Check the locked to smpte box if you want to lock the marker to the smpte time. 5. Click ok. Pro audio adds the marker and displays it in the time ruler, the markers v...
Page 168
5-20 to jump to a marker there are many different ways to jump to a speciÞc marker: ¥ choose a marker from the drop-down list in the markers toolbar to jump to that marker. ¥ click the now time in the toolbar, press f5 to display a list of markers, choose the marker you want, and click ok. ¥ press f...
Page 169: Working With Linked Clips
5-21 arranging to select a time range using markers you can select a range of times by clicking in the marker section of the time ruler: ¥ click to the left of the Þrst marker to select the time between the start of the project and the Þrst marker. ¥ click to the right of the last marker to select t...
Page 170
5-22 if you attempt to copy only a portion of a linked clip, the copy will not be linked to the original. Copies of a clip can be linked to the original only when you select and copy the entire clip. To make linked copies of a clip using drag and drop… 1. Right-click in the clips pane and choose dra...
Page 171
5-23 arranging splitting and combining clips pro audio provides several commands that are used to split and combine clips. SpeciÞcally, you can: ¥ split a clip into several smaller clips ¥ create a new clip from a selected portion of an existing clip ¥ combine adjacent or overlapping clips into a si...
Page 172
5-24 the following table summarizes the commands you can use: the split command lets you split clips four different ways: to do this… use this command… notes… split clips into parts split works on all selected clips create a new clip from part of an existing clip edit-create clips erases the selecte...
Page 173
5-25 arranging while the split command works for both midi and audio clips, the split tool in the audio view provides more precise control, which is often required for audio material. In particular, this other command provides sample accurate editing and snap-to-zero capability. Note that the undo a...
Page 174: Changing Tempos
5-26 adding effects in the track view you can add both midi and audio effects directly from the track view. Cakewalk adds these effects in real-time, preserving your trackÕs original data. Changing tempos your project can incorporate all kinds of tempo changes, including step changes from one tempo ...
Page 175
5-27 arranging the edit-fit to time and edit-fit improvisation commands can also be used to introduce tempo changes into your work Þle. For more information, see Òstretching and shrinking eventsÓ on page 6-12 and Òfit improvisationÓ on page 6-26. When you change the tempo of a project that contains ...
Page 176
5-28 the tempo ratio buttons temporarily change the speed of playback, without affecting the actual tempo that is stored with your song. During playback, the tempo is multiplied by the current tempo ratio. By default, the three tempo ratios are 0.50 (half speed), 1.00 (normal speed), and 2.00 (doubl...
Page 177
5-29 arranging using the tempo commands the insert-tempo change and insert-series of tempos commands can be used to change the existing tempo of a project or to introduce one or more tempo changes at various points in a project. You can enter tempo values directly, introduce smooth increase or decre...
Page 178
5-30 to insert a series of tempos… 1. Choose insert-series of tempos to display the insert series of tempos dialog box. 2. Enter a starting tempo, ending tempo, and step size. 3. Enter a starting and ending time for the series of tempo changes. 4. Check the stretch audio option if you want audio to ...
Page 179
5-31 arranging using the tempo view the tempo view provides both a graphic display of the tempo and a list of all tempo changes in your project. In the graphical display you can use your mouse to draw tempo changes directly onto the graph. In the tempo list, you can insert, edit, and delete individu...
Page 180
5-32 if you make a mistake using any of these tools, you can use undo to correct the error. When you use the draw tool, the speed with which you drag the mouse determines the density of tempo events. To insert a larger number of relatively small tempo changes, move the mouse slowly. To insert a smal...
Page 181
5-33 arranging to erase tempo changes… 1. Select the tool. 2. Drag the mouse over the graph to highlight the region you want to erase. 3. Release the mouse button. Pro audio deletes all tempo changes in the area you marked. The last tempo setting prior to the erased region is now in effect in that r...
Page 182
5-34.
Page 183
6 editing ev ents editing events and controllers pro audio lets you edit the events in your songs in dozens of different ways. The piano roll view lets you add and edit notes, controllers, and automation data interactively, using a graphic display. Pro audioÕs many editing commands can improve the q...
Page 184: The Piano Roll View
6-2 the piano roll view the piano roll view displays all notes and other events from one or more tracks in a grid format that looks much like a player piano roll. Notes are displayed as horizontal bars, and drum notes as diamonds. Pitch runs from bottom to top, with the left vertical margin indicati...
Page 185
6-3 editing ev ents opening the view there are several ways to open the piano roll view: ¥ in the track view, select the track you want to see, then choose view-piano roll ¥ in the track view, right-click on a track and choose piano roll from the pop-up menu ¥ double-click on a midi clip in the clip...
Page 186
6-4 beyond the boundary of the clip in which they are located. When you move the notes, the clip will be extended as needed. The piano roll view also lets you scrub the tracks that are currently displayed. The scrub command lets you drag a vertical bar over the view so that you can hear the notes in...
Page 187
6-5 editing ev ents to edit a note… 1. Click to select the draw tool. 2. Edit notes as described in the table: to do this… do this… change the start time drag the left edge of the note in either direction. The note duration stays the same, but the start time is shifted. Change the pitch drag the mid...
Page 188
6-6 to copy notes... 1. Click or press s to select the select tool. 2. Select one or more notes. 3. Press and hold the ctrl key. 4. Drag the selected notes to a new location. 5. If necessary, choose the drag and drop options from the drag and drop dialog box. Pro audio copies the selected notes. To ...
Page 189
6-7 editing ev ents working with multiple tracks in the piano roll view the following is a list of ways to optimize the multiple track functionality in the piano roll view. Selecting tracks use the pick tracks combo button to assign tracks to the layers pane. Click on the left side of the pick track...
Page 190: Selecting and Editing Events
6-8 note names you can change the instrument deÞnition for the active track in the piano roll view. Right-click in the left side of the note pane to open the note names dialog where you can use note names that are deÞned as part of any instrument deÞnition. For more information about instrument deÞn...
Page 191
6-9 editing ev ents or clean up a performance or to search for or select events that meet certain criteria. For more information, see the following sections of this chapter. Transposing the edit-transpose command transposes the pitches of note events up or down by a Þxed number of steps. It does so ...
Page 192
6-10 shifting events in time the track view lets you move entire clips forward or backward in time by using drag and drop editing or by changing the start time of selected clips. The edit-slide command is slightly more ßexibleÑyou can use it to shift individual events and markers (or selected events...
Page 193
6-11 editing ev ents to insert a single blank measure into a project… 1. Press the 5 key on the numeric keypad (num lock must be off) or select edit-select-none to make sure that no track or time range is selected. 2. Set the now time to the place where you want to insert the measure. 3. Choose inse...
Page 194
6-12 stretching and shrinking events the edit-length and edit-fit to time commands can be used to stretch or shrink a portion of a project. Edit-length lets you stretch or shrink the selection by a Þxed percentage and makes the adjustment by altering the individual events. A value of 200 percent, fo...
Page 195
6-13 editing ev ents here are some examples: ¥ if your project contains background music and a voice-over, you might want to change the tempo of the background music without altering the voice-over ¥ if youÕre trying to modify the speed of some midi tracks to match a sampled drum groove, you want to...
Page 196
6-14 reversing notes in a clip the edit-retrograde command reverses the order of events in a selection. If one or more clips are selected, then the events within each clip are reversed. If several clips are selected from the same track, then the order of the clips is also reversed. You could use thi...
Page 197
6-15 editing ev ents adding crescendos and decrescendos the edit-scale velocity command lets you create crescendos and decrescendos on those instruments that respond to midi velocity. Most such instruments map changes in velocity to changes in note loudness. Many synthesizer patches alter the timbre...
Page 198
6-16 pro audio has two types of commands that you can use to modify the timing of a clip. The quantize commands alter the timing of the notes in your recording so that they Þt a time grid. The grid can have Þxed time intervals or intervals that are based on some existing note pattern. The fit to imp...
Page 199
6-17 editing ev ents resolution the resolution indicates the spacing of the grid. You can use any value from a whole note down to a thirty-second note triplet. You can also specify resolution in clock ticks. A rule of thumb is to select a resolution that matches the smallest note in the region you a...
Page 200
6-18 percent indicates that all notes are moved so that they are in perfect time, while a strength of 50 percent means that all notes are moved half- way towards the desired position. This lets you Òtighten upÓ the timing as much as you want, without going too far. The groove quantize command also l...
Page 201
6-19 editing ev ents a window of 100 percent includes all notes and guarantees that all notes will be shifted to lie exactly on the grid. The window extends half the resolution distance before and after the quantization point. A window of 50 percent extends only a quarter of the way toward the adjac...
Page 202
6-20 2. Choose edit-quantize to display the quantize dialog box. 3. Choose one of your own presets from the list, or enter the settings you want according to the table: setting… what to do… resolution choose a note size or enter the number of clock ticks change check the event types and characterist...
Page 203
6-21 editing ev ents to use the groove quantize command… 1. Select the track or clip you want to quantize, using any of the selection tools and commands. 2. Choose edit-groove quantize to display the groove quantize dialog box. 3. Choose a groove file from the groove file field. 4. Choose a groove p...
Page 204
6-22 defining a groove to use the groove quantize feature, you must create or choose a small snippet of musicÑthe groove patternÑfor pro audio to use as the timing and accent reference. You can use either of the following: ¥ a track, clip, or portion of a clip stored on the windows clipboard ¥ a gro...
Page 205
6-23 editing ev ents as many times as necessary. You can also create a groove template based on an audio clip using the edit-audio-extract timing command. To define a new groove... 1. Select the music that defines the groove using any of the selection tools and commands. 2. Choose edit-copy to place...
Page 206
6-24 9. If you are replacing a groove, verify that you want to delete the existing version. 10. Click close when you are done to return to the groove quantize dialog box. Pro audio stores the groove in the file and chooses the new groove as the current groove source. To copy an existing groove... 1....
Page 207
6-25 editing ev ents groove quantize tips here are some tips to help you with groove quantizing: aligning sloppy tracks with a good one. Select the portion of the ÒgoodÓ track that you want to apply to the ÒsloppyÓ tracks and copy it to the clipboard. Select the portion of the sloppy tracks you want...
Page 208
6-26 fixing a bad verse. Copy a good verse to the clipboard. Then change the selected range to cover only the bad verse. Perform a groove quantize using the clipboard contents as the groove source. The rhythms of the two verses then match. Working with audio drum loops. Create an audio drum loop. Us...
Page 209: Searching For Events
6-27 editing ev ents searching for events the events in a project have many different parameters. For example, all midi notes have a channel, starting time, pitch, velocity, and duration. Controllers have a controller number and value. Pro audio makes it simple to Þnd, select, and modify events that...
Page 210
6-28 these capabilities can help you Þnd problem spots or errors in a project or make systematic changes to events that have particular attributes. All of these capabilities rely on the use of an event Þlter, which lets you choose the types of events you want to work with and the range of values in ...
Page 211
6-29 editing ev ents the event filter dialog box looks like this: different types of events have different parameters, as shown in the table: this event type... Has these parameters... Note pitch, velocity, and duration key aftertouch pitch and pressure value controller controller number and value x...
Page 212
6-30 the event Þlter only accepts events that meet all the speciÞed ranges. This means that a note event must fall within the pitch range, the velocity range, and the duration range in order to be included. The event Þlter can also be used to accept events that occur in a range of channel numbers, b...
Page 213
6-31 editing ev ents next event that meets the criteria using the go-search again command (or by pressing f3). Selecting events the edit-select by filter command is used to reÞne a selection by applying an event Þlter to an initial selection. You can use this command any number of times to reÞne the...
Page 214
6-32 example: splitting left-hand and right-hand parts suppose you recorded a keyboard riff on track 1 but want to split the left and right hands apart into separate tracks so you can edit them separately. Suppose that all the right-hand notes are above c4. HereÕs how to proceed: edit-interpolate th...
Page 215
6-33 editing ev ents in the second event filter dialog box, the checkboxes and value ranges for beats and ticks are ignored. Only the replacement value ranges for the selected event types are used. The edit-interpolate command understands a wild card octave number in the second event Þlter to mean, ...
Page 216: Automation Data
6-34 controllers, rpns, nrpns, and automation data pro audio projects contain a lot more information than the notes and digital audio Þles that are at the heart of your work. Controllers, rpns, and nrpns (xrpns, for short) are special types of events used by midi software and hardware to control the...
Page 217
6-35 editing ev ents and dull. ThatÕs partly because a guitar player doesnÕt just play notes one after anotherÑhe often bends or slides on the strings to put emotion into his playing. You can use controllers in the same way, creating bends, volume swells, and other effects that make sounds more real...
Page 218
6-36 following table shows the controller numbers pro audio uses for rpn and nrpn events: automation data both the console view and the studioware view allow you to record automation data that deÞne changes in volume and pan throughout a project. The automation data can include step changes recorded...
Page 219
6-37 editing ev ents aftertouch data. The controllers pane is the lower half of the piano roll view. The controllers pane looks like a graph; the horizontal axis represents time, and the vertical axis represents the event values. Each event appears as a single vertical line, and the height of this l...
Page 220
6-38 the controllers pane has several tools you can use to add or modify events. The following tools apply only to the track that is selected in the track list pane: note that you can also add controllers using the insert-series of controllers command. If you make a mistake using any of these tools ...
Page 221
6-39 editing ev ents to display controller, rpn, nrpn, velocity, pitch-bend, or aftertouch data… 1. Select the track whose controller or xrpn data you want to see by clicking on the track number in the track view. 2. Choose view-piano roll to display the piano roll view. 3. Drag the horizontal split...
Page 222
6-40 to insert a controller value... 1. In the controllers pane, choose the data type, controller or xrpn number, and channel (if applicable) from the lists in the toolbar. 2. Select the tool or the tool. 3. Click in the controllers pane view at any desired time point and value. Pro audio adds a con...
Page 223
6-41 editing ev ents 1. Choose insert-series of controllers to display the insert series of controllers dialog box. 2. Choose the controller type from the insert list. 3. Choose the controller number or type from the number list. 4. Use the spinners or enter the desired midi channel. 5. Enter a star...
Page 224: The Event List View
6-42 the event list view the event list view shows events in a list format. You can insert, delete, or modify any kind of event, including notes, pitch-wheel data, velocity, midi controllers, patch changes, wave Þles, lyrics, text strings, mci commands, system exclusive meta-events, and more. There ...
Page 225
6-43 editing ev ents the event list is updated and the highlight is moved to the event that will be played next. When the event list view includes more than one track, events are mixed together in chronological order. For example, if you select tracks 1 and 3 when you open the event list view, you s...
Page 226
6-44 here are some notes about events and their parameters: ¥ the channel parameter in the track view can force an event to play on a different midi channel than the one shown in the event list. ¥ pedal marks entered in the staff view are displayed in the event list view as controller events (64). ¥...
Page 227
6-45 editing ev ents ¥ see chapter 14, using system exclusive data, for more information about system exclusive banks. ¥ see chapter 7, editing audio, for more information about audio events. Additional information about note events and mcicmd events appears later in this chapter. Event list display...
Page 228
6-46 if you try to change the event type (kind of event), pro audio lets you choose the kind of event you want from a dialog box. When you change one kind of midi event into another kind of midi event, pro audio preserves the parameters as fully as possible. To insert a new event... 1. Move the high...
Page 229
6-47 editing ev ents additional event information note events there are three values parameters for note events: ¥ a pitch, which represents the midi key number as a note and an octave. Pitch may also be indicated by a note name, if there is an assigned instrument deÞnition that uses a note name lis...
Page 230
6-48 instrument appears in event list view rather than a note and an octave from the piano keyboard. Pro audio uses the following notation to display ßats and sharps in this and other views: mcicmd events media control interface (mci) commands are special events that let you control other multimedia...
Page 231: Midi Effects
6-49 editing ev ents midi effects pro audio provides the ability to use plug-in midi effects. Using plug-in effects is similar to using the midi processing commands described earlier in the chapter. The overall procedure is as follows: ¥ select the midi data to be affected. ¥ choose the effect you w...
Page 232
6-50 processing or effect again in the future. The following table tells you how to use presets: quantizing the quantize command moves events to (or towards) an evenly-spaced timing grid. The quantize effect is similar to the edit-quantize command. For more information, see Òother settingsÓ on page ...
Page 233
6-51 editing ev ents adding echo/delay the echo delay command creates a series of repeating echoes of each note. The echo notes can decrease or increase in velocity, and can be transposed from the original by regular intervals. The parameters used to specify the echo/delay effect are as follows: off...
Page 234
6-52 filtering events the event filter command lets you remove events from the midi data, keeping or passing through only those events that you specify. The event filter effect works almost identically to the event Þlter used by the edit- select by filter command. For more information, see Òevent fi...
Page 235
6-53 editing ev ents the parameters used to specify the arpeggiator effect are as follows: parameter/option... Meaning... Swing (%) the distortion of timing used to produce a swing feel. A value of 0% indicates a straight rendition; negative and positive values produce distortion of the timing grid....
Page 236
6-54 analyzing chords the chord analyzer command analyzes chords. You select the notes to be analyzed in one of cakewalkÕs windows, then open the chord analyzer and press the audition button. The chord appears on the midi display and the staff, and its name with possible alternatives appears in the ...
Page 237
6-55 editing ev ents changing velocities the velocity command lets you adjust velocities of midi notes. You can set velocity values, set scale values, add speciÞc or random offsets, create smooth transitions, and limit the velocity range. The velocity effect options are as follows: parameter/option....
Page 238
6-56 transposing midi notes the edit-midi effects-cakewalk fx-transpose command is a ßexible transposition feature. You can perform simple chromatic or diatonic transpositions, transpose from one key to another, or deÞne your own custom transposition. The transpose options are as follows: parameter/...
Page 239
6-57 editing ev ents to transpose midi data... 1. Select the data to be affected. 2. Choose midi effects-cakewalk fx-transpose from the edit menu or from the pop-up menu to open the transpose dialog box. 3. Set the transposition options as described in the table above. 4. Click ok. Pro audio transpo...
Page 240
6-58.
Page 241
7 editing audio editing audio the audio view lets you edit and arrange audio events. You can perform basic tasks such as cut, copy, paste, and move; apply simple audio processing such as volume change, fades, and equalization; and use sophisticated audio effects such as stereo chorus and reverb. The...
Page 242: Digital Audio Fundamentals
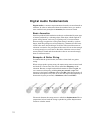
7-2 digital audio fundamentals digital audiois a numeric representation of sound; it is sound stored as numbers. In order to understand what the numbers mean, you need to start with the basic principles of acoustics, the science of sound. Basic acoustics sound is produced when molecules in the air a...
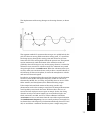
Page 243
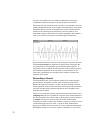
7-3 editing audio the displacement of the string changes as the string vibrates, as shown here: the segment marked ÒaÓ represents the string as it is pulled back by the pick; ÒbÓ shows it moving back towards its resting point, ÒcÓ represents the string moving through the resting point and onward to ...
Page 244
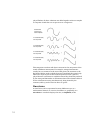
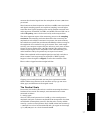
7-4 played. Rather, all these vibrations are added together to form a complex or composite sound that our ear perceives as a single tone. This composite waveform still doesn't account for the uniqueness of the sound of different instruments. For example, stringed instruments usually have a resonator...
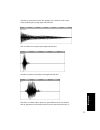
Page 245
7-5 editing audio vibration as a function of time. For example, the waveform of the sound of the plucked guitar string might look like this: the waveform of a trumpet blast might look like this: and the waveform of a spoken word might look like this: the three waveforms shown above are quite differe...
Page 246
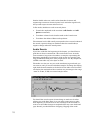
7-6 envelope, and each has its own complex combination of frequency components, which can change across the duration of the sound. The center line of a waveform is the zero line; it corresponds to the rest position (displacement of 0) of the original vibrating object. (a waveform for perfect silence...
Page 247
7-7 editing audio measure the electrical signal from the microphone at least 4,400 times per second. Since humans can hear frequencies well above 10 khz, most sound cards and digital recording systems are capable of sampling at much higher rates than that. Typical sampling rates used by modern music...
Page 248
7-8 similar decibel scales are used in other branches of science and engineering to measure electrical power levels and other signal levels, always with respect to some reference level. In pro audio, decibels are used in several places: ¥ to scale the amplitude of the waveform (3db louder and 3db qu...
Page 249
7-9 editing audio waveform can occur if you record a signal at too high a record level, or if you apply audio processing or effects that increase the waveform amplitude too much. If you accidentally cause the waveform to clip, you should undo the command and try again with different parameters. Clip...
Page 250: The Audio View
7-10 the audio view the audio view displays audio events on a timeline, arranged by track. There are Þve ways to open the audio view: ¥ in the track view, select the tracks you want to see, then click the audio view button ¥ in the track view, select the tracks you want to see, then choose view-audi...
Page 251: Basic Audio Editing
7-11 editing audio like many other views, the audio view includes zoom tools that let you change the vertical and horizontal scale of the view. When multiple tracks are displayed, a white arrow in the track number column indicates which track is centered when zooming vertically. You can use the page...
Page 252
7-12 use the selection tool to make selections. Selection methods in the audio view are similar to those in other views. Here is a summary: editing event properties audio events have four properties that you can change: a name, a time, an anchor, and a velocity. The name of an event is used in the a...
Page 253
7-13 editing audio its volume. The velocity of an audio event is a number between 0 and 127, with a velocity of 103 corresponding to the natural loudness of the waveform. Higher velocities increase the volume, lower values decrease the volume. The default relationship between velocity and volume (in...
Page 254
7-14 setting volume and pan envelopes each audio event can have its own volume and pan envelope. An envelope indicates how the value of a parameter changes over time. For example, you may want the volume of an audio event to rise slowly, reach a plateau, then fade quickly. Or, you may want the pan t...
Page 255
7-15 editing audio to make alignment of envelopes with audio data easier, the envelope is superimposed on the audio event in the audio view, as shown here: to set up a volume or pan envelope, you must: ¥ create an envelope ¥ create intermediate points ¥ drag points and line segments to shape the env...
Page 256
7-16 moving, copying, and deleting audio events events can be cut, copied, pasted, and deleted with edit menu commands, or moved and copied with drag-and-drop techniques. These work the same in the audio view as they do in the clips pane of the track view. For more information, see Òarranging tracks...
Page 257
7-17 editing audio combining audio events individual audio events in the same track can be combined into a single event with the combine command. To split events with the scissors tool… 1. Click the scissors tool . 2. Split events according to the table: to do this… do this… split an event into two ...
Page 258
7-18 when you combine events that overlap, you have two choices as to what happens to the overlapping audio: if you combine several events that do not overlap and have identical velocities, the new event has the same velocity as the original events. If you combine events that overlap or that have di...
Page 259
7-19 editing audio the following pictures show fade and swell envelopes in the midst of being drawn: the height of the envelope at each point determines the multiplicative factor that will be applied to the waveform at that point. The zero- crossing line of the waveform corresponds to an envelope he...
Page 260: Basic Audio Processing
7-20 scrubbing you can use the scrub tool to locate or audition a particular sound or passage as you drag the mouse. You can scrub a single event, or scrub all events displayed in the view. Basic audio processing audio processing commands let you modify audio data according to some rule or algorithm...
Page 261
7-21 editing audio ones to increase and decrease volume, to reverse the data, and to perform equalization. Audio processing commands can work on both whole and partial events. For example, suppose you want to make certain words in a vocal passage softer. You can select the portion of the audio event...
Page 262
7-22 increasing or decreasing volume pro audio provides three commands to boost or cut the volume of audio data. The 3db louder and 3db quieter commands are used to increase or decrease the volume by three decibels, respectively. For more information on the decibel scale, see Òthe decibel scaleÓ on ...
Page 263
7-23 editing audio that are too quiet and others that are loud, you should probably split off the quiet segments into separate events and then normalize those. Reversing audio data by reversing audio data, you can make it play backwards. You may wish to do this to obtain unusual sounds for special e...
Page 264
7-24 equalizing audio data equalization lets you boost or decrease the volume of sounds at different frequencies. For example, you can boost the bass, cut high-frequency hiss, or brighten mid-range vocals. Pro audio provides a graphic equalizer that lets you boost or decrease the volume of audio eve...
Page 265: Advanced Audio Processing
7-25 editing audio advanced audio processing pro audio provides a number of advanced audio processing commands for power users. Among these are commands to remove silent sections of audio from the data, to extract timing information, to detect pitch, and to apply parametric equalization, fades/envel...
Page 266
7-26 the digital noise gate parameters are described in the following table. Parameter... Meaning... Open level (db) the loudness threshold for opening the noise gate. The gate officially opens when loudness rises above this level, although it can open earlier because of the attack time. Close level...
Page 267
7-27 editing audio extracting timing the extract timing command creates midi notes and (optionally) tempo changes based on rhythmic peaks in audio. The extract timing command Þrst analyzes the audio for pulses, sudden percussive changes in volume. Then, from each pulseÕs position and intensity, extr...
Page 268
7-28 ¥ adjust the tempo and feel of an existing sequence to match that of a new rhythm track ¥ record a new midi sequence on top of an audio rhythm track and let the audio track determine the tempo map for the song extract timing works in two steps: pulse analysis and timing synthesis. In the Þrst s...
Page 269
7-29 editing audio the timing synthesis parameters are as follows: when using extract timing, keep in mind the following: ¥ it knows nothing about the musical context of the audio ¥ it does not know, and cannot Þgure out, the approximate tempo of the audio, the feel, or the time signature it only kn...
Page 270
7-30 to extract timing from audio data... 1. Select the audio data to be analyzed. 2. Choose edit-audio-extract timing , or right-click in the audio view and choose extract timing from the menu, to open the extract timing dialog box. 3. Set the pulse analysis parameters as described in the table abo...
Page 271
7-31 editing audio here are some examples of ways to use the extract timing command. To generate midi notes that play along with an audio rhythm track... 1. Select the audio events containing the rhythm track. 2. Choose edit-audio-extract timing and adjust the pulse analysis parameters. 3. Once you’...
Page 272
7-32 detecting pitch the pitch detection command is an audio-to-midi converter; it creates midi note and pitch-wheel events from audio events. The audio must be monophonic; that is, there can only be one sound or instrument playing at a time. Pitchdetection does not work well on events containing ha...
Page 273
7-33 editing audio parametric equalization the parametric eq command lets you apply a high-pass, low-pass, band-pass, or band-stop Þlter to your audio data. You must specify the Þlter type and parameters as follows: to generate midi notes from audio data... 1. Select the audio data to be analyzed. 2...
Page 274
7-34 quality the sharpness the frequency cutoff, that is, how far outside the cutoff range a frequency must be for its gain to be fully reduced. Higher quality values are sharper. Cut (db) the maximum amount of gain reduction to apply to stopped frequencies. Gain (db) the overall level for the filte...
Page 275
7-35 editing audio fades and crossfades pro audio provides several commands for applying gradual volume changes to audio data. The Þrst command, fade/envelope, lets you fade in or fade out, and lets you choose an envelope, a curve that governs the rate of the fade. The starting envelope can be linea...
Page 276
7-36 3. Select an envelope from the dropdown list. 4. If desired, manipulate the curve as described in the table above. 5. Click ok. Pro audio applies the fade to the selected audio data. To crossfade two overlapping events... 1. Select two overlapping audio events. They need not be on the same trac...
Page 277: Audio Effects
7-37 editing audio audio effects pro audio provides the ability to use plug-in audio effects using microsoftÕs directx technology. Some audio plug-in effects are supplied with pro audio. Others can be purchased from third-party software manufacturers, and appear automatically in pro audioÕs menus on...
Page 278
7-38 audio Þles are created. See Òmixing and effects patchingÓ on page 9-1, for more information on real-time effects. Mixing audio effects the dialog box for each plug-in effect has a mixing tab that provides three options for processing the data. Option... Meaning... Process in-place, mono to mono...
Page 279
7-39 editing audio adding parametric equalization the cakewalk fx parametric eq command lets you apply a complex Þlter to your audio data. The complex Þlter is a combination of up to three simple Þlters, each deÞned individually. Parameters for each Þlter are described in the following table: while ...
Page 280
7-40 attenuate 60-cycle hum or high-frequency noise, or to boost a particular instrument sound for use in other pro audio commands. Adding chorus the cakewalk fx chorus command fattens the audio to make one instrument sound like many. When many people sing together, for example, each of their voices...
Page 281
7-41 editing audio applying delay and echo the cakewalk fx delay command creates a series of repeating signals from the original signal. You can create a single echo on the original signal, or a series of echoes up to Þve seconds apart. Parameters for the delay effect are identical to those for the ...
Page 282
7-42 adding flanging the cakewalk fx flanger command mixes the original signal with a slightly delayed version of the signal, so that the two are out of phase. This creates a spacey, ethereal sound. Parameters for the flanger effect are identical to those for the chorus and delay effects. However, w...
Page 283
7-43 editing audio applying reverb the cakewalk fx reverb command adds many small echoes to a signal to create the illusion of spaciousness. By changing the parameters, you can simulate a stage, a hall, an arena, or a variety of other room types. The reverb parameters are as follows: parameter/optio...
Page 284
7-44 shifting pitch the cakewalk fx pitch shifter raises or lowers the pitch of an audio signal, while leaving the duration of the audio event unchanged. The pitch shift parameters are as follows: this is a fast pitch shifter that uses minimal computation time. The cakewalk fx time/pitch stretch com...
Page 285
7-45 editing audio stretching time and pitch the cakewalk fx time/pitch stretch command lengthens or shortens audio data, and raises or lowers pitch. Time and pitch can be stretched independently. You can use this effect to stretch or compress audio while preserving pitch, or to change pitch while p...
Page 286
7-46 for the most natural-sounding results, choose low settings; transpose by no more than a third or a fourth. Higher values, though, can be used for special effects. To apply time/pitch stretch to audio data... 1. Select the audio data to be affected. 2. Choose audio effects-cakewalk fx-time/pitch...
Page 287
8 notation working with notation and lyrics this chapter describes three pro audio views that are used to edit the musical aspects of your project. ¥ pro audioÕs staff view lets you work with your composition in a standard musical staff, guitar tablature and a virtual guitar fretboard. You can add, ...
Page 288
8-2 working with lyrics . . . . . . . . . . . . . . . . . . . . . . . . . . . . . . . . . . . . . . . . 44 the staff view the staff view is composed of a staff pane and a fretboard. When you Þrst open the staff view, you may see only the staff and not the fretboard. Resize the staff view by dragging...
Page 289
8-3 notation notes and chords shown in the fretboard can be easily edited by drag- ging them up and down the guitar strings. Opening the staff view there are three ways to open the staff view: ¥ in the track view, select the midi tracks you want to see, then click the staff view button . ¥ in the tr...
Page 290
8-4 like many other views, the staff view includes zoom tools that let you change the vertical and horizontal scale of the view. The staff view also has a snap to grid button. For more information on this feature, see ÒdeÞning and using the snap gridÓ on page 5-15. Staff pane layout the staff pane c...
Page 291
8-5 notation interpolate opens the event filter search dialog box. See “edit-interpolate” on page 6-32 for more information. Length opens the length dialog box. See “stretching and shrinking events” on page 6-12 for more information. Retrograde reverses the order of selected events and clips. Transp...
Page 292
8-6 the fretboard the fretboard shows you the notes located at the now time in the staff pane, laid out on a virtual guitar fretboard. For example, if the staff pane shows you this: the fretboard pane shows you this: the fretboard stays in sync with the now time during playback and recording, and st...
Page 293: Basic Musical Editing
8-7 notation basic musical editing the staff view's tools let you edit a song by manipulating the elements of standard music notation. Using these tools, you can create and edit notes, pedal marks, expression marks, hairpins, and lyrics. Inserting notes on the staff you can add notes to your composi...
Page 294
8-8 can also page through the track by clicking the play-next button or the play-previous button. Note: you cannot insert notes whose durations are less than the value in the display resolution Þeld, which is located in the top level of the staff view toolbar. You may want to pick a different snap-t...
Page 295
8-9 notation selecting notes use the selection tool to make selections. Selection methods in the staff view are similar to those in other views. Here is a summary: moving, copying, and deleting notes on the staff selections can be cut, copied, pasted, and deleted with edit menu commands. The techniq...
Page 296
8-10 this makes it easy to drag notes quickly among pitches that are in the current key. But you can also drag in half-steps (chromatic scale) by clicking the right mouse button while dragging. Right-clicking again returns you to the diatonic scale. If you need to transpose more than a few notes, us...
Page 297
8-11 notation ing notes from within the fretboard you can drag notes displayed in the fretboard horizontally along each string to change their pitch. They always change in the chromatic scale. You can not drag notes from one string to another. Auditioning sometimes it is useful to listen to your mus...
Page 298
8-12 backward or forward at any speed. Step play lets you step through the song note by note, in either direction. Changing note properties the staff view lets you edit all the midi parameters for a note, including those not normally portrayed by standard musical notation. Note properties are as fol...
Page 299
8-13 notation deglitch dialog when recording midi guitar, even the best players occasionally play unintended notes. The deglitch feature allows you to Þlter out the soft- est, shortest, and highest notes in the Þle. There are three Þlters in the deglitch dialog: pitch with the pitch Þlter you can se...
Page 300
8-14 working with triplets the staff view places certain limitations on the use of triplets. The limitations are: ¥ triplets must occur in full sets of three. ¥ all three steps in a triplet must be notes (no rests) of the same basic duration. ¥ there can be no ties in or out of the triplet. In most ...
Page 301
8-15 notation beaming of rests the staff view supports beaming of rests, a practice that is popular with rhythmically complex music. Beam lengths are extended to include rests that are integral parts of the beamed group of notes. Short stems, called stemlets, extend from the beam toward the rest. Th...
Page 302
8-16 on the other hand, if you are entering notes into the staff view with the mouse, fill and trim durations may produce confusing results. For example, with fill durations, an inserted eighth note in 4/4 time would look like a quarter note until you insert another eighth note immediately fill and ...
Page 303
8-17 notation following it. It is recommended that you turn off the fill durations and trim durations options when entering notes; these options are more appropriate for looking at notes you recorded. Using enharmonic spellings any musical note can be referred to by several different names. For exam...
Page 304
8-18 you can change enharmonic spellings in other views, such as the event list view, by similarly typing a new spelling wherever the note pitch is displayed as a text string. You can also use the edit-interpolate command to change enharmonic spellingsÑfor example, to change multiple occurrences of ...
Page 305
8-19 notation is conceptually linked to the use of different instruments. Therefore, setting notes to different channels gives you a useful way to show separate voices, whether the track has a forced channel or not. You can disable the forced mapping of midi channels. For more informa- tion, see app...
Page 306
8-20 if you are planning to record or input notes from a midi guitar synth or midi converter, you need to set this up on the instrument. In the case of the roland gr-30, for example, you set it to send on midi channel 11, mono. This sends out each corresponding string on channels 11-16. To display n...
Page 307: Chords and Marks
8-21 notation chords and marks the staff view lets you add and edit chord symbols, dynamic markings, hairpin symbols, and pedal events. Like notes, these symbols are placed in the score with the draw tool. They can be selected, cut, copied, pasted, deleted, and dragged and dropped. With the exceptio...
Page 308
8-22 you edit chords in the chord properties dialog box. Chord properties are shown in the following table: the chord properties dialog box also lets you draw guitar chord grids and manage the chord library. You can suppress the display of all guitar chord diagrams by deselecting the show chord grid...
Page 309
8-23 notation to edit a chord symbol… 1. Right-click the symbol to open the chord properties dialog box. 2. Edit information about the chord according to the table: to do this… do this… move a chord in time change the time property. Give the chord a new name select a chord from the dropdown list, or...
Page 310
8-24 to add a guitar chord grid… 1. Right-click the chord symbol to open the chord properties dialog box. 2. Follow the instructions in the table: to do this… do this… display a blank chord grid click new grid place a dot on the grid select the finger number (1-4, or t for thumb), then click the gri...
Page 311
8-25 notation adding expression marks expression marks tell a performer how to interpret the notes and durations on the page. They provide a necessary supplement to simple notation, in which notes have only pitch and duration, but no hint of how loudly, softly, or smoothly, they are to be played. Dy...
Page 312
8-26 expression text is italicized in the staff view. Standard dynamic markings also appear bold. To add an expression mark... 1. Click the draw tool . 2. Select the expression tool . 3. Position the pointer below the lowest note in the staff. (the pointer changes to a pencil when you are in a legal...
Page 313
8-27 notation adding hairpin symbols some musical phrases vary dynamically, increasing or decreasing in loudness for dramatic effect. Pro audio lets you insert traditional crescendo and diminuendo hairpin symbols that convey this information to a performer, as shown here: if the track is split into ...
Page 314
8-28 adding pedal marks pedal marks traditionally indicate where the sustain pedal of a piano is to be pressed and for how long. With pro audio, you can achieve the same effect by inserting a pair of symbols indicating when the sustain pedal controller is to be turned on (down) and when it is to be ...
Page 315
8-29 notation you can suppress the display of all pedal marks by deselecting the show pedal events option in the staff view's layout dialog box. Tablature the staff view can display guitar or bass midi tracks as tablature. You can generate and edit tablature or enter notes on either the fretboard or...
Page 316
8-30 ture for selected parts of a track, select part of a track and use the regenerate command. In the staff view layout dialog box you can choose a preset style of tab- lature by choosing from the preset popup menu, or you can deÞne your own style by clicking the deÞne button in the staff view layo...
Page 317
8-31 notation changing fretboard texture and orientation you can change fretboard texture and orientation (high string on top or bottom of neck) in the staff view layout dialog box, or by right-clicking the fretboard. 4. Type a number into the number of frets field. This determines how many frets th...
Page 318
8-32 quick tab pro audio quickly creates a tablature based on standard Þngering pat- terns. After you try the quick version, you can customize the tablature to your liking. Regenerate tab the regenerate tab command works on selected regions in a track to modify the Þngering according to the method y...
Page 319
8-33 notation entering notes from the tab staff you can enter notes or chords directly from the tab staff. To regenerate tab... 1. In the staff view, use the select tool to drag a rectangle around the notes or tab numbers you want to change. 2. In the staff view toolbar, click the dropdown arrow on ...
Page 320
8-34 single note editing from the tab staff pro audio enables you to edit single notes from the tab staff in several ways: ¥ with the draw tool selected, drag fret numbers up or down. When you reach the desired fret number, release the mouse. ¥ with the draw tool selected, move a note to a different...
Page 321: Working With Percussion
8-35 notation editing notes and chords from the fretboard you can transpose single notes or chords from the fretboard. Working with percussion the staff view can display percussion tracks on a Þve-line percussion staff or on a single percussion line. The staff usually displays notes for a drum set o...
Page 322
8-36 instrument; mapping lets you display any instrument in any position on the staff, regardless of the underlying midi note value). You can saveinstrument; mapping lets you display any instrument in any position on the staff, regardless of the underlying midi note value). You can save your setting...
Page 323
8-37 notation if you want to change a percussion staff to a percussion line or vice versa, or if you want to change another type of staff to a percussion staff, you can do so in the staff view layout dialog box. If you change a trackÕs clef to a non-percussion clef, the percussion notation settings ...
Page 324
8-38 ghost strokes in percussion notation, parentheses around a note mean that it is a ghost stroke, played very lightly and barely heard. Pro audio supports ghost strokes by displaying parentheses around any percussion note event with velocity less than 32 (a Þxed, arbitrary threshold). If necessar...
Page 325: Printing
8-39 notation printing the staff view provides printing support of standard musical notation in nine staff sizes. The staff view prints general project information from the file info dialog box (see Òlabeling your projectsÓ on page 4-34) at the beginning of the score, including the song's title (or ...
Page 326: The Meter/key View
8-40 the meter/key view the meter/key view lets you enter meter and key changes at measure boundaries. Meter and key changes affect all tracks. What is meter? The meterÑalso known as the time signatureÑdescribes how to divide time into rhythmic pulses. When you set the meter, you are specifying the ...
Page 327
8-41 notation internally, pro audio stores times as ÒrawÓ ticks or clock pulses. The timebaseÑthe number of pulses per quarter note (ppq)Ñis adjustable, from 48 to 480 ppq. If you are using a timebase of 120 ppq and the song Þle is in 4/4 time, then a whole measure equals 480 ticks. See Òsetting the...
Page 328
8-42 opening the meter/key view to open the meter/key view, click or choose view-meter/key. The meter/key view displays a list of meter/key changes in the project. There is always an entry for measure 1, because there must always be a meter and key signature for the song. The default meter is 4/4 an...
Page 329
8-43 notation to add a meter/key change... 1. Open the meter/key view. 2. Click add , or choose insert-meter/key change , to open the meter/key signature dialog box. 3. Enter information about the new meter/key change. 4. Click ok. Pro audio inserts the meter/key change into the project. The meter/ ...
Page 330: Working With Lyrics
8-44 working with lyrics pro audio lets you create, edit, and display lyrics, the words and syllables associated with notes in a track. Lyrics can be the words to a song, the text of a vocal passage, a narration to be read along with the music, cues of some type, or text totally unrelated to the mus...
Page 331
8-45 notation adding and editing lyrics in the staff view the staff view displays lyrics below their associated track. If the track is split into treble/bass staves, lyrics are aligned with notes in both staves, but are displayed below the treble staff. When a lyric word or syllable spans multiple n...
Page 332
8-46 opening the lyrics view there are three ways to open the lyrics view: ¥ in the track view, select the track whose lyrics you want to see, then click ¥ in the track view, select the track whose lyrics you want to see, then choose view-lyrics ¥ right-click a clip in the clips pane and choose lyri...
Page 333
8-47 notation display will show only a series of hyphens (one for each note in the track). If you enter more syllables than there are notes in the track, pro audio assigns the extra lyrics times at quarter note intervals. To edit lyrics in the lyrics view editing in the lyrics view follows standard ...
Page 334
8-48.
Page 335
9 mixing & effects mixing and effects patching this chapter describes the console view, a live digital mixer that gives you full track-by-track control over recording and playback of your project. Using the console view, you can: ¥ set track parameters such as port, channel, bank, patch, and source ...
Page 336: The Console View
9-2 the console view the console view contains all the controls you need to mix your project. To open the console view click the console view button or choose view-console. Sound controls in the console view are grouped in modules. There are four types of modules: module type... What you can do... M...
Page 337
9-3 mixing & effects one module is always outlined with a broken line. This corresponds to the track with the focus in the track view. You can change the focus by clicking to the right of the moduleÕs volume fader. The console view contains several different types of controls. HereÕs how they are us...
Page 338
9-4 volume and pan faders also have snap-to positions; double-click a faderÕs knob to return the fader to its snap-to value. The controls and effects patch points all have tool tips associated with them. To see a description of a particular control or effect, simply rest the cursor over the item for...
Page 339
9-5 mixing & effects second, pro audio lets you choose two modes of operation for the stereo pan/balance controls: third, pro audio offers two tapering options for how midi volume and velocity are combined to produce actual gain values. With either option, the actual effective gain on an audio track...
Page 340
9-6 to choose the modules that are displayed… 1. Click the module manager button to open the module manager dialog box. 2. In the module list, check those modules you would like displayed in the console view, and uncheck the rest. You can use shift- click, control-click, or the quick select buttons ...
Page 341
9-7 mixing & effects to change a meter’s range… 1. Right-click on the meter and choose a new range. To change the number of aux busses... 1. Choose options-audio and click the general tab. 2. Enter the desired number of aux busses in the number of aux busses box. 3. Click ok. The next time you start...
Page 342: Mixing Midi
9-8 mixing midi each midi track in your project is assigned a strip in the console view. A midi strip looks like this: the chorus, reverb, pan, and volume controls work by sending controller messages to your midi device. As you move the knobs and faders for these controls, the controller value is sh...
Page 343
9-9 mixing & effects output port (note that not all midi devices support chorus and reverb controller messages). You can control the mixing and playback of a midi track as follows: to do this... Do this... Add a real-time midi effect to the track right-click in the effects patch point and select an ...
Page 344
9-10 when moving the volume fader, the value box in the toolbar displays the level from a scale of 0 (minimum) to 127 (maximum). When you move the pan slider, the value box displays the pan value on a scale that ranges from 0 (hard left) to 64 (center) to 127 (hard right). Routing and mixing digital...
Page 345
9-11 mixing & effects this is shown in the picture below: any audio track can be tapped, before or after the track volume control, and sent to one or more aux busses. An aux bus can tap any number of audio tracks. Each trackÕs data passes through the trackÕs send level knob on its way to the aux bus...
Page 346
9-12 the audio in each aux bus passes through the send level and pan controls, is processed by any real-time effects you have patched, sent through the return level and pan controls, and then sent to the designated main output, in stereo. This is shown in the picture below: at each main output, all ...
Page 347
9-13 mixing & effects audio track modules you control the mixing and playback of an audio track as follows: when moving the volume fader and aux send level knobs, the value box in the toolbar displays the value in db (decibels). A value of 0 db indicates full signal strength; negative values indicat...
Page 348
9-14 you control the aux bus as follows: as with audio strips, the value box in the toolbar displays the send and return levels in decibels and the send and return balance values on a scale of 0 to 127. To do this... Do this... Send audio data from an audio track to the aux bus in the audio track’s ...
Page 349
9-15 mixing & effects audio main output modules one module in the console view is dedicated to each audio output port. The number of main modules you will see depends upon the number and type of audio outputs in your computer. Some sound cards have multiple audio outputs; each stereo output will hav...
Page 350: Using Real-Time Effects
9-16 using real-time effects in chapter 6, you learned how to use pro audioÕs plug-in midi effects to modify midi data, and in chapter 7, you learned how to use pro audioÕs plug-in audio effects to modify digital audio data. In the console view, you can use plug-in effects nondestructively, in real ...
Page 351
9-17 mixing & effects the tools-mixdown audio-export to file(s), allows you to apply real- time effects when you export, so you do not need to apply your effects destructively or use the mixdown audio-bounce to track(s) command to prepare the tracks beforehand. For information about mixdown audio, s...
Page 352
9-18 applying audio effects from the console view you can destructively apply audio effects for one or more tracks. When you are pleased with the audio effects you have patched into a track, you can apply the effects to the track. Applying effects to a track saves resources, allowing you to include ...
Page 353: Using Control Groups
9-19 mixing & effects cpu usage of audio effects the number of real-time audio effects that your computer can handle depends on the number of audio tracks in your project, the number and type of effects you want to apply, and the type and speed of your cpu. Certain effects are more cpu-intensive tha...
Page 354
9-20 absolute the range of motion in all controls in the group is identical. When you move one control in the group, all other controls in the group move the same amount in the same direction. The controls do not necessarily need to start at the same level. Here are two examples: the first control i...
Page 355
9-21 mixing & effects relative the range of motion for controls in the group is not the same. All controls in the group have the same value at one pointÑthe lowest level for send, return, and volume levels, and zero for pan controls. Here are two examples: custom sometimes you want to deÞne a more c...
Page 356
9-22 when you have deÞned a custom group, you can adjust the starting and ending position of each control using the group settings dialog box or using pop-up menus on the controls in the group. To add a control to a group... 1. Right-click on the control. 2. Choose a group from the group submenu. Pr...
Page 357: Using Remote Control
9-23 mixing & effects using remote control pro audio lets you use a midi device to remotely control knobs, buttons, and sliders in the console view. For example, you can: ¥ use a key on your keyboard to temporarily mute a track ¥ work the send level in an aux bus with your pitch bend wheel ¥ set the...
Page 358
9-24 the type of midi message used to work a control is selected in the remote control dialog box. The options are as follows: message option... Message effect on buttons... Message effect on sliders and knobs... None no remote control no remote control note on the button state is toggled the slider...
Page 359: Recording Automation Data
9-25 mixing & effects recording automation data you can move the knobs and faders in the console view while playing back a project to adjust the playback levels and panning. In addition, you can record changes that you make to these controls so that the changes become a part of your project. Recordi...
Page 360
9-26 you can re-record moves again and again until youÕve got the movement exactly how you want it. You can also edit automation data using the controllers pane in the piano roll view. Automation data for an individual track is saved as a series of controller events on the corresponding track. Autom...
Page 361
9-27 mixing & effects mixing down and distributing audio to record a snapshot while playback is in progress... 1. Make sure the button in the console view toolbar is not pressed so that update is disabled. 2. Change the now time to a few bars or seconds before the time you wish to take the snapshot....
Page 362
9-28 the mixdown audio-bounce to track(s) command lets you combine one or more audio tracks into a submix. A submix can be a mono track, a stereo track or two mono tracks (one for the right stereo channel and one for the left) that contain the mixture of the original tracks, preserving the volume, p...
Page 363
9-29 mixing & effects preparing audio for distribution you can use pro audio to prepare audio Þles, or audio/video Þles for distribution via the world wide web or other electronic means. Four formats are supported: to mix down audio tracks... 1. Set all volume, pan, effects, and automation settings ...
Page 364
9-30 if your audio hardware is conÞgured for stereo playback, wave Þles are created in stereo; if your audio hardware is conÞgured for monophonic playback, the wave Þle is created in mono. To export audio to realaudio format 1. Make sure all the tracks you want to export are unmuted and unarchived. ...
Page 365
9-31 mixing & effects if your project contains audio data, the realaudio settings dialog box lets you deÞne the settings for the realaudio data, as follows: you may choose several formats if you wish. The realaudio 2.0 formats are good for backwards compatibility with older players and for 14.4 kb c...
Page 366
9-32 to export audio to wave file format 1. Make sure all the tracks you want to export are unmuted and unarchived. 2. Make a time selection, if necessary. If any tracks use real-time effects such as reverb or delay, select your whole project plus an extra measure or two at the end so you won’t cut ...
Page 367
9-33 mixing & effects to export a project in windows media format 1. Make sure all the tracks you want to export are unmuted and unarchived. 2. Make a time selection, if necessary. If any tracks use real-time effects such as reverb or delay, select your whole project plus an extra measure or two at ...
Page 368
9-34 to export a project in mp3 format 1. Make sure all the tracks you want to export are unmuted and unarchived. 2. Make a time selection, if necessary. If any tracks use real-time effects such as reverb or delay, select your whole project plus an extra measure or two at the end so you won’t cut of...
Page 369
10 instruments using instrument definitions instrument deÞnitions are a powerful feature of pro audio that gives you greater access to the features and capabilities of your midi instruments. An instrument deÞnition is a Þle that contains information about the banks, patches, controllers, and other f...
Page 370: Assigning Instruments
10-2 assigning instruments pro audio lets you assign a midi instrument deÞnition to each available midi port and channel. The assignments you make determine the midi bank names, patch names, note names, and controller names that you see during your pro audio session. Suppose that you have a roland g...
Page 371
10-3 instruments to assign instruments to midi ports and channels… 1. Choose options-instruments to display the assign instruments dialog box. 2. Select one or more midi ports and channels from the port/ channel list (use shift-click and ctrl-click to select multiple ports and channels). 3. Choose t...
Page 372
10-4 importing instrument definitions when you install pro audio, a few common instrument deÞnitions are already set up for you and ready to use. Pro audio also includes several hundred additional instrument deÞnitions that you can import. These instrument deÞnitions are stored in Þles, organized la...
Page 373
10-5 instruments creating instrument definitions pro audio lets you create and edit instrument deÞnitions. To create an instrument deÞnition, you must answer these types of questions: ¥ what are the names of the patches in each bank? ¥ which note names should be used for each patch? ¥ what are the n...
Page 374
10-6 you expand or collapse the folders and lists in each tree by clicking on the + or Ð key shown to the left of each item. You can also right-click on an item and choose expand or collapse from the menu, or double-click on an item to expand or collapse it. To deÞne an instrument, you drag resource...
Page 375
10-7 instruments to create a new instrument… 1. Right-click on the word instruments at the top of the instrument tree, and choose add instrument from the menu. 2. Type a name for the new instrument and press enter. The new instrument is provided with default settings for all of its characteristics. ...
Page 376
10-8 creating lists you can create and edit the various lists that make up each instrument deÞnition. Patch name, note name, and controller name lists can contain up to 128 entries, numbered 0 through 127. Rpn and nrpn name lists can contain up to 16,384 entries, numbered 0 through 16,383. To manage...
Page 377
10-9 instruments copying name lists you can easily create new lists that are similar to other lists. For example, suppose you want to create a new patch name list called newlist that is almost identical to the general midi patch list, but with one or two small changes. HereÕs how you proceed: ¥ crea...
Page 378
10-10 the bank select method you choose affects the bank numbers that you assign to each patch list, as described in the following section. HereÕs how you compute the bank numbers: here is an example of the normal bank select method. According to the documentation for the roland jv-1080 synthesizer,...
Page 379
10-11 instruments how to compute the bank numbers to which each patch name list is assigned. Each bank can also be assigned a special drum ßag, which indicates that all patches in that bank contain drum sounds. If you set this ßag, the piano roll view will display drum notes as diamonds, and the sta...
Page 380
10-12 assigning note names each patch may have a list of up to 128 names for notes. Usually, note names are labels for percussion instruments. For example, the pitch c3 may really be Òkick drum,Ó and d3 may be Òsnare.Ó because a drum machine may provide different drum kits for each patch, pro audio ...
Page 381
10-13 instruments to change the note names for a patch… 1. Drag a note name list from the names tree onto the note names for patches folder. 2. Enter a patch number, or enter –1 to indicate that this list of note names should be used as the default. 3. Pro audio displays the updated patch and note n...
Page 382
10-14 assigning controller, rpn, and nrpn names pro audio lets each instrument have its own lists of controller names, rpn names, and nrpn names. There is always exactly one list of each type per instrument. To see the controller, rpn, and nrpn name lists… 1. Expand the instrument definition by clic...
Page 383
11 studiow are working with studioware studioware panels are software interfaces to external midi devices such as samplers, keyboards, automatable mixers, and effects units. These interfaces allow you to manipulate the controls on any external midi device from graphical controls on your screen. The ...
Page 384: Studioware Panels
11-2 studioware panels pro audio comes with a variety of studioware panels. Some are designed to control a speciÞc external midi device, while others are useful with a variety of devices. Here is a listing of some of the panels that are included with pro audio: panel name... What it’s for... Art sqx...
Page 385
11-3 studiow are you can also create a basic studioware panel that contains a standard set of controls for selected tracks in a project. This panel will provide functionality similar to that provided by the console view. When you open or create a studioware panel, it is conÞgured to be part of the c...
Page 386: Using Panels
11-4 using panels every studioware panel is made up of a collection of controls and other information displays. The controls are software representations of the knobs, buttons, and sliders on an external midi device. By moving the controls on the screen, you adjust the controls on the external midi ...
Page 387
11-5 studiow are there are a variety of ways to adjust the values of buttons, sliders, and knobs: to change the value of a knob or slider using the keyboard, you must Þrst select the control: ¥ to select a control that has a numeric value display or label, click on the value or the label. ¥ to selec...
Page 388
11-6 grouping controls pro audio lets you create groups of studioware controls. When several controls are in a single group, you can move a single control and have the remaining controls in the group adjust automatically. This is useful for many different mixing and crossfade applications. When you ...
Page 389
11-7 studiow are the minimum and maximum values of the faders look like this: to create a group of controls... 1. Select any control by clicking on it with the mouse. 2. Hold down the ctrl key and click on one or more additional controls. Pro audio creates a group from the selected controls. To remo...
Page 390
11-8 to set faders that are always the same distance apart, set the ranges something like this: to set faders to move over different ranges of values, set them something like this: recording control movements you can move the controls in a studioware panel while playing back a song to adjust the lev...
Page 391
11-9 studiow are there are two general approaches to recording control movements, as indicated in the following table: the Þrst approach is useful, for example, when your project contains a variety of distinct sections and you want to make a sudden change in one or more settings between the sections...
Page 392
11-10 most studioware panels are designed to both send and receive midi data. This means two things: ¥ if you move the controls on your external midi device, the studioware panel will be notiÞed of the changes ¥ when you play back a project containing automation data, the studioware panel is notiÞed...
Page 393
11-11 studiow are 34. For more information on the event list view, see Òthe event list viewÓ on page 6-42. To record a snapshot while playback is stopped... 1. Set the now time to the point in the project where you want the settings to take effect. 2. Move the controls to the settings you desire. 3....
Page 394
11-12 control settings the controls in a studioware panel are designed to send and receive various types of midi information. This information can be transmitted to two possible destinations: ¥ a speciÞc track in your project ¥ a midi output port when you want to record the movements of controls wit...
Page 395
11-13 studiow are studioware panel drawing speed some studioware panels use bitmap graphics to enhance their appearance. These graphics can slow down the speed with which a panel is displayed on some slower pcs. You can turn off these bitmap graphics by adding this line to the [wincake] section of t...
Page 396
11-14 ¥ change the settings for each widget so that it controls the external midi device or displays the information you want ¥ customize the appearance of the panel each of these steps is discussed in the sections that follow. Note that widgets have a large number of properties, some of which deter...
Page 397
11-15 studiow are to start designing a panel... 1. Create a new project using the file-new command. 2. Choose file-new to display the new dialog box. 3. Choose studioware panel from the list and click ok. Pro audio creates a standard studioware panel. 4. Stretch the panel window to the right until t...
Page 398
11-16 adding and arranging widgets you add widgets to a studioware panel by choosing one of the design tools in the studioware toolbar and then clicking where you want to add the widget. To arrange or edit widgets, you must select them using the select tool . You select a widget by clicking on it wi...
Page 399
11-17 studiow are the cut, copy, paste, and delete commands all work in the normal fashion. You can use these commands to cut or copy widgets within a single panel or between panels. When you paste widgets into a panel, they will appear at their original locations. The widgets that are pasted are au...
Page 400
11-18 using clusters the cluster is a special type of widget that you can use to organize other widgets. The cluster widget is very useful for organizing large, complicated panels. When you place widgets in a cluster, you can: ¥ move all the widgets in a cluster just by moving the cluster widget ¥ c...
Page 401
11-19 studiow are a cluster widget is simply a rectangular container region. When you place any other type of widget so that its upper-left corner is inside the cluster, that widget becomes a part of the cluster. You can either place a new widget inside the cluster or move an existing widget into th...
Page 402
11-20 functional settings every widget can be programmed to take certain actions when it is manipulated by the panel user. Widgets can send midi messages to a port, record midi events in a track, change the value of variables (called aliases) that control the operation of the panel, and so on. These...
Page 403
11-21 studiow are to change a widget’s functional settings... 1. Make sure the button is pressed so you are in design mode. 2. Double-click on a widget, or right-click and choose properties from the menu. 3. Choose either the automate in track or direct to port option. 4. Choose the track or port nu...
Page 404
11-22 primary action this section of the widget properties selects the type of data that the widget will generate. Widgets can send the following types of midi information to a track or port: ¥ notes ¥ controllers ¥ patch changes ¥ pitch wheel events ¥ key aftertouch ¥ channel aftertouch ¥ registere...
Page 405
11-23 studiow are controller the widget sends a midi controller number and value. The list of available controllers is determined partly by the instrument deÞnitions in the assign instruments dialog box, which you access by choosing options-instruments. Patch change the widget sends bank and patch c...
Page 406
11-24 key aftertouch the widget sends aftertouch messages for individual notes. This may be useful if your synthesizer receives (but doesnÕt send) midi key aftertouch, as is true of synthesizer modules. Key deÞnes which note the message will be sent to. Pressure sets the amount of aftertouch. Channe...
Page 407
11-25 studiow are sysx bank the widget sends system exclusive messages. The studioware view allows you to deÞne sysx messages that tell pro audio how to package data values into a sysx message for transmission or recording and also how to extract data values from an incoming or previously recorded s...
Page 408
11-26 this is similar to the syntax used by pro audio for deÞning dump request macros, where a combination of literal hex bytes and symbolic names specify how a particular sysx message should be generated. You can enter a byte of a message as either a hexadecimal or decimal constant or as a symbolic...
Page 409
11-27 studiow are cal program the widget runs a short cal program (which you enter into the program Þeld) each time the widget is manipulated. The cal program can be one of two things: ¥ a stand-alone cal program, which you type directly into the dialog box or copy and paste from the cal view ¥ a sh...
Page 410
11-28 alias the alias is a user-deÞned symbolic name that expresses the widgetÕs value. By using the same alias for several widgets, you can link the operation of these widgets. For example, if a slider and a meter share the same alias, adjustments that are made to the slider will change the current...
Page 411
11-29 studiow are the x, y, width, and height parameters provide another way to position widgets inside a panel. Note that the show label and show value options use up some of the space allocated to a widget. This means that enabling one or both of these options on an existing widget will shrink the...
Page 412
11-30 as indicated in the above table, some widget bitmaps are drawn with a transparent background. For these bitmaps, any pixels that match the upper-left most pixel in the image will be transparent, showing through to whatever is behind them. You can use this effect to design widget artwork that i...
Page 413: Advanced Panel Design
11-31 studiow are advanced panel design studioware allows you to create very sophisticated and complex panels. This section covers advanced panel design capabilities. Alias formulas you can use aliases, or formulas using aliases, to manage interactions between the widgets in a panel. You can enter f...
Page 414
11-32 calculated expression: enter a computational expression that refers to other aliases, such as vocallevel + 18. This allows one widget to take on a value that is determined by (but not necessarily identical to) the value of one or more other widgets. Expressions of this form are not inverted, s...
Page 415
11-33 studiow are some examples of operator usage are: != inequality less than less than or equal to > greater than >= greater than or equal to formula... Example... X = y alias x is assigned the value of alias y whenever the value of alias y changes x = y + 2 * z alias x is assigned the value of al...
Page 416
11-34 using aliases for track and port numbers by using aliases for track or port numbers, you can create a panel in which one widget determines the destination for midi information sent by another widget. For example, you could create a panel like this one: in this panel, the knob is used to change...
Page 417
11-35 studiow are ¥ make sure you follow the rules for naming aliases ¥ if a cluster has a shadow on the right and bottom edges, it is a pop- up cluster that will be hidden when the alias drops below the minimum value also, note that when you set the alias and minimum value for a cluster, the cluste...
Page 418
11-36 widget tips and tricks when you place an image widget into a panel, it may seem tricky to get the widget size exactly the way youÕd like. The best way to resolve this is to use any bitmap drawing program to Þnd out the exact height and width of the image in pixels. Then, after you create the i...
Page 419: Tutorial—Creating A Panel
11-37 studiow are you can display the actual value of an alias in almost any format, by using a text widget. To do so, you create a string for the label Þeld of the text widget that contains some special characters, as listed in the following table: the format strings are similar to those deÞned in ...
Page 420
11-38 starting out first, letÕs create a standard panel and then remove all of its widgets. Adding a pop-up cluster next, letÕs place one of each type of widget in our new panel. WeÕll start with a cluster widget, and then place other widgets insider the cluster. 1. With the one general midi assigne...
Page 421
11-39 studiow are now, letÕs name the cluster and set up an alias, so we can hide and show the cluster when we want to. Now, letÕs add a button widget that will control the display of the hidden cluster. We want to place this button outside the cluster we just created. 1. Right-click on the cluster,...
Page 422
11-40 controlling midi sustain and modulation now, letÕs add a button inside our cluster that will turn on the sustain of the midi track. Now letÕs add a knob to control midi modulation. 1. Click in the studioware toolbar to select the button tool. 2. Click inside the cluster. 3. Right-click on the ...
Page 423
11-41 studiow are now that we have a knob to control the modulation, letÕs create a more visual representation of the modulation level by adding a meter to the panel. The meter widget shows the value that is represented by its alias. Meters can be resized so that they are vertical or horizontal, dep...
Page 424
11-42 volume control and indicators now letÕs add one more control that changes the volume of the track. WeÕll also add some led indicators that light up at minimum and maximum volume. Now for the leds: 1. Click to leave design mode. 2. Adjust the knob. The value indicated by the meter should track ...
Page 425
11-43 studiow are now, follow these similar steps for the minimum volume led: adding labels and images a text widget can display labels or numeric values. LetÕs add a couple of text widgets, one that serves as your own personal copyright notice, and one that displays the volume level in a formatted ...
Page 426
11-44 now for the formatted string: finally, letÕs insert a bitmap image into our panel to Þnish it off. 1. Click in the studioware toolbar to select the text tool. 2. Click anywhere in the panel. 3. Right-click on the text widget and choose properties . 4. Choose volume from the alias list. 5. Ente...
Page 427
12 la youts & templates using layouts and templates a layout is the current arrangement of all the views that pertain to a particular project. The layout of each project is stored automatically as part of every project Þle. In addition, you can save the current layout or load any saved layout and ap...
Page 428: Layouts
12-2 note that toolbars are not part of a Þle layout or template. The toolbar arrangement you choose is stored automatically from session to session. Layouts the layout of the views that are displayed for a project is stored automatically in the project Þle when you save the project. By default, the...
Page 429
12-3 la youts & templates to create or save a layout… 1. Arrange the views for the current project the way you want. 2. Choose view-layouts to display the window layouts dialog box. 3. Click add to display the new global layout dialog box. 4. Enter a name for the layout, and click ok. The layout is ...
Page 430: Templates
12-4 templates template Þles make it easy to create new projects with certain predeÞned settings. To create a template Þle, create a new project Þle and arrange the project settings the way you want, then save the project as a template Þle. Template Þles have a Þle extension of .Tpl. When you create...
Page 431
12-5 la youts & templates ¥ meter and key settings ¥ clock and synchronization information ¥ midi data ¥ midi in/out/thru settings ¥ midi metronome settings ¥ selection start and end times ¥ record mode and punch-in times the following parameters are saved globally and are not stored in template or ...
Page 432
12-6 template example: three midi instruments suppose that your system has only a single midi port but you own three different synthesizers: ¥ one synthesizer set to receive on channels 1 through 8 ¥ a general midi synthesizer module set to receive data on all 16 channels ¥ a drum machine set to rec...
Page 433
13 audio p erformance improving audio performance there are lots of different sound cards on the market. Pro audio analyzes your sound card(s) the Þrst time you run pro audio, and conÞgures itself to work well with most popular cards. However, you may be able to get better audio performance by choos...
Page 434: Audio System Configuration
13-2 audio system configuration sound cards differ in the precision of their timing, whether they can record and play back simultaneously, what size audio buffers they require, and other characteristics. Pro audio has a utility called the wave device proÞler that can usually automatically detect the...
Page 435
13-3 audio p erformance ignored, and vice versa. Some newer sound cards report themselves as having sample-accurate wave out position reporting. If pro audio detects this capability, the wave out position option is enabled automatically. You can always override this setting and force pro audio to us...
Page 436
13-4 enabling and disabling audio devices your computer may have several installed devices like fax modems and software synthesizers that windows recognizes as sound cards containing audio drivers. You do not want to use these devices for audio input or output. If they are listed as audio drivers in...
Page 437
13-5 audio p erformance playback rate on each card. These differences may lead to slight synchronization problems if you use one card for recording and a different one for playback. Therefore, you should choose your highest quality sound card for both record and playback timing. Note that while some...
Page 438
13-6 general tab options: option. . . How to use it. . . Playback timing master and record timing master these two options determine which sound cards control timing for the song, if you’re using multiple wave drivers for playback or recording. Note that if you’ve got two wave drivers, but all audio...
Page 439
13-7 audio p erformance sampling rate the sampling rate drop-down list allows you to specify the audio sampling rate for a new .Wrk file. Once any audio has been added to a .Wrk file—either by recording audio or by using insert-wave file—you can’t change the sampling rate for that .Wrk file. Therefo...
Page 440
13-8 drivers tab options: latency slider the latency slider enables you to set mixing latency manually, overriding the value set by the wave device profiler. To use the lowest values your sound card is capable of, make sure wavepipe acceleration is enabled in the advanced tab of the directshow audio...
Page 441
13-9 audio p erformance advanced tab options: option. . . How to use it. . . Data directory this item specifies the directory in which cakewalk stores audio data files.You may want to keep your audio files in a separate data directory or on a different drive; just be sure to enter that data director...
Page 442
13-10 i/o buffer size this value determines the buffer characteristics for transfers to and from the disk. Changing this value does not affect audio latency, but will affect the disk throughput for audio tracks. The default setting is 64. If you have audio problems, try 32 and then 16. If audio prob...
Page 443
13-11 audio p erformance device profiles tab options: unpack >16 bit audio checking this option can improve performance on specific 24-bit audio hardware systems (for example, the sonorus studi/o card). By choosing this option, you are instructing cakewalk to skip its expensive 24-bit data packing o...
Page 444
13-12 configuring pro audio for 18-, 20-, and 24-bit operation when Þrst installed, pro audio is conÞgured to create 16-bit audio sampled at 44.1khz. Nearly all sound cards support this kind of audio data. A growing number of "professional" cards are capable of recording and playing back audio at hi...
Page 445
13-13 audio p erformance ¥ check your dma buffer sizes when operating at 24 bits. ¥ read the soundcards.Pdf document located in the onlinedoc folder of your product cd ¥ keep in mind that using 24-bit depth and/or a high sampling rate needs a lot of disk space and a fast cpu. For more information ab...
Page 446
13-14 pro audio stores audio data separately from the rest of your projects, in Þles placed into a special folder called the wavedata folder. These audio Þles are in the same format as regular wave Þles. Pro audio stores audio data in a way that conserves disk space. If you copy an audio event from ...
Page 447
13-15 audio p erformance ¥ you can record and edit digital audio without having to enter Þle names for every piece of audio ¥ you use much less disk space than would otherwise be required ¥ you donÕt have to manually organize and keep track of all your audio Þles pro audio includes several features ...
Page 448
13-16 deleting unused audio files the clean audio disk command is used to delete digital audio Þles in the wavedata folder that are no longer used by any of your projects. You should use this command from time to time to free up disk space. This command searches all of your hard disks for project Þl...
Page 449
13-17 audio p erformance compacting audio files the compact audio data command places all digital audio used in the current project into a single digital audio Þle. This can improve the efÞciency of playback, particularly if you have performed lots of audio editing. Individual audio events in the pr...
Page 450
13-18 backing up projects with digital audio a bundle Þle is a single Þle that contains all the informationÑexcept videoÑused in a project. A bundle Þle includes everything that is stored in a normal project Þle, plus all the digital audio that is used in the project. Use a bundle Þle when you want ...
Page 451
13-19 audio p erformance the following are descriptions of both Þle types: imported audio files by default, pro audio will make a copy of any audio data imported via the insert-wave file command and place the imported audio into the wavedata folder. You can disable this option if, for example, you w...
Page 452: Audio
13-20 automatic handling of imported Þles is enabled by default. Do not disable this option unless you are prepared to manage the audio Þles individually. Improving performance with digital audio when a project contains many tracks of digital audio or when many real- time effects are in use, your co...
Page 453
13-21 audio p erformance exit other programs the more programs you have open, the more cpu cycles you are taking away from your project. Exit any programs unnecessary to the task at hand. Refrain from other activity during playback if you open and close windows or do lots of editing while playback i...
Page 454
13-22 for more information, consult the online help topic, Òdropouts and other audio problems.Ó mixing latency pro audio has a slider in the directshow audiodialog box, on the general tab, to set mixing latency. Mixing latency is the amount of time pro audio allocates to prepare a buffer full of aud...
Page 455
13-23 audio p erformance lower latency settings add processing time because of the need to reÞll the smaller data buffers more often. To use mixing latency settings below 100 msec., you should usually enable wavepipeª acceleration in the directshow audio dialog box, in the advanced tab. You may need...
Page 456
13-24 ¥ the disk meter measures how much of the available time pro audio is using to perform input/output functions on your hard disk. The size of your setupÕs i/o buffer (listed in the directshow audio dialog box, in the advanced tab) determines how much time is allowed to perform disk operations a...
Page 457
14 sysx data using system exclusive data pro audioÕs system exclusive (sysx) librarian provides you with 256 banks in which to hold midi system exclusive messages. A bank is a storage area plus some associated parameters such as a destination port and an optional description. Each bank can hold any ...
Page 458: What Is System Exclusive?
14-2 what is system exclusive? System exclusive data is midiÕs way of letting each synthesizer manufacturer transmit private data about its products. A system exclusive message has a manufacturer id; the rest of the message is completely proprietary and varies for each manufacturer, even for each of...
Page 459
14-3 sysx data using the system exclusive view the system exclusive window has a list box for the 256 banks, plus buttons. Most of the buttons affect whatever bank you have selected in the list. Certain buttons will be disabled if the selected bank is empty. To open the system exclusive view, choose...
Page 460
14-4 2. Click to open the receive system exclusive dialog box. The list labeled request contains a list of dump request macros (drms). Each drm has a name that describes the synthesizer and type of data that it asks the synthesizer to send. Select your choice and click ok. The first item in the list...
Page 461
14-5 sysx data 3. The drm may prompt you for additional information, which you should supply. • patch number: drms that are written to request an individual patch or configuration give you this prompt, so you can specify the one you want to have dumped. • channel/unit number: most synthesizers have ...
Page 462
14-6 more about dump request macros drms are deÞned in your cakewalk . Ini Þle in the [dump request macros] section. You may add your own drms or modify the ones that we have provided. Use the windows notepad to edit the Þle. Comments in the cakewalk . Ini Þle itself describe how to write drms. The ...
Page 463
14-7 sysx data edit bytes although pro audio is designed mainly to store system exclusive data for you, you can edit the bytes of shorter messages in hex format (many of the more popular synthesizers have special patch-editing programs available that let you edit data using sliders and other tools r...
Page 464: Exclusive Messages
14-8 transmitting banks during playback pro audio has a special meta-event, sysx bank, that lets you play a system exclusive bank at a speciÞed time in your song. You can use a sysx meta-event to send any of the 256 available sysx banks at any time in a sequence. To do this, you have to insert a new...
Page 465: Banks
14-9 sysx data saving midi files containing sysx banks if a midi Þle has system exclusive auto-send banks, then pro audio saves these in a midi Þle as system exclusive messages at the very beginning of the song (1:1:0). If the song has other midi data starting at 1:1:0Ñfor example, notesÑit wonÕt be...
Page 466: Troubleshooting
14-10 the options described below occur in the [options] section of the ttsseq . Ini Þle. You can edit this Þle using the windows notepad. Every time you add or change one or more lines in ttsseq.Ini, you must restart pro audio in order for the change to take effect. Sysxsenddelaymsecs=n this settin...
Page 467
14-11 sysx data doesn't include a drm for my instrument if there is no dump request macro (drm) for your instrument, you should select you start dump on instrument, then initiate the sysx dump from the instrument. Once the bytes received count stops increasing, click done to tell pro audio to stop r...
Page 468
14-12 this gives the device extra time to process each system exclusive message. Roland equipment some roland equipmentÑnotably, the gr-1 and gr-50 guitar synthesizersÑhave problems receiving sysx packets in fast succession. You must use the setting sysxdelayafterf7 = 1 with these devices. Ensoniq i...
Page 469
15 synchronization synchronizing your gear your computer is often used with other equipment: sound cards, midi equipment, and digital tape decks or other digital recording tools. All these devices can have their own built-in clocks or timing mechanisms. When several pieces of equipment are used toge...
Page 470: Synchronization Overview
15-2 synchronization overview pro audio supports several different types of synchronization, which rely on a variety of different clock sources: when you use either the internal or audio clock, pro audio can control other midi devices using midi sync. In this case, pro audio is the ÒmasterÓ device a...
Page 471: Devices
15-3 synchronization the clock source and the type of synchronization that is used are options that are stored as part of your project Þles. For example, one of your projects might be set up to use the internal clock; a second might use the audio clock and midi sync with pro audio as the master timi...
Page 472: Midi Synchronization
15-4 midi synchronization midi synchronization, or midi sync, is usually used to synchronize pro audio with drum machines, stand-alone midi hardware sequencers, and sequencers built into midi keyboards. When midi devices are synched, the master device sends messages to all other devices to start and...
Page 473
15-5 synchronization when you start playback on the master midi device, for example, it sends a start message to all slave devices, announcing that playback has started. If the slave devices are set up correctly, they receive the message and start playing back with the master device. When pro audio ...
Page 474
15-6 pro audio as the master there are several options, found in the project options dialog box, which you can use when pro audio is the midi sync master device: 4. Make sure that your midi interface is highlighted in the input ports list, and click ok. 5. Click on the sync toolbar to use the midi s...
Page 475
15-7 synchronization using midi sync with drum machines the most ßexible way to use a midi drum machine is to record the notes it generates into pro audio, then use that machine as a midi playback device. This lets you edit, cut, paste, and copy your drum parts like any other clip. You can use midi ...
Page 476: Smpte/midi Time Code
15-8 troubleshooting midi sync if you experience problems with midi sync when pro audio is the master device, verify that your external devices are conÞgured correctly to respond to midi sync. Most devices have a clock option that should be set to external or midi. If pro audio does not respond to m...
Page 477
15-9 synchronization tape stripe might start at 00:00:00:00, 01:00:00:00, or any other time. The material recorded on the tape usually starts anywhere from 10 seconds to several minutes after the start of the time code. Sometimes, the tape stripe starts at a time like 00:59:50:00, and the material s...
Page 478
15-10 for more information on frame rate time formats, see the documentation for your time code hardware. Refer to the documentation for your midi interface or external midi device for additional information about smpte/mtc. When pro audio is slaved to smpte/mtc, hereÕs how things work: ¥ when you c...
Page 479
15-11 synchronization playing digital audio under smpte/mtc sync pro audio gives you two choices for controlling audio playback when using time smpte/mtc sync: some digital sound cards (such as the frontier design wavecenter or the antex studio card) have external clock inputs. If you are using one ...
Page 480
15-12 a simple analogy makes this behavior easy to understand: synchronizing audio to smpte/mtc is a lot like trying to get even and stay neck-and-neck with another car on the freeway. If the car is ahead of you, you need to drive faster to catch up to it. If it's behind you, you have to slow until ...
Page 481
15-13 synchronization troubleshooting smpte/mtc sync the most common problems with smpte/mtc sync, and ways to correct or avoid them, are shown in the following table: problem… what to do… the tape is striped incorrectly check the tape stripe using your time code generator and, if necessary, restrip...
Page 482: Midi Machine Control
15-14 midi machine control midi machine control (mmc) is a protocol that controls an mmc- equipped remote device via midi. Pro audio lets you use mmc to start and stop playback and recording on remote midi devices such as tape decks, video recorders, and even other software packages. If you have sev...
Page 483
15-15 synchronization 4. Check the transmit mmc box. 5. Enter the id of the master timing device in the time code master’s unit id box. 6. Click ok. Mmc is now enabled. To disable midi machine control… 1. Choose options-project , and click the midi out tab. 2. Make sure the transmit mmc box is not c...
Page 484
15-16.
Page 485
16 programming programming with cal cakewalk application language (cal) is an event-processing language that you use to extend pro audio with custom editing commands. You can write your own cal program and use or edit cal programs that other people have written. You also can create cal programs by r...
Page 486
16-2 creating and running cal programs the cal view is a small notepad-like editor for creating, editing, saving, recording, and running cal programs. The cal view works like a basic text editor, allowing you to enter and edit your programs freely. The editor supports cut, copy, and paste, and you c...
Page 487: Sample Cal Files
16-3 programming sample cal files the following is a description of the sample cal programs that come with pro audio. You can use these programs as is or modify them to suit your own needs. Split note to tracks.Cal this program splits individual notes to separate tracks. It is useful if you have one...
Page 488
16-4 split channel to tracks.Cal this program splits a track by channel into 16 new tracks. This can be useful for type 0 midi Þles, which may have data recorded on many channels but only one track. Random time.Cal this program randomizes event starting times. It asks you for a number of ticks. The ...
Page 489: Writing Cal Programs
16-5 programming thin pitch wheel.Cal this works almost exactly like the previous two programs, but it thins pitch-wheel events. It asks you for the thinning factor. This program never deletes wheel events with these special values: -8192, 0, and 8191. Major chord.Cal, minor chord.Cal these two cal ...
Page 490: Recording Cal Programs
16-6 here is a sample program that illustrates how the cal language works. This sample program asks the user to enter a value and then adds that value to the velocity parameter of note events. (do) (int amt 0) (getint amt "amount to add?" -127 127) (foreachevent (if (== event.Kind note) (+= note.Vel...
Page 491
16-7 programming to record a cal program… 1. Choose file-new , select cal script from the list, and click ok. A new cal program is displayed in the cal view. 2. Click the button in the cal toolbar to start recording. 3. Choose file-open or click on the main toolbar to display the open dialog box. 4....
Page 492
16-8.
Page 493
A troubleshooting appendix a: troubleshooting if youÕre having a problem with pro audio, donÕt panic. This appendix lists some common problems and how to solve them. If you donÕt Þnd an answer here, there are two other important places to look for help: ¥ check the readme Þle that came with your sof...
Page 494
A-2 if none of these suggestions works, check our web site for additional suggestions or contact technical support. I can’t record from my midi instrument if you are unable to record music from your electronic keyboard, synthesizer, or other midi instrument, Þrst test to see if you are able to play ...
Page 495
A-3 troubleshooting if none of these suggestions works, check our web site for additional suggestions or contact technical support. When i play a file containing audio, the audio portion doesn’t play opening the song called riff funk audio and midi demo.Bun and click the play button. You should hear...
Page 496
A-4 if none of these suggestions works, check our web site for additional suggestions or contact technical support. I can’t record any audio if you are unable to record audio through your sound card, try the following suggestions: if these suggestions donÕt work, check our web site for additional su...
Page 497
A-5 troubleshooting many instruments). See the documentation for your instrument for more information. Another possibility is that you are playing back a gm (general midi)- authored midi Þle on a non-gm compatible device. How do i use pro audio to access all the sounds on my midi instrument? Pro aud...
Page 498
A-6 midi interface and echoed back to the keyboard, where it is played a second time. The best way to resolve the problem is to disable local control on the keyboard, following the instructions that came with the keyboard. This stops the keyboard from playing independently. The keys you play still p...
Page 499
A-7 troubleshooting you donÕt know where the audio data are stored, choose start-find- files or folders and search for Þles named *.Wav. For more information about the wavedata folder, see Òdigital audio data managementÓ on page 13-13. Why do i get errors from the wave profiler? Audio devices such a...
Page 500
A-8.
Page 501
B tips & tricks appendix b: tips & tricks pro audio includes literally hundreds of features that make it easy to conÞgure your work environment and get your project work done more efÞciently. This appendix lists some of the features not covered elsewhere in the manual and highlights some shortcuts a...
Page 502: Video Support
B-2 video support pro audio can load and play avi, quicktime, and mpeg video Þles. Use the insert-video file command to insert a video Þle into the current project (only one video per project is allowed). Pro audio displays the video in its own view, along with the current time, and plays it in sync...
Page 503
B-3 tips & tricks these features are described below. The play list view the play list view lets you create, edit, and save a play list (or set) of up to 128 pro audio projects. Once youÕve created the list, you can play back the entire sequence automatically. You can even program the list to pause ...
Page 504
B-4 virtual jukebox the virtual jukebox is a stand-alone program that lets you play up to 999 songs or audio Þles in sequence. Virtual jukebox lets you create play lists (.Ply Þles) containing Þles in the following formats: project (.Wrk), bundle (.Bun), play list (.Set), midi (.Mid), and wave (.Wav...
Page 505
B-5 tips & tricks editing. By default, the virtual jukebox plays all the Þles in the play list in sequence. You can modify the playback mode for all Þles at once or for each individual Þle. If your play list includes Þles that contain any midi data, you must choose a midi output device before you ca...
Page 506
B-6 to create or edit a play list… 1. To create or edit a play list, follow the directions in the table: to do this… do this… create a new play list choose file-new play list. If you made any changes to the currently open play list, you will be prompted to save the changes. Open an existing play lis...
Page 507
B-7 tips & tricks to control playback… 1. Here’s how to control playback with the play list: to do this… do this… play the play list double-click a file to start playback on that file, or click on a file in the list and click the play button. Stop playback click the stop button. Move forward or back...
Page 508: Key Bindings
B-8 key bindings key bindings let you associate pro audio commands with keys on your midi or computer keyboard. This makes it easy for you to access speciÞc features more quickly and efÞciently. From your computer keyboard, you can create a custom key binding for any of 62 key combinations: ¥ the ct...
Page 509
B-9 tips & tricks itÕs just as if you had chosen the edit-quantize command from the menu. You can choose one of two options to deÞne the shift key: ¥ midi key (typically, the very lowest or highest key on your midi keyboard) ¥ controller event (typically, one of the pedals) if you use a midi key as ...
Page 510
B-10 to create a key binding using a midi keyboard… 1. Choose options-key bindings to display the key bindings dialog box. 2. Check midi in the type of keys list. 3. Check the enable box to make sure midi key bindings are enabled. 4. If you haven’t already done so, assign a shift key by doing one of...
Page 511: Windows Taskbar Indicators
B-11 tips & tricks windows taskbar indicators when pro audio is running, youÕll normally see two indicators in your windows taskbar, right next to the clock: the midi activity monitor contains two lights that indicate midi input and output. When you play your midi keyboard, the Þrst light ßashes whe...
Page 512
B-12 undo, redo, and the undo history pro audio provides very powerful undo and redo commands that let you move forward or backward through any portion of an editing session. Every project has its own independent undo history. This means you can return to any open project and use the undo and redo c...
Page 513: Screen Colors and Wallpaper
B-13 tips & tricks to revert to an earlier version of a project, highlight the entry in the history list that represents the point to which youÕd like to return, and click ok. Pro audio performs the necessary undo or redo actions to take you to that point. Once you edit the project (for example, by ...
Page 514
B-14 erasing color used to show your erasing in the piano roll and tempo views event list note color of note events in the event list view event list keyaft color of key aftertouch events in the event list view event list control color of controller events in the event list view event list patch col...
Page 515
B-15 tips & tricks note that if you set any other screen element to the same color as window background, youÕll make that screen element invisible! Audio view pan envelope color of audio event pan envelopes in the audio view audio view volume envelope color of audio event volume envelopes in the aud...
Page 516: Instruments
B-16 music notation for nonconcert key instruments for historical reasons, certain musical instruments are traditionally notated in a transposed key rather than the actual key. For example, a normal (bb) trumpet part is written in the key one whole step higher than the actual concert key, and an eb ...
Page 517
B-17 tips & tricks sixth higher. Musicians have traditionally learned to read and refer to the notes they play using the proper transposition interval for their instrument. Pro audio supports these nonconcert instrumental keys through use of the key+ column in the track view. Simply enter or record ...
Page 518
B-18.
Page 519
C adv anced setup appendix c: advanced setup this appendix contains additional details on installing pro audio and conÞguring your equipment for use with pro audio. Step 1. Install windows 95, 98 or nt before installing pro audio, make sure that windows 95, 98 or nt is installed properly. Try some o...
Page 520
C-2 4. When setup starts, a dialog box welcomes you to the cakewalk pro audio setup. Click next to continue. 5. Setup asks you to enter your name, company (if any), and serial number. Cakewalk uses your name as the default author and copyright holder of songs. These credits appear on printed scores....
Page 521
C-3 adv anced setup audio files and disk caching by default, pro audio bypasses the windows disk cache when reading and writing digital audio Þles. You can selectively re-enable disk caching. For more information, see chapter 13, improving audio performance. Step 3. Read the readme file cakewalk pro...
Page 522
C-4 properly. Instead, use the midi driver provided with your midi interface card or sound card. Consult your cardÕs accompanying documentation to determine which driver to use and how to install and conÞgure that driver. If you plan to record and play back digital audio on a windows- compatible sou...
Page 523
C-5 adv anced setup to install a driver included with windows… windows includes drivers for most common multimedia devices. To install a driver included with windows, do the following: 1. Click the start button, and choose settings-control panel . 2. In the control panel, double-click the add new ha...
Page 524
C-6 if you need to change dma, irq, or port settings, deselect the use automatic settings checkbox and reconÞgure the driver with the correct dma, irq, and port addresses. Installing drivers in windows nt 4.0 this section gives you general steps for installing and setting up multimedia drivers under...
Page 525
C-7 adv anced setup step 5. Connect your midi equipment if you are using a midi interface (such as an mpu-401 or sound blaster midi option) with an external midi keyboard, you need to connect the equipment using midi cables. It is possible to connect your equipment in some rather complex ways that m...
Page 526
C-8 if your keyboard has a midi thru jack if your keyboard has three midi jacksÑin, out, and thruÑthen use the following diagram. If you are using a 15-pin joystick adapter cable that splits into two midi cables: ¥ connect the 15-pin jack to your computerÕs joystick port. ¥ connect the in cable to y...
Page 527
C-9 adv anced setup each midi device should be set to a unique midi channel or range of channels to avoid note-doubling. Refer to the manuals for your midi devices for information on how to set their midi channels. Your midi interface may have a thru jack as well as in and out jacks. If your master ...
Page 528
C-10 each midi device should be set to a unique midi channel or range of channels to avoid note-doubling. Refer to the manuals for your midi devices for information on how to set their midi channels. If your master keyboard now seems to double notes (they sound thicker), or if you can play only one ...
Page 529
C-11 adv anced setup electric guitar direct-in you can connect an electric guitar directly to your sound card using a 1/4Ó mono to 1/8Ó stereo adapter. The following diagram shows this setup: the 1/8Ó jack should be plugged into the sound cardÕs mic input, although plugging into the line input may a...
Page 530
C-12 if you want to connect a guitar ampliÞerÕs direct output to the sound card, you should base your setup on this example. Microphone direct-in microphones can be plugged into the sound cardÕs mic input. Some inexpensive microphones are made especially for use with sound cards and come equipped wi...
Page 531
C-13 adv anced setup mixer you can connect a mixer to the sound card with a setup of the following kind: step 8. Start pro audio when you installed pro audio, the default setup procedure added a cakewalk folder to your programs menu. Here are some other ways to start pro audio in windows: ¥ right-cl...
Page 532
C-14 ¥ select the pro audio program item or a pro audio document Þle using the my computer icon on the desktop, the windows explorer, or the find menu. All pro audio Þle types (.Wrk, .Bun, .Tpl, .Mid, .Mff) are registered with windows. See your windows documentation or on-line help for more informat...
Page 533
C-15 adv anced setup setting up the midi in and midi out devices when you start pro audio for the Þrst time, it checks your computer to Þnd all the midi input and output devices you have installed (such as sound cards and midi interfaces). However, sometimes you need to tell pro audio exactly which ...
Page 534
C-16 using midi devices after making driver changes if you later add or remove drivers using the drivers icon of the windows control panel, pro audio reacts in the following way: ¥ if you remove a control panel driver, pro audio will not use the device it belongs to the next time you run the program...
Page 535
D midi f iles appendix d: midi files the standard midi Þle format is a Þle interchange format deÞned by the midi manufacturers association (mma). The purpose of the format is to allow for the exchange of midi data between different programs. Any program that can read and write midi Þles has a common...
Page 536
D-2 speciÞcation leaves some details open to interpretation by software and hardware manufacturers. Timebases midi Þles can be expressed in any of a number of timebases (ppq resolutions). It is likely that most midi Þles you will encounter use a common timebase, such as 96 or 120. Although pro audio...
Page 537
D-3 midi f iles that every event on track 1 has a channel number of 10. When you subsequently load the midi Þle all of those track view parameters will have vanished. But the music will sound the same, because pro audio has made these changes to the events themselves. Other midi file handling notes ...
Page 538
D-4 when loading a gm Þle, each trackÕs bank, patch, volume and pan parameters are lifted from the data stream and placed in pro audioÕs track view for you to see and edit onscreen. The gm mode ensures that all patches, banks and controllers are placed at speciÞed times throughout a setup measure wh...
Page 539
D-5 midi f iles the bank to auto send. This message will not only re-initialize a general midi compatible sound module to a known state, but will also tell pro audio to generate gm setup measures for your program changes when you save the song in standard midi format. See Òvariables in the [options]...
Page 540
D-6.
Page 541: Initialization Files
E initialization f iles appendix e: initialization files many windows applications, as well as windows itself, use Þles to store information about your preferences and conÞguration. Often applications store values to these Þles when you make selections in the program using menus or dialog boxes. How...
Page 542: Initialization File Format
E-2 initialization file format initialization Þles all follow a common format. They are divided into sections whose names appear in the Þle in brackets, like this: [section name] within each section, variables are of the form: = for example, the drawplayingaudio variable belongs in the [wincake] sec...
Page 543
E-3 initialization f iles the following section lists the different variables you can change in cakewalk.Ini. Variable... Type... Default value... What it does… drawplayingaudio= 1> boolean 0 (disable) this line controls whether the audio waveform is redrawn or not when the display is scrolling duri...
Page 544
E-4 ttsseq.Ini the ttsesseq.Ini Þle can only be changed using the windows notepad. Variables in the [options] section staffviewchanseparatevoices= boolean 1 (enable) this line specifies whether or not pro audio should treat channels assigned to each note as separate voices. This is useful if you wan...
Page 545
E-5 initialization f iles generalmidismfs= boolean 1 (enable) this line controls whether or not pro audio creates a general midi setup measure when loading standard midi files. Lyrictrack= integer 3 (track 4) this line specifies which track is to contain lyrics from type 0 standard midi files. A zer...
Page 546
E-6 sendlocaloff= boolean 1 (enable) this line determines whether or not pro audio should send a local control off message during startup. Sendlocalon= boolean 0 (disable) this line determines whether or not pro audio should send a local control on message at exit. Syncallowratetweak= 1> boolean 1 (...
Page 547: Section
E-7 initialization f iles variables in the [midi input devices] section variables in the [midi output devices] section aud.Ini the aud.Ini Þle can only be changed using the windows notepad. Variables in the [aud] section variable... Type... Default value... What it does… maxinport= integer 15 (16 po...
Page 548
E-8.
Page 549
F presets appendix f: presets the following is a list of presets provided with pro audio plug-in audio effects. The fx effects are stereo effects; the cfx effects are mono effects. F.
Page 550
F-2 fx stereo reverb and cfx reverb preset… description… ambient very wet reverb—great for synth pads. Arena when applied to several instruments, this creates an arena or stadium type of sound. Club simulates a small club room. Good for sax, rhythm guitar, or percussion. Concert simulates the sound ...
Page 551
F-3 presets fx stereo chorus and cfx chorus fx stereo flanger and cfx flanger preset… description… deep chorus guitar a deep chorus, fender jazz-like. Great on bass too. Vocal chorus a solo vocal chorus effect. Thick group vocals great for taking a few background voices and creating more of a choir-...
Page 552
F-4 fx stereo delay cfx delay/echo fx pitch shifter preset… description… slap-back 1 a 100 millisecond slap-back delay. Slap-back 2 a 400 millisecond slap-back delay. Slap-back 3 a 500 millisecond slap-back delay. Fast tremolo delay a fast delay with a tremolo effect. Great on guitars. Preset… descr...
Page 553
F-5 presets fx time/pitch stretch 5th up pitch shift a 5th up. 5th down pitch shift a 5th down. Preset... Description… vocal 3rd up a formant-preserving pitch shift a 3rd up. Vocal 3rd down a formant-preserving pitch shift a 3rd down. Vocal 4th up a formant-preserving pitch shift a 4th up. Vocal 4th...
Page 554
F-6 fx stereo parametric eq cfx 2-band eq preset... Description… 6db high pass filter slight reduction of low-frequency elements. 6db low pass filter slight reduction of high-frequency elements. Ac hum removal narrow band pass filter, reducing frequencies around 60hz by 12db. Flat response no filter...
Page 555
G ne w f eatures appendix g: summary of new features pro audio 9 has many important new features to make your work easier and more productive. This appendix highlights the major differences between version 9 and version 8. Audiox window pro audio 9 has a new window that lists any of your sound cards...
Page 556
G-2 guitar fretboard display, tablature, and tuner pro audio 9 has a host of new features for guitar players, including real- time fretboard display of midi guitar tracks, guitar tablature, and a guitar tuner. You can enter and edit notes and chords from the fretboard or tab displays. You can export...
Page 557
G-3 ne w f eatures ntonyx style enhancer midi plug-in (micro 1.28 lite version) the ntonyx style enhancer uses performance modeling to give midi tracks a more human feeling. The style enhancer models a wide variety of musical styles that you can apply to any selected midi data. For more information,...
Page 558
G-4 real-time tempo adjustment in pro audio 9, you can use the spin buttons on the tempo dialog box to change tempo and hear the results immediately. Minimum clip width this viewing option in the clips pane ensures that even the smallest clip is visible enough to edit. For more information, see Òdis...
Page 559
H session drummer appendix h: session drummer the session drummer is a midi plug-in that allows the user to select, arrange and then play a midi drum pattern within a song in cakewalk. It is as simple to use as standard drum machine, but, unlike the hardware device, it works within the program so no...
Page 560
H-2 the session drummer can quickly generate drum parts for practicing, composing, or just playing. The midi drums can play back on the internal sound card, or out the midi port to any compatible midi device. Style various drum patterns representing different styles of music. The choices in the patt...
Page 561: The Settings Dialog
H-3 session drummer load song from a file click to select from a list of previously saved drum tracks. In the open dialog, select the drum track you want to open and click ok. Save song to a file click to save the set of patterns in the song Þeld. In the save dialog, enter a name for the drum track ...
Page 562
H-4 default settings the following is a list of the default settings in the settings dialog: port the default port is 1. Channel there is no default channel set. 3. In session drummer, enter a name for the new mapping in the drop-down list. 4. Click the . Note: if you do not select an output port, t...
Page 563
H-5 session drummer instruments drum map note # note name name note # note name name 35 b2 acoustic bass drum 59 b4 ride cymbal 2 36 c3 bass drum 1 60 c5 hi bongo 37 c#3 side stick 61 c#5 low bongo 38 d3 acoustic snare 62 d5 mute hi conga 39 eb3 hand clap 63 eb5 open hi conga 40 e3 electric snare 64...
Page 564
H-6 deleting a preset to delete a preset, select the preset from the drop down menu and click the button (to the right of the disk button). Using session drummer in real-time to write a song to a track… 1. Arrange patterns the way you want. 2. Open the track view. 3. Patch session drummer into a tra...
Page 565: Drummer
H-7 session drummer arranging patterns into a song playing patterns from the pattern pane is as easy to use as a drum machine. However, at some point you may get bored hearing the same pattern over and over again. This is where the song pane comes in. You can add patterns to the song pane, control h...
Page 566
H-8 a list of the markers in Þle. These patterns are stored in a single Þle, called a style Þle. The Þle name that is used when saving a style Þle is what will appear in the style pane of the session drummer. A quick way to familiarize yourself with this is to open one of the drum style Þles using p...
Page 567: Drummer
H-9 session drummer since the session drummer plays the pattern over and over, it is extremely important that the pattern loops correctly. You can check this before you save your style pattern by selecting the clip in the track view and looping it using the loop toolbar. Guidelines ¥ patterns should...
Page 568
H-10 defining the arrangement many styles of modern music feature several different musical sections (verse, chorus, bridge etc.). The rhythm arrangements can be changed or altered (slightly or drastically) to help distinguish these different sections. HereÕs a few very basic ideas among the thousan...
Page 569
I roland u-8 appendix i: roland u-8 you can control most of cakewalkÕs basic functions from the roland u-8 digital studio, which this guide refers to as u-8. After u-8 and cakewalk connect, the u-8 buttons for playback, recording, stopping, rewinding, and many other functions control cakewalk. You c...
Page 570: Connecting Cakewalk to U-8
I-2 connecting cakewalk to u-8 note: for cakewalk and u-8 to connect, the roland u-8 studioware panel must be open. If you don't see the studioware panel open after you launch cakewalk, use cakewalk's file-open command and choose roland u-8 cakewalk studioware from the open dialog box. To connect ca...
Page 571
I-3 roland u-8 controlling cakewalk with u-8 after u-8 and cakewalk connect, the u-8 buttons for playback, recording, stopping, rewinding, and many other functions control cakewalk. Besides these common tasks, two of the most basic functions youÕll do from u-8 are: ¥ selecting a track groupÑyou can ...
Page 572
I-4 2. Select one of the following track groups: • audio+midi—if you choose this track group, u-8 faders 1-4 control audio tracks 1-4, and u-8 faders 5-8 control the first four midi tracks. Always choose audio+midi when you work with the u-8 mixer. That way, the u-8 faders 5-8 control the mixer’s wh...
Page 573
I-5 roland u-8 the following table covers all the remaining tasks that you can control using u-8. To do this... Do this… activate the u-8 mixer window press the mixer button activate the u-8 effects window press the effects button toggle between u-8 studioware and track view press the window button ...
Page 574: Wizards
I-6 using the ez recording and mixdown wizards u-8 has two wizards that simplify recording and mixdown (see following two sections). You launch the wizards by pressing one of several ez recording buttons. U-8Õs start button opens the cakewalk quick start window. After the window opens, you can open ...
Page 575
I-7 roland u-8 the ez mixdown wizard the ez mixdown wizard handles choosing a mixdown destination for your audio tracks, choosing a destination track, and adding an effect. You can move u-8Õs track volume faders to control track level during mixdown. You can also automate track volume changes in cak...
Page 576
I-8 view faders have equal priority, and produce chaotic volume changes if used simultaneously. To mix audio with the ez mixdown wizard… 1. Mute or archive any audio tracks you don’t want to include in your mix. 2. Rewind cakewalk to the beginning. 3. Press the mix down button. The ez mixdown wizard...
Page 577: Using The U-8 Mixer
I-9 roland u-8 using the u-8 mixer you can control the u-8 mixer from the u-8 module. To open the u-8 mixer window, press u-8Õs mixer button. To close it, press uÕ8Õs exit button. The u-8 mixer is also called the u-8 controller. The basic way that you use the mixer is to move the u-8 moduleÕs cursor...
Page 578
I-10 use cakewalk's file-open command and choose roland u-8 cakewalk studioware from the open dialog box. Tip: when you work with the u-8 mixer, always set the u-8 moduleÕs track status buttons to audio+midi. That way, u-8 faders 5-8 control the white input faders in the u-8 mixer. The following tab...
Page 579
I-11 roland u-8 play buttons—when a play button is highlighted (yellow), it allows that input to be heard. Move the cursor buttons until the blue frame encloses the four play buttons. Use effects/ mixer control knobs 1-4 to choose values. Solo buttons—when a solo button is highlighted (yellow), it s...
Page 580
I-12 red fader—this is the master fader. It controls overall level for both playback and recording. Move u-8’s red master fader. Rec adjust knob—moving this knob makes fine adjustments to the record level. Move the cursor buttons until the blue frame encloses the rec adjust knob. Use any effects/ mi...
Page 581: Using The Effects Window
I-13 roland u-8 using the effects window u-8Õs effects window has powerful editing tools, including allowing you to assign u-8Õs effects/mixer control knobs to control any parameter of any available effect. Open or close the effects window by pressing u-8Õs effects button. When cakewalk is open, the...
Page 582
I-14 effect button—this is a bypass button. When it is not highlighted, the effect is disabled. Move the cursor buttons until the blue frame encloses the effect button, and press u-8’s enter button to turn the effect button on or off. Patch manager button—this button opens the effects patch manager ...
Page 583: Troubleshooting
I-15 roland u-8 troubleshooting recording tips and hints ¥ in the ez recording wizard, when you select a track to record on, always leave at least one track empty to mix down to. If you Þnd yourself running out of tracks, use cakewalkÕs tools-mixdown audio-bounce to tracks command to combine some au...
Page 584: Mixdown Tips and Hints
I-16 function to show if a track is armed or muted. Mixdown tips and hints ¥ when you close the ez mixdown wizard, instead of pressing the record button right away, press play to audition any applied effect for a few seconds. If you like it, rewind and press record. Otherwise, open the effects windo...
Page 585
I inde x index numerics 18-24 bit operation 13-12 3db louder 7-8, 7-22 3db quieter 7-8, 7-22 a acoustics 7-2 adjusting timing of notes see quantizing aftertouch 6-36 data display 6-39 see also channel aftertouch alias 11-20, 11-25 cluster widget 11-34 to 11-35 displaying value of 11-37 for tracks an...
Page 586
Index-2 directx technology 7-37 echo 7-41 to 7-42 ßanging 7-42 mixing 7-38 pitch stretching 7-38, 7-45 to 7-46 reverb 7-43 shifting pitch 7-44 time stretching 7-38, 7-45 to 7-46 see also mixing; reverb audio events 7-8 to 7-9 adjusting volume of 7-23 changing duration of 6-19 changing name of 7-13 c...
Page 587
Index-3 inde x block rate 7-45 border 11-28 bundle Þle 13-15 c cakewalk application language see cal programs cakewalk fx parametric eq 2-37, 7-39 to 7-40 cakewalk fx pitch shifter 7-44 cakewalk fx stereo chorus 7-40 cakewalk fx stereo delay 7-41 to 7-42 cakewalk fx stereo flanger 7-42 cakewalk fx s...
Page 588
Index-4 adjusting knobs in 9-3 choosing source in 4-13 conÞguring 9-4 to 9-6 controls 9-3 linking controls in 9-19 to 9-23 modules 9-2 mute and solo in 2-10, 3-12 overview 1-6, 9-1 toolbar 9-26 control event 6-43 control groups 9-19 to 9-23 absolute 9-20, 9-22 custom 9-21, 9-23 editing 9-18, 9-22 re...
Page 589
Index-5 inde x duration 4-25 changing 6-19 fill 8-15 to 8-17 increasing 7-32 note 6-17, 6-47 note property 8-12 parameter 6-43 strength 6-21 time 8-15 to 8-17 e echo controls 4-37 to 4-38 echo mode disabling a-6 echo see echo/delay echo/delay adding 6-51, 7-42 effects 1-9 adding 3-23 adding in the t...
Page 590
Index-6 file bundle 2-39 file extensions . Bun 2-39, 4-33 . Cal 16-1 . Ini e-1 . Mid 4-32 . Syx 14-1, 14-7 . Tpl 12-4 . Wav 4-30 . Wrk 1-4, 2-39 file info window 4-35 files 12-4 . Wav 9-29 bundle 2-39, 11-14, 11-16, b-2 bundle, creating 13-19 cal 1-12, 16-3 to 16-5 digital audio 13-1 foreground bitm...
Page 591
Index-7 inde x higher bit operation 13-12 history b-12 hold time (ms) 7-26 home stereo c-12 hp filter 7-43 hz 7-2 i if outside window 6-21 importing from a cakewalk project 4-31 to 4-32 music 4-30 to 4-35 wave Þles 4-30 initial 11-20 initialization Þles e-1 input Þltering 4-36 input levels 2-25, 2-3...
Page 592
Index-8 loop recording 4-20 using 4-21 loop/auto shuttle settings 3-8 toolbar 3-7 looping delays 3-29 drum 6-26 over songs 2-5 to 2-7 sections of song 2-6 setting up 2-21 to 2-22, 3-7 to 3-9 using punch-in while 4-24 low pass 7-33 lp filter 7-43 lyric event 6-44 lyrics 1-10, 8-44 to 8-47 hyphenating...
Page 593
Index-9 inde x mixing 9-8 to 9-10 modulation 11-40 to 11-42 note parameters 8-12 note velocities 6-36 notes 8-15 to 8-17 omni 4-11 to 4-12 output devices 3-17 to 3-19 pitch wheel 6-36 pitch-bend 6-36 playback settings 3-13 to 3-29 ports 2-12, 2-18, 3-17 to 3-19, 4-16 recording music from 4-15 to 4-1...
Page 594
Index-10 of patches 10-12 to 10-13 note velocity 6-8, 7-29 adjusting 3-27 to 3-28 changing 6-55 compressing 6-33 displaying 6-36 editing 6-36 inverting 6-33 notes 6-43 bending 7-32 changing display of 8-15 to 8-17 changing properties of 6-5 changing timing of 6-15 to 6-26 creating midi 7-27 to 7-31 ...
Page 595
Index-11 inde x assigning to a track 3-22 change 11-23 event 6-43 names 10-10 to 10-12 numbers 6-29 patch/controller searchback before play starts 3-29 patches, program a-1 pattern-based step recording 4-27 to 4-28 pedal events 8-21 editing 8-29 parameters 8-28 pedal marks adding 8-28 percussion 2-1...
Page 596
Index-12 using 1-19 process in-place creating stereo output tracks 7-38 mono to mono 7-38 project 1-4 creating a 4-1 to 4-38 importing from a cakewalk 4-31, 4-31 to 4-32 information 4-34 to 4-35 inserting measures into 6-10 to 6-12 labeling 4-34 to 4-35 parameters 4-2 saving 4-33 views 12-2 project ...
Page 597
Index-13 inde x rests, beaming of 8-15 retrograde 6-14 reverb 7-43 reverse 6-14 rewind 3-6 right delay 7-40 right feedback 7-41 roland gear 10-4 roland gs 11-2 roland u-8 11 connecting home studio to u-8 i-2 controlling home studio with u-8 i-3 recording tips and hints i-15 troubleshooting i-15 usin...
Page 598
Index-14 looping over 2-5 to 2-7 markers in 2-4 to 2-5 pitch 2-13 to 2-16 publishing d-4 to d-5 quantizing 6-18 restarting 2-5 to 2-7 saving, as midi Þles d-2 tempo in 2-7 to 2-8 title 4-34 tutorial 2-2 to 2-16 sound card c-16 built-in 13-5 conÞguring 13-1 to 13-24, c-10 full-duplex 4-16 half-duplex...
Page 599
Index-15 inde x deleting 14-7 edit bytes 14-7 naming 14-6 port 14-6 receive 14-3 send 14-3 send all 14-3 sysx data 14-2 in event list 6-44 sysx data events 14-2 sysx view 14-1 opening 14-2 purpose of 1-10 using 14-3 to 14-7 t tab see tablature tablature deÞning a style 8-30 editing 8-33 generating 8...
Page 600
Index-16 resizing columns of 3-15 track properties bank 3-22 channel 8-36 key+ 3-26 pan 3-24 patch 2-11 to 2-12 port 2-13, 3-16, 3-20, 8-36 size 3-14 time+ 3-29 vel+ 3-28 volume 3-24 see also tracks track see tracks track source 3-13 track status archive 3-10 mute 3-10 normal 3-10 solo 3-10 track vi...
Page 601
Index-17 inde x troubleshooting a-1 to a-7 midi sync 15-8 problems playing midi Þles d-4 smpte/mtc sync 15-13 sysx 14-10 to 14-12 sysx data 14-10 to 14-12 tutorials audio editing and mixing 2-28 to 2-40 creating a studioware panel 11-37 to 11- 44 playing a song 2-2 to 2-16 recording midi and digital...
Page 602
Index-18 importing 4-30 wave out position 13-2, 13-4 wave proÞler see wave device proÞler wavedata folder 13-14, 13-19 changing 13-15 waveforms 7-4 to 7-6, 7-19 clipped 7-7 wet mix 7-40, 7-44 wheel event 6-43 widgets 11-16 to 11-31 bitmap options for 11-29 button 11-29 cluster 11-18 to 11-19, 11-29,...
Page 603
Twelve tone systems, inc. D/b/a cakewalk license agreement you should carefully read all of the following terms and conditions before using this product. Installing and using the product indicates your acceptance of these terms and conditions. If you do not agree with them, you should promptly retur...
Page 604
Efforts to correct any defects that are reported to it within the foregoing warranty period or (2) to refund the full purchase price. Cakewalk does not warrant that the product will be error free, nor that all program errors will be corrected. In addition, cakewalk makes no warranties if the failure...

