- DL manuals
- Can-Am
- Offroad Vehicle
- Renegade 1000R 2016
- Service Manual
Can-Am Renegade 1000R 2016 Service Manual
Summary of Renegade 1000R 2016
Page 1
This service manual covers the 2 index searchable bestshopmanuals combined.Html[4/4/2014 1:33:25 pm] 2016 can-am renegade 570 / 850 series here is combined the base service manual with the 2016 supplement manual into one manual..
Page 2: Safety Notice
Safety notice safety notice this shop manual supplement has been prepared as a guide to correctly service and repair the 2016 can-am ™ renegade atvs as described in the model list in the introduction . This edition was primarily published to be used by mechanics and technicians who are already famil...
Page 3: Introduction
Introduction introduction this shop manual supplement covers the follow- ing brp made 2016 can-am renegade series ve- hicles. Model option package std renegade 570 xxc std renegade 850 xxc xxc renegade 1000r x mr the information and component/system descrip- tions contained in this manual are correc...
Page 4: Engine Emissions
Introduction tmr2011-002-002_a typical - rh side of other engines 1. Engine identification number (ein) engine emissions information manufacturer's responsibility manufacturers of engines must determine the exhaust emission levels for each engine horse- power family and certify these engines with th...
Page 5
Introduction a number of procedures throughout the book re- quire the use of special tools. Before starting any procedure, be sure that you have on hand all re- quired tools, or their approved equivalents. The use of right and left indications in the text are always referenced to the driving positio...
Page 6
Introduction section 06 engine subsection 01 (magneto) magneto models 55 mmr2008-001 xxx0000 model loctite 243 5 nm (44 lbfin) 1 new page heading indicates section and subsection. Exploded view assists you in identifying parts and their related positions. Typical page illustration number for publi...
Page 7
Introduction typical page subsection 09 (magneto system) general note: the following procedures can be done without removing the engine. During assembly/installation, use the torque val- ues and service products as in the exploded views. Clean threads before applying a threadlocker. Re- fer to the s...
Page 8
Introduction tightening torque tighten fasteners to the torque specified in the exploded view(s) and/or in the written procedure. When a torque is not specified, refer to the following table. Warning torque wrench tightening specifications must be strictly adhered to. Locking devices must be replace...
Page 9: Fastener Information
Introduction fastener information notice most components in the vehicles are built with parts dimensioned in the metric system. Most fasteners are metric and must not be replaced by customary fasteners or vice-versa. Mismatched or incorrect fasteners could cause damage to the vehicle or possible per...
Page 10
Introduction 4. Apply several drops along the threaded hole and at the bottom of the hole. 5. Apply several drops on bolt threads. 6. Tighten as required. Threadlocker application for stud installation in blind holes 2 1 3 lmr2007-040-005_a 1. On stud threads 2. On threads and in the hole 3. On reta...
Page 11
Introduction note: if it is difficult to readjust, heat screw with a soldering iron (232°c (450°f)). Application for stripped thread repair a00a3qa 5 8 6 7 1 2 3 4 1. Release agent 2. Stripped threads 3. Form-a-thread 4. Tape 5. Cleaned bolt 6. Plate 7. New threads 8. Threadlocker standard thread re...
Page 12
Introduction threadlocker application for mounting on a shaft mounting with a press a00a3ua 1 2 3 1. Bearing 2. Proper strength loctite 3. Shaft 1. Clean shaft external contact surface. 2. Clean internal contact surface of part to be in- stalled on shaft. 3. Apply a strip of proper strength loctite ...
Page 13: General
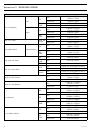
Subsection 01 (periodic maintenance schedule) periodic maintenance schedule general maintenance is very important for keeping your vehicle in safe operating condition. Proper maintenance is the owner's responsibility. The vehicle should be serviced as per the maintenance schedule. The maintenance sc...
Page 14
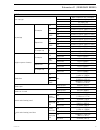
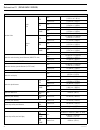
Subsection 01 (periodic maintenance schedule) every 1 500 km (1,000 mi) or 50 hours (whichever comes first) every 750 km (500 mi) or 25 hours (whichever comes first) tighten wheel beadlock bolts (if equipped) lubricate lower shock absorber spherical bearings (outlander ltd and xt-p, renegade xxc and...
Page 15
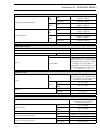
Subsection 01 (periodic maintenance schedule) every 6 000 km (4,000 mi) or 200 hours (whichever comes first) every 3 000 km (2,000 mi) or 100 hours (whichever comes first) inspect input and output shaft seals (gearbox, differential and final drive) clean vehicle speed sensor clean and lubricate lowe...
Page 16: Periodic Maintenance
Subsection 02 (periodic maintenance procedures) periodic maintenance procedures service tools description part number page test cap ...................................................................................... 529 035 991 ............................................. 8 vacuum/pressure pump ...
Page 17
Subsection 02 (periodic maintenance procedures) note: a socket wrench may be used to ease re- moval of the filter cover. Vmo2015-005-014_a 1. Air filter cover 4. Remove air filter. Vmo2015-005-015_a draining and inspecting the engine air filter housing 1. Remove lh side panel and extension. Refer to...
Page 18
Subsection 02 (periodic maintenance procedures) notice it is not recommended to blow com- pressed air on the paper filter; this could dam- age the paper fibers and reduce its filtration ability when used in dusty environments. Notice do not wash the paper filter with any cleaning solution. Cleaning ...
Page 19
Subsection 02 (periodic maintenance procedures) reinstall the console. Exhaust system cleaning and inspecting the muffler spark arrester warning never run engine in an enclosed area. Never perform this operation immediately after the engine has been run because exhaust sys- tem is very hot. Make sur...
Page 20
Subsection 02 (periodic maintenance procedures) verifying the engine oil level notice operating the engine with an im- proper engine oil level may severely damage engine. Note: while checking the oil level, visually in- spect engine area for leaks. Vmr2016-400-002_a note: do not lose the o-ring plac...
Page 21
Subsection 02 (periodic maintenance procedures) 850 and 1000r engines tightening torque magnetic drain plug 30 n•m ± 2 n•m (22 lbf•ft ± 1 lbf•ft) 11. Replace oil filter. Refer to replacing the engine oil filter in this subsection. 12. Refill engine with recommended engine oil. Engine oil capacity 2 ...
Page 22
Subsection 02 (periodic maintenance procedures) vmr2006-008-001_a 1. Slightly oil 2. Slightly oil 5. Install the cover on the engine. 6. Tighten oil filter cover screws to recommended torque. Tightening torque oil filter cover screws 10 n•m ± 1 n•m (89 lbf•in ± 9 lbf•in) 7. Reinstall remaining parts...
Page 23
Subsection 02 (periodic maintenance procedures) vmr2016-009-002_a 1. Leak indicator hose 2. Water pump another leak indicator hole is visible on the pto side. It provides an indication of the pto gasket condition. If a liquid leaks from this hole, pto gas- ket replacement is necessary. Vmr2015-063-0...
Page 24
Subsection 02 (periodic maintenance procedures) vmr2012-013-010_a typical - some parts removed for clarity 1. Coolant drain plug 4. Drain cooling system into a suitable container. 5. Disconnect the lower radiator hose and drain the remaining coolant. Note: take note of the hose clamp position be- fo...
Page 25
Subsection 02 (periodic maintenance procedures) vmr2015-029-204_a lh side 1. Rear cylinder bleed screw 6. Fill cooling system until coolant comes out of bleed screws. 7. Squeeze the top of the coolant hose between the radiator and coolant pump several times to bleed all air from the highest point of...
Page 26
Subsection 02 (periodic maintenance procedures) gearbox recommended gearbox oil recommended product quantity xps synthetic gear oil (75w 140) (p/n 293 600 140) approximately 450 ml (15.2 u.S. Oz) if the recommended oil is not available, use a 75w140 gearbox oil that meets the api gl-5 specification....
Page 27
Subsection 02 (periodic maintenance procedures) vmr2016-400-006_a gearbox with gbps 1. Magnetic drain plug 2. Oil level plug 7. Clean magnetic drain plug and pay attention to any debris present on drain plug. Note: presence of excessive debris provides an indication of a gearbox problem. 8. Reinstal...
Page 28
Subsection 02 (periodic maintenance procedures) inspecting the drive belt 1. Inspect belt for cracks, fraying or abnormal wear. Replace if necessary. 2. Check drive belt width at cord level. Replace if it is out of specification. Drive belt width service limit 30 mm (1.181 in) vmr2006-021-005_a 1. D...
Page 29
Subsection 02 (periodic maintenance procedures) warning always use a silicone-based lubricant. Using another lubricant (like a water-based lubri- cant) could cause the throttle lever/cable to become sticky and stiff. Open the throttle lever housing. V07i0fy 1 v07i0fb 1. Remove these screws separate ...
Page 30
Subsection 02 (periodic maintenance procedures) vmo2006-007-032_a 1. Throttle body 2. Side cover screws insert the needle of the lubricant can in the end of throttle cable adjuster. V07i0ja typical note: place a rag around the throttle cable ad- juster to prevent the lubricant from splashing. Add lu...
Page 31
Subsection 02 (periodic maintenance procedures) replacing the spark plugs spark plug access to access the front cylinder spark plug, remove the exhaust system outer heat shield. Refer to exhaust system subsection. To access the rear cylinder spark plug, remove the rh side panel. Removing the spark p...
Page 32
Subsection 02 (periodic maintenance procedures) vmr2016-107-001_a rh side of vehicle note: allow enough time for oil to flow out. 6. Install and tighten drain plug to specification. Tightening torque drain plug 2.5 n•m ± 0.5 n•m (22 lbf•in ± 4 lbf•in) 7. Refill front differential with recommended oi...
Page 33
Subsection 02 (periodic maintenance procedures) tightening torque drain plug 5 n•m ± 1 n•m (44 lbf•in ± 9 lbf•in) 7. Refill the rear final drive. Recommended oil quantity xps synthetic gear oil (75w 140) (p/n 293 600 140) or a 75w 140 (api gl-5) gear oil 300 ml (10 u.S. Oz) 8. Reinstall filler plug ...
Page 34
Subsection 02 (periodic maintenance procedures) tie-rod end check tie-rod end ball joint for: – damage – pitting – abnormal play. Replace if necessary. Cleaning and lubricating the steering column half bushing clean, inspect and lubricate upper and lower steering column half bushings and o rings. Re...
Page 35
Subsection 02 (periodic maintenance procedures) vmr2012-040-013_a typical 1. Grease fittings inspecting the front suspension arm 1. Check suspension arm for: – cracks – pitting – bending – distortion. 2. Check suspension arm for abnormal play: – side to side – up and down. 3. If any play is detected...
Page 36
Subsection 02 (periodic maintenance procedures) verifying the brake fluid reservoir level with vehicle on a level surface, check brake fluid in reservoirs for proper level. Note: a low level may indicate leaks or worn brake pads. Front brake reservoir turn steering in the straight-ahead position to ...
Page 37
Subsection 02 (periodic maintenance procedures) notice brake pads must always be replaced in pairs. Brake caliper 1. Remove caliper then check the following com- ponents: – check brake pad pin – check caliper boots for cracks – check caliper movement on its support – check pistons movement – check p...
Page 38
Subsection 02 (periodic maintenance procedures) warning use only dot 4 brake fluid from a sealed con- tainer. Do not use brake fluid from an old or already opened container. Bleeding the brake system (using a vacuum pump) note: brake fluid reservoir must be kept full to prevent air from being pumped...
Page 39: Storage Procedure
Subsection xx (storage procedure) storage procedure service products description part number page brp heavy duty cleaner ....................................................... 293 110 001 ............................................. 3 xps fuel stabilizer...............................................
Page 40
Subsection xx (storage procedure) vmr2012-007-001_a typical 1. Cvt cover 2. Exhaust system heat shield 3. Cvt outlet 6. Block cvt outlet hose using a rag. Vmr2012-007-002_a typical 1. Cvt outlet hose exhaust system block muffler outlet using a rag to avoid intrusion of small animals. Vmr2012-011-007...
Page 41
Subsection xx (storage procedure) recommended product for plastic parts xps atv wash (p/n 219 701 702) soapy water notice it is necessary to use flannel cloths on plastic parts to avoid damaging surfaces. Never clean plastic parts with strong deter- gent, degreasing agent, paint thinner, acetone, pr...
Page 42: Preseason Preparation
Subsection 05 (preseason preparation) preseason preparation proper vehicle preparation is required after a stor- age period. Any worn, broken or damaged parts found must be replaced. Remove rags that were installed for storage: en- gine air inlet hose, cvt outlet hose and muffler. Clean drive and dr...
Page 43: Special Procedures
Subsection xx (special procedures) special procedures service products description part number page xps lube...................................................................................... 293 600 016 ........................................... 2 general note: component failures resulting from...
Page 44
Subsection xx (special procedures) – check rear final drive oil level and refill if neces- sary. – inspect suspension components and steering system components. – inspect body and chassis for any damages. – start engine. If the oil pressure light stays on, stop engine immediately and investigate the...
Page 45
Subsection xx (engine removal and installation) engine removal and installation service tools description part number page engine lifting tool ................................................................ 529 036 022 ........................................... 5 = component must be replaced when ...
Page 46: Procedures
Subsection xx (engine removal and installation) procedures engine removal 1. Place vehicle on a workstation equipped with an engine-lifting hoist. 2. Disconnect negative (-) cable from battery. 3. Carry out the following operations. Refer to ta- ble. Operations references (subsection) safely lift an...
Page 47
Subsection xx (engine removal and installation) vmr2012-009-004_a typical 1. Crankcase vent hose 8. Disconnect both engine harness connectors (hic). Vmr2012-009-005_a typical 1. Engine harness connectors (hic) 9. Move ecm as illustrated. Vmr2012-009-006 typical 10. Cut locking ties from ignition coi...
Page 48
Subsection xx (engine removal and installation) vmr2012-009-009_a typical 1. Plastic cover 14. Remove harnesses support from engine. Vmr2012-009-010_a typical 1. Harnesses support 15. Disconnect magneto connector from voltage regulator rectifier. Vmr2012-043-013_b typical - outlander shown 1. Magnet...
Page 49
Subsection xx (engine removal and installation) vmr2012-009-025_a 500/650/800r engines - some parts removed for clarity 1. Disconnect the following coolant hoses vmr2012-009-013_a 1000 engine - some parts removed for clarity 1. Disconnect the following coolant hoses 19. Remove main ground wire from ...
Page 50
Subsection xx (engine removal and installation) vmr2012-009-017_a lh side 1. Rear retaining bolt 4. Remove front retaining bolt from engine. Vmr2012-009-018_a lh side 1. Front retaining bolt 5. Remove engine support plate from frame. Vmr2012-009-019_a rh side 1. Engine support plate screws 6. Remove...
Page 51
Subsection xx (engine removal and installation) 10. Move propeller shaft yoke downwards to make room. Vmr2012-009-023 typical 11. Move engine rearward to disconnect front pro- peller shaft from engine. 12. Remove engine by the rh side. Vmr2012-009-024 typical engine installation the installation is ...
Page 52: Air Intake System
Subsection xx (air intake system) air intake system air filter housing 1.6 ± 0.4 nm (14 ± 4 lbfin) 6 ± 1 nm (53 ± 9 lbfin) 2.5 ± 0.5 nm (22 ± 4 lbfin) to throttle body to engine 6 ± 1 nm (53 ± 9 lbfin) loctite 5150 (silicone sealant) suspension grease loctite 5150 (silicone sealant) vmr2012-...
Page 53: General
Subsection xx (air intake system) general notice never modify the air intake system. Otherwise, engine performance degradation or damage can occur. The engine is calibrated to operate specifically with these components. Procedures air filter for air filter servicing, refer to periodic main- tenance ...
Page 54
Subsection xx (air intake system) 7. Move ecm aside. Vmr2012-009-005_a typical 1. Engine harness connectors (hic) 8. Remove air intake tube retaining screw. Vmr2012-010-003_a 1. Air intake tube retaining screw 9. Move air intake tube to gain access to coolant tank lh screw. 10. Remove coolant tank r...
Page 55
Subsection xx (air intake system) vmr2012-010-007 typical - outlander shown 13. Remove the following locking ties. Vmr2013-010-001_a typical - outlander shown 1. Locking tie to remove - location shown vmr2012-010-009_a typical - outlander shown 1. Locking ties to remove 14. Detach gearbox vent hose ...
Page 56
Subsection xx (air intake system) vmr2012-010-013_a screw located under coolant tank 1. Air filter housing retaining screw vmr2012-010-014_a screw located on lh side - access from under shift lever 1. Air filter housing retaining screw 17. Detach throttle body from intake adapters. 18. Slightly lift...
Page 57: Exhaust System
Subsection 03 (exhaust system) exhaust system new = component must be replaced when removed. 13 ± 1 n•m (115 ± 9 lbf•in) 10 ± 2 n•m (89 ± 18 lbf•in) 13 ± 1 n•m (115 ± 9 lbf•in) 9 ± 1 n•m (80 ± 9 lbf•in) 9 ± 1 n•m (80 ± 9 lbf•in) 40 ± 1 n•m (30 ± 1 lbf•ft) bolt down, nut facing outwards new new new 9...
Page 58: General
Subsection 03 (exhaust system) general warning never touch exhaust system components im- mediately after the engine has run. Procedures spark arrester for spark arrester servicing, refer to periodic maintenance procedures subsection. Muffler muffler removal 1. Loosen exhaust pipe clamp. Smr2012-011-...
Page 59
Subsection 03 (exhaust system) heat shield heat shield removal 1. Refer to body and remove lh panel. 2. Remove heat shield retaining bolts. Notice do not use impact tool to remove or install heat shield bolts. Vmr2012-011-008_a 1. Heat shield 2. Heat shield bolts 3. Remove muffler for rear and inner...
Page 60
Subsection 03 (exhaust system) vmr2012-011-010_a 1. Y-exhaust pipe 2. Springs y-exhaust pipe inspection check y-exhaust pipe for cracks, bending or other damages. Replace if needed. Y-exhaust pipe installation the installation is the reverse of the removal pro- cedure. Install new exhaust gaskets an...
Page 61
Subsection 03 (exhaust system) exhaust system tightening system sequence install all nuts and bolts loosely. Install springs. Tighten all fasteners as per following tightening sequence. Refer to exploded view for torque specifications. Vmr2016-401-002_a exhaust system tightening sequence vmr2016-401...
Page 62: Lubrication System
Subsection 04 (lubrication system) lubrication system service tools description part number page adapter hose ........................................................................... 529 035 652 ............................................. 5 disconnect tool .........................................
Page 63
Subsection 04 (lubrication system) components 570 engine = component must be replaced when removed. New 20 ± 2 n•m (15 ± 1,5 lbf•ft) new 10 ± 1 n•m (89 ± 9 lbf•in) new engine oil loctite 243 12 ± 1 n•m (106 ± 9 lbf•in) new engine oil loctite 243 7 ± 0,5 n•m (62 ± 4 lbf•in) engine oil 10 ± 1 n•m (89 ...
Page 64
Subsection 04 (lubrication system) components 850 and 1000r engines = component must be replaced when removed. New new new new new loctite 243 loctite 243 loctite 243 loctite 243 engine oil engine oil engine oil 20 ± 2 n•m (15 ± 1.5 lbf•ft) 10 ± 1 n•m (89 ± 9 lbf•in) 12 ± 1 n•m (106 ± 9 lbf•in) 30 ±...
Page 65
Subsection 04 (lubrication system) engine lubrication circuit vmr2007-033-001_a 1. Camshaft bearings 2. Oil pressure switch 3. Oil filter 4. Oil pressure regulator valve 5. Oil strainer 6. Oil pump 7. Crankshaft main bearings 8. Crankshaft support bearing 9. Connecting rod bearings 4 vmr2016-402.
Page 66: Inspection
Subsection 04 (lubrication system) inspection testing the engine oil pressure note: the engine oil pressure test should be done with a warm engine 100°c (212°f) and the recommended oil. Remove the oil pressure switch. Refer to oil pressure switch in this subsection. Install the pressure test gauge w...
Page 67: Procedures
Subsection 04 (lubrication system) 2. Cylinder head or cylinder base gasket leak. - retighten cylinder head to specified torque, refer to top end subsection. Replace gasket if tight- ening does not solve the problem. 3. Engine internal damage. - repair engine. 4. Oil cooler gasket leak. - replace oi...
Page 68
Subsection 04 (lubrication system) oil pressure switch (ops) oil pressure switch access remove ops cover. Vmr2016-402-003 vmr2016-402-002_a oil pressure switch activation the oil pressure switch activates when the engine oil pressure is lower than following specified pres- sure range. Oil pressure s...
Page 69
Subsection 04 (lubrication system) engine oil pressure regulator oil pressure regulator location the oil pressure regulator is located on the engine magneto side, integrated in the magneto cover. Vmr2016-402-004_a note: the oil pressure regulator system works when the oil pressure exceeds 400 kpa (5...
Page 70
Subsection 04 (lubrication system) tmr2011-010-011_a 1. Thrust washer 2. Needle pin 3. Oil pump gear 4. Retaining ring 2. Remove oil pump cover screws and pull oil pump cover out. Vmr2006-042-011_a 1. Retaining screws 2. Oil pump cover 3. Remove oil pump shaft with needle pin and in- ner rotor. 4. R...
Page 71
Subsection 04 (lubrication system) vmr2006-042-013_a 1. Pittings on the teeth using a feeler gauge, measure the clearance of inner and outer rotors as shown. Clearance of inner and outer rotor service limit 0.25 mm (.0098 in) a a a 2 1 vmr2006-042-014_a 1. Outer rotor 2. Inner rotor a. 0.25 mm (.009...
Page 72
Subsection 04 (lubrication system) vmr2015-114-005_a 1. Markings after reinstallation of the remaining parts, check for smooth operation of the oil pump assembly. Testing the oil pump function after engine is completely reassembled, start en- gine and make sure oil pressure is within specifi- cation...
Page 73
Subsection 04 (lubrication system) vmr2006-042-018_a 1. Reed valve 2. Stopper 3. Screws removing the reed valve remove: – engine from vehicle – pto cover (refer to pto cover in the bot- tom end subsection) – reed valve retaining screws – stopper plate – reed valve. Inspecting the reed valve check re...
Page 74: Cooling System
Cooling system service tools description part number page handle ........................................................................................ 420 877 650 ........................................... 17 oil seal pusher...........................................................................
Page 75
Radiator 570 engine 2.5 ± 0.5 n•m (22 ± 4 lbf•in) new 10 ± 2 n•m (89 ± 18 lbf•ft) new = component must be replaced when removed. 10 ± 2 n•m (89 ± 18 lbf•ft) vmr2016-417-100_a 2 vmr2016-417.
Page 76
850 and 1000r engine 2.5 ± 0.5 n•m (22 ± 4 lbf•in) 10 ± 2 n•m (89 ± 18 lbf•ft) 850 1000r x mr std, x xc = component must be replaced when removed. New new new new new vmr2016-417-102_a vmr2016-417 3.
Page 77
Water pump and thermostat renegade 570 20 ± 2 n•m (15 ± 1 lbf•ft) 6 ± 0.7 n•m (53 ± 6 lbf•in) loctite 243 6 ± 0.7 n•m (53 ± 6 lbf•in) loctite 243 16 ± 2 n•m (142 ± 18 lbf•in) cts see electronic fuel injection (efi) 10 ± 1 n•m (89 ± 9 lbf•in) 2.5 ± 0.3 n•m (22 ± 3 lbf•in) molycote 111 engine oil engi...
Page 78
Water pump renegade 850 and 1000r 3,5 ± 0,4 n•m (31 ± 4 lbf•in) 6 ± 0.7 n•m (53 ± 6 lbf•in) loctite 243 16 ± 2 n•m (142 ± 18 lbf•in) cts, see electronic fuel injection (efi) new new loctite 243 6 ± 0.7 n•m (53 ± 6 lbf•in) 20 ± 2 n•m (15 ± 1.5 lbf•ft) engine oil 2.5 ± 0.3 n•m (22 ± 3 lbf•in) new moly...
Page 79: General
General notice never start engine without coolant. Some engine parts such as the rotary seal on the water pump shaft can be damaged. Procedures thermostat renegade 570 thermostat location 570 engine the thermostat is located in the thermostat hous- ing at the top of the front cylinder (rh side). Vmr...
Page 80
Vmr2016-417-002_a 2. Remove oetiker clamps. Vmr2016-417-003_a 3. Remove the thermostat and its housing as a unit. Testing the thermostat to check thermostat, put it in water and heat the water. Thermostat opening temperature starts to open fully open 65°c (149°f) 75°c (167°f) replace thermostat (wit...
Page 81
Vmr2015-029-104_a step 1: disconnect cooling fan connector step 2: remove the harness connector from the fan shroud vmr2015-029-105_a 1. Remove fan motor vent hose (if so equipped) note: take note of the rooting of vent hose on vehicle to ease reinstallation. Vmr2015-029-103_a step 1: remove upper r...
Page 82
Vmr2015-044-006_a testing the radiator cooling fan 1. Disconnect radiator cooling fan connector. Vmr2015-029-101_a 1. Cooling fan connector 2. Connect cooling fan connector pin b to a suit- able 20 a fuse jumper and then directly to the positive battery post. 3. Connect cooling fan connector pin a (...
Page 83
2. Remove radiator cooling fan retaining screws. Vmr2012-013-008_a 1. Cooling fan retaining screws 3. Remove radiator cooling fan. Installing the radiator cooling fan the installation is the reverse of the removal pro- cedure. However, pay attention to the following. Tighten cooling fan retaining sc...
Page 84
Tmr2015-016-003_a 1. Gasket installing the water pump housing the installation is the reverse of the removal pro- cedure. However, pay attention to the following. Notice to prevent leaking, take care that the gasket is exactly in groove when you reinstall the water pump housing. Tighten screws of wa...
Page 85
Tmr2011-011-050_a 1. Inner part of rotary seal vbs2008-011-005 typical - inner part of rotary seal removed 3. Carefully bend down the outer part of rotary seal lip using a small chisel. Tmr2011-011-051_a 1. Small chisel 4. Use 2 screwdrivers and carefully remove the outer part of the rotary seal. Tm...
Page 86
5. Thoroughly remove sealing residue and burr of rotary seal using a scraper. Notice be careful not to damage water pump shaft. Tmr2011-011-053_a 1. Scraper 6. Install 2 wooden screws in the seal. Tmr2011-011-054_a 1. Wooden screws 2. Oil seal 7. Remove oil seal from crankcase by pulling screws with...
Page 87
Vbs2008-011-034 oil seal installation 5. Ensure that the oil seal is properly seated in wa- ter pump cavity. Vbs2008-011-035_a typical 1. Oil seal properly seated 6. Apply engine oil on water pump shaft. 7. Place rotary seal onto water pump shaft and pull out water pump shaft by hand. Notice do not ...
Page 88
Tmr2011-011-058_a rotary seal pusher plate assembly 1. 4 x tubes (70 mm (2.75 in) length) 2. 4 x screws m6 x 85 3. Plane surface on pusher bolt 12. Install rotary seal installation tools on crankcase as follows. Note: make sure pusher bolt has a plane surface. 12.1 apply a little grease at the end o...
Page 89
Vbs2008-011-040 water pump shaft properly adjusted with rotary seal notice the water pump shaft must be properly adjusted with rotary seal. The water pump shaft must move freely while pushing it toward the crankcase. 18. Install the following parts, see procedure in this subsection. – water pump imp...
Page 90
Tmr2011-011-011_a 1. Oil seal 2. Machined surface for rotary seal tmr2011-011-012_a oil seal removal - view from inside crankcase mag side 1. Orifices for oil seal removal water pump shaft and seals installation the installation is the reverse of the removal pro- cedure. However, pay attention to th...
Page 91
Mmr2009-112-028_a water pump shaft assembly 1. Surface where rotary seal is pushed by tool notice never use a hammer for rotary seal installation. Only use a press to avoid damag- ing the ceramic component. Tmr2011-011-015_a 1. Water pump shaft with rotary seal 2. Water pump seal installer notice af...
Page 92
Vmr2015-029-001_a crankcase pto side 1. Water pump intermediate drive gear 2. Circlip 3. Water pump intermediate shaft 4. Crankcase pto side water pump drive gear see bottom end subsection. Removing the water pump gears water pump gear 1. Remove circlip retaining water pump gear and discard it. Tmr2...
Page 93
Notice a missing thrust washer will cause a leaking rotary seal. Tmr2011-011-009_a 1. Water pump gear 2. Needle pin 3. Thrust washer note: ensure water pump gear snaps properly onto needle pin. Install new circlip to retain water pump gear. Notice never use the circlip a second time. Always install ...
Page 94: Magneto And Starter
Subsection xx (magneto and starter) magneto and starter service tools description part number page crankshaft locking bolt..................................................... 529 035 617 ............................................. 6 crankshaft protector ..............................................
Page 95
Subsection xx (magneto and starter) = component must be replaced when removed. New 6 ± 0,7 n•m (53 ± 6 lbf•in) 5 ± 0,6 n•m (44 ± 5 lbf•in) loctite 243 engine oil 10 ± 1 n•m (89 ± 9 lbf•in) multi purpose grease bp ls3 see electronic fuel injection (efi) 10 ± 1 n•m (89 ± 9 lbf•in) 10 ± 1 n•m (89 ± 9 l...
Page 96: Procedures
Subsection xx (magneto and starter) procedures magneto cover magneto cover access refer to the body subsection and remove the fol- lowing part. Vmr2016-403-001 engine with 420w magneto vmr2016-403-002 engine with 650w magneto removing the magneto cover drain engine oil (refer to engine oil change in...
Page 97
Subsection xx (magneto and starter) installing the magneto cover for installation, reverse the removal procedure. However, pay attention to the following. Install a new magneto cover gasket. Apply drei bond sealing compound (p/n 420 297 906) on stator cable grommet as shown in next illustration. Tmr...
Page 98
Subsection xx (magneto and starter) v07g05a yl yl yl typical 5. If any reading is out of specification, replace sta- tor. 6. Re-plug connectors properly. Testing the stator insulation 1. Set multimeter to . 2. Connect multimeter between any yellow wire (on stator connector) and engine ground. 3. Rea...
Page 99
Subsection xx (magneto and starter) vmr2015-030-004_a 1. Threads for cable holding strip 2. Notch for stator tightening torque holding strip screws 4 n•m ± 0.5 n•m (35 lbf•in ± 4 lbf•in) + loctite 243 (blue) (p/n 293 800 060) stator retaining screws 10 n•m ± 1 n•m (89 lbf•in ± 9 lbf•in) rotor removi...
Page 100
Subsection xx (magneto and starter) tmr2011-012-007_a 1. Rotor 2. Oil bore check keyway of the rotor for wear or damages. Check if trigger wheel teeth are bent or otherwise damaged. Check woodruff key and keyway on the crank- shaft for wear or damages. Replace parts as necessary. Installing the roto...
Page 101
Subsection xx (magneto and starter) tightening torque rotor retaining screw 150 n•m ± 10 n•m (111 lbf•ft ± 7 lbf•ft) + loctite 648 (green) (p/n 413 711 400) sprag clutch removing the sprag clutch remove magneto cover . See procedure in this subsection. Heat screws in order to break the loctite. Loos...
Page 102
Subsection xx (magneto and starter) vmr2006-041-015_b 1. Sprag clutch 2. Sprag clutch housing 3. Sprag clutch gear 4. Apply engine oil here install rotor, refer to rotor in this subsection. Tighten sprag clutch housing screws to specifica- tion. Tightening torque sprag clutch housing screws 30 n•m ±...
Page 103
Subsection xx (magneto and starter) vmr2006-041-017_a 1. Intermediate gear 2. Starter double gear 3. Starter gear 4. Location pins inspecting the starter drive gear inspect gears and location pins for wear and dam- age. Replace parts as necessary. Installing the starter drive gear the installation i...
Page 104
Subsection xx (magneto and starter) 3. Remove body parts as listed in starter ac- cess . 4. For models using the gearbox with gbps, re- fer to continuously variable transmis- sion (cvt) subsection and remove the: – drive pulley – driven pulley – cvt back cover. 5. Disconnect red (+) cable from start...
Page 105: Intake Manifold
Subsection 07 (intake manifold) intake manifold = component must be replaced when removed. New see electronic fuel injection (efi) loctite 243 engine oil 6 ± 0,7 n•m (53 ± 6 lbf•in) engine oil 10 ± 1 n•m (89 ± 9 lbf•in) engine oil 0,7 ± 0,1 n•m (6 ± 1 lbf•in) 20 ± 2 n•m (15 ± 1.5 lbf•ft) see electro...
Page 106: Procedures
Subsection 07 (intake manifold) procedures intake manifold intake manifold access refer to body subsection and remove the follow- ing: – console – rh side panel and extension. Removing the intake manifold 1. Release fuel pressure. Refer to fuel tank and fuel pump subsection. 2. Disconnect top of shi...
Page 107
Subsection 07 (intake manifold) vmr2012-015-005_a 1. Remove 8. Remove intake manifold from engine. Vmr2015-031-004_a 1. Manifold retaining screws (4x) inspecting the intake manifold check intake manifold for cracks, warping at flanges or any other damage. Replace if neces- sary. Installing the intak...
Page 108: Top End
Subsection 08 (top end) top end service tools description part number page crankshaft locking bolt..................................................... 529 035 617 ........................................... 21 dial indicator adapter ......................................................... 529 036 ...
Page 109
Subsection 08 (top end) cylinder head no. 1 = component must be replaced when removed. New new engine oil loctite 648 new engine oil engine oil see tightening procedure engine oil new engine oil see ignition system 7 ± 0,8 n•m (62 ± 7 lbf•in) 12 ± 1 n•m (106 ± 9 lbf•in) 12 ± 1 n•m (106 ± 9 lbf•in) 1...
Page 110
Subsection 08 (top end) cylinder head no. 2 = component must be replaced when removed. New engine oil new loctite 648 engine oil new engine oil see tightening procedure see ignition system engine oil engine oil 10 ± 1 n•m (89 ± 9 lbf•in) 12 ± 1 n•m (106 ± 9 lbf•in) 7 ± 0,8 n•m (62 ± 7 lbf•in) 10 ± 1...
Page 111
Subsection 08 (top end) cylinders and pistons engine oil engine oil engine oil engine oil engine oil engine oil new new new new new vmr2006-043-003_d 4 vmr2016-419.
Page 112: General
Subsection 08 (top end) general special reference are made in the text for proce- dures which are different for cylinder no. 1 and cylinder no. 2. Vmr2012-015-002_a typical 1. Cylinder 1 (front) 2. Cylinder 2 (rear) when diagnosing an engine problem, always per- form a cylinder leak test. Note: even...
Page 113
Subsection 08 (top end) engine required tool all tdc dial indicator (p/n 414 104 700) 850 and 1000r dial indicator adapter (p/n 529 036 159) tmr2011-013-007_a 1. Tdc dial indicator note: if a dial gauge is not available, use a screw- driver or another similarly suitable tool. Notice do not scratch o...
Page 114: Procedures
Subsection 08 (top end) procedures valve cover valve cover access front cylinder refer to body subsection and remove the follow- ing. – seat – console – rh side panel – rh inner fender panel rear cylinder refer to body and remove: – seat – console – rh side panel – lh side panel. Refer to exhaust sy...
Page 115
Subsection 08 (top end) vmr2006-043-016_a 1. Rocker arm shaft 2. Rocker arm (exhaust side) 3. Rocker arm (intake side) 4. Adjustment screw 5. Lock nut 5. Remove rocker arm assembly (exhaust side and intake side) with adjustment screws and lock nuts. 6. Remove thrust washers. Tmr2011-013-010_a 1. Roc...
Page 116
Subsection 08 (top end) r400motr69a 1 1. Free movement of adjustment screw top inspecting the rocker arm shaft check for scored friction surfaces; if so, replace parts. Measure rocker arm shaft diameter. R400motr70a a a. Measure rocker arm shaft diameter here rocker arm shaft diameter new 12.000 mm ...
Page 117
Subsection 08 (top end) notice each camshaft is different in design. Thus, it is important not to mix up any parts of the camshaft assembly with that of the other cylinder. Keep parts as a group. 1. Remove valve cover (see valve cover in this subsection). 2. Refer to the timing chain subsection to r...
Page 118
Subsection 08 (top end) camshaft lobe (intake) new 32.890 mm to 33.090 mm (1.2949 in to 1.3028 in) 850 engine service limit 32.870 mm (1.2941 in) new 32.960 mm to 33.160 mm (1.2976 in to 1.3055 in) 1000r engine service limit 32.940 mm (1.2969 in) camshaft lobe (exhaust) new 31.730 mm to 31.930 mm (1...
Page 119
Subsection 08 (top end) 2. Drain coolant (refer to periodic mainte- nance procedures subsection). 3. Disconnect the coolant hose from the thermo- stat housing. Note: before removing cylinder head, blow out remaining coolant by air pressure. During cylin- der head removal, the remaining coolant in cy...
Page 120
Subsection 08 (top end) r400motr77a a b a. Camshaft bearing (timing chain side) b. Camshaft bearing (spark plug side) camshaft bearing (timing chain side) new 35.000 mm to 35.025 mm (1.378 in to 1.3789 in) service limit 35.040 mm (1.3795 in) camshaft bearing (spark plug side) new 22.000 mm to 22.021...
Page 121
Subsection 08 (top end) cylinder head screw identification location no. 1 m10 x 140 570 and 850 engines location no. 2 m6 x 85 location no. 1 m10 x 159 1000r engine location no. 2 m6 x 105 tighten m10 cylinder head screws first as per following specifications. Note: always perform one step on all m1...
Page 122
Subsection 08 (top end) 1 r400motr78a 3 2 1. Valve spring compressor clamp 2. Valve spring compressor cup 3. Valve cotter 4. Remove tools and withdraw valve spring re- tainer and valve spring. Tmr2011-013-015_a 1. Valve spring retainer 2. Valve spring inspecting the valve spring check valve spring f...
Page 123
Subsection 08 (top end) notice an improperly locked valve spring will cause engine damage. Valves removing the valve 1. Remove valve spring, see valve spring in this subsection. 2. Push valve stem, then pull valves (intake and exhaust) out of valve guide. Vmr2006-043-021_a 1. Intake valves 31 mm 2. ...
Page 124
Subsection 08 (top end) valve stem diameter exhaust valve new 4.956 mm to 4.970 mm (.1951 in to .1957 in) 570 engine service limit 4.930 mm (.1941 in) new 5.461 mm to 5.476 mm (.215 in to .2156 in) 850 and 1000r engines service limit 5.440 mm (.2142 in) intake valve new 4.966 mm to 4.980 mm (.1955 i...
Page 125
Subsection 08 (top end) 1 r400motr85a 2 1. Thrust washer 2. Sealing lips of valve stem seal to ease installation of cotters, apply oil or grease on them so that they remain in place while relea- sing the spring. After spring is installed, ensure it is properly locked by tapping on valve stem end wit...
Page 126
Subsection 08 (top end) tmr2013-068-026_a 1. Valve guide installer 2. Mark "ex" - exhaust valve guide installer 3. Mark "in" - intake valve guide installer a. 14.5 mm (.571 in) b. 13.3 mm (.524 in) all engines 1 r400motr87a 2 1. Valve guide installer 2. Valve guide note: apply loctite 767 (antiseize...
Page 127
Subsection 08 (top end) 4 r400motr90a 1 2 3 1. Cylinder 2. Piston assembly 3. Cylinder base gasket 4. Camshaft timing chain inspecting the cylinder check cylinder for cracks, scoring and wear ridges on the top and bottom of the cylinder. If so, re- place cylinder. Cylinder taper measure cylinder bor...
Page 128
Subsection 08 (top end) required tool piston ring compressor with band width of 15 mm to 20 mm (.59 in to .79 in) first mount cylinder 2. Note: the cylinder can not be pushed fully over the piston unless the piston is located at tdc. Then remove the crankshaft locking bolt (p/n 529 035 617) . Crank ...
Page 129
Subsection 08 (top end) 1 r400motr96a a 1. Measuring perpendicularly (90°) to piston pin a. 8 mm (.315 in) the measured dimension should be as described in the following tables. If not, replace piston. Piston measurement new 83.950 mm to 83.966 mm (3.3051 in to 3.3057 in) 570 engine service limit 83...
Page 130
Subsection 08 (top end) if clearance exceeds specified tolerance, replace piston by a new one and measure piston/cylinder clearance again. Note: make sure the cylinder bore gauge indica- tor is set exactly at the same position as with the micrometer, otherwise the reading will be false. Connecting r...
Page 131
Subsection 08 (top end) vmr2016-118-002_a 570 , 850 and 1000r engines 1. Piston of cylinder 1 (front) 2. Mark on piston must show to intake side of cylinder 1 3. Piston of cylinder 2 (rear) 4. Mark on piston must show to exhaust side of cylinder 2 all engines use the piston appropriate circlip insta...
Page 132
Subsection 08 (top end) vmr2016-033-006 correct position of the piston circlip piston rings removing the piston rings remove the piston (see piston in this subsec- tion). Inspecting the piston rings ring/piston groove clearance using a feeler gauge measure each ring/piston groove clearance. If the c...
Page 133
Subsection 08 (top end) note: use a ring expander to prevent breakage during installation. The oil ring must be installed by hand. Install the oil scraper ring first, then the lower compression ring with the word “n and top “ facing up, then the upper compression ring with the word “n and top“ facin...
Page 134: Timing Chain
Subsection 09 (timing chain) timing chain service tools description part number page camshaft timing tool........................................................... 529 036 268 ............................................. 5 crankshaft tdc position tool ........................................... 52...
Page 135: Troubleshooting
Subsection 09 (timing chain) troubleshooting unusual engine noise or vibration 1. Improper valve clearance adjustment and/or worn out rocker arm(s) - readjust valve clearance and/or replace defective part(s), refer to top end subsection. 2. Defective chain tensioner - replace chain tensioner. 3. Wor...
Page 136
Subsection 09 (timing chain) caution tensioner is spring loaded. 3. Remove: – o-ring – spring – chain tensioner plunger. Vmr2006-043-004_a 1. Chain tensioner screw plug 2. O-ring 3. Spring 4. Chain tensioner plunger 4. Remove: – chain tensioner housing retaining screws – chain tensioner housing – o-...
Page 137
Subsection 09 (timing chain) tmr2013-069-006_a 1. Plug 2. Slot 3. Spring 4. Spring end 5. O-ring 7. Fit the spring on the other side into the plunger. Note: turn spring only clockwise in order to fit the spring end into the notch of the plunger to avoid loosening the plunger during spring installa- ...
Page 138
Subsection 09 (timing chain) tmr2011-045-003_b typical 1. Camshaft timing gear retaining screws 2. Camshaft timing gear 5. Remove the camshaft timing gear. Note: secure timing chain with a piece of wire. Inspecting the camshaft timing gear check camshaft timing gear for wear or deteriora- tion. If t...
Page 139
Subsection 09 (timing chain) vmr2015-033-002_a press tool lever down 1. Lever 2. Flat portion 3. Camshaft notice crankshaft and camshaft must be locked at tdc ignition position to place camshaft timing gear and timing chain in the proper position. 5. Place camshaft timing gear and timing chain on th...
Page 140
Subsection 09 (timing chain) vmr2015-033-005_a 1. Screw plug 2. O-ring 4. Remove the crankshaft position sensor (cps). Vmr2015-033-006_a 1. Cps 2. Screw 5. Set rear piston no. 2 to tdc ignition by turning the crankshaft clockwise. Required tool allen key 14 mm vmr2015-033-007_a turn crankshaft clock...
Page 141
Subsection 09 (timing chain) tmr2011-045-003_c typical - piston at tdc ignition 1. Printed marks on camshaft timing gear 2. Cylinder head base 6. Install the crankshaft tdc position tool to lock crankshaft in position. Refer to crankshaft tdc position tool in this subsection. Camshaft timing piston ...
Page 142
Subsection 09 (timing chain) install tool in magneto cover cps bore. Required tool crankshaft tdc position tool (p/n 529 036 201) note: make sure to match the teeth on the crankshaft tdc position tool with the magneto rotor. Tmr2011-045-020_a 1. Crankshaft tdc position tool teeth (end view) vmr2015-...
Page 143
Subsection 09 (timing chain) vmr2012-016-005_a 1. Timing chain 2. Lower timing chain guide 3. Timing chain guide (tensioner side) note: mark the operating direction of the timing chain and check for excessive radial play before removal. Refer to timing chain inspection . 5. Carefully pull the timing...
Page 144
Subsection 09 (timing chain) vmr2006-044-018_a 1. Timing chain if chain is excessively worn or damaged, replace it as a set (camshaft timing gear and timing chain). Check timing chain guides for wear, cracks or de- formation. Replace as required. Note: check also the timing chain guide (ten- sioner ...
Page 145: Bottom End
Subsection 10 (bottom end) bottom end service tools description part number page crankcase support mag/pto .............................................. 529 036 031 ........................................... 14 crankshaft locking bolt..................................................... 529 035 61...
Page 146
Subsection 10 (bottom end) crankcase and pto cover = component must be replaced when removed. New new new new loctite 243 loctite 243 6 ± 0,7 n•m (53 ± 6 lbf•in) 12 ± 1 n•m (106 ± 9 lbf•in) 10 ± 1 n•m (89 ± 9 lbf•in) engine oil engine oil 10 ± 1 n•m (89 ± 9 lbf•in) engine oil 10 ± 1 n•m (89 ± 9 lbf•...
Page 147
Subsection 10 (bottom end) crankshaft engine oil engine oil new new see tightening procedure see tightening procedure vmr2016-421-100_a vmr2016-421 3.
Page 148: Procedures
Subsection 10 (bottom end) procedures important: note position of parts on disas- sembly. This may help to find the root cause of a problem. A component that is not replaced should be reinstalled in the same position as originally mounted. Engine drive shaft note: the engine drive shaft transmits th...
Page 149
Subsection 10 (bottom end) tmr2011-014-009_a 1. Bearing cover 2. Drive shaft bearing check drive shaft for cracks, bend, pitting or other visible damages. Check drive shaft splines for wear or damages. Check oil seal running surface of the drive shaft for scratches. Replace if necessary. Installing ...
Page 150
Subsection 10 (bottom end) installing the front bearing cover vmr2016-120-001_a front of engine 1. Bearing cover front side 2. Drive shaft 3. Water pump cover tightening torque service product loctite 243 (blue) (p/n 293 800 060) front bearing cover screws 10 n•m ± 1 n•m (89 lbf•in ± 9 lbf•in) insta...
Page 151
Subsection 10 (bottom end) 2. Remove rear bearing cover, refer to engine drive shaft removal/installation in this subsection. 3. Remove o-ring from bearing cover. Vmr2013-018-003_a 1. Bearing cover 2. O-ring 4. Remove drive shaft seal from bearing cover. Tmr2013-018-005_a 1. Bearing cover 2. Oil sea...
Page 152
Subsection 10 (bottom end) notice avoid scoring surfaces with tool. Vmr2015-034-003_a 1. Pto cover 2. Oil seal inspecting the pto oil seal check oil seal running surface of crankshaft pto side for grooves. Replace if necessary. Installing the pto oil seal the installation is the reverse of the remov...
Page 153
Subsection 10 (bottom end) warning always wear skin and eye protection. Chem- icals can cause skin rash, skin burns and se- vere eye injury. 4. Check surface of sealing sleeve for wear or other damages. Replace pto cover if dam- aged. Tmr2011-014-013_a 1. Oil breather bore 2. Surface of sealing slee...
Page 154
Subsection 10 (bottom end) vmr2006-044-008_a 1. Mark position of oil bore on pto cover 2. Mark position of oil bore on plain bearing remover/installer notice misalignment of plain bearing and pto cover oil bores will prevent proper oil supply to plain bearings. 3. Carefully press in the plain bearin...
Page 155
Subsection 10 (bottom end) tmr2011-014-014_a 1. Breather gear 2. Intermediate gear 3. Water pump drive gear 4. Oil pump drive gear removing the drive gears 1. Remove pto cover, refer to pto cover in this subsection. 2. Withdraw intermediate gear and breather gear. 3. Remove oil pump drive gear, refe...
Page 156
Subsection 10 (bottom end) crankcase disassembling the crankcase 1. Refer to periodic maintenance proce- dures subsection and carry out the following: 1.1 drain cooling system. 1.2 drain engine oil. 1.3 drain gearbox oil. 2. Lock crankshaft. Refer to crankshaft locking procedure in the this subsec- ...
Page 157
Subsection 10 (bottom end) models with oil cooler tmr2011-014-021_a 1. Four screws m8 x 65 2. 13 screws m6 x 75 3. Two screw m6 x 25 all models 14. Carefully split crankcase halves using a screw- driver and a soft hammer. Vmr2016-035-003 note: during disassembly, do not damage the sealing surfaces o...
Page 158
Subsection 10 (bottom end) inspecting the crankcase check crankcase halves for cracks or other dam- age. Replace if damaged. Check mag and pto plain bearings for scoring or other damages. Tmr2011-014-024_a 1. Plain bearing measure plain bearing inside diameter and com- pare to pto/mag main journal d...
Page 159
Subsection 10 (bottom end) during reassembly, make sure not to damage the sealing surfaces of the crankcase halves. Note: place the proper crankcase support sleeve under crankcase halves before installing the plain bearings, refer to plain bearing removal procedure in this subsection. Install plain ...
Page 160
Subsection 10 (bottom end) reinstall water pump intermediate shaft and gears, refer to water pump gears in the cooling system subsection. Tighten crankcase retaining screws as per follow- ing sequence. All models vmr2016-035-002_b m8 screws tightening sequence tightening torque m8 crankcase screws 2...
Page 161
Subsection 10 (bottom end) crankshaft locking procedure note: when the crankshaft is locked, the rear piston no. 2 is at tdc (top dead center). The crankshaft cannot be locked with front piston no. 1 at tdc. Notice to see if the rear piston no. 2 is at tdc ignition, refer to camshaft timing gear in ...
Page 162
Subsection 10 (bottom end) vmr2007-037-008_b cylinder 2 at tdc 1. Number 2 piston identifier 2. Index mark on magneto flywheel 3. Notch on magneto cover 4. Cps bore in magneto cover 6. Use a screwdriver to check if the groove in the crankshaft is aligned with the crankshaft locking tool orifice. Vmr...
Page 163
Subsection 10 (bottom end) measure axial play on pto end of crankshaft using a dial indicator. Crankshaft axial play new 0.200 mm to 0.500 mm (.008 in to .02 in) service limit 0.600 mm (.024 in) if axial play is out of specification, replace crankcase and/or crankshaft. Connecting rod big end axial ...
Page 164
Subsection 10 (bottom end) crank pin diameter new 40.001 mm to 40.025 mm (1.5748 in to 1.5758 in) 570 and 850 engines service limit 39.990 mm (1.5744 in) new 41.986 mm to 42.010 mm (1.653 in to 1.6539 in) 1000r engineservice limit 41.967 mm (1.6522 in) if the crank pin diameter is out of specificati...
Page 165
Subsection 10 (bottom end) crankshaft radial play (pto cover bearing) measure crankshaft journal diameter (pto cover bearing). Compare to plain bearing inside diame- ter (pto cover). Refer to pto cover in this sub- section. Vmr2006-044-042_a 1. Micrometer 2. Crankshaft journal (pto support bearing) ...
Page 166
Subsection 10 (bottom end) vmr2006-044-043_a 1. Angle torque wrench 570 and 850 engines new connecting rods can be installed either way. Tightening torque step a tighten to 1/2 of specified torque step b tighten to 20 n•m ± 2 n•m (15 lbf•ft ± 1 lbf•ft) connecting rod screws step c torque an addition...
Page 167
Subsection 10 (bottom end) vmr2006-044-035_a 1. Crankcase half mag side 2. Connecting rod cylinder 1 3. Connecting rod cylinder 2 vmr2016-421 23.
Page 168: Continuously Variable
Subsection 11 (continuously variable transmission (cvt)(570/850)) continuously variable transmission (cvt) (570/850) service tools description part number page clutch holder ......................................................................... 529 036 238 ........................... 6, 14, 20–22...
Page 169
Subsection 11 (continuously variable transmission (cvt)(570/850)) 120 ± 8 n•m (89 ± 6 lbf•ft) see tightening procedure pulley flange cleaner isoflex grease topas nb 52 loctite 243 10 ± 1 n•m (89 ± 9 lbf•in) isoflex grease topas nb 52 5 ± 0,6 n•m (44 ± 5 lbf•in) 7 ± 0.8 n•m (62 ± 7 lbf•in) 570 engine...
Page 170
Subsection 11 (continuously variable transmission (cvt)(570/850)) = component must be replaced when removed. New 2.5 ± 0.5 n•m (22 ± 4.5 lbf•ft) 5 ± 1 n•m (44 ± 9 lbf•in) 5 ± 1 n•m (44 ± 9 lbf•in) new 2.5 ± 0.5 n•m (22 ± 4.5 lbf•ft) new 8 ± 1 n•m (71 ± 9 lbf•in) vmr2016-404-100_a vmr2016-404 3.
Page 171: General
Subsection 11 (continuously variable transmission (cvt)(570/850)) general note: for a better understanding, the following illustrations are taken with engine out of vehicle. To perform the following instructions, it is not nec- essary to remove engine. Warning never touch cvt while engine is running...
Page 172
Subsection 11 (continuously variable transmission (cvt)(570/850)) tightening torque cvt cover screws 7 n•m ± 0.8 n•m (62 lbf•in ± 7 lbf•in) drive belt removing the drive belt notice in case of a drive belt failure, the cvt, cover, drain reservoir and air outlet must be cleaned and inspected for obst...
Page 173
Subsection 11 (continuously variable transmission (cvt)(570/850)) vmr2006-021-011_a 1. Mark on drive pulley sliding sheave 2. Mark on governor cup 3. Lock the drive pulley. Required tool clutch holder (p/n 529 036 238) tmr2013-019-003_a 1. Clutch holder 2. Drive pulley sliding sheave 4. Loosen the d...
Page 174
Subsection 11 (continuously variable transmission (cvt)(570/850)) vmr2012-018-009_a 1. Drive pulley puller 2. Fixed sheave disassembling the drive pulley governor cup 1. Carefully lift governor cup until slider shoes move to their highest position in the guides. Tmr2011-015-005_a 1. Governor cup 2. ...
Page 175
Subsection 11 (continuously variable transmission (cvt)(570/850)) vmr2006-021-016_a 1. Removal direction 2. Assembly direction note: whenever removing a governor cup which already has two marked boxes, replace it by a new one. Vmr2006-021-018 sliding sheave unscrew lock nut and remove centrifugal le...
Page 176
Subsection 11 (continuously variable transmission (cvt)(570/850)) cleaning the drive pulley clean pulley faces and shaft with fine steel wool and a dry cloth. Using a paper towel with the recommended cleaning solvent, clean: – crankshaft tapered end – taper inside the fixed sheave of the drive pulle...
Page 177
Subsection 11 (continuously variable transmission (cvt)(570/850)) vmr2016-036-002_a 1. Roller 2. Slider shoe 3. Chamfer a. Roller outer diameter roller outer diameter new 13.80 mm to 14.00 mm (.543 in to .551 in) service limit 13.20 mm (.519 in) roller inner diameter new 8.025 mm to 8.175 mm (.316 i...
Page 178
Subsection 11 (continuously variable transmission (cvt)(570/850)) vmr2006-021-024_a a. Centrifugal lever pivot bolt bore diameter centrifugal lever pivot bolt bore diameter new 6.113 mm to 6.171 mm (.241 in to .243 in) service limit 6.300 mm (.248 in) measure bushing diameters of sliding sheave. Req...
Page 179
Subsection 11 (continuously variable transmission (cvt)(570/850)) check for any marks on fixed sheave plate. Re- place if necessary. Spring measure spring free length and squareness. If spring is out of specification, replace by a new one. Clutch spring free length 570 engine service limit 85 mm (3....
Page 180
Subsection 11 (continuously variable transmission (cvt)(570/850)) vmr2006-021-029_a 1. Top edge of roller sleeve 2. Mating surface of slider shoes 3. Vice whenever replacing the roller sleeves, make a mark in the box on the governor arm using a punch. Notice do not tap too hard. Severe damage to the...
Page 181
Subsection 11 (continuously variable transmission (cvt)(570/850)) tmr2013-019-006_a 1. Clutch holder (p/n 529 036 238) 2. Drive pulley driven pulley removing the driven pulley 1. Remove drive belt, refer to drive belt re- moval in this subsection. 2. Hold the driven pulley and loosen the driven pul-...
Page 182
Subsection 11 (continuously variable transmission (cvt)(570/850)) vmr2006-021-035_a 1. Retaining ring 2. Torque gear 3. Fixed sheave of driven pulley note: the following procedure is not necessary except if ball bearing or shaft must be removed. Refer to inspection before proceeding. 2. Heat ball be...
Page 183
Subsection 11 (continuously variable transmission (cvt)(570/850)) using a paper towel with pulley flange cleaner (p/n 413 711 809) , clean countershaft end and shaft bore. Notice to avoid damage, make sure cleaner does not contact the countershaft oil seal. Vmr2006-021-037_a 1. Countershaft support ...
Page 184
Subsection 11 (continuously variable transmission (cvt)(570/850)) bushing inner diameter new 30.060 mm to 30.100 mm (1.183 in to 1.185 in) service limit 30.200 mm (1.189 in) check torque gear for visible damage and cracks. Measure for wear limit using a caliper. Tmr2011-015-011_a a. Measurement insi...
Page 185
Subsection 11 (continuously variable transmission (cvt)(570/850)) spring free length all engines service limit 125 mm (4.921 in) clutch spring squareness all engines service limit 3.8 mm (.15 in) assembling the driven pulley for installation, reverse the removal procedure. Pay attention to following...
Page 186
Subsection 11 (continuously variable transmission (cvt)(570/850)) 570 engine install cam on countershaft. Notice cam splines must engage on coun- tershaft splines. Required product countershaft splines and countershaft end loctite 767 (antiseize lubricant) (p/n 293 800 070) vmr2012-018-014_a typical...
Page 187
Subsection 11 (continuously variable transmission (cvt)(570/850)) required tool clutch holder (p/n 529 036 238) tightening torque step a 20 n•m ± 1 n•m (15 lbf•ft ± 1 lbf•ft) driven pulley screw step b 180° ± 5° check driven pulley end play. Specification driven pulley end play 0 mm (0 in) 850 engin...
Page 188
Subsection 11 (continuously variable transmission (cvt)(570/850)) vmr2012-018-011_a 1. Driven pulley screw 2. Thrust washer insert a screwdriver of approximately 5 mm (.197 in) diameter in the cam. Note: for clarity of understanding, some parts not shown in the following illustration. Vmr2012-018-01...
Page 189
Subsection 11 (continuously variable transmission (cvt)(570/850)) tmr2013-019-009_b 850 engine 1. Clutch holder 2. Screwdriver a. Cam freedom of movement install drive belt. Refer to drive belt in this sub- section. Required tool puller/locking tool (p/n 529 036 098) vmr2012-018-022_a 1. Puller/lock...
Page 190
Subsection 11 (continuously variable transmission (cvt)(570/850)) vmr2012-018-020_a 1. Cvt air guide 2. O-rings installing the cvt air guide for installation reverse the removal procedure. Always install new o-rings before installing the cvt air guide. Vmr2016-404 23.
Page 191: (With External Switches)
Subsection 13 (gearbox and 4x4 coupling unit (with external switches)) gearbox and 4x4 coupling unit (with external switches) service tools description part number page backlash measurement tool............................................. 529 036 030 ........................................... 13 b...
Page 192
Subsection 13 (gearbox and 4x4 coupling unit (with external switches)) gearbox components and 4x4 coupling mechanism super lube grease 25 ± 3 nm (18 ± 2 lbfft) new = component must be replaced when removed. New 10 ± 1 nm (89 ± 9 lbfin) loctite 243 super lube grease super lube grease engine oil e...
Page 193
Subsection 13 (gearbox and 4x4 coupling unit (with external switches)) gearbox housing and 4x4 actuator unit = component must be replaced when removed. New petamo grease petamo grease petamo grease 2.5 ± 0.3 n•m (22 ± 3 lbf•in) vmr2015-036-001_a vmr2016-422 3.
Page 194: General
Subsection 13 (gearbox and 4x4 coupling unit (with external switches)) general gearbox identification gearbox with gbps this gearbox is equipped with 1 gearbox position sensor. Vmr2016-124-001_a gearbox, right hand side 1. Gearbox position sensor 2. Output shaft gearbox with external switches this g...
Page 195: Procedures
Subsection 13 (gearbox and 4x4 coupling unit (with external switches)) 4 wheel drive indication fails 1. 4wd indicator switch failure. - test 4wd indicator switch. Replace as required. - bad contact. Check for corrosion or loose con- nector. - damaged wires. Repair as required. 4 wheel drive does no...
Page 196
Subsection 13 (gearbox and 4x4 coupling unit (with external switches)) vss circuit protection condition circuit protection supplied with main relay activated fuse 5 of fuse block 1 (from main relay r2) testing the vss input voltage 1. Set multimeter to vdc. Required tool fluke 115 multimeter (p/n 52...
Page 197
Subsection 13 (gearbox and 4x4 coupling unit (with external switches)) vmr2016-123-003_a 1. Screw 2. Vss installing the vss for installation, reverse the removal procedure. Pay attention to the following. Lubricate vss o-ring. Vss o-ring service product super lube grease (p/n 293 550 030) tighten vs...
Page 198
Subsection 13 (gearbox and 4x4 coupling unit (with external switches)) a blank space indicates switch is not making con- tact, there should be no continuity (r = infinite). If the indicator switch is good, check the vehicle harness and/or indicator lights. Removing the gearbox position indicator swi...
Page 199
Subsection 13 (gearbox and 4x4 coupling unit (with external switches)) switch position switch wire resistance 2wd close to 0 4wd black/ beige engine ground infinite (ol) if the resistance is out of specification, replace the 4wd indicator switch. Installing the 4wd indicator switch for installation,...
Page 200
Subsection 13 (gearbox and 4x4 coupling unit (with external switches)) actuator o-ring service product super lube grease (p/n 293 550 030) vmr2015-123-003_a 1. Actuator o-ring ensure coupling fork is in 4wd position (posi- tioned toward the front of vehicle). Tmr2011-016-026_a 1. Coupling fork in 4w...
Page 201
Subsection 13 (gearbox and 4x4 coupling unit (with external switches)) gearbox oil seals replacing the gearbox oil seals replace oil seals if they are brittle, hard or dam- aged. A small flat screwdriver can be used to remove most of these oil seals. Notice avoid scoring parts during oil seal remova...
Page 202
Subsection 13 (gearbox and 4x4 coupling unit (with external switches)) vmr2012-019-007_a 1. Countershaft oil seal 2. Oil seal pusher shift shaft oil seal the shift shaft oil seal can be removed without removing the gearbox from the vehicle. To replace the shift shaft oil seal, refer to body subsecti...
Page 203
Subsection 13 (gearbox and 4x4 coupling unit (with external switches)) vmr2006-022-008_a 1. Output shaft oil seal 2. Oil seal installer output shaft and coupling mechanism remove gearbox. Refer to gearbox in this sub- section. Before removing the right housing and output shaft measure the backlash o...
Page 204
Subsection 13 (gearbox and 4x4 coupling unit (with external switches)) vmr2006-022-012_a 1. Backlash measurement tool 2. Mark on tab a. 47 mm (1.85 in) 6. Position the head of the dial indicator, against the tab at a 90° angle and on the line. Then, gently rotate the output shaft. This reading gives...
Page 205
Subsection 13 (gearbox and 4x4 coupling unit (with external switches)) vmr2012-019-009_a 1. Output shaft 2. Coupling sleeve 3. Soft hammer 6. Remove: – coupling sleeve – o-ring – ball bearing – thrust washer. Vmr2006-022-024_a 1. Coupling sleeve 2. O-ring 3. Ball bearing 4. Thrust washer 7. Remove: ...
Page 206
Subsection 13 (gearbox and 4x4 coupling unit (with external switches)) replace oil seal if brittle, hard or damaged. Replace o-rings if brittle, hard or damaged. Check splines of coupling sleeve for wear or other damages. Vmr2006-022-030_a 1. Inspect splines measure the coupling sleeve groove width....
Page 207
Subsection 13 (gearbox and 4x4 coupling unit (with external switches)) if backlash is within specifications, remove dial indicator, backlash measuring tool, bearing cover and right housing. Note: install coupling fork, pin and screw in right housing before applying sealant to the mating sur- face. V...
Page 208
Subsection 13 (gearbox and 4x4 coupling unit (with external switches)) tightening torque step a hand tightened right housing m8 screws step b 25 n•m ± 3 n•m (18 lbf•ft ± 2 lbf•ft) vmr2006-022-036_a tighten all m6 torx screws to specification tightening torque right housing m6 screws 10 n•m ± 1 n•m (...
Page 209
Subsection 13 (gearbox and 4x4 coupling unit (with external switches)) bevel gear axial clearance new 0.02 mm to 0.15 mm (.0008 in to .0059 in) service limit 0.19 mm (.0075 in) 3. Unscrew the left housing screws. 4. Place the left housing on a wood stand, center housing pointing upwards. 5. Using 2 ...
Page 210
Subsection 13 (gearbox and 4x4 coupling unit (with external switches)) vmr2006-022-058_a 1. Bevel gear 2. Low range gear 3. Shim 11. Remove sliding gear with shift fork. Vmr2006-022-059_a 1. Sliding gear 2. Shift fork 12. Remove thrust washer, needle bearing and re- verse gear. Vmr2006-022-060_a 1. ...
Page 211
Subsection 13 (gearbox and 4x4 coupling unit (with external switches)) vmr2006-022-062_a 1. Countershaft 2. Low range gear 3. High range gear 15. Insert a flat screwdriver in the slot of index lever. Turn screwdriver clockwise and remove shift drum. Vmr2006-022-065_a 1. Index lever 2. Shift drum 16....
Page 212
Subsection 13 (gearbox and 4x4 coupling unit (with external switches)) vmr2006-022-068_a press shaft in the direction as shown by the arrow 1. Intermediate gear shaft 2. Left housing removing the bearings if necessary heat housing up to 100°c (212°f) be- fore removing ball bearings or needle bearing...
Page 213
Subsection 13 (gearbox and 4x4 coupling unit (with external switches)) – worn or scoured shift fork – worn or scoured shift fork shaft – rounded engagement dogs and slots – bent shift forks – bent shift fork shaft – worn shift fork engagement pins – worn tracks on shift drum – worn shift fork engage...
Page 214
Subsection 13 (gearbox and 4x4 coupling unit (with external switches)) vmr2006-022-077_a 1. Main gear 2. Caliper a. Width for engagement of shift fork width of shift fork engagement groove (high gear shifting) new 5.00 mm to 5.10 mm (.197 in to .201 in) service limit 5.20 mm (.205 in) width of shift...
Page 215
Subsection 13 (gearbox and 4x4 coupling unit (with external switches)) vmr2006-022-124_a 1. Free pinion bearings bevel gear shaft service limit free pinion bearing 24.984 mm (.9836 in) shims always replace shim by a new one with the same thickness, when reassembling the gearbox with existing output ...
Page 216
Subsection 13 (gearbox and 4x4 coupling unit (with external switches)) c d(e) b g i(j) h f 1 a 2 vmr2006-022-079_a 1. Mating surface — output shaft 2. Mating surface — left housing bevel gear backlash procedure use the following course of calculation to determine the theoretical shim thickness d: d ...
Page 217
Subsection 13 (gearbox and 4x4 coupling unit (with external switches)) this bevel gear reference number could be be- tween - 10 and + 10. Vmr2006-022-085_a 1. Bevel gear 2. Bevel gear reference number use following formula to find out value b. Bevel gear reference number b = ( 100 ) + 37.8 for examp...
Page 218
Subsection 13 (gearbox and 4x4 coupling unit (with external switches)) vmr2006-022-082_a 1. Ball bearing inner race 2. Mating surface of left housing 3. Depth gauge g = distance between mating surface of center housing and shim surface. Vmr2006-022-083_a 1. Mating surface of center gear housing 2. S...
Page 219
Subsection 13 (gearbox and 4x4 coupling unit (with external switches)) place new bearing in freezer for 10 minutes be- fore installation. Use a suitable installer for installing ball bearings of countershaft and bevel gear. Note: place gearbox housings on a wood stand before installing ball bearings...
Page 220
Subsection 13 (gearbox and 4x4 coupling unit (with external switches)) vmr2006-022-052_b 1. Intermediate gear shaft fit support flange in the left housing and install index lever. Note: fit step ring into index lever. Vmr2006-022-090_a 1. Washer 2. Index lever 3. Step ring 4. Index spring install pa...
Page 221
Subsection 13 (gearbox and 4x4 coupling unit (with external switches)) vmr2006-022-093_a 1. Reverse gear 2. Needle bearing 3. Thrust washer 4. Countershaft bearing screw install countershaft with low gear and high gear assembly. Vmr2006-022-094_a 1. Countershaft 2. Low gear 3. High gear install a ne...
Page 222
Subsection 13 (gearbox and 4x4 coupling unit (with external switches)) vmr2006-022-097_a 1. Index lever 2. Shift drum 3. Neutral position vmr2006-022-101_a 1. Parking stop location 2. Reverse stop location 3. Neutral stop location 4. High gear stop location 5. Low gear stop location install shift sh...
Page 223
Subsection 13 (gearbox and 4x4 coupling unit (with external switches)) gearbox housing mating surfaces are best cleaned using a combination of loctite chisel (gasket remover) (p/n 413 708 500) and a brass brush. Brush a first pass in one direction then make the final brushing perpendicularly (90°) t...
Page 224
Subsection 13 (gearbox and 4x4 coupling unit (with external switches)) vmr2016-037-001_a 1. O-ring 2. Bearing cover tighten the three (3) nuts that attaching the gear- box to the engine. Tightening torque service product loctite 243 (blue) (p/n 293 800 060) gearbox retaining nuts 25 n•m ± 3 n•m (18 ...
Page 225: (With Gbps)
Subsection 13 (gearbox and 4x4 coupling unit (with gbps)) gearbox and 4x4 coupling unit (with gbps) service tools description part number page countershaft oil seal pusher .......................................... 529 036 222 ........................................... 12 ecm adapter tool.............
Page 226
Subsection 13 (gearbox and 4x4 coupling unit (with gbps)) gearbox components and 4x4 coupling mechanism = component must be replaced when removed. New new loctite 5910 loctite 243 engine oil 10 ± 1 n•m (89 ± 9 lbf•in) 10 ± 1 n•m (89 ± 9 lbf•in) 25 ± 3 n•m (18 ± 2 lbf•ft) 3 ± 0,3 n•m (27 ± 3 lbf•in) ...
Page 227
Subsection 13 (gearbox and 4x4 coupling unit (with gbps)) gearbox components and 4x4 coupling mechanism = component must be replaced when removed. New new new loctite 5910 super lube grease loctite 243 loctite 648 engine oil loctite 648 petamo grease 20 ± 2 n•m (15 ± 1.5 lbf•ft) 10 ± 1 n•m (89 ± 9 l...
Page 228: General
Subsection 13 (gearbox and 4x4 coupling unit (with gbps)) general gearbox identification gearbox with gbps this gearbox is equipped with 1 gearbox position sensor. Vmr2016-124-001_a gearbox, right hand side 1. Gearbox position sensor 2. Output shaft gearbox with external switches this gearbox is equ...
Page 229: Procedures
Subsection 13 (gearbox and 4x4 coupling unit (with gbps)) gear indication fails 1. Defective gearbox position sensor (gbps). - perform a gearbox position sensor test. - damaged wires. Repair as required. Gear(s) is (are) hard to shift 1. Incorrect shift rod adjustment. - adjust shift rod (refer to s...
Page 230
Subsection 13 (gearbox and 4x4 coupling unit (with gbps)) vmr2012-020-020_a 1. Vss connector 5. Measure voltage as per following table. Vehicle speed sensor input voltage test test probes result (key on) pin a violet/blue wire pin c green/brown wire battery voltage if voltage is not as specified, te...
Page 231
Subsection 13 (gearbox and 4x4 coupling unit (with gbps)) installing the vss for installation, reverse the removal procedure. Pay attention to the following. Lubricate vss o-ring. Vss o-ring service product super lube grease (p/n 293 550 030) tighten vss retaining screw to specification. Tightening ...
Page 232
Subsection 13 (gearbox and 4x4 coupling unit (with gbps)) vmr2016-424-001 testing the gbps input voltage note: prior to conduct testing, check fault codes in b.U.D.S. Back-probe the gbps connector using fluke rigid back-probe (p/n tp88) or equivalent. Test as follow: multimeter probe positions volta...
Page 233
Subsection 13 (gearbox and 4x4 coupling unit (with gbps)) important: do not force to install gbps if shaft flat is not properly aligned. If alignment is incor- rect, check shift rod adjustment. Tmr2011-016-011_a 1. Flat on shift drum shaft tightening torque gbps retaining screws 10 n•m ± 1 n•m (89 l...
Page 234
Subsection 13 (gearbox and 4x4 coupling unit (with gbps)) required tool fluke 115 multimeter (p/n 529 035 868) unplug actuator connector. Turn ignition key on. Set emergency engine stop switch to run. Measure voltage as follows. Switch position switch wire voltage 2wd white/blue 4wd white/black whit...
Page 235
Subsection 13 (gearbox and 4x4 coupling unit (with gbps)) tmr2011-016-027_a 1. Actuator 2. Actuator fork 3. Coupling fork rotate the actuator counterclockwise until it ori- ents itself to mounting position. Notice do not cut or break the actuator o-ring. Install all actuator screws and tighten them....
Page 236
Subsection 13 (gearbox and 4x4 coupling unit (with gbps)) tmr2011-016-013_a 1. Countershaft oil seal 2. Distance sleeve tmr2011-016-014_a 1. Distance sleeve 2. O-ring install countershaft oil seal tool. Required tool countershaft oil seal pusher (p/n 529 036 222) vmr2012-020-005_a 1. Countershaft oi...
Page 237
Subsection 13 (gearbox and 4x4 coupling unit (with gbps)) remove propeller shaft. Refer to rear drive subsection. Tmr2011-016-015_a 1. Shift shaft oil seal 2. Shift drum shaft oil seal 3. Output shaft oil seal punch a sharp screwdriver through oil seal for re- moval. Note: position screwdriver only ...
Page 238
Subsection 13 (gearbox and 4x4 coupling unit (with gbps)) tmr2011-016-038_a lh side of engine 1. Nut m8 tmr2011-016-039_a rh side of engine 1. Nut m8 pull gearbox to separate it from engine. Disassembling the gearbox note: during gearbox disassembly, inspect the condition of each part closely. Gearb...
Page 239
Subsection 13 (gearbox and 4x4 coupling unit (with gbps)) index lever and index washer set gearbox to neutral position. Remove screw retaining the index washer to the shift drum. Tmr2011-016-073_a 1. Screw 2. Index washer insert a flat screwdriver in the slot of index lever. Turn screwdriver clockwi...
Page 240
Subsection 13 (gearbox and 4x4 coupling unit (with gbps)) tmr2011-016-047_a 1. Shift fork shaft 2. Shift fork 3. Shift drum remove main shaft assembly with shift fork. Tmr2011-016-048_a 1. Main shaft assembly 2. Shift fork remove shifting sleeve (high range gear) and shift fork. Vmr2012-020-006_a 1....
Page 241
Subsection 13 (gearbox and 4x4 coupling unit (with gbps)) vmr2012-020-008_a 1. Snap ring 2. Shifting sleeve (low/reverse range gear) 3. Snap ring 4. Free pinion (reverse range gear) 5. Needle bearing 6. Main shaft assembly gearbox right cover remove actuator and gbps (gearbox po- sition sensor) , se...
Page 242
Subsection 13 (gearbox and 4x4 coupling unit (with gbps)) tmr2011-016-072_a 1. Screw 2. Washer 3. Intermediate gear 4. Dowel pin remove shift fork shaft. Disengage shift forks from shift drum. Tmr2011-016-076_a 1. Shift fork shaft 2. Shift fork 3. Shift drum remove shift drum and thrust washer. Tmr2...
Page 243
Subsection 13 (gearbox and 4x4 coupling unit (with gbps)) vmr2015-123-004_a 1. Hexagonal screw 2. Coupling fork shaft 3. Coupling fork countershaft use a soft hammer to push out countershaft from gearbox cvt side. Remove distance sleeve and o-ring. Tmr2011-016-042_a 1. Countershaft 2. Distance sleev...
Page 244
Subsection 13 (gearbox and 4x4 coupling unit (with gbps)) tmr2011-016-054_a 1. Ball bearing main shaft 2. Center housing inspecting the gearbox always verify for the following when inspecting gearbox components: – gear teeth damage – worn or scoured bearing surfaces – rounded engagement dogs and slo...
Page 245
Subsection 13 (gearbox and 4x4 coupling unit (with gbps)) width of shift fork engagement groove new 5.30 mm to 5.40 mm (.209 in to .213 in) service limit 5.50 mm (.217 in) shafts check bearing pin of reverse intermediate gear for wear. Tmr2011-016-057_a 1. Bearing pin a. Outer diameter bearing pin o...
Page 246
Subsection 13 (gearbox and 4x4 coupling unit (with gbps)) tmr2011-016-080_a 1. Track for the low/reverse range gear shift fork 2. Track for the high range gear shift fork 3. Springs shift forks check both shift forks for visible damage, wear or bent shift fork claws. Check engagement rollers for wea...
Page 247
Subsection 13 (gearbox and 4x4 coupling unit (with gbps)) vmr2006-022-032_a 1. Coupling fork 2. Micrometer coupling fork claw thickness new 4.95 mm to 5.05 mm (.195 in to .199 in) service limit 4.80 mm (.189 in) assembling the gearbox the assembly of gearbox is essentially the reverse of disassembly...
Page 248
Subsection 13 (gearbox and 4x4 coupling unit (with gbps)) vmr2012-020-006_a 1. Shifting sleeve (high range gear) 2. Shift fork carefully fit main shaft assembly with shift fork (low/reverse range gear) into inner splines of shifting sleeve (high range gear). Install reverse intermediate gear. Tmr201...
Page 249
Subsection 13 (gearbox and 4x4 coupling unit (with gbps)) install coupling fork, coupling fork shaft and hexagonal screw in right cover before applying sealant to the mating surface. Vmr2015-123-002_a 1. Coupling fork 2. Coupling fork shaft 3. Hexagonal screw shift shaft and shift drum install shift...
Page 250
Subsection 13 (gearbox and 4x4 coupling unit (with gbps)) at installation of left cover, engage parking lock lever slot onto index washer pin. Tmr2011-016-065_a 1. Left cover 2. Parking lock lever slot 3. Index washer pin install all screws on left cover and tighten them as per following sequence. T...
Page 251
Subsection 13 (gearbox and 4x4 coupling unit (with gbps)) before gearbox installation check o-ring in bearing cover if brittle, hard or damaged. Replace if nec- essary. Tmr2011-016-040_a 1. Bearing cover 2. O-ring tighten the four (4) nuts that attach the gearbox to the engine. Tightening torque ser...
Page 252: Switches)
Subsection 15 (shifter (gearbox with external switches)) shifter (gearbox with external switches) service products description part number page loctite 243 (blue)..................................................................... 293 800 060 ............................................. 2 loctite ...
Page 253: Procedures
Subsection 15 (shifter (gearbox with external switches)) procedures handle handle removal vmr2015-024-002_a step 1: loosen lock nut step 2: unscrew shift lever handle handle installation reverse the removal procedure. Service product where used loctite 243 (blue) (p/n 293 800 060) shift lever thread...
Page 254
Subsection 15 (shifter (gearbox with external switches)) vmr2015-024-005_a vmr2015-024-007_a vmr2015-024-008_a 1. Locking tie to cut 5. Remove shift lever with shift lever support. Shift lever inspection check shift lever for bending or cracks. Check spring and bushing condition. Check ball joint co...
Page 255
Subsection 15 (shifter (gearbox with external switches)) shift rod shift rod adjustment 1. Place shift lever in neutral position. Notice move vehicle back and forth to en- sure gearbox is set in neutral position. 2. Secure vehicle using wheel chocks. 3. Remove body parts as required. Refer to shift ...
Page 256
Subsection 15 (shifter (gearbox with external switches)) vmr2015-037-004_a 1. Shift rod ball joint 2. Shift plate a. Parallel within +/- 5° warning after adjustment, make sure the park posi- tion is also properly set. Shift plate shift plate removal note: do not remove shift plate needlessly. 1. Pla...
Page 257
Subsection 15 (shifter (gearbox with external switches)) if there are no index marks, adjust shift plate as per following illustrations. A atv out 2 3 4 1 vmr2015-037-010_a shift plate alignment 1. "atv out" marking this side 2. Forward edge of shift plate 3. Horizontal plane (top surface of gearbox...
Page 258
Subsection 16 (shifter (gearbox with gbps)) shifter (gearbox with gbps) service products description part number page loctite 243 (blue)..................................................................... 293 800 060 ........................................... 2 = component must be replaced when re...
Page 259: Procedures
Subsection 16 (shifter (gearbox with gbps)) procedures handle handle removal vmr2015-024-002_a step 1: loosen lock nut step 2: unscrew shift lever handle handle installation reverse the removal procedure. Service product where used loctite 243 (blue) (p/n 293 800 060) shift lever threads shift lever...
Page 260
Subsection 16 (shifter (gearbox with gbps)) shift lever inspection check shift lever for bending or cracks. Check spring and bushing condition. Check ball joint condition. Replace all damaged parts. Shift lever installation the installation is the reverse of the removal pro- cedure. However, pay att...
Page 261
Subsection 16 (shifter (gearbox with gbps)) warning after adjustment, make sure that park posi- tion works properly. Shift plate shift plate removal note: do not remove shift plate needlessly. 1. Place shift lever in neutral position. 2. Refer to body subsection and remove the rh engine cover. 3. Re...
Page 262
Subsection 16 (shifter (gearbox with gbps)) ensure that shift shaft protrudes shift plate as per illustration. Vmr2012-021-011_a 1. Shift shaft end 2. Shift plate a. 2.5 mm ± 1 mm (.1 in ± .040 in) adjust shift rod, refer to shift rod adjust- ment in this subsection. Tighten shift plate nut to speci...
Page 263
Subsection 01 (engine management system (ems)) engine management system (ems) engine with gearbox using external switches ecm vss gbps cts iacv inj 2 inj 1 ign coil ops 4wd tps mapts cps cooling fan ign sw fuel pump starter solenoid start sw ecm ecm out in vmr2015-064-001_aen vmr2016-127 1.
Page 264
Subsection 01 (engine management system (ems)) engine with gearbox using external switches md cps ops gbps ba inj2 inj1 hic1 hic2 cts tps ecm iacv mapts vss sd vmr2015-064-002_a 2 vmr2016-127.
Page 265
Subsection 01 (engine management system (ems)) engine with gearbox using gbps ecm vss gbps cts iacv inj 2 inj 1 ign coil ops 4wd tps mapts cps cooling fan ign sw fuel pump starter solenoid start sw ecm ecm out in vmr2015-125-001_a vmr2016-127 3.
Page 266
Subsection 01 (engine management system (ems)) engine with gearbox using gbps md cps ops gbps ba inj2 inj1 hic1 hic2 cts tps ecm iacv mapts vss sd vmr2015-125-002_a 4 vmr2016-127.
Page 267: General
Subsection 01 (engine management system (ems)) abbreviation definition ba ignition coil cps crankshaft position sensor cts coolant temperature sensor ecm electronic control module gbps gear box position sensor hic1‡ harness interconnect 1 hic2‡ harness interconnect 2 iacv idle air control valve inj1...
Page 268
Subsection 01 (engine management system (ems)) engine rpm limiter the ecm limits the maximum engine speed with the shifter selected to any position. It uses the cps and the gbps for this function. An override switch, on the handlebar, allows the engine to be run at a higher speed than the rpm limite...
Page 269: General
Subsection xx (controller area network (can)) controller area network (can) general system description the can (controller area network) protocol is an iso standard for serial data communication. The can bus links the ecm, multifunction gauge and dps module together so that they can communi- cate to...
Page 270: Communication Tools And
Subsection 03 (communication tools and b.U.D.S.) communication tools and b.U.D.S. Service tools description part number page diagnostic cable .................................................................... 710 000 851 ......................................... 1, 3 mpi-2 interface card ............
Page 271: Procedures
Subsection 03 (communication tools and b.U.D.S.) usb light status what to do light is off check usb connection between mpi card and pc computer. Check usb operation on pc computer (hardware or usb drivers) light is green connections are good. Communication can take place on usb side prerequisite for...
Page 272
Subsection 03 (communication tools and b.U.D.S.) vmr2012-023-003_a 1. Diagnostic connector connecting the pc to the vehicle warning if the computer you are using is connected to the 110 vac power outlet, there is a poten- tial risk of electrocution when working in con- tact with water. Be careful no...
Page 273
Subsection 03 (communication tools and b.U.D.S.) tmr2015-028-003_a typical - successful connection 1. Connection protocol 2. Number of modules read model number of modules models without dps 2 (ecm and multifunction gauge) models with dps 3 (ecm, dps and multifunction gauge) if the number is less th...
Page 274
Subsection 03 (communication tools and b.U.D.S.) vbl2012-007-010_a 1. Greyed out: no update to perform black: update file available before applying an update, log onto knowl- edge center and search the vehicle's vin to find the unit's history. Tmr2015-028-001_a complete all warranty campaigns to ver...
Page 275
Subsection 03 (communication tools and b.U.D.S.) in such a case, turn ignition switch off, then wait for the message to disappear before disconnect- ing the mpi. Disconnect mpi card and store the vehicle diag- nostic connector in its protective cap. Vmr2012-023-003_a 1. Diagnostic connector in its s...
Page 276: General
Subsection 01 (diagnostic and fault codes) diagnostic and fault codes general monitoring system the engine management system (ems) features a monitoring system that self-diagnoses various electrical and electronic components. This mode becomes active when the ignition key is turned on. Note: some co...
Page 277
Subsection 01 (diagnostic and fault codes) fault codes fault code categories a fault code consists of an alphanumeric designa- tor followed by a hexadecimal number of 3 digits. The alphanumeric designator defines the category of the fault code while the hexadecimal number refers to a unique fault. F...
Page 278
Subsection 01 (diagnostic and fault codes) 2. Press and hold mode button while quickly toggling hi - lo beam. Note: a minimum of 3 hi - lo toggles must be completed within 2 seconds. Vdd2008-001-097_a typical step 1: press and hold step 2: quickly toggle hi - lo beam how to read fault codes using b....
Page 279
Subsection 01 (diagnostic and fault codes) fault page description item information more details button to display possible causes and service actions related to the selected fault clear fault button to clear occurred faults one at a time clear occurred faults button to clear all occurred faults in r...
Page 280
Subsection 01 (diagnostic and fault codes) more details page description item information possible causes list the possible causes that triggered the fault service actions list the possible actions to perform to solve the fault conditions when fault occurred list the operating conditions of the engi...
Page 281
Subsection 01 (diagnostic and fault codes) note: the page displays data whatever there is fault code(s) or not. Rmr2011-070-003_a 1. History tab 2. Additional history pages history page description item information minimum/ maximum display the minimum and maximum values encountered. Click "clear min...
Page 282
Subsection 01 (diagnostic and fault codes) general guidelines to solve fault codes condition action low system voltage on one module. Power problem on sensor(s) check related fuse(s) and relay. Check related power and ground wires. Check for common power supply to several sensors/modules (refer to p...
Page 283
Subsection 01 (diagnostic and fault codes) ecus share information and their systems may interact with each other. Certain faults may cause more than one ecu to set a fault code or indication (pilot lamp or message) as the failure of some components may affect the operation of several systems. Fault ...
Page 284: General
Subsection xx (diagnostic and fault codes) diagnostic and fault codes general fault code table pcode module description cause action c2109 scm-xmr release valve activation delay exceeded pressure did not drop to desired set point after predefined delay release valve tube momentary blocked blown valv...
Page 285
Subsection xx (diagnostic and fault codes) pcode module description cause action c2111 scm-xmr auxiliary line pressure sensor value out of range too many values of the external sensor out of range (negative pressure) sensor disconnect damaged circuit wires or connectors faulty auxiliary line sensor ...
Page 286
Subsection xx (diagnostic and fault codes) pcode module description cause action c21e0 scm-xmr system rear suspension pumping delay exceeded pressure did not reach to desired set point after predefined delay leak in the system jammed compressor intake tube damaged circuit wires or connectors blown c...
Page 287
Subsection xx (diagnostic and fault codes) pcode module description cause action c21e2 scm-xmr system rear suspension valve failure too many occurrence of pressure pumping and release in short delay rear valve tube blocked blown valve fuse faulty valve block damaged circuit wires or connectors fault...
Page 288
Subsection xx (diagnostic and fault codes) pcode module description cause action c21f0 scm-xmr system front suspension pumping delay exceeded pressure did not reach to desired set point after predefined delay leak in the system jammed compressor intake tube damaged circuit wires or connectors blown ...
Page 289
Subsection xx (diagnostic and fault codes) pcode module description cause action c21f2 scm-xmr system front suspension valve failure too many occurrence of pressure pumping and release in short delay front valve tube blocked blown valve fuse faulty valve block damaged circuit wires or connectors fau...
Page 290
Subsection xx (diagnostic and fault codes) pcode module description cause action p0107 ecm manifold air pressure sensor voltage too low damaged sensor, damaged circuit wires, damaged connector or damaged ecm pins, ecm voltage supply low make sure sensor connector is fully inserted. Measure voltage b...
Page 291
Subsection xx (diagnostic and fault codes) pcode module description cause action p0113 ecm intake air temperature sensor 1 circuit high damaged sensor, wires shorted to battery +, ecm voltage supply too high. Make sure sensor connector is fully inserted. Measure voltage between harness connector pin...
Page 292
Subsection xx (diagnostic and fault codes) pcode module description cause action p0118 ecm engine coolant temperature sensor 1 circuit high disconnected sensor, or sensor resistance too high. Disconnect the sensor. Measure resistance from connector: ecm-f4 to cts-1 (expected value: measure resistanc...
Page 293
Subsection xx (diagnostic and fault codes) pcode module description cause action p0231 ecm fuel pump circuit shorted to ground, or open circuit blown fuse, damaged or disconnected fuel pump relay, damaged circuit wires, damaged connectors or damaged ecm output pins. Check fuse measure voltage betwee...
Page 294
Subsection xx (diagnostic and fault codes) pcode module description cause action p0262 ecm cylinder 1 injector shorted to battery + damaged injector, damaged circuit wires, damaged connector or damaged ecm output pins. Disconnect injector 1 measure resistance between injector pin 1 and 2 (expected v...
Page 295
Subsection xx (diagnostic and fault codes) pcode module description cause action p0480 ecm radiator cooling fan relay blown fuse, damaged or disconnected relay, damaged circuit wires or connectors, damaged ecm output pins, damaged relay. Check fuse disconnect relay. Measure resistance between termin...
Page 296
Subsection xx (diagnostic and fault codes) pcode module description cause action p0523 ecm engine oil pressure sensor sticking damaged switch, damaged circuit wires, damaged connector, damaged ecm pins. Measure resistance between harness connector ops and ground when engine stopped. (expected value ...
Page 297
Subsection xx (diagnostic and fault codes) pcode module description cause action p0563 dps system voltage high rectifier failure, damaged circuit wires or connection. Measure battery voltage with engine stopped. (expected value: 11 to 13 volts) measure battery voltage with engine running at 3500rpm....
Page 298
Subsection xx (diagnostic and fault codes) pcode module description cause action p0617 ecm starter relay circuit shorted to battery + damaged relay, danaged start switch, damaged circuit wires, damaged connector, damaged ecm pins. Check start button, check run/stop button, check if free weeling diod...
Page 299
Subsection xx (diagnostic and fault codes) pcode module description cause action p0685 ecm accessory relay circuit diagnosis related to accessories or light relay, blown fuse, damaged or disconnected relay, damaged circuit wires, damaged connectors or damaged ecm output pins check fuse disconnect ac...
Page 300
Subsection xx (diagnostic and fault codes) pcode module description cause action p0691 ecm radiator fan circuit shorted to ground or open circuit blown fuse, damaged or disconnected fan relay, damaged circuit wires, damaged connectors or damaged ecm output pins. Check fuse disconnect radiator fan re...
Page 301
Subsection xx (diagnostic and fault codes) pcode module description cause action p0707 ecm gear position sensor shorted to ground, or open circuit verify that gear position information change when you change the position of gear on vehicle. Disconnect gbps measure voltage between harness connector g...
Page 302
Subsection xx (diagnostic and fault codes) pcode module description cause action p1f01 dps power output overload motor short circuit or power output failed reset fault, if fault re-occur, replace dps unit p1f02 dps power output overload (18v). High voltage at the unit input. Measure battery voltage ...
Page 303
Subsection xx (diagnostic and fault codes) pcode module description cause action p2303 ecm cyllinder 2 ignition output shorted to ground damaged ignition coil, damaged circuit wires, damaged connector or damaged ecm output pins. Open the ecm activation page in buds perform an ignition coil activatio...
Page 304
Subsection xx (diagnostic and fault codes) pcode module description cause action p3000 scm-ltd auxiliary line pressure sensor value out of range too many values of the external sensor out of range (negative pressure) sensor disconnect damaged circuit wires or connectors faulty auxiliary line sensor ...
Page 305
Subsection xx (diagnostic and fault codes) pcode module description cause action p3001 scm-ltd system suspension pumping delay exceeded pressure did not reach to desired set point after predefined delay leak in the system jammed compressor intake tube damaged circuit wires or connectors blown compre...
Page 306
Subsection xx (diagnostic and fault codes) pcode module description cause action p3002 scm-ltd release valve activation delay exceeded pressure did not drop to desired set point after predefined delay release valve momentary blocked blown valve fuse damaged circuit wires or connectors faulty valve b...
Page 307
Subsection xx (diagnostic and fault codes) pcode module description cause action u0073 ecm can bus off, no messages damaged circuit wires or damaged cluster pins. Disconnect mpi2 from db connector. Measure resistance between db-1 and db-2 (expected value = 50 to 70 ohms). Measure resistance between ...
Page 308
Subsection xx (diagnostic and fault codes) pcode module description cause action u0155 ecm lost communication with cluster (lost of can id’s) missing can id module internal error damaged circuit wires or damaged module pins. Check for cluster fault or ecm fault measure voltage between harness connec...
Page 309
Subsection xx (diagnostic and fault codes) pcode module description cause action u0400 scm-xmr variant coding failure faulty variant coding faulty programming 1- verify in setting - vehicle configuration page is correctly set up. 2- if update file is available reflash the scm. If not, clear the faul...
Page 310: General
Subsection 01 (electronic fuel injection (efi)) electronic fuel injection (efi) service tools description part number page ecm adapter tool................................................................... 529 036 166 ............................................. 5 fluke 115 multimeter ...............
Page 311: Adjustment
Subsection 01 (electronic fuel injection (efi)) vmr2015-073-001_a 1. Throttle body 2. Idle air control valve (iacv) 3. Intake manifold fitted on the throttle body, a throttle plate regu- lates the amount of air that enters the engine. A tps is incorporated on the throttle body. It pro- vides a signa...
Page 312: Troubleshooting
Subsection 01 (electronic fuel injection (efi)) note: the multifunction gauge and b.U.D.S. Use the same signal to provide the engine rpm indi- cation. Closed throttle and idle actuator reset this operation performs a reset of the values in the ecm. This reset is very important. The setting of the tp...
Page 313: Procedures
Subsection 01 (electronic fuel injection (efi)) after a problem has been solved, be sure to clear the fault(s) in the ecm using the b.U.D.S. Soft- ware. Warning electrical actuators and electronic modules may be powered up as soon as the ignition switch is set to on and emergency engine stop switch ...
Page 314
Subsection 01 (electronic fuel injection (efi)) testing the ecm power supply required tool ecm adapter tool (p/n 529 036 166) fluke 115 multimeter (p/n 529 035 868) 1. Disconnect ecm connector. 2. Install the ecm adapter tool on the ecm con- nector. 3. Install a jumper wire between k1 and m4 on the ...
Page 315
Subsection 01 (electronic fuel injection (efi)) test result reading result approximately 60 ecm and cluster can wires and resistors good approximately 120 ecm can resistor open, or cluster can resistor open, or can wire to cluster or ecm open infinite (open circuit) can wire to db connector open cir...
Page 316
Subsection 01 (electronic fuel injection (efi)) vmr2015-042-010_a 3.3 double click on the autosave folder. Vmr2015-042-011_a note: you may have to go to another au- tosave folder from a previous version of b.U.D.S. 3.4 choose the latest file saved for this spe- cific vehicle. Vmr2015-042-012_a impor...
Page 317
Subsection 01 (electronic fuel injection (efi)) – engine number (do not enter the “m” at the beginning of the engine number) – enter model number. – customer name. Smr2009-030-007_a vehicle tab 9. Click on the following tabs: – history – part replacement – add part in history. 10. Enter the old ecm ...
Page 318
Subsection 01 (electronic fuel injection (efi)) if supply voltage is not good, check fuse and if good, perform an injector power circuit resistance test . If supply voltage is good, perform a fuel injec- tor resistance test . Testing the injector power circuit resistance check continuity between mai...
Page 319
Subsection 01 (electronic fuel injection (efi)) vmr2006-014-071_a manifold o-ring position carefully insert injector in manifold paying atten- tion to the manifold o-ring. Notice gently push o-ring in evenly all around while inserting injector. O-ring must be completely inserted and not visible, bef...
Page 320
Subsection 01 (electronic fuel injection (efi)) warning perform a fuel pressure test and ensure that there is no leak. Refer to fuel tank and fuel pump . Throttle cable removing the throttle cable remove steering cover. Remove lh side panel. Disconnect throttle cable from throttle body. Re- fer to p...
Page 321
Subsection 01 (electronic fuel injection (efi)) vmr2006-014-068_a 1. Adjuster lock nut 2. Adjuster reinstall throttle cable cover. Throttle body throttle body description vmr2006-014-010_a 1. Throttle body 2. Throttle cable attachment 3. Throttle plate 4. Tps 5. Idle air bypass channel 6. Idle air c...
Page 322
Subsection 01 (electronic fuel injection (efi)) vmr2012-026-003_a 1. Remove these screws 2. Lift rear of air intake silencer as much as possi- ble and block in this position. 3. Unplug connectors from tps and iacv. 4. Loosen both throttle body clamps. 5. Rotate throttle body to gain access to thrott...
Page 323
Subsection 01 (electronic fuel injection (efi)) vmr2006-014-064_a rotate throttle body into position and ensure to index throttle body tab with boot notch. Vmr2006-014-065_a vmr2006-014-65_a tighten clamps. – check throttle cable adjustment. Refer to throttle cable in this subsection. – if throttle ...
Page 324
Subsection 01 (electronic fuel injection (efi)) vmr2012-026-004_b step 1: loosen step 2: rotate testing the tps wear important: prior to testing the tps, ensure that mechanical components of throttle body are checked. While engine is not running, activate throttle and pay attention for smooth operat...
Page 325
Subsection 01 (electronic fuel injection (efi)) bat smr2005-056-016_a if voltage test is not good, check/repair wiring har- ness. If wiring tests good, refer to replacing the ecm . If voltage test is good, everything is in order (as- suming resistance test was performed). Replacing the tps refer to ...
Page 326
Subsection 01 (electronic fuel injection (efi)) idle air control valve measurement pin resistance ( ) @ 20°c (68°f) a d b c 50 ± 5 vmr2015-042-004_a if the resistance of any winding is not good, re- place the idle air control valve. If resistance test of valve windings is good, check continuity of c...
Page 327
Subsection 01 (electronic fuel injection (efi)) install ecm adapter tool on the ecm connector. Using a multimeter, measure resistance as per ta- ble. Ecm adapter measurement pin resistance @ 20°c (68°f) d1 e1 700 - 900 if resistance value is incorrect, check or repair the connectors and the wiring h...
Page 328
Subsection 01 (electronic fuel injection (efi)) thereafter, once the engine is started, it mea- sures the air pressure in the intake manifold at operating rpms. The sensor must be correctly installed on intake manifold. Otherwise, the mapts could generate a fault code for an unexpected sensor range ...
Page 329
Subsection 01 (electronic fuel injection (efi)) vmr2016-045-001_a 1. Monitoring tab 2. Mapts temperature reading 4. Perform the same test with a new mapts and compare both readings. If the engine mapts temperature reading is sig- nificantly different than the new mapts, replace it. Note: both sensor...
Page 330
Subsection 01 (electronic fuel injection (efi)) tightening torque service product loctite 243 (blue) (p/n 293 800 060) mapts retaining screw 6 n•m ± 0.7 n•m (53 lbf•in ± 6 lbf•in) cts (coolant temperature sensor) refer to appropriate engine management system subsection for component and connec- tor ...
Page 331
Subsection 01 (electronic fuel injection (efi)) vmr2012-026-008_a 1. Cts 3. Disconnect cts connector and remove cts. 4. Install the new cts and torque as specified. Tightening torque cts 16 n•m ± 2 n•m (142 lbf•in ± 18 lbf•in) 5. Reinstall remaining removed parts. 6. Refill and bleed the cooling sys...
Page 332: Fuel Tank And Fuel Pump
Subsection 02 (fuel tank and fuel pump) fuel tank and fuel pump service tools description part number page fluke 115 multimeter ............................................................ 529 035 868 ........................................... 11 fuel hose adapter......................................
Page 333
Subsection 02 (fuel tank and fuel pump) new = component must be replaced when removed. To engine europe new new new new new new new new new new vmr2015-043-100_a 2 vmr2016-409.
Page 334: General
Subsection 02 (fuel tank and fuel pump) general warning fuel is flammable and explosive under cer- tain conditions. Ensure work area is well ven- tilated. Do not smoke or allow open flames or sparks in the vicinity. Warning always disconnect battery prior disconnect- ing a fuel system pressure hose....
Page 335: Inspection
Subsection 02 (fuel tank and fuel pump) to access the fuel tank vent breather filter, re- move the rear body module. Vmr2015-130-002_c 1. Fuel tank vent breather filter fuel pump module the fuel pump module is inserted in the fuel tank. It provides fuel delivery for the efi system and en- compasses ...
Page 336
Subsection 02 (fuel tank and fuel pump) note: for access to the fuel tank vent system, refer to fuel pump access in this subsection. Fuel system pressure test the pressure test will show the available pressure in the system. It validates the pressure regulator and the fuel pump, and allows for check...
Page 337
Subsection 02 (fuel tank and fuel pump) slow pressure drop if there is a slow pressure drop after the engine is stopped, check for a fuel injector leak. Refer to electronic fuel injection (efi) subsection. Note: the fuel pressure regulator or fuel pump check valve integral to the fuel pump module ma...
Page 338: Troubleshooting
Subsection 02 (fuel tank and fuel pump) troubleshooting fuel system diagnostic flow chart repair or replace replace fuel pump module fuel system ok retest replace fuel pump module activate electric system to enable fuel pump fuel pump does not run fuel pump runs for 2 sec. Then stops install fuel pr...
Page 339: Procedures
Subsection 02 (fuel tank and fuel pump) procedures fuel hose and oetiker clamps disconnecting a fuel pressure hose 1. Remove the fuel pump relay (r4) in the front fuse box. 2. Release fuel pressure by running engine until it runs out of fuel. 3. Carefully disconnect the fuel hose fitting from the in...
Page 340
Subsection 02 (fuel tank and fuel pump) vmr2012-028-013_a 1. Battery support 2. Support retaining screws note: it is not necessary to remove the wiring harness or other components from the battery support. 10. Flip the battery support over towards the rh side of the vehicle for access to the rear fr...
Page 341
Subsection 02 (fuel tank and fuel pump) vmr2012-028-018_a 1. Rear frame extension 2. Loosen these 2 nuts 3. Remove these 4 bolts 17. Remove nuts and screws securing final drive protector and rear frame support to rear final drive. Vmr2012-028-024_a 1. Final drive protector 18. Remove rear frame supp...
Page 342
Subsection 02 (fuel tank and fuel pump) tightening torque fuel tank retaining screws 6.5 n•m ± 0.5 n•m (58 lbf•in ± 4 lbf•in) be sure to properly connect and route: – fuel tank vent tube – fuel pump pressure hose – electrical connectors. Refuel tank and ensure there are no leaks by performing a fuel...
Page 343
Subsection 02 (fuel tank and fuel pump) fuel pump input voltage test test probes voltage reading fuel pump connector pin 3 fuel pump connector pin 4 battery voltage if battery voltage is read, carry out a fuel pump resistance test. If battery voltage is not read, test fuel pump power input as follow...
Page 344
Subsection 02 (fuel tank and fuel pump) vmr2015-043-005_a 570 engine 1. Fuel pump connector 2. Vent hose 3. High pressure fuel hose vmr2015-130-005_a 850 and 1000r engines 1. Fuel pump connector 2. Vent hose 3. High pressure fuel hose 3. Remove fuel pump retaining nut. Warning fuel vapors are flamma...
Page 345
Subsection 02 (fuel tank and fuel pump) vmr2015-130-004_a typical 1. Gasket ring here 2. Fuel pump flange warning ensure gasket ring makes good contact all around fuel pump and fuel pump mounting neck on fuel tank. 3. Ensure proper fuel pump orientation as in fol- lowing illustration. Vmr2015-043-01...
Page 346
Subsection 02 (fuel tank and fuel pump) tightening torque fuel pump retaining nut 29 n•m ± 1 n•m (21 lbf•ft ± 1 lbf•ft) 7. Install fuel pressure hose on fuel pump using a new oetiker clamp. 8. Install fuel vent tube on fuel pump. 9. Install electrical connector on fuel pump. 10. Install fuel pump re...
Page 347
Subsection 02 (fuel tank and fuel pump) 6. Lubricate assembly area of new strainer and fuel pump with o-ring lubricant or clean oil vmr2015-043-031_a 7. Insert the new strainer on fuel pump making sure to press it in tightly against the fuel pump surface. 8. Using a small socket, press in a new push...
Page 348
Subsection 02 (fuel tank and fuel pump) 7. Press in a new push nut to secure strainer. 8. Reinstall remaining removed parts. Fuel level sender the fuel level sender is a float actuated variable resistance type that is part of the fuel pump. Vmr2015-043-023_a 570 engine vmr2008-135-901_a 850 and 1000...
Page 349
Subsection 02 (fuel tank and fuel pump) test result service action 5v is not read test wiring continuity between fuel level sender and multifunction gauge wiring continuity is good replace multifunction gauge wiring continuity is not obtained repair or replace wiring fuel level sender replacement re...
Page 350
Subsection 02 (fuel tank and fuel pump) vmr2015-130-002_e 1. Inlet check valve 2. Fuel pump vent inlet fitting 3. Install small hose pincher here 2. Set vacuum/pressure pump to pressure and activate pump. The gauge should increase in reading. 3. Set vacuum/pressure pump to vacuum and activate pump. ...
Page 351: General
Subsection 01 (power distribution and grounds) power distribution and grounds general power distribution diagram main relay (r2) fuse box 1 bat brake light relay (r8) ignition coil ecm f4 5a fl-1 16 awg f5 5a f6 5a f7 5a f8 5a f9 25a f10 5a f11 30a f12 15a f14 15a f15 5a starter solenoid winch relay...
Page 352
Subsection 01 (power distribution and grounds) fuse box 1 vmr2012-028-006_g fuses vmr2012-028-006_h relays fuse identification 4 5 a 5 5 a 6 5 a 7 5 a 8 5 a 9 25 a 10 5 a 11 30 a 12 20 a 14 20 a 15 5 a fuse jp1 jumper 1 (or 20 a fuse) relay identification relay state (on) relay state (off) r1 coolin...
Page 353: Procedures
Subsection 01 (power distribution and grounds) fuse links and fuse box 2 vmr2016-132-002_a location of fuse links and fb2 1. Connector support (right side of vehicle) 2. Fuse box 2 3. Fuse links 1 and 2 4. Starter solenoid 5. Battery 6. Battery support vmr2015-044-004_a fuse box 2 fuse link identifi...
Page 354
Subsection 01 (power distribution and grounds) vmr2016-132-003_a pre-assembled replacement fuse link 1. Insulated fuse link wire 2. Butt end terminal 3. Terminal factory crimped on fuse link 4. Crimp here when installing in circuit 5. Solder ring 1. Disconnect the battery. 2. Cut the circuit wiring ...
Page 355: General
Subsection 02 (wiring harness and connectors) wiring harness and connectors service tools description part number page crimping tool (heavy gauge wire) .................................... 529 035 730 ........................................... 14 ecm adapter tool.......................................
Page 356
Subsection 02 (wiring harness and connectors) abbreviation description pld rh license plate light (used on european models only) plg lh license plate light (used on european models only) prd rear rh light prg rear lh light rbl trailer harness (used on european models only) rd1 voltage regulator/rect...
Page 357
Subsection 02 (wiring harness and connectors) wiring harness routing main harness (front 1/2) hic2 hic1 cc dc1 dc2 dps2 pdh pdb db sw4 sw1 sw2 dc3 bd dc5 sww mg1 mg2 vmr2015-132-100_a vmr2016-133 3.
Page 358
Subsection 02 (wiring harness and connectors) main harness (front 2/2) pf2 sm dps1 dps3 hica ci ft pgh pgb vmr2016-133-100_a 4 vmr2016-133.
Page 359
Subsection 02 (wiring harness and connectors) main harness (rear) frr bn pf2 dc6 ss ft pl crd rd1 prd bn4 bn1 bn2 ss2 ss1 bp3 bp1 vmr2016-133-101_a vmr2016-133 5.
Page 360
Subsection 02 (wiring harness and connectors) wiring harness splice location main harness (rear part) db dc6 jt wh/be jt wh/bk d2 jt wh/or jt rd jt bk2 jt rd/pk pf2 fl frr vmr2016-133-102_a main harness (front part 1/2) jt rd/gn jt rd/gy dps2 diode 5 diode 6 sw4 dps1 vmr2015-132-105_a 6 vmr2016-133.
Page 361
Subsection 02 (wiring harness and connectors) main harness (front part 2/2) dc2 dc1 pf1 ft hica jt bu diode 11 jt rd/or jt rd/wh jt bk1 jt rd/vi jt bk3 jt rd/bk jt gn jt vi/be jt vi/gy jt rd/br jt bk/br jt rd/bu jt or/bk jt bk/wh jt be jt bu/gy jt rd/be jt vi/rd jt rd/yl vmr2015-132-106_a vmr2016-13...
Page 362: Procedures
Subsection 02 (wiring harness and connectors) procedures deutsch connectors deutsch connector application a variety of deutsch connectors are used on var- ious systems: – diagnostic connector – vehicle speed sensor (vss) connector. The following procedures may be used on each as they are similar in ...
Page 363
Subsection 02 (wiring harness and connectors) v01g0qa 1 1 typical — female connector 1. Retaining tabs terminal insertion 1. For insertion of a terminal, ensure the sec- ondary plastic lock is removed. 2. Insert terminal through the back of the connec- tor in the appropriate position, and push it in...
Page 364
Subsection 02 (wiring harness and connectors) vmr2006-032-001_a vmr2006-032-001_b connector pinout push on both tabs to remove retainer. 1 a33z01a 2 typical 1. Retainer 2. Tab (one on each side) open housing by lifting 4 tabs. 1 a33z02a typical 1. Tabs (2 on each side) lift the top plastic lock of t...
Page 365
Subsection 02 (wiring harness and connectors) a32e3xa 2 1 typical 1. Lift and hold plastic lock 2. Lift to unlock and push out molex connector molex connector application molex connectors are used on the following sys- tem: – ecm molex connector removal push and hold the locking tab. Vmr2008-022-013...
Page 366
Subsection 02 (wiring harness and connectors) rotate connector lock until it snaps locked. Vmr2008-022-013 _b 1. Locked here molex connector probing the most recommended and safest method to probe ecm connector terminals is to use the ecm adapter tool (p/n 529 036 166) . This tool will prevent defor...
Page 367
Subsection 02 (wiring harness and connectors) 529036175 1. Remove rear protector from connector. 2. Pull out the connector lock. Smr2009-045-025_a 3. Insert tool to unlock terminal. Smr2009-045-026_a 1. Unlock here 4. Gently pull on the wire to extract the terminal out the back of the connector. Smr...
Page 368
Subsection 02 (wiring harness and connectors) smr2010-050-022_a step 2: insert gm terminal extractor tool (p/n 12094430) 3. Gently pull on the wire to extract the pin out the back of the connector. Smr2010-050-023_a step 3: pull wire to extract pin notice before installing terminals in the connector...
Page 369
Subsection 02 (wiring harness and connectors) 2 a32e2sa 1 positioning the crimping pliers step 1: press step 2: rotate after positioning the crimping pliers, crimp the ter- minal already installed on wire. A32e2ta crimping of wire a32e2ua properly crimped wire to verify, if the wire is properly crim...
Page 370: Ignition System
Subsection 03 (ignition system) ignition system service tools description part number page ecm adapter tool................................................................... 529 036 166 ......................................... 2, 4 fluke 115 multimeter ................................................
Page 371: Procedures
Subsection 03 (ignition system) 2. Damaged trigger wheel/defective or loose cps - inspect trigger wheel and cps, refer to mag- neto and starter and electronic fuel injection (efi) subsections. Procedures ignition switch ignition switch quick test turn ignition switch to on position. If multifunction...
Page 372
Subsection 03 (ignition system) testing the emergency engine stop switch at multifunction switch connectors refer to wiring harness and connectors subsection for connector locations. The emergency engine stop switch is wired into the lh multifunction switch connectors (mg1 and mg2). 1. Remove gauge ...
Page 373
Subsection 03 (ignition system) ignition coil input voltage test connectors voltage pin 2 with battery ground battery voltage if battery voltage is not read, check continuity of ignition coil supply circuit. Refer to wiring dia- gram . Testing the ignition coil ground circuit continuity 1. Disconnec...
Page 374
Subsection 03 (ignition system) spark plug for spark plug replacement procedure, refer to periodic maintenance procedures sub- section. Troubleshooting fouled spark plug fouling of the spark plug is indicated by irregular running of the engine, decreased engine speed due to misfiring, reduced perfor...
Page 375: Charging System
Subsection 04 (charging system) charging system service tools – other supplier description part number page extech inductive ammeter .................................................. 380941 ............................................. 2 napa ultra pro battery load tester .............................
Page 376: Procedures
Subsection 04 (charging system) battery regularly discharged or weak 1. Loose or corroded battery cable connections. - tighten or repair battery cable connections. 2. Worn or defective battery. - charge and test battery. 3. Defective magneto stator. - test stator, refer to magneto and starter system...
Page 377
Subsection 04 (charging system) test conditions load as required to decrease battery voltage to 12 vdc time 15 seconds ‡ required for accurate testing 6. Read amperage on ammeter. Model specification base models (no-dps, not ce) 35 ± 5 amps dps models 41 ± 5 amps all ce models 41 ± 5 amps if amperag...
Page 378
Subsection 04 (charging system) test conditions rd1-3 permanent ground backprobe probe specification rd1-3 bat1 (+) battery voltage 2. Connect a battery load tester such as the napa ultra pro battery load tester (p/n 95260) . 3. Start vehicle. 4. Ensure proper test conditions. Test conditions batter...
Page 379
Subsection 04 (charging system) warning ensure battery is stored in a safe place, out of reach for children. New battery activation refer to the instructions provided with the battery. Battery charging warning always wear safety glasses and charge in a well ventilated area. Never charge or boost a b...
Page 380: Starting System
Subsection 05 (starting system) starting system service tools description part number page ecm adapter tool................................................................... 529 036 166 ........................................... 4 fluke 115 multimeter .................................................
Page 381
Subsection 05 (starting system) starting system tests starter solenoid - + vmr2015-135-001_a 1. Disconnect ss1 and ss2 vmr2015-048-012_a 1. Ss1 2. Activate the starter solenoid. 2.1 apply 12vdc to ss1 2.2 ground ss2 vmr2015-048-003_c ss1 is on the right 3. If starter turns, verify starter solenoid c...
Page 382
Subsection 05 (starting system) fr e e st a r t 6 1 of f on / on / w l ig h t wo l ig h t d c e a b f 5 a f run st o p 2 1 ecm b f8 vmr2016-136-101_a 1. Disconnect mg2 connector. Vmr2008-139-003_a typical - mg2 steering harness connector pin-out test condition engine stop switch run ignition switch ...
Page 383
Subsection 05 (starting system) starter solenoid control ground circuit ss1- ss2- hic1-j ecm l3 b4 g2 k3 a4 vmr2015-048-005_a 1. Disconnect ss2. 2. Install the ecm connector onto the ecm adapter tool (p/n 529 036 166) vmr2008-139-016_a 1. Ecm connector 2. Ecm adapter tool probe probe specification s...
Page 384
Subsection 05 (starting system) vmr2015-048-007_a probe probe specification bp3 terminal to starter motor o.L. 4. Jump starter solenoid. Vmr2015-048-009_a ss1 is on the right probe probe specification bp3 terminal to starter motor close to 0 if resistance is not as per specification, replace the sol...
Page 385
Subsection 05 (starting system) vmr2015-048-011_a forward polarity, must be around 0.5 v vmr2015-048-010_a reverse polarity, must be open circuit 1. Ss1 if test failed, replace diode. Refer to wiring harness and connectors for diode loca- tion. Note: the diode is integrated in the harness near the s...
Page 386: Digitally Encoded Security
Subsection xx (digitally encoded security system (d.E.S.S.)) digitally encoded security system (d.E.S.S.) general system description the ignition key contains a rom chip with a unique digital code that is the equivalent of a unique teeth pattern on a conventional key. When the ignition key is turned...
Page 387
Subsection xx (digitally encoded security system (d.E.S.S.)) key key type black key performance key gray key normal key 8. Click on the appropriate add key button. Tbl2011-001-053_d 1. Add performance key button 2. Add normal key button note: the add work key button is not used for these vehicles. 9...
Page 388: General
Subsection 07 (lights, gauge and accessories) lights, gauge and accessories service tools description part number page fluke 115 multimeter ............................................................ 529 035 868 ............................................. 9 service products description part numbe...
Page 389
Subsection 07 (lights, gauge and accessories) vmo2013-010-001_b 1. Fuel level display 5) 4wd indicator lamp when this indicator is on, it indicates the 4wd system is activated. 6) low fuel level indicator lamp when this indicator is on, it indicates that there is approximately 5 l (1.3 u.S. Gal.) of...
Page 390
Subsection 07 (lights, gauge and accessories) odometer (od) odometer records the total distance travelled ei- ther in miles or kilometers. Vsi2009-018-030 clock shows current time. Vmo2011-008-001 refer to gauge setup to set current time. Trip meter (tp) the trip meter records the travelled distance...
Page 391: Troubleshooting
Subsection 07 (lights, gauge and accessories) 3. Press and release selector button once to dis- play od (odometer). 4. Press the selector button again, this time for 2 seconds. This will change the mode to either speed, rpm or combined. Vdd2008-001-083 5. To select another mode, repeat steps 3 and 4...
Page 392
Subsection 07 (lights, gauge and accessories) diagnostic guidelines (gauge) multifunction gauge will not come on 1. Multifunction gauge not powered up. - check fuse (f4), refer to power distribution subsection. - test diode d11, refer to wiring diagram. - test multifunction gauge 12 vdc input and gr...
Page 393: Procedures
Subsection 07 (lights, gauge and accessories) 6. Defective flasher module. - replace flasher module, refer to flasher mod- ule in this subsection. Hazard lights come on without being selected (ce models only) 1. Hazard lights switch or wiring short circuit. - check for water in lh multifunction swit...
Page 394
Subsection 07 (lights, gauge and accessories) multifunction gauge wire identification function pin color 12 volt input from fuse f4 17 orange/yellow 12 volt input from fuse f10 (clock) 16 red/white ground 20 black can lo 18 white/black can hi 19 white/beige fuel level gauge supply 4 brown/pink fuel ...
Page 395
Subsection 07 (lights, gauge and accessories) clock setting in b.U.D.S., select the: – setting page tab – cluster page tab. To set clock to the 24-hour format, check the 24 h box. To set it to the 12-hour format, leave the box empty. If 12-hour format was selected, check the pm box if required. Set ...
Page 396
Subsection 07 (lights, gauge and accessories) 2. Remove seat to access diagnostic link connec- tor (db). 3. Remove diagnostic link connector from its holder. Vmr2012-023-003_a 1. Diagnostic link connector (db) 4. Measure the resistance of the can resistors as follows. Required tool fluke 115 multime...
Page 397
Subsection 07 (lights, gauge and accessories) installing the multifunction gauge for the installation, reverse the removal proce- dure. New multifunction gauge registration (coding) whenever the multifunction gauge is replaced, b.U.D.S. Must be used to register it in the ecm. Simply click yes when t...
Page 398
Subsection 07 (lights, gauge and accessories) 4. Remove the jp1 jumper/fuse, refer to power distribution subsection. 5. Measure the voltage on headlight connector as follows. Switch position wire color voltage lo beam battery voltage hi beam green (low beam connector) no voltage lo beam no voltage h...
Page 399
Subsection 07 (lights, gauge and accessories) vmo2012-012-060_a low and high beams 1. Adjustment knobs taillights/brake lights brake light switch for brake light switch location and testing, refer to brakes subsection. Brake light wire identification brake light relay (r8) function pin color 12 volt...
Page 400
Subsection 07 (lights, gauge and accessories) flasher module function pin color 12 volt input from fuse f7 mc1-5 red/black rh turn 12 volt input from turn signal switch mc1-1 beige/brown lh turn 12 volt input from turn signal switch mc1-2 beige/gray output to rh turn signal lights mc2-2 brown output...
Page 401
Subsection 07 (lights, gauge and accessories) winch winch wire identification winch relay function pin color 12 volt input from battery (winch power) rd red ground sw4 black 12 volt input from switch (in) sw1 green/blue 12 volt input from switch (out) sw2 light blue motor power (switches polarity de...
Page 402
Subsection 07 (lights, gauge and accessories) tsi2011-004-009_a 1. Hook 2. Hook pin 3. Cotter pin 3. Remove the winch cable fairlead. Vmr2016-410-001_a 4. Remove the front lower fascia. Vmr2016-410-002_a 5. Remove the front skid plate. Vmr2016-410-003_a 6. Disconnect both winch power cables. Note: n...
Page 403
Subsection 07 (lights, gauge and accessories) installing the winch for the installation, reverse the removal proce- dure, however pay attention to the following. Connect winch power cables as noted at removal. Note: if the winch power cables are not con- nected correctly, the winch motor will operat...
Page 404: Front Drive
Section 06 drive system subsection 01 (front drive) front drive service tools description part number page backlash measurement tool............................................. 529 035 665 ......................................... 469 cv boot clamp plier ...............................................
Page 405
Section 06 drive system subsection 01 (front drive) front drive shafts and front propeller shaft = component must be replaced when removed. 205 ± 15 n•m (151 ± 11 lbf•ft) xps synthetic grease see steering system 61 ± 9 n•m (45 ± 7 lbf•ft) (m10) 24.5 ± 3.5 n•m (18 ± 3 lbf•ft) (m8) loctite 648 xps syn...
Page 406
Section 06 drive system subsection 01 (front drive) front differential for backlash adjustment new new new new xps synthetic grease xps synthetic grease xps synthetic grease new = component must be replaced when removed. New new new new 180 ± 15 n•m (133 ± 11 lbf•ft) loctite 277 7.5 ± 0.5 n•m (66 ± ...
Page 407: General
Section 06 drive system subsection 01 (front drive) general the procedure explained below is the same for the rh and lh sides unless otherwise instructed. System description the visco-lok ® system constantly monitors front wheel speed and, if it detects one wheel spinning faster than its mate, it pr...
Page 408
Section 06 drive system subsection 01 (front drive) front drive shaft front drive shaft removal lift and support vehicle. Remove inner fender panel(s). Refer to body subsection. Remove the knuckle . Refer to steering sys- tem subsection. Remove shock absorber lower bolt. Lift and attach the followin...
Page 409
Section 06 drive system subsection 01 (front drive) 529036005 vmr2007-053-010_a typical — cv joint shown 1. Joint extractor tool with an hammer, hit on the tool to separate joint from shaft. When joint and shaft are separated, remove boot from drive shaft. Remove and discard the circlip. A new one i...
Page 410
Section 06 drive system subsection 01 (front drive) vmr2012-036-005_a front propeller shaft moved rearward 7. Remove front differential by pulling it from rh side. Notice be careful not to knock or to bend vent hose fitting while removing front differen- tial. Front differential inspection (assemble...
Page 411
Section 06 drive system subsection 01 (front drive) backlash adjustment guideline backlash measurement what to do below 0.1 mm (.004 in) remove shim(s) and recheck backlash above 0.25 mm (.01 in) add shim(s) and recheck backlash vmr2015-051-008 1. Backlash shim preload inspection screw the propeller...
Page 412
Section 06 drive system subsection 01 (front drive) visco-lok carrier/ring gear remove visco-lok carrier/ring gear out of half housing. Vmr2015-051-002_a remove screws securing ring gear to visco-lok unit. Vmr2015-051-009 separate ring gear from visco-lok unit. Vmr2015-051-010_a 1. Visco-lok unit 2....
Page 413
Section 06 drive system subsection 01 (front drive) 529035649 vmr2012-036-011_a 1. Pinion nut remove bearing and pinion gear together. Recommended tools qty pipe: 78 mm (3-1/16 in) diameter x 127 mm (5 in) in length 1 threaded rod: m10 x 1.25, 178 mm (7 in) length 1 m10 x 1.25 nut 3 flat bar 1 vmr20...
Page 414
Section 06 drive system subsection 01 (front drive) visco-lok carrier/ring gear the installation is the reverse of the removal pro- cedure. However, pay attention to the following. Tighten visco-lok / ring gear screws to specifica- tion. Tightening torque visco-lok / ring gear screws 37 n•m ± 3 n•m ...
Page 415
Section 06 drive system subsection 01 (front drive) tightening torque m8 nut securing front differential to frame 24.5 n•m ± 3.5 n•m (18 lbf•ft ± 3 lbf•ft) m10 nuts securing front differential to frame 61 n•m ± 9 n•m (45 lbf•ft ± 7 lbf•ft) install new oetiker clamps. Refill front differential with r...
Page 416
Section 06 drive system subsection 01 (front drive) 9. Remove front propeller shaft adapters from en- gine and from front differential. Front propeller shaft inspection inspect if propeller shaft is not bent or twisted. Check propeller shaft splines for wear or damage. Check if propeller shaft bello...
Page 417: Rear Drive
Section 07 drive system subsection 03 (rear drive) rear drive service tools description part number page backlash measurement tool............................................. 529 035 665 ......................................... 620 cv boot clamp plier .................................................
Page 418
Section 07 drive system subsection 03 (rear drive) models with 500 engine 205 ± 15 n•m (151 ± 11 lbf•ft) xps synthetic grease new = component must be replaced when removed. New new new new xps synthetic grease hi-temp bearing grease nlgi-2 or equivalent xps synthetic grease new new 90 ± 5 n•m (66 ± ...
Page 419
Section 07 drive system subsection 03 (rear drive) models with 450 engine 205 ± 15 n•m (151 ± 11 lbf•ft) xps synthetic grease new = component must be replaced when removed. New new new new xps synthetic grease hi-temp bearing grease nlgi-2 or equivalent xps synthetic grease new new 90 ± 5 n•m (66 ± ...
Page 420
Section 07 drive system subsection 03 (rear drive) new = component must be replaced when removed. New for preload adjustment for backlash adjustment new new new new new new 180 ± 15 n•m (133 ± 11 lbf•ft) lh threads xps synthetic grease xps synthetic grease 32 ± 3 n•m (24 ± 2 lbf•ft) 5 ± 1 n•m (44 ± ...
Page 421: Procedures
Section 07 drive system subsection 03 (rear drive) procedures wheel hub wheel hub removal lift and support vehicle. Remove the wheel. Remove the following parts: – caliper mounting bolts (if applicable), refer to brakes subsection – hub cap – cotter pin – wheel hub nut – belleville washer. Vmr2012-0...
Page 422
Section 07 drive system subsection 03 (rear drive) tightening torque wheel hub nut 205 n•m ± 15 n•m (151 lbf•ft ± 11 lbf•ft) note: if required, tighten castellated nut further to align grooves with drive shaft hole. Install a new cotter pin. Tmr2011-032-005 drive shaft drive shaft removal vmr2012-03...
Page 423
Section 07 drive system subsection 03 (rear drive) remove and discard the circlip. A new one is in- cluded in the boot kit. With the special tool place drive shaft in vice with the joint downward. Install the cv joint extractor (p/n 529 036 005) on bearing. 529036005 vmr2007-053-010_b typical — cv j...
Page 424
Section 07 drive system subsection 03 (rear drive) vmr2012-037-007_a 1. Master cylinder moved apart 5. From rh side of vehicle, remove propeller shaft screw from gearbox output shaft. Note: heat screw to break the threadlocker bond prior to removal. Vmr2012-037-008_a typical — rh side of vehicle 1. ...
Page 425
Section 07 drive system subsection 03 (rear drive) parts torque propeller shaft screw (rear final drive side) 75 n•m ± 5 n•m (55 lbf•ft ± 4 lbf•ft) + loctite 648 (green) (p/n 413 711 400) propeller shaft screw (gearbox side) 75 n•m ± 5 n•m (55 lbf•ft ± 4 lbf•ft) + loctite 648 (green) (p/n 413 711 40...
Page 426
Section 07 drive system subsection 03 (rear drive) v01h12a install snap ring. Complete installation for the other bearing caps. Grease u-joint. Refer to periodic mainte- nance procedures subsection. Rear final drive rear final drive removal drain oil. Refer to periodic maintenance procedures subsect...
Page 427
Section 07 drive system subsection 03 (rear drive) vmr2006-023-015_a 1. Tab of backlash measurement tool 2. Mark on tab a. 25.4 mm (1 in) position the dial indicator tip against the tab at a 90° angle and right on the previously scribed mark. Gently, move the tool tab back and forth. Note the backla...
Page 428
Section 07 drive system subsection 03 (rear drive) vmr2015-052-006_a preload specification 0.06 n•m (.5 lbf•in) to 0.50 n•m (4 lbf•in) if preload is out of specification, split final drive housing and adjust shim thickness as per follow- ing guideline. Preload guideline preload measurement what to d...
Page 429
Section 07 drive system subsection 03 (rear drive) unscrew the pinion nut. Use the spanner socket (p/n 529 035 649) . 529035649 vmr2015-052-009_a note: the pinion nut is left hand threaded. Un- screw by turning clockwise. Remove the bearing along with the pinion gear. Be careful to keep track of shi...
Page 430
Section 07 drive system subsection 03 (rear drive) recommended shim thickness pinion gear see procedure for pinion gear shim thickness backlash preload 0.5 mm (.02 in) (as a preliminary adjustment) procedure for pinion gear shim thickness: 1. Remove the old pinion gear and install the new one withou...
Page 431
Section 07 drive system subsection 03 (rear drive) – check backlash. – check preload. Ring gear the installation is the reverse of the removal pro- cedure. However, pay attention to the following: check condition of seal. Replace if damaged. Vmr2015-052-013_a install new bearings. Vmr2015-052-014_a ...
Page 432: Wheels And Tires
Section 08 chassis subsection 01 (wheels and tires) wheels and tires service products description part number page loctite 767 (antiseize lubricant) ....................................... 293 800 070 ......................................... 627 procedures tires warning do not rotate tires. The fro...
Page 433
Section 08 chassis subsection 01 (wheels and tires) tmr2011-033-002_a typical 1. Direction of rotation install wheel with the tire in the right direction of rotation. Install lug nuts with the taper towards the wheel. Tighten wheel lug nuts to the specified torque us- ing the illustrated sequence. W...
Page 434: Steering System
Subsection 01 (steering system) steering system service tools description part number page steering alignment tool..................................................... 529 036 059 ............................................. 3 service tools – other supplier description part number page smoothflow™ ...
Page 435
Subsection 01 (steering system) europe x mr 24.5 ± 3.5 n•m (18 ± 3 lbf•ft) xps synthetic grease new new 31.5 ± 3.5 n•m (23 ± 3 lbf•ft) new 24.5 ± 3.5 n•m (18 ± 3 lbf•ft) 24.5 ± 3.5 n•m (18 ± 3 lbf•ft) new 72.5 ± 7.5 n•m (53 ± 6 lbf•ft) 72.5 ± 7.5 n•m (53 ± 6 lbf•ft) new new new new 72.5 ± 7.5 n•m (5...
Page 436: General
Subsection 01 (steering system) general the procedures described below are the same for the rh and lh sides, unless otherwise instructed. Adjustment steering alignment 1. Place vehicle on a level surface. 2. Check pressure in each tire. Adjust to recom- mended pressure. 3. Lift and secure vehicle of...
Page 437: Procedures
Subsection 01 (steering system) 13. Measure the distance between the rope and the rim, at the front and at the rear of the wheel rim. Vmr2008-068-008 typical — front of wheel vmr2008-068-009 typical — rear of wheel 14. Calculate the difference between the front and rear measurements and compare with...
Page 438
Subsection 01 (steering system) tightening torque grip cap screw 0.4 n•m ± 0.1 n•m (4 lbf•in ± 1 lbf•in) handlebar removing the handlebar 1. Remove handlebar cover. Note: remove handlebar grips, throttle handle, brake handle and multifunction switch only if the handlebar is defective and requires re...
Page 439
Subsection 01 (steering system) throttle lever removing the throttle lever 1. Disconnect the bd connector (2/4wd switch), refer to wiring harness and connec- tors subsection. 2. Remove throttle lever housing retaining screws. V07i0fa 1 typical - throttle lever housing 1. Remove retaining screws 3. S...
Page 440
Subsection 01 (steering system) 2. Disconnect brake hose, refer to brakes sub- section. Removing the brake lever (at handlebar) 1. Remove brake lever retaining screws. Vmr2008-068-004_a 1. Retaining screws 2. Separate brake lever from handlebar. Installing the brake lever for installation, reverse t...
Page 441
Subsection 01 (steering system) vmr2012-039-010_a typical 1. Upper steering column support 2. Half bushings 3. Half bushing retainer 4. Retainer mounting screws (2) 8. Pull steering column from vehicle. Removing the steering column (with a dps) 1. Remove gauge support, refer to removing the multifun...
Page 442
Subsection 01 (steering system) product o-rings, half bushings and dps input shaft splines xps synthetic grease (p/n 293 550 010) dps output shaft splines loctite 767 (antiseize lubricant) (p/n 293 800 070) install new cotter pins (as applicable per model). Both ends of cotter pins must be folded. I...
Page 443
Subsection 01 (steering system) rmr2008-028-015_a nominal length 1. Pitman arm side 2. Knuckle side a. 416.4 mm (16.394 in) tie-rod maximum unengaged length dimension "a" - shoulder to tie rod end face 32 mm (1.26 in) warning maximum tie-rod unengaged length must not exceed specification. Both tie-r...
Page 444
Subsection 01 (steering system) v07i0ra typical 3. Remove the circlip. 1 v07i0sa typical 1. Circlip tmr2011-034-015_a typical 1. Seal 2. Circlip 4. Install knuckle on a press. 5. Remove bearing from knuckle using an appro- priate bearing remover. Tmr2011-034-109 note: it may be necessary to heat the...
Page 445: General
Section 07 chassis subsection 03 (dynamic power steering (dps)) dynamic power steering (dps) service tools description part number page fluke 115 multimeter ............................................................ 529 035 868 ......................................... 520 pitman arm jig ............
Page 446
Section 07 chassis subsection 03 (dynamic power steering (dps)) dps med provides normal (medium) steering as- sist for general all purpose riding. Dps min provides less steering assist for in- creased feedback and aggressive trail riding. A fourth mode of operation is available as an ac- cessory to ...
Page 447: Adjustment
Section 07 chassis subsection 03 (dynamic power steering (dps)) steering torque sensor rmr2008-019-017 the steering column is connected to the shaft on the dps unit. A small area of the dps shaft is magnetized. Inside the dps unit, a torque sensor surrounds the magnetized area of the dps shaft. When...
Page 448: Troubleshooting
Section 07 chassis subsection 03 (dynamic power steering (dps)) dps assist mode 1. To view the active dps assist mode, momen- tarily press and release the override/dps button on the lh multifunction switch assem- bly. Vmo2012-012-014_b 1. Override/dps/acs button the active dps mode will be displayed...
Page 449
Section 07 chassis subsection 03 (dynamic power steering (dps)) flow chart a in b.U.D. S ., clic o n module, dp s , i n formatio n a n d validate if the calibratio n checksum is v alid. • check if torque se n sor values • are varyi n g i n the b.U.D. S . • mo n itori n g scree n while tur n - • i n ...
Page 450
Section 07 chassis subsection 03 (dynamic power steering (dps)) flow chart b dps intermittent assistance • perform the required service actio n s as per b.U.D. S . A n d/or appropriate s hop ma n ual. Ye s no no ye s if pro b lem not solve d , co n tact the s ervice departme n t a n d have the b.U.D...
Page 451
Section 07 chassis subsection 03 (dynamic power steering (dps)) flow chart c ye s ye s no derating or limite d assistance make sure that n o dp s file updates are proposed i n b.U.D. S . T ire pressure good? 34 to 48 kpa (5 to 7 p s i) is there a voltage drop a the battery whe n the dp s is activate...
Page 452
Section 07 chassis subsection 03 (dynamic power steering (dps)) flow chart d • v erify if the pi n ch bolt at the bottom of the steeri n g colum n is tight. Bolt tight free play felt in steering system is there a n y backlash or play i n the steeri n g system? • v erify that tie-rods, pitma n arm, b...
Page 453
Section 07 chassis subsection 03 (dynamic power steering (dps)) flow chart e ye s ye s no no ye s ye s steering t urns easier on one than the other si d e is torque offset value more tha n 3 n•m whe n the ha n dlebars are free, untouche d a n d are positio n ed straight ahead? A n y of the previous ...
Page 454: Procedures
Section 07 chassis subsection 03 (dynamic power steering (dps)) procedures dps unit dps unit fuse test a 40 a dps fuse located in a fuse holder, on the rh side of the frame, under the battery support, provides power for the dps motor. Vmr2012-023-003_d typical 1. Rear fuse box (pf2) 1. Test dps fuse...
Page 455
Section 07 chassis subsection 03 (dynamic power steering (dps)) multimeter probe positions voltage dps2 power connector pin a dps2 power connector pin b battery ground rmr2008-028-091_a battery voltage if no voltage is measured, test the 40 a dps fuse in the rear fuse holder (pf2-f3). If good, check...
Page 456
Section 07 chassis subsection 03 (dynamic power steering (dps)) multimeter probe positions reading dps gdn connector pin a dps gdn connector pin b battery ground continuity (close to 0 ) if there is no continuity or a high resistance is measured, check wires and connector pins from dps unit to chass...
Page 457
Section 07 chassis subsection 03 (dynamic power steering (dps)) mmr2009-023-027_e 1. Min function selected 7. Turn the handlebar momentarily against the steering frame stops to each side. Note: do not hold steering against frame stops for an extended period of time. 8. Read the min charging system v...
Page 458
Section 07 chassis subsection 03 (dynamic power steering (dps)) 5. With the vehicle engine running in park, turn the handlebar side to side, momentarily against each stop and observe the indications on the b.U.D.S. Dps monitoring page. The dps torque sensor nm increase with torque applied to handleb...
Page 459
Section 07 chassis subsection 03 (dynamic power steering (dps)) 6. Remove the steering column pinch bolt and re- taining nut. Discard the retaining nut. Vmr2010-003-017_a typical 1. Steering column pinch bolt 7. Remove the hardware that secures both tie-rod ends to the pitman arm (steering lever). D...
Page 460
Section 07 chassis subsection 03 (dynamic power steering (dps)) vmr2012-039-014_a dps removal - rh side 1. Dps 2. Rh dps support bracket 3. Remove these screws (2) note: discard the conical spring washers on the dps retaining screws. 12. On the lh side of the dps unit, remove the dps support bracket...
Page 461
Section 07 chassis subsection 03 (dynamic power steering (dps)) vmr2012-039-035_a 1. Dps heat shield 2. Retaining screws to hold steady (2 not visible) 3. Retaining nuts to remove dps unit installation important: the following hardware must all be replaced with new ones: – hexagonal forming screws w...
Page 462
Section 07 chassis subsection 03 (dynamic power steering (dps)) vmr2012-039-018_a a. Xps synthetic grease (p/n 293 550 010) here 5. Insert the steering column onto the dps input shaft 6. Position the lh dps support bracket onto the hexagonal forming screw that was left on the frame dps mount. Vmr201...
Page 463
Section 07 chassis subsection 03 (dynamic power steering (dps)) vmr2010-003-023_a typical 1. Pitman arm 2. Tie rod ends inserted in pitman arm 3. Hardened steel washer on tie rod end 9. Install the lower half bushing retainer loosely using new fasteners. Vmr2012-039-021_a 1. Lower half bushing retai...
Page 464
Section 07 chassis subsection 03 (dynamic power steering (dps)) 11 13 vmr2012-039-102_a dps and steering torque sequence (3 of 3) 12. Install the second hardened steel washer and nut on each tie-rod end. Tighten retaining nuts as specified. Tightening torque tie-rod end to pitman arm 72.5 n•m ± 7.5 ...
Page 465
Section 07 chassis subsection 03 (dynamic power steering (dps)) vmr2010-003-039_a typical - lh illustrated 1. Pitman arm 2. Contact point with frame stop note: contact between pitman arm and pitman arm stops must be checked with vehicle weight on wheels. 16. Reconnect dps electrical connectors. 17. ...
Page 466
Section 07 chassis subsection 03 (dynamic power steering (dps)) required tools pitman arm jig (p/n 529 036 225) 4. Insert the dps input shaft in the pitman arm jig receptacle with the pitman arm facing up. Vmr2012-039-025_a 1. Dps input shaft 2. Shaft receptacle in pitman arm jig vmr2012-039-023_a 1...
Page 467
Section 07 chassis subsection 03 (dynamic power steering (dps)) vmr2012-039-026_b 1. Extractor nut 2. No space here 8. Install the universal pitman arm puller over the pitman arm and the extractor thrust bearing. Required tool pitman arm puller (p/n 529 036 227) vmr2012-039-028_a 1. Extractor thrust...
Page 468
Section 07 chassis subsection 03 (dynamic power steering (dps)) required tool pitman arm jig (p/n 529 036 225) 2. Apply antizeize lubricant on dps output shaft splines; completely cover all the splines with a light coat. Product dps output shaft splines loctite 767 (antiseize lubricant) (p/n 293 800...
Page 469
Section 07 chassis subsection 03 (dynamic power steering (dps)) vmr2012-039-032_a vmr2012-039-033_a 1. Ensure proper contact here 7. Unscrew positioning screw and remove pusher adapter and pull out dps unit. 8. Install pitman arm retaining washer and nut. Tighten nut as specified. Vmr2012-039-022_a ...
Page 470: Front Suspension
Subsection xx (front suspension) front suspension service tools description part number page ball joint removal tool...................................................... 529 036 310 ........................................... 7 vmr2015-056 1.
Page 471
Subsection xx (front suspension) upper suspension arms and components new suspension grease 45 ± 5 n•m (33 ± 4 lbf•ft) new 3 ± 0.5 n•m (27 ± 4 lbf•in) new suspension grease 90° from arm axis new new 3 ± 0.5 n•m (27 ± 4 lbf•in) 73 ± 7 n•m (54 ± 5 lbf•ft) 61 ± 9 n•m (45 ± 7 lbf•ft) = component must be...
Page 472
Subsection xx (front suspension) lower suspension arms and components new new 48 ± 6 n•m (35 ± 4 lbf•ft) 3.0 ± 0.5 n•m (27 ± 4 lbf•in) new new 4.5 ± 0.5 n•m (40 ± 4 lbf•in) new suspension grease suspension grease 90° from arm axis 3.0 ± 0.5 n•m (27 ± 4 lbf•in) = component must be replaced when remov...
Page 473: General
Subsection xx (front suspension) general the procedure explained below is the same for the rh and lh sides unless otherwise noted. Procedures shock absorber shock absorber removal 1. Safely lift and support the vehicle of the ground. 2. Remove screws and nuts retaining shock ab- sorber. Vsi2015-143-...
Page 474
Subsection xx (front suspension) vmr2015-056-002_a 4. Remove screws and nuts securing suspension arm to frame. Vmr2012-040-003_a 1. Suspension arm screws 5. Remove suspension arm. Vmr2012-040-004_a move outwards lower suspension arm installation the installation is the reverse of the removal pro- ce...
Page 475
Subsection xx (front suspension) vsi2015-143-006 6. Carefully move brake hose aside. 7. Using a plastic hammer, carefully hit on the knuckle side to separate ball joint from knuckle. Note: a ball joint remover can be used if the ball joint is jammed into knuckle. Notice never hit on suspension arm t...
Page 476
Subsection xx (front suspension) 3 2 2 1 vsi2015-143-009_a upper suspension arm 1. Wear plates 2. Bushings 3. Sleeves vmr2015-056-009_a lower suspension arm 1. Wear plates 2. Bushings 3. Sleeves suspension arm bushings installation the installation is the reverse of the removal pro- cedure. However,...
Page 477
Subsection xx (front suspension) 529036310 vmr2015-056-013 vmr2015-056-014_a contact between tool and ball joint on the outside edge only 4. Remove ball joint from suspension arm. Notice make sure that suspension arm is properly supported on the press during ball joint removal. Ball joint installati...
Page 478: Rear Suspension
Section 08 chassis subsection 05 (rear suspension) rear suspension service tools description part number page spring compressor ............................................................... 529 036 184 ......................................... 681 service products description part number page susp...
Page 479
Section 08 chassis subsection 05 (rear suspension) trailing arms and sway bar = components must be replaced when removed new new 3.0 ± 0.5 n•m (27 ± 4 lbf•in) suspension grease new suspension grease 255 ± 10 n•m (188 ± 7 lbf•ft) new 4.5 ± 0.5 n•m (40 ± 4 lbf•in) 3.0 ± 0.5 n•m (27 ± 4 lbf•in) new new...
Page 480
Section 08 chassis subsection 05 (rear suspension) shock absorbers new = components must be replaced when removed new 61 ± 9 n•m (45 ± 7 lbf•ft) vmr2015-057-101 vmr2015-057 679.
Page 481: General
Section 08 chassis subsection 05 (rear suspension) general the procedure described below is the same for the rh and lh sides, unless otherwise instructed. Procedures shock absorbers shock absorber removal 1. Safely lift and support the vehicle off the ground. 2. Remove screws and nuts retaining shoc...
Page 482
Section 08 chassis subsection 05 (rear suspension) tmr2011-036-020 typical 5. Install a new bushing as the reverse of re- moval. 6. Install shock absorber on vehicle. Springs spring removal 1. Remove shock absorber from vehicle. Refer to shock absorbers in this subsection. 2. Place the spring compre...
Page 483
Section 08 chassis subsection 05 (rear suspension) vmr2015-057-003 6. Remove sway bar. Sway bar inspection check sway bar for cracks, bending or other dam- ages. Replace if necessary. Sway bar installation the installation is the reverse of the removal pro- cedure. However, pay attention to the foll...
Page 484
Section 08 chassis subsection 05 (rear suspension) vmr2015-057-008 6. Firmly hold trailing arm then remove: – shock absorber lower screw – trailing arm pivot shaft (pull from opposite side). Note: if only one trailing arm is removed, pull pivot shaft just enough to clear trailing arm. Vmr2015-057-01...
Page 485
Section 08 chassis subsection 05 (rear suspension) trailing arm inspection check trailing arms for: – cracks – bending. Check seals condition. Check inner race of each pivot bearing with your finger. Bearings should turn smoothly and quietly. Replace all damaged parts. Trailing arm assembly and inst...
Page 486: Brakes
Subsection 07 (brakes) brakes service tools description part number page ecm adapter tool................................................................... 529 036 166 ........................................... 9 service products description part number page xps brakes and parts cleaner (usa) .......
Page 487
Subsection 07 (brakes) front circuit all except ce models = component must be replaced when removed. New to rear circuit 5.5 ± 1.5 n•m (49 ± 13 lbf•in) 28.5 ± 1.5 n•m (21 ± 1 lbf•ft) 28.5 ± 1.5 n•m (21 ± 1 lbf•ft) 61 ± 9 n•m (45 ± 7 lbf•ft) 33.5 ± 3.5 n•m (25 ± 3 lbf•ft) 28.5 ± 1.5 n•m (21 ± 1 lbf•f...
Page 488
Subsection 07 (brakes) rear circuit all except ce models = component must be replaced when removed. New to front circuit new 28.5 ± 1.5 n•m (21 ± 1 lbf•ft) new 27.5 ± 2.5 n•m (20 ± 2 lbf•ft) see tightening sequence xps synthetic grease 33.5 ± 3.5 n•m (25 ± 3 lbf•ft) new new 28.5 ± 1.5 n•m (21 ± 1 lb...
Page 489
Subsection 07 (brakes) front circuit ce models = component must be replaced when removed. New to brake pedal cylinder new 28.5 ± 1.5 n•m (21 ± 1 lbf•ft) new 5.5 ± 1.5 n•m (49 ± 13 lbf•in) 5.5 ± 1.5 n•m (49 ± 13 lbf•in) new 28.5 ± 1.5 n•m (21 ± 1 lbf•ft) new new 28.5 ± 1.5 n•m (21 ± 1 lbf•ft) to rear...
Page 490
Subsection 07 (brakes) rear circuit ce models = component must be replaced when removed. New new 27.5 ± 2.5 n•m (20 ± 2 lbf•ft) see tightening sequence xps synthetic grease 61 ± 9 n•m (45 ± 7 lbf•ft) 33.5 ± 3.5 n•m (25 ± 3 lbf•ft) to front rh splitter new new 0.7 ± 0.1 n•m (6 ± 1 lbf•in) to front rh...
Page 491
Subsection 07 (brakes) calipers and brake levers all models 8.5 ± 1.5 n•m (75 ± 13 lbf•in) front lh side xps synthetic grease xps synthetic grease on applicable models rh side 8.5 ± 1.5 n•m (75 ± 13 lbf•in) rear 8.5 ± 1.5 n•m (75 ± 13 lbf•in) brake caliper synthetic grease 8.5 ± 1.5 n•m (75 ± 13 lbf...
Page 492: General
Subsection 07 (brakes) general warning always check brake system operation after removing or servicing a brake component. Notice avoid spilling brake fluid on plastic, rubber or painted parts. Protect these parts with a rag when servicing brake system. Notice sealing washers must be discarded and re...
Page 493: Procedures
Subsection 07 (brakes) 6. If load reading is not in accordance with the specification: 6.1 perform a brake system inspection and cleaning. 6.2 bleed brake system. Note: refer to periodic maintenance procedures subsection. Brake pedal verification note: do not pump up the brakes repeatedly be- fore d...
Page 494
Subsection 07 (brakes) vmr2012-035-006_a front brake manifold 1. Brake light switch 2. Brake light switch connector brake light switch resistance test 1. Disconnect brake light switch connector. 2. Check switch operation as follows. Brake light switch position pin resistance firmly pushed close to 0...
Page 495
Subsection 07 (brakes) vmr2015-058-005_a 6. Remove brake pedal. Vmr2015-058-006_a brake pedal installation the installation is the reverse of the removal pro- cedure. However, pay attention to the following. Install new brake pedal o-ring. Lubricate brake pedal pivot. Lubrication brake pedal pivot x...
Page 496
Subsection 07 (brakes) tightening torque brake hose screw (banjo fitting) 28.5 n•m ± 1.5 n•m (21 lbf•ft ± 1 lbf•ft) bleeder 8.5 n•m ± 1.5 n•m (75 lbf•in ± 13 lbf•in) install new sealing washers. Refill and bleed brake system, refer to periodic maintenance procedures subsection. Caliper caliper remov...
Page 497
Subsection 07 (brakes) vmr2012-042-009_a 1. Pin retainer 3. Remove brake pad pin from caliper. Vmr2012-042-010_a typical 1. Brake pad pin 4. Carefully remove brake pads. 5. Clean pistons end using the following product or and equivalent. Required service product usa xps brakes and parts cleaner (usa...
Page 498
Subsection 07 (brakes) vmr2012-042-014_a 1. Caliper support 13. Install caliper, refer to caliper installa- tion in this subsection. Brake disc brake disc inspection 1. Check disc surfaces for scratches or grooves on both sides. 2. Measure thickness of the disc. Disc minimum thickness front 4.0 mm (...
Page 499: Body (Except X Mr)
Subsection 08 (body (except x mr)) body (except x mr) service tools description part number page oetiker pliers........................................................................... 295 000 070 ........................................... 9 vmr2016-416 1.
Page 500
Subsection 08 (body (except x mr)) body parts nomenclature front body module rear body module 1 2 3 4 5 6 7 8 9 11 10 vmr2016-416-001_a rear body module - front body module 1. Gauge support 2. Console 3. Rear fender 4. Side panel 5. Footrest 6. Side panel extension (lh side only) 7. Inner fender pan...
Page 501
Subsection 08 (body (except x mr)) body parts (rear) 4.5 ± 0.5 n•m (40 ± 4 lbf•in) 4.5 ± 0.5 n•m (40 ± 4 lbf•in) 2.5 ± 0.5 n•m (22 ± 4 lbf•in) new new new 4.5 ± 0.5 n•m (40 ± 4 lbf•in) 4.5 ± 0.5 n•m (40 ± 4 lbf•in) = component must be replaced when removed. New vmr2016-416-002_a vmr2016-416 3.
Page 502
Subsection 08 (body (except x mr)) body parts (front) 4.5 ± 0.5 n•m (40 ± 4 lbf•in) new 1.6 ± 0.4 n•m (14 ± 4 lbf•in) 1.6 ± 0.4 n•m (14 ± 4 lbf•in) 2.5 ± 0.5 n•m (22 ± 4 lbf•in) new 2.5 ± 0.5 n•m (22 ± 4 lbf•in) 4.5 ± 0.5 n•m (40 ± 4 lbf•in) 4.5 ± 0.5 n•m (40 ± 4 lbf•in) new new 4.5 ± 0.5 n•m (40 ± ...
Page 503
Subsection 08 (body (except x mr)) body parts (central) = component must be replaced when removed. New 4.5 ± 0.5 n•m (40 ± 4 lbf•in) new new 4.5 ± 0.5 n•m (40 ± 4 lbf•in) new 4.5 ± 0.5 n•m (40 ± 4 lbf•in) new 2.5 ± 0.5 n•m (22 ± 4 lbf•in) new 2.5 ± 0.5 n•m (22 ± 4 lbf•in) 3.5 ± 0.5 n•m (31 ± 4 lbf•i...
Page 504
Subsection 08 (body (except x mr)) rear bumper = component must be replaced when removed. New 10 ± 2 n•m (89 ± 18 lbf•in) 24.5 ± 3.5 n•m (18 ± 3 lbf•ft) 24.5 ± 3.5 n•m (18 ± 3 lbf•ft) 10 ± 2 n•m (89 ± 18 lbf•in) 24.5 ± 3.5 n•m (18 ± 3 lbf•ft) new new new 24.5 ± 3.5 n•m (18 ± 3 lbf•ft) new 48 ± 6 n•m...
Page 505
Subsection 08 (body (except x mr)) front bumper = component must be replaced when removed. New 24.5 ± 3.5 n•m (18 ± 3 lbf•ft) new new 24.5 ± 3.5 n•m (18 ± 3 lbf•ft) 4.5 ± 0.5 n•m (40 ± 4 lbf•in) new 10 ± 2 n•m (89 ± 18 lbf•in) new 4.5 ± 0.5 n•m (40 ± 4 lbf•in) new new 24.5 ± 3.5 n•m (18 ± 3 lbf•ft) ...
Page 506
Subsection 08 (body (except x mr)) skid plates 4.5 ± 0.5 n•m (40 ± 4 lbf•in) new 4.5 ± 0.5 n•m (40 ± 4 lbf•in) new 4.5 ± 0.5 n•m (40 ± 4 lbf•in) new 10 ± 2 n•m (89 ± 18 lbf•in) 24.5 ± 3.5 n•m (18 ± 3 lbf•ft) new new 2.5 ± 0.5 n•m (22 ± 4 lbf•in) = component must be replaced when removed. New renegad...
Page 507: Procedures
Subsection 08 (body (except x mr)) procedures plastic rivet plastic rivets are used in the riveting of the vari- ous body parts. Plastic rivets can be reused many times. Use the oetiker pliers (p/n 295 000 070) to remove them. 2 v06l08a 1 typical 1. Pliers 2. Plastic rivet decals removing a decal us...
Page 508
Subsection 08 (body (except x mr)) vmr2012-047-003_a from underneath lh front fender 1. Ignition switch connector 8. Remove screws securing front fender to footrest panel (on both sides). Vmr2012-047-004_a rh side shown 1. Screws securing front fender to footrest panel 9. Remove bolt securing front ...
Page 509
Subsection 08 (body (except x mr)) 12. Remove front body module by pulling it for- wards. 13. Install front body module on an appropriate support. Installing the front body module the installation is the reverse of the removal pro- cedure. However, pay attention to the following. Tighten front body ...
Page 510
Subsection 08 (body (except x mr)) 8. Place a clean rag into fuel tank filler tube. 9. Remove rear body module by pulling it rear- wards. 10. Install rear body module on an appropriate support. 11. Remove rag and reinstall fuel tank cap. Warning fuel vapors are flammable and explosive under certain ...
Page 511
Subsection 08 (body (except x mr)) vmr2012-047-013_a some parts removed for clarity 1. Plastic rivets (3 on lh side) installing the inner fender panel the installation is the reverse of the removal pro- cedure. Side panels removing the side panel 1. Remove console . See procedure in this sub- sectio...
Page 512
Subsection 08 (body (except x mr)) vmr2012-047-004_a typical 1. Screw securing front fender 4. Remove screw securing rear fender to footrest panel. Vmr2012-047-009_a typical 1. Screw securing rear fender 5. Remove footrest panel from vehicle. Installing the footrest panel the installation is the rev...
Page 513: Frame
Subsection xx (frame) frame service tools – other supplier description part number page blind threaded insert installer....................................... Model 9600 ........................................... 3 vmr2013-047 1.
Page 514
Subsection xx (frame) 61 ± 9 n•m (45 ± 7 lbf•ft) 24.5 ± 3.5 n•m (18 ± 3 lbf•ft) 61 ± 9 n•m (45 ± 7 lbf•ft) 31.5 ± 3.5 n•m (23 ± 3 lbf•ft) 31.5 ± 3.5 n•m (23 ± 3 lbf•ft) upper frame support (welded) lower frame support renegade series 24.5 ± 3.5 n•m (18 ± 3 lbf•ft) 24.5 ± 3.5 n•m (18 ± 3 lbf•ft) trai...
Page 515: Procedures
Subsection xx (frame) procedures frame frame inspection check frame for bending, cracks, weld damages or any other damage. Replace frame as neces- sary. Frame welding no welding should be done on frame except if mentioned or required on an approved brp bul- letin. Frame insert replacement to install...
Page 516: Renegade Series
Subsection 01 (renegade series) renegade series engine 570 rotax ® 549, 4-stroke, 2 cylinders (v-twin), liquid cooled 850 rotax 850, 4-stroke, 2 cylinders (v-twin), liquid cooled engine type 1000r rotax 1010ho, 4-stroke, 2 cylinders (v-twin), liquid cooled valve train 4 valves/cylinder (mechanical a...
Page 517
Subsection 01 (renegade series) engine new 4.966 mm to 4.980 mm (.1955 in to .1961 in) 570 service limit 4.930 mm (.1941 in) new 5.472 mm to 5.486 mm (.2154 in to .216 in) intake 850 1000r service limit 5.450 mm (.2146 in) new 4.956 mm to 4.970 mm (.1951 in to .1957 in) 570 service limit 4.930 mm (....
Page 518
Subsection 01 (renegade series) engine 1 st upper compression ring, rectangular 2 nd lower compression ring, tapered face piston ring type 3 rd oil scraper ring new 0.10 mm to 0.30 mm (.004 in to .012 in) 570 service limit 0.50 mm (.02 in) new 0.20 mm to 0.35 mm (.008 in to .014 in) 850 service limi...
Page 519
Subsection 01 (renegade series) engine new 31.830 mm to 32.030 mm (1.2531 in to 1.261 in) 570 service limit 31.810 mm (1.2524 in) new 32.890 mm to 33.090 mm (1.2949 in to 1.3028 in) 850 service limit 32.870 mm (1.2941 in) new 32.960 mm to 33.160 mm (1.2976 in to 1.3055 in) intake valve 1000r service...
Page 520
Subsection 01 (renegade series) engine new 20.010 mm to 20.020 mm (.7878 in to .7882 in) 570 850 service limit 20.060 mm (.7898 in) new 22.010 mm to 22.020 mm (.8665 in to .8669 in) connecting rod small end diameter 1000r service limit 22.050 mm (.8681 in) new 19.996 mm to 20.000 mm (.7872 in to .78...
Page 521
Subsection 01 (renegade series) transmission new 6.078 mm to 6.100 mm (.239 in to .24 in) centrifugal lever pivot bolt diameter service limit 6.000 mm (.236 in) new 6.035 mm to 6.078 mm (.2376 in to .2393 in) centrifugal lever bore diameter service limit 6.200 mm (.244 in) new 6.113 mm to 6.171 mm (...
Page 522
Subsection 01 (renegade series) gearbox with external switches high 3.341 low 5.662 570 reverse 5,451 high 2,886 low 5.662 overall gear ratios 850 reverse 5.451 capacity 400 ml (13.5 u.S. Oz) gearbox oil recommended xps synthetic gear oil (75w 140) (p/n 293 600 140) or a 75w140 api gl-5 synthetic ge...
Page 523
Subsection 01 (renegade series) gearbox with gbps type dual range (hi-lo) with park, neutral and reverse angle drive sub-transmission 37/15 = 2.467 intermediate 45/44 = 1.023 high 37/33 = 1.121 low 46/17 = 2.706 gear ratios reverse 34/12 = 2.833 high 2.829 low 6.826 overall gear ratios reverse 7.148...
Page 524
Subsection 01 (renegade series) electrical system without dps 400 w @ 6000 rpm magneto generator output with dps 625 w @ 6000 rpm stator resistance (20°c (68°f)) 0.15 to 0.30 ignition system type idi (inductive discharge ignition) ignition timing not adjustable quantity 2 make and type ngk dcpr8e 57...
Page 525
Subsection 01 (renegade series) electrical system accessory relay control brake lights relay control communication connector (db4) gauge brake relay dps control f4 5 a ignition coils fuel injectors vehicle speed sensor f5 5 a engine control module power (ecm) fan relay control f6 5 a position lights...
Page 526
Subsection 01 (renegade series) drive system rear drive ratio 3.6:1 capacity 500 ml (17 u.S. Oz) front differential oil type xps synthetic gear oil (75w 90) (p/n 293 600 043) or synthetic gear oil 75w90 api gl-5 capacity 250 ml (8.45 u.S. Oz) rear final drive oil type xps synthetic gear oil (75w 140...
Page 527
Subsection 01 (renegade series) rear suspension std 570 355.7 mm (14 in) std 850 and 1000r 311 mm (12.24 in) spring free length x xc 321.6 mm (12.66 in) std 570 5 position cam preload adjustment type all other models variable positions brakes qty 2 front brake type 214 mm cross drilled disc brakes w...
Page 528
Subsection 01 (renegade series) front 96.5 cm (38 in) wheel track rear 91.4 cm (36 in) ground clearance 26.7 cm (11 in) weight and loading capacity 570 engine 279 kg (615 lb) 850 engine 303 kg (668 lb) dry weight 1000r engine 314 kg (692 lb) rear cargo area capacity 16 kg (35 lb) total vehicle load ...
Page 529: Wiring Diagram Information
Subsection 01 (wiring diagram information) wiring diagram information general wiring diagram location wiring diagrams are found in the wiring dia- gram booklet . Wiring diagram with colored lines the wiring diagram on the knowledge center is in color. Wiring diagram codes the wiring diagrams use the...
Page 530: Procedures
Subsection 01 (wiring diagram information) wire colors and sizes mmr2015-147-003_a 1. Wire color 2. Wire gauge (awg) the first color of a wire is the main color, second color is the stripe. Example: ye/bk is a yellow wire with a black stripe. Color code bg — beige og — orange bk — black rd — red bu ...
Page 531
Subsection 01 (wiring diagram information) mmr2010-043-003 4.3 remove the shrink tube with long nose pli- ers. 5. Locate detached wire from splice. Mbg2008-021-116_a 1. Detached wire 2. Splice 6. Twist detached wire around splice. Mbg2008-021-117_a 1. Twisted wire 7. Perform a tin solder on twisted ...
Page 532
Subsection 01 (wiring diagram information) mbg2008-021-118_a 1. Broken wire 2. Splice 6. Strip wire insulation at the end of broken wire. 7. Strip wire insulation below the splice. Mbg2008-021-119_a 1. Broken wire stripped 2. Splice wire stripped 8. Twist wire around stripped wire. Mbg2008-021-120_a...
Page 533
1 2 3 4 5 6 7 8 9 10 a b c d e f g h a b c d e f g h wm2 models with winch bp4 bn4 models with dps can hi can lo hic1_f, hic2_f ==>interconnect to engine harness db ==> diagnostic connector dc3, dc5, dc5_1, dc6 ==>accessory connectors hica, crd, crg, pl ==> ce option only rectifier/ regulator rd r d...
Page 534
Stop_sw p_latch +12v vss,coil, inj pgnd1 pgnd2 vbr vbd vbk acc_relay dess fan_relay fp_relay starter_sol ovr_sw sel_mode can lo can hi 4wd_sw gnd_tps,mapts,dess vss output +12v vss, coil,inj brake_sw gearbox position sensor hic1_m, hic2_m ==>interconnect to vehicle harness tps pin layout refer to tp...


