- DL manuals
- Canon
- All in One Printer
- 4204B019
- User Manual
Canon 4204B019 User Manual
Summary of 4204B019
Page 1
How to use this manual printing this manual mc-4432-v1.00 basic guide describes the summary of this product. Advanced guide describes the detailed function of this product. Troubleshooting page 1 of 973 pages canon mx340 series on-screen manual.
Page 2
How to use this manual printing this manual mp-4182-v1.00 advanced guide contents overview of the machine main components how to navigate menus on the lcd preparing for faxing confirming the telephone line connection specifying the basic settings for faxing setting the receive mode faxing sending fa...
Page 3: Overview Of The Machine
Advanced guide troubleshooting contents > overview of the machine overview of the machine this section shows the component names of the machine and describes the basic operations you need to know before using it. Main components front view rear view inside view operation panel how to navigate menus ...
Page 4: Main Components
Advanced guide troubleshooting contents > overview of the machine > main components main components front view rear view inside view operation panel front view (1) adf (auto document feeder) load a document to copy, scan, or fax. The documents loaded in the document tray are scanned automatically on...
Page 5
(9) document cover open to load an original on the platen glass. (10) wi-fi lamp lights or flashes blue to indicate the wireless lan status. Lights: wireless lan active is selected. Flashes: printing or scanning over wireless lan. Also flashes while searching for wireless lan access point during set...
Page 6
Rear view (16) external device jack connect an external device such as telephone, answering machine, or modem of a computer. Important do not touch the metal casing. Note remove the telephone connector cap to connect the external device. (17) telephone line jack connect the telephone line. Caution t...
Page 7
(20) ink cartridge locking covers lock the fine cartridges into place. (21) fine cartridge holder install the fine cartridges. The color fine cartridge should be installed into the left slot ( ) and the black fine cartridge should be installed into the right slot ( ). (22) fine cartridges (ink cartr...
Page 8
(1) on button (power lamp) turns the power on or off. Lights or flashes green to indicate the power status. Before turning on the power, make sure that the document cover is closed. Important disconnecting the power plug when disconnecting the power plug after turning off the power, be sure to confi...
Page 9
Used to enter numerical values such as the number of copies, as well as fax/telephone numbers and characters. (9) redial/pause button used to select a number from those recently dialed with the numeric buttons to redial. You can also use this button to enter pause time between or after numbers when ...
Page 10
Page top page 10 of 973 pages main components.
Page 11
Advanced guide troubleshooting contents > overview of the machine > how to navigate menus on the lcd how to navigate menus on the lcd you can use the machine to make copies, send/receive faxes, or scan originals without a computer. You can also make good use of the various functions of the machine w...
Page 12
Pressing the menu button while in the copy standby screen cycles through the available menus in the order shown below. You can use the (+) button to scroll through the menu selections. The following lists of menu items will help you find an appropriate menu item for a specific function you want to s...
Page 13
Receive mode set. Memory reference print reports/lists tel no. Registration fax user settings transmission settings reception settings save to see saving scanned data on the computer . Pc usb flash drive device settings see machine settings . Print settings lan settings device user settings mobile p...
Page 14
Checklist staff paper 1 staff paper 2 handwriting paper weekly schedule monthly schedule basic operation on the setting options when printing in the copy or fax mode, or saving scanned data on a computer or a usb flash drive in the scan mode, you can use the settings button to change settings on the...
Page 15: Preparing For Faxing
Advanced guide troubleshooting contents > preparing for faxing preparing for faxing this section describes typical examples of connecting and setting up the machine before using the faxing functions. Confirming the telephone line connection connecting various lines setting the telephone line type sp...
Page 16
Advanced guide troubleshooting contents > preparing for faxing > confirming the telephone line connection confirming the telephone line connection for the basic connection of the machine, refer to the printed manual: getting started . This guide describes other typical connections. The machine canno...
Page 17
(a) digital subscriber line (b) xdsl modem (splitter may not be built-in to the modem) (c) wan (wide area network) (d) broadband router compatible with internet telephone (e) computer (f) telephone or answering machine (g) lan (local area network) (h) tel (i) line *port configurations and names may ...
Page 18
Before using your machine, make sure you set the correct telephone line type for your telephone line. If you are unsure of your telephone line type, contact your telephone company. For xdsl or isdn connections, contact the telephone company or service provider to confirm your line type. Note telepho...
Page 19
Advanced guide troubleshooting contents > preparing for faxing > specifying the basic settings for faxing specifying the basic settings for faxing this section describes the basic settings for faxing such as how to register the sender information, to enter numbers and letters, to set daylight saving...
Page 20
Advanced guide troubleshooting contents > preparing for faxing > specifying the basic settings for faxing > sender information sender information if the unit name and unit fax/telephone number are registered, they are printed with date and time as sender information on the recipient's fax. (a) date ...
Page 21
Advanced guide troubleshooting contents > preparing for faxing > specifying the basic settings for faxing > setting the date and time setting the date and time note when the machine is connected to a computer with the mp drivers installed, the date and time setting will be copied from the computer t...
Page 22
Advanced guide troubleshooting contents > preparing for faxing > specifying the basic settings for faxing > setting daylight saving time (summer time) setting daylight saving time (summer time) some countries adopt the daylight saving time (summer time) system that shifts the clock time forward at c...
Page 23
(4) make sure that set week is selected, and press the ok button. (5) use the (-) or (+) button to select the week when summer time starts, and press the ok button. (6) make sure that set day of week is selected, and press the ok button. (7) use the (-) or (+) button to select the day of the week wh...
Page 24
(8) make sure that set shift time is selected, and press the ok button. (9) use the numeric buttons to enter the time (in 24-hour format) when summer time ends. Precede single digits with a zero. (10) press the ok button. The summer time end date/time will be set. 5. Press the fax button to return t...
Page 25
Advanced guide troubleshooting contents > preparing for faxing > specifying the basic settings for faxing > registering user information registering user information important before sending a fax, be sure to enter your fax/telephone number and name in unit tel no. Registr. And unit name registr. In...
Page 26
4. Press the fax button to return to the fax standby screen. Page top page 26 of 973 pages registering user information.
Page 27
Advanced guide troubleshooting contents > preparing for faxing > specifying the basic settings for faxing > entering numbers, letters, and symbols entering numbers, letters, and symbols with the numeric buttons on the machine, you can enter the unit name and the recipient's name for the coded speed ...
Page 28
Note here describes the procedure to enter the unit name as example. To display the unit name registr. Screen, see registering user information . 2. Use the numeric buttons to enter characters. Press the button repeatedly until the character you want to enter appears. To enter characters (ex., to en...
Page 29
Advanced guide troubleshooting contents > preparing for faxing > specifying the basic settings for faxing > other basic settings other basic settings you can select the following items in fax user settings of fax settings. For details, refer to the on-screen manual: advanced guide . Auto print when ...
Page 30: Setting The Receive Mode
Advanced guide troubleshooting contents > preparing for faxing > setting the receive mode setting the receive mode there are four receive modes as follows. Tel priority mode fax priority mode fax only mode drpd *1 or network switch *2 *1 this setting is only available in us and canada. *2 this setti...
Page 31
1. Display the drpd: fax ring pat. Screen. (1) press the fax button, and press the menu button. (2) use the (-) or (+) button to select reception settings in the fax settings menu, and press the ok button. (3) use the (-) or (+) button to select drpd: fax ring pat., and press the ok button. 2. Selec...
Page 32
Available settings for an incoming call *2 change the number of times to ring the telephone. Ring count available settings for a voice call *2 change the number of seconds until the machine starts ringing. Ring start time in fax priority mode change the number of seconds that the machine rings. Tele...
Page 33: Faxing
Advanced guide troubleshooting contents > faxing faxing this section describes the basic operation to send or receive faxes with the fax functions of the machine. Sending faxes sending a fax with the numeric buttons redialing the number dialed with the numeric buttons using various sending functions...
Page 34: Sending Faxes
Advanced guide troubleshooting contents > faxing > sending faxes sending faxes this section describes dialing and sending faxes directly using the numeric buttons. For details on other ways to send faxes, see using various sending functions . Sending a fax with the numeric buttons redialing the numb...
Page 35
(3) press the fax button. 2. Adjust the scan contrast and resolution as necessary. (1) press the fax quality button. The scan contrast screen will appear. (2) use the (-) or (+) button to select the scan contrast. The (-) button decreases the scan contrast, and the (+) button increases the scan cont...
Page 36
(2) press the color button for color sending, or the black button for black & white sending. The machine starts scanning the original. Important color sending requires that the recipient's fax machine supports color faxing. If the recipient's fax machine does not support color faxing, you can set th...
Page 37
(1) press the redial/pause button. The fax/telephone number last dialed with the numeric buttons will be displayed. (2) use the (-) or (+) button to select the fax/telephone number to redial. (3) press the ok button. The selected number will appear in the fax sending screen. 4. Send the fax. (1) pre...
Page 38
Advanced guide troubleshooting contents > faxing > using various sending functions using various sending functions you can send a fax in various ways as follows. For details, refer to the on-screen manual: advanced guide . Sending a fax after speaking on telephone you can send a fax manually after s...
Page 39
Broadcasting) you can send the same documents to two or more recipients with one operation. The recipients can be specified with the numeric buttons, coded speed dial, and group dial in combination. Preventing dialing a wrong number (fax number re-entry) to prevent dialing a wrong number, you enter ...
Page 40
Ecm tx sends faxes in ecm (error correction mode). When the recipient's fax machine is compatible with ecm, the machine resends the fax after correcting errors automatically. Pause time settings sets the length of time paused for each press of the redial/pause button when entering fax/ telephone num...
Page 41: Receiving Faxes
Advanced guide troubleshooting contents > faxing > receiving faxes receiving faxes this section describes the operation to receive a fax with the machine depending on the receive mode. This section also describes the operation to print documents stored in the memory of the machine such as when ink o...
Page 42
Note the paper settings are shared among the copy mode, fax mode, and template print. After printing in other modes, confirm or change the paper settings. If page size other than a4, 8.5"x11" (ltr), or legal (or 8.5"x14"), or a media type other than plain paper is selected, faxes or reports cannot b...
Page 43
See remote reception . When the call is a voice call: the telephone will ring when a call incomes. (1) pick up the handset, and talk on the telephone. Note if you have subscribed to duplex ringing service in hong kong, the machine will receive faxes automatically even if you set the receive mode of ...
Page 44
Note other options change the number of times to ring the telephone. See settings for receiving faxes . When the call is a voice call: the telephone will ring when a call incomes. When the machine detects a voice call, the machine will ring. (1) pick up the handset, and press the stop button to talk...
Page 45
Note if a telephone is connected to the machine, the telephone will ring when a call incomes. When drpd or network switch is selected: when the call is a fax: the telephone will ring when a call incomes. The machine will receive the fax automatically when the fax ring pattern is detected. Note other...
Page 46
Note to use this feature, you need to subscribe to a compatible service provided by your telephone company. Contact your telephone company for details. For drpd you need to select the appropriate ring pattern on the machine. For details, see setting the drpd ring pattern (us and canada only) . For n...
Page 47
See preparing for receiving a fax . A media type other than plain paper is selected for media type. Select plain paper for media type. See preparing for receiving a fax . You pressed the stop button to cancel printing of a fax. Press the fax button to resume printing of the fax. Note the machine can...
Page 48
Select save all documents to save all documents in the memory on the usb flash drive. (2) use the (-) or (+) button to select yes, and press the ok button. The machine starts printing documents in the memory one by one. (3) to delete the printed document, use the (-) or (+) button to select yes. To ...
Page 49
Advanced guide troubleshooting contents > faxing > using various receiving functions using various receiving functions the machine has various receiving functions as follows. For details, refer to the on-screen manual: advanced guide . Fax reception rejection the machine can be set to reject faxes f...
Page 50
Manual/auto switch receives faxes automatically after the external telephone rings a specified length of time when the receive mode is set to tel priority mode. Rx image reduction reduces to print received faxes automatically so that they fit in the selected page size. Rx start speed selects the fax...
Page 51
Advanced guide troubleshooting contents > faxing > using useful fax functions using useful fax functions the machine has various fax functions as follows. For details, refer to the on-screen manual: advanced guide . Print reports/lists press the fax button, then the menu button to display the fax se...
Page 52: Copying
Advanced guide troubleshooting contents > copying copying you can copy in the various methods such as enlarging/reducing or copying two original pages onto a single sheet of paper. Making copies changing the settings using various copy functions page top page 52 of 973 pages copying.
Page 53: Making Copies
Advanced guide troubleshooting contents > copying > making copies making copies this section describes the procedure to copy a document of a4 size on plain paper. For the operation, see the notes and operation procedure described in the reference page. You need to prepare: originals to copy. See ori...
Page 54
(5) load an original on the platen glass or in the adf. See loading originals . To load the original on the platen glass, align it with the alignment mark with the side to copy facing down as shown below. Then close the document cover gently. Note for details on the types and conditions of the origi...
Page 55
(3) press the color button for color copying, or the black button for black & white copying. The machine starts copying. Remove the original on the platen glass or the document output slot after copying is completed. Important do not open the document cover or move the loaded original until copying ...
Page 56
Cannot make a borderless copy of the document loaded in the adf. Load the original on the platen glass. If borderless copy is selected, slight cropping may occur at the edges since the copied image is enlarged to fill the whole page. The settings of the print quality, automatic intensity adjustment,...
Page 57
Advanced guide troubleshooting contents > copying > using various copy functions using various copy functions you can make various kinds of copies, such as making borderless copies or copying two pages onto a single sheet, by selecting special copy in the copy mode. For details, refer to the on-scre...
Page 58
Page top page 58 of 973 pages using various copy functions.
Page 59: Scanning
Advanced guide troubleshooting contents > scanning scanning you can save scanned data to your computer, and edit or process them with the supplied software application. You can also save scanned data on a usb flash drive inserted into the machine. Saving scanned data on the computer preparing for sc...
Page 60
Advanced guide troubleshooting contents > scanning > saving scanned data on the computer saving scanned data on the computer you can save scanned data on the computer with the usb cable or via a network. This section describes the procedure to detect the type of original automatically with auto scan...
Page 61
(2) press the scan button. (3) if save to is being displayed, use the (-) or (+) button to select pc, and press the ok button. The computer selection screen will appear. Note if save to is not displayed, press the menu button to display it. (4) select the computer to save scanned data, and press the...
Page 62
Do not open the document cover or move the loaded original until scanning is completed. Note the position or size of the original may not be scanned correctly depending on the type of original. If the scan is not performed correctly, try to scan again after selecting document or photo for document t...
Page 63
Advanced guide troubleshooting contents > scanning > using various scan functions using various scan functions you can save scanned data also on the usb flash drive inserted into the machine by selecting usb flash drive in save to in the scan mode. For details, refer to the on-screen manual: advance...
Page 64
Advanced guide troubleshooting contents > printing from your computer printing from your computer this section describes the procedure to print documents or photos with a computer. You can easily print photos taken with your digital camera by using easy-photoprint ex supplied with the machine. Print...
Page 65
Advanced guide troubleshooting contents > printing from your computer > printing photos (easy-photoprint ex) printing photos (easy-photoprint ex) print image data saved on your computer by using easy-photoprint ex supplied with the machine. This section describes the procedure to print borderless ph...
Page 66
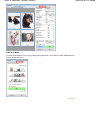
3. Select a photo to print. (1) select the folder in which images are saved. (2) click the image to print. The number of copies appears as "1", and the image you selected appears in the selected image area (a). You can select two or more images at the same time. Note to print two or more copies, cli...
Page 67
5. Select a layout and start printing. (1) select the layout of the photo. Here we select borderless (full). The preview will appear in the selected layout for confirmation of the required print result. Note you can change the direction of photo or crop photos to print. For details on the operation,...
Page 68
Advanced guide troubleshooting contents > printing from your computer > printing photos (easy-photoprint ex) > using various functions of easy- photoprint ex using various functions of easy-photoprint ex this section introduces a few of the useful functions of easy-photoprint ex. For details, refer ...
Page 69: Printing Documents
Advanced guide troubleshooting contents > printing from your computer > printing documents printing documents this section describes the procedure to print a document of a4 size on plain paper. For details, refer to the on-screen manual: advanced guide . Note operations may vary depending on your so...
Page 70
The settings suitable for the print object such as media type or print quality will also appear. When you specify two or more copies in copies, the collate check box will be selected. (2) make sure of the displayed settings. Here we make sure that plain paper in media type, standard in print quality...
Page 71
Note the message on how to load envelopes will appear when printing on them. This message will not appear next time if you select the do not show this message again. Check box. For details on the settings to print envelopes, see loading envelopes . To cancel a print job in progress, press the stop b...
Page 72: Other Usages
Advanced guide troubleshooting contents > other usages other usages this section introduces the procedure to print the template forms such as notebook paper, etc., the setting items of the machine, and the function to print directly from a digital camera or mobile phone. This section also introduces...
Page 73
Advanced guide troubleshooting contents > other usages > printing the template forms such as notebook paper printing the template forms such as notebook paper this section describes the procedure to select and print the template forms. You need to prepare: a4, b5, or letter-sized plain paper. See me...
Page 74
(1) use the (-) or (+) button to specify page size, and press the ok button. Note you can only select a4, b5, or 8.5"x11" (ltr). B5 may not be available depending on the selected template form. (2) confirm that plain paper is selected in media type, and press ok button. Note if a media type other th...
Page 75
Monthly schedule calendar type page top page 75 of 973 pages printing the template forms such as notebook paper.
Page 76: Phone
Advanced guide troubleshooting contents > other usages > printing photos directly from your digital camera or mobile phone printing photos directly from your digital camera or mobile phone printing photos from a pictbridge compliant device you can connect the pictbridge compliant device to this mach...
Page 77
For details on the operation, refer to the on-screen manual: advanced guide . Page top page 77 of 973 pages printing photos directly from your digital camera or mobile phone.
Page 78: Machine Settings
Advanced guide troubleshooting contents > other usages > machine settings machine settings this section describes the items you can set or change in the fax settings or device settings menu available by pressing the menu button. For details on setting or changing, refer to the on-screen manual: adva...
Page 79
Used when printing from a pictbridge compliant device, selects whether or not to prioritize the exif information saved on a photo when auto photo fix on is selected. Lan settings wlan active/inactive switches whether to enable or disable the wireless lan. Wireless lan setup configures the wireless l...
Page 80
Language selection changes the language for lcd messages and menus. Quiet mode enables this function if you want to reduce the operating noise of the machine, such as when using the machine at night (when copying, printing from the pictbridge compliant device, printing with wireless communication, e...
Page 81
Advanced guide troubleshooting contents > other usages > useful software applications useful software applications the machine can be used with useful software applications such as solution menu, my printer, and easy -webprint ex. Solution menu with solution menu, you can start the software applicat...
Page 82
Note you can also start my printer from solution menu or the taskbar. Install my printer from the setup cd-rom when it has not been installed or has been uninstalled. To install my printer, select my printer in custom install. To start my printer from the start menu, select all programs (or programs...
Page 83
For details on printing web pages, click (help) to view the online help. Note installing easy-webprint ex if easy-webprint ex is not installed, the guidance for installation of easy-webprint ex may appear in the notification area of the taskbar. To install easy-webprint ex, click the displayed guida...
Page 84: Loading Paper / Originals
Advanced guide troubleshooting contents > loading paper / originals loading paper / originals this section describes types of paper or originals you can load, how to load printing paper in the rear tray, and how to load originals to copy, fax, or scan. Loading paper loading plain paper / photo paper...
Page 85: Loading Paper
Advanced guide troubleshooting contents > loading paper / originals > loading paper loading paper loading plain paper / photo paper loading envelopes media types you can use media types you cannot use loading plain paper / photo paper important if you cut plain paper into small size such as 4" x 6" ...
Page 86
(3) slide the paper guides (a) to open them, and load the paper in the center of the rear tray with the print side facing you. (4) slide the paper guides (a) to align them with both sides of the paper stack. Do not slide the paper guides too hard. The paper may not be fed properly. Important always ...
Page 87
Note do not load sheets of paper higher than the load limit mark (d). Note the machine may make an operating noise when feeding paper. After loading paper when using the machine to copy without a computer, select the size and type of the loaded paper for page size and media type of the setting optio...
Page 88
Advanced guide troubleshooting contents > loading paper / originals > loading paper > loading envelopes loading envelopes you can print on european dl and us #10 envelopes. The address is automatically rotated and printed according to the envelope's direction by specifying with the printer driver pr...
Page 89
(2) open the paper output tray gently. (3) slide the paper guides (a) to open them, and load the envelopes in the center of the rear tray with the address side facing you. The folded flap of the envelope will be faced down on the left side. Up to 10 envelopes can be loaded at once. (4) slide the pap...
Page 90
(2) select dl env. Or comm. Env. #10 in the envelope size setting window. (3) select landscape in orientation. Important if you do not specify the envelope size or orientationproperly, the address will be printed upside down or will be turned to 90 degrees. Note the machine may make an operating noi...
Page 91
Advanced guide troubleshooting contents > loading paper / originals > loading paper > media types you can use media types you can use choose paper suitable for printing, for the best print results. Canon provides you various types of paper to enhance the fun of printing, such as stickers as well as ...
Page 92
- media type settings - operation panel: pro platinum printer driver: photo paper pro platinum photo paper pro ii - media type settings - operation panel: pro ii printer driver: photo paper pro ii glossy photo paper "everyday use" - media type settings - operation panel: glossy printer driver: gloss...
Page 93
Available only when printing from your computer. For creating your own prints: t-shirt transfers *1 - media type settings - printer driver: t-shirt transfers photo stickers *2, *3 - media type settings - operation panel: glossy printer driver: glossy photo paper - paper load limit - rear tray: 1 she...
Page 94
Maximum size: 8.50 x 26.61 inches / 215.9 x 676.0 mm paper weight 17 to 28 lb / 64 to 105 g/m 2 (except for canon genuine paper) do not use heavier or lighter paper (except for canon genuine paper), as it could jam in the machine. Notes on storing paper take out only the necessary number of paper fr...
Page 95
Advanced guide troubleshooting contents > loading paper / originals > loading paper > media types you cannot use media types you cannot use do not use the following types of paper. Using such paper will cause not only unsatisfactory results, but also the machine to jam or malfunction. Folded, curled...
Page 96: Loading Originals
Advanced guide troubleshooting contents > loading paper / originals > loading originals loading originals this section describes the procedure to load originals on the platen glass and in the adf. Position to load originals loading originals on the platen glass how to load originals for each functio...
Page 97
Advanced guide troubleshooting contents > loading paper / originals > loading originals > loading originals on the platen glass loading originals on the platen glass you can load originals to copy, fax, or scan on the platen glass. You may have to load the original in a different position depending ...
Page 98
Page top page 98 of 973 pages loading originals on the platen glass.
Page 99
Advanced guide troubleshooting contents > loading paper / originals > loading originals > how to load originals for each function how to load originals for each function loading the original to be aligned with the alignment mark load originals to copy or fax in the scan mode, - select usb flash driv...
Page 100
(b) 0.12 inches / 3.0 mm (c) 0.20 inches / 5.0 mm (d) 0.13 inches / 3.4 mm (0.25 inches / 6.4 mm for letter and legal-sized paper) (e) 0.13 inches / 3.4 mm (0.25 inches / 6.3 mm for letter and legal-sized paper) loading only one original in the center of the platen glass in the scan mode, - select a...
Page 101
(a) 0.4 inches / 10 mm note the skew correction function automatically compensates for the originals placed at an angle of up to approximately 10 degrees. Slanted photos with a long edge of 7.1 inches / 180 mm or more cannot be corrected. Non-rectangular or irregular shaped photos (such as cut out p...
Page 102
Advanced guide troubleshooting contents > loading paper / originals > loading originals > loading documents in the adf loading documents in the adf you can load documents to copy, fax, or scan in the adf. Note to scan a document at optimum quality, load it on the platen glass. 1. Make sure that any ...
Page 103
Page top page 103 of 973 pages loading documents in the adf.
Page 104
Advanced guide troubleshooting contents > loading paper / originals > loading originals > originals you can load originals you can load the originals you can load on the platen glass or in the adf for copying, scanning, or faxing are as follows: platen glass adf types of originals text document, mag...
Page 105
Page top page 105 of 973 pages originals you can load.
Page 106: Routine Maintenance
Advanced guide troubleshooting contents > routine maintenance routine maintenance this section describes the procedure to clean the machine when the print result is faint, to replace fine cartridges when they run out of ink, or to take an action when paper does not feed properly. When printing becom...
Page 107
Advanced guide troubleshooting contents > routine maintenance > when printing becomes faint or colors are incorrect when printing becomes faint or colors are incorrect if print results are blurred or colors are not printed correctly, the print head nozzles (fine cartridges) are probably clogged. Fol...
Page 108
Note if the problem is still not resolved after replacing the fine cartridge, contact the service center. When the print results are not even such as the ruled lines are misaligned: see aligning the print head . Note you can also perform the maintenance operations from your computer. For details, re...
Page 109
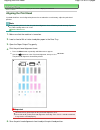
Advanced guide troubleshooting contents > routine maintenance > when printing becomes faint or colors are incorrect > printing the nozzle check pattern printing the nozzle check pattern print the nozzle check pattern to determine whether the ink ejects properly from the print head nozzles. Note if t...
Page 110
Advanced guide troubleshooting contents > routine maintenance > when printing becomes faint or colors are incorrect > examining the nozzle check pattern examining the nozzle check pattern examine the nozzle check pattern, and clean the print head if necessary. 1. Check if there are missing lines in ...
Page 111
Advanced guide troubleshooting contents > routine maintenance > when printing becomes faint or colors are incorrect > cleaning the print head cleaning the print head clean the print head if lines are missing or if horizontal white streaks are present in the printed nozzle check pattern. Cleaning unc...
Page 112
Advanced guide troubleshooting contents > routine maintenance > when printing becomes faint or colors are incorrect > cleaning the print head deeply cleaning the print head deeply if print quality does not improve by the standard cleaning of the print head, clean the print head deeply. Cleaning the ...
Page 113
Advanced guide troubleshooting contents > routine maintenance > when printing becomes faint or colors are incorrect > aligning the print head aligning the print head if printed ruled lines are misaligned or print results are otherwise unsatisfactory, adjust the print head position. Note if the remai...
Page 114
Important do not touch any printed part on the print head alignment sheet. Be careful not to get the print head alignment sheet dirty. If the sheet is stained or wrinkled, it may not be scanned properly. 5. Scan the print head alignment sheet to adjust the print head position. (1) load the print hea...
Page 115
Important do not open the document cover or remove the print head alignment sheet on the platen glass until adjusting the print head position is completed. If the message "failed to scan the head alignment sheet" appears, press the ok button. Refer to " troubleshooting " in the on-screen manual: adv...
Page 116
Advanced guide troubleshooting contents > routine maintenance > replacing a fine cartridge replacing a fine cartridge when remaining ink cautions or errors occur, the message will appear to inform you of the error. Refer to "an error message is displayed on the lcd" in " troubleshooting " of the on-...
Page 117
1. Make sure that the power is turned on, and open the paper output tray gently. 2. Lift the scanning unit (cover), then hold it open with the scanning unit support (c). The fine cartridge holder moves to the replacement position. Caution do not hold the fine cartridge holder to stop or move it forc...
Page 118
4. Prepare the new fine cartridge. (1) take a new fine cartridge out of its package and remove the orange protective tape (d) gently. Important if you shake a fine cartridge, ink may spill out and stain your hands and the surrounding area. Handle a fine cartridge carefully. Be careful not to stain y...
Page 119
(e) closed correctly (f) not closed correctly (the cover is tilted) important the machine cannot print unless both the color and black fine cartridges are installed. Be sure to install both the fine cartridges. 6. Lift the scanning unit (cover) slightly to set the scanning unit support back to its o...
Page 120
Advanced guide troubleshooting contents > routine maintenance > replacing a fine cartridge > checking the ink status checking the ink status you can check the ink status on the lcd. Make sure that the machine is turned on, then press the copy, fax , or scan button. The current ink level will appear ...
Page 121
Advanced guide troubleshooting contents > routine maintenance > cleaning the paper feed roller cleaning the paper feed roller if the paper feed roller is dirty or paper powder is attached to it, paper may not be fed properly. In this case, clean the paper feed roller. Cleaning will wear out the pape...
Page 122: Appendix
Advanced guide troubleshooting contents > appendix appendix legal limitations on use of your product and use of images tips on how to use your machine page top page 122 of 973 pages appendix.
Page 123
Advanced guide troubleshooting contents > appendix > legal limitations on use of your product and use of images legal limitations on use of your product and use of images it may be unlawful to make copies of, scan, print, or use reproductions of the following documents. The list provided is non-exha...
Page 124
Advanced guide troubleshooting contents > appendix > tips on how to use your machine tips on how to use your machine this section introduces the tips on how to use your machine and for printing with optimal quality. Ink is used for various purposes. How is ink used for various purposes other than pr...
Page 125
Tip!: after loading paper, be sure to specify the paper settings! After loading paper, be sure to select the loaded paper for media type with the operation panel or media type with the printer driver. If the type of paper is not selected, you may not be able to get the satisfactory print result. See...
Page 126
Tip!: carefully choose the area to place the machine! Note when you place the machine near other electrical appliances such as fluorescent lamps place the machine at least 5.91 inches / 15 cm away from other electrical appliances such as fluorescent lamps. If the machine is placed closer to those, i...
Page 127
Colors are uneven, and print results are blurred. Tip!: print the nozzle check pattern to check if the nozzles are clogged. If the print head nozzles are clogged, colors may become uneven or the print results may be blurred. In this case print the nozzle check pattern check the printed check pattern...
Page 128
Mc-4470-v1.00 basic guide printing scanning copying faxing troubleshooting how to use this manual printing this manual maintenance about bluetooth communication changing the machine settings appendix about network communication when you display this on-screen manual in a language environment other t...
Page 129
Using the face sharpener function using the digital face smoothing function using the blemish remover function adjusting images correct/enhance images window questions and answers how can i move (or copy) the saved file? Which side of the displayed image does the printing start from? How do i print ...
Page 130
Page layout printing poster printing booklet printing duplex printing stamp/background printing registering a stamp registering image data to be used as a background printing an envelope displaying the print results before printing setting paper dimensions (custom size) changing the print quality an...
Page 131
Settings on the machine printing photographs from a wireless communication device printing via bluetooth communication printing through bluetooth communication changing the bluetooth settings setting the page size, media type, and layout when printing from a mobile phone displaying the mobile phone ...
Page 132
Sending via e-mail editing files setting passwords for pdf files opening/editing password-protected pdf files mp navigator ex screens navigation mode screen scan/import documents or images tab view & use images on your computer tab custom scan with one-click tab photos/documents (platen) screen (sca...
Page 133
Scanning in advanced mode scanning in auto scan mode scanning multiple documents from the adf (auto document feeder) in advanced mode scanning multiple documents at one time with scangear (scanner driver) correcting images and adjusting colors with scangear (scanner driver) correcting images (unshar...
Page 134
Special copy settings for special copy copying two pages to fit onto a single page (2-on-1 copy) copying four pages to fit onto a single page (4-on- 1 copy) copying without borders (borderless copy) repeating an image on a page (image repeat) making multiple copies of an entire document (collated co...
Page 135
Rejecting fax reception changing/deleting the rejected number using the caller id service to reject calls document stored in memory printing a document in memory deleting a document in memory saving a document in memory to usb flash drive summary of reports and lists using speed dial utility about s...
Page 136
No printing results/printing is blurred/colors are wrong/ white streaks colors are unclear lines are misaligned printed paper curls or has ink blots paper is smudged/printed surface is scratched back of the paper is smudged vertical lines are printed on the sides of the printout colors are uneven or...
Page 137
Driver) screen does not appear scan quality (image displayed on the monitor) is poor scanned image is surrounded by extra white areas cannot scan multiple documents at one time cannot scan properly in auto scan mode slow scanning speed "there is not enough memory." message is displayed computer stop...
Page 138
Using mp navigator ex about solution menu page 138 of 973 pages mx340 series advanced guide.
Page 139: How To Use This Manual
Advanced guide > how to use this manual how to use this manual operating the contents pane operating the explanation window printing this manual using keywords to find a document registering documents to my manual symbols used in this document trademarks page top page 139 of 973 pages how to use thi...
Page 140
Advanced guide > how to use this manual > operating the contents pane operating the contents pane when you click a document title displayed in the contents pane found to the left of the on-screen manual, the documents of that title are displayed in the explanation window on the right side. When you ...
Page 141
Advanced guide > how to use this manual > operating the explanation window operating the explanation window explanation window (1) click the green characters to jump to the corresponding document. (2) the cursor jumps to the top of this document. Window used in operation explanation this on-screen m...
Page 142: Printing This Manual
Advanced guide > how to use this manual > printing this manual printing this manual click to display the print pane to the left of the on-screen manual. Note click to close or display the print pane. When you click and then click page setup, the page setup dialog box appears. You can then easily set...
Page 143
Print all documents note you can select the type to be printed, and then easily specify print settings on the print setup tab. Print current document you can print the currently displayed document. 1. From select target, select current document the title of the currently displayed document is displa...
Page 144
Confirm the number of pages to be printed, and then click yes. All documents with selected check boxes are printed. Print my manual you can select and print documents registered in my manual. For details about my manual, see " registering documents to my manual ." 1. From select target, select my ma...
Page 145
Confirm the number of pages to be printed, and then click yes. All documents are printed. Important a large amount of paper is necessary to print all documents. Before printing, be sure to check the number of print pages displayed in the print page count confirmation dialog box. The print preview di...
Page 146
Advanced guide > how to use this manual > using keywords to find a document using keywords to find a document you can enter a keyword to search for a target document. All documents in the currently displayed on-screen manual are searched. 1. Click the search pane is displayed to the left of the on-s...
Page 147
The search is started, and the titles of documents containing the keyword are displayed in the search results list. When you execute a search by entering multiple keywords, the search results are displayed as shown below. [documents containing perfect match] documents containing the entire search ch...
Page 148
Advanced guide > how to use this manual > registering documents to my manual registering documents to my manual register frequently read documents as my manual documents so that you can refer to those documents easily at any time. 1. Display the document display the document to be added to my manual...
Page 149
4. Display my manual when you double-click (or select and press enter key) a document title displayed in list of my manual, that document is displayed in the explanation window. Note to delete a document from list of my manual, select that document title from the list, and then click delete (or pres...
Page 150
Advanced guide > how to use this manual > symbols used in this document symbols used in this document warning instructions that, if ignored, could result in death or serious personal injury caused by incorrect operation of the equipment. These must be observed for safe operation. Caution instruction...
Page 151: Trademarks
Advanced guide > how to use this manual > trademarks trademarks microsoft is a registered trademark of microsoft corporation. Windows is a trademark or registered trademark of microsoft corporation in the u.S. And/or other countries. Windows vista is a trademark or registered trademark of microsoft ...
Page 152: Printing From A Computer
Advanced guide > printing from a computer printing from a computer printing with the bundled application software printing with other application software page top page 152 of 973 pages printing from a computer.
Page 153
Advanced guide > printing from a computer > printing with the bundled application software printing with the bundled application software what is easy-photoprint ex? Printing photos creating an album printing calendars printing stickers printing layout correcting and enhancing photos questions and a...
Page 154
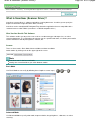
Advanced guide > printing from a computer > printing with the bundled application software > what is easy-photoprint ex? What is easy-photoprint ex? Easy-photoprint ex allows you to create albums, calendars and stickers easily using photos taken with digital cameras. You can also print borderless ph...
Page 155
The photo print function is available with the following applications: mp navigator ex ver.1.00 or later zoombrowser ex ver.6.0 or later digital photo professional ver.3.2 or later important easy-photoprint ex is subject to the following restrictions when started from digital photo professional: - m...
Page 156: Printing Photos
Advanced guide > printing from a computer > printing with the bundled application software > printing photos printing photos easy-photoprint ex allows you to print your favorite photos in a variety of layouts. You can also create borderless photos easily. Corrections suitable for photos can be appli...
Page 157
Page top page 157 of 973 pages printing photos.
Page 158
Advanced guide > printing from a computer > printing with the bundled application software > printing photos > starting easy-photoprint ex starting easy-photoprint ex 1. From the start menu, select (all) programs > canon utilities > easy-photoprint ex > easy-photoprint ex. Easy-photoprint ex starts ...
Page 159: Selecting A Photo
Advanced guide > printing from a computer > printing with the bundled application software > printing photos > selecting a photo selecting a photo 1. Click photo print from menu. The select images screen appears. Important the thumbnails (reduced images) displayed in the screen may appear as follows...
Page 160
(delete imported image). To delete all images from the selected image area, click (delete all imported images). To print two or more copies of an image, click (up arrow) until the number of copies you want is reached. To reduce the number of copies shown in the box, click (down arrow). You can chang...
Page 161: Selecting The Paper
Advanced guide > printing from a computer > printing with the bundled application software > printing photos > selecting the paper selecting the paper 1. Click select paper. The select paper screen appears. 2. Set the following items according to the printer and paper to be used: printer paper sourc...
Page 162: Printing
Advanced guide > printing from a computer > printing with the bundled application software > printing photos > printing printing 1. Click layout/print. The layout/print screen appears. Important the thumbnails (reduced images) displayed in the screen may appear as follows: - a black line appears alo...
Page 163
Note you can crop images or print dates on photos. Cropping photos (photo print) printing dates on photos (photo print) you can correct or enhance the selected image before printing. Correcting and enhancing photos you can specify advanced photo print settings (number of copies, print quality, etc.)...
Page 164: Creating An Album
Advanced guide > printing from a computer > printing with the bundled application software > creating an album creating an album easy-photoprint ex allows you to create your own personalized photo album. Steps 1. Starting easy-photoprint ex 2. Selecting the paper and layout 3. Selecting a photo 4. E...
Page 165
How can i move (or copy) the saved file? What is "c1" or "c4"? Page top page 165 of 973 pages creating an album.
Page 166
Advanced guide > printing from a computer > printing with the bundled application software > creating an album > starting easy-photoprint ex starting easy-photoprint ex 1. From the start menu, select (all) programs > canon utilities > easy-photoprint ex > easy-photoprint ex. Easy-photoprint ex start...
Page 167
Advanced guide > printing from a computer > printing with the bundled application software > creating an album > selecting the paper and layout selecting the paper and layout 1. Click album from menu. The page setup screen appears. 2. Set the following items in the general settings section: paper si...
Page 168
4. If you want to change the layout, click layout.... The change layout dialog box appears. In the change layout dialog box, you can change the layout or select whether to print the date (on which the picture was taken) on the photo. Note the layouts that can be selected may vary depending on the pa...
Page 169: Selecting A Photo
Advanced guide > printing from a computer > printing with the bundled application software > creating an album > selecting a photo selecting a photo 1. Click select images. The select images screen appears. 2. Select the folder that contains the image you want to print from the folder tree area. The...
Page 170
To delete all images from the selected image area, click (delete all imported images). Note see help for details on the select images screen. Page top page 170 of 973 pages selecting a photo.
Page 171: Editing
Advanced guide > printing from a computer > printing with the bundled application software > creating an album > editing editing 1. Click edit. The edit screen appears. 2. Edit your album if necessary. Changing layout changing background adding photos swapping positions of photos replacing photos ch...
Page 172
C4: back cover "c2"/"c3" appears only when the leave the inside of front cover blank/leave the inside of back cover blank checkbox is selected in the cover options dialog box. Saving note see help for details on the edit screen. Page top page 172 of 973 pages editing.
Page 173: Printing
Advanced guide > printing from a computer > printing with the bundled application software > creating an album > printing printing 1. Click print settings. The print settings screen appears. 2. Set the following items according to the printer and paper to be used: printer media type copies paper sou...
Page 174
3. Click print. Note see help for details on the print settings screen. Page top page 174 of 973 pages printing.
Page 175: Printing Calendars
Advanced guide > printing from a computer > printing with the bundled application software > printing calendars printing calendars easy-photoprint ex allows you to create your own calendar using your favorite photos. Steps 1. Starting easy-photoprint ex 2. Selecting the paper and layout 3. Selecting...
Page 176
Questions and answers how can i move (or copy) the saved file? Page top page 176 of 973 pages printing calendars.
Page 177
Advanced guide > printing from a computer > printing with the bundled application software > printing calendars > starting easy-photoprint ex starting easy-photoprint ex 1. From the start menu, select (all) programs > canon utilities > easy-photoprint ex > easy-photoprint ex. Easy-photoprint ex star...
Page 178
Advanced guide > printing from a computer > printing with the bundled application software > printing calendars > selecting the paper and layout selecting the paper and layout 1. Click calendar from menu. The page setup screen appears. 2. Set the following items in the general settings section: pape...
Page 179
See help for details on the page setup screen. Page top page 179 of 973 pages selecting the paper and layout.
Page 180: Selecting A Photo
Advanced guide > printing from a computer > printing with the bundled application software > printing calendars > selecting a photo selecting a photo 1. Click select images. The select images screen appears. 2. Select the folder that contains the image you want to print from the folder tree area. Th...
Page 181: Editing
Advanced guide > printing from a computer > printing with the bundled application software > printing calendars > editing editing 1. Click edit. The edit screen appears. 2. Edit the calendar if necessary. Changing layout changing background adding photos swapping positions of photos replacing photos...
Page 182
See help for details on the edit screen. Page top page 182 of 973 pages editing.
Page 183: Printing
Advanced guide > printing from a computer > printing with the bundled application software > printing calendars > printing printing 1. Click print settings. The print settings screen appears. 2. Set the following items according to the printer and paper to be used: printer media type copies paper so...
Page 184
Note see help for details on the print settings screen. Page top page 184 of 973 pages printing.
Page 185: Printing Stickers
Advanced guide > printing from a computer > printing with the bundled application software > printing stickers printing stickers you can print your favorite photos on compatible sticker sheets. Steps 1. Starting easy-photoprint ex 2. Selecting the paper and layout 3. Selecting a photo 4. Editing 5. ...
Page 186
Advanced guide > printing from a computer > printing with the bundled application software > printing stickers > starting easy-photoprint ex starting easy-photoprint ex 1. From the start menu, select (all) programs > canon utilities > easy-photoprint ex > easy-photoprint ex. Easy-photoprint ex start...
Page 187
Advanced guide > printing from a computer > printing with the bundled application software > printing stickers > selecting the paper and layout selecting the paper and layout 1. Click stickers from menu. The page setup screen appears. 2. Set the following items in the general settings section: paper...
Page 188: Selecting A Photo
Advanced guide > printing from a computer > printing with the bundled application software > printing stickers > selecting a photo selecting a photo 1. Click select images. The select images screen appears. 2. Select the folder that contains the image you want to print from the folder tree area. The...
Page 189: Editing
Advanced guide > printing from a computer > printing with the bundled application software > printing stickers > editing editing 1. Click edit. The edit screen appears. 2. Edit the stickers if necessary. Adding photos swapping positions of photos replacing photos changing position, angle and size of...
Page 190: Printing
Advanced guide > printing from a computer > printing with the bundled application software > printing stickers > printing printing 1. Click print settings. The print settings screen appears. 2. Set the following items according to the printer and paper to be used: printer media type copies paper sou...
Page 191
Page top page 191 of 973 pages printing.
Page 192: Printing Layout
Advanced guide > printing from a computer > printing with the bundled application software > printing layout printing layout you can add text to your favorite photos and print them in a variety of layouts. Steps 1. Starting easy-photoprint ex 2. Selecting the paper and layout 3. Selecting a photo 4....
Page 193
Advanced guide > printing from a computer > printing with the bundled application software > printing layout > starting easy-photoprint ex starting easy-photoprint ex 1. From the start menu, select (all) programs > canon utilities > easy-photoprint ex > easy-photoprint ex. Easy-photoprint ex starts ...
Page 194
Advanced guide > printing from a computer > printing with the bundled application software > printing layout > selecting the paper and layout selecting the paper and layout 1. Click layout print from menu. The page setup screen appears. 2. Set the following items in the general settings section: pap...
Page 195: Selecting A Photo
Advanced guide > printing from a computer > printing with the bundled application software > printing layout > selecting a photo selecting a photo 1. Click select images. The select images screen appears. 2. Select the folder that contains the image you want to print from the folder tree area. The i...
Page 196: Editing
Advanced guide > printing from a computer > printing with the bundled application software > printing layout > editing editing 1. Click edit. The edit screen appears. 2. Edit the layout if necessary. Changing layout adding photos swapping positions of photos replacing photos changing position, angle...
Page 197: Printing
Advanced guide > printing from a computer > printing with the bundled application software > printing layout > printing printing 1. Click print settings. The print settings screen appears. 2. Set the following items according to the printer and paper to be used: printer media type copies paper sourc...
Page 198
Note see help for details on the print settings screen. Page top page 198 of 973 pages printing.
Page 199
Advanced guide > printing from a computer > printing with the bundled application software > correcting and enhancing photos correcting and enhancing photos you can correct and enhance images. Click (correct/enhance images) in the select images or edit screen, or in the layout/print screen of photo ...
Page 200
Adjusting images page top page 200 of 973 pages correcting and enhancing photos.
Page 201
Advanced guide > printing from a computer > printing with the bundled application software > correcting and enhancing photos > using the auto photo fix function using the auto photo fix function this function will automatically analyze the captured scene and apply suitable corrections. Important the...
Page 202
Note if only one image is selected, the thumbnail list does not appear below preview. 3. Make sure that auto is selected. 4. Click auto photo fix, then click ok. The entire photo is corrected automatically and the (correction/enhancement) mark appears on the upper left of the image. Note click (comp...
Page 203
Advanced guide > printing from a computer > printing with the bundled application software > correcting and enhancing photos > using the red-eye correction function using the red-eye correction function you can correct red eyes caused by a camera flash. You can perform the red-eye correction functio...
Page 204
Auto correction 3. Make sure that auto is selected. 4. Click red-eye correction. 5. Click ok. Red eyes are corrected and the (correction/enhancement) mark appears on the upper left of the image. Important areas other than the eyes may be corrected depending on the image. Note click (compare) to disp...
Page 205
Red eye is corrected and the (correction/enhancement) mark appears on the upper left of the image. Note click (compare) to display the images before and after the correction side by side so that you can compare and check the result. Click undo to undo the preceding correction operation. 6. Click sav...
Page 206
Advanced guide > printing from a computer > printing with the bundled application software > correcting and enhancing photos > using the face brightener function using the face brightener function you can brighten dark faces caused by bright background. Note you can brighten dark photos caused by br...
Page 207
4. Click face brightener. Note effect levels can be changed using the slider below face brightener. Move the cursor over the image. The shape of the cursor changes to (cross). 5. Drag to select the area you want to correct, then click ok that appears over the image. The entire image is corrected so ...
Page 208
Page top page 208 of 973 pages using the face brightener function.
Page 209
Advanced guide > printing from a computer > printing with the bundled application software > correcting and enhancing photos > using the face sharpener function using the face sharpener function you can sharpen out-of-focus faces in a photo. You can perform the face sharpener function either automat...
Page 210
4. Click face sharpener. Note effect levels can be changed using the slider below face sharpener. 5. Click ok. The face is sharpened and the (correction/enhancement) mark appears on the upper left of the image. Note click (compare) to display the images before and after the correction side by side s...
Page 211
The facial area in and around the selected area is sharpened and the (correction/ enhancement) mark appears on the upper left of the image. Note you can also drag to rotate the selected area. Click (compare) to display the images before and after the correction side by side so that you can compare a...
Page 212
Advanced guide > printing from a computer > printing with the bundled application software > correcting and enhancing photos > using the digital face smoothing function using the digital face smoothing function you can enhance skin beautifully by removing blemishes and wrinkles. You can perform the ...
Page 213
4. Click digital face smoothing. Note effect levels can be changed using the slider below digital face smoothing. 5. Click ok. Skin is enhanced beautifully and the (correction/enhancement) mark appears on the upper left of the image. Note click (compare) to display the images before and after the en...
Page 214
Skin in and around the selected area is enhanced beautifully and the (correction/enhancement) mark appears on the upper left of the image. Note you can also drag to rotate the selected area. Click (compare) to display the images before and after the enhancement side by side so that you can compare a...
Page 215
Advanced guide > printing from a computer > printing with the bundled application software > correcting and enhancing photos > using the blemish remover function using the blemish remover function you can remove moles. 1. Select photos in the select images screen, then click (correct/enhance images)...
Page 216
Note move the cursor over the image. The shape of the cursor changes to (cross). 5. Drag to select the area you want to enhance, then click ok that appears over the image. Moles in and around the selected area are removed and the (correction/enhancement) mark appears on the upper left of the image. ...
Page 217: Adjusting Images
Advanced guide > printing from a computer > printing with the bundled application software > correcting and enhancing photos > adjusting images adjusting images you can make fine adjustments to the overall brightness, contrast, etc. Of images. 1. Select photos in the select images screen, then click...
Page 218
Sharpness blur show-through removal note click (compare) to display the images before and after the adjustment side by side so that you can compare and check the result. Click defaults to reset all adjustments. 5. Click save selected image or save all corrected images. You can save adjusted images a...
Page 219
Advanced guide > printing from a computer > printing with the bundled application software > correcting and enhancing photos > correct/enhance images window correct/enhance images window you can correct/enhance images in this window. To display the correct/enhance images window, click (correct/enhan...
Page 220
(2)task area available tasks and settings may vary between the auto and manual tabs. Click auto or manual to display the corresponding tab. Auto tab use the functions in the auto tab to apply corrections and enhancements to the entire image. Auto photo fix applies automatic corrections suitable for ...
Page 221
Select this checkbox to apply corrections primarily based on the settings made at the time of shooting. Deselect this checkbox to apply corrections based on the image analysis results. It is recommended that you normally select this setting. Note exif is a standard format for embedding various shoot...
Page 222
Brightness adjusts the overall image brightness. Move the slider to the left to darken and right to brighten the image. Contrast adjusts the contrast of the image. Adjust the contrast when the image is flat due to lack of contrast. Move the slider to the left to decrease and right to increase the co...
Page 223
Red-eye correction corrects red eyes in the selected area. You can adjust the effect level using the slider. Note for photo print, red eyes are automatically corrected when printing by selecting enable auto photo fix in color correction for printing on the advanced tab of the preferences dialog box ...
Page 224
Page top page 224 of 973 pages correct/enhance images window.
Page 225: Questions And Answers
Advanced guide > printing from a computer > printing with the bundled application software > questions and answers questions and answers how can i move (or copy) the saved file? Which side of the displayed image does the printing start from? How do i print with even margins? What is "c1" or "c4"? Pa...
Page 226
Advanced guide > printing from a computer > printing with the bundled application software > questions and answers > how can i move (or copy) the saved file? How can i move (or copy) the saved file? If you want to move (or copy) a file created and saved with easy-photoprint ex from one folder to ano...
Page 227: From?
Advanced guide > printing from a computer > printing with the bundled application software > questions and answers > which side of the displayed image does the printing start from? Which side of the displayed image does the printing start from? As shown below, printing starts from the left side of t...
Page 228
Advanced guide > printing from a computer > printing with the bundled application software > questions and answers > how do i print with even margins? How do i print with even margins? When you print on a bordered layout, the margins on the left and right or the top and bottom may become wider than ...
Page 229
Advanced guide > printing from a computer > printing with the bundled application software > questions and answers > what is "c1" or "c4"? What is "c1" or "c4"? When an album is printed, labels such as "c1" and "c4" are printed as page numbers. The "c1" and "c4" represent the front cover and back co...
Page 230: Photo Print Settings
Advanced guide > printing from a computer > printing with the bundled application software > photo print settings photo print settings printing vivid photos reducing photo noise cropping photos (photo print) printing dates on photos (photo print) printing multiple photos on one page printing an inde...
Page 231: Printing Vivid Photos
Advanced guide > printing from a computer > printing with the bundled application software > photo print settings > printing vivid photos printing vivid photos select the vivid photo checkbox in the select paper screen to boost the colors in a photo before printing. Important this function is availa...
Page 232: Reducing Photo Noise
Advanced guide > printing from a computer > printing with the bundled application software > photo print settings > reducing photo noise reducing photo noise when a photo is taken in a dark location such as night scene using digital camera, noise may appear in the image. Select the photo noise reduc...
Page 233
Advanced guide > printing from a computer > printing with the bundled application software > photo print settings > cropping photos (photo print) cropping photos (photo print) cropping a photo is the act of removing the unnecessary portions of the photo by selecting the necessary portions. Click (cr...
Page 234
Page top page 234 of 973 pages cropping photos (photo print).
Page 235
Advanced guide > printing from a computer > printing with the bundled application software > photo print settings > printing dates on photos (photo print) printing dates on photos (photo print) to print the date the photo was taken on the photo, click (date settings) in the layout/print screen, then...
Page 236
Advanced guide > printing from a computer > printing with the bundled application software > photo print settings > printing multiple photos on one page printing multiple photos on one page you can print multiple photos on one page by selecting a multiple-photo layout in the layout/print screen. Not...
Page 237: Printing An Index
Advanced guide > printing from a computer > printing with the bundled application software > photo print settings > printing an index printing an index you can print an index of selected photos. An index print shows the thumbnails of the photos in one page. It is convenient for managing your photos....
Page 238
Page top page 238 of 973 pages printing an index.
Page 239
Advanced guide > printing from a computer > printing with the bundled application software > photo print settings > printing id photos (id photo print) printing id photos (id photo print) you can print a variety of id photos. Important the photo may not qualify as an official id photo depending on i...
Page 240
To display the preferences dialog box, click (settings) or select preferences... From the file menu. Id photos can only be printed on 4"x6" 10x15cm paper. Page top page 240 of 973 pages printing id photos (id photo print).
Page 241: Printing Photo Information
Advanced guide > printing from a computer > printing with the bundled application software > photo print settings > printing photo information printing photo information you can print the photo and the exif information side by side. To print them, select letter 8.5"x11" or a4 for paper size in the s...
Page 242: Saving Photos
Advanced guide > printing from a computer > printing with the bundled application software > photo print settings > saving photos saving photos you can save edited photos. The information of cropping and layout can be saved. Click save in the layout/print screen. When the save as dialog box appears,...
Page 243: Opening Saved Files
Advanced guide > printing from a computer > printing with the bundled application software > photo print settings > opening saved files opening saved files you can open files created with easy-photoprint ex. 1. Click library from menu. The open dialog box appears. You can check files created and sav...
Page 244
You can also open a recently used file by clicking the file name shown in the file menu. Page top page 244 of 973 pages opening saved files.
Page 245: Other Settings
Advanced guide > printing from a computer > printing with the bundled application software > other settings other settings changing layout changing background adding photos swapping positions of photos replacing photos changing position, angle and size of photos cropping photos framing photos printi...
Page 246: Changing Layout
Advanced guide > printing from a computer > printing with the bundled application software > other settings > changing layout changing layout you can change the layout of each page separately. Select the page you want to change the layout of in the edit screen, then click (change layout). Select the...
Page 247
Important the layouts of all pages are changed to the selected layout. All images that do not fit in the new layout will be collected on the last page. Note the layouts that can be selected may vary depending on the paper size and orientation. Layout print important if the new layout has a different...
Page 248: Changing Background
Advanced guide > printing from a computer > printing with the bundled application software > other settings > changing background changing background you can change the background of each page. Important you cannot change the background of the photo print, stickers, and layout print. Click backgroun...
Page 249
Click search backgrounds... To access the canon website from which you can download additional materials for free. Internet connection is required to access the website. Internet connection fees apply. This function may not be available in some regions. Exit easy-photoprint ex before installing back...
Page 250
Note see help for details on how to set the background in the change background dialog box. Page top page 250 of 973 pages changing background.
Page 251: Adding Photos
Advanced guide > printing from a computer > printing with the bundled application software > other settings > adding photos adding photos you can add images to pages. Select the page you want to add photos in the edit screen, then click (add image). Note the screens for album printing are used as ex...
Page 252
Advanced guide > printing from a computer > printing with the bundled application software > other settings > swapping positions of photos swapping positions of photos you can swap the positions of images. Click (swap image positions) in the edit screen. Note the screens for album printing are used ...
Page 253: Replacing Photos
Advanced guide > printing from a computer > printing with the bundled application software > other settings > replacing photos replacing photos you can replace an image with another image. Select the image you want to replace in the edit screen, then click (replace selected image). Select the folder...
Page 254
Advanced guide > printing from a computer > printing with the bundled application software > other settings > changing position, angle and size of photos changing position, angle and size of photos you can adjust the position, angle and size of images. Select the image of which you want to change th...
Page 255: Cropping Photos
Advanced guide > printing from a computer > printing with the bundled application software > other settings > cropping photos cropping photos cropping an image is the act of removing the unnecessary portions of the image by selecting the necessary portions. Select the image you want to crop in the e...
Page 256: Framing Photos
Advanced guide > printing from a computer > printing with the bundled application software > other settings > framing photos framing photos you can add frames to images. Important you cannot add frames to images in photo print, stickers, and layout print. Select the image you want to frame in the ed...
Page 257
Selected page at one time. Various frames are available on our website besides those saved in the application. Click search frames... To access the canon website from which you can download additional materials for free. Internet connection is required to access the website. Internet connection fees...
Page 258: Printing Dates On Photos
Advanced guide > printing from a computer > printing with the bundled application software > other settings > printing dates on photos printing dates on photos you can print dates on images. Select the image you want to print the date in the edit screen and click (edit image) or double-click the ima...
Page 259
Advanced guide > printing from a computer > printing with the bundled application software > other settings > attaching comments to photos attaching comments to photos you can attach comments to images and display them in your album. The photo name, shooting date and comments are displayed (from top...
Page 260
Select the show comment box checkbox. Select the checkboxes of the items you want to display, and enter comments. Set the size and color of font, and position of the comments, etc., then click ok. Note see help for details on comments. Page top page 260 of 973 pages attaching comments to photos.
Page 261: Adding Text To Photos
Advanced guide > printing from a computer > printing with the bundled application software > other settings > adding text to photos adding text to photos you can add text to photos. Click (add text) in the edit screen and drag the mouse over the area in which you want to add text. Note the screens f...
Page 262: Saving
Advanced guide > printing from a computer > printing with the bundled application software > other settings > saving saving you can save edited items. Click save in the edit or print settings screen. Note the screens for album printing are used as examples in the following descriptions. The screens ...
Page 263: Setting Holidays
Advanced guide > printing from a computer > printing with the bundled application software > other settings > setting holidays setting holidays you can add holidays to your calendar. Click set holidays... In the page setup screen of calendar, or click (setup period/holiday) in the edit screen and cl...
Page 264
Enter the name in holiday name and specify the date. Select the set as holiday checkbox to display that day as a holiday in your calendar. Note see help for details on each dialog box. Page top page 264 of 973 pages setting holidays.
Page 265: Setting Calendar Display
Advanced guide > printing from a computer > printing with the bundled application software > other settings > setting calendar display setting calendar display you can customize the calendar display (fonts, lines, colors, position, size, etc.). Click settings... In the page setup screen of calendar,...
Page 266: Opening Saved Files
Advanced guide > printing from a computer > printing with the bundled application software > other settings > opening saved files opening saved files you can open files created with easy-photoprint ex. 1. Click library from menu. The open dialog box appears. You can check files created and saved wit...
Page 267
Editing album editing calendar editing stickers editing layout print note you can open files created with easy-photoprint ex with the following methods, besides from library in menu. - double-click or click the file. - from the file menu, click open..., then select the file you want to edit. You can...
Page 268
Advanced guide > printing from a computer > printing with other application software printing with other application software various printing methods changing the print quality and correcting image data overview of the printer driver page top page 268 of 973 pages printing with other application so...
Page 269: Various Printing Methods
Advanced guide > printing from a computer > printing with other application software > various printing methods various printing methods printing with easy setup setting a page size and orientation setting the number of copies and printing order setting the stapling margin borderless printing fit-to...
Page 270: Printing With Easy Setup
Advanced guide > printing from a computer > printing with other application software > various printing methods > printing with easy setup printing with easy setup the simple setup procedure for carrying out appropriate printing on this machine, is as follows: 1. Open the printer driver setup window...
Page 271
Advanced guide > printing from a computer > printing with other application software > various printing methods > setting a page size and orientation setting a page size and orientation the paper size and orientation are essentially determined by the application. When the page size and orientation s...
Page 272
Advanced guide > printing from a computer > printing with other application software > various printing methods > setting the number of copies and printing order setting the number of copies and printing order default setting print from last page collate print from last page + collate the procedure ...
Page 273
Uncheck this check box to print all pages with the same page number together. 5. Complete the setup click ok. When you execute print, the specified number of copies will be printed with the specified printing order. Important when the application software that you used to create the document has the...
Page 274
Advanced guide > printing from a computer > printing with other application software > various printing methods > setting the stapling margin setting the stapling margin the procedure for setting the staple side and the margin width is as follows: 1. Open the printer driver setup window 2. Specify t...
Page 275
Note the printer automatically reduces the print area depending on the staple position margin. 4. Complete the setup click ok on the page setup tab. When you execute print, the data is printed with the specified staple side and margin width. Important staple side and specify margin... Appear grayed ...
Page 276: Borderless Printing
Advanced guide > printing from a computer > printing with other application software > various printing methods > borderless printing borderless printing the borderless printing function allows you to print data without any margin by enlarging the data so that it extends slightly off the paper. With...
Page 277
Check the page size list. When you want to change, select another page size from the list. The list displays only sizes that can be used for borderless printing. 4. Adjust the amount of extension from the paper if necessary, adjust the amount of extension using the amount of extension slider. Moving...
Page 278
Page top page 278 of 973 pages borderless printing.
Page 279: Fit-to-Page Printing
Advanced guide > printing from a computer > printing with other application software > various printing methods > fit- to-page printing fit-to-page printing the procedure for printing a document that is automatically enlarged or reduced to fit the page size to be used is as follows: 1. Open the prin...
Page 280
5. Complete the setup click ok. When you execute print, the document will be enlarged or reduced to fit to the page size. Page top page 280 of 973 pages fit-to-page printing.
Page 281: Scaled Printing
Advanced guide > printing from a computer > printing with other application software > various printing methods > scaled printing scaled printing the procedure for printing a document with pages enlarged or reduced is as follows: 1. Open the printer driver setup window 2. Set scaled printing select ...
Page 282
Specify a scaling factor directly type in a value into the scaling box. The current settings are displayed in the settings preview on the left side of the printer driver. 5. Complete the setup click ok. When you execute print, the document will be printed with the specified scale. Important when the...
Page 283
Selecting scaled changes the printable area of the document. Page top page 283 of 973 pages scaled printing.
Page 284: Page Layout Printing
Advanced guide > printing from a computer > printing with other application software > various printing methods > page layout printing page layout printing the page layout printing function allows you to print more than one page image on a single sheet of paper. The procedure for performing page lay...
Page 285
Pages to change the number of pages to be printed on a single sheet of paper, select the number of pages from the list. You can also set 2-page print or 4-page print on the quick setup tab. Page order to change the page arrangement order, select an icon from the list to change the page placement ord...
Page 286: Poster Printing
Advanced guide > printing from a computer > printing with other application software > various printing methods > poster printing poster printing the poster printing function allows you to enlarge image data, divide it into several pages, and print these pages on separate sheets of paper. When the p...
Page 287
4. Set the number of image divisions and the pages to be printed if necessary, click specify..., specify the following settings in the poster printing dialog box, and then click ok. Image divisions select the number of divisions (vertical x horizontal). As the number of divisions increases, the numb...
Page 288
Note click the deleted pages to display them again. Right-click the settings preview to select print all pages or delete all pages. 2. Complete the setup after completing the page selection, click ok. When you execute print, only specified pages will be printed. Important when poster is selected, th...
Page 289: Booklet Printing
Advanced guide > printing from a computer > printing with other application software > various printing methods > booklet printing booklet printing the booklet printing function allows you to print data for a booklet. Data is printed on both sides of the paper. This type of printing ensures that pag...
Page 290
Margin for stapling select which side should the stapling margin be on when the booklet is completed. Insert blank page to leave one side of a sheet blank, check the check box, and select the page to be left blank. Margin enter the margin width. The specified width from the center of the sheet becom...
Page 291: Duplex Printing
Advanced guide > printing from a computer > printing with other application software > various printing methods > duplex printing duplex printing the procedure for printing data on both sides of a sheet of paper is as follows: you can also set duplex printing in additional features on the quick setu...
Page 292
Click ok on the page setup tab. When you execute print, the document is first printed on one side of a sheet of paper. After one side is printed, reload the paper correctly according to the message. Then click ok to print the opposite side. Important if a media type other than plain paper is selecte...
Page 293: Stamp/background Printing
Advanced guide > printing from a computer > printing with other application software > various printing methods > stamp/background printing stamp/background printing stamp or background may be unavailable when certain printer drivers are used. The stamp function allows you to print a stamp text or a...
Page 294
3. Select a stamp check the stamp check box, and select the stamp to be used from the list. The current settings are displayed in the settings preview on the left side of the page setup tab. 4. Set the stamp details if necessary, specify the following settings, and then click ok. Define stamp... But...
Page 295
Click ok on the page setup tab. When you execute print, the data is printed with the specified background. Important when borderless is selected, the stamp/background... (stamp...) button appears grayed out and is unavailable. Note the stamp and background are not printed on blank sheets inserted wi...
Page 296: Registering A Stamp
Advanced guide > printing from a computer > printing with other application software > various printing methods > stamp/background printing > registering a stamp registering a stamp this feature may be unavailable when certain printer drivers are used. You can create and register a new stamp. You ca...
Page 297
3. Click define stamp... The stamp settings dialog box opens. 4. Configure the stamp while viewing the preview window stamp tab select text, bitmap, or date/time/user name that matches your purpose for stamp type. For text registration, the characters must already be entered in stamp text. If necess...
Page 298
Check the stamp check box in the stamp/background (stamp) dialog box, and then select the title of the stamp to be changed from the stamp list. 2. Click define stamp... The stamp settings dialog box opens. 3. Configure the stamp while viewing the preview window 4. Overwrite save the stamp click save...
Page 299
Advanced guide > printing from a computer > printing with other application software > various printing methods > stamp/background printing > registering image data to be used as a background registering image data to be used as a background this feature may be unavailable when certain printer drive...
Page 300
3. Click select background... The background settings dialog box opens. 4. Select the image data to be registered to the background click select file.... Select the target bitmap file (.Bmp), and then click open. 5. Specify the following settings while viewing the preview window layout method select...
Page 301
Title, enter a new title in the title box and click save. Click ok when the confirmation message appears. 5. Complete the setup click ok. The stamp/background dialog box opens again. The registered title appears in the background list. Deleting an unnecessary background 1. Click select background......
Page 302: Printing An Envelope
Advanced guide > printing from a computer > printing with other application software > various printing methods > printing an envelope printing an envelope if you are using the xps printer driver, replace "canon ij status monitor" with "canon ij xps status monitor" when reading this information. For...
Page 303
5. Select the paper size select comm.Env. #10, dl env., youkei 4 105x235mm, or youkei 6 98x190mm in the envelope size setting dialog box, and then click ok. 6. Set the orientation to print the addressee horizontally, select landscape for orientation. 7. Select the print quality select high or standa...
Page 304
Advanced guide > printing from a computer > printing with other application software > various printing methods > displaying the print results before printing displaying the print results before printing you can display and check the print result before printing. The procedure for displaying the pri...
Page 305
Advanced guide > printing from a computer > printing with other application software > various printing methods > setting paper dimensions (custom size) setting paper dimensions (custom size) you can specify the height and width of paper when its size cannot be selected from the page size. Such a pa...
Page 306
4. Set the custom paper size specify units, and enter the width and height of the paper to be used. Then click ok. 5. Complete the setup click ok on the page setup tab. When you execute print, the data is printed with the specified paper size. Page top page 306 of 973 pages setting paper dimensions ...
Page 307
Advanced guide > printing from a computer > printing with other application software > changing the print quality and correcting image data changing the print quality and correcting image data selecting a combination of the print quality level and a halftoning method printing a color document in mon...
Page 308: Halftoning Method
Advanced guide > printing from a computer > printing with other application software > changing the print quality and correcting image data > selecting a combination of the print quality level and a halftoning method selecting a combination of the print quality level and a halftoning method you can ...
Page 309
3. Setting the print quality and halftone expression method move the quality slider to select the quality level. Select the expression method in halftoning and click ok. Note halftones refer to color shades between the darkest color and the brightest color. The printer replaces the color shades with...
Page 310
Advanced guide > printing from a computer > printing with other application software > changing the print quality and correcting image data > printing a color document in monochrome printing a color document in monochrome the procedure for printing a color document in monochrome is as follows: you c...
Page 311
During grayscale printing, color inks may be used as well as black ink. Page top page 311 of 973 pages printing a color document in monochrome.
Page 312
Advanced guide > printing from a computer > printing with other application software > changing the print quality and correcting image data > specifying color correction specifying color correction you can specify the color correction method suited to the type of document to be printed. Normally, th...
Page 313
Driver matching by using canon digital photo color, you can print srgb data with color tints that most people prefer. Driver matching is the default setting for color correction. Icm/icc profile matching adjusts the colors by using an icc profile when printing. Specify the input profile to be used. ...
Page 314
Advanced guide > printing from a computer > printing with other application software > changing the print quality and correcting image data > specifying color correction > optimal photo printing of image data optimal photo printing of image data when people print images taken with digital cameras, t...
Page 315
Advanced guide > printing from a computer > printing with other application software > changing the print quality and correcting image data > specifying color correction > adjusting colors with the printer driver adjusting colors with the printer driver you can specify the color correction function ...
Page 316
6. Set the other items if necessary, click color adjustment tab, and adjust the color balance (cyan, magenta, yellow) and adjust brightness, intensity, and contrast settings, and then click ok. 7. Complete the setup click ok on the main tab. When you execute print, the printer driver adjusts the col...
Page 317
Advanced guide > printing from a computer > printing with other application software > changing the print quality and correcting image data > specifying color correction > printing with icc profiles printing with icc profiles when the image data has a specified input icc profile, you can print by us...
Page 318
Click matching tab, and select none for color correction. 6. Set the other items if necessary, click color adjustment tab, and adjust the color balance (cyan, magenta, yellow) and adjust brightness, intensity, and contrast settings, and then click ok. 7. Complete the setup click ok on the main tab. ...
Page 319
3. Select the print quality for print quality, select high, standard, or fast according to your purpose. 4. Select the manual color adjustment select manual for color/intensity, and click set.... Manual color adjustment dialog box opens. 5. Select color correction click matching tab, and select icm ...
Page 320
Select adobe rgb (1998). Important when the application software specifies an input profile, the input profile setting of the printer driver becomes invalid. When no input icc profiles are installed on your computer, adobe rgb (1998) is not displayed. You can install icc profiles from the setup cd-r...
Page 321: Adjusting Color Balance
Advanced guide > printing from a computer > printing with other application software > changing the print quality and correcting image data > adjusting color balance adjusting color balance you can adjust the color tints when printing. Since this function adjusts color balance of the output by chang...
Page 322
There are individual sliders for cyan, magenta, and yellow. Each color becomes stronger when the corresponding slider is moved to the right, and becomes weaker when the corresponding slider is moved to the left. For example, when cyan becomes weaker, the color red becomes stronger. You can also dire...
Page 323: Adjusting Brightness
Advanced guide > printing from a computer > printing with other application software > changing the print quality and correcting image data > adjusting brightness adjusting brightness you can change the brightness of the overall image data during printing. This function does not change pure white or...
Page 324
4. Complete the setup click ok on the main tab. When you execute print, the data is printed at the specified brightness. Related topics selecting a combination of the print quality level and a halftoning method specifying color correction adjusting color balance adjusting intensity adjusting contras...
Page 325: Adjusting Intensity
Advanced guide > printing from a computer > printing with other application software > changing the print quality and correcting image data > adjusting intensity adjusting intensity you can dilute (brighten) or intensify (darken) the colors of the overall image data during printing. The following sa...
Page 326
Important adjust the slider gradually. 4. Complete the setup click ok on the main tab. When you execute print, the image data is printed with the adjusted intensity. Related topics selecting a combination of the print quality level and a halftoning method specifying color correction adjusting color ...
Page 327: Adjusting Contrast
Advanced guide > printing from a computer > printing with other application software > changing the print quality and correcting image data > adjusting contrast adjusting contrast you can adjust the image contrast during printing. To make the differences between the light and dark portions of images...
Page 328
Important adjust the slider gradually. 4. Complete the setup click ok on the main tab. When you execute print, the image is printed with the adjusted contrast. Related topics selecting a combination of the print quality level and a halftoning method specifying color correction adjusting color balanc...
Page 329: Simulating An Illustration
Advanced guide > printing from a computer > printing with other application software > changing the print quality and correcting image data > simulating an illustration simulating an illustration this feature is unavailable when the xps printer driver is used. With the simulate illustration function...
Page 330
Advanced guide > printing from a computer > printing with other application software > changing the print quality and correcting image data > representing image data with a single color representing image data with a single color this feature is unavailable when the xps printer driver is used. With ...
Page 331
When the grayscale printing check box on the main tab is checked, monochrome effects appears grayed out and is unavailable. Page top page 331 of 973 pages representing image data with a single color.
Page 332
Advanced guide > printing from a computer > printing with other application software > changing the print quality and correcting image data > presenting image data with vivid colors presenting image data with vivid colors this feature is unavailable when the xps printer driver is used. The vivid pho...
Page 333: Smoothing Jagged Outlines
Advanced guide > printing from a computer > printing with other application software > changing the print quality and correcting image data > smoothing jagged outlines smoothing jagged outlines this feature is unavailable when the xps printer driver is used. The image optimizer function reduces the ...
Page 334
Page top page 334 of 973 pages smoothing jagged outlines.
Page 335
Advanced guide > printing from a computer > printing with other application software > changing the print quality and correcting image data > changing color properties to improve coloration changing color properties to improve coloration this feature is unavailable when the xps printer driver is use...
Page 336
When you execute print, the printer corrects the photo coloring and prints out the photos. Important photo optimizer pro does not function when: background is set in the stamp/background dialog box on the page setup tab. Define stamp... Is selected in the stamp/background dialog box on the page setu...
Page 337: Reducing Photo Noise
Advanced guide > printing from a computer > printing with other application software > changing the print quality and correcting image data > reducing photo noise reducing photo noise this feature is unavailable when the xps printer driver is used. With the photo noise reduction function, you can re...
Page 338
It is recommended to select normal for most cases. Select strong if you have selected normal and the noise still bothers you. Depending on application software or resolution of image data, effects of digital camera noise reduction may not be obvious. When this function is used for other than photos ...
Page 339
Advanced guide > printing from a computer > printing with other application software > overview of the printer driver overview of the printer driver printer driver operations canon ij printer driver xps printer driver how to open the printer driver setup window maintenance tab canon ij status monito...
Page 341: Canon Ij Printer Driver
Advanced guide > printing from a computer > printing with other application software > overview of the printer driver > canon ij printer driver canon ij printer driver the canon ij printer driver is software that is installed on your computer for printing data on this machine. The canon ij printer d...
Page 342: Xps Printer Driver
Advanced guide > printing from a computer > printing with other application software > overview of the printer driver > canon ij printer driver > xps printer driver xps printer driver the following two printer drivers can be installed on windows vista sp1 or later: ij printer driver xps printer driv...
Page 343
Advanced guide > printing from a computer > printing with other application software > overview of the printer driver > canon ij printer driver > how to open the printer driver setup window how to open the printer driver setup window the printer driver setup window can be displayed through the appli...
Page 344: Maintenance Tab
Advanced guide > printing from a computer > printing with other application software > overview of the printer driver > canon ij printer driver > maintenance tab maintenance tab the maintenance tab allows you to perform machine maintenance or change the settings of the machine. Features cleaning the...
Page 345: Canon Ij Status Monitor
Advanced guide > printing from a computer > printing with other application software > overview of the printer driver > canon ij status monitor canon ij status monitor if you are using the xps printer driver, replace "canon ij status monitor" with "canon ij xps status monitor" when reading this info...
Page 346: Canon Ij Preview
Advanced guide > printing from a computer > printing with other application software > overview of the printer driver > canon ij preview canon ij preview the canon ij preview is an application software that displays what the print result will look like before a document is actually printed. The prev...
Page 347
Advanced guide > printing using the operation panel of the machine printing using the operation panel of the machine printing lined paper or graph paper copying page top page 347 of 973 pages printing using the operation panel of the machine.
Page 348
Advanced guide > printing using the operation panel of the machine > printing lined paper or graph paper printing lined paper or graph paper printing template forms such as lined paper or graph paper page top page 348 of 973 pages printing lined paper or graph paper.
Page 349
Advanced guide > printing using the operation panel of the machine > printing lined paper or graph paper > printing template forms such as lined paper or graph paper printing template forms such as lined paper or graph paper you can print a template form such as lined paper, graph paper, or check li...
Page 350
You can print a notepad with checkboxes. Staff paper you can print staff paper with 10 or 12 staves. Staff paper 1: 10 staves staff paper 2: 12 staves handwriting paper you can print handwriting paper. Weekly schedule you can print a weekly schedule form. Monthly schedule you can print a monthly sch...
Page 351: Copying
Advanced guide > printing using the operation panel of the machine > copying copying making copies using useful copy functions page top page 351 of 973 pages copying.
Page 352: Making Copies
Advanced guide > printing using the operation panel of the machine > copying > making copies making copies for the basic procedure to make copies, refer to copying . Setting items reducing or enlarging a copy page top page 352 of 973 pages making copies.
Page 353
Advanced guide > printing using the operation panel of the machine > copying > making copies > setting items setting items you can change the copy settings such as the page size, media type, or intensity. In copy mode, press the settings button repeatedly to switch the item to set. Use the button to...
Page 354
Note if you select auto adjust (a), load the original on the platen glass. If you select auto adjust (a), a appears on the lcd. If you select manual adjust, use the button to decrease the intensity or the button to increase it. Image quality adjust print quality according to the original. Ex: fast/s...
Page 355
Advanced guide > printing using the operation panel of the machine > copying > making copies > reducing or enlarging a copy reducing or enlarging a copy 1. Make sure that the machine is turned on. 2. Press the copy button. 3. Load paper. 4. Load the original document on the platen glass or in the ad...
Page 356
Repeat . Fit to page the machine automatically reduces or enlarges the image to fit the page size. Note when you select fit to page, the document size may not be detected correctly depending on the original. In this case, select preset ratio or magnification. When fit to page is selected, load the d...
Page 357
Advanced guide > printing using the operation panel of the machine > copying > using useful copy functions using useful copy functions special copy choose the copy method according to your purpose. Note see settings for special copy for how to select the copy method. Frame erase when copying thick o...
Page 358: Settings For Special Copy
Advanced guide > printing using the operation panel of the machine > copying > using useful copy functions > settings for special copy settings for special copy 1. Make sure that the machine is turned on. 2. Press the copy button. 3. Load paper. 4. Load the original document on the platen glass or i...
Page 359
Advanced guide > printing using the operation panel of the machine > copying > using useful copy functions > copying two pages to fit onto a single page (2-on-1 copy) copying two pages to fit onto a single page (2-on-1 copy) you can copy two original pages (a) (b) onto a single sheet of paper (c) by...
Page 360
Advanced guide > printing using the operation panel of the machine > copying > using useful copy functions > copying four pages to fit onto a single page (4-on-1 copy) copying four pages to fit onto a single page (4-on-1 copy) you can copy four original pages onto a single sheet of paper by reducing...
Page 361
When the document has been loaded in the adf: the machine starts scanning the next sheet of document automatically after one sheet of document finishes being scanned. Note if memory is full appears on the lcd when scanning, set the print quality to standard or reduce the number of sheets of document...
Page 362
Advanced guide > printing using the operation panel of the machine > copying > using useful copy functions > copying without borders (borderless copy) copying without borders (borderless copy) you can copy images so that they fill the entire page without borders. Settings for special copy 1. Use the...
Page 363
Advanced guide > printing using the operation panel of the machine > copying > using useful copy functions > repeating an image on a page (image repeat) repeating an image on a page (image repeat) you can copy an image multiple times onto a single page. You can set the machine to automatically selec...
Page 364
Advanced guide > printing using the operation panel of the machine > copying > using useful copy functions > making multiple copies of an entire document (collated copy) making multiple copies of an entire document (collated copy) you can obtain sorted printouts when making multiple copies of a mult...
Page 365
Advanced guide > printing using the operation panel of the machine > copying > using useful copy functions > copying thick originals such as books (frame erase) copying thick originals such as books (frame erase) when copying thick originals such as books, you can make a copy without black margins a...
Page 366
Advanced guide > printing using the operation panel of the machine > copying > using useful copy functions > copying on stickers (sticker copy) copying on stickers (sticker copy) you can make stickers easily with the specified layout using canon sticker paper. (a) platen glass (place the document fa...
Page 367: Scanning
Advanced guide > scanning scanning scanning images scanning with using the operation panel of the machine scanning with the bundled application software scanning with other application software canon ij network scan utility screens other scanning methods page top page 367 of 973 pages scanning.
Page 368: Scanning Images
Advanced guide > scanning > scanning images scanning images scanning images before scanning placing documents page top page 368 of 973 pages scanning images.
Page 369: Scanning Images
Advanced guide > scanning > scanning images > scanning images scanning images you can scan images from the machine and save them to a computer or on a usb flash drive easily. In addition, you can scan images with advanced settings from a computer using an application software. Select the scanning me...
Page 370: Before Scanning
Advanced guide > scanning > scanning images > before scanning before scanning before scanning images, confirm the following: does the original to be scanned meet the requirements for an original to be set on the platen glass or in the adf? If you forward the data to the pc, refer to placing document...
Page 371: Placing Documents
Advanced guide > scanning > scanning images > placing documents placing documents learn how to place documents on the machine's platen or adf (auto document feeder). Place documents correctly according to the type of document to be scanned. Otherwise, documents may not be scanned correctly. Importan...
Page 372
Important large documents (such as a4 size photos) that cannot be placed away from the edges/ arrow (alignment mark) of the platen may be saved as pdf files. To save in a format other than pdf, scan by specifying the file format. Placing multiple documents allow 0.39 inches (1 cm) or more space betw...
Page 373
2. Place the documents on the adf (auto document feeder), then adjust the paper guides to the width of the documents. Insert the documents face-up until a beep sounds. Place the documents face-up to scan both sides of the documents. Page top page 373 of 973 pages placing documents.
Page 374
Advanced guide > scanning > scanning with using the operation panel of the machine scanning with using the operation panel of the machine saving scanned data on the usb flash drive using the operation panel of the machine forwarding scanned data to pc using the operation panel of the machine setting...
Page 375
Advanced guide > scanning > scanning with using the operation panel of the machine > saving scanned data on the usb flash drive using the operation panel of the machine saving scanned data on the usb flash drive using the operation panel of the machine important do not remove the usb flash drive fro...
Page 376
Selecting no on the confirmation screen allows you to save the scanned documents in one pdf file. You can save up to 100 pages of images in one pdf file. Remove the original on the platen glass or from the document output slot after scanning is complete. To remove the usb flash drive after scanning ...
Page 377
Note if you use the usb flash drive with the access lamp, refer to the instruction manual supplied with the usb flash drive to check if the writing operation is complete on the usb flash drive. 2. Remove the usb flash drive. Hold the usb flash drive and remove it from the machine straightforward. Pa...
Page 378: The Machine
Advanced guide > scanning > scanning with using the operation panel of the machine > forwarding scanned data to pc using the operation panel of the machine forwarding scanned data to pc using the operation panel of the machine you can forward scanned data to the pc using the operation panel of the m...
Page 379
Auto scan this item is available only when the machine is connected to the computer using a usb cable. The machine detects the type of the originals automatically and the image is forwarded in the optimized size, resolution and data format. Important scanning via a network is not available. Load ori...
Page 380
Important if the scanning result with auto scan is not satisfactory, select document or photo according to the original in step 5, then specify the scan size or other setting items in step 6. If you want to scan originals with advanced settings, or if you want to edit or print the scanned images: if...
Page 381
Advanced guide > scanning > scanning with using the operation panel of the machine > setting items on the operation panel of the machine setting items on the operation panel of the machine you can change the scan settings such as the scan size, resolution, or data format. In scan mode, press the set...
Page 382
Pdf/compact pdf/jpeg/tiff note pdf and compact pdf can be selected when you forward the scanned data to the computer and document type is set to document. Scan resolution select the resolution for scanning. Ex: if you save the scanned data on the usb flash drive: 150dpi/300dpi/600dpi if you forward ...
Page 383
Advanced guide > scanning > scanning with using the operation panel of the machine > appendix: various scan settings appendix: various scan settings enabling network scanning network scan settings specifying how to respond when scanning using the operation panel of the machine selecting a response t...
Page 384: Network Scan Settings
Advanced guide > scanning > scanning with using the operation panel of the machine > appendix: various scan settings > network scan settings network scan settings you can connect the machine to a network to share it among multiple computers or scan images into a specified computer. Important multipl...
Page 385
For usb connection, select (model name) series for product name. 4. Click ok. The preferences dialog box closes. You can now scan via a network connection. Go to the main menu to check whether network scanning is enabled. Setting for scanning using the operation panel you can make settings for scann...
Page 386
Note when multiple scanners are connected via a network, you can select up to three scanners. See " canon ij network scan utility menu and setting screen " for details on canon ij network scan utility. Note if the scanner you want to use is not displayed, check the following conditions and click ok ...
Page 387: Using Mp Navigator Ex
Advanced guide > scanning > scanning with using the operation panel of the machine > appendix: various scan settings > selecting a response to commands from the operation panel using mp navigator ex selecting a response to commands from the operation panel using mp navigator ex mp navigator ex enabl...
Page 388
Note see the section below for details. Scanner button settings tab (save to pc) 4. Click ok. The operation will be performed according to the settings when you press the color or black button on the machine. Page top page 388 of 973 pages selecting a response to commands from the operation panel us...
Page 389
Advanced guide > scanning > scanning with the bundled application software scanning with the bundled application software what is mp navigator ex (supplied scanner software)? Let's try scanning useful mp navigator ex functions utilizing images in mp navigator ex mp navigator ex screens appendix: ope...
Page 390
Advanced guide > scanning > scanning with the bundled application software > what is mp navigator ex (supplied scanner software)? What is mp navigator ex (supplied scanner software)? Mp navigator ex is an application that enables you to easily scan photos and documents. It is suitable even for begin...
Page 391
Use the scan/import window to scan photos and documents. View & use window use the view & use window to select what you want to do with the scanned images. Page top page 391 of 973 pages what is mp navigator ex (supplied scanner software)?.
Page 392: Let'S Try Scanning
Advanced guide > scanning > scanning with the bundled application software > let's try scanning let's try scanning try scanning using mp navigator ex. Starting mp navigator ex starting mp navigator ex scanning documents, photos, magazines, etc. From the platen scanning photos and documents scanning ...
Page 393: Starting Mp Navigator Ex
Advanced guide > scanning > scanning with the bundled application software > let's try scanning > starting mp navigator ex starting mp navigator ex note to scan via a network connection, start mp navigator ex and set up the network environment before scanning. Network scan settings starting mp navig...
Page 394
The one-click mode screen appears. Note select the show this window at startup checkbox in the navigation mode screen to always open the navigation mode screen at startup. If this checkbox is not selected, the last used screen appears at startup. Page top page 394 of 973 pages starting mp navigator ...
Page 395
Advanced guide > scanning > scanning with the bundled application software > let's try scanning > scanning photos and documents scanning photos and documents scan photos and documents placed on the platen. 1. Place the document on the platen. Placing documents 2. Start mp navigator ex and open the n...
Page 396
When you select magazine(color), the descreen function will be enabled and scanning takes longer than usual. To disable the descreen function, deselect the descreen checkbox in the scan settings dialog box. Select text(ocr) to extract the text in the image and convert to editable text data using mp ...
Page 397
7. Edit the scanned images as required. Use edit tools to rotate images, select a part of an image, etc. See the edit tools in " photos/documents (platen) screen (scan/import window) " for details. Note first select images to edit. (selected images are outlined in orange.) drag the mouse or use shif...
Page 398
Advanced guide > scanning > scanning with the bundled application software > let's try scanning > scanning multiple documents at one time scanning multiple documents at one time you can scan two or more photos (small documents) at one time by setting document size to auto detect (multiple documents)...
Page 399
5. Click specify.... Select auto detect (multiple documents) for document size. When setting is completed, click ok. Scan settings dialog box (photos/documents) 6. Click scan. Page 399 of 973 pages scanning multiple documents at one time.
Page 400
Multiple documents are scanned at one time. Note click cancel to cancel the scan. When scanning is completed, the scan complete dialog box opens. Select scan or exit. Select scan to scan the next document, or select exit to end. The scanned images appear in the thumbnail window. 7. Edit the scanned ...
Page 401
Saving as pdf files note if you want to preview the images before scanning, use scangear. Scanning multiple documents at one time with scangear (scanner driver) page top page 401 of 973 pages scanning multiple documents at one time.
Page 402: Document Feeder)
Advanced guide > scanning > scanning with the bundled application software > let's try scanning > scanning multiple documents at one time from the adf (auto document feeder) scanning multiple documents at one time from the adf (auto document feeder) place multiple documents on the adf (auto document...
Page 403
5. Click specify... To set the document size and scanning resolution as required. Click orientation... To specify the orientation of the documents to be scanned. In the displayed dialog box, you can specify the original orientation and binding location. How to place the documents when scanning the b...
Page 404
Starts scanning. Note click cancel to cancel the scan. When a duplex type is selected for document type, the manual duplex scanning dialog box opens after scanning. Continue to scan the back sides of the documents. When a simplex type is selected for document type, the scan complete dialog box opens...
Page 405
8. Click ok. Starts scanning. Note click cancel to cancel the scan. 9. When scanning is completed, the scan complete dialog box opens. Select scan or exit. Select scan to scan the next document, or select exit to end. The scanned images appear in the thumbnail window. 10. Edit the scanned images as ...
Page 406
Page top page 406 of 973 pages scanning multiple documents at one time from the adf (auto document fe....
Page 407
Advanced guide > scanning > scanning with the bundled application software > let's try scanning > scanning images larger than the platen (stitch assist) scanning images larger than the platen (stitch assist) stitch assist allows you to scan the left and right halves of a large document separately an...
Page 408
4. Click specify.... Select stitch assist for document size, then specify the scanning resolution as required. When setting is completed, click ok. Scan settings dialog box (photos/documents) 5. Click scan. Page 408 of 973 pages scanning images larger than the platen (stitch assist).
Page 409
The stitch-assist window opens. 6. Place the left half of the document face-down on the platen. 7. Click scan. The left half of the document is scanned and appears in the stitch-assist window. Note click cancel to cancel the scan. Page 409 of 973 pages scanning images larger than the platen (stitch ...
Page 410
8. Place the right half of the document face-down on the platen. 9. Click scan. The right half of the document is scanned. Note click cancel to cancel the scan. 10. Adjust the scanned image as required. Use the icons to swap the left and right halves, rotate the image 180 degrees or enlarge/reduce t...
Page 411
Important this function is not available while the image is enlarged/reduced. (enlarge) enlarges the displayed image. (reduce) reduces the displayed image. (full-screen) enlarges/reduces the image to display it full-screen. Note enlarge/reduce does not affect the actual size of the scanned image. Wh...
Page 412
13. Save the scanned images. Saving saving as pdf files page top page 412 of 973 pages scanning images larger than the platen (stitch assist).
Page 413
Advanced guide > scanning > scanning with the bundled application software > let's try scanning > easy scanning with one-click easy scanning with one-click you can complete from scanning to saving, etc. At one time by simply clicking the corresponding icon. 1. Place the document on the platen. Placi...
Page 414
4. Click the corresponding icon. Custom scan with one-click tab one-click mode screen 5. Select document type according to the document to be scanned. 6. Set the document size and scanning resolution as required. 7. Start scanning. Starts scanning. Note click cancel to cancel the scan. Page top page...
Page 415
Advanced guide > scanning > scanning with the bundled application software > useful mp navigator ex functions useful mp navigator ex functions with mp navigator ex, you can correct/enhance scanned images beautifully, and search saved images quickly. Correcting/enhancing images automatically correcti...
Page 416
Advanced guide > scanning > scanning with the bundled application software > useful mp navigator ex functions > correcting/enhancing images automatically correcting/enhancing images automatically mp navigator ex will analyze and correct/enhance scanned images automatically. 1. Scan documents into mp...
Page 417
Note if you selected only one image in the view & use window, the thumbnail list does not appear and only the preview image appears. 4. Make sure that auto is selected. 5. Click auto photo fix, face sharpener or digital face smoothing. Important once image is corrected with auto photo fix and saved,...
Page 418
6. Click ok. The entire image is corrected/enhanced automatically and (correct/enhance) appears on the upper left of the thumbnail and preview image. Note click reset selected image to undo the correction/enhancement. Select the apply to all images checkbox to correct/enhance all selected images. 7....
Page 419
Advanced guide > scanning > scanning with the bundled application software > useful mp navigator ex functions > correcting/enhancing images manually correcting/enhancing images manually you can correct/enhance scanned images manually. 1. Scan documents into mp navigator ex and save them, then open t...
Page 420
Note if you selected only one image in the view & use window, the thumbnail list does not appear and only the preview image appears. 4. Click manual, then click correct/enhance. 5. Click face brightener, face sharpener, digital face smoothing or blemish remover. Note the face brightener, face sharpe...
Page 421
The portion in and around the selected area is corrected/enhanced and (correct/enhance) appears on the upper left of the thumbnail and preview image. Note you can also drag to rotate the rectangle. Click undo to undo the latest correction/enhancement. Click reset selected image to cancel all correct...
Page 422: Adjusting Images
Advanced guide > scanning > scanning with the bundled application software > useful mp navigator ex functions > adjusting images adjusting images you can make fine adjustments to the overall brightness, contrast, etc. Of images. 1. Scan documents into mp navigator ex and save them, then open the vie...
Page 423
Note if you selected only one image in the view & use window, the thumbnail list does not appear and only the preview image appears. 4. Click manual, then click adjust. 5. Move the slider of the item you want to adjust and set the effect level. When you move a slider, (correct/enhance) appears on th...
Page 424
The file format of adjusted images is jpeg/exif. 7. Click exit. Important the adjustments will be lost if you exit before saving adjusted images. Page top page 424 of 973 pages adjusting images.
Page 425: Searching Images
Advanced guide > scanning > scanning with the bundled application software > useful mp navigator ex functions > searching images searching images in the view & use window of the navigation mode screen, you can search images saved on your computer and open them in mp navigator ex. Opened images can b...
Page 426
Search in if you know where to look for, select the drive, folder or network from specify folder. File name if you know the file name, enter it. A word or phrase in the file enter a word or phrase included in the items selected in more advanced options. Important for pdf files, you can only search f...
Page 427
Checkbox, text in maker, model, description and user comment is searched. If you select the pdf text checkbox, text in pdf files is searched. Important text in password-protected pdf files cannot be searched. Search subfolders select this checkbox to search subfolders. Case sensitive select this che...
Page 428
Advanced guide > scanning > scanning with the bundled application software > useful mp navigator ex functions > classifying images into categories classifying images into categories display images scanned with mp navigator ex by category. You can classify images displayed in unclassified automatical...
Page 429
Documents: business card, postcard, standard size, pdf file, others custom categories: displays your custom categories. To create custom categories, see " creating custom categories ." unclassified: displays images that are not classified. Note click classify images to classify images displayed in u...
Page 430
View & use window page top page 430 of 973 pages classifying images into categories.
Page 431
Advanced guide > scanning > scanning with the bundled application software > utilizing images in mp navigator ex utilizing images in mp navigator ex you can scan images using mp navigator ex and edit or print the saved images. See the corresponding sections below for details on saving scanned images...
Page 432: Saving
Advanced guide > scanning > scanning with the bundled application software > utilizing images in mp navigator ex > saving saving save images scanned with mp navigator ex to a computer. 1. Select the checkboxes of the images you want to save, then click save. 2. In the save dialog box, specify the sa...
Page 433
Windows 2000: mp navigator ex folder in my pictures folder 3. Click save. Scanned images are saved according to the settings. To further use/edit the scanned images on mp navigator ex, click open saved location in the save complete dialog box. Creating/editing pdf files printing documents printing p...
Page 434: Saving As Pdf Files
Advanced guide > scanning > scanning with the bundled application software > utilizing images in mp navigator ex > saving as pdf files saving as pdf files save images scanned with mp navigator ex as pdf files. 1. Select the checkboxes of the images you want to save, then click save as pdf file. 2. I...
Page 435
Save each of the selected images as a separate pdf file. Pdf(multiple pages) save multiple images in one pdf file. Note pdf(multiple pages) is displayed when multiple images are selected. Pdf(add page) add the scanned images to a pdf file. The images are added to the end of the pdf file. You cannot ...
Page 436: Creating/editing Pdf Files
Advanced guide > scanning > scanning with the bundled application software > utilizing images in mp navigator ex > creating/editing pdf files creating/editing pdf files create/edit pdf files using mp navigator ex. After scanning documents and saving them, open the view & use window to create pdf fil...
Page 437
Opening/editing password-protected pdf files 3. Add/delete pages as required. To add an existing file, click add page and select the file. To delete a page, select it and click delete selected pages. Note you can add pdf, jpeg, tiff and bmp files. When adding a password-protected pdf file, you will ...
Page 438
2. Click open pdf file on the list. The application associated with the .Pdf file extension by the operating system starts. Important password-protected pdf files cannot be opened in applications not supporting pdf security. Files may not open if an application that can be associated with pdf files ...
Page 439: Printing Documents
Advanced guide > scanning > scanning with the bundled application software > utilizing images in mp navigator ex > printing documents printing documents you can print multiple scanned images at one time, print at specific quality, etc. Using mp navigator ex. 1. Scan documents into mp navigator ex an...
Page 440
Important at normal-size (100%), some images may be printed small or with some portions cropped. In that case, select auto to resize the print in proportion to the paper size. 4. Click print. Starts printing. Note when printing a multiple-page pdf file via print document, printing may take time depe...
Page 441: Printing Photos
Advanced guide > scanning > scanning with the bundled application software > utilizing images in mp navigator ex > printing photos printing photos you can print photos using mp navigator ex or an application that accompanies the machine. After scanning documents and saving them, open the view & use ...
Page 442
3. Specify print settings as required. In the displayed dialog box, specify paper size, print count, etc. Print photo dialog box 4. Click print. Starts printing. Note to cancel while spooling, click cancel. To cancel while printing, click cancel printing in the confirmation window for the printer st...
Page 443: Sending Via E-Mail
Advanced guide > scanning > scanning with the bundled application software > utilizing images in mp navigator ex > sending via e-mail sending via e-mail send scanned images via e-mail. Important mp navigator ex is compatible with the following e-mail software programs: - windows mail (windows vista)...
Page 444
Note you can select a compression type when sending jpeg images via e-mail. Click set... To open a dialog box and select a compression type from high(low compression), standard or low(high compression). 4. Click ok. Files are saved according to the settings, and the e-mail software program starts. 5...
Page 445: Editing Files
Advanced guide > scanning > scanning with the bundled application software > utilizing images in mp navigator ex > editing files editing files you can edit images or convert them to text using mp navigator ex or an application that accompanies the machine. After scanning documents and saving them, o...
Page 446
Scan text in scanned magazines and newspapers and display it in notepad (included with windows). Important pdf files cannot be converted to text. 1. Select images and click edit/convert. 2. Click convert to text file on the list. Notepad (included with windows) starts and editable text appears. Note...
Page 447
Advanced guide > scanning > scanning with the bundled application software > utilizing images in mp navigator ex > setting passwords for pdf files setting passwords for pdf files set passwords for opening, editing and printing pdf files. You can set two passwords: one for opening the file and one fo...
Page 448
The password security -settings dialog box opens. Note you can also open the password security -settings dialog box by clicking set..., then selecting password security for security in the pdf settings dialog box. 3. Select the require a password to open the document or use a password to restrict pr...
Page 449
Document open password permissions password 5. Re-enter the password and click ok. The save as pdf file dialog box returns. Important if you close the save as pdf file dialog box without clicking save, the settings in the password security -settings dialog box will be deleted. Passwords are deleted ...
Page 450
Advanced guide > scanning > scanning with the bundled application software > utilizing images in mp navigator ex > opening/editing password-protected pdf files opening/editing password-protected pdf files enter a password to open or edit/print password-protected pdf files. Password entry method vari...
Page 451
2. The password dialog box opens. Enter the password and click ok. The pdf file opens in the zoom in dialog box. Note to reopen the file after closing the zoom in dialog box, re-enter the password. Entering a password (permissions password) to edit or print a file 1. In the view & use window, select...
Page 452
2. To create a pdf file or edit the file, select create/edit pdf file on the list. To print the file, click print document. In the password dialog box, you will be prompted to enter a password. Note if the document open password is set as well, the document open password will be required, then the p...
Page 453: Mp Navigator Ex Screens
Advanced guide > scanning > scanning with the bundled application software > mp navigator ex screens mp navigator ex screens learn about the screens and functions of mp navigator ex. Scan/import documents or images tab photos/documents (platen) screen (scan/import window) scan settings dialog box (p...
Page 454: Navigation Mode Screen
Advanced guide > scanning > scanning with the bundled application software > mp navigator ex screens > navigation mode screen navigation mode screen this is one of the startup screens of mp navigator ex. Point to the icon at the top of the screen to display each tab. Use each tab depending on what y...
Page 455
Advanced guide > scanning > scanning with the bundled application software > mp navigator ex screens > scan/ import documents or images tab scan/import documents or images tab point to scan/import in the navigation mode screen to display the scan/import documents or images tab. Scan photos and docum...
Page 456
Advanced guide > scanning > scanning with the bundled application software > mp navigator ex screens > view & use images on your computer tab view & use images on your computer tab point to view & use in the navigation mode screen to display the view & use images on your computer tab. You can open i...
Page 457
Preferences the preferences dialog box opens. In the preferences dialog box, you can make advanced settings to mp navigator ex functions. Preferences dialog box (guide) opens this guide. Related topic opening images saved on a computer page top page 457 of 973 pages view use images on your computer ...
Page 458
Advanced guide > scanning > scanning with the bundled application software > mp navigator ex screens > custom scan with one-click tab custom scan with one-click tab point to one-click in the navigation mode screen to display the custom scan with one-click tab. You can complete from scanning to savin...
Page 459
Start scanning by clicking the button select this checkbox and click an icon to start scanning immediately. (switch mode) switches to one-click mode. The one-click mode screen appears. One-click mode screen show this window at startup select this checkbox to open the main menu at startup. If this ch...
Page 460
Advanced guide > scanning > scanning with the bundled application software > mp navigator ex screens > photos/ documents (platen) screen (scan/import window) photos/documents (platen) screen (scan/import window) point to scan/import in the navigation mode screen and click photos/documents (platen) t...
Page 461
You cannot select document type if the use the scanner driver checkbox is selected. Specify... Specify the document size, resolution, and other advanced scan settings. Scan settings dialog box (photos/documents) important specify... Is not available if the use the scanner driver checkbox is selected...
Page 462
Selects all images in the thumbnail window. (cancel all) cancels all image selections in the thumbnail window. (rotate left) rotates the target image (outlined in orange) 90 degrees counter-clockwise. (rotate right) rotates the target image (outlined in orange) 90 degrees clockwise. (invert) inverts...
Page 463
(cancel selection) cancels the selection of the target image (outlined in orange) in the selected images area. Selected images area images selected in the thumbnail window are displayed. Related topic scanning photos and documents page top page 463 of 973 pages photos/documents (platen) screen (scan...
Page 464
Advanced guide > scanning > scanning with the bundled application software > mp navigator ex screens > scan settings dialog box (photos/documents) scan settings dialog box (photos/documents) the scan settings dialog box opens when you click specify... In the scan/import window. In the scan settings ...
Page 465
Resolution note the following scanning resolutions can be specified when document type is text(ocr). 300 dpi / 400 dpi auto photo fix / auto document fix the displayed item varies by document type. Auto photo fix this is displayed when document type is color photo. Select this checkbox to automatica...
Page 466
Reduce show-through select this checkbox to sharpen text in a document or reduce show-through in newspapers. Important you cannot select this checkbox when document type is color photo, black and white photo or text(ocr). Note select this checkbox when document type is text document and show-through...
Page 467
Defaults restores the default settings. Page top page 467 of 973 pages scan settings dialog box (photos/documents).
Page 468
Advanced guide > scanning > scanning with the bundled application software > mp navigator ex screens > stack of documents (adf) screen (scan/import window) stack of documents (adf) screen (scan/import window) point to scan/import in the navigation mode screen and click stack of documents (adf), or c...
Page 469
Text(duplex) important you cannot select document type if the use the scanner driver checkbox is selected. Specify... Specify the document size, resolution, and other advanced scan settings. Scan settings dialog box (stack of documents (adf)) important specify... Is not available if the use the scan...
Page 470
Edit tools (select all) selects all images in the thumbnail window. (cancel all) cancels all image selections in the thumbnail window. (rotate left) rotates the target image (outlined in orange) 90 degrees counter-clockwise. (rotate right) rotates the target image (outlined in orange) 90 degrees clo...
Page 471
(cancel all) cancels the selection of all images in the selected images area. (cancel selection) cancels the selection of the target image (outlined in orange) in the selected images area. Selected images area images selected in the thumbnail window are displayed. Related topic scanning multiple doc...
Page 472
Advanced guide > scanning > scanning with the bundled application software > mp navigator ex screens > scan settings dialog box (stack of documents (adf)) scan settings dialog box (stack of documents (adf)) the scan settings dialog box opens when you click specify... In the scan/import window. In th...
Page 473
Important binding location cannot be specified when a simplex type such as color document(simplex) is selected for document type. Scanning resolution select the resolution at which to scan documents. Resolution note the following scanning resolutions can be specified when document type is text(simpl...
Page 474
The inclination of the following types of documents may not be corrected, as the text cannot be detected correctly. - documents in which the text lines are inclined more than 10 degrees or the angles vary by line - documents containing both vertical and horizontal text - documents with extremely lar...
Page 475: Save Dialog Box
Advanced guide > scanning > scanning with the bundled application software > mp navigator ex screens > save dialog box save dialog box the save dialog box opens when you click save in the scan/import window. In the save dialog box, you can make settings for saving images to a computer. Save in displ...
Page 476
Page top page 476 of 973 pages save dialog box.
Page 477
Advanced guide > scanning > scanning with the bundled application software > mp navigator ex screens > save as pdf file dialog box save as pdf file dialog box in the save as pdf file dialog box, you can make advanced settings for saving scanned images as pdf files. You can save multiple documents as...
Page 478
Pdf save each of the selected images as a separate pdf file. Pdf(multiple pages) save multiple images in one pdf file. Note pdf(multiple pages) is displayed when multiple images are selected. Pdf(add page) add the scanned images to a pdf file. The images are added to the end of the pdf file. You can...
Page 479: Pdf Settings Dialog Box
Advanced guide > scanning > scanning with the bundled application software > mp navigator ex screens > pdf settings dialog box pdf settings dialog box in the pdf settings dialog box, you can specify the pdf compression type and other advanced settings for creating pdf files. Enable keyword search se...
Page 480
Standard it is recommended that you normally select this setting. High compresses the file size when saving, allowing you to reduce the load on your network/server. Important this function is not available when scanning by selecting pdf on the operation panel of the machine. Highly compressed pdf im...
Page 481
Advanced guide > scanning > scanning with the bundled application software > mp navigator ex screens > view & use window view & use window point to view & use in the navigation mode screen and click my box (scanned/imported images), specify folder or recently saved images to open the view & use wind...
Page 482
Displays folders of images (grouped by year, year/month and year/month/date) in my box in tree view. Select a folder to display its contents in the thumbnail window to the right. Image date is the scanned, captured or updated date. Specify folder displays all hard disks and folders in tree view. Sel...
Page 483
(image correction/enhancement) allows you to correct the target image (outlined in orange). Click this button to open the correct/ enhance images window in which you can correct/enhance images and also adjust the brightness, contrast, etc. Correct/enhance images window important image correction/enh...
Page 484
Note a lock icon appears for pdf files with document open password set. Thumbnails may appear as "?" in the following cases. - opening unsupported images - file size is too large and there is not enough memory to display the image - the file is corrupted when images are sorted by categories scanned ...
Page 485
Displays all categories and images. Specific categories displays categories containing images, along with the contained images. More images will be displayed in the thumbnail window, allowing you to find or move images easily. Note immediately after opening the view & use window, categories containi...
Page 486
Advanced guide > scanning > scanning with the bundled application software > mp navigator ex screens > create/ edit pdf file window create/edit pdf file window click pdf in the view & use window, then click create/edit pdf file on the list to open the create/edit pdf file window. In the create/edit ...
Page 487
Add page allows you to select and add an existing pdf file. Note a password will be required to add a password-protected pdf file. Undo cancels the latest change made. Reset cancels all the changes made. Save selected pages opens the save as pdf file dialog box. Specify the save settings. Only the s...
Page 488
(full-screen) enlarges/reduces the image to display it fully in preview. (thumbnail mode) switches to thumbnail mode. The pages are displayed in thumbnail view. Page top page 488 of 973 pages create/edit pdf file window.
Page 489: Print Document Dialog Box
Advanced guide > scanning > scanning with the bundled application software > mp navigator ex screens > print document dialog box print document dialog box click print in the view & use window, then click print document on the list to open the print document dialog box. In the print document dialog b...
Page 490
Auto scale is adjusted automatically according to the detected paper width and the selected paper size. Image may be printed rotated 90 degrees depending on its size. Scale select a scale from the list. Important at normal-size (100%), some images may be printed small or with some portions cropped. ...
Page 491: Print Photo Dialog Box
Advanced guide > scanning > scanning with the bundled application software > mp navigator ex screens > print photo dialog box print photo dialog box click print in the view & use window, then click print photo on the list to open the print photo dialog box. Important the print photo dialog box will ...
Page 492
Select this checkbox to print the image on an entire sheet of paper without margins. Important page layout setting will be disabled when you select borderless printing. This setting is only available with printers that support borderless printing. Orientation specify the print orientation. Important...
Page 493
Advanced guide > scanning > scanning with the bundled application software > mp navigator ex screens > send via e-mail dialog box send via e-mail dialog box click send in the view & use window, then click attach to e-mail on the list to open the send via e-mail dialog box. In the send via e-mail dia...
Page 494
Page top page 494 of 973 pages send via e-mail dialog box.
Page 495
Advanced guide > scanning > scanning with the bundled application software > mp navigator ex screens > correct/ enhance images window correct/enhance images window click (image correction/enhancement) in the view & use window or click fix photo images in image handling buttons to open the correct/en...
Page 496
Auto photo fix applies automatic corrections suitable for photos. Prioritize exif info select this checkbox to apply corrections primarily based on the settings made at the time of shooting. Deselect this checkbox to apply corrections based on the image analysis results. It is recommended that you n...
Page 497
See " correcting/enhancing images manually " for details. Adjustment brightness adjusts the overall image brightness. Move the slider to the left to darken and right to brighten the image. Contrast adjusts the contrast of the image. Adjust the contrast when the image is flat due to lack of contrast....
Page 498
Face brightener corrects the entire image to brighten the facial area in and around the selected area. You can adjust the effect level using the slider. Face sharpener corrects the entire image to sharpen the facial area in and around the selected area. You can adjust the effect level using the slid...
Page 499
Inverts the image horizontally. (trimming) trimming is the act of selecting the area you want to keep in a photo and discarding the rest. In the displayed window, drag the white frame to specify the trimming area. Move the cursor inside the white frame and drag to move the trimming area. Note place ...
Page 500: One-Click Mode Screen
Advanced guide > scanning > scanning with the bundled application software > mp navigator ex screens > one-click mode screen one-click mode screen click (switch mode) at the bottom left of the navigation mode screen to display the one-click mode screen. You can complete from scanning to saving, etc....
Page 501
Preferences dialog box (guide) opens this guide. Important the following restrictions apply when you scan with document type set to auto mode in the save or custom dialog box. When you want to convert text in the scanned image to text data, specify document type (do not select auto mode). Related to...
Page 502: Auto Scan Dialog Box
Advanced guide > scanning > scanning with the bundled application software > mp navigator ex screens > auto scan dialog box auto scan dialog box click auto scan on the custom scan with one-click tab or click auto in the one-click mode screen to open the auto scan dialog box. Supported documents phot...
Page 503
When this checkbox is selected, the files can be saved in jpeg/exif or pdf format only. Scanning may take longer than usual when this checkbox is selected. The color tone may change from the source image due to corrections. In that case, deselect the checkbox and scan. Save settings file name enter ...
Page 504
Save to a subfolder with current date select this checkbox to create a subfolder in the folder specified in save in with the current date and save scanned files in it. A subfolder with a name such as "2010_01_01" (year_month_date) will be created. If this checkbox is not selected, files are saved di...
Page 505
Advanced guide > scanning > scanning with the bundled application software > mp navigator ex screens > save dialog box (one-click mode screen) save dialog box (one-click mode screen) click save to pc on the custom scan with one-click tab or click save in the one-click mode screen to open the save di...
Page 506
Documents of the same size even if auto mode is set. Note to reduce moire, set document type to magazine. Color mode select how to scan the document. Document size select the size of the document to be scanned. When you select custom, a screen in which you can specify the document size appears. Sele...
Page 507
See " placing documents " for details on how to place documents. Large documents (such as a4 size photos) that cannot be placed away from the edges/arrow (alignment mark) of the platen may be saved as pdf files. To save in a format other than pdf, scan by specifying the file format. Images cannot be...
Page 508
Note you cannot select this setting if the use the scanner driver checkbox is selected. When you save an image with the save the jpeg/exif file in adobergb checkbox selected, an underscore is added to the beginning of the file name. (example: _image0001.Jpg) open the save dialog box after scanning t...
Page 509
Advanced guide > scanning > scanning with the bundled application software > mp navigator ex screens > scan settings dialog box (one-click mode screen) scan settings dialog box (one-click mode screen) the scan settings dialog box opens when you click specify... In a dialog box of the one-click mode ...
Page 510
Important when you select auto detect, the image may not be scanned at the correct position and size. In that case, change the size to the actual document size (a4, letter, etc.) and align a corner of the document with the corner at the arrow (alignment mark) of the platen. Orientation... Set the or...
Page 511
Checkbox and scan. Descreen select this checkbox to reduce moire patterns. Printed photos and pictures are displayed as a collection of fine dots. "moire" is a phenomenon where uneven gradation or a stripe pattern appears when such photos or pictures printed with fine dots are scanned. Descreen is t...
Page 512
You cannot select this checkbox when document size is stitch assist. This function may not work properly depending on the document language. Only text documents written in languages that can be selected from document language are supported. The orientation of the following types of documents may not...
Page 513: Save Dialog Box
Advanced guide > scanning > scanning with the bundled application software > mp navigator ex screens > save dialog box save dialog box the save dialog box opens when you scan from the save or custom dialog box of the one-click mode screen after selecting open the save dialog box after scanning the i...
Page 514
Important pdf, pdf(multiple pages) and pdf(add page) cannot be selected for images scanned from the custom dialog box. You cannot select jpeg/exif when color mode is black and white. Set... When save as type is jpeg/exif you can specify a compression type for jpeg files. Select high(low compression)...
Page 515
Page top page 515 of 973 pages save dialog box.
Page 516: Exif Settings Dialog Box
Advanced guide > scanning > scanning with the bundled application software > mp navigator ex screens > exif settings dialog box exif settings dialog box you can input exif information into a file to be saved. Exif is a standard format for embedding various shooting data in digital camera images (jpe...
Page 517: Pdf Dialog Box
Advanced guide > scanning > scanning with the bundled application software > mp navigator ex screens > pdf dialog box pdf dialog box click save as pdf file on the custom scan with one-click tab or click pdf in the one-click mode screen to open the pdf dialog box. Scan settings document type select t...
Page 518
Document with the corner at the arrow (alignment mark) of the platen. Resolution select the resolution at which to scan documents. Resolution specify... Opens the scan settings dialog box in which you can make advanced scan settings. Scan settings dialog box (one-click mode screen) save settings aut...
Page 519
Open the save dialog box after scanning the image select this to open the save as pdf file dialog box after scanning the images and specify the save settings such as destination folder and file name. Save as pdf file dialog box note to set passwords for pdf files, select open the save dialog box aft...
Page 520
Advanced guide > scanning > scanning with the bundled application software > mp navigator ex screens > save as pdf file dialog box save as pdf file dialog box the save as pdf file dialog box opens when you scan from the pdf dialog box of the one-click mode screen after selecting open the save dialog...
Page 521
Machine. If a password-protected pdf file is edited, the passwords will be deleted. Reset the passwords. Setting passwords for pdf files set... Make advanced settings for creating pdf files. See " pdf settings dialog box " for details. Password security settings select this checkbox to open the pass...
Page 522: Mail Dialog Box
Advanced guide > scanning > scanning with the bundled application software > mp navigator ex screens > mail dialog box mail dialog box click attach to e-mail on the custom scan with one-click tab or click mail in the one-click mode screen to open the mail dialog box. Scan settings document type sele...
Page 523
Resolution select the resolution at which to scan documents. Resolution use the scanner driver select this checkbox to display the scangear (scanner driver) screen and make advanced scan settings. Color mode, document size, resolution and other settings in the mail dialog box will be disabled. Speci...
Page 524
Attachment settings mail program specify an e-mail software program. Note select add... To open the select mail program dialog box in which you can select an e-mail software program. If the e-mail software program you want to use is not listed, click add to list and select it. Start scanning by clic...
Page 525
Advanced guide > scanning > scanning with the bundled application software > mp navigator ex screens > ocr dialog box ocr dialog box click ocr on the custom scan with one-click tab or in the one-click mode screen to open the ocr dialog box. Scan settings document type select the type of document to ...
Page 526
Settings. Color mode, document size, resolution and other settings in the ocr dialog box will be disabled. Specify these settings in the scangear screen. Specify... Opens the scan settings dialog box in which you can make advanced scan settings. Scan settings dialog box (one-click mode screen) note ...
Page 527
According to the language of the document to be scanned. When scanning multiple documents, you can collect the extracted text into one file. General tab text displayed in notepad (included with windows) is for guidance only. Text in the image of the following types of documents may not be detected c...
Page 528: Custom Dialog Box
Advanced guide > scanning > scanning with the bundled application software > mp navigator ex screens > custom dialog box custom dialog box click custom on the custom scan with one-click tab or in the one-click mode screen to open the custom dialog box. Scan settings document type select the type of ...
Page 529
When scanning two or more documents from the adf (auto document feeder), place documents of the same size even if auto mode is set. Note to reduce moire, set document type to magazine. Color mode select how to scan the document. Document size select the size of the document to be scanned. When you s...
Page 530
You cannot select jpeg/exif when color mode is black and white. Note when auto is selected, files are saved in the following formats according to the document type. Photos, postcards, cd/dvd and business cards: jpeg magazines, newspapers and text documents: pdf you can change the file format from se...
Page 531
Select this to open the save dialog box after scanning the images and specify the save settings such as destination folder, file name and exif information. Save dialog box application settings open with specify an application with which to open scanned images. Drag and drop the icon of an applicatio...
Page 532: Preferences Dialog Box
Advanced guide > scanning > scanning with the bundled application software > mp navigator ex screens > preferences dialog box preferences dialog box click preferences to open the preferences dialog box. In the preferences dialog box, you can make advanced settings to mp navigator ex functions via th...
Page 533: General Tab
Advanced guide > scanning > scanning with the bundled application software > mp navigator ex screens > general tab general tab on the general tab, you can specify general mp navigator ex settings. Product name displays the product name of the machine that mp navigator ex is currently configured to u...
Page 534
- black and white cannot be selected in the color mode settings for one-click mode. - remove gutter shadow is not available. - auto photo fix and auto document fix are not available. - save the jpeg/exif file in adobergb for one-click mode is not available. - available resolutions: 75 dpi / 150 dpi ...
Page 535
Specify the language according to the language of the document to be scanned. Only text written in languages that can be selected in the document language can be extracted to notepad. Combine multiple text conversion results when scanning multiple documents, select the checkbox to collect the conver...
Page 536
Advanced guide > scanning > scanning with the bundled application software > mp navigator ex screens > scanner button settings tab (save to pc) scanner button settings tab (save to pc) on the scanner button settings tab, you can specify how to respond when scanning using the operation panel of the m...
Page 537
Automatically save the image to your computer after scanning it select this to save the images to your computer as specified after scanning them. The file name and save in settings will be displayed. Important if you select this function, you will not be able to set passwords for pdf files. File nam...
Page 538
You can make advanced settings for creating pdf files when pdf is selected on the operation panel of the machine. Click set... To open a dialog box and specify the save settings for pdf files. See " pdf settings dialog box " for details. Important use the operation panel of the machine to set the co...
Page 539
Advanced guide > scanning > scanning with the bundled application software > mp navigator ex screens > scan settings dialog box (scanner button settings) scan settings dialog box (scanner button settings) the scan settings dialog box opens when you click specify... On the scanner button settings tab...
Page 540
Scanning resolution set this item using the operation panel of the machine. Recommended image correction select this checkbox to apply suitable corrections automatically based on the document type. This function is available when document type is auto scan. Important when this checkbox is selected, ...
Page 541
Set to detect text in text documents and apply suitable corrections. This function is available when document is selected for document type on the scanner button settings tab of the preferences dialog box. Correct slanted document select this checkbox to detect the scanned text and correct the angle...
Page 542
Page top page 542 of 973 pages scan settings dialog box (scanner button settings).
Page 543
Advanced guide > scanning > scanning with the bundled application software > appendix: opening files other than scanned images appendix: opening files other than scanned images you can save or print data other than scanned images using mp navigator ex. Using images saved on a computer opening images...
Page 544
Advanced guide > scanning > scanning with the bundled application software > appendix: opening files other than scanned images > opening images saved on a computer opening images saved on a computer you can open images saved on a computer and print them or attach them to e-mail using mp navigator ex...
Page 545
4. Select the images you want to use, then select what you want to do with them. See the corresponding sections below for details on using images. Creating/editing pdf files printing documents printing photos sending via e-mail editing files page top page 545 of 973 pages opening images saved on a c...
Page 546
Advanced guide > scanning > scanning with other application software scanning with other application software what is scangear (scanner driver)? Scanning with advanced settings using scangear (scanner driver) correcting images and adjusting colors with scangear (scanner driver) scangear (scanner dri...
Page 547
Advanced guide > scanning > scanning with other application software > what is scangear (scanner driver)? What is scangear (scanner driver)? Scangear (scanner driver) is software required for scanning documents. It enables you to specify the output size and make image corrections when scanning. Scan...
Page 548
Auto scan mode use auto scan mode to scan easily by simply placing documents on the platen or adf (auto document feeder) and clicking scan. Page top page 548 of 973 pages what is scangear (scanner driver)?.
Page 549: Driver)
Advanced guide > scanning > scanning with other application software > scanning with advanced settings using scangear (scanner driver) scanning with advanced settings using scangear (scanner driver) starting scangear (scanner driver) starting scangear (scanner driver) scanning documents after making...
Page 550
Advanced guide > scanning > scanning with other application software > scanning with advanced settings using scangear (scanner driver) > starting scangear (scanner driver) starting scangear (scanner driver) use scangear (scanner driver) to make image corrections and color adjustments when scanning. ...
Page 551
2. Click the corresponding icon. The corresponding dialog box opens. 3. Select the use the scanner driver checkbox in scan settings, then click scan. The scangear screen appears. Important use the scanner driver is not displayed in the pdf dialog box or auto scan dialog box. Starting from an applica...
Page 552: Scanning In Basic Mode
Advanced guide > scanning > scanning with other application software > scanning with advanced settings using scangear (scanner driver) > scanning in basic mode scanning in basic mode in basic mode, you can scan easily by following the on-screen steps. This section explains how to scan a single docum...
Page 553
Important some applications do not support continuous scanning from the adf (auto document feeder). For details, refer to the application's manual. Note to scan magazines containing many color photos, select magazine(color). 3. Click preview. Preview image appears in the preview area. Important prev...
Page 554
Skip ahead to step 8 when an adf type is selected for select source. 5. Set output size. Output size options vary by the item selected in destination. 6. Adjust the scan area (cropping frame) as required. Adjust the size and position of the cropping frame (scan area) on the preview image. Adjusting ...
Page 555: Scanning In Advanced Mode
Advanced guide > scanning > scanning with other application software > scanning with advanced settings using scangear (scanner driver) > scanning in advanced mode scanning in advanced mode in advanced mode, you can specify the color mode, output resolution, image brightness, color tone, etc. When sc...
Page 556
Note settings are not retained when you switch between modes. 3. Set input settings. Input settings 4. Click preview. Preview images appear in the preview area. Note if you scan without preview, the show-through reduction function will be active. This function is useful when scanning magazines. Howe...
Page 557
Advanced mode tab page top page 557 of 973 pages scanning in advanced mode.
Page 558
Advanced guide > scanning > scanning with other application software > scanning with advanced settings using scangear (scanner driver) > scanning in auto scan mode scanning in auto scan mode you can scan easily in auto scan mode of scangear (scanner driver) by letting it automatically determine the ...
Page 559
On the scan tab of the preferences dialog box. Scan tab related topic auto scan mode tab page top page 559 of 973 pages scanning in auto scan mode.
Page 560: Feeder) In Advanced Mode
Advanced guide > scanning > scanning with other application software > scanning with advanced settings using scangear (scanner driver) > scanning multiple documents from the adf (auto document feeder) in advanced mode scanning multiple documents from the adf (auto document feeder) in advanced mode i...
Page 561
Starts scanning. Note click (information) to open a dialog box in which you can check the current scan settings (document type, etc.). Scangear's response after scanning can be specified in status of scangear dialog after scanning on the scan tab of the preferences dialog box. Scan tab related topic...
Page 562: (Scanner Driver)
Advanced guide > scanning > scanning with other application software > scanning with advanced settings using scangear (scanner driver) > scanning multiple documents at one time with scangear (scanner driver) scanning multiple documents at one time with scangear (scanner driver) you can scan two or m...
Page 563
3. Click preview. Thumbnails of the preview images appear in the preview area. Images are cropped (scan areas are specified) automatically according to the document size. 4. Set destination. 5. Set output size. 6. Adjust the scan areas (cropping frames) and set image corrections as required. Note yo...
Page 564
8. Click scan. Scanning multiple documents in whole image view follow these steps if thumbnails are not displayed correctly when previewed or if you want to scan multiple documents as a single image. Note positions of slanted documents are not corrected in whole image view. 1. After previewing image...
Page 565
Note scangear's response after scanning can be specified in status of scangear dialog after scanning on the scan tab of the preferences dialog box. Scan tab page top page 565 of 973 pages scanning multiple documents at one time with scangear (scanner driver).
Page 566: (Scanner Driver)
Advanced guide > scanning > scanning with other application software > correcting images and adjusting colors with scangear (scanner driver) correcting images and adjusting colors with scangear (scanner driver) the following sections provide you with tips and know-how on advanced scanning techniques...
Page 567
Advanced guide > scanning > scanning with other application software > correcting images and adjusting colors with scangear (scanner driver) > correcting images (unsharp mask, reduce dust and scratches, fading correction, etc.) correcting images (unsharp mask, reduce dust and scratches, fading corre...
Page 568
Reducing show-through in text documents or lightening the base color in recycled paper, newspapers, etc. When scanning from the adf (auto document feeder) set reduce show-through to low or high according to the degree of show-through or darkness of the base color. None low sharpening slightly out-of...
Page 569
Correcting photos that have faded with time or due to colorcast set fading correction to low, medium or high according to the degree of fading or colorcast. None medium reducing graininess set grain correction to low, medium or high according to the degree of graininess. None medium correcting backl...
Page 570
Advanced guide > scanning > scanning with other application software > correcting images and adjusting colors with scangear (scanner driver) > adjusting colors using a color pattern adjusting colors using a color pattern you can preview color changes and reproduce natural colors by using the color p...
Page 571
It is recommended that you find a portion in the image where it should be white, and adjust the colors so that the portion turns white. Preview image appears in the center. Preview image colors change as you adjust them. Below is an example of correcting a bluish image. Since blue and green are too ...
Page 572
Advanced guide > scanning > scanning with other application software > correcting images and adjusting colors with scangear (scanner driver) > adjusting saturation and color balance adjusting saturation and color balance in scangear (scanner driver)'s advanced mode tab, click (saturation/color balan...
Page 573
Move (slider) under color balance to the left or right to emphasize the corresponding color. Cyan & red magenta & green yellow & blue these are complementary color pairs (each pair produces a shade of gray when mixed). You can reproduce the natural colors of the scene by reducing the cast color and ...
Page 574
Advanced guide > scanning > scanning with other application software > correcting images and adjusting colors with scangear (scanner driver) > adjusting brightness and contrast adjusting brightness and contrast in scangear (scanner driver)'s advanced mode tab, click (brightness/contrast). Note click...
Page 575
Note only grayscale will be displayed in channel when color mode is grayscale. Brightness adjust the image brightness. Move (slider) under brightness to the left to darken and right to brighten the image. You can also enter a value (-127 to 127). Darkened original image brightened note highlights ma...
Page 576: Adjusting Histogram
Advanced guide > scanning > scanning with other application software > correcting images and adjusting colors with scangear (scanner driver) > adjusting histogram adjusting histogram in scangear (scanner driver)'s advanced mode tab, click (histogram). Note click defaults to reset all adjustments in ...
Page 577
(1) bright area (2) dark area (3) whole image more data is distributed to the highlight side. More data is distributed to the shadow side. Data is widely distributed between the highlight and shadow. Adjusting histograms (using the slider) select a channel, then move (black-point slider) or (white-p...
Page 578
Moving the mid-point slider move the mid-point slider to specify the level to be set as the middle of the tonal range. Images with more data distributed to the highlight side move the mid-point slider toward the highlight side. Images with more data distributed to the shadow side move the mid-point ...
Page 579: Adjusting Tone Curve
Advanced guide > scanning > scanning with other application software > correcting images and adjusting colors with scangear (scanner driver) > adjusting tone curve adjusting tone curve in scangear (scanner driver)'s advanced mode tab, click (tone curve settings). Note click defaults to reset all adj...
Page 580
Adjusting tone curve in select tone curve, select a tone curve from no correction, overexposure, underexposure, high contrast, reverse the negative/positive image and edit custom curve. No correction (no adjustment) overexposure (convex curve) the midtone data of the input side is stretched toward t...
Page 581
Edit custom curve you can drag specific points on the tone curve to freely adjust the brightness of the corresponding areas. Page top page 581 of 973 pages adjusting tone curve.
Page 582: Setting Threshold
Advanced guide > scanning > scanning with other application software > correcting images and adjusting colors with scangear (scanner driver) > setting threshold setting threshold the brightness of color and grayscale images is expressed in a value between 0 and 255. However, in creating black and wh...
Page 583
Advanced guide > scanning > scanning with other application software > scangear (scanner driver) screens scangear (scanner driver) screens the following sections describe scangear (scanner driver)'s screens and functions, and how to use scangear. Basic mode tab advanced mode tab input settings outpu...
Page 584: Basic Mode Tab
Advanced guide > scanning > scanning with other application software > scangear (scanner driver) screens > basic mode tab basic mode tab this mode allows you to scan easily by following the on-screen steps. This section describes the settings and functions available in basic mode. When scanning from...
Page 585
Scan documents from the adf (auto document feeder) in black and white. Important some applications do not support continuous scanning from the adf (auto document feeder). For details, refer to the application's manual. Note when you select a document type, the unsharp mask function will be active. W...
Page 586
Displayed, the portion within the cropping frame will be scanned. When no cropping frame is displayed, each frame is scanned individually. In whole image view when no cropping frame is displayed, the entire preview area will be scanned. When a cropping frame is displayed, the portion within the crop...
Page 587
You can adjust the scan area within the preview area. If an area is not specified, the document will be scanned at the document size (auto crop). If an area is specified, only the portion in the cropping frame will be scanned. Adjusting cropping frames image corrections fading correction corrects an...
Page 588
(rotate right) rotates the preview image 90 degrees clockwise. - the result will be reflected in the scanned image. - the image returns to its original state when you preview again. (auto crop) displays and adjusts the cropping frame automatically to the size of the document displayed in the preview...
Page 589
Note when multiple images are previewed, different outlines indicate different selection status. - focus frame (thick blue outline): the displayed settings will be applied. - selected frame (thin blue outline): the settings will be applied to the focus frame and selected frames simultaneously. You c...
Page 590
Page top page 590 of 973 pages basic mode tab.
Page 591: Advanced Mode Tab
Advanced guide > scanning > scanning with other application software > scangear (scanner driver) screens > advanced mode tab advanced mode tab this mode allows you to make advanced scan settings such as the color mode, output resolution, image brightness and color tone. This section describes the se...
Page 592
Enter setting name and click add. The name appears in favorite settings list. When you click save, the item appears in the favorite settings list and can be selected, along with the predefined items. To delete an item, select it in favorite settings list and click delete. Click save to save settings...
Page 593
Preview performs a trial scan. Scan scanning starts. Note when scanning starts, the progress will be displayed. Click cancel to cancel the scan. When scanning is completed, a dialog box prompting you to select the next action may open. Follow the prompt to complete. For details, see status of scange...
Page 594
(thumbnail)/ (whole image) switches the view in the preview area. Preview area (clear) click this button to delete the preview image. It also resets the toolbar and color adjustment settings. (crop) allows you to specify the scan area by dragging the mouse. (move image) if an enlarged image is too l...
Page 595
(information) displays the version of scangear and the current scan settings (document type, etc.). (open guide) this page appears. Preview area preview area this is where a trial image is displayed after you click preview. You can also check the results of the settings (image corrections, color adj...
Page 596
Note you can specify the scan area (cropping frame) on the displayed image. In thumbnail view, you can only create one cropping frame per image. In whole image view, you can create multiple cropping frames. Adjusting cropping frames related topic scanning in advanced mode page top page 596 of 973 pa...
Page 597: Input Settings
Advanced guide > scanning > scanning with other application software > scangear (scanner driver) screens > input settings input settings input settings allows you to set the following items: select source the type of document to be scanned is displayed. To scan from the platen, select platen. To sca...
Page 598
Important the orientation dialog box can only be opened when select source is document (adf simplex). Color mode select how to scan the document. Color select this mode to scan color documents or to create color images. This mode renders the image in 256 levels (8 bit) of r(ed), g(reen), and b(lue)....
Page 599: Output Settings
Advanced guide > scanning > scanning with other application software > scangear (scanner driver) screens > output settings output settings output settings allows you to set the following items: output resolution select the resolution to scan at. The higher the resolution (value), the more detail in ...
Page 600
When no cropping frame is displayed, the entire preview area will be scanned. When a cropping frame is displayed, the portion within the cropping frame will be scanned. Note to enlarge/reduce the scanned image, enter values into (width) and (height) in output settings or specify a value (by 1%) for ...
Page 601
Data size an image file is created when the preview image is scanned. Its size when saved in bmp format is displayed. Note when the file size exceeds a certain size, the value appears in red. In that case, a warning message appears when you click scan. It is recommended that you adjust the settings ...
Page 602: Image Settings
Advanced guide > scanning > scanning with other application software > scangear (scanner driver) screens > image settings image settings important do not apply these functions to images without moire, dust/scratches or faded colors. The color tone may be adversely affected. Image correction results ...
Page 603
Newspaper applies image adjustment suitable for newspapers. Document applies image adjustment suitable for text documents. Important you can set image adjustment after preview. You can set this setting when recommended is selected on the color settings tab of the preferences dialog box. Note if the ...
Page 604
This function may not be effective for some types of photos. Note it is recommended that you select none when scanning printed materials. Fading correction use this function to correct photos that have faded with time or have a colorcast. Colorcast is a phenomenon where a specific color affects the ...
Page 605
Important you can set backlight correction after preview. You can set this setting when recommended is selected on the color settings tab of the preferences dialog box. Backlight correction may not be effective if the scan area is too small. Note noise patterns may appear when backlight correction i...
Page 606
Note cover the document with black cloth if white spots, streaks, or colored patterns appear in scan results due to ambient light entering between the document and the platen. If the shadow is not corrected properly, adjust the cropping frame on the preview image. Adjusting cropping frames page top ...
Page 607: Color Adjustment Buttons
Advanced guide > scanning > scanning with other application software > scangear (scanner driver) screens > color adjustment buttons color adjustment buttons the color adjustment buttons allow you to make fine corrections to the image brightness and color tones. You can adjust the image's overall bri...
Page 608
(histogram) a histogram allows you to see the data concentration at each brightness level of an image. You can specify the darkest level (shadow) and brightest level (highlight) within an image, cut the levels and expand the middle of the tonal range of the image. Adjusting histogram (tone curve set...
Page 609
Enter setting name and click add. The name appears in tone curve settings list or threshold settings list. Click save to save. You can load and apply the saved tone curve/threshold settings to a preview image. To load the settings, select the saved item from the pull-down menu. To delete an item, se...
Page 610: Auto Scan Mode Tab
Advanced guide > scanning > scanning with other application software > scangear (scanner driver) screens > auto scan mode tab auto scan mode tab this mode allows you to scan easily by simply placing documents on the platen or adf (auto document feeder) and clicking a button. In auto scan mode, docum...
Page 611
" placing documents " appears. Execute recommended image correction select this checkbox to apply suitable corrections automatically based on the document type. Important when this checkbox is selected in scangear (scanner driver) started from mp navigator ex, the files can be saved in jpeg/exif or ...
Page 612: Preferences Dialog Box
Advanced guide > scanning > scanning with other application software > scangear (scanner driver) screens > preferences dialog box preferences dialog box click preferences... In the scangear (scanner driver) screen to open preferences dialog box. In the preferences dialog box, you can make advanced s...
Page 613: Scanner Tab
Advanced guide > scanning > scanning with other application software > scangear (scanner driver) screens > scanner tab scanner tab on the scanner tab, you can specify the following settings. Quiet mode select this checkbox to reduce scanner sound by slowing down the scanner head when previewing or s...
Page 614: Preview Tab
Advanced guide > scanning > scanning with other application software > scangear (scanner driver) screens > preview tab preview tab on the preview tab, you can specify the following settings. Preview at start of scangear select what to do with preview when scangear (scanner driver) is started. Automa...
Page 615
Cropping size for thumbnail view select the cropping size for thumbnails of scanned documents. Larger displays 105% (in width and height) of the area displayed for the standard size. Standard the standard size. Smaller displays 95% (in width and height) of the area displayed for the standard size. N...
Page 616: Scan Tab
Advanced guide > scanning > scanning with other application software > scangear (scanner driver) screens > scan tab scan tab on the scan tab, you can specify the following settings. Status of scangear dialog after scanning select what to do with scangear (scanner driver) after scanning images. Close...
Page 617: Color Settings Tab
Advanced guide > scanning > scanning with other application software > scangear (scanner driver) screens > color settings tab color settings tab on the color settings tab, you can specify the following settings. Color adjustment select either of the following. You can select one when color mode is c...
Page 618
Monitor. Click defaults to return to the default monitor gamma value (2.20). Note refer to the manual of your monitor to check its gamma value. If it is not written in the manual, contact the manufacturer. Page top page 618 of 973 pages color settings tab.
Page 619
Advanced guide > scanning > scanning with other application software > appendix: useful information on scanning appendix: useful information on scanning adjusting the cropping frame (scan area) adjusting cropping frames selecting the best resolution resolution learning about file formats file format...
Page 620: Adjusting Cropping Frames
Advanced guide > scanning > scanning with other application software > appendix: useful information on scanning > adjusting cropping frames adjusting cropping frames you can specify the scan area by creating a cropping frame on the image displayed in the preview area of the scangear (scanner driver)...
Page 621
The cursor will change into (crosshair arrow) when it is positioned within a cropping frame. Click and drag the mouse to move the entire cropping frame. Note in advanced mode, you can specify the cropping frame size by entering the values into (width) and (height) in input settings. Input settings y...
Page 622
You can create multiple cropping frames and apply different scan settings to each cropping frame. You can also select multiple cropping frames by clicking them while pressing the ctrl key. If you select multiple cropping frames and change the settings on a tab at the right of scangear, the settings ...
Page 623: Resolution
Advanced guide > scanning > scanning with other application software > appendix: useful information on scanning > resolution resolution what is resolution? The data in the image you have scanned is a collection of dots carrying information about brightness and color. The density of these dots is cal...
Page 624
Setting the resolution in scangear (scanner driver) in scangear, you can specify the resolution with output resolution in output settings on the advanced mode tab. Example of appropriate resolution when printing to scale the scanning resolution is automatically set so that the value set in output re...
Page 625
Slow down significantly, and you will experience inconvenience such as lack of memory. Set the minimum required resolution according to the use of the image. Page top page 625 of 973 pages resolution.
Page 626: File Formats
Advanced guide > scanning > scanning with other application software > appendix: useful information on scanning > file formats file formats you can select a file format when saving scanned images. You should specify the most suitable format according to how you want to use the image on which applica...
Page 627: Color Matching
Advanced guide > scanning > scanning with other application software > appendix: useful information on scanning > color matching color matching color matching adjusts devices as shown below to match the colors of an image displayed on a monitor or a printed image with the colors of the original docu...
Page 628
Advanced guide > scanning > canon ij network scan utility screens canon ij network scan utility screens canon ij network scan utility menu and setting screen page top page 628 of 973 pages canon ij network scan utility screens.
Page 629
Advanced guide > scanning > canon ij network scan utility screens > canon ij network scan utility menu and setting screen canon ij network scan utility menu and setting screen set up canon ij network scan utility to scan images into a computer over a network using the operation panel of the machine....
Page 630
Select the product you want to use. Scanners that are registered to the system are displayed. Select the checkbox of the product you want to use. You can select up to three scanners. Click instructions to open this page. Note if the scanner you want to use is not displayed, check the following condi...
Page 631: Other Scanning Methods
Advanced guide > scanning > other scanning methods other scanning methods scanning with wia driver scanning using the control panel (windows xp only) page top page 631 of 973 pages other scanning methods.
Page 632: Scanning With Wia Driver
Advanced guide > scanning > other scanning methods > scanning with wia driver scanning with wia driver you can scan an image from a wia-compliant application and use the image in that application. Windows image acquisition (wia) is a driver model implemented in windows xp or later. It allows you to ...
Page 633
The currently set product name is displayed. To change the scanner, click change... And select the product you want to use. Profile select photo (default) or documents according to the document to be scanned. To save a new profile, select add profile.... You can specify the details in the add new pr...
Page 634
Scanner or camera from .) (select the command to scan a document in the application.) 3. Select an image type according to the document to be scanned. To scan from the platen, select flatbed for paper source. To scan from the adf (auto document feeder), select document feeder. Note to scan with the ...
Page 635
With network connection, you cannot specify brightness and contrast. 5. Click preview to preview the image. The preview image appears on the right. Drag to specify the scan area. Important with network connection, scan without preview when scanning documents from the adf (auto document feeder). If y...
Page 636
Advanced guide > scanning > other scanning methods > scanning using the control panel (windows xp only) scanning using the control panel (windows xp only) you can scan images via the control panel of windows xp using the wia driver. Important with network connection, you cannot scan using the wia dr...
Page 637
Brightness move the slider to adjust the brightness. Move it to the left to darken and right to brighten the image. You can also enter a value (-127 to 127). Contrast move the slider to adjust the contrast. Moving it to the left will decrease the contrast of the image, thus softening the image. Movi...
Page 638: Faxing
Advanced guide > faxing faxing sending/receiving faxes using the operation panel of the machine sending faxes from a computer page top page 638 of 973 pages faxing.
Page 639: Machine
Advanced guide > faxing > sending/receiving faxes using the operation panel of the machine sending/receiving faxes using the operation panel of the machine sending faxes sending a fax after speaking on telephone registering recipients for speed dialing sending a fax using the speed dialing feature s...
Page 640: Sending Faxes
Advanced guide > faxing > sending/receiving faxes using the operation panel of the machine > sending faxes sending faxes for the preparations required to send faxes, or the basic procedure for sending faxes using the numeric buttons, refer to sending faxes . Page top page 640 of 973 pages sending fa...
Page 641
Advanced guide > faxing > sending/receiving faxes using the operation panel of the machine > sending a fax after speaking on telephone sending a fax after speaking on telephone if you want to speak to the recipient before sending a fax, or if the recipient does not have a fax machine that can receiv...
Page 642
Advanced guide > faxing > sending/receiving faxes using the operation panel of the machine > registering recipients for speed dialing registering recipients for speed dialing speed dialing allows you to dial fax/telephone numbers by simply pressing a few buttons. The following speed dialing methods ...
Page 643
Advanced guide > faxing > sending/receiving faxes using the operation panel of the machine > registering recipients for speed dialing > registering coded speed dial numbers registering coded speed dial numbers before you can use the coded speed dialing feature, you need to register the recipients' n...
Page 644
Note to register another recipient's name and number to a coded speed dial code, repeat steps 4 to 8. For a list of the recipients you have registered, print the coded speed dial code list. For details, see printing a list of the registered destinations . Page top page 644 of 973 pages registering c...
Page 645
Advanced guide > faxing > sending/receiving faxes using the operation panel of the machine > registering recipients for speed dialing > registering group dial numbers registering group dial numbers to send the same document to several recipients successively, select the numbers you registered to the...
Page 646
To register another group, repeat steps 4 to 7. For a list of the entries you have made, print the group dial code list. For details, see printing a list of the registered destinations . Page top page 646 of 973 pages registering group dial numbers.
Page 647
Advanced guide > faxing > sending/receiving faxes using the operation panel of the machine > registering recipients for speed dialing > changing registered information changing registered information to change information registered for speed dialing, follow the procedure below. Note you can change ...
Page 648
Page top page 648 of 973 pages changing registered information.
Page 649
Advanced guide > faxing > sending/receiving faxes using the operation panel of the machine > registering recipients for speed dialing > deleting registered information deleting registered information to delete information registered for speed dialing, follow the procedure below. Note you can delete ...
Page 650
Advanced guide > faxing > sending/receiving faxes using the operation panel of the machine > registering recipients for speed dialing > printing a list of the registered destinations printing a list of the registered destinations you can print a list of the recipients registered for speed dialing an...
Page 651
Advanced guide > faxing > sending/receiving faxes using the operation panel of the machine > sending a fax using the speed dialing feature sending a fax using the speed dialing feature registering fax or telephone numbers for speed dialing enables you to send faxes easily. Note for the preparations ...
Page 652
Advanced guide > faxing > sending/receiving faxes using the operation panel of the machine > searching a registered dial code number by name (directory dialing) searching a registered dial code number by name (directory dialing) you can search the fax/telephone numbers registered to the coded speed ...
Page 653
Page top page 653 of 973 pages searching a registered dial code number by name (directory dialing).
Page 654: Broadcasting)
Advanced guide > faxing > sending/receiving faxes using the operation panel of the machine > sending the same document to several recipients (sequential broadcasting) sending the same document to several recipients (sequential broadcasting) this machine allows you to prepare for sending the same doc...
Page 655
Important color transmission is available only when the recipient's fax machine supports color faxing. Note to cancel sequential broadcasting, press the stop button. To cancel a fax transmission while it is in progress, press the stop button, then follow the instructions on the lcd. If documents rem...
Page 656
Advanced guide > faxing > sending/receiving faxes using the operation panel of the machine > resending faxes (redialing a busy number) resending faxes (redialing a busy number) there are two methods of redialing: automatic redialing and manual redialing. Automatic redialing manual redialing importan...
Page 657
Coded dial or redial/pause button. To cancel manual redialing, press the stop button. Page top page 657 of 973 pages resending faxes (redialing a busy number).
Page 658
Advanced guide > faxing > sending/receiving faxes using the operation panel of the machine > using the hook button using the hook button follow the procedure below to send faxes using the hook button. Note you can use the hook button only when hook key setting is set to enable. For details, see hook...
Page 659
Advanced guide > faxing > sending/receiving faxes using the operation panel of the machine > using the useful transmission functions using the useful transmission functions using the information services transmission/reception of faxes using ecm preventing mistransmission of faxes for sending faxes ...
Page 660
Advanced guide > faxing > sending/receiving faxes using the operation panel of the machine > using the information services using the information services you can use various information services such as provided by banks, and make airline reservations or hotel reservations. Since these services req...
Page 661
You can use the hook button only when hook key setting is set to enable. For details, see hook key setting . 1. Press the fax button. 2. Press the hook button. 3. Use the numeric buttons to dial the number of the information service. 4. When the recorded message for the information service answers, ...
Page 662
Advanced guide > faxing > sending/receiving faxes using the operation panel of the machine > transmission/ reception of faxes using ecm transmission/reception of faxes using ecm this machine is set to send/receive faxes in error correction mode (ecm). If the recipient's fax machine is compatible wit...
Page 663
Advanced guide > faxing > sending/receiving faxes using the operation panel of the machine > preventing mistransmission of faxes preventing mistransmission of faxes this machine has two functions for preventing the mistransmission of faxes. Sending faxes after dialing the fax/telephone number twice ...
Page 664
Matches the dialed number. 1. Press the fax button, then press the menu button. The fax settings screen is displayed. 2. Use the button to select transmission settings, then press the ok button. 3. Use the button to select check rx fax info, then press the ok button. 4. Use the button to select on, ...
Page 665: Receiving Faxes
Advanced guide > faxing > sending/receiving faxes using the operation panel of the machine > receiving faxes receiving faxes refer to receiving faxes for information on receiving faxes or the receive mode settings. Page top page 665 of 973 pages receiving faxes.
Page 666
Advanced guide > faxing > sending/receiving faxes using the operation panel of the machine > changing the print settings changing the print settings this machine prints received faxes to paper loaded on the rear tray. You can use the operation panel to change the paper settings for printing faxes. M...
Page 667
Advanced guide > faxing > sending/receiving faxes using the operation panel of the machine > setting the number of rings for fax calls setting the number of rings for fax calls when fax priority mode or fax only mode is selected as the receive mode, you can specify how many times the external device...
Page 668
Advanced guide > faxing > sending/receiving faxes using the operation panel of the machine > using the useful reception functions using the useful reception functions memory reception remote reception rejecting fax reception using the caller id service to reject calls page top page 668 of 973 pages ...
Page 669: Memory Reception
Advanced guide > faxing > sending/receiving faxes using the operation panel of the machine > memory reception memory reception if the machine receives a fax under one of the following conditions, it will not be able to print the received fax and will store it in its memory. The in use/memory lamp is...
Page 670
Advanced guide > faxing > sending/receiving faxes using the operation panel of the machine > remote reception remote reception if the machine is located away from the telephone, pick up the handset of the telephone connected to the machine and dial 25 (the remote reception id) to receive faxes (remo...
Page 671: Rejecting Fax Reception
Advanced guide > faxing > sending/receiving faxes using the operation panel of the machine > rejecting fax reception rejecting fax reception you can set the machine to reject faxes with no sender information or those from specific senders. Select one of the following conditions to reject faxes. Faxe...
Page 672
Register rejected no. Data entry ok is displayed on the lcd, then the lcd returns to the screen for registering a rejected number. 4. Repeat steps 2 and 3 to continue registering numbers to reject. You can register up to 10 rejected numbers. Note when the machine rejects reception, reception rejecte...
Page 673
Advanced guide > faxing > sending/receiving faxes using the operation panel of the machine > using the caller id service to reject calls using the caller id service to reject calls if you subscribe to the caller id service, the machine detects the sender's caller id. If the sender's id does not matc...
Page 674: Document Stored In Memory
Advanced guide > faxing > sending/receiving faxes using the operation panel of the machine > document stored in memory document stored in memory in the following cases, the machine is not able to print the received fax and will automatically store the fax in its memory. Ink has run out. Paper has ru...
Page 675
Advanced guide > faxing > sending/receiving faxes using the operation panel of the machine > document stored in memory > printing a document in memory printing a document in memory if the machine was not able to send a fax or print a received fax, it stores the unsent or unprinted fax in its memory....
Page 676
Note if you select no to print all the pages of the document, and all the pages in memory have been printed, ok to delete? Is displayed on the lcd. If you select yes, printed pages in memory are deleted. If there are no documents stored in memory, no documents in memory is displayed, and the machine...
Page 677
Advanced guide > faxing > sending/receiving faxes using the operation panel of the machine > document stored in memory > deleting a document in memory deleting a document in memory deleting a specified document in memory deleting all the documents in memory deleting a specified document in memory 1....
Page 678
4. Use the button to select yes, then press the ok button. Note this function is not available while the machine is receiving a fax. Page top page 678 of 973 pages deleting a document in memory.
Page 679
Advanced guide > faxing > sending/receiving faxes using the operation panel of the machine > document stored in memory > saving a document in memory to usb flash drive saving a document in memory to usb flash drive you can save sent/received faxes on a usb flash drive as pdf files using the operatio...
Page 680
To save other documents, repeat the procedure from steps 5 and 6. 7. Press the back button or stop button. Note you can save up to 50 pages of fax as one pdf file. You can save up to 2000 pdf files on a usb flash drive. Faxes are saved according to the order of the transaction number when save all d...
Page 681
Advanced guide > faxing > sending/receiving faxes using the operation panel of the machine > summary of reports and lists summary of reports and lists the table below shows the reports and lists that can be printed from the machine. Refer to the pages indicated for more details. Report or list descr...
Page 682
Printing the activity report manually 1. Load paper. Refer to loading paper / originals . 2. Press the fax button, then press the menu button. The fax settings screen is displayed. 3. Use the button to select print reports/lists, then press the ok button. 4. Use the button to select activity report,...
Page 683
The fax settings screen is displayed. 3. Use the button to select print reports/lists, then press the ok button. 4. Use the button to select rejected number list, then press the ok button. The rejected number list is printed. Caller history list this function may not be available depending on the co...
Page 684
Operation. See document jams in the adf . #003 document is too long. You attempted to send a document longer than 15.75 inches / 400 mm. You cannot send a document longer than 15.75 inches / 400 mm from the adf. #003 is also printed if it takes time to send a page. Divide the document or set the ima...
Page 685
The causes corresponding to the error numbers are as follows. No. Cause action #003 it takes too long to receive a page. Contact the sender and have the sender divide the fax or set the image quality (fax resolution) to a lower setting and resend it. #005 no answer. When receiving a fax manually, th...
Page 686
Advanced guide > faxing > sending/receiving faxes using the operation panel of the machine > using speed dial utility using speed dial utility about speed dial utility speed dial utility is a utility for forwarding the fax/telephone numbers registered on the machine to a computer and registering/cha...
Page 687
Advanced guide > faxing > sending/receiving faxes using the operation panel of the machine > using speed dial utility > starting up speed dial utility starting up speed dial utility before starting up speed dial utility, confirm the following: the necessary application software (mp drivers and speed...
Page 688
Advanced guide > faxing > sending/receiving faxes using the operation panel of the machine > using speed dial utility > speed dial utility dialog box speed dial utility dialog box the following items are on the speed dial utility dialog box. 1. Printer name selects the machine for editing the regist...
Page 689
8. Exit quits speed dial utility. Information registered or edited using speed dial utility is neither saved on the computer nor registered on the machine. 9. Save to pc... Saves information edited using speed dial utility on the computer. 10. Register to printer registers information edited using s...
Page 690
Advanced guide > faxing > sending/receiving faxes using the operation panel of the machine > using speed dial utility > saving registered information on the machine to your pc saving registered information on the machine to your pc follow the procedure below to save the speed dial/group dial numbers...
Page 691
Advanced guide > faxing > sending/receiving faxes using the operation panel of the machine > using speed dial utility > registering recipients for speed dialing using speed dial utility registering recipients for speed dialing using speed dial utility follow the procedure below to register fax/telep...
Page 692
1. Enter the group name. 2. Select the code you want to add to the group dial, then click add. Note you can only enter numbers that have already been registered to coded speed dial codes. 6. Click ok. To continue registering fax/telephone numbers or a group dial, repeat steps 4 to 6. To save the reg...
Page 693
Advanced guide > faxing > sending/receiving faxes using the operation panel of the machine > using speed dial utility > changing recipients for speed dialing using speed dial utility changing recipients for speed dialing using speed dial utility follow the procedure below to change fax/telephone num...
Page 694
Select the code to add to the group dial, then click add. To delete a member: select the code to delete from the group dial, then click delete. 5. Click ok. To continue changing fax/telephone numbers or group dials, repeat steps 4 and 5. To save the edited information on the computer. 1. Click save ...
Page 695
Advanced guide > faxing > sending/receiving faxes using the operation panel of the machine > using speed dial utility > deleting recipients for speed dialing using speed dial utility deleting recipients for speed dialing using speed dial utility follow the procedure below to delete fax/telephone num...
Page 696
Advanced guide > faxing > sending/receiving faxes using the operation panel of the machine > using speed dial utility > changing sender information using speed dial utility changing sender information using speed dial utility follow the procedure below to change the user's name or fax/telephone numb...
Page 697
Advanced guide > faxing > sending/receiving faxes using the operation panel of the machine > using speed dial utility > registering/changing rejected number using speed dial utility registering/changing rejected number using speed dial utility follow the procedure below to register, change, or delet...
Page 698
Advanced guide > faxing > sending/receiving faxes using the operation panel of the machine > using speed dial utility > calling the registered information up from your pc and registering the information to the machine calling the registered information up from your pc and registering the information...
Page 699
Advanced guide > faxing > sending/receiving faxes using the operation panel of the machine > using speed dial utility > uninstalling speed dial utility uninstalling speed dial utility follow the procedure below to uninstall speed dial utility. Important log into a user account with administrator pri...
Page 700
Advanced guide > faxing > sending faxes from a computer sending faxes from a computer sending a fax creating an address book page top page 700 of 973 pages sending faxes from a computer.
Page 701: Sending A Fax
Advanced guide > faxing > sending faxes from a computer > sending a fax sending a fax you can send faxes using the fax driver from applications that support document printing. Note you can only specify one fax recipient. You cannot send a fax to two or more recipients in one operation. Only black an...
Page 702
Note you can also register a recipient in the recipient list by following the instructions below: 1. Click display address book..., select a recipient from the recipient list 2. Click add to recipient list 3. Click ok for details on valid characters, see the help for the fax driver. You can register...
Page 703
Page top page 703 of 973 pages sending a fax.
Page 704: Creating An Address Book
Advanced guide > faxing > sending faxes from a computer > creating an address book creating an address book by using the address book, you can send a fax by simply specifying a recipient from it. You can register the recipient's name, fax number and other information in the address book. Registering...
Page 705
Select create new windows address book file for mp., then click ok. You can also change the setting later so as to be able to use another address book. For details, see the help for the fax driver. Using an existing windows address book select this option if you do not create a new address book file...
Page 706
6. Enter the first, middle, and last of the contact in the name and e-mail tab (name tab when using other than windows 7/windows vista) on the properties screen. The recipient's name will be printed at the top of the fax received by the recipient. 7. Enter the fax number on the home or work tab, the...
Page 707
Note in windows xp/windows 2000, you can use or import another windows address book. For details, see the help for the fax driver. Related topic edit or remove a recipient from an address book search for a recipient in an address book page top page 707 of 973 pages creating an address book.
Page 708
Advanced guide > faxing > sending faxes from a computer > edit or remove a recipient from an address book edit or remove a recipient from an address book you can change the recipients' names, fax numbers and other information, or delete recipients registered in the address book. Editing recipients i...
Page 709
5. Change information as needed on the properties dialog box, then click ok. Removing recipients from an address book you can delete the contacts registered in the address book. 1. From the start menu, navigate as follows: windows 7: from the start menu, select control panel > hardware and sound > d...
Page 710
3. In the canon (model name) series fax printing preferences dialog box, click address book.... 4. Select the recipient you want to delete from the address book dialog box, then click delete. 5. When a confirmation message is displayed, click yes. Page top page 710 of 973 pages edit or remove a reci...
Page 711
Advanced guide > faxing > sending faxes from a computer > search for a recipient in an address book search for a recipient in an address book you can search for recipients registered in the address book by name. 1. Open the document you want to fax with an application (such as word), and then click ...
Page 712
Important you cannot search by criteria other than name. Page top page 712 of 973 pages search for a recipient in an address book.
Page 713
Advanced guide > printing photographs directly from a compliant device or a wireless communication device printing photographs directly from a compliant device or a wireless communication device printing photographs directly from a compliant device printing photographs from a wireless communication ...
Page 714
Advanced guide > printing photographs directly from a compliant device or a wireless communication device > printing photographs directly from a compliant device printing photographs directly from a compliant device printing photographs directly from a compliant device about pictbridge print setting...
Page 715
Advanced guide > printing photographs directly from a compliant device or a wireless communication device > printing photographs directly from a compliant device > printing photographs directly from a compliant device printing photographs directly from a compliant device you can connect a pictbridge...
Page 716
5. Specify the print settings such as the paper type and layout. You can perform settings using the menu on the lcd of your pictbridge compliant device. Select the size and type of paper that you loaded in the machine. Settings on a pictbridge compliant device if your pictbridge compliant device doe...
Page 717
Advanced guide > printing photographs directly from a compliant device or a wireless communication device > printing photographs directly from a compliant device > about pictbridge print settings about pictbridge print settings settings on a pictbridge compliant device settings on the machine settin...
Page 718
Trimming default (off: no trimming), on (follow the camera's setting), off settings on the machine you can change the pictbridge print settings from the pictbridge settings screen. Set the print settings to default on the pictbridge compliant device when you want to print according to the settings o...
Page 719
Advanced guide > printing photographs directly from a compliant device or a wireless communication device > printing photographs from a wireless communication device printing photographs from a wireless communication device printing via bluetooth communication setting the page size, media type, and ...
Page 720
Advanced guide > printing photographs directly from a compliant device or a wireless communication device > printing photographs from a wireless communication device > printing via bluetooth communication printing via bluetooth communication this section describes the procedure to print photos throu...
Page 721
Bluetooth settings screen. Changing the bluetooth settings note communication is possible in a range of up to about 33 ft. / 10 m depending on the conditions below. Printing speed may vary depending on the following conditions: presence of obstacles between the communication equipment, and radio con...
Page 722
Advanced guide > printing photographs directly from a compliant device or a wireless communication device > printing photographs from a wireless communication device > printing via bluetooth communication > changing the bluetooth settings changing the bluetooth settings as preparation for printing t...
Page 723: From A Mobile Phone
Advanced guide > printing photographs directly from a compliant device or a wireless communication device > printing photographs from a wireless communication device > setting the page size, media type, and layout when printing from a mobile phone setting the page size, media type, and layout when p...
Page 724: Maintenance
Advanced guide > maintenance maintenance cleaning your machine aligning the print head performing maintenance from a computer page top page 724 of 973 pages maintenance.
Page 725: Cleaning Your Machine
Advanced guide > maintenance > cleaning your machine cleaning your machine cleaning cleaning the exterior of the machine cleaning the platen glass and document cover cleaning the adf cleaning the inside of the machine (bottom plate cleaning) cleaning the protrusions inside the machine page top page ...
Page 726: Cleaning
Advanced guide > maintenance > cleaning your machine > cleaning cleaning this section describes the cleaning procedure that is needed to maintain your machine. Important do not use tissue paper, paper towels, rough-textured cloth, or similar materials for cleaning the exterior of the machine so as n...
Page 727
Advanced guide > maintenance > cleaning your machine > cleaning the exterior of the machine cleaning the exterior of the machine be sure to use a soft cloth such as eyeglasses cleaning cloth and wipe off dirt on the surface gently. Smooth out wrinkles on the cloth if necessary before cleaning. Impor...
Page 728
Advanced guide > maintenance > cleaning your machine > cleaning the platen glass and document cover cleaning the platen glass and document cover important be sure to turn off the power and disconnect the power plug before cleaning the machine. The power cannot be turned off while the machine is send...
Page 729: Cleaning The Adf
Advanced guide > maintenance > cleaning your machine > cleaning the adf cleaning the adf important be sure to turn off the power and disconnect the power plug before cleaning the machine. The power cannot be turned off while the machine is sending or receiving a fax, or when there are unsent faxes s...
Page 730
4. After wiping, close the document feeder cover by pushing it until it clicks into place. 5. Close the document tray. Page top page 730 of 973 pages cleaning the adf.
Page 731
Advanced guide > maintenance > cleaning your machine > cleaning the inside of the machine (bottom plate cleaning) cleaning the inside of the machine (bottom plate cleaning) this section explains how to clean the inside of the machine. If the inside of the machine becomes dirty, printed paper may get...
Page 732
Advanced guide > maintenance > cleaning your machine > cleaning the protrusions inside the machine cleaning the protrusions inside the machine if protrusions inside the machine are stained, wipe off any ink from the protrusions using a cotton swab or the like. Important be sure to turn off the power...
Page 733
Advanced guide > maintenance > aligning the print head aligning the print head aligning the print head page top page 733 of 973 pages aligning the print head.
Page 734: Aligning The Print Head
Advanced guide > maintenance > aligning the print head > aligning the print head aligning the print head if printed ruled lines are misaligned or print results are otherwise unsatisfactory, adjust the print head position. Note if the remaining ink level is low, the print head alignment sheet will no...
Page 735
1. Load the print head alignment sheet on the platen glass. Load the print head alignment sheet with the printed side facing down and align the mark on the upper left corner of the sheet with the alignment mark ( ). Note the print head alignment sheet cannot be scanned if it is loaded in the adf. 2....
Page 736
Advanced guide > maintenance > performing maintenance from a computer performing maintenance from a computer cleaning the print heads cleaning the paper feed rollers aligning the print head position checking the print head nozzles cleaning inside the machine page top page 736 of 973 pages performing...
Page 737: Cleaning The Print Heads
Advanced guide > maintenance > performing maintenance from a computer > cleaning the print heads cleaning the print heads the print head cleaning function allows you to unclog clogged nozzles in the print head. Perform print head cleaning if printing is faint or a specific color fails to print, even...
Page 738
5. Check the results to check whether the print quality has improved, click print check pattern. To cancel the check process, click cancel. Important cleaning consumes a small amount of ink. Deep cleaning consumes a larger amount of ink than cleaning. Cleaning the print heads frequently will rapidly...
Page 739
Advanced guide > maintenance > performing maintenance from a computer > cleaning the paper feed rollers cleaning the paper feed rollers cleans the paper feed roller. Perform feed roller cleaning when there are paper particles sticking to the paper feed roller and paper is not fed properly. The proce...
Page 740
Advanced guide > maintenance > performing maintenance from a computer > aligning the print head position aligning the print head position print head alignment corrects the installation positions of the print head and improves deviated colors and lines. This machine supports two head alignment method...
Page 741
When you have entered all the necessary values, click ok. Note if it is difficult to pick the best pattern, pick the setting that produces the least noticeable vertical white streaks. (a) less noticeable vertical white streaks (b) more noticeable vertical white streaks if it is difficult to pick the...
Page 742
When you have entered all the necessary values, click ok. Note if it is difficult to pick the best pattern, pick the setting that produces the least noticeable vertical white streaks. (a) less noticeable vertical white streaks (b) more noticeable vertical white streaks 11. Confirm the displayed mess...
Page 743
When you have entered all the necessary values, click ok. Note if it is difficult to pick the best pattern, pick the setting that produces the least noticeable horizontal white stripes. (a) less noticeable horizontal white stripes (b) more noticeable horizontal white stripes note to print and check ...
Page 744
Advanced guide > maintenance > performing maintenance from a computer > checking the print head nozzles checking the print head nozzles the nozzle check function allows you to check whether the print heads are working properly by printing a nozzle check pattern. Print the pattern if printing becomes...
Page 745
Advanced guide > maintenance > performing maintenance from a computer > cleaning inside the machine cleaning inside the machine perform bottom plate cleaning before you execute duplex printing to prevent smudges on the back side of the paper. Also perform bottom plate cleaning if ink smudges caused ...
Page 746
Advanced guide > about bluetooth communication about bluetooth communication handling precautions preparation to use the bluetooth unit printing data via bluetooth communication basic procedure for printing via bluetooth communication bluetooth settings troubleshooting specifications page top page 7...
Page 747: Handling Precautions
Advanced guide > about bluetooth communication > handling precautions handling precautions shipping the product page top page 747 of 973 pages handling precautions.
Page 748: Shipping The Product
Advanced guide > about bluetooth communication > handling precautions > shipping the product shipping the product this product may not be used in countries or regions other than the country or region where it was purchased due to local laws and regulations. Please note that the use of this product i...
Page 749
Advanced guide > about bluetooth communication > preparation to use the bluetooth unit preparation to use the bluetooth unit bluetooth unit attaching to and removing from the printer page top page 749 of 973 pages preparation to use the bluetooth unit.
Page 750
Advanced guide > about bluetooth communication > preparation to use the bluetooth unit > bluetooth unit bluetooth unit the bluetooth unit bu-30 (hereafter referred to as the bluetooth unit) is an adaptor which can be used with a canon ij printer with bluetooth interface. By attaching the bluetooth u...
Page 751
Advanced guide > about bluetooth communication > preparation to use the bluetooth unit > attaching to and removing from the printer attaching to and removing from the printer attaching the bluetooth unit to the printer removing the bluetooth unit from the printer attaching the bluetooth unit to the ...
Page 752
Note when the bluetooth unit is properly attached to the printer with the power lamp, the power lamp on the printer flashes twice. When the bluetooth unit is properly attached to the printer without the power lamp, the message is displayed on the lcd. Removing the bluetooth unit from the printer rem...
Page 753
Advanced guide > about bluetooth communication > printing data via bluetooth communication printing data via bluetooth communication preparation installing the mp drivers setting the printer registering the printer deleting the printer page top page 753 of 973 pages printing data via bluetooth commu...
Page 754: Preparation
Advanced guide > about bluetooth communication > printing data via bluetooth communication > preparation preparation in order to print via bluetooth communication with windows, the following system requirements must be satisfied. Computer a computer in which an internal bluetooth module is installed...
Page 755
When using windows xp sp2 or later, and when bluetooth devices is displayed in printers and other hardware under control panel authenticate the printer as a bluetooth device on bluetooth devices in printers and other hardware under control panel. See registering the printer . When using a toshiba wi...
Page 756: Installing The Mp Drivers
Advanced guide > about bluetooth communication > printing data via bluetooth communication > installing the mp drivers installing the mp drivers note if you use the printer connecting with a computer, the mp drivers have already been installed. In this case, move to the next step. Setting the printe...
Page 757: Setting The Printer
Advanced guide > about bluetooth communication > printing data via bluetooth communication > setting the printer setting the printer this section describes the procedures for checking the settings of the bluetooth unit on the lcd of the printer in preparation for bluetooth printing. Canon ij printer...
Page 758
Text lcd 4. Check the device name. The device name is necessary to register the printer as a bluetooth device. Be sure to note the device name. Note if multiple printer units with the same model name are connected to the system, assigning a different device name to each printer is recommended for ea...
Page 759: Registering The Printer
Advanced guide > about bluetooth communication > printing data via bluetooth communication > registering the printer registering the printer register the printer as a bluetooth device using bluetooth devices (add a bluetooth device in windows 7) under control panel. Note before registering the print...
Page 760
When registering this printer, pairing with this wireless device (connecting with this device in windows 7) is displayed. Note if you set a passkey on the printer, select enter the device's pairing code and input the passkey, then click next. For more information about setting a passkey, see bluetoo...
Page 761
This message again for this device. In windows xp: 1. Log into a user account with the administrator privilege. 2. Click control panel, printers and other hardware, then bluetooth devices. 3. Click add on the devices sheet. Add bluetooth device wizard will start. 4. Make sure that the printer is tur...
Page 762
Select the same device name as that checked under setting the printer . Note if the device name is not displayed, see check 3: is the printer name which you want to register displayed in printer list? . 6. Select don't use a passkey, and then next. Note if you set a passkey on the printer, select us...
Page 763
8. Check that the device name selected at step 5 is registered on the devices sheet, and click ok. Now, the settings for printing via bluetooth communication are ready. Page top page 763 of 973 pages registering the printer.
Page 764: Deleting The Printer
Advanced guide > about bluetooth communication > printing data via bluetooth communication > deleting the printer deleting the printer this section describes the procedure to delete the registered printer. If you want to re-register the printer as a bluetooth device, first follow the procedure below...
Page 765
Advanced guide > about bluetooth communication > basic procedure for printing via bluetooth communication basic procedure for printing via bluetooth communication printing with computers printing with bluetooth compliant devices other than a computer page top page 765 of 973 pages basic procedure fo...
Page 766: Printing With Computers
Advanced guide > about bluetooth communication > basic procedure for printing via bluetooth communication > printing with computers printing with computers when using bluetooth communication, also refer to the computer's instruction manual. When printing from a bluetooth compliant device other than ...
Page 767
1. Select the print setting in commonly used settings. 2. Confirm the required print settings in media type, printer paper size, and so on. Note you can specify the advanced print settings on main sheet and page setup sheet. For details on the print settings, refer to various printing methods . 3. C...
Page 768
When you use a usb cable for printing, select canon xxx printer from select printer. To cancel a print job in progress, press the stop button on the printer or click cancel printing on the printer status monitor. After printing is canceled, a sheet of paper may be ejected with no printing results. T...
Page 769: Computer
Advanced guide > about bluetooth communication > basic procedure for printing via bluetooth communication > printing with bluetooth compliant devices other than a computer printing with bluetooth compliant devices other than a computer the lcd of the printer allows you to perform settings for printi...
Page 770: Bluetooth Settings
Advanced guide > about bluetooth communication > bluetooth settings bluetooth settings setting bluetooth printing bluetooth settings screen page top page 770 of 973 pages bluetooth settings.
Page 771: Setting Bluetooth Printing
Advanced guide > about bluetooth communication > bluetooth settings > setting bluetooth printing setting bluetooth printing 1. Make sure that the printer is turned on, and attach the bluetooth unit. Note when the bluetooth unit is properly attached to the printer with the power lamp, the power lamp ...
Page 772: Bluetooth Settings Screen
Advanced guide > about bluetooth communication > bluetooth settings > bluetooth settings screen bluetooth settings screen canon ij printers with the bluetooth interface are divided into two types. One is equipped with a graphic lcd, and the other with a text lcd. Graphic lcd text lcd 1. Select devic...
Page 773
Select device name/device name screen allows you to set the device name of the printer on a bluetooth device. In the example used for this explanation, the model name is set to mx870 series. When a model other than mx870 series is used, whatever appears in place of "mx870" becomes the model name use...
Page 774
Change passkey/passkey screen when you select enable on the security settings screen, you are required to set a passkey to register the printer on other bluetooth devices. After you change the passkey, you may be asked to input the passkey on the bluetooth devices you were able to print from before ...
Page 775: Troubleshooting
Advanced guide > about bluetooth communication > troubleshooting troubleshooting troubleshooting printer cannot be registered printing does not start page top page 775 of 973 pages troubleshooting.
Page 776: Troubleshooting
Advanced guide > about bluetooth communication > troubleshooting > troubleshooting troubleshooting this section describes how to solve the problems occurred during the use of the bluetooth unit. Problems related to the printer's hardware, mp drivers installation, and so on, are also described in tro...
Page 777
Advanced guide > about bluetooth communication > troubleshooting > printer cannot be registered printer cannot be registered check 1: have mp drivers been installed? If mp drivers are not yet installed, insert the setup cd-rom into the computer's disc drive, then perform custom install and select mp...
Page 778
1. Display the bluetooth settings screen on the lcd of the printer. For information about how to display the bluetooth settings screen, refer to changing the machine settings on the lcd . 2. Select access refusal setting/access refusal. 3. Select off and press the ok button on the printer. Page top ...
Page 779: Printing Does Not Start
Advanced guide > about bluetooth communication > troubleshooting > printing does not start printing does not start check 1: is bluetooth unit ready for use? Make sure that the bluetooth settings screen can be displayed on the lcd of the printer. If the screen cannot be displayed, bluetooth communica...
Page 780
For windows vista when authenticating the printer as a bluetooth device in control panel bthnnn (canon xxx printer (copy x)) ("n" is a digit). When authenticating the printer as a bluetooth device using bluetooth settings built in the computer tbpnnn (canon xxx printer (copy x)) ("n" is a digit) for...
Page 781
Check 5: were the mp drivers installed after printer registration on bluetooth devices (add a bluetooth device in windows 7)? If you have installed the mp drivers after registering the printer as a bluetooth device on bluetooth devices (add a bluetooth device in windows 7), delete the printer and th...
Page 782: Specifications
Advanced guide > about bluetooth communication > specifications specifications communication method bluetooth v2.0 maximum speed 1.44 mbps output bluetooth power class 2 communication distance line-of-sight distance: approx. 33 ft./10 m * * it may vary depending on factors including the presence of ...
Page 783
Advanced guide > changing the machine settings changing the machine settings changing the machine settings on the lcd changing machine settings from your computer page top page 783 of 973 pages changing the machine settings.
Page 784
Advanced guide > changing the machine settings > changing the machine settings on the lcd changing the machine settings on the lcd changing the machine settings on the lcd fax settings print settings lan settings device user settings mobile phone settings bluetooth settings pictbridge settings reset...
Page 785
Advanced guide > changing the machine settings > changing the machine settings on the lcd > changing the machine settings on the lcd changing the machine settings on the lcd this section describes the procedure to change the settings in the device settings screen, taking the steps to specify extende...
Page 786: Fax Settings
Advanced guide > changing the machine settings > changing the machine settings on the lcd > fax settings fax settings this section describes the setting items in fax user settings, transmission settings, and reception settings in the fax settings menu. Fax user settings transmission settings recepti...
Page 787
Line monitor volume: selects the line monitor volume. Rx ring level adjusts the level of the ringing sound the machine makes when it receives a fax. You can select either standard or high. Telephone line type selects the telephone line type setting for the machine. Confirming the telephone line conn...
Page 788
If you select print error only or print for each tx, you can enable/disable printing of the first page of the fax under the report. Dial tone detect avoids mistransmission when reception and transmission occur at the same time. If you select on, the machine transmits the fax after confirming the dia...
Page 789
Telephone company. You can select the ring pattern from normal ring, double ring, short-short-long, short-long- short, and other ring type. Setting the receive mode this setting is available only in the us and canada. Ring count specifies the number of times the external device rings when the receiv...
Page 790
If you subscribe to the caller id service, the machine detects the sender's caller id. If the sender's id does not match the conditions specified in this setting, the machine rejects the phone call or fax reception from the sender. If you select subscribed in caller id service, you can specify the f...
Page 791: Print Settings
Advanced guide > changing the machine settings > changing the machine settings on the lcd > print settings print settings prevent abrasion use this setting only if the print surface becomes smudged. Off/on important be sure to set this back to off after printing since it may result in lower printing...
Page 792
Advanced guide > changing the machine settings > changing the machine settings on the lcd > lan settings lan settings wlan active/inactive activates/deactivates wireless lan. Wireless lan setup selects the setting method for wireless lan connection. Easy setup select when you perform settings for wi...
Page 793
Enab./disab. Bonjour selecting active allows you to use bonjour to perform the network settings. Enter service name specifies the bonjour service name. You can use up to 48 characters for the name. Note you cannot use the same service name as that already used for other lan connected devices. Lpr se...
Page 794: Device User Settings
Advanced guide > changing the machine settings > changing the machine settings on the lcd > device user settings device user settings date/time setting sets the current date and time. Specifying the basic settings for faxing date display format sets the format of dates displayed on the lcd and print...
Page 795
Off/on enabling this function reduces the noises generated in the following cases: copying printing from a pictbridge compliant device printing from a wireless communication device sending/receiving the fax printing a template form important operating speed may be reduced compared to when this setti...
Page 796: Mobile Phone Settings
Advanced guide > changing the machine settings > changing the machine settings on the lcd > mobile phone settings mobile phone settings when printing from a mobile phone through bluetooth communication, select the page size, media type, layout, and so on. For details on how to print from a mobile ph...
Page 797: Bluetooth Settings
Advanced guide > changing the machine settings > changing the machine settings on the lcd > bluetooth settings bluetooth settings you can change the device name of the machine, passkey, and so on in the bluetooth settings. For details on how to print from a mobile phone through bluetooth communicati...
Page 798: Pictbridge Settings
Advanced guide > changing the machine settings > changing the machine settings on the lcd > pictbridge settings pictbridge settings you can change the print settings when printing from a pictbridge compliant device. Set the print settings to default on the pictbridge compliant device when you want t...
Page 799
Advanced guide > changing the machine settings > changing the machine settings on the lcd > reset setting reset setting reverts all settings you made to the machine back to default. However, some data may not be changed, depending on the current usage state of your machine. Telephone no. Data revert...
Page 800
Advanced guide > changing the machine settings > changing machine settings from your computer changing machine settings from your computer changing the print options registering a frequently used printing profile setting the ink cartridge managing the machine power reducing the machine noise changin...
Page 801
Advanced guide > changing the machine settings > changing machine settings from your computer > changing the print options changing the print options you change the detailed print driver settings for print data that is sent from an application software. Specify this option if you encounter print fai...
Page 802
Advanced guide > changing the machine settings > changing machine settings from your computer > registering a frequently used printing profile registering a frequently used printing profile you can register the frequently used printing profile to commonly used settings on the quick setup tab. Unnece...
Page 803
4. Save the settings enter a name in the name field, and if necessary, set the items in options.... Then click ok. The printing profile is saved, and the quick setup tab is displayed again. The name and icon are added to the commonly used settings list. Important to save the page size, orientation, ...
Page 804: Setting The Ink Cartridge
Advanced guide > changing the machine settings > changing machine settings from your computer > setting the ink cartridge setting the ink cartridge this feature enables you to specify the most appropriate ink cartridge among installed cartridges according to an intended use. When one of the ink cart...
Page 805
Advanced guide > changing the machine settings > changing machine settings from your computer > managing the machine power managing the machine power this function allows you to manage the machine power from the printer driver. The procedure for managing the printer power is as follows: power off th...
Page 806
Advanced guide > changing the machine settings > changing machine settings from your computer > reducing the machine noise reducing the machine noise this function allows you to reduce the operating noise. Select when you wish to reduce the operating noise of the printer at night, etc. Using this fu...
Page 807
Advanced guide > changing the machine settings > changing machine settings from your computer > changing the machine operation mode changing the machine operation mode if necessary, switch between various modes of machine operation. The procedure for configuring custom settings is as follows: custom...
Page 808: Troubleshooting
Advanced guide > troubleshooting troubleshooting troubleshooting if an error occurs the machine cannot be powered on an error message is displayed on the lcd a message for faxing is displayed on the lcd lcd cannot be seen at all an unintended language is displayed on the lcd cannot install the mp dr...
Page 809: Troubleshooting
Advanced guide > troubleshooting > troubleshooting troubleshooting this section describes troubleshooting tips for problems you may encounter when using the printer. For troubleshooting tips related to the setup, refer to the network setup troubleshooting . Page top page 809 of 973 pages troubleshoo...
Page 810: If An Error Occurs
Advanced guide > troubleshooting > if an error occurs if an error occurs when an error occurs in printing such as the machine is out of paper or paper is jammed, a troubleshooting message is displayed automatically. Take the appropriate action described in the message. The message may vary depending...
Page 811
Advanced guide > troubleshooting > the machine cannot be powered on the machine cannot be powered on check 1: press the on button. Check 2: make sure that the power plug is securely plugged into the power cord connector of the machine, then turn it back on. Check 3: unplug the machine from the power...
Page 812
Advanced guide > troubleshooting > an error message is displayed on the lcd an error message is displayed on the lcd if an error message is displayed on the lcd, take the corresponding action described below. Message action check ink u051/u052/u053/u059 the fine cartridge may not be installed proper...
Page 813
Disabled. Replace the empty ink cartridge immediately after the printing. The resulting print quality is not satisfactory, if printing is continued under the ink out condition. Note if the function for detecting the remaining ink level is disabled, is displayed on the lcd. Routine maintenance since ...
Page 814
If the error is not resolved, connect the machine to the computer and align the print head on the printer driver. Aligning the print head position unsupported usb hub remove hub if a pictbridge compliant device is connected via a usb hub, remove the hub and connect it directly to the machine. Printe...
Page 815
Your application software. For details, refer to the instruction manual of your application. Document too long press [ok] the document is too long or is jammed in the adf. Remove the document page jammed in the adf, then press the ok button. After resolving the error, make sure that the document you...
Page 816
Advanced guide > troubleshooting > a message for faxing is displayed on the lcd a message for faxing is displayed on the lcd message action auto redial the machine is waiting to redial the recipient's number because the line was busy or the recipient did not answer when you tried to send a document....
Page 817
(or 8.5"x14"): set page size to a4, 8.5"x11"(ltr), or legal (or 8.5"x14"). Media type is set to other than plain paper: set media type to plain paper. You pressed the stop button to cancel printing of a fax: press the fax button. Note to print the received faxes automatically, select on for auto pri...
Page 818
Message is displayed when check rx fax info is set to on. For details, see sending faxes after checking information (checking the recipient's information) . Reception rejected reception has been rejected because the fax matches the fax rejection condition specified by fax reception reject. For detai...
Page 819
Advanced guide > troubleshooting > lcd cannot be seen at all lcd cannot be seen at all if the power lamp is off: the machine is not powered on. Connect the power cord and press the on button. If the power lamp is lit: the lcd may be in the screen-saver mode. On the operation panel, press a button ot...
Page 820
Advanced guide > troubleshooting > an unintended language is displayed on the lcd an unintended language is displayed on the lcd select the language you want to be displayed according to the following procedure. 1. Press the copy button, wait for about 5 seconds. 2. Press the menu button three times...
Page 821
Advanced guide > troubleshooting > cannot install the mp drivers cannot install the mp drivers important if you cannot install the mp drivers when you use the machine over lan, refer to the setup manual. If the installation does not start even after the setup cd-rom is inserted into your computer's ...
Page 822
Securely plugged into the usb port of the machine and is connected to the computer, and then follow the procedure below to reinstall the mp drivers. Note the printer is not detected. Check the connection. May be displayed depending on the computer you use. In this case, follow the procedure below to...
Page 823
Advanced guide > troubleshooting > cannot connect to computer with a usb cable properly cannot connect to computer with a usb cable properly printing or scanning speed is slow/hi-speed usb connection does not work/"this device can perform faster" message is displayed if your system environment is no...
Page 824
Advanced guide > troubleshooting > print results not satisfactory print results not satisfactory if the print result is not satisfactory due to white streaks, misaligned lines, or uneven colors, confirm the paper and print quality settings first. Check 1: do the page size and media type settings mat...
Page 825
Paper is smudged/printed surface is scratched back of the paper is smudged vertical lines are printed on the sides of the printout colors are uneven or streaked page top page 825 of 973 pages print results not satisfactory.
Page 826
Advanced guide > troubleshooting > print results not satisfactory > cannot print to end of job cannot print to end of job check 1: is the size of the print data extremely large? Click print options on the page setup sheet. Then, select the prevent loss of print data check box in the displayed dialog...
Page 827: Streaks
Advanced guide > troubleshooting > print results not satisfactory > no printing results/printing is blurred/colors are wrong/white streaks no printing results/printing is blurred/colors are wrong/white streaks no printing results printing is blurred colors are wrong white streaks page 827 of 973 pag...
Page 828
Check 1: did you confirm the paper and print quality settings? Print results not satisfactory check 2: is the fine cartridge installed properly? If the ink cartridge locking cover is not closed securely, ink may not be ejected correctly. Open the scanning unit (cover), open the ink cartridge locking...
Page 829
The paper is loaded with the printable side facing up. Printing on the wrong side of such paper may cause unclear prints or prints with reduced quality. Refer to the instruction manual supplied with the paper for detailed information on the printable side. Check 6: is the platen glass or the glass o...
Page 830: Colors Are Unclear
Advanced guide > troubleshooting > print results not satisfactory > colors are unclear colors are unclear check 1: enable color correction. When printing photographs or other graphics, enabling color correction in the printer driver may improve color. Select vivid photo in the effects sheet in the p...
Page 831: Lines Are Misaligned
Advanced guide > troubleshooting > print results not satisfactory > lines are misaligned lines are misaligned check 1: did you confirm the paper and print quality settings? Print results not satisfactory check 2: perform print head alignment. If you did not align the print head after installation, s...
Page 832
Advanced guide > troubleshooting > print results not satisfactory > printed paper curls or has ink blots printed paper curls or has ink blots printed paper has ink blots printed paper curls check 1: did you confirm the paper and print quality settings? Print results not satisfactory check 2: if the ...
Page 833
Advanced guide > troubleshooting > print results not satisfactory > paper is smudged/printed surface is scratched paper is smudged/printed surface is scratched paper is smudged the edges of paper are smudged printed surface is smudged printed surface is scratched check 1: did you confirm the paper a...
Page 834
1. Roll up the paper in the opposite direction to the paper curl as shown below. 2. Check that the paper is now flat. We recommend printing curl-corrected paper one sheet at a time. Note depending on the media type, the paper may be smudged or may not be fed properly even if it is not curled inward....
Page 835
Software. 2. On the main sheet, select manual for color/intensity, and then click set. 3. Drag the intensity slide bar on the color adjustment sheet to adjust the intensity. When copying setting items check 6: is printing performed beyond the recommended printing area? If you are printing beyond the...
Page 836
Depending on the media type, the paper may be scratched by other loaded paper when feeding from the rear tray. In this case, load one sheet at a time. Page top page 836 of 973 pages paper is smudged/printed surface is scratched.
Page 837
Advanced guide > troubleshooting > print results not satisfactory > back of the paper is smudged back of the paper is smudged check 1: did you confirm the paper and print quality settings? Print results not satisfactory check 2: perform the bottom plate cleaning to clean the inside of the machine. C...
Page 838
Advanced guide > troubleshooting > print results not satisfactory > vertical lines are printed on the sides of the printout vertical lines are printed on the sides of the printout check 1: did you confirm the paper type and print quality settings? Print results not satisfactory check 2: is the size ...
Page 839
Advanced guide > troubleshooting > print results not satisfactory > colors are uneven or streaked colors are uneven or streaked colors are uneven colors are streaked check 1: did you confirm the paper and print quality settings? Print results not satisfactory check 2: print the nozzle check pattern ...
Page 840
Check 3: perform print head alignment. Aligning the print head note if the problem is not resolved after performing the print head alignment, perform print head alignment manually referring to aligning the print head position . Page top page 840 of 973 pages colors are uneven or streaked.
Page 841: Printing Does Not Start
Advanced guide > troubleshooting > printing does not start printing does not start check 1: make sure that the power plug is securely plugged in, then turn the machine on. While the power lamp is flashing green, the machine is initializing. Wait until the power lamp stops flashing and remains lit gr...
Page 842
4. Click the ports tab to confirm the port settings. Make sure that a port named usbnnn (where "n" is a number) with canon xxx printer appearing in the printer column is selected for print to the following port(s). Note when the machine is used over lan, the port name of the machine is displayed as ...
Page 843
Advanced guide > troubleshooting > copying/printing stops before it is completed copying/printing stops before it is completed check 1: has the machine been printing continuously for a long period? If the machine has been printing continuously for a long time, the print head may overheat. To protect...
Page 844
Advanced guide > troubleshooting > machine moves but ink is not ejected machine moves but ink is not ejected check 1: are the print head nozzles clogged? Print the nozzle check pattern to determine whether the ink ejects properly from the print head nozzles. Refer to routine maintenance for the nozz...
Page 845
Advanced guide > troubleshooting > printing speed is not as fast as expected printing speed is not as fast as expected check 1: is printing performed in quiet mode? Print speed is reduced if you specified to print in quiet mode on the computer or operation panel. For faster printing, do not print in...
Page 846: Replacing
Advanced guide > troubleshooting > fine cartridge holder does not move to the position for replacing fine cartridge holder does not move to the position for replacing check 1: is the power lamp off? Check if the power lamp is lit green. The fine cartridge holder will not move unless the power is on....
Page 847
Advanced guide > troubleshooting > paper does not feed properly paper does not feed properly check 1: make sure of the following when you load paper. When loading two or more sheets of paper, flip through the paper before loading. When loading two or more sheets of paper, align the edges of the shee...
Page 848
If the paper tears in the rear tray, see paper jams to remove it. If there are any foreign objects in the rear tray, be sure to turn off the machine, unplug it from the power supply, then remove the foreign object. Check 5: clean the paper feed roller. Routine maintenance note cleaning the paper fee...
Page 849: Paper Jams
Advanced guide > troubleshooting > paper jams paper jams important while the machine is receiving a fax (in memory), you cannot turn off the machine. Turn it off after receiving the fax. Do not disconnect the power plug while the machine is receiving a fax. If you disconnect the power plug, all the ...
Page 850
Advanced guide > troubleshooting > paper jams > paper is jammed in the paper output slot or the rear tray paper is jammed in the paper output slot or the rear tray remove the paper following the procedure below. 1. Slowly pull the paper out, either from the rear tray or from the paper output slot, w...
Page 851: In Other Cases
Advanced guide > troubleshooting > paper jams > in other cases in other cases make sure of the following: check 1: are there any foreign objects around the paper output slot? Check 2: are there any foreign objects in the rear tray? If there are any foreign objects in the rear tray, be sure to turn o...
Page 852: Document Jams In The Adf
Advanced guide > troubleshooting > document jams in the adf document jams in the adf important when you turn off the machine to remove the jammed document, make sure of the following. While the machine is receiving a fax (in memory), you cannot turn off the machine. Turn it off after receiving the f...
Page 853
5. Close the document feeder cover, then turn on the machine. When rescanning the document after clearing the error, rescan it from the first page. If you cannot remove the document or the document tears inside the machine, or if the document jam error continues after removing the document, contact ...
Page 854
Advanced guide > troubleshooting > message appears on the computer screen message appears on the computer screen error number: b200 a printer error has occurred. Turn the printer off and unplug the power cord of the printer from the power supply. Then contact the service center. Is displayed error n...
Page 855
Writing error/output error/communication error check 1: if the power lamp is off, make sure that the power plug is plugged in, then turn the machine on. While the power lamp is flashing green, the machine is initializing. Wait until the power lamp stops flashing and remains lit green. Check 2: make ...
Page 856
And select mp drivers to install again. Check 5: when the machine is connected to your computer with a usb cable, check the status of the device on your computer. Follow the procedure below to check the status of the device. 1. Click control panel, hardware and sound, then device manager. If the use...
Page 857
If you agree to participate in the survey program: click agree, then follow the on-screen instructions. The printer usage information will be sent via the internet. If you have followed the on-screen instructions, the information will be sent automatically from the second time onward and the confirm...
Page 858
3. Select change. If you select yes after you have followed the on-screen instructions, the confirmation screen will be displayed at the time of the next survey. If you select no, the information will be sent automatically. Note if you select uninstall (or remove), the inkjet printer/scanner/fax ext...
Page 859: For Windows Users
Advanced guide > troubleshooting > for windows users for windows users printer status monitor is not displayed check: is the printer status monitor enabled? Make sure that enable status monitor is selected on the option menu of the printer status monitor. 1. Open the printer driver setup window. Ope...
Page 860
3. Select wia canon xxx ser, then click the properties button. If the user account control screen appears, click continue. 4. Click the events tab on the wia canon xxx ser properties screen. 5. Select start this program for actions, then select mp navigator ex ver3.1 from the pull-down menu. Choose ...
Page 861
Advanced guide > troubleshooting > error message appears on a pictbridge compliant device error message appears on a pictbridge compliant device the following are the possible errors that may occur when printing directly from a pictbridge compliant device and the countermeasures to clear them. Note ...
Page 862
Advanced guide > troubleshooting > cannot print properly from a wireless communication device cannot print properly from a wireless communication device check: is printing possible through bluetooth communication? Printing via bluetooth communication page top page 862 of 973 pages cannot print prope...
Page 863: Problems With Scanning
Advanced guide > troubleshooting > problems with scanning problems with scanning scanner does not work scangear (scanner driver) does not start error message appears and the scangear (scanner driver) screen does not appear scan quality (image displayed on the monitor) is poor scanned image is surrou...
Page 864: Scanner Does Not Work
Advanced guide > troubleshooting > problems with scanning > scanner does not work scanner does not work check 1: make sure that the machine is turned on. Check 2: connect the usb cable to a different usb port on the computer. Check 3: if the usb cable is connected to a usb hub, remove it from the us...
Page 865
Advanced guide > troubleshooting > problems with scanning > scangear (scanner driver) does not start scangear (scanner driver) does not start check 1: make sure that the mp drivers is installed. If it is not installed, insert the setup cd-rom into the computer's disc drive, then select custom instal...
Page 866: Screen Does Not Appear
Advanced guide > troubleshooting > problems with scanning > error message appears and the scangear (scanner driver) screen does not appear error message appears and the scangear (scanner driver) screen does not appear check 1: make sure that the machine is turned on. Check 2: connect the usb cable t...
Page 867
Advanced guide > troubleshooting > problems with scanning > scan quality (image displayed on the monitor) is poor scan quality (image displayed on the monitor) is poor check 1: increase the scanning resolution. Resolution check 2: set the scale to 100%. Some applications do not display images clearl...
Page 868
On the advanced mode tab of scangear, set image adjustment in image settings to none. Image settings on the color settings tab in the preferences dialog box of scangear, set color matching. Color settings tab page top page 868 of 973 pages scan quality (image displayed on the monitor) is poor.
Page 869
Advanced guide > troubleshooting > problems with scanning > scanned image is surrounded by extra white areas scanned image is surrounded by extra white areas check: specify the scan area. Click (auto crop) in whole image view of scangear (scanner driver) to automatically display the cropping frame (...
Page 870
Advanced guide > troubleshooting > problems with scanning > cannot scan multiple documents at one time cannot scan multiple documents at one time check 1: make sure that the documents are placed correctly on the platen. Placing documents check 2: scan each item individually. Some applications do not...
Page 871
Advanced guide > troubleshooting > problems with scanning > cannot scan properly in auto scan mode cannot scan properly in auto scan mode check 1: make sure that the documents are placed correctly on the platen. Placing documents check 2: multiple image scanning may not be supported. Some applicatio...
Page 872: Slow Scanning Speed
Advanced guide > troubleshooting > problems with scanning > slow scanning speed slow scanning speed check 1: to view the image on a monitor, set the output resolution to around 150 dpi. To print, set it to around 300 dpi. Resolution check 2: set fading correction, grain correction, etc. To none. Ima...
Page 873
Advanced guide > troubleshooting > problems with scanning > "there is not enough memory." message is displayed "there is not enough memory." message is displayed check 1: exit other applications and try again. Check 2: reduce the resolution or output size and scan again. Resolution page top page 873...
Page 874
Advanced guide > troubleshooting > problems with scanning > computer stops operating during scanning computer stops operating during scanning check 1: restart the computer, reduce the output resolution in scangear (scanner driver) and scan again. Check 2: delete unnecessary files to obtain sufficien...
Page 875
Advanced guide > troubleshooting > problems with scanning > scanner does not work after upgrading windows scanner does not work after upgrading windows check: disconnect the usb cable, then uninstall and reinstall the mp drivers and mp navigator ex. Step 1: uninstall the mp drivers. See " deleting t...
Page 876: Software Problems
Advanced guide > troubleshooting > software problems software problems e-mail software program you want to use does not appear in the screen for selecting an e-mail software program scanned image is printed enlarged (reduced) scanned image is enlarged (reduced) on the computer monitor scanned image ...
Page 877
Advanced guide > troubleshooting > software problems > e-mail software program you want to use does not appear in the screen for selecting an e-mail software program e-mail software program you want to use does not appear in the screen for selecting an e-mail software program check 1: mp navigator e...
Page 878
Advanced guide > troubleshooting > software problems > scanned image is printed enlarged (reduced) scanned image is printed enlarged (reduced) check: set the printing size in the application. Page top page 878 of 973 pages scanned image is printed enlarged (reduced).
Page 879: Monitor
Advanced guide > troubleshooting > software problems > scanned image is enlarged (reduced) on the computer monitor scanned image is enlarged (reduced) on the computer monitor check 1: change the display setting in the application. For details, refer to the application's manual. If you have any quest...
Page 880
Advanced guide > troubleshooting > software problems > scanned image does not open scanned image does not open check: if the file format is not supported by the application, scan the image again and save it in a popular file format such as jpeg. For details, refer to the application's manual. If you...
Page 881: Mp Navigator Ex Problems
Advanced guide > troubleshooting > mp navigator ex problems mp navigator ex problems cannot scan at the correct size position or size of the image cannot be detected correctly when scanning using the operation panel document is placed correctly, but the scanned image is slanted document is placed co...
Page 882
Advanced guide > troubleshooting > mp navigator ex problems > cannot scan at the correct size cannot scan at the correct size check 1: make sure that the documents are placed correctly on the platen. Placing documents check 2: set document size to the actual document size and scan again. If the matc...
Page 883
Advanced guide > troubleshooting > mp navigator ex problems > position or size of the image cannot be detected correctly when scanning using the operation panel position or size of the image cannot be detected correctly when scanning using the operation panel check 1: make sure that the documents ar...
Page 884: Slanted
Advanced guide > troubleshooting > mp navigator ex problems > document is placed correctly, but the scanned image is slanted document is placed correctly, but the scanned image is slanted check: in mp navigator ex, deselect the correct slanted document checkbox and scan again. Scan settings dialog b...
Page 885: The Scanned Image
Advanced guide > troubleshooting > mp navigator ex problems > document is placed correctly, but the orientation changes in the scanned image document is placed correctly, but the orientation changes in the scanned image check: in mp navigator ex, deselect the detect the orientation of text documents...
Page 886: Problems With Faxing
Advanced guide > troubleshooting > problems with faxing problems with faxing this section mainly describes the problems you may encounter when using a fax. Problems receiving faxes problems sending faxes telephone problems note for details on messages for faxing displayed on the lcd, see a message f...
Page 887: Problems Receiving Faxes
Advanced guide > troubleshooting > problems receiving faxes problems receiving faxes cannot receive a fax, cannot print a fax machine does not switch automatically between voice and fax calls quality of received fax is poor cannot receive a color fax errors often occur when you receive a fax cannot ...
Page 888
The fine cartridge, then print the faxes in memory. Document stored in memory note if the machine was receiving faxes in the fax mode, printing will start automatically after the fine cartridge is replaced. You can set the machine to forcibly print a received fax even if the ink has run out. However...
Page 889
Poor, or is the sender's fax machine compatible with ecm? On your machine, select on for ecm rx on reception settings. Ecm rx contact the sender and ask the sender to check whether the machine is set to enable ecm transmission. If the sender's or recipient's fax machine is not compatible with ecm, t...
Page 890: Problems Sending Faxes
Advanced guide > troubleshooting > problems sending faxes problems sending faxes cannot send a fax cannot perform sequential broadcasting by redialing, or cannot dial using the numeric buttons cannot send a fax clearly errors often occur when you send a fax cannot send a fax check 1: is the power tu...
Page 891
Check that the telephone line is connected correctly to the proper jack. If so, then there is a problem with your telephone line. Contact your telephone company. Check 10: is the document loaded properly? Remove the document, then reload it on the platen glass or in the adf. Loading paper / original...
Page 892
Page top page 892 of 973 pages problems sending faxes.
Page 893: Telephone Problems
Advanced guide > troubleshooting > telephone problems telephone problems cannot dial telephone disconnects during a call cannot dial check 1: is the telephone line connected correctly? Check that the telephone line is connected correctly. Refer to your setup manual. Check 2: is the telephone line ty...
Page 894
Advanced guide > troubleshooting > if you cannot resolve the problem if you cannot resolve the problem if you cannot resolve the problem with any of the workarounds in this chapter, please contact the seller of the machine or the service center. Canon support staff are trained to be able to provide ...
Page 895: Faqs
Advanced guide > troubleshooting > faqs faqs no printing results/printing is blurred/colors are wrong/white streaks machine moves but ink is not ejected cannot install the mp drivers printing does not start copying/printing stops before it is completed writing error/output error/communication error ...
Page 896
Advanced guide > troubleshooting > instructions for use (printer driver) instructions for use (printer driver) this printer driver is subject to the following restrictions. Keep the following points in mind when using the printer driver. Restrictions on the printer driver with some applications, the...
Page 897
Points to note with applications there are following restrictions in microsoft word (microsoft corporation). When microsoft word has the same printing functions as the printer driver, use word to specify them. When selecting scaled, fit-to-page, or page layout from the page layout list on the page s...
Page 898
Advanced guide > troubleshooting > general notes (scanner driver) general notes (scanner driver) scangear (scanner driver) is subject to the following restrictions. Keep these points in mind when using it. Scanner driver restrictions when using the ntfs file system, the twain data source may not be ...
Page 899
When scanning platen size images into microsoft office 2000/2003 (word, excel or powerpoint) etc., click custom insert in the insert picture from scanner or camera screen. Otherwise, images may not be scanned correctly. When scanning images into microsoft office 2007 (such as word, excel, powerpoint...
Page 900
Advanced guide > troubleshooting > general notes (fax driver) general notes (fax driver) this fax driver is subject to the following restrictions. Keep the following points in mind when using the fax driver. Microsoft excel 2002 may not always work correctly when sending a document as a fax using th...
Page 901: Appendix
Advanced guide > appendix appendix printing area editing the print document or reprinting from the print history deleting the undesired print job updating the mp drivers uninstalling the on-screen manuals transporting the machine opening the printer driver setup window notice for unplugging the powe...
Page 902: Printing Area
Advanced guide > appendix > printing area printing area to ensure the best print quality, the machine allows a margin along each edge of media. The actual printable area will be the area inside these margins. Recommended printing area : canon recommends that you print within this area. Printable are...
Page 903
Advanced guide > appendix > printing area > other sizes than letter, legal, envelopes other sizes than letter, legal, envelopes size printable area (width x height) a5 5.56 x 7.95 inches / 141.2 x 202.0 mm a4 8.00 x 11.38 inches / 203.2 x 289.0 mm b5 6.90 x 9.80 inches / 175.2 x 249.0 mm 4" x 6" / 1...
Page 904: Letter, Legal
Advanced guide > appendix > printing area > letter, legal letter, legal size printable area (width x height) letter 8.00 x 10.69 inches / 203.2 x 271.4 mm legal 8.00 x 13.69 inches / 203.2 x 347.6 mm recommended printing area printable area page top page 904 of 973 pages letter, legal.
Page 905: Envelopes
Advanced guide > appendix > printing area > envelopes envelopes size recommended printing area (width x height) european dl* 4.06 x 7.07 inches / 103.2 x 179.5 mm us comm. Env. #10* 3.86 x 7.91 inches / 98.0 x 200.8 mm * this page size can be used only when printing from your computer. Recommended p...
Page 906
Advanced guide > appendix > editing the print document or reprinting from the print history editing the print document or reprinting from the print history this function is unavailable when the standard ij printer driver is used. In the canon ij xps preview window, you can edit the print document or...
Page 907
1. Open the printer driver setup window 2. Set the preview check the preview before printing check box on the quick setup tab or the main tab. 3. Complete the setup click ok. The canon ij xps preview will start and the print result will be displayed before printing. 4. Editing print documents and pr...
Page 908
Reprinting from the print history when you click save print history on the file menu to enable the setting, the document printed from the preview is saved, and you can reprint the document with the same settings. 1. Displaying the print history select the start menu -> all programs -> "your model na...
Page 909
Advanced guide > appendix > deleting the undesired print job deleting the undesired print job if you are using the xps printer driver, replace "canon ij status monitor" with "canon ij xps status monitor" when reading this information. If the printer does not start printing, the print job data cancel...
Page 910: Updating The Mp Drivers
Advanced guide > appendix > updating the mp drivers updating the mp drivers obtaining the latest mp drivers deleting the unnecessary mp drivers before installing the mp drivers installing the mp drivers page top page 910 of 973 pages updating the mp drivers.
Page 911
Advanced guide > appendix > updating the mp drivers > obtaining the latest mp drivers obtaining the latest mp drivers the mp drivers include a printer driver, scanner driver (scangear), and fax driver. By updating the mp drivers to the latest version of the mp drivers, unresolved problems may be sol...
Page 912
Advanced guide > appendix > updating the mp drivers > deleting the unnecessary mp drivers deleting the unnecessary mp drivers the mp drivers you no longer use can be deleted. When deleting the mp drivers, first exit all programs that are running. The procedure to delete the unnecessary mp drivers is...
Page 913
If you are using windows 7, when the confirmation message appears, click yes. Then when the user account control dialog box appears, click yes. The icon is deleted. If you are using windows vista, when the user account control dialog box appears, click continue. Then when the confirmation message ap...
Page 914
Advanced guide > appendix > updating the mp drivers > before installing the mp drivers before installing the mp drivers this section describes the items that you should check before installing the mp drivers. You should also refer to this section if the mp drivers cannot be installed. Checking the m...
Page 915: Installing The Mp Drivers
Advanced guide > appendix > updating the mp drivers > installing the mp drivers installing the mp drivers you can access our web site through the internet and download the latest mp drivers for your model. The procedure for installing the downloaded mp drivers is as follows: 1. Turn off the machine ...
Page 916
Page top page 916 of 973 pages installing the mp drivers.
Page 917
Advanced guide > appendix > uninstalling the on-screen manuals uninstalling the on-screen manuals follow the procedure below to uninstall all of the installed on-screen manuals from your computer. Before uninstalling the on-screen manuals, exit all on-screen manuals that are opening. 1. Click start ...
Page 918: Transporting The Machine
Advanced guide > appendix > transporting the machine transporting the machine when relocating the machine, pack the machine using the original packing materials. If you do not have the original packing materials, pack the machine carefully using protective material and place it inside a sturdy box. ...
Page 919
Advanced guide > appendix > opening the printer driver setup window opening the printer driver setup window the printer driver setup window can be displayed through the application software in use or the start menu of the windows. Open the printer driver setup window through the application software...
Page 920
Advanced guide > appendix > notice for unplugging the power cord notice for unplugging the power cord to unplug the power cord, follow the procedure below. Important confirm that the power lamp is off before unplugging the power cord, then unplug the power cord. Unplugging the power cord while the m...
Page 921: Using Easy-Photoprint Ex
Advanced guide > using easy-photoprint ex using easy-photoprint ex --- transforming your photos into creative works of art --- easy-photoprint ex allows you to create albums, calendars and stickers easily using photos taken with digital cameras. You can also print borderless photos easily. Start eas...
Page 922
Check! Select album to add text and frames. You cannot decorate photos with photo print. Create a calendar using your favorite photos create calendars easily with easy-photoprint ex. Create your own calendar using your favorite photos! It'll be exciting to turn the calendar pages. You can use all ki...
Page 923
Page top page 923 of 973 pages using easy-photoprint ex.
Page 924: Using Mp Navigator Ex
Advanced guide > using mp navigator ex using mp navigator ex mp navigator ex is an application that enables you to easily scan photos and documents. It is suitable even for beginners. Start mp navigator ex click here: mp navigator ex note see " let's try scanning " for details on how to scan images ...
Page 925
Scan with one-click in one-click mode, mp navigator ex completes from scanning to saving, with a click of an icon. One-click mode also allows you to scan and save images as pdf files or attach them to e-mail automatically. Scan and correct/enhance photos you can easily correct/enhance scanned photos...
Page 926: About Solution Menu
Advanced guide > about solution menu about solution menu quick shortcut!! Solution menu solution menu is a menu window that provides quick access from your desktop to canon applications, manuals, and online product information. Important the number and types of buttons displayed in the window may va...
Page 927
(large or small). Solution menu opens with the last used window size next time it is started. When window size is small starting an application 1. Point to a button on the window to display the description of each application. 2. By clicking each button, the introduced application starts. Follow the...
Page 928
Advanced guide > about network communication about network communication changing and confirming network settings troubleshooting appendix glossary page top page 928 of 973 pages about network communication.
Page 929
Advanced guide > about network communication > changing and confirming network settings changing and confirming network settings canon ij network tool canon ij network tool dialog box canon ij network tool menus changing the settings in the wireless lan sheet changing the wpa or wpa2 detailed settin...
Page 930: Canon Ij Network Tool
Advanced guide > about network communication > changing and confirming network settings > canon ij network tool canon ij network tool the canon ij network tool is a utility that enables you to display and modify the machine network settings. It is installed when the machine is set up. Important do n...
Page 931
Advanced guide > about network communication > changing and confirming network settings > canon ij network tool dialog box canon ij network tool dialog box this section describes the items displayed on the canon ij network tool dialog box. Important to use the machine over lan, make sure you have th...
Page 932
Page top page 932 of 973 pages canon ij network tool dialog box.
Page 933
Advanced guide > about network communication > changing and confirming network settings > canon ij network tool menus canon ij network tool menus this section describes the menus in the canon ij network tool dialog box. 1. File menu exit exits the canon ij network tool. 2. View menu status displays ...
Page 934
3. Settings menu configuration displays the configuration dialog box to configure settings of the selected printer. Note this item has the same function as configuration in the canon ij network tool dialog box. Associate port displays the associate port dialog box and you can associate a port with t...
Page 935
Advanced guide > about network communication > changing and confirming network settings > changing the settings in the wireless lan sheet changing the settings in the wireless lan sheet to change the wireless network settings of the printer, connect the printer and the computer with a usb cable temp...
Page 936
3. Search the search dialog box is displayed to select an access point to connect to. Search dialog box note when the canon ij network tool runs over a lan, the button is grayed out and cannot be selected. Connect the printer and the computer with a usb cable temporarily to change the settings. 4. E...
Page 937
1. Detected access points the signal strength from the access point, encryption type, name of access point, and the radio channel can be confirmed. Important if you connect to a network that is not protected with security measures, there is a risk of disclosing data such as your personal information...
Page 938
Specify the printer wep settings. When changing the password (wep key), the same change must be made to the password (wep key) of the access point. 1. Wep key enter the same key as the one set to the access point. The number of characters and character type that can be entered differ depending on th...
Page 939
Advanced guide > about network communication > changing and confirming network settings > changing the wpa or wpa2 detailed settings changing the wpa or wpa2 detailed settings to change the wireless network settings of the printer, connect the printer and the computer with a usb cable temporarily. I...
Page 940
1. Authentication type type of authentication used for client authentication is displayed. This machine supports the psk authentication method. Psk this authentication type uses a passphrase entered in the next screen. 8. Enter the passphrase, confirm the type of dynamic encryption and click next. 1...
Page 941
Important if the printer cannot communicate with the computer after the encryption type of the printer was switched, make sure that encryption types for the computer and the access point matches that set to the printer. How to set a wep/wpa/wpa2 key page top page 941 of 973 pages changing the wpa or...
Page 942
Advanced guide > about network communication > changing and confirming network settings > changing the settings in the admin password sheet changing the settings in the admin password sheet 1. Start up the canon ij network tool. Starting up canon ij network tool 2. Select the printer in printers. 3....
Page 943
Advanced guide > about network communication > changing and confirming network settings > monitoring wireless network status monitoring wireless network status 1. Start up the canon ij network tool. Starting up canon ij network tool 2. Select the printer in printers. 3. Select status from the view m...
Page 944
Advanced guide > about network communication > changing and confirming network settings > initializing the network settings of the machine initializing the network settings of the machine important note that initialization erases all network settings on the machine, printing, scanning, or faxing ope...
Page 945
Advanced guide > about network communication > changing and confirming network settings > viewing the modified settings viewing the modified settings the confirmation dialog box is displayed when you modified the printer settings on the configuration dialog box. When you click yes on the confirmatio...
Page 946
Advanced guide > about network communication > changing and confirming network settings > printing out network setting information printing out network setting information you can print out the network settings of the machine such as its ip address and ssid. Important this print out contains valuabl...
Page 947
Advertising ("x" represents an alphanumeric character ranging from 0 to 9 and a to f.) *1 only when ipv4 is selected on ipv4/ipv6 setting, the status of the network is printed. *2 only when ipv6 is selected on ipv4/ipv6 setting, the status of the network is printed. *3 only when ipv6 is selected on ...
Page 948: Troubleshooting
Advanced guide > about network communication > troubleshooting troubleshooting troubleshooting how to set a network key/network password/passphrase cannot communicate with the machine/cannot print from the machine the following screen is displayed during setup printer status monitor of the machine d...
Page 949: Troubleshooting
Advanced guide > about network communication > troubleshooting > troubleshooting troubleshooting this section describes troubleshooting tips for problems you may encounter when using the machine. For troubleshooting tips related to the setup, refer to the network setup troubleshooting . Page top pag...
Page 950
Advanced guide > about network communication > troubleshooting > how to set a network key/network password/ passphrase how to set a network key/network password/passphrase cannot connect with an access point to which a wep/wpa/wpa2 key is set (you forgot the wep/ wpa/wpa2 key) how to set a wep/wpa/w...
Page 951
Page top page 951 of 973 pages how to set a network key/network password/passphrase.
Page 952: Machine
Advanced guide > about network communication > troubleshooting > cannot communicate with the machine/cannot print from the machine cannot communicate with the machine/cannot print from the machine cannot communicate with the machine after applying mac/ip address filtering or entering a wep/ wpa/wpa2...
Page 953
Check 3: if a network key is set to the access point, set the machine to match it. How to set a wep/wpa/wpa2 key check 4: make sure that the valid wireless channel is used. The wireless channel to be used may be limited depending on wireless network devices installed in the computer. Refer to the ma...
Page 954
Check 1: make sure that the machine is turned on. Check 2: is wlan active/inactive in device settings set to wireless lan active? Changing the machine settings on the lcd check 3: make sure that the network settings in the machine are identical with those of the access point. Refer to the manual pro...
Page 955
Check 1: make sure that the machine is turned on. Check 2: make sure that the machine setup is completed. If not, refer to your setup manual of the machine to complete the machine setup. Check 3: when using canon ij network tool, click update to search for the printer again. Canon ij network tool di...
Page 956
Advanced guide > about network communication > troubleshooting > the following screen is displayed during setup the following screen is displayed during setup the enter password dialog box is displayed during setup the dialog box for setting the encryption is displayed after selecting the access poi...
Page 957
Advanced guide > about network communication > troubleshooting > printer status monitor of the machine does not operate printer status monitor of the machine does not operate use the printer driver with bidirectional communication. Select enable bidirectional support in the ports sheet of the proper...
Page 958
Advanced guide > about network communication > troubleshooting > cannot print, scan, or fax from a computer connected to the network cannot print, scan, or fax from a computer connected to the network check 1: make sure that the network settings of the computer are correct. For the procedures to set...
Page 959
Advanced guide > about network communication > troubleshooting > it takes a long time for printing to start it takes a long time for printing to start check 1: the machine may be printing out or scanning a large job issued from another computer. Check 2: make sure that the radio status is good and a...
Page 960
Advanced guide > about network communication > troubleshooting > the admin password set to the machine was forgotten the admin password set to the machine was forgotten initialize the lan settings. Restoring the machine's network settings to factory default after initializing the lan settings, refer...
Page 961
Advanced guide > about network communication > troubleshooting > checking information about the network checking information about the network checking the ip address or the mac address of the machine checking the ip address or the mac address of the computer checking if the computer and the machine...
Page 962
Advanced guide > about network communication > troubleshooting > restoring the machine's network settings to factory default restoring the machine's network settings to factory default important note that initialization erases all network settings on the machine, and printing, scanning, or faxing op...
Page 963: Updating The Mp Drivers
Advanced guide > about network communication > troubleshooting > updating the mp drivers updating the mp drivers download the latest mp drivers in advance. To obtain the latest mp drivers, access our web site through the internet and download the latest mp drivers for your model. After uninstalling ...
Page 964
Advanced guide > about network communication > troubleshooting > uninstalling the canon ij network tool/canon ij network scan utility uninstalling the canon ij network tool/canon ij network scan utility uninstalling the canon ij network tool follow the procedure below to uninstall the canon ij netwo...
Page 965: Appendix
Advanced guide > about network communication > appendix appendix restrictions initial values set at factory (network) page top page 965 of 973 pages appendix.
Page 966: Restrictions
Advanced guide > about network communication > appendix > restrictions restrictions if you use a printer over the wireless lan, the printer may recognize nearby wireless systems, you should set a network key (wep, wpa, or wpa2) to the access point to encrypt wireless transmission. Wireless communica...
Page 967
Advanced guide > about network communication > appendix > initial values set at factory (network) initial values set at factory (network) item initial values wlan active/inactive wireless lan inactive ssid bjnpsetup communication mode infrastructure wireless security disable ip address getting autom...
Page 968: Glossary
Advanced guide > about network communication > glossary glossary about technical terms page top page 968 of 973 pages glossary.
Page 969: About Technical Terms
Advanced guide > about network communication > glossary > about technical terms about technical terms in this section, technical terms used in the manual are explained. A b c d f i k l m o p r s t u w a access point a wireless transceiver or base station that receives information from wireless clien...
Page 970
Point. Open system in this authentication method, the communication partner is authenticated without using wep key even if "use wep" is selected. Shared key in this authentication method, the communication partner is authenticated using the wep key that was set for encryption. B bonjour a service bu...
Page 971
Automatically. For the procedure to check the ip address of the printer, see checking the ip address or the mac address of the machine . Ipv4/ipv6 they are internetwork-layer protocol used on the internet. Ipv4 uses 32-bit addresses and ipv6 uses 128-bit addresses. K key format select either ascii o...
Page 972
Psk an encryption method employed by wpa/wpa2. R router a relay device to connect to another network. S signal strength the strength of the signal received by the printer from the access point is indicated with a value from 0 to 100%. Ssid unique label for wireless lan. It is often represented such ...
Page 973
Wep/wep key an encryption method employed by ieee 802.11. Shared security key used to encrypt and decrypt data sent over wireless networks. This printer supports key length of 64 bits or 128 bits, key format of ascii code or hexadecimal, and key number of 1 to 4. Wi-fi international association that...


