- DL manuals
- Hach
- Measuring Instruments
- 2100P
- Instrument And Procedure Manual
Hach 2100P Instrument And Procedure Manual
Summary of 2100P
Page 1
Cat. No. 46500-88 portable turbidimeter model 2100p instrument and procedure manual © hach company, 1991-2004. Te/dk 3/04 8ed all rights reserved. Printed in the u.S.A..
Page 2
2.
Page 3: Table of Contents
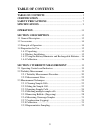
3 table of contents table of contents ................................................................ 3 certification ............................................................................ 5 safety precautions ............................................................. 7 specifications .......
Page 4: Table of Contents
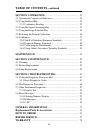
4 table of contents, continued section 3 operation .......................................................... 33 3.1 operational controls and indicators ............................................. 33 3.2 using the read key ...................................................................... 35 3...
Page 5: Certification
5 certification hach company certifies this instrument was tested thoroughly, inspected and found to meet its published specifications when it was shipped from the factory. The model 2100p portable turbidimeter has been tested and is certified as indicated to the following instrumentation standards:...
Page 6: Certification
6 certification, continued fcc part 15, class “a” limits: supporting test records by amador corp. (now tuv product services), certified compliance by hach company. This device complies with part 15 of the fcc rules. Operation is subject to the following two conditions: 1. This device may not cause h...
Page 7: Safety Precautions
7 safety precautions please read this entire manual before unpacking, setting up, or operating this instrument. Pay particular attention to all danger and caution statements. Failure to do so could result in serious injury to the operator or damage to the equipment. To ensure the protection provided...
Page 8
8.
Page 9: Specifications
9 specifications specifications subject to change without notice. Operating specifications applicable at 25 °c unless noted. Program software copyrighted by hach company, 1991. Measurement method: ratio nephelometric signal (90°) scatter light ratio to transmitted light range: 0-1000 ntu with automa...
Page 10: Specifications
10 specifications, continued operating temperature: 0 to 50 °c (32 to 122 °f) (instrument only) operating humidity range: 0 to 90% rh noncondensing at 30 °c; 0 to 80% rh noncondensing at 40 °c; 0 to 70% rh noncondensing at 50 °c power requirements: four aa alkaline cells or optional battery eliminat...
Page 11: Danger
Danger handling chemical samples, standards, and reagents can be dangerous. Review the necessary material safety data sheets and become familiar with all safety procedures before handling any chemicals. Danger la manipulation des échantillons chimiques, étalons et réactifs peut être dangereuse. Lire...
Page 12
12.
Page 13: Section 1 Description
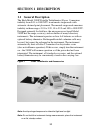
13 section 1 description 1.1 general description the hach model 2100p portable turbidimeter (figure 1) measures turbidity from 0.01 to 1000 ntu in automatic range mode with automatic decimal point placement. The manual range mode measures turbidity in three ranges: 0.01 to 9.99, 10 to 99.9 and 100 t...
Page 14: Section 1
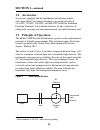
14 section 1, continued 1.2 accessories accessories supplied with the turbidimeter include nine sample cells; three gelex ® secondary standards; one sealed vial each of: ® stabilized formazin standards; 4 aa alkaline batteries; 15 ml of silicone oil; oiling cloth; carrying case; instrument manual; a...
Page 15: Section 1
15 section 1, continued 1.4 preparation for use 1.4.1 unpacking remove the instrument and accessories from the shipping box and inspect them for damage that may have occurred due to rough handling or extreme weather conditions. Verify the following are present: • model 2100p portable turbidimeter • ...
Page 16: Section 1
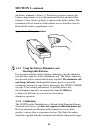
16 section 1, continued the battery eliminator (figure 3). For battery operation, remove the battery compartment cover on the instrument bottom and install the batteries. Correct battery polarity is shown on the battery holder. The instrument will not function if the batteries are not installed corr...
Page 17: Section 1
17 section 1, continued for application, but must be assigned values before use from formazin calibration. See section 3.6 on page 37 for calibration instructions..
Page 18
18.
Page 19: 2.2 Turbidity Measurement
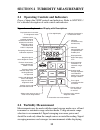
19 section 2 turbidity measurement 2.1 operating controls and indicators figure 4 shows the 2100p controls and indicators. Refer to section 3 for a detailed description of each control and indicator. Figure 4 keyboard and display with descriptions 2.2 turbidity measurement measurements may be made w...
Page 20: Section 2
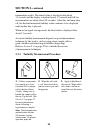
20 section 2, continued intermediate results. The initial value is displayed after about 11 seconds and the display is updated every 1.2 seconds until all ten measurements are taken (about 20 seconds). After this, the lamp turns off, but the final measured turbidity value continues to be displayed u...
Page 21: Section 2
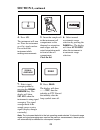
21 section 2, continued 4. Press: i/o . The instrument will turn on. Place the instrument on a flat, sturdy surface. Do not hold the instrument while making measurements. 5. Insert the sample cell in the instrument cell compartment so the diamond or orientation mark aligns with the raised orientatio...
Page 22: Section 2
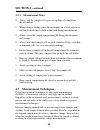
22 section 2, continued 2.2.2 measurement notes • always cap the sample cell to prevent spillage of sample into the instrument. • when taking a reading, place the instrument on a level, stationary surface. It should not be held in the hand during measurement. • always close the sample compartment li...
Page 23: Section 2
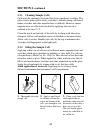
23 section 2, continued 2.3.1 cleaning sample cells cells must be extremely clean and free from significant scratches. The glass used to make cells is easily scratched – manufacturing cells free of minor scratches and other imperfections is difficult. However, minor imperfections are effectively mas...
Page 24: Section 2
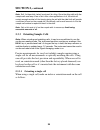
24 section 2, continued note: soft, lint-free cloth (velvet) works well for oiling. Store the oiling cloth with the sample cells and keep it free of dirt. After a few applications of oil, the cloth will contain enough residual oil that simply wiping the cell with the oiled cloth will provide a suffi...
Page 25: Section 2
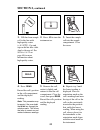
25 section 2, continued 1. Fill the clean sample cell to the line with high quality water ( wipe with lint-free cloth. Apply silicone oil. See section 3.6.2.2 on page 40 for more information about high quality water. 2. Press: i/o to turn the instrument on. 3. Insert the sample cell into the sample ...
Page 26: Section 2
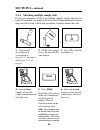
26 section 2, continued 2.3.4 matching multiple sample cells precise measurements of very low turbidity samples require the cells be optically matched or a single cell be used for all measurements. If more than one cell is used, follow this procedure to match (index) the cells: 1. Clean and oil the ...
Page 27: Section 2
27 section 2, continued 7. Press: read record the cell’s position in the cell compartment and the displayed reading. 8. Remove the cell, rotate it slightly and reinsert into the cell compartment. Close the cover, then press read again. Record the cell’s position and the displayed reading. 9. Repeat ...
Page 28: Section 2
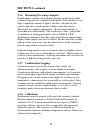
28 section 2, continued 2.3.5 removing bubbles (degassing) before measurement, removing air and other trapped gasses from the sample is strongly recommended, even if bubbles are not visible. Four degassing methods are commonly used: 1. Applying a partial vacuum 2. Adding a surfactant 3. Using an ult...
Page 29: Section 2
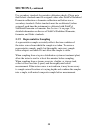
29 section 2, continued 2.3.5.2 adding a surfactant surfactants should be limited to severe problems when other degassing methods are ineffective. Surfactants change the surface tension of the water, which releases trapped gases. Hach recommends a surfactant such as triton x-100 or the equivalent, h...
Page 30: Section 2
30 section 2, continued 2.3.5.3 using an ultrasonic bath note: the time necessary to expel bubbles may vary from a few seconds to a minute or more. To avoid excessive application of ultrasound, a simple procedure can be followed. First, apply ultrasound until all visible bubbles are absent. Then mea...
Page 31: Section 2
31 section 2, continued 2.3.6 measuring overrange samples nephelometric turbidity measurement depends on detection of light scattered from particles suspended in the liquid. If the turbidity is very high, a significant amount of light is blocked or absorbed by the particles and only a small amount o...
Page 32: Section 2
32 section 2, continued use secondary standards for periodic calibration checks. Please note that gelex ® standards must be assigned values after stablcal stabilized formazin calibration or formazin calibration and before use as secondary standards. Gelex standards must be recalibrated (values assig...
Page 33: Section 3 Operation
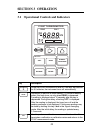
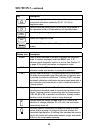
33 section 3 operation 3.1 operational controls and indicators key description power key to turn instrument on and off. If no keys are pressed for 5.5 minutes, the instrument turns off automatically. Depressed to perform a measurement. To conserve battery power, the lamp turns on only when read is d...
Page 34: Section 3
34 section 3, continued edits a flashing digit in the calibration mode or sequences through the calibration standards (s0,s1, s2, s3) or diagnostic menu. Used to move the editing cursor to the digits being edited in the calibration mode or initiate editing of a standard value. Turns the signal avera...
Page 35: Section 3
35 section 3, continued 3.2 using the read key to preserve battery power and prolong lamp life, the lamp turns on only after the read key is pressed. Pressing the key turns the instrument lamp on; after about 12 seconds, the lamp turns off, but the measurement value continues to be displayed. After ...
Page 36: Section 3
36 section 3, continued 11 seconds and the display is updated every 1.2 seconds until all ten measurements are taken (about 22 seconds). After 22 seconds, the lamp turns off, but the final measured turbidity value continues to be displayed until another key is pressed. When signal averaging is off, ...
Page 37: Section 3
37 section 3, continued 3.6 calibration calibration of the 2100p turbidimeter is based on formazin, the primary standard for turbidity. The instrument's electronic and optical design provide long-term stability and minimize the need for frequent calibration. The two-detector ratioing system compensa...
Page 38: Section 3
38 section 3, continued • do not transfer the standard to another container for storage. • do not return standard from the sample cell back into the its original container. Standard contamination will result. • store standards between 0 and 25 °c. • for long-term storage, refrigeration at 5 °c is re...
Page 39: Section 3
39 section 3, continued 5. Rinse the sample cell at least one time with the standard and discard the rinse. 6. Immediately fill the sample cell with the standard. Cap the sample cell and let it stand for one minute. The standard is now ready for use in the calibration procedure, section 3.6.3. 3.6.1...
Page 40: Section 3
40 section 3, continued 3.6.2 formazin primary standards perform the procedure in section 3.6.2.1 to prepare a 4000-ntu standard. Alternately, order a 4000-ntu stock solution from hach by specifying cat. 2461-49. Prepare the dilutions from the 4000-ntu stock solution by following the instructions in...
Page 41: Section 3
41 section 3, continued the dilution water turbidity is greater than 0.5 ntu. In this case, prepare the water as directed below. The value of the dilution water can be arbitrarily forced to zero (see calibration procedure). This is not recommended for most applications and, if done, should be done o...
Page 42: Section 3
42 section 3, continued 3.6.2.4 preparing formazin dilutions (factory recommended) hach company recommends using 20, 100, and 800 ntu formazin standards for calibrating the 2100p turbidimeter. Dilutions with other ntu values can be prepared and used (see section 3.6.3.1 on page 48). If problems occu...
Page 43: Section 3
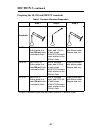
43 section 3, continued preparing the 20, 100 and 800 ntu standards table 1 formazin standard preparation step 1 step 2 step 3 standards 20 ntu add 100 ml of dilution water to a clean 200-ml class a volumetric flask. With a tensette* pipet, add 1.00 ml of well-mixed 4000 ntu formazin stock solution ...
Page 44: Section 3
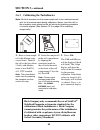
44 section 3, continued 3.6.3 calibrating the turbidimeter note: for best accuracy use the same sample cell or four matched sample cells for all measurements during calibration. Always insert the cell so the orientation mark placed on the cell during the matching procedure is correctly aligned. (see...
Page 45: Section 3
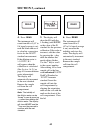
45 section 3, continued 4. Press: read the instrument will count from 60 to 0, (67 to 0 if signal average is on), read the blank and use it to calculate a correction factor for the 20 ntu standard measurement. If the dilution water is ≥ 0.5 ntu, e 1 will appear when the calibration is calculated (se...
Page 46: Section 3
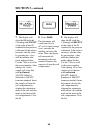
46 section 3, continued 7. The display will show the s2 (with the 2 flashing) and 100 ntu or the value of the s2 standard for the previous calibration. If the value is incorrect, edit the value by pressing the → key until the number that needs editing flashes. Use the ↑ key to scroll to the correct ...
Page 47: Section 3
47 section 3, continued 10. Press: read the instrument will count from 60 to 0 (67 to 0 if signal average is on), measure the turbidity and store the value. Then the display will increment back to the s0 display. Remove the sample cell from the cell compartment. 11. Press: cal to accept the calibrat...
Page 48: Section 3
48 section 3, continued notes • if the i/o key is pressed during calibration, the new calibration data is lost and the old calibration will be used for measurements. Once in calibration mode, only the read, i/o, ↑, and → keys function. Signal averaging and range mode must be selected before entering...
Page 49: Section 3
49 section 3, continued 3.6.3.2 calibrating with user-selected standards note: for best accuracy use the same sample cell or four matched sample cells for all measurements during calibration. Always insert the sample cell with the same orientation. 1. Fill a clean sample cell to the line (about 15 m...
Page 50: Section 3
50 section 3, continued 4. Press: read . The instrument will count from 60 to 0 (67 to 0 if signal average is on), measure the blank and use it to calculate a correction factor for the lowest standard. If the dilution water is ≥0.5 ntu, e 1 will appear (see section 3.6.2.3 on page 41 for more diluti...
Page 51: Section 3
51 section 3, continued 7. Edit the standard concentration by pressing →. The 1 will stop flashing and the left digit in the display will flash. Press ↑ to scroll the digit up to the appropriate number. Press → again to move the cursor to the next digit and edit it in the same manner. 8. When all th...
Page 52: Section 3
52 section 3, continued 10. The display will show the s2 icon (with the 2 flashing) and 100 ntu or the value of the s2 standard for the previous calibration. 11. Edit the standard concentration by pressing →. The 2 will stop flashing and the left digit in the display will flash. Press ↑ to scroll th...
Page 53: Section 3
53 section 3, continued 16. When all the digits show the appropriate value, press read . The instrument will count from 60 to 0 (67 to 0 if signal average is on), measure the turbidity and store the value. The instrument will increment back to s0. Remove the sample cell from the cell compartment. 17...
Page 54: Section 3
54 section 3, continued notes • if the i/o key is pressed during calibration, the new calibration data is lost and the old calibration will be used for measurements. Once in calibration mode, only the read, i/o, ↑, and → keys function. Signal averaging and range mode must be selected before entering...
Page 55: Section 3
55 section 3, continued 3.6.4.1 assigning values to gelex standards 1. Calibrate the instrument with formazin. 2. Select automatic range mode using the range key. 3. Thoroughly clean the outside of the gelex vials and apply a thin coating of silicone oil. 4. Place the 0-10 ntu gelex standard in the ...
Page 56: Section 3
56 section 3, continued 3.6.4.2 routine calibration check with gelex standards the 2100p turbidimeter does not require standardization before every measurement as some turbidimeters do. Periodically, as experience dictates, check the instrument calibration using the appropriate gelex secondary stand...
Page 57: Maintenance
Some of the following manual sections contain information in the form of warnings, cautions and notes that require special attention. Read and follow these instructions carefully to avoid personal injury and damage to the instrument. Only personnel qualified to do so, should conduct the maintenance ...
Page 58
58.
Page 59: Section 4 Maintenance
59 section 4 maintenance 4.1 cleaning keep the turbidimeter and accessories as clean as possible and store the instrument in the carrying case when not in use. Avoid prolonged exposure to sunlight and ultraviolet light. Wipe spills up promptly. Wash sample cells with non-abrasive laboratory detergen...
Page 60: Section 4
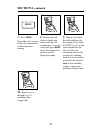
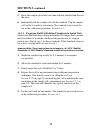
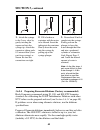
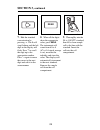
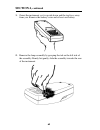
60 section 4, continued 1. Orient the instrument so it is upside down and the top faces away from you. Remove the battery cover and at least one battery. 2. Remove the lamp assembly by grasping the tab on the left side of the assembly. Firmly, but gently, slide the assembly towards the rear of the i...
Page 61: Section 4
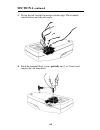
61 section 4, continued 3. Rotate the tab towards the nearest outside edge. The assembly should release and slip out easily. 4. Back the terminal block screws partially out (1 to 2 turns) and remove the old lamp leads..
Page 62: Section 4
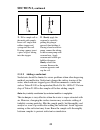
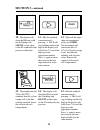
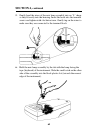
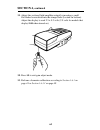
62 section 4, continued 5. Gently bend the wires of the new lamp assembly into an “l” shape so they fit easily into the housing. Insert the leads into the terminal screws and tighten with clockwise turns. Gently tug on the wires to make sure they are connected to the terminal block. 6. Hold the new ...
Page 63: Section 4
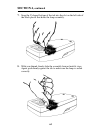
63 section 4, continued 7. Snap the u-shaped bottom of the tab into the slot on the left side of the black plastic that holds the lamp assembly. 8. With your thumb, firmly slide the assembly forward until it stops. Again, push firmly against the tab to make sure the lamp is seated correctly..
Page 64: Section 4
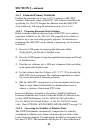
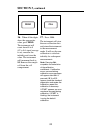
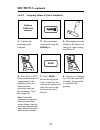
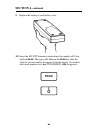
64 section 4, continued 9. Replace the battery(s) and battery cover. 10. Insert the 800 ntu formazin standard into the sample cell. Press and hold read . Then press i/o . Release the read key after the software version number disappears from the display (for models with serial numbers less than 9203...
Page 65: Section 4
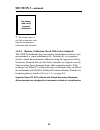
65 section 4, continued 11. Adjust the scattered light amplifier output by inserting a small flat-bladed screwdriver into the trimpot hole (located on bottom). Adjust the display to read 2.5 ± 0.3 volts (2.0 volts for models that display 2100 when turned on). 12. Press i/o to exit gain adjust mode. ...
Page 66
66.
Page 67: Section 5 Troubleshooting
67 section 5 troubleshooting 5.1 using the diagnostic functions key enter the diagnostic mode by pressing the diag key. Exit this mode at any time by pressing the key again. The diagnostic mode allows access to information about instrument function which may be useful for servicing and troubleshooti...
Page 68: Section 5
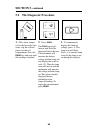
68 section 5, continued 5.2 the diagnostic procedure 1. Fill a clean sample cell to the line with clear water, cap the cell and place it in the cell compartment. Press the read key and wait until the reading is finished. 2. Press: diag the diag icon will turn on and 1 will be displayed below the ico...
Page 69: Section 5
69 section 5, continued 4. Press the ↑ key to scroll through the other diagnostics. Each press of the key increments the digit in the small numerical display below the diag icon and the result of the diagnostic measurement is then displayed. Each press of the read key updates the value. For measurem...
Page 70: Section 5
70 section 5, continued 5.3 other instrument diagnostics 5.3.1 display test pressing and holding the i/o key turns on all the display icons and elements so you can determine if all the elements and icons are functioning. The display test sequence will cycle as long as the key is held down. 5.4 error...
Page 71: Section 5
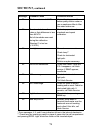
71 section 5, continued message* probable cause corrective action e1 dilution water is ≥ 0.5 ntu. Start calibration over with better quality dilution water or use a membrane filter to filter the water before use. E2 two standards have the same value or their difference is less than 60 ntu. Not all s...
Page 72
72.
Page 73: General Information
At hach company, customer service is an important part of every product we make. With that in mind, we have compiled the following information for your convenience. 73 general information.
Page 74: Replacement Parts
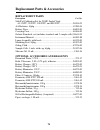
74 replacement parts & accessories replacement parts description cat. No. Stablcal calibration set for 2100p, sealed vials: aa batteries, 4/pkg .................................................................. 19380-04 battery door ......................................................................
Page 75: Continued
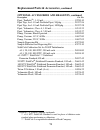
75 replacement parts & accessories, continued optional accessories and reagents, continued description cat. No. Pipet, tensette ® *, 1-10 ml...................................................... 19700-10 pipet tips, for 1-10 ml tensette pipet, 50/pkg ....................... 21997-96 pipet tips, for ...
Page 76: How To Order
76 how to order information required technical and customer service (u.S.A. Only) hach technical and customer service department personnel are eager to answer questions about our products and their use. Specialists in analytical methods, they are happy to put their talents to work for you. Call 1-80...
Page 77: Repair Service
77 repair service authorization must be obtained from hach company before sending any items for repair. Please contact the hach service center serving your location. In the united states: hach company 100 dayton avenue ames, iowa 50010 (800) 227-4224 (u.S.A. Only) telephone: (515) 232-2533 fax: (515...
Page 78: Warranty
78 warranty hach warrants most products against defective materials or workmanship for at least one year from the date of shipment; longer warranties may apply to some items. Hach warrants to the original buyer that hach products will conform to any express written warranty given by hach to the buye...

