- DL manuals
- Hach
- Measuring Instruments
- sc100 1720E
- Instrument Manual
Hach sc100 1720E Instrument Manual
Summary of sc100 1720E
Page 1
Catalog number 60100-18 hach sc100™ 1720e analysis system instrument manual 11/03 2ed © hach company, 2003. All rights reserved. Printed in the u.S.A. Ds/dp.
Page 2: Table Of Contents
2 table of contents section 1 specifications ............................................................................................................................................... 4 section 2 general information ..................................................................................
Page 3: Table Of Contents
Table of contents 3 section 5 system startup ........................................................................................................................................... 40 5.1 general operation .............................................................................................
Page 4: Section 1
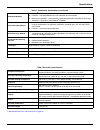
4 section 1 specifications specifications are subject to change without notice. Table 1 turbidimeter specifications method of detection nephelometric light scatter at 90 degrees relative to the incident light beam. The incident light beam is composed of a tungsten filament light source with a color ...
Page 5
Specifications 5 calibration methods 1. Stablcal ® (stabilized formazin) – primary or wet calibration of the instrument 2. Formazin – user-prepared primary or wet calibration of the instrument 3. Multi-sensor calibration – performed with a specialized calibration procedure for up to eight sensors on...
Page 6: Section 2
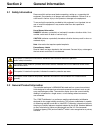
6 section 2 general information 2.1 safety information please read this entire manual before unpacking, setting up, or operating this equipment. Pay attention to all danger and caution statements. Failure to do so could result in serious injury to the operator or damage to the equipment. To ensure t...
Page 7
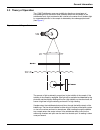
General information 7 2.3 theory of operation the 1720e turbidimeter measures turbidity by directing a strong beam of collimated light from the sensor head assembly down into the sample in the turbidimeter body. Light scattered at 90° relative to the center line of incident light by suspended partic...
Page 8: Section 3
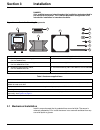
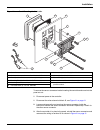
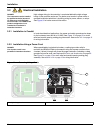
8 section 3 installation danger only qualified personnel should conduct the installation tasks described in this section of the manual. The 1720e/sc100 product configuration is not intended for installation in hazardous locations. Figure 2 controller mounting components 3.1 mechanical installation i...
Page 9
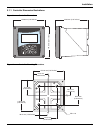
Installation 9 3.1.1 controller dimension illustrations figure 3 controller dimensions figure 4 controller mounting dimensions sc100 144.0 mm (5.67 inches) 150.0 mm (5.91 inches) 144.0 mm (5.67 inches) 80.27 mm (3.16 inches) 144.02 mm (5.67 inches) 80.27 mm (3.16 inches) 144.02 mm (5.67 inches) 72.0...
Page 10
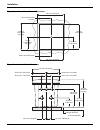
10 installation figure 5 panel mount cut-out dimensions figure 6 conduit hole dimensions 133 mm 5.25 inches 144 mm 5.67 inches (ref only) 135 mm 5.31 inches 144 mm 5.67 inches (ref only) 67.4 mm 2.65 inches 72 mm 2.835 inches (ref only) 66.67 mm 2.625 inches 75 mm 2.955 inches (ref only) 6.35 mm 0.2...
Page 11
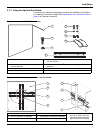
Installation 11 3.1.2 using the optional sun shield the optional sun shield was designed to increase the readability of the display by screening it from direct sunlight. See replacement parts and accessories on page 55 for ordering information. Figure 7 sun shield kit components figure 8 mounting th...
Page 12
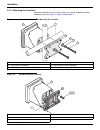
12 installation 3.1.3 mounting the controller attach the controller to a rail or wall or mount it in a panel. Supplied mounting hardware is shown in figure 9 , figure 10 , and figure 11 . Figure 9 vertical or horizontal pipe mounting the controller figure 10 wall mounting the controller 1. Controlle...
Page 13
Installation 13 figure 11 panel mounting the controller to remove the sensor connectors before inserting the controller enclosure into the panel cut-out: 1. Disconnect power to the controller. 1. Disconnect the wires at terminal block j5, see figure 21 on page 21 . 2. Loosen and remove the nut secur...
Page 14
14 installation 3.2 electrical installation danger the instrument must be installed by qualified technical personnel for adherence to all applicable electrical codes. The 1720e/sc100 product configuration is not intended for installation in hazardous locations. High-voltage wiring for the controller...
Page 15
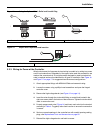
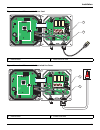
Installation 15 figure 13 using the optional strain relief and conduit plug figure 14 proper wire preparation and insertion 3.2.3 wiring for power at the controller wire the instrument for line power by hard-wiring in conduit or by wiring to a power cord if local code allows. Regardless of the type ...
Page 16
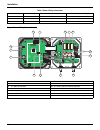
16 installation figure 15 wiring connections table 4 power wiring information terminal number terminal description wire color code for north america wire color code for europe 1 hot (l1) black brown 2 neutral (n) white blue 3 protective earth (pe) green green w/yellow tracer 1. J1—network connector ...
Page 17
Installation 17 figure 16 local disconnect for power cord figure 17 local disconnect for hard-wired line power 1. Power terminal 2. Power cord strain relief 1. Power terminal 2. Conduit strain relief nc nc nc com com com no f1 f2 no no relay c relay c relay b relay a j1 j2 j4 network interface card ...
Page 18
18 installation 3.3 alarms and relays the controller is equipped with three unpowered relays rated 100–230 v ac, 50/60 hz, 5 amp resistive maximum. 3.3.1 connecting the relays the relay connector accepts 18–12 awg wire (as determined by load application). Wire gauge less than 18 awg is not recommend...
Page 19
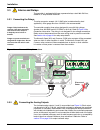
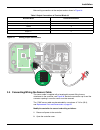
Installation 19 make wiring connections at the analyzer end as shown in figure 19 . Figure 19 analog output connections 3.4 connecting/wiring the sensor cable the sensor cable is supplied with a keyed quick-connect fitting for easy attachment to the controller, see figure 20 . Retain the connector c...
Page 20
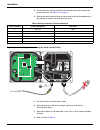
20 installation 3. Disconnect and remove the existing wires between the quick connect and terminal block j5, see figure 21 on page 21 . 4. Remove the quick connect fitting and wires and install the threaded plug on the opening to maintain the environmental rating. Figure 20 attaching the sensor usin...
Page 21
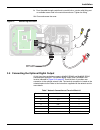
Installation 21 9. Pass the cable through conduit and a conduit hub or a strain relief fitting and an available access hole in the controller enclosure. Tighten the fitting. 10. Close and secure the cover. Figure 21 hard-wiring the sensor 3.5 connecting the optional digital output at this time, the ...
Page 22
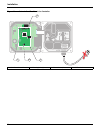
22 installation figure 22 network card position in the controller 1. J2—network card header 2. Mounting hole (3) 3. Network card placement 4. J1 terminal nc nc nc com com com no f1 f2 no no relay c relay b relay a j1 j2 j4 s1 network interface card j3 j5 j6 u5 u9 1 1 + data + data + out 2 + out 2 – ...
Page 23
Installation 23 figu re 23 1 720 e dimens ion s power status 127.8 mm (5.0 inches) 255.3 mm (11.05 inches) 217.2 mm (8.55 inches) 143.2 mm (5.64 inches) 40.6 mm (1.60 inches) 72.04 mm (2.84 inches) 107.95 mm (4.25 inches) 343.67 mm (13.53 inches) 19.72 mm (0.78 inches) 238.35 mm (9.38 inches) 312.48...
Page 24
24 installation 3.6 turbidimeter installation information the turbidimeter body is designed for wall-mounting (although it may be mounted on the optional floor stand). The turbidimeter sensor must be mounted within six feet of the controller unless an extension cable is used. Maximum cable length is...
Page 25
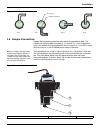
Installation 25 figure 24 sampling techniques 3.8 sample connections sample inlet and drain connections are made on the turbidimeter body. The sample inlet fitting installed in the body is a ¼-inch npt x ¼-inch compression fitting. One additional fitting supplied with the instrument is a ½-inch npt-...
Page 26: Section 4
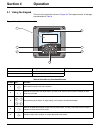
26 section 4 operation 4.1 using the keypad the front of the controller is shown in figure 26 . The keypad consists of the eight keys described in table 8 . Figure 26 front of the controller 1. Instrument display 4. Right, left, up, and down keys 7. Enter key 2. Back key 5. Irda (infrared data acqui...
Page 27: 0.023
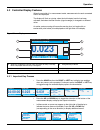
Operation 27 4.2 controller display features when the controller is in measurement mode, measurements for each connected sensor are displayed. The display will flash on startup, when the hold outputs function has been activated, and when the filter function (signal average) is changed to a different...
Page 28
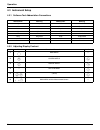
28 operation 4.3 instrument setup 4.3.1 software text abbreviation conventions 4.3.2 adjusting display contrast abbreviation meaning abbreviation meaning adj adjust p/f pass/fail cal calibration pass password cont. Continue preped prepared cyl cylinder sn serial number dflt default std standard diag...
Page 29
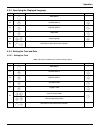
Operation 29 4.3.3 specifying the displayed language 4.3.4 setting the time and date 4.3.4.1 setting the time note: the time is available only in 24-hour (military) format. Step select menu level/instructions confirm 1 main menu — 2 system setup 3 display setup 4 language 5 select language 6 main me...
Page 30
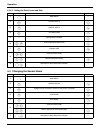
30 operation 4.3.4.2 setting the date format and date 4.4 changing the sensor name step select menu level/instructions confirm 1 main menu — 2 system setup 3 display setup 4 set date/time 5 — highlight date format 6 choose appropriate date format 7 highlight date 8 select character to edit — choose ...
Page 31
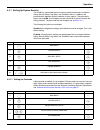
Operation 31 4.4.1 setting up system security the sc100 has a passcode feature to restrict unauthorized access to network setup, security setup, log setup, and test/maint menus. In addition, the passcode also regulates function selection for relay options. The passcode is factory set to sc100 (the f...
Page 32
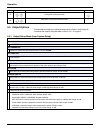
32 operation 4.5 output options the controller provides two isolated analog outputs (output 1 and output 2). Customize the outputs using the table in section 4.5.1 on page 32 . 5 change the existing passcode 6 main menu or main measurement screen — step select menu level/instructions confirm 4.5.1 o...
Page 33
Operation 33 4.5.2 hold/transfer outputs when cleaning or servicing the instrument, the analog outputs can be held at the last measured values. To hold the output until released: during calibration, the analog outputs can remain active, be held, or be transferred to a preset ma value. When output ho...
Page 34
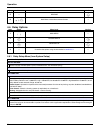
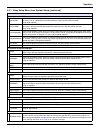
34 operation 4.6 relay options 5 — release 6 main menu or main measurement screen — step select menu level confirm 1 main menu — 2 system setup 3 relay setup 4 — customize the options using the information in section 4.6.1 — 4.6.1 relay setup menu (from system setup) 1. Select relay a, b, or c selec...
Page 35
Operation 35 activation function set to alarm low alarm sets the value where the relay will turn on in response to decreasing measured value. For example: if the low alarm is set for 1.0 and the measured value drops to 0.9, the relay will be activated. Range: 0.00–100 ntu high alarm sets the value w...
Page 36
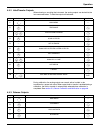
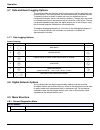
36 operation 4.7 data and event logging options the sc100 provides two data logs (one for each sensor) and two event logs (one for each sensor). The data logs store the measurement data at selected intervals. The event log stores a variety of events that occur on the devices such as configuration ch...
Page 37
Operation 37 4.9.2 sensor setup menu calibrate select sensor (if more than one sensor is attached) user prepd cal calibration using 4000 ntu stock solution diluted to 20.00 ntu formazin. Stablcal cal calibration using 20 ntu stablcal stabilized formazin standard verification perform a verification, ...
Page 38
38 operation relay setup (see section 4.6 on page 34 for expanded menu information.) select relay a, b, or c select source select from none, any connected sensor, or the real time clock (rtc). Set parameter press enter to select from the displayed parameters. Set function select from the available o...
Page 39
Operation 39 overfeed reset reset the overfeed time out. Test output select output 1 or 2 user selectable ma value. 0–20 ma test relay select relay a, b, or c energize or de-energize the selected relay. Reset config reset to default configuration of the controller simulation select source, set param...
Page 40: Section 5
40 section 5 system startup 5.1 general operation plug the sensor into the unpowered controller by aligning the orientation tab on the cable connector with the channel in the controller connector. Push in and turn to secure the connection. Tug gently to check the connection. After all plumbing and e...
Page 41
System startup 41 • always clean the turbidimeter body or calibration cylinder per the instructions in section 6.4.3 on page 48 . Rinse with deionized water before calibrating. • store the calibration cylinder upside-down to minimize contamination between calibrations. • pour the calibration standar...
Page 42
42 system startup note: if a dry verification is performed directly after a calibration, the measured value is assigned as the expected value for future verifications (when using the dry verification device with the same serial number). As long as the verification exists within the verification hist...
Page 43
System startup 43 note: if a dry verification is performed directly after a calibration, the measured value is assigned as the expected value for future verifications (when using the dry verification device with the same serial number). As long as the verification exists within the verification hist...
Page 44
44 system startup two types of verifications are offered. The dry verification is performed using a “dry” calibration device such as the icepic™. A wet verification is performed using a standard with a predetermined value such as stablcal ® stabilized formazin or a user-prepared standard with a valu...
Page 45
System startup 45 5.4.2 wet verification before starting the verification, read and apply the appropriate tips in section 5.3 on page 40 . Step select menu level/instructions confirm 1 main menu — 2 sensor setup 3 — calibrate 4 verification 5 — perform ver 6 output mode choose active, hold, transfer...
Page 46
46 system startup 5.5 calibration and verification history the calibration and verification history logs contain information on the last 12 calibrations and the last 12 verifications. The calibration history log shows the gain value, the time and date of the calibration, and the initials of the oper...
Page 47: Section 6
47 section 6 maintenance danger only qualified personnel should conduct the maintenance tasks described in this section of the manual. 6.1 maintenance schedule scheduled periodic maintenance requirements of the 1720e are minimal and include calibration and cleaning of the photocell window, bubble tr...
Page 48
48 maintenance 6.4 cleaning 6.4.1 cleaning the controller with the enclosure securely closed, wipe the exterior with a damp cloth. 6.4.2 cleaning the photocell window occasional cleaning of the photocell window is required. The frequency will depend on the nature and concentration of dissolved and s...
Page 49
Maintenance 49 5. Restore sample flow to the instrument. 6. Calibrate the instrument using one of the methods in section 5.3 on page 40 . If the above cleaning procedures have been performed and the turbidimeter readings are still noisy, the bottom plate and gasket may need to be removed and cleaned...
Page 50
50 maintenance a. Wear cotton gloves to protect your hands and to avoid fingerprints on the bulb. B. Grasp the bulb. C. Twist the bulb in a counterclockwise direction, pulling out slightly, until it is released from the housing. D. Pull the lamp leads and connector through the hole in the lamp housi...
Page 51
Maintenance 51 6.5 fuse replacement the controller contains two mains fuses. Failed fuses are an indication that an equipment problem could exist. Problem resolution and fuse replacement should only be performed by qualified service personnel. Refer to figure 29 and perform the following steps to re...
Page 52: Section 7
52 section 7 troubleshooting 7.1 error codes when a sensor is experiencing an error condition, the sensor reading on the measurement screen will flash and all relays and analog outputs associated with the sensor will be held. Highlight the probe diag menu and press enter. Highlight errors and press ...
Page 53
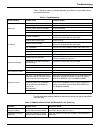
Troubleshooting 53 table 11 presents sensor warnings displayed in the event log, possible causes, and corrective actions. The following table presents additional malfunctions which may not be recorded in the event log. Table 11 troubleshooting sensor warning possible cause corrective action bad lamp...
Page 54
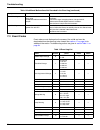
54 troubleshooting 7.3 event codes event codes are not displayed on the screen of the sc100 and must be downloaded from the event log to be viewed. See section 4.7 on page 36 for additional information. Troubleshooting actions are given in section table 11 on page 53 . Erratic readings calibration s...
Page 55: Section 8
55 section 8 replacement parts and accessories replacement items item cat. No. Fuse, t, 1.6 a, 250 v .......................................................................................................................................... 52083-00 instruction manual, sc100 controller, english ........
Page 56
56 replacement parts and accessories calibration and verification standards and accessories item qty cat. No. Calibration cylinder....................................................................................................................Each.................44153-00 formazin calibration sta...
Page 57: Section 9
57 section 9 how to order u.S.A. Customers by telephone: 6:30 a.M. To 5:00 p.M. Mst monday through friday (800) 227-hach (800-227-4224) by fax: (970) 669-2932 by mail: hach company p.O. Box 389 loveland, colorado 80539-0389 u.S.A. Ordering information by e-mail: orders@hach.Com 9.1 information requi...
Page 58: Section 10
58 section 10 repair service authorization must be obtained from hach company before sending any items for repair. Please contact the hach service center serving your location. In the united states: hach company ames service 100 dayton avenue ames, iowa 50010 (800) 227-4224 (u.S.A. Only) fax: (515) ...
Page 59: Section 11
59 section 11 limited warranty hach company warrants its products to the original purchaser against any defects that are due to faulty material or workmanship for a period of one year from date of shipment unless otherwise noted. In the event that a defect is discovered during the warranty period, h...
Page 60: Section 10
60 section 10 compliance information hach co. Certifies this instrument was tested thoroughly, inspected and found to meet its published specifications when it was shipped from the factory. The model sc100 with 1720e sensor has been tested and is certified as indicated to the following instrumentati...
Page 61
Compliance information 61 additional emissions standard/s include: en 55011 (cispr 11) class “a” emission limits canadian interference-causing equipment regulation, iecs-003, class a supporting test records by hewlett packard, fort collins, colorado hardware test center (a2la # 0905-01) and certifie...
Page 62: Appendix A
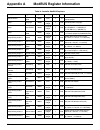
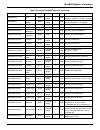
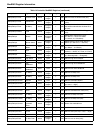
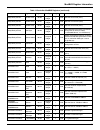
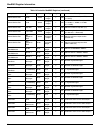
62 appendix a modbus register information table 14 controller modbus registers group name tag name register # data type length r/w description measurements calculated value 40001 float 2 r value calculated from two sensor measurements setup language 40003 unsigned integer 1 r/w current system langua...
Page 63
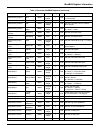
Modbus register information 63 setup/analog output 2 type 40031 unsigned integer 1 r/w selects output type (0 = linear output; 1 = pid control) setup/analog output 2 transfer value 40032 float 2 r/w sets the transfer value setup/analog output 2 filter 40034 unsigned integer 1 r/w sets the output fil...
Page 64
64 modbus register information setup/relay 1/control phase 40067 unsigned integer 1 r/w sets the controller phase (0 = low; 1 = high) setup/relay 1/control deadband 40068 float 2 r/w sets the controller deadband setup/relay 1/control overfeed timer 40070 unsigned integer 1 r/w sets the overfeed time...
Page 65
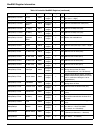
Modbus register information 65 setup/relay 2 type 40093 unsigned integer 1 r/w selects the relay type (0 = alarm; 1 = control; 2 = status; 3 = timer; 4 = event) setup/relay 2 transfer setting 40094 unsigned integer 1 r/w selects the transfer value for the relays (0 = de-energized; 1 = energized) set...
Page 66
66 modbus register information setup/relay 2/timer duration time 40126 unsigned integer 1 r/w sets the timer on duration time (sec) setup/relay 2/timer period time 40127 unsigned integer 1 r/w sets the period between timer on events (mins) setup/relay 2/timer off delay 40128 unsigned integer 1 r/w s...
Page 67
Modbus register information 67 setup/relay 3/event on min time 40160 unsigned integer 1 r/w sets the min on time (mins) setup/relay 3/event off max time 40161 unsigned integer 1 r/w sets the max off time (mins) setup/relay 3/event off min time 40162 unsigned integer 1 r/w sets the min off time (mins...
Page 68
68 modbus register information comm/service port mode 40185 unsigned integer 1 r/w sets the modbus mode (0 = rtu; 1 = ascii) comm/service port baud 40186 unsigned integer 1 r/w sets the modbus baud rate (0 = 9600; 1 = 19200; 2 = 38400; 3 = 57600; 4 = 115200) comm/service port stop bits 40187 unsigne...
Page 69
Modbus register information 69 table 15 sensor modbus registers group name tag name register # data type length r/w units (u) range measurements cal gain 40013 float 2 r none 0.5 to 2.0 verification pf criteria 40062 integer 1 r/w — — measurements turbidity 40001 float 2 r ntu 0/100 diagnostics temp...
Page 70: Index
70 index numerics 90 degree detector ....................................................... 7 a accuracy ........................................................................ 4 alarms ......................................................................... 18 analog outputs .......................
Page 71
Index 71 sample line installation .............................................. 24 security passcode .............................................................. 31 setup ............................................................... 31 , 38 system ..................................................
Page 72
Visit http: //www.Hach.Com.

