- DL manuals
- Hach
- Accessories
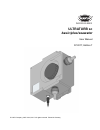
- ULTRATURB sc
- User Manual
Hach ULTRATURB sc User Manual
Summary of ULTRATURB sc
Page 1
Doc023.53.03231 ultraturb sc basic/plus/seawater user manual 07/2017, edition 7 © hach company, 2007–2010, 2017. All rights reserved. Printed in germany.
Page 3: Table of Contents
3 table of contents section 1 specifications .............................................................................................................................................. 5 1.1 dimensions...................................................................................................
Page 4
4 table of contents.
Page 5: Section 1
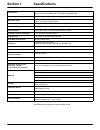
5 section 1 specifications specifications are subject to change without notice. Components microprocessor-controlled turbidity bypass sensor ultraturb sc for very low to medium turbidities with comprehensive self-diagnostics measuring technique 90° infrared pulse scattered light technique in accorda...
Page 6
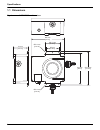
6 specifications 1.1 dimensions fig. 1 ultraturb sc dimensions 105.15 mm [4.14 in] 221 mm [8.7 in] 216 mm [8.5 in] 233,4 mm [9.19 in] 111 mm [4.37 in] 85 mm [3.35 in] Ø 5.4 mm [0.21 in] Ø 5.4 mm [0.21 in].
Page 7: Section 2
7 section 2 general information 2.1 safety information please read this entire manual before unpacking, setting up or operating this equipment. Pay attention to all danger and caution statements. Failure to do so could result in serious injury to the operator or damage to the equipment. To ensure th...
Page 8
8 general information 2.2 applications ultraturb sc bypass sensors are innovative precision turbidity measuring instruments developed using the latest technical findings. Ultraturb sc bypass sensos are developed primary for waste and drinking water applications. The very robust seawater version is d...
Page 9
General information 9 2.5 items supplied • ultraturb sc sensor • connecting cable (length as per order) • user manual • factory test certificate • accessory set lzp816 • wiper set (for 4 changes) lzv275 (only plus and seawater version) 2.6 function check after unpacking, all components should be che...
Page 10
10 general information.
Page 11: Section 3
11 section 3 installation danger installation may only be carried out by qualified experts in accordance with all local safety regulations. 3.1 assembling select an appropriate installation location for the instrument to guarantee • safe installation • safe operation • problem-free maintenance plan ...
Page 12
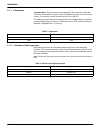
12 installation 3.1.1 connectors important note: the instrument can be damaged if the connectors and/or the union nuts are attached too tightly. Only hand-tighten the union nuts for the hose mounts. If necessary, hold the connectors with a tool (sw 22). The measuring instrument can be integrated int...
Page 13
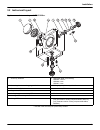
Installation 13 3.2 instrument layout fig. 3 instrument layout ultraturb sc * included in the accessory set (connection) lzp816 1. Screw top, hrr195 8. Diaphragm plate* (if necessary) hrs185: 1.2 mm hrs186: 2 mm hrs187: 3 mm 2. Measuring chamber sealing plug, had087 9. Tubing nipple* (Ø 13 mm), hxa0...
Page 14
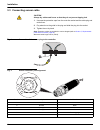
14 installation 3.3 connecting sensor cable caution always lay cables and hoses so that they do not pose a tripping risk. 1. Unscrew the protective caps from the controller socket and the cable plug and retain them. 2. Pay attention to the guide in the plug and slide the plug into the socket. 3. Tig...
Page 15: Section 4
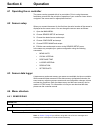
15 section 4 operation 4.1 operating the sc controller the sensor can be operated with all sc controllers. Prior to using the sensor, familiarise yourself with the principle of operation of your controller. Learn how to navigate in the menus and run appropriate functions. 4.2 sensor setup when you c...
Page 16
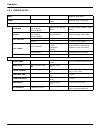
16 operation 4.4.2 sensor setup wipe initiates a wiping action verify verification using cvm module verification with dry standard calibrate standard selection as per cal. Config output mode calibration with standard solution procedure during calibration, menu based offset selection as per cal. Conf...
Page 17
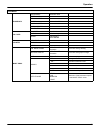
Operation 17 test/maint probe info ultraturbsc instrument name edited name serial number range 0.001 ... 1000 fnu model number item no. Sensor software vers sensor software driver vers cal. Data cal. Date date of the last calibration factor default setting 1.00 offset default setting 0.000 trbfnu co...
Page 18
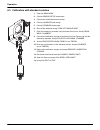
18 operation 4.5 calibration with standard solution 1. Open the main menu. 2. Choose sensor setup and accept. 3. Choose the related sensor and accept. 4. Choose calibrate and accept. 5. Choose standard and accept. 6. Shut-off the feed and accept turn off sample inlet. 7. Drain the measuring chamber ...
Page 19
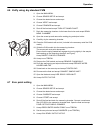
Operation 19 4.6 verify using dry standard cvm 1. Open the main menu. 2. Choose sensor setup and accept. 3. Choose the related sensor and accept. 4. Choose verify and accept. 5. Choose standard and accept. 6. Shut-off the feed and accept turn off sample inlet. 7. Drain the measuring chamber via the ...
Page 20
20 operation.
Page 21: Section 5
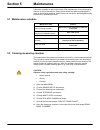
21 section 5 maintenance it has been possible to reduce the scope of the maintenance to be performed by the user to only a few actions. Clearly summarised in a table and described in detail in the following sections, these actions can be quickly and straightforwardly performed by qualified personnel...
Page 22
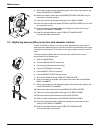
22 maintenance 9. Remove the screw top and the sealing plug for the measuring chamber and accept open meas. Chamber. 10. Remove the wiper holder and accept remove wiper holder (only for plus and for seawater version). 11. Clean the measuring chamber and accept cln. Meas chamb. 12. Re-fit the wiper h...
Page 23
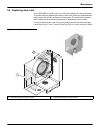
Maintenance 23 5.4 replacing desiccant the ultraturb sc turbidity sensor is continuously subject to a wet environment. To provide protection against the moisture, there are 2 generously sized desiccant bags close to the optical and electronic components. To maintain this protection, the manufacturer...
Page 24
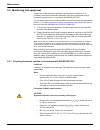
24 maintenance 5.5 monitoring test equipment as part of a quality assurance system for test equipment monitoring, it is necessary to check the instrument calibration; this can be performed using a formazine standard series in accordance with din en iso 7027. You can either make up the formazine solu...
Page 25
Maintenance 25 the turbidity of this parent solution is 400, stated in formazine attenuation units (fau) or formazine nephelometric units (fnu). This solution can be stored in a dark place at 25 °c (±3 °c) (77 °f (± 5.4 °f)) for around 4 weeks. Formazine reference solution dilute the parent solution...
Page 26
26 maintenance.
Page 27: Section 6
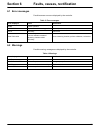
27 section 6 faults, causes, rectification 6.1 error messages possible sensor errors are displayed by the controller. 6.2 warnings possible warning messages are displayed by the controller. Table 3: error messages error displayed cause rectification none correct operation wiper pos. Wiper not is cor...
Page 28
28 faults, causes, rectification.
Page 29: Section 7
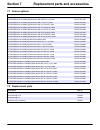
29 section 7 replacement parts and accessories 7.1 sensor options description cat. No. Ultraturb basic sc turbidity bypass sensor without cable lpv415.99.01001 ultraturb basic sc turbidity bypass sensor with 0.35 m (1.1 ft.) cable lpv415.99.11001 ultraturb basic sc turbidity bypass sensor with 1 m (...
Page 30
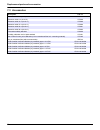
30 replacement parts and accessories 7.3 accessories description cat. No. Extention cable 1 m (3.3 ft.) 6122400 extention cable 5 m (16.40 ft.) lzx848 extention cable 10 m (32.81 ft.) lzx849 extention cable 15 m (49.21 ft.) lzx850 extention cable 20 m (65.62 ft.) lzx851 extention cable 30 m (98.43 f...
Page 31: Section 8
31 section 8 limited warranty hach company warrants its products to the original purchaser against any defects that are due to faulty material or workmanship for a period of one year from date of shipment unless otherwise noted in the product manual. In the event that a defect is discovered during t...
Page 32
32 limited warranty.
Page 33: Section 9
33 section 9 contact hach company world headquarters p.O. Box 389 loveland, colorado 80539-0389 u.S.A. Tel (800) 227-hach (800) -227-4224 (u.S.A. Only) fax (970) 669-2932 orders@hach.Com www.Hach.Com repair service in the united states: hach company ames service 100 dayton avenue ames, iowa 50010 te...
Page 34
34 contact hach lange d.O.O. Fajfarjeva 15 si-1230 domžale tel. +386 (0)59 051 000 fax +386 (0)59 051 010 info@hach-lange.Si www.Hach-lange.Si ΗΑ ch lange e. Π . Ε . Αυλίδος 27 gr-115 27 Αθήνα Τηλ . +30 210 7777038 fax +30 210 7777976 info@hach-lange.Gr www.Hach-lange.Gr hach lange e.P.E. 27, avlido...
Page 35: Appendix A
35 appendix a modbus register information table 5: sensor modbus registers group name register # data type length r/w description measurement 40001 float 2 r diplayed measurement value unit 40003 unsigned integer 1 r/w unit parameter 40004 unsigned integer 1 r/w parameter reserved 40005 unsigned int...
Page 36
36 modbus register information user_cal_int 40082 integer 1 r/w user cal int cal_out_cfg 40083 integer 1 r/w cal. Output mode meas_mode 40084 integer 1 r/w measure mode meas_val_format 40085 integer 2 r measurement format meas_prec 40087 integer 1 r/w measurement precesion logger_int 40088 integer 1...
Page 37
Modbus register information 37.
Page 38
38 modbus register information.

