- DL manuals
- Lauda
- Thermometer
- DCS2
- Operating Instructions Manual
Lauda DCS2 Operating Instructions Manual
Summary of DCS2
Page 1
Lauda dr. R. Wobser gmbh & co. Kg p.O.Box 1251 germany 97912 lauda-königshofen valid from serie b02 09/03 yame0017 phone: (+49) (0)9343/ 503-0 fax : +49) (0)9343/ 503-222 e-mail info@lauda.De internet http://www.Lauda.De operating instruction digical digital thermometer dcs 2.
Page 3
Digical dcs 2 yame0017/ 09.10.03 safety notes 3 safety notes: before operating the equiqment please read carefully all the instructions and safety notes. If you have any questions please phone us! Follow the instructions on setting up, operation etc. This is the only way to avoid incorrect operation...
Page 4
Digical dcs 2 4 contents yame0017/09.10.03 content 1. Control and functional elements ............................................................................................. 6 2. Handling / introduction ..............................................................................................
Page 5
Digical dcs 2 yame0017/ 09.10.03 explanation of signs 5 explanation of signs: danger: this symbol is used where there may be injury to personnel through incorrect handling. ☞ note: here spezial attention is drawn to some aspect. May include reference to danger. þ reference: refers to additional info...
Page 6
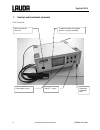
Digical dcs 2 6 control and functional elements yame0017/09.10.03 1. Control and functional elements dcs 2 front view measuring port for channel 2 temperature-measuring probe channel 1 (firmly connected) control panel (keys) on/off - switch righthand adjustable base.
Page 7
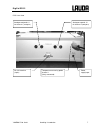
Digical dcs 2 yame0017/ 09.10.03 handling / introduction 7 dcs 2 rear view analogue outlput 0-1v for channel 1 (red=plus) analogue output 0-1v for channel 2 (red=plus) rs 232 interface (9 pins) power supply input temperature measuring probe channel 1 (firmly connected).
Page 8
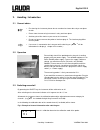
Digical dcs 2 8 handling / introduction yame0017/09.10.03 2. Handling / introduction 2.1 general advice ☞ • for cleaning the instrument please do not use abrasive cleaner but a dry or wet piece of cloth. • please store the measuring instrument in a dry and clean place. • avoid any force like shocks ...
Page 9
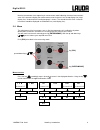
Digical dcs 2 yame0017/ 09.10.03 handling / introduction 9 now the thermometer starts operating in measurement mode indicating the actual measurement value. All instruments display the measurement value of channel 1 on the top display line (large display line). Underneath the trending bargraph is sh...
Page 10
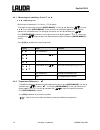
Digical dcs 2 10 handling / introduction yame0017/09.10.03 2.4.1 measuring unit switching °c and °f - tlhr tlhr = measuring unit measuring unit temperature (°c=celsius, °f=fahrenheit). To change the measuring unit press [enter/menue]. Use the up and down keys [ ] to select tlhr . Press again [enter/...
Page 11
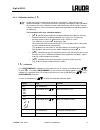
Digical dcs 2 yame0017/ 09.10.03 handling / introduction 11 2.4.3 calibration function - b@k ☞ despite high quality manufacturing techniques, each probe is slightly different from specified standards. To eliminate inaccuracies caused by exchanging or ageing of probes, the instrument offer easy calib...
Page 12
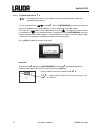
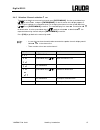
Digical dcs 2 12 handling / introduction yame0017/09.10.03 2.4.3.1 encoded calibration - mo0 ☞ this calibrating function is only needed in case you would add another probe to the second measuring channel. Use the up and down keys [ ] to select mo0 . Press [enter/menue] to confirm the requested setti...
Page 13
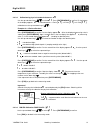
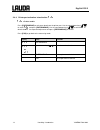
Digical dcs 2 yame0017/ 09.10.03 handling / introduction 13 2.4.3.2 calibration by physical standard references - mo1 use the up and down keys [ ] to select mo1 . Press [enter/menue] to confirm. On the bottom of the display appears 0 o . To select between a 1-point [ 0 o ] , a 2-point [ 1 o ] or 3-p...
Page 14
Digical dcs 2 14 handling / introduction yame0017/09.10.03 2.4.4 printer port activation / deactivation - opdl opdl = printer enable press [enter/menue] to activate or deactivate the printer port. Use the up and down keys [ ] to select opdl and press [enter/menue]. Use the up and down keys [ ] to ac...
Page 15
Digical dcs 2 yame0017/ 09.10.03 handling / introduction 15 2.4.5 selection / channel activation - bgl to activate or deactivate a measuring channel press [enter/menue]. Use the up and down keys [ ] to select bglk and press [enter/menue]. On the left corner of the display appears a small 1, which in...
Page 16
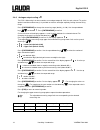
Digical dcs 2 16 handling / introduction yame0017/09.10.03 2.4.6 analogue output scaling- c@b the dcs 2-measuring instrument contains an analogue output (0-1volt) for each channel. To get the optimal resolution and accuracy it is possible to scale the analogue output by limiting the measuring range....
Page 17
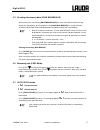
Digical dcs 2 yame0017/ 09.10.03 handling / introduction 17 2.5 recalling the memory data (hold max min ave) after pressing first time the key [hold max min ave] the actual value will be hold on the top display line (big display). Pressing again the key [hold max min ave] the saved maximum-, minimum...
Page 18
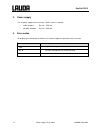
Digical dcs 2 18 power supply / error codes yame0017/09.10.03 3. Power supply for the power supply of the instrument a 9vdc source is required: • 230v; 50/60hz, ref. No. Ebe 042 • 90-260v; 50-60hz, ref. No. Ebe 043 4. Error codes by displaying the following error codes the instrument support the ope...
Page 19
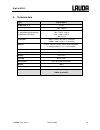
Digical dcs 2 yame0017/ 09.10.03 technical data 19 5. Technical data type: digical dcs 2 probe ports 1 / 2 pt100 measuring range -200...+450°c accuracy pt 100 temperature probe with manufacturer calibration -200...–100°c: 0.05°c -100...+150°c: 0.03°c +150...+200°c: 0.05°c >200°c: 0.1% resolution -20...
Page 20
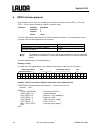
Digical dcs 2 20 rs 232 interface protocol yame0017/09.10.03 6. Rs232 interface protocol during the data transmission, the availability via pc of the the tension levels for rts (=+12v) and dtr (= -12v) must be assured by a software’s regulation code. Parameter: baudrate 2400 baud datenbits 8 stopbit...
Page 21
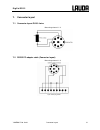
Digical dcs 2 yame0017/ 09.10.03 connector layout 21 7. Connector layout 7.1 connector layout pt100 4-wire measuring channel 1 / 2 7.2 rs232 pc-adapter cable (connector layout) measuring channel 1 / 2.
Page 22
Digical dcs 2 22 data of probe-calibration yame0017/09.10.03 8. Data of probe-calibration our quality-probes are the main reason for the precision and quality of your measuring. To facilitate the exchange of a probe without a losing precision, our probes were measured in our company and added with a...
Page 23
Digical dcs 2 yame0017/ 09.10.03 accessories / ordering spares 23 9. Accessories accessories cat.-no. Pt 100 sheathed resistance probe with 4-wire connection, class b 1/3 din, -200 ... +450°c. The calibration values of this probe are encoded in the lauda calibration code. Probes with a 3mm diameter ...
Page 25
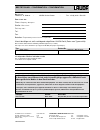
BestÄtigung / confirmation / confirmation formblatt / form / formulaire: unbedenk.Doc erstellt / published / établi: lsc Änd.-stand / config-level / version: 0.1 datum / date: 30.10.1998 lauda dr. R. Wobser gmbh & co. Kg pfarrstraße 41/43 tel: +49 (0)9343 / 503-0 d - 97922 lauda-königshofen fax: +49...

