- DL manuals
- MACROMEDIA
- Other
- DIRECTOR MX 2004-USING DIRECTOR
- Using Manual
MACROMEDIA DIRECTOR MX 2004-USING DIRECTOR Using Manual
Summary of DIRECTOR MX 2004-USING DIRECTOR
Page 1
Using fireworks.
Page 2
Trademarks afterburner, appletace, attain, attain enterprise learning system, attain essentials, attain objects for dreamweaver, authorware, authorware attain, authorware interactive studio, authorware star, authorware synergy, backstage, backstage designer, backstage desktop studio, backstage enter...
Page 3: Contents
3 contents chapter 1: selecting and transforming objects . . . . . . . . . . . . . . . . . . . . . . . . . 7 selecting objects . . . . . . . . . . . . . . . . . . . . . . . . . . . . . . . . . . . . . . . . . . . . . . . . . . . 7 selecting pixels . . . . . . . . . . . . . . . . . . . . . . . . . . ...
Page 4
4 contents chapter 5: applying color, strokes, and fills . . . . . . . . . . . . . . . . . . . . . . . . . . 97 using the colors section of the tools panel . . . . . . . . . . . . . . . . . . . . . . . . . . . . . . 98 organizing swatch groups and color models . . . . . . . . . . . . . . . . . . . ....
Page 5
Contents 5 chapter 12: optimizing and exporting . . . . . . . . . . . . . . . . . . . . . . . . . . . . . . 225 about optimizing . . . . . . . . . . . . . . . . . . . . . . . . . . . . . . . . . . . . . . . . . . . . . . . . 226 using the export wizard. . . . . . . . . . . . . . . . . . . . . . . . ...
Page 6
6 contents.
Page 7: Chapter 1
7 chapter 1 selecting and transforming objects as you work in macromedia fireworks mx 2004, you manipulate vector and bitmap objects, text blocks, slices and hotspots, and areas of pixels. Using the selection and transformation tools, you can move, copy, delete, rotate, scale, or skew objects. In do...
Page 8
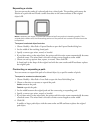
8 chapter 1: selecting and transforming objects using the pointer tool the pointer tool selects objects when you click them or when you drag a selection area around all or part of the objects. To select an object by clicking, do one of the following: • move the pointer tool over the object’s path or...
Page 9
Selecting objects 9 using the select behind tool when working with graphics that contain multiple objects, you can use the select behind tool to select an object that is hidden or obscured by other objects. To select an object that is behind other objects: • click the select behind tool repeatedly o...
Page 10
10 chapter 1: selecting and transforming objects to select everything on every layer in the document: • choose select > select all. Note: select all does not select hidden objects. To deselect all selected objects: • choose select > deselect. Note: you must deselect the single layer editing preferen...
Page 11
Selecting pixels 11 bitmap selection tool options when you choose the marquee, oval marquee, lasso, polygon lasso, or magic wand tool, the property inspector displays three edge options for the tool: hard creates a marquee selection with a defined edge. Anti-alias prevents jagged edges in the marque...
Page 12
12 chapter 1: selecting and transforming objects plotting points to create a marquee selection the polygon lasso tool allows you to select specific pixels in a bitmap image by clicking repeatedly around the perimeter of the pixel area you want to select. To select a polygonal area of pixels: 1 choos...
Page 13
Selecting pixels 13 a marquee appears around the selected range of pixels. Pixels selected with a lower tolerance (above), then a higher tolerance (below) to select similar colors throughout the document: 1 select an area of color with a marquee or lasso tool, or with the magic wand tool. 2 choose s...
Page 14
14 chapter 1: selecting and transforming objects adjusting selection marquees after selecting pixels with a marquee or lasso tool, you can edit or move the marquee border without affecting the pixels beneath it. You can manually add pixels to or delete pixels from a marquee border using modifier key...
Page 15
Selecting pixels 15 creating a marquee from intersecting marquees you can select pixels in an existing marquee by drawing a marquee that overlaps the original. To select a pixel area defined by the intersection of two marquees: 1 hold down alt+shift (windows) or option+shift (macintosh) while creati...
Page 16
16 chapter 1: selecting and transforming objects creating an inverse pixel selection starting with a current pixel selection, you can create another pixel selection that selects all the pixels that are not currently selected. You can use this method to select and then erase all pixels surrounding th...
Page 17
Selecting pixels 17 selecting an area around an existing marquee you can create an additional marquee to frame an existing marquee at a specified width. This lets you create special graphics effects, such as feathering the edges of a pixel selection. To select an area around an existing marquee: 1 a...
Page 18
18 chapter 1: selecting and transforming objects saving and restoring marquee selections you can save the size, shape, and location of a selection to reapply later. To save a marquee selection: • choose select > save bitmap selection. To restore a marquee selection: • choose select > restore bitmap ...
Page 19
Editing selected objects 19 to insert a new bitmap by copying and pasting a pixel selection: 1 select an area of pixels using a pixel selection tool. 2 choose edit > insert > bitmap via copy. A new bitmap object based on the pixel selection is created in the current layer, and the selected pixels re...
Page 20
20 chapter 1: selecting and transforming objects to duplicate a selected object by dragging: • alt-drag (windows) or option-drag (macintosh) the object using the pointer tool. To duplicate a pixel selection, do one of the following: • drag the pixel selection using the subselection tool. • alt-drag ...
Page 21
Transforming and distorting selected objects and selections 21 transforming and distorting selected objects and selections you can transform a selected object or group, or a pixel selection, using the scale, skew, and distort tools and menu commands: when you choose any transformation tool or transf...
Page 22
22 chapter 1: selecting and transforming objects resizing (scaling) objects scaling an object enlarges or reduces it horizontally, vertically, or in both directions. To scale a selected object: 1 do one of the following to display the transform handles: ■ choose the scale tool. ■ choose modify > tra...
Page 23
Transforming and distorting selected objects and selections 23 flipping objects you can flip an object across its vertical or horizontal axis without moving its relative position on the canvas. To flip a selected object: • choose modify > transform > flip horizontal or flip vertical. Skewing objects...
Page 24
24 chapter 1: selecting and transforming objects transforming objects numerically instead of dragging to scale, resize, or rotate an object, you can transform it by entering specific values. To resize selected objects using the property inspector or info panel: • enter new width (w) or height (h) me...
Page 25
Organizing objects 25 grouping objects you can group individual selected objects and then manipulate them as if they were a single object. For example, after drawing the petals of a flower as individual objects, you can group them to select and move the entire flower as a single object. You can edit...
Page 26
26 chapter 1: selecting and transforming objects stacking objects within a layer, fireworks stacks objects based on the order in which they were created, placing the most recently created object on the top of the stack. The stacking order of objects determines how they appear when they overlap. Laye...
Page 27
Organizing objects 27 about arranging objects among layers the layers panel offers another dimension of organizational control. You can move selected objects from one layer to another by dragging the object thumbnail or the blue selection indicator in the layers panel to another layer. For more info...
Page 28
28 chapter 1: selecting and transforming objects.
Page 29: Chapter 2
29 chapter 2 working with bitmaps bitmaps are graphics composed of small colored squares called pixels, which combine like the tiles of a mosaic to create an image. Examples of bitmap graphics include photographs, scanned images, and graphics created from paint programs. They are sometimes referred ...
Page 30
30 chapter 2: working with bitmaps creating bitmap objects you can create bitmap graphics by using the fireworks bitmap drawing and painting tools, by cutting or copying and pasting pixel selections, or by converting a vector image into a bitmap object. Another way to create a bitmap object is to in...
Page 31
Drawing, painting, and editing bitmap objects 31 to convert selected vector objects to a bitmap image, do one of the following: • choose modify > flatten selection. • choose flatten selection from the layers panel options menu. A vector-to-bitmap conversion is irreversible, except when edit > undo o...
Page 32
32 chapter 2: working with bitmaps to change the color of pixels to the color in the fill color box: 1 choose the paint bucket tool. 2 choose a color in the fill color box. 3 set the tolerance value in the property inspector. Note: the tolerance determines how similar in color pixels must be to be f...
Page 33
Drawing, painting, and editing bitmap objects 33 erasing bitmap objects you can use the eraser tool to remove pixels. By default, the eraser tool pointer represents the size of the current eraser, but you can change the size and appearance of the pointer in the preferences dialog box. For more infor...
Page 34
34 chapter 2: working with bitmaps retouching bitmaps fireworks provides a wide range of tools to help you retouch your images. You can alter an image’s size, reduce or sharpen its focus, or copy and “stamp” a part of it to another area. Cloning pixels the rubber stamp tool clones an area of a bitma...
Page 35
Retouching bitmaps 35 to set rubber stamp tool options: 1 choose the rubber stamp tool. 2 choose from among the following options in the property inspector: size determines the size of the stamp. Edge determines the softness of the stroke (100% is hard; 0% is soft). Source aligned affects the sampli...
Page 36
36 chapter 2: working with bitmaps to smudge colors in an image: 1 choose the smudge tool. 2 set the tool options in the property inspector: size specifies the size of the brush tip. Shape sets a round or square brush tip shape. Edge specifies the softness of the brush tip. Pressure sets the intensi...
Page 37
Retouching bitmaps 37 removing red-eye from photos in some photographs, the subjects’ pupils are an unnatural shade of red. You can use the red-eye removal tool to correct this red-eye effect. The red-eye removal tool paints red areas of a photograph only, replacing reddish colors with grays and bla...
Page 38
38 chapter 2: working with bitmaps replacing colors the replace color tool lets you select a color and paint over that color with a different color. Original photograph; after using the replace color tool to replace one color with another: 1 choose the replace color tool from its pop-up menu. 2 clic...
Page 39
Adjusting bitmap color and tone 39 cropping a selected bitmap you can isolate a single bitmap object in a fireworks document and crop only that bitmap object, leaving other objects on the canvas intact. To crop a bitmap image without affecting other objects in the document: 1 select a bitmap object ...
Page 40
40 chapter 2: working with bitmaps you can apply filters from the filters menu to pixel selections, but not live effects. You can, however, define an area of a bitmap and create a separate bitmap from it, and then apply a live effect to it. If you apply a filter to a selected vector object using the...
Page 41
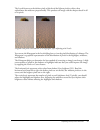
Adjusting bitmap color and tone 41 the levels feature sets the darkest pixels as black and the lightest pixels as white, then redistributes the midtones proportionally. This produces an image with the sharpest detail in all of its pixels. Original with pixels concentrated in the highlights; after ad...
Page 42
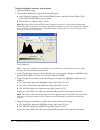
42 chapter 2: working with bitmaps to adjust highlights, midtones, and shadows: 1 select the bitmap image. 2 do one of the following to open the levels dialog box: ■ in the property inspector, click the add effects button, and then choose adjust color > levels from the add effects pop-up menu. ■ cho...
Page 43
Adjusting bitmap color and tone 43 using auto levels you can use auto levels to have fireworks make tonal range adjustments for you. To adjust highlights, midtones, and shadows automatically: 1 select the image. 2 do one of the following to choose auto levels: ■ in the property inspector, click the ...
Page 44
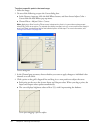
44 chapter 2: working with bitmaps to adjust a specific point in the tonal range: 1 select the image. 2 do one of the following to open the curves dialog box: ■ in the property inspector, click the add effects button, and then choose adjust color > curves from the add effects pop-up menu. ■ choose f...
Page 45
Adjusting bitmap color and tone 45 tip: you can also adjust highlights, midtones, and shadows automatically by clicking the auto button in the curves dialog box. To delete a point along the curve: • drag the point off the grid. Note: you cannot delete the end points of the curve. Using tonal eyedrop...
Page 46
46 chapter 2: working with bitmaps to adjust the brightness or contrast: 1 select the image. 2 do one of the following to open the brightness/contrast dialog box: ■ in the property inspector, click the add effects button, and then choose adjust color > brightness/contrast from the add effects pop-up...
Page 47
Adjusting bitmap color and tone 47 adjusting hue and saturation you can use the hue/saturation feature to adjust the shade of a color, its hue; the intensity of a color, its saturation; or the lightness of a color in an image. Original; after adjusting the saturation to adjust the hue or saturation:...
Page 48
48 chapter 2: working with bitmaps inverting an image’s color values you can use invert to change each color in an image to its inverse on the color wheel. For example, applying the filter to a red object (r=255, g=0, b=0) changes the color to light blue (r=0, g=255, b=255). A monochrome image; afte...
Page 49
Blurring and sharpening bitmaps 49 blurring and sharpening bitmaps fireworks has a set of blurring and sharpening options that you can apply as live effects or as irreversible, permanent filters. Blurring an image blurring softens the look of a bitmap image. Fireworks has six blurring options: blur ...
Page 50
50 chapter 2: working with bitmaps to blur an image using motion blur: 1 select the image. 2 do one of the following to open the motion blur dialog box: ■ in the property inspector, click the add effects button, and choose blur > motion blur from the add effects pop-up menu. ■ choose filters > blur ...
Page 51
Blurring and sharpening bitmaps 51 using the find edges effect to create a sketch look the find edges effect changes your bitmaps to look like line drawings by identifying the color transitions in the images and changing them to lines. Original; after applying find edges to apply the find edges effe...
Page 52
52 chapter 2: working with bitmaps using the sharpen feature to sharpen an image you can use the sharpen feature to correct images that are blurry. Fireworks has three sharpen options: sharpen adjusts the focus of a blurred image by increasing the contrast of adjacent pixels. Sharpen more increases ...
Page 53
Adding noise to an image 53 5 drag the threshold slider to select a threshold of 0 to 255. Values between 2 and 25 are most commonly used. An increase in threshold sharpens only those pixels of a higher contrast in the image. A decrease in threshold includes pixels of lower contrast. A threshold of ...
Page 54
54 chapter 2: working with bitmaps to add noise to an image: 1 select the image. 2 do one of the following to open the add noise dialog box: ■ in the property inspector, click the add effects button, and choose noise > add noise from the add effects pop-up menu. ■ choose filters > noise > add noise....
Page 55: Chapter 3
55 chapter 3 working with vector objects a vector object is a computer graphic whose shape is defined by a path. The shape of a vector path is determined by points that are plotted along the path. A vector object’s stroke color follows the path. Its fill occupies the area inside the path. The stroke...
Page 56
56 chapter 3: working with vector objects to draw a line, rectangle, or ellipse: 1 choose the line, rectangle, or ellipse tool. 2 if desired, set the stroke and fill attributes in the property inspector. See chapter 5, “applying color, strokes, and fills,” on page 97 . 3 drag on the canvas to draw t...
Page 57
Drawing vector objects 57 to round the corners of a selected rectangle: • enter a value from 0 to 100 in the roundness box in the property inspector and press enter, or drag the pop-up slider. Note: if the property inspector is at half height, click the expander arrow in the lower right corner to ex...
Page 58
58 chapter 3: working with vector objects auto shape tools create shapes in preset orientations. For example, the arrow tool draws arrows horizontally. You can transform auto shapes to change their orientation. For more information, see “transforming and distorting selected objects and selections” o...
Page 59
Drawing vector objects 59 adjusting arrow auto shapes arrows have five control points. There are control points for adjusting the flare of the arrowhead, the length of the arrow tail, the length of the arrowhead tip, and the width of the arrow tail. To adjust the flare of an arrowhead: • drag the fl...
Page 60
60 chapter 3: working with vector objects to adjust a single corner of a beveled, chamfered, or rounded rectangle auto shape: • alt-drag (windows) or option-drag (macintosh) a corner control point of a selected shape. To resize a beveled, chamfered, or rounded rectangle auto shape without affecting ...
Page 61
Drawing vector objects 61 to set the inner radius of a selected doughnut to zero: • click the reset radius control point. Adjusting pie auto shapes pie auto shapes initially have three control points. There are control points for dividing the shape into slices, adjusting slice size, and for resettin...
Page 62
62 chapter 3: working with vector objects to resize the inner polygon of a smart polygon, do one of the following: • if the polygon has an inner polygon, drag the inner polygon control point. • if the polygon has no inner polygon, drag the reset inner polygon control point. To reset the inner polygo...
Page 63
Drawing vector objects 63 adding new auto shapes to fireworks you can add new auto shapes to fireworks using the fireworks exchange website. Some new auto shapes will appear in the shapes tab in the assets panel, and others will appear in the tools menu, grouped with the other auto shapes. You can a...
Page 64
64 chapter 3: working with vector objects you can also modify existing brush strokes and add fills to selected objects you have drawn with the vector path tool. The new stroke and fill settings are retained for subsequent use of the vector path tool in the current document. To draw a freeform vector...
Page 65
Drawing vector objects 65 to draw a path with straight line segments: 1 choose the pen tool. 2 if desired, choose edit > preferences and enable any of the following options on the editing tab of the preferences dialog box, then click ok: show pen preview previews the line segment that would result f...
Page 66
66 chapter 3: working with vector objects to draw an object with curved segments: 1 choose the pen tool. 2 click to place the first corner point. 3 move to the location of the next point, then click and drag to produce a curve point. Each time you click and drag, fireworks extends the line segment t...
Page 67
Drawing vector objects 67 adjusting the shape of a curved path segment you can change the shape of a vector object by dragging its point handles with the subselection tool. The point handles determine the degree of curvature between fixed points. These curves are known as bézier curves. To edit the ...
Page 68
68 chapter 3: working with vector objects converting path segments to straight or curved straight path segments are intersected by corner points. Curved path segments contain curve points. You can convert a straight segment to a curved segment and vice versa by converting its point. To convert a cor...
Page 69
Drawing vector objects 69 to convert a curve point to a corner point: 1 choose the pen tool. 2 click a curve point on a selected path. The handles retract, and the adjacent segments straighten. Selecting points the subselection tool allows you to select multiple points. Before selecting a point with...
Page 70
70 chapter 3: working with vector objects moving points and point handles you can change an object’s shape by dragging its points and point handles with the subselection tool. To move a point: • drag it with the subselection tool. Fireworks redraws the path to reflect the point’s new position. To ch...
Page 71
Editing paths 71 continuing an existing path you can use the pen tool to continue drawing an existing open path. To resume drawing an existing open path: 1 choose the pen tool. 2 click the end point and continue the path. The pen tool pointer changes to indicate that you are adding to a path. Mergin...
Page 72
72 chapter 3: working with vector objects bending and reshaping vector objects the freeform tool allows you to bend and reshape vector objects directly instead of manipulating points. You can push or pull any part of a path, regardless of where the points are located. Fireworks automatically adds, m...
Page 73
Editing paths 73 to pull a selected path: 1 choose the freeform tool. 2 move the pointer directly over the selected path. The pointer changes to the pull pointer. 3 drag the path. To push a selected path: 1 choose the freeform tool. The pointer changes to the push or pull pointer. 2 point slightly a...
Page 74
74 chapter 3: working with vector objects to distort selected paths: 1 choose the reshape area tool, located in the freeform tool pop-up menu. 2 drag across the paths to redraw them. To change the size of the reshape area pointer, do one of the following: • while holding down the mouse button, press...
Page 75
Editing paths 75 cutting paths into multiple objects the knife tool allows you to slice a path into two or more paths. To cut a selected path: 1 choose the knife tool. Note: using the eraser on wacom pens automatically selects the knife tool. 2 do one of the following: ■ drag the pointer across the ...
Page 76
76 chapter 3: working with vector objects to combine selected closed paths as one path enclosing the entire area of the original paths: • choose modify > combine paths > union. The resulting path assumes the stroke and fill attributes of the object that is placed farthest back. Creating an object fr...
Page 77
Editing paths 77 cropping a path you can crop a path using the shape of another path. The front or topmost path defines the shape of the cropped area. To crop a selected path: 1 select the path object that defines the area to be cropped. 2 choose modify > arrange > bring to front. 3 hold down shift ...
Page 78
78 chapter 3: working with vector objects expanding a stroke you can convert the stroke of a selected path into a closed path. The resulting path creates the illusion of a path with no fill and a stroke that takes on the same attributes as the original object’s fill. Note: expanding the stroke of a ...
Page 79: Chapter 4
79 chapter 4 using text macromedia fireworks mx 2004 has many text features typically reserved for sophisticated desktop publishing applications. You can create text in a variety of fonts and sizes and adjust kerning, spacing, color, leading, baseline shift, and more. Combining fireworks text-editin...
Page 80
80 chapter 4: using text creating text blocks all text in a fireworks document appears inside a rectangle with handles called a text block. To enter text: 1 choose the text tool. The property inspector displays options for the text tool. 2 choose color, font, size, spacing, and other text characteri...
Page 81
Editing text 81 using auto-sizing and fixed-width text blocks fireworks has both auto-sizing text blocks and fixed-width text blocks. An auto-sizing text block expands horizontally as you type. If you remove text, the auto-sizing text block shrinks to accommodate only the remaining text. Auto-sizing...
Page 82
82 chapter 4: using text you can also use the text editor and the commands in the text menu to edit text, but the property inspector offers the quickest way to change text attributes and provides more detailed editing control than the other two options. For more information about the text editor, se...
Page 83
Editing text 83 the text tool retains the current text color independently of the fill color of other tools. When you use another tool after using the text tool, the fill and stroke settings revert to the most recent settings from before the text tool was used. Likewise, when you return to the text ...
Page 84
84 chapter 4: using text the color of the fill color box in the tools panel changes to reflect the color you sample with either the eyedropper pointer or the eyedropper tool, and the color of the selected text also changes. Applying color to highlighted text in a text block you can change the text c...
Page 85
Editing text 85 zero represents normal kerning. Positive values move letters farther apart. Negative values move letters closer together. ■ hold down control (windows) or command (macintosh) while pressing the left arrow or right arrow keys on the keyboard. The left arrow key increases the space bet...
Page 86
86 chapter 4: using text text can also flow right to left or left to right. Text flowing right to left and left to right in fireworks, you set horizontal and vertical orientation as well as the direction of text flow in the property inspector. These settings apply to entire text blocks only. To set ...
Page 87
Editing text 87 the alignment controls appear in the property inspector when text is highlighted or a text block is selected. Text alignment options in the property inspector to set text alignment: 1 select the text. 2 click an alignment button in the property inspector. Indenting text you can inden...
Page 88
88 chapter 4: using text smoothing text edges to smooth out a text edge, you anti-alias it. This makes the edges of the text blend into the background so that the text is cleaner and more readable when it is large. Original text; after smoothing you use the property inspector to set anti-aliasing. I...
Page 89
Applying strokes, fills, and effects to text 89 to expand or contract selected characters: • in the property inspector, drag the horizontal scale pop-up slider or enter a value in the text box. Drag the slider higher than 100% to expand the width or height of the characters, and drag it lower to red...
Page 90
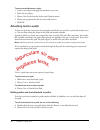
90 chapter 4: using text to save text attributes as a style: 1 create a text object and apply the attributes you want. 2 select the text object. 3 choose new style from the styles panel options menu. 4 choose the properties for the new style and name it. 5 click ok. Attaching text to a path to free ...
Page 91
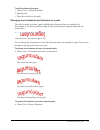
Attaching text to a path 91 to edit the shape of the path: 1 choose text > detach from path. 2 edit the path. 3 place the text back on the path. Changing text orientation and direction on a path the order in which you draw a path establishes the direction of the text attached to it. For example, if ...
Page 92
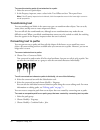
92 chapter 4: using text to move the starting point of text attached to a path: 1 select the text-on-a-path object. 2 in the property inspector, enter a value in the text offset text box. Then press enter. Note: if the property inspector is minimized, click the expander arrow in the lower right corn...
Page 93
Importing text 93 importing text you can copy text from a source document and paste into the current fireworks document, or you can drag it from the source to the current document. You can also open or import an entire text file in fireworks. Fireworks can import rtf (rich text format) and ascii (pl...
Page 94
94 chapter 4: using text you can choose fonts to replace the missing fonts. After you replace fonts, the document opens and you can edit and save the text. When the document is reopened on a computer that contains the original fonts, fireworks remembers and uses the original fonts. To select a repla...
Page 95
Using the text editor 95 customizing spell checking you can customize the way fireworks spell-checks documents using the spelling setup dialog box. From here you can specify one or more language dictionaries for fireworks to use during spell checking, as well as edit the words in your personal dicti...
Page 96
96 chapter 4: using text.
Page 97: Chapter 5
97 chapter 5 applying color, strokes, and fills macromedia fireworks mx 2004 has a wide range of panels, tools, and options for organizing and choosing colors, and applying colors to bitmap images and vector objects. In the swatches panel, you can choose a preset swatch group such as color cubes, co...
Page 98
98 chapter 5: applying color, strokes, and fills using the colors section of the tools panel the colors section of the tools panel contains controls for activating the stroke color and fill color boxes, which in turn determine whether the strokes or fills of selected objects are affected by color ch...
Page 99
Organizing swatch groups and color models 99 applying colors using the swatches panel the swatches panel displays all the colors in the current swatch group. You can use the swatches panel to apply stroke and fill colors to selected vector objects or text. To apply a color to the stroke or fill of a...
Page 100
100 chapter 5: applying color, strokes, and fills customizing the swatches panel you can add, delete, replace, and sort color swatches or entire swatch groups using the swatches panel. Note: choosing edit > undo does not undo swatch additions or deletions. Swatches panel to add a color to the swatch...
Page 101
Organizing swatch groups and color models 101 to save a selection of sampled colors: 1 add sampled colors to the swatches panel. 2 choose save swatches from the swatches panel options menu. The export swatches dialog box opens. 3 choose a filename and directory and click save. Clearing and sorting s...
Page 102
102 chapter 5: applying color, strokes, and fills by default, the color mixer identifies rgb colors as hexadecimal, displaying hexadecimal color values for red (r), green (g), and blue (b) color components. Hexadecimal rgb values are calculated based on a range of values from 00 to ff. You can choos...
Page 103
Organizing swatch groups and color models 103 creating colors using the system color pickers you can create colors using the windows system or the macintosh system dialog boxes, instead of using the color mixer and swatches panel. To pick a color from the system color picker: 1 click any color box. ...
Page 104
104 chapter 5: applying color, strokes, and fills dithering with websafe colors sometimes you might need to use a color that is not a websafe color. For example, your company logo may use a color that is not websafe. To approximate a websafe color that doesn’t shift or dither when exported with a we...
Page 105
Using color boxes and color pop-up windows 105 using color boxes and color pop-up windows throughout fireworks you will find color boxes—from the colors section of the tools panel to the property inspector to the color mixer. Each displays the current color assigned to the associated object property...
Page 106
106 chapter 5: applying color, strokes, and fills working with strokes using the property inspector, the stroke options pop-up menu, and the edit stroke dialog box, you can have full control of every brush nuance, including ink amount, tip size and shape, texture, edge effect, and aspect. Applying s...
Page 107
Working with strokes 107 to remove all stroke attributes from a selected object, do one of the following: • choose none from the stroke options pop-up menu in the property inspector or the stroke options pop-up window. • click the stroke color box in either the tools panel or the property inspector ...
Page 108
108 chapter 5: applying color, strokes, and fills to set general brush stroke options: 1 on the options tab of the edit stroke dialog box, set the ink amount, spacing, and flow rate. Higher flow rates create brush strokes that flow over time, as with an airbrush. 2 to overlap brush strokes for dense...
Page 109
Working with strokes 109 placing strokes on paths by default, an object’s brush stroke is centered on a path. You have the option of placing the brush stroke completely inside or outside the path. This allows you to control the overall size of stroked objects and to create effects such as strokes on...
Page 110
110 chapter 5: applying color, strokes, and fills working with fills using the property inspector, the fill options pop-up menu, the fill options pop-up window, and the gradient pop-up window, as well as a collection of bitmap textures and patterns, you can create a wide variety of fills for vector ...
Page 111
Applying gradient and pattern fills 111 applying gradient and pattern fills you can change fills to display a variety of solid, dithered, pattern, or gradient characteristics that range from solid colors to gradients. These characteristics resemble satin, ripples, folds, or gradients that conform to...
Page 112
112 chapter 5: applying color, strokes, and fills adding a custom pattern you can set a bitmap file as a new pattern fill. You can use files with these formats as patterns: png, gif, jpeg, bmp, tiff, and pict (macintosh only). When a pattern fill is a 32-bit transparent image, the transparency affec...
Page 113
Applying gradient and pattern fills 113 editing a gradient fill you can edit the current gradient fill by clicking any fill color box and then using the edit gradient pop-up window. Edit gradient pop-up window to open the edit gradient pop-up window: 1 select an object that has a gradient fill or ch...
Page 114
114 chapter 5: applying color, strokes, and fills creating fills with the gradient tool the gradient tool is in the same tool group as the paint bucket tool. This new tool works much as the paint bucket tool does, but it fills an object with a gradient instead of a solid color. Like the paint bucket...
Page 115
Applying gradient and pattern fills 115 setting hard-edged, anti-aliased, or feathered fill edges in fireworks, you can make the edge of a fill a regular hard line or soften the edge by anti-aliasing or feathering it. By default, edges are anti-aliased. Anti-aliasing smooths jagged edges that may oc...
Page 116
116 chapter 5: applying color, strokes, and fills adding texture to strokes and fills you can add three-dimensional effects to both strokes and fills by adding texture. Fireworks provides several textures, or you can use external textures. Adding texture to a stroke textures modify the brightness of...
Page 117
Adding texture to strokes and fills 117 adding texture to a fill textures modify the brightness of a fill, but not the hue, and give fills a less mechanical, more organic look. You can add a texture to any fill. Fireworks ships with several textures from which to choose, such as chiffon, oilslick, a...
Page 118
118 chapter 5: applying color, strokes, and fills.
Page 119: Chapter 6
119 chapter 6 using live effects macromedia fireworks mx 2004 live effects are enhancements that you can apply to vector objects, bitmap images, and text. Live effects include bevels and embossing, drop shadows and glows, color correction, and blurring and sharpening. You can apply live effects to s...
Page 120
120 chapter 6: using live effects applying live effects you can apply one or more live effects to selected objects using the property inspector. Each time you add a new effect to the object, it is added to the list in the effects pop-up menu in the property inspector. You can turn each effect on or ...
Page 121
Applying live effects 121 experiment with the settings until you get the look you want. If you want to change the effect settings later, see “editing live effects” on page 124 . Inner bevel pop-up window to apply a live effect to selected objects: 1 click the add effects button in the property inspe...
Page 122
122 chapter 6: using live effects applying beveled edges applying a beveled edge to an object gives it a raised look. You can create an inner bevel or an outer bevel. A rectangle, with inner bevel, and with outer bevel to apply a beveled edge to a selected object: 1 click the add effects button in t...
Page 123
Applying live effects 123 applying shadows and glows fireworks makes it easy to apply drop shadows, inner shadows, and glows to objects. You can specify the angle of the shadow to simulate the angle of the light shining on the object. Drop shadow, inner shadow, and glow effects to apply a shadow or ...
Page 124
124 chapter 6: using live effects plug-ins from the filters menu when you install a photoshop plug-in in fireworks, it is added to the filters menu and to the property inspector. You should use the filters menu to apply filters and photoshop plug-ins only when you are certain that you will not want ...
Page 125
Editing live effects 125 reordering live effects you can rearrange the order of the effects applied to an object. Reordering effects changes the sequence in which the effects are applied, which can change the combined effect. In general, effects that change the interior of an object, such as the inn...
Page 126
126 chapter 6: using live effects to create a custom live effect using the styles panel: 1 apply live effect settings to selected objects. For more information, see “applying live effects” on page 120 . 2 choose add style from the styles panel options menu. The add style dialog box opens. 3 deselect...
Page 127
Editing live effects 127 4 do one of the following: ■ choose save as command from the history panel options menu. ■ click the save button at the bottom of the history panel. 5 enter a command name and click ok to add the command to the commands menu. Save button.
Page 128
128 chapter 6: using live effects.
Page 129: Chapter 7
129 chapter 7 layers, masking, and blending layers divide a macromedia fireworks mx 2004 document into discrete planes, as though the components of the illustration were drawn on separate tracing paper overlays. A document can be made up of many layers, and each layer can contain many objects. In fi...
Page 130
130 chapter 7: layers, masking, and blending the layers panel displays the current state of all layers in the current frame of a document. To view other frames, you can use the frames panel or choose an option from the frame pop-up menu at the bottom of the layers panel. For more information, see “w...
Page 131
Working with layers 131 to add a layer, do one of the following: • click the new/duplicate layer button with no layer selected. • choose edit > insert > layer. • choose new layer from the layers panel options menu, and click ok. To delete a layer, do one of the following: • drag the layer to the tra...
Page 132
132 chapter 7: layers, masking, and blending to name a layer or object: 1 double-click a layer or object in the layers panel. 2 type a new name for the layer or object and press enter. Note: the web layer cannot be renamed. However, you can name web objects on the web layer, such as slices and hotsp...
Page 133
Working with layers 133 to show or hide a layer or objects on a layer: • click the square in the middle column to the left of a layer or object name. The eye icon indicates that a layer is visible. To show or hide multiple layers or objects: • drag the pointer along the eye column in the layers pane...
Page 134
134 chapter 7: layers, masking, and blending using the web layer the web layer is a special layer that appears as the top layer in each document. The web layer contains web objects, such as slices and hotspots, used for assigning interactivity to exported fireworks documents. For more information on...
Page 135
Masking images 135 about vector masks if you have used other vector-illustration applications such as macromedia freehand, you may be familiar with vector masks, which are sometimes called clipping paths or paste insides. The vector mask object crops or clips the underlying objects to the shape of i...
Page 136
136 chapter 7: layers, masking, and blending about bitmap masks if you’re photoshop user, you may be familiar with layer masks. Fireworks bitmap masks are similar to layer masks in that the pixels of a mask object affect the visibility of underlying objects. However, fireworks bitmap masks are much ...
Page 137
Masking images 137 by default, most bitmap masks are applied using their grayscale appearance, but you can also apply them using their alpha channel. For more information, see “changing the way masks are applied” on page 149 . Note: fireworks mx and fireworks mx 2004 grayscale masks behave more like...
Page 138
138 chapter 7: layers, masking, and blending 4 select the object or group you want to mask. If you are masking multiple objects, the objects must be grouped. For more information about grouping objects, see “grouping objects” on page 25 . 5 do one of the following to paste the mask: ■ choose edit > ...
Page 139
Masking images 139 masking objects using the paste inside command if you are a macromedia freehand user, you may be familiar with the paste inside method of creating masks. Paste inside creates either a vector mask or a bitmap mask, depending on the type of mask object you use. The paste inside comm...
Page 140
140 chapter 7: layers, masking, and blending 4 select the object into which you want to paste the contents. This object will be used as the mask, or clipping path. 5 choose edit > paste inside. The objects you pasted appear to be inside or clipped by the mask object. Using text as a mask text masks ...
Page 141
Masking images 141 masking objects using the layers panel the quickest way to add an empty, transparent bitmap mask is through the layers panel. The layers panel adds a white mask to an object, which you can customize by drawing on it with the bitmap tools. Note: for details on creating empty, opaqu...
Page 142
142 chapter 7: layers, masking, and blending masking objects using the reveal and hide commands the modify > mask submenu has several options for applying empty bitmap masks to objects: reveal all applies an empty, transparent mask to an object, revealing the entire object. To achieve the same effec...
Page 143
Masking images 143 3 do one of the following to create the mask: ■ choose modify > mask > reveal selection to show the area defined by the pixel selection. ■ choose modify > mask > hide selection to hide the area defined by the pixel selection. The results of reveal selection and hide selection a bi...
Page 144
144 chapter 7: layers, masking, and blending to group objects to form a mask: 1 shift-click two or more overlapping objects. You can select objects from different layers. 2 choose modify > mask > group as mask. Editing masks you can modify masks in many ways. By modifying a mask’s position, shape, a...
Page 145
Masking images 145 when you select the mask thumbnail, the mask icon appears beside it in the layers panel, and the mask’s properties show in the property inspector, where they can be changed if desired. To select a mask: • click the mask thumbnail in the layers panel. The layers panel displays a ye...
Page 146
146 chapter 7: layers, masking, and blending moving masks and masked objects you can reposition masks and masked objects. They can be moved together or independently. To move a mask and its masked objects together: 1 select the mask on the canvas using the pointer tool. 2 drag the mask to a new loca...
Page 147
Masking images 147 to move a mask independently using its move handle: 1 select the mask on the canvas using the pointer tool. 2 choose the subselection tool and drag the mask’s move handle to a new location. To move masked objects independently of the mask using the move handle: 1 select the mask o...
Page 148
148 chapter 7: layers, masking, and blending modifying a mask’s appearance by modifying a mask’s shape and color, you can change the visibility of masked objects. You change the shape of a bitmap mask by drawing on it with the bitmap tools. You change the shape of a vector mask by moving the mask ob...
Page 149
Masking images 149 changing the way masks are applied you can use the property inspector to ensure that you are editing a mask and to identify the type of mask you are working on. When a mask is selected, the property inspector lets you change the way the mask is applied. If the property inspector i...
Page 150
150 chapter 7: layers, masking, and blending both vector and bitmap masks can be applied using their grayscale appearance. Bitmap masks are applied using their grayscale appearance by default. When a mask is applied using its grayscale appearance, the lightness of its pixels determines how much of t...
Page 151
Masking images 151 adding objects to a masked selection you can add more objects to an existing masked selection. To add masked objects to a masked selection: 1 choose edit > cut to cut the selected object or objects you want to add. 2 select the thumbnail of the masked object in the layers panel. 3...
Page 152
152 chapter 7: layers, masking, and blending blending and transparency compositing is the process of varying the transparency or color interaction of two or more overlapping objects. In fireworks, blending modes allow you to create composite images. Blending modes also add a dimension of control to ...
Page 153
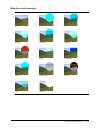
Blending and transparency 153 blending mode examples original image normal multiply screen darken lighten difference hue saturation color luminosity invert tint erase.
Page 154
154 chapter 7: layers, masking, and blending adjusting opacity and applying blends you can use the property inspector or the layers panel to adjust the opacity of selected objects and to apply blending modes. An opacity setting of 100 renders an object completely opaque. A setting of 0 (zero) render...
Page 155: Chapter 8
155 chapter 8 using styles, symbols, and urls macromedia fireworks mx 2004 provides three panels in which you can store and reuse styles, symbols, and urls. Styles are stored in the styles panel, symbols are stored in the library panel, and urls are stored in the url panel. By default, all three pan...
Page 156
156 chapter 8: using styles, symbols, and urls applying a style you can use the styles panel to create, store, and apply styles to objects or text. Styles panel when you apply a style to an object, you can later update the style without affecting the original object. Fireworks does not keep track of...
Page 157
Using styles 157 to create a new style: 1 create or select a vector object or text with the stroke, fill, effect, or text attributes you want. 2 click the new style button at the bottom of the styles panel. 3 choose the attributes you want to be part of the style from the new style dialog box. Note:...
Page 158
158 chapter 8: using styles, symbols, and urls to import styles: 1 choose import styles from the styles panel options menu. 2 choose a styles document to import. All styles in the styles document are imported and placed directly after the selected style in the styles panel. Using style defaults if y...
Page 159
Using symbols 159 creating a symbol you can create graphic, animation, and button symbols using the edit > insert submenu. You can create a symbol from any object, text block, or group, and then organize them in the library panel. To place instances in a document, you simply drag them from the libra...
Page 160
160 chapter 8: using styles, symbols, and urls editing symbols you can modify a symbol in the symbol editor, which automatically updates all associated instances when you finish editing. Note: for most types of edits, modifying an instance affects the symbol and all other instances. There are some e...
Page 161
Using symbols 161 breaking symbol links you can modify an instance without affecting the symbol or other instances by first breaking the link between it and the symbol. To release an instance from a symbol: 1 select the instance. 2 choose modify > symbol > break apart. The selected instance becomes ...
Page 162
162 chapter 8: using styles, symbols, and urls importing symbols fireworks has symbol libraries in the edit > libraries submenu from which you can import prepared animation symbols, graphic symbols, and button symbols, as well as navigation bars and multisymbol themes. Using these symbols, you can q...
Page 163
Using symbols 163 to import a symbol by dragging and dropping or copying and pasting, do one of the following: • drag a symbol instance from the document containing the symbol into the destination document. • copy a symbol instance in the document containing the symbol, then paste it into the destin...
Page 164
164 chapter 8: using styles, symbols, and urls working with urls assigning a url to a web object creates a link to a file such as a web page. You can assign urls to hotspots, buttons, and slice objects. When you intend to use the same urls several times, you can create a url library in the url panel...
Page 165
Working with urls 165 to create a new url library: 1 choose new url library from the url panel options menu. 2 enter the library name in the text box and click ok. The new library name appears in the library pop-up menu in the url panel. To add a new url to a url library: 1 choose a library from the...
Page 166
166 chapter 8: using styles, symbols, and urls about absolute and relative urls when you enter a url in the url panel, you can enter an absolute or relative url: • if you are linking to a web page that is beyond your own website, you must use an absolute url. • if you are linking to a web page withi...
Page 167: Chapter 9
167 chapter 9 slices, rollovers, and hotspots slices are the basic building blocks for creating interactivity in macromedia fireworks mx 2004. Slices are web objects—they exist not as images, but ultimately as html code. You can view, select, and rename them through the web layer in the layers panel...
Page 168
168 chapter 9: slices, rollovers, and hotspots optimizing one challenge of web graphic design is ensuring that images download quickly without sacrificing quality. Slicing enables you to optimize each individual slice using the most appropriate file format and compression settings. For more informat...
Page 169
Creating and editing slices 169 creating html slices an html slice designates an area where ordinary html text appears in the browser. An html slice does not export an image; it exports html text that appears in the table cell defined by the slice. Html slices are useful if you want to quickly updat...
Page 170
170 chapter 9: slices, rollovers, and hotspots you can also insert a slice on top of the vector path to create irregular slice shapes. To draw a polygon slice object: 1 choose the polygon slice tool. 2 click to place the vector points of the polygon. The polygon slice tool draws only straight line s...
Page 171
Creating and editing slices 171 showing and hiding slices hiding a slice renders the slice invisible in the fireworks png file. You can turn off all or some web objects. Because slices are web objects, they are listed beneath the web layer in the layers panel, where visibility can be turned on or of...
Page 172
172 chapter 9: slices, rollovers, and hotspots moving slice guides to edit slices slice guides define the perimeter and position of slices. Slice guides extending beyond slice objects define how the rest of the document is sliced upon export. You can change the shape of a rectangular slice object by...
Page 173
Making slices interactive 173 to move adjacent slice guides: 1 shift-drag a slice guide across adjacent slices guides. 2 release the slice guide in the desired location. All slice guides that you dragged across are moved to this location. Tip: you can cancel this operation by releasing the shift key...
Page 174
174 chapter 9: slices, rollovers, and hotspots adding simple interactivity to slices the drag-and-drop rollover method is a fast and efficient way to create rollover and swap-image effects. Specifically, the drag-and-drop rollover method allows you to determine what happens to a slice when the point...
Page 175
Making slices interactive 175 in fireworks, when you select a trigger web object created using a behavior handle or the behaviors panel, all of its behavior relationships are displayed. By default, a rollover interaction is represented by a blue behavior line. Creating a simple rollover a simple rol...
Page 176
176 chapter 9: slices, rollovers, and hotspots creating a disjoint rollover a disjoint rollover swaps in an image under a web object when the pointer rolls over another web object. In response to a pointer rolling over or clicking a trigger image, an image appears in a different location on the web ...
Page 177
Making slices interactive 177 applying multiple rollovers to a slice you can drag more than one behavior handle from a single slice to create multiple swap behaviors. For example, you can trigger a rollover and a disjoint rollover from the same slice. A slice triggering a rollover behavior and a dis...
Page 178
178 chapter 9: slices, rollovers, and hotspots swap image restore restores the target object to its default appearance in frame 1. Set nav bar image sets a slice to be a part of a fireworks navigation bar. Each slice that is part of the navigation bar must have this behavior. The set nav bar image o...
Page 179
Making slices interactive 179 editing behaviors the behaviors panel also gives you the ability to edit existing behaviors. You can specify the type of mouse event (such as onclick) that triggers the behavior. Note: you cannot change the event for simple rollover and set nav bar image. To change the ...
Page 180
180 chapter 9: slices, rollovers, and hotspots preparing slices for export using the property inspector, you can make slices interactive by assigning links and targets to the slices. You can also specify alternate text to be displayed in a browser while an image is loading. In addition, you can choo...
Page 181
Preparing slices for export 181 assigning a target a target is an alternate web page frame or web browser window in which the linked document opens. You can specify a target for a selected slice in the property inspector. If the property inspector is minimized, click the expander arrow to see all pr...
Page 182
182 chapter 9: slices, rollovers, and hotspots auto-naming slice files if you do not enter a slice name in either the property inspector or the layers panel, fireworks reverts to auto-naming. Auto-naming assigns a unique name to each slice file automatically based on the default naming convention. T...
Page 183
Preparing slices for export 183 to change the default auto-naming convention: 1 choose file > html setup to open the html setup dialog box. 2 click the document specific tab. 3 in the file names section, create your new naming convention by selecting from the lists. 4 (optional) to set this informat...
Page 184
184 chapter 9: slices, rollovers, and hotspots to define how fireworks exports html tables: 1 choose file > html setup, or click the options button in the export dialog box. 2 click the table tab. 3 choose a spacing option from the space with pop-up menu: nested tables — no spacers creates a nested ...
Page 185
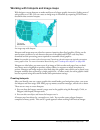
Working with hotspots and image maps 185 working with hotspots and image maps web designers can use hotspots to make small parts of a larger graphic interactive, linking areas of web graphics to a url. You can create an image map in fireworks by exporting html from a document that contains hotspots....
Page 186
186 chapter 9: slices, rollovers, and hotspots to create a rectangular or circular hotspot: 1 choose the rectangle hotspot or circle hotspot tool from the web section of the tools panel. 2 drag the hotspot tool to draw a hotspot over an area of the graphic. Hold down alt (windows) or option (macinto...
Page 187
Working with hotspots and image maps 187 preparing hotspots for export you can use the property inspector to assign urls, alternate text, targets, and custom names to hotspots. If the property inspector is minimized, click the expander arrow in the lower right to see all properties. You assign hotsp...
Page 188
188 chapter 9: slices, rollovers, and hotspots 7 if necessary, choose put images in subfolder and browse to the appropriate folder. Note: if you choose copy to clipboard, this step is not required, and thus the option is disabled. 8 click save to close the export dialog box. Tip: when you are export...
Page 189
Working with hotspots and image maps 189 using hotspots on top of slices you can place a hotspot on top of a slice to trigger an action or behavior. You may want to do this if you have a large graphic and you want only a small portion of it to act as the trigger for an action. For example, perhaps y...
Page 190
190 chapter 9: slices, rollovers, and hotspots.
Page 191: Chapter 10
191 chapter 10 creating buttons and pop-up menus in macromedia fireworks mx 2004 you can create a variety of javascript buttons and pop-up menus, even if you know nothing about javascript. The fireworks button editor leads you through the button-creation process, automating many button-making tasks....
Page 192
192 chapter 10: creating buttons and pop-up menus • a button is easy to edit. Double-click the instance on the canvas, and you can change it in the button editor or the property inspector. • like other symbols, buttons have a registration point. The registration point is a center point that helps yo...
Page 193
Creating button symbols 193 to create an over state: 1 with the button editor open, click the over tab. 2 do one of the following to create the button’s over state: ■ click copy up graphic to paste a copy of the up state button into the over window, and then edit it to change its appearance or text....
Page 194
194 chapter 10: creating buttons and pop-up menus using bevel effects to draw button states as you create graphics for each button state, you can apply preset live effects to create common appearances for each state. For example, if you are creating a four-state button, you can apply the raised effe...
Page 195
Creating button symbols 195 6 choose the button symbol type. 7 click ok. The new button is added to the library. Tip: you can also convert four-frame animations to buttons. Simply select all four objects, and each is placed on its own button state. Inserting buttons into a document you can insert in...
Page 196
196 chapter 10: creating buttons and pop-up menus editing button symbols fireworks button symbols are a special kind of symbol. They have two kinds of properties: some properties change in all instances when you edit an instance of the symbol, and other properties affect only the current instance. F...
Page 197
Creating button symbols 197 • additional behaviors assigned to an instance using the behaviors panel • the show down state on load option in the property inspector for instances in a nav bar note: in fireworks mx 2004, you need not choose the show down state on load option for every button instance ...
Page 198
198 chapter 10: creating buttons and pop-up menus setting the url for a button symbol or instance a url, or uniform resource locator, is a link to another web page, website, or anchor on the same web page. The url can be a symbol- or instance-level button property. You can attach a url to a selected...
Page 199
Creating button symbols 199 2 do one of the following in the property inspector: ■ choose a preset target from the target pop-up menu: none or _self loads the web page into the same frame or window as the link. Blank loads the web page into a new, unnamed browser window. Parent loads the web page in...
Page 200
200 chapter 10: creating buttons and pop-up menus to set the alt text for a button instance in the workspace: 1 select the button instance in the workspace. 2 enter the description in the alt text box in the property inspector. Creating navigation bars a navigation bar, or nav bar, is a group of but...
Page 201
Creating pop-up menus 201 about the pop-up menu editor the pop-up menu editor is a tabbed dialog box that guides you through the creation of a pop-up menu. Its many options for controlling the characteristics of a pop-up menu are organized in four tabs: content has options for determining the basic ...
Page 202
202 chapter 10: creating buttons and pop-up menus creating a basic pop-up menu the content tab of the pop-up menu editor is where you determine the basic structure and content of the pop-up menu. The current or default settings for the options on the other pop-up menu editor tabs are applied to the ...
Page 203
Creating pop-up menus 203 creating submenus within a pop-up menu using the indent menu and outdent menu buttons on the content tab of the pop-up menu editor, you can create submenus—pop-up menus that appear when the user moves the pointer over or clicks another pop-up menu item. You can create as ma...
Page 204
204 chapter 10: creating buttons and pop-up menus to move an entry in the pop-up menu: 1 with the desired pop-up menu displayed in the pop-up menu editor, click the content tab. 2 drag the menu item to a new location in the list. 3 click done. Designing the appearance of a pop-up menu after you crea...
Page 205
Creating pop-up menus 205 to set whether a pop-up menu is html- or image-based: 1 with the desired pop-up menu open in the pop-up menu editor, click the appearance tab. For information on opening an existing pop-up menu in the pop-up menu editor, see “editing pop-up menus” on page 209 . 2 choose a c...
Page 206
206 chapter 10: creating buttons and pop-up menus adding pop-up menu styles you can add custom cell styles to the pop-up menu editor. Custom cell styles are available along with the preset choices on the appearance tab when you choose the image option as the cell type, which sets pop-up menus to use...
Page 207
Creating pop-up menus 207 to set advanced cell properties for the current pop-up menu: 1 with the desired pop-up menu open in the pop-up menu editor, click the advanced tab. For information on opening an existing pop-up menu in the pop-up menu editor, see “editing pop-up menus” on page 209 . 2 choos...
Page 208
208 chapter 10: creating buttons and pop-up menus positioning pop-up menus and submenus the position tab of the pop-up menu editor lets you specify a pop-up menu’s position. You can also position a top-level pop-up menu by dragging its outline in the workspace when the web layer is visible. To set t...
Page 209
Creating pop-up menus 209 to set the position for a pop-up submenu using the pop-up menu editor: 1 with the desired pop-up menu open in the pop-up menu editor, click the position tab. For information on opening an existing pop-up menu in the pop-up menu editor, see “editing pop-up menus” on page 209...
Page 210
210 chapter 10: creating buttons and pop-up menus to move an entry in the pop-up menu: 1 with the desired pop-up menu displayed in the pop-up menu editor, click the content tab. 2 drag the menu item to a new location in the list. 3 click done. About exporting pop-up menus fireworks generates all the...
Page 211: Chapter 11
211 chapter 11 creating animation animated graphics add an exciting, sophisticated look to your website. In macromedia fireworks mx 2004, you can create animated graphics with banner ads, logos, and cartoons that move. For example, you can make your company mascot dance across a page while the logo ...
Page 212
212 chapter 11: creating animation 3 use the frame delay controls in the frames panel to set the speed of the animated motion. For more information, see “setting the frame delay” on page 216 . 4 optimize the document as an animated gif. For more information, see “optimizing an animation” on page 222...
Page 213
Working with animation symbols 213 to convert an object to an animation symbol: 1 select the object. 2 choose modify > animation > animate selection. 3 enter the desired settings in the dialog box. For more information on settings, see “editing animation symbols” on page 213 . Animation controls app...
Page 214
214 chapter 11: creating animation scaling is the percent change in size from start to finish. Although the default is 100%, you can enter any number you wish in the scaling text box. To scale an object from 0 to 100%, the original object must be very small; vector objects are recommended. Opacity i...
Page 215
Working with animation symbols 215 editing symbol graphics you can change the graphic your symbol is based on as well as its properties. You edit symbol graphics in the symbol editor. The symbol editor lets you use any of the drawing, text, or color tools to edit the graphic. While you’re working in...
Page 216
216 chapter 11: creating animation working with frames you build animations by creating a number of frames. You can see the contents of each frame using the frames panel. The frames panel is where you create and organize frames. You can name the frames, reorganize them, manually set the timing of th...
Page 217
Working with frames 217 showing and hiding frames for playback you can show or hide frames for playback. If a frame is hidden, it is not displayed during playback and it is not exported. To show or hide a frame: 1 do one of the following: ■ choose properties from the frames panel options menu. ■ dou...
Page 218
218 chapter 11: creating animation to copy a selected frame and place it in a sequence: 1 choose duplicate frame from the frames panel options menu. 2 enter the number of duplicates to create for the selected frame, choose where the duplicate frames are to be inserted, and click ok. Duplicating a fr...
Page 219
Working with frames 219 to share a layer across frames: 1 double-click the layer. 2 select share across frames. Note: all the contents in a shared layer appear in every frame. To disable the sharing of a layer across frames: 1 double-click the shared layer. 2 deselect share across frames. 3 choose o...
Page 220
220 chapter 11: creating animation using onion skinning onion skinning lets you view the contents of frames preceding and following the currently selected frame. You can smoothly animate objects without having to flip back and forth through them. The term onion skinning comes from a traditional anim...
Page 221
Exporting your animation 221 4 to distribute the tweened objects to separate frames, choose distribute to frames and click ok. If you choose not to distribute the objects to separate frames, you can do it later by selecting all instances and clicking the distribute to frames button in the frames pan...
Page 222
222 chapter 11: creating animation setting the animation repetition the loop setting in the frames panel determines how many times the animation repeats. This feature loops frames over and over so you can minimize the number of frames needed to build the animation. To set the selected animation to r...
Page 223
Working with existing animations 223 animation export formats after you create and optimize an animation, it is ready to export. Animated gifs give the best results for clip art and cartoonlike graphics. For information about exporting animated gifs, see “exporting an animation” on page 250 . You ca...
Page 224
224 chapter 11: creating animation using multiple files as one animation fireworks can create an animation based on a group of image files. For example, you can create a banner ad based on several existing graphics by opening each graphic and placing it in a separate frame in the same document. To o...
Page 225: Chapter 12
225 chapter 12 optimizing and exporting the ultimate goal in web graphic design is to create great-looking images that download as fast as possible. To do that, you must select a file format with the best compression for your image while maintaining as much quality as possible. This balancing act is...
Page 226
226 chapter 12: optimizing and exporting about optimizing optimizing graphics in fireworks involves doing the following: • choosing the best file format. Each file format has a different method of compressing color information. Choosing the appropriate format for certain types of graphics can greatl...
Page 227
Using the export wizard 227 using export preview when accessed through the export wizard, the export preview displays recommended optimization and export options for the current document. When selected directly from the file menu, the export preview displays the current document export settings as d...
Page 228
228 chapter 12: optimizing and exporting to export using export preview: 1 choose file > export preview to open the export preview. ■ to edit optimization settings, click the options tab. For information about the options available on this tab, see the following procedures. ■ to edit the size and ar...
Page 229
Using the export wizard 229 to set optimization settings using export preview: 1 click the options tab. Most of the options available here are similar to those in the optimize panel. For more about these options, see “using optimization settings” on page 231 . 2 click the optimize to size wizard but...
Page 230
230 chapter 12: optimizing and exporting to set animation settings using export preview: 1 click the animation tab. 2 use the following techniques to preview animation frames: ■ to display a single frame, select the desired frame in the list on the left side of the dialog box, or use the frame contr...
Page 231
Optimizing in the workspace 231 optimizing in the workspace exporting graphics for use on the web is a two-step process: optimizing, then exporting (or in some cases, simply saving). Optimizing graphics ensures they possess the right mix of color, compression, and quality. After you finalize a graph...
Page 232
232 chapter 12: optimizing and exporting to choose a preset optimization: • choose a preset from the settings pop-up menu in the property inspector or the optimize panel: gif web 216 forces all colors to websafe colors. The color palette contains up to 216 colors (see “optimizing gif, png, tiff, bmp...
Page 233
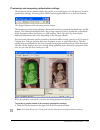
Optimizing in the workspace 233 previewing and comparing optimization settings the document preview buttons display the graphic as it would appear in a web browser, based on optimization settings. You can preview rollover and navigation behaviors, as well as animation. The original button and the do...
Page 234
234 chapter 12: optimizing and exporting to compare views with different optimization settings: 1 click the 2-up or 4-up button in the upper left of the document window. 2 click one of the split-view previews to select it. 3 enter settings in the optimize panel. 4 select the other previews and speci...
Page 235
Optimizing in the workspace 235 tiff , or tagged image file format, is a graphic format used for storing bitmap images. Tiffs are most commonly used in print publishing. Many multimedia applications also accept imported tiff graphics. Bmp , the microsoft windows graphic file format, is a common file...
Page 236
236 chapter 12: optimizing and exporting windows and macintosh each contain the 256 colors defined by the windows or macintosh platform standards, respectively. Grayscale is a palette of 256 or fewer shades of gray. Choosing this palette converts the image to grayscale. Black and white is a two-colo...
Page 237
Optimizing in the workspace 237 removing unused colors removing unused colors from an image before exporting or saving makes its file size smaller. Note: this option is available only for gifs and other 8-bit graphic file formats. To remove unused colors: • choose remove unused colors from the optim...
Page 238
238 chapter 12: optimizing and exporting various small symbols appear on some color swatches, indicating certain characteristics of individual colors, as follows: if you edit the document, the color table may no longer show all the colors in the document. When this occurs, you should rebuild the col...
Page 239
Optimizing in the workspace 239 locking colors in a palette you can lock individual colors so that you cannot remove or change them when changing palettes or when reducing the number of colors in a palette. If you switch to another palette after colors have been locked, locked colors are added to th...
Page 240
240 chapter 12: optimizing and exporting to force a color to its closest websafe equivalent: 1 select a color in the optimize panel color table. 2 click the snap to web safe button. If you save a fireworks png, changing colors to websafe in the optimize panel affects only the exported version of the...
Page 241
Optimizing in the workspace 241 making areas transparent you can set transparent areas for gifs and 8-bit pngs so that in a web browser the background of the web page is visible through those areas. In fireworks, a gray-and-white checkerboard on document previews denotes transparent areas. Optimized...
Page 242
242 chapter 12: optimizing and exporting to select a color for transparency: 1 click the preview, 2-up, or 4-up button at the upper left of the document window. In 2-up or 4-up view, click a view other than the original. 2 in the optimize panel, choose index transparency from the transparency pop-up...
Page 243
Optimizing in the workspace 243 optimizing jpegs using the optimize panel, you can optimize jpegs by setting compression and smoothing options. Jpegs are always saved and exported in 24-bit color, so you can’t optimize a jpeg by editing its color palette. The color table is empty when a jpeg image i...
Page 244
244 chapter 12: optimizing and exporting selectively compressing areas of a jpeg selective jpeg compression lets you compress different areas of a jpeg at different levels. Areas of particular interest in an image can be compressed at a higher quality level. Areas of lesser significance, such as bac...
Page 245
Optimizing in the workspace 245 blurring or sharpening detail you can set smoothing in the optimize panel to help decrease the file size of jpegs. Smoothing blurs hard edges, which do not compress well in jpegs. Higher numbers produce more blurring in the exported or saved jpeg, typically creating s...
Page 246
246 chapter 12: optimizing and exporting removing halos when you make the canvas color transparent on an image that was previously anti-aliased, the pixels from the anti-aliasing remain. Then when you export (or in some cases, save) the graphic and place it on a web page with a different background ...
Page 247
Exporting from fireworks 247 to save optimization settings as a preset: 1 select save settings from the optimize panel options menu. 2 type a name for the optimization preset and click ok. Saved optimization settings appear at the bottom of the settings pop-up menu in the optimize panel and in the p...
Page 248
248 chapter 12: optimizing and exporting exporting a single image you use the file > export command to export a graphic after you have finished optimizing it in the workspace. If you are working with an existing image that you opened in fireworks, you may be able to save it rather than export it, de...
Page 249
Exporting from fireworks 249 exporting selected slices you can export selected slices in a fireworks document. Shift-click to select multiple slices. Note: for more information on slicing, see “creating and editing slices” on page 167 . To export selected slices: 1 do one of the following: ■ choose ...
Page 250
250 chapter 12: optimizing and exporting exporting an animation after you create and optimize an animation, it is ready to export. You can export an animation as an animated gif, as a flash swf file, or as multiple files. If your document contains more than one animation, you can insert slices on to...
Page 251
Exporting from fireworks 251 exporting frames or layers fireworks can export each layer or frame in a document as a separate image file, using the optimization settings specified in the optimize panel. The name of the layer or frame determines the filename of each exported file. This export method i...
Page 252
252 chapter 12: optimizing and exporting exporting html unless you specify otherwise, when you export a sliced fireworks document, what you’re actually exporting is an html file and its images. Fireworks generates pure html that can be read by most web browsers and html editors. There are a variety ...
Page 253
Exporting from fireworks 253 including comments in html fireworks html is well commented, telling you what the pieces of code relate to. Fireworks html comments begin with . Anything between these two markers is not interpreted as html or javascript code. If you want comments included in your html, ...
Page 254
254 chapter 12: optimizing and exporting you can set up global html export preferences using the html setup dialog box. For more information, see “setting html export options” on page 259 . Note: macromedia dreamweaver shares a tight integration with fireworks. Fireworks handles the export of html d...
Page 255
Exporting from fireworks 255 copying html‘ to the clipboard a fast way to export fireworks-generated html is to copy it to the clipboard. You can copy html code in fireworks in either of two ways. You can use the copy html code command, or you can choose copy to clipboard as an option in the export ...
Page 256
256 chapter 12: optimizing and exporting to copy fireworks html using the export dialog box: 1 choose file > export. Note: optionally, if you are exporting to dreamweaver, click the quick export button and choose copy html to clipboard from the dreamweaver submenu. 2 in the export dialog box, specif...
Page 257
Exporting from fireworks 257 copying and pasting html from an exported fireworks file you can open exported fireworks html in an html editor and copy and paste sections of code into another html file. To copy code from an exported fireworks file and paste it into another html document: 1 open the fi...
Page 258
258 chapter 12: optimizing and exporting to update html using the update html command: 1 do one of the following: ■ choose file > update html. ■ click the quick export button and choose update html from the pop-up menu. 2 select the file to update in the locate html file dialog box. 3 click open. 4 ...
Page 259
Exporting from fireworks 259 for more information on xhtml, visit the world wide web consortium (w3c) xhtml specification at www.W3.Org. To export xhtml from fireworks: 1 choose file > html setup, choose an xhtml style from the html style pop-up menu on the general tab, and click ok. 2 export your d...
Page 260
260 chapter 12: optimizing and exporting to export your document using the xhtml standard, choose the appropriate xhtml style from the pop-up menu. For more information about xhtml, see “exporting xhtml” on page 258 . ■ choose a file extension from the extension pop-up menu or enter a new one. ■ cho...
Page 261
Exporting from fireworks 261 using the quick export button the quick export button, located in the upper right corner of the document window, offers easy access to common options for exporting fireworks files to other applications. Using the quick export button, you can export to a variety of format...
Page 262
262 chapter 12: optimizing and exporting sending a fireworks document as an e-mail attachment you can easily send documents as e-mail attachments from within fireworks. You can send a fireworks png, a compressed jpeg, or a document using other file formats and optimization settings available in the ...
Page 263: Chapter 13
263 chapter 13 automating repetitive tasks web designers often spend lots of time doing repetitive tasks, such as optimizing images or converting images to fit within certain constraints. Part of the power of macromedia fireworks mx 2004 is its capability to automate and simplify many tedious drawin...
Page 264
264 chapter 13: automating repetitive tasks finding and replacing the find and replace feature helps you search for and replace elements, such as text, urls, fonts, and colors. Find and replace can search the current document or multiple files. Find and replace works only in fireworks png files or i...
Page 265
Finding and replacing 265 5 set the options for the selected find attribute. 6 choose a find-and-replace operation: find locates the next instance of the element. Found elements appear selected in the document. Replace changes a found element with the contents of the change to option. Replace all fi...
Page 266
266 chapter 13: automating repetitive tasks finding and replacing text fireworks makes it easy to search for and replace text. You have a variety of options to refine your search to consider case or to find entire words or parts of words. To search for and replace words, phrases, or text strings: 1 ...
Page 267
Batch processing 267 finding and replacing urls in addition to words, typefaces, and colors, fireworks allows you to find and replace urls assigned to interactive elements in your documents. To search for and replace urls assigned to web objects: 1 choose find url from the find pop-up menu of the fi...
Page 268
268 chapter 13: automating repetitive tasks to batch-process files: 1 choose file > batch process, and select the files to process. You can select files from different folders or group them by file type. Note: if the files you select are locked or checked in from a dreamweaver site, you are prompted...
Page 269
Batch processing 269 4 click next, then do one or both of the following: ■ to add a task to the batch, select it in the batch options list and click add. Each task can be added only once. For more information on adding commands, see “performing commands with a batch process” on page 272 . ■ to reord...
Page 270
270 chapter 13: automating repetitive tasks changing optimization settings with a batch process you can change file optimization settings using the export option in the batch process dialog box. To set export settings for a batch process: 1 choose export from the batch options list and click add. 2 ...
Page 271
Batch processing 271 scaling graphics with a batch process you can alter the height and width of images being exported using the scale option in the batch process dialog box. To set scaling options for batch-processed files: 1 choose scale from the batch options list and click add. 2 in the scale po...
Page 272
272 chapter 13: automating repetitive tasks to select attributes to find and replace during a batch process: 1 choose find and replace from the batch options list and click add. 2 click edit. 3 select the type of attribute to find and replace from the find pop-up menu: text, font, color, url, or non...
Page 273
Batch processing 273 specifying the batch process output location after you choose all batch options in the batch process dialog box, you must choose options for saving your files. You can save backup copies of the original files from a batch process. Backup copies of files are placed in an original...
Page 274
274 chapter 13: automating repetitive tasks saving batch processes as scripts you can save batch process settings as a script or command to re-create the batch process easily in the future. After you choose all batch options in the batch dialog box, you are given options for saving your files. To cr...
Page 275
Extending fireworks 275 extending fireworks extending fireworks has never been easier. Fireworks offers a variety of different ways you can create custom commands that enhance its capabilities. With the extension manager, you can install and manage extensions that augment the functionality of firewo...
Page 276
276 chapter 13: automating repetitive tasks scripting with the history panel the history panel records a list of the steps you have performed while working in fireworks. Each step is stored on a separate line of the history panel, starting with the most recent. By default, the panel remembers 20 ste...
Page 277
Extending fireworks 277 playing commands you can execute recorded commands or a selection of actions in the history panel at any time. To play back a saved command: 1 if necessary, select one or more objects. 2 choose the command from the commands menu. To replay a selection of steps: 1 select one o...
Page 278
278 chapter 13: automating repetitive tasks about scripting with flash swf files with flash, you can create swf movies that contain javascript code. These movies can be used as fireworks commands, accessible from the commands menu in fireworks. You can even create a swf movie and use it as a firewor...
Page 279
Extending fireworks 279 editing or customizing a command script command scripts are saved as javascript. If you know javascript, you can open and edit commands in any text editor, such as notepad (windows) or textedit (macintosh). To edit a command using javascript: 1 from your desktop, navigate to ...
Page 280
280 chapter 13: automating repetitive tasks.
Page 281: Chapter 14
281 chapter 14 preferences and keyboard shortcuts macromedia fireworks mx 2004 preference settings let you control the general appearance of the user interface, as well as editing and folder aspects. In addition, fireworks allows you to customize your keyboard shortcuts. This means that you can cust...
Page 282
282 chapter 14: preferences and keyboard shortcuts • soft interpolation, which was used in fireworks 1, gives a soft blur and eliminates sharp details. This method is useful when others produce unwanted artifacts. • nearest neighbor interpolation results in jagged edges and sharp contrasts with no b...
Page 283
Setting preferences 283 note: macromedia flash is an exception. When launching and editing graphics in flash, fireworks always uses the preferences you set in the launch and edit section of the preferences dialog box. When editing from external application determines whether the original fireworks p...
Page 284
284 chapter 14: preferences and keyboard shortcuts restoring preferences you can restore preferences to their original settings by deleting the preferences file. The first time fireworks is launched after the preferences file has been deleted, a new preferences file is created, restoring fireworks t...
Page 285
Changing keyboard shortcut sets 285 5 choose the command whose shortcut you want to modify from the commands list. If a shortcut exists, it is displayed in the shortcuts list. 6 click in the press key text box, and press the desired keys for the new shortcut on the keyboard. If the key combination y...
Page 286
286 chapter 14: preferences and keyboard shortcuts working with configuration files to accommodate multiuser systems, fireworks supports user-specific configuration files. This lets you customize features in fireworks such as styles, keyboard shortcuts, commands, and so forth, without affecting the ...
Page 287
Viewing package contents (macintosh only) 287 location of the fireworks preferences file fireworks preferences are stored in a file named fireworks mx 2004 preferences.Txt (windows) or fireworks mx 2004 preferences (macintosh). The location of this file varies depending on your operating system. • i...
Page 288
288 chapter 14: preferences and keyboard shortcuts.
Page 289: Index
289 index numerics 24-bit color 236 32-bit color 236 a absolute urls, entering 166 act file format, swatches 99 add noise filter 54 add preview icons preference 282 adding frames 217 styles 157 adjusting hue or saturation 47 tonal range using eyedropper 45 adobe golive 261 aligning objects 26 alpha ...
Page 290
290 index b backing up during find and replace 265 baseline shift 89 batch process dialog box 268 batch processing 267 backing up files 273 commands 272 export settings 270 filenames 272 find and replace 271 optimization settings 270 saving as scripts 274 saving files 269 scaling graphics 271 batch ...
Page 291
Index 291 buttons active area 197 button editor 191 creating 191 defined 192 live effects 194 navigation bars 200 overview 191 setting a target 198 c cell border properties 207 center point and axis of rotation 22 chamfer rectangle tool 58 character spacing. See kerning check spelling command 94 clo...
Page 292
292 index commands batch processing 272 creating 276 deleting custom 278 editing 279 renaming custom 278 renaming or deleting fireworks commands 278 commands menu 277 managing saved commands 278 composite paths 75 compositing 152 compression adjusting 240 and optimization 231 blurring edges 245 choo...
Page 293
Index 293 pie charts 58 polygons 57, 58 rectangles 56 rounded rectangles 56, 58 selecting a point 69 spirals 58 splitting paths 75 stars 57 drop shadows 123 duplicating by dragging 20 selected objects 19 e e-mail 262 edges beveled 122 showing and hiding 10 edit gradient dialog box 113 edit stroke di...
Page 294
294 index files, unlocking 262 fill color box 32 fill color live effect 154 fills adding texture to 117 adjusting 114 applying color fills 46 applying gradient 32, 112 applying pattern 111 applying solid 110 changing color for basic shape tools 110 changing edges 115 drawing over strokes 109 editing...
Page 295
Index 295 g gaussian blur filter 49 gif file format choosing 234 choosing a color palette 235 swatches 99 glow effects 123 golive 261 gradient fills 32 adding new color 113 adjusting 114 adjusting color transition 113 applying 112 changing colors 113 converting images to transparency 51 edit gradien...
Page 296
296 index j jpeg files choosing jpeg format 234 editing selected areas 244 optimization settings 243 progressive 245 selective jpeg compression 244 sharpen jpeg edges command 245 k kerning 84 keyboard shortcuts 284 changing current set 284 custom shortcut sets 284 deleting custom shortcut sets 285 r...
Page 297
Index 297 n nav (navigation) bars creating 200 down state 178 over state 178 restore behavior 178 nearest neighbor interpolation scaling method 282 nested tables 183 numeric transform command 24 o objects converting to animation 213 creating bitmaps 30 distorting 23 grouping 25 merging 133 moving se...
Page 298
298 index pen tool 64 adding points with 70 curved segments 65 deleting points with 70 resuming path 71 straight segments 65 pencil tool 31 perspective illusion 23 photoshop applying plug-ins 124 grouped layers 134 import preferences 283 installing plug-ins 124 layer masks 143 patterns 283 plug-ins ...
Page 299
Index 299 r radial blur filter 50 raster images 29 rectangles 56 rounded corners 59 red-eye removal tool 34, 37 redoing using history panel 276 redraw path tool 74 redrawing paths 74 reducing points 77 reinstalling fireworks 287 relative urls, entering 166 removing effects 125 parts of a path 76 ren...
Page 300
300 index send to back command 26 sending documents as e-mail attachments 262 set nav bar image behavior 178 set pop-up menu behavior 178 set text of status bar behavior 178 shadows 41, 123 sharing layers 133 sharpen filter 52 sharpen more filter 52 sharpen tool 34 sharpening 52 bitmap areas 34 imag...
Page 301
Index 301 subselection tool auto-joining paths with 71 selecting masks with 145 swap image behavior 177 swap image rollovers creating disjoint rollovers 176 with single slice 175 swap image, external images for 179 swatch group, choosing custom 99 swatches panel 99 appending swatches 99 deleting a c...
Page 302
302 index replace color 34, 38 rubber stamp 34 scale 22 sharpen 34 skew 23 smudge 34 subselection 71, 145 text 79 transform 21 transformation tools distort 23 scale 22 skew 23 transforming by dragging 21 gradient fills 114 numerically 24 objects 21 pattern fills 114 text 92 transparency adding or re...


