- DL manuals
- MACROMEDIA
- Other
- FLASH 8-FLASH
- Tutorials Manual
MACROMEDIA FLASH 8-FLASH Tutorials Manual
Summary of FLASH 8-FLASH
Page 1
Flash tutorials.
Page 2
Trademarks 1 step robopdf, activeedit, activetest, authorware, blue sky software, blue sky, breeze, breezo, captivate, central, coldfusion, contribute, database explorer, director, dreamweaver, fireworks, flash, flashcast, flashhelp, flash lite, flashpaper, flash video encoder, flex, flex builder, f...
Page 3
3 contents chapter 1: basic tasks: create a document . . . . . . . . . . . . . . . . . 13 take a tour of the user interface . . . . . . . . . . . . . . . . . . . . . . . . . . . . . . . . . 14 change background and stage size . . . . . . . . . . . . . . . . . . . . . . . . . . . . . 17 change your v...
Page 4
4 contents chapter 4: basic tasks: creating a banner, part 3 . . . . . . . . . . .63 examine the completed fla file . . . . . . . . . . . . . . . . . . . . . . . . . . . . . . . . 64 considering your audience . . . . . . . . . . . . . . . . . . . . . . . . . . . . . . . . . . . . . 67 checking your ...
Page 5
Contents 5 write a function. . . . . . . . . . . . . . . . . . . . . . . . . . . . . . . . . . . . . . . . . . . . . . .103 write an event handler for the component . . . . . . . . . . . . . . . . . . . . . . .104 test your application . . . . . . . . . . . . . . . . . . . . . . . . . . . . . . . . ...
Page 6
6 contents chapter 11: basic tasks: create a presentation with screens (flash professional only) . . . . . . . . . . . . . . . . . . . . . . . . . . . . . . . . 135 set up your workspace. . . . . . . . . . . . . . . . . . . . . . . . . . . . . . . . . . . . . . . . 136 view the screen hierarchy and ...
Page 7
Contents 7 chapter 15: creating graphics: applying gradients . . . . . . . . . . 177 examine the completed fla file. . . . . . . . . . . . . . . . . . . . . . . . . . . . . . . . 179 open the starter document . . . . . . . . . . . . . . . . . . . . . . . . . . . . . . . . . . . . 181 apply a linear ...
Page 8
8 contents chapter 19: actionscript: write scripts . . . . . . . . . . . . . . . . . . 225 set up your workspace. . . . . . . . . . . . . . . . . . . . . . . . . . . . . . . . . . . . . . . .226 create an instance of a symbol. . . . . . . . . . . . . . . . . . . . . . . . . . . . . . . . .226 name b...
Page 9
Contents 9 chapter 22: actionscript: work with objects and classes . . 255 set up your workspace . . . . . . . . . . . . . . . . . . . . . . . . . . . . . . . . . . . . . . . 256 learn about classes and object types . . . . . . . . . . . . . . . . . . . . . . . . . . 256 create an object from a clas...
Page 10
10 contents.
Page 11
11 introduction this part of flash help includes several step-by-step tutorials, designed to teach you the fundamentals of flash. Macromedia recommends that you go through the lessons using the sample files provided. The path to the sample file is provided in each lesson. By completing these hands-o...
Page 12
12 introduction.
Page 13
13 1 chapter 1 basic tasks: create a document you’re about to experience the power of macromedia flash basic 8 and macromedia flash professional 8. You’ll see how, in a few minutes, you can create a compelling web experience that combines video, text, graphics, and media control behaviors. You can p...
Page 14
14 basic tasks: create a document take a tour of the user interface first, you’ll open the starting fla file that you’ll use to complete this lesson. Each lesson includes one start file, and a finished file that demonstrates how the fla file should appear upon completion of the lessons. 1. To open y...
Page 15
Take a tour of the user interface 15 select panel sets and arrange panels the default workspace layout panel set arranges your workspace in a way that facilitates taking lessons. You’ll use this layout for all lessons that you take in flash. ■ select window > workspace layout > default. You can move...
Page 16
16 basic tasks: create a document undo changes flash can undo a series of changes to your document. You’ll undo the artwork that you just created. 1. To see the undo feature in action, first open the history panel (window > other panels > history). The pencil tool appears in the panel, because using...
Page 17
Change background and stage size 17 the playhead (the red indicator line) is on frame 1 in the timeline. The keyframes are designated by small circles in the frames, which are filled, indicating there’s content in those frames. You can add a keyframe to a document when you want the flash content to ...
Page 18
18 basic tasks: create a document change your view of the stage you can change your view of the stage without affecting the actual stage size of your document. 1. In the stage view text box, above the right side of the stage, enter 500%. Then press enter (windows) or return (macintosh). Your view of...
Page 19
Add video 19 add graphics to the stage to add library items to your document, you verify that you’re adding the object to the correct layer, and then drag the item from the library panel to the stage. 1. In the timeline, click the content layer name to select that layer. With the selection tool sele...
Page 20
20 basic tasks: create a document view object properties when you add an object to the stage, you can select it, and then view and change its properties in the property inspector. The type of object selected determines which properties appear. For example, if you select a text object (not a text gra...
Page 21
Add video control behaviors 21 3. In the play video dialog box, verify that relative is selected. Select video, which is the instance name that you gave to the video clip, and click ok. 4. On the stage, click the pause movie clip instance to select it. In the behaviors panel, click add (+) and selec...
Page 22
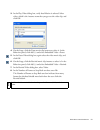
22 basic tasks: create a document use the movie explorer to view the document structure the movie explorer helps you arrange, locate, and edit media. With its hierarchical tree structure, the movie explorer provides information about the organization and flow of a document. 1. Select window > movie ...
Page 23
Summary 23 test the document as you author a document, you should save and test it frequently to ensure the flash content plays as expected. When you test the swf file, click the video control buttons to see if the video stops, plays, and rewinds as expected. 1. Save the document (file > save) and s...
Page 24
24 basic tasks: create a document ■ view object properties ■ add video control behaviors ■ use the movie explorer to view the document structure ■ test the document ■ find help to learn more about flash, take another lesson..
Page 25
25 2 chapter 2 basic tasks: creating a banner, part 1 macromedia flash basic 8 or macromedia flash professional 8 can seem like a very complex programs to learn. One reason for this seeming complexity is that you can use it for so many different things, such as cartoon animations, media players, and...
Page 26
26 basic tasks: creating a banner, part 1 in part 1 of this tutorial, you will complete the following tasks: examine the completed fla file. . . . . . . . . . . . . . . . . . . . . . . . . . . . . 27 creating a new document. . . . . . . . . . . . . . . . . . . . . . . . . . . . . . . . . . .29 chang...
Page 27
Examine the completed fla file 27 examine the completed fla file as you examine the finished version of an application that you’ll create, you’ll also look at the flash workspace. In this section, you will complete the following tasks: ■ “open the authoring document” on page 163 ■ “review the comple...
Page 28
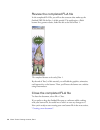
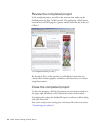
28 basic tasks: creating a banner, part 1 review the completed fla file in the completed fla file, you will see the structure that makes up the finished swf file for part 1 of this tutorial. The application, a flash banner for a gnome website, looks like this at the end of part 1: the completed bann...
Page 29
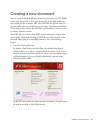
Creating a new document 29 creating a new document you can create all kinds of different elements for the web or for cd-roms and devices using flash 8. First, you create a file in the flash authoring tool, which you use to output swf files. Swf files are the files that you can put online when you em...
Page 30
30 basic tasks: creating a banner, part 1 2. Click flash document from the create new column on the start page to create a blank document. 3. Select file > save as from the main menu. 4. Name the file banner.Fla, find or create a new directory to save your project in, and click save when you're done...
Page 31
Changing document properties 31 around the stage you see a variety of panels. The panel on the left is called the tools panel (see the following figure). This panel includes tools you can use to create and modify documents, such as tools you use to draw and make selections. Use the tools panel to dr...
Page 32
32 basic tasks: creating a banner, part 1 if you don't have any objects or frames selected, the property inspector allows you to modify properties for the document itself. 1. Open the property inspector (window > properties > properties) and click the button next to the text that says size to open t...
Page 33
Importing graphics 33 3. Click ok when you finish entering the new dimensions to return to the authoring environment. When you return to the authoring environment, notice how the dimensions of your document change. You can also change the current document's background color and frame rate directly i...
Page 34
34 basic tasks: creating a banner, part 1 you'll see the import dialog box (see the following figure), which enables you to browse to the file you want to import. Browse to the folder on your hard disk that contains an image to import into your flash document. 2. Navigate to the directory where you ...
Page 35
Importing graphics 35 6. Click the selection tool, and select the instance on the stage. If you look at the property inspector you'll notice that you can modify the image's width and height, as well as the image's x and y position on the stage. When you select an object on the stage, you can see and...
Page 36
36 basic tasks: creating a banner, part 1 setting new coordinates moves the upper-left corner of the image to the upper-left corner of the stage. You can drag the bitmap image around the stage using the selection tool instead of changing coordinates in the property inspector. Use the property inspec...
Page 37
Introducing layers and the timeline 37 in this section, you will complete the following tasks: ■ “creating a new layer” on page 38 ■ “importing to a layer” on page 39 1. Select layer 1 in the timeline and click the dot below the lock icon, as shown in the following figure. Lock a layer so its conten...
Page 38
38 basic tasks: creating a banner, part 1 creating a new layer in just about any flash project where you use imported graphics and animation, you'll need to create at least a few layers. You need to separate certain elements onto their own layers, particularly when you start to animate objects. You ...
Page 39
Introducing layers and the timeline 39 importing to a layer in an earlier exercise, “importing graphics” , you imported the gnome.Png image directly into the document's library. Then you dragged the image onto a selected layer on the stage. You can also import assets directly to the stage instead of...
Page 40
40 basic tasks: creating a banner, part 1 move the star.Png file on the stage to just above the gnome's head in the image, as shown in the following figure. Move the star.Png image just above the gnome’s head. 6. Select file > save to save your document before moving on to “test the application” . T...
Page 41
Summary 41 2. Click the close button of the window that contains the swf file to return to the authoring environment. Find the folder on your hard disk where you saved banner.Fla at the beginning of this tutorial in “creating a new document” . When you open this folder, you should see an additional ...
Page 42
42 basic tasks: creating a banner, part 1.
Page 43
43 3 chapter 3 basic tasks: creating a banner, part 2 welcome to part 2 of this three-part introduction to macromedia flash basic 8 or macromedia flash professional 8. You successfully completed part 1 of this tutorial, where you created, set up, and imported content into an fla file. Because you're...
Page 44
44 basic tasks: creating a banner, part 2 ■ “creating a symbol” on page 49 shows you how to create a movie clip symbol, to which you’ll add an animation. ■ “adding animation to a timeline” on page 51 shows you how to create animation using the main timeline and motion tweens. ■ “creating a button” o...
Page 45
Examine the completed fla file 45 copy the flashbanner folder to another location on your hard disk to which you have access. Inside this folder are three directories for each part of this tutorial: part1, part2, and part3. In the flashbanner/part2 folder, you will find a flash file called banner2_c...
Page 46
46 basic tasks: creating a banner, part 2 this file contains an animation in a movie clip, text, an invisible button, and the assets that you imported in part 1 of this tutorial. ■ the movie clip instance contains a graphical instance that you animate. ■ text fields contain static, stylized text tha...
Page 47
Adding text 47 you can add any of these types of text using the text tool. For this exercise, you will add some static text to the stage for decorative purposes. To add static text, follow these steps: open the banner.Fla file you created in part 1 of this tutorial, and rename the file banner2.Fla. ...
Page 48
48 basic tasks: creating a banner, part 2 when you finish, the text should be similar in size and in position to the text in the following figure. Add some static text to the banner. Select any font you want to use. 9. Select the text tool again, and type underpaid? Below the text you added previous...
Page 49
Creating a symbol 49 creating a symbol a symbol is an object that you create in flash. As you discovered in part 1, a symbol can be a graphic, button, or movie clip, and you can then reuse it throughout the current fla or other fla files. Any symbol that you create is automatically added to the docu...
Page 50
50 basic tasks: creating a banner, part 2 use the convert to symbol dialog box to convert selected content into a symbol, give it a name, and click ok (shown above) add it to the document’s library. You might see a smaller dialog box without the advanced linkage and source information when you conve...
Page 51
Adding animation to a timeline 51 adding animation to a timeline you have already used the timeline in part 1 of this tutorial ( “basic tasks: creating a banner, part 1” on page 25 ) to insert new layers and add content onto those layers. In part 1 you added assets to a frame on the timeline. You mi...
Page 52
52 basic tasks: creating a banner, part 2 3. Double-click the join us symbol instance on the stage. This opens the symbol in symbol-editing mode (see the following figure). In this mode, you see the movie clip symbol's timeline, which runs independently of the timeline for the main fla file (the one...
Page 53
Adding animation to a timeline 53 scene 1 refers to the main timeline of the fla file. You can click this button on the edit bar to return to the main timeline. The names after it point to the symbol that you're editing. If the symbol is nested within other symbols, this path might contain several n...
Page 54
54 basic tasks: creating a banner, part 2 10. Change the slider value to 75% (see the following figure). Change the brightness of the movie clip instance. The brightness changes for the instance on frame 15. The instances on frames 1 and 30 do not change. This means that you can now add a motion twe...
Page 55
Adding animation to a timeline 55 you can create several kinds of animation in an fla file, such as motion tweens, shape tweens, and frame-by-frame animation. In this tutorial, you will create a motion tween. A motion tween is an animation where you define properties such as position, size, and rota...
Page 56
56 basic tasks: creating a banner, part 2 15. Select control > test movie. The test environment opens where you can see the animation. Notice how it loops, appearing to fade in and out because of the change in brightness. By default, the playhead returns to frame 1 and replays the animation after it...
Page 57
Creating a button 57 5. Select no color, as shown in the following figure. Doing so disables the rectangle's outline. Select no color for the stroke color control. 6. Drag the mouse diagonally across the stage to create a rectangle. The size of the rectangle does not matter—you'll resize it later us...
Page 58
58 basic tasks: creating a banner, part 2 12. Double-click the new button on the stage to enter the symbol-editing mode. The rectangle is currently on the first up frame of the button you created. This is the up state of the button—what users see when the button sits on the stage. Instead, you want ...
Page 59
Writing simple actions 59 writing simple actions you need to add some simple actionscript to your banner in order for the invisible button to open a website or send information about how many clicks the banner has received. There are several different places you can add actionscript in a flash docum...
Page 60
60 basic tasks: creating a banner, part 2 before you add the code, you need to give the button a unique instance name. The instance name enables you to target the button with actionscript code. If you don't name the button, your code doesn't have a way of targeting the button from the timeline. The ...
Page 61
Test the application 61 7. Select file > save to save your progress before moving on. After you finish saving the file, proceed to the following exercise, “test the application” . Test the application now you have a flash banner, with graphics and animation, which also reacts to button clicks. You h...
Page 62
62 basic tasks: creating a banner, part 2 summary congratulations for completing the next step of creating a banner in flash. You used the flash authoring tool to add text, create symbols, animate on a timeline, and add interactivity to your application. In part 2 of this tutorial, you learned how t...
Page 63
63 4 chapter 4 basic tasks: creating a banner, part 3 this is part 3 of a three-part article on how to build a simple animated banner in macromedia flash basic 8 or macromedia flash professional 8, and add it to a web page using macromedia dreamweaver. In this final part, you learn about file size, ...
Page 64
64 basic tasks: creating a banner, part 3 the tutorial workflow includes the following tasks: ■ “examine the completed fla file” on page 64 lets you view the completed flash document for part 3. ■ “checking your publish settings” on page 68 shows you how to check and modify your publish settings bef...
Page 65
Examine the completed fla file 65 open the finished project the files for this tutorial are located in the samples and tutorials folder in the flash installation folder. For many users, particularly in educational settings, this folder is read-only. Before proceeding with the tutorial, you should co...
Page 66
66 basic tasks: creating a banner, part 3 review the completed project in the completed project, you will see the structure that makes up the finished project for part 3 of this tutorial. The application, a flash banner inserted into an html page for a gnome website, looks like this at the end of pa...
Page 67
Considering your audience 67 considering your audience when you create a site, you often need to follow certain guidelines for submitting a flash banner. For the purposes of this article, following established advertising guidelines is not a great concern because you're not submitting the banner to ...
Page 68
68 basic tasks: creating a banner, part 3 the purpose of this article is understand how to create flash content, export it from flash, and add it to your own website. The lesson to draw from considering banner guidelines is that you need to consider your audience. Whenever you create a flash site, t...
Page 69
Checking your publish settings 69 in earlier parts of this tutorial, you made changes in the document settings dialog box. You set the dimensions and frame rate (fps) for the swf file. In this final section, you will make sure that the flash player setting you want to target is correct, and that you...
Page 70
70 basic tasks: creating a banner, part 3 8. In the options section, select compress movie. You do not need to make any other selections on the flash tab. 9. When you finish, click ok to accept the changes to your document. 10. Select file > publish when you have finished editing your fla file. This...
Page 71
Inserting flash on a dreamweaver site 71 inserting flash on a dreamweaver site you might have a web page already created for a banner. We have created a page for you to use for the purposes of this exercise, which is ready to have a banner of this size placed on it. Make sure that you have the flash...
Page 72
72 basic tasks: creating a banner, part 3 this is where you want to add the flash banner to the website. Select the large image placeholder on the right side of the web page in dreamweaver. Notice that the dimensions are the same as your banner file. 6. Press the backspace or delete key to delete th...
Page 73
Using roundtrip editing 73 using roundtrip editing by now, you might want to change something in your flash banner. Say you want to change the frame rate, or add some more text. It's easy to return to flash to edit the document from dreamweaver. 1. In gnome.Html, select the swf file in design view (...
Page 74
74 basic tasks: creating a banner, part 3 checking for flash player most people who visit your website will have the flash player 6 or greater plug-in installed. In rare circumstances, a visitor might not have the plug- in installed. There are several different things you can do when a visitor witho...
Page 75
Checking for flash player 75 6. Select the always go to first url if detection is not possible option. When selected, this option effectively means "assume that the visitor has the plug-in, unless the browser explicitly indicates that the plug-in is not present." because you add an alternate ad for ...
Page 76
76 basic tasks: creating a banner, part 3 test the application now you have a flash banner, with graphics and animation, which also reacts to button clicks. You have completed your first interactive and animated flash document, and then you inserted it into a website using dreamweaver. Let's take a ...
Page 77
Summary 77 summary now you have completed your first flash site and inserted it into a dreamweaver web page. You have learned how to create a new file, import content, create new assets in flash, add simple animation and actionscript, and publish your work for the web. You also learned how to use dr...
Page 78
78 basic tasks: creating a banner, part 3.
Page 79
79 5 chapter 5 basic tasks: create accessible flash content with knowledge of a few design techniques and accessibility features in macromedia flash basic 8 and macromedia flash professional 8, you can create flash content that is accessible to all users, including those with disabilities. This less...
Page 80
80 basic tasks: create accessible flash content set up your workspace first, you’ll open the start file for the lesson and set up your workspace to use an optimal layout for taking lessons. 1. To open your start file, in flash select file > open and navigate to the file: ■ in windows, browse to boot...
Page 81
Provide a document title and description 81 make your document accessible to screen readers you’ll now specify that your document is accessible to screen readers, and provide a name and description of your document that a screen reader can read aloud. 1. With nothing selected on the stage, select wi...
Page 82
82 basic tasks: create accessible flash content provide a title and description for instances now that you’ve provided information about the entire document, you can provide information about stage objects included in the document. 1. Select the trio motor company logo along the top of the stage. In...
Page 83
Change static text to dynamic text for accessibility 83 specify that screen readers ignore elements in your document screen readers follow a specific order when reading web content. However, when content on the web page changes, most screen readers will begin reading the web content all over again. ...
Page 84
84 basic tasks: create accessible flash content 2. In the property inspector, select dynamic text from the text type pop-up menu. Accessibility settings now appear in the accessibility panel. 3. In the instance name text box, enter text9_txt. Control the tab order and reading order you can create a ...
Page 85
Control the tab order and reading order 85 to create a tab order in this lesson, use one of the following procedures. To create a reading order along with a tab order, follow the procedure to control the tab order and reading order using actionscript. If you have flash professional 8, you can follow...
Page 86
86 basic tasks: create accessible flash content if you have flash professional 8, follow this procedure to view a tab order: ■ select view > show tab order. The tab index number that you entered appears next to the instance on the stage. Follow this procedure to control the tab order and reading ord...
Page 87
Summary 87 about testing your document with screen readers you already know the importance of regularly testing your flash document as you create it to ensure it performs as expected. Frequent testing is even more important when you design a document to work with assistive technologies such as scree...
Page 88
88 basic tasks: create accessible flash content.
Page 89
89 6 chapter 6 basic tasks: work with layers in macromedia flash basic 8 and macromedia flash professional 8, layers are analogous to transparent sheets of acetate stacked on top of each other. In the areas of a layer that don’t contain content, you can see through to content in the layers below. La...
Page 90
90 basic tasks: work with layers set up your workspace first, you’ll open the start file for the lesson and set up your workspace to use an optimal layout for taking lessons. 1. To open your start file, in flash select file > open and navigate to the file: ■ in windows, browse to boot drive\program ...
Page 91
Select a layer 91 select a layer you place objects, add text and graphics, and edit on the active layer. To make a layer active, you either select the layer in the timeline or select a stage object in the layer. The active layer is highlighted in the timeline, and the pencil icon indicates it can be...
Page 92
92 basic tasks: work with layers hide and show layers you can hide layers to view content on other layers. When hiding layers, you have the option of hiding all layers in your document simultaneously or hiding layers individually. 1. Click the eye icon above the layers so that a red x appears in the...
Page 93
Change the order of layers 93 add and name a layer you’ll now add a layer, name the layer, and then add a graphic symbol to the layer. 1. In the timeline, click the car layer. 2. Click insert layer below the timeline. The new layer appears above the car layer and becomes the active layer. 3. Double-...
Page 94
94 basic tasks: work with layers organize layers in a folder you can create layer folders to organize layers and reduce timeline clutter. The timeline contains two layers that contain navigation objects: one for navigational buttons and another for navigational art. You’ll create a layer folder, nam...
Page 95
Add a guide layer 95 4. In the timeline, drag the road layer to the mask layer, placing it below the car layer. The mask layer and the layers it masks are automatically locked. 5. To view the mask effect, select control > test movie. 6. When you finish viewing the mask effect, close the swf file win...
Page 96
96 basic tasks: work with layers delete a layer because you don’t really need the guide layer in your document, you’ll delete it. ■ in the timeline, with the notes layer selected, click the delete layer button. Summary congratulations on learning how to work with layers in flash. In just a few minut...
Page 97
97 7 chapter 7 basic tasks: create an application the application that you’ll create in this lesson lets users view the cost of selecting multiple products. A calculate button then adds the total cost. You can print this tutorial by downloading a pdf version of it from the macromedia flash documenta...
Page 98
98 basic tasks: create an application set up your workspace first, you’ll open the start file for the lesson and set up your workspace to use an optimal layout for taking lessons. 1. To open your start file, in flash select file > open and navigate to the file: ■ in windows, browse to boot drive\pro...
Page 99
Name text fields 99 copy input and dynamic text fields you’ll use input text fields to create a form. 1. Click the input text field where users enter the quantity of cd players. Press alt and drag the copy of the field down to the shocks qty area. 2. Alt-click the input text field that you just drag...
Page 100
100 basic tasks: create an application add and name a button component components are movie clips that offer an easy way of adding advanced functionality to your document without having to know advanced actionscript. You’ll use the button component to create a calculate button that totals prices. Be...
Page 101
Declare variables and values for the prices 101 declare variables and values for the prices for your application to multiply the quantity of parts selected by the price of the part, you need to define a variable for each part in actionscript. The value for the variable is the cost of the part. 1. In...
Page 102
102 basic tasks: create an application specify values for input text fields you must specify values for the input text fields. You’ll use the values when you write actionscript that multiplies the quantity and cost values. 1. In the script pane, with the insertion point after the text that reads 125...
Page 103
Write a function 103 write a function a function is a script that you can use repeatedly to perform a specific task. You can pass parameters to a function, and it can return a value. In this lesson, every time your user clicks the calculate button, a function will run that multiplies data in the inp...
Page 104
104 basic tasks: create an application write an event handler for the component for your swf file to react to events such as a mouse click, you can use event handlers—actionscript associated with a particular object and event. You’ll use an on() event handler for the button component that calculates...
Page 105
Summary 105 when you finish, your script should appear as follows: on(click) { with(_parent){ pricetotal_txt.Text = number (price1_txt.Text) + number (price2_txt.Text) + number (price3_txt.Text); } } the event handler that you typed specifies that the text in the pricetotal_txt field should be the s...
Page 106
106 basic tasks: create an application.
Page 107
107 8 chapter 8 basic tasks: use layout tools macromedia flash basic 8 and macromedia flash professional 8 offer a variety of ways to place objects on the stage. This tutorial teaches you how to use the layout tools in flash to create a user interface. You can print this tutorial by downloading a pd...
Page 108
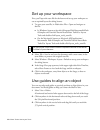
108 basic tasks: use layout tools set up your workspace first, you’ll open the start file for the lesson and set up your workspace to use an optimal layout for taking lessons. 1. To open your start file, in flash select file > open and navigate to the file: ■ in windows, browse to boot drive\program...
Page 109
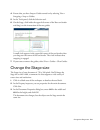
Change the stage size 109 4. Ensure that you have snap to guides turned on by selecting view > snapping > snap to guides. 5. In the tools panel, click the selection tool. 6. On the stage, click inside the upper-left corner of the blue text border and drag it to the intersection of the two guides. A ...
Page 110
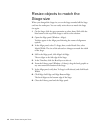
110 basic tasks: use layout tools resize objects to match the stage size when you changed the stage size, art on the stage extended off the stage and into the workspace. You can easily resize the art to match the stage size again. 1. On the stage, click the gray mountains to select them. Shift-click...
Page 111
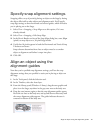
Align an object using the alignment guides 111 specify snap alignment settings snapping offers a way of precisely placing an object on the stage by having the object affix itself to other objects and alignment tools. You’ll specify snap align settings to show horizontal and vertical guides, which wi...
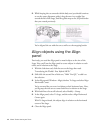
Page 112
112 basic tasks: use layout tools 5. While keeping the car centered with the body text (you should continue to see the center alignment guide), drag the auto in a straight line, toward the left of the stage, until the guide snaps at the 30-pixel border that you created previously. You’ve aligned the...
Page 113
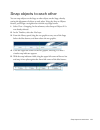
Snap objects to each other 113 snap objects to each other you can snap objects on the stage to other objects on the stage, thereby setting the alignment of objects to each other. Using the snap to objects feature, you’ll align a navigation bar with the top stage banner. 1. Select view > snapping. In...
Page 114
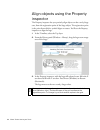
114 basic tasks: use layout tools align objects using the property inspector the property inspector lets you precisely align objects on the x and y stage axes, from the registration point of the stage object. The registration point is the point from which a symbol aligns or rotates. You’ll use the p...
Page 115
Summary 115 align objects using the grid and arrow keys you can use the grid to assist you in placing objects on the stage. 1. Select view > grid > show grid. The grid does not appear when you test or publish your document. 2. On the stage, select the title text you previously grouped together. 3. U...
Page 116
116 basic tasks: use layout tools.
Page 117
117 9 chapter 9 basic tasks: create symbols and instances a symbol is a reusable object, and an instance is an occurrence of a symbol on the stage. Repeatedly using instances does not increase the file size and is a good part of a strategy for keeping a document file size small. Symbols also simplif...
Page 118
118 basic tasks: create symbols and instances set up your workspace first, you’ll open the start file for the lesson and set up your workspace to use an optimal layout for taking lessons. 1. To open your start file, in flash select file > open and navigate to the file: ■ in windows, browse to boot d...
Page 119
Create a graphic symbol 119 create a graphic symbol a graphic symbol is well suited for repeated use of static images, or for creating animations associated with the main timeline. Unlike with movie clip and button symbols, you cannot give instance names to graphic symbols, nor can you refer to them...
Page 120
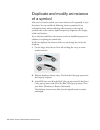
120 basic tasks: create symbols and instances duplicate and modify an instance of a symbol after you’ve created a symbol, you can use instances of it repeatedly in your document. You can modify the following instance properties for an individual instance without affecting other instances or the orig...
Page 121
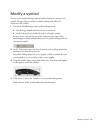
Modify a symbol 121 modify a symbol you can enter symbol-editing mode by double-clicking any instance of a symbol. Changes that you make in symbol-editing mode affect all instances of the symbol. 1. Do one of the following to enter symbol-editing mode: ■ on the stage, double-click one of the car ins...
Page 122
122 basic tasks: create symbols and instances create a movie clip symbol a movie clip symbol is analogous in many ways to a document within a document. This symbol type has its own timeline independent of the main timeline. You can add movie clips within other movie clips and buttons to create neste...
Page 123
Summary 123 add an effect to the movie clip you can create an animation within a movie clip timeline, in symbol- editing mode, that plays independent of the main timeline. You’ll add an effect to the mcwheel symbol that will cause all instances of the symbol to spin. 1. With the selection tool, doub...
Page 124
124 basic tasks: create symbols and instances.
Page 125
125 10 chapter 10 basic tasks: add button animation and navigation a button is a symbol that contains special frames for different button states, such as when the user’s mouse pointer is over the button or when the user clicks the button. When you select the button behavior for a new symbol, macrome...
Page 126
126 basic tasks: add button animation and navigation set up your workspace first, you’ll open the start file for the lesson and set up your workspace to use an optimal layout for taking lessons. 1. To open your start file, in flash select file > open and navigate to the file: ■ in windows, browse to...
Page 127
Name a button instance 127 create a button from grouped objects you can create buttons from text and graphics, including bitmap images and grouped objects. In this lesson, you’ll turn a logo and some text into one large button. 1. In the tools panel, click the selection tool. On the stage, select th...
Page 128
128 basic tasks: add button animation and navigation view the hit area by enabling buttons when the enable simple buttons feature is active, you can view the less complex aspects of your buttons, such as the hit area (the clickable area of a button) and the colors used for the button states. More co...
Page 129
Align buttons 129 3. Select the hit frame (frame 4) of the hit area layer in the btnlogo timeline, and press f6 to add a keyframe. 4. In the tools panel, select the rectangle tool. The stroke and fill color for the rectangle are unimportant. On the stage, draw a rectangle that covers, as closely as ...
Page 130
130 basic tasks: add button animation and navigation 7. Using the selection tool, drag to select all three buttons. 8. Open the align panel by selecting window > align. Verify that to stage is not selected, because you do not want to align the buttons relative to the stage. 9. In the align panel, cl...
Page 131
Add an action to a button 131 7. With the playhead still on frame 15, select the button shape on the stage, and in the property inspector select a bright shade of red from the fill color pop-up menu. 8. In the timeline, click any frame between frames 1 and 15. In the property inspector, select shape...
Page 132
132 basic tasks: add button animation and navigation add navigation to a button with behaviors, you can quickly add navigation to a button without having to know actionscript. You’ll add navigation to open a web page when the user clicks a button. 1. On the stage, select the instance of button 1. 2....
Page 133
Summary 133 test the swf file you’ll test your document to view the button animation and see if the navigation works as expected. 1. Save your document and select control > test movie. 2. Move the mouse pointer over the instance of button 1 to view the color animation that you created. 3. Click the ...
Page 134
134 basic tasks: add button animation and navigation.
Page 135
135 11 chapter 11 basic tasks: create a presentation with screens (flash professional only) flash professional 8 offers a new way to create presentations with slide screens. If you can imagine placing media on slide screens, adding nested slides that inherit media from other slides, and using the bu...
Page 136
136 basic tasks: create a presentation with screens (flash professional only) set up your workspace first, you’ll open the start file for the lesson and set up your workspace to use an optimal layout for taking lessons. 1. To open your start file, in flash select file > open and navigate to the file...
Page 137
View the screen hierarchy and screen timelines 137 view the screen hierarchy and screen timelines you add content to screens in much the same way that you add content to the stage, but screens are nested movie clips, relying on a hierarchy, nested timelines, and inheritance. All screens exist in the...
Page 138
138 basic tasks: create a presentation with screens (flash professional only) 2. In the screen outline pane, select the presentation screen. All slide screen documents contain a presentation screen, which is at the top level of the screen hierarchy. Think of the presentation slide as a master slide:...
Page 139
Add content to a presentation slide 139 add content to a presentation slide you’ll add navigation buttons to the presentation slide so that the buttons appear on each slide in the presentation. 1. In the screen outline pane, select the presentation slide thumbnail. In the timeline, select frame 1 of...
Page 140
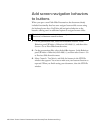
140 basic tasks: create a presentation with screens (flash professional only) add screen navigation behaviors to buttons when you open a new flash slide presentation, the document already includes functionality that lets users navigate between slide screens using the keyboard arrow keys. You’ll also...
Page 141
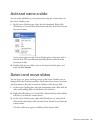
Select and move slides 141 add and name a slide you can easily add slides to your presentation using the context menu in the screen outline pane. 1. In the screen outline pane, select the title thumbnail. Right-click (windows) or control-click (macintosh) and select insert screen from the context me...
Page 142
142 basic tasks: create a presentation with screens (flash professional only) add content to a new slide the features slide, as a child of the presentation slide, inherits properties from that slide. Additionally, because the features slide is a parent to the three slides that you copied and pasted,...
Page 143
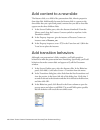
Summary 143 4. To add the fly behavior, verify that the features slide is still selected. In the behaviors panel, click add (+) and select screen > transition from the menu. 5. In the transitions dialog box, select fly from the list of transitions, and select out as the direction. 6. In the duration...
Page 144
144 basic tasks: create a presentation with screens (flash professional only).
Page 145
145 12 chapter 12 creating graphics: draw in flash when you draw in flash, you create vector art, which is a mathematical representation of lines, curves, color, and position. Vector art is resolution- independent; you can rescale the art to any size or display it at any resolution without losing cl...
Page 146
146 creating graphics: draw in flash set up your workspace first, you’ll open the start file for the lesson and set up your workspace to use an optimal layout for taking lessons. 1. To open your start file, in flash select file > open and navigate to the file: ■ in windows, browse to boot drive\prog...
Page 147
Draw a polygon 147 3. Click anywhere in the gray workspace beside the stage to display properties for the shape you’ll create. In the property inspector (window > properties), verify that black is selected as the stroke color, 1 pixel is selected as the stroke height, and solid is selected as the st...
Page 148
148 creating graphics: draw in flash rotate the shape after you’ve created a shape, you can use the transform panel to specify a precise number of degrees in which to rotate the shape. 1. In the tools panel, click the selection tool. On the stage, double-click within the hexagon to select both the s...
Page 149
Copy strokes 149 3. In the tools panel, click the selection tool. On the stage, click within the circle, and press backspace or delete. Transform the shape of your drawing using the free transform tool, you can scale, rotate, compress, stretch, or skew lines and shapes. You’ll use the free transform...
Page 150
150 creating graphics: draw in flash 3. Press shift+alt and drag down slightly to drag a copy of the three lines, as in the following illustration: draw with the line tool the line tool allows you to draw straight lines in any direction. ■ in the tools panel, select the line tool. On the stage, draw...
Page 151
Create a logo with the pen tool 151 group the shape you can manipulate the stroke and fill of a shape as separate entities, as you did earlier, or you can group the stroke with the fill to manipulate the shape as a single graphic, which you’ll do now. 1. With the selection tool, drag around the shap...
Page 152
152 creating graphics: draw in flash 5. With the selection tool, move the pointer around the logo that you created. When you move the pointer over a corner point, which you can drag to create various angles, the pointer appears as follows: when you move the pointer over a curved line segment (you do...
Page 153
153 13 chapter 13 creating graphics: create a timeline animation macromedia flash basic 8 and macromedia flash professional 8 provide powerful tools for creating animation. Most simple animation in flash is done using a process known as tweening. Tweening is short for “in between” and refers to fill...
Page 154
154 creating graphics: create a timeline animation set up your workspace first, you’ll open the start file for the lesson and set up your workspace to use an optimal layout for taking lessons. 1. To open your start file, in flash select file > open and navigate to the file: ■ in windows, browse to b...
Page 155
Create a motion tween 155 create a motion tween you create a motion tween by defining properties for an instance, a grouped object, or text in a starting keyframe, and then changing the object’s properties in a subsequent keyframe. Flash creates the animation from one keyframe to the next in the fra...
Page 156
156 creating graphics: create a timeline animation 7. In the tireanim layer, select any frame between frames 2 and 14. In the property inspector, select motion from the tween pop-up menu. An arrow appears in the timeline between the two keyframes. 8. Select any frame between frames 16 and 29. Again,...
Page 157
Copy and paste keyframes in an animation 157 5. If the color mixer is not already open, select window > color mixer to open it, and change the alpha value from 25% to 10%. 6. Click the pop-up menu control in the upper-right side of the color mixer and select close panel. 7. Select any frame between ...
Page 158
158 creating graphics: create a timeline animation 4. Select the transformation center point (the small circle near the center of the movie clip) and drag it to the bottom of the tire. The center point snaps to the lower-middle transform handle. 5. On the stage, drag the upper-middle transform handl...
Page 159
Change the speed of the animation 159 change the frames per second speed the frame rate, measured in frames per second (fps) is the speed at which the animation plays. By default, flash animations play at a rate of 12 fps, which is ideal for web animation. Sometimes, however, it’s desirable to chang...
Page 160
160 creating graphics: create a timeline animation test the swf file you’ll test your document to view the animation and see if it works as expected. 1. Save your document and select control > test movie. 2. When you finish viewing the animation, close the swf file window. Summary congratulations on...
Page 161
161 14 chapter 14 creating graphics: making animations with easing (flash professional only) this tutorial guides you through the process of using the tweening tools in macromedia flash basic 8 and macromedia flash professional 8. Tweening is the process of animating a graphic by setting starting an...
Page 162
162 creating graphics: making animations with easing (flash professional only) in this tutorial, you will complete the following tasks: examine the completed fla file. . . . . . . . . . . . . . . . . . . . . . . . . . . . 163 open the starter document . . . . . . . . . . . . . . . . . . . . . . . . ...
Page 163
Examine the completed fla file 163 examine the completed fla file as you examine the finished version of the application you’ll create, you will also look at the flash workspace. In subsequent sections, you’ll go through the steps to create the application yourself. Open the authoring document it’s ...
Page 164
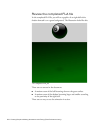
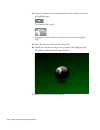
164 creating graphics: making animations with easing (flash professional only) review the completed fla file in the completed fla file, you will see a graphic of an eight ball with a shadow beneath it on a green background. The illustration looks like this: the completed fla file there are two tween...
Page 165
Open the starter document 165 see the animation play in a separate window as a swf file to see the animation play in a separate window as a swf file, select control > test movie. See the animation on the stage in the flash authoring environment to see the animation on the stage in the flash authorin...
Page 166
166 creating graphics: making animations with easing (flash professional only) add the necessary frames to the timeline to add the necessary frames to the timeline: 1. In the timeline, drag the pointer to select all the frames from 1 to 60 in all four layers. Selecting multiple frames in the timelin...
Page 167
Open the starter document 167 3. On the stage, press shift and drag the eight ball downward until the bottom of the eight ball is in the middle of the shadow graphic. The eight ball correctly placed on the shadow you have now defined a new position for the eight ball on the stage in frame 61. The ba...
Page 168
168 creating graphics: making animations with easing (flash professional only) 6. In the timeline, drag the playhead from frame 1 to frame 61. You will see the eight ball animate downward towards the shadow graphic. 7. Select file > save as. 8. Name the file my_tween_start.Fla and click ok. Use easi...
Page 169
Open the starter document 169 ease out the eight-ball animation 1. In the timeline, select the entire ball layer by clicking the layer name. 2. In the property inspector, drag the ease slider up until the value is 100. This will provide the maximum amount of easing out, thereby causing the eight-bal...
Page 170
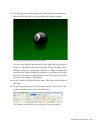
170 creating graphics: making animations with easing (flash professional only) the custom ease in / ease out dialog box displays a graph representing the degree of motion over time. Frames are represented by the horizontal axis, and the percentage of change is represented by the vertical axis. The c...
Page 171
Open the starter document 171 4. Drag the line to the top of the graph (the 100% line) while keeping it at frame 20 on the horizontal axis. The line is now a complex curve. Dragging the control point to the top of the graph 5. Drag the left vertex handle of the new control point to the right until i...
Page 172
172 creating graphics: making animations with easing (flash professional only) 6. Control-click (windows) or command-click (macintosh) the flat part of the curve at the top of the graph near frame 32 and drag the new point downward to approximately 76% along the vertical axis. Dragging the point at ...
Page 173
Open the starter document 173 9. Drag the vertex handles for the new control point onto the control point. 10. Control-click (windows) or command-click (macintosh) the curve at about frame 52 and drag it down to about 95% on the vertical axis. 11. Drag the vertex handles so that the line connecting ...
Page 174
174 creating graphics: making animations with easing (flash professional only) create a motion tween with an alpha setting in this section, you will create a tween of the alpha value of the shadow graphic that appears under the eight ball. Because the changes in the shadow should match the speed and...
Page 175
Open the starter document 175 8. In the timeline, click the layer named ball to select the frames in that layer. 9. In the property inspector, click edit next to the ease slider. 10. In the custom ease in / ease out dialog box, press control-c (windows) or command-c (macintosh) to copy the easing cu...
Page 176
176 creating graphics: making animations with easing (flash professional only) test the application at any point during authoring, you can test how your application plays as a swf file. Because this tutorial contains no animation or interactivity, the file will look the same in test mode as it does ...
Page 177
177 15 chapter 15 creating graphics: applying gradients this tutorial guides you through the process of using the gradient tools in macromedia flash basic 8 and macromedia flash professional 8. With flash, you can create simple color gradients and complex gradient effects. In this tutorial, you lear...
Page 178
178 creating graphics: applying gradients after examining the completed illustration, you’ll begin by opening a starter flash document and end by publishing the document for web playback. The tutorial should take approximately 20 minutes to complete. Before you take this tutorial you should read cha...
Page 179
Examine the completed fla file 179 examine the completed fla file as you examine the finished version of an application you’ll create, you will also look at the flash workspace. In subsequent sections, you’ll go through the steps to create the application yourself. Open the authoring document it’s h...
Page 180
180 creating graphics: applying gradients review the completed fla file in the completed fla file, you will see the combined effects of several gradients. The illustration looks like this: there are five gradients in the illustration: ■ a gradient from black to green on the background. ■ a gradient ...
Page 181
Apply a linear gradient 181 close the completed fla file to close the document, select file > close. If you prefer to keep the finished file open as a reference while working with the starter file, be careful not to edit it or save any changes to it. Open the starter document now that you have seen ...
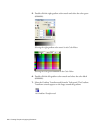
Page 182
182 creating graphics: applying gradients 5. Double-click the right gradient color swatch and select the color green (#006600). Selecting the right gradient color swatch in the color mixer selecting the color green #006600 in the color picker 6. Double-click the left gradient color swatch and select...
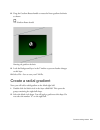
Page 183
Create a radial gradient 183 8. Drag the gradient rotate handle to rotate the linear gradient clockwise as shown. The gradient rotate handle rotating the gradient clockwise 9. Lock the background layer in the timeline to prevent further changes to this layer. 10. Select file > save to save your fla ...
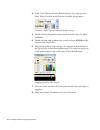
Page 184
184 creating graphics: applying gradients 3. In the color mixer panel select radial from the type pop-up menu. Select mirror overflow mode from the overflow pop-up menu. The correct radial type and mirror overflow settings 4. Double-click the left gradient color swatch and select the color black (#0...
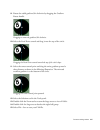
Page 185
Create a radial gradient 185 9. Rotate the radial gradient 90º clockwise by dragging the gradient rotate handle. Dragging to rotate the gradient 90º clockwise. 10. Select the focal point control and drag it near the top of the circle. Dragging the focal point control toward the top of the circle sha...
Page 186
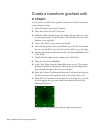
186 creating graphics: applying gradients create a transform gradient with a shape in this section, you will create a gradient and then use the free transform tool to change its shape. 1. Select the shadow layer in the timeline. 2. Select the oval tool in the tools panel. 3. Hold down shift and then...
Page 187
Apply the finishing touches 187 12. Select the selection tool from the tools panel. 13. Drag the shadow shape under the eight ball with the selection tool. 14. Click outside the stage to deselect the shadow. 15. Select file > save to save your fla file. Apply the finishing touches to complete the il...
Page 188
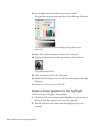
188 creating graphics: applying gradients 12. Set the alpha value for the black color swatch to 100%. Your gradient settings should match those in the following illustration: the color mixer with the correct settings for the gradient on the white circle 13. Select the gradient transform tool from th...
Page 189
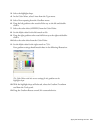
Apply the finishing touches 189 3. Select the highlight shape. 4. In the color mixer, select linear from the type menu. 5. Select non-repeating from the overflow menu. 6. Drag the left gradient color swatch all the way to the left and double- click it. 7. Select the color white (#ffffff) from the co...
Page 190
190 creating graphics: applying gradients 14. Drag the gradient scale control downward until it touches the top of the highlight shape. The gradient scale control dragging the gradient scale control downward to touch the highlight shape 15. Select the selection tool from the tools panel. 16. Double-...
Page 191
Test the application 191 test the application at any point during authoring, you can test how your application plays as a swf file. Because this tutorial contains no animation or interactivity, the file will look the same in test mode as it does in authoring mode. 1. Select file > save to save your ...
Page 192
192 creating graphics: applying gradients.
Page 193
193 16 chapter 16 creating graphics: apply graphic filters and blends (flash professional only) this tutorial guides you through the process of creating eye-catching graphic effects using some of the authoring features in macromedia flash professional 8 (filters are not available in flash basic). By...
Page 194
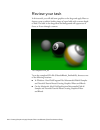
194 creating graphics: apply graphic filters and blends (flash professional only) review your task in this tutorial, you will add some graphics to the stage and apply filters to them to create a realistic-looking image of a pool table with a narrow depth of field. The balls in the foreground and bac...
Page 195
Apply filters and blends 195 open the starter document now that you have seen the document you will create, it is time to create your own version of the document. The first thing to do is open the starter document, which contains the graphic objects you will use with the filter and blend features of...
Page 196
196 creating graphics: apply graphic filters and blends (flash professional only) 4. Drag the 9ball outlines movie clip from the library panel onto the stage so that it perfectly covers the 9ball instance. You can use the arrow keys to make fine adjustments to the placement of the 9ball outlines ins...
Page 197
Apply filters and blends 197 apply filters and blends to the cue ball the last step is to use a color effect and a filter to make the cue ball appear to be in the background of the stage. 1. Drag the cueball movie clip from the library panel to the upper-left corner of the stage. 2. With the new cue...
Page 198
198 creating graphics: apply graphic filters and blends (flash professional only).
Page 199
199 17 chapter 17 text: add text to a document macromedia flash basic 8 and macromedia flash professional 8 provide a variety of text features and options. This lesson introduces you to the three primary types of text you can add to a document. You can add static text for titles, labels, or other te...
Page 200
200 text: add text to a document create a dynamic text field . . . . . . . . . . . . . . . . . . . . . . . . . . . . . . . . 205 specify format options . . . . . . . . . . . . . . . . . . . . . . . . . . . . . . . . . . . 206 view actionscript for the dynamic text field . . . . . . . . . . . . . . ....
Page 201
Create an expanding-width text block 201 create an expanding-width text block you can define the size of a text block, or you can use a text block that expands to fit the text you write. You’ll begin this lesson by simply adding text to a document. 1. Click in a blank area in the workspace to make s...
Page 202
202 text: add text to a document create a fixed-width text block in addition to creating a line of text that expands as you type, you can create a text block that has a fixed width. Text that you enter into a fixed- width text block wraps to the next line at the edge of the block. You’ll now create ...
Page 203
Add an input text field 203 3. In the tools panel, click the selection tool. Use the property inspector to select the bold style. 4. Click the text fill color control and select a different text color, such as another shade of gray. Select device fonts when you use a font installed on your system in...
Page 204
204 text: add text to a document 4. In the text property inspector, set the following options: ■ select input text in the text type pop-up menu ■ select arial in the font pop-up menu. ■ for the font size, enter 8. ■ click the text color box and select a shade of dark blue. ■ select the alias text bu...
Page 205
Create a dynamic text field 205 assign instance names to text fields an input text field on the stage is an instance of the actionscript textfield object, to which you can apply properties and methods. As a best practice, you should name text field instances so that you or others working on the proj...
Page 206
206 text: add text to a document 4. On the stage, drag to create a text field in the area between the two horizontal rules. 5. In the instance name text box of the property inspector, name the dynamic text field newfeatures_txt. The actionscript in this document loads an external text file, which is...
Page 207
Test the swf file 207 view actionscript for the dynamic text field you can view the actionscript that loads text from the external text file into the dynamic text field. This script uses loadvars actions to load the safetyfeatures.Txt content in the newfeatures text field. 1. In the timeline, select...
Page 208
208 text: add text to a document check spelling flash basic 8 and flash professional 8 introduce new features that let you check spelling in most places where text occurs in your document, including text fields, layer names, and actionscript strings. To check spelling, you first configure the spelli...
Page 209
209 18 chapter 18 actionscript: use script assist mode this tutorial guides you through using script assist mode in macromedia flash basic 8 and macromedia flash professional 8. Script assist mode prompts you to enter the elements of a script, and helps you to add simple interactivity to your swf fi...
Page 210
210 actionscript: use script assist mode in this tutorial, you will complete the following tasks: examine the completed fla file. . . . . . . . . . . . . . . . . . . . . . . . . . . . 211 open the starter document . . . . . . . . . . . . . . . . . . . . . . . . . . . . . . . . 213 add a script to a ...
Page 211
Examine the completed fla file 211 examine the completed fla file as you examine the finished version of an application that you’ll create, you’ll also look at the flash workspace. In subsequent sections you’ll go through the steps to create the application yourself. Open the authoring document it’s...
Page 212
212 actionscript: use script assist mode review the completed fla file in the completed fla file, you will see all the objects (buttons, movie clips, and graphics) that make up the sample application. The application, a flash-based company information website, looks like this: the completed fla file...
Page 213
Add a script to a button by using script assist mode 213 open the starter document now that you have seen the completed file, it is time to create your own flash document. To get started, you’ll open a starter file that contains the elements to which you will add actionscript code using script assis...
Page 214
214 actionscript: use script assist mode 4. In the actions panel, you’ll see the script assist button above the actionscript editor. Click script assist to display script assist mode. With no functions selected, the script assist pane is blank. Initially, the script assist portion of the actions pan...
Page 215
Add a script to a button by using script assist mode 215 6. From the movie clip control option, select the on event handler. Script assist mode prompts you to set the function’s parameters. The release event of the on event handler is selected by default. You’ll use the release event to trigger the ...
Page 216
216 actionscript: use script assist mode 7. Click add again and then select the goto() function from the global functions > timeline control option. Adding the function that is triggered when the event occurs the goto() function is added as the action of the on event handler. In other words, when th...
Page 217
Add a script to a button by using script assist mode 217 10. In the frame text box, enter home. Modifying function parameters to complete the script the changes you made with script assist mode are displayed in the actionscript editor. You’ve just created a script without manually writing code in th...
Page 218
218 actionscript: use script assist mode add frame scripts to the timeline by using script assist mode rather than adding scripts to individual objects, and acting on objects directly but also dispersing code in many different places in your flash document, place the scripts in a frame in the timeli...
Page 219
Add frame scripts to the timeline by using script assist mode 219 5. Click the insert a target path button to display the insert target path dialog box. Selecting the target object from the insert target path dialog box 6. Select the about button ( about_btn ) from the tween_mc movie clip. 7. Make s...
Page 220
220 actionscript: use script assist mode you now need to add the goto() function, the action that occurs when the about button is clicked. 1. Using the actions toolbox or the add button on the actions panel toolbox, select global functions > timeline control and insert the goto function. 2. In the s...
Page 221
Add a frame script to the title movie clip 221 add a frame script to the title movie clip the final step is to add a script to the last frame of the title movie clip. This script is used to display the text “home” in the title movie clip when its animation has completed. 1. From the library panel, s...
Page 222
222 actionscript: use script assist mode 5. Next, using either the actions toolbox or the add button, select actionscript 2.0 classes > movie > movieclip > methods > gotoandstop. Modifying function parameters to complete the script 6. In the script assist panel, select the gotoandstop action on line...
Page 223
Summary 223 test the application at any point during authoring, you can test how your application plays as a swf file. Now that you’ve added scripts to the application with script assist mode, you can test the interactivity you’ve just added to it. 1. Select file > save to save your fla file. 2. Sel...
Page 224
224 actionscript: use script assist mode.
Page 225
225 19 chapter 19 actionscript: write scripts the actionscript language that is part of macromedia flash basic 8 and macromedia flash professional 8 offers designers and developers a variety of benefits. With actionscript you can control document playback in response to events such as elapsed time a...
Page 226
226 actionscript: write scripts set up your workspace first, you’ll open the start file for the lesson and set up your workspace to use an optimal layout for taking lessons. 1. To open your start file, in flash select file > open and navigate to the file: ■ in windows, browse to boot drive\program f...
Page 227
Create an instance of a symbol 227 3. From the library panel (window > library), drag map_skewed to the black background area of the stage. Because guides don’t appear when you first drag an object from the library panel, you’ll release the object, and then drag it again. 4. Drag the map_skewed movi...
Page 228
228 actionscript: write scripts name button instances using the appropriate suffix to prompt code hinting, you’ll provide instance names for two button instances that are already on the stage. 1. In the timeline, unlock the buttons layer. 2. On the stage, select the instance of play_button (the larg...
Page 229
Apply actionscript syntax 229 4. Click in the script pane, at the end of the screen_mc text, and type a period ( . ). 5. When you type the period, code hints appear for the movie clip, because you used the _mc suffix when naming the instance. Double-click _visible from the list of code hints, and ty...
Page 230
230 actionscript: write scripts locate actionscript reference documentation during authoring, if you’d like additional information about the actionscript that you enter, you can select the action in the actions toolbox or script pane and click reference. The help panel displays information about the...
Page 231
Write a function for a button 231 write a function for a button a command in actionscript is called a function. A function is a script that you can write once and use repeatedly in a document to perform a certain task. You’re going to write a function that makes the screen_mc movie clip appear ( vis...
Page 232
232 actionscript: write scripts copy and modify a button function you just created one function that sets the visible property of a movie clip to true when the user releases the mouse button after a button click. You can probably guess how to create another function that hides the screen_mc movie cl...
Page 233
Check syntax and test your application 233 check syntax and test your application as you learned earlier in this lesson, actionscript depends on correct syntax to execute properly. Flash offers a variety of ways for you to test your syntax. 1. To check the syntax, do one of the following: ■ click th...
Page 234
234 actionscript: write scripts summary congratulations on learning a few basics about writing scripts with actionscript. In a short amount of time, you learned how to accomplish the following tasks: ■ name instances following recommended practices. ■ initialize a document. ■ apply actionscript synt...
Page 235
235 20 chapter 20 actionscript: add interactivity macromedia flash basic 8 and macromedia flash professional 8 offer numerous ways to engage users with interactivity. When you incorporate interactivity, you’re not limited to playing each frame in a timeline sequentially; however, sequential playing ...
Page 236
236 actionscript: add interactivity set up your workspace first, you’ll open the start file for the lesson and set up your workspace to use an optimal layout for taking lessons. 1. To open your start file, in flash select file > open and navigate to the file: ■ in windows, browse to boot drive\progr...
Page 237
Add a scene 237 name button instances you’ll provide instance names for the buttons on the stage so that you can refer to the instance names in actionscript. 1. On the lower-right side of the stage, select the button at the left. In the property inspector (window > properties), type goscene_btn in t...
Page 238
238 actionscript: add interactivity 3. Use the property inspector to give the animation movie clip an instance name of animation_mc. 4. Rename layer 1 animation. Create a new layer and name it buttons. Drag an instance of the btnback symbol to the stage, and place it anywhere to the right of the mov...
Page 239
Add navigation to return to scene 1 239 link a button to a scene now that the playhead stops at frame 1, you’ll add actionscript that takes the user to scene 2 upon releasing the goscene_btn instance. ■ press enter (windows) or return (macintosh) twice and type the following comment. Then write the ...
Page 240
240 actionscript: add interactivity play a movie clip you can configure your document to play a movie clip at runtime. Using the attachmovie() method, you can attach an instance of a movie clip in the library panel to the stage even though you have not placed an instance on the stage. With the attac...
Page 241
Play a movie clip 241 next, you’ll specify what the function does: it plays the movie clip on the root timeline, which is the main timeline. In your script, you’ll refer to the movie clip by the linkage identifier name in the linkage properties dialog box (mctrio). Additionally, even though you didn...
Page 242
242 actionscript: add interactivity unload the movie clip after the movie clip plays, you need a way to remove the movie clip from the stage when the user goes to scene 2. You can modify your script for the goscene_btn to “unload” the movie clip. 1. In the timeline, select frame 1 of the actions lay...
Page 243
Test your document 243 use a behavior to play an mp3 file when you want to add interactivity to your document with actionscript, you can often rely on behaviors to add the actionscript for you. You’ll use a sound behavior to play an mp3 file from the library. 1. In the library panel, right-click (wi...
Page 244
244 actionscript: add interactivity summary congratulations on learning how to create an interactive document. In a few minutes, you learned how to accomplish the following tasks: ■ create a new scene. ■ write actionscript to navigate between scenes. ■ write actionscript to play an animated movie cl...
Page 245
245 21 chapter 21 actionscript: create a form with conditional logic and send data you can create a form with conditional logic that allows the swf file to respond to user interaction and send the form data from the swf file to an external source. This tutorial shows you how to create a simple form....
Page 246
246 actionscript: create a form with conditional logic and send data set up your workspace first, you’ll open the start file for the lesson and set up your workspace to use an optimal layout for taking lessons. 1. To open your start file, in flash select file > open and navigate to the file: ■ in wi...
Page 247
Add a submit button to the form 247 3. In the property inspector, do the following to set text attributes: ■ select input text from the text type pop-up menu. ■ select _sans from the font pop-up menu. ■ enter 10 in the font size text box. ■ click the text color box and select a shade of dark blue. ■...
Page 248
248 actionscript: create a form with conditional logic and send data add an error message you’ll add a message to display if the user clicks the submit button before entering data. 1. In the timeline, with the branding layer selected, click insert layer and name the layer dialog boxes. 2. Select fra...
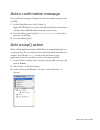
Page 249
Add a stop() action 249 add a confirmation message next, you’ll add a message to display when the user submits an entry in the text field. 1. In the dialog boxes layer, select frame 10. Right-click (windows) or control-click (macintosh) the selected frame and select insert blank keyframe from the co...
Page 250
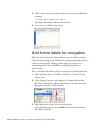
250 actionscript: create a form with conditional logic and send data 4. Click in the script pane of the actions panel, and type the following comment: // stops the playhead at frame 1 . Press enter (windows) or return (macintosh). 5. Type stop() ; to add the stop action. Add frame labels for navigat...
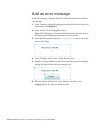
Page 251
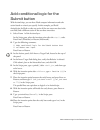
Add conditional logic for the submit button 251 add conditional logic for the submit button with actionscript, you can have flash compare information and take action based on criteria you specify. In this example, you’ll add actionscript for flash to take one action if the user enters no data in the...
Page 252
252 actionscript: create a form with conditional logic and send data 11. Type gotoandstop("confirm") in the script pane. Press enter or return, and type }, and then press enter or return again and type }; . Your script should appear as follows: // stops the playhead at frame 1. Stop(); // adds condi...
Page 253
Test your swf file 253 write a function for the try again button a function is a script that you can use repeatedly to perform a specific task. You can pass parameters to a function, and it can return a value. In this example, when the user clicks the try again button, a function runs that returns t...
Page 254
254 actionscript: create a form with conditional logic and send data summary congratulations on learning how to write a script with conditional logic and send data. In a few minutes, you learned how to complete the following tasks: ■ add an input text field to a document. ■ create a button symbol. ■...
Page 255
255 22 chapter 22 actionscript: work with objects and classes classes are the blueprint for objects in macromedia flash basic 8 and macromedia flash professional 8. All objects in flash have an underlying class; for example, all movie clips have a method called geturl() , and geturl() is defined in ...
Page 256
256 actionscript: work with objects and classes set up your workspace first, you’ll view the finished files and set up your workspace to use an optimal layout for taking lessons. 1. View the finished files. This lesson does not include start files. You can find finished files of handson1.Fla, handso...
Page 257
Create an object from a class 257 create an object from a class you’ll create an existing class using visual tools (the textfield class) and code (using the date class). 1. Open a new flash document and change the name of layer 1 to text. 2. In the text layer, create a dynamic text field and assign ...
Page 258
258 actionscript: work with objects and classes modify your script you’ll modify your script to compensate for the zero indexing. 1. Add +1 to the value when you create currentmonth, and test your document to be sure the expected month number appears. That line of script should read as follows: var ...
Page 259
Create a custom class 259 create a custom class although actionscript includes many classes of objects, such as the movieclip class and the color class, there will be times when you need to construct your own classes so you can create objects based on a particular set of properties or methods. To cr...
Page 260
260 actionscript: work with objects and classes to create objects from this class, you could now use the following code: var cliplesspedal:product=new product(1, "clipless pedal", 11); var monkeybar:product=new product(2, "monkey bar", 10); however, in actionscript 2.0, variables that are part of a ...
Page 261
Create a custom class 261 build a custom class you’ll now build a new product class with getter and setter methods and create an object from the product class. 1. Create an actionscript file by doing one of the following: ■ if you’re using flash professional 8, select file > new > actionscript file ...
Page 262
262 actionscript: work with objects and classes 5. Define getter and setter methods for each property of the class, as in the following example. Specify void as the return type for the setter methods, and indicate the data type returned for the getter methods. Class product { var id:number; var prod...
Page 263
Create two objects from the product class 263 create two objects from the product class you’ll create a new fla file, and then create two objects from the product class. 1. Open a new flash document and save it in the same location where you saved product.As. 2. In the new document, select frame 1 i...
Page 264
264 actionscript: work with objects and classes learn about extending existing classes the extends keyword in actionscript 2.0 allows you to use all the methods and properties of an existing class in a new class. For example, if you wanted to define a class called drag that inherited everything from...
Page 265
Extend the movieclip class to create a new class 265 extend the movieclip class to create a new class you’ll create a new class by extending the built-in movieclip class. 1. Create a new flash document and name it shape.Fla. 2. Using the drawing tools, draw a shape on the stage. With the entire shap...
Page 266
266 actionscript: work with objects and classes 8. In the actionscript file that you just created, create a new class and constructor called drag : class drag extends movieclip { function drag () { onpress=dodrag; onrelease=dodrop; } } 9. Define private methods in the class that use the existing mov...
Page 267
Summary 267 summary congratulations on learning how to work with objects and classes in actionscript 2.0. In a few minutes, you learned how to accomplish the following tasks: ■ create and use objects from existing classes. ■ create a custom class. ■ create a property within a custom class. ■ create ...
Page 268
268 actionscript: work with objects and classes.
Page 269
269 23 chapter 23 data integration: overview (flash professional only) the following tutorials illustrate several ways to use data binding and the data components in macromedia flash professional 8. Many of the tutorials use public web services and therefore require that you have an internet connect...
Page 270
270 data integration: overview (flash professional only).
Page 271
271 24 chapter 24 data integration: using the macromedia tips web service (flash professional only) in this tutorial, you use the web services panel to connect to a web service, which you use to return a random tip about macromedia software. You then use components to set up a simple user interface....
Page 272
272 data integration: using the macromedia tips web service (flash professional only) connect to a public web service define a web service in flash that will connect to a public web service. 1. Create a new flash document using flash professional 8. Make sure your computer is connected to the intern...
Page 273
Connect to a public web service 273 the web service has one method, called gettipbyproduct() . This method accepts a single parameter called product . The parameter is a string that tells the web service what macromedia product you want to see a tip for. In the next step, you bind this parameter wit...
Page 274
274 data integration: using the macromedia tips web service (flash professional only) create a user interface and bind the components with the web service next, you use components to create a simple user interface that you can use to select a product, click a button, and see a random tip about the p...
Page 275
Create a user interface and bind the components with the web service 275 6. Drag another label component above the tip_ta textarea component. In the property inspector, give it the instance name tip_lbl and in the text field type tips. Now add a binding for the webservice connector component from th...
Page 276
276 data integration: using the macromedia tips web service (flash professional only) 8. In the component inspector, double-click the empty value in the bound to field. In the bound to dialog box, select combobox, for the component path and value:string for the schema location. Click ok. Bound to fi...
Page 277
Create a user interface and bind the components with the web service 277 9. In the component inspector, click add binding (+) again. In the add binding dialog box, select results:string , and then click ok. In the component inspector, double-click the empty value in the bound to field, and in the bo...
Page 278
278 data integration: using the macromedia tips web service (flash professional only) 13. Test the application (control > test movie). Select flash from the combobox instance and click get tip. The results should look similar to the following screen shot: 14. Select dreamweaver and click get tip aga...
Page 279
279 25 chapter 25 data integration: using xml for a timesheet (flash professional only) this tutorial shows you how to create an application for editing timesheet data. The timesheet data is stored as xml within a native xml database. The xupdateresolver component is the best choice for this type of...
Page 280
280 data integration: using xml for a timesheet (flash professional only) for this tutorial, you will need to the data.Xml file provided in the tutorial assets folder. This file can be found in one of the following locations: ■ in windows, browse to boot drive\program files\macromedia\flash 8\sample...
Page 281
Create the user interface 281 3. In the component inspector or the property inspector, click the parameters tab. For the url parameter, enter data.Xml, and for the direction parameter, select receive from the pop-up menu. 4. From the components panel, drag a dataset component on the stage. In the pr...
Page 282
282 data integration: using xml for a timesheet (flash professional only) 7. Select the date schema field. Its type is set to string. This is because the flash authoring tool cannot determine that it is a date type based on its value. You need to give flash some additional information to encode this...
Page 283
Create the user interface 283 8. Select the data type parameter for the date schema field and change it to date. This tells the databinding component to try to work with this value as a date. For more information on data binding and data types, see “about handling data types in data binding (flash p...
Page 284
284 data integration: using xml for a timesheet (flash professional only) for more information on data binding and encoders, see “schema encoders” in using flash (in flash, select help > using flash). 10. Select the @billable schema field. The field’s data type was automatically set to boolean by th...
Page 285
Create the user interface 285 20. In the bound to dialog box, click the data set component, and then select the dataprovider: array schema location and click ok. The databinding component copies each object within the row array into a new record (transfer object) within the dataset component. It app...
Page 286
286 data integration: using xml for a timesheet (flash professional only) 23. Using the same method, create the following new fields: ■ field name = billable, data type = boolean ■ field name = date, data type = date ■ field name = duration, data type = number ■ field name = rate, data type = number...
Page 287
Create the user interface 287 4. In the component inspector, click the bindings tab. 5. Click the add binding button. 6. In the add binding dialog box, select the dataprovider: array item and click ok. 7. In the bindings tab, click the bound to property. 8. In the bound to dialog box, click the data...
Page 288
288 data integration: using xml for a timesheet (flash professional only) edit the data now you will modify the application so that you can edit data through the datagrid component. 1. On the stage, select the datagrid component. Then click the parameters tab in the component inspector. 2. Set the e...
Page 289
289 26 chapter 26 data integration: using xupdate to update the timesheet (flash professional only) prerequisite: “data integration: using xml for a timesheet (flash professional only)” this tutorial starts where the “data integration: using xml for a timesheet (flash professional only)” tutorial le...
Page 290
290 data integration: using xupdate to update the timesheet (flash professional only) for this tutorial, you will need to the data.Xml file provided in the tutorial assets folder. This file can be found in one of the following locations: ■ in windows, browse to boot drive\program files\macromedia\fl...
Page 291
Update the timesheet 291 6. Double-click the encoder options property. When prompted for a value for the rownodekey property, type datapacket/row[@id='?Id'] . This property identifies which node within the xml file will be treated as a record within the data set. It also defines which element or att...
Page 292
292 data integration: using xupdate to update the timesheet (flash professional only) 16. In the add binding dialog box, click the text: string property and click ok. 17. In the bindings tab, double-click the bound to property. 18. In the bound to dialog box, click the xupdateresolver component, and...


