- DL manuals
- MACROMEDIA
- Other
- FREEHAND 10-USING FREEHAND
- Using Manual
MACROMEDIA FREEHAND 10-USING FREEHAND Using Manual
Summary of FREEHAND 10-USING FREEHAND
Page 1
Macromedia ™ ® using freehand.
Page 2
2 trademarks add life to the web, afterburner, aftershock, andromedia, animation powerpack, aria, attain, authorware, authorware star, backstage, design in motion, director, dream templates, dreamweaver, drumbeat 2000, extreme 3d, fireworks, flash, fontographer, freehand, generator, know your site, ...
Page 3
3 t/maker clickart license agreement united states copyright law and international copyright treaties protect these clickart images (“the images”) but you may copy the images in their present or modified form and incorporate them into another work for your own internal use. The images may not be dis...
Page 4
4.
Page 5
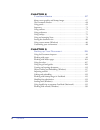
5 contents introduction getting started . . . . . . . . . . . . . . . . . . . . . . . . . . . . . . . . . 11 system requirements . . . . . . . . . . . . . . . . . . . . . . . . . . . . . . . . . . . . . . 12 installing and starting freehand . . . . . . . . . . . . . . . . . . . . . . . . . . . . . 1...
Page 6
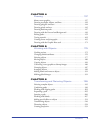
Contents 6 chapter 2 freehand basics . . . . . . . . . . . . . . . . . . . . . . . . . . . . . . 67 about vector graphics and bitmap images . . . . . . . . . . . . . . . . . . . . . . .67 the document window . . . . . . . . . . . . . . . . . . . . . . . . . . . . . . . . . . . .68 using panels . . ....
Page 7
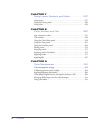
Contents 7 chapter 4 drawing . . . . . . . . . . . . . . . . . . . . . . . . . . . . . . . . . . . . . . 137 about vector graphics . . . . . . . . . . . . . . . . . . . . . . . . . . . . . . . . . . . . .137 drawing rectangles, ellipses, and lines . . . . . . . . . . . . . . . . . . . . . . . . .142...
Page 8
Contents 8 chapter 7 using layers, symbols, and styles . . . . . . . . . . . . 237 using layers. . . . . . . . . . . . . . . . . . . . . . . . . . . . . . . . . . . . . . . . . . . . .237 using the library panel. . . . . . . . . . . . . . . . . . . . . . . . . . . . . . . . . . . .246 using styles ....
Page 9
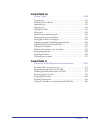
Contents 9 chapter 10 using type . . . . . . . . . . . . . . . . . . . . . . . . . . . . . . . . . . . 315 creating text . . . . . . . . . . . . . . . . . . . . . . . . . . . . . . . . . . . . . . . . . . . .315 working with text blocks . . . . . . . . . . . . . . . . . . . . . . . . . . . . . . . ....
Page 10
Contents 10 chapter 12 printing . . . . . . . . . . . . . . . . . . . . . . . . . . . . . . . . . . . . . . .387 about choosing an output device . . . . . . . . . . . . . . . . . . . . . . . . . . . .387 setting up to print. . . . . . . . . . . . . . . . . . . . . . . . . . . . . . . . . . . . . . ....
Page 11
11 introduction . . . . . . . . . . . . . . . . . . . . . . . . . . . . . . . . . . . . . . . . . . . . . . . . . . . . . . . . . . . . . . . . . . . . . . . . . . . . . . . . . . . . . . . . . . . . . . . . . . . . . . . . . . . . . Getting started macromedia freehand 10 is a vector-based drawing a...
Page 12
Introduction 12 system requirements freehand runs on both windows™ and macintosh ® operating systems. Their installers are found on separate cd-rom disks. To install freehand and begin using the application, you will need the following hardware and software: windows • an intel pentium ® processor or...
Page 13
Getting started 13 installing and starting freehand this section describes how to install freehand on your hard disk and start the application. Before you begin, make sure your computer meets the system requirements listed under “system requirements” on page 12. Read the read me document on the free...
Page 14
Introduction 14 uninstalling freehand to uninstall freehand, you should use add/remove programs (windows) or the installer (macintosh) to ensure that all freehand files are removed from your system. To uninstall freehand in windows: 1 choose start > settings > control panel. 2 double-click add/remov...
Page 15
Getting started 15 freehand lessons and tutorial if you are new to freehand, or if you have used only a limited set of its features, start with the lessons. The lessons introduce you to the main features of freehand, letting you practice on isolated examples. To view the lessons, choose help > lesso...
Page 16
Introduction 16 what’s new in freehand 10 in addition to new and improved tools and panels that enhance your work experience, freehand 10 offers a new array of features that allow you to move seamlessly from print to web. And you can now use freehand with other applications more smoothly and efficie...
Page 17
Getting started 17 • you can now click on a selected path to insert a new point. • in freehand 10 you can click on a point to retract its handles. If the handles are retracted, clicking on a point with the pen deletes the point. • you can now use the shift key to temporarily disable certain pen func...
Page 18
Introduction 18 file info dialog box the file info dialog box lets you enter optional information such as dates, file names, captions, headline slugs, author/photographer names, and copyright information. Freehand uses the international press telecommunications council (iptc) protocol standard to st...
Page 19
19 1 chapter 1 . . . . . . . . . . . . . . . . . . . . . . . . . . . . . . . . . . . . . . . . . . . . . . . . . . . . . . . . . . . . . . . . . . . . . . . . . . . . . . . . . . . . . . . . . . . . . . . . . . . . . . . . . . . . . Tutorial introduction this tutorial demonstrates how to use the sop...
Page 20
Chapter 1 20 what you should know although the tutorial is designed for beginning freehand users, before completing it you need the basic skills covered in five lessons found in freehand help. These interactive lessons cover the following topics: • introduction to freehand 10 • working with paths • ...
Page 21
Tutorial 21 pages 1 and 2 are designed to display in a web browser; both pages include navigation buttons that link the pages to each other when the pages are exported into the flash movie format (swf). 3 to turn from one page to another, select the desired page from the go to page pop-up menu. Note...
Page 22
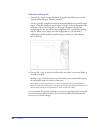
Chapter 1 22 open the starting file 1 choose file > open. In your freehand 10 application folder, browse to the tutorial folder and open tutorial_start.Fh10. You see a partially completed version of the tutorial file that you viewed earlier. Page 1 of this file includes an artist’s sketch, which is ...
Page 23
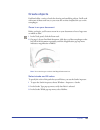
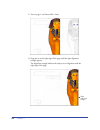
Tutorial 23 create objects freehand offers a variety of tools for drawing and modifying objects. You’ll work with some of these tools now, as you create the art that completes the eye on the sarcophagus. Zoom in on your document before you begin, you’ll want to zoom in on your document to have a lar...
Page 24
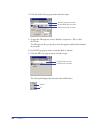
Chapter 1 24 4 click the stoke color pop-up menu and select lapis. 5 to open the fill inspector, choose window > inspectors > fill, or click the fill tab. The fill inspector lets you specify a color that appears within the boundaries of your path. 6 in the fill type pop-up menu, verify that basic is...
Page 25
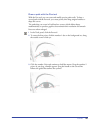
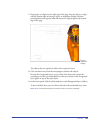
Tutorial 25 draw a path with the pen tool with the pen tool, you can create and modify precise paths easily. To draw a curved path with the pen tool, you create points, then drag tangent handles to shape the curves. The paths that you create in freehand are vectors, which define shapes mathematicall...
Page 26
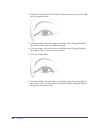
Chapter 1 26 4 click the number 3 dot. The line will not follow the curve, but you will modify this line segment shortly. 5 click the number 4 dot and continue to hold the mouse. Drag the handle of the number 4 dot so the curve follows the guide. 6 click the number 5 dot and continue to hold the mou...
Page 27
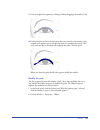
Tutorial 27 9 draw a straight line segment by clicking (without dragging) the number 9 dot. 10 position the pen tool over the first point that you created on the number 1 dot. A small circle appears next to the pen tip when it is positioned correctly. This circle indicates that a click here will com...
Page 28
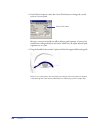
Chapter 1 28 3 in the object inspector, select the corner point button to change the curved point to a corner point. Moving a curve point handle can affect adjacent path segments. Corner point handles move independently of each other, which lets you adjust adjacent path segments one at a time. 4 dra...
Page 29
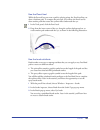
Tutorial 29 use the pencil tool while the pen tool lets you create a path by placing points, the pencil tool lets you draw a freeform path. To compare the two tools, you will use the pencil tool to draw another path that creates the eyeliner effect underneath the eye. 1 in the tools panel, click the...
Page 30
Chapter 1 30 4 in the scale text box, change the percentage to 10%, and press enter (windows) or return (macintosh). The path looks as though it has been applied with a brush; the stroke tapers at the ends..
Page 31
Tutorial 31 use the ellipse tool another method of drawing in your freehand document is to select a shape tool in the tools panel, drag in your document with the tool to create the shape, and allow freehand to automatically place the points. You’ll use this method now to complete the eye. 1 in the t...
Page 32
Chapter 1 32 5 if you need to move the ellipse, use the pointer tool to drag it (being careful not to drag the points) so the ellipse is over the oval on the background art. When you move the ellipse, the values in the x and y coordinate text boxes in the object inspector change to reflect the curre...
Page 33
Tutorial 33 create a mirror image with the reflect tool the reflect tool offers a way to create a mirror copy of a selected object. Rather than drawing the second eye, you’ll use the reflect tool to create it from the eye you’ve already drawn. 1 verify that the eye is selected and choose edit > dupl...
Page 34
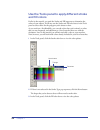
Chapter 1 34 use the tools panel to apply different stroke and fill colors earlier in the tutorial, you used the stroke and fill inspectors to determine the colors of your objects. You’ll now use the stroke and fill color boxes in the tools panel to select colors for the polygons you’re about to dra...
Page 35
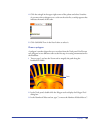
Tutorial 35 4 click the triangle in the upper right corner of the palette and select swatches. As you move the eyedropper over a color on the color list, a tooltip appears that indicates the name of the color. 5 click gold mid-tone in the list of colors to select it. Draw a polygon a polygon is anot...
Page 36
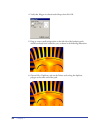
Chapter 1 36 4 verify that polygon is selected under shape, then click ok. 5 drag to create a small polygon close to the left side of the headpiece path, which has already been created for you, as shown in the following illustration: 6 choose edit > duplicate, and use the pointer tool to drag the du...
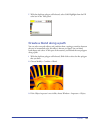
Page 37
Tutorial 37 7 with the duplicate polygon still selected, select gold highlight from the fill color box in the tools panel. Create a blend along a path you can select two path objects and combine them, creating a transition between the two in incremental steps; this effect is known as a blend. You ca...
Page 38
Chapter 1 38 4 in the steps text box, type 6 and press enter (windows) or return (macintosh). The transition between the two polygons occurs over 6 steps. 5 with the polygon blend selected, hold down shift and click the curved path on the headdress to add it to the selection. Note: if necessary, mov...
Page 39
Tutorial 39 6 choose modify > combine > join blend to path or click the attach to path button. Add special effects you can apply the emboss special effect to your polygons to make them appear three-dimensional on the headdress: 1 choose modify > ungroup. 2 choose modify > ungroup again. All of the p...
Page 40
Chapter 1 40 6 either type 1 in the depth text box or move the depth slider to 1. The depth value controls the distance by which the effect appears raised. 7 type 135 in the angle text box and click ok. The angle specifies the direction of the highlight and shadow. 8 click anywhere away from an obje...
Page 41
Tutorial 41 work with objects in layers using layers, as you learned in the working with layers lesson, is an integral part of working in freehand. Layers are analogous to transparent sheets of acetate, or tracing paper, stacked on top of each other. Layers offer a logical way to organize objects—fo...
Page 42
Chapter 1 42 5 turn to page 1 and choose edit > paste. 6 drag the art to the right edge of the page until the right alignment triangle appears. The alignment triangle indicates the objects are in alignment with the right edge of the page. Right alignment triangle.
Page 43
Tutorial 43 7 keeping the art aligned to the right edge of the page, drag the objects to align with the bottom edge of the page. Again, an alignment triangle, this time pointing downward, appears when the objects are aligned against the bottom edge of the page. The objects that you copied are still ...
Page 44
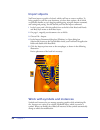
Chapter 1 44 import objects you’ll now import a graphic of a bead, which you’ll use to create a necklace. To bring graphics or text into your document, you have three options, all of which are probably familiar to you: dragging and dropping, using the import command, and cutting and pasting. For thi...
Page 45
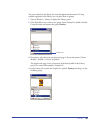
Tutorial 45 you store symbols in the library for reuse throughout the document. To keep symbols organized in the library, you can place them in groups. 1 choose window > library to display the library panel. 2 click the folder icon to create a new group. In the library list, double-click the group-0...
Page 46
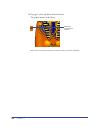
Chapter 1 46 use the spray brush earlier in the tutorial, you used the paintbrush attribute to extend a graphic symbol along a path. Now you’ll use the spray brush attribute to repeat a graphic symbol—in this case, the bead—along a path. 1 with the bead on page 1 selected, choose modify > brush > cr...
Page 47
Tutorial 47 6 in the stroke inspector, select brush from the stroke type pop-up menu. 7 in the brush pop-up menu, select necklace—the name of the custom brush you created. Instances of the bead symbol repeat along the path. 8 in the width text box in the stroke panel, type 60 and press enter (window...
Page 48
Chapter 1 48 use colors and tints you can use the color mixer to mix colors from cmyk (cyan, magenta, yellow, black), rgb (red, green, blue), and other color modes to create specific colors. The cmyk mode uses process colors that represent inks in four-color print, and rgb mode uses colors that appe...
Page 49
Tutorial 49 note: when you add a tint to your list of swatches, freehand automatically adds the base color for the tint to your list of swatches as well. 6 on page 1, select the bead instance (not the beads along the path) and choose modify > symbol > edit symbol. 7 in the symbol-editing window, mag...
Page 50
Chapter 1 50 10 on page 1, select and delete the bead instance. The symbol remains in the library. Note: as you complete the tutorial, remember to save your work frequently. Delete the original bead instance..
Page 51
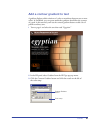
Tutorial 51 add a contour gradient to text a gradient displays subtle variations of a color or transitions between two or more colors. In freehand, you can create multicolor gradients that follow the contour of a path. In this tutorial, you’ll use the contour gradient feature to add a bit of polish ...
Page 52
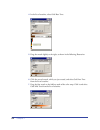
Chapter 1 52 4 in the list of swatches, select gold base-tone. 5 drag the swatch slightly to the right, as shown in the following illustration. 6 click the second swatch, which you just created, and select gold low-tone from the list of swatches. 7 drag the first swatch to the halfway mark of the co...
Page 53
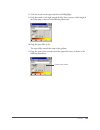
Tutorial 53 8 click the swatch on the right and select gold highlight. 9 drag the swatch on the right toward the left, about a quarter of the length of the color ramp, as shown in the following illustration. 10 drag the taper slider to 20. The taper slider controls the ramp of the gradient. 11 drag ...
Page 54
Chapter 1 54 the egyptian text in your document displays all of the colors you specified in the fill panel applied as a contour gradient. Note: you can use the subselect tool in the tools panel to select an individual letter within the egyptian text. You can then adjust the taper slider for that let...
Page 55
Tutorial 55 14 turn to page 1 and choose edit > paste. Remove pages from your document pages 3 and 4 in your document are now unnecessary, because they contain no objects. To delete the pages, you can use the document inspector. 1 turn to page 3, and choose window > inspectors > document. 2 click th...
Page 56
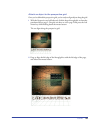
Chapter 1 56 use the perspective grid by attaching objects to the perspective grid, you can orient the objects in relation to a vanishing point that adds depth to your art. Although you’ll use one vanishing point in this tutorial, freehand lets you create custom grids with up to three vanishing poin...
Page 57
Tutorial 57 8 in the tools panel, select the perspective tool. 9 position the perspective tool pointer on the horizon line, which is the top border of the horizontal grid, and drag the horizon up to the horizontal guide line supplied for you. Vanishing point horizon horizontal grid vertical grid gui...
Page 58
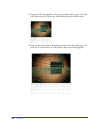
Chapter 1 58 10 drag the vanishing point to the right until the vertical lines align with the vertical guide. 11 drag the horizontal grid line at the bottom of the perspective grid down to meet the horizontal guide below page 2. Guide guide.
Page 59
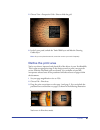
Tutorial 59 attach an object to the perspective grid once you’ve defined the perspective grid, you’re ready to align objects along the grid. 1 with the perspective tool still selected, click the larger hieroglyphic art from the pasteboard above page 2. Drag the art down to cover page 2 and press the...
Page 60
Chapter 1 60 3 drag the smaller hieroglyphic art from the pasteboard below page 2 to the left wall, and press the left arrow key while holding down the mouse button. 4 drag to align the left edge of hieroglyphics with the left edge of the page, and place the art in the blank area of the wall that do...
Page 61
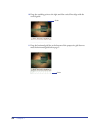
Tutorial 61 5 choose view > perspective grid > show to hide the grid. 6 in the layers panel, unlock the tomb walls layer and hide the drawing guides layer. Note: as you complete the tutorial, remember to save your work frequently. Define the print area you’ve now drawn, imported, and placed all of t...
Page 62
Chapter 1 62 note: you can resize or delete the print area; print area attributes save with the document. For more information, see “defining a print area” on page 412. 4 click inside the print area to open the print area dialog box. 5 in the printer pop-up menu, select the printer you wish to print...
Page 63
Tutorial 63 3 in the link pop-up menu, select page 2, then close the navigation panel. When users click the navigation button in the swf file that you’ll create from this freehand file, they will go to page 2. Preview the file in the flash player window to test the button navigation that you created...
Page 64
Chapter 1 64 4 in the animation pop-up menu, select none, then click ok. 5 in the controller, click the test movie button. Freehand creates a temporary swf of your document. Page 1 appears in a flash playback window, similar to how it will appear if you export the file as a swf using the current mov...
Page 65
Tutorial 65 to learn more congratulations on learning how to complete the following tasks: • creating and editing vector shapes • importing objects • organizing objects in libraries • working with objects on layers • working with colors, including contour gradient fills • aligning objects along a pa...
Page 66
Chapter 1 66.
Page 67
67 2 chapter 2 . . . . . . . . . . . . . . . . . . . . . . . . . . . . . . . . . . . . . . . . . . . . . . . . . . . . . . . . . . . . . . . . . . . . . . . . . . . . . . . . . . . . . . . . . . . . . . . . . . . . . . . . . . . . . Freehand basics to get the most out of working in macromedia freeha...
Page 68
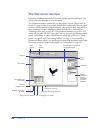
Chapter 2 68 the document window launching freehand displays the document window and the pasteboard—the area that contains the pages of your document. The document window contains all your documents’ objects. Objects must be placed on a page in order to be printed with the print command; if they are...
Page 69
Freehand basics 69 using panels freehand panels float on top of the pasteboard and can be repositioned anywhere onscreen. You can move, separate, or combine these customizable tabbed panels by dragging their tabs. To make a panel active, you click the panel’s tab. You can also zip and unzip panels b...
Page 70
Chapter 2 70 the following panels and inspectors are grouped together: • object, stroke, fill, text, and document inspectors • swatches, layers, and styles panels • color mixer and tints panels the halftones and library panels are not grouped with any other panels by default, but you can group them ...
Page 71
Freehand basics 71 to remove a panel from a group: drag the panel by its tab from the panel group. To return panels to their default positions: 1 exit freehand. 2 locate the english folder within the freehand 10 application folder and delete the fhprefs.Txt (windows) or preferences (macintosh) file....
Page 72
Chapter 2 72 docking panels when you move, open and close, or zip and unzip docked panels, the action affects all docked panels as one unit. You can dock one panel horizontally or vertically to another panel, and resize panels within docked panels. In windows, nontabbed panels do not snap or dock to...
Page 73
Freehand basics 73 inspectors an inspector is a panel that allows you to display and alter the attributes of objects and pages. At least one inspector is used in almost all drawing tasks. Freehand comes with the following inspectors: • the object inspector displays the position and dimensions of a s...
Page 74
Chapter 2 74 using toolbars freehand has several toolbars, which appear along the top, left, and bottom of the document window. The xtra tools, and xtras operations toolbars appear on the left side of the document window. The main, text, and envelope toolbars appear above the document window. The st...
Page 75
Freehand basics 75 the main toolbar the main toolbar contains the basic commands you use when beginning your freehand project. You use the main toolbar to open, lock, and unlock document files and to manage the appearance of your document. Creates a new document unlocks the selected objects. Opens a...
Page 76
Chapter 2 76 using the tools panel the tools panel contains tools that allow you to select, draw, and edit objects, apply color to objects, and create text. It is divided into two sections: tools and colors. You can customize the panel by adding and removing buttons. The tools panel contains the fol...
Page 77
Freehand basics 77 the status toolbar the status toolbar appears along the bottom of the document window. It contains page selector buttons as well as pop-up menus for magnification, page view, drawing mode, and units. The toolbar displays messages about the task in progress or the menu command high...
Page 78
Chapter 2 78 to display preference options: 1 choose edit > preferences. 2 in windows, click a tab; on the macintosh, click an item in the category list. Windows preference tabs and macintosh preference categories to restore all preferences to their default settings: 1 choose edit > preferences. 2 c...
Page 79
Freehand basics 79 using tooltips tooltips give you information about a tool name or toolbar button. In freehand, tooltips appear by default; you can turn them off if you wish. To display a tooltip: pause the pointer over a button on a toolbar. To turn off tooltips: 1 choose edit > preferences. Clic...
Page 80
Chapter 2 80 to turn an xtra on or off: 1 choose xtra > xtras manager to open the xtras manager. 2 do one of the following: • in windows, click the name of the xtra you wish to turn on or off. A check mark next to the name indicates that the xtra is on. Changes take effect immediately. • on the maci...
Page 81
Freehand basics 81 to choose a drawing mode: choose an option from the drawing mode pop-up menu in the status toolbar (windows) or in the lower left of the document window (macintosh): • preview displays the document as it will print. (you can’t preview custom, postscript, or textured strokes and fi...
Page 82
Chapter 2 82 to switch between preview mode and keyline mode: choose view > preview. Choosing view > preview when the document is set to preview switches it to keyline mode. Choosing view > preview when the document is set to keyline switches it to preview mode. To switch between fast keyline and fa...
Page 83
Freehand basics 83 magnifying and reducing the view you can zoom in or out to magnify or reduce your view using tools, menu commands, or keyboard shortcuts. You can create custom views based on the applied magnification using the zoom tool. You can choose magnifications from 6% to 6400% the actual s...
Page 84
Chapter 2 84 to enlarge or reduce a page using keyboard shortcuts: 1 select the zoom tool. 2 do one of the following: • to reduce the page view to the next increment, hold down alt (windows) or option (macintosh) and click the page. • to zoom out to the lowest magnification, hold down shift+alt (win...
Page 85
Freehand basics 85 naming and saving custom views you can name and save the current view’s magnification percentage, drawing mode, and scroll bar positions to recall later. To save settings with a custom view name: 1 adjust view elements using the magnification pop-up menu, drawing mode pop-up menu,...
Page 86
Chapter 2 86 using context menus (windows) in windows, you can choose commands from context menus as you work. You can also print a shortcut card for quick reference. Using the windows right mouse button you can display a context menu with context-specific commands for objects— including paths, text...
Page 87
Freehand basics 87 • right-click a page, color box, style, or foreground or background layer. This works within the document inspector, swatches panel, layers panel, styles panel, and tints panel, as well as for any color swatch, any color box, or a blank area of the document. To use the right mouse...
Page 88
Chapter 2 88 printing a shortcut quick-reference card you can print a shortcut quick-reference card and save a custom card. To print a shortcut quick-reference card: 1 choose edit > keyboard shortcuts. 2 click print. 3 in the keyboard shortcuts dialog box click print. 4 in the print dialog box, clic...
Page 89
Freehand basics 89 to assign a custom shortcut: 1 choose edit > keyboard shortcuts. Customize keyboard shortcuts dialog box (windows) customize keyboard shortcuts dialog box (macintosh) 2 do one of the following to create a custom shortcut: • to keep all default freehand shortcuts intact and create ...
Page 90
Chapter 2 90 4 click the name of the command to which you want to assign a new shortcut. The command description appears under description. The current shortcut keys text box displays any shortcuts already assigned to the command. A command can have more than one shortcut, but only one appears in th...
Page 91
Freehand basics 91 to copy a customized shortcut group from one computer to another: 1 select the shortcuts file, located in the keyboard folder within the freehand 10/english/settings folder. 2 copy the file to the same folder location on the other computer. The new group’s name appears in the keyb...
Page 92
Chapter 2 92 to customize toolbars using the toolbars dialog box: 1 choose edit > keyboard shortcuts and click the toolbars tab (windows) or choose window > toolbars > customize (macintosh). Customize toolbars dialog box (windows) customize toolbars dialog box (macintosh).
Page 93
Freehand basics 93 2 do one of the following to select the command you want to add: • scroll the commands list. If necessary, click the plus (+) sign (windows) or the triangle (macintosh) to find the command whose button you want to place on a toolbar. • if the command is not in a freehand menu, cli...
Page 94
Chapter 2 94 to move a toolbar onto the pasteboard: 1 click a toolbar handle. 2 drag the toolbar onto the pasteboard. The toolbar becomes a resizable floating toolbar when dropped beyond the toolbar area. To dock a floating toolbar onto the top, bottom, or side toolbar area: 1 click the gray area of...
Page 95
95 3 chapter 3 . . . . . . . . . . . . . . . . . . . . . . . . . . . . . . . . . . . . . . . . . . . . . . . . . . . . . . . . . . . . . . . . . . . . . . . . . . . . . . . . . . . . . . . . . . . . . . . . . . . . . . . . . . . . . Setting up your document when you begin your macromedia freehand pr...
Page 96
Chapter 3 96 using the document inspector the document inspector displays a miniature representation of the pasteboard, with thumbnail icons for each page in your document. You can use the document inspector to add and remove pages or set page attributes, such as size, orientation, and bleed, as wel...
Page 97
Setting up your document 97 5 click a page magnification button to enlarge or reduce the size of the page thumbnails. When magnification is set to the middle or highest levels, all of the pages in the document may not be visible in the document inspector’s pasteboard window. 6 select a value from th...
Page 98
Chapter 3 98 selecting pages to change a page’s attributes, you must first select the page. You can do this directly in your document, or in the document inspector. You can set preferences to allow you to select a page in the document inspector by using the page up and page down keys on the keyboard...
Page 99
Setting up your document 99 duplicating, removing, and moving pages to duplicate, remove, or move pages, you use either the document inspector or the page tool. To duplicate a page: 1 select the page (see “selecting pages” on page 98). 2 in the document inspector, do one of the following: • click th...
Page 100
Chapter 3 100 modifying, resizing, and rotating pages you can modify page attributes. To resize and rotate pages, you use the page tool. To modify a page: 1 alt-double-click (windows) or option-double-click (macintosh) the page to open the modify page dialog box. 2 do any of the following: • select ...
Page 101
Setting up your document 101 defining custom page sizes you can add custom page sizes to the document inspector using the edit page sizes dialog box in the page size pop-up menu. Custom page sizes are based on the document’s current unit of measure. Custom pages cannot be changed; to edit a custom p...
Page 102
Chapter 3 102 to create a custom page size using a different unit of measure than displayed in the edit page sizes dialog box: 1 close the edit page sizes dialog box if it is open. 2 change the document’s unit of measure using the units pop-up menu in the status toolbar (windows) or in the lower lef...
Page 103
Setting up your document 103 to set the unit of measure for an entire document : 1 click the units pop-up menu in the status toolbar (windows) or in the lower left corner of the document window (macintosh). 2 choose a unit of measure. This setting affects almost all numeric text boxes except the tex...
Page 104
Chapter 3 104 working with master pages master pages allow you to easily apply consistent page layouts in a document. You can define page attributes on a master page, as well as place text and graphics on it, and then apply these attributes to some or all of the pages in your document. You can creat...
Page 105
Setting up your document 105 • selecting a master page from the pop-up menu in the document inspector makes the current page (or range of pages) a child (or children) of the master page. Selecting none in the document inspector makes the current page (or range of pages) an ordinary page (or pages), ...
Page 106
Chapter 3 106 to add a child page to a document, do one of the following: • click the triangle in the upper right corner of the document inspector to display the options pop-up menu, and choose add pages. Select make child of master page. • select a child page, click the triangle in the upper right ...
Page 107
Setting up your document 107 3 click the file name, and click open. 4 select the master page from the import symbols dialog box (shift-click to select multiple pages), and click import. The lower pane of the library panel displays the imported master page. To export a master page: 1 in the library p...
Page 108
Chapter 3 108 to reset the page rulers: double-click the zero-point marker. To define a custom unit of measure: 1 choose view > page rulers > edit. 2 in the edit units dialog box, create a new custom unit by typing a new name or accepting the default name. 3 enter numeric values in the text boxes an...
Page 109
Setting up your document 109 using the grid and guides for alignment aids, you can display nonprinting lines as a grid or guides. You can change the color of these lines. To change the color of the grid or guides: 1 choose edit > preferences. Click colors. 2 to change the color of the guides or grid...
Page 110
Chapter 3 110 using guides guides are nonprinting blue lines that help you align and position objects. You can change the color of guides; see “using the grid and guides” on page 109. You can set guides where you want them using the page rulers or the edit guides command. You can add, modify, and de...
Page 111
Setting up your document 111 7 click add. 8 repeat steps 3 through 7 to set additional horizontal or vertical guides. 9 click ok. To make objects snap to guides or to release snapping: choose view > guides > snap to guides. This command toggles between snapping and not snapping. A check mark by the ...
Page 112
Chapter 3 112 3 do one of the following: • to edit a guide’s position, click edit. In the guide position dialog box, enter a new location for the guide and click ok. • to release the guide or guides, click release. • to delete the guide or guides, click remove (windows) or delete (macintosh). 4 clic...
Page 113
Setting up your document 113 to open an existing document: 1 choose file > open or click the open button in the main toolbar. 2 locate the file to open, and click open. To switch between open documents: choose window and the name of the document to display. Note: on the macintosh, you can also click...
Page 114
Chapter 3 114 opening freehand 5 and later documents because some of freehand’s features change between versions, some illustration attributes may change or be omitted when an illustration is converted. After converting a document from an earlier version, be sure it displays and prints properly befo...
Page 115
Setting up your document 115 • symbols and master pages • all objects • custom brushes • custom colors • custom page sizes • custom units of measurement when you open a template, an untitled copy of the template appears. You use the untitled copy to create a new template or replace an existing templ...
Page 116
Chapter 3 116 to change the default template: 1 choose edit > preferences. Click document. 2 for new document template, enter the file name of the new default template. 3 click ok. Creating a new default template using the default template, you can apply document-level defaults to control settings i...
Page 117
Setting up your document 117 object linking and embedding (windows) object linking and embedding (ole) is a windows standard for sharing information between applications. One application acts as an ole server (freehand), while the other application acts as a client. For more information on ole, see ...
Page 118
Chapter 3 118 • freehand correctly imports clipping paths for both eps and tiff images. • when bitmap images are imported from a file or opened, they are linked to a freehand document, not embedded, by default; you can change this preference. Bitmap images that are imported by dragging and dropping ...
Page 119
Setting up your document 119 • bitmap image files from fireworks in pict (macintosh), png,tga, tiff, psd, gif, jpeg, or bmp formats. Bitmap graphics import in their original format. For details, see “working with bitmap images in freehand” on page 125. • other file formats, including adobe acrobat a...
Page 120
Chapter 3 120 encapsulated postscript, macintosh eps, ms-dos eps, eps x x vector and bitmap eps with tiff preview eps x x vector and bitmap jpeg jpg x x bitmap macintosh pict pict, pict2 n/a x bitmap micrografx designer 3.X drw x n/a vector portable network graphic png x x bitmap quarkxpress eps eps...
Page 121
Setting up your document 121 importing clip art using the freehand clipart viewer the freehand clipart viewer allows you to choose from thousands of clip art files shipped with freehand 10. To import the clip art files, you can drag clip art previews directly to your freehand document. Note: the cli...
Page 122
Chapter 3 122 linking and embedding you can set preferences to determine whether to link or embed a bitmap or eps graphic when you import it into a freehand document. An embedded graphic is included in the document; a linked file remains independent of the file, resulting in a smaller freehand docum...
Page 123
Setting up your document 123 managing links when linking or embedding a graphic, freehand records the graphic’s file name and location. When you open, export, or print the illustration containing a link, freehand looks for the linked graphic by its file name. If the source graphic is not in its orig...
Page 124
Chapter 3 124 to extract an embedded graphic from a document and create a new link to an external graphic file: 1 do one of the following: • choose edit > links. Click extract. • in the object inspector, click the links button, and click extract. 2 in the extract import dialog box, select the folder...
Page 125
Setting up your document 125 working with bitmap images in freehand you can import bitmap images from other applications that have been saved in the tiff, gif, jpeg, pict, png, targa, bmp, and photoshop (psd) bitmap formats. In most cases, all bitmap formats behave in freehand exactly as tiff images...
Page 126
Chapter 3 126 to edit a grayscale ramp for a bitmap: 1 select the bitmap. 2 click edit in the object inspector. 3 in the image dialog box, do one of the following: • select one of the four predefined grayscale ramps. • manually edit the grayscale ramp using the lightness and contrast arrows. 4 do on...
Page 127
Setting up your document 127 3 for object, choose the file format from the pop-up menu: pict, bmp, gif, jpeg, photoshop, png image, targa, tiff image, or xres lrg image. 4 click the ellipsis (...) button, navigate to select an editor, and click ok (windows) or open (macintosh). 5 click ok twice. To ...
Page 128
Chapter 3 128 importing dxf files dxf is a vector graphic file exchange format used to transfer files between 3d editing applications, or between 3d editing applications and vector drawing applications. Most 3d editing applications, including autocad and 3d studio max, support dxf format. Freehand c...
Page 129
Setting up your document 129 importing eps and dcs eps files eps files can contain vector graphics, bitmap images, or both. Eps is the best file format for preserving prepress-ready color. Freehand imports an eps graphic as a linked, not embedded, file by default. You can import dcs eps (desktop col...
Page 130
Chapter 3 130 gif gif is a bitmap graphic file format that is supported by both windows and macintosh platforms. A gif can be imported into or exported from freehand and supports up to 256 colors. However, this format is not recommended for print, and transparent gifs are not transparent on import. ...
Page 131
Setting up your document 131 importing pdf files acrobat pdf (portable document format) is a common file format for sharing documents across most computer platforms. Pdf files can be viewed or printed using the acrobat reader. Freehand can open pdf documents that contain notes or links to urls on th...
Page 132
Chapter 3 132 importing pict files freehand can import pict patterns and convert their fills to postscript tints to maintain the original’s tint. To choose pict import preferences (macintosh): 1 choose edit > preferences. Click import. 2 select convert pict patterns to grays to convert a pattern fil...
Page 133
Setting up your document 133 displaying imported tiff files tiff (tagged image file format) is a bitmap graphic file format that is supported by both windows and macintosh platforms. To display imported tiff files at the highest resolution available: 1 choose edit > preferences. Click redraw. 2 move...
Page 134
Chapter 3 134 2 when a warning appears asking if you want to reformat the document using available fonts, click ok. 3 in the missing fonts dialog box, at the prompt to replace missing fonts, do one of the following: • click replace to display the replace font dialog box. Enter the font name to repla...
Page 135
Setting up your document 135 4 to add the e-mail addresses, type an address in the text box or click to. 5 click send. The documents are attached in their current state. If the documents are unnamed, they are attached with the default names. Using applescript to automate freehand (macintosh) on the ...
Page 136
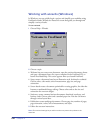
Chapter 3 136 working with wizards (windows) in windows, you can quickly begin a project and simplify your workflow using freehand wizards. Wizards are interactive screens that guide you through and simplify a variety of tasks. To use a wizard: 1 choose help > wizards. 2 choose a topic: • welcome le...
Page 137
137 4 chapter 4 . . . . . . . . . . . . . . . . . . . . . . . . . . . . . . . . . . . . . . . . . . . . . . . . . . . . . . . . . . . . . . . . . . . . . . . . . . . . . . . . . . . . . . . . . . . . . . . . . . . . . . . . . . . . . Drawing macromedia freehand gives you a wide range of options for ...
Page 138
Chapter 4 138 in contrast, bitmap images consist of a matrix of pixels whose display depends on the resolution of your monitor and printer. Bitmap images appear granulated when enlarged. Vector image (top) and bitmap image (bottom) freehand is a vector drawing program, but you can work with bitmap i...
Page 139
Drawing 139 path and point characteristics paths and points have the following basic characteristics: • a path can be open with unconnected end points, or closed with the same beginning and ending point. Examples of open (top) and closed (bottom) paths • each path can have up to 32,000 points, which...
Page 140
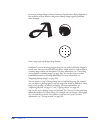
Chapter 4 140 • paths have either clockwise or counterclockwise direction. The rectangle, polygon, and ellipse tools draw in a clockwise direction. With the line tool, the direction in which you draw sets the path direction. With the freehand pen and bezigon tools, the order in which you place point...
Page 141
Drawing 141 freehand places a corner point, which is displayed as a square, when you draw a straight path segment. A corner point’s handles can be adjusted independently. When you first select a corner point, its handles are retracted. Freehand places a curve point, which is displayed as a circle, w...
Page 142
Chapter 4 142 drawing rectangles, ellipses, and lines rectangles, ellipses, and lines are the basic freehand shapes. You can draw basic shapes by dragging with one of these tools. You can also precisely adjust rectangles’ size and position, and adjust the curve of rectangle corners. Rectangles and e...
Page 143
Drawing 143 2 in the rectangle tool dialog box, enter a value or use the slider to adjust the corner radius, from 0 for a standard 90° corner to 100 for extremely curved corners. 3 click ok. 4 draw the rectangle. To adjust the corners of a selected rectangle: 1 choose window > inspectors > object to...
Page 144
Chapter 4 144 drawing polygons and stars you can use the polygon tool to draw polygons and stars. When you draw a polygon, you create a closed path. A polygon path is similar to a path drawn with the pen or bezigon tools, except that the polygon tool constrains the path to a regular shape with the c...
Page 145
Drawing 145 drawing spirals and arcs with the spiral and arc xtras tools, you can easily draw spirals and arcs. Each tool has several options that let you customize the way it works. For information on managing xtras, see “using and managing xtras” on page 79. To set spiral tool options: 1 choose wi...
Page 146
Chapter 4 146 3 to modify the spiral as you draw, use any of the following keys: • press shift to constrain the placement of the final point. • press alt (windows) or option (macintosh) to draw from the center regardless of the selected drawing option. To set arc tool options: 1 choose window > tool...
Page 147
Drawing 147 drawing freeform paths with the pencil tool, you can draw freeform paths that follow the direction of your hand movements. The three modes of operation for this tool are freehand, variable stroke, and calligraphic pen. To set pencil tool options: 1 double-click the pencil tool. 2 in the ...
Page 148
Chapter 4 148 7 for the calligraphic pen, select additional width and angle options: • click fixed to set calligraphic paths to a constant width, or click variable to specify a path width between 1 and 72 points. Set the angle of the calligraphic pen by entering a value or dragging the angle dial be...
Page 149
Drawing 149 4 for the variable stroke or calligraphic pen option, vary the path width by 1/8 the tool’s width setting as you draw: • to decrease the path width, press the left arrow key (windows) or left bracket key (macintosh). • to increase path width, use the right arrow key (windows) or the righ...
Page 150
Chapter 4 150 pen tool smart cursors freehand 10 makes the pen tool easier to use by adding additional smart cursors. As you move the pen tool, the cursor changes to show what action will happen if you click at the pen’s location. To draw with the pen tool: 1 click the pen tool. 2 do any of the foll...
Page 151
Drawing 151 to constrain path segments: hold down shift as you place a point. To continue a selected path: 1 click the pen or bezigon tool. You can continue a pen path with the bezigon tool and vice versa. 2 click or drag to draw additional segments. To place a path segment at a sharp angle to a pre...
Page 152
Chapter 4 152 editing paths you can easily edit paths using various tools and techniques. Once you’ve drawn a path, you can add or delete points, reposition points, or redirect the path. You can edit paths using the pen, bezigon, pointer, and subselect tools. You can reshape paths using the freeform...
Page 153
Drawing 153 reshaping a path you can reshape a path by moving points and path segments, and by adjusting a point’s handles by dragging with the pointer or subselect tools. You can also modify a path using the object inspector or the freeform tool. For information on using the freeform tool, see “edi...
Page 154
Chapter 4 154 3 drag a handle to adjust the curve. Moving a handle closer to its point decreases the amount of curve. Moving it away from the point increases the curve. Dragging a corner point’s handle to curve a straight path segment dragging a curve point’s handle to reverse a path segment’s curve...
Page 155
Drawing 155 to adjust points using the object inspector: 1 choose window > inspectors > object to display the object inspector. Path information in object inspector 2 select the path and then the points you want to adjust. The object inspector displays several options for the selected points. If you...
Page 156
Chapter 4 156 editing a path with the freeform tool the freeform tool lets you modify a path by pushing, pulling, or reshaping. The freeform tool automatically adds points, deletes points, or changes point types as you modify the paths. The freeform tool has two modes of operation: push/pull lets yo...
Page 157
Drawing 157 4 choose the pull settings options. • choose a bend option from the drop-down list. By length lets you specify the length of the segment that will be affected, from 1 to 1000 pixels. Between points affects all of a path segment between its end points. A small s by the pull cursor shows w...
Page 158
Chapter 4 158 • click beside the path and drag to push the path. A circular pointer indicates that you are in push mode. The pointer’s size depends on the freeform tool size setting. Push set at 50 (left) and curve after being pushed (right) 5 while dragging with the freeform tool in push/pull mode,...
Page 159
Drawing 159 to reshape a selected path: 1 double-click the freeform tool in the tools panel. 2 in the freeform tool dialog box, select reshape area. 3 click ok. 4 position the pointer near the path and press the mouse button. The pointer changes to the reshaping pointer. Note: the inner circle of th...
Page 160
Chapter 4 160 • enter a value from 0 to 72 points in the width text box or set the width with the slider control. A width of 0 gives a single, thin cut. Higher values will make two cuts spaced according to the width value. • select close cut paths to close the resulting paths and to display the stro...
Page 161
Drawing 161 to simplify a selected path: 1 choose modify > alter path > simplify. 2 enter a value in the amount text box or adjust the slider control. The higher the value, the more points freehand removes from the path. 3 click apply to preview the result. You can change the result and preview it a...
Page 162
Chapter 4 162 tracing artwork you can import bitmap artwork into freehand and then use the trace tool to create paths that follow the outlines of all or part of the artwork. You can trace all of an image within the selection marquee, or you can trace just an area of contiguous color within the image...
Page 163
Drawing 163 to set trace tool options: 1 double-click the trace tool in the tools panel. 2 in the trace tool dialog box, set the color mode options. • choose the number of colors, from 2 to 256. Excess colors in the image are converted to the nearest color. • choose colors or grays to set the color ...
Page 164
Chapter 4 164 5 set the path conversion option to determine how paths are traced: • choose outline to trace along the outside border of the graphics and create closed, filled paths. Then choose a path overlap option: none to trace line art and text; loose to trace continuous-tone images; or tight fo...
Page 165
Drawing 165 to trace a contiguous area of color: 1 click the trace tool in the tools panel. 2 in the document, click to select an area of color. • to add to the current selection, shift-click additional areas. • to subtract from the current selection, shift-click a selected area. • to deselect all a...
Page 166
Chapter 4 166 5 do one of the following to add data to the selected cell: • type in the text box above the chart cells. To undo the last change, click the undo button. • click import to import tab-delimited text from another application, such as microsoft excel. 6 to create labels and legends, leave...
Page 167
Drawing 167 5 when you have finished editing data, click apply to preview your changes without closing the chart panel, or click ok to apply the changes and close the panel. To edit the appearance of chart elements: 1 click the subselect tool and click a chart element to select it. 2 choose edit > s...
Page 168
Chapter 4 168 • area displays filled areas representing the progress of data over time. Each area represents a column of data in the worksheet. Each column’s value is added to the previous column’s total. • scatter plots data as paired sets of coordinates to identify trends in data. Each coordinate ...
Page 169
Drawing 169 4 for gridlines, select x axis to extend gridlines from left to right along the x- axis, y axis to extend gridlines from top to bottom along the y-axis, or select both options to create a grid behind the chart. 5 click apply to preview your changes without closing the chart panel, or cli...
Page 170
Chapter 4 170 adding pictographs to charts pictographs represent data visually, according to the type data shown. For example, instead of a simple bar to represent a dollar amount, you can add a pictograph of a dollar sign or stack of coins. To create a pictograph: 1 select and copy the freehand gra...
Page 171
Drawing 171 drawing with the graphic hose tool for quick illustration, you can use the graphic hose tool in the xtra tools toolbar to “spray” frequently used objects on your document page. Objects in hose (left) and spraying result the graphic hose panel lets you store up to 10 images (including bit...
Page 172
Chapter 4 172 to draw with the graphic hose tool: 1 choose window > toolbars > xtra tools to display the xtra tools toolbar. 2 click the graphic hose button. 3 drag the tool, controlling the spray as follows: • increase or decrease the speed and direction of dragging to control how objects are place...
Page 173
Drawing 173 3 choose a method to create a new set: • choose new from the sets pop-up menu to add a new set. • choose rename or duplicate from the pop-up menu to base the new set on an existing one. 4 in the dialog box that appears, name the new set and click save to add it to the list. Hoses are sto...
Page 174
Chapter 4 174 setting graphic hose options you can set options for painting with the graphic hose, including the order of objects, spacing, scale, and rotation of objects. To set graphic hose options: 1 choose window > toolbars > xtra tools to display the xtra tools toolbar. 2 double-click the graph...
Page 175
175 5 chapter 5 . . . . . . . . . . . . . . . . . . . . . . . . . . . . . . . . . . . . . . . . . . . . . . . . . . . . . . . . . . . . . . . . . . . . . . . . . . . . . . . . . . . . . . . . . . . . . . . . . . . . . . . . . . . . . Working with objects macromedia freehand lets you manipulate objec...
Page 176
Chapter 5 176 to set the number of undo levels: 1 choose edit > preferences. Click general. 2 enter a value between 1 and 100 in the undo’s text box. Setting the level to more than 10 uses additional computer memory. 3 click ok. For this change to take effect, you must close and reopen the document ...
Page 177
Working with objects 177 selecting objects you can select objects with the pointer, subselect, or lasso tools, or by using keyboard shortcuts or menu commands. The pointer, subselect, and lasso tools let you select objects or points by clicking. The pointer and subselect tools also let you select ob...
Page 178
Chapter 5 178 to select an object or point using the subselect tool, do one of the following: • using the subselect tool, click the object, path, or point. This selects only the part you click, even if it is contained in a grouped object. • if you are using the pointer tool, hold down alt (windows) ...
Page 179
Working with objects 179 hiding objects you can hide objects to prevent them from being modified. Hidden objects will appear in printed documents. You can choose view > show all to redisplay hidden objects. Hidden objects will automatically redisplay when you close and re-open a file. To hide select...
Page 180
Chapter 5 180 moving objects you can move selected objects by dragging, pressing an arrow key, or by using the transform panel. When moving an object with the arrow keys, you can specify the distance it moves each time you press an arrow key. To specify the distance an object moves when you press an...
Page 181
Working with objects 181 you can also use blends or power duplicating to evenly space identical objects across a page. For more information, see “working with blends” on page 207 and “power-duplicating” on page 224. To align or distribute selected objects or points: 1 choose window > panels > align ...
Page 182
Chapter 5 182 you can override the default format by using the copy special or paste special commands. You can change the list of copy formats available to freehand by changing the export preferences. In windows only, you can change the list of paste formats available by changing the import preferen...
Page 183
Working with objects 183 • emf • ascii • metafile • bitmap • device independent bitmap to set copy format preferences: 1 choose edit > preferences. Click export. 2 in the clipboard copy formats list (windows) or clipboard output formats (macintosh), select the formats you want freehand to use when c...
Page 184
Chapter 5 184 2 do one of the following to paste the object: • choose edit > paste to paste the selection according to the clipboard paste formats preferences. • choose edit > paste special and choose a format in the copy special dialog box. To copy an object by dragging within a freehand document: ...
Page 185
Working with objects 185 • choose edit > paste to paste the selection according to the clipboard paste formats preferences. • choose edit > paste special and choose a format in the copy special dialog box. To copy an object by dragging between freehand documents: 1 open both the source and destinati...
Page 186
Chapter 5 186 3 do one of the following: • choose edit > paste to paste the selection according to the clipboard paste formats preferences. • choose edit > paste special and choose a format in the copy special dialog box. Converting vector graphics to bitmap images you can directly convert, or raste...
Page 187
Working with objects 187 to add the crop tool to a toolbar: 1 choose window > toolbars > customize. 2 in the commands list, click other. 3 drag the crop tool button to any open toolbar. 4 in the customize window, click close. To crop a selected bitmap image: 1 press c or click the crop tool button t...
Page 188
Chapter 5 188 to ungroup a selected group: choose modify > ungroup. To automatically return objects to their original layers when ungrouping: 1 choose edit > preferences. Click general. 2 select remember layer info and click ok. Selecting grouped objects you can work with individual objects within a...
Page 189
Working with objects 189 to deselect a subselected object: press tab or click the document outside the group. To select the group containing a subselected object: choose edit > select > superselect. Working with nested objects nested objects are objects in groups within larger groups. You can manipu...
Page 190
Chapter 5 190 to subselect a nested group: 1 do one of the following: • with the pointer tool selected, hold down alt (windows) or option (macintosh) and click an object within the nested group. • click the subselect tool and click an object. 2 to add objects to the subselection, press shift as you ...
Page 191
Working with objects 191 4 do one of the following: • choose edit > paste in front to paste the cut/copied object in front of the selected object. • choose edit > paste behind to paste the cut/copied object behind the selected object. Adding names and notes to objects you can name an object or add a...
Page 192
Chapter 5 192 you can find and replace type attributes using the find & replace graphics feature; for more information, see “adding, duplicating, and removing styles” on page 253. To find and replace text, you use the find text dialog box; for more information, see “finding and replacing text” on pa...
Page 193
Working with objects 193 • text effect selects all text blocks that have any effect or a specific effect. • object name assigns names in the navigation panel. • object type specifies the number of points, composite paths, clipping paths, groups, blends, ellipses, rectangles, text blocks, bitmaps, ep...
Page 194
Chapter 5 194 3 choose a category from the attribute pop-up menu: • choose color to select a color to change. Specify the colors using the pop-up menus under from and to. Select include tints to search for tints of the from base color. For more information on color, see “color, strokes, and fills” o...
Page 195
195 6 chapter 6 . . . . . . . . . . . . . . . . . . . . . . . . . . . . . . . . . . . . . . . . . . . . . . . . . . . . . . . . . . . . . . . . . . . . . . . . . . . . . . . . . . . . . . . . . . . . . . . . . . . . . . . . . . . . . Transforming and distorting objects once you’ve created an object,...
Page 196
Chapter 6 196 to select an object underneath another object within a composite path, group, blend, or paste inside: 1 click the subselect tool. 2 hold down control and alt-right-click (windows), or hold down control and option-click (macintosh) the object. This selects the top object in the stack. C...
Page 197
Transforming and distorting objects 197 to control whether nontouching open paths are joined: 1 choose edit > preferences. Click object. 2 do one of the following: • select join non-touching paths to connect the paths if the end points are within the snap distance set in the general preferences dial...
Page 198
Chapter 6 198 4 if the composite path’s overlapping fill does not appear as expected, select a subpath, and do one of the following: • click the correct direction button in the xtra operations toolbar. • choose modify > alter path > correct direction. • choose modify > alter path > reverse direction...
Page 199
Transforming and distorting objects 199 using the divide command divide cuts selected paths into sections defined by the areas of overlap. Use open paths, closed paths, or a combination. Stroke and fill attributes of the topmost path are applied to the areas common to all selected paths. To apply th...
Page 200
Chapter 6 200 using the intersect command intersect creates a new path of the area common to all selected, closed paths, with the stroke and fill attributes of the farthest back object. If selected paths don’t overlap, the command deletes the selection, unless the path operations consume original pa...
Page 201
Transforming and distorting objects 201 using the punch command punch removes parts of selected, closed paths below the topmost, closed path. The front selected path is deleted as its shape punches a hole. Where a hole is fully enclosed within a path, a punched path becomes a composite path. Stroke ...
Page 202
Chapter 6 202 to apply the crop command to selected paths, do one of the following: • choose modify > combine > crop. • choose window > toolbars > xtra operations and click the crop icon. Note: for more information on using and managing xtras, see “using and managing xtras” on page 79. • choose xtra...
Page 203
Transforming and distorting objects 203 working with clipping paths you can fill a closed path with other objects: vector graphics, text, or bitmap images. These paths are called clipping paths, and the items they contain are called contents or paste insides. Contents extending beyond the clipping p...
Page 204
Chapter 6 204 3 choose edit > cut. 4 select a closed path to use as the clipping path. 5 choose edit > paste inside. 6 use the paste inside handle to move the contents. Repeat the procedure to add additional contents to the clipping path. To set transformation options for a selected clipping path: 1...
Page 205
Transforming and distorting objects 205 2 subselect the contents you want to edit. To select all of the clipping path’s contents, double-click the paste inside handle. 3 edit the contents. To remove contents from a clipping path: 1 select the clipping path. 2 choose edit > cut contents. Expanding a ...
Page 206
Chapter 6 206 insetting a path inset path expands or contracts one or more closed paths by a specified amount and creates additional paths that follow the original path’s outline. You can specify the number of additional paths as well as their location and spacing. To create an inset path of a selec...
Page 207
Transforming and distorting objects 207 5 adjust the join, and miter limit settings. For more information on these options, see “applying strokes” on page 275. 6 click ok. Working with blends you can create a blend from two or more paths that have the same fill and stroke type. Blending creates a se...
Page 208
Chapter 6 208 blends between spot colors result in intermediate steps using only tints of those spot colors and will print on two separation plates. When printing a spot-to-process blend, the spot color is set to overprint the process color. Steps in spot-to-spot and spot-to-process blends are set t...
Page 209
Transforming and distorting objects 209 to adjust a blend: 1 select one of the original objects using the subselect tool. 2 do one of the following: • change the object’s shape. • change the object’s path direction. • change the object’s stroke or fill color. Joining a blend to a path you can join a...
Page 210
Chapter 6 210 blending composite paths and groups you can create blends between composite paths and between groups. Groups must contain only simple paths and cannot contain composite paths, images, clipping paths, or other groups. Objects in both groups must have the same type of stroke and fill. Ma...
Page 211
Transforming and distorting objects 211 adding special effects to objects you can transform and distort objects in many ways to give a three-dimensional effect. You can add a drop shadow to an object, smudge it, or emboss it. Adding a drop shadow to an object a drop shadow is a copy of an object pla...
Page 212
Chapter 6 212 4 for a soft edge shadow, drag a color to the fade to color well to set the shadow’s background color (white by default). Set a soft edge degree to soften the shadow’s edges with the fade to color, from 0 for a hard edge to 100 for soft throughout. 5 for a zoom shadow, set a stroke col...
Page 213
Transforming and distorting objects 213 smudging an object the smudge tool lets you soften the edges of objects for a drop shadow effect by blending the edge colors. Smudging creates grouped copies of the original object. If you smudge an object more than once, freehand creates copies of each object...
Page 214
Chapter 6 214 embossing an object use emboss to create a three-dimensional effect in which the edges of an object are raised or lowered so the object appears to be embossed into the background. Applying the emboss xtra creates multiple objects much like blending or smudging. You can only emboss clos...
Page 215
Transforming and distorting objects 215 4 for depth, enter a value up to 72 or drag the slider between 1 and 20 to control the distance by which the effect is raised or impressed. 5 for angle, enter a value or drag the dial to set the angle for the light source. Angle affects the direction of the hi...
Page 216
Chapter 6 216 • center of gravity makes the projection center behind the visual center of the object. • origin makes the projection begin at the lower left corner of the object. Xz and yz coordinates appear below the pop-up menu. • x/y coordinates lets you enter x and y coordinates for the projectio...
Page 217
Transforming and distorting objects 217 to transform a selected object using the transform tools: 1 click a transformation tool in the tools panel. 2 place the pointer at the spot that will be the center of transformation. On the macintosh, control-click to set the center of transformation as the ce...
Page 218
Chapter 6 218 to rotate a selected object: 1 do one of the following: • double-click the rotate tool in the tools panel. • choose modify > transform > rotate. • choose window > panels > transform and click the rotate button in the transform panel. 2 choose one or more of the following options: • sel...
Page 219
Transforming and distorting objects 219 to scale a selected object: 1 do one of the following: • double-click the scale tool in the tools panel. • choose modify > transform > scale. • choose window > panels > transform and click the scale button in the transform panel. 2 choose one or more of the fo...
Page 220
Chapter 6 220 to skew a selected object: 1 do one of the following: • double-click the skew tool in the tools panel. • choose modify > transform > skew. • choose window > panels > transform and click the skew button in the transform panel. 2 choose one or more of the following options: • select cont...
Page 221
Transforming and distorting objects 221 to reflect a selected object: 1 do one of the following: • double-click the reflect tool in the tools panel. • choose modify > transform > reflect. • choose window > panels > transform and click the reflect button in the transform panel. 2 choose one or more o...
Page 222
Chapter 6 222 transforming objects freely you can use transformation handles to freely transform objects, including text blocks, and to combine a series of transformations. You can also use the transformation handles to transform an object within a group or a paste inside, or to transform a point wi...
Page 223
Transforming and distorting objects 223 • to scale the selection, position the pointer on a transformation handle, and drag. Shift-drag to resize proportionally. • to skew the selection, position the pointer on the dotted outline between the transformation handles and drag. Shift-drag to constrain t...
Page 224
Chapter 6 224 power-duplicating power-duplicating is the process of repeating a transformation (move, scale, skew, reflect, rotate) on successive duplicates of the object. You can use power-duplication with more than one transformation. For example, you can move, scale, and skew a duplicate, and tho...
Page 225
Transforming and distorting objects 225 • choose xtras > distort > add points. Added points to distort a selected object manually: 1 choose window > toolbars > xtra tools toolbar. 2 click the tool corresponding to the desired effect, as follows: • roughen creates a jagged effect. • fisheye lens crea...
Page 226
Chapter 6 226 5 click anywhere on the path and drag. Dragging farther from the path makes the path rougher. Note: to apply this effect to text, first select the text and choose text > convert to paths. To apply a precise fisheye lens effect to a selected path or object: 1 double-click the fisheye le...
Page 227
Transforming and distorting objects 227 • drag down for a bloated effect, curving the path outward while the anchor points are moved inward. Creating envelopes the envelope tool lets you warp and distort graphics and text blocks. An envelope is a hidden wrapper or enclosure that contains one or more...
Page 228
Chapter 6 228 3 modify the envelope as you would any freehand path and note the effect on the contents of the envelope. You can use any path-changing tool or operation to modify an envelope. For example, dragging a corner point of an envelope outward causes the objects enclosed to stretch in that di...
Page 229
Transforming and distorting objects 229 creating patterns you can create simple or complex patterns using xtra operations or tools. The fractalize command creates intricate, square-like patterns. The mirror xtra tool reflects an existing path to create a pattern. To create a square pattern using the...
Page 230
Chapter 6 230 4 if you chose multiple, select these additional options: • enter the number of axes the object reflects around (1 to 50 using the slider or 1 to 100 entering a value). • choose reflect to multiply the path and its reflection or choose rotate to multiply only the path. 5 select close p...
Page 231
Transforming and distorting objects 231 creating perspective you can add perspective to objects by attaching them to a perspective grid. The perspective grid is a nonprinting array of lines that lets you define one-, two-, or three-point perspective with vanishing points, a horizon line, and grid li...
Page 232
Chapter 6 232 4 while holding down the mouse button, press and release the arrow key that corresponds to where you want to attach the object to the perspective grid, as follows: • for a perspective grid with only one vanishing point, press either the left or right arrow key to attach an object to th...
Page 233
Transforming and distorting objects 233 to flip an object horizontally or vertically on the perspective grid: 1 click the object with the perspective tool. Do not release the mouse button yet. 2 while holding the mouse button down, press the spacebar to flip a side grid object horizontally or a floo...
Page 234
Chapter 6 234 editing text on a perspective grid you can use the text editor to edit text that is attached to a perspective grid. If you release text from the perspective grid while retaining its perspective (view > perspective grid > release with perspective), it is converted to grouped paths and c...
Page 235
Transforming and distorting objects 235 6 to change the grid color, click the left, right, or horizontal grid color swatches, and choose a new color from the color palette. 7 when you have finished defining the grid, click ok. To edit an existing grid: 1 choose view > perspective grid > define grid....
Page 236
Chapter 6 236 3 adjust the grid in the following ways: • to hide or show a grid associated with a particular vanishing point, double-click the vanishing point. A small arrow remains to mark the vanishing point’s location. • to hide or show a grid floor, double-click the horizon line. A line remains ...
Page 237
237 7 chapter 7 . . . . . . . . . . . . . . . . . . . . . . . . . . . . . . . . . . . . . . . . . . . . . . . . . . . . . . . . . . . . . . . . . . . . . . . . . . . . . . . . . . . . . . . . . . . . . . . . . . . . . . . . . . . . . Using layers, symbols, and styles to work more efficiently in macr...
Page 238
Chapter 7 238 the guides layer contains guide lines dragged from the ruler or entered manually, as well as paths that have been converted to guides. Objects on the background layer are dimmed, and the layer appears by default below the separator bar, so it does not print. If you move the background ...
Page 239
Using layers, symbols, and styles 239 to display the layers panel: choose window > panels > layers. To designate a layer as nonprinting, do one of the following in the layers panel: • drag the layer below the separator line. • drag the separator line above the layer. Creating layers to create new la...
Page 240
Chapter 7 240 selecting layers you can use the layers panel to select a layer, making it the active layer. In addition to selecting a layer, you can easily select all the objects on a layer. To select a layer and make it active: 1 choose edit > select > none or press tab to deselect all objects. Thi...
Page 241
Using layers, symbols, and styles 241 to move an object to another layer using menu commands: 1 choose edit > preferences. Click panels. 2 deselect clicking on a layer name moves selected objects, and click ok. 3 select an object. The object’s layer name is highlighted in the layers panel. 4 do one ...
Page 242
Chapter 7 242 to copy layer information between documents: 1 choose edit > preferences. Click general. 2 select remember layer info, and click ok. 3 select an object in the source document and choose edit > cut or edit > copy. 4 open the destination document and choose edit > paste. If the layer nam...
Page 243
Using layers, symbols, and styles 243 removing layers you can remove layers you no longer need. To remove a layer: 1 select the layer to be removed. 2 do one of the following: • click the triangle in the upper right corner of the layers panel to display the options pop-up menu, and choose remove. • ...
Page 244
Chapter 7 244 locking and unlocking layers you can lock layers to protect the objects on those layers from changes while keeping them visible. A closed padlock icon next to the layer name in the layers panel indicates a layer is locked; an open padlock icon indicates it’s unlocked. To lock or unlock...
Page 245
Using layers, symbols, and styles 245 to turn an object into a guide: 1 select the object. 2 in the layers panel, click the guides layer. The object displays in the guide color. Any object moved to the guides layer becomes a guide. To turn a guide object into a normal object: 1 double-click the guid...
Page 246
Chapter 7 246 to change the layer highlight color display: 1 choose edit > preferences. Click general. 2 choose how to display highlight colors: • to display selected handles and points in the highlight color, select smoother editing. Deselecting this option improves performance. • to display path s...
Page 247
Using layers, symbols, and styles 247 creating and importing symbols a symbol is an object stored in the library for future reuse. You can create a symbol from any object, text, or group. Creating a new symbol automatically adds the symbol to the library. You can duplicate symbols as well as preview...
Page 248
Chapter 7 248 to import a symbol: 1 click the triangle in the upper right corner of the library panel to display the options pop-up menu, and choose import. 2 in the open dialog box, browse to locate the folder from which to import the symbol. 3 click the file name, and click open. 4 select the symb...
Page 249
Using layers, symbols, and styles 249 to release an instance: 1 select the instance. 2 choose modify > symbol > release instance. 3 if the graphic is grouped, choose modify > ungroup to ungroup the graphic. To update all instances of a symbol: 1 select an instance in the document and release it. 2 m...
Page 250
Chapter 7 250 exporting symbols you can export a symbol in order to use it in other freehand documents. To export a symbol: 1 click the triangle in the upper right corner of the library panel to display the options pop-up menu, and choose export. 2 select the symbol (or symbols) you wish to export. ...
Page 251
Using layers, symbols, and styles 251 to edit a style: 1 click the style name in the styles panel. 2 click the triangle in the upper right corner of the styles panel to display the options pop-up menu, and choose edit to set specific attributes. 3 click ok. To change how styles display in the styles...
Page 252
Chapter 7 252 applying styles you can apply a style to a selection by using the styles panel to select or drag and drop a style, or by copying and pasting. You can set preferences to control how new styles are defined and whether new graphic styles apply immediately to selected objects. To apply a s...
Page 253
Using layers, symbols, and styles 253 adding, duplicating, and removing styles to add new styles, copy styles, or remove styles, you use the styles panel. To create a new style: 1 choose edit > select > none or press tab to deselect your artwork. 2 set the desired object or text attributes. 3 click ...
Page 254
Chapter 7 254 modifying styles you can modify any stroke, fill, color, or halftone attribute using the edit style dialog box. You can also override or redefine a style using the options pop-up menu within the styles panel. To edit a style: 1 choose window > panels > styles to display the styles pane...
Page 255
Using layers, symbols, and styles 255 3 in the redefine style dialog box, select the name of the style you are redefining, and click ok. The style assumes the attributes of the selected object or text. Note: if you have nothing selected, then the style is redefined based on your default drawing attr...
Page 256
Chapter 7 256 to copy style information to another document: 1 select an object in the source document and choose edit > cut or copy. You can also select text or a paragraph style. 2 open the destination document and choose edit > paste. The object appears in the document, and its style appears in t...
Page 257
257 8 chapter 8 . . . . . . . . . . . . . . . . . . . . . . . . . . . . . . . . . . . . . . . . . . . . . . . . . . . . . . . . . . . . . . . . . . . . . . . . . . . . . . . . . . . . . . . . . . . . . . . . . . . . . . . . . . . . . Color, strokes, and fills freehand lets you create a list of named...
Page 258
Chapter 8 258 the difference between the two colors is that process colors are printed as four-color separations, corresponding to the four process inks. Spot colors do not need to be separated, since a spot color is printed on a single plate. Freehand includes several color libraries that you can i...
Page 259
Color, strokes, and fills 259 both the color mixer and the tints panel use the same color box to display a color as you edit it. The color box displays the original color on the left and the new color on the right. You can change this display to a single color box using preferences. The single color...
Page 260
Chapter 8 260 to define a cmyk color or an rgb color: 1 click the cmyk or rgb mode button to change color modes. 2 to adjust color component values, move the sliders or enter values in each entry text box. Use the color box to monitor the color as you mix it. 3 to add the new color to the swatches p...
Page 261
Color, strokes, and fills 261 using the tints panel tints are lighter versions of a color, created by specifying a percentage of the original color. To apply, create, and edit tints, you use the tints panel. If you add a tint to the swatches panel, its base color is also added. If you remove the bas...
Page 262
Chapter 8 262 using the swatches panel the swatches panel lets you store colors, edit and rename them, convert process colors to spot colors and vice versa, change the color mode (rgb and cmyk), and import and export custom color libraries. To show or hide the swatches panel, do one of the following...
Page 263
Color, strokes, and fills 263 the swatches panel displays process color names in italics, spot color names in plain type, with a triple-dot icon next to rgb colors, no symbol for cmyk colors, and a black hexagon for hexachrome colors. Rgb colors include those created in hls view, the apple color pic...
Page 264
Chapter 8 264 • drag a color from the color box of the color mixer or tints panel to either the empty space at the bottom of the color list or onto the color drop box (the down arrow button) at the top of the swatches panel. Drag on to an existing color swatch to replace a color. • in windows, right...
Page 265
Color, strokes, and fills 265 the name all colors xtra adds all unnamed colors used in a document to the swatches panel with default names. The name all colors xtra also lists colors created by applying the color control, desaturate, darken, lighten, randomize, or saturate colors xtras. For more inf...
Page 266
Chapter 8 266 converting between rgb and cmyk when creating artwork and printing it, you can specify color as rgb or cmyk in the swatches panel. For more information on color management, see “color management” on page 301. You can also convert colors in the separations panel in the print setup dialo...
Page 267
Color, strokes, and fills 267 to convert a color to a process or spot color: 1 in the swatches panel, select the color. 2 click the triangle in the upper right corner of the swatches panel to display the options pop-up menu, and choose from the following options: • choose make spot to make the color...
Page 268
Chapter 8 268 to add colors from a color-matching system library or custom color library: 1 display the swatches panel, and click the triangle in the upper right corner of the panel to display the options pop-up menu. 2 do one of the following: • choose a library from the options pop-up menu. Panton...
Page 269
Color, strokes, and fills 269 managing the color list in the swatches panel you can sort colors by name, rearrange colors, hide or show color names, and delete unused colors from your artwork. Freehand sorts colors other than the defaults first numerically and then alphabetically. You can change the...
Page 270
Chapter 8 270 removing colors removing colors from the color list retains the colors in any corresponding objects as unnamed colors. When removing multiple colors, a dialog box prompts you either to remove all colors or only the unused colors. Removing spot, hexachrome, and tint colors does the foll...
Page 271
Color, strokes, and fills 271 brightening and dulling colors using the colors xtras, you can brighten colors or dull them in a single step. To more precisely control colors, use the color control xtra (see “controlling color values” on page 271). The lighten, darken, saturate, and desaturate colors ...
Page 272
Chapter 8 272 creating grayscale and monochrome effects you can convert vector objects to grayscale or convert grayscale graphics to another color for a monochrome effect using the convert to grayscale xtra. Converting a color also converts any tints based on it. To convert a selected object to gray...
Page 273
Color, strokes, and fills 273 3 in the replace color dialog box, select from the source of the replacement color, color library or swatches panel. Then use the pop-up menus or color swatch to select a new color. Selected objects are replaced with the new color and the original color is deleted. To r...
Page 274
Chapter 8 274 applying color in freehand you can apply stroke and fill colors to objects, selected or not, by dragging color swatches from the color mixer or tints panel or from the color list in the swatches panel. You can apply colors to selected objects using the stroke and fill inspectors, or th...
Page 275
Color, strokes, and fills 275 2 after you have dragged a color swatch over an object and before you release the mouse button, you can use one of the following keys to change how the color is applied. • hold down shift as you release the mouse button to apply the color only to an object’s fill. • hol...
Page 276
Chapter 8 276 to set default stroke attributes for new objects: 1 choose edit > select > none to deselect all objects in the document. 2 choose window > inspectors > stroke to display the stroke inspector. Stroke inspector 3 set the stroke attributes you want applied to new objects. To edit the list...
Page 277
Color, strokes, and fills 277 4 specify a stroke width by doing one of the following: • choose one of the preset values from the width list. Preset values appear in points. • type a value from 0 to 288 points in the width text box, and press return. 5 select a cap option to set the style for a path ...
Page 278
Chapter 8 278 8 to apply a dashed stroke, choose a dash style from the list. Choose no dash for a solid stroke. 9 to apply an arrowhead to an open path, choose from the arrowheads lists. The left list applies an arrowhead to the first point (origin) of the selected path, and the right one applies to...
Page 279
Color, strokes, and fills 279 using brush strokes you can apply symbols to a stroke or path using the brush stroke feature. You can use the symbols that came with freehand, or you can import or create your own. For more information on using symbols, see “using the library panel” on page 246. You can...
Page 280
Chapter 8 280 3 in the edit brush dialog box, type a name for this brush in the brush name text box. 4 use the include symbol controls to add other symbols to the brush. The brush preview window at the bottom of the edit brush dialog box shows what the brush will look like. • click the include symbo...
Page 281
Color, strokes, and fills 281 8 set the angle to set the rotation of the instance as it is applied to the path. • choose fixed for a fixed rotation. Enter a value from 0° to 359°, or click the arrow to set the angle with the slider control. • choose random for a random rotation. Enter the min. And m...
Page 282
Chapter 8 282 to edit a brush: 1 in the stroke inspector, choose brush from the stroke list. 2 choose the brush you want to edit from the brush list. 3 click the triangle in the upper right corner of the panel to display the options pop-up menu, and choose edit. 4 edit the brush as described in the ...
Page 283
Color, strokes, and fills 283 to export a brush: 1 in the stroke inspector, choose export from the options pop-up menu. 2 in the export brushes dialog box, select the brushes you want to export. Shift-click to select multiple brushes. 3 click export. 4 in the export brushes dialog box, type a file n...
Page 284
Chapter 8 284 custom stroke catalog arrow ball braid cartographer checker crepe diamond dot heart left diagonal neon rectangle right diagonal roman.
Page 285
Color, strokes, and fills 285 applying pattern strokes you can choose from 64 predefined pattern strokes. You can also edit each pattern. The inspector displays an editable version of the pattern on the left, and a preview on the right that updates as you edit the pattern. To apply a pattern stroke ...
Page 286
Chapter 8 286 4 click a pattern in the lower right corner of the inspector. Use the slider to scroll through the available patterns. To edit a pattern stroke: 1 in the stroke inspector, choose pattern from the list. 2 choose a color for the stroke. 3 choose a pattern, using the slider at the bottom ...
Page 287
Color, strokes, and fills 287 note: postscript programming is beyond the scope of this document. Refer to a postscript language manual for more information. To apply a postscript stroke to a selected object: 1 in the stroke inspector, choose postscript from the list. 2 enter up to 255 characters of ...
Page 288
Chapter 8 288 use the fill inspector to apply fills to selected objects or to set the default fill attributes for new objects in the active document. For more information on applying colors to fills, see “applying color in freehand” on page 274. Note: your onscreen display and printed results depend...
Page 289
Color, strokes, and fills 289 you can edit custom fills by changing their spacing, angle, width and other attributes. You can also change the color of the bricks, circles, hatch, and squares fills. Custom fills print at one size on postscript output devices and do not scale with the object they fill...
Page 290
Chapter 8 290 • squares applies a fill of squares. Set the side length to change the size of squares in the fill. Set the spacing between squares as measured from center to center. To avoid overlapping squares, set the spacing to more than the side length. Enter an angle to rotate the fill clockwise...
Page 291
Color, strokes, and fills 291 to apply a gradient fill to a selected object with the fill inspector: 1 in the fill inspector, choose gradient from the pop-up menu. 2 select the type of gradient by clicking the graduated, radial, or contour button. Graduated, radial, and contour buttons 3 click the c...
Page 292
Chapter 8 292 5 for a graduated fill, set the following options: • choose an option from the taper list. Linear tapers the color in equal increments. Logarithmic tapers the color in increasingly wide bands. Linear (top) and logarithmic taper • set the taper angle using the dial or by entering a valu...
Page 293
Color, strokes, and fills 293 to apply a gradient fill to a selected object by dragging a color swatch, do one of the following: • to apply a color as a graduated fill, hold down control as you drag a color swatch onto an object. Where you drop the color sets the angle of the gradient fill. • to app...
Page 294
Chapter 8 294 • invert reverses colors to their complementary cmyk colors (their opposites on a color wheel) for a negative effect. Invert lens • lighten lightens the colors of the objects beneath the lens. • darken darkens the colors of the objects beneath the lens. • monochrome displays colors und...
Page 295
Color, strokes, and fills 295 6 for transparency, lighten, and darken lenses, adjust the effect by entering a value or dragging the slider, as follows: • for a transparency fill, values range from 0 (completely transparent) to 100 (completely opaque). Transparency fill applied to circle • for a ligh...
Page 296
Chapter 8 296 7 select centerpoint to display a handle at the center of a selected lens. To reposition the center point anywhere in a document, drag the center point using the pointer tool. Shift-click the center point to return it to the center of the lens. The center point disappears when you dese...
Page 297
Color, strokes, and fills 297 applying pattern fills you can choose from 64 predefined pattern fills. You can also edit each pattern. The inspector displays an editable version of the pattern on the left, and a preview on the right that updates as you edit the pattern. Pattern fills print at one siz...
Page 298
Chapter 8 298 to apply a postscript fill to a selected object: 1 in the fill inspector, choose postscript from the list. 2 enter up to 255 characters of code in the postscript code text box. You can type the code directly or paste it from another source. Separate commands with a space, and allow the...
Page 299
Color, strokes, and fills 299 to apply a textured fill to a selected object: 1 in the fill inspector, choose textured from the fill type list. 2 select a texture from the texture list. 3 select a color from the color list. Applying tiled fills tiled fills are patterns based on a repeating object, or...
Page 300
Chapter 8 300 to create a tiled fill with space between its tiles: 1 draw a rectangle with a stroke and fill of none around the object you want to use as a tile. The stroke width determines the space between tiles. 2 select the object and the rectangle and create a tiled fill as described in the pre...
Page 301
301 9 chapter 9 . . . . . . . . . . . . . . . . . . . . . . . . . . . . . . . . . . . . . . . . . . . . . . . . . . . . . . . . . . . . . . . . . . . . . . . . . . . . . . . . . . . . . . . . . . . . . . . . . . . . . . . . . . . . . Color management you can use color management strategies in freeha...
Page 302
Chapter 9 302 differences between onscreen colors and those in the final output are inherent. Monitors display colors using additive rgb color, while printing presses re-create colors using subtractive cmyk color. Because the rgb gamut, or range of colors, is much larger than the cmyk gamut, some co...
Page 303
Color management 303 the freehand color management workflow to manage color effectively in freehand, you can perform some or all of the following procedures: • calibrate your monitor to adjust monitor colors to match colors in the output device profile. To adjust the monitor colors by matching them ...
Page 304
Chapter 9 304 to use color profiles between windows and macintosh platforms, you should adhere to the following naming conventions: • add a period and the three-letter extension icm to the profile name. • avoid special characters such as slashes ( / ) and parentheses. • use names of no more than 27 ...
Page 305
Color management 305 4 click any color in the display color setup dialog box to display the color dialog box (windows) or apple color picker (macintosh). Windows color dialog box apple color picker 5 hold color samples from the output device or color swatch book next to the color on the screen to co...
Page 306
Chapter 9 306 applying dithering (macintosh) on the macintosh, you can set the screen display to dither 8-bit colors, to create a closer approximation of colors that do not appear in the 8-bit (256-color) palette. Dithering adjusts adjacent pixels of different colors to create the appearance of a th...
Page 307
Color management 307 2 choose kodak digital science or apple colorsync from the color management pop-up menu. 3 choose whether to manage spot colors electronically: • select color manage spot colors to use the color management system to adjust the screen display of spot colors for different devices ...
Page 308
Chapter 9 308 9 for intent, choose a method for translating colors between color spaces in different devices in the workflow. For more information, see “about rendering intent” on page 310. 10 if you are printing proofs of four-color separations on a composite printer, select composite simulates sep...
Page 309
Color management 309 a generic hexachrome printer profile is also available for six-color (cmykog) output when a more suitable profile for your separations printer is not available. A hexachrome profile separates documents to six-color output but displays rgb colors according to the monitor profile ...
Page 310
Chapter 9 310 to choose a composite printer profile for simulated four-color separations: 1 choose file > print. On the macintosh, choose freehand 10 from the pop-up menu. 2 click color management. 3 in the color management preferences dialog box, choose kodak digital science or apply colorsync from...
Page 311
Color management 311 managing rgb image color for selected images to improve the display and output of a selected rgb image, you can assign a device profile to the image based on how the image was created. The profile determines the colors that the image displays and prints within that profile’s col...
Page 312
Chapter 9 312 about preserving rgb device profiles for device profiles for rgb images to be preserved when the images are opened on another computer system, the profiles must be installed on that system. If the profiles have not been installed or are not available, the missing image sources dialog b...
Page 313
Color management 313 4 for monitor simulates, choose how to set your monitor to simulate the color gamut displayed by the final output device: • choose none to display rgb colors according to the monitor profile and cmyk colors as rgb according to the printer profile. This option leaves the monitor ...
Page 314
Chapter 9 314.
Page 315
315 10 chapter 10 . . . . . . . . . . . . . . . . . . . . . . . . . . . . . . . . . . . . . . . . . . . . . . . . . . . . . . . . . . . . . . . . . . . . . . . . . . . . . . . . . . . . . . . . . . . . . . . . . . . . . . . . . . . . . Using type text that you place in a freehand document is contain...
Page 316
Chapter 10 316 to create text: 1 click the text tool in the tools panel. 2 do one of the following: • to create an auto-expanding text block, click in the document window and begin typing to enter text. To create a line break, press enter (windows) or return (macintosh). • to create a fixed-size tex...
Page 317
Using type 317 a square link box appears at the lower right corner of a selected text block. When a fixed-size text block contains more text than it can display, a dot appears in the link box to indicate overflow text. (auto-expanding text blocks do not overflow, because they expand as text is enter...
Page 318
Chapter 10 318 moving, deleting, and resizing text blocks you can move text blocks, and delete selected text blocks or all empty text blocks in a page or document. By dragging their selection handles, you can resize fixed- size text blocks. When working in preview mode, you can turn selection highli...
Page 319
Using type 319 to resize a fixed-size text block: 1 select the pointer tool. 2 do one of the following: • to adjust the size of a text block, drag a corner handle. Text within the container reflows to fill the new size. • to scale a text block proportionally, shift-drag a corner handle. Text within ...
Page 320
Chapter 10 320 to convert a text block between auto-expanding and fixed-size: 1 select a text block with the pointer tool. 2 double-click a text block side handle (not a corner handle) to convert the text block from auto-expanding to fixed-size or the reverse. To convert multiple text blocks between...
Page 321
Using type 321 importing text in freehand, you can import rtf (rich text format) text files with text formatting intact, and unformatted ascii text files (plain text). If you import text containing fonts and text styles not installed on your system, the missing fonts dialog box prompts you to select...
Page 322
Chapter 10 322 selecting text to edit or delete text or change type attributes, you select the text with the text tool. When you click in a text block or select text with the text tool, the text ruler appears. The text ruler displays the text block’s width in points, as well as tab and indent marker...
Page 323
Using type 323 linking text blocks you can link fixed-size text blocks to other text blocks or to objects, such as paths, to force text to flow between the linked blocks or objects. Generally, you link text blocks when they contain overflow text (indicated by a dot in the link box). However, you can...
Page 324
Chapter 10 324 to create a link: 1 use the pointer tool to select the fixed-size text block that you want to link. Note: if the originating text block contains overflow text, an indicator dot appears in its link box. You can link blocks with or without overflow text. 2 drag from the link box of the ...
Page 325
Using type 325 editing text you can edit text in freehand using various techniques. To edit text onscreen, you select it with the text tool; see “selecting text” on page 322. You can also edit text in the text editor. You can check spelling, hyphenate text, use smart quotes, and insert nonprinting c...
Page 326
Chapter 10 326 3 select 12 point black to ignore formatting attributes and display text in 12-point black type in the text editor window. This option does not affect text formatting in the document. 4 select show invisibles to display nonprinting characters, such as spaces, tabs, or paragraph breaks...
Page 327
Using type 327 to insert characters from the special characters submenu: 1 with the text editor open (see “using the text editor” on page 325), click in the text editor window where you want to insert a special character. 2 choose text > special characters, and select a character from the submenu. C...
Page 328
Chapter 10 328 hyphenating text you can turn on automatic hyphenation for a document or a selection. Freehand uses the selected document language to determine where hyphenation should be placed. You can also insert discretionary hyphens at specific points in the text. For more information, see “inse...
Page 329
Using type 329 using smart quotes when the smart quotes option is turned on, freehand uses a curved right or left quotation mark or marks when you type a single (') or double (") quotation mark. You can choose from six predefined smart quotation marks in the define quotes pop-up menu. If the smart q...
Page 330
Chapter 10 330 finding and replacing text you can find and replace text using standard word-processing search procedures in the find text dialog box. To find and replace type attributes, you use the find & replace graphics feature; see “selecting, finding, and replacing type attributes” on page 340....
Page 331
Using type 331 the text toolbar can be customized with additional toolbar buttons. For more information, see “customizing toolbars” on page 91. The text menu the text menu and its submenus include options for adjusting the font, size, type style, alignment, leading, baseline shift, effects, and case...
Page 332
Chapter 10 332 the text context menu (windows) in windows, the text context menu displays many of the choices that are also available in the text menu, text toolbar, and text inspectors. You access the text context menu by right-clicking a text block. Setting precise type specifications you can perf...
Page 333
Using type 333 to specify a point size, do one of the following: • choose text > size and choose a point size from the submenu. To specify a point size that does not appear in the menu, choose other and enter a value in the type size dialog box, then click ok. To change the point size by 1-point inc...
Page 334
Chapter 10 334 converting type case you can use the convert case commands to format text as uppercase, lowercase, or small caps, or to apply title capitalization (uppercase for the first letter of each word) or sentence capitalization (uppercase for the first letter of each sentence). You can specif...
Page 335
Using type 335 5 to delete an exception, select it in the list and click delete. 6 click ok. Setting alignment, leading, range kerning, and baseline shift alignment determines the position of each line of type in a paragraph relative to the left and right edges of the text block. Type can be aligned...
Page 336
Chapter 10 336 to specify alignment, do one of the following: • choose text > align and choose an alignment option from the submenu. • in the text toolbar or text character inspector, click an alignment button. • in windows, right-click a text block, choose align, and choose an option from the menu....
Page 337
Using type 337 2 in the leading text box, enter a value in points to set leading to the exact size specified and press enter (windows) or return (macintosh). To specify leading as a percentage of the current point size: 1 do one of the following: • choose text > leading > other to display the leadin...
Page 338
Chapter 10 338 to specify baseline shift, do one of the following: • in the text character inspector, enter a value in the baseline shift text box, and press enter (windows) or return (macintosh). • hold down control+alt (windows) or control+option (macintosh) and press the up arrow or down arrow ke...
Page 339
Using type 339 to scale characters horizontally: 1 to adjust horizontal scaling for existing text, select the text (not the text block). If no text is selected, the adjustment is applied to subsequent text that you enter. 2 in the text inspector, click the spacing button to display the text spacing ...
Page 340
Chapter 10 340 to keep a specified number of lines together at the end of a column or linked text block: in the text spacing inspector, for keep together, enter the number of lines to be kept together. Enter a value of at least 2 to prevent the first or last line of a paragraph from being isolated a...
Page 341
Using type 341 to select type attributes: 1 do one of the following to display the find & replace graphics panel: • choose edit > find & replace > graphics. • click the find graphics button in the main toolbar. 2 in the find & replace graphics dialog box, click the select tab. 3 choose font from the...
Page 342
Chapter 10 342 3 choose font from the attribute pop-up menu. 4 for change in, choose an option to define the scope of the search—selection, page, or document. 5 under from, choose a font from the font menu. To search all fonts in a document, choose any font. 6 choose a style from the style menu. To ...
Page 343
Using type 343 setting tabs you can align text using default tabs, or by adding tabs. You can also add tab leaders, repeating characters (such as dots) used to fill the space between tabbed elements. You can create a custom leader using a character of your choosing. Default tabs left-align at 1/2-in...
Page 344
Chapter 10 344 • drag the decimal-align tab to align text at the decimal point. If the text does not contain a decimal point, the tab right-aligns the text. Decimal tabs • drag the wrapping tab to make multiple columns of text flow between two tab markers. To define a space between two columns creat...
Page 345
Using type 345 3 in the edit tab dialog box, set the following options: • for alignment, choose the type of tab: left, right, center, decimal, or wrapping. • for position, enter a number in points for the tab’s location, measured from the left side of the text block. 4 click ok. 5 repeat steps 2 thr...
Page 346
Chapter 10 346 to track tab placement with a vertical line in the text block: 1 choose edit > preferences. Click text. 2 select track tab movement with vertical line (the default setting) to display a vertical highlight line in the text block as you move a tab on the text ruler. Deselect the option ...
Page 347
Using type 347 • drag the right indent marker to set the right paragraph margin. First-line indent; left paragraph margin; and right paragraph margin to set a hanging indent using the text ruler: 1 using the text tool, click to set an insertion point or drag to select a paragraph or paragraphs. 2 if...
Page 348
Chapter 10 348 3 to set left and right indents, enter values in points in the left and right text boxes. Positive numbers place text inside the column or text block, and negative numbers place text outside the column or text block. 4 to set a first-line indent, enter a value in points in the first l...
Page 349
Using type 349 note: when working with text on a path, enter values for left and right. An inset value of 0 (zero) positions text against the text block border. Positive values position text inside the text block border, and negative values position text outside the text block border..
Page 350
Chapter 10 350 aligning paragraphs and adding paragraph rules to control how text spreads across the width of the column, you can align paragraphs in text columns. You can also add rules between paragraphs to offset paragraphs visually. Aligning paragraphs to precisely control how paragraphs align a...
Page 351
Using type 351 to apply paragraph rules: 1 use the text tool to select the paragraphs to which you’ll apply the rules. 2 choose window > inspectors > text, and click the paragraph button to display the text paragraph inspector. 3 choose an option from the rules menu: • centered places a rule that is...
Page 352
Chapter 10 352 to apply a stroke or fill color to text: 1 using the text tool, select the text inside the text block. 2 choose window > panels > color mixer and window > panels > swatches to display those panels. 3 choose window > inspectors > stroke to display the stroke inspector, or window > insp...
Page 353
Using type 353 to remove a stroke or fill from text: 1 select the text with the text tool. 2 do one of the following: • choose none from the stroke or fill inspector. • in the swatches panel, select the stroke or fill selector, and then select the none swatch in the color list. To control how the sw...
Page 354
Chapter 10 354 creating columns and rows you can create multiple columns and rows in text blocks. Using columns and rows, you can create a table with cells of uniform size. To create tables with cells of varying sizes, you use tabs, paragraph breaks, and paragraph spacing. You can add lines between ...
Page 355
Using type 355 • choose full width to create rules the width of the full row. Note: to apply a stroke to the rules, see the procedure that follows. 11 to move text automatically to the top of the next column, place an insertion point with the text tool and choose text > special characters > end of c...
Page 356
Chapter 10 356 to create a table with uniform cells using columns and rows: 1 create columns and rows as described in the preceding procedure, with the following specifications: • set spacing for columns and rows to 0. • for column rules, select full height, and for row rules, select full width. 2 t...
Page 357
Using type 357 balancing columns of text the text adjust columns inspector lets you copyfit text by balancing text among columns, modifying leading, or altering the text size and leading proportionally to fit the selected text block. You can also use the text adjust columns inspector to make text in...
Page 358
Chapter 10 358 using paragraph styles you can use paragraph styles to create sets of text formatting specifications that you can save and apply to multiple paragraphs or text blocks in a document. Paragraph styles help you maintain visual consistency and simplify formatting tasks. Paragraph styles l...
Page 359
Using type 359 to edit a style: 1 in the styles panel, select the style in the scroll list. 2 click the triangle in the upper right corner of the panel to display the options pop-up menu, and choose edit. 3 in the edit style dialog box, select options for text and paragraph attributes. For informati...
Page 360
Chapter 10 360 to rename a style: in the styles panel, double-click the style name in the scroll list and enter the new name. Note: you cannot rename normal text, the default text style. Applying styles you can apply styles to text by selecting the style in the styles panel, dragging the style from ...
Page 361
Using type 361 overriding and redefining styles you can override settings for individual attributes in selected text, and you can remove an override to restore the style settings in the selection. You can use a text selection as the basis for redefining a style. To override a paragraph style setting...
Page 362
Chapter 10 362 applying text effects in freehand, you can create many special effects with text. You can attach and align text to a path, wrap text around graphics, create inline graphics, and apply built-in special text effects such as shadows and underlines. Attaching text to paths you can align t...
Page 363
Using type 363 aligning text on a path you can adjust the alignment and orientation of text on a path using the object inspector. Text flows in the direction of the path, from left to right (clockwise) or from right to left (counterclockwise). To reverse the direction of the text, you reverse the di...
Page 364
Chapter 10 364 to move text on a path manually: 1 place an insertion point or select the path with the pointer tool. A triangular text handle appears to the left, center, or right of the text, depending on the text alignment. To display text as it moves on the path, hold down alt (windows) or option...
Page 365
Using type 365 2 choose text > flow inside path, or click the flow inside path button in the text toolbar. 3 to adjust the text’s placement within the path, choose window > inspectors > object to display the object inspector. Enter values in the inset text boxes to define the margins between the tex...
Page 366
Chapter 10 366 wrapping text around objects you can wrap text automatically around a single object, including imported graphics and composite paths, using the run around selection command. The command applies to objects, not to text blocks. However, you can use this technique to create pull quotes a...
Page 367
Using type 367 5 for standoff, enter the minimum distance between the selected object and the text that wraps around it. Positive numbers begin text flow outside the selected object. Negative numbers overlap text behind the selected object. Values are in the document unit of measure. 6 click ok. To ...
Page 368
Chapter 10 368 note: if you add an inline graphic to a paragraph with a paragraph style applied, the styles panel displays a plus (+) sign next to the name of the assigned paragraph style to indicate an override. Removing the override adjusts the inline graphic proportionally to match the style’s fo...
Page 369
Using type 369 • adjust baseline shift to move the inline graphic below (negative value) or above (positive value) the baseline of the surrounding text. Initial caps are even with the baseline of the first line of text. • to adjust a text wrap, in the text character inspector, choose edit from the e...
Page 370
Chapter 10 370 to edit the highlight, underline, and strikethrough text effects, set the following options: • for position, enter a positive number for the effect’s distance above the baseline, or enter a negative number for the distance below the text baseline. • to apply a dash pattern, choose a p...
Page 371
Using type 371 5 for search, choose an option to define the scope of the search—selection, page, or document. 6 if you chose selection in step 4, select add to selection to add text with the specified effect to a current selection. If you chose page or document in step 4, select remove from selectio...
Page 372
Chapter 10 372 to convert text to paths: 1 select the text block you wish to convert with the pointer tool. 2 choose text > convert to paths or click the convert to paths button in the text toolbar. The following conversions occur: • text aligned to a path remains in place, but the path disappears. ...
Page 373
373 11 chapter 11 . . . . . . . . . . . . . . . . . . . . . . . . . . . . . . . . . . . . . . . . . . . . . . . . . . . . . . . . . . . . . . . . . . . . . . . . . . . . . . . . . . . . . . . . . . . . . . . . . . . . . . . . . . . . . Creating web graphics and animation you can prepare freehand doc...
Page 374
Chapter 11 374 the navigation panel lets you assign urls to objects, inspect objects to see what urls are assigned to them, update a url for all objects linked to it, and search for objects linked to a specified url. The substring field displays words or phrases within an active text block that are ...
Page 375
Creating web graphics and animation 375 when compressing artwork in a bitmap format, you should choose a file format based on the color and tonal characteristics of the original artwork, and on the type of browser you expect your web audience to have. In general, the gif format is best for illustrat...
Page 376
Chapter 11 376 to publish a freehand document as html: 1 with the document displayed in the document window, choose file > publish as html. 2 in the html output dialog box, do one of the following to choose html settings: • choose a setting from the html setting pop-up menu. (if you have not previou...
Page 377
Creating web graphics and animation 377 to create or edit an html setting: 1 choose file > publish as html to view the html output dialog box, if it is not already open. 2 in the html output dialog box, click setup to open the html setup dialog box. 3 do one of the following: • to create a new html ...
Page 378
Chapter 11 378 animating objects and text to animate objects for display in the flash player, you place the objects on layers using the animate > release to layers xtra. You can animate blends or groups, as well as objects attached to a path. To animate a text block, you first convert the text to pa...
Page 379
Creating web graphics and animation 379 to animate objects: 1 select the objects that you want to animate. A nested object included in a group behaves as a single object. 2 choose window > panels > layers to display the layers panel. The layers panel will display new layers as you create them in the...
Page 380
Chapter 11 380 assigning flash actions you can assign flash actions to artwork you create in freehand in order to use the freehand artwork in interactive flash movies. You export the freehand document with flash actions as a swf file, for display in the flash player. In an interactive movie, your au...
Page 381
Creating web graphics and animation 381 to assign actions to artwork in freehand: 1 in the document window, select the object or objects to which you want to assign actions. 2 choose window > panels > navigation. 3 for action, select an action from the pop-up menu. 4 for event, from the pop-up menu ...
Page 382
Chapter 11 382 note: to display anti-aliased artwork on the screen as it will appear when exported to macromedia flash swf format, test the swf file using the controller or control menu. For more information, see “using the controller or control menu with swf files” on page 384. To export a freehand...
Page 383
Creating web graphics and animation 383 8 select the pages to export. 9 choose an animation option to export layer-based frames, page-based frames, or both: • select layers and pages to export one swf file that contains all the freehand document content. All layers of the first page are exported as ...
Page 384
Chapter 11 384 using the controller or control menu with swf files you can use the controller or the control menu to test, change movie settings for, and export swf movie files. To test movies, you can play, stop, rewind, step forward, and step backward through frames. When you test a movie, freehan...
Page 385
Creating web graphics and animation 385 to change movie settings: 1 click the movie settings button in the controller, or choose control > movie settings. 2 in the movie settings dialog box, select options to format the movie, as described in “exporting flash movies” on page 381. To export a movie: ...
Page 386
Chapter 11 386.
Page 387
387 12 chapter 12 . . . . . . . . . . . . . . . . . . . . . . . . . . . . . . . . . . . . . . . . . . . . . . . . . . . . . . . . . . . . . . . . . . . . . . . . . . . . . . . . . . . . . . . . . . . . . . . . . . . . . . . . . . . . . Printing printing from freehand is straightforward whether you w...
Page 388
Chapter 12 388 a service provider can output your document in a variety of forms. For example, an imagesetter prints high-resolution, camera-ready art or color separations on either paper or film. A dye sublimation or high-resolution proofing device (such as the 3m matchprint system) prints high-res...
Page 389
Printing 389 in the print dialog box, you can select general options such as page range, number of copies, and output destination (whether to output the document to a printer or to a postscript file). You can also select a postscript printer description (ppd) when outputting to a postscript device, ...
Page 390
Chapter 12 390 10 for scale percentage, choose one of the following options to scale the printed document horizontally or vertically, without affecting the original document: • select uniform and enter a value to print an illustration larger or smaller than actual size. • select variable and enter a...
Page 391
Printing 391 3 choose an option: • select use ppd. In the select ppd dialog box (windows) or the open dialog box (macintosh), select a ppd and click open. • deselect use ppd to use the selected printer defaults. This option limits your choice of paper sizes. Note: on the macintosh, when you use lase...
Page 392
Chapter 12 392 to preview printing: 1 choose file > print or click the print button in the main toolbar to display the print dialog box. 2 on the macintosh, choose freehand from the pop-up menu to display the freehand print options. 3 do one of the following: • in windows: for postscript printers, c...
Page 393
Printing 393 4 select a print preview mode from the pop-up menu at the bottom of the preview window: • x-box displays the page with an x and the bleed. Choose this option to speed the opening of the print setup dialog box. • keyline displays the objects on the page in keyline view. • preview display...
Page 394
Chapter 12 394 to reposition objects in the print preview for printing: 1 position the pointer in the print preview area; the cursor becomes a grabber hand. 2 use the grabber to reposition objects on the paper for printing. Note: repositioning objects in the print preview area repositions the object...
Page 395
Printing 395 3 in the print setup dialog box, select one of the following options: • to select separations options, click the separations tab (see “setting separations options” on page 396). • to select imaging options, click the imaging tab (see “setting imaging and output options” on page 400). • ...
Page 396
Chapter 12 396 you can specify a default userprep file in export preferences. To select a userprep file: 1 choose file > print. 2 in macintosh, select freehand from the pop-up menu. 3 click setup to display the print setup dialog box. 4 in the user prep pop-up menu, choose an item from the list of i...
Page 397
Printing 397 4 in the print setup dialog box, click the separations panel. 5 choose whether to print each ink on one page or separate pages: • select composite to print all of the inks on one page. • select separations to print each spot and process color ink on a separate page. Note: you can also c...
Page 398
Chapter 12 398 note: if you have specified overprinting options for selected objects, these object-level overrides are not indicated in the separations colors window. For more information, see “overprinting” on page 405. 9 in the angle column, click to display the screen angle dialog box and enter a...
Page 399
Printing 399 in addition, because different types of paper absorb inks in different ways, the characteristics of your paper and the press also determine the screen ruling you should use. When setting the screen ruling for grayscale images, the maximum number of grays possible in an image is 256. Inc...
Page 400
Chapter 12 400 to apply halftone settings to selected objects: 1 select an object or objects in the document. 2 choose window > panels > halftones. 3 for screen, choose a halftone dot shape. Choose default to use the shape specified in the separations panel in the printer setup dialog box. 4 enter a...
Page 401
Printing 401 4 in the print setup dialog box, click the imaging tab. 5 select any of the following options to print labels and marks outside the boundaries of the document page: • separation names adds a label with the name of the ink to each plate in a color separation. • file name and date prints ...
Page 402
Chapter 12 402 3 select split complex paths to split paths into smaller sections as they are printed and exported, to reduce the likelihood of memory-related postscript errors. Note: to avoid printing problems, deselect this option if a document contains an eps or bitmap image pasted inside a comple...
Page 403
Printing 403 choosing a paper size and orientation use the paper setup tab to choose a paper size and orientation. The paper size menu displays paper sizes defined in the selected ppd file. If the selected printer supports custom paper sizes, the paper size menu also displays custom paper sizes. A t...
Page 404
Chapter 12 404 • for crop marks, increase the paper size by 36 points (0.5 inch or 12.7 mm) for both height and width. • for separation names or file name and date (or both), increase the paper size by 9 points (0.125 inch or 3.2 mm) for height. 6 if your imagesetter supports custom page sizes, sele...
Page 405
Printing 405 7 select the orientation: tall (portrait) or wide (landscape). Select automatic if pages in your document differ in size and orientation. Tall orientation (left) and wide orientation (right) overprinting overprinting is a technique to compensate for slight misregistration that might occ...
Page 406
Chapter 12 406 note: text is set to overprint black ink by default. Knockout (left) and overprint (right) you can overprint ink colors, so that all occurrences of a specified color in a document overprint (ink-level overprinting). For instructions on applying ink-level overprinting, see “setting sep...
Page 407
Printing 407 guidelines for overprinting for best results, follow these guidelines: • use overprinting to print a spot color directly on top of an underlying object or background color. Overprinting using process colors may give unexpected results. • overprint a dark color on top of a light-colored ...
Page 408
Chapter 12 408 to apply overprinting to selected objects: 1 select the object that will overprint the background or select he bitmap image to overprint. 2 choose from the following options: • to overprint basic fills, gradient fills, fills in text boxes, or bitmap images, choose modify > fill to dis...
Page 409
Printing 409 traditionally, trapping is a prepress task handled by a commercial print shop. Designers and production artists can use drawing tools in freehand to create traps, or they can leave this task to prepress professionals. An alternative to trapping is to apply the spread size printing optio...
Page 410
Chapter 12 410 chokes and spreads when two colors meet, the darker color defines the visual edge and determines the direction of the trap. You can minimize the visual impact of traps by creating a choke to trap a dark foreground object to a light background or by creating a spread to trap a light fo...
Page 411
Printing 411 3 choose window > inspectors > stroke and select overprint. 4 choose window > inspectors > fill and deselect overprint. To trap a foreground object to a dark background object: 1 select the foreground object and choose edit > clone. 2 apply a basic stroke with a width equal to twice the...
Page 412
Chapter 12 412 5 select reverse traps to force traps to spread when they would normally choke. 6 select a trap color method: • use maximum value to create a trap color that is the strongest tint available in the document. • use tint reduction and enter a percentage value to specify a trap color tint...
Page 413
Printing 413 to resize a print area: place the print area pointer on a corner or side handle and drag to resize the print area. To move the print area on the pasteboard: do one of the following: • place the print area pointer on the area boundary (not on a corner or side handle). The cursor turns in...
Page 414
Chapter 12 414 tiling pages for printing you can use manual or automatic tiling to print sections of a large document on separate sheets of paper. With manual tiling, you can specify which section of the document to print, page by page. With automatic tiling, freehand automatically prints the entire...
Page 415
Printing 415 • in the imaging tab in the print setup dialog box, deselect the include invisible layers option. In the layers panel, hide layers to make them invisible and prevent them from printing. For more information, see “setting imaging and output options” on page 400 and “viewing layers and la...
Page 416
Chapter 12 416 on the macintosh, a postscript font is available for output when the screen font is properly installed in the system. The macintosh does not require a separate font metrics file because font metric information is stored in the screen font. Store postscript screen and printer fonts in ...
Page 417
Printing 417 • fonts lists information for each font used in the document, including font name, postscript font name, file format, style, and point size. • text blocks lists information on each text block, including its fonts, color, bounding box location, line and paragraph count, and first line of...
Page 418
Chapter 12 418 4 click report to display your report onscreen. 5 click print to print the report. 6 click save to save the report as an ascii text file. Name the report and click save. Preparing a document for a service bureau when preparing a document to send to a service bureau, you can easily gat...
Page 419
Printing 419 2 in the document report dialog box, select items you want in the document report, and click ok (windows) or report (macintosh). For more information on document report, see “using document report” on page 416. 3 in the save dialog box, name the report file, choose a destination for the...
Page 420
Chapter 12 420 do the following to minimize the printing time for imported graphics: • bitmap images. Scale, crop, or rotate eps, tiff, and other bitmap images in an image editing application before you place them. • vector graphics. Select imported pict or cgm graphics and choose modify > alter pat...
Page 421
421 13 chapter 13 . . . . . . . . . . . . . . . . . . . . . . . . . . . . . . . . . . . . . . . . . . . . . . . . . . . . . . . . . . . . . . . . . . . . . . . . . . . . . . . . . . . . . . . . . . . . . . . . . . . . . . . . . . . . . Saving and exporting files you can save files in freehand in var...
Page 422
Chapter 13 422 saving files you can save freehand files as freehand documents, freehand templates, or editable eps files. To achieve design consistency, use freehand templates to create multiple pages with the same layout. For more information, see “using templates” on page 114. Editable eps files c...
Page 423
Saving and exporting files 423 to add file information using the iptc xtra: 1 with a file open in freehand, choose xtras > other > file info. 2 in the file info dialog box, enter information for categories in the origin, credits, caption, and categories and keywords sections. Note: the iptc determin...
Page 424
Chapter 13 424 urls in a freehand document export correctly to swf and pdf formats. For more information on how to assign urls to freehand objects, see “attaching urls to objects and text” on page 373. Urls also export to html format (see “publishing freehand documents as html” on page 375). Freehan...
Page 425
Saving and exporting files 425 choosing an export format the export format you choose is determined by the intended use for the exported file, and particularly the output device that will be used to produce or display the file. To choose an export format based on the output device, see the following...
Page 426
Chapter 13 426 about web formats gif, jpeg, and png graphic file formats are commonly used for the web because they can be highly compressed for faster transfer across the internet and because they are supported by most browsers. (note that the gif and jpeg formats are more widely supported than the...
Page 427
Saving and exporting files 427 exporting files exporting a file lets you save it in another file format using the export command. When you use the export command, the options that appear in the export dialog box depend on the selected file format; not all options are available for all formats. See d...
Page 428
Chapter 13 428 to export a document: 1 choose file > export. 2 in the export document dialog box, enter a name for the file and select a location where it will be saved. Export dialog box: windows and macintosh 3 choose the file format from the save as type menu (windows) or the format menu (macinto...
Page 429
Saving and exporting files 429 6 to launch another application to open the exported file, select open in external application. In the dialog box that appears, navigate to the application that will open the image and click ok. For example, you can open exported flash animations using flash or a web b...
Page 430
Chapter 13 430 using extensis portfolio (macintosh) freehand supports extensis portfolio, a program that can catalog thousands of graphics in a single database and provide instant visual access to the cataloged items. You can add keywords to your document for use in cataloging graphics. To prepare a...
Page 431
Saving and exporting files 431 exporting vector artwork you can export vector artwork in eps format using one of the various encapsulated postscript (eps) formats, autocad dxf format, a freehand document format, or an adobe illustrator format. Files in each of these formats are eps files (though dxf...
Page 432
Chapter 13 432 8 choose a convert colors to option to maintain color consistency among applications: • cmyk for standard cmyk output and color separations. • rgb for use in an image-editing application such as fireworks or photoshop. • cmyk and rgb for print applications with a postscript rip such a...
Page 433
Saving and exporting files 433 photoshop (eps) you can export freehand artwork to photoshop as vector artwork using the photoshop eps format. To preserve colors in cmyk mode when exporting to photoshop, use photoshop 3 eps format, or eps with tiff (windows) or macintosh eps (macintosh). Photoshop 4 ...
Page 434
Chapter 13 434 exporting bitmap images you can export bitmap images in bmp (bitmap), gif, jpeg, photoshop psd, targa, or tiff format. You can choose the image resolution and specify an anti-aliasing level to smooth jagged edges. On windows, you can set bitmap export preferences to specify the defaul...
Page 435
Saving and exporting files 435 working with alpha channels using alpha channels, you can export bitmap images with complex masking and transparency for use in web page graphics, multimedia, video images, and image- editing applications. An alpha channel is a graphic layer that defines transparent an...
Page 436
Chapter 13 436 6 click ok to return to the export dialog box. 7 click export to export the document. Defining transparency use a background layer to define custom areas of transparency on graphics exported as bitmap images with alpha channels. To define a custom transparency: 1 create a graphic. 2 o...
Page 437
Saving and exporting files 437 4 in the bmp export dialog box, choose a bit depth option: • 8-bit uncompressed to export bmp images in 256 colors without any compression. • 8-bit compressed to export bmp images in 256 colors and compress the bmp on export. • 16-bit to export bmp images in thousands ...
Page 438
Chapter 13 438 4 for image, select interlaced to create an image that displays in intermittent bands while the full image is downloading. 5 for dither, select an option to simulate colors not in the current palette. A higher dither setting simulates more colors but can increase file size. 6 for pale...
Page 439
Saving and exporting files 439 jpeg (.Jpg) jpeg is an alternative to gif developed by the joint photographic experts group specifically for photographic images. Jpeg supports millions of colors (24-bit). The jpeg format is best for scanned photographs, images using textures, images with gradient col...
Page 440
Chapter 13 440 to export invisible layers: 1 choose file > output options. 2 for objects, select include invisible layers and click ok. Exporting an object to photoshop 4 or higher exports the object in pixels. Png (.Png) when exporting png images, you can select the color depth and compression, as ...
Page 441
Saving and exporting files 441 you cannot export the following effects to pdf format: • custom and postscript fills and strokes, arrowheads, and textured fills. • alpha channel transparency. • eps images. If an eps image has a tiff preview, freehand exports the preview instead of the eps file. • tex...
Page 442
Chapter 13 442 3 choose color or grayscale image compression options to compress images in jpeg format and reduce file size. A higher compression setting yields a smaller file size, but may reduce image quality. For print, choose little or no compression. For onscreen display, choose higher levels o...
Page 443
Saving and exporting files 443 exporting text you can drag text to export it if the destination application supports the drag-and- drop text feature. You can also export text by using the copy and paste commands or by using the export dialog box. You can export rtf (rich text format) text with forma...
Page 444
Chapter 13 444.
Page 445
445 appendix . . . . . . . . . . . . . . . . . . . . . . . . . . . . . . . . . . . . . . . . . . . . . . . . . . . . . . . . . . . . . . . . . . . . . . . . . . . . . . . . . . . . . . . . . . . . . . . . . . . . . . . . . . . . . Troubleshooting contacting technical support before contacting techni...
Page 446
Appendix 446 other resources if you have internet access and still need help, try these resources to find solutions. • searchable technotes each macromedia product has a searchable technotes section on macromedia’s web site. Details for conducting searches are included on this site. To search macrom...
Page 447
Troubleshooting 447 technical support checklist if you still need help, use this checklist to prepare for a call to macromedia technical support: • define the problem before you call. Be able to repeat the steps that led to the problem and identify when and how the problem occurred. The support repr...
Page 448
Appendix 448 guide to the technical support phone system to quickly reach the support representative best qualified to answer your questions, please refer to these tips for navigating the technical support phone system. • for the fastest response, enter a valid customer number, incident number, or n...
Page 449
Troubleshooting 449 • contacting technical support technical support fax for freehand, fireworks, and fontographer: 972-680-0535 technical support phone: 415-252-9080 technical support fax: 415-703-0924 macromedia, inc. 600 townsend street san francisco, ca 94103 for additional help, contact the mac...
Page 450
Appendix 450 • macromedia southern europe (france, spain, italy, middle east and africa) centre d’affaires acte 41/41 bis avenue de l’europe bp 264 78147 velizy cedex france tel: 33 134 58 23 40 fax: 33 134 58 23 44 http://www.Macromedia.Com/fr/ • macromedia scandinavia bergkallavagen 31 d 192 27 so...
Page 451
Troubleshooting 451 troubleshooting coreldraw files requirements for importing coreldraw files into freehand • files must be saved in uncompressed coreldraw 7 or 8 for windows format. Coreldraw files using either graphics or bitmap compression will not import properly; bitmap images are imported as ...
Page 452
Appendix 452 import limitations freehand can import coreldraw files, but may not retain all illustration elements. The following sections describe known limitations when importing text and images from coreldraw files. Text overall, subtle differences in word wrap, justification, and kerning introduc...
Page 453
Troubleshooting 453 importing images because freehand and coreldraw support different color spaces, coreldraw bitmaps in the lab color space are imported as empty text containers. To accommodate cropping, bitmaps are defined by coreldraw as paste insides. These paste inside attributes are retained o...
Page 454
Appendix 454 troubleshooting printing of strokes and fills compatible output devices stroke or fill print to display and output basic strokes and fills postscript and non-postscript. Solid onscreen and in print. Custom strokes and fills postscript. Solid onscreen, but prints correctly. In print, col...
Page 455
Troubleshooting 455 troubleshooting printing if you have trouble printing a freehand document, verify that your printer is plugged in and turned on, that all cables and connections are properly joined, and that your computer is attached to your printer. If you need assistance with this, see your pri...
Page 456
Appendix 456 • try another machine. Test the same file on another machine to see if you get the same results. • if you are printing through a spooler, try turning off the spooler and printing again. The printer driver determines how background printing spools print jobs. To turn off print spooling: ...
Page 457
Troubleshooting 457 to troubleshoot postscript errors related to document complexity: • when printing to an imagesetter, verify that the document prints correctly to a desktop printer. A document that fails to print at a low resolution often will not print to an imagesetter. • print to a postscript ...
Page 458
Appendix 458 • verify that you are using the recommended version of the printer driver for your printer. If truetype fonts print incorrectly, a postscript font with the same name may be installed in the printer. • when you print a document containing a truetype font to a printer containing a postscr...
Page 459
Troubleshooting 459 you can also use the find & replace graphics feature to automatically recalculate blends for different printer resolutions. • for spot-to-spot blends and spot-to-spot gradient fills, set appropriate halftone angles for each spot color in the blend or gradient fill in the separati...
Page 460
Appendix 460
Page 461
461 index numerics 12 point black option 326 3d rotation tool 216 a absolute colorimetric rendering intent 310 add points command 224 add words to the dictionary preference 327 adding colors from libraries 267 colors to the swatches panel 263 custom page sizes 101 layers 239 adobe acrobat compatibil...
Page 462
Index 462 bleeds 96 calculating paper size for 403 master pages with 104 blends 207 adjusting 209 animating 378 between composite paths 210 between groups 210 creating 208 exporting 209 joining to paths 209 modifying 208 removing from paths 209 bmp files 436 brush strokes applying 279 creating 279 d...
Page 463
Index 463 color mixer/tints panel uses split color well option 259 color modes changing 259 cmyk 258 converting colors 266 hls 258 rgb 258 system colors 258 color palettes exact 438 optimized palette 438 websafe 438 websnap 438 color space, defined 302 color tables 312 color management strategies wi...
Page 464
Index 464 composite simulates separations option 308 compress text and graphics option 442 compressing images 374 connector points 141 consecutive hyphens option 328 conserving disk space 12 contact sensitive option 177 context menus 86 continuing a path 151 control menu 384 controller 384 convert c...
Page 465
Index 465 d dcs eps files 129 dcs files, importing 129 decimal-align tab 344 default freehand preferences 113 default line weights option 276 default rgb image source option 308 define quotes options 329 define style based on selection option 252 delete empty text blocks xtra 318 delete unused named...
Page 466
Index 466 drop option, in animation 379 drop shadows 211, 212 adding with shadow tool 211, 212 setting options for 211 duplicate command 106, 184, 224, 247, 253 duplicating layers 239 pages 99 power-duplicating 224 styles 253 symbols 247 e earlier versions of freehand converting a file from 114 work...
Page 467
Index 467 exporting files (continued) gif format 437 html documents 375 jpeg format 439 launching external editor for 429 pdf format 440 photoshop (psd) format 439 photoshop eps format 433 png format 440 reexporting 429 swf format 381, 384 targa format 440 thumbnail preview with 427 tiff format 440 ...
Page 468
Index 468 flash 381 animation options 383 autoplay option with 383 changing movie settings 384 compatibility with freehand 383 exporting animations 381 frame rate in 383 full-screen playback with 383 high-quality printing with 383 image compression in 382 layers and pages animation option 383 layers...
Page 469
Index 469 grouping objects 187 panels 70 symbols 248 groups animating 378 blending 210 of objects 187 subselecting nested groups 190 subselecting within 188 guide color box 244 guides 110 adding by dragging 110 adjusting precisely 110 changing color of 109 editing, releasing, and deleting 111 lockin...
Page 470
Index 470 importing (continued) eps and dcs eps files 129 file formats for 118 gif files 130 graphics 118 hpgl, cgm, or dxf formats 118 jpeg files 130 master pages 106 pdf files 131 photoshop files 132 styles 256 symbols 248 text 321 using the clipart viewer for 121 include invisible layers option 4...
Page 471
Index 471 l labels, adding to document 400 lasso tool 178 layer name moves selected object option 240 layers 237 adding 239 arranging 238 background 238 changing highlight color of 245 copying information between documents 242 duplicating 239 exporting hidden in photoshop (psd) format 440 foreground...
Page 472
Index 472 links breaking in text blocks 324 creating new 124 extracting embedded graphics 124 locating missing 124 updating after opening document 123 load movie action 380 locate file dialog box 124 locating a missing link 124 lock button 75 lock command 179 locking and unlocking guides 111 layers ...
Page 473
Index 473 nested objects 189 subselecting group 190 within an existing group 189 new button 75, 112 new document template preference 116 new documents, creating 112 new features in freehand 16 new html setting dialog box 377 new text containers auto-expand option 319 nonbreaking space character 326 ...
Page 474
Index 474 orphans 338 output devices choosing 387 compatibility with freehand 454 output options 400, 402 overflow text in text blocks 317 overlapping fills 161 overprinting 405 gradient fills 407 guidelines 407 knockout and 405 selected objects 407 setting document-level (ink-level) 397 setting thr...
Page 475
Index 475 paragraph styles (continued) preserving 359 redefining 361 removing overrides from 361 paragraph styles based on option 361 paragraphs adding rules to 350 aligning 350 ragging 350 setting spacing for 346 parameters, assigning with flash actions 380 paste attributes command 252, 353 paste b...
Page 476
Index 476 perspective grid (continued) modifying 234, 235 modifying objects using 231 removing objects from 233, 234 perspective tool 231 perspective, creating 231 photoshop (psd) files 439 exporting hidden layers in 440 preserving freehand layers in 439 photoshop eps files, exporting 433 photoshop ...
Page 477
Index 477 preferences (continued) point display 141 redrawing while scrolling 82 remembering layer information 241 removing overlapping paths 147 restoring default 78, 113 restoring view on opening document 80, 113 retaining originals when combining 196 returning objects to layers 188 saving documen...
Page 478
Index 478 printing (continued) selected objects 390 selecting page range for 389 separations option 389 separations options 396 setting colors for gradient fills 402 setting document-level overprinting 397 setting file name and date for 401 setting film emulsion options for 401 setting halftone scre...
Page 479
Index 479 rgb images default device profile for 308 preserving device profiles for 312 setting device profiles for selected 311 right mouse button 86 context menus and 86 magnifying an area of your document with 87 right-align tab 343 rotate tool 216, 218 rotating objects 218 pages 100 pages when pr...
Page 480
Index 480 sequence option, in animation 379 service bureau, preparing files for 418 setting external editor options 126 shadow tool 211, 212 show all command 179 show fill for new open paths option 141 show invisibles option 326 show output warnings option 376 show smaller handles option 141 show so...
Page 481
Index 481 strokes (continued) postscript, applying 286, 287, 298 preset widths, editing 276 width of 277 styles 237 applying 252 basing on another 253 child 255 copying and pasting attributes of 252 copying to another document 256 creating for paragraphs 358 creating new 253 defining graphic 252 dup...
Page 482
Index 482 templates 114 converting freehand files into (macintosh) 115 creating 115 creating new default 116 editing 115 replacing 115 saving documents as 115 text adding leader tabs in 345 adjusting ragged width of 350 aligning on path 363 aligning paragraphs in 350 alignment, setting 335 animating...
Page 483
Index 483 text character inspector 331 text columns and rows inspector 331, 354 text context menu (windows) 332 text editor 325 default formatting in 326 show invisibles option in 326 special characters with 326 text effects 362 animating letters 378 highlight 370 inline 370 searching for 370 settin...
Page 484
Index 484 tools panel 76 adding a tool to 76 removing a tool from 76 showing and hiding 74 tooltips 79 displaying 79 turning off 79 trace dashed strokes option 382 trace tool 162 tracing color modes 163 contiguous areas of color 165 options for 163 path conversion 164 resolution for 163 scanning ima...
Page 485
Index 485 v vector artwork exporting 431 with html 377 vector graphics 137 vector images 67 view closing document 84 defining, naming, and saving 85 deleting named 85 editing named 85 enlarging or reducing 83, 84 fitting to selection or page 84 opening additional document 84 recalling saved 85 savin...

