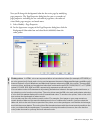
MACROMEDIA STUDIO 8-EXPLORING STUDIO 8 Manual
Summary of STUDIO 8-EXPLORING STUDIO 8
Page 1
Exploring studio 8 000_exploringstudio.Book page 1 tuesday, august 30, 2005 9:30 am.
Page 2
Trademarks 1 step robopdf, activeedit, activetest, authorware, blue sky software, blue sky, breeze, breezo, captivate, central, coldfusion, contribute, database explorer, director, dreamweaver, fireworks, flash, flashcast, flashhelp, flash lite, flashpaper, flash video encoder, flex, flex builder, f...
Page 3
3 contents part 1: getting started introduction . . . . . . . . . . . . . . . . . . . . . . . . . . . . . . . . . . . . . . . . . . . . . 9 what you can do with studio 8 . . . . . . . . . . . . . . . . . . . . . . . . . . . . . . . . . . 10 installing studio 8. . . . . . . . . . . . . . . . . . . . ...
Page 4
4 contents part 2: setting up your environment and planning your page design chapter 4: tutorial: setting up your site and project files . . . 137 learn about dreamweaver sites . . . . . . . . . . . . . . . . . . . . . . . . . . . . . . . 137 set up your project files . . . . . . . . . . . . . . . ....
Page 5
Contents 5 chapter 9: tutorial: building your first flash application . . . . 215 review your task. . . . . . . . . . . . . . . . . . . . . . . . . . . . . . . . . . . . . . . . . . . . . .216 examine the completed application . . . . . . . . . . . . . . . . . . . . . . . . . . . . .216 create a new...
Page 6
6 contents chapter 12: tutorial: formatting your page with css . . . . . . 295 locate your files. . . . . . . . . . . . . . . . . . . . . . . . . . . . . . . . . . . . . . . . . . . . . .296 review your task . . . . . . . . . . . . . . . . . . . . . . . . . . . . . . . . . . . . . . . . . . . . .297...
Page 7
7 1 part 1 getting started in this part, you’ll familiarize yourself with the macromedia studio 8 software suite and learn everything you need to do before you begin building your website. This part contains the following sections: introduction . . . . . . . . . . . . . . . . . . . . . . . . . . . ....
Page 8
000_exploringstudio.Book page 8 tuesday, august 30, 2005 9:30 am.
Page 9
9 introduction this manual introduces you to macromedia studio 8, an integrated web development suite that includes macromedia dreamweaver 8, macromedia flash professional 8, macromedia fireworks 8, macromedia contribute 3.1, and macromedia flashpaper 2. This manual gives an overview of the products...
Page 10
10 introduction what you can do with studio 8 studio 8 includes five macromedia products: dreamweaver, flash, fireworks, contribute, and flashpaper. This section provides a brief overview of each product. This section covers the following topics: ■ “what you can do with dreamweaver” on page 10 ■ “wh...
Page 11
What you can do with studio 8 11 dreamweaver is fully customizable. Using new behaviors, property inspectors, and site reports, you can create your own objects and commands, modify keyboard shortcuts, and even write javascript code to extend dreamweaver capabilities. For more information on the reso...
Page 12
12 introduction to build a flash application, you typically perform the following basic steps: 1. Decide which basic tasks the application will perform. 2. Create and import media elements, such as images, video, sound, and text. 3. Arrange the media elements on the stage and in the timeline to defi...
Page 13
What you can do with studio 8 13 what you can do with contribute as a web developer or designer, you use a website-creation application, such as dreamweaver, to build your website. That includes planning, designing, developing, testing, and publishing the website. When that work is done, you can use...
Page 14
14 introduction flash documents also work well as stand-alone files. Anyone who has flash player installed on their computer can view swf files, and anyone who has adobe acrobat reader installed on their computer can view pdf files. Installing studio 8 this section describes the installation procedu...
Page 15
Installing studio 8 15 if the screen does not appear, or if you are installing from a network drive, in windows, use windows explorer to locate the studio 8 installer.Exe file in the accessibility directory, double-click the filename, and follow the installation instructions. On the macintosh, doubl...
Page 16
16 introduction activating your studio products if you are a single-license user, you must activate the license for your macromedia products within 30 days of installation. When you activate one of the studio 8 products, the other products are also activated. You can activate the product through an ...
Page 17
17 1 chapter 1 learning studio macromedia studio 8 includes a variety of resources to help you learn the studio programs quickly. This chapter outlines all of the documentation resources that are available to you, and provides detailed information about using the help systems in the studio products....
Page 18
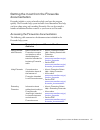
18 learning studio getting the most from the dreamweaver documentation dreamweaver includes a variety of media to help you learn the program quickly and become proficient in creating web pages. The dreamweaver help system includes several documents that help you learn about dreamweaver, dreamweaver ...
Page 19
Getting the most from the studio documentation 19 extending dreamweaver description of the dreamweaver framework and application programming interface (api). Intended for advanced users who want to build extensions or customize the dreamweaver interface. • view in dreamweaver: select help > extendin...
Page 20
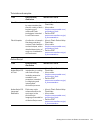
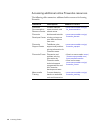
20 learning studio accessing additional online dreamweaver resources the following table summarizes additional online resources for learning dreamweaver. Using coldfusion a selection of the most important books in the coldfusion documentation set. (the full set is available on livedocs.) intended fo...
Page 21
Getting the most from the studio documentation 21 getting the most from the flash documentation the macromedia flash help system contains a great deal of information and resources that describe the full range of flash authoring capabilities and the actionscript language. Many online resources are al...
Page 22
22 learning studio feature information title description/ audience where to find it getting started with flash basic introduction to flash concepts and interface, with a detailed beginner tutorial. Intended for beginning flash users. • view in flash: select help > flash help • view online: livedocs....
Page 23
Getting the most from the studio documentation 23 tutorials and samples actionscript title description/ audience where to find it flash tutorials a collection of step- by-step tutorials that teach a variety of both beginning and advanced flash techniques. Intended for all flash users. • view in flas...
Page 24
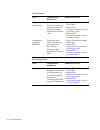
24 learning studio components extending flash title description/ audience where to find it using components information about how to use and customize components in your flash documents. Intended for all flash users. • view in flash: select help > flash help • view online: livedocs.Macromedia.Com/ g...
Page 25
Getting the most from the studio documentation 25 flash lite title description/ audience where to find it getting started with flash lite introductory information about flash lite workflows and authoring considerations. Intended for mobile and device developers and intermediate flash users. • view i...
Page 26
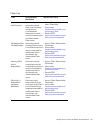
26 learning studio accessing additional online flash resources the following table summarizes additional online resources for learning flash. Resource description where to find it flash support center technotes, plus support and problem- solving information. • www.Macromedia.Com/go/ flash_support fl...
Page 27
Getting the most from the studio documentation 27 getting the most from the fireworks documentation fireworks includes a variety of media to help you learn the program quickly. The fireworks help system includes several documents that help you learn about using and extending fireworks. You can also ...
Page 28
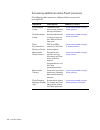
28 learning studio accessing additional online fireworks resources the following table summarizes additional online resources for learning fireworks. Resource description where to find it fireworks documentation resource center product manuals, errata, tutorials, and release notes. • www.Macromedia....
Page 29
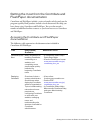
Getting the most from the studio documentation 29 getting the most from the contribute and flashpaper documentation contribute and flashpaper include a variety of media to help you learn the programs quickly. Both products include several documents that help you learn about using contribute and flas...
Page 30
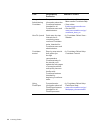
30 learning studio using and administering contribute comprehensive information about the contribute features. Intended for all contribute users and administrators. • in contribute: select help > macromedia contribute help • view online: l ivedocs.Macromedia.Com • get the pdf: www.Macromedia.Com/go/...
Page 31
Getting the most from the studio documentation 31 accessing additional online contribute and flashpaper resources the following table summarizes additional online resources for learning contribute and flashpaper. Resource description where to find it contribute documentation resource center product ...
Page 32
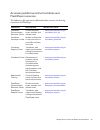
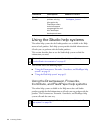
32 learning studio using the studio help systems the online help systems for the studio products are available in the help menu of each product. Each help system provides detailed information on all tasks you can perform with the studio products. This section describes how to use the studio help sys...
Page 33
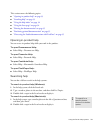
Using the studio help systems 33 this section covers the following topics: ■ “opening in-product help” on page 33 ■ “searching help” on page 33 ■ “using the help index” on page 34 ■ “using the start page” on page 34 ■ “printing the documentation” on page 35 ■ “purchasing printed documentation” on pa...
Page 34
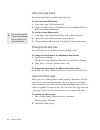
34 learning studio using the help index you can find information quickly in the help index. To use the index (windows): 1. In the help system, click the index tab. 2. Scroll to an index entry in the alphabetized list and double-click it to display the indexed information. To use the index (macintosh...
Page 35
Using the studio help systems 35 printing the documentation the studio documentation is available in pdf format on the macromedia website at www.Macromedia.Com/go/st_documentation . You can print all or part of the pdf on your own printer, or you can take the pdf to a copy shop to have it printed. P...
Page 36
36 learning studio this section covers the following topics: ■ “opening the help panel” on page 36 ■ “searching the help system” on page 36 ■ “using context-sensitive help” on page 38 ■ “printing the flash documentation” on page 39 ■ “purchasing printed documentation” on page 39 ■ “discussing the fl...
Page 37
Using the studio help systems 37 multiple-word searches return a list of help pages that each contain all of the search terms you enter. In this case the word and is implicit in the search. For example, you might type movie clip in the search text box. This action returns a list of pages that contai...
Page 38
38 learning studio to search for a word or phrase within a specific help page: 1. Locate the help page you want to search. 2. Click in the help page so it has the focus. 3. Press ctrl+f (windows) or command+f (macintosh). 4. In the find dialog box, enter the word or phrase you want to search for and...
Page 39
Using the studio help systems 39 printing the flash documentation printable versions of each of the books in the flash help system are available on the macromedia website. You can also print individual help pages from within the flash help panel. To print an individual book or chapter from the macro...
Page 40
40 learning studio one of the advantages of livedocs is the ability to see comments that clarify the documentation, or correct any errata or issues that arise after a software release. Livedocs is not the place to ask for help requests, such as asking questions about your code that doesn’t work, or ...
Page 41
Using the studio help systems 41 to arrange the help panel in an undocked (floating) position: 1. Undock the help panel to the desired position. 2. Expand the help panel if it is not already expanded. 3. Resize the panel window. 4. Press f1 to close or open the help panel as needed. Changing the siz...
Page 42
42 learning studio 000_exploringstudio.Book page 42 tuesday, august 30, 2005 9:30 am.
Page 43
43 2 chapter 2 studio basics macromedia studio offers an integrated workspace that allows for seamless transition between products. You will find that panels, menus, selection icons, and other user interface elements are similar across products and are easy to use. As you move between products, the ...
Page 44
44 studio basics about dreamweaver files you can work with a variety of file types in dreamweaver. The primary kind of file you will work with is the html file. Html files—or hypertext markup language files—contain the tag-based language responsible for displaying a web page in a browser. You can sa...
Page 45
Dreamweaver basics 45 aspx , or asp.Net files, have a .Aspx extension. They are used to process dynamic pages. For more information on working with these types of files, see chapter 41, “building asp.Net applications rapidly,” in using dreamweaver. Php , or php: hypertext preprocessor files, have a ...
Page 46
46 studio basics the workspace layout in windows, dreamweaver provides an all-in-one-window integrated layout. In the integrated workspace, all windows and panels are integrated into a single larger application window. Files panel property inspector tag selector document toolbar insert bar document ...
Page 47
Dreamweaver basics 47 on the macintosh, dreamweaver can display multiple documents in a single window with tabs that identify each document. Dreamweaver can also appear as part of a floating workspace in which each document appears in its own individual window. Panel groups are initially docked toge...
Page 48
48 studio basics the document window the document window shows the current document. You can select any of the following views: design view is a design environment for visual page layout, visual editing, and rapid application development. In this view, dreamweaver displays a fully editable, visual r...
Page 49
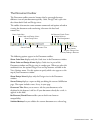
Dreamweaver basics 49 the document toolbar the document toolbar contains buttons that let you toggle between different views of your document quickly: code, design, and a split view that shows both code and design views. The toolbar also contains some common commands and options related to viewing t...
Page 50
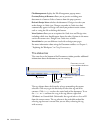
50 studio basics file management displays the file management pop-up menu. Preview/debug in browser allows you to preview or debug your document in a browser. Select a browser from the pop-up menu. Refresh design view refreshes the document’s design view after you make changes in code view. Changes ...
Page 51
Dreamweaver basics 51 the hand tool lets you click the document and drag it in the document window. Click the select tool to disable the hand tool. The zoom tool and set magnification pop-up menu let you set a magnification level for your document. For more information, see “zooming in and out” in u...
Page 52
52 studio basics the insert bar is organized in the following categories: the common category enables you to create and insert the most commonly used objects, such as images and tables. The layout category enables you to insert tables, div tags, layers, and frames. You can also you choose among thre...
Page 53
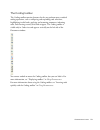
Dreamweaver basics 53 the coding toolbar the coding toolbar contains buttons that let you perform many standard coding operations, such as collapsing and expanding code selections, highlighting invalid code, applying and removing comments, indenting code, and inserting recently used code snippets. T...
Page 54
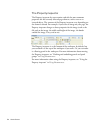
54 studio basics the property inspector the property inspector lets you examine and edit the most common properties for the currently selected page element, such as text or an inserted object. The contents of the property inspector vary depending on the element selected. For example, if you select a...
Page 55
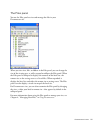
Dreamweaver basics 55 the files panel you use the files panel to view and manage the files in your dreamweaver site. When you view sites, files, or folders in the files panel, you can change the size of the viewing area, as well as expand or collapse the files panel. When the files panel is collapse...
Page 56
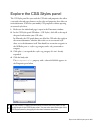
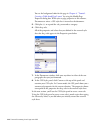
56 studio basics the css styles panel the css styles panel lets you track the css rules and properties affecting a currently selected page element (current mode), or the rules and properties affecting an entire document (all mode). A toggle button at the top of the css styles panel lets you switch b...
Page 57
Flash basics 57 in all mode, the css styles panel displays two panes: an all rules pane (on top), and a properties pane (on bottom). The all rules pane displays a list of rules defined in the current document as well as all rules defined in style sheets attached to the current document. The properti...
Page 58
58 studio basics actionscript code is the programming code you can add to flash documents to make them respond to user interactions and to more finely control the behavior of your flash documents. Much can be accomplished in flash without actionscript, but using actionscript offers many more possibi...
Page 59
Flash basics 59 getting to know the flash workspace the following sections provide a detailed introduction to the tools, panels, and other elements of the flash workspace. This section contains the following topics: ■ “using the start page” on page 59 ■ “using the stage” on page 60 ■ “using the time...
Page 60
60 studio basics the start page also offers quick access to help resources. You can take a tour of flash, learn about flash documentation resources, and find macromedia authorized training facilities. To hide the start page: ■ on the start page, select don’t show again. To display the start page aga...
Page 61
Flash basics 61 zooming to view the entire stage on the screen, or to view a particular area of your drawing at high magnification, you can change the magnification level. The maximum magnification depends on the resolution of your monitor and the document size. The minimum value for zooming out on ...
Page 62
62 studio basics ■ to display the entire stage, select view > magnification > show frame or select show frame from the zoom control at the upper-right corner of the timeline. ■ to display the workspace surrounding the stage, select view > work area. The work area is shown in light gray. Use the work...
Page 63
Flash basics 63 the timeline status display at the bottom of the timeline indicates the selected frame number, the current frame rate, and the elapsed time to the current frame. You can change the way frames are displayed in the timeline, as well as display thumbnails of frame content in the timelin...
Page 64
64 studio basics you can resize the timeline to change the number of layers and frames that are visible. When there are more layers than can be displayed in the timeline, you can view additional layers by using the scroll bars on the right side of the timeline. To move the timeline when it is docked...
Page 65
Flash basics 65 when you’re working with a large number of frames that can’t all be displayed in the timeline at once, you can move the playhead along the timeline to easily display a specific frame. To go to a frame: ■ click the frame’s location in the timeline header, or drag the playhead to the d...
Page 66
66 studio basics to change the display of frames in the timeline: 1. Click the frame view button in the upper-right corner of the timeline to display the frame view pop-up menu. 2. Select from the following options: ■ to change the width of frame cells, select tiny, small, normal, medium, or large. ...
Page 67
Flash basics 67 you can perform the following modifications on frames or keyframes: ■ insert, select, delete, and move frames or keyframes ■ drag frames and keyframes to a new location on the same layer or on a different layer ■ copy and paste frames and keyframes ■ convert keyframes to frames ■ dra...
Page 68
68 studio basics to select one or more frames in the timeline: ■ to select one frame, click the frame. If you have span based selection enabled in the preferences dialog box, clicking one frame selects the entire frame sequence between two keyframes. For more information, see “setting preferences in...
Page 69
Flash basics 69 ■ to convert a keyframe to a frame, select the keyframe and select edit > timeline > clear keyframe, or right-click (windows) or control-click (macintosh) the keyframe and select clear keyframe from the context menu. The stage contents of the cleared keyframe and all frames up to the...
Page 70
70 studio basics you can also organize and manage layers by creating layer folders and placing layers in them. You can expand or collapse layer folders in the timeline without affecting what you see on the stage. It’s a good idea to use separate layers or folders for sound files, actionscript, frame...
Page 71
Flash basics 71 you can change the height of layers in the timeline in order to display more information (such as sound waveforms) in the timeline. You can also change the number of layers displayed in the timeline. To show or hide a layer or folder, do one of the following: ■ click in the eye colum...
Page 72
72 studio basics to change layer height in the timeline: 1. Do one of the following: ■ double-click the layer’s icon (the icon to the left of the layer name) in the timeline. ■ right-click (windows) or control-click (macintosh) the layer name and select properties from the context menu. ■ select the...
Page 73
Flash basics 73 to rename a layer or folder, do one of the following: ■ double-click the name of the layer or folder in the timeline and enter a new name. ■ right-click (windows) or control-click (macintosh) the name of the layer or folder and select properties from the context menu. Enter the new n...
Page 74
74 studio basics to delete a layer or folder: 1. Select the layer or folder by clicking its name in the timeline or any frame in the layer. 2. Do one of the following: ■ click the delete layer button in the timeline. ■ drag the layer or folder to the delete layer button. ■ right-click (windows) or c...
Page 75
Flash basics 75 to expand or collapse all folders: ■ right-click (windows) or control-click (macintosh) and select expand all folders or collapse all folders from the context menu. Using guide layers for help in aligning objects when drawing, you can create guide layers. You can then align objects o...
Page 76
76 studio basics using the tools panel the tools in the tools panel let you draw, paint, select, and modify artwork, as well as change the view of the stage. The tools panel is divided into four sections: ■ the tools area contains drawing, painting, and selection tools. ■ the view area contains tool...
Page 77
Flash basics 77 customizing the tools panel you can customize the tools panel to specify which tools appear in the authoring environment. You use the customize tools panel dialog box to add or remove tools from the tools panel. You can display more than one tool in one location. When more than one t...
Page 78
78 studio basics using the grid, guides, and rulers flash can display rulers and guides that help you draw and lay out objects precisely. You can place guides in a document and snap objects to those guides, or turn on the grid and snap objects to it. Using rulers when rulers are displayed, they appe...
Page 79
Flash basics 79 to display or hide the drawing guides: ■ select view > guides > show guides. To turn snapping to guides on or off: ■ select view > snapping > snap to guides. To move a guide: 1. Make sure rulers are visible by selecting view > rulers. 2. With the selection tool, click anywhere on the...
Page 80
80 studio basics to set guide preferences: 1. Select view > guides > edit guides and do any of the following: ■ for color, click the triangle in the color box and select a guide line color from the palette. The default guide color is green. ■ select or deselect show guides to display or hide guides....
Page 81
Flash basics 81 to set grid preferences: 1. Select view > grid > edit grid. 2. For color, click the triangle in the color box and select a grid line color from the palette. The default grid line color is gray. 3. Select or deselect show grid to display or hide the grid. 4. Select or deselect snap to...
Page 82
82 studio basics depending on what is currently selected, the property inspector displays information and settings for the current document, text, symbol, shape, bitmap, video, group, frame, or tool. When two or more different types of objects are selected, the property inspector displays the total ...
Page 83
Flash basics 83 to display the library panel, do one of the following: ■ select window > library. ■ press control+l (windows) or command+l (macintosh). About the actions panel the actions panel lets you create and edit actionscript code for an object or frame. Selecting a frame, button, or movie cli...
Page 84
84 studio basics panels let you work with objects, colors, text, instances, frames, scenes, and entire documents. For example, you use the color mixer panel to create colors, and the align panel to align objects to each other or the stage. To view the complete list of panels available in flash, see ...
Page 85
Flash basics 85 to close all panels: ■ select window > hide panels. Arranging panels in flash, you can organize panels into groups. You can rearrange the order in which panels appear within panel groups. You can also create new panel groups and dock panels to existing panel groups. If you want a pan...
Page 86
86 studio basics to float a panel: ■ drag the panel by its gripper and move it away from other panels. To create a new panel group: ■ drag the panel by its gripper, away from other panel groups. Add additional panels to the first panel to form a new group. Using panel sets you can create custom pane...
Page 87
Flash basics 87 setting preferences in flash flash lets you set preferences for general application operations, editing operations, and clipboard operations. For more information about the drawing preferences, see “specifying drawing settings” in using flash. The general category in the preferences ...
Page 88
88 studio basics to set preferences: 1. Select edit > preferences (windows) or flash > preferences (macintosh). 2. In the category list, select the one of the following: ■ general ■ actionscript ■ auto format ■ clipboard ■ drawing ■ text ■ warning 3. Select from the respective options as described i...
Page 89
Flash basics 89 ■ for test movie options, select open test movie in tabs to have flash open a new document tab in the application window when you select control > test movie. The default is to open the test movie in its own window. ■ for selection options, select or deselect shift select to control ...
Page 90
90 studio basics to set autoformat preferences for actionscript: ■ select any of the check boxes. To see the effect of each selection, look in the preview pane. To set clipboard preferences, select from the following options: ■ for bitmaps (windows only), select options for color depth and resolutio...
Page 91
Flash basics 91 to set text preferences, select one of the following options: ■ for font mapping default, select a font to use when substituting missing fonts in documents you open in flash. For more information, see “substituting missing fonts” in using flash. ■ for vertical text options, select de...
Page 92
92 studio basics ■ select warn on conversion of effect graphic objects to have flash warn you when you attempt to edit a symbol that has timeline effects applied to it. ■ select warn on exporting to flash player 6 r65 to have flash warn you when you export a document to this earlier version of flash...
Page 93
Flash basics 93 to view or print the current set of keyboard shortcuts: 1. Select edit > keyboard shortcuts. 2. In the keyboard shortcuts dialog box, select the shortcut set you wish to view from the current pop-up menu. 3. Click the export set as html button. The export set as html button 4. In the...
Page 94
94 studio basics to add or remove a keyboard shortcut: 1. Select edit > keyboard shortcuts (windows) or flash > keyboard shortcuts (macintosh) and select the set that you want to modify. 2. From the commands pop-up menu, select drawing menu commands, drawing tools, test movie menu commands, or workp...
Page 95
Flash basics 95 using context menus context menus contain commands relevant to the current selection. For example, when you select a frame in the timeline window, the context menu contains commands for creating, deleting, and modifying frames and keyframes. Context menus exist for many items and con...
Page 96
96 studio basics selecting panels or the property inspector with keyboard shortcuts you can select a panel or the property inspector (also referred to as applying focus to the panel or property inspector) by using the keyboard shortcut control+alt+tab (windows) or command+option+tab (macintosh). You...
Page 97
Flash basics 97 to use keyboard shortcuts to expand or collapse panels or the property inspector: 1. Press control+alt+tab (windows) or command+option+tab (macintosh) until the panel you wish to expand or collapse has focus. A dotted line appears around the title of the currently focused panel. 2. P...
Page 98
98 studio basics to move the focus from a panel title bar to a panel pop-up menu, do one of the following: ■ press tab. ■ press the right arrow key. Press the left arrow key or shift+tab to return the focus to the panel title bar. ■ if the panel is in a group, press the up arrow key to move the focu...
Page 99
Flash basics 99 ■ when the focus is applied to a dialog box control button—such as the ok, cancel, or apply button—press enter to activate the button (equivalent to clicking the button). ■ when the focus is not applied to any dialog box control button—such as the ok, cancel, or apply button—press en...
Page 100
100 studio basics ■ objects on layers that are hidden or locked cannot be selected with the tab key. To select the stage: ■ press control+alt+home (windows) or command+option+home (macintosh). To select an object on the stage: ■ with the stage selected, press tab. Navigating tree controls using keyb...
Page 101
Flash basics 101 items are cut, copied, and pasted using the following criteria: ■ you can cut or copy one item or multiple items. ■ you cannot paste a shape from the stage into the library. ■ you cannot paste a library item into a common library, because common libraries cannot be modified. However...
Page 102
102 studio basics fireworks basics to get the most out of your fireworks experience, you should understand the basic elements of the fireworks workspace. This section gives you an overview of fireworks files and introduces you to the most important and commonly used workspace elements. This section ...
Page 103
Fireworks basics 103 getting to know the fireworks workspace when you open a document in fireworks for the first time, fireworks activates the work environment, including the tools panel, property inspector, menus, and other panels. The tools panel, on the left of the screen, contains labeled catego...
Page 104
104 studio basics using the tools panel the tools panel is organized into six categories: select, bitmap, vector, web, colors, and view. About bitmap and vector graphics computers display graphics in either vector or bitmap format. Understanding the difference between the two formats helps you under...
Page 105
Fireworks basics 105 vector graphics render images using lines and curves, called vectors, that include color and position information. When you edit a vector graphic, you modify the properties of the lines and curves that describe its shape. Vector graphics are resolution-independent, which means y...
Page 106
106 studio basics to select an alternative tool from a tool group: 1. Click the tool icon and hold down the mouse button. A pop-up menu appears with tool icons, tool names, and shortcut keys. The currently selected tool has a check mark to the left of the tool name. 2. Drag the pointer to highlight ...
Page 107
Fireworks basics 107 to expand a half-height property inspector to full height, revealing additional options: ■ click the expander arrow in the lower right corner of the property inspector. ■ click the icon in the upper-right of the property inspector and select full height from the property inspect...
Page 108
108 studio basics the layers panel organizes a document’s structure and contain options for creating, deleting, and manipulating layers. The frames panel includes options for creating animations. The history panel lists commands you recently used so that you can quickly undo and redo them. In additi...
Page 109
Fireworks basics 109 the auto shape properties panel (window > auto shape properties) lets you set the properties of auto shapes. The image editing panel (window > image editing) assembles the most commonly used tools for photo editing in one place. The special characters panel (window > special cha...
Page 110
110 studio basics to collapse or expand a panel group or panel, do one of the following: ■ click the title of the panel group or panel. ■ click the expander arrow in the upper left corner of the panel group or panel. To undock a panel from a panel group: ■ select group with > new panel group from th...
Page 111
Fireworks basics 111 about the quick export button the quick export button lets you export your fireworks files to a number of macromedia applications, including dreamweaver, flash, director, and macromedia freehand mx. In addition, you can export your files to photoshop, frontpage, adobe golive, an...
Page 112
112 studio basics when your document is maximized in windows, you can easily choose among multiple open documents by using the document tabs that appear at the top of the document window. Each open document displays its filename on a tab. Contribute basics to get the most out of your contribute expe...
Page 113
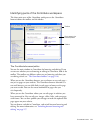
Contribute basics 113 identifying parts of the contribute workspace the three main areas of the contribute workspace are the contribute browser/editor, the toolbar, and the sidebar. The contribute browser/editor you use the main window in contribute for browsing and editing. If you are not sure whet...
Page 114
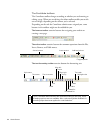
114 studio basics the contribute toolbars the contribute toolbar changes according to whether you are browsing or editing a page. When you are editing, the editor toolbar enables you to edit text or images, depending on the content you’ve selected. Depending on the role the contribute administrator ...
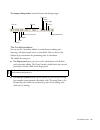
Page 115
Contribute basics 115 the image editing toolbar contains buttons for editing images. The contribute sidebar you can use the contribute sidebar to switch between editing and browsing, and obtain quick access to your drafts. You can also use the sidebar to get instructions for performing tasks in cont...
Page 116
116 studio basics you can click any link in the how do i panel in the sidebar to get more information on that task. If the task you’re looking for is not in the list, see using contribute (help > macromedia contribute help) for detailed information. You can expand, collapse, or resize the panels and...
Page 117
Contribute basics 117 switching between browsing and editing you can use contribute to browse or edit web pages. You can switch between browsing and editing at any time. When you leave a draft that you’re editing, contribute saves your changes so that you can return to the draft later and continue e...
Page 118
118 studio basics flashpaper basics to get the most out of your flashpaper experience, you should understand the basic elements of the flashpaper workspace. This section gives you an overview of flashpaper files and introduces you to the most important and commonly used workspace elements. This sect...
Page 119
Flashpaper basics 119 the flashpaper workspace consists of the flashpaper toolbar, which is the same in both the application and the viewing environments. The flashpaper toolbar enables you to resize a document for viewing, navigate through the document pages, select text, search the document, and p...
Page 120
120 studio basics to resize the document, do one of the following: ■ use the zoom slider to dynamically resize the document. You can adjust the document magnification range from 25% to 250%. The zoom text box updates as you use the slider. ■ enter a number in the zoom text box to resize the document...
Page 121
121 3 chapter 3 web development workflow this chapter demonstrates how the individual components of macromedia studio 8—macromedia dreamweaver 8, macromedia flash 8, macromedia fireworks 8, macromedia contribute 3, and macromedia flashpaper 2—make up a comprehensive suite for designing, developing, ...
Page 122
122 web development workflow ■ creating content assets, which includes creating images, video, and so on with fireworks and flash ■ building application assets, which includes creating dynamic pages and rich internet applications with dreamweaver and flash ■ assembling, testing, and deploying your s...
Page 123
Setting up the development environment 123 determine your site goals ask yourself or your client questions about the site, and write down your goals so that you remember them as you go through the design process. A list of goals helps you focus and target your website to your particular needs. The c...
Page 124
124 web development workflow choose a web server and install it on your local or networked computer a web server is software that serves files in response to requests from web browsers. When the web server receives a request for a static html page, the server reads the request, finds the page, and s...
Page 125
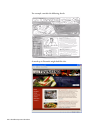
Planning page design and layout 125 related tutorial ■ chapter 4, “tutorial: setting up your site and project files,” on page 137 planning page design and layout a web design project usually begins with storyboards or flowcharts that the designers and developers then turn into sample pages. You can ...
Page 126
126 web development workflow for example, consider the following sketch: a mock-up in fireworks might look like this: 000_exploringstudio.Book page 126 tuesday, august 30, 2005 9:30 am.
Page 127
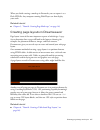
Planning page design and layout 127 when you finish creating a mock-up in fireworks, you can export it as a flash swf file. Any computer running flash player can then display your work. Related tutorial ■ chapter 5, “tutorial: creating page mock-ups,” on page 143 creating page layouts in dreamweaver...
Page 128
128 web development workflow creating content assets after you know what your design and layout will look like, you can create and gather the assets that you will need for your website. Assets can be items such as images (including buttons, banner graphics, logos, photographs, and so on), text, flas...
Page 129
Creating content assets 129 creating flash content and video your flash content can include graphics, text, animation, and applications for websites. Flash content consists primarily of vector graphics, but it can also include video, bitmap graphics, and sounds. Because flash content uses compact ve...
Page 130
130 web development workflow flash treats flash video as simply another media type, so you can layer, script, and control video just as you would any other object in a swf file. Related tutorials ■ chapter 9, “tutorial: building your first flash application,” on page 215 ■ chapter 10, “tutorial: bui...
Page 131
Assembling, testing, and deploying 131 after assembling your page, you can edit the assets directly in the dreamweaver workspace. You can perform a number of simple image- editing tasks—including cropping, adjusting contrast, optimizing, and sharpening—without the assistance of an image-editing appl...
Page 132
132 web development workflow ■ monitor the size of your pages and the time that they take to download. Keep in mind that for pages that consist of one large table, visitors will see nothing until the entire table is downloaded. Consider breaking up large tables; if this is not possible, consider put...
Page 133
Maintaining and updating your site 133 maintaining and updating your site when the bulk of the site has been published, you need to continue to update and maintain it. Publishing your site—that is, deploying the site to a server and making it live—is an ongoing process. Dreamweaver has many tools to...
Page 134
134 web development workflow 000_exploringstudio.Book page 134 tuesday, august 30, 2005 9:30 am.
Page 135
135 2 part 2 setting up your environment and planning your page design in this part, you’ll begin building the cafe townsend sample website. Before you begin, you must copy the sample files and set up your project. Then you’ll use macromedia fireworks 8 and macromedia dreamweaver 8 to create a web p...
Page 136
000_exploringstudio.Book page 136 tuesday, august 30, 2005 9:30 am.
Page 137
137 4 chapter 4 tutorial: setting up your site and project files this tutorial introduces you to the concept of a macromedia dreamweaver 8 site and shows you how to set up the project files for the cafe townsend sample website. In dreamweaver, a site generally consists of two parts: a collection of ...
Page 138
138 tutorial: setting up your site and project files a dreamweaver site consists of as many as three parts, depending on your computing environment and the type of website you are developing: local folder is your working directory. Dreamweaver refers to this folder as your local site. The local fold...
Page 139
Set up your project files 139 set up your project files when you create a local site, you can place any existing assets (images or other pieces of content) in the local site’s root folder (the main folder for the site). Then when you’re ready to add content to your pages, the assets are there and re...
Page 140
140 tutorial: setting up your site and project files 3. Copy the cafe_townsend folder into the local_sites folder. The cafe_townsend folder is the folder that you will use as the root folder (main folder) for your dreamweaver site. Define a local folder you must define a dreamweaver local folder for...
Page 141
Define a local folder 141 6. In the default images folder text box, specify the images folder that already exists in the cafe_townsend folder. You can click the folder icon to browse to and select the folder, or enter a path in the default images folder text box. The site definition dialog box shoul...
Page 142
142 tutorial: setting up your site and project files the files panel now shows the new local root folder for your current site. The file list in the files panel acts as a file manager, allowing you to copy, paste, delete, move, and open files just as you would on a computer desktop. For more informa...
Page 143
143 5 chapter 5 tutorial: creating page mock-ups this tutorial will guide you through the basic tasks of creating a mock-up of a web page with macromedia fireworks 8. Page mock-ups are typically used to show proposed page designs to colleagues or clients. Once a design is approved, the mock-up is us...
Page 144
144 tutorial: creating page mock-ups when the team returned to the office, they told you the clients particularly liked two designs, which were captured in the following napkin sketches: 000_exploringstudio.Book page 144 tuesday, august 30, 2005 9:30 am.
Page 145
Create and save a new document 145 you’re given the task of creating a page mock-up of the second design to show to the clients. The mock-up will look like a real web page but it won’t work like one. Create and save a new document after previewing the completed page mock-up, you’re ready to begin yo...
Page 146
146 tutorial: creating page mock-ups 5. Select file > save, and then browse to the following folder on your hard disk: local_sites/cafe_townsend/fireworks_assets/ 6. Name the file homepage-mockup. 7. Click save. The title bar displays the new filename with a .Png extension. Png is the native file fo...
Page 147
Import and place images 147 4. Use the arrow keys on your keyboard to precisely align the banner graphic with the top of the canvas. The banner is correctly aligned if the values of its x and y coordinates in the property inspector are both 0. The property inspector is located at the bottom of the d...
Page 148
148 tutorial: creating page mock-ups create a composite of the content area now you’re ready to create a mock-up of the content area of the web page. You’ll draw fireworks vector objects to graphically represent areas of the web page. Before you begin, you review the napkin sketch to refresh your me...
Page 149
Create a composite of the content area 149 1. Select the rounded rectangle tool in the vector section of the tools panel. The rounded rectangle tool is a shape tool. Click the expander icon on the shape icon to select it. 2. In the document window, position the cross-hair pointer over the canvas, an...
Page 150
150 tutorial: creating page mock-ups 4. With the rounded rectangle still selected, in the property inspector, click the fill color box next to the bucket icon. The fill color pop-up window opens. 5. Type 6b1101 in the text box at the top of the window, and then press enter. 6. Click the stroke color...
Page 151
Create a composite of the content area 151 1. With the rounded rectangle still selected, open the auto shape properties panel by selecting window > auto shape properties (not window > auto shapes). 2. Enter 20 for the roundness of the first corner, and then press enter. Because the values are locked...
Page 152
152 tutorial: creating page mock-ups next, you need to give the rectangle an orange fill. 1. With the rectangle still selected, in the property inspector, click the fill color box next to the bucket icon. The fill color pop-up window appears. 2. Type a3210a in the text box at the top of the window, ...
Page 153
Place text and images 153 now you need to give the rectangle an off-white fill. 1. With the rectangle still selected, in the property inspector, click the fill color box next to the bucket icon. The fill color pop-up window appears. 2. Type f7eedf in the text box at the top of the window, and then p...
Page 154
154 tutorial: creating page mock-ups place placeholder text for the links the first element to create is the text representing the navigation links. 1. Select the text tool in the vector section of the tools panel, and move the pointer over the document window. The pointer changes to an i-beam, and ...
Page 155
Place text and images 155 5. Type the following items, pressing enter after each to start a new line: ■ chef ipsum ■ articles ■ special events ■ location ■ menu ■ contact us when you complete this step, you have a text block representing the navigation links. 6. Click the pointer tool in the tools p...
Page 156
156 tutorial: creating page mock-ups 3. Position the insertion pointer about 6 pixels below and to the right of the upper-left corner of the off-white copy area, and then click to insert the image. 4. With the placeholder image still selected, use the arrow keys on your keyboard to adjust its positi...
Page 157
Place text and images 157 4. With the placeholder image still selected, use the arrow keys on your keyboard to adjust its position. You want to position the image so that its left edge aligns with the left edge of the video placeholder image. 5. Click anywhere outside the selected image to deselect ...
Page 158
158 tutorial: creating page mock-ups 3. Position the i-beam pointer about 6 pixels from the upper-right corner of the video-placeholder image, and then drag down and to the right to draw a text box. Ensure that there is about a 6-pixel margin on all sides. 4. Type or paste about two paragraphs of pl...
Page 159
Place text and images 159 now you add a line of text at the end of each paragraph and make it look like a web link. 1. Click the i-beam pointer at the end of the first paragraph and press the spacebar on your keyboard. 2. Type learn more, and then select the text you just typed. 3. In the property i...
Page 160
160 tutorial: creating page mock-ups export the image for the web the mock-up of the cafe townsend homepage you created should look as follows: next, you decide to export the png file to a jpeg file that you can display on an internal website or e-mail to your colleagues or clients. 000_exploringstu...
Page 161
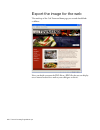
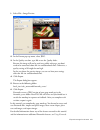
Export the image for the web 161 1. Select file > image preview. 2. In the format pop-up menu, select jpeg. 3. In the quality text box, type 90, or use the quality slider. Because this image will not be used on a public web page, you don’t need to be concerned about file size and download time. Othe...
Page 162
162 tutorial: creating page mock-ups 000_exploringstudio.Book page 162 tuesday, august 30, 2005 9:30 am.
Page 163
163 6 chapter 6 tutorial: creating a table-based page layout this tutorial explains how to create a table-based page layout in macromedia dreamweaver 8. A page layout determines how your page will appear in the browser, showing, for example, the placement of menus, images, and macromedia flash conte...
Page 164
164 tutorial: creating a table-based page layout a comp consists of any number of page elements that the client has requested for their website. For example, the client might say, “i want to have a logo at the top of the page, a navigation that links to these other pages, a section for an online sto...
Page 165
Create and save a new page 165 you’ll notice that the graphic designer has provided you with a web page comp that includes a number of content areas, as well as some graphic ideas. In the next sections, you’ll use dreamweaver to lay out this design. You can also open the original comp file that you ...
Page 166
166 tutorial: creating a table-based page layout 6. In the document title text box at the top of your new document, type cafe townsend. This is the title of your page (different from the filename). Your site visitors will see this title in the browser window title bar when they view the page in a we...
Page 167
Insert tables 167 ■ enter 0 in the cell spacing text box. 4. Click ok. A table with three rows and one column appears in your document. The table is 700 pixels wide with no border, cell padding, or cell spacing. 000_exploringstudio.Book page 167 tuesday, august 30, 2005 9:30 am.
Page 168
168 tutorial: creating a table-based page layout 5. Click once to the right of the table to deselect it. 6. Select insert > table to insert another table. 7. In the insert table dialog box, do the following for the second table: ■ enter 1 in the rows text box. ■ enter 3 in the columns text box. ■ en...
Page 169
Insert tables 169 8. Click ok. A second table with one row and three columns appears below your first table. 9. Click to the right of the table to deselect it. 10. Insert a third table by selecting insert > table and entering the following values in the insert table dialog box: ■ enter 1 in the rows...
Page 170
170 tutorial: creating a table-based page layout set table properties now you’ll set precise table properties, using expanded tables mode, a feature that temporarily adds cell padding and spacing to tables and increases the borders of the tables to simplify editing. Specifically, it lets you positio...
Page 171
Set table properties 171 2. Click once inside the first row of the first table. 3. In the property inspector (window > properties), enter 90 in the cell height (h) text box and press enter (windows) or return (macintosh). 4. Click once inside the second row of the first table. 5. In the property ins...
Page 172
172 tutorial: creating a table-based page layout 7. In the property inspector, enter 24 in the cell height text box and press enter (windows) or return (macintosh). You should now have three rows of differing heights in the first table. Next you’ll set properties for the second table (the table that...
Page 173
Set table properties 173 9. In the property inspector, enter 140 in the cell width (w) text box and press enter (windows) or return (macintosh). 10. Click once inside the second column of the second table. 11. In the property inspector, enter 230 in the cell width text box and press enter (windows) ...
Page 174
174 tutorial: creating a table-based page layout 14. In the property inspector, enter 24 in the cell height text box and press enter (windows) or return (macintosh). Your layout should now look as follows: 15. Click the exit expanded tables mode link at the top of the document window to return to st...
Page 175
Insert an image placeholder 175 insert an image placeholder an image placeholder is a graphic that you use until final artwork is ready to be added to a web page. An image placeholder is useful when you lay out web pages because it allows you to position an image on a page before you actually create...
Page 176
176 tutorial: creating a table-based page layout 4. Click ok. The image placeholder appears inside the first table. The image placeholder displays a label and the size attributes of the image that you’ll eventually place there. 5. Save your page. No te when viewed in a browser the label and size tex...
Page 177
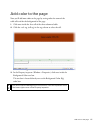
Add color to the page 177 add color to the page now you’ll add more color to the page by setting colors for some of the table cells and for the background of the page. 1. Click once inside the first cell of the three-columned table. 2. Click the 3. In the property inspector (window > properties), cl...
Page 178
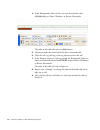
178 tutorial: creating a table-based page layout 4. In the background color text box, enter the hexadecimal value #993300 and press enter (windows) or return (macintosh). The color of the table cell turns to reddish-brown. 5. Click once inside the second cell of the three-columned table. 6. Click th...
Page 179
Add color to the page 179 next you’ll change the background color for the entire page by modifying page properties. The page properties dialog box lets you set a number of page properties, including the size and color of page fonts, the colors of visited links, page margins, and much more. 1. Select...
Page 180
180 tutorial: creating a table-based page layout 3. Click ok. Your page background turns to black. 4. Save your work. Your page layout is now complete. The layout contains a number of tables that can hold assets such as images, text, and flash video (flv) files. 000_exploringstudio.Book page 180 tue...
Page 181
181 3 part 3 creating content assets in this part, you’ll build assets for the cafe townsend sample website. You’ll use macromedia fireworks 8 to process images and design a banner graphic for the cafe townsend website. You’ll use macromedia flash 8 to build a flexible messaging area and a video pla...
Page 182
000_exploringstudio.Book page 182 tuesday, august 30, 2005 9:30 am.
Page 183
183 7 chapter 7 tutorial: handling photographs this tutorial will guide you through the basic tasks of optimizing photographs with macromedia fireworks 8. You will learn how to batch process the files, and to compose and export a group of images. In this tutorial, you’ll complete the following tasks...
Page 184
184 tutorial: handling photographs batch process large image files when the source of your image files is a digital camera, you probably won’t be able to use the images directly as web graphics. The size and resolution are much too great. You may also want to alter the composition so that only parts...
Page 185
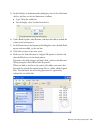
Batch process large image files 185 5. In the scale box at the bottom of the dialog box, select scale to size from the list, and then set the size dimensions as follows: ■ type 750 in the width box. ■ for the height, select variable from the list. 6. Under batch options, select rename, and then clic...
Page 186
186 tutorial: handling photographs compose the images the next step is to compose the images to appear in the slideshow. Each image must be 700 pixels by 150 pixels to fit the dimensions of the slideshow. However, because each image you batch processed is larger than the slideshow dimensions, you mu...
Page 187
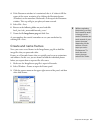
Compose the images 187 4. If the document window isn’t maximized, that is, if it doesn’t fill the center of the screen, maximize it by clicking the maximize button (windows) or the zoom box (macintosh) at the top of the document window. This step will give you plenty of room to work. 5. Select file ...
Page 188
188 tutorial: handling photographs 4. In the add frames dialog box, enter 5 as the number of new frames, make sure the after the current frame option is selected, and click ok. Fireworks adds five new frames to the existing one, giving you a total of six. By default, fireworks names the new frames f...
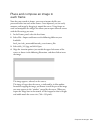
Page 189
Compose the images 189 place and compose an image in each frame now that you created six frames, you want to import the files you processed earlier into each of the frames. Once imported, you can easily compose each image by dragging it around the canvas. Using frames to store and manipulate the ima...
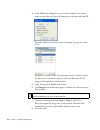
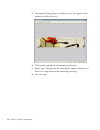
Page 190
190 tutorial: handling photographs 5. To compose the image, drag it until the part you want appears in the window created by the canvas. 6. Click anywhere outside the selected image to deselect it. 7. Repeat steps 1 through 6 for the remaining five images, making sure to select a new, empty frame be...
Page 191
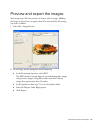
Preview and export the images 191 preview and export the images your image source file now contains six frames with six images. Holding the images in frames lets you export them all at once with the file settings you want, as follows. 1. Select file > image preview. 2. In the image preview dialog bo...
Page 192
192 tutorial: handling photographs 3. In the export dialog box that appears, browse to the following folder on your hard disk: local_sites/cafe_townsend/images/ 4. Select frames to files in the export pop-up menu. 5. Make sure that trim images is not selected. 6. Click export. Fireworks exports each...
Page 193
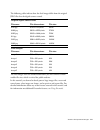
View the final optimized images 193 the following tables indicate how the final images differ from the original jpeg files that the digital camera created: the final images have the uniform dimensions you need and have much smaller file sizes, which is critical for public websites. In this tutorial,...
Page 194
194 tutorial: handling photographs 000_exploringstudio.Book page 194 tuesday, august 30, 2005 9:30 am.
Page 195
195 8 chapter 8 tutorial: creating a page banner this tutorial will guide you through the task of designing a page banner with macromedia fireworks 8. You’ll learn to import image assets, work with layers, shapes, masks, and text, and optimize and export the finished banner graphic. In this tutorial...
Page 196
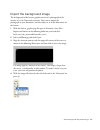
196 tutorial: creating a page banner add a background and place the logo after you create a new png file for the banner, you want to import a photo to serve as the background image for the graphic. You also want to import the cafe townsend logo. You start by creating a new png file for the banner. I...
Page 197
Add a background and place the logo 197 import the background image the background of the banner graphic consists of a photograph of the interior of a cafe townsend restaurant. You want to import the photograph in your document, and then adjust it to fit the dimensions of the banner. 1. With the ban...
Page 198
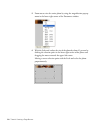
198 tutorial: creating a page banner 5. Zoom out to view the entire photo by using the magnification pop-up menu in the lower right corner of the document window. 6. With the scale tool, reduce the size of the photo by about 25 percent by clicking the selection point in the lower right corner of the...
Page 199
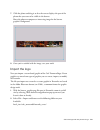
Add a background and place the logo 199 7. Click the photo and drag it so that the canvas displays the part of the photo that you want to be visible in the banner. Move the photo to compose an interesting image for the banner graphic’s background. 8. Once you’re satisfied with the image, save your w...
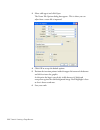
Page 200
200 tutorial: creating a page banner 3. Select cafelogo.Ai and click open. The vector file options dialog box appears. This is where you can adjust how a vector file is imported. 4. Click ok to accept the default options. 5. Position the insertion pointer inside the upper-left corner of the banner a...
Page 201
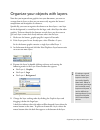
Organize your objects with layers 201 organize your objects with layers now that you imported two graphics into your document, you want to arrange them in layers so that you can more easily organize the banner’s composition and manipulate its elements. Specifically, you want to organize the elements...
Page 202
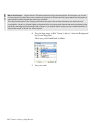
202 tutorial: creating a page banner 6. Drag the logo image (called “group: 3 objects”) from the background layer to the logo layer. The layers panel should look as follows: 7. Save your work. About... More about layers layers divide a fireworks document into discrete planes. A document can consist ...
Page 203
Create a contrasting background for the logo 203 create a contrasting background for the logo the cafe townsend logo is not clearly visible because it’s black and transparent against a dark background. You decide to place a lighter colored rectangle behind the logo to make it stand out more. 1. In t...
Page 204
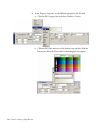
204 tutorial: creating a page banner 3. In the property inspector, set the following properties for the tool: a. Click the fill category box and select gradient > linear. . B. Click the fill color box next to the bucket icon and then click the button just above the preset label in the dialog box tha...
Page 205
Create a contrasting background for the logo 205 a pop-up window appears to let you pick the first gradient color. C. Type f7efe3 in the text box at the top of the window, and then press enter. The beginning color of the gradient changes to reflect your color choice. D. Click the second gradient col...
Page 206
206 tutorial: creating a page banner f. Use the slider to set the opacity of the second gradient color to 50%. 4. Press enter to accept the settings, and then draw a rectangle over the cafe townsend logo in the banner. When you release the mouse button, a semi-transparent rectangle appears over the ...
Page 207
Create an outline around the banner 207 create an outline around the banner you want to create a black outline around the banner. To create this effect, you decide to use a rounded rectangle as a vector mask. A vector mask crops or clips the underlying object to the shape of its path, creating a coo...
Page 208
208 tutorial: creating a page banner 4. On the canvas, draw and position the rounded rectangle inside the banner. The area that falls outside the rounded rectangle will be black, forming the banner’s outline. Use the blue selection points to adjust the size of the shape. Use the yellow diamond-shape...
Page 209
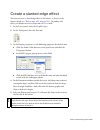
Create a slanted edge effect 209 create a slanted edge effect you want to create a slanted edge effect in the banner, as shown in the banner sketch (see “review your task” on page 195 ). To produce this effect, you decide to create a shape and use it as a mask. 1. In the layers panel, select the gra...
Page 210
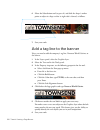
210 tutorial: creating a page banner 6. Select the subselection tool (or press a) and click the shape’s anchor points to adjust its shape so that its right side is slanted, as follows. 7. Save your work. Add a tag line to the banner next, you need to add the company’s tag line, nouveau world cuisine...
Page 211
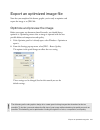
Export an optimized image file 211 export an optimized image file now that you completed the banner graphic, you’re ready to optimize and export the image as an jpeg file. Optimize and preview the image before you export any document from fireworks, you should always optimize it. Optimizing ensures ...
Page 212
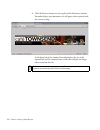
212 tutorial: creating a page banner 3. Click the preview button near the top left of the document window. Fireworks displays your document as it will appear when exported with the current settings. At the lower left of the window, fireworks displays the size of the exported file and the estimated t...
Page 213
Export an optimized image file 213 export the image after choosing your optimization settings, export the image as a jpeg file. Select file > export. The filename listed has a .Jpg extension. Fireworks chose this file format because you selected it in the optimize panel. 1. Browse to the following f...
Page 214
214 tutorial: creating a page banner the jpeg image opens in fireworks. Because jpeg images are bitmaps, all your objects and layers are flattened in the layers panel. Also, the property inspector displays only a few properties. All the properties available in the png file are no longer available in...
Page 215
215 9 chapter 9 tutorial: building your first flash application this tutorial guides you through the process of creating a simple application using some of the authoring features in macromedia flash basic 8 and flash professional 8. A flash application, broadly defined, can be as simple as content t...
Page 216
216 tutorial: building your first flash application review your task in this tutorial, you will create a type of application known as a flexible messaging area, or fma for the web site of a fictional restaurant called cafe townsend. An fma is a common type of flash application used for displaying co...
Page 217
Examine the completed application 217 run the completed application to better understand the type of application you’ll create as you work through this tutorial, you can look at a completed fla file version of the application in the flash authoring tool. Fla files are the type of files you work on i...
Page 218
218 tutorial: building your first flash application 3. After you have the file open, you can explore the stage, the library panel, and the timeline. ■ on the stage you will see a variety of graphic shapes, which you will learn to create later in this tutorial. ■ in the library panel, you will see a ...
Page 219
Create a new document 219 4. Name the file flash_fma.Fla and save the file in the cafe_townsend folder you copied to the local_sites folder on your hard disk. Define document properties configuring document properties is a common first step in flash authoring. You can change the document properties ...
Page 220
220 tutorial: building your first flash application 4. In the document properties dialog box, enter 700 in the width text box and 150 in the height text box, and then click ok. Flash automatically inserts the px (for pixel) after the number. The document properties dialog box 5. In the timeline, cli...
Page 221
Create symbols 221 create symbols next, you will create some symbols or reusable assets. Symbols allow you to use the same asset more than once without storing multiple copies of it in your fla file. You store the symbol in the library panel, and drag instances of the symbol to the stage when you ne...
Page 222
222 tutorial: building your first flash application 7. Drag in the drawing area to draw a wide, flat rectangle. 8. Select the selection tool from the tools panel. 9. Double-click the rectangle you drew to select both its fill and its stroke. 10. In the property inspector, enter 0 in both the x and y...
Page 223
Create symbols 223 4. In the library panel (window > library), drag the imageholder symbol to the drawing area. You have now created an instance of the imageholder symbol. This instance is part of the new slides symbol you are creating. 5. With the new instance still selected on the stage, in the pr...
Page 224
224 tutorial: building your first flash application you have now finished creating the symbol called slides. Next, you will create a third symbol that will contain an instance of the slides symbol. As you can see, nesting symbol instances inside other symbols is a common technique of flash authoring...
Page 225
Edit a symbol timeline 225 4. With the symbol instance still selected, in the property inspector, enter 0 in the x and y text boxes. 5. Still in the property inspector, enter slides_mc in the instancename text box. Edit a symbol timeline now that you have created the three symbols, you will edit the...
Page 226
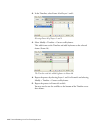
226 tutorial: building your first flash application 2. In the timeline, select frame 20 of layers 1 and 2. Selecting frame 20 of layers 1 and 2 3. Select modify > timeline > convert to keyframes. This adds frames to the timeline and adds keyframes to the selected frames (frame 20). The timeline with...
Page 227
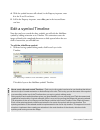
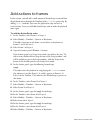
Add actions to frames 227 add actions to frames in this section, you will add a small amount of actionscript to control how the playhead moves through the timeline of the slideshow movie clip. By adding stop() methods, you cause the playhead to stop and wait at certain frames. Later you will add act...
Page 228
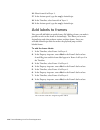
228 tutorial: building your first flash application 16. Select frame 60 of layer 2. 17. In the actions panel, type the stop(); actionscript. 18. In the timeline, select frame 80 of layer 2. 19. In the actions panel, type the stop(); actionscript. Add labels to frames now you will add labels to speci...
Page 229
Add motion tweens 229 add motion tweens a motion tween is a type of animation in which an object moves from one position to another. In this project, you will make the images of food animate upward when the user clicks on a button, which you will add later. To add the motion tweens: 1. In the timeli...
Page 230
230 tutorial: building your first flash application 8. In the property inspector, enter -150 in the y text box. This moves the slideshow movie clip instance upward 150 pixels in the keyframe in frame 20. The motion tween from frame 1 to frame 20 slides the movie clip upward smoothly instead of causi...
Page 231
Edit the main timeline 231 edit the main timeline now you will return to the main timeline of your flash document to add details that affect the entire document. To add layers to the main timeline: 1. Click the scene 1 icon at the top of the timeline. You exit symbol-editing mode and return to the m...
Page 232
232 tutorial: building your first flash application to add the slideshow movieclip to the stage: 1. Click the slideshow layer name to make that layer active. 2. Drag the slideshow symbol from the library panel to the stage and align its upper-left corner with the upper left corner of the stage. 3. W...
Page 233
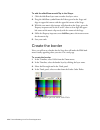
Create the border 233 5. Select the color black (#000000) from the fill color picker. Selecting black from the fill color picker 6. Draw a rectangle on the stage that is approximately the same shape as the stage. Drawing a black rectangle the shape of the stage 7. In the tools panel, select the sele...
Page 234
234 tutorial: building your first flash application 10. In the align panel, click the to stage option so it is selected. This allows the align panel to align the selected rectangle with the stage area. The align panel with the to stage option selected 11. In the align panel, find the match-size area...
Page 235
Create the border 235 13. Still in the align panel, click the align horizontal center button. Clicking the align horizontal center button the rectangle is now precisely centered on the stage. The black rectangle centered on the stage 14. Click outside the stage to deselect the black rectangle. 15. I...
Page 236
236 tutorial: building your first flash application 16. Still in the tools panel, select the color blue with the hexadecimal value #0000ff from the fill color picker. 17. In the tools panel, double-click the rectangle tool. 18. In the rectangle settings dialog box, enter 16 in the corner radius text...
Page 237
Create the border 237 21. In the tools panel, click the selection tool. 22. Click the blue rectangle to select it. 23. With the blue rectangle selected, go to the property inspector panel and enter the following values in the text boxes: ■ w: 700 ■ h: 150 ■ x: 0 ■ y: 0 the properly sized blue rectan...
Page 238
238 tutorial: building your first flash application add a symbol in this section, you will add a blue-colored area to the right side of the stage. This is where the text that describes each menu item and the button for switching menu items will appear. To add a new symbol with a blue shape: 1. Click...
Page 239
Add a text box 239 16. In the tools panel, click the subselection tool. 17. Move the mouse over the lower-left corner of the rectangle until a tiny white box appears next to the arrow pointer. The pointer indicating that the corner of the rectangle can be dragged 18. Drag the corner of the rectangle...
Page 240
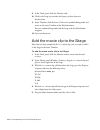
240 tutorial: building your first flash application to add the text box for the menu item title: 1. In the tools panel, click the text tool. 2. In the property inspector, select dynamic text from the text type menu. 3. Still in the property inspector, enter 14 in the font size text box. 4. With the ...
Page 241
Add a text box 241 add the second text box now you will add the second text box, which will hold the description text for each menu item. To add a text box for the descriptions: 1. Click outside the stage to deselect the text box you created in the previous section. 2. In the tools panel, click the ...
Page 242
242 tutorial: building your first flash application 9. In the tools panel, click the selection tool. 10. Click in the stage area outside the shapes you have drawn to deselect them. 11. In the timeline, click the scene 1 link to exit symbol-editing mode and return to the main timeline of the flash do...
Page 243
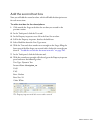
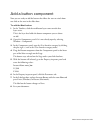
Add a button component 243 add a button component now you are ready to add the button that allows the user to switch from one slide to the next in the slide show. To add the next button: 1. In the timeline, click the nextbutton layer name to make that layer active. This is the layer that holds the b...
Page 244
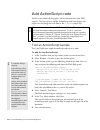
244 tutorial: building your first flash application add actionscript code you have now added all the graphic and text elements that your fma requires. The last step is to add the actionscript code that displays the proper text and image for each slide in the slideshow movie clip. Test an actionscrip...
Page 245
Add actionscript code 245 enter actionscript code for the slide show now you will enter the actionscript code that makes the slideshow animate each new slide into place when the next button is clicked. After you add the code, your flash document will be complete. To add the actionscript code to the ...
Page 246
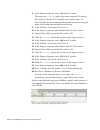
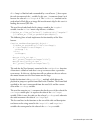
246 tutorial: building your first flash application menu_mc.Description_txt.Text = this["image"+currimage+"desc"]; for (var i:number = 0; i slideshow_mc.Slides_mc["holder"+i].Loadmovie(this["image" +(i)+"uri"],slideshow_mc.Slides_mc.Getnexthighestdepth ()); } slideshow_mc.Slides_mc["holder4"].Loadmo...
Page 247
Add actionscript code 247 the first section of code contains variables that store information about the images that will appear in each section of the slideshow movie clip. /* 0 */ var image0title:string = "summer salad"; var image0desc:string = "butter lettuce with apples, blood orange segments, go...
Page 248
248 tutorial: building your first flash application image0uri contains a string that is the universal resource identifier for the image file that is loaded and displayed in each section of the slides movie clip. The next two lines of code declare two more variables: var currimage:number = 0; var tot...
Page 249
Add actionscript code 249 a for loop is a block of code surrounded by a set of braces { } that repeats for each increment of the i variable. In this case, i increments from 0 to 4 because the value of totalimages is 4. The loadmovie() method can be used to load a flash file or an image file into the...
Page 250
250 tutorial: building your first flash application the line of code immediately after the function definition tells flash to execute the nextmenuitem function when the next_btn instance receives a mouse click. Next_btn.Addeventlistener("click", nextmenuitem); because the nextmenuitem function is no...
Page 251
Resources 251 5. Click publish. Flash saves a swf file copy of your document and an html file in the folder that contains your working fla file. This should be the cafe_townsend directory. 6. Click ok to close the publish settings dialog box. Now that you have completed the flash fma that will be us...
Page 252
252 tutorial: building your first flash application flash training and certification boost your flash skills with hands-on tasks and real-world scenarios. Flash training allows you to roll up your sleeves and get right to work. Choose between instructor-led and online training, or combine them to cr...
Page 253
Resources 253 additional resources the following macromedia web pages include reference materials and links to third-party flash resources: ■ websites devoted to macromedia flash and flash developers can be found at www.Macromedia.Com/go/tn_12046 . ■ macromedia press (macromedia’s publishing divisio...
Page 254
254 tutorial: building your first flash application 000_exploringstudio.Book page 254 tuesday, august 30, 2005 9:30 am.
Page 255
255 10 chapter 10 tutorial: building a video player (flash professional only) this tutoral guides you through the process of creating a simple video player by using some of the authoring features in macromedia flash basic 8 and flash professional 8. After it is created, you can deploy the video play...
Page 256
256 tutorial: building a video player (flash professional only) in this tutorial, after examining an existing flash document, you’ll begin by creating a new flash document and end by publishing the application for web playback. The tutorial should take approximately 20 to 30 minutes to complete. Exa...
Page 257
Examine the completed application 257 open the authoring document it’s helpful to look at the completed authoring fla file to see how the author designed the application. To view the authoring version of the file in flash: 1. In flash, select file > open. 2. Browse to the completed file in the local...
Page 258
258 tutorial: building a video player (flash professional only) encode a video file the first thing you will do is convert a quicktime video file (mov) to a flash video file (flv). To convert the video file: 1. Start the flash video encoder application. 2. Drag the cafe_townsend_chef.Mov file from t...
Page 259
Create a new flash document 259 4. In the flash video encoding settings dialog box, select flash 8 - medium quality (400kbps) from the flash video encoding profile menu. This setting is the default. This action applies only a small amount of compression to the file. 5. Click ok to close the settings...
Page 260
260 tutorial: building a video player (flash professional only) open a new document now you’re ready to create your own version of the fma. To create a new document: 1. Start flash. 2. Select file > new. 3. In the new document dialog box, select flash document and then click ok. 4. Select file > sav...
Page 261
Add a media component 261 4. Click ok. 5. Save your work. For more information about setting document properties, see “creating or opening a document and setting properties” in using flash. Add a media component next, you will add a media playback component to the stage. This component will contain ...
Page 262
262 tutorial: building a video player (flash professional only) to add a media component: 1. Select window > components to open the components panel. 2. In the components panel, click the plus sign (+) next to the flv playback - player 8 category. 3. Drag an flvplayback component to the stage. The n...
Page 263
Add a media component 263 4. With the new component still selected on the stage, enter the following values in the property inspector: ■ w: 360 ■ h: 240 ■ x: 0 ■ y: 0 this makes the component the same size as the stage and centers it on the stage. The property inspector with the proper values entere...
Page 264
264 tutorial: building a video player (flash professional only) 10. Save your work. 11. To test your document, select control >test movie. The document plays in the test movie window. You can control the playback of the video file with the controls at the bottom of the stage. Publish your document t...
Page 265
The next steps 265 the next steps now that you have completed the flash video player, you would normally insert the swf file into a real-world web page. This illustration demonstrates what a web page containing the video_pod.Swf file might look like. The video_pod.Swf file inserted in a web page 000...
Page 266
266 tutorial: building a video player (flash professional only) 000_exploringstudio.Book page 266 tuesday, august 30, 2005 9:30 am.
Page 267
267 4 part 4 assembling and deploying your website in this part, you’ll assemble the cafe townsend sample website and add the finishing touches before you publish the website. Then you’ll learn how you can easily maintain a website. You’ll use macromedia dreamweaver 8 to put all the pieces you’ve cr...
Page 268
000_exploringstudio.Book page 268 tuesday, august 30, 2005 9:30 am.
Page 269
269 11 chapter 11 tutorial: adding content to pages this tutorial shows you how to add content to web pages in macromedia dreamweaver 8. You can add many different kinds of content to web pages, including graphics, macromedia flash files, macromedia flash video files, and text, to name a few. After ...
Page 270
270 tutorial: adding content to pages you’ll also need to use the assets that you created in chapter 8, “tutorial: creating a page banner” and chapter 9, “tutorial: building your first flash application”. If you did not complete those tutorials, you can find the finished assets in the completed_file...
Page 271
Review your task 271 review your task in this tutorial you’ll add assets to the home page for cafe townsend, a fictional restaurant. You’ll learn how to add images, a macromedia flash file, a macromedia flash video file, and text. When you’re finished, the page will look like this: you’ll notice tha...
Page 272
272 tutorial: adding content to pages if you’ve completed the previous tutorials in this book, the required assets for this tutorial are saved in your cafe_townsend root folder. If you haven’t been doing the tutorials in order, see “locate your files” on page 269 for how to locate the required files...
Page 273
Insert images 273 4. Select the banner_graphic.Jpg file and click ok. Dreamweaver replaces the image placeholder with the banner graphic for cafe townsend. 5. Click once outside the table to deselect the image. 6. Save the page (file > save). No te if you didn’t complete “creating a page banner,” op...
Page 274
274 tutorial: adding content to pages insert an image by using the insert menu 1. Click once inside the third row of the first table (two rows below the banner graphic you just inserted, just above the colored table cells). 2. Select insert > image. 3. In the select image source dialog box, navigate...
Page 275
Insert images 275 insert an image by dragging 1. Click once inside the last row of the last table on the page (just below the colored table cells). 2. In the files panel (window > files), locate the body_main_footer.Gif file (it’s inside the images folder), and drag it to the insertion point in the ...
Page 276
276 tutorial: adding content to pages insert an image from the assets panel 1. Click once inside the center column of the three-columned table (the first table cell that is colored light tan). 2. In the property inspector (window > properties), select center from the horz pop-up menu, and select top...
Page 277
Insert images 277 4. Click the assets tab in the files panel, or select window > assets. Your site assets appear. 5. If images view isn’t selected, click images to view your image assets. 6. In the assets panel, select the street_sign.Jpg file. Images button ab ou t.. . The assets panel you can use ...
Page 278
278 tutorial: adding content to pages 7. Do one of the following: ■ drag the street_sign.Jpg file to the insertion point in the center table cell. ■ click insert at the bottom of the assets panel. The street_sign.Jpg graphic appears on the page. 8. Click once outside the table to deselect the image....
Page 279
Insert and play a flash file 279 insert and play a flash file next, you’ll insert a flash file that plays a photographic slide show of cafe townsend’s featured food items. The flash file you’ll insert is a flexible messaging area—or fma—file. An fma is a common type of flash application that display...
Page 280
280 tutorial: adding content to pages 3. Select insert > media > flash. In the select file dialog box, browse to the flash_fma.Swf file (it’s in the cafe_townsend root folder of your site), select the file, and click ok. If the object tag accessibility attributes dialog box appears, click ok. A flas...
Page 281
Insert and play a flash file 281 4. The flash content placeholder should remain selected after you insert the swf file, as long as you don’t click anywhere else on the page. If it’s not selected, select the flash content placeholder by clicking it. 5. In the property inspector (window > properties),...
Page 282
282 tutorial: adding content to pages insert flash video next you’ll insert a flash video file, using the asset provided. 1. With the index.Html page open in the dreamweaver document window, click once above the graphic that you placed in the center column of the three-columned table. In the previou...
Page 283
Insert flash video 283 4. In the url text box, specify a relative path to the cafe_townsend_home.Flv file by clicking browse, navigating to the cafe_townsend_home.Flv file (located in cafe_townsend root folder of your site), and selecting the flv file. 5. Select halo skin 2 from the skin pop-up menu...
Page 284
284 tutorial: adding content to pages 6. In the width and height text boxes, do the following: ■ in the width text box, type 180. ■ in the height text box, type 135 and press enter (windows) or return (macintosh). The value in the width and height text boxes specifies the width and height in pixels ...
Page 285
Insert text 285 8. Click ok to close the dialog box and add the flash video content to your web page. The insert flash video command generates a video player swf file and a skin swf file that are used to display your flash video content on a web page. (you may need to click the refresh button in the...
Page 286
286 tutorial: adding content to pages insert body text 1. In the files panel, locate the sample_text.Txt file (in the cafe_townsend root folder) and double-click the file’s icon to open it in dreamweaver. You’ll notice that this window is in code view, and cannot be switched to design view (the view...
Page 287
Insert text 287 the text from the text file appears in the selected table cell. Depending on your monitor resolution, the three-columned table widens to accommodate the text. Don’t worry about how this looks right now. In the next tutorial, you’ll learn how to use css to format the text so that ever...
Page 288
288 tutorial: adding content to pages insert text for a navigation bar next you’ll insert text for a navigation bar. However, the text won’t look like a navigation bar until you format it in the next tutorial. 1. Click once in the first column of the three-columned table (the column that is colored ...
Page 289
Insert text 289 4. Repeat the previous step until you’ve entered the following words with a space between each one: articles, special events, location, menu, contact us. Do not press enter (windows) or return (macintosh) when you type. Use only the spacebar to separate words, and let the words wrap ...
Page 290
290 tutorial: adding content to pages 6. In the property inspector (window > properties), select top from the vert pop-up menu. This aligns the text you just typed to the top of the table cell. 7. Save your page. Create links a link is a reference, inserted in a web page, that points to another docu...
Page 291
Create links 291 1. With the index.Html page open in the document window, select the word cuisine that you typed in the first cell of the three-columned table. Be careful to select the word cuisine only, and not the space after it. 2. In the property inspector (window > properties), click the folder...
Page 292
292 tutorial: adding content to pages 5. Repeat the previous steps to link each word or set of words that you typed for the navigation. You want to create six more links: one for chef ipsum, articles, special events, location, menu, and contact us. Link each word or set of words to the menu.Html pag...
Page 293
Preview your page in a browser 293 1. Make sure the index.Html file is open in the document window. 2. Press the f12 key (windows) or option+f12 (macintosh). Your primary browser starts if it’s not running already and displays the index page. 3. (optional) switch back to dreamweaver to make any nece...
Page 294
294 tutorial: adding content to pages 000_exploringstudio.Book page 294 tuesday, august 30, 2005 9:30 am.
Page 295
295 12 chapter 12 tutorial: formatting your page with css this tutorial shows you how to format text on your page using cascading style sheets (css) in dreamweaver. Css provides you with greater control over the appearance of your page by letting you format and position text in ways that html cannot...
Page 296
296 tutorial: formatting your page with css locate your files in this tutorial, you’ll begin with the cafe townsend index page to which you added content in chapter 11, “tutorial: adding content to pages.” if you did not complete that tutorial, you can either complete it before proceeding, or you ca...
Page 297
Review your task 297 review your task in this tutorial, you’ll use cascading style sheets (css) to format the text on the home page for cafe townsend, a fictional restaurant. You’ll create different kinds of css rules to format the body text. You’ll also format the link text on the left side of the ...
Page 298
298 tutorial: formatting your page with css for more information about css, proceed to the next section. To start creating css right away, proceed to “create a new style sheet” on page 300 . Learn about css cascading style sheets (css) are a collection of formatting rules that control the appearance...
Page 299
Learn about css 299 the term cascading refers to your ability to apply multiple styles to the same element or web page. For example, you can create one css rule to apply color and another rule to apply margins, and apply them both to the same text on a page. The defined styles “cascade” to the eleme...
Page 300
300 tutorial: formatting your page with css create a new style sheet first, you’ll create an external style sheet that contains a css rule that defines a style for paragraph text. When you create styles in an external style sheet, you can control the appearance of multiple web pages from a central l...
Page 301
Create a new style sheet 301 3. Save the page (file > save) as cafe_townsend.Css. When you save the style sheet, make sure you save it in the cafe_townsend folder (the root folder of your website). 4. Type the following code in the style sheet: p{ font-family: verdana, sans-serif; font-size: 11px; c...
Page 302
302 tutorial: formatting your page with css don’t forget to include a semicolon at the end of each line, after the property values. When you’re finished, the code should look like following example: 5. Save the style sheet. Next you’ll attach the style sheet to the index.Html page. Attach a style sh...
Page 303
Attach a style sheet 303 1. In the document window, open the cafe townsend index.Html file. (you can click its tab if it’s already open.) 2. Select the text of the first paragraph that you pasted into the page in chapter 11, “tutorial: adding content to pages” . 3. Look in the property inspector and...
Page 304
304 tutorial: formatting your page with css 5. In the css styles panel (window > css styles), click the attach style sheet button in the lower-right corner of the panel. 6. In the attach external style sheet dialog box, click browse and browse to the cafe_townsend.Css file that you created in the pr...
Page 305
Explore the css styles panel 305 explore the css styles panel the css styles panel lets you track the css rules and properties that affect a currently selected page element, or the rules and properties that affect an entire document. It also lets you modify css properties without opening an external...
Page 306
306 tutorial: formatting your page with css you set the background color for the page in chapter 6, “tutorial: creating a table-based page layout” by using the modify page properties dialog box. When you set page properties in this manner, dreamweaver writes a css style that is internal to the docum...
Page 307
Create a new css rule 307 create a new css rule in this section you’ll use the css styles panel to create a custom css rule, or class style. Class styles let you set style attributes for any range or block of text, and can be applied to any html tag. For more information on different types of css ru...
Page 308
308 tutorial: formatting your page with css 4. Select cafe_townsend.Css from the define in pop-up menu. It should be selected by default. 5. Click ok. The css rule definition dialog box appears, indicating that you are creating a class style called .Bold in the cafe_townsend.Css file. 6. In the css ...
Page 309
Apply a class style to text 309 7. Click ok. 8. Click all at the top of the css styles panel. 9. Click the plus (+) button next to the cafe_townsend.Css category if the category isn’t already expanded. You’ll see that dreamweaver added the .Bold class style to the list of rules defined in the extern...
Page 310
310 tutorial: formatting your page with css 3. Repeat step 2 to apply the bold class style to the first four words of the second paragraph. 4. Save your page. Format the navigation bar text next you’ll use css to apply styles to the link text for the navigation bar. Many web pages use images of colo...
Page 311
Format the navigation bar text 311 create a new rule for the navigation 1. Open the cafe_townsend.Css file if it isn’t already open, or click on its tab to see it. 2. Define a new rule by typing the following code in the file, after the .Bold class style: .Navigation { } this is an empty rule. The c...
Page 312
312 tutorial: formatting your page with css 5. In the css styles panel, make sure all mode is selected, select the new .Navigation rule and click edit style in the lower-right corner of the panel. 000_exploringstudio.Book page 312 tuesday, august 30, 2005 9:30 am.
Page 313
Format the navigation bar text 313 6. In the css rule definition dialog box, do the following: ■ enter verdana, sans-serif in the font text box. ■ select 16 from the size pop-up menu, and select pixels from the pop-up menu immediately to the right of the size pop-up menu. ■ select normal from the st...
Page 314
314 tutorial: formatting your page with css 8. In the css styles panel, make sure the .Navigation rule is selected and click show list view. List view reorganizes the properties pane to display an alphabetical list of all available properties (in contrast to set properties view, the previous view, w...
Page 315
Format the navigation bar text 315 10. Enter #993300 as the hexadecimal value and press enter (windows) or return (macintosh). 11. Locate the display property (you might need to scroll down), click once in the column to the right, and select block from the pop-up menu. 12. Locate the padding propert...
Page 316
316 tutorial: formatting your page with css 14. Click show set properties so that only your set properties appear in the properties pane. 15. Click on the cafe_townsend.Css file to display it. You’ll see that dreamweaver has added all of the properties you specified to the file. 16. Save the cafe_to...
Page 317
Format the navigation bar text 317 apply the rule 1. With the index.Html page open in the document window, click the word cuisine so that the insertion point is somewhere in the word. 2. In the tag selector, click the rightmost tag. This action selects all of the text for the specified tag, or link....
Page 318
318 tutorial: formatting your page with css 4. Repeat step 1 through 3 for each of the individual links in the navigation bar. You must assign a navigation class style to each tag or link, so it’s important that you use the tag selector to select each link individually, and then assign the class sty...
Page 319
Format the navigation bar text 319 add a rollover effect now you’ll add a rollover effect so that the background color of the navigation bar blocks change whenever the mouse pointer passes over one of the links. To add a rollover effect, add a new rule that contains the :hover pseudo-class. 1. Open ...
Page 320
320 tutorial: formatting your page with css 4. Click once at the end of the rule and press enter (windows) or return (macintosh) a few times to create some space. 5. Paste (edit > paste) the copied text in the space you just created. 6. Add the :hover pseudo-class to the pasted .Navigation selector,...
Page 321
(optional) center the contents of the page 321 7. In the new .Navigation:hover rule, replace the current background-color (#993300) with #d03d03. 8. Save the file and close it. 9. Open the index.Html file in the document window and preview the page in a browser (file > preview in browser). When you ...
Page 322
322 tutorial: formatting your page with css 1. With the index.Html page open in the document window, click the tag in the tag selector. Clicking the tag selects everything between the open and close tags in the document window. To see the selection, click code view at the top of the document window....
Page 323
(optional) center the contents of the page 323 2. In the property inspector (window > properties), click the align center button. Dreamweaver inserts css the page. In design view, a dotted line borders the area that the tags center. 3. Save the page. Your page is now finished. The last task of build...
Page 324
324 tutorial: formatting your page with css 000_exploringstudio.Book page 324 tuesday, august 30, 2005 9:30 am.
Page 325
325 13 chapter 13 tutorial: publishing your site this tutorial shows you how to set up a remote site with macromedia dreamweaver 8 and publish your web pages. A remote site is usually a place on a remote computer, running a web server, that holds copies of your local files. Users access the remote s...
Page 326
326 tutorial: publishing your site the procedures described in this tutorial work best if your remote root folder is empty. If your remote site already contains files, create an empty folder in your remote site (on the server), and use that empty folder as your remote root folder. You also need to h...
Page 327
Define a remote folder 327 2. In dreamweaver, select site > manage sites. 3. In the manage sites dialog box, select the cafe townsend site. If you did not define the cafe townsend site, create a local folder for the site before you proceed. For more information, see “tutorial: setting up your site a...
Page 328
328 tutorial: publishing your site 7. Select an access option. The most common methods for connecting to a server on the internet are ftp and sftp; the most common method for connecting to a server on your intranet, or to your local computer if you’re using that as a web server, is local/network. If...
Page 329
Upload your local files 329 upload your local files after you set up your local and remote folders, you can upload your files from your local folder to the web server. To make your pages publicly accessible, you must upload them even if the web server is running on your local computer. 1. In the fil...
Page 330
330 tutorial: publishing your site troubleshoot the remote folder setup (optional) a web server can be configured in many ways. The following list provides information about some common issues you may encounter in setting up a remote folder, and how to resolve them: ■ the dreamweaver ftp implementat...
Page 331
Troubleshoot the remote folder setup (optional) 331 ■ many servers use symbolic links (unix), shortcuts (windows), or aliases (macintosh) to connect a folder on one part of the server’s disk with another folder elsewhere. For example, the public_html subdirectory of your home directory on the server...
Page 332
332 tutorial: publishing your site 000_exploringstudio.Book page 332 tuesday, august 30, 2005 9:30 am.
Page 333
333 14 chapter 14 tutorial: setting up your website for contribute users macromedia contribute enables you and your users to maintain, distribute, and control content on the web. You can easily connect to your website with contribute, and send connection keys to set up your users so that they can ed...
Page 334
334 tutorial: setting up your website for contribute users review your task in this tutorial you’ll use contribute to connect to your website and send connection keys so that others can edit the website. You’ll also set up user roles and edit role settings to control the level of editing that users ...
Page 335
Connect to a website as an administrator 335 connect to a website as an administrator after you create the cafe townsend website, you can use contribute to connect to the website. 1. In contribute, select edit > my connections (windows) or contribute > my connections(macintosh). The my connections d...
Page 336
336 tutorial: setting up your website for contribute users set administrative settings now that you’ve connected to the cafe townsend website and established yourself as an administrator, you can set some administrative settings. Contribute administrative settings are a collection of settings that a...
Page 337
Create a user role 337 create a user role when contribute users connect to a website, they are prompted to indicate which role they belong to. You’ll create a role for chefs who need to update the menu on the cafe townsend sample website. 1. Select edit > administer websites (windows) or contribute ...
Page 338
338 tutorial: setting up your website for contribute users edit a role’s settings now you’re ready to determine which folders the users who have the chef role can access and what kind of modifications those users can make to the cafe townsend website. 1. In the administer website dialog box, select ...
Page 339
Edit a role’s settings 339 8. Click the select menu_images button at the bottom. 9. In the edit “chef” settings dialog box, select the editing category from the list on the left. 10. In the other editing options section, select require alt text for images. 11. Select the shared assets category from ...
Page 340
340 tutorial: setting up your website for contribute users c. Next, click in the alt text column beside the special_salmon image. D. Type image of saturday salmon special. E. Next, click in the alt text column beside the special_vegetarian image. F. Type image of sunday vegetarian special. G. Click ...
Page 341
Create a connection key and send it to users 341 6. Enter a password that you can remember, and then enter the password again. If you were actually going to make this key available to users, you would need to inform them of this password. 7. Click next. 8. Review the summary screen, and then click d...
Page 342
342 tutorial: setting up your website for contribute users 000_exploringstudio.Book page 342 tuesday, august 30, 2005 9:30 am.
Page 343
343 index a accessibility in the flash authoring environment 95 accessing documentation contribute 29 contribute and flashpaper 29 dreamweaver 18 fireworks 27 flash 21 actions panel (in flash) 83 activating studio products 16 alternative text 175 animation, frame-by-frame and tweened 129 application...
Page 344
344 index d default layout command, for panels 86 deleting frames or keyframes 68 layers and layer folders 74 design view 49 discussing help in livedocs 39 document toolbar (in dreamweaver) 49 document window basics 48 page size and download time 51 status bar 50 tag selector 50 title bar 48 window ...
Page 345
Index 345 g gradients on clipboard preference (in flash) 90 grids editing 81 showing 80 snapping to 80 guide layers 75 guides clearing 80 locking 79 moving 79 removing 79 setting preferences 80 showing 79 snapping to 79 h hand tool 51, 62 help accessing 33 changing font size 34 context sensitive 38 ...
Page 346
346 index layers about 69 add layer button 70 changing layer height 72 changing number of layers displayed 72 changing order of 74 changing outline color 71 copying 73 creating 70 deleting 74 editing 72 guide layers 75 hiding and showing 70, 71 locking 73 organizing 74 renaming 73 selecting 72 viewi...
Page 347
Index 347 preferences bitmaps on clipboard (windows only) 90 clipboard 90 drawing 90 font mapping default 91 freehand text on clipboard 90 general (in flash) 88 gradients on clipboard (windows only) 90 highlight color 89 named anchor on scenes 89 on launch options 88 pict settings for clipboard (mac...
Page 348
348 index t table header menu 168 table of contents 36 tables about 168 creating layout with 163–180 expanded tables mode 170 inserting 166–170 setting properties 170–174 tag selector 289 test connection button 328 text inserting 286 selecting 286 text files in code view 286 third-party resources 25...
Page 349
Index 349 window size pop-up menu 51 work area, showing and hiding 62 work environment 103 workspace 103 about 45 contribute 112 dreamweaver 45 fireworks 103 flash 59 flashpaper 118 floating layout 46 z zoom tool (in flash) 61 zooming 61 000_exploringstudio.Book page 349 tuesday, august 30, 2005 9:3...
Page 350
350 index 000_exploringstudio.Book page 350 tuesday, august 30, 2005 9:30 am.

