- DL manuals
- OHAUS
- Scales
- DISCOVERY BALANCE
- Service Manual
OHAUS DISCOVERY BALANCE Service Manual - Service Manual
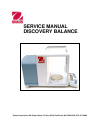
SERVICE MANUAL
DISCOVERY BALANCE
The information contained in this manual is believed to be accurate at the time of publication, but Ohaus
Corporation assumes no liability arising from the use or misuse of this material. Reproduction of this
material is strictly prohibited.
Material in this manual is subject to change.
© Copyright 2007 Ohaus Corporation, all rights reserved.
TM Registered trademark of Ohaus Corporation.
Summary of DISCOVERY BALANCE
Page 1
Service manual discovery balance ohaus corporation 19a chapin road, p.O. Box 2033, pine brook, nj 07058-2033 (973) 377-9000
Page 3: Service Manual
Service manual discovery balance the information contained in this manual is believed to be accurate at the time of publication, but ohaus corporation assumes no liability arising from the use or misuse of this material. Reproduction of this material is strictly prohibited. Material in this manual i...
Page 5
Table of contents page no. Chapter 1 introduction 1.1 introduction ................................................................................................................1-1 1.2 service facilities..................................................................................................
Page 6
Table of contents page no. Appendix a standard calibration a.1 automatic internal calibration (advanced auto cal) ................................................ A-2 a.2 span calibration ....................................................................................................... A-3 a.3 ...
Page 7
Table of contents list of illustrations (cont.) figure no. Title page no. 3-7 scale drawing of discovery balance display parts ...............................................3-5 3-8 removing screws to separate display housing from bottom of balance ..............3-6 3-9 display balance load cell cov...
Page 8
Table of contents list of illustrations (cont.) figure no. Title page no. 3-52 solder points on bottom of load cell pcb ..........................................................3-27 3-53 up/down stop plate ............................................................................................3...
Page 9
Table of contents list of illustrations (cont.) figure no. Title page no. 3-98 proper position of incal weight cover ................................................................3-48 3-99 inserting screws in display cable shield plate, after checking that pan socket is centered in hole in middle ...
Page 10
Table of contents ohaus corporation www.Ohaus.Com vi discovery balance service manual.
Page 11
Chapter 1 introduction 1.1 introduction this service manual contains the information needed to perform routine maintenance and service on the discovery balances. The contents of this manual are contained in five chapters, three appendixes and are listed as follows: chapter 1 introduction – a guide s...
Page 12
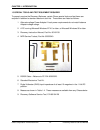
Chapter 1 introduction 1.3 special tools and test equipment required to properly service the discovery balances, certain ohaus special tools and test items are required in addition to standard electronic tool kits. These items are listed as follows: 1. Alternate voltage power adapter if local power ...
Page 13
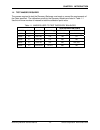
Chapter 1 introduction 1.4 test masses required the masses required to test the discovery balances must meet or exceed the requirements of the class specified. The calibration points for the discovery models are listed in table 1-1. Use the minimum number of masses to total the calibration point val...
Page 14
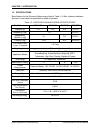
Chapter 1 introduction 1.5 specifications specifications for the discovery balances are listed in table 1-2. After a balance has been serviced, it must meet the specifications listed in the table. Table 1-2. Discovery balance model specifications model number dv 114c dv 214c dv 314c dv215cd capacity...
Page 15
Chapter 2 diagnosis 2.1 troubleshooting this section of the manual contains troubleshooting information. Information is contained to isolate specific problems using table 2-1 – 2-5, diagnostic guide, and table 2-6, error codes. Follow all directions step by step. Make certain that the work area is c...
Page 16
Chapter 2 diagnosis table 2-1. Balance will not turn on symptom probable cause remedy balance will not turn on. Main power source is off. On/zero off switch defective or actuating fingers on top housing defective. Main pc board is defective. Check the main power source outlet for proper voltage. See...
Page 17
Chapter 2 diagnosis table 2-2. Balance does not respond to front panel controls. Symptom probable cause remedy balance does not respond to front panel controls. Pc board switch or actuating fingers on top housing are defective. Display pc board is defective. Main pc board is defective open the balan...
Page 18
Chapter 2 diagnosis table 2-4. Balance cannot calibrate using external weights symptom probable cause remedy balance can be turned on but will not calibrate manually. Incorrect weights. Balance is set for legal for trade operation. Balance not level. Balance is unstable. Verify that proper weights a...
Page 19
Chapter 2 diagnosis table 2-5. Balance cannot calibrate internally symptom probable cause remedy balance can be turned on but will not calibrate using internal calibration. Balance may be unstable. The incal weight hardware may be dirty, mis-aligned or defective. Calibration motor assembly may be de...
Page 20
Chapter 2 diagnosis 2.3 error codes the following table lists error codes, possible causes and remedies. If the problem persists, contact ohaus corporation. Table 2-6. Error codes error code probable cause remedy error 7.0 unstable weight reading when defining the reference weight eliminate vibratio...
Page 21
Chapter 3 repair procedures 3.1 repair procedures this section of the manual contains detailed disassembly procedures of the discovery balance. Section 5 of this manual contains exploded views and associated parts lists for all models. Refer to section 5 drawings before disassembling the balance. Co...
Page 22
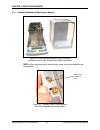
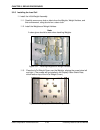
Chapter 3 repair procedures 3.1.1 housing disassembly/opening the balance 1. Remove the two screws shown and then the third one on the bottom. Figure 3-2. Removing back cover. 2. Remove the back cover. Back screw figure 3-3. Balance with back cover removed. Ohaus corporation www.Ohaus.Com 3-2 discov...
Page 23
Chapter 3 repair procedures 3.1.1 housing disassembly/opening the balance 3. Tip the balance on its back. 4. Locate the screw shown in figure 3-4. 5. Turn the screw counterclockwise four to five turns. Figure 3-4. Scale bottom, showing draft shield assembly. 6. Set the balance back on its feet. 7. T...
Page 24
Chapter 3 repair procedures 3.1.1 housing disassembly/opening the balance figure 3-5. Discovery balance with cover removed, and also cover of main printed circuit board removed. Note: when replacing cover, place keyway holes over cone-shaped brass screw heads. Keyway hole on balance cover figure 3-6...
Page 25
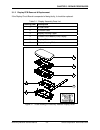
Chapter 3 repair procedures 3.1.2 display pcb removal & replacement if the display circuit board is suspected of being faulty, it should be replaced. Table 3-1. Display assembly parts list drawing item description 1 in use cover 2 function label 3 display housing upper 4 printed circuit board (pcb) ...
Page 26
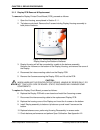
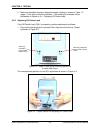
Chapter 3 repair procedures 3.1.2 display pcb removal & replacement to remove the display printed circuit board (pcb), proceed as follows: 1. Open the housing, as explained in section 3.1.1. 2. Tip balance onto back. Remove the 2 screws holding display housing assembly to back plate of balance. Figu...
Page 27
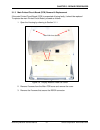
Chapter 3 repair procedures 3.1.3 main printed circuit board (pcb) removal & replacement if the main printed circuit board (pcb) is suspected of being faulty, it should be replaced. To replace the main printed circuit board, proceed as follows: 1. Open the housing by referring to section 3.1.1. Main...
Page 28
Chapter 3 repair procedures 3.1.3 main printed circuit board (pcb) removal & replacement battery eeprom chip pcb screw cable connections cable connection pcb screws figure 3-10. Discovery balance printed circuit board (pcb). Caution when handling the printed circuit board, handle by edges only! Do n...
Page 29
Chapter 3 repair procedures 3.1.3 main printed circuit board (pcb) removal & replacement 8. Install the replacement pcb, carefully aligning the 3 screw holes and the rs232 screw holes. 9. Install the 2 screws that secure the rs232 connector. 10. Install the 3 screws that secure the pcb. 11. Insert t...
Page 30
Chapter 3 repair procedures 3.1.4 incal weight hardware disassembly & testing if the weight mechanism appears to be unstable, the first remedy should be to perform an incal weight mechanism test. This test is done with the discovery balance software service tool (see appendix c, especially c.5 and c...
Page 31
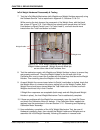
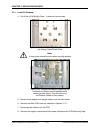
Chapter 3 repair procedures 3.1.4 incal weight hardware disassembly & testing 4. Lift off the incal weight cover. It does not have screws. Figure 3-14. The incal weight cover sits beneath the display cable shield plate. Note: a clean glove should be worn when handling weights. Figure 3-15. Weights a...
Page 32
Chapter 3 repair procedures incal weight hardware disassembly & testing 7. Test the incal weight mechanism (with weights and weight holders removed) using the software service tool as explained in appendix c, sections c.5 & c.6. While running the test, observe the movement of the weight arms, with t...
Page 33
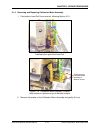
Chapter 3 repair procedures 3.1.5 removing and replacing calibration motor assembly 1. First perform load cell cover removal, following section 3.2.1. Figure 3-17. Calibration motor assembly, installed to the right of the load cell. Screws securing calibration motor assembly to balance chassis. Figu...
Page 34
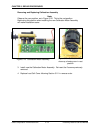
Chapter 3 repair procedures removing and replacing calibration assembly note: observe the cam position, as in figure 3-20. This is the rest position. Replicating this position when installing the new calibration motor assembly will make installation easier. Figure 3-19. Calibration motor assembly fi...
Page 35
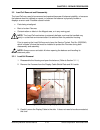
Chapter 3 repair procedures 3.2 load cell removal and disassembly the load cell may need to be removed and repaired because of balance instability, or because the balance does not calibrate or repeat, or because the balance is physically broken or displays an error code. Possible causes include: • p...
Page 36
Chapter 3 repair procedures 3.2.1 load cell removal 4. Lift off the incal weight cover. It does not have screws. Figure 3-22. The incal weight cover sits beneath the display cable shield plate note: a clean glove should be worn when handling weights figure 3-23. Weights and weight holders can be rem...
Page 37
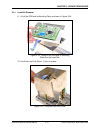
Chapter 3 repair procedures 3.2.1 load cell removal 9. Lift off the pcb and its mounting plate, as shown in figure 3-24. Figure 3-24. Lifting off the pcb and its mounting plate from the load cell. 10. Lift off the load cell cover. It has no screws. Figure 3-25. Lifting off load cell cover. Discovery...
Page 38
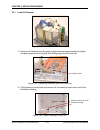
Chapter 3 repair procedures 3.2.1 load cell removal figure 3-26. Load cell with cover removed. 11. Remove the cantilever arm by applying slight downward pressure with the fingers and press upward with the thumb, then sliding away from the load cell. Cantilever arm figure 3-27. Removing cantilever ar...
Page 39
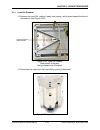
Chapter 3 repair procedures 3.2.1 load cell removal 13. Remove the load cell, jostling it away from keyway, which faces towards the front of the balance. (see figure 3-29.) load cell keyway inside chassis figure 3-29. Load cell chassis. Note position of keyway, facing towards front of balance. 14. D...
Page 40
Chapter 3 repair procedures 3.2.2 load cell disassembly 1. First follow procedures for load cell removal in section 3.2.1. 2. Remove the two screws shown (on each side) to remove the top and bottom covers. Be careful of the flexure arm assemblies. Figure 3-31: removing screws from figure 3-32. Load ...
Page 41
Chapter 3 repair procedures 3.2.2 load cell disassembly 3. Tip the load cell onto the back frame and loosen the 2 screws that connect the bottom flexure arm to the frame, no more than half a turn. This is preparation for installing the fixture to protect the flexure arms. Screw connecting bottom fle...
Page 42
Chapter 3 repair procedures 3.2.2 load cell disassembly 5. Be sure to have the correct service toolset as shown below. Brass fixture thumb screws allen keys brass brackets centering pin threaded rod brass rod figure 3-37. Service toolset, part no. 80030340, containing two allen keys, one brass fixtu...
Page 43
Chapter 3 repair procedures 3.2.2 load cell disassembly 7. Install the 2 thumb screws from service toolset, as shown. Hanger thumb screws figure 3- 40. Thumb screws and hanger on top of load cell. It is now safe to remove the load flexure. Load flexure screws figure 3-41. Screws securing load flexur...
Page 44
Chapter 3 repair procedures 3.2.4 load cell disassembly load flexure aluminum washers steel washers screws figure 3-42. Load cell with load flexure, 2 screws and 4 washers removed. Note: all flexures must be perfectly straight. If they are even slightly bent they need to be replaced for the balance ...
Page 45
Chapter 3 repair procedures 3.2.2 load cell disassembly there are two fine connecting wires called wire conductor strips soldered to the load cell’s pcb and to a smaller pcb on the top-front of the ratio beam. These wires must be carefully disconnected from the load cell’s pcb in order to further di...
Page 46
Chapter 3 repair procedures 3.2.2 load cell disassembly before proceeding with load cell disassembly, secure the ratio beam with stabilizing rods from the service toolset in the front and rear. This will lock ratio beam to the yoke and prevent it from falling down when the up/down stop plate is remo...
Page 47
Chapter 3 repair procedures 3.2.2 load cell disassembly 17. Remove the two screws on the top of the load cell pcb. Carefully remove stepped washer from rear screw hole, and lift off the pcb. Figure 3-49. Removing screws from pcb. Note stepped washer under rear screw. Figure 3-50. Magnet cover withou...
Page 48
Chapter 3 repair procedures 3.2.2 load cell disassembly 18. Remove the up/down stop plate that controls the ratio beam’s movement. Figure 3-53. Up/down stop plate. Figure 3-54. Removing temperature conductor. 19. Remove the temperature conductor, as shown in figure 3-53. 20. Remove the two screws th...
Page 49
Chapter 3 repair procedures 3.2.2 load cell disassembly 21. Remove the hanger by removing thumb screws, which will release the brass fixture inserted earlier. Figure 3-58. Load cell without hanger and brass fixture. Note uncovered magnet in background. Figure 3-57. Removing thumb screws that hold ha...
Page 50
Chapter 3 repair procedures 3.2.2 load cell disassembly 23. Gently lift the ratio beam out of the load cell note: the ratio beam is a critical part – handle with care! Figure 3-60. Ratio beam, removed from load cell. 3.2.3 load cell cleaning all parts should be inspected and cleaned. Pay special att...
Page 51
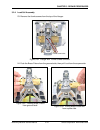
Chapter 3 repair procedures 3.2.4. Load cell assembly the first several steps of load cell assembly are critical. Check at each step that parts are correctly aligned in order to ensure the balance will function properly. 1. Set the ratio beam assembly in place and loosely install the 2 screws on lef...
Page 52
Chapter 3 repair procedures 3.2.4. Load cell assembly 4. Once the ratio beam is centered, remove the brass rod in the front and the threaded rod in the back, and gently move the ratio beam up and down from the rear, checking for any friction. If there is friction, replace the brass rod and repeat th...
Page 53
Chapter 3 repair procedures 3.2.4 load cell assembly 5.5. Loosen top 2 flexure screws. 5.6. Screw in the threaded rod to snugly hit the ratio beam. 5.7. Remove flexure screws and flexures. 5.8. Examine flexures. If they are bent, replace them. 5.9. Loosen threaded rod and insert centering pin in tem...
Page 54
Chapter 3 repair procedures 3.2.4 load cell assembly 5.20. Remove brass rod and check vertical centering over temperature sensor tube and around magnet. 5.21. Tighten screws on yoke, checking again to ensure ratio beam remains centered. 5.22. Re-tighten threaded rod. 5.23. Re-install hanger and thum...
Page 55
Chapter 3 repair procedures 3.2.4 load cell assembly 11. Set the magnet cover in place, with its rear hole clearing the ratio beam’s stop tab. Figure 3-69. Inserting screws to secure the magnet cover. Figure 3-68. Magnet cover has oblong hole that clears ratio beam’s stop tab. 12. Insert the 2 screw...
Page 56
Chapter 3 repair procedures 3.2.4 load cell assembly 14. Inspect the up/down stop plate for dust or signs of corrosion, and clean it. Pcb screw receptacle figure 3-73. Up/down stop plate inserted over ratio beam tab and pcb screw receptacle on magnet cover. Figure 3-72. Up/down stop plate which rest...
Page 57
Chapter 3 repair procedures 3.2.4 load cell assembly 17. Re-solder the two fine wires that connect the load cell pcb to a smaller pcb on the top-front of the load cell. Follow these steps: 17.1. Carefully clean the solder out of the solder holes. 17.2. Use tweezers to thread the fine wires through t...
Page 58
Chapter 3 repair procedures 3.2.4 load cell assembly note: do not rest the load cell on the ratio beam rod. The load cell should be supported on the threaded rod to protect the ratio beam rod. The threaded rod should support the weight of the load cell and not the ratio beam rod screw. See figure 3-...
Page 59
Chapter 3 repair procedures 3.2.4 load cell assembly 18. Install the bottom flexure arm, with flexure screw heads facing inward, by inserting the 3 screws, as shown in figure 3-73. Screws connecting bottom flexure arm to frame. Flexure screw heads face inward. Screw connecting bottom flexure arm to ...
Page 60
Chapter 3 repair procedures 3.2.4 load cell assembly 21. Set the load cell on its back frame and position the load flexure with elongated hole on the bottom. Steel washers load flexure with elongated screw hole at bottom aluminum washers screws elongated screw hole goes on the bottom. Figure 3-80. L...
Page 61
Chapter 3 repair procedures 3.2.4 load cell assembly 23. Remove the thumb screws from the top of the hanger. Figure 3-82. Hanger with thumb screws removed. Thumb screw holes 24. Push the brass fixture from the grooved side, then pull it out from the square side. Figure 3-83. Pushing brass fixture fr...
Page 62
Chapter 3 repair procedures 3.2.4 load cell assembly 25. Install the bottom load cell cover – push it to the stops, then insert and tighten screws on both sides. Stops on sides of bottom load cell cover screw holes figure 3-85. Note stops on sides of bottom load cell cover. Figure 3-86. Tightening s...
Page 63
Chapter 3 repair procedures 3.2.4 load cell assembly 26. Set the top load cell cover in place. Press evenly against the bottom cover. Note: make sure the cover does not touch any screws. Figure 3-87. Top load cell cover rests flush against bottom cover. 27. Tighten the screws, as shown in figure 3-8...
Page 64
Chapter 3 repair procedures 3.2.4 load cell assembly 28. Gently push on the hanger to make sure it moves freely and smoothly. Figure 3-89. Hanger should move smoothly when touched. Ohaus corporation www.Ohaus.Com 3-44 discovery balance service manual.
Page 65
Chapter 3 repair procedures 3.2.5 installing the load cell 1. Place load cell in the chassis. Make sure to set the front foot in the keyway. (see figure 3-90.) install 3 screws in bottom of chassis. Do not tighten the 3 screws. Screws securing load cell to chassis load cell keyway figure 91. Three s...
Page 66
Chapter 3 repair procedures 3.2.5 installing the load cell 4. Tighten the 3 mounting screws after aligning load cell. Tighten screw at point of triangle first, then re-check alignment, and adjust as necessary. Then tighten 2 screws at base of triangle. Re-check alignment and adjust as necessary. 5. ...
Page 67
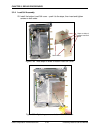
Chapter 3 repair procedures 3.2.5 installing the load cell 8. Place the printed circuit board (pcb) mounting plate on the load cell, aligning the screw holes on the left and right. Ensure that the cable from the load cell to the main pcb lies flat, passing though the small slot on the left of the lo...
Page 68
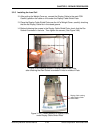
Chapter 3 repair procedures 3.2.5 installing the load cell 11. Install the incal weight assembly: 11.1. Carefullyremove any dust or debris from the weights, weight holders, and their environment, using alcohol on a clean cloth. 11.2. Install the weights and weight holders. Note: a clean glove should...
Page 69
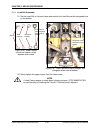
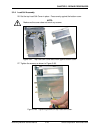
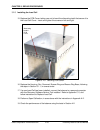
Chapter 3 repair procedures 3.2.5 installing the load cell 12. After putting the weight cover on, connect the display cable to the main pcb. Carefully position the cable so it fits under the display cable shield plate. 13. Place the display cable shield plate over the incal weight cover, carefully c...
Page 70
Chapter 3 repair procedures 3.2.5 installing the load cell 15. Replace the pcb cover, taking care not to bend the alternating teeth that secure it to the load cell cover. Insert and tighten the screws on left and right. Alternating teeth in pcb cover figure 3-101. Securing pcb cover. 16. Replace the...
Page 71
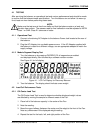
Chapter 4 testing 4.1 testing after servicing the balance, an operational test and various performance tests should be made to confirm that the balance meets specifications. Turn the balance on and allow it to warm up for at least one hour before performing these tests. Note: make sure the test area...
Page 72
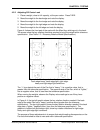
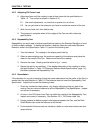
Chapter 4 testing 5. Maximum allowable change in displayed weight readings is shown in table 1-2 (page 1-3) for each of the four positions. If this reading is exceeded, follow procedures in section 4.2.4 – adjusting off center load. 4.2.2 adjusting off center load if the off center load (ocl) is exc...
Page 73
Chapter 4 testing 4.2.2 adjusting off center load 1. Place a weight, close to full capacity, at the pan center. Press tare. 2. Move the weight to the back edge and note the display. 3. Move the weight to the front edge and note the display. 4. Move the weight to the right edge and note the display. ...
Page 74
Chapter 4 testing 4.2.2 adjusting off center load 6. Adjust as shown until the reading is two to three times the the specifications in table 1-2. Then re-test as shown in section 4.2.1. 6.1. Use small adjustments, no more than a quarter-turn at a time. 6.2. As you get close to the tolerance you have...
Page 75
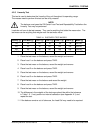
Chapter 4 testing 4.2.5 linearity test this test is used to determine the linearity of the unit throughout its operating range. The masses used to perform this test can be utility masses. Note: the balance must pass the off-center load test and repeatability test before the linearity test may be per...
Page 76
Chapter 4 testing 4.3 rs232 interface test the discovery balance interface can be tested using an external printer or computer connected to the balance. The rs232 menu provides communication parameters which can be set to accommodate external printers or computers. It contains three submenus: baud r...
Page 77
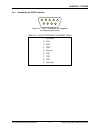
Chapter 4 testing 4.4.1 connecting the rs232 interface 5 4 3 2 1 9 8 7 6 figure 4-5. Com 1 connector, as it appears on balance’s back cover. Table 4-2. Com1 interface pin connections: 1 not used 2 txd 3 rxd 4 dsr 5 ground 6 dtr 7 cts 8 rts 9 not used discovery balance service manual 4-7 ohaus corpor...
Page 78
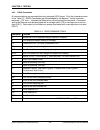
Chapter 4 testing 4.4.2 rs232 commands all communications are accomplished using standard ascii format. Only the characters shown in the table 4-3 - rs232 commands are acknowledged by the balance. Invalid command response – “es” error – indicates the balance has not recognized the command. Commands ...
Page 79
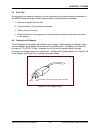
Chapter 4 testing 4.5 print test printing data to an external computer or printer requires that the communication parameters in the rs232 submenus be set to match external device communication parameters. 1. Remove all weight from the pan. 2. Tare the balance, 0.0g should be displayed 3. Place a mas...
Page 80
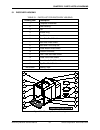
Chapter 5 parts lists & diagrams 5.1 discovery housing table 5-1. Parts list for discovery housing drawing item description 1 complete draftshield 2 rear housing 3 pan 4 breeze ring 5 pan shield 6 door side draft shield 7 back wall draft shield 8 back and front strip set 9 glass bottom draft shield ...
Page 81
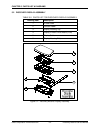
Chapter 5 parts list & diagrams 5.2 discovery display assembly table 5-2. Parts list for discovery display assembly drawing item description 1 in use cover 2 function label 3 display housing top 4 display printed circuit board (pcb) 5 display cable 6 display housing bottom figure 5-2. Discovery bala...
Page 82
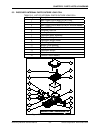
Chapter 5 parts lists & diagrams 5.3 discovery internal parts outside load cell table 5-3. List of internal parts outside load cell drawing item description 1 main printed circuit board (pcb) cover 2 printed circuit board (pcb) mounting plate 3 main printed circuit board (pcb) w/ eerom battery 4 bla...
Page 83
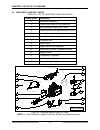
Chapter 5 parts list & diagrams 5.4 discovery load cell parts table 5-4. List of discovery load cell parts drawing item description 1 ratio beam assembly 2 printed circuit board (pcb) load cell 3 wire conductor strips (5cm, 10cm) 4 flexure, aluminum & steel washers & screw 5 lower flexure arm assemb...
Page 84
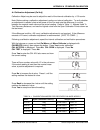
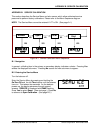
Appendix a standard calibration appendix a. Standard calibration standard calibration is performed by one of four methods – automatic internal calibration (advanced autocal), span calibration, calibration test and calibration adjustment. A.1 automatic internal calibration (advanced autocal) –two int...
Page 85
Appendix a standard calibration a.1 automatic internal calibration (advanced auto cal) internal calibration can be done without using an external weight. Note: be careful not to touch the scale or the table while calibration is in progress, as it will cause the process to fail. With the balance on, ...
Page 86
Appendix a standard calibration a.2 span calibration before initiating span calibration, determine the balance’s model number. It appears when the balance is powered up. Also be sure to have masses available press and hold cal menu until menu calibrate is displayed with calibrate blinking, then rele...
Page 87
Appendix a standard calibration a.3 calibration test (cal test) calibration test allows a check of a known calibration mass against the last stored calibration information in the balance. With the balance on, press and hold cal menu until menu calibrate is displayed with calibrate blinking, then rel...
Page 88
Appendix a standard calibration a.4 calibration adjustment (cal adj) calibration adjust may be used to adjust the result of the internal calibration by ± 100 counts. Note: before making a calibration adjustment, perform an internal calibration. To verify whether an adjustment is needed, place a test...
Page 89
Appendix b service calibration appendix b. Service calibration this section describes the service menu and sub-menus, which allow authorized service personnel to perform factory calibrations. Please refer to the menu sequence diagram. Note: the service menu cannot be entered if lft is on. (see page ...
Page 90
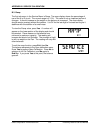
Appendix b service calibration b.3 ramp the first sub-menu in the service menu is ramp. The ramp display shows the percentage of use of the a to d circuit. The normal range is 6 -10%. The value is not as important as how it changes. It should increase as the weight on the balance is increased. The r...
Page 91
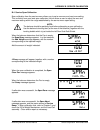
Appendix b service calibration b.4 service span calibration span calibration from the service menu allows you to set a new zero and maximum setting. This is distinct from user level span calibration, which allows a user to adjust the zero and maximum setting within the range established by the servi...
Page 92
Appendix b service calibration b.5 service internal calibration (incal) use internal calibration from the service menu after any service procedure. Note: the balance should be perfectly level before attempting a service calibration. Use the balance’s leveling feet (at the rear of the balance), toget...
Page 93
Appendix c software service tool instructions appendix c. Software service tool instructions the discovery software service tool is used for 5 purposes: 1. To restore eeprom data. 2. To install a new load cell. 3. To install a new main printed circuit board (pcb). 4. To update the software in the ba...
Page 94
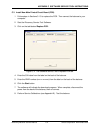
Appendix c software service tool instructions c.1 to restore the eeprom data: 1. Record the following information from the balance to be repaired: 1.1. Serial number from the label on the back of the balance. 1.2. Model number from the label on the back of the balance. 1.3. Idnr number, just above t...
Page 95
Appendix c software service tool instructions c.2 to replace a load cell: 1. Follow the steps in section 3-2 to replace the defective load cell. 2. Open the packet containing labels that was supplied with the replacement load cell. These labels each contain a model number followed by the idnr number...
Page 96
Appendix c software service tool instructions c.3 install new main printed circuit board (pcb). 1. Follow steps in sections 3.1.3 to replace the pcb. Then connect the balance to your computer. 2. Start the discovery service tool software. 3. Click on the tab labeled replace pcb. Figure c-4. The soft...
Page 97
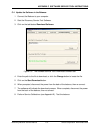
Appendix c software service tool instructions c.4 update the software in the balance: 1. Connect the balance to your computer. 2. Start the discovery service tool software. 3. Click on the tab labeled download software. Figure c-5. The software service tool’s download software tab. 4. Enter the path...
Page 98
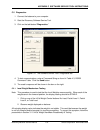
Appendix c software service tool instructions c.5 diagnostics 1. Connect the balance to your computer. 2. Start the discovery software service tool. 3. Click on the tab labeled “diagnostics.” figure c-6. The software service tool’s diagnostics tab. 4. To test communications, enter a command string a...
Page 99
*80104135* p/n 80104135 service manual: discovery balance.

