- DL manuals
- OHAUS
- Touch Panel
- T51P
- Service Manual
OHAUS T51P Service Manual - Service Manual
SERVICE MANUAL
5000 Series T51 Indicators:
T51P & T51XW
The information contained in this manual is believed to be accurate at the time of publication, but Ohaus
Corporation assumes no liability arising from the use or misuse of this material. Reproduction of this
material is strictly prohibited.
Material in this manual is subject to change.
© Copyright 2008 Ohaus Corporation, all rights reserved.
TM Registered trademark of Ohaus Corporation.
Summary of T51P
Page 1
Service manual 5000 series t51 indicators t51p t51xw ohaus corporation 19a chapin road, p.O. Box 2033, pine brook, nj 07058-2033 (973) 377-9000
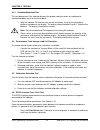
Page 3: Service Manual
Service manual 5000 series t51 indicators: t51p & t51xw the information contained in this manual is believed to be accurate at the time of publication, but ohaus corporation assumes no liability arising from the use or misuse of this material. Reproduction of this material is strictly prohibited. Ma...
Page 5
Table of contents chapter 1 getting started page no. 1.1 introduction ................................................................................................................1-1 1.2 service facilities...............................................................................................
Page 6
Table of contents chapter 4 testing (continued) page no. 4.5 calibration retention test .........................................................................................4-3 4.6 rs232 interface test..................................................................................................
Page 7
Chapter 1 getting started 1.1 introduction this service manual contains the information needed to perform routine maintenance and service on the ohaus t51 indicators. The contents of this manual are contained in five chapters: chapter 1 getting started – contains information regarding service facili...
Page 8
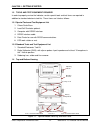
Chapter 1 getting started 1.3 tools and test equipment required in order to properly service the indicator, certain special tools and test items are required in addition to standard electronic tool kits. These items are listed as follows: 1.3.1 special tools and test equipment list 1. Ohaus scale ba...
Page 9
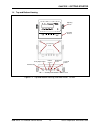
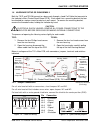
Chapter 1 getting started 1.4 top and bottom housing adjusting knobs mounting bracket 4 hex-head bolts rs485/422 scale 1 rs232, scale 2 relay option cable load cell cables rs232 cable power cord security screw location figure 1-2. Top and bottom housing, and rear panel, t51xw. 5000 series t51 indica...
Page 10
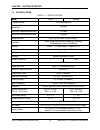
Chapter 1 getting started 1.5 specifications table 1-1. Specifications model t51p t51xw capacity range 5 to 20,000 kg or lb maximum displayed resolution 1:30,000 maximum approved resolution 1:10,000 maximum counting resolution 1:300,000 weighing units kg, lb, g, oz, lb:oz, tonnes, custom static weig...
Page 11
Chapter 1 getting started 1.6 hardware setup or disassembly both the t51p and t51xw connect to a base scale through a load cell cable that connects to the indicator’s main printed circuit board (pcb). Each model has a mounting bracket that can be attached to a column mount bracket or a wall mount. T...
Page 12
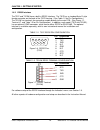
Chapter 1 getting started 1.6.2 rs232 interface the t51p and t51xw have a built-in rs232 interface. The t51p has a standard 9-pin d-style female connector on the back of the t51p housing. (see table 1-2 for pin configuration.) the t51xw has terminals for connecting a cable directly to the main pcb. ...
Page 13
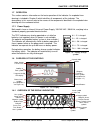
Chapter 1 getting started 1.7 operation this section contains information on the basic operation of the indicator. An exploded view drawing is included in chapter 5 which identifies all components of the indicator. The descriptions in this manual refer to the names of the components identified in th...
Page 14
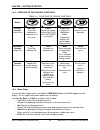
Chapter 1 getting started 1.8.2 overview of the control functions table 1-4. Functions of display controls button primary function (short press) on/zero turns the indicator on if indicator is on, sets zero. Print sends the current value to the com port if autoprint is set to off. Function initiates ...
Page 15
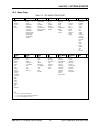
Chapter 1 getting started 1.8.3 menu setup table 1-5. T51 menu structure → calibration → setup → readout → mode → unit → gmp → print 1 → zero 1 span 1 linearity 1 cal test geo 1 end cal reset range 2 capacity 2 graduation 2 power on 2 zero range 2 auto tare 2 retain weight 2 legal for trade beeper v...
Page 16
Chapter 1 getting started 1.9 calibration three calibration processes are available: zero, span, and linearity calibration. In addition, a calibration test and geographical adjustment factor setting are accessible from the cal menu. Preliminary steps: 1. Be sure appropriate calibration masses are av...
Page 17
Chapter 1 getting started 1.9.2 span calibration span calibration uses two points to adjust the indicator. The first point is the zero value, where there is no weight on the scale. The second point is the span value, where a calibration mass is placed on the scale. Press and hold tare/menu until men...
Page 18
Chapter 1 getting started 1.9.3 linearity calibration linearity calibration uses three calibration points. The full calibration point is established with a weight on the scale. The mid-calibration point is established with a weight equal to half of the full calibration weight on the scale. The zero ...
Page 19
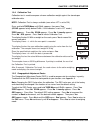
Chapter 1 getting started 1.9.4 calibration test calibration test is used to compare a known calibration weight against the stored span calibration data. Note: calibration test is always available (even when lft is set to on). Press and hold tare/menu until c.A.L. Appears, then press yes. (lft.No ap...
Page 20
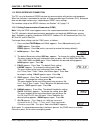
Chapter 1 getting started 1.10 rs232 interface connection the t51 has a bi-directional rs232 interface for communication with printers and computers. When the indicator is connected to a printer or programmable logic controller (plc), displayed data can be output various ways, depending on print men...
Page 21
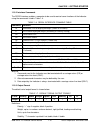
Chapter 1 getting started 1.10.2 interface commands the rs232 interface enables a computer to be used to control some functions of the indicator using the commands listed in table 1-4. Table 1-6. Serial interface command table. Command 1 function ip immediate print of displayed weight (stable or uns...
Page 22
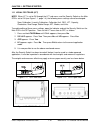
Chapter 1 getting started 1.11 legal for trade (lft) note: when lft is set to on through the lft sub-menu, and the security switch on the main pcb is set to on (see figure 1-1, page 1-4), the following menu settings cannot be changed: span calibration, linearity calibration, calibration unit, geo, l...
Page 23
Chapter 2 troubleshooting 2.1 introduction this section of the manual covers visual inspection of the indicator, troubleshooting, and a diagnostic guide, table 2-1. For setup and connection to either a known good base or simulator, see chapter 1. Follow all directions step by step. Make certain that...
Page 24
Chapter 2 troubleshooting 2.3 diagnostic guide table 2-1 is a diagnostic guide designed to help locate the problem area quickly and easily. The probable causes are listed with the most common cause first. If the first remedy does not fix the problem, proceed to the next remedy. Before attempting any...
Page 25
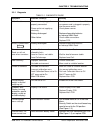
Chapter 2 troubleshooting 2.3.1 diagnosis table 2-1. Diagnostic guide symptom possible cause(s) remedy unit will not turn on power cord not plugged in or properly connected. Power outlet not supplying electricity. Battery discharged. Other failure. Check power cord connections. Make sure power cord ...
Page 26
Chapter 2 troubleshooting symptom possible cause(s) remedy error 8.1 weight reading exceeds power on zero limit. Remove load from scale. Recalibrate scale. Error 8.2 weight reading below power on zero limit. Add load to scale. Recalibrate scale. Error 8.3 weight reading exceeds overload limit. Reduc...
Page 27
Chapter 3 maintenance procedures 3.1 preventive maintenance ohaus indicators are precision instruments and should be carefully handled, stored in a clean, dry, dust-free area, and cleaned periodically. Follow these precautionary steps: – when an indicator has had chemicals or liquids spilled on it, ...
Page 28
Chapter 3 maintenance procedures 3.2.1 main printed circuit board (pcb) replacement repairs are not recommended on the main pcb. Component parts of the main pcb are not stocked by ohaus. Replacement is recommended rather than repairing. 1. Unplug the indicator from the ac adapter. 2. Remove the four...
Page 29
Chapter 3 maintenance procedures 3.2.2 display printed circuit board (pcb) replacement repairs are not recommended on the display pcb. Component parts of the display pcb are not stocked by ohaus. Replacement is recommended rather than repairing. 1. Separate the top and bottom housing. (follow steps ...
Page 30
Chapter 3 maintenance procedures 3.2.3 membrane switch replacement 1. Separate the top and bottom housing. (follow steps 1 – 3 in section 3.2.1.) 2. Disconnect the plastic ribbon cable that connects the membrane switch to the display pcb’s keypad connector. 3. On the top housing, lift up the defecti...
Page 31
Chapter 4 testing 4.1 testing before and after servicing the indicator, operational and performance tests should be made to determine if it meets specifications. Turn the indicator on and allow it to warm up for at least 10 minutes before performing these checks. The masses used for calibration shou...
Page 32
Chapter 4 testing 4.3.1 overload/underload test this test determines if the indicator displays the proper indication when an underload or overload condition exists on the scale base. 1. With the indicator on and no mass on the scale base, lift up on the scale base platform and observe the display. T...
Page 33
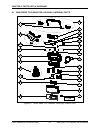
Chapter 5 parts lists & diagrams this section of the manual contains exploded views for the 5000 series t51 indicators. The exploded view drawings are designed to identify the parts which can be serviced on the indicator in the field. Note: in all cases where a part is replaced, the balance must be ...
Page 34
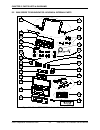
Chapter 5 parts lists & diagrams 5.1 5000 series t51p indicator: housing & internal parts figure 5-1. Series 5000 t51p indicator: housing & internal parts. Ohaus corporation www.Ohaus.Com 5-2 5000 series t51 indicators service manual.
Page 35
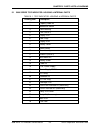
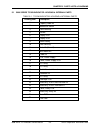
Chapter 5 parts lists & diagrams 5.1 5000 series t51p indicator: housing & internal parts table 5-1. T51p indicator: housing & internal parts drawing item description 1 capacity label kit 2 membrane switch 3 front housing 4 feet, set of 4, 5 display lcd 6 hole plugs 7 display pcb 8 battery cover 9 n...
Page 36
Chapter 5 parts lists & diagrams 5.2 5000 series t51xw indicator: housing & internal parts figure 5-1. Series 5000 t51xw indicator: housing & internal parts. Ohaus corporation www.Ohaus.Com 5-4 5000 series t51 indicators service manual.
Page 37
Chapter 5 parts lists & diagrams 5.1 5000 series t51xw indicator: housing & internal parts table 5-1. T51xw indicator: housing & internal parts drawing item description 1 capacity label kit 2 membrane switch 3 front housing 4 gasket 5 display lcd 7 display pcb 9 nimh battery 10 rear housing 11 knob ...
Page 38
Chapter 5 parts lists & diagrams ohaus corporation www.Ohaus.Com 5-6 5000 series t51 indicators service manual.
Page 39
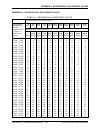
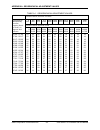
Appendix a geographical adjustment values appendix a. Geographical adjustment values table a-1. Geographical adjustment values. Elevation above sea level in meters 00 0 325 325 650 650 975 0 975 1300 1300 1625 1625 1950 1950 2275 2275 2600 2600 2925 2925 3250 3250 3575 elevation above sea level in f...
Page 40
Appendix a geographical adjustment values table a-1. Geographical adjustment values. Elevation above sea level in meters 00 0 325 325 650 650 975 0 975 1300 1300 1625 1625 1950 1950 2275 2275 2600 2600 2925 2925 3250 3250 3575 elevation above sea level in feet geographical latitude away from the equ...
Page 42
*80252587* p/n 80252587 service manual: 5000 series t51 indicators.

