- DL manuals
- RADWAG
- Scale
- PS Series
- Operating Instructions Manual
RADWAG PS Series Operating Instructions Manual
Number of instruction:
LMI-24-04/06/08/ENG
Precision balances
PS series
M A N U F A C T U R E R
O F E L E C T R O N I C W E I G H I N G I N S T R U M E N T S
RADWAG 26 – 600 Radom, Bracka 28 Street, POLAND
phone +48 48 38 48 800, phone/fax. +48 48 385 00 10
Sales Department +48 48 366 80 06
www.radwag.com
Summary of PS Series
Page 1
Number of instruction: lmi-24-04/06/08/eng precision balances ps series m a n u f a c t u r e r o f e l e c t r o n i c w e i g h i n g i n s t r u m e n t s radwag 26 – 600 radom, bracka 28 street, poland phone +48 48 38 48 800, phone/fax. +48 48 385 00 10 sales department +48 48 366 80 06 www.Radw...
Page 2
2 june 2008.
Page 3: Contents
3 contents 1. Technical data ............................................................................. 6 2. Basic information ........................................................................ 8 2.1. Intended use ................................................................................
Page 4
4 10.3. “beep” signal – reaction on pressing key ............................................. 30 10.4. Printout of all balance parameters through rs 232 port ...................... 31 11. Balance calibration ........................................................... 31 11.1. Balance with internal ...
Page 5
5 18. Error messages .................................................................... 72 19. Additional equipment .......................................................... 72 19.1. Vibration damping table ....................................................................... 72 19.2. Rack for ...
Page 6
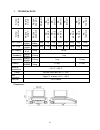
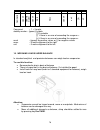
6 1. Technical data external calibr a tion ps 510 / c/1/ct ps 200 / 200 0/c/1 ps 60/c/1 ps 110/c/1 ps 210/c/1 ps 360/c/1 ps 510/c/1 ps 750/c/1 ps 100 0/c/1 internal calibr a tion ps 510 / c/2/ct ps 200 / 200 0/c/2 ps 110/c/2 ps 210/c/2 ps 360/c/2 ps 600/c/2 ps 750/c/2 ps 100 0/c/2 max capacity 510g ...
Page 7
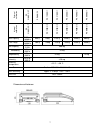
7 external calibr a tion ps 2100/c/1/c t ps 600/c/1 ps 1200/c/1 ps 2100/c/1 ps 3500/c/1 ps 4500/c/1 ps 6000/c/1 internal calibr a tion ps 2100/c/2/c t ps 1200/c/2 ps 2100/c/2 ps 3500/c/2 ps 4500/c/2 ps 6000/c/2 max capacity 2100 g / 10500 ct 600 g 1200g 2100 g 3500 g 4500 g 6000 g tare range -2100 g...
Page 8
8 2. Basic information 2.1. Intended use balance you have acquired serves to determine the weighing value of a load in laboratory environment. It is intended for application as a non-automatic weighing instrument only, i.E. The material to be weighed is manually and carefully placed in the center of...
Page 9
9 2.4. Monitoring the metrological parameters of the instrument metrological features of the balance should be tested by the user within regular intervals of time, within scope of quality assurance. 2.5. Data included in this user manual please read the user manual carefully before erecting and comm...
Page 10
10 4. Unpacking, installation and commissoning 4.1. Installation and operation place • balance should be stored and used in locations free of vibrations and shakes, free of wind and dust. • air temperature should not exceed range between: +10 o c ÷ +45 o c • humidity of air should not exceed 80% (no...
Page 11
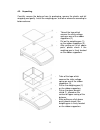
11 4.2. Unpacking carefully remove the balance from its packaging, remove the plastic and foil wrapping and gently. Install the weighing pan, and other elements according to below schema: - take of the tape which secures the static voltage spring on one of the rubber supporters (2), - put on the wei...
Page 12
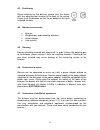
12 4.3. Positioning before switching on the balance, please level the device with two adjusting feet situated at the back of the casing. Please level the balance so that the air bubble of the level is placed centrally. 4.4. Standard accessories • balance. • weighing pan and protecting elements. • po...
Page 13
13 5. Basic functions of the instrument electronic balance is appropriate for precise measurements mass in laboratory conditions with possibility of setting to zero in all measure range. Balance calibration is done by cal on balance keyboard. 9 functions for weighing units (press units key) - select...
Page 14
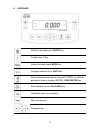
14 6. Keyboard switches the display off. On/off key. Function key. F key. Selects the work mode. Mode key. Changes measure units. Units key. Sends information to external instrument (print) or confirms parameter value or function (enter). Print/enter key. Sets indication to zero. Esc/tara key. Calib...
Page 17
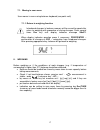
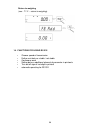
17 7.1. Moving in user menu user moves in menu using balance keyboard (see point no 6) 7.1.1. Return to weighing function introduced changes in balance memory will be saved for good after return to weighing with procedure of saving changes. Press several times esc key until display indicates message...
Page 18
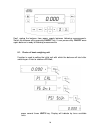
18 don’t unplug the balance from power supply between following measurements. Switch the balance off by pressing on/off key. If user presses key on/off once again balance is ready to following measurements 8.1. Choice of basic weighing unit function is used to setting the initial unit with which the...
Page 19
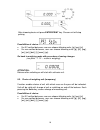
19 after choosing basic unit press enter/print key. Chosen unit will stop pulsing. Possibilities of choice: • for ec verified balances, user can choose following units: [g], [mg], [ct] • for non-verified balances, user can choose following units: [g], [ct], [mg], [oz], [ozt], [dwt], [t], [mom], [gn]...
Page 20
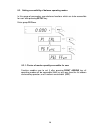
20 8.3. Setting accessibility of balance operating modes in this group of parameters user declares functions which are to be accessible for user after pressing setup key. Enter group p6 func. 8.3.1. Choice of modes quantity accessible for user function enables user to set if after pressing right arr...
Page 21
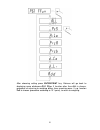
21 after choosing setting press enter/print key. Balance will go back to displaying name ofsubmenu. P6.1 ffun. If function other than all is chosen, procedure of returning to weighing differs from remaining ones. If e.G. Function pcs is chosen (procedure according to 13.1 point), to return to weighi...
Page 22
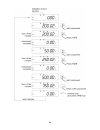
22 press key esc/tara, balance will return to weighing. 8.3.2. Setting contents of p6.1 ffun – all parameters function enables switching off modes not used by operator. This causes faster access to used modes..
Page 23
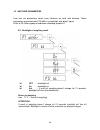
23 off – inaccessible mode on – accessible mode. Return to weighing (see - 7.1.2. – return to weighing). 9. Main setting parameters user can adjust balance to external conditions (filter range) or own needs (autozero working, memory of tare value). These parameters are in group p3 read>. These funct...
Page 24
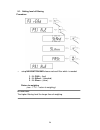
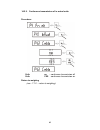
24 9.1. Setting level of filtering procedure: - using navigation bar choose value of filter which is needed 1 - filtr fast – (fast) 2 -filtr stand – (standard) 3 - filtr slouu – (slow). Return to weighing (see - 7.1.2. – return to weighing). Attention: the higher filtering level the longer time of w...
Page 25
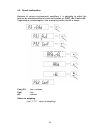
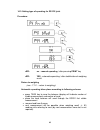
25 9.2. Result confirmation because of various environmental conditions it is advisable to adjust the balance by selecting method of result confirmation as: fast_rel, fast or rel. Depending on selected option, time of weighing will be shorter or longer. Fast_rel - fast + release fast - fast rel - re...
Page 26
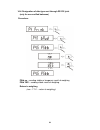
26 9.3. Autozero function in order to ensure precise indication of balance, „autozero” function was introduced. The application of this function is automatic control and correction of zero indication of balance. When function is active comparison of results takes place at declared time intervals e.G...
Page 27
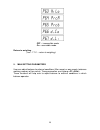
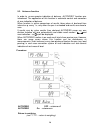
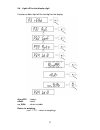
27 9.4. Light off the last display digit function enables light off the last digit on the display. Aluuays - always neuer - never uu_stab - when is stable. Return to weighing (see - 7.1.2. – return to weighing)..
Page 28
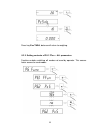
28 10. Another parameters user can set parameters which have influence on work with balance. These parameters are contained in p5 other e.G. Backlight and „beep” signal. Enter to p5 others group of submenu according to point 6.1. 10.1. Backlight of weighing result bl off – backlight off bl on – back...
Page 29
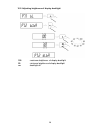
29 10.2. Adjusting brightness of display backlight 100 - maximum brightness of display backlight 20 - minimum brightness of display backlight no - backlight off.
Page 30
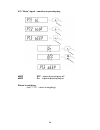
30 10.3. “beep” signal – reaction on pressing key beep off – signal of pressing key off beep on - signal of pressing key on. Return to weighing (see - 7.1.2. – return to weighing)..
Page 31
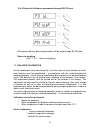
31 10.4. Printout of all balance parameters through rs 232 port after pressing f key, balance parameters will be send through rs 232 port. Return to weighing (see - 7.1.2. – return to weighing). 11. Balance calibration as the acceleration value due to gravity is not the same at every location on ear...
Page 32
32 - manual internal calibration * initiated from the balance keyboard - calibration made with external weight * with declared mass which cannot be modified. In verified balances (with internal calibration) only automatic internal calibration and manual internal calibration is accessible, however in...
Page 33
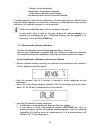
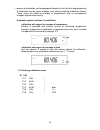
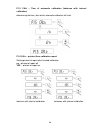
33 - process of calibration can be postponed frequently, but fact that long postponing of calibration can be cause of bigger error during weighing should be noticed. These errors are effect of changes of temperatures and as consequence changes of balance sensitivity. Automatic system includes 3 poss...
Page 34
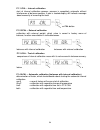
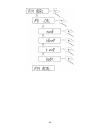
34 p1.1 ical – internal calibration start of internal calibration process, process is completely automatic without interference of balance operator, if pan is loaded display will indicate message about necessity of removing the load. Or cal button p1.2 ecal – external calibration calibration with ex...
Page 35
35.
Page 36
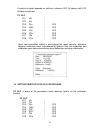
36 p1.5 calt – time of automatic calibration (balances with internal calibration) determining the time, after which automatic calibration will start. P1.6 calr – printout from calibration report setting printout of report after finished calibration no – printout of report off yes – printout of repor...
Page 37
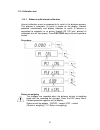
37 11.3. Calibration test 11.3.1. Balances with internal calibration internal calibration mass is compared to its value in the balance memory. This process is automatic. Its result is shown on the display. Process proceeds automatically and display indicates its result (if balance is connected to co...
Page 38
38 11.3.2. Balances with external calibration it consists in comparison of mass of standard with mass previously saved in balance memory during the calibration. Process proceeds automatically and display indicates its result (if balance is connected to computer or to printer through rs 232 joint, pr...
Page 39
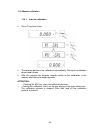
39 11.4. Manual calibration 11.4.1. Internal calibration • press f key three times • the balance performs the calibration automatically. During this calibration do not load the pan. • after this process the balance records results of the calibration in the memory and returns to weighing mode. Attent...
Page 40
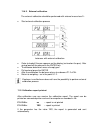
40 11.4.2. External calibration the external calibration should be performed with external mass class f 2 • start external calibration process balances with external calibration • order to load off the pan appears on the display (no load on the pan). After yesing load off the pan press the enter key...
Page 42
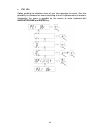
42 for fields: - user (max 8 alphanumerical signs) - design (max 8 alphanumerical signs) introduce names by the balance keyboard. For the rest select: - no (do not print during report) - yes (print during report) 12.1. Setting the contents of printouts for glp procedures p2 glp group of parameters e...
Page 43
43 • p2.1 usr option enabling to introduce name of user who operates the scale. User has possibility to introduce the name consisting of max 8 alphanumeric characters. Introduction the name is possible by the means of scale keyboard with navigation bar and enter key..
Page 44
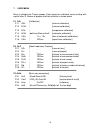
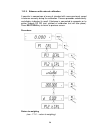
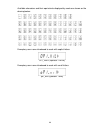
44 available characters and their equivalents displayed by scale are shown on the drawing below: exemplary user name introduced to scale with capital letters: op1_wilk (operator 1 wilk) exemplary user name introduced to scale with small letters: op1_wilk (operator 1 wilk).
Page 45
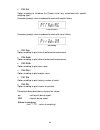
45 • p2.2 prj option enabling to introduce the project name (e.G. Associated with specific weighing type). Exemplary project name introduced to scale with capital letters: prradwag exemplary project name introduced to scale with small letters: prradwag • p2.3 ptin option enabling to print time of pe...
Page 46
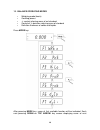
46 13. Balance operating modes - weighing mode (basic) - counting pieces - +/- control referring mass of set standard - control of % deviation referring mass of standard - definition thickness of solids and liquids. Press mode key: after pressing mode key, name of first available function will be in...
Page 47
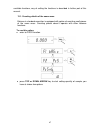
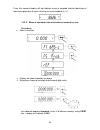
47 available functions, way of setting the functions is described in further part of this manual. 13.1. Counting details of the same mass balance in standard execution is equipped with option of counting small pieces of the same mass. Counting pieces doesn’t operate with other balance functions. To ...
Page 48
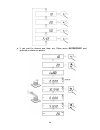
48 • if you want to choose one them e.G. 20pcs press enter/print and proceed as shown on picture.
Page 49
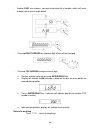
49 − if option free was chosen, you must enter quantity of sample, which will serve to determine mass of single detail − pressing right arrow key chooses digit which will be changed − pressing top arrow changes value of digit • confirm entered value by pressing enter/print key • display will indicat...
Page 50
50 attention: if user presses enter key when details are not placed on the pan, message er8 outr will be indicated for few second and balance will automatically return to weighing. 13.2. +/- control referring mass of set standard procedure of operating: enter to function.
Page 51
51 during setting threshold values following dependences take place: set lower threshold right arrow – choice of set digit; top/down arrow - choice of value of digit; enter/print – confirmation of entered values set upper threshold.
Page 52
52 right arrow – choice of set digit; top/down arrow - choice of value of digit; enter/print – confirmation of entered values attention: if user by mistake enters value of lower threshold higher than upper, balance will indicate error message and will return to weighing. Return to weighing (see - 7....
Page 53
53 13.3. Control of % deviation referring mass of standard balance software enables control of deviation (in %) of weighed loads mass referring mass of standard. Mass of standard can be determined by its weighing ( perc a function) or entered to balance memory by user (perc b function). 13.3.1. Mass...
Page 54
54 from this moment display will not indicate mass of weighed load but deviation of load mass placed on the pan referring mass of standard (in %). 13.3.2. Mass of standard entered to balance memory by user procedure: • enter to function. • display will show indication as above • using keys choice of...
Page 55
55 from this moment display will not indicate mass of weighed load but deviation of load mass placed on the pan referring mass of standard (in %). Return to weighing (see - 7.1.2. – return to weighing). 13.4. Defining thickness of solids and liquids there is equipment to defining thickness of solids...
Page 56
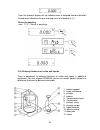
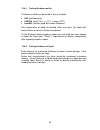
56 13.4.1. Testing thickness solids thickness of solids can be tested in one of 3 liquids: • h2o (distilled water), • c2h5oh (spirit 100% +/- 0.1% in temp. 20 0 c), • another (another liquid with known thickness) give temperature of liquid for distilled water and spirit. For liquid with known thickn...
Page 57
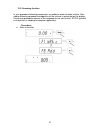
57 13.5. Summing function in sum procedure following components are added in order to make mixture. After adding following component composition of the mixture is presented on the display. During sum procedure masses of the components are sent to joint rs 232 (printout on the printer or sending to c...
Page 58
58.
Page 59
59 return to weighing (see - 7.1.2. – return to weighing). 14. Functions for using rs 232 - choose speed of transmission - define sent data as: stable / not stable - continuous work - setting data as additional element of parameter in printouts - turn on/off sign of last digit in printout - automati...
Page 60
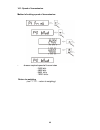
60 14.1. Speed of transmission method of setting speed of transmission: − choose required speed of transmission - 2400 bit/s - 4800 bit/s - 9600 bit/s - 19200 bit/s. Return to weighing (see - 7.1.2. – return to weighing)..
Page 61
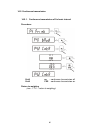
61 14.2. Continuous transmission 14.2.1. Continuous transmission off in basic interval procedure: cnta no – continuous transmission off cnta yes - continuous transmission on. Return to weighing (see - 7.1.2. – return to weighing)..
Page 62
62 14.2.2. Continuous transmission of in actual units procedure: cntb no – continuous transmission off cntb yes - continuous transmission on. Return to weighing (see - 7.1.2. – return to weighing)..
Page 63
63 14.3. Setting type of operating for rs 232 joint procedure: repl no – manual operating / after pressing print key repl yes - automatic operating / after stabilization of weighing result. Return to weighing (see - 7.1.2. – return to weighing). Automatic operating takes place according to following...
Page 64
64 14.4. Designation of data type sent through rs 232 joint (only for non-verified balances) procedure: pstb no – sending stable or temporary result of weighing pstb yes – sending stable result of weighing. Return to weighing (see - 7.1.2. – return to weighing)..
Page 65
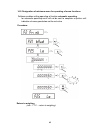
65 14.5. Designation of minimum mass for operating of some functions software enables setting operating of function automatic operating. - for automatic operating result will not be sent to computer or printer until indication of mass goes below set lo net value procedure: return to weighing (see - ...
Page 66
66 15. Cooperation with printer or computer every pressing of key print > sends signal of current display state with measuring units to computer or printer. Balance has factory setting speed of transmission 4800 bit/s. If external mechanism (printer, computer) require different setting of speed of t...
Page 67
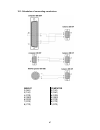
67 15.1. Schedules of connecting conductors weight computer 2 (rxd) 3 (txd) 3 (txd) 2 (rxd) 4 (dtr) 6 (dsr) 5 (gnd) 5 (gnd) 6 (dsr) 6 (dtr) 7 (rts) 8 (cts) 8 (cts) 7 (rts).
Page 68
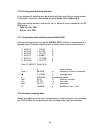
68 15.2. Printing data with date and time every printout of weighing can be printed with date and time of measurement. It’s possible if balance is connected to printer kafka 1/z or kafka sq s. After connecting balance and printer set in balance menu parameters of p2 glp group: pdat on value yes ptin...
Page 69
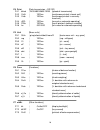
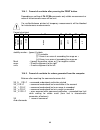
69 15.4.1. Format of sent data after pressing the print button depending on setting of p4.5 pstb parameter only stable measurement or mass of instantaneous mass will be sent. For verified balance printout of temporary measurements will be blocked for instantaneous measurements. Format of printout 1 ...
Page 70
70 1 - 3 4 5 6 7 8 - 16 17 18 - 20 21 22 command space stability marker space mark mass space unit cr lf command – 1 ÷ 3 marks stability marker – [space] if stable [?] if unstable [^] if there is an error of exceeding the range on + [v] if there is an error of exceeding the range on - mark – [space]...
Page 71
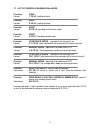
71 17. List of orders in radwag balances function tara format t cr lf (setting to tare) function zero format z cr lf (setting to zero) function print format si cr lf (sending results when stab) function print format s cr lf (sending results now) function constance work - equivalent for key cona on f...
Page 72
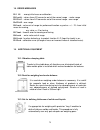
72 18. Error messages er1 hi - wrong initial mass or calibration er2 null - values from a.D converter out of the normal range - under range er3 ful1 - values from a.D converter out of the normal range - over range er4 ful2 - over range er5 rout - value out of range for performed function e.G value >...
Page 73
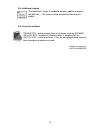
73 19.4. Additional display characteristics: length of conductor between additional display and balance – 1,5m, plastic casing, possibility of bending the display. 19.5. Computer software pw-win 2004 – gathering data from any balance made by radwag. Rad-key 2000 – enables to introduce result of weig...
Page 74
74 manufacturer of electronic weighing instruments radwag 26-600 radom bracka 28 street poland central phone +48 48 38 48 800 phone/fax. + 48 48 385 00 10 sales department + 48 48 366 80 06 www.Radwag.Com.

