B&w rearview camera installation & operation ca52 (camera) for more information www.Strategicvista.Com before operating this system, please read this manual thoroughly and retain it for future reference.
Before using this unit please read these operating instructions carefully. Take special care to follow th warnings indicated on the unit itself as well as the safety suggestions listed below. Keep them handy for future reference. Power source – the unit should be connected to power supply only of th...
Table of contents -2- safety precautions………………………………………………………. Introduction……………………………………………………………….. System contents………………………………………………………… features…………………………………………………………………... Camera controls………………………………………………………… camera installation……………………………………………………… connections……………………………………………………………… operatin...
Introduction thank you for purchasing the sentinel black & white rearview cam era . This camera promotes and prevents backing-up and parking accidents, where you can view or check on the traffic behind your vehicle, or when rounding corners (blind spot prevention). This camera can be used in combina...
Camera controls lens microphone mounting bracket 3 1 2 4 5 camera connector ground 5 dc 12v power 4 audio 3 video output 2 not connected 1 description pin number -4- camera installation camera camera bracket washer spring washer 20m, 4 pin 2-piece cable with mini din jack (female) 1.8m, 4 pin cable ...
1. At the desired camera mounting position, fit the camera mounting bracket into position using the supplied screws on the center hole and slide hole. 2. Turn the bracket left and right to a correct direction and then tighten the screws. 3. Fit the camera to the bracket using the supplied washers, s...
Connections connect the red wire to the (10v–32v dc) power terminal, which is energized with the ignition key. Connect the black wire to the metal point of the vehicle or the negative battery post. Connect the green wire to the switched power output terminal of the “r” (reverse) gear. -6- video out ...
Operating instructions • when you turn the ignition key to the accessory or on position, power is supplied to the monitor and the monitor is in standby (if the power button is not pushed in) • when you push the power button you can view the picture from the camera manually • when the system is in st...
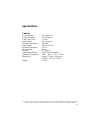
Specifications camera pick-up device 1/3” b&w ccd picture elements 270,000 pixels fixed focus lens 3.0 mm viewing angle 120° diagonal horizontal resolution 380 lines video output 1v p-p, 75 ohms minimum illumination 0.5 lux shock rating 6.8 g vibration 0 – 2000 hz input voltage range 12vdc from the ...


