- DL manuals
- Vega
- Transmitter
- VEGABAR 55
- Operating Instructions Manual
Vega VEGABAR 55 Operating Instructions Manual
Summary of VEGABAR 55
Page 1
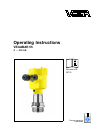
Operating instructions vegabar 55 4 … 20 ma d ocument id: 36733 p rocess pressure/ h ydrostatic.
Page 2: Contents
Contents 1 about this document 1.1 f unction. . . . . . . . . . . . . . . . . . . . . . . . . . . . . . . . . . 4 1.2 t arget group . . . . . . . . . . . . . . . . . . . . . . . . . . . . . . 4 1.3 s ymbolism used. . . . . . . . . . . . . . . . . . . . . . . . . . . . 4 2 for your safety 2.1 a uthor...
Page 3
7.3 c alculation of total deviation (similar to din 16086) . . 43 7.4 e xchanging the electronics module . . . . . . . . . . . . . . 44 7.5 s oftware update . . . . . . . . . . . . . . . . . . . . . . . . . . . . 44 7.6 i nstrument repair . . . . . . . . . . . . . . . . . . . . . . . . . . . 45 8 di...
Page 4: About This Document
1 about this document 1 .1 function t his operating instructions manual provides all the information you need for mounting, connection and setup as well as important instructions for maintenance and fault rectification. Please read this information before putting the instrument into operation and kee...
Page 5: For Your Safety
2 for your safety 2 .1 authorised personnel a ll operations described in this operating instructions manual must be carried out only by trained specialist personnel authorised by the plant operator. D uring work on and with the device the required personal protective equipment must always be worn. 2...
Page 6
2 .5 safety label on the instrument t he safety approval markings and safety tips on the device must be observed. 2 .6 ce conformity t his device fulfills the legal requirements of the applicable ec guidelines. By attaching the ce mark, vega provides a confirmation of successful testing. You can find t...
Page 7: Product Description
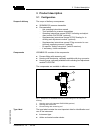
3 product description 3 .1 configuration t he scope of delivery encompasses: l vegabar 55 pressure transmitter l d ocumentation - this operating instructions manual - t est certificate for pressure transmitters - o perating instructions manual 27835 "indicating and adjust- ment module plicscom" (optio...
Page 8
L t echnical data: measuring range, process pressure, process temperature, signal output, voltage supply, protection, protection class l o rder number l a rticle numbers, documentation l sil identification (with sil rating ex works) t he serial number allows you to access the delivery data of the ins...
Page 9
3 .4 packaging, transport and storage y our instrument was protected by packaging during transport. Its capacity to handle normal loads during transport is assured by a test according to din en 24180. T he packaging of standard instruments consists of environment- friendly, recyclable cardboard. For...
Page 10
T he protective cover protects the sensor housing against soiling and intense heat from solar radiation. Y ou will find additional information in the supplementary instructions manual "protective cover" (document-id 34296). T he electronics module is a replacement part for pressure transmitter vegaba...
Page 11: Mounting
4 mounting 4 .1 general instructions m ake sure that all parts of the instrument exposed to the process, in particular the sensor element, process seal and process fitting, are suitable for the existing process conditions. These include above all the process pressure, process temperature as well as t...
Page 12
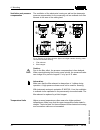
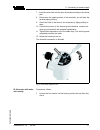
T he ventilation of the electronics housing as well as the atmosperic pressure compensation for the measuring cell are realised via a filter element in the area of the cable gland. 2 1 2 1 2 1 1 2 fig. 3: position of the filter element. Upper row single chamber housing, lower row double chamber housin...
Page 13
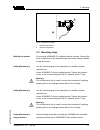
1 2 fig. 4: temperature ranges 1 process temperature 2 ambient temperature 4 .2 mounting steps f or mounting vegabar 55, a welded socket is required. You can find these components in the supplementary instructions manual "welded socket and seals". U se the seal belonging to the instrument or a suitab...
Page 14
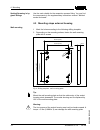
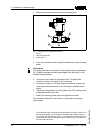
U se the seal suitable for the respective process fitting. You can find the components in the supplementary instructions manual "welded socket and seals". 4 .3 mounting steps external housing 1 m ark the holes according to the following drilling template 2 d epending on the mounting surface, fasten th...
Page 15
5 connecting to power supply 5 .1 preparing the connection a lways keep in mind the following safety instructions: l c onnect only in the complete absence of line voltage l i f overvoltage surges are expected, overvoltage arresters should be installed tip: w e recommend using vega overvoltage arrest...
Page 16
U se cable with round cross-section. A cable outer diameter of 5 … 9 mm (0.2 … 0.35 in) ensures the seal effect of the cable gland. If you are using cable with a different diameter or cross-section, exchange the seal or use a suitable cable gland. W e generally recommend the use of screened cable for ...
Page 17
7 i nsert the wire ends into the open terminals according to the wiring plan 8 p ress down the opening levers of the terminals, you will hear the terminal spring closing 9 c heck the hold of the wires in the terminals by lightly pulling on them 10 c onnect the screen to the internal ground terminal,...
Page 18
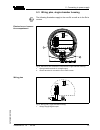
2 r emove the housing socket from the mounting plate 3 2 1 fig. 7: components of the external housing 1 screw 2 wall mounting plate 3 cable gland 3 l oop the connection cable through the cable entry on the housing base 1) information: t he cable gland can be mounted in three positions each displaced...
Page 19
5 .3 wiring plan, single chamber housing t he following illustrations apply to the non-ex as well as to the ex-ia version. 2 1 display 4...20ma 1 2 fig. 8: electronics and connection compartment, single chamber housing 1 spring-loaded terminals for voltage supply 2 ground terminal for connection of ...
Page 20
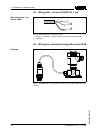
5 .4 wiring plan - version ip 66/ip 68, 1 bar + - 1 2 fig. 10: wire assignment, connection cable 1 brown (+) and blue (-) to power supply or to the processing system 2 shielding 5 .5 wiring plan, external housing with version ip 68 fig. 11: vegabar 55 in ip 68 version 25 bar and axial cable outlet, ...
Page 21
5 6 7 8 1 2 d ispl ay i²c 4 5 1 2 3 fig. 12: electronics and connection compartment 1 plug connector for vegaconnect (i²c interface) 2 spring-loaded terminals for connection of the external indication vegadis 61 3 cable gland to vegabar 4 ground terminal for connection of the cable screen 5 spring-l...
Page 22
1 2 3 4 6 3 4 1 2 5 fig. 13: connection of the sensor in the housing socket 1 brown 2 blue 3 yellow 4 white 5 shielding 6 breather capillaries i2c display 1 1 2 5 6 7 8 fig. 14: wiring plan external electronics 1 power supply 5 .6 switch on phase a fter connecting vegabar 55 to power supply or after...
Page 23
L i nternal check of the electronics l i ndication of the instrument type, the firmware as well as the sensor tags (sensor designation) l o utput signal jumps briefly (approx. 10 seconds) to the set fault current t hen the corresponding current is outputted to the cable (the value corresponds to the a...
Page 24: Module Plicscom
6 set up with the indicating and adjustment module plicscom 6 .1 short description t he indicating and adjustment module is used for measured value display, adjustment and diagnosis. It can be mounted in the following housing versions and instruments: l a ll sensors of the plics ® instrument family,...
Page 25
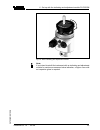
Fig. 15: insert indicating and adjustment module note: i f you intend to retrofit the instrument with an indicating and adjustment module for continuous measured value indication, a higher cover with an inspection glass is required. Vegabar 55 • 4 … 20 ma 25 6 s et up with the indicating and adjustme...
Page 26
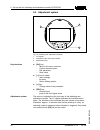
6 .3 adjustment system 1.1 2 3 1 fig. 16: indicating and adjustment elements 1 lc display 2 indication of the menu item number 3 adjustment keys l [ok] key: - m ove to the menu overview - c onfirm selected menu - e dit parameter - s ave value l [->] key to select: - menu change - list entry - s elect...
Page 27
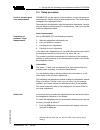
6 .4 setup procedure vegabar 55 can be used for level as well as for process pressure measurement. Default setting is level measurement. The mode can be changed in the adjustment menu. D epending on the application only the respective subchapter "level or process pressure measurement" is of importan...
Page 28
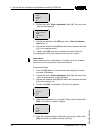
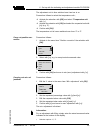
▶ b asic adjustment d isplay d iagnostics s ervice i nfo 2 c onfirm the menu "basic adjustment" with [ok], the menu item "unit" will be displayed. U nit u nit of measurement bar ▼ t emperature unit °c ▼ 3 a ctivate the selection with [ok] and select "units of measure- ment with [->]. 4 a ctivate the ...
Page 29
T he adjustment unit is thus switched over from bar to m. P roceed as follows to select the temperature unit: 3) à activate the selection with [ok] and select "temperature unit with [->]. à activate the selection with [ok] and select the requested unit with [->] ( e.G. °f). à confirm with [ok]. T he ...
Page 30
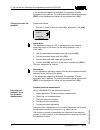
I f the adjustment ranges are exceeded, the message "outside parameter limits" appears. The editing procedure can be aborted with [esc] or the displayed limit value can be accepted with [ok]. P roceed as follows: 1 e dit the % value in the menu item "max. Adjustment" with [ok]. M ax. Adjustment +100...
Page 31
I n the menu items "zero" and "span" you determine the span of the sensor, the span corresponds to the end value. Information: t he steps 1, 3 and 4 are not necessary for instruments which are already preset according to customer specifications! Y ou can find the data on the type label on the instrume...
Page 32
▶ b asic adjustment d isplay d iagnostics s ervice i nfo 2 c onfirm the menu "basic adjustment" with [ok], the menu item "unit" will be displayed. U nit u nit of measurement bar ▼ t emperature unit °c ▼ 3 a ctivate the selection with [ok] and select "units of measure- ment with [->]. 4 a ctivate the ...
Page 33
P roceed as follows: 1 e dit the mbar value in the menu item "zero" with [ok]. Z ero adjustment 000 .0 % p = +0000 .0 mbar 0000.0 mbar 2 s et the requested mbar value with [+] and [->]. 3 c onfirm with [+] and move to span adjustment with [->]. T he zero adjustment is finished. Information: t he zero ...
Page 34
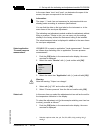
I f the adjustment ranges are exceeded, the message "outside parameter limits" appears. The editing procedure can be aborted with [esc] or the displayed limit value can be accepted with [ok]. A linearization is necessary for all vessels in which the vessel volume does not increase linearly with the ...
Page 35
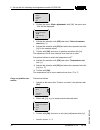
T he following safety-relevant data are not read out or written: l sil l hart mode l pin l a pplication c opy sensor data c opy sensor data? Basic adjustment i f the "reset" (sensor-specific basic adjustment) is carried out, the sensor resets the values of the following menu items to the reset values...
Page 36
Menu section function reset value a pplication no reset factory setting l ike basic adjustment, in addition, special parameters are reset to default values. 6) pointer t he min. And max. Temperature or pressure values are each reset to the actual value. A dditional adjustment and diagnosis options s...
Page 37
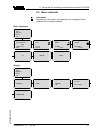
6 .5 menu schematic information: d epending on the version and application, the highlighted menu windows are not always available. Basic adjustment 1 ▶ b asic adjustment d isplay d iagnostics s ervice i nfo 1.1 u nit u nit of measurement bar ▼ t emperature unit °c ▼ 1.2 p osition correction off set p...
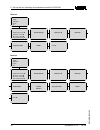
Page 38
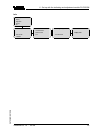
Service 4 b asic adjustment d isplay d iagnostics ▶ s ervice i nfo 4.1 c urrent output o utput mode: 4-20 ma ▼ f ail.Mode: ▼ m in. Current: 3.8 ma ▼ max. Current: 20.5 ma ▼ 4.2 s imulation start simulation ▼ 4.3 r eset select reset ▼ 4.4 l anguage deutsch ▼ 4.7 c opy sensor data copy sensor data? 4....
Page 39
Info 5 b asic adjustment d isplay d iagnostics s ervice ▶ i nfo 5.1 i nstrument type s erial number 12345678 5.2 d ate of manufacture 1 st october 2009 s oftware version 3.80 5.3 l ast change using pc 1 st october 2009 5.4 s ensor characteristics display now? Vegabar 55 • 4 … 20 ma 39 6 s et up with...
Page 40
6 .6 saving the parameter adjustment data i t is recommended noting the adjusted data, e.G. In this operating instructions manual and archive them afterwards. They are hence available for multiple use or service purposes. I f vegabar 55 is equipped with an indicating and adjustment module, the most ...
Page 41
7 maintenance and fault rectification 7 .1 maintain w hen the instrument is used properly, no special maintenance is required in normal operation. I n some applications, product buildup on the diaphragm can influence the measuring result. Depending on the sensor and application, take precautions to en...
Page 42
T he hotline is available to you 7 days a week round-the-clock. Since we offer this service world-wide, the support is only available in the e nglish language. The service is free of charge, only the standard telephone costs will be charged. C onnect a handheld multimeter in the suitable measuring ra...
Page 43
? E 036 l no operable sensor software à carry out a software update or send the instrument for repair ? E 041 l h ardware error à exchange instrument or return instrument for repair d epending on the failure reason and measures taken, the steps described in chapter "set up" must be carried out again...
Page 44
Total deviation digital output signal in percent: f total = f perf + f stab f stab = (0.1 % x td)/year f stab = (0.1 % x 1.25)/year f stab = 0.125 % f total = 0.19 % + 0.125 % = 0.315 % total deviation digital output signal absolute: f total = 0.315 % x 8 bar/100 % = 25.2 mbar basic accuracy analogu...
Page 45
L via the indicating and adjustment module l via pactware y ou can view all software histories on our website www.Vega.Com. M ake use of this advantage and get registered for update information via e-mail. T he following components are required to update the sensor software: l s ensor l p ower suppl...
Page 46: Dismount
8 dismount 8 .1 dismounting steps warning: b efore dismounting, be aware of dangerous process conditions such as e.G. Pressure in the vessel, high temperatures, corrosive or toxic products etc. T ake note of chapters "mounting" and "connecting to power supply" and carry out the listed steps in rever...
Page 47: Supplement
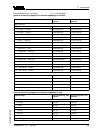
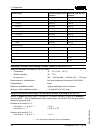
9 supplement 9 .1 technical data general data p ressure type g auge pressure or gauge pressure m easuring principle ceramic-capacitive, temperature-compensated iso- lated system c ommunication interface i ²c bus materials and weights m aterials, wetted parts - p rocess fitting 316l - p rocess diaphra...
Page 48
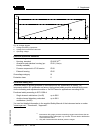
Ma-value unchanged 20.5 ma, 22 ma, ( adjustable) m ax. Output current 22 ma l oad see load diagram under power supply f ulfilled namur recommendations ne 43 dynamic behaviour output r un-up time approx. 10 s 90 % 100 % 10 % t t t a t t s 2 1 fig. 17: sudden change of the process variable. T t : dead ...
Page 49
R ecommended max. Turn down 10 : 1 ( no limitation) nominal measuring ranges and overload capability in bar/kpa nominal range overload capacity, max. Pressure overload capacity, min. Pressure g auge pressure 0 … 0.1 bar/0 … 10 kpa 15 bar/1500 kpa -1 bar/-100 kpa 0 … 0.2 bar/0 … 20 kpa 20 bar/2000 kp...
Page 50
Nominal range overload capacity, max. Pressure overload capacity, min. Pressure 0 … 350 psig 1900 psig -15 psig -15 … 0 psig 500 psig -15 psig -15 … 25 psig 700 psig -15 psig -15 … 70 psig 950 psig -15 psig -15 … 150 psig 1300 psig -15 psig -15 … 350 psig 1900 psig -15 psig -0.7 … 0.7 psig 200 psig ...
Page 51
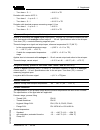
- t urn down > 5 : 1 0.02 % x td d eviation with version 0.075 % - t urn down 1 : 1 up to 5 : 1 0.075 % - t urn down > 5 : 1 0.015 % x td d eviation with absolute pressure measuring range 0.1 bar - t urn down 1 : 1 up to 5 : 1 0.25 % - t urn down > 5 : 1 0.05 % x td influence of the product or ambien...
Page 52
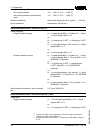
- with cooling element -12 … +180 °c (+10 … +356 °f) - with cooling element and screening sheet -12 … +200 °c (+10 … +392 °f) v ibration resistance mechanical vibrations with 4 g and 5 … 100 hz 10) s hock resistance a cceleration 100 g/6 ms 11) electromechanical data - version ip 66/ip 67 c able ent...
Page 53
- d ouble chamber housing l 1 x ip 68 cable gland m20 x 1.5; 1 x blind stopper m20 x 1.5; plug m12 x 1 for vegadis 61 ( optional) or: l 1 x closing cap ½ npt, 1 x blind stopper ½ npt, plug m12 x 1 for vegadis 61 ( optional) c onnection cable - c onfiguration four wires, one suspension cable, one brea...
Page 54
- c olour - standard pur b lue - c olour - ex-version b lue indicating and adjustment module v oltage supply and data transmission through the sensor i ndication lc display in dot matrix a djustment elements 4 keys p rotection rating - unassembled ip 20 - mounted into the sensor without cover ip 40 ...
Page 55
1000 750 500 250 12 18 16 14 20 22 24 26 28 30 32 34 36 w v 3 1 2 fig. 18: voltage diagram 1 voltage limit eex-ia instrument 2 voltage limit non-ex/exd instrument 3 operating voltage electrical protective measures p rotection rating - h ousing, standard ip 66/ip 67 14) - a luminium and stainless hou...
Page 56
Approvals d epending on the version, instruments with approvals can have different technical data. F or these instruments, the corresponding approval documents have to be taken into account. T hese are part of the delivery or can be downloaded under www.Vega.Com via "vega tools" and "serial number se...
Page 57
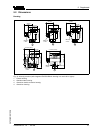
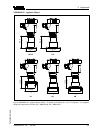
9 .2 dimensions housing ~ 69 mm (2.72") ø 77 mm (3.03") 1 1 2 m m (4 13 / 32 ") m20x1,5/ ½ npt ~ 69 mm (2.72") ø 77 mm (3.03") 1 1 7 m m (4 .6 1 ") m20x1,5/ ½ npt ~ 87 mm (3.43") m16x1,5 ø 84 mm (3.31") 1 2 0 m m (4 .7 2 ") m20x1,5/ ½ npt ~ 116 mm (4.57") ø 84 mm (3.31") 1 1 6 m m (4 .5 7 ") m20x1,5...
Page 58
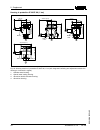
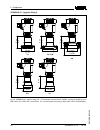
Housing in protection ip 66/ip 68 (1 bar) 1 1 7 mm (4 .6 1 ") 1 2 0 mm (4 .7 2 ") ~ 103 mm (4.06") ~ 105 mm (4.13") ø 77 mm (3.03") 1 1 6 mm (4 .5 7 ") ~ 150 mm (5.91") ø 84 mm (3.31") ø 84 mm (3.31") ~ 93 mm (3.66") ø 80 mm (3.15") 1 1 2 mm (4 .4 1 ") m20x1,5/ ½ npt m20x1,5 m20x1,5/ ½ npt m16x1,5 4...
Page 59
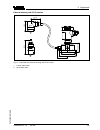
External housing with ip 68 version 1 2 65 mm (2 9 / 16 ") 68 mm (2 43 / 64 ") 92 mm (3 5 / 8 ") 42mm (1 21 / 32 ") 40mm (1 37 / 64 ") 90 mm (3 35 / 64 ") 110 mm (4 21 / 64 ") ~ 66 mm (2 19 / 32 ") 59 mm (2 21 / 64 ") fig. 21: transmitter and external housing with ip 68 version 1 lateral cable outle...
Page 60
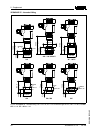
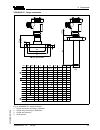
Vegabar 55 - threaded fitting gg gl - 180°c gn gg - 180°c/200°c ba / bb be 78 mm (3 5 / 64 ") 118 mm (4 41 / 64 ") 46 mm (1 13 / 16 ") 111 mm (4 3 / 8 ") 55 mm (2 11 / 64 ") 22 mm ( 55 / 64 ") ø 55 mm (2 11 / 64 ") ø 55 mm (2 11 / 64 ") 78 mm (3 5 / 64 ") 22 mm ( 55 / 64 ") ø 55 mm (2 11 / 64 ") ø 84...
Page 61
Vegabar 55 - hygienic fitting 1 78 mm (3 5 / 64 ") 78 mm (3 5 / 64 ") ø 64 mm (2 33 / 64 ") 78 mm (3 5 / 64 ") ø 91 mm (3 37 / 64 ") ø 78 mm (3 5 / 64 ") ø 85 mm (3 11 / 32 ") ø 73 mm (2 7 / 8 ") 78 mm (3 5 / 64 ") la ca/cf cb sb sa fig. 23: vegabar 55 - hygienic fitting: ca/cf = tri-clamp 2"/tri-clam...
Page 62
Vegabar 55 - hygienic fitting 2 78 mm (3 5 / 64 ") 78 mm (3 5 / 64 ") 78 mm (3 5 / 64 ") 78 mm (3 5 / 64 ") ø 66 mm (2 19 / 32 ") ø 105 mm (4 9 / 64 ") ø 78 mm (3 5 / 64 ") ø 92 mm (3 5 / 8 ") ø 84 mm (3 5 / 16 ") ø 60 mm (2 23 / 64 ") 78 mm (3 5 / 64 ") ø 64 mm (2 33 / 64 ") aa ta ka ts rv / rw fig....
Page 63
Vegabar 55 - flange connection 3 15 / 32 " 4 1 / 64 " 5 7 / 16 " 1 / 8 " 1 / 8 " 1 / 8 " 4xø 45 / 64 " 4xø 45 / 64 " 8xø 45 / 64 " 4 21 / 64 " 4 59 / 64 " 6 19 / 64 " 7 31 / 64 " 5 29 / 32 " 6 1 / 2 " 7 7 / 8 " 45 / 64 " 25 / 32 " 15 / 16 " fb 40 40 fc 50 40 fh 80 40 6 3 / 8 " 1 / 8 " 8xø 55 / 64 " 9...
Page 64
9 .3 industrial property rights vega product lines are global protected by industrial property rights. Further information see http://www.Vega.Com . Only in u.S.A.: further information see patent label at the sensor housing. Vega produktfamilien sind weltweit geschützt durch gewerbliche schutzrechte...
Page 65: Index
Index a a ccessory - flanges 9 - indicating and adjustment module 9 - protective cover 10 c c able entry 16 c able screening 16 c auses of malfunction 41 c heck output signal 42 c onnection cable 15 c opy sensor data 34 e e lectronics and connection compartment 19 e rror messages 42 f f ault rectific...
Page 66
66 vegabar 55 • 4 … 20 ma i ndex 36733 -en -091008.
Page 67
Vegabar 55 • 4 … 20 ma 67 i ndex 36733 - en -091008.
Page 68
Vega g rieshaber kg a m hohenstein 113 77761 s chiltach g ermany p hone +49 7836 50-0 f ax +49 7836 50-201 e- mail: info@de.Vega.Com www.Vega.Com p rinting date: iso 9001 a ll statements concerning scope of delivery, application, practical use and operating conditions of the sensors and processing s...

