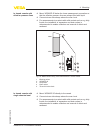
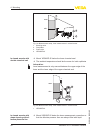
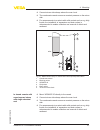
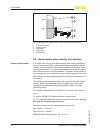
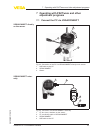
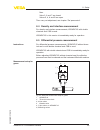
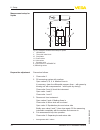
- DL manuals
- Vega
- Transmitter
- VEGADIF 65
- Operating Instructions Manual
Vega VEGADIF 65 Operating Instructions Manual
Summary of VEGADIF 65
Page 1
Operating instructions vegadif 65 foundation fieldbus document id: 36130 differential pressure.
Page 2: Contents
Contents 1 about this document 1.1 function. . . . . . . . . . . . . . . . . . . . . . . . . . . . . . . . . . 5 1.2 target group . . . . . . . . . . . . . . . . . . . . . . . . . . . . . . 5 1.3 symbolism used. . . . . . . . . . . . . . . . . . . . . . . . . . . . 5 2 for your safety 2.1 authorised...
Page 3
6.4 parameter description . . . . . . . . . . . . . . . . . . . . . . . . 47 6.5 menu schematic . . . . . . . . . . . . . . . . . . . . . . . . . . . . 57 6.6 saving the parameter adjustment data . . . . . . . . . . . . 60 7 operating with pactware and other adjustment programs 7.1 connect the pc vi...
Page 4
Information: editing status: 2011-05-09 4 vegadif 65 • foundation fieldbus contents 36130 -en -110510
Page 5: About This Document
1 about this document 1 .1 function this operating instructions manual provides all the information you need for mounting, connection and setup as well as important instructions for maintenance and fault rectification. Please read this information before putting the instrument into operation and keep...
Page 6: For Your Safety
2 for your safety 2 .1 authorised personnel all operations described in this operating instructions manual must be carried out only by trained specialist personnel authorised by the plant operator. During work on and with the device the required personal protective equipment must always be worn. 2 ....
Page 7
2 .5 safety label on the instrument the safety approval markings and safety tips on the device must be observed. 2 .6 ce conformity this device fulfills the legal requirements of the applicable ec guidelines. By attaching the ce mark, vega provides a confirmation of successful testing. You can find the...
Page 8
L chapter "packaging, transport and storage" l chapter "disposal" 8 vegadif 65 • foundation fieldbus 2 for your safety 36130 -en -110510
Page 9: Product Description
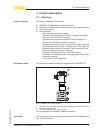
3 product description 3 .1 structure the scope of delivery encompasses: l vegadif 65 differential pressure transmitter l depending on the version ventilation valves and/or closing screws l optional accessory l documentation - this operating instructions manual - operating instructions manual 27835 "i...
Page 10
L instrument type l article number instrument l ex approval l technical data: measuring range, process pressure, process temperature, signal output, voltage supply, protection, protection class l order number, serial number instrument l hardware and software version l article numbers, documentation ...
Page 11
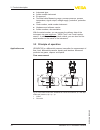
Level measurement 1 2 3 h = ∆p ρ g + + – – h + – fig. 3: level measurement with vegadif 65. Δp = differential pressure, ρ = density of the medium, g = acceleration of gravity 1 basic version with effective pressure lines 2 version with flange chemical seal 3 version with capillaries and cell chemical s...
Page 12
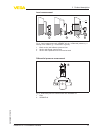
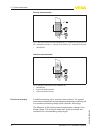
Density measurement = ∆p h g + – h 1 fig. 5: density measurement with vegadif 65, h = defined mounting distance, Δp = differential pressure, ρ = density of the medium, g = acceleration of gravity 1 vegadif 65 interface measurement 1 + – h 2 3 fig. 6: interface measurement with vegadif 65 1 vegadif 65 ...
Page 13
For connection to the processe, the marking "+" and "-" on the process component in chapter "mounting and connection instructions" must hence be noted. The pressure effective on "+" goes positive, the effective pressure on "-" goes negative into the calculation of the pressure difference. The configurat...
Page 14
L via a linking device with hse (high speed ethernet) and additional power supply according to iec 61158-2 the dd (device descriptions) and cff (capability files) necessary for planning and configuration of your ff (foundation fieldbus) commu- nication network are available in the download area of the...
Page 15
The delivery must be checked for completeness and possible transit damage immediately at receipt. Ascertained transit damage or concealed defects must be appropriately dealt with. Up to the time of installation, the packages must be left closed and stored according to the orientation and storage mar...
Page 16: Mounting
4 mounting 4 .1 general instructions to use the instrument make sure that all parts of the instrument exposed to the process, in particular the sensor element, process seal and process fitting, are suitable for the existing process conditions. These include above all the process pressure, process tem...
Page 17
Dp flow elements are calculated for certain pipeline and operating data. Therefore, check the pipeline data before installation at the measuring point and compare the measurement loop number. Detailed instructions for mounting the dp flow element are stated in din en iso 5167 as well as in the instrum...
Page 18
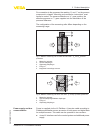
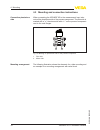
4 .3 mounting and connection instructions when connecting the vegadif 65 to the measurement loop, take note of the plus/minus side of the process component. The plus side is marked with a "+", the minus side with a "-" on the process component next to the oval flanges. + – 2 1 fig. 10: marking for pl...
Page 19
2 3 4 5 6 7 8 9 1 fig. 11: mounting arrangement with tube mounting 1 strap for tube mounting 2 mounting bracket 3 ventilation valve 4 fixing screws 5 vegadif 65 6 ptfe seal 7 5-fold valve block 8 oval flange adapter 9 fixing screws the use of the valve block with inlet and outlet valves allows simple...
Page 20
A: a 1 2 4 3 5 7 8 9 6 2 2 3 1 8 4 6 7 9 5 fig. 12: connection of a 5-fold valve block 1 process fitting 2 process fitting 3 check/ventilate 4 check/ventilate 5 valve for checking/ventilating 6 valve for checking/ventilating 7 inlet valve 8 inlet valve 9 breather valve 20 vegadif 65 • foundation field...
Page 21
4 .4 measurement setup flow à mount vegadif 65 above the measurement loop so that condensate can drain off in the process cable. + – 1 2 4 3 fig. 13: measurement setup, flow measurement in gases 1 vegadif 65 2 three-fold valve block 3 blocking valves 4 orifice or impact pressure probe à mount vegadif 65...
Page 22
+ – 1 2 3 3 5 5 6 6 7 4 fig. 14: measurement setup, flow measurement in vapours 1 condensate vessels 2 orifice or impact pressure probe 3 blocking valves 4 vegadif 65 5 precipitator 6 drain valves 7 three-fold valve block à mount vegadif 65 below the measurement loop so that the effective pressure line...
Page 23
+ – 1 2 2 3 5 5 6 4 4 fig. 15: measurement setup, flow measurement in liquids 1 orifice or impact pressure probe 2 blocking valves 3 vegadif 65 4 precipitator 5 drain valves 6 three-fold valve block 4 .5 measurement setup level à mount vegadif 65 below the lower measurement connection so that the effec...
Page 24
à for measurements in products with solid content such as e.G. Dirty liquids, the installation of separators and drain valves is recommended to enable collection and removal of debris and sediment. + p atm min. P atm 2 3 4 5 1 fig. 16: measurement setup, level measurement in the open vessel 1 vegadi...
Page 25
à mount vegadif 65 below the lower measurement connection so that the effective pressure lines are always filled with liquid à connect minus side always above the max. Level à for measurements in products with solid content such as e.G. Dirty liquids, the installation of separators and drain valves is...
Page 26
+ – max. Min. + – 1 2 3 4 fig. 19: measurement setup, level measurement in closed vessel 1 blocking valve 2 precipitator 3 drain valve 4 vegadif 65 à mount vegadif 65 below the lower chemical seal à the ambient temperature should be the same for both capillaries information: level measurement is onl...
Page 27
à connect minus side always above the max. Level à the condensate vessel ensures a constant pressure on the minus side à for measurements in products with solid content such as e.G. Dirty liquids, the installation of separators and drain valves is recommended to enable collection and removal of debr...
Page 28
+ – min. Max. 1 2 3 4 5 + – fig. 22: measurement setup in closed vessel with superimposed steam 1 condensate vessel 2 blocking valve 3 precipitator 4 drain valve 5 vegadif 65 4 .6 measurement setup density and interface in a vessel with varying level and homogeneous density distribution, density mea...
Page 29
The min. Adjustment is carried out for the differential pressure measured at density 1.0: Δp = ρ • g • h = 1.0 kg/dm³ • 9.81m/s • 0.3 m = 29.4 mbar the max. Adjustment is carried out for the differential pressure measured at density 1.2: Δp = ρ • g • h = 1.2 kg/dm³ • 9.81m/s • 0.3 m = 35.3 mbar = ∆p h...
Page 30
= 23.5 mbar the max. Adjustment is carried out for the differential pressure occuring with density 1.0: Δp = ρ • g • h = 1.0 kg/dm³ • 9.81 m/s • 0.3 m = 29.4 mbar à mount vegadif 65 below the lower chemical seal à the ambient temperature should be the same for both capillaries 1 + – 0,3 m 0,8 1,0 fig...
Page 31
4 .7 measurement setup differential pressure à mount vegadif 65 above the measurement loop so that condensate can drain off in the process cable. + 1 2 3 4 3 fig. 25: measurement setup, differential pressure measurement in gases and vapours 1 vegadif 65 2 three-fold valve block 3 blocking valves 4 e.G....
Page 32
+ – 1 2 4 5 6 4 5 2 3 fig. 26: measurement setup, flow measurement in liquids 1 e.G. filter 2 blocking valves 3 vegadif 65 4 precipitator 5 drain valves 6 three-fold valve block à mount chemical seal with capillaries on top or laterally on the pipeline à in vacuum applications: mount vegadif 65 below ...
Page 33
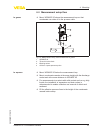
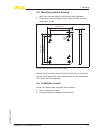
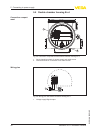
4 .8 mounting external housing 1 mark the holes according to the following drilling template 2 depending on the mounting surface, fasten the wall mounting plate with 4 screws 90 mm (3.54") r3,5 mm (0.14") 3 mm (0.12") 70 mm (2.76") 8 mm (0.32") 93 mm (3.66") 110 mm (4.33") fig. 28: drilling template...
Page 34
5 connecting to power supply 5 .1 preparing the connection always keep in mind the following safety instructions: l connect only in the complete absence of line voltage l if overvoltage surges are expected, overvoltage arresters should be installed according to foundation fieldbus specification tip: ...
Page 35
In systems without potential equalisation, connect the cable screen directly to ground potential at the power supply unit and at the sensor. In the connection box or t-distributor, the screen of the short stub to the sensor must not be connected to ground potential or to another cable screen. The ca...
Page 36
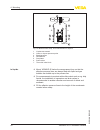
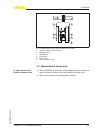
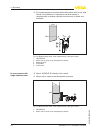
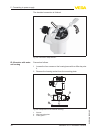
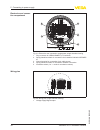
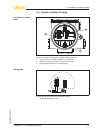
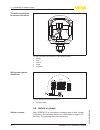
The electrical connection is finished. Fig. 29: connection steps 6 and 7 proceed as follows: 1 loosen the four screws on the housing base with an allen key size 4 2 remove the housing socket from the mounting plate 3 2 1 fig. 30: components of the external housing 1 screws 2 wall mounting plate 3 cab...
Page 37
3 loop the connection cable through the cable entry on the housing base 1) information: the cable gland can be mounted in three positions each displaced by 90°. Simply exchange the cable gland against the blind plug in the suitable thread opening. 4 connect the wire ends as described under "single/d...
Page 38
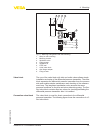
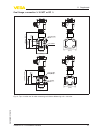
I²c 3 4 5 1 2 display typ: 1 2 5 6 7 8 bus sim. Fig. 31: electronics and connection compartment, single chamber housing 1 plug connector for vegaconnect (i²c interface) 2 spring-loaded terminals for connection of the external indication vegadis 61 3 ground terminal for connection of the cable screen...
Page 39
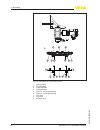
5 .4 double chamber housing 3 1 2 display 1 2 i²c fig. 33: connection compartment, double chamber housing 1 plug connector for vegaconnect (i²c interface) 2 ground terminal for connection of the cable screen 3 spring-loaded terminals for voltage supply i2c 1 1 2 fig. 34: wiring plan with double cham...
Page 40
5 .5 double chamber housing ex d 1 2 1 2 fig. 35: connection compartment with double chamber housing ex d 1 spring-loaded terminals for power supply and cable screen 2 ground terminal for connection of the cable screen 1 1 2 fig. 36: wiring plan with double chamber housing ex d 1 voltage supply/sign...
Page 41
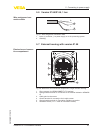
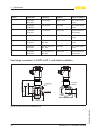
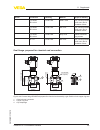
5 .6 version ip 66/ip 68, 1 bar + - 1 2 fig. 37: wire assignment connection cable 1 brown (+) and blue (-) to power supply or to the processing system 2 shielding 5 .7 external housing with version ip 68 i²c display typ: 1 2 5 6 7 8 bus sim. 4 5 6 1 2 3 fig. 38: electronics and connection compartmen...
Page 42
1 2 3 4 3 4 1 2 5 fig. 39: connection of the sensor in the housing socket 1 brown 2 blue 3 yellow 4 white 5 shielding i2c display 1 1 2 5 6 7 8 fig. 40: wiring plan external electronics 1 voltage supply 5 .8 switch on phase after vegadif 65 is connected to voltage supply or after voltage recurrence,...
Page 43
L internal check of the electronics l indication of the instrument type, the firmware as well as the sensor tags (sensor designation) l status byte goes briefly to fault value then the current measured value will be displayed and the corresponding digital output signal will be outputted to the cable. ...
Page 44: Adjustment Module Plicscom
6 adjustment with the indicating and adjustment module plicscom 6 .1 short description the indicating and adjustment module is used for measured value display, adjustment and diagnosis. It can be mounted in the following housing versions and instruments: l all continuously measuring sensors in singl...
Page 45
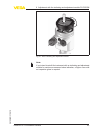
Fig. 41: insert indicating and adjustment module note: if you intend to retrofit the instrument with an indicating and adjustment module for continuous measured value indication, a higher cover with an inspection glass is required. Vegadif 65 • foundation fieldbus 45 6 adjustment with the indicating ...
Page 46
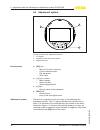
6 .3 adjustment system 1.1 2 3 1 fig. 42: indicating and adjustment elements 1 lc display 2 indication of the menu item number 3 adjustment keys l [ok] key: - move to the menu overview - confirm selected menu - edit parameter - save value l [->] key to select: - menu change - select list entry - sele...
Page 47
6 .4 parameter description vegadif 65 has general adjustment parameters which are also used for other measuring principles as well as instrument-specific adjust- ment parameters. The general adjustment parameters are described in the operating instructions manual "indicating and adjustment module". T...
Page 48
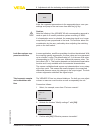
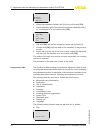
5 select the requested application in the selection list, for example "f low" and confirm with [ok]. In this menu item you select the adjustment unit as well as the unit for the temperature indication in the display. To select the adjustment unit (in the example switching over from mbar to bar), proc...
Page 49
5 select the requested unit, e.G. Kg/dm³ with [->] and confirm with [ok] , the submenu "density" appears. Unit of measurement density 0001000 kg/dm³ 6 enter the requested density value with [->] and [+], confirm with [ok] and move to position correction with [->]. The adjustment unit is thus switched ...
Page 50
The current measured value was corrected to 0, the corrective value is available in the display as offset value with sign reversal. If a known value should be taken over as position correction which is not the current value, then you have to select the function "edit" and enter the requested value. I...
Page 51
The span adjustment is finished. Proceed as follows: 1 edit the % value in the menu item "min. Adjustment" with [ok]. Min. Adjustment 0 .00 % = 0.0000 bar 0.0000 bar 2 set the requested value with [+] and [->]. 3 confirm with [ok] and edit the requested bar value. 4 set the requested bar value with [+...
Page 52
Min. Adjustment 0 .00 % = 0.0000 bar 0.0000 bar 2 set the requested value with [+] and [->], for example 100 %. 3 confirm with [ok] and edit the requested bar value. 4 set the requested bar value with [+] and [->], for example 29.4 mbar. 5 confirm with [ok] and move to max. Adjustment with [->]. For a...
Page 53
Linearisation curve linear enter the requested parameters via the appropriate keys, save your settings and jump to the next menu item with the [->] key. Caution: note the following if the vegadif 65 with corresponding approval is used as part of an overfill protection system according to whg: if a li...
Page 54
Part sum counter ▶ mass flow ▶ volume flow without unit 4 select the requested variable with [->] and confirm with [ok]. 5 select calibration unit of the effective pressure transmitter with [- > ] , for example m 3 /s and confirm with [ok]. Part sum counter 0 % = +0000 m 3 /s= 100 % = +0000 m 3 /s= 6 edi...
Page 55
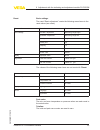
Basic settings the reset "basic adjustment" resets the following menu items to the reset values (see chart): menu section menu item reset value basic settings zero/min. Adjustment measuring range begin span/max. Adjustment measuring range end density 1 kg/l density unit kg/l damping 1 s linearisatio...
Page 56
Additional adjustment and diagnosis options such as e.G. Scaling, simulation or trend curve presentation are shown in the following menu schematic. You will find a detailed description of these menu items in the operating instructions manual "indicating and adjustment module". Optional settings 56 ve...
Page 57
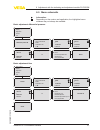
6 .5 menu schematic information: depending on the version and application, the highlighted menu windows may not always be available. Basic adjustment differential pressure 1 ▶ basic settings display diagnostics service info 1.1 application differential pressure ▼ 1.1 unit unit of measurement bar ▼ tem...
Page 58
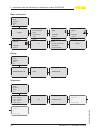
Basic setting level 1 ▶ basic settings display diagnostics service info 1.1 application level ▼ 1.1 unit unit of measurement bar ▼ temperature unit °c ▼ 1.2 position correction offset dp = -0.0035 bar 0.0000 bar 1.3 min. Adjustment 000 .0 % = 0 .0000 bar 0.0000 bar 1.4 max. Adjustment 100 .00 % = 0 ....
Page 59
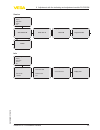
Service 4 basic settings display diagnostics ▶ service info 4.2 simulation start simulation ▼ 4.3 reset select reset ▼ 4.4 language deutsch ▼ 4.7 copy sensor data copy sensor data? 4.8 pin enable? Info 5 basic settings display diagnostics service ▶ info 5.1 instrument type serial number 12345678 5.2...
Page 60
6 .6 saving the parameter adjustment data it is recommended noting the adjusted data, e.G. In this operating instructions manual and archive them afterwards. They are hence available for multiple use or service purposes. If vegadif 65 is equipped with an indicating and adjustment module, the most im...
Page 61: Adjustment Programs
7 operating with pactware and other adjustment programs 7 .1 connect the pc via vegaconnect 3 1 2 fig. 43: connection of the pc via vegaconnect directly to the sensor 1 usb cable to the pc 2 vegaconnect 3 sensor 1 2 3 4 open twist usb lock fig. 44: connection via vegaconnect externally 1 i²c bus (co...
Page 62
Necessary components: l vegadif 65 l pc with pactware and suitable vega dtm l vegaconnect l power supply unit or processing system 7 .2 parameter adjustment with pactware further setup steps are described in the operating instructions manual "dtm c ollection/pactware" attached to each cd and which c...
Page 63: Setup
8 setup 8 .1 select the mode the following modes can be adjusted on vegadif 65: l flow measurement l level measurement l differential pressure measurement 8 .2 flow measurement in flow measurement, vegadif 65 is normally used without a chemical seal. Before adjusting vegadif 65, you have to clean the ...
Page 64
A b + 1 5 6 7 + – 2 4 3 ii i iii iii fig. 46: preferred measurement setup for liquids i vegadif 65 ii three-fold valve block iii precipitator 1.5 drain valves 2.4 inlet valves 3 breather valve 6.7 vent valves on vegadif 65 a, b blocking valves proceed as follows: 1 close valve 3 2 fill measuring sys...
Page 65
4 carry out a position correction if the following conditions apply. If the conditions are not fulfilled, then carry out the position correction after step 6. Conditions: the process cannot be sealed off. The pressure extraction points (a and b) are at the same geodesic height. 5 put measurement loop ...
Page 66
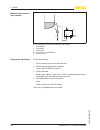
Fig. 47: preferred measurement setup for open vessels i vegadif 65 ii precipitator 1 drain valve 6.7 vent valves on vegadif 65 a blocking valve proceed as follows: 1 fill the vessel to just over the lower tap. 2 fill measuring system with medium. Open valve a: medium flows in. 3 vent instrument briefl...
Page 67
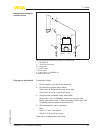
+ a b 6 7 3 2 4 1 5 + – ii i iii iii fig. 48: preferred measurement setup for closed vessels i vegadif 65 ii three-fold valve block iii precipitator 1, 5 drain valves 2, 4 inlet valves 6, 7 vent valves on vegadif 65 a, b blocking valves proceed as follows: 1 fill the vessel to just above the lower t...
Page 68
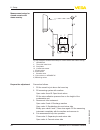
+ a b 6 7 3 2 4 1 5 + – ii i iii iii iv fig. 49: preferred measurement setup for closed vessels with steam overlay i vegadif 65 ii three-fold valve block iii precipitator iv condensate vessel 1, 5 drain valves 2, 4 inlet valves 3 breather valve 6, 7 vent valves on vegadif 65 a, b blocking valves pro...
Page 69
Now: valve 3, 6 and 7 are closed valves 2, 4, a and b are open. Then carry out adjustment, see chapter "set parameters". 8 .4 density and interface measurement for density and interface measurements, vegadif 65 with double chemical seal csb is used. Vegadif 65 in this version is immediately ready fo...
Page 70
A b + 1 5 6 7 + – 2 4 3 ii i iii iii fig. 51: preferred measurement setup for liquids i vegadif 65 ii three-fold valve block iii precipitator 1.5 drain valves 2.4 inlet valves 3 breather valve 6, 7 vent valves on vegadif 65 a, b blocking valves proceed as follows: 1 close valve 3 2 fill measuring sy...
Page 71
Open valve 4: connect minus side now: valves 1, 3, 5, 6 and 7 are closed 6) valves 2 and 4 open valves a and b open (if available) then carry out adjustment, see chapter "set parameters". 6) valves 1, 3, 5: configuration with 5 valves. Vegadif 65 • foundation fieldbus 71 8 setup 36130 - en -110510
Page 72
9 maintenance and fault rectification 9 .1 maintenance if the instrument is used properly, no special maintenance is required in normal operation. In some applications, product buildup on the separating diaphragms can influence the measuring result. Depending on the sensor and application, take precau...
Page 73
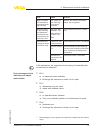
Error cause removal when an additio- nal instrument is connected, the h1 segment fails. Max. Supply cur- rent of the seg- ment coupler exceeded measure the current consumption, reduce size of segment measured value on the indicating and adjustment module does not correspond to the value in the plc t...
Page 74
Depending on the failure reason and measures taken, the steps described in chapter "set up" must be carried out again, if necessary. 9 .3 exchanging the electronics module in case of a defect, the electronics module can be exchanged by the user against an identical type. If no electronics module is ...
Page 75
Connect the sensor to power supply and provide connection from pc to the instrument via vegaconnect. Start pactware and provide connection to the sensor, e.G. Via the vega project assistant. Close the parameter window of the sensor, as far as open. Go in the pactware menu bar to "instrument data", "...
Page 76: Dismounting
10 dismounting 10 .1 dismounting steps warning: before dismounting, be aware of dangerous process conditions such as e.G. Pressure in the vessel, high temperatures, corrosive or toxic products etc. Take note of chapters "mounting" and "connecting to power supply" and carry out the listed steps in re...
Page 77: Supplement
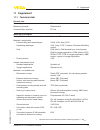
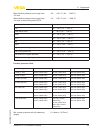
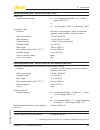
11 supplement 11 .1 technical data general data pressure type differential pressure measuring principle piezoresistive communication interface i ²c bus materials and weights material 316l corresponds to stainless steel 1.4404 or 1.4435 materials, wetted parts - process fitting with lateral flanges c 22...
Page 78
- type plate support with ip 68 version on cable pe hard ohmic contact between ground terminal and process fitting max. Torque screws mounting strap 30 nm max. Torque screws socket external housing 5 nm (3.688 lbf ft) weight approx. 4.2 … 4.5 kg (9.26 … 9.92 lbs), depending on process fitting output v...
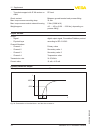
Page 79
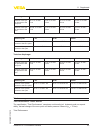
Version, nominal measuring range dead time t 1 time constant t 2 basic version 10 bar and 30 bar 100 ms 250 ms basic version 100 mbar 100 ms 180 ms basic version 500 mbar 100 ms 180 ms basic version, 3 bar 100 ms 180 ms basic version 16 bar and 40 bar 100 ms 180 ms chemical seal version, all nominal...
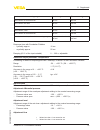
Page 80
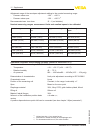
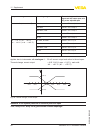
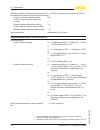
Adjustment range of the zero/span adjustment relating to the nominal measuring range: - pressure value zero -120 … +120 % - pressure value span -120 … +120 % 11) recommended max. Turn down 15 : 1 (no limitation) nominal measuring ranges, measurement limits and smallest spans to be calibrated nominal...
Page 81
Deviation determined according to the limit point method according to iec 60770 14 ) applies to digital interfaces (hart, profibus pa, foundation fieldbus) as well as to analogue current output 4 … 20 ma. Specifications refer to the set span. Turn down (td) is the ratio nominal measuring range/set spa...
Page 82
Temperature range measuring range thermal changes of the zero signal and the output span rela- ting to the adjusted span -10 … +60 °c (+14 … +140 °f) 10 mbar, 30 mbar ± (0.31 x td + 0.06) % 100 mbar ± (0.18 x td + 0.02) % 500 mbar, 3 bar ± (0.08 x td + 0.05) % 16 bar ± (0.1 x td + 0.1) % 16 bar ± (0...
Page 83
Measuring cell 10 mbar 30 mbar 100 mbar 500 mbar influence of the sys- tem pressure to the zero point ± 0.15 % of url/ 7 bar ± 0.35 % of url/ 70 bar ± 0.15 % of url/ 70 bar ± 0.075 % of url/ 70 bar influence of the sys- tem pressure to the span ± 0.035 % of url/ 7 bar ± 0.14 % of url/ 70 bar ± 0.14 % ...
Page 84
- 316l, alloy, gold-rhodium diaphragm ± 0.15 % of the set span 15)16) - tantalum diaphragm ± 0.30 % of the set span 17)18) total error - basic version the specification "total error" comprises the longterm stability and the total performance. Diaphragm material measuring range total error 316l, alloy...
Page 85
With effective pressure lines longer than 100 mm -40 … +120 °c (-40 … +248 °f) with effective pressure lines longer than 100 mm, process fitting steel c22.8 -10 … +120 °c (+14 … +248 °f) seal material temperature limits fkm -20 … +85 °c (-4 … +185 °f) ffkm (kalrez 6375) -5 … +85 °c (23 … +185 °f) epdm ...
Page 86
Vibration resistance (mechanical vibrations with 5 … 100 hz), depending on the version as well as the material and series of the electronics housing 22) - single and double chamber plastic housing, single chamber aluminium housing 4 g - double chamber aluminium housing, single chamber stainless stee...
Page 87
Electromechanical data - version ip 66/ip 68 (1 bar) cable entry - single chamber housing l 1 x ip 68 cable gland m20 x 1.5; 1 x blind stopper m20 x 1.5 or: l 1 x closing cap ½ npt, 1 x blind plug ½ npt connection cable - structure four wires, one suspension cable, one breather capillary, screen bra...
Page 88
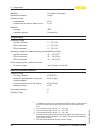
Indication lc display in dot matrix adjustment elements 4 keys protection rating - unassembled ip 20 - mounted into the sensor without cover ip 40 materials - housing abs - inspection window polyester foil voltage supply operating voltage - non-ex instrument 9 … 32 v dc - eex-ia instrument 9 … 24 v ...
Page 89
Approvals instruments with approvals can have different technical data depending on the version. That's why the associated approval documents have to be noted with these instruments. They are part of the delivery or can be downloaded under www.Vega.Com via "vega tools" and "serial number search" as w...
Page 90
11 .2 information on foundation fieldbus block diagram, measured value processing the following illustration shows the transducer block and function block in simplified form. T i simulate alarms out pv field-value mode & status pvf-time l o w -c u to f f l-typ e out-scale pv-scale direct indirect ind...
Page 91
L primary_value - process value after min/max-adjustment and linearization. Selected as input to aifb by setting 'c hannel' = 1. Unit derives from 'primary_value_unit' l primary_value_unit - unit code of 'primary_value' - % l secondary_value_1 - process pressure. Selected as input to aifb by setting...
Page 92
- result of table plausibility check - " 0: ""uninitialized"" 1: ""good"" 2: ""not monotonous increasing"" 3: ""not monotonous decreasing"" 4: ""not enough values transmitted"" 5: ""too many values transmitted"" 6: ""g radient of edge too high"" 7: ""values not excepted"" 8: ""table currently loaded...
Page 93
L max_peak_temperature_value - holds the maximum process temperature. Write access resets to current value. Unit derives from 'temperature.Unit' - write access resets to current value l min_peak_temperature_value - holds the minimum process temperature. Write access resets to current value. Unit der...
Page 94
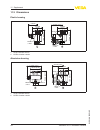
11 .3 dimensions plastic housing ~ 69 mm (2.72") ø 79 mm (3.03") 112 mm (4.41") m20x1,5/ ½ npt ~ 84 mm (3.31") m16x1,5 112 mm (4.41") m20x1,5/ ½ npt 1 2 ø 79 mm (3.31") 1 single chamber version 2 double chamber version aluminium housing 2 1 ø 86 mm (3.39") ~ 116 mm (4.57") 116 mm (4.57") m20x1,5 m20...
Page 95
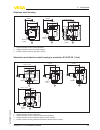
Stainless steel housing ~ 69 mm (2.72") ø 79 mm (3.11") 117 mm (4.61") m20x1,5/ ½ npt ~ 59 mm (2.32") ø 80 mm (3.15") 112 mm (4.41") m20x1,5/ ½ npt ~ 87 mm (3.43") ø 86 mm (3.39") 120 mm (4.72") m20x1,5/ ½ npt m16x1,5 3 2 1 1 single chamber version, electropolished 2 single chamber version, precisio...
Page 96
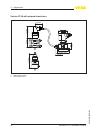
Version ip 68 with external electronics 1 2 + – 68,3 mm (2.69") 103 mm (4.06") 93 mm (3.66") 115 mm (4.53") ø 55 mm (2.17") ø 55 mm (2.17") 90 mm (3.54") 110 mm (4.33") ~ 66 mm (2.6") 59 mm (2.32") 1 lateral cable outlet 2 axial cable outlet 96 vegadif 65 • foundation fieldbus 11 supplement 36130 -e...
Page 97
Oval flange, connection ¼-18 npt or rc ¼ 41,3 mm (1.63") 85 mm (3.35") 134,5 mm (5.3") 41,3 mm (1.63") 72 mm (2.84") 128 mm (5.04") 100 mm (3.94") 98 mm (3.94") 100 mm (3.94") 106 mm (4.17") 54 mm (2.13") 54 mm (2.13") + – + – 7/16-20 unf m 10 1/4-18 npt rc1/4 7/16-20 unf m 10 (m12) 1/4-18 npt rc1/4 ...
Page 98
Version connection fastening material scope of delivery b 1/4-18 npt iec 61518 7/16-20 unf steel c 22.8 incl. 2 vent valves (316l) d 1/4-18 npt iec 61518 7/16-20 unf aisi 316l incl. 2 vent valves (316l) f 1/4-18 npt iec 61518 7/16-20 unf alloy c276 without valves/clo- sing screws u rc 1/4 7/16-20 un...
Page 99
Version connection fastening material scope of delivery c 1/4-18 npt iec 61518 7/16-20 unf steel c 22.8 incl. 4 closing screws (aisi 316l) and 2 ventilation valves e 1/4-18 npt iec 61518 7/16-20 unf aisi 316l incl. 4 closing screws (aisi 316l) and 2 ventilation valves h 1/4-18 npt iec 61518 7/16-20 ...
Page 100
11 .4 industrial property rights vega product lines are global protected by industrial property rights. Further information see http://www.Vega.Com . Only in u.S.A.: further information see patent label at the sensor housing. Vega produktfamilien sind weltweit geschützt durch gewerbliche schutzrecht...
Page 101: Index
Index a adjustment - unit 48 - with density 51 - with differential pressure 50 - with ow 52 - with level 51 application area - density measurement 12 - differential pressure measurement 11 - flow measurement 10 - interface measurement 12 - level measurement 11 c check signal 72 connection compartme...
Page 102
102 vegadif 65 • foundation fieldbus index 36130 -en -110510
Page 103
Vegadif 65 • foundation fieldbus 103 index 36130 - en -110510
Page 104
Vega grieshaber kg am hohenstein 113 77761 schiltach germany phone +49 7836 50-0 fax +49 7836 50-201 e-mail: info@de.Vega.Com www.Vega.Com printing date: iso 9001 all statements concerning scope of delivery, application, practical use and operating conditions of the sensors and processing systems co...

