- DL manuals
- Vega
- Tools
- VEGASON 64
- Operating Instructions Manual
Vega VEGASON 64 Operating Instructions Manual
Summary of VEGASON 64
Page 1
Operating instructions vegason 64 profibus pa ultrasonic.
Page 2: Contents
Contents 1 about this document 1.1 function. . . . . . . . . . . . . . . . . . . . . . . . . . . . . . . . . . 4 1.2 target group . . . . . . . . . . . . . . . . . . . . . . . . . . . . . . 4 1.3 symbolism used. . . . . . . . . . . . . . . . . . . . . . . . . . . . 4 2 for your safety 2.1 authorised...
Page 3
8 maintenance and fault rectification 8.1 maintenance . . . . . . . . . . . . . . . . . . . . . . . . . . . . . . 43 8.2 remove interferences . . . . . . . . . . . . . . . . . . . . . . . . 43 8.3 exchanging the electronics module . . . . . . . . . . . . . . 45 8.4 software update . . . . . . . . . ....
Page 4: 1 About This Document
1 about this document 1.1 function this operating instructions manual provides all the information you need for mounting, connection and setup as well as important instructions for maintenance and fault rectification. Please read this information before putting the instrument into operation and keep ...
Page 5: 2 For Your Safety
2 for your safety 2.1 authorised personnel all operations described in this operating instructions manual must be carried out only by trained specialist personnel authorised by the plant operator. During work on and with the device the required personal protective equipment must always be worn. 2.2 ...
Page 6
2.5 safety approval markings and safety tips the safety approval markings and safety tips on the device must be observed. 2.6 ce conformity this device fulfills the legal requirements of the applicable ec guidelines. By attaching the ce mark, vega provides a confirmation of successful testing. You can...
Page 7
L chapter "packaging, transport and storage" l chapter "disposal" vegason 64 • profibus pa 7 2 for your safety 28787 - en -081127.
Page 8: 3 Product Description
3 product description 3.1 configuration the scope of delivery encompasses: l vegason 64 ultrasonic sensor l unassembled cable gland l documentation - this operating instructions manual - operating instructions manual 27835 "indicating and adjust- ment module plicscom" (optional) - ex-specific "safety ...
Page 9
L technical data: for example approvals, process temperature, process fitting/material, signal output, power supply, protection with the serial number, you can access the delivery data of the instrument via www.Vega.Com, "vega tools" and "serial number search". In addition to the type label outside, ...
Page 10
3.4 packaging, transport and storage your instrument was protected by packaging during transport. Its capacity to handle normal loads during transport is assured by a test according to din en 24180. The packaging of standard instruments consists of environment- friendly, recyclable cardboard. For sp...
Page 11: 4 Mounting
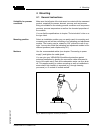
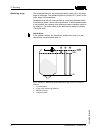
4 mounting 4.1 general instructions make sure that all parts of the instrument in contact with the measured product, especially the sensor element, process seal and process fitting, are suitable for the existing process conditions such as process pressure, process temperature as well as the chemical ...
Page 12
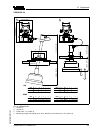
The reference plane for the measuring range (version a) is the lower edge of the flange. The reference plane for versions b, c and d is the lower edge of the transducer. Remember that with all versions there is a minimum distance below the reference plane - the so-called dead band - in which measurem...
Page 13
1 3 2 100% 0% 4 fig. 4: version b, c, d - measuring range (operating range) and max. Measuring distance 1 full (dead band) 2 empty (max. Measuring distance) 3 measuring range 4 reference plane gauge pressure in the vessel does not influence vegason 64. Low pressure or vacuum does, however, damp the u...
Page 14
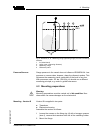
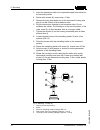
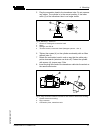
3 insert the transducer tube in the requested length from below into the swivelling holder 4 fasten with screws (4); torque max. 10 nm 5 remove the plug from below out of the instrument housing and plug it into the socket of the transducer tube 6 plug the electronics housing to the transducer tube. ...
Page 15
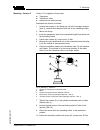
Version c is supplied in three parts: l transducer l transducer cable l electronics for wall mounting assemble the version as follows: 1 loosen the screws on the fixing ring (4) with a hexagon spanner (size 4), remove the transducer tube out of the swivelling holder 2 mount the flange 3 insert the tra...
Page 16
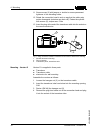
11 secure screw (3) with lacquer or similar to ensure permanent tightness of the swivelling holder 12 rotate the connection head in such a way that the cable entry points downwards (moisture can drain off). Fasten the cylinder with screws (5); torque max. 5 nm 13 insert the plug at the end of the tra...
Page 17
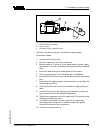
5 plug the connection head to the transducer tube. Do not squeeze any cables. The cylinder is in the correct position, if the lower notch (2) of the transducer tube is no longer visible 1 2 3 4 fig. 8: mounting - version d 1 groove for locking the connection head 2 notch 3 hexagon nut sw 46 4 termin...
Page 18
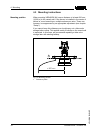
4.3 mounting instructions when mounting vegason 64, keep a distance of at least 500 mm (19.69 in) to the vessel wall. If the sensor is installed in the center of dished or round vessel tops, multiple echoes can arise. These can, however, be suppressed by an appropriate adjustment (see chapter " setu...
Page 19
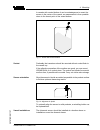
In vessels with conical bottom it can be advantageous to mount the sensor in the center of the vessel, as measurement is then possible down to the lowest point of the vessel bottom. Fig. 11: vessel with conical bottom preferably the transducer should be mounted without socket flush to the vessel top....
Page 20
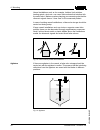
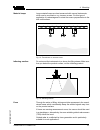
Vessel installations such as for example, ladders, limit switches, heating spirals, struts etc. Can cause false echoes that interfere with the useful echo. Make sure when planning your measuring site that the ultrasonic signals have a "clear view" to the measured product. In case of existing vessel ...
Page 21
Large material heaps are best measured with several instruments, which can be mounted on e.G. Traverse cranes. For this type of application it is advantageous to orient the sensor perpendicular to the bulk solid surface. Fig. 15: transducers on traverse crane do not mount the instruments in or above...
Page 22
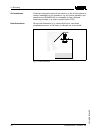
If there are strong air currents in the vessel, e.G. Due to strong winds in outdoor installations or air turbulence, e.G. By cyclone extraction you should mount vegason 64 in a standpipe or use a different measuring principle, e.G. Radar or guided radar (tdr). Strong heat fluctuations, e.G. Caused by ...
Page 23
5 connecting to power supply 5.1 preparing the connection always keep in mind the following safety instructions: l connect only in the complete absence of line voltage l if overvoltage surges are expected, overvoltage arresters should be installed according to profibus specifications tip: we recommend...
Page 24
In systems with potential equalisation, connect the cable screen directly to ground potential at the power supply unit, in the connection box and at the sensor. The screen in the sensor must be connected directly to the internal ground terminal. The ground terminal outside on the housing must be con...
Page 25
1 2 3 fig. 18: plug connector between transducer and socket of electronics housing 1 socket electronics housing 2 plug connector 3 connection piece, transducer tube only then, the sensor may be connected to voltage supply. Proceed as follows: 1 unscrew the housing cover 2 loosen compression nut of t...
Page 26
The electrical connection is finished. Fig. 19: connection steps 5 and 6 5.3 wiring plan, double chamber housing 1 2 3 4 5 fig. 20: double chamber housing 1 housing cover, connection compartment 2 blind stopper or plug m12 x 1 for vegadis 61 (optional) 3 housing cover, electronics compartment 4 filte...
Page 27
1 3 2 display 1 2 5 6 7 8 i²c fig. 21: electronics compartment, double chamber housing 1 plug connector for vegaconnect (i²c interface) 2 internal connection cable to the connection compartment 3 terminals for vegadis 61 3 1 2 3 4 1 2 l1 n bus fig. 22: connection compartment, double chamber housing ...
Page 28
Pe / l / n l1 n 1 2 1 2 3 4 bus fig. 23: wiring plan, double chamber housing 1 power supply 2 signal output 5.4 switch on phase after vegason 64 is connected to voltage supply or after voltage recurrence, the instrument carries out a self-check for approx. 30 seconds. The following steps are carried...
Page 29: Module Plicscom
6 set up with the indicating and adjustment module plicscom 6.1 short description the indicating and adjustment module plicscom is used for measured value display, adjustment and diagnosis. It can be mounted in the following housing versions and instruments: l all sensors of the plics ® instrument f...
Page 30
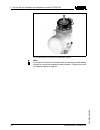
Fig. 24: mounting the indicating and adjustment module note: if you intend to retrofit the instrument with an indicating and adjustment module for continuous measured value indication, a higher cover with an inspection glass is required. 30 vegason 64 • profibus pa 6 set up with the indicating and adj...
Page 31
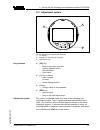
6.3 adjustment system 1.1 2 3 1 fig. 25: indicating and adjustment elements 1 lc display 2 indication of the menu item number 3 adjustment keys l [ok] key: - move to the menu overview - confirm selected menu - edit parameter - save value l [->] key to select: - menu change - list entry - select editi...
Page 32
6.4 setup procedure before starting the actual parameter adjustment of a profibus pa sensor, the address setting must first be carried out. You will find a detailed description in the operating instructions manual of the indicating and adjustment module or in the online help of pactware or dtm. As vega...
Page 33
3 prepare the % value for editing with [ok] and set the cursor to the requested position with [->]. Set the requested percentage value with [+] and save with [ok]. The cursor jumps now to the distance value. 4 enter the suitable distance value in m for the empty vessel (e.G. Distance from the sensor...
Page 34
Apart from the medium, the vessel shape can also influence the measurement. To adapt the sensor to these measuring conditions, this menu item offers different options depending on whether liquid or solid is selected. With "liquids" these are "storage tank", "stilling tube", " open vessel" or "stirred v...
Page 35
In this menu item you can enter an unambiguous designation for the sensor, e.G. The measurement loop name or the tank or product designation. In digital systems and in the documentation of larger plants, a singular designation should be entered for exact identification of individual measuring sites. ...
Page 36
Note: since with the function "quick level change > 1 m/min." the generation of an average value of the signal processing is considerably reduced, false reflections by agitators or vessel installations can cause measured value fluctuations. A false echo memory is thus recom- mended. This function enab...
Page 37
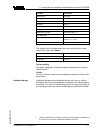
Function reset value vessel form not known damping 0 s linearisation linear channel pv lin. % sensor-tag sensor displayed value pa-out additional pa value secondary value 1 % out-scale-unit % pv-out-scale 0.00 lin % = 0.0 % 100.0 lin % = 100 % unit of measurement m(d) the values of the following men...
Page 38
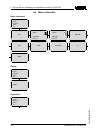
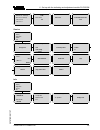
6.5 menu schematic basic adjustment 1 ▶ basic adjustment display diagnostics service info 1.1 sensor address 000 1.2 min. Adjustment 000.0 % = 10.000 m(d) 1.245 m(d) 1.3 max. Adjustment 100.0 % = 0.000 m(d) 6.789 m(d) 1.4 medium bulk solid 1.5 vessel form silo 1.6 linearisation curve linear 1.7 chan...
Page 39
3.1 pointer distance min.: 0.580 m(d) dist. Max.: 16.785 m(d) t-min.: 30.6 °c t-min.: 4.5 °c 3.2 meas. Reliability 36 db sensor status ok 3.3 curve selection echo curve 3.4 echo curve presentation of the echo curve service 4 basic adjustment display diagnostics ▶ service info 4.1 gating out of false...
Page 40
6.6 saving the parameter adjustment data it is recommended noting the adjusted data, e.G. In this operating instructions manual and archive them afterwards. They are hence available for multiple use or service purposes. If vegason 64 is equipped with an indicating and adjustment module, the most imp...
Page 41: Programs
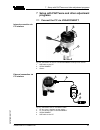
7 setup with pactware and other adjustment programs 7.1 connect the pc via vegaconnect 3 1 2 fig. 26: connection of the pc via vegaconnect directly to the sensor 1 usb cable to the pc 2 vegaconnect 3 sensor 1 2 3 4 open twist usb lock fig. 27: connection via i²c connection cable 1 i²c bus (com.) int...
Page 42
Necessary components: l vegason 64 l pc with pactware and suitable vega dtm l vegaconnect l power supply unit or processing system 7.2 parameter adjustment with pactware further setup steps are described in the operating instructions manual " dtm collection/pactware" attached to each cd and which ca...
Page 43
8 maintenance and fault rectification 8.1 maintenance when used in the correct way, no special maintenance is required in normal operation. 8.2 remove interferences the operator of the system is responsible for taken suitable measures to remove interferences. A maximum of reliability is ensured. Neve...
Page 44
? Measured value on the indicating and adjustment module does not correspond to the value in the plc l the menu item "display - display value" is not set to "pa-out" à check values and correct, if necessary ? No connection between plc and pa network l incorrect adjustment of the bus parameter and th...
Page 45
Depending on the failure reason and measures taken, the steps described in chapter "set up" must be carried out again, if necessary. 8.3 exchanging the electronics module if the electronics module is defective, it can be replaced by the user. In ex applications only one instrument and one electronic...
Page 46
Pactware checks now the actual hardware and software version of the sensor and displays the data. This procedure lasts approx. 60 s. Push the button " update software" and select the previously extracted hex file. Then the software update can be started. Further files are installed automatically. Depe...
Page 47: 9 Dismounting
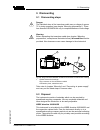
9 dismounting 9.1 dismounting steps danger: the individual wires of the transducer cable carry a voltage of approx. 70 v during operation (see chapter "mounting preparations"). There- fore dismount vegason 64 only in complete absence of line voltage. Warning: before separating the transducer cable (...
Page 48
Correct disposal avoids negative effects to persons and environment and ensures recycling of useful raw materials. Materials: see chapter "technical data" if you have no possibility to dispose of the old instrument professionally, please contact us concerning return and disposal. 48 vegason 64 • profi...
Page 49: 10 Supplement
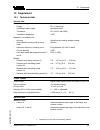
10 supplement 10.1 technical data general data materials, wetted parts - flange pp or aluminium - swivelling holder, flange galvanized steel - transducer pa (1.4301 with stex) - transducer diaphragm 316ti materials, non-wetted parts - housing aluminium die-casting powder coated - seal between housing...
Page 50
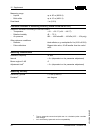
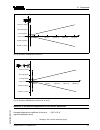
Measuring range - liquids up to 25 m (82.02 ft) - bulk solids up to 15 m (49.21 ft) dead band 1 m (3.3 ft) reference conditions to measuring accuracy (similar to din en 60770-1) reference conditions according to din en 61298-1 - temperature + 18 … +30 °c (+64 … +86 °f) - relative humidity 45 … 75 % ...
Page 51
25 m (82.021 ft) 10 m (32.8 ft) 3 m (9.48 ft) 25 mm (0.984 in) 50 mm (1.196 in) 6 mm (0.236 in) -6 mm (-0.236 in) -25 mm (-0.984 in) -50 mm (-1.196 in) 5 m (16.4 ft) 15 m (49.213 ft) 20 m (65.617 ft) fig. 29: deviation vegason 64 version a 25 m (82.021 ft) 10 m (32.8 ft) 3 m (9.48 ft) 25 mm (0.984 i...
Page 52
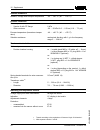
Ambient conditions ambient, storage and transport temperature -40 … +80 °c (-40 … +176 °f) process conditions process pressure - version a with pp flange 0 kpa - other versions -20 … 50 kpa/-0.2 … 0.5 bar (-2.9 … 7.3 psi) process temperature (transducer temper- ature) -40 … +80 °c (-40 … +176 °f) vib...
Page 53
Materials - housing abs - inspection window polyester foil power supply operating voltage - non-ex and ex-d instrument 20 … 72 v dc, 20 … 253 v ac, 50/60 hz power consumption max. 4 va; 2.1 w electrical protective measures protection ip 66/ip 67 overvoltage category iii protection class i approvals ...
Page 54
10.2 profibus pa instrument master file the instrument master file (gsd) contains the characteristic data of the profibus pa instrument. These data are, e.G. The permissible transmission rates as well as information on diagnostics values and the format of the measured value outputted by the pa instrumen...
Page 55
M(d) % lin% min-max adjustment linearization profibus pa-output primary value secondary value 1 secondary value 2 target mode failure mode alarms scaling source for scaling t i damping sensor characteristics pa-out tb fb select additional cyclic value fig. 31: vegason 64: block diagram with ai (pa-o...
Page 56
L long for profibus master only supporting the "identifier format" byte, e.G. Siemens s7-300/400 examples of telegram configuration in the following you will see how the modules can be combined and how the appendant data telegram is structured. Example 1 (standard setting) with distance value, temperat...
Page 57
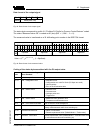
Data format of the output signal byte4 byte3 byte2 byte1 byte0 status value (ieee-754) fig. 35: data format of the output signal the status byte corresponds to profile 3.0 "profibus pa profile for process control devices" coded. The status "measured value ok" is coded as 80 (hex) (bit7 = 1, bit6 … 0 = ...
Page 58
Status code description according to pro- fibus standard possible cause 0 x 51 uncertain - sensor; conversion not accurate - low limited sensor value 0 x 52 uncertain - sensor; conversion not accurate - high limited sensor value > upper limit 0 x 80 good (non-cascade) - ok ok 0 x 84 good (non-cascade...
Page 59
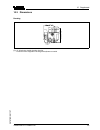
10.3 dimensions housing ø 84mm ~ 27 / ") 120mm (4 23 / 32 ") * 129mm (5 5 / 64 ") 5 / 16 ") m20x1,5/ ½ npt m12x fig. 37: aluminium double chamber housing * dimension with integrated indicating and adjustment module vegason 64 • profibus pa 59 10 supplement 28787 - en -081127.
Page 60
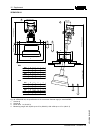
Vegason 64 3 4 3 4 1 1 0 mm (4 .3 3 ") ø 189 mm / (7.44") ø 196 mm (7.72") b 130 mm (5.12") k d 2 4 0 mm (9 .4 5 ") 1 2 >ø 200 mm (7.87") 2 5 0 mm (9 .8 4 ") 4 4 0 mm (1 7 .3 2 ") max. 15° (0.59") k d d mm din asme b k d dn 50 165 11,5 125 4x ø 18 dn 80 200 11,5 160 4x ø 18 d inch b k d dn 50 / 2" d...
Page 61
Vegason 64 3 4 1 2 2 5 0 mm (9 .8 4 ") 3 1 2 mm (1 2 .2 8 ") 150 mm (5.91") >ø 200 mm (7.87") 2 2 0 mm (8 .6 6 ") 1 4 9 mm (5 .8 7 ") 1 8 mm (0 .7 1") 1 4 3 mm (5 .6 3 ") g1a k d d mm din asme b k d dn 50 165 11,5 125 4x ø 18 dn 80 200 11,5 160 4x ø 18 d inch b k d dn 50 / 2" dn 80 / 3" d mm b k d 2...
Page 62
10.4 industrial property rights vega product lines are global protected by industrial property rights. Further information see http://www.Vega.Com . Only in u.S.A.: further information see patent label at the sensor housing. Vega produktfamilien sind weltweit geschützt durch gewerbliche schutzrechte...
Page 63
Vegason 64 • profibus pa 63 10 supplement 28787 - en -081127.
Page 64
Vega grieshaber kg am hohenstein 113 77761 schiltach germany phone +49 7836 50-0 fax +49 7836 50-201 e-mail: info@de.Vega.Com www.Vega.Com printing date: iso 9001 all statements concerning scope of delivery, application, practical use and operating conditions of the sensors and processing systems co...

