- DL manuals
- X-Rite
- Measuring Instruments
- Ci60
- User Manual
X-Rite Ci60 User Manual
Summary of Ci60
Page 1
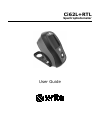
Ci62l+rtl spectrophotometer user guide.
Page 3
C i 6 2 l + r t l s p e c t r o p h o t o m e t e r 1 consult this documentation in all cases where the attention symbol appears. This symbol is used to inform you of any potential hazard or actions that may require your attention. Ce declaration hereby, x-rite, incorporated, declares that this ci6x...
Page 4: 2200
C i 6 2 l + r t l s p e c t r o p h o t o m e t e r 2 if your device is equipped with a bluetooth wireless transmitter, it contains the following module. Microchip rn42 microchip technology inc. 2355 west chandler blvd. Chandler, arizona 85224 tel: 480-792-7200 module meets the following standards: ...
Page 5
C i 6 2 l + r t l s p e c t r o p h o t o m e t e r 3 proprietary notice the information contained in this manual is copyrighted information proprietary to x-rite, incorporated. Publication of this information does not imply any rights to reproduce or use it for purposes other than installing, opera...
Page 6
C i 6 2 l + r t l s p e c t r o p h o t o m e t e r 4 and non-infringement. No employee or agent of x-rite, other than an officer of x- rite, is authorized to make any warranty in addition to the foregoing. In no event will x-rite be liable for any of buyer’s manufacturing costs, overhead, lost prof...
Page 7
C i 6 2 l + r t l s p e c t r o p h o t o m e t e r 5 table of contents introduction and setup 7 packaging 7 attaching the safety strap 8 powering on and off 9 locking the navigation control 9 power save modes 10 charging the battery pack 10 connecting the ac adapter 11 connecting the usb cable 11 u...
Page 8
C i 6 2 l + r t l s p e c t r o p h o t o m e t e r 6 deleting a standard 29 editing standard name 29 editing standard tolerances 30 projects 32 selecting a project 32 creating a project 32 adding standards to a project 33 deleting projects, standards, and samples 34 locking a project 34 editing pro...
Page 9
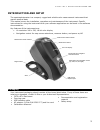
C i 6 2 l + r t l s p e c t r o p h o t o m e t e r 7 introduction and setup the spectrophotometer is a compact, rugged and reliable color measurement instrument that reports spectral data. This manual covers the installation, operation and maintenance of the instrument. Specific instructions for us...
Page 10
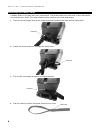
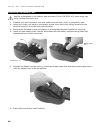
C i 6 2 l + r t l s p e c t r o p h o t o m e t e r 8 attaching the safety strap a safety strap is included with your instrument. The strap attaches to the back of the instrument and around your wrist. The strap should not be used to carry the instrument. 1. Feed the small looped end of the strap ar...
Page 11
C i 6 2 l + r t l s p e c t r o p h o t o m e t e r 9 powering on and off the power button is used to initiate the instrument from a power off state. Simply press and hold the button for three seconds to turn on the instrument. If the instrument does not power up after pressing the power button, the...
Page 12
C i 6 2 l + r t l s p e c t r o p h o t o m e t e r 10 power save modes the instrument utilizes two power save modes to conserve battery life during nonuse times. Standby mode: the instrument is ready to measure, however the display is not on. A button press, measurement, power connection (if not co...
Page 13
C i 6 2 l + r t l s p e c t r o p h o t o m e t e r 11 connecting the ac adapter note: the instrument can operate from the ac adapter only. The battery pack does not need to be installed. The ac adapter (x-rite p/n se30-277) overrides any charge condition of the battery pack in the instrument. Measu...
Page 14
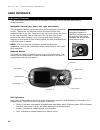
C i 6 2 l + r t l s p e c t r o p h o t o m e t e r 12 user interface instrument controls the instrument controls are used to navigate the screen, select options, and perform measurements. Navigation control (up, down, left, right and center) the navigation control moves the focus of the highlight a...
Page 15
C i 6 2 l + r t l s p e c t r o p h o t o m e t e r 13 general sample measurement the instrument can take measures from just about any clean, dry surface that is reasonably flat. The instrument shoe should be able to rest flat and steady on the sample area. If the item to be measured is smaller than...
Page 16
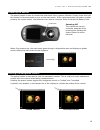
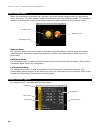
C i 6 2 l + r t l s p e c t r o p h o t o m e t e r 14 main screen menu when the instrument is powered-up, the main (top level) screen appears after the diagnostics test is complete. The main screen consists of the header bar and operation modes. The operation modes are selected by using the navigat...
Page 17
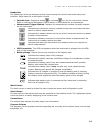
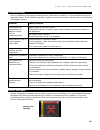
C i 6 2 l + r t l s p e c t r o p h o t o m e t e r 15 header bar the header bar at the top displays various icons showing the current instrument setup and condition. Refer below for a description of each. • controls lock: displays a locked or unlocked icon for the instrument controls. Refer to lock...
Page 18
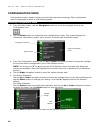
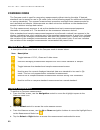
C i 6 2 l + r t l s p e c t r o p h o t o m e t e r 16 configuration mode configuration mode is used to adjust and view the instrument’s settings. Each configuration option is explained in detail on the following pages. Entering configuration mode 1. From the main screen, use the navigation control ...
Page 19
C i 6 2 l + r t l s p e c t r o p h o t o m e t e r 17 exiting configuration mode after configuring options, use the left navigation button to move the highlight focus to the main screen icon in the main column and tap the select button to exit. Note: if a setting has a checkmark save icon it must b...
Page 20
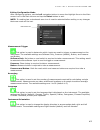
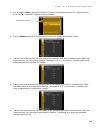
C i 6 2 l + r t l s p e c t r o p h o t o m e t e r 18 date format this option is used to adjust the date format the instrument uses. The available settings are: mm/dd/yyyy (default), dd/mm/yyyy, dd.Mm.Yyyy, yyyy/mm/dd, and yyyy-mm-dd. Note: the date format automatically changes to the correct forma...
Page 21
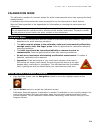
C i 6 2 l + r t l s p e c t r o p h o t o m e t e r 19 calibration mode the calibration consists of a ceramic plaque for white measurements and a trap opening for black measurements. A calibration should be performed when prompted for by the instrument or when desired. Refer to cleaning section in t...
Page 22
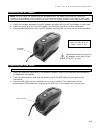
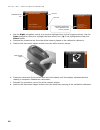
C i 6 2 l + r t l s p e c t r o p h o t o m e t e r 20 3. Use the right navigation control to move the highlight focus to the progress column. Use the down navigation control to highlight the next arrow icon ( →) if not highlighted and tap the select button. 4. Remove the protective cap from the whi...
Page 23
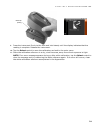
C i 6 2 l + r t l s p e c t r o p h o t o m e t e r 21 9. Press the instrument firmly to the shoe and hold steady until the display indicates that the reading is complete. Release the instrument. 10. Tap the select control to save the calibration and exit to the main menu. 11. Store the calibration ...
Page 24
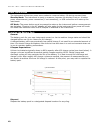
C i 6 2 l + r t l s p e c t r o p h o t o m e t e r 22 compare mode the compare mode is used for comparing measurements without storing the data. If desired, standards can be saved for use in qa mode (refer to the following pages for additional information on saving standards). The compare measureme...
Page 25
C i 6 2 l + r t l s p e c t r o p h o t o m e t e r 23 5. Use the up or down navigation buttons to move the highlight focus to the compare mode. An arrow () indicates compare mode is selected. 6. Tap the select button and the screen returns to the measure standard screen. 7. Position the instrument...
Page 26
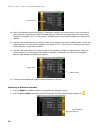
C i 6 2 l + r t l s p e c t r o p h o t o m e t e r 24 10. After the standard measurement(s) is complete, position the instrument on the first area of the sample to compare and take the measurement. After the measurement, the instrument displays “averaged 1 of 3" in the screen, indicating two more m...
Page 27
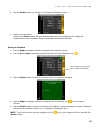
C i 6 2 l + r t l s p e c t r o p h o t o m e t e r 25 3. Tap the select button to change to the measure standard screen. 4. Measure the standard. Tapping the select button with the standard/sample icon highlighted will toggle the measurement screen between measure standard and measure sample. Savin...
Page 28
C i 6 2 l + r t l s p e c t r o p h o t o m e t e r 26 qa mode the qa measurement mode is the main mode of operation. Sample measurements are compared to stored standards and the results displayed. The qa measurement procedure requires three measurements for each sample. Measurements are taken at va...
Page 29
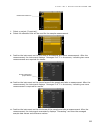
C i 6 2 l + r t l s p e c t r o p h o t o m e t e r 27 7. Select a project (if required). 8. Select the standard that will be used for the sample measurement. 9. Position the instrument on the first area of the sample and take a measurement. After the measurement, the instrument displays "averaged 1...
Page 30
C i 6 2 l + r t l s p e c t r o p h o t o m e t e r 28 note: if an error occurs during a measurement, try measuring the sample again. If the error still occurs, refer to the troubleshooting section in the appendices. Sample data difference data measurement timestamp.
Page 31
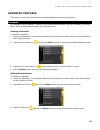
C i 6 2 l + r t l s p e c t r o p h o t o m e t e r 29 advanced features this section covers the procedures for editing standards and creating projects. Standards qa standards can be deleted, renamed, and tolerances edited after they are created in compare mode. Refer to the following pages for the ...
Page 32
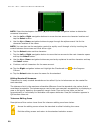
C i 6 2 l + r t l s p e c t r o p h o t o m e t e r 30 note: select the backspace character () and use the left navigation button to delete the unwanted characters. 4. Use the left or right navigation buttons to move the two arrows to character location and tap the select button. 5. Use the up or d...
Page 33
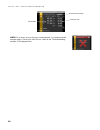
C i 6 2 l + r t l s p e c t r o p h o t o m e t e r 31 indicates that the tolerance plus and minus attributes change symmetric (locked) when edited. Indicates that the tolerance plus and minus attributes change asymmetric (not locked) when edited. Access previous screen when browsing tolerances. Acc...
Page 34
C i 6 2 l + r t l s p e c t r o p h o t o m e t e r 32 note: if additional tolerance sets (up to six) are required for the selected standard, highlight the right arrow icon is the progress bar and tap the select button. Edit the next tolerance set as explained above. Projects the project icon lists ...
Page 35
C i 6 2 l + r t l s p e c t r o p h o t o m e t e r 33 4. Tap the left navigation button to move the highlight to the add project screen. 5. Tap the select button to access the option. 6. Use the up or down navigation buttons to page through the alphanumeric list for the first character of the name....
Page 36
C i 6 2 l + r t l s p e c t r o p h o t o m e t e r 34 3. Tap the select button and then tap the left navigation button to move the highlight to the select standards screen. 4. Use the up or down navigation buttons and the select button to choose the standards. 5. When finished, tap the right naviga...
Page 37
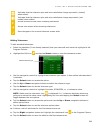
C i 6 2 l + r t l s p e c t r o p h o t o m e t e r 35 2. Highlight the edit icon and tap the select button to view the select option screen. 3. Select the edit icon and tap the select button to view the enter project name screen. 4. Tap the left navigation button to move the highlight to the enter ...
Page 38
C i 6 2 l + r t l s p e c t r o p h o t o m e t e r 36 appendices service information x-rite provides repair service to their customers. Because of the complexity of the circuitry, all warranty and non warranty repairs should be referred to an authorized service center. For non warranty repairs, the...
Page 39
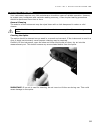
C i 6 2 l + r t l s p e c t r o p h o t o m e t e r 37 cleaning the instrument your instrument requires very little maintenance to achieve years of reliable operation. However, to protect your investment and maintain reading accuracy, a few simple-cleaning procedures should be performed from time to...
Page 40
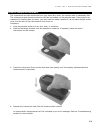
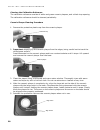
C i 6 2 l + r t l s p e c t r o p h o t o m e t e r 38 cleaning the calibration reference the calibration reference consists of white and green ceramic plaques, and a black trap opening. The calibration reference should be cleaned periodically. Ceramic plaque cleaning procedure 1. Remove the protect...
Page 41
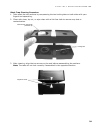
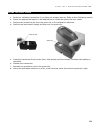
C i 6 2 l + r t l s p e c t r o p h o t o m e t e r 39 black trap cleaning procedure 1. Take apart the two sections by compressing the two locking tabs on both sides with your fingers and separating. 2. Clean with clean, dry air, or wipe clean with a lint-free cloth to remove any dust or contaminati...
Page 42
C i 6 2 l + r t l s p e c t r o p h o t o m e t e r 40 replacing the battery pack use the rechargeable li-ion battery pack provided (x-rite p/n se15-40); other types may burst causing personal injury. 1. Carefully turn the instrument over and rotate the shoe back until it is completely open. 2. Usin...
Page 43
C i 6 2 l + r t l s p e c t r o p h o t o m e t e r 41 troubleshooting prior to contacting the support department for instrument problems, try the applicable solution(s) described below. If the condition persists, contact us using one of the methods listed in the service information section. Problem...
Page 44
C i 6 2 l + r t l s p e c t r o p h o t o m e t e r 42 technical specifications measurement geometrics d/8°, drs spectral engine, choice of optical aperture: 14 mm measurement area/20 mm target window receiver blue-enhanced silicon photodiodes light source gas-filled tungsten lamp illuminant type a,...
Page 45
C i 6 2 l + r t l s p e c t r o p h o t o m e t e r 43 green tile color check 1. Perform a calibration procedure if you have not already done so. Refer to the calibrating section. 2. Select the appropriate option in the application to initiate the green tile color check. 3. Remove the protective cap...
Page 49
Corporate headquarters x-rite, incorporated 4300 44th street se grand rapids, michigan 49512 phone 1 800 248 9748 or 1 616 803 2100 fax 1 800 292 4437 or 1 616 803 2705 european headquarters x-rite europe gmbh althardstrasse 70 8105 regensdorf switzerland phone (+41) 44 842 24 00 fax (+41) 44 842 22...

