- DL manuals
- Yamaha
- Offroad Vehicle
- RX10H
- Service Manual
Yamaha RX10H Service Manual
Summary of RX10H
Page 1
Service manual.
Page 2: Notice
Warning caution: note: notice this manual was written by the yamaha motor company primarily for use by yamaha dealers and their qualified mechanics. It is not possible to put an entire mechanic’s education into one manual, so it is assumed that persons using this book to perform maintenance and repa...
Page 3: Spec
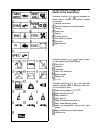
10 spec elec carb 8 1 2 3 4 5 6 7 11 12 13 14 15 16 17 18 19 20 21 22 23 24 25 gen info insp adj eng chas powr tr 9 cool illustrated symbols (refer to the illustration) illustrated symbols 1 to 9 are designed as thumb tabs to indicate the chapter’s number and content. 1 general information 2 periodi...
Page 4: Insp
1 9 8 6 5 4 insp adj general information periodic inspections and adjustments power train engine cooling system electrical specifications gen info 2 3 powr tr eng cool elec spec chassis chas 7 carburetion carb index.
Page 5
Chapter 1. General information machine identification 1-1 . . . . . . . . . . . Frame serial number 1-1 . . . . . . . . . . Engine serial number 1-1 . . . . . . . . . Important information 1-2 . . . . . . . . . . . Preparation for removal and disassembly 1-2 . . . . . . . . . . . . . . . . . . . . A...
Page 6
Chapter 3. Chassis steering 3-1 . . . . . . . . . . . . . . . . . . . . . . . . . . . Inspection 3-7 . . . . . . . . . . . . . . . . . . . . . . Installation 3-8 . . . . . . . . . . . . . . . . . . . . Ski 3-11 . . . . . . . . . . . . . . . . . . . . . . . . . . . . . . . . . Inspection 3-12 . . . ....
Page 7
A.C. Magneto and starter clutch 5-31 . . . . . . . . . . . . . . . . . . . . . . . . . . . Removal 5-33 . . . . . . . . . . . . . . . . . . . . . . Installation 5-35 . . . . . . . . . . . . . . . . . . Oil pan and oil pump 5-37 . . . . . . . . . . . . Removal 5-39 . . . . . . . . . . . . . . . . . ....
Page 8
Signal system 8-25 . . . . . . . . . . . . . . . . . . . Circuit diagram 8-25 . . . . . . . . . . . . . . Troubleshooting 8-27 . . . . . . . . . . . . Brake light switch 8-33 . . . . . . . . . . Gear position switch (rx10r, rx10rs) 8-33 . . . . . . . . . . . . . . . . . . . . . . . Back buzzer (rx10...
Page 9: Gen
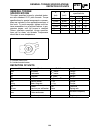
1-1 machine identification gen info note: general information machine identification frame serial number the frame serial number 1 is located on the right-hand side of the frame (just below the front of the seat). Engine serial number the engine serial number 1 is located on the left-hand side of th...
Page 10: Gen
1 1-2 important information gen info important information preparation for removal and disassembly 1. Remove all dirt, mud, dust, and foreign material before removal and disassembly. While cleaning, take care to protect the electrical parts, such as relays, switches, motor, resistors, controllers, e...
Page 11: Gen
1-3 important information gen info caution: gaskets, oil seals, and o-rings 1. All gaskets, seals, and o-rings should be replaced when an en- gine is overhauled. All gasket surfaces, oil seal lips, and o-rings must be cleaned. 2. Properly oil all mating parts and bearings during reassembly. Ap- ply ...
Page 12: Gen
1-4 special tools gen info note: special tools some special tools are necessary for a completely accurate tune-up and assembly. Using the correct special tool will help prevent dam- age that can be caused by the use of improper tools or improvised techniques. Be sure to use the correct part number w...
Page 13: Gen
1-5 special tools gen info for engine service spiston pin puller p/ n: yu-01304 (for u.S.A. / canada) 90890-01304 (for europe) this tool is used to remove the piston pin. Srotor holding puller, attachment p/ n: yu-33270 (for u.S.A. / canada) 90890-01362 (for europe) p/ n: ym-33282 90890-04089 this t...
Page 14: Gen
1-6 special tools gen info svalve guide remover (ø4, ø4.5) p/ n: ym-04111 (ø4) (for u.S.A. / canada) 90890-04111 (for europe) p/ n: ym-4116 (ø4.5) (for u.S.A. / canada) 90890-04116 (for europe) these tools are used to remove or install the valve guides. Svalve guide installer (ø4, ø4.5) p/ n: ym-041...
Page 15: Gen
1-7 special tools gen info for power train service sprimary sheave holder p/ n: ys-01880 (for u.S.A. / canada) 90890-01701 (for europe) this tool is used to hold the primary sheave. Sprimary sheave puller (18 mm) p/ n: ys-01881-1 1 , ys-01882-1 2 (for u.S.A. / canada) 90890-01898 (for europe) this t...
Page 16: Gen
1-8 special tools gen info for carburetion service smity vac p/ n: yb-35956 (for u.S.A. / canada) 90890-06756 (for europe) this tool is used to check the fuel pump. For electrical service spocket tester p/ n: yu-03112 (for u.S.A. / canada) 90890-03112 (for europe) this instrument is necessary for ch...
Page 17: Insp
2-1 introduction/periodic maintenance table insp adj periodic inspection and adjustment introduction this chapter includes all information necessary to perform recommended inspections and adjust- ments. These preventive maintenance procedures, if followed, will ensure more reliable machine op- erati...
Page 18: Insp
2-2 periodic maintenance table insp adj 2 note: initial every item remarks preopera- tion check (daily) 1 month or 800 km (500 mi) (40 hr) seasonally or 3,200 km (2,000 mi) (160 hr) check operation and fluid leakage. F brake and parking brake adjust free play and/or replace pads if necessary. F repa...
Page 19: Insp
2-3 spark plugs insp adj note: engine spark plugs 1. Remove: sspark plug caps sspark plugs 2. Inspect: selectrodes 1 damage / wear ! Replace the spark plug. Sinsulator color 2 3. Measure: sspark plug gap a out of specification ! Regap. Use a wire thickness gauge. Spark plug gap: 0.7 x 0.8 mm (0.028 ...
Page 20: Insp
2-4 fuel line inspection/cooling system insp adj note: warning fuel line inspection 1. Remove: sintake silencer refer to “carburetors” in chapter 7. 2. Inspect: sfuel hoses 1 sfuel delivery hoses 2 cracks / damage ! Replace. 3. Install: sintake silencer refer to “carburetors” in chapter 7. Cooling s...
Page 21: Insp
2-5 cooling system insp adj note: note: warning 4. Place an open container under the coolant hose. 5. Disconnect: scoolant hose 1 6. Drain the coolant. Lift up the tail of the machine to drain the cool- ant. 7. Remove: srear cover 1 8. Disconnect: scoolant hoses 1 9. Drain the coolant. Lift up the f...
Page 22: Insp
2-6 cooling system insp adj caution: 12. Install: scoolant hose 1 13. Install: sintake silencer refer to “carburetors” in chapter 7. 14. Fill: scooling system recommended coolant: high quality silicate-free ethylene glycol antifreeze containing corrosion inhibitors coolant mixing ratio (coolant:wate...
Page 23: Insp
2-7 cooling system insp adj inspection steps: sattach the cooling system tester 1 and adapt- er 2 to the coolant filler 3 . Cooling system tester: 90890-01325, yu-24460-01 adapter: 90890-01352, yu-24460-01 sapply 100 kpa (1.0 kg/cm 2 , 14 psi). Smeasure the pressure with the gauge. Air bleeding 1. R...
Page 24: Insp
2-8 cooling system insp adj warning to avoid severe injury or death: smake sure the machine is securely sup- ported with a suitable stand. Sdo not exceed 3,000 r/min. Drive line dam- age and excessive v-belt wear could occur, or the machine could unexpectedly move forward if the clutch engages. Sope...
Page 25: Insp
2-9 valve clearance adjustment insp adj note: note: valve clearance adjustment svalve clearance adjustment should be made on a cold engine, at room temperature. Swhen the valve clearance is to be measured or adjusted, the piston must be at top dead center (tdc) on the compression stroke. 1. Drain: s...
Page 26: Insp
2-10 valve clearance adjustment insp adj note: note: sif the valve clearance is incorrect, record the measured reading. Smeasure the valve clearance in the following sequence. Valve clearance measuring sequence cylinder #1 ! #2 ! #4 ! #3 a front for each cylinder, starting with cylinder #1 at tdc, t...
Page 27: Insp
2-11 valve clearance adjustment insp adj note: note: note: scover the timing chain opening with a rag to prevent the valve pad from falling into the crankcase. Smake a note of the position of each valve lifter 1 and valve pad 2 so that they can be installed in the correct place. Sselect the proper v...
Page 28: Insp
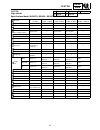
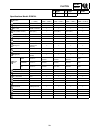
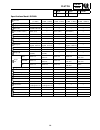
2-12 valve cllearance adjustment insp adj measured clearance # exa ! Installed pad number 120 125 130 135 140 145 150 155 160 165 170 175 180 185 190 195 200 205 210 215 220 225 230 235 240 0.00 x 0.02 120 125 130 135 140 145 150 155 160 165 170 175 180 185 190 195 200 205 210 215 220 225 0.03 x 0.0...
Page 29: Insp
2-13 valve clearance adjustment insp adj note: note: note: sinstall the new valve pad 1 and the valve lifter 2 . Sapply molybdenum disulfide oil to the valve pad and the valve lifter. Sthe valve lifter must turn smoothly when ro- tated by hand. Sinstall the valve lifter and the valve pad in the corr...
Page 30: Insp
2-14 carburetor synchronization insp adj note: carburetor synchronization prior to synchronizing the carburetors, the valve clearance and the engine idling speed should be properly adjusted and the ignition timing should be checked. 1. Remove: svacuum cap 2. Install: scarburetor synchronizer 1 sengi...
Page 31: Insp
2-15 carburetor synchronization insp adj note: note: after each step, rev the engine two or three times, each time for less than a second, and check the synchronization again. Ssynchronize carburetor #4 to carburetor #3 by turning the synchronizing screw 2 in either direction until both gauges read ...
Page 32: Insp
2-16 engine idle speed adjustment insp adj note: note: engine idle speed adjustment prior to adjusting the engine idling speed, the carburetor synchronization should be adjusted properly, the air filter should be clean, and the engine should have adequate compression. 1. Start the engine and let it ...
Page 33: Insp
2-17 throttle cable free play adjustment insp adj note: note: throttle cable free play adjustment sbefore adjusting the throttle cable free play, the engine idle speed should be adjusted. Sadjust the throttle cable free play while the cable is in the cable guide. 1. Measure: sthrottle cable free pla...
Page 34: Insp
2-18 throttle override system (t.O.R.S.) check/ compression pressure measurement insp adj warning warning note: throttle override system (t.O.R.S.) check when checking t.O.R.S.: sbe sure the parking brake is applied. Sbe sure the throttle lever moves smoothly. Sdo not run the engine up to the clutch...
Page 35: Insp
2-19 compression pressure measurement insp adj caution: before removing the spark plugs, use com- pressed air to blow away any dirt accumu- lated in the spark plug wells to prevent it from falling into the cylinders. 4. Install: scompression gauge 1 compression gauge set 90890-03081, yu-33223 compre...
Page 36: Insp
Compression pressure measurement/ engine oil level inspection insp adj 2-20 warning note: caution: caution: measurement steps: sturn the main switch to “on”. Swith the throttle wide open, crank the engine until the reading on the compression gauge stabilizes. To prevent sparking, ground all spark pl...
Page 37: Insp
2-21 engine oil level inspection insp adj caution: caution: note: note: caution: sthe engine oil level should be between the minimum level mark a and maximum level mark b . Below the minimum level mark ! Add the rec- ommended engine oil to the proper level. When adding the engine oil, be careful not...
Page 38: Insp
Engine oil replacement insp adj 2-22 note: engine oil replacement 1. Start the engine, warm up for several min- utes, and then turn it off. 2. Place a containers under the engine oil drain bolt and oil tank. 3. Remove: sbottom panel sright side cover soil level gauge coupler soil level gauge/dipstic...
Page 39: Insp
2-23 engine oil replacement insp adj caution: sapply a thin coat of engine oil onto the o-ring 1 of the new oil filter cartridge. Make sure that the o-ring 1 is positioned correctly in the groove of the oil filter car- tridge. Stighten the new oil filter cartridge to specifica- tion with an oil filt...
Page 40: Insp
Engine oil replacement/crankcase breather hose inspection/carburetor joints inspection insp adj 2-24 caution: 10. Inspect: sengine oil pressure inspection steps: sslightly loosen the oil gallery bolt 1 . Sstart the engine and keep it idling until engine oil starts to seep from the oil gallery bolt. ...
Page 41: Insp
2-25 exhaust system inspection insp adj exhaust system inspection 1. Remove: sseat sexhaust system srefer to “exhaust pipe and muffler” in chapter 5. 2. Inspect: sexhaust joint 1 stightening torque bolt (exhaust joint): 25 nm (2.5 m skg, 18 ftslb) smuffler 2 stightening torque bolt (muffler): 16 nm ...
Page 42: Insp
2-26 sheave offset adjustment insp adj note: note: power train sheave offset adjustment 1. Measure: ssheave offset a use the sheave gauge. Out of specification ! Adjust. Sheave offset: 15 ± 1.5 mm (0.59 ± 0.06 in) (13.5 x 16.5 mm (0.53 x 0.65 in)) sheave gauge: ys-42421-1 push the secondary sheave t...
Page 43: Insp
2-27 sheave offset adjustment/drive v-belt insp adj warning caution: 3. Measure: ssecondary sheave freeplay (clearance) a use a feeler gauge. Out of specification ! Adjust. Secondary sheave free play (clearance): 1.0 x 2.0 mm (0.04 x 0.08 in) 4. Adjust: ssecondary sheave freeplay (clearance) adjustm...
Page 44: Insp
2-28 drive v-belt insp adj note: new belt width: 34.5 mm (1.36 in) belt wear limit width: 32.5 mm (1.28 in) 1. Measure: sv-belt position a install the new v-belt onto the secondary sheave only. Do not force the v-belt between the sheaves; the sliding and fixed sheaves must touch each other. Standard...
Page 45: Insp
2-29 drive v-belt/engagement speed check insp adj 4. Inspect: sdrive v-belt cracks / damage / wear ! Replace. Oil or grease on the v-belt ! Check the pri- mary and secondary sheaves. 5. Inspect: sprimary sheave ssecondary sheave oil or grease on the primary and secondary sheaves ! Use a rag soaked i...
Page 46: Insp
2-30 parking brake adjustment/ brake lever adjustment insp adj parking brake adjustment 1. Measure: sparking brake cable distance a out of specification ! Adjust. Parking brake cable distance: 43.5 x 46.5 mm (1.713 x 1.831 in) 2. Adjust: sparking brake cable adjustment steps: sloosen the locknut 1 s...
Page 47: Insp
2-31 brake lever adjustment/ brake fluid level inspection insp adj note: caution: warning adjustment steps: sloosen the locknut 1 . Swhile lightly pushing the brake lever in direc- tion a , turn the adjusting bolt 2 by fingers to set the brake lever to the desired position. Stighten the locknut secu...
Page 48: Insp
2-32 brake pad inspection/brake hose inspection/ air bleeding (hydraulic brake system) insp adj warning brake pad inspection 1. Apply the brake lever. 2. Inspect: sbrake pad wear a wear indicator 1 nearly contacts the brake disc ! Replace as a set. Wear limit: 7.5 mm (0.30 in) brake hose inspection ...
Page 49: Insp
2-33 air bleeding (hydraulic brake system) insp adj note: warning a. Slowly apply the brake lever several times. B. Pull the lever in, then hold the lever in posi- tion. C. Loosen the bleed screws and allow the brake lever to travel towards its limit. D. Tighten the bleed screws when the brake le- v...
Page 50: Insp
2-34 a b drive chain insp adj warning caution: drive chain oil level inspection the engine and muffler will be very hot after the engine has run. Avoid touching a hot en- gine and muffler while they are still hot with any part of your body or clothing during in- spection or repair. 1. Place the mach...
Page 51: Insp
2-35 drive chain insp adj caution: caution: recommended oil: gear oil api “gl-3” sae #75 or #80 make sure that no foreign material enters the gear case. Sreinsert the dipstick 2 . Oil replacement oil replacement steps: splace the oil pan under the drain hole. Sremove the oil drain bolt 1 and drain t...
Page 52: Insp
2-36 track tension adjustment insp adj warning track tension adjustment a broken track or track fittings, and debris thrown by the track could be dangerous to an operator or by standers. Observe the fol- lowing precautions. Sdo not allow anyone to stand behind the machine when the engine is running....
Page 53: Insp
2-37 a b 6 7 track tension adjustment/ slide runner inspection insp adj 4 5 6 7 4 5 caution: track alignment shifted to right shifted to left left adjuster turn out turn in right adjuster turn in turn out 8 slide runner 9 track 10 track metal 11 gap 12 forward a rx10, rx10s , rx10r, rx10rs b rx10m, ...
Page 54: Insp
2-38 maximizing drive track life insp adj maximizing drive track life recommendations track tension during initial break-in, the new drive track will tend to stretch quickly as the track settles. Be sure to correct the track tension and alignment frequently. (see pages 2-36 x 2-37 for adjust- ment p...
Page 55: Insp
2-39 ski/ski runner insp adj caution: chassis ski/ ski runner 1. Inspect: sski sski runner damage / wear ! Replace. Sski runner thickness a splastic ski thickness b out of specification ! Replace. Ski runner wear limit: 8 mm (0.31 in) plastic ski wear limit: 24 mm (0.95 in) to avoid scratching, wear...
Page 56: Insp
2-40 steering system insp adj steering system free play check 1. Check: ssteering system free play move the handlebar up and down and back and forth. Turn the handlebar slightly to the right and left. Excessive free play ! Check that the han- dlebar, tie rod ends and relay rod ends are installed sec...
Page 57: Insp
2-41 steering system/lubrication insp adj a b c caution: warning 3. Adjust: sski toe-out adjustment steps: sloosen the locknuts (tie-rod) 1 . Sturn the tie rods 2 in or out until the specified toe-out is obtained. Stighten the locknuts (tie-rod) 1 . Locknut (rod end): 25 nm (2.5 m skg, 18 ftslb) loc...
Page 58: Insp
2-42 lubrication insp adj a a b c front and rear suspension 1. Use a grease gun to inject grease into the nipples 1 . Recommended lubricant: esso beacon 325 grease or aeroshell grease #7a a front b rear (rx10, rx10s, rx10r, rx10rs) c rear (rx10m, rx10ms).
Page 59: Insp
2-43 headlight beam adjustment insp adj d s electrical headlight beam adjustment 1. Place the machine on a level surface. 2. Place the machine in front of a wall at the rec- ommended distance d . Refer to the table below. 3. Measure the distance h from the floor to the center of the headlight and pl...
Page 60: Insp
2-44 battery inspection insp adj warning caution: eas00178 battery inspection batteries generate explosive hydrogen gas and contain electrolyte which is made of poisonous and highly caustic sulfuric acid. Therefore, always follow these preventive measures: swear protective eye gear when handling or ...
Page 61: Insp
2-45 battery inspection insp adj relationship between the open-circuit voltage and the charging time at 20 _c open-circuit voltage (v) these values vary with the temperature, the condition of the battery plates, and the electrolyte level. 13.0 12.5 12.0 11.5 5 6.5 10 charging time (hours) note: caut...
Page 62: Insp
2-46 charging ambient temperature 20 _c open-circuit voltage (v) check the open-circuit voltage. Time (minutes) ambient temperature 20 _c open-circuit voltage (v) charging condition of the battery (%) battery inspection insp adj warning caution: 4. Charge: sbattery (refer to the appropriate charging...
Page 63: Insp
2-47 battery inspection insp adj measure the open-circuit voltage prior to charging. Connect a charged and amp meter to the battery and start charging. Make sure that the current is higher than the standard charging current written on the battery. By turning the charging voltage adjust dial, set the...
Page 64: Insp
2-48 battery inspection insp adj measure the open-circuit voltage prior to charging. Connect a charger and amp meter to the battery and start charging. Make sure that the current is higher than the standard charging current written on the battery. Charge the battery until the battery’s charging volt...
Page 65: Insp
2-49 battery inspection insp adj caution: 5. Install: sbattery 6. Connect: sbattery leads (to the battery terminals) first, connect the positive lead 1 , then the negative lead 2 . 7. Check: sbattery terminals dirt ! Clean with a wire brush. Loose connection ! Connect properly. 8. Lubricate: sbatter...
Page 66: Insp
2-50 fuse inspection insp adj caution: note: 1 2 3 4 5 6 7 fuse inspection the following procedure applies to all of the fuses. To avoid a short circuit, always set the main switch to “off” when checking or replacing a fuse. 1. Inspect: scontinuity inspection steps: sconnect the pocket tester to the...
Page 67: Insp
2-51 fuse inspection/speedometer unit inspection insp adj warning never use a fuse with an amperage other than that specified. Improvising or using a fuse with the wrong amperage rating may cause extensive damage to the electrical system, cause the lighting, ignition, grip warmer, signal and meter s...
Page 68: Insp
2-52 carburetor tuning insp adj caution: a b c d e f g h tuning carburetor tuning the carburetors are set at the factory to run at temperatures of 0 _c x–20_c (32_f x–4_f) at sea level. If the machine is to be operated un- der conditions other than those specified above, the carburetors must be prop...
Page 69: Insp
2-53 carburetor tuning insp adj caution: note: note: mid-range and high speed tuning adjustments are normally not required, but may sometimes be necessary, depending on tem- peratures, altitude or both. Mid-range speed and high speed tuning (from 1 / 4 to full-throttle) can be done by adjusting the ...
Page 70: Insp
2-54 carburetor tuning insp adj b piston valve opening fully opened closed fuel flow rate (l/hr) a d e piston valve opening a b mid-range speed tuning high speed turning c fully opened d closed e low speed tuning f guide for carburetion.
Page 71: Insp
2-55 carburetor tuning insp adj jet needle b piston valve opening b fully opened c piston valve opening b fully opened c a main jet fuel flow rate (l/hr) a jet needle fuel flow rate (l/hr) clip a caution: a standard main jet b main jet whose diameter is 10% smaller than standard c main jet whose dia...
Page 72: Insp
2-56 carburetor tuning insp adj caution: note: note: low-speed tuning the carburetors are built so that low speed tun- ing can be done by adjusting the pilot mixture screw 1 and throttle stop screw 2 . Never run the engine without the air intake silencer installed. Severe engine damage may result. 1...
Page 73: Insp
2-57 carburetor tuning insp adj main jet selection chart spark plug color diagnosis remedy light tan or gray carburetors are tuned properly. Dry black or fluffy deposits mixture is too rich. Replace the main jet with the next smaller size. White or light gray mixture is too lean. Replace the main je...
Page 74: Insp
2-58 carburetor tuning insp adj trouble diagnosis adjustment poor performance at mid-range speeds: s momentary slow response to the clogged or loose pilot jet s remove the pilot jet, clean it with compressed air, and then install it. S make sure that the pilot jet is fully tightened. Throttle s poor...
Page 75: Insp
2-59 clutch insp adj clutch high altitude a b c d e f g h i j k l m n o p q r s t u v w x y z a b c d note: g green p pink s silver y yellow specifications model: rx10, rx10s, rx10r, rx10rs elevation x 800 m ( x 2,500 ft) 600 x 1,400 m (2,000 x 4,500 ft) 1,200 x 2,000 m (4,000 x 6,500 ft) 1,800 x 2,...
Page 76: Insp
2-60 clutch insp adj a b c d e f g h i j k l m n o p q r s t u v w x y z a b c d note: s silver o orange w white specifications model: rx10m, rx10ms elevation x 800 m ( x 2,500 ft) 600 x 1,400 m (2,000 x 4,500 ft) 1,200 x 2,000 m (4,000 x 6,500 ft) 1,800 x 2,600 m (6,000 x 8,500 ft) 2,400 x 3,000 m ...
Page 77: Insp
2-61 clutch/gear selection insp adj the clutch may require tuning depending upon where the machine will be operated and the de- sired handling characteristics. The clutch can be tuned by changing the engagement and shifting speeds. Clutch engagement speed is defined as the en- gine speed at which th...
Page 78: Insp
2-62 gear selection insp adj a b c d e f g a b drive gear driven gear a b c d e f g h i a b seat sheave 1 chain and sprocket part number parts name teeth & links parts no. Standard 20 teeth 8fa-17682-00 21 teeth 8fa-17682-10 rx10m, rx10ms drive sprocket 22 teeth 8fa-17682-20 23 teeth 8fa-17682-30 24...
Page 79: Insp
2-63 identification mark a gear selection insp adj b c d e f g h 5 torque cam (secondary spring seat) effects part no. Cam angle identification mark standard quicker upshifting during acceleration 8fa-17604-00 51-43 _ 8bvfa rx10, rx10s, rx10r, rx10rs 8bv-17604-71 47 _ 8bv71 8bv-17604-51 45 _ 8bv51 r...
Page 80: Insp
2-64 d e f g h i j k l spring identification color code a spring rate color b preload color c gear selection insp adj 6 primary spring parts no. Spring rate n / mm (kg / mm) preload n (kg) color wire gauge mm (in) outside diameter mm (in) no. Of coils free length mm (in) standard 90501-551l3 19.6 (2...
Page 81: Insp
2-65 gear selection insp adj a b c d 7 clutch weight parts no. Weight g (oz) without bush and rivets shape & id mark standard 8ch-17605-10 35.32 (1.247) 8cr-17605-10 38.09 (1.345) 8dg-17605-00 34.26 (1.209) 8dj-17605-00 37.77 (1.333) 8dn-17605-20 42.09 (1.486) 8ek-17605-00 39.00 (1.376) 8fa-17605-00...
Page 82: Insp
2-66 gear selection insp adj a b c d e f g h a b c d e f g h i j l m k 8 weight rivets parts no. Material length mm (in) weight g (oz) standard effects 90261-06033 steel 17.2 (0.677) 4.5 (0.159) in: rx10, rx10s, rx10r, rx10rs 90269-06006 steel 17.2 (0.677) 3.6 (0.127) with hole out: rx10, rx10s, rx1...
Page 83: Insp
2-67 test the main jet (performance & plug color) adjust the main jet size according to the chart check std settings s carburetors s spark plugs adjust the secondary clutch as required high altitude tuning ok adjust the size of the main jet re-test test the low speed setting check to see if the gear...
Page 84: Insp
2-68 front suspension insp adj a a caution: warning front suspension spring preload 1. Adjust: sspring preload adjustment steps: sturn the spring seat 1 in or out. Rx10, rx10s, rx10r, rx10rs spring seat standard p g distance shorter z ! Longer preload harder z ! Softer min. Max. Length 250 mm 258 mm...
Page 85: Insp
2-69 rear suspension insp adj a b caution: note: a rear suspension stopper band 1. Adjust: sstopper band tension make sure the left and right sides of the rear suspension stopper band are adjusted evenly. This adjustment affects the handling character- istics of the machine. Adjustment steps: sloose...
Page 86: Insp
2-70 rear suspension insp adj a b a warning b spring preload (rx10, rx10s, rx10r, rx10rs) 1. Adjust: sspring preload adjustment step: sturn the spring seat 1 in or out. Front a spring seat standard p g distance shorter z ! Longer preload harder z ! Softer min. Max. Length 180 mm 190 mm 190 mm g (7.0...
Page 87: Insp
2-71 rear suspension insp adj a b a b note: caution: spring preload (rx10m, rx10ms) 1. Adjust: sspring preload adjustment steps: sturn the adjusting ring 1 to the proper posi- tion. Spring adjuster position 1 2 3 4 5 preload softer z ! Harder front standard 3 spring adjuster position 1 2 3 4 5 6 7 p...
Page 88: Insp
2-72 rear suspension insp adj caution: caution: note: sturn the adjusting bolt 2 to the desired posi- tion. Be sure the adjusting bolt ends are set at the same position on each side. Swhile holding the adjusting bolt securely, tighten the nut 1 . Nut (shock absorber): 49 nm (4.9 m skg, 35 ftslb) nev...
Page 89: Insp
2-73 rear suspension insp adj caution: warning note: control rod 1. Adjust: scontrol rod stroke a make sure the adjusting bolt ends are set at the same position on each side. Adjustment steps: sloosen the lock nut 1 . Sturn the adjusting nut 2 in or out to adjust the control rod stroke. Adjusting po...
Page 90: Chas
3 3-1 order job name / part name q’ty remarks 1 2 3 4 5 6 7 8 9 10 11 12 handlebar removal handlebar cover plastic band thumb warmer lead coupler thumb warmer switch lead coupler engine stop switch coupler brake switch coupler headlight beam switch coupler grip warmer lead coupler grip warmer switch...
Page 91: Chas
Steering chas 3-2 order job name / part name q’ty remarks 13 14 15 16 17 master cylinder assembly handlebar holder (upper) cable holder handlebar handlebar holder (lower) 1 2 1 1 1 after installing all parts, refer to “cable routing” in chapter 9, to check the cable, lead and hose routings. For inst...
Page 92: Chas
3-3 order job name / part name q’ty remarks 1 2 3 4 5 6 7 8 9 10 11 12 handlebar removal handlebar cover plastic band thumb warmer lead coupler thumb warmer switch lead coupler engine stop switch coupler brake switch coupler headlight beam switch coupler grip warmer lead coupler grip warmer switch l...
Page 93: Chas
3-4 steering chas order job name / part name q’ty remarks 13 14 15 16 17 master cylinder assembly handlebar holder (upper) cable holder handlebar handlebar holder (lower) 1 2 1 1 1 after installing all parts, refer to “cable routing” in chapter 9, to check the cable, lead and hose routings. For inst...
Page 94: Chas
3-5 order job name / part name q’ty remarks 1 2 3 4 5 6 7 8 9 10 11 12 13 14 15 16 steering column and tie rod removal handlebar clip relay rod cotter pin steering shaft steering column 1 lock plate bearing bearing holder plate collar steering column 2 tie rod idler arm relay arm bushing washer 6 1 ...
Page 95: Chas
3-6 67 nm (6.7 m skg, 49 ftslb) : e : a 25 nm (2.5 m skg, 18 ftslb) 35 nm (3.5 m skg, 25 ftslb) 30 nm (3.0 m skg, 22 ftslb) 35 nm (3.5 m skg, 25 ftslb) : b : c : d 23 nm (23 m skg, 17 ftslb) : f : esso beacon 325 grease or aeroshell grease #7a 1 order job name / part name q’ty remarks 17 18 19 washe...
Page 96: Chas
3-7 steering chas warning warning inspection 1. Inspect: shandlebar 1 (rx10, rx10s, rx10r, rx10rs) shandlebar 2 (rx10m, rx10ms) ssteering column 3 bends / cracks / damage ! Replace. Do not attempt to straighten a bent column. This may dangerously weaken the column. 2. Inspect: sbearings (steering co...
Page 97: Chas
3-8 steering chas a b a b c note: installation 1. Install: srelay arms 1 sbushings swashers 2 bolt (relay arm): 67 nm (6.7 m skg, 49 ftslb) sclips 3 2. Install: sidler arm 4 sbushings swashers srelay rod 5 nut (idler arm): 35 nm (3.5 m skg, 25 ftslb) nut (relay rod): 30 nm (3.0 m skg, 22 ftslb) 3. I...
Page 98: Chas
3-9 steering chas caution: a b a b c note: caution: always use new cotter pins. Locknut (rod end): 25 nm (2.5 m skg, 18 ftslb) loctite nut (tie rod-idler arm): 30 nm (3.0 m skg, 22 ftslb) nut (tie rod-steering arm): 35 nm (3.5 m skg, 25 ftslb) 5. Install: ssteering shaft 1 slocknuts 2 sjoints 3 stee...
Page 99: Chas
3-10 steering chas a d c b caution: 6. Adjust: sskis adjustment steps: stemporarily install the handlebar. Shold the handlebar straight and check that the skis and relay arms are at right angles to the handlebar. Sloosen the locknuts (steering shaft) 1 . Shold the handlebar straight. Sadjust the ste...
Page 100: Chas
3-11 order job name / part name q’ty remarks 1 2 3 4 5 6 7 8 9 10 ski removal cotter pin ski stopper collar washer ski column lower bracket ski runner collar ski washer ski handle 1 1 1 6 1 1 2 1 4 1 remove the parts in the order listed below. For installation, reverse the removal procedure. : a 11 ...
Page 101: Chas
3-12 ski chas note: inspection 1. Inspect: sski 1 sski runner 2 sski stopper 3 sski column lower bracket 4 sski handle 5 wear / cracks / damage ! Replace. Smounting bolt 6 scollar 7 sbolts 8 scollars 9 wear / damage ! Replace. Installation 1. Install: sski column lower bracket 1 be sure to install t...
Page 102: Chas
3-13 order job name / part name q’ty remarks 1 2 3 4 5 6 7 8 9 10 11 12 front suspension removal ski front cover shock absorber cap steering arm ski column bushing upper arm lower arm collar bushing connecting rod stabilizer arm 1 1 1 1 1 1 1 1 2 4 1 1 remove the parts in the order listed below. Ref...
Page 103: Chas
3-14 order job name / part name q’ty remarks 13 14 15 stabilizer steering knuckle collar 1 1 2 for installation, reverse the removal procedure. 65 nm (6.5 m skg, 47 ftslb) : e : a 45 nm (4.5 m skg, 33 ftslb) 37 nm (3.7 m skg, 27 ftslb) 40 nm (4.0 m skg, 29 ftslb) 35 nm (3.5 m skg, 25 ftslb) : b : c ...
Page 104: Chas
3-15 front suspension chas warning handling notes this shock absorber contains highly com- pressed nitrogen gas. Before handling the shock absorber read and make sure that you understand the following information. The manufacturer cannot be held responsible for property damage or personal injury tha...
Page 105: Chas
3-16 front suspension chas note: note: 4. Inspect: sconnecting rod 1 sstabilizer 2 sstabilizer arm 3 cracks / bends / damage ! Replace. Sbushing 4 wear / scratches / damage ! Replace. Installation 1. Install: ssteering arm 1 salign the punch mark a on the ski column with the punch mark b on the stee...
Page 106: Chas
3-17 front suspension chas note: ski alignment be sure to verify the spring preload setting and the ski spindle camber before adjusting the ski toe out since either of those adjustments may affect the ski toe out setting. Point the skis straight forward and measure the amount of ski toe out. A ski t...
Page 107: Powr
4-1 order job name / part name q’ty remarks 1 2 3 primary sheave removal left side cover v-belt primary sheave assembly 1 1 1 : a 1st 60 nm (6.0 m skg, 43 ftslb) 2nd 120 nm (12 m skg, 85 ftslb) remove the parts in the order listed below. For installation, reverse the removal procedure. Primary sheav...
Page 108: Powr
4 4-2 order job name / part name q’ty remarks primary sheave disassembly primary sheave cap primary sheave spring collar roller washer collar weight washer fixed sheave stopper sliding sheave bushing spider slider 1 1 3 3 6 3 3 6 1 1 1 1 1 6 disassemble the parts in the order listed below. Left-hand...
Page 109: Powr
4-3 primary sheave and drive v-belt powr tr note: removal 1. Remove: sprimary sheave assembly 1 use the primary sheave holder 2 and primary sheave puller 3 . Primary sheave holder: 90890-01701, ys-01880 primary sheave puller: 90890-01898 ys-01881-1, ys-01882-1 disassembly 1. Remove: sfixed sheave 1 ...
Page 110: Powr
4-4 primary sheave and drive v-belt powr tr note: caution: sfit the primary sheave assembly onto the adapter and secure the supporting plates 8 . Securely fit the projections on the adapter into the fixed sheave holes. Sset the bar wrench 9 onto the spider and turn the special tool clockwise to loos...
Page 111: Powr
4-5 primary sheave and drive v-belt powr tr note: inspection 1. Inspect: sspider 1 ssliding sheave 2 sfixed sheave 3 sprimary sheave cap 4 cracks / damage ! Replace. 2. Inspect: sprimary sheave spring 1 cracks / damage ! Replace. 3. Measure: sprimary sheave spring free length a out of specification ...
Page 112: Powr
4-6 primary sheave and drive v-belt powr tr a b c d note: 5. Inspect: sweight 1 sroller 2 sbushing 3 sslider 4 srivet 5 scollar wear / scratches / damage ! Replace. Slider inside clearance + : min. 0 mm (0 in) max. 0.3 mm (0.0118 in) rivet replacement steps: sremove old rivet with the appropriate dr...
Page 113: Powr
4-7 primary sheave and drive v-belt powr tr note: note: caution: note: note: assembly 1. Install: ssliding sheave (onto the spider) be sure the sliding sheave match mark (x) is aligned with the spider match mark (x). 2. Install: sfixed sheave (onto the spider) sclean the threads. Sapply loctite648 t...
Page 114: Powr
4-8 primary sheave and drive v-belt powr tr caution: warning note: note: stighten the spider to specification using the bar wrench 3 . Spider: 200 nm (20 m skg, 145 ftslb) the spider has a left-handed thread. Sdo not operate the primary sheave until the loctite has dried completely. Wait 24 hours be...
Page 115: Powr
4-9 primary sheave and drive v-belt powr tr caution: installation 1. Install: sprimary sheave assembly be sure to remove any oil or grease from the tapered portion of the crankshaft and spider using a cloth dampened with thinner. 2. Apply: sengine oil or an equivalent grease (to threads of primary s...
Page 116: Powr
4-10 order job name / part name q’ty remarks 1 2 3 4 5 secondary sheave removal left side cover v-belt washer and bolt shim collar secondary sheave assembly shim 1 – 1 1 – remove the parts in the order listed below. Refer to “sheave offset adjustment” in chapter 2. For installation, reverse the remo...
Page 117: Powr
4-11 secondary sheave powr tr order job name / part name q’ty remarks secondary sheave disassembly spring seat secondary sheave spring fixed sheave stopper sliding sheave 1 1 1 1 1 remove the parts in the order listed below. For assembly, reverse the disassembly procedure. 7 nm (0.7 m skg, 5.1 ftslb...
Page 118: Powr
4-12 secondary sheave powr tr warning disassembly suse extreme caution when disassem- bling the secondary sheave since serious injury can occur due to the sudden release of spring tension. Use the sheave com- pressor to contain the spring tension be- fore removing the nuts (spring seat). Sdo not att...
Page 119: Powr
4-13 secondary sheave powr tr note: 5. Measure: sramp shoe thickness a out of specification ! Replace the ramp shoe. Wear limit: 1.0 mm (0.04 in) assembly 1. Install: sstopper ssliding sheave screw (stopper): 7 nm (0.7 m skg, 5.1 ftslb) 2. Install: sfixed sheave 1 sbolts 2 (along with the shims) bol...
Page 120: Powr
4-14 secondary sheave powr tr a note: note: installation steps: shold the spring seat 1 and turn the fixed sheave 2 counterclockwise to the specified angle a . The holes in the spring seat should align with the bolts on the sliding sheave. A = (sheave hole number + spring seat hole number) 10 twist ...
Page 121: Powr
4-15 secondary sheave powr tr note: adjustment steps: sdisassemble the secondary sheave. Sremove the bolts and original shims 1 . Sinstall new shims of the proper thickness and reassemble the secondary sheave. Smeasure the secondary sheave clearance again. Repeat these steps until the clearance is w...
Page 122: Powr
4-16 order job name / part name q’ty remarks 1 2 3 4 5 6 7 8 9 10 11 12 13 drive chain housing removal brake caliper parking brake right side cover brake disc chain tension adjuster drain bolt drive chain housing cover chain tensioner roller drive sprocket collar drive chain driven sprocket collar d...
Page 123: Powr
4-17 drive chain housing powr tr note: caution: caution: inspection 1. Inspect: sdrive chain housing 1 sdrive chain housing cover 2 cracks / damage ! Replace. Soil seals (drive chain housing) wear / damage ! Replace. Sbearings (drive chain housing and cover) 3 pitting/ damage ! Replace. Sbearing (ch...
Page 124: Powr
4-18 drive chain housing powr tr note: 3. Measure: s14 link section a of the drive chain using a spring scale, pull on the drive chain with 36 kg (80 lb) of force b . Out of specification ! Replace the drive chain. Maximum 14 link drive chain section length: 133.35 mm (5.25 in) limit: 137.35 mm (5.4...
Page 125: Powr
4-19 drive chain housing powr tr installation 1. During installation, pay attention to the fol- lowing. A make sure that the bearing seals face towards the drive chain as shown. B properly install the rubber seal onto the drive chain housing, making sure that there are no gaps. C 1 c 2 c 3 be sure t...
Page 126: Powr
4-20 drive chain housing powr tr order job name / part name q’ty remarks 1 2 3 4 5 6 7 8 9 10 11 12 13 14 drive chain housing removal brake caliper parking brake right side cover brake disc chain tension adjuster joint shift rod shift lever assembly lever drain bolt collar drive chain housing cover ...
Page 127: Powr
4-21 drive chain housing powr tr order job name / part name q’ty remarks 15 16 17 18 19 20 21 22 23 24 25 26 27 28 29 30 31 chain tensioner roller collar spring journal reverse driven gear washer forward driven sprocket collar reverse drive gear drive sprocket drive chain collar washer plate shaft d...
Page 128: Powr
4-22 drive chain housing powr tr inspection 1. Inspect: sdrive chain housing 1 sdrive chain housing cover 2 cracks / damage ! Replace. Sshift fork 3 pitting/ wear / damage ! Replace. Soil seals (drive chain housing) wear / damage ! Replace. Sbearings (drive chain housing and cover) 4 pitting/ damage...
Page 129: Powr
4-23 drive chain housing powr tr installation 1. During installation, pay attention to the fol- lowing. A properly install the rubber seal onto the drive chain housing, making sure that there are no gaps. B make sure that the bearing seals face towards the drive chain as shown. C 1 c 2 be sure to in...
Page 130: Powr
4-24 drive chain housing powr tr 4. Install: sshift rod 1 5. Adjust: sshift rod length a adjustment steps: smove the shift lever to the “fwd.” position. Sloosen the locknuts 2 . Sturn the shift rod 1 so that shift rod free play is 0 mm (in direction where a can be short- ened appropriately) and then...
Page 131: Powr
4-25 1 2 3 order job name / part name q’ty remarks secondaryshaft removal secondary sheave drive chain housing circlip secondaryshaft bearing 1 1 1 remove the parts in the order listed below. Refer to “secondary sheave”. Refer to “drive chain housing”. For installation, reverse the removal procedure...
Page 132: Powr
4-26 secondaryshaft powr tr inspection 1. Inspect: ssecondaryshaft 1 scratches (excessive) / damage ! Replace. Ssplines 2 wear / damage ! Replace the secondary- shaft. Sbearing contact surface 3 scratches / wear / damage ! Replace the secondaryshaft. 2. Inspect: sbearing 1 pitting/ damage ! Replace....
Page 133: Powr
4-27 secondaryshaft powr tr secondaryshaft and drive chain housing installation 1. Install: ssecondaryshaft sdrive chain housing installation steps: sinstall the secondaryshaft. Sinstall the drive chain housing 1 . Stighten the bolts. Bolt (drive chain housing): 48 nm (4.8 m skg, 35 ftslb) sinstall ...
Page 134: Powr
4-28 order job name / part name q’ty remarks 1 2 3 4 5 brake pad removal cap bolt retaining pin pad spring brake pad brake caliper assembly 1 1 1 2 1 remove the parts in the order listed below. For installation, reverse the removal procedure. : a 6 nm (0.6 m skg, 4.3 ftslb) : b 48 nm (4.8 m skg, 35 ...
Page 135: Powr
4-29 brake powr tr caution: note: note: disc brake components rarely require dis- assembly. Do not: sdo not disassemble components unless absolutely necessary. Sdo not use solvents on internal brake com- ponents. Sdo not use contaminated brake fluid for cleaning. Use only clean brake fluid. Sdo not ...
Page 136: Powr
4-30 brake powr tr 2. Install: sbrake pads spad spring installation steps: sconnect a suitable hose 1 tightly to the cali- per bleed screw 2 . Put the other end of this hose into an open container. Sloosen the caliper bleed screw and push the pistons into the caliper with your finger. Stighten the c...
Page 137: Powr
4-31 order job name / part name q’ty remarks brake caliper and parking brake removal brake fluid brake hose brake caliper assembly parking brake cable spring lever parking brake assembly collar 1 1 1 1 1 1 1 remove the parts in the order listed below. Drain. For installation, reverse the removal pro...
Page 138: Powr
4-32 brake powr tr note: warning warning brake caliper disassembly before disassembling a caliper, drain brake fluid from brake hose, master cylinder, brake caliper and brake reservoir of their brake fluid. 1. Remove: spistons spiston oil seals 1 removal steps: susing a wood of piece 2 , lock the ri...
Page 139: Powr
4-33 brake powr tr warning warning caution: 1. Inspect: scaliper piston 1 scratches / rust / wear ! Replace the caliper assembly. Scaliper cylinder 2 wear / scratches ! Replace the caliper as- sembly. Scaliper body 3 cracks / damage ! Replace. Soil delivery passage (caliper body) blow out with compr...
Page 140: Powr
4-34 brake powr tr order job name / part name q’ty remarks brake master cylinder removal brake fluid parking brake cable brake switch brake lever parking brake lever union bolt holder master cylinder assembly 1 1 1 1 1 1 1 remove the parts in the order listed below. Drain. For installation, reverse ...
Page 141: Powr
4-35 brake powr tr warning note: inspection 1. Inspect: smaster cylinder 1 wear / scratches ! Replace the master cyl- inder assembly. Smaster cylinder body 2 cracks / damage ! Replace. Soil delivery passage (master cylinder body) blow out with compressed air. 2. Inspect: smaster cylinder kit 1 scrat...
Page 142: Powr
4-36 order job name / part name q’ty remarks 1 2 slide rail suspension removal rear axle nut tension adjuster left side cover slide rail suspension collar 1 2 remove the parts in the order listed below. Loosen. Loosen. Refer to “primary sheave and drive velt”. For installation, reverse the removal p...
Page 143: Powr
4-37 slide rail suspension powr tr order job name / part name q’ty remarks slide rail suspension disassembly stopper band hook bushing collar front shock absorber bracket front suspension bracket rubber damper front pivot arm bushing shaft bushing collar suspension wheel collar wheel bracket front p...
Page 144: Powr
4-38 slide rail suspension powr tr order job name / part name q’ty remarks suspension wheel collar wheel bracket circlip suspension wheel collar bushing shaft rear suspension bracket spacer bushing collar 2 2 2 2 2 2 2 1 1 2 2 1 : a 24 nm (2.4 m skg, 17 ftslb) 49 nm (4.9 m skg, 35 ftslb) 72 nm (7.2 ...
Page 145: Powr
4-39 slide rail suspension powr tr order job name / part name q’ty remarks rear shock absorber bushing collar pull rod collar bushing guide wheel control rod assembly bushing bushing 1 2 1 2 4 4 2 2 2 2 : a 49 nm (4.9 m skg, 35 ftslb) 72 nm (7.2 m skg, 52 ftslb) : b : esso beacon 325 grease or aeros...
Page 146: Powr
4-40 order job name / part name q’ty remarks rear pivot arm bushing shaft shaft rear pivot arm bracket shaft circlip suspension wheel wheel bracket shaft rear axle guide wheel collar tension adjuster collar collar sliding frame 1 2 1 1 1 1 2 2 1 1 3 2 2 1 1 2 for assembly, reverse the disassembly pr...
Page 147: Powr
4-41 1 2 order job name / part name q’ty remarks slide rail suspension removal rear axle nut tension adjuster left side cover slide rail suspension collar 1 2 remove the parts in the order listed below. Loosen. Loosen. Refer to “primary sheave and drive velt”. For installation, reverse the removal p...
Page 148: Powr
4-42 order job name / part name q’ty remarks slide rail suspension disassembly stopper band hook rubber collar rubber collar shaft bushing collar front shock absorber front pivot arm bushing collar bushing collar front suspension bracket suspension wheel collar wheel bracket 2 2 2 1 1 4 2 1 1 2 1 4 ...
Page 149: Powr
4-43 order job name / part name q’ty remarks suspension wheel collar wheel bracket front pivot arm bracket circlip suspension wheel collar bushing collar rear suspension bracket spacer bushing collar 2 2 2 2 2 2 2 2 1 1 2 2 1 : a 24 nm (2.4 m skg, 17 ftslb) 49 nm (4.9 m skg, 35 ftslb) 72 nm (7.2 m s...
Page 150: Powr
4-44 order job name / part name q’ty remarks rear shock absorber bushing collar pull rod collar bushing guide wheel control rod assembly bushing bushing shaft 1 2 1 2 4 4 2 2 2 2 1 : a 49 nm (4.9 m skg, 35 ftslb) 72 nm (7.2 m skg, 52 ftslb) : b : esso beacon 325 grease or aeroshell grease #7a 1 31 3...
Page 151: Powr
4-45 order job name / part name q’ty remarks rear pivot arm bushing collar collar rear pivot arm bracket collar circlip suspension wheel wheel bracket shaft rear axle guide wheel collar tension adjuster collar collar sliding frame 1 2 1 1 1 1 2 2 1 1 4 2 2 2 1 2 for assembly, reverse the disassembly...
Page 152: Powr
4-46 slide rail suspension powr tr a b inspection 1. Inspect: ssuspension wheel sguide wheel cracks / damage ! Replace. Swheel bearing wheel turns roughly ! Replace. 2. Inspect: sstopper band 1 frayed / damage ! Replace. Spull rod 2 bends / damage ! Replace. Sshock absorber 3 oil leaks / damage ! Re...
Page 153: Powr
4-47 slide rail suspension powr tr note: assembly 1. Install: sstopper band 1 sfor rx10, rx10s, rx10r, rx10rs: install the stopper band with a toward the hook and b toward the front suspension bracket. Sfor rx10m, rx10ms: install the stopper band with a toward the hook and b toward the shaft. Nut (s...
Page 154: Powr
4-48 slide rail suspension powr tr a b c d b c a e f g h i j control rod parts number control rod 1 length mm (in) length mm (in) length mm (in) rx10, rx10s, rx10r, rx10rs 301.0 (11.85) 155.5 (6.12) 2.5p 3 = 7.5 (0 098p 3 = 0 295) rx10m, rx10ms 257.5 (10.14) 165.0 (6.50) (0.098p 3 = 0.295) control r...
Page 155: Powr
4-49 order job name / part name q’ty remarks 1 2 3 4 5 6 7 front axle and track removal drive chain housing slide rail suspension secondary sheave speed sensor bearing holder gear unit set bolt front axle assembly bearing track 1 1 1 2 1 1 1 remove the parts in the order listed below. Refer to “driv...
Page 156: Powr
4-50 front axle and track powr tr a b note: inspection 1. Inspect: strack 1 sslide metal 2 wear / cracks / damage ! Replace. 2. Inspect: ssprocket wheel 1 wear / break / damage ! Replace. Sfront axle 2 bends/scratches (excessive)/damage ! Re- place. Installation 1. Install: ssprocket wheels sguide w...
Page 157: Powr
4-51 front axle and track powr tr a b note: 2. Place the track in the chassis. For track with a direction of rotation mark a : install the track with the mark pointing in the direction of track rotation. A rx10, rx10s, rx10r, rx10rs b rx10m, rx10ms.
Page 158: Eng
5 5-1 order job name / part name q’ty remarks 1 2 3 4 5 6 7 8 seat and fuel tank removal rear cover muffler end pipe muffler side cover tail / brake light cover seat fuel tank cover side cover fuel tank 1 2 2 1 1 1 2 1 remove the parts in the order listed below. For installation, reverse the removal...
Page 159: Eng
Exhaust pipe and muffler eng 5-2 order job name / part name q’ty remarks 1 2 3 4 5 exhaust pipe and muffler removal slide rail suspension front axle assembly track seat and fuel tank protector muffler exhaust pipe gasket band 1 1 2 2 2 remove the parts in the order listed below. Refer to “slide rail...
Page 160: Eng
5-3 exhaust pipe and muffler eng note: installation 1. Install: smuffler 1 2. Install: sexhaust pipe 1 hang the exhaust pipe to the frame a . 3. Tighten: sexhaust pipe bolts 1 bolt (band): 9 nm (0.9 m skg, 7 ftslb) 4. Tighten: sexhaust pipe bolts 1 smuffler band bolts 2 bolt (exhaust pipe): 25 nm (2...
Page 161: Eng
5-4 order job name / part name q’ty remarks 1 2 engine assembly removal intake silencer fuel pump carburetor assembly primary sheave coolant fuel tank relay rod oil tank frame cross member engine assembly 1 1 remove the parts in the order listed below. Refer to“primary sheave and drive v-belt” in ch...
Page 162: Eng
5-5 engine assembly eng note: note: inspection 1. Inspect: sengine mounting adjust bolts cracks / damage ! Replace. Installation after installing all parts, refer to “cable rout- ing” in chapter 9, to check the cable, lead and hose routing. 1. Install: sengine mounting adjust bolts sengine sengine m...
Page 163: Eng
5-6 order job name / part name q’ty remarks 1 2 3 4 5 cylinder head cover removal coolant coolant hose and pipe ignition coil spark plug cylinder head cover cylinder head cover gasket timing chain guide (top side) 4 4 1 1 1 remove the parts in the order listed below. Drain. Refer to “heat exchanger”...
Page 164: Eng
5-7 order job name / part name q’ty remarks 1 2 3 4 5 6 7 8 9 camshaft removal oil tank timing chain tensioner cap bolt timing chain tensioner timing chain tensioner gasket timing chain guide (exhaust side) intake camshaft sprocket exhaust camshaft sprocket intake camshaft cap dowel pin exhaust cams...
Page 165: Eng
5-8 : a 10 nm (1.0 m skg, 7.2 ftslb) 24 nm (2.4 m skg, 17 ftslb) : b 6 nm (0.6 m skg, 4.3 ftslb) : c 10 nm (1.0 m skg, 7.2 ftslb) : d order job name / part name q’ty remarks 10 11 intake camshaft exhaust camshaft 1 1 for installation, reverse the removal procedure. Camshafts eng.
Page 166: Eng
5-9 camshafts eng note: note: removal 1. Remove: stiming plug 2. Align: s“i” mark a on the a.C. Magneto rotor (with the stationary pointer b on the a.C. Magneto cover) sturn the crankshaft clockwise. Swhen piston #4 is at tdc on the compression stroke, align the “i” mark a with the stationary pointe...
Page 167: Eng
5-10 camshafts eng caution: 7. Remove: stiming chain guide (exhaust side) 1 scamshaft caps sdowel pins to prevent damage to the cylinder head, camshafts or camshafts caps, loosen the camshaft cap bolts in stages and in a criss- cross pattern, working from the outside in. 8. Remove: sintake camshaft ...
Page 168: Eng
5-11 camshafts eng inspection 1. Inspect: scamshaft lobes blue discoloration / pitting / scratches ! Re- place the camshaft. 2. Measure: scamshaft lobe dimensions a and b out of specification ! Replace the cam- shaft. Camshaft dimensions: intake: : a 32.40 mm (1.2756 in) b 24.85 mm (0.9783 in) exhau...
Page 169: Eng
5-12 camshafts eng note: measurement steps: sinstall the camshaft into the cylinder head (without the dowel pins and camshaft caps). Sposition a strip of plastigauge 1 onto the camshaft journal. Sinstall the dowel pins and camshaft caps. Stighten the camshaft cap bolts in stages and in a crisscross ...
Page 170: Eng
5-13 camshafts eng 8. Inspect: stiming chain tensioner cracks / damage ! Replace. Inspection steps: swhile lightly pressing the timing chain tension- er rod by hand, turn the tensioner rod fully clockwise with a thin screwdriver 1 . Sremove the screwdriver and slowly release the timing chain tension...
Page 171: Eng
5-14 camshafts eng note: note: note: caution: installation 1. Install: sexhaust camshaft 1 sintake camshaft 2 install the camshafts with the punch mark a facing up. 2. Install: sdowel pins sintake camshaft caps sexhaust camshaft caps make sure that the punch marks a on the cam- shafts are aligned wi...
Page 172: Eng
5-15 camshafts eng note: caution: warning splace the timing chain onto both camshaft sprockets and then install the camshaft sprockets onto the camshafts. When installing the camshaft sprockets, start with the exhaust camshaft and be sure to keep the timing chain as tight as possible on the ex- haus...
Page 173: Eng
5-16 camshafts eng stighten the timing chain tensioner bolts 3 to the specified torque. Bolt (timing chain tensioner): 10 nm (1.0 m skg, 7.2 ftslb) sremove the screwdriver, make sure that the timing chain tensioner rod releases, and then tighten the cap bolt to the specified torque. Bolt (cap): 6 nm...
Page 174: Eng
5-17 order job name / part name q’ty remarks 1 2 3 4 5 6 7 8 cylinder head removal seat and fuel tank intake and exhaust camshafts cover exhaust joint pipe exhaust joint pipe gasket band gasket cylinder head cylinder head gasket dowel pin 1 4 1 4 4 1 1 2 remove the parts in the order listed below. R...
Page 175: Eng
5-18 cylinder head eng note: removal 1. Remove: scylinder head nuts 1 scylinder head cap nut 2 scylinder head bolts 3 sloosen the nuts in the proper sequence as shown. Sloosen each nut 1/2 of a turn at a time. After all of the nuts are fully loosened, remove them..
Page 176: Eng
5-19 cylinder head eng note: note: inspection 1. Eliminate: scarbon deposits (from the combustion chambers) use the rounded scraper. Do not use a sharp instrument to avoid damag- ing or scratching: sspark plug threads svalve seats 2. Inspect: scylinder head damage / scratches ! Replace. Scylinder he...
Page 177: Eng
5-20 cylinder head eng note: note: note: installation 1. Install: sgasket (cylinder head) new 1 sdowel pins 2 scylinder head pass the timing chain through the timing chain cavity. 2. Tighten: scylinder head nuts 1 x 10 scylinder head bolts 11 , 12 sfirst, tighten the nuts 1 x 10 to approximate- ly 2...
Page 178: Eng
5-21 order job name / part name q’ty remarks 1 2 3 4 5 6 7 8 9 10 11 12 13 valves and valve springs removal cylinder head intake valve lifter intake valve pad intake valve cotter intake valve retainer intake valve spring intake valve stem seal intake valve spring seat intake valve intake valve guide...
Page 179: Eng
5-22 order job name / part name q’ty remarks 14 15 16 17 18 exhaust valve spring exhaust valve stem seal exhaust valve spring seat exhaust valve exhaust valve guide 8 8 8 8 8 for installation, reverse the removal procedure. Valves and valve springs eng.
Page 180: Eng
5-23 valves and valve springs eng note: note: note: note: removal before removing the internal parts of the cylin- der head (e.G., valves, valve springs, valve seats), make sure that the valves properly seal. 1. Remove: svalve lifter 1 svalve pad 2 make a note of the position of each valve lifter an...
Page 181: Eng
Valves and valve springs eng 5-24 note: a b note: valve spring compressor 90890-04019, ym-04019 valve spring compressor attachment intake valve 90890-04114, ym-4114 exhaust valve 90890-04108, ym-4108 4. Remove: svalve retainer 1 svalve spring 2 sstem seal 3 svalve spring seat 4 svalve 5 identify the...
Page 182: Eng
5-25 valves and valve springs eng note: replacement steps: sremove the valve guide with a valve guide remover 1 . Sinstall the new valve guide with a valve guide installer 2 and valve guide remover 1 . Safter installing the valve guide, bore the valve guide with a valve guide reamer 3 to obtain the ...
Page 183: Eng
5-26 valves and valve springs eng note: note: note: 6. Measure: svalve stem runout out of specification ! Replace the valve. Swhen installing a new valve, always replace the valve guide. Sif the valve is removed or replaced, always re- place the oil seal. Valve stem runout: 0.01 mm (0.0004 in) 7. El...
Page 184: Eng
5-27 valves and valve springs eng caution: note: lapping steps: sapply a coarse lapping compound a to the valve face. Do not let the lapping compound enter the gap between the valve stem and the valve guide. Sapply molybdenum disulfide oil onto the valve stem. Sinstall the valve into the cylinder he...
Page 185: Eng
5-28 valve and valve springs eng 12. Measure: scompressed spring force a out of specification ! Replace the valve spring. B installed length compressed spring force: intake 82 x 96 n at 34.5 mm (8.2 x 9.6 kg at 34.5 mm, 18.1 x 21.2 lb at 1.36 in) exhaust 110 x 126 n at 35.0 mm (11.0 x 12.6 kg at 35....
Page 186: Eng
5-29 valves and valve springs eng note: note: installation 1. Deburr: svalve stem end (with an oil stone) 2. Lubricate: svalve stem 1 svalve stem seal 2 (with the recommended lubricant) recommended lubricant molybdenum disulfide oil 3. Install: svalve 1 slower spring seat 2 soil seal 3 svalve spring...
Page 187: Eng
5-30 valves and valve springs eng note: caution: note: 4. Install: svalve cotters 1 install the valve cotters by compressing the valve spring with the valve spring compressor 2 and attachment 3 . Valve spring compressor: 90890-04019, ym-04019 attachment: intake valve 90890-04114, ym-4114 exhaust val...
Page 188: Eng
5-31 order job name / part name q’ty remarks 1 2 3 4 5 a.C. Magneto rotor cover removal right side cover engine oil oil level switch coupler oil tank a.C. Magneto rotor cover gasket dowel pin 1 1 1 1 2 remove the parts in the order listed below. Refer to “drive chain housing” in chapter 4. Drain. Re...
Page 189: Eng
5-32 order job name / part name q’ty remarks 1 2 3 4 5 6 a.C. Magneto rotor and starter clutch removal a.C. Magneto rotor idle gear shaft starter motor idle gear starter clutch woodruff key starter clutch gear 1 1 1 1 1 1 remove the parts in the order listed below. For installation, reverse the remo...
Page 190: Eng
5-33 a.C. Magneto and starter clutch eng note: caution: note: removal 1. Remove: sa.C. Magneto rotor bolt swasher swhile holding the a.C. Magneto rotor 1 with the sheave holder 2 , loosen the magneto ro- tor bolt. Sdo not allow the sheave holder to touch the projection on the a.C. Magneto rotor. She...
Page 191: Eng
5-34 a.C. Magneto and starter clutch eng note: 3. Remove: sstarter clutch swhile holding the magneto rotor with the sheave holder, remove the starter clutch bolt 1 . Sdo not allow the sheave holder to touch the projection on the magneto rotor. Sheave holder 90890-01701, ys-01880 4. Inspect: sstarter...
Page 192: Eng
5-35 a.C. Magneto and starter clutch eng note: note: note: installation 1. Install: sstarter clutch swhile holding the magneto rotor with the sheave holder, tighten the starter clutch bolt. Sdo not allow the sheave holder to touch the projection on the magneto rotor. Sheave holder 90890-01701, ys-01...
Page 193: Eng
5-36 a.C. Magneto and starter clutch eng 5. Apply: ssealant (onto the stator coil assembly lead grommet) yamaha bond no. 1215 90890-85505 quick gasket acc-1100-15-01.
Page 194: Eng
5-37 order job name / part name q’ty remarks 1 2 3 4 5 6 oil pan and oil pump removal engine water pump oil pipe oil pan gasket dowel pin oil pump assembly oil pipe 1 1 1 4 1 1 remove the parts in the order listed below. Refer to “engine assembly”. Refer to “water pump” in chapter 6. For installatio...
Page 195: Eng
5-38 order job name / part name q’ty remarks oil pump disassembly oil pump cover 1 oil pump inner rotor 1 pin oil pump outer rotor 1 oil pump cover 2 oil pump inner rotor 2 oil pump outer rotor 2 oil pump shaft valve spring pin oil pump housing 1 1 2 1 1 1 1 1 1 1 4 1 disassemble the parts in the or...
Page 196: Eng
5-39 oil pan and oil pump eng note: removal 1. Remove: spipe 1 soil pan 2 soil pump loosen each bolt 1 / 4 of a turn at a time, in stages and in a crisscross pattern. After all of the bolts are fully loosened, remove them..
Page 197: Eng
5-40 oil pan and oil pump eng inspection 1. Inspection: soil pump housing 1 soil pump cover 2 cracks / damage / wear ! Replace the de- fective part(-s). 2. Measure: sinner-rotor-to-outer-rotor-tip clearance a (between inner rotor 1 and outer rotor 2 ) souter-rotor-to-oil-pump-housing clearance b (be...
Page 198: Eng
5-41 oil pan and oil pump eng note: note: installation 1. Lubricate: sinner rotor souter rotor soil pump shaft (with the recommended lubricant) recommended lubricant engine oil 2. Install: spin 1 sinner rotor 2 souter rotor 3 shousing 4 when installing the inner rotor, align the pin 1 in the oil pum...
Page 199: Eng
5-42 order job name / part name q’ty remarks 1 2 3 4 5 6 7 8 9 10 crankcase removal countershaft cover dowel pin gasket oil pump drive chain guide timing chain timing chain guide (intake side) lower crankcase dowel pin counter shaft oil seal cover 1 2 1 1 1 1 1 2 1 1 remove the parts in the order li...
Page 200: Eng
5-43 order job name / part name q’ty remarks 1 2 3 4 5 6 7 8 9 connecting rods and pistons removal connecting rod cap big end bearing piston pin clip piston pin piston connecting rod top ring 2nd ring oil ring 4 8 8 4 4 4 4 4 4 remove the parts in the order listed below. For installation, reverse th...
Page 201: Eng
5-44 crankshaft and counter shaft removal crankshaft crankshaft journal bearing drive gear lock plate counter shaft assembly oil pump drive chain oil pump driven gear order job name / part name q’ty remarks 1 2 3 4 5 6 7 1 10 1 1 1 1 1 remove the parts in the order listed below. For installation, re...
Page 202: Eng
5-45 crankcase eng note: caution: note: note: removal 1. Remove: scrankcase bolts splace the engine upside down. Sloosen each bolt 1/4 of a turn at a time, in stages and in a crisscross pattern. After all of the bolts are fully loosened, remove them. Sloosen the bolts in decreasing numerical or- der...
Page 203: Eng
5-46 crankcase eng caution: note: note: note: 5. Remove: spiston pin clips 1 spiston pin 2 spiston 3 sconnecting rod 4 do not use a hammer to drive the piston pin out. Sfor reference during installation, put identifi- cation marks on the piston crown. Sbefore removing the piston pin, deburr the pis-...
Page 204: Eng
5-47 crankcase eng note: inspection 1. Inspect: spiston wall and cylinder wall vertical scratches ! Rebore or replace the cylinder, and replace the piston and piston rings as a set. 2. Measure: spiston-to-cylinder clearance measurement steps: 1st step: smeasure cylinder bore “c” with the cylinder bo...
Page 205: Eng
5-48 crankcase eng note: 2nd step: smeasure piston skirt diameter “p” with the micrometer. A 5 mm (0.20 in) from the bottom edge of the piston. Piston size (standard) (p): 73.955 x 73.970 mm (2.9116 x 2.9122 in) sif out of specification, replace the piston and piston rings as a set. 3rd step: scalcu...
Page 206: Eng
5-49 crankcase eng note: note: 4. Install: spiston ring (into the cylinder) level the piston ring in the cylinder with the pis- ton crown. A 5 mm (0.20 in) 5. Measure: send gap (piston rings) out of specification ! Replace the piston rings as a set. The oil ring expander spacer’s end gap cannot be m...
Page 207: Eng
5-50 crankcase eng 8. Measure: spiston pin bore inside diameter out of specification ! Replace the piston. Piston pin bore inside diameter: 17.002 x 17.013 mm (0.6694 x 0.6698 in) 9. Calculate: spiston pin to piston pin bore clearance out of specification ! Replace the piston pin and piston as a set...
Page 208: Eng
5-51 crankcase eng caution: note: note: 11. Inspect: scrankshaft journal surfaces scrankshaft pin surfaces sbearing surfaces scratches / wear ! Replace the crankshaft. 12. Measure: scrankshaft-journal-to-crankshaft-journal- bearing clearance out of specification ! Replace the crank- shaft journal be...
Page 209: Eng
5-52 crankcase eng note: note: sinstall the crankshaft journal lower bearings 1 into the lower crankcase and assemble the crankcase halves. Salign the projections a of the crankshaft jour- nal lower bearings with the notches b in the crankcase. Sdo not move the crankshaft until the clearance measure...
Page 210: Eng
5-53 crankcase eng note: 13. Select: scrankshaft journal bearings (j1 x j5) sthe numbers a stamped into the crankshaft web and the numbers b stamped into the low- er crankcase are used to determine the re- placement crankshaft journal bearing sizes. S“j1 x j5” refer to the bearings shown in the cran...
Page 211: Eng
5-54 crankcase eng caution: note: note: measurement steps: do not interchange the big end bearings and connecting rods. To obtain the correct crankshaft-pin-to-big-end-bearing clear- ance and prevent engine damage, the big end bearings must be installed in their origi- nal positions. Sclean the big ...
Page 212: Eng
5-55 crankcase eng caution: warning caution: note: sreplace the connecting rod bolts and nuts with new ones. Tighten the connecting rod bolts using the plastic-region tightening angle method. Always install new bolts and nuts. Sclean the connecting rod bolts and nuts. Stighten the connecting rod nut...
Page 213: Eng
5-56 crankcase eng note: note: 15. Select: sbig end bearings (p 1 x p 4 ) sthe numbers a stamped into the crankshaft web and the numbers 1 on the connecting rods are used to determine the replacement big end bearing sizes. S“p1” x “p4” refer to the bearings shown in the crankshaft illustration. Sele...
Page 214: Eng
5-57 crankcase eng 17. Inspect: sbearings clean and lubricate the bearings, then rotate the inner race with your finger. Rough movement ! Replace. 18. Inspect: soil seals damage / wear ! Replace. 19. Inspect: sprimary drive gear 1 soil pump driven gear 2 cracks / damage / wear ! Replace the de- fect...
Page 215: Eng
5-58 crankcase eng note: note: note: installation 1. Install: scrankshaft journal bearing 1 (into the upper crankcase) salign the projections a on the crankshaft jour- nal upper bearings with the notches b in the crankcase. Sbe sure to install each crankshaft journal up- per bearing in its original ...
Page 216: Eng
5-59 crankcase eng note: 5. Lubricate: spiston spiston rings scylinder scrankshaft pins sbig end bearings (with the recommended lubricant) recommended lubricant engine oil 6. Offset: spiston ring end gaps a top ring b lower oil ring rail c upper oil ring rail d 2nd ring e oil ring expander 7. Instal...
Page 217: Eng
5-60 crankcase eng caution: warning caution: note: 8. Align: sbolt heads (with the connecting rod caps) 9. Tighten: sconnecting rod nuts nut (connecting rod): 20 nm (2.0 m skg, 14 ftslb)+120_ sreplace the connecting rod bolts and nuts with new ones. Tighten the connecting rod bolts using the plastic...
Page 218: Eng
5-61 crankcase eng note: note: 10. Lubricate: scrankshaft journal bearings (with the recommended lubricant) recommended lubricant engine oil 11. Apply: ssealant (onto the crankcase mating surfaces) yamaha bond no. 1215 90890-85505, acc-1100-15-01 do not allow any sealant to come into contact with th...
Page 219: Eng
Crankcase eng 5-62 note: 14. Install: scrankcase bolts slubricate the bolt threads with engine oil. Stighten the bolts in increasing numerical or- der. Sinstall washers on bolts 1 x 10 . Crankcase bolt bolt 1 x 10 1st: 15 nm (1.5 m skg, 11 ftslb) 2nd: 15 nm (1.5 m skg, 11 ftslb) + 45 x 50_ bolt 11 x...
Page 220: Cool
6 6-1 heat exchanger cool order job name / part name q’ty remarks 1 2 3 4 5 6 7 8 9 10 11 12 13 heat exchanger removal coolant primary sheave assembly coolant reservoir tank coolant hose 1 heat exchanger (right) coolant hose 2 heat exchanger (rear) coolant hose 3 heat exchanger (left) coolant hose 4...
Page 221: Cool
6-2 order job name / part name q’ty remarks 14 15 16 17 18 19 20 21 22 23 24 25 26 27 28 29 coolant pipe 2 coolant hose 7 coolant hose 8 thermostat assembly coolant hose 9 coolant hose 10 oil cooler outlet hose oil cooler oil cooler inlet hose pipe 3 water pump hose carburetor heater hose heat excha...
Page 222: Cool
6-3 heat exchanger cool inspection 1. Inspect: scoolant hoses sheat exchangers soil cooler scoolant pipes cracks / damage ! Replace. 2. Measure: sfiller cap opening pressure cap opens with a pressure below the speci- fied pressure ! Replace. Filler cap opening pressure: 95 x 125 kpa (0.95 x 1.25 kg/...
Page 223: Cool
6-4 heat exchanger cool note: installation 1. Install: sheat exchangers use the rivet gun. 2. Install: so-ring soil cooler slock washer sbolt (oil cooler bolt) bolt (oil cooler): 35 nm (3.5 m skg, 25 ftslb) sbefore installing the oil cooler, lubricate the oil cooler bolt and o-ring with a thin coat ...
Page 224: Cool
6-5 order job name / part name q’ty remarks thermostat disassembly thermostat housing cover thermostat thermostat housing water temperature sensor 1 1 1 1 disassemble the parts in the order listed below. For assembly, reverse the disassembly procedure. 1 2 3 4 : a 10 nm (1.0 m skg, 7.2 ftslb) 23 nm ...
Page 225: Cool
6-6 thermostat cool note: inspection 1. Inspect: sthermostat does not open at 71 x 85_c (160 x 185_f) ! Replace. Inspection steps: ssuspend the thermostat in a container filled with water. Sslowly heat the water. Place a thermometer in the water. Swhile stirring the water, observe the thermo- stat a...
Page 226: Cool
6-7 thermostat cool note: caution: installation 1. Install: sthermostat (into the thermostat housing) install the thermostat with its breather hole a aligned with the this place b on the thermostat housing. 2. Install: sthermostat cover sbolts (thermostat housing) bolt (thermostat housing): 10 nm (1...
Page 227: Cool
6-8 order job name / part name q’ty remarks water pump disassembly oil pan water pump cover plate circlip impeller shaft water pump seal oil seal bearing o-ring water pump housing pipe 1 1 1 1 1 1 1 2 1 2 disassembly the parts in the order listed below. Refer to “oil pan and oil pump”. For assembly,...
Page 228: Cool
6-9 water pump cool note: note: note: disassembly 1. Remove: simpeller swater pump seal 1 remove the water pump seal 1 from the inside of the water pump housing 2 . 2. Remove: sbearing 1 soil seal 2 remove the bearing 1 and oil seal 2 from the inside of the water pump housing 3 . 3. Remove: srubber ...
Page 229: Cool
6-10 water pump cool note: note: caution: inspection 1. Inspect: swater pump housing cover 1 swater pump housing 2 simpeller 3 srubber damper 4 srubber damper holder 5 swater pump seal soil seal cracks / damage / wear ! Replace. 2. Inspect: sbearing rough movement ! Replace. Assembly 1. Install: soi...
Page 230: Cool
6-11 water pump cool note: note: caution: sinstall the water pump seal 1 with the water pump seal installers 4 5 . Sbefore installing the water pump seal, apply yamaha bond no.1215 2 to the water pump housing 3 . Water pump seal installer: 90890-04078, ym-33221 40 and 50 mm bearing driver: 90890-040...
Page 231: Carb
7-1 order job name / part name q’ty remarks 1 2 3 4 5 6 7 8 9 10 11 12 carburetors removal intake silencer fuel pump carburetor switch (t.O.R.S.) lead starter cable throttle position sensor coupler carburetor heater lead carburetor heating hose fuel hose throttle cable carburetor assembly caburetor ...
Page 232: Carb
7 7-2 order job name / part name q’ty remarks carburetor separation carburetor heater harness carburetor heating hose starter plunger link connecting bolt spacer fuel inlet pipe spring vacuum chamber air vent hose float chamber air vent hose throttle position sensor carburetor 1 3 1 2 3 2 1 2 2 1 4 ...
Page 233: Carb
7-3 order job name / part name q’ty remarks carburetor disassembly starter plunger pilot air jet vacuum chamber cover piston valve spring piston valve jet needle holder jet needle kit pilot screw fuel drain bolt float pin 1 1 1 1 1 1 1 1 1 1 disassemble the parts in the order listed below. The follo...
Page 234: Carb
7-4 order job name / part name q’ty remarks float needle valve needle valve seat main jet main jet holder pilot jet needle jet carburetor switch (t.O.R.S.) carburetor heater starter jet 1 1 1 1 1 1 1 1 1 1 for assembly, reverse the disassembly procedure. 11 12 13 14 15 16 17 18 19 20 carburetors car...
Page 235: Carb
7-5 carburetors carb note: inspection 1.Inspect: scarburetor body sfloat chamber sjet housing cracks / damage ! Replace. 2. Inspect: sfuel passages obstruction ! Clean. Suse a petroleum based solvent for cleaning. Sblow out all passage and jets with compressed air. 3. Inspect: sfloat chamber body 1 ...
Page 236: Carb
7-6 carburetors carb 8. Inspect: spiston valve 1 damage / scratches / wear ! Replace. Srubber diaphragm 2 cracks / tears ! Replace. 9. Inspect: svacuum chamber cover 1 spiston valve spring 2 sjet needle holder 3 cracks / damage ! Replace. 10. Inspect: sjet needle kit 1 sstarter jet 2 smain jet 3 sma...
Page 237: Carb
7-7 carburetors carb note: note: assembly sbefore assembling the carburetors, wash all of the parts in a petroleum based solvent. Salways use a new gasket and o-rings. 1. Install: sjet needle kit sneedle jet spilot jet smain jet 2. Inspect: spiston valve spiston valve spring svacuum chamber cover so...
Page 238: Carb
7-8 carburetors carb note: installation after installing all parts, refer to “cable rout- ing” in chapter 9, to check the cable, lead and hose routing. 1. Adjust: scarburetor synchronization refer to “synchronizing the carbu- retors” in chapter 2. 2. Adjust: sengine idling speed engine idle speed: 1...
Page 239: Carb
7-9 carburetors carb note: fuel level adjustment 1. Measure: sfuel level a out of specification ! Adjust. Fuel level (below the line on the float chamber): 3.0 x 4.0 mm (0.118 x 0.157 in) measurement steps: sinstall the fuel level gauge 1 to the fuel drain pipe 2 . Fuel level gauge 90890-01312, yu-0...
Page 240: Carb
7-10 carburetors carb note: throttle position sensor (t.P.S.) inspection and adjustment before adjusting the throttle position sensor, properly adjust the idle speed. 1. Inspect: sthrottle position sensor. Inspection steps: sdisconnect throttle position sensor coupler. Sconnect the pocket tester (Ω ...
Page 241: Carb
7-11 carburetors carb note: 2. Adjust: sthrottle position sensor position adjustment steps: sdisconnect the throttle position sensor cou- pler. Sconnect the test coupler to the throttle position sensor. Sconnect three dry cells (1.5 v 3 pcs.) in se- ries to the test coupler. Dry cells (–) ! 1 dry ce...
Page 242: Carb
7-12 fuel pump carb note: inspection 1. Inspect: sfuel hose 1 svacuum hose 2 clogs / damage ! Replace. 2. Inspect: sfuel pump operation. Inspection steps: sconnect the mity vac 1 to the vacuum hose 2 . Mity vac: 90890-06756, yb-35956 splace a container 3 under the end of the fuel hoses 4 . Soperate ...
Page 243: Elec
8-1 switch inspection elec note: electrical switch inspection switch inspection use a pocket tester to check the terminals for continuity. If the continuity is faulty at any point, replace the switch. Pocket tester: 90890-03112, yu-03112 sset the pocket tester to “0” before starting a test. Swhen te...
Page 244: Elec
8 8-2 ignition system elec b/y br b/l br/w b/y br b br/w w w w w w w r r/w br br/w r/y r/w br br/w ll r r l/w l/w l/r r/w r /y hi lo lg l/w lg l/w y lg lg l/w l/w y l/g g lg g l/g g yb g yb g y y y g y y b g g b y lg/g y/b l/y g/r l/w r/b w sb g/b y/g b/g g/r g/r c g/r g/b g/b a g/b w w b w l/y l/y ...
Page 245: Elec
8-3 ignition system elec 1 a.C. Magneto 2 rectifier / regulator 3 main switch 4 main relay 5 fuse (main) 8 battery 9 engine stop switch 10 throttle switch 11 carburetor switch 16 cdi unit 17 ignition coil 18 spark plug 31 fuse (ignition) ignition system circuit diagram.
Page 246: Elec
8-4 ignition system elec check the main fuse and ignition fuse. Refer to “fuse inspection” in chapter 2. Faulty replace the main fuse and / or ignition fuse. Check the battery. Refer to “battery inspection” in chapter 2. Out of specification replace and / or charge the battery. Refer to “battery cha...
Page 247: Elec
8-5 ignition system elec b a a a.C. Magneto 1. Disconnect: sa.C. Magneto coupler 1 2. Connect: spocket tester (to the a.C. Magneto coupler) 3. Measure: sstator coil resistance b / pickup coil resis- tance a out of specification ! Replace. Pickup coil resistance: (gray – black) 189 x 231 Ω at 20_c (6...
Page 248: Elec
8-6 ignition system elec a b ignition spark gap 1. Remove: signition coil 2. Measure: signition spark gap out of specification ! Replace the ignition coil measurement steps: sdisconnect the ignition coil 2 from the spark plug. Sconnect the dinamic spark tester 1 . Sset the main switch to “on”. Smeas...
Page 249: Elec
8-7 ignition system elec a b c warning a b c status switch throttle override system (t.O.R.S.) if the carburetor or throttle cable should mal- function during operation, t.O.R.S. Will operate when the throttle lever is released. T.O.R.S. Is designed to interrupt the ignition and keep the engine revo...
Page 250: Elec
8-8 ignition system elec handlebar switch (right) engine stop switch and throttle switch 1. Disconnect: shandlebar switch (right) coupler 1 2. Connect: spocket tester 3. Inspect: sengine stop switch continuity faulty ! Replace the handlebar switch (right). Switch position continuity run (pulled out)...
Page 251: Elec
8-9 ignition system elec main switch 1. Disconnect: smain switch coupler 1 2. Connect: spocket tester 3. Inspect: smain switch continuity faulty ! Replace. Switch position continuity off yes on no switch color code position br r / y br/ w r / w off on start continuity main relay 1. Inspect: smain re...
Page 253: Elec
8-11 starter motor does not operate. Warning before starter motor operation, push the engine stop switch to “off”. 1. Connect: s starter relay terminals (battery side and starter motor side) jumper lead 2. Check: s starter motor operation check the battery and connectors. Refer to “battery inspectio...
Page 254: Elec
8-12 electrical starting system elec check the main fuse and ignition fuse. Refer to “fuse inspection” in chapter 2. Replace the main fuse and / or ignition fuse. Faulty check the main switch. Ok correct the connection. Ok replace the main switch. Faulty * main switch 1. Disconnect: smain switch cou...
Page 255: Elec
8-13 order job name / part name q’ty remarks starter motor disassembly starter motor removal rear bracket bearing starter motor yoke o-ring armature assembly brush brush holder starter motor front cover bearing 1 1 1 3 1 3 1 1 1 disassemble the parts in the order listed below. Refer to “engine remov...
Page 256: Elec
8-14 electrical starting system elec caution: inspection 1. Inspect: scommutator (outer surface) dirty ! Clean with #600 grit sandpaper 1 . Hold the armature in a vise 2 and copper or aluminium plate 3 . Lightly grip the armature with a vise. 2. Measure: scommutator (diameter) measure the diameter a...
Page 257: Elec
8-15 electrical starting system elec 5. Measure: sbrush length a out of specification ! Replace the starter motor. Brush wear limit: 5 mm (0.20 in) 6. Measure: sbrush spring pressure fatigue / out of specification ! Replace as a set. Brush spring pressure: 7.36 x 11.04 n (736 x 1,104 g, 26.0 x 38.9 ...
Page 259: Elec
8-17 1. Connect: s pocket tester (to the battery terminals) 2. Measure: s battery voltage s check the battery. S replace and/or charge the battery. Refer to “battery inspection” in chapter 2. Out of specifications ok 3. Start the engine and accelerate to 5,000 r / min. 4. Measure: s charging voltage...
Page 260: Elec
8-18 charging system elec warning battery inspection 1. Inspect: sbattery condition refer to “battery inspection” in chapter 2. Battery storage the battery should be stored if the vehicle is not going to be used for a long period. 1. Remove: sbattery when removing the battery, disconnect the negativ...
Page 261: Elec
8-19 lighting system circuit diagram lighting system elec.
Page 262: Elec
8-20 lighting system elec 1 a.C. Magneto 2 rectifier / regulator 3 main switch 4 main relay 5 fuse (main) 8 battery 16 cdi unit 27 tail / brake light 28 fuse (headlight) 29 fuse (signal) 31 fuse (ignition) 32 headlight beam switch 33 headlight relay 34 headlight 37 meter light 41 hi beam indicator l...
Page 263: Elec
8-21 lighting system elec check the bulb(s). No continuity replace the bulb(s). Check the main fuse, ignition fuse and headlight fuse. Refer to “fuse inspection” in chapter 2. Faulty replace the main fuse, ignition fuse and / or headlight fuse. Check the battery. Refer to “battery inspection” in cha...
Page 264: Elec
8-22 lighting system elec check the tail / brake light bulb(s). No continuity replace the tail / brake light bulb(s). Check the main fuse, ignition fuse and signal fuse. Refer to “fuse inspection” in chapter 2. Faulty replace the main fuse, ignition fuse and / or signal fuse. Check the battery. Refe...
Page 265: Elec
8-23 lighting system elec c warning 1 2 1 3 bulb(s) 1. Remove: sheadlight bulb a stail/brake light bulb b smeter light bulb c 2. Connect: spocket tester (to the bulb terminals) keep flammable products and your hands away from the bulb while it is on; it will be hot. Do not touch the bulb until it co...
Page 266: Elec
8-24 lighting system elec headlight relay 1. Inspect: sheadlight relay (black coupler) 1 inspection steps: sdisconnect the headlight relay from the cou- pler. Sconnect the pocket tester (Ω 1) and battery (12 v) to the headlight relay terminals as shown. Low beam positive tester probe ! Blue/white 1 ...
Page 267: Elec
8-25 signal system elec signal system circuit diagram.
Page 268: Elec
8-26 signal system elec 1 a.C. Magneto 2 rectifier / regulator 3 main switch 4 main relay 5 fuse (main) 8 battery 16 cdi unit 19 water temperature sensor 24 back buzzer 25 gear position switch 26 brake light switch 27 tail / brake light 29 fuse (signal) 31 fuse (ignition) 38 water temperature indica...
Page 269: Elec
8-27 signal system elec check the tail / brake light bulb(s). Refer to “lighting system”. No continuity replace the tail / brake light bulbs. Check the main fuse, ignition fuse and signal fuse. Refer to “fuse inspection” in chapter 2. Faulty replace the main fuse, ignition fuse and / or signal fuse....
Page 270: Elec
8-28 signal system elec check the water temperature indicator light bulb(s). Refer to “lighting system”. No continuity replace the bulb(s). Check the main fuse, ignition fuse and signal fuse. Refer to “fuse inspection” in chapter 2. Faulty replace the main fuse, ignition fuse and / or signal fuse. C...
Page 271: Elec
8-29 signal system elec check the warning light bulb. Refer to “lighting system”. No continuity replace the bulb. Check the main fuse, ignition fuse and signal fuse. Refer to “fuse inspection” in chapter 2. Faulty replace the main fuse, ignition fuse and / or signal fuse. Check the battery. Refer to...
Page 272: Elec
8-30 signal system elec check the warning light bulb. Refer to “lighting system”. No continuity replace the bulb. Check the main fuse, ignition fuse and signal fuse. Refer to “fuse inspection” in chapter 2. Faulty replace the main fuse, ignition fuse and / or signal fuse. Check the battery. Refer to...
Page 273: Elec
8-31 signal system elec check the speedometer unit. Refer to “speedometer unit inspection” in chapter 2. Faulty replace the speedometer unit. Check the main fuse, ignition fuse and signal fuse. Refer to “fuse inspection” in chapter 2. Faulty replace the main fuse, ignition fuse and / or signal fuse....
Page 274: Elec
8-32 signal system elec check the main fuse, ignition fuse and signal fuse. Refer to “fuse inspection” in chapter 2. Faulty replace the main fuse, ignition fuse and / or signal fuse. Check the battery. Refer to “battery inspection” in chapter 2. Out of specification replace and / or charge the batte...
Page 275: Elec
Signal system elec 8-33 brake light switch 1. Disconnect: sbrake light switch coupler 1 2. Inspect: sbrake light switch continuity faulty ! Replace. Switch position continuity brake lever operates yes brake lever does not operate no gear position switch (rx10r, rx10rs) 1. Inspect: sgear position swi...
Page 276: Elec
Signal system elec 8-34 caution: note: caution: caution: water temperature sensor 1. Disconnect the water temperature sensor coupler 1 and remove the water tempera- ture sensor. Handle the water temperature sensor with special care. Never subject it to shock or al- low it to be dropped. If it is dro...
Page 277: Elec
Signal system elec 8-35 a b engine oil level switch 1. Remove: soil level gauge 1 2. Connect: spocket tester (to the oil level switch coupler) 3. Inspect: soil level switch continuity faulty ! Replace. Switch position good condition bad condition down position f f up position f f f : continuity : no...
Page 278: Elec
8-36 signal system elec speed sensor 1. Inspect: sspeed sensor inspection steps: sconnect the pocket tester (dc 20 v) to the speed sensor coupler 1 (wire harness side) as shown. Positive tester probe ! White negative tester probe ! Black/green positive battery terminal ! Blue/yellow negative battery...
Page 279: Elec
Grip warmer system elec 8-37 hi lo grip w armer system circuit diagram.
Page 280: Elec
Grip warmer system elec 8-38 1 a.C. Magneto 2 rectifier / regulator 3 main switch 4 main relay 5 fuse (main) 8 battery 14 grip warmer 15 thumb warmer 16 cdi unit 21 grip warmer switch 22 thumb warmer switch 29 fuse (signal) 31 fuse (ignition) 39 multi-function meter grip warmer system circuit diagra...
Page 281: Elec
Grip warmer system elec 8-39 check the main fuse and signal fuse. Refer to “fuse inspection” in chapter 2. Faulty replace the main fuse and / or ignition fuse. Check the battery. Refer to “battery inspection” in chapter 2. Out of specification replace and / or charge the battery. Refer to “battery i...
Page 282: Elec
Grip warmer system elec 8-40 grip and thumb warmer coil 1. Disconnect: sgrip warmer leads 1 sthumb warmer coupler 2 2. Connect: spocket tester (to the grip warmer coil leads and / or thumb warmer coil leads) 3. Inspect: sgrip warmer 1 continuity sthumb warmer 2 continuity no continuity ! Replace bot...
Page 283: Elec
Grip warmer system elec 8-41 grip warmer switch 1. Disconnect: sgrip warmer switch coupler 1 2. Connect: spocket tester (to the switch coupler) 3. Inspect: sgrip warmer switch continuity switch is operated. Faulty ! Replace the handlebar switch (left). Grip warmer switch position continuity switch i...
Page 284: Elec
8-42 carburetor heater system elec hi lo b/w l/r carburet or hea ter system circuit diagram.
Page 285: Elec
Carburetor heater system elec 8-43 1 a.C. Magneto 2 rectifier / regulator 3 main switch 4 main relay 5 fuse (main) 8 battery 12 carburetor heater relay 13 carburetor heater 16 cdi unit 19 water temperature sensor 29 fuse (signal) 30 fuse (carburetor heater) 31 fuse (ignition) carburetor heater syste...
Page 286: Elec
Carburetor heater system elec 8-44 check the main fuse, signal fuse, carburetor heater fuse and ignition fuse. Refer to “fuse inspection” in chapter 2. Faulty replace the main fuse and / or signal fuse, and / or carburetor heater fuse and / or ignition fuse. Check the battery. Refer to “battery insp...
Page 287: Elec
8-45 carbreter heater system elec carburetor heater relay 1. Inspect: scarburetor heater relay 1 inspection steps: sdisconnect the carburetor heater relay from the coupler. Sconnect the pocket tester (Ω 1) and battery (12 v) to the carburetor heater relay terminals as shown. Positive battery termina...
Page 288: Elec
8-46 self-diagnosis elec note: self-diagnosis this model features a self-diagnosing system for following displays. 1. Fuel meter, fuel level warning indicator 1 and the warning light 4 2. Coolant temperature warning light 2 and the warning light 4 3. Self-diagnosis warning indicator 3 and the warnin...
Page 289: Elec
Self-diagnosis elec 8-47 2. Coolant temperature warning light and the warning light the coolant temperature warning light and the warning light faults are displayed as follows sthermo sensor item thermo sensor condition disconnected short-circuit 3. Self-diagnosis warning indicator and the warning l...
Page 290: Elec
8-48 self-diagnosis elec self-diagnosis elec item grip warmer condition short-circuit item thumb warmer switch condition disconnected item thumb warmer condition short-circuit item voltage condition wrong on warning light on off warning light off s time (second).
Page 291: Spec
9-1 general specifications spec specifications general specifications model rx10, rx10s, rx10r, rx10rs, rx10m, rx10ms model code number: 8fa1 (rx10 for u.S.A / canada) 8eu1 (rx10s for u.S.A / canada) 8er1 (rx10r for u.S.A / canada) 8ew1 (rx10rs for u.S.A / canada) 8ep1 (rx10m for u.S.A / canada) 8ev...
Page 292: Spec
9 9-2 general specifications spec r+m 2 model rx10, rx10s, rx10r, rx10rs, rx10m, rx10ms oil filter: oil filter type cartridge (paper) drive chain housing oil: type capacity gear oil api “gl-3” sae#75 or #80 0.25 l (8.8 lmp oz, 8.5 us oz) coolant: capacity 4.7 l (4.1 lmp qt, 5.0 us qt) fuel: type tan...
Page 293: Spec
9-3 general specifications spec model rx10, rx10s, rx10r, rx10rs, rx10m, rx10ms track: track type track width length on ground track deflection mm / 100 n (10 kg, 22 lb) internal drive type 381 mm (15.0 in) 752 mm (29.6 in) (rx10, rx10s , rx10r, rx10rs) 1,071 mm (42.2 in) (rx10m, rx10ms) 25 x 30 mm ...
Page 294: Spec
9-4 maintenance specifications spec maintenance specifications engine model rx10, rx10s, rx10r, rx10rs, rx10m, rx10ms cylinder head: volume (with spark plug) 13.45 x 14.00 cm 3 (0.82 x 0.85 cu. In) 0.1 mm (0.004 in) * lines indicate straight edge measurement. Cylinder: material bore size aluminum al...
Page 295: Spec
9-5 maintenance specifications spec head diameter face width seat width margin thickness model rx10, rx10s, rx10r, rx10rs, rx10m, rx10ms valve dimensions: valve head diameter a intake exhaust valve face width b intake exhaust valve seat width c intake exhaust valve margin thickness d intake exhaust ...
Page 296: Spec
9-6 maintenance specifications spec model rx10, rx10s, rx10r, rx10rs, rx10m, rx10ms valve spring: free length intake exhaust installed length (valve closed) intake exhaust compressed spring force (installed) intake exhaust spring tilt intake exhaust winding direction (top view) intake exhaust 38.90 ...
Page 297: Spec
9-7 maintenance specifications spec model rx10, rx10s, rx10r, rx10rs, rx10m, rx10ms piston pin: piston pin outside diameter piston pin length piston pin to piston pin bore clearance 16.991 x 17.000 mm (0.6689 x 0.6693 in) 51.4 x 51.5 mm (2.0236 x 2.0276 in) 0.002 x 0.022 mm (0.00008 x 0.0009 in) 0.0...
Page 298: Spec
9-8 maintenance specifications spec model rx10, rx10s, rx10r, rx10rs, rx10m, rx10ms carburetor: type / quantity manufacturer i.D. Mark main jet (m.J) main air jet (m.A.J) jet needle (j.N) needle jet (n.J) pilot jet (p.J) pilot air jet (p.A.J.1) (p.A.J.2) pilot outlet (p.O) bypass 1 (b.P.1) (b.P.2) (...
Page 299: Spec
9-9 maintenance specifications spec power train model rx10, rx10s, rx10r, rx10rs, rx10m, rx10ms transmission: type range of ratio engagement speed r / min shift r / min sheave distance sheave offset v-belt automatic 3.8 x 1.0 : 1 3,600 ± 200 r/min (3,400 x 3,800 r/min) (rx10, rx10s, rx10r, rx10rs) 4...
Page 300: Spec
9-10 maintenance specifications spec model rx10, rx10s, rx10r, rx10rs, rx10m, rx10ms secondary sheave spring: part number color code outside diameter wire diameter hole position sheave side-spring side (twist angle) spring rate number of coils free length torque cam angle 90508-60012 (rx10, rx10s, r...
Page 301: Spec
9-11 maintenance specifications spec model rx10, rx10s, rx10r, rx10rs, rx10m, rx10ms slide rail suspension (rear suspension): center travel rear travel suspension spring rate front rear suspension wire diameter front rear 221 mm (8.70 in) (rx10, rx10s, rx10r, rx10rs) 188 mm (7.40 in) (rx10m, rx10ms)...
Page 302: Spec
9-12 maintenance specifications spec model rx10, rx10s, rx10r, rx10rs, rx10m, rx10ms slide runner: thickness wear limit 17.8 mm (0.70 in) 10 mm (0.39 in) track sprocket wheel: material number of teeth high molecular weight polyethylene 9 t (rx10, rx10s, rx10r, rx10rs) 8 t (rx10m, rx10ms) rear guide ...
Page 303: Spec
9-13 maintenance specifications spec chassis model rx10, rx10s, rx10r, rx10rs, rx10m, rx10ms frame: frame material seat height luggage box location aluminum 738 mm (29.1 in) front steering: lock-to-lock angle (left) (right) ski alignment toe-out size caster angle 30.0 _ (r ski) 34.7_ (l ski) 34.7 _ ...
Page 304: Spec
9-14 maintenance specifications spec electrical model rx10, rx10s, rx10r, rx10rs, rx10m, rx10ms voltage 12 v ignition system: ignition timing (b.T.D.C.) advanced type 5 _ at 1,450 r/min digital type ignition coil: model / manufacturer primary coil resistance secondary coil resistance f6t54973 / mits...
Page 305: Spec
9-15 maintenance specifications spec model rx10, rx10s, rx10r, rx10rs, rx10m, rx10ms starter relay: model / manufacturer amperage rating coil resistance ms5f-441 / jideco 180 a 4.2 x 4.6 Ω at 20_c (68_f) t.P.S. (throttle position sensor): model / manufacturer resistance ts67 / 02-1c / mikuni 4 x 6 k...
Page 306: Spec
9-16 high altitude settings spec tempera- ture altitude tempera- ture altitude high altitude settings rx10, rx10s, rx10r, rx10rs –40 _c (–40 _f) –20 _c (–4 _f) 0 _c (32 _f) 16 _c (60 _f) idling speed (r/min) 0 x 200 m (0 x 670 ft) mj ps #140 std mj ps #137.5 std mj ps #135 std 1350 200 x 1000 m ( x ...
Page 307: Spec
9-17 tightening torque spec tightening torque engine parts to be tightened tightening torque remarks parts to be tightened nm m skg ft slb remarks spark plug cylinder head nut (m10 1.25) 2 cylinder head nut (m10 1.25) 6 cylinder head nut 2 cylinder head bolt camshaft cap and cylinder head cylinder h...
Page 308: Spec
Tightening torque spec note: 9-18 parts to be tightened tightening torque remarks parts to be tightened nm m skg ft slb remarks fuel pump fuel pump stay 10 10 1.0 1.0 7.2 7.2 1. First, tighten the bolt to approximately 15 nm (1.5 m skg, 11 ftslb) with a torque wrench, then loosen the bolt completely...
Page 309: Spec
9-19 tightening torque spec power train parts to be tightened tightening torque remarks parts to be tightened nm m skg ft slb remarks primary sheave (1st) (2nd) spider and sliding sheave primary sheave cap and sliding sheave roller and weight (primary sheave) secondary sheave stopper (secondary shea...
Page 310: Spec
Tightening torque spec note: 9-20 parts be tightened tightening torque remarks parts be tightened nm m skg ft slb remarks wheel bracket shaft and sliding frame set bolt (front axle) speed sensor gear unit (speed sensor) 72 9 20 40 7.2 0.9 2.0 4.0 52 6.5 14 29 apply loctite tightening steps: 1. Tight...
Page 311: Spec
9-21 tightening torque spec chassis parts to be tightened tightening torque remarks parts to be tightened nm m skg ftslb remarks handlebar holder steering column upper lower steering column 2 and steering shaft steering shaft and steering column 1 steering column 1 and relay rod relay rod and relay ...
Page 312: Spec
9-22 general torque specifications this chart specifies torque for standard fasteners with standard i.S.O. Pitch threads. Torque speci- fications for special components or assemblies are included in the applicable sections of this book. To avoid warpage, tighten multi-fastener assemblies in a crissc...
Page 313: Spec
9-23 cable routing spec.
Page 314: Spec
1 to the headlight and meter as- sembly battery negative lead battery positive lead oil level switch lead coupler oil level switch carburetor switch lead connec- tor coolant temperature sensor lead coupler to the brake caliper to the heat exchanger main switch joint connector tail / brake light lead...
Page 315: Spec
9-25 cable routing spec.
Page 316: Spec
Connect the battery negative lead to the starter motor mount- ing bolt voltage regulator relay back buzzer (rx10r, rx10rs) nut bolt battery negative lead clamp the vacuum hose to the coolant hose clamp the ignition coil lead to the frame route the fuel hose under the clamp clamp the fuel hose clamp ...
Page 317: Spec
9-27 cable routing spec.
Page 318: Spec
1 headlight wire harness align it with the positioning tape of the headlight wire harness meter coupler (securety fit in the rubber cover) 2 3 9-28 cable routing spec.
Page 319: Spec
9-29 cable routing spec.
Page 320: Spec
1 do not clamp the throttle cable throttle cable handlebar holder all leads and cables except brake hose and parking brake cable clamp the tail / brake light lead, headlight beam switch lead and grip warmer lead parking brake cable left handlebar switch brake hose and parking brake cable through low...
Page 321: Spec
9-31 cable routing spec.
Page 322: Spec
Right handlebar switch clamp the wire harness only clamp the fuel sender head and speed sensor lead less than 50 mm (2.0 in) clamp the wire harness route the carburetor air vent hose under the fuel hose push into the end of clamp be- tween frame and fuel tank breather tank 26 27 28 29 30 31 32 33 9-...
Page 323: Spec
9-33 cable routing spec.
Page 324: Spec
Coolant reservoir tank reservoir tank hose parking brake cable brake hose clamp the hose at the white paint position. Point the clamp position to the front outside clamp the battery positive lead headlight lead tighten the frame ground and voltage regulator upper bolt to- gether engine oil tank hose...
Page 325: Spec
9-35 cable routing spec.
Page 326: Spec
1 fuel pump coolant reservoir tank point the pawl of clip to the up- ward clamp the fuel tank breather and speed sensor lead. Thigh- ten the frame cross member and frame together wire harness clamp rivets speed sensor point the pawl of clip to the downward 2 3 4 5 6 7 8 9-36 cable routing spec.
Page 327: Spec
9-37 cable routing spec.
Page 328: Spec
9-38 cable routing spec 1 cdi unit battery negative lead starter motor position the negative lead on the engine at 45 _ battery positive lead cdi unit bracket battery band battery cover to the carburetor equip it with the frame cross member wire harness holder battery bracket battery seat air box dr...
Page 329
1 a.C. Magneto 2 rectifier / regulator 3 main switch 4 main relay 5 fuse (main) 6 starter relay 7 starter motor 8 battery 9 engine stop switch 10 throttle switch 11 carburetor switch 12 carburetor heater relay 13 carburetor heater 14 grip warmer 15 thumb warmer 16 cdi unit 17 ignition coil 18 spark ...
Page 330
( ) 01. 05 0.8 (e) itp printed on recycled paper.
Page 332: Foreword
Warning caution: note: foreword this supplementary service manual has been prepared to introduce new service and new data for the rxw10j, rxw10sj. For complete information, on service proce- dures, it is necessary to use this supplementary service manual together with following manual: rx10h/ rx10sh...
Page 333: Spec
10 spec elec carb 8 1 2 3 4 5 6 7 11 12 13 14 15 16 17 18 19 20 21 22 23 24 25 gen info insp adj eng chas powr tr 9 cool illustrated symbols (refer to the illustration) illustrated symbols 1 to 9 are designed as thumb tabs to indicate the chapter’s number and content. 1 general information 2 periodi...
Page 334: Insp
1 9 8 6 5 4 insp adj general information periodic inspections and adjustments power train engine cooling system electrical specifications gen info 2 3 powr tr eng cool elec spec chassis chas 7 carburetion carb index.
Page 335
Chapter 1. General information special tools 1 . . . . . . . . . . . . . . . . . . . . . . For tune up 1 . . . . . . . . . . . . . . . . . . . . . For engine service 1 . . . . . . . . . . . . . For power train service 1 . . . . . . Chapter 2. Periodic inspection and adjustment introduction 2 . . . ....
Page 336: Gen
1 1 special tools gen info note: special tools gen info special tools some special tools are necessary for a completely accurate tune-up and assembly. Using the correct special tool will help prevent dam- age that can be caused by the use of improper tools or improvised techniques. S be sure to use ...
Page 337: Insp
2 introduction/periodic maintenance table insp adj periodic inspection and adjustment introduction this chapter includes all information necessary to perform recommended inspections and adjust- ments. These preventive maintenance procedures, if followed, will ensure more reliable machine op- eration...
Page 338: Insp
3 periodic maintenance table insp adj 2 note: initial every item remarks preopera- tion check (daily) 1 month or 800 km (500 mi) (40 hr) seasonally or 3,200 km (2,000 mi) (160 hr) check operation and fluid leakage. F brake and parking brake *adjust free play and/or replace pads if neces- sary. F *re...
Page 339: Insp
4 parking brake adjustment insp adj power train parking brake adjustment 1. Measure: sparking brake cable distance a out of specification ! Adjust. Parking brake cable distance: 43.5 x 46.5 mm (1.713 x 1.831 in) 2. Adjust: sparking brake cable adjustment steps: sloosen the locknut 1 sturn the adjust...
Page 340: Insp
5 a a b lubrication insp adj warning chassis lubrication brake lever, throttle lever and throttle cable end 1. Lubricate the brake lever pivot, throttle lever and the ends of the throttle cables. Recommended lubricant: esso beacon 325 grease apply a dab of grease onto only the end of the cables. Do ...
Page 341: Insp
6 clutch insp adj tuning clutch high altitude a b c d e f g h i j k l m n o p q r s t u v w x y z a b c d note: g green p pink w white s silver y yellow elevation x 800 m ( x 2,500 ft) 600 x 1,400 m (2,000 x 4,500 ft) 1,200 x 2,000 m (4,000 x 6,500 ft) 1,800 x 2,600 m (6,000 x 8,500 ft) 2,400 x 3,00...
Page 342: Insp
7 clutch/gear selection insp adj the clutch may require tuning depending upon where the machine will be operated and the de- sired handling characteristics. The clutch can be tuned by changing the engagement and shifting speeds. Clutch engagement speed is defined as the en- gine speed at which the m...
Page 343: Insp
8 gear selection insp adj a b c d e f g a b drive gear driven gear a b c d e f g h i a b seat sheave 1 chain and sprocket part number parts name teeth & links parts no. Standard 20 teeth 8fa-17682-00 21 teeth 8fa-17682-10 drive sprocket 22 teeth 8fa-17682-20 23 teeth 8fa-17682-30 rxw10j, rxw10sj 24 ...
Page 344: Insp
9 identification mark a gear selection insp adj b c d e f g h 5 torque cam (secondary spring seat) effects part no. Cam angle identification mark standard quicker upshifting during acceleration 8fa-17604-00 51-43 _ 8bvfa rxw10j, rxw10sj 8bv-17604-71 47 _ 8bv71 8bv-17604-51 45 _ 8bv51 8bv-17604-31 43...
Page 345: Insp
10 d e f g h i j k l spring identification color code a spring rate color b preload color c gear selection insp adj 6 primary spring parts no. Spring rate n / mm (kg / mm) preload n (kg) color wire gauge mm (in) outside diameter mm (in) no. Of coils free length mm (in) standard 90501-551l3 19.6 (2.0...
Page 346: Insp
11 gear selection insp adj a b c d 7 clutch weight parts no. Weight g (oz) without bush and rivets shape & id mark standard 8ch-17605-10 35.32 (1.247) 8cr-17605-10 38.09 (1.345) 8dg-17605-00 34.26 (1.209) 8dj-17605-00 37.77 (1.333) 8dn-17605-20 42.09 (1.486) 8ek-17605-00 39.00 (1.376) 8fa-17605-00 6...
Page 347: Insp
12 gear selection insp adj a b c d 7 clutch weight parts no. Weight g (oz) without bush and rivets shape & id mark standard 8dn-17605-10 39.76 (1.40) 8fa-17605-10 63.8 (2.25) rxw10j, rxw10sj.
Page 348: Insp
13 gear selection insp adj a b c d e f g h a b c d e f g h i j l m k 8 weight rivets parts no. Material length mm (in) weight g (oz) standard effects 90261-06033 steel 17.2 (0.677) 4.5 (0.159) in: rxw10j, rxw10sj increased f 90269-06006 steel 17.2 (0.677) 3.6 (0.127) with hole out: rxw10j, rxw10sj f...
Page 349: Insp
14 front suspension/rear suspension insp adj a caution: warning caution: note: front suspension spring preload 1. Adjust: sspring preload adjustment steps: sturn the spring seat 1 in or out. Spring seat standard p g distance shorter z ! Longer preload harder z ! Softer min. Max. Length 248 mm 258 mm...
Page 350: Insp
15 rear suspension insp adj a a b * caution: adjustment steps: sloosen the locknut 1 . Sturn the adjusting nut 2 in or out to adjust the stopper band tension. Adjuster thread length 15 ± 0.5 mm (0.59 ± 0.02 in) maximum: 35 mm (1.37 in) minimum: 10 mm (0.40 in) effects longer more weight on skis; les...
Page 351: Insp
16 rear suspension insp adj caution: warning control rod 1. Check scontrol rod bolt a bolt (control rod bolt): 32 nm (3.2 m skg, 23 ftslb) 2. Adjust: scontrol rod stroke a make sure the adjusting bolt ends are set at the same position on each side. Adjustment steps: sloosen the lock nut 1 . Sturn th...
Page 352: Chas
17 3 steering chas a b a b c caution: chassis steering installation 1. Install: srelay arms 1 sbushings swashers 2 bolt (relay arm): 67 nm (6.7 m skg, 49 ftslb) sclips 3 2. Install: sidler arm 4 sbushings swashers srelay rod 5 nut (idler arm): 35 nm (3.5 m skg, 25 ftslb) nut (relay rod): 30 nm (3.0 ...
Page 353: Chas
18 steering chas note: caution: a b a b c note: caution: 5. Install: stie rods 1 smake sure that the indentation a on the tie rod faces out. Sthe threads on both rod ends must be the same length. Always use new cotter pins. Locknut (rod end): 25 nm (2.5 m skg, 18 ftslb) loctite nut (tie rod-idler ar...
Page 354: Chas
19 steering chas a d c b 7. Adjust: shandlebar adjustment steps: stemporarily install the handlebar. Sinstall the steering linkage alignment plate 3 . Steering linkage alignment plate 90890-01487, ys-01487 sloosen the locknuts (steering shaft) 1 . Sturn the steering shaft 2 clockwise or coun- terclo...
Page 355: Chas
20 steering chas caution: 9. Install: shandlebar sbe sure the projection on the handlebar is not installed into the area a shown. Sbe sure the side of the holder with the small gap b faces forward. B = 0 mm (0 in) sfirst tighten the bolts on the front side of the handlebar holder, and then tighten t...
Page 356: Chas
21 order job name / part name q’ty remarks 1 2 3 4 5 6 7 8 9 10 11 front suspension removal ski front cover shock absorber cap steering arm ski column bushing upper arm lower arm bushing connecting rod stabilizer arm 1 1 1 1 1 1 1 1 4 1 1 remove the parts in the order listed below. Refer to “ski”. 6...
Page 357: Chas
22 order job name / part name q’ty remarks 12 13 14 15 stabilizer bushing steering knuckle collar 1 1 1 2 for installation, reverse the removal procedure. 65 nm (6.5 m skg, 47 ftslb) : e : a 45 nm (4.5 m skg, 33 ftslb) 37 nm (3.7 m skg, 27 ftslb) 40 nm (4.0 m skg, 29 ftslb) 35 nm (3.5 m skg, 25 ftsl...
Page 358: Powr
23 4 secondaryshaft powr tr 1 2 3 4 5 order job name / part name q’ty remarks secondary shaft removal secondary sheave drive chain housing collar nut collar circlip secondary shaft bearing 1 1 1 1 1 remove the parts in the order listed below. Refer to “secondary sheave”. Refer to “drive chain housin...
Page 359: Powr
24 secondaryshaft powr tr secondaryshaft powr tr note: caution: note: note: removal 1. Remove: sdrive chain housing parts refer to “drive chain housing with reverse model” in chapter 4 ssecondary sheave assembly refer to “secondary sheave” in chap- ter 4 2. Install: ssecondary shaft slide & holder 2...
Page 360: Powr
25 secondaryshaft powr tr note: inspection 1. Inspect: ssecondary shaft 1 scratches (excessive) / damage ! Replace. Ssplines 2 wear / damage ! Replace the secondary shaft. Sbearing contact surface 3 scratches / wear / damage ! Replace the secondary shaft. 2. Inspect: sbearing 1 pitting/ damage ! Rep...
Page 361: Powr
26 secondaryshaft powr tr a b note: caution: installation 1. Install sdrive chain housing parts refer to “drive chain housing with reverse model” in chapter 4. 2. Install: sbearing collar nut 1 ssecondary shaft 2 a engine side b secondary clutch side 3. Install: sdrive gear socket 3 drive gear socke...
Page 362: Powr
27 secondaryshaft powr tr note: note: caution: 7. Install: ssecondary sheave mounting bolt 7 suse the secondary sheave mounting bolt 7 and washer which tighten the secondary clutch. 8. Tighten: ssecondary sheave mounting bolt 7 secondary sheave mounting bolt 30 n sm (3.0 mskg, 22 ftslb) 9. Remove: s...
Page 363: Powr
28 order job name / part name q’ty remarks brake caliper and parking brake removal brake fluid brake hose brake caliper assembly parking brake cable spring lever parking brake assembly collar 1 1 1 1 1 1 1 remove the parts in the order listed below. Drain. For installation, reverse the removal proce...
Page 364: Powr
29 order job name / part name q’ty remarks 1 slide rail suspension removal rear axle nut tension adjuster left side cover slide rail suspension 1 remove the parts in the order listed below. Loosen. Loosen. Refer to “primary sheave and drive velt”. For installation, reverse the removal procedure. : a...
Page 365: Powr
30 slide rail suspension powr tr order job name / part name q’ty remarks slide rail suspension disassembly stopper band hook bushing bushing front shock absorber bracket front suspension bracket shaft rubber damper front pivot arm bushing shaft bushing collar suspension wheel collar wheel bracket fr...
Page 366: Powr
31 slide rail suspension powr tr order job name / part name q’ty remarks suspension wheel collar wheel bracket circlip suspension wheel collar bushing shaft rear suspension bracket spacer collar bushing 2 2 2 2 2 2 2 1 1 2 1 2 : a 24 nm (2.4 m skg, 17 ftslb) 49 nm (4.9 m skg, 35 ftslb) 72 nm (7.2 m ...
Page 367: Powr
32 slide rail suspension powr tr order job name / part name q’ty remarks rear shock absorber collar bushing pull rod collar bushing collar suspension wheel control rod bushing bushing 1 1 2 2 4 4 2 2 2 2 2 : a 49 nm (4.9 m skg, 35 ftslb) 72 nm (7.2 m skg, 52 ftslb) : b : esso beacon 325 grease or ae...
Page 368: Powr
33 order job name / part name q’ty remarks rear pivot arm bushing shaft shaft rear pivot arm bracket shaft circlip suspension wheel wheel bracket shaft rear axle guide wheel collar tension adjuster collar collar guide wheel sliding frame 1 2 1 1 1 1 2 2 1 1 2 2 2 1 1 1 2 for assembly, reverse the di...
Page 369: Powr
34 slide rail suspension powr tr a b c d b c a e f g h i j installation control rod parts number control rod 1 length mm (in) length mm (in) length mm (in) rxw10j, rxw10sj 303.5(11.95) 160.0(6.30) 2.5p 3 = 7.5 (0.098p 3 = 0.295) control rod 1 parts number control rod 2 parts number washer plate part...
Page 370: Eng
35 5 engine assembly eng note: note: engine engine assembly installation after installing all parts, refer to “cable rout- ing” in chapter 9, to check the cable, lead and hose routing. 1. Install: sengine mounting adjust bolts sengine sengine mounting bolts and nuts suse the pivot shaft wrench to ti...
Page 371: Eng
36 engine assembly eng 2. Fill: scoolant refer to “cooling system” in chapter 2. 3. Fill: sengine oil refer to “engine oil replacement” in chapter 2..
Page 372: Carb
37 7 order job name / part name q’ty remarks carburetor separation carburetor heater harness carburetor heating hose starter plunger link connecting bolt spacer fuel inlet pipe spring vacuum chamber air vent hose float chamber air vent hose throttle position sensor carburetor band 1 3 1 2 3 2 1 2 2 ...
Page 373: Carb
38 order job name / part name q’ty remarks carburetor disassembly starter plunger pilot air jet vacuum chamber cover piston valve spring piston valve jet needle holder jet needle kit pilot screw fuel drain bolt float pin 1 1 1 1 1 1 1 1 1 1 disassemble the parts in the order listed below. The follow...
Page 374: Carb
39 order job name / part name q’ty remarks float needle valve needle valve seat main jet main jet holder pilot jet needle jet carburetor switch (t.O.R.S.) carburetor heater starter jet 1 1 1 1 1 1 1 1 1 1 for assembly, reverse the disassembly procedure. 11 12 13 14 15 16 17 18 19 20 carburetors carb.
Page 375: Spec
40 general specifications spec r+m 2 specifications general specifications model rxw10j, rxw10sj model code number: 8fg1 (for u.S.A. / canada) 8fh1 (for u.S.A. / canada) 8fg2 (for europe) 8fh2 (for europe) dimensions: overall length overall width overall height 3,000 mm (118.1 in) 1,210 mm (47.6 in)...
Page 376: Spec
41 general specifications spec 9 model rxw10j, rxw10sj carburetors: type / quantity manufacture bsr37 4 mikuni spark plug: type manufacture gap cr9e ngk 0.7 x 0.8 mm (0.028 x 0.031 in) primary reduction: primary reduction system primary reduction ratio spur gear 1.19 (37 / 31) transmission: primary ...
Page 377: Spec
42 maintenance specifications spec maintenance specifications engine model rxw10j, rxw10sj cylinder head: volume (with spark plug) 13.45 x 14.00 cm 3 (0.82 x 0.85 cu. In) 0.1 mm (0.004 in) * lines indicate straight edge measurement. Cylinder: material bore size aluminum alloy with dispersion coating...
Page 378: Spec
43 maintenance specifications spec head diameter face width seat width margin thickness model rxw10j, rxw10sj valve dimensions: valve head diameter a intake exhaust valve face width b intake exhaust valve seat width c intake exhaust valve margin thickness d intake exhaust valve stem diameter intake ...
Page 379: Spec
44 maintenance specifications spec model rxw10j, rxw10sj valve spring: free length intake exhaust installed length (valve closed) intake exhaust compressed spring force (installed) intake exhaust spring tilt intake exhaust winding direction (top view) intake exhaust 38.90 mm (1.53 in) 40.67 mm (1.60...
Page 380: Spec
45 maintenance specifications spec model rxw10j, rxw10sj piston pin: piston pin outside diameter piston pin length piston pin to piston pin bore clearance 16.991 x 17.000 mm (0.6689 x 0.6693 in) 51.4 x 51.5 mm (2.0236 x 2.0276 in) 0.002 x 0.022 mm (0.00008 x 0.0009 in) 0.072 mm (0.0028 in) piston ri...
Page 381: Spec
46 maintenance specifications spec model rxw10j, rxw10sj carburetor: type / quantity manufacturer i.D. Mark main jet (m.J) main air jet (m.A.J) jet needle (j.N) needle jet (n.J) pilot jet (p.J) pilot air jet (p.A.J.1) pilot outlet (p.O) bypass 1 (b.P.1) bypass 2 (b.P.2) bypass 3 (b.P.3) pilot screw ...
Page 382: Spec
47 maintenance specifications spec power train model rxw10j, rxw10sj transmission: type range of ratio engagement speed r / min shift r / min sheave distance sheave offset v-belt automatic 3.8 x 1.0 : 1 3,600 ± 200 r/min (3,400 x 3,800 r/min) 10,250 ± 250 r/min (10,000 x 10,500 r/min) 268.5 ± 1.5 mm...
Page 383: Spec
48 maintenance specifications spec model rxw10j, rxw10sj secondary sheave spring: part number color code outside diameter wire diameter hole position sheave side-spring side (twist angle) spring rate number of coils free length torque cam angle 90508-60007 white 69.5 mm (2.736 in) 6 mm (0.236 in) 3-...
Page 384: Spec
49 maintenance specifications spec model rxw10j, rxw10sj suspension setting position: hook setting length *(standard) (maximum) (minimum) full rate adjusting position ** 15 ± 0.5 mm (0.59 ± 0.02 in) 35 mm (1.37 in) 10 mm (0.40 in) b shock absorber: damping force center extension compression rear ext...
Page 385: Spec
50 maintenance specifications spec chassis model rxw10j, rxw10sj frame: frame material seat height luggage box location aluminum 680 mm (26.8 in) front steering: lock-to-lock angle (left) (right) ski alignment toe-out size caster angle 30.0 _ (r ski) 34.7_ (l ski) 34.7 _ (r ski) 30.0_ (l ski) toe-ou...
Page 386: Spec
51 maintenance specifications spec electrical model rxw10j, rxw10sj voltage 12 v ignition system: ignition timing (b.T.D.C.) advanced type 5 _ at 1,350 r/min digital type ignition coil: model / manufacturer primary coil resistance secondary coil resistance f6t54973 / mitsubishi 0.16 x 0.22 Ω at 20_c...
Page 387: Spec
52 maintenance specifications spec model rxw10j, rxw10sj starter relay: model / manufacturer amperage rating coil resistance ms5f-441 / jideco 180 a 4.2 x 4.6 Ω at 20_c (68_f) t.P.S. (throttle position sensor): model / manufacturer resistance ts67 / 02-1c / mikuni 4 x 6 kΩ at 20_c (68_f) (blue – bla...
Page 388: Spec
53 maintenance specifications spec tempera- ture altitude high altitude settings –40 _c (–40 _f) –20 _c (–4 _f) 0 _c (32 _f) 16 _c (60 _f) idling speed (r/min) 0 x 200 m (0 x 670 ft) mj ps #140 std mj ps #137.5 std mj ps #135 std 1350 200 x 1000 m ( x 3300 ft) mj ps #137.5 std mj ps #135 std mj ps #...
Page 389: Spec
54 tightening torque spec tightening torque engine parts to be tightened tightening torque remarks parts to be tightened nm m skg ft slb remarks spark plug cylinder head nut (m10 1.25) 2 cylinder head nut (m10 1.25) 6 cylinder head nut 2 cylinder head bolt camshaft cap and cylinder head cylinder hea...
Page 390: Spec
55 tightening torque spec note: parts to be tightened tightening torque remarks parts to be tightened nm m skg ft slb remarks fuel pump fuel pump stay 10 10 1.0 1.0 7.2 7.2 1. First, tighten the bolt to approximately 15 nm (1.5 m skg, 11 ftslb) with a torque wrench, then loosen the bolt completely. ...
Page 391: Spec
56 tightening torque spec power train parts to be tightened tightening torque remarks parts to be tightened nm m skg ft slb remarks primary sheave (1st) (2nd) spider and sliding sheave primary sheave cap and sliding sheave roller and weight (primary sheave) secondary sheave stopper (secondary sheave...
Page 392: Spec
57 tightening torque spec note: parts to be tightened tightening torque remarks parts to be tightened nm m skg ft slb remarks wheel bracket shaft and sliding frame set bolt (front axle) speed sensor gear unit (speed sensor) bearing nut 72 9 20 40 55 7.2 0.9 2.0 4.0 5.5 52 6.5 14 29 40 apply loctite ...
Page 393: Spec
58 tightening torque spec chassis parts to be tightened tightening torque remarks parts to be tightened nm m skg ftslb remarks handlebar holder steering column (upper) steering column (lower) steering column 2 and steering shaft steering shaft and steering column 1 steering column 1 and relay rod re...
Page 394: Spec
59 general torque specifications this chart specifies torque for standard fasteners with standard i.S.O. Pitch threads. Torque speci- fications for special components or assemblies are included in the applicable sections of this book. To avoid warpage, tighten multi-fastener assemblies in a crisscro...
Page 395: Spec
60 cable routing spec.
Page 396: Spec
61 cable routing spec to the headlight and meter as- sembly clamp the lead at the position of white tape. Battery positive lead battery negative lead main harness negative lead connector carburetor heater lead coupler oil level switch lead coupler oil level switch starter motor positive lead (un- de...
Page 397: Spec
62 cable routing spec.
Page 398: Spec
63 cable routing spec brake hose fuel sender lead coupler set the coupler in the rear space of the instrument panel clamp the ignition coil lead un- der the fuel hose. Clamp the fuel hose. There should be no slack of leads. Clamp the throttle position switch lead. Route the coolant hose be- tween th...
Page 399: Spec
64 cable routing spec.
Page 400: Spec
65 cable routing spec 1 headlight wire harness align it with the positioning tape of the headlight wire harness clamp 1 clamp meter coupler (securely fit in the rubber cover) 2 3 4 5.
Page 401: Spec
66 cable routing spec.
Page 402: Spec
67 cable routing spec 1 right handlebar switch clamp the main harness, main switch and harness. Clamp the grip warmer lead and the right handlebar switch lead. Throttle cable handlebar holder pass all leads and cables through the cable holder. (ex- cept for brake hose and parking brake cable.) clamp...
Page 403: Spec
68 cable routing spec.
Page 404: Spec
69 cable routing spec carburetor air vent hose to the parking brake. To the brake caliper brake hose clamp the wire harness and fuel tank breather hose from the top. Less than 50 mm (2.0 in). Clamp the wire harness. Fuel hose clamp the wire harness and fuel tank breather hose from the lower side. Pu...
Page 405: Spec
70 cable routing spec.
Page 406: Spec
71 cable routing spec headlight wire harness tighten the frame ground and voltage regulator upper bolt to- gether. Engine oil tank hose point the clamp tightening direction to the downward. Drain hose less than 30 mm (1.2 in). Pass the coolant reservoir tank breather hose through be- tween engine an...
Page 407: Spec
72 cable routing spec.
Page 408: Spec
73 cable routing spec 1 fuel pump fuel hoses coolant reservoir tank point the pawl of clip to the up- ward. Clamp the fuel tank breather hose and speed sensor lead. Tighten the frame cross mem- ber and frame. Wire harness clamp rivets speed sensor nylon nuts point the pawl of clip to the downward. 2...
Page 409: Spec
74 cable routing spec.
Page 410: Spec
75 cable routing spec 1 starter motor battery positive lead cdi unit battery negative lead air box drain hose battery band battery cover 0 x 5 mm (0 x 0.20 in) wire harness plate cover clip it to the frame cross mem- ber to the carburetor. Wire harness holder battery bracket battery battery seat cdi...
Page 411
1 a.C. Magneto 2 rectifier / regulator 3 main switch 4 main relay 5 fuse (main) 6 starter relay 7 starter motor 8 battery 9 engine stop switch 10 throttle switch 11 carburetor switch 12 carburetor heater relay 13 carburetor heater 14 grip warmer 15 thumb warmer 16 cdi unit 17 ignition coil 18 spark ...
Page 413
B/y br b/l br/w b/y br b br/w w w w w w w r r/w br br/w r/y r/w br br/w l l r r l/w l/w l/r r/w r/y hi lo lg l/w lg l/w y lg lg l/w l/w y l/g g lg g l/g g y b g y b g y y b b g b b a y y b g g b y lg/b y/b l/y g/r l/w r/b w sb g/b y/g b/g g/r g/r g/r g/b g/b a g/b w w b w l/y l/y b l/y l/w b l/w lg/...
Page 414
Supplementary service manual lit-12618-02-39.
Page 415: Foreword
Warning caution: note: foreword this supplementary service manual has been prepared to introduce new service and new data for the rx10k, rx10rk, rx10rsk, rxw10k, rxw10sk, rx10mk, rx10msk. For complete information, on service proce- dures, it is necessary to use this supplementary service manual toge...
Page 416: Spec
10 spec elec carb 8 1 2 3 4 5 6 7 11 12 13 14 15 16 17 18 19 20 21 22 23 24 25 gen info insp adj eng chas powr tr 9 cool illustrated symbols (refer to the illustration) illustrated symbols 1 to 9 are designed as thumb tabs to indicate the chapter’s number and content. 1 general information 2 periodi...
Page 417: Insp
1 9 8 6 5 4 insp adj general information periodic inspections and adjustments power train engine cooling system electrical specifications gen info 2 3 powr tr eng cool elec spec chassis chas 7 carburetion carb index.
Page 418
Chapter 2. Periodic inspections and adjustments power train 1 . . . . . . . . . . . . . . . . . . . . . . . . Brake pad inspection 1 . . . . . . . . . . . Brake hose inspection 1 . . . . . . . . . Air bleeding (hydraulic brake system) 1 . . . . . . Track tension adjustment 3 . . . . Slide runner ins...
Page 419: Insp
1 2 brake pad inspection/brake hose inspection/ air bleeding (hydraulic brake system) insp adj warning periodic inspections and adjustments power train brake pad inspection 1. Apply the brake lever. 2. Inspect: sbrake pad wear a wear indicator 1 nearly contacts the brake disc ! Replace as a set. Wea...
Page 420: Insp
2 air bleeding (hydraulic brake system) insp adj note: warning a. Slowly apply the brake lever several times. B. Pull the lever in, then hold the lever in posi- tion. C. Loosen the bleed screws and allow the brake lever to travel towards its limit. D. Tighten the bleed screws when the brake le- ver ...
Page 421: Insp
3 a b 6 7 track tension adjustment/ slide runner inspection insp adj 4 5 6 7 4 5 caution: track tension adjustment track alignment shifted to right shifted to left left adjuster turn out turn in right adjuster turn in turn out 8 slide runner 9 track 10 track metal 11 gap 12 forward a rx10k, rx10rk, ...
Page 422: Insp
4 a a b lubrication insp adj warning lubrication brake lever, throttle lever and throttle cable end 1. Lubricate the brake lever pivot, throttle lever and the ends of the throttle cables. Recommended lubricant: esso beacon 325 grease apply a dab of grease onto only the end of the cables. Do not grea...
Page 423: Insp
5 clutch insp adj clutch high altitude a b c d e f g h i j k l m n o p q r s t u v w x y z a b c d note: g green p pink s silver y yellow specifications model: rx10k, rx10rk, rx10rsk elevation x 800 m ( x 2,500 ft) 600 x 1,400 m (2,000 x 4,500 ft) 1,200 x 2,000 m (4,000 x 6,500 ft) 1,800 x 2,600 m (...
Page 424: Insp
6 clutch insp adj a b c d e f g h i j k l m n o p q r s t u v w x y z a b c d note: s silver o orange w white p pink specifications model: rx10mk, rx10msk elevation x 800 m ( x 2,500 ft) 600 x 1,400 m (2,000 x 4,500 ft) 1,200 x 2,000 m (4,000 x 6,500 ft) 1,800 x 2,600 m (6,000 x 8,500 ft) 2,400 x 3,...
Page 425: Insp
7 gear selection insp adj a b c d e f g a b drive gear driven gear a b c d e f g h i a b seat sheave gear selection 1 chain and sprocket part number parts name teeth & links parts no. Standard 19 teeth 8fa-17682-90 20 teeth 8fa-17682-00 drive sprocket 21 teeth 8fa-17682-10 rx10mk, rx10msk drive spro...
Page 426: Insp
8 identification mark a gear selection insp adj b c d e f g h 5 torque cam (secondary spring seat) effects part no. Cam angle identification mark standard quicker upshifting during acceleration 8fa-17604-00 51-43 _ 8bvfa rx10k, rx10rk, rx10rsk, rxw10k, rxw10sk 8bv-17604-71 47 _ 8bv71 8bv-17604-51 45...
Page 427: Insp
9 d e f g h i j k l spring identification color code a spring rate color b preload color c gear selection insp adj 6 primary spring parts no. Spring rate n / mm (kg / mm) preload n (kg) color wire gauge mm (in) outside diameter mm (in) no. Of coils free length mm (in) standard 90501-551l3 19.6 (2.00...
Page 428: Insp
10 gear selection insp adj a b c d 7 clutch weight parts no. Weight g (oz) without bush and rivets shape & id mark standard 8bu-17605-20 45.41 (1.60) rx10mk, rx10msk 8dg-17605-00 34.26 (1.209) 8dj-17605-00 37.77 (1.333) 8dn-17605-10 39.76 (1.40) 8ek-17605-00 39.00 (1.376) 8es-17605-00 54.6 (1.93) 8f...
Page 429: Insp
11 gear selection insp adj a b c d e f g h a b c d e f g h i j l m k 8 weight rivets parts no. Material length mm (in) weight g (oz) standard effects 90261-06033 steel 17.2 (0.677) 4.5 (0.159) in: rx10k, rx10rk, rx10rsk, rxw10k, rxw10sk increased f 90269-06006 steel 17.2 (0.677) 3.6 (0.127) with hol...
Page 430: Insp
12 front suspension insp adj a a caution: warning front suspension spring preload 1. Adjust: sspring preload adjustment steps: sloosen the lock nut 1 sturn the spring seat 2 in or out. Rx10k, rx10rk, rx10rsk, rxw10k, rxw10sk spring seat standard p g distance shorter z ! Longer preload harder z ! Sof...
Page 431: Insp
13 a b b a rear suspension insp adj caution: note: a e a f rear suspension stopper band 1. Adjust: sstopper band tension make sure the left and right sides of the rear suspension stopper band are adjusted evenly. (rx10mk, rx10msk) this adjustment affects the handling character- istics of the machine...
Page 432: Insp
14 rear suspension insp adj warning caution: spring preload (rx10k, rx10rk, rx10rsk) 1. Adjust: sspring preload adjustment step: this shock absorber contains highly pres- surized nitrogen gas. Do not tamper with or attempt to open the shock absorber assembly. Do not subject the shock absorber assem-...
Page 433: Insp
15 rear suspension insp adj a b a b z ! A b spring preload (rx10mk, rx10msk) 1. Adjust: sspring preload adjustment steps: sturn the adjusting ring 1 to the proper posi- tion. Spring adjuster position 1 2 3 4 5 preload softer z ! Harder front standard 3 sturn the adjusting hook 2 to the proper posi- ...
Page 434: Insp
16 rear suspension insp adj caution: z ! Warning control rod (rx10mk, rx10msk) 1. Adjust: scontrol rod stroke a make sure the adjusting bolt ends are set at the same position on each side. Adjustment steps: sloosen the lock nut 1 . Sturn the adjusting nut 2 in or out to adjust the control rod stroke...
Page 435: Chas
17 3 order job name / part name q’ty remarks 1 2 3 4 5 6 7 8 9 10 11 12 handlebar removal handlebar cover plastic band thumb warmer lead coupler thumb warmer switch lead coupler engine stop switch coupler brake switch coupler headlight beam switch coupler grip warmer lead coupler grip warmer switch ...
Page 436: Chas
18 steering chas order job name / part name q’ty remarks 13 14 15 16 17 18 master cylinder assembly handlebar holder (upper) cable holder handlebar handlebar holder (lower) handlebar joint 1 2 1 1 1 1 after installing all parts, refer to “cable routing” in chapter 9, to check the cable, lead and hos...
Page 437: Chas
19 order job name / part name q’ty remarks 1 2 3 4 5 6 7 ski removal cotter pin bolt collar nut collar ski stopper ski 1 1 1 1 2 1 1 remove the parts in the order listed below. For installation, reverse the removal procedure. : a 19 nm (1.9 m skg, 14 ftslb) 17 nm (1.7 m skg, 12 ftslb) 11 nm (1.1 m s...
Page 438: Chas
20 ski chas order job name / part name q’ty remarks 1 2 3 4 5 6 7 ski removal cotter pin bolt collar nut collar ski stopper ski 1 1 1 1 2 1 1 remove the parts in the order listed below. For installation, reverse the removal procedure. : a 19 nm (1.9 m skg, 14 ftslb) 17 nm (1.7 m skg, 12 ftslb) 11 nm...
Page 439: Powr
21 4 order job name / part name q’ty remarks 1 2 3 4 5 6 7 8 9 10 11 12 13 14 drive chain housing removal brake caliper parking brake right side cover collar brake disc chain tension adjuster drain bolt drive chain housing cover chain tensioner roller drive sprocket collar drive chain driven sprocke...
Page 440: Powr
22 drive chain housing powr tr installation 1. During installation, pay attention to the fol- lowing. A make sure that the bearing seals face towards the drive chain as shown. B properly install the rubber seal onto the drive chain housing, making sure that there are no gaps. C 1 c 2 c 3 be sure to ...
Page 441: Powr
23 drive chain housing powr tr order job name / part name q’ty remarks 1 2 3 4 5 6 7 8 9 10 11 12 13 14 15 drive chain housing removal brake caliper parking brake right side cover collar brake disc chain tension adjuster joint shift rod shift lever assembly lever drain bolt collar drive chain housin...
Page 442: Powr
24 drive chain housing powr tr order job name / part name q’ty remarks 16 17 18 19 20 21 22 23 24 25 26 27 28 29 30 31 32 chain tensioner roller collar spring journal reverse driven gear washer forward driven sprocket collar reverse drive gear drive sprocket drive chain collar washer plate shaft dri...
Page 443: Powr
25 drive chain housing powr tr installation 1. During installation, pay attention to the fol- lowing. A properly install the rubber seal onto the drive chain housing, making sure that there are no gaps. B make sure that the bearing seals face towards the drive chain as shown. C 1 c 2 be sure to inst...
Page 444: Powr
26 drive chain housing powr tr 4. Install: sshift rod 1 5. Adjust: sshift rod length a adjustment steps: smove the shift lever to the “fwd.” position. Sloosen the locknuts 2 . Sturn the shift rod 1 so that shift rod free play is 0 mm (in direction where a can be short- ened appropriately) and then t...
Page 445: Powr
27 order job name / part name q’ty remarks 1 2 3 4 5 brake pad removal cap bolt retaining pin pad spring brake pad brake caliper assembly 1 1 1 2 1 remove the parts in the order listed below. For installation, reverse the removal procedure. : a 6 nm (0.6 m skg, 4.3 ftslb) : b 48 nm (4.8 m skg, 35 ft...
Page 446: Powr
28 brake powr tr caution: note: note: disc brake components rarely require dis- assembly. Do not: sdo not disassemble components unless absolutely necessary. Sdo not use solvents on internal brake com- ponents. Sdo not use contaminated brake fluid for cleaning. Use only clean brake fluid. Sdo not al...
Page 447: Powr
29 brake powr tr 2. Install: sbrake pads spad spring installation steps: sconnect a suitable hose 1 tightly to the cali- per bleed screw 2 . Put the other end of this hose into an open container. Sloosen the caliper bleed screw and push the pistons into the caliper with your finger. Stighten the cal...
Page 448: Powr
30 order job name / part name q’ty remarks brake caliper and parking brake removal brake fluid brake hose brake caliper assembly parking brake cable spring lever parking brake assembly collar 1 1 1 1 1 1 1 remove the parts in the order listed below. Drain. For installation, reverse the removal proce...
Page 449: Powr
31 brake powr tr note: warning warning brake caliper disassembly before disassembling a caliper, drain brake fluid from brake hose, master cylinder, brake caliper and brake reservoir of their brake fluid. 1. Remove: spistons spiston oil seals 1 removal steps: susing a piece of wood 2 , lock the righ...
Page 450: Powr
32 brake powr tr warning warning caution: 1. Inspect: scaliper piston 1 scratches / rust / wear ! Replace the caliper assembly. Scaliper cylinder 2 wear / scratches ! Replace the caliper as- sembly. Scaliper body 3 cracks / damage ! Replace. Soil delivery passage (caliper body) blow out with compres...
Page 451: Powr
33 order job name / part name q’ty remarks 1 2 slide rail suspension removal rear axle nut tension adjuster slide rail suspension collar 1 2 remove the parts in the order listed below. Loosen. Loosen. For installation, reverse the removal procedure. 72 nm (7.2 m skg, 52 ftslb) : a slide rail suspens...
Page 452: Powr
34 slide rail suspension powr tr order job name / part name q’ty remarks slide rail suspension disassembly shock absorber adjuster assembly stopper band shaft rubber collar shock absorber spacer collar oil seal bearing control rod assembly spacer collar oil seal bearing 1 1 1 2 1 2 2 4 2 1 2 2 4 2 r...
Page 453: Powr
35 slide rail suspension powr tr order job name / part name q’ty remarks front pivot arm bushing collar sliding runner suspension wheel suspension wheel bracket shaft collar front pivot arm bracket bushing collar shaft rear pivot arm circlip guide wheel bushing shaft rear pivot arm bracket 1 4 2 2 6...
Page 454: Powr
36 slide rail suspension powr tr order job name / part name q’ty remarks guide wheel collar tension adjuster rear axle shaft 3 4 2 1 for assembly, reverse the disassembly procedure. 36 35 34 33.
Page 455: Powr
37 1 2 order job name / part name q’ty remarks slide rail suspension removal rear axle nut tension adjuster slide rail suspension collar 1 2 remove the parts in the order listed below. Loosen. Loosen. For installation, reverse the removal procedure. 72 nm (7.2 m skg, 52 ftslb) : a slide rail suspens...
Page 456: Powr
38 slide rail suspension powr tr order job name / part name q’ty remarks slide rail suspension disassembly stopper band shaft rubber collar front shock absorber collar bushing front pivot arm shaft bushing collar suspension wheel assembly shaft suspension bracket bushing bracket collar 2 1 3 1 2 4 1...
Page 457: Powr
39 slide rail suspension powr tr order job name / part name q’ty remarks suspension wheel hook assembly rear shock absorber collar reay rod collar bushing shaft collar bushing braket collar guide wheel spacer rear spring shaft bushing rear pivot arm protector rear pivot arm 2 2 1 2 2 4 4 1 2 2 1 2 2...
Page 458: Powr
40 slide rail suspension powr tr order job name / part name q’ty remarks circlip hook control rod assembly shaft pivot shaft suspension wheel suspension bracket guide wheel rear axle shaft collar tension adjuster 2 2 1 1 1 2 2 3 1 4 2 for assembly, reverse the disassenbly procedure. 36 37 38 39 40 4...
Page 459: Powr
41 slide rail suspension powr tr a b inspection 1. Inspect: ssuspension wheel sguide wheel cracks / damage ! Replace. Swheel bearing wheel turns roughly ! Replace. 2. Inspect: sstopper band 1 frayed / damage ! Replace. Srelay rod 2 (rx10mk, rx10msk) bends / damage ! Replace. Sshock absorber 3 oil le...
Page 460: Powr
42 a b slide rail suspension powr tr a b c d b c a e f h i j k e g h i j k control rod parts number a rx10k, rx10rk, rx10rsk b rx10mk, rx10msk control rod 1 length mm (in) length mm (in) length mm (in) rx10k, rx10rk, rx10rsk 292.3 (11.51) 150.5 (5.93) – rx10mk, rx10msk 228.8 (9.01) 198.7 (7.82) 2.5p...
Page 461: Powr
43 front axle and track powr tr a b a b note: note: front axle and track installation 1. Install: ssprocket wheels sguide wheels swhen pressing the sprocket wheels onto the front axle, align the lugs on each sprocket wheel. Sposition each sprocket wheel on the axle as shown in the illustration. A rx...
Page 462: Eng
44 order job name / part name q’ty remarks 1 2 3 4 5 6 7 8 seat and fuel tank removal muffler end pipe rear cover muffler side cover tail / brake light cover seat fuel tank cover side cover fuel tank 2 1 2 1 1 1 2 1 remove the parts in the order listed below. For installation, reverse the removal pr...
Page 463: Eng
45 5 exhaust pipe and muffler eng order job name / part name q’ty remarks 1 2 3 4 5 exhaust pipe and muffler removal slide rail suspension front axle assembly track seat and fuel tank protector muffler exhaust pipe gasket band 1 1 2 2 2 remove the parts in the order listed below. Refer to “slide rai...
Page 464: Cool
46 heat exchanger cool order job name / part name q’ty remarks 1 2 3 4 5 6 7 8 9 10 11 12 heat exchanger removal coolant primary sheave assembly coolant reservoir tank coolant hose 1 heat exchanger (right) coolant hose 2 heat exchanger (rear) coolant hose 3 heat exchanger (left) coolant hose 4 heat ...
Page 465: Cool
47 6 order job name / part name q’ty remarks 13 14 15 16 17 18 19 20 21 22 23 24 25 26 27 28 29 coolant pipe 1 coolant pipe 2 coolant hose 7 coolant hose 8 thermostat assembly coolant hose 9 coolant hose 10 oil cooler outlet hose oil cooler oil cooler inlet hose pipe 3 water pump hose carburetor hea...
Page 466: Cool
48 heat exchanger cool order job name / part name q’ty remarks 30 31 coolant hose 11 coolant hose 12 1 1 for installation, reverse the removal procedure. : a 35 nm (3.5 m skg, 25 ftslb).
Page 467: Spec
49 9 general specifications spec specifications general specifications model rx10k, rx10rk, rx10rsk, rxw10k, rxw10sk, rx10mk, rx10msk model code number: 8fu1 (rx10k for u.S.A / canada) 8fv1 (rx10rk for u.S.A / canada) 8fy1 (rx10rsk for u.S.A / canada) 8fx1 (rxw10k for u.S.A / canada) 8gb1 (rxw10sk f...
Page 468: Spec
50 general specifications spec r+m 2 model rx10k, rx10rk, rx10rsk, rxw10k, rxw10sk, rx10mk, rx10msk engine oil: type oil capacity periodic oil change with oil filter replacement total amount api se, sf, sg or highter sae0w-30 2.8 l (2.5 lmp qt, 3.0 us qt) 3.0 l (2.6 lmp qt, 3.2 us qt) 3.8 l (3.3 lmp...
Page 469: Spec
51 general specifications spec model rx10k, rx10rk, rx10rsk, rxw10k, rxw10sk, rx10mk, rx10msk suspension: front suspension type rear suspension type independent double wishbone suspension slide rail suspension track: track type track width length on ground track deflection at 100 n (10 kg, 22 lb) in...
Page 470: Spec
52 maintenance specifications spec maintenance specifications engine model rx10k, rx10rk, rx10rsk, rxw10k, rxw10sk, rx10mk, rx10msk cylinder head: volume (with spark plug) 13.45 x 14.05 cm 3 (0.82 x 0.86 cu. In) 0.1 mm (0.004 in) * lines indicate straight edge measurement. Cylinder: material bore si...
Page 471: Spec
53 maintenance specifications spec head diameter face width seat width margin thickness model rx10k, rx10rk, rx10rsk, rxw10k, rxw10sk, rx10mk, rx10msk valve dimensions: valve head diameter a intake exhaust valve face width b intake exhaust valve seat width c intake exhaust valve margin thickness d i...
Page 472: Spec
54 maintenance specifications spec model rx10k, rx10rk, rx10rsk, rxw10k, rxw10sk, rx10mk, rx10msk valve spring: free length intake exhaust installed length (valve closed) intake exhaust compressed spring force (installed) intake exhaust spring tilt intake exhaust winding direction (top view) intake ...
Page 473: Spec
55 maintenance specifications spec model rx10k, rx10rk, rx10rsk, rxw10k, rxw10sk, rx10mk, rx10msk piston pin: piston pin outside diameter piston pin length piston pin to piston pin bore clearance 16.991 x 17.000 mm (0.6689 x 0.6693 in) 51.4 x 51.5 mm (2.0236 x 2.0276 in) 0.002 x 0.022 mm (0.00008 x ...
Page 474: Spec
56 maintenance specifications spec model rx10k, rx10rk, rx10rsk, rxw10k, rxw10sk, rx10mk, rx10msk carburetor: type / quantity manufacturer i.D. Mark main jet (m.J) main air jet (m.A.J) jet needle (j.N) needle jet (n.J) pilot jet (p.J) pilot air jet (p.A.J.) pilot outlet (p.O) bypass 1 (b.P.1) (b.P.2...
Page 475: Spec
57 maintenance specifications spec power train model rx10k, rx10rk, rx10rsk, rxw10k, rxw10sk, rx10mk, rx10msk transmission: type range of ratio engagement speed r / min shift r / min sheave distance sheave offset v-belt automatic 3.8 x 1.0 : 1 3,600 ± 200 r/min (3,400 x 3,800 r/min) (rx10k, rx10rk, ...
Page 476: Spec
58 maintenance specifications spec model rx10k, rx10rk, rx10rsk, rxw10k, rxw10sk, rx10mk, rx10msk rivet: outer part number material size quantity hole quantity inner part number material size quantity hole quantity 90269-06006 (rx10k, rx10rk, rx10rsk, rxw10k, rxw10sk, rx10mk, rx10msk) steel (rx10k, ...
Page 477: Spec
59 maintenance specifications spec model rx10k, rx10rk, rx10rsk, rxw10k, rxw10sk, rx10mk, rx10msk drive chain: type number of links secondary reduction ratio borg warner automotive 23rh303-70asm 70l 38 / 23 (1.65) (rxw10k, rxw10sk) 38 / 24 (1.58) (rx10k, rx10rk, rx10rsk) 40 / 21 (1.90) (rx10mk, rx10...
Page 478: Spec
60 maintenance specifications spec model rx10k, rx10rk, rx10rsk, rxw10k, rxw10sk, rx10mk, rx10msk suspension setting position: hook setting length (standard) (maximum) (minimum) full rate adjusting position ** 25 ± 0.5 mm (0.98 ± 0.02 in) (rx10k, rx10rk, rx10rsk) 15 ± 0.5 mm (0.59 ± 0.02 in) (rxw10k...
Page 479: Spec
61 maintenance specifications spec chassis model rx10k, rx10rk, rx10rsk, rxw10k, rxw10sk, rx10mk, rx10msk frame: frame material seat height luggage box location aluminum 720 mm (28.3 in) front steering: lock-to-lock angle (left) (right) ski alignment toe-out size caster angle 30.0 _ (r ski) 34.7_ (l...
Page 480: Spec
62 maintenance specifications spec electrical model rx10k, rx10rk, rx10rsk, rxw10k, rxw10sk, rx10mk, rx10msk voltage 12 v ignition system: ignition timing (b.T.D.C.) advanced type 5 _ at 1,450 r/min digital type ignition coil: model / manufacturer primary coil resistance secondary coil resistance f6...
Page 481: Spec
63 maintenance specifications spec model rx10k, rx10rk, rx10rsk, rxw10k, rxw10sk, rx10mk, rx10msk starter relay: model / manufacturer amperage rating coil resistance ms5f-421 / jideco 180 a 4.2 x 4.6 Ω at 20_c (68_f) t.P.S. (throttle position sensor): model / manufacturer resistance ts67 / 02-1c / m...
Page 482: Spec
64 maintenance specifications spec tempera- ture altitude tempera- ture altitude high altitude settings rx10k, rx10rk, rx10rsk, rxw10k, rxw10sk –40 _c (–40 _f) –20 _c (–4 _f) 0 _c (32 _f) 16 _c (60 _f) idling speed (r/min) 0 x 200 m (0 x 670 ft) mj ps #140 std mj ps #137.5 std mj ps #135 std 1350 20...
Page 483: Spec
66 tightening torque spec tightening torque engine parts to be tightened tightening torque remarks parts to be tightened nm m skg ft slb remarks spark plug cylinder head nut (m10 1.25) 2 cylinder head nut (m10 1.25) 6 cylinder head nut 2 cylinder head bolt camshaft cap and cylinder head cylinder hea...
Page 484: Spec
67 tightening torque spec note: parts to be tightened tightening torque remarks parts to be tightened nm m skg ft slb remarks fuel pump fuel pump stay 10 10 1.0 1.0 7.2 7.2 1. First, tighten the bolt to approximately 15 nm (1.5 m skg, 11 ftslb) with a torque wrench, then loosen the bolt completely. ...
Page 485: Spec
68 tightening torque spec power train parts to be tightened tightening torque remarks parts to be tightened nm m skg ft slb remarks primary sheave (1st) (2nd) spider and sliding sheave primary sheave cap and sliding sheave roller and weight (primary sheave) secondary sheave stopper (secondary sheave...
Page 486: Spec
69 tightening torque spec note: parts be tightened tightening torque remarks parts be tightened nm m skg ft slb remarks (rxw10k, rxw10sk) stopper band hook and front pivot arm wheel bracket and sliding frame bracket bolt (front) bracket bolt (rear) front pivot arm and front pivot arm bracket front p...
Page 487: Spec
70 tightening torque spec chassis parts to be tightened tightening torque remarks parts to be tightened nm m skg ftslb remarks handlebar holder steering column upper lower steering column 2 and steering shaft steering shaft and steering column 1 steering column 1 and relay rod relay rod and relay ar...
Page 488: Spec
71 general torque specifications this chart specifies torque for standard fasteners with standard i.S.O. Pitch threads. Torque speci- fications for special components or assemblies are included in the applicable sections of this book. To avoid warpage, tighten multi-fastener assemblies in a crisscro...
Page 489: Spec
72 cable routing spec.
Page 490: Spec
73 cable routing spec for rx10k, rx10mk, rx10msk to the headlight and meter as- sembly clamp the lead at the position of white tape. Clamp the wire harness and a.C.Magneto lead. Battery negative lead battery positive lead main harness negative lead connector carburetor heater lead coupler oil level ...
Page 491: Spec
74 cable routing spec.
Page 492: Spec
75 cable routing spec route the starter cable above the left handlebar switch lead. Brake hose fuel sender lead coupler clamp the ignition coil lead un- der the fuel hose. Clamp the fuel hose. Route the coolant hose be- tween the upper vacuum hose and lower vacuum hose. Route the vacuum hose under t...
Page 493: Spec
76 cable routing spec.
Page 494: Spec
77 cable routing spec 1 headlight wire harness align it with the positioning tape of the headlight wire harness meter coupler (securely fit in the rubber cover) put the boots of the meter cou- pler in the boss root on the side of the meter. 2 3 4.
Page 495: Spec
78 cable routing spec.
Page 496: Spec
79 cable routing spec 1 clamp the grip warmer lead and the right handlebar switch lead. Clamp the main harness, main switch and harness. Throttle cable handlebar holder pass all leads and cables through the cable holder. (ex- cept for brake hose and parking brake cable.) pass the brake hose and the ...
Page 497: Spec
80 cable routing spec.
Page 498: Spec
81 cable routing spec carburetor air vent hose to the parking brake. To the brake caliper brake hose clamp the wire harness and fuel tank breather hose from the top. Clamp the wire harness. Fuel hose clamp the wire harness and fuel tank breather hose from the lower side. Right handlebar switch push ...
Page 499: Spec
82 cable routing spec.
Page 500: Spec
83 cable routing spec headlight wire harness tighten the frame ground and voltage regulator upper bolt to- gether. Engine oil tank hose point the clamp tightening direction to the downward. Drain hose less than 30 mm (1.2 in). Pass the coolant reservoir tank breather hose through be- tween engine an...
Page 501: Spec
84 cable routing spec.
Page 502: Spec
85 cable routing spec 1 fuel pump fuel hoses coolant reservoir tank point the pawl of clip to the up- ward. Clamp the fuel tank breather hose and speed sensor lead. Tighten the frame cross mem- ber and frame. Wire harness clamp rivets speed sensor nylon nuts point the pawl of clip to the downward. 2...
Page 503: Spec
86 cable routing spec.
Page 504: Spec
87 cable routing spec 1 battery positive lead cdi unit battery negative lead air box drain hose starter motor plate cover wire harness clip it to the frame cross member wire harness holder battery bracket battery battery seat cdi unit bracket latch battery band battery cover to the carburetor. 0 x 5...
Page 505: Spec
88 cable routing spec.
Page 506: Spec
89 cable routing spec for rx10rk, rx10rsk, rxw10k, rxw10sk to the headlight and meter as- sembly clamp the lead at the position of white tape. Clamp the wire harness and a.C.Magneto lead. Battery positivee lead battery negative lead main harness negative lead connector carburetor heater lead coupler...
Page 507: Spec
90 cable routing spec.
Page 508: Spec
91 cable routing spec route the starter cable above the left handlebar switch lead. Brake hose fuel sender lead coupler clamp the ignition coil lead un- der the fuel hose. Clamp the fuel hose. Route the coolant hose be- tween the upper vacuum hose and lower vacuum hose. Route the vacuum hose under t...
Page 509: Spec
92 cable routing spec.
Page 510: Spec
93 cable routing spec 1 headlight wire harness align it with the positioning tape of the headlight wire harness meter coupler (securely fit in the rubber cover) put the boots of the meter cou- pler in the boss root on the side of the meter. 2 3 4.
Page 511: Spec
94 cable routing spec.
Page 512: Spec
95 cable routing spec 1 clamp the grip warmer lead and the right handlebar switch lead. Clamp the main harness, main switch and harness. Throttle cable handlebar holder pass all leads and cables through the cable holder. (ex- cept for brake hose and parking brake cable.) pass the brake hose and the ...
Page 513: Spec
96 cable routing spec.
Page 514: Spec
97 cable routing spec carburetor air vent hose to the parking brake. To the brake caliper brake hose clamp the wire harness and fuel tank breather hose from the top. Clamp the wire harness. Fuel hose clamp the wire harness and fuel tank breather hose from the lower side. Right handlebar switch push ...
Page 515: Spec
98 cable routing spec.
Page 516: Spec
99 cable routing spec headlight wire harness tighten the frame ground and voltage regulator upper bolt to- gether. Engine oil tank hose point the clamp tightening direction to the downward. Drain hose less than 30 mm (1.2 in). Pass the coolant reservoir tank breather hose through be- tween engine an...
Page 517: Spec
100 cable routing spec.
Page 518: Spec
101 cable routing spec 1 fuel pump fuel hoses coolant reservoir tank point the pawl of clip to the up- ward. Clamp the fuel tank breather hose and speed sensor lead. Tighten the frame cross mem- ber and frame. Wire harness clamp rivets speed sensor nylon nuts point the pawl of clip to the downward. ...
Page 519: Spec
102 cable routing spec.
Page 520: Spec
103 cable routing spec 1 battery negative lead cdi unit battery positive lead air box drain hose starter motor plate cover wire harness clip it to the frame cross member wire harness holder battery bracket battery battery seat cdi unit bracket latch battery band battery cover to the carburetor. 0 x ...
Page 521
B/y br b/l br/w b/y br b br/w w w w w w w r r/w br br/w r/y r/w br br/w l l r r l/w l/w l/r r/w r/y hi lo lg l/w lg l/w y lg lg l/w l/w y l/g g lg g l/g g y b g y b g y y b b g b b a y y b g g b y lg/b y/b l/y g/r l/w r/b w sb g/b y/g b/g g/r g/r g/r g/b g/b a g/b w w b w l/y l/y b l/y l/w b l/w lg/...
Page 522
1 a.C. Magneto 2 rectifier / regulator 3 main switch 4 main relay 5 fuse (main) 6 starter relay 7 starter motor 8 battery 9 engine stop switch 10 throttle switch 11 carburetor switch 12 carburetor heater relay 13 carburetor heater 14 grip warmer 15 thumb warmer 16 cdi unit 17 ignition coil 18 spark ...
Page 523
05. 11 0.8 (e) itp printed on recycled paper.
Page 524: Rx10Rtl/rx10Rl
Rx10rtl/rx10rl rx10rtrl/rx10gtl rxw10l/rx10ml lit-12618-02-44 supplementary service manual 8fs-28197-10
Page 525: Foreword
Foreword this supplementary service manual has been prepared to introduce new service and new data for the rx10rtl, rx10rl, rx10rtrl, rx10gtl, rxw10l, rx10ml. For complete information, on service proce- dures, it is necessary to use this supplemen- tary service manual together with following manual:...
Page 526
Illustrated symbols (refer to the illustration) illustrated symbols to are designed as thumb tabs to indicate the chapter’s number and content. General information periodic inspections and adjustments chassis power train engine cooling system fuel injection system electrical specifications illustrat...
Page 527: Index
Index general information gen info 1 periodic inspection and adjustment insp adj 2 chassis chas 3 power train powr tr 4 engine eng 5 cooling system cool 6 fuel injection system fi 7 electrical elec 8 specifications spec 9.
Page 528
Chapter 1. General information special tools ..........................................1 for fuel injection service............1 chapter 2. Periodic inspection and adjustment introduction............................................2 periodic maintenance chart for the emission control system ...........
Page 529
Chapter 8. Electrical ignition system ..................................... 93 circuit diagram ............................... 93 throttle override system (t.O.R.S.) ............................................... 95 handlebar switch (right) ............ 96 main switch..................................
Page 530: Gen
Gen info 1 general information special tools some special tools are necessary for a completely accurate tune- up and assembly. Using the correct special tool will help prevent damage that can be caused by the use of improper tools or impro- vised techniques. Note: be sure to use the correct part num...
Page 531: Insp
Insp adj 2 periodic inspection and adjustment introduction this chapter includes all information necessary to perform recommended inspections and adjust- ments. These preventive maintenance procedures, if followed, will ensure more reliable machine operation and a longer service life. In addition, t...
Page 532: Insp
Insp adj 3 general maintenance and lubrication chart item remarks pre-opera- tion check (daily) initial 1 month or 800 km (500 mi) (40 hr) every seasonally or 4,000 km (2,500 mi) (200 hr) engine oil check oil level. Replace. Engine oil filter cartridge replace. Every 20,000 km (12,000 mi) fuel check...
Page 533: Insp
Insp adj 4 note: brake system: 1. After disassembling the master cylinder or caliper cylinder, always change the brake fluid. Regu- larly check the brake fluid level and add fluid if necessary. 2. Replace the oil seals of the master cylinder and caliper cylinder every two years. 3. Replace the brake...
Page 534: Insp
Insp adj 5 fuel line inspection 1. Remove: • top cover refer to “cowlings” in chapter 3. 2. Remove: • intake silencer refer to “fuel injection” in chapter 7. 3. Inspect: • fuel hoses • fuel delivery hoses cracks/damage → replace. 4. Install: • intake silencer refer to “fuel injection” in chapter 7. ...
Page 535: Insp
Insp adj 6 5. Remove: • side cover (right) • side under cover (right) refer to “cowlings” in chapter 3. 6. Place an open container under the coolant hose. 7. Disconnect: • coolant hose 8. Drain the coolant. Note: note: lift up the tail of the machine to drain the cool- ant. 9. Remove: • rear cover 1...
Page 536: Insp
Insp adj 7 12.Connect: • coolant hoses 13.Install: • rear cover 14.Install: • coolant hose 15.Install: • side under cover (right) refer to “cowlings” in chapter 3. 16.Install: • intake silencer refer to “fuel injection” in chapter 7. 17.Fill: • cooling system caution: • hard water or salt water is h...
Page 537: Insp
Insp adj 8 18.Bleed the air from the cooling system. 19.Inspect: • cooling system decrease of pressure (leaks) → repair as required. Inspection steps: • attach the cooling system tester and adapter to the coolant filler . • apply 100 kpa (1.0 kg/cm 2 , 14 psi). • measure the pressure with the gauge....
Page 538: Insp
Insp adj 9 air bleeding steps: • lift up the tail of the machine. • remove the bleed bolt on the heat exchanger. • while slowly adding coolant to the coolant filler, drain the coolant until no more air bub- bles appear. • tighten the bleed bolt . • remove the coolant reservoir tank cap and add coola...
Page 539: Insp
Insp adj 10 synchronizing the throttle bodies note: note: prior to synchronizing the throttle bodies, the valve clearance and the engine idling speed should be properly adjusted and the ignition timing should be checked. 1. Place the machine on a level surface. 2. Remove: • shroud • hood (left and r...
Page 540: Insp
Insp adj 11 7. Adjust: • throttle body synchronization a. With throttle body #1 as standard, adjust throttle bodies #2, #3, and #4 using the air screws . #1 , #2 , #3 , #4 note: note: • after each step, rev the engine two or three times, each time for less than a second, and check the synchronizatio...
Page 541: Insp
Insp adj 12 engine idle speed adjustment note: note: prior to adjusting the engine idling speed, the carburetor synchronization should be adjusted properly, the air filter should be clean, and the engine should have adequate compression. 1. Start the engine and let it warm up for sev- eral minutes. ...
Page 542: Insp
Insp adj 13 throttle cable free play adjustment note: note: • before adjusting the throttle cable free play, the engine idle speed should be adjusted. • adjust the throttle cable free play while the cable is in the cable guide. 1. Measure: • throttle cable free play out of specification → adjust. 2....
Page 543: Insp
Insp adj 14 power train sheave offset adjustment 1. Measure: • sheave offset use the sheave gauge. Out of specification → adjust. Note: note: push the secondary sheave toward the inside of vehicle frame first and measure the sheave offset. 2. Adjust: • sheave offset adjustment steps: • apply the bra...
Page 544: Insp
Insp adj 15 3. Measure: • secondary sheave freeplay (clearance) use a feeler gauge. Out of specification → adjust. 4. Adjust: • secondary sheave freeplay (clearance) adjustment steps: • apply the brake to lock the secondary sheave. • remove the bolt and washer . • adjust the secondary sheave freepla...
Page 545: Insp
Insp adj 16 applay grease applay grease (both sides) applay grease (bpth sides) front rear (rx10rtl, rx10rl, rx10rtrl, rx10gtl) rear (rxw10l) rear (rx10ml) (both sides) lubrication.
Page 546: Insp
Insp adj 17 specifications model: rx10rtl, rx10rl, rx10rtrl, rx10gtl clutch high altitude l blue p pink s silver w white y yellow elevation – 800 m (– 2,500 ft) 600 ~ 1,400 m (2,000 ~ 4,500 ft) 1,200 ~ 2,000 m (4,000 ~ 6,500 ft) 1,800 ~ 2,600 m (6,000 ~ 8,500 ft) 2,400 ~ 3,000 m (8,000 ~ 10,000 ft) ...
Page 547: Insp
Insp adj 18 specifications model: rxw10l l blue p pink s silver w white y yellow elevation – 800 m (– 2,500 ft) 600 ~ 1,400 m (2,000 ~ 4,500 ft) 1,200 ~ 2,000 m (4,000 ~ 6,500 ft) 1,800 ~ 2,600 m (6,000 ~ 8,500 ft) 2,400 ~ 3,000 m (8,000 ~ 10,000 ft) engine idle speed 1,500 ± 100 r/min ← ← ← ← engag...
Page 548: Insp
Insp adj 19 specifications model: rx10ml l blue p pink s silver w white y yellow elevation – 800 m (– 2,500 ft) 600 ~ 1,400 m (2,000 ~ 4,500 ft) 1,200 ~ 2,000 m (4,000 ~ 6,500 ft) 1,800 ~ 2,600 m (6,000 ~ 8,500 ft) 2,400 ~ 3,000 m (8,000 ~ 10,000 ft) engine idle speed 1,500 ± 100 r/min ← ← ← ← engag...
Page 549: Insp
Insp adj 20 gear selection the reduction ratio of the driven gear to the drive gear must be set according to the snow conditions. If there are many rough surfaces or unfavorable snow conditions, the drive/driven gear ratio should be increased. If the surfaces are fairly smooth or better snow conditi...
Page 550: Insp
Insp adj 21 chain and sprocket part number gear ratio parts name teeth & links parts no. Standard drive sprocket 18 teeth 8fa-17682-80 19 teeth 8fa-17682-90 20 teeth 8fa-17682-00 rx10ml 21 teeth 8fa-17682-10 22 teeth 8fa-17682-20 23 teeth 8fa-17682-30 rxw10l 24 teeth 8fa-17682-40 rx10rtl, rx10rl, rx...
Page 551: Insp
Insp adj 22 secondary sheave spring secondary spring twist angle part no. Spring rate n•mm/rad (kg•mm/rad) preload n/mm (kg / mm) (lb/in) color wire gauge mm (in) no. Of coils free length mm (in) outside diameter mm (in) standard 90508-500b1 6003 (613) 6.2 (0.63), 35.28 brown 5.0 (0.196) 5.19 75 (2....
Page 552: Insp
Insp adj 23 primary spring spring identification color code preload color spring rate color parts no. Spring rate n/mm (kg/mm) preload n (kg) color wire gauge mm (in) outside diameter mm (in) no. Of coils free length mm (in) standard 90501-551l3 19.6 (2.00) 294 (30) blue-pink-blue 5.5 (0.216) 59.5 (...
Page 553: Insp
Insp adj 24 clutch weight parts no. Weight g (oz) without bush and rivets shape & id mark standard 8bu-17605-20 45.41 (1.60) 8ch-17605-10 35.32 (1.247) 8dg-17605-00 34.26 (1.209) 8dj-17605-00 37.77 (1.333) 8dn-17605-10 39.76 (1.40) 8es-17605-00 54.6 (1.93) 8fa-17605-10 63.8 (2.25) gear selection.
Page 554: Insp
Insp adj 25 weight rivets parts no. Weight g (oz) without bush and rivets shape & id mark standard 8fp-17605-00 67.81 (2.392) rx10rtl, rx10rl, rx10rtrl, rx10gtl, rxw10l 8fs-17605-00 65.52 (2.311) rx10ml parts no. Material length mm (in) weight g (oz) standard effects 90261-06033 steel 17.2 (0.677) 4...
Page 555: Insp
Insp adj 26 rollers i.D. 9 mm (0.354 in) roller with bushing part number outside diameter mm (in) bushing type (p/n) identification mark (width) standard effects 8fg-17624-00 14.5 (0.57) vespel tp-8549 90386-09001 grooved & machined rx10rtl, rx10rl, rx10rtrl, rx10gtl, rxw10l increased force decrease...
Page 556: Insp
Insp adj 27 front suspension spring preload 1. Adjust: • spring preload adjustment steps: • loosen the locknut . • adjust the spring preload by turning the spring seat . Rx10rtl, rx10rl, rx10rtrl, rxw10l rx10gtl rx10ml • tighten the locknut . Caution: be sure that the left and right spring pre- load...
Page 557: Insp
Insp adj 28 rear suspension spring preload (rx10gtl) 1. Adjust: • spring preload adjustment step: • loosen the locknut . • adjust the spring preload by turning the spring seat . Front • tighten the locknut . Warning this shock absorber contains highly pres- surized nitrogen gas. Do not tamper with o...
Page 558: Insp
Insp adj 29 • press the electric suspension/grip warmer adjustment switch in direction or . (maximum: 16 push) • this display scale is set in 2-level for one graduation. Note: note: • the electric suspension indicator comes on and the display switch to the electric sus- pension level when the electr...
Page 559: Chas
Chas 30 chassis cowlings order job/part q’ty remarks removing the cowlings remove the parts in the order listed. 1 shroud 1 2 side cover (left and right) 2 3 side under cover (left and right) 2 4 top cover 1 5 headlight assembly 1 6 headlight stay 1 7 intake silencer 1 for installation, reverse the ...
Page 560: Chas
Chas 31 steering rx10rtl, rx10rl, rx10rtrl, rxw10l order job/part q’ty remarks handlebar removal remove the parts in the order listed below. Top cover refer to “cowlings”. 1 handlebar cover 1 2 cable guide (front) 1 3 grip warmer lead coupler 2 disconnect. 4 throttle switch lead coupler 2 disconnect...
Page 561: Chas
Chas 32 order job/part q’ty remarks 13 master cylinder assembly 1 note: note: after installing all parts, refer to “cable routing” to check the cable, lead and hose routings. 14 handlebar holder (upper) 2 15 cable holder 1 16 handlebar 1 17 handlebar joint 1 18 cable guide (rear) 1 for installation,...
Page 562: Chas
Chas 33 rx10gtl order job/part q’ty remarks handlebar removal remove the parts in the order listed below. Top cover refer to “cowlings”. 1 cable guide (front) 2 grip warmer lead coupler 2 disconnect. 3 throttle switvh lead coupler 2 disconnect. 4 engine stop switch lead coupler 1 disconnect. 5 thumb...
Page 563: Chas
Chas 34 order job/part q’ty remarks 12 master cylinder assembly 1 note: note: after installing all parts, refer to “cable routing” to check the cable, lead and hose routings. 13 handlebar holder (upper) 2 14 cable holder 1 15 handlebar 1 16 handlebar joint 1 17 cable guide (rear) 1 for installation,...
Page 564: Chas
Chas 35 rx10ml order job/part q’ty remarks handlebar removal remove the parts in the order listed below. Top cover remove to “cowlings”. 1 cable guide (front) 1 2 grip warmer lead coupler 2 disconnect. 3 throttle switvh lead coupler 2 disconnect. 4 engine stop switch lead coupler 1 disconnect. 5 thu...
Page 565: Chas
Chas 36 order job/part q’ty remarks 12 master cylinder assembly 1 note: note: after installing all parts, refer to “cable routing” to check the cable, lead and hose routings. 13 handlebar holder (upper) 2 14 cable holder 1 15 handlebar 1 16 handlebar joint 1 17 cable guide (rear) 1 for installation,...
Page 566: Powr
37 powr tr power train primary sheave and drive v-belt order job/part q’ty remarks primary sheave removal remove the parts in the order listed below. Left side cover refer to “cowlings” in chapter 3. 1 v-belt 1 2 primary sheave assembly 1 for installation, reverse the removal procedure. 1st 120 nm (...
Page 567: Powr
Powr tr 38 order job/part q’ty remarks primary sheave disassembly disassemble the parts in the order listed below. Primary sheave cap 1 primary sheave spring 1 collar 3 roller 3 washer 6 collar 3 weight 3 washer 6 fixed sheave 1 stopper 1 sliding sheave 1 bushing 1 spider 1 left-handed thread. Slide...
Page 568: Powr
39 powr tr slide rail suspension rx10gtl order job/part q’ty remarks slide rail suspension removal remove the parts in the order listed below. Rear axle nut loosen. Tension adjuster loosen. 1 slide rail suspension 1 2 collar 2 for installation, reverse the removal procedure. 60 nm (6.0 m•kg, 43 ft•l...
Page 569: Powr
Powr tr 40 order job/part q’ty remarks slide rail suspension disassembly remove the parts in the order listed below. Stopper band 1 shaft 1 rubber collar 2 electric suspension sub-wire lead 1 shock absorber 1 collar 1 control rod assembly 1 spacer 2 collar 2 oil seal 4 bearing 2 slide rail suspensio...
Page 570: Powr
41 powr tr order job/part q’ty remarks front pivot arm 1 bushing 4 collar 2 sliding runner 2 suspension wheel 6 suspension wheel bracket 6 shaft 1 collar 1 front pivot arm bracket 2 bushing 4 collar 2 shaft 1 rear pivot arm 1 guide wheel 2 bushing 2 shaft 1 rear pivot arm bracket 1 slide rail suspen...
Page 571: Powr
Powr tr 42 order job/part q’ty remarks guide wheel 3 collar 4 tension adjuster 2 rear axle shaft 1 for assembly, reverse the disassembly procedure. Slide rail suspension.
Page 572: Powr
43 powr tr rxw10l order job/part q’ty remarks slide rail suspension removal remove the parts in the order listed below. Rear axle nut loosen. Tension adjuster loosen. 1 collar 2 2 shaft 1 3 guide wheel 2 4 slide rail suspension 1 for installation, reverse the removal procedure. 72 nm (7.2 m•kg, 52 f...
Page 573: Powr
Powr tr 44 order job/part q’ty remarks slide rail suspension disassembly remove the parts in the order listed below. Shock absorber adjuster assembly 1 stopper band 1 shaft 1 rubber collar 2 shock absorber 1 spacer 2 collar 2 oil seal 4 bearing 2 control rod assembly 1 spacer 2 collar 2 oil seal 4 b...
Page 574: Powr
45 powr tr order job/part q’ty remarks front pivot arm 1 bushing 4 collar 2 sliding runner 2 protector 1 suspension wheel 6 suspension wheel bracket 6 shaft 1 collar 1 front pivot arm bracket 2 bushing 4 collar 2 shaft 1 rear pivot arm 1 bushing 2 shaft 1 rear pivot arm bracket 1 slider 2 slide rail...
Page 575: Powr
Powr tr 46 order job/part q’ty remarks guide wheel 3 collar 4 tension adjuster 2 rear axle shaft 1 for assembly, reverse the disassembly procedure. Slide rail suspension.
Page 576: Powr
47 powr tr rx10ml order job/part q’ty remarks slide rail suspension removal remove the parts in the order listed below. Rear axle nut loosen. Tension adjuster loosen. 1 slide rail suspension 1 2 collar 2 for installation, reverse the removal procedure. 72 nm (7.2 m•kg, 52 ft•lb) slide rail suspensio...
Page 577: Powr
Powr tr 48 order job/part q’ty remarks slide rail suspension disassembly remove the parts in the order listed below. Stopper band 2 shaft 1 rubber collar 3 front shock absorber 1 collar 2 bushing 4 front pivot arm 1 shaft 1 bushing 2 collar 2 suspension wheel assembly 2 shaft 1 shaft 1 suspension br...
Page 578: Powr
49 powr tr order job/part q’ty remarks suspension wheel 2 hook assembly 2 rear shock absorber 1 collar 2 relay rod 2 collar 4 bushing 4 shaft 1 collar 2 bushing 2 bracket 1 collar 2 guide wheel 2 spacer 2 rear spring 2 shaft 1 bushing 2 rear pivot arm protector 2 rear pivot arm 1 slide rail suspensi...
Page 579: Powr
Powr tr 50 order job/part q’ty remarks circlip 2 hook 2 control rod assembly 1 shaft 1 pivot shaft 1 suspension wheel 2 suspension bracket 2 shaft 1 guide wheel 3 rear axle shaft 1 collar 4 tension adjuster 2 for assembly, reverse the disassenbly procedure. Slide rail suspension.
Page 580: Powr
51 powr tr control rod parts number rx10rtl, rx10rl, rx10rtrl, rx10gtl, rxw10l rx10ml control rod 1 length mm (in) length mm (in) length mm (in) rx10rtl, rx10rl, rx10rtrl, rx10gtl, rxw10l 277.3 (10.92) 150.5 (5.93) – rx10ml 236.3 (9.30) 200.7 (7.90) 2.5p × 2 = 5 (0.098p × 2 = 0.196) control rod 1 pa...
Page 581: Eng
Eng 52 engine seat and fuel tank order job/part q’ty remarks seat and fuel tank removal remove the parts in the order listed below. 1 muffler end pipe 2 2 tail/brake light cover 1 3 muffler side cover 2 4 seat 1 5 fuel tank cap 1 6 fuel tank cover 1 7 side cover 2 8 fuel tank 1 for installation, rev...
Page 582: Eng
Eng 53 exhaust pipe and muffler order job/part q’ty remarks exhaust pipe and muffler removal remove the parts in the order listed below. Front axle assembly track seat and fuel tank refer to “seat and fuel tank”. 1 protector 1 2 muffler 1 3 exhaust pipe 2 4 gasket 2 5 band 2 for installation, revers...
Page 583: Cool
Cool 54 cooling system heat exchanger order job/part q’ty remarks heat exchanger removal remove the parts in the order listed below. Coolant drain. Refer to “cooling system” in chapter 2. Primary sheave assembly refer to “primary sheave and drive v-velt” in chapter 4. 1 coolant reservoir tank 1 2 co...
Page 584: Cool
Cool 55 order job/part q’ty remarks 13 heat exchanger (front) 1 14 coolant hose 6 1 15 water pump assembly 1 16 throttle body heater hose 1 17 coolant hose 7 1 18 coolant pipe 1 1 19 coolant hose 8 1 20 coolant pipe 2 1 21 coolant hose 9 1 22 water jacket joint 1 23 coolant hose 10 2 24 thermostat a...
Page 585: Cool
Cool 56 order job/part q’ty remarks 30 pipe 3 1 31 water pump hose 1 32 o-ring 1 33 coolant hose 13 1 34 coolant hose 14 1 for installation, reverse the removal procedure. 35 nm (3.5 m•kg, 25 ft•lb) heat exchanger.
Page 586: Cool
Cool 57.
Page 587: Fuel Injection System
Fi 58 fuel injection system fuel injection system ignition coil spark plug fuel tank fuel pump grip warmer adjust- ment down side switch fuel injection system relay speed sensor engine trouble warn- ing light cylinder identification sensor fuel delivery hose throttle position sen- sor oil pressure s...
Page 588
Fi 59 \ wiring diagram wire harness main harness b gy b/l g y w w w w w w b r ww w br off on st ar t r/w r br/w br l/w r/y bb r ru n st op close open b/y b/l hi lo g l lg l/w r w br/l br r r r r r r br/w b/l l/w y b g lg b w b lg b b y/r b/r off on l/rg l/r g w l b/l p o/r b/w r/b ch gb gb ch y/l y/...
Page 589
Fi 60 crankshaft position sensor main switch fuse (main) fuse (fuel injection system) battery engine stop switch oil pressure switvh e.C.U. Ignition coil #1 ignition coil #2 ignition coil #3 ignition coil #4 spark plug fuel injection system relay injector #1 injector #2 injector #3 injector #4 fuel ...
Page 590
Fi 61 eas00899 ecu’s self-diagnostic function the ecu is equipped with a self-diagnostic function in order to ensure that the engine control sys- tem is operating normally. If this function detects a malfunction in the system, it immediately oper- ates the engine under substitute characteristics and...
Page 591
Fi 62 substitute characteristics operation control (fail-safe action) if the ecu detects an abnormal signal from a sensor while the vehicle is being driven, the ecu illu- minates the engine trouble warning light and provides the engine with alternate operating instruc- tions that are appropriate for...
Page 592
Fi 63 communication error with the meter fault code no. Item symptom fail-safe action able/unable to start able/unable to drive 44 error in writing the amount of co adjustment on eeprom an error is detected while reading or writing on eeprom (co adjustment value). – able able 46 vehicle system power...
Page 593
Fi 64 eas00904 troubleshooting chart engine operation is not normal or the engine trouble warning light flash. *engine trouble warning light may not come on even if the engine operation is not normal. The engine trouble warning light flash. Check the fault code number displayed on the meter. Identif...
Page 594
Fi 65 eas00905 diagnostic mode it is possible to monitor the sensor output data or check the activation of actuators without connecting the measurement equipment by simply switching the meter indication from the normal mode to the diagnostic monitoring mode. Setting the diagnostic mode 1. Turn the m...
Page 595
Fi 66 6. Verify the operation of the sensor or actua- tor. • sensor operation the data representing the operating condi- tions of the sensor appears on the trip lcd. • actuator operation set the grip warmer adjustment down side switch to “on” to operate the actuator. * if the grip warmer adjustment ...
Page 596
Fi 67 diagnostic fault code table fault code no. Symptom probable cause of malfunction diagnostic code 11 no normal signals are received from the cylinder identification sensor. • open or short circuit in wiring sub lead. • open or short circuit in wiring harness. • defective cylinder identification...
Page 597
Fi 68 fault code no. Symptom probable cause of malfunction diagnostic code 42 no normal signals are received from the speed sensor. • open or short circuit in wiring harness. • defective speed sensor. • malfunction in vehicle speed sensor detected unit. • malfunction in ecu. 07 43 the ecu is unable ...
Page 598
Fi 69 diagnostic mode table switch the meter display from the regular mode to the diagnosis mode. To switch the display, refer to “diagnostic mode”. Note: • check the intake air temperature and coolant temperature as close as possible to the intake air temperature sensor and the coolant temperature ...
Page 599
Fi 70 29 suspension for the adjustment of damping force the following connection judgment result is transmitted to the meter. When the connection judgment is “connected”: h’00 when the connection judgment is “not connected”: h’f0 the following item is performed only when the connection judgment is “...
Page 600
Fi 71 diagnostic code item description of action data displayed on meter (reference value) 50 fuel injection system relay after the engine stop switch has been turned from off to on, it actuates the fuel injection system relay five times every second and illuminates the engine trouble warning light ...
Page 601
Fi 72 troubleshooting details this section describes the measures per fault code number displayed on the meter. Carry out check and maintenance on items or components that could be a cause of malfunction in accordance with the order. When the check and maintenance of malfunctioned part is completed,...
Page 602
Fi 73 fault code no. 12 symptom no normal signals are received from the crankshaft position sensor. Used diagnostic code no. – – order inspection operation item and probable cause operation item and countermeasure reinstatement method 1 installed condition of sensor check the installed area for loos...
Page 603
Fi 74 fault code no. 13 symptom intake air pressure sensor – open or short circuit detected. Used diagnostic code no. 03 (intake air pressure sensor) order inspection operation item and probable cause operation item and countermeasure reinstatement method 1 connected condition of connector inspect t...
Page 604
Fi 75 fault code no. 14 symptom intake air pressure sensor – hose system malfunction (clogged or detached hose). Used diagnostic code no. 03 (intake air pressure sensor) order inspection operation item and probable cause operation item and countermeasure reinstatement method 1 intake air pressure se...
Page 605
Fi 76 fault code no. 16 symptom stuck throttle position sensor detected. Used diagnostic code no. 01 (throttle position sensor) order inspection operation item and probable cause operation item and countermeasure reinstatement method 1 when detecting fault code no.15. Refer to “fault code no.15”. Re...
Page 606
Fi 77 fault code no. 22 symptom open or short circuit detected from the intake temperature sensor. Used diagnostic code no. 05 (intake temperature sensor) order inspection operation item and probable cause operation item and countermeasure reinstatement method 1 connected condition of connector insp...
Page 607
Fi 78 fault code no. 23 symptom open or short circuit detected from the atmospheric pressure sensor. Used diagnostic code no. 02 (atmospheric pressure sensor) order inspection operation item and probable cause operation item and countermeasure reinstatement method 1 connected condition of connector ...
Page 608
Fi 79 fault code no. 30 symptom oil pressure dropped. Used diagnostic code no. – – order inspection operation item and probable cause operation item and countermeasure reinstatement method 1 oil pressure dropped keep the snow mobile horizontal and then measure the oil pressure after the sufficient w...
Page 609
Fi 80 fault code no. 35 symptom malfunction detected in the primary lead of the ignition coil (#3). Used diagnostic code no. 32 (ignition coil #3) order inspection operation item and probable cause operation item and countermeasure reinstatement method 1 connected condition of connector inspect the ...
Page 610
Fi 81 fault code no. 42 symptom 1 no normal signals are received from the speed sensor. Used diagnostic code no. 07 (speed sensor) → a1 ~ a4 order inspection operation item and probable cause operation item and countermeasure reinstatement method a1 connected condition of speed sensor connector insp...
Page 611
Fi 82 fault code no. 43 symptom the ecu is unable to monitor the battery voltage. Used diagnostic code no. 09 (fuel system voltage) order inspection operation item and probable cause operation item and countermeasure reinstatement method 1 connected condition of connector inspect the coupler for any...
Page 612
Fi 83 fault code no. 44 symptom error is detected while reading or writing on eep-rom (co adjustment value). Used diagnostic no. 60 (eep-rom improper cylinder indication) order inspection operation item and probable cause operation item and countermeasure reinstatement method 1 malfunction in ecu ex...
Page 613
Fi 84 fault code no. 81 symptom grip warmer-short circuit detected. Used diagnostic code no. 26 order inspection operation item and probable cause operation item and countermeasure reinstatement method 1 short circuit in wiring harness. Repair or replace if there is an short circuit. Between switch ...
Page 614
Fi 85 fault code no. Er-1 symptom no signal are received from the ecu. Er-2 symptom no signal are received from the ecu within the specified duration. Er-3 symptom data from the ecu cannot be received correctly. Er-4 symptom non-registered data has been received from the meter. Used diagnostic code ...
Page 615
Fi 86 oil pressure switch 1. Disconnect: • oil pressure switch coupler 2. Connect: • pocket tester (to the switch coupler) 3. Inspect: • oil pressure switch continuity switch is operated. Faulty → replace the oil pressure switch. Main switch position continuity off yes fuel injection system.
Page 616
Fi 87 throttle bodies order job/part q’ty remarks removing the throttle bodies remove the parts in the order listed below. Intake silencer refer to “cowlings” in chapter 3. Headlight stay refer to “cowlings” in chapter 3. 1 sub wire harness coupler 1 disconnect. 2 fuel hose 2 3 throttle cable 1 4 th...
Page 617
Fi 88 eas00910 injectors order job/part q’ty remarks removing the injectors remove the parts in the order listed. 1 throttle position sensor coupler 1 disconnect. 2 intake air pressure sensor coupler 1 disconnect. 3 cylinder #4-injector coupler 1 4 cylinder #3-injector coupler 1 5 cylinder #2-inject...
Page 618
Fi 89 eas00911 caution: the throttle bodies should not be disas- sembled. Eas00912 checking the injectors 1. Check: • injectors damage → replace. Eas00913 checking the throttle bodies 1. Check: • throttle bodies cracks/damage → replace the throttle bodies as a set. 2. Check: • fuel passages obstruct...
Page 619
Fi 90 checking the fuel pump and pressure regulator operation 1. Check: • fuel pump operation refer to “seat and fuel tank” in chapter 5. A. Remove the seat and fuel tank. Refer to “seat and fuel tank” in chapter 5. B. Connect the pressure gauge and adapter onto the fuel injection pipe. C. Install t...
Page 620
Fi 91 eas00916 checking and adjusting the throttle position sensor note: note: before adjusting the throttle position sensor, the engine idling speed should be properly adjusted. 1. Check: • throttle position sensor a. Disconnect the throttle position sensor cou- pler. B. Remove the throttle positio...
Page 621
Fi 92 f. While slowly opening the throttle, check that the throttle position sensor resistance is within the specified range. The resistance does not change or it changes abruptly → replace the throttle position sensor. The slot is worn or broken → replace the throttle position sensor. Note: note: c...
Page 622: Elec
Elec 93 electrical ignition system circuit diagram b gy b/l g y w w w w w w b r ww w br off on st ar t r/w r br/w br l/w r/y bb r ru n st op cl ose open b/y b/l hi lo g l g l/w r w br/l br r r r r r r br/w b/l l/w y b g lg b w b lg b b y/r b/r off on l/rg l/r g w l b/l p o/r b/w y/l y/w b/l o/l o/w ...
Page 623: Elec
Elec 94 a.C. Magneto rectifier/regulator main switch load relay fuse (main) battery engine stop switch throttle switch ignition coil #1 ignition coil #2 ignition coil #3 ignition coil #4 spark plug fuse (ignition) ignition system.
Page 624: Elec
Elec 95 throttle override system (t.O.R.S.) if the carburetor or throttle cable should mal- function during operation, t.O.R.S. Will operate when the throttle lever is released. T.O.R.S. Is designed to interrupt the fuel injec- tion and keep the engine revolutions between 2,800 and 3,000 r/min if th...
Page 625: Elec
Elec 96 handlebar switch (right) engine stop switch and throttle switch 1. Disconnect: • engine stop switch coupler • throttle switch coupler 2. Connect: • pocket tester 3. Inspect: • engine stop switch continuity faulty → replace the handlebar switch (right). 4. Inspect: • throttle switch continuit...
Page 626: Elec
Elec 97 main switch 1. Disconnect: • main switch coupler 2. Connect: • pocket tester 3. Inspect: • main switch continuity faulty → replace. Load relay 1. Inspect: • load relay inspection steps: • disconnect the load relay from the coupler. • connect the pocket tester ( Ω × 1) and battery (12 v) to t...
Page 627: Elec
Elec 98 electrical starting system circuit diagram off on st ar t r/w r br/w br l/w r/y bb r ru n st op cl ose open b/y b/l r w br/l br r r r r r r w w w w w w b b b r/w l/w b b b b br br/w br r/w ch by r r r/g r/w l/w r r r r r w b b r r r b/l b/y br/g br/l ch r/g o/r r/w r/w r/y r/y br br br r/w b...
Page 628: Elec
Elec 99 main switch 1. Disconnect: • main switch coupler 2. Connect: • pocket tester 3. Inspect: • main switch continuity faulty → replace. Switch position continuity off yes on no switch position color code r br r/w br/w off on start continuity electrical starting system.
Page 629: Elec
Elec 100 charging system circuit diagram b gy b/l gy w w w w w w b r ww w br off on st ar t r/w r br/w br l/w r/y bb r ru n st op cl ose open b/y b/l r w br/l br r r r r r r w w w w w w br/g b b b r/w l/w b b b b br br/w br r/w ch by r r r/g r/w l/w r r r r r w w w b b r r w r gy b/l b/y l/r br/g br...
Page 630: Elec
Elec 101 lighting system circuit diagram wire harness main harness b gy b/l g y w w w w w w b r ww w br off on st ar t r/w r br/w br l/w r/y bb r ru n st op close open b/y b/l hi lo g l lg l/w r w br/l br r r r r r r br/w b/l l/w y b g lg b w b lg b b y/r b/r off on l/rg l/r g w l b/l p o/r b/w r/b ...
Page 631: Elec
Elec 102 headlight beam switch 1. Disconnect: • headlight beam switch coupler 2. Connect: • pocket tester (to the headlight beam switch coupler) 3. Inspect: • headlight beam switch continuity faulty → replace. Headlight relay 1. Inspect: • headlight relay (black coupler) inspection steps: • disconne...
Page 632: Elec
Elec 103 signal system circuit diagram wire harness main harness b gy b/l g y w w w w w w b r ww w br off on st ar t r/w r br/w br l/w r/y bb r ru n st op close open b/y b/l hi lo g l lg l/w r w br/l br r r r r r r br/w b/l l/w y b g lg b w b lg b b y/r b/r off on l/rg l/r g w l b/l p o/r b/w r/b ch...
Page 633: Elec
Elec 104 a.C. Magneto rectifier/regulator main switch load relay fuse (main) battery e.C.U. Speed sensor water temperature sensor back buzzer gear position switch brake light switch tail/brake light fuse (signal) fuse (ignition) multi-function meter warning light water temperature indicator light oi...
Page 634: Elec
Elec 105 engine oil level switch 1. Remove: • oil level gauge 2. Connect: • pocket tester (to the oil level switch coupler) 3. Inspect: • oil level switch continuity faulty → replace. Speed sensor 1. Inspect: • speed sensor inspection steps: • connect the pocket tester (dc 20 v) to the speed sensor ...
Page 635: Elec
Elec 106 grip warmer system circuit diagram wire harness main harness b gy b/l g y w w w w w w b r ww w br off on st ar t r/w r br/w br l/w r/y bb r ru n st op close open b/y b/l hi lo g l lg l/w r w br/l br r r r r r r br/w b/l l/w y b g lg b w b lg b b y/r b/r off on l/rg l/r g w l b/l p o/r b/w r...
Page 636: Elec
Elec 107 grip and thumb warmer coil 1. Disconnect: • grip warmer leads • thumb warmer coupler 2. Connect: • pocket tester (to the grip warmer coil leads and/or thumb warmer coil leads) 3. Inspect: • grip warmer continuity • thumb warmer continuity no continuity → replace both grips together or separ...
Page 637: Elec
Elec 108 cooling system circuit diagram b gy b/l g y w w w w w w b r ww w br off on st ar t r/w r br/w br l/w r/y bb r ru n st op cl ose open b/y b/l hi lo g l r w br/l br r r r r r r l/w y b g lg b w b lg b b y/r b/r off on l/rg l/r g w w w w w w br/g l g/y r/w l/r p br p b b b r/w l/w b b o/g l/b ...
Page 638: Elec
Elec 109 troubleshooting radiator fan motor and radiator fan motor relay ok ok ok ok ok ok ok faulty faulty faulty no continuity out of specification out of specification faulty check the main fuse and radiator fan motor fuse. Refer to “fuse inspection” in chapter 2. Check the battery. Refer to “bat...
Page 639: Elec
Elec 110 radiator fan motor 1. Disconnect: • radiator fan motor coupler 2. Connect: • battery 3. Inspect: • radiator fan motor positive battery terminal → blue negative battery terminal → black does not move → replace the radiator fan motor. Radiator fan motor relay 1. Disconnect: • radiator fan mot...
Page 640: Spec
Spec 111 specifications general specifications model rx10rtl, rx10rl, rx10rtrl, rx10gtl, rxw10l, rx10ml model code number: 8fp1 (rx10rtl for u.S.A/canada) 8fr1 (rx10rl for u.S.A/canada) 8fr3 (rx10rtrl for u.S.A/canada) 8gd1 (rx10gtl for u.S.A/canada) 8ft1 (rxw10l for u.S.A/canada) 8fs1 (rx10ml for u...
Page 641: Spec
Spec 112 model rx10rtl, rx10rl, rx10rtrl, rx10gtl, rxw10l, rx10ml engine oil: type api se, sf, sg or higher sae0w-30 oil capacity periodic oil change 2.8 l (2.5 imp qt, 3.0 us qt) with oil filter replacement 3.0 l (2.6 imp qt, 3.2 us qt) total amount 3.8 l (3.3 imp qt, 4.0 us qt) oil filter: oil fil...
Page 642: Spec
Spec 113 model rx10rtl, rx10rl, rx10rtrl, rx10gtl, rxw10l, rx10ml suspension: front suspension type independent double wishbone suspension rear suspension type slide rail suspension track: track type internal drive type track width 381 mm (15.0 in) length on ground 768 mm (30.2 in) (rx10rtl, rx10rl,...
Page 643: Spec
Spec 114.
Page 644: Spec
Spec 115 maintenance specifications engine model rx10rtl, rx10rl, rx10rtrl, rx10gtl, rxw10l, rx10ml cylinder head: volume (with spark plug) 13.45 ~ 14.05 cm 3 (0.82 ~ 0.86 cu. In) 0.1 mm (0.04 in) * lines indicate straight edge measurement. Cylinder: material aluminum alloy with dispersion coating b...
Page 645: Spec
Spec 116 head diameter face width seat width margine thickness model rx10rtl, rx10rl, rx10rtrl, rx10gtl, rxw10l, rx10ml valve dimensions: valve head diameter a intake 22.9 ~ 23.1 mm (0.9016 ~ 0.9094 in) exhaust 24.4 ~ 24.6 mm (0.9606 ~ 0.9685 in) valve face width b intake 1.76 ~ 2.90 mm (0.0693 ~ 0....
Page 646: Spec
Spec 117 model rx10rtl, rx10rl, rx10rtrl, rx10gtl, rxw10l, rx10ml valve spring: free length intake 43.59 mm (1.72 in) exhaust 40.62 mm (1.60 in) installed length (valve closed) intake 34.50 mm (1.36 in) exhaust 35.00 mm (1.38 in) compressed spring force (installed) intake 126 ~ 146 n (12.8 ~ 14.9 kg...
Page 647: Spec
Spec 118 model rx10rtl, rx10rl, rx10rtrl, rx10gtl, rxw10l, rx10ml piston ring: sectional sketch top ring ring type barrel dimensions (b × t) 0.90 × 2.75 mm (0.035 × 0.108 in) 2nd ring ring type taper dimensions (b × t) 0.8 × 2.8 mm (0.031 × 0.110 in) oil ring dimensions (b × t) 1.5 × 2.5 mm (0.059 ×...
Page 648: Spec
Spec 119 model rx10rtl, rx10rl, rx10rtrl, rx10gtl, rxw10l, rx10ml oil pump: oil pump type trochoidal inner-rotor-to-outer-rotor-tip clearance 0.00 ~ 0.12 mm (0.000 ~ 0.005 in) outer-rotor-to-oil-pump-housing clearance 0.09 ~ 0.15 mm (0.004 ~ 0.006 in) max. Impeller shaft tilt 0.15 mm (0.0059 in) 0.0...
Page 649: Spec
Spec 120 power train model rx10rtl, rx10rl, rx10rtrl, rx10gtl, rxw10l, rx10ml primary sheave spring: part number 90501-582l1 (rx10rtl, rx10rl, rx10rtrl, rx10gtl, rxw10l) 90501-581l5 (rx10ml) color code yellow – silver – yellow (rx10rtl, rx10rl, rx10rtrl, rx10gtl, rxw10l) yellow – pink – yellow (rx10...
Page 650: Spec
Spec 121 model rx10rtl, rx10rl, rx10rtrl, rx10gtl, rxw10l, rx10ml rivet: outer part number 90261-06033 (rx10rtl, rx10rl, rx10rtrl, rx10gtl, rxw10l) 90266-06002 (rx10ml) material steel size 17.2 mm (0.677 in) (rx10rtl, rx10rl, rx10rtrl, rx10gtl, rxw10l) 13.3 mm (0.524 in) with hole (rx10ml) quantity ...
Page 651: Spec
Spec 122 model rx10rtl, rx10rl, rx10rtrl, rx10gtl, rxw10l, rx10ml secondary sheave spring: part number 90508-60012 (rx10rtl, rx10rl, rx10rtrl, rx10gtl) 90508-60007 (rxw10l, rx10ml) color code pink (rx10rtl, rx10rl, rx10rtrl, rx10gtl) white (rxw10l, rx10ml) outside diameter 69.5 mm (2.736 in) wire di...
Page 652: Spec
Spec 123 model rx10rtl, rx10rl, rx10rtrl, rx10gtl, rxw10l, rx10ml track: part number 8fa-47110-00 (rx10rtl, rx10rl, rx10rtrl, rx10gtl) 8fg-47110-00 (rxw10l) 8fs-47110-00 (rx10ml) width 381 mm (15.0 in) length 3,072 mm (120.9 in) (rx10rtl, rx10rl, rx10rtrl, rx10gtl) 3,456 mm (136.1 in) (rxw10l) 4,115...
Page 653: Spec
Spec 124 model rx10rtl, rx10rl, rx10rtrl, rx10gtl, rxw10l, rx10ml shock absorber: damping force extension 1,950 n/0.3 m/s (198.71 kg/0.3 m/s, 438 lb/0.3 m/s) (rx10rtl, rx10rl, rx10rtrl) 1,069 ~ 1,167 n/0.3 m/s (108.93 ~ 118.92 kg/0.3 m/s, 240 ~ 262 lb/0.3 m/s) (rx10gtl) 1,830 n/0.3 m/s (186.48 kg/0....
Page 654: Spec
Spec 125 chassis model rx10rtl, rx10rl, rx10rtrl, rx10gtl, rxw10l, rx10ml frame: frame material aluminum seat height 765 mm (30.1 in) (rx10rtl, rx10rl, rx10rtrl, rxw10l, rx10ml) 770 mm (30.3 in) (rx10gtl) luggage box location rear steering: lock-to-lock angle (left) 29.0° (r ski) 34.5° (l ski) (rx10...
Page 655: Spec
Spec 126 electrical model rx10rtl, rx10rl, rx10rtrl, rx10gtl, rxw10l, rx10ml voltage 12 v ignition system: ignition timing (b.T.D.C.) 5° at 1,500 r/min advanced type digital type ignition coil: model/manufacturer f6t567/mitsubishi primary coil resistance 1.19 ~ 1.61 Ω at 20°c (68°f) secondary coil r...
Page 656: Spec
Spec 127 model rx10rtl, rx10rl, rx10rtrl, rx10gtl, rxw10l, rx10ml starter relay: model/manufacturer 2768081-a/jideco amperage rating 180 a coil resistance 4.2 ~ 4.6 Ω at 20°c (68°f) t.P.S. (throttle position sensor): model/manufacturer ts62/146/mikuni resistance 4 ~ 6 k Ω at 20°c (68°f) (blue – blac...
Page 657: Spec
Spec 128 model rx10rtl, rx10rl, rx10rtrl, rx10gtl, rxw10l, rx10ml circuit breaker: type fuse amperage for individual circuit main fuse 40 a × 1 fuel injection system fuse 10 a × 1 headlight fuse 20 a × 1 signal fuse 10 a × 1 ignition fuse 20 a × 1 electronic control suspension fuse 10 a × 1 (rx10gtl...
Page 658: Spec
Spec 129 tightening torque engine parts to be tightened tightening torque remarks nm m•kg ft•lb spark plug 13 1.3 9.4 cylinder head nut (m10 × 1.25) × 2 20 + 121° 2.0 + 121° 14 + 121° cylinder head nut (m10 × 1.25) × 6 20 + 105° 2.0 + 105° 14 + 105° cylinder head nut x 2 20 + 140° 2.0 + 140° 14 + 14...
Page 659: Spec
Spec 130 note: 1. First, tighten the bolt to approximately 15 nm (1.5 m•kg, 11 ft•lb) with a torque wrench, then loosen the bolt completely. 2. Retighten the bolt to 15 nm (1.5 m•kg, 11 ft•lb), and tighten another 65 ~ 70° with a angle gauge. Parts to be tightened tightening torque remarks nm m•kg f...
Page 660: Spec
Spec 131 power train parts to be tightened tightening torque remarks nm m•kg ft•lb primary sheave (1st) 120 12.0 85 tighten the bolts in two stages. See note. (2nd) 60 6.0 43 spider and sliding sheave 200 20.0 145 left-hand thread. Apply loctite ® primary sheave cap and sliding sheave 14 1.4 10 roll...
Page 661: Spec
Spec 132 note: tightening steps: 1. Tighten the bolt to a torque at 120 nm (12.0 m•kg, 85 ft•lb). 2. Loosen the bolt completely. 3. Retighten the bolt to a torque of 60 nm (6.0 m•kg, 43 ft•lb). Parts to be tightened tightening torque remarks nm m•kg ft•lb (rx10rtl, rx10rl, rx10rtrl, rx10gtl, rxw10l)...
Page 662: Spec
Spec 133 chassis parts to be tightened tightening torque remarks nm m•kg ft•lb handlebar holder 15 1.5 11 steering joint cover 3 0.3 2.2 steering column upper 23 2.3 17 lower 23 2.3 17 steering column 2 and steering shaft 35 3.5 25 steering shaft and steering column 1 35 3.5 25 steering column 1 and...
Page 663: Spec
Spec 134 a: distance across flats b: outside thread diameter definition of units general torque specifications this chart specifies torque for standard fasten- ers with standard i.S.O. Pitch threads. Torque specifications for special components or assem- blies are included in the applicable sections...
Page 664: Spec
Spec 135 cable routing cable routing.
Page 665: Spec
Spec 136 cable routing clamp the a.C. Magneto lead and wire harness ground lead. Clamp the wire harness and a.C. Magnet lead to the raised portion of the battery bracket. Battery positive lead main fuse main harness battery negative lead flange bolt clamp the wire harness to the steering gate clamp....
Page 666: Spec
Spec 137 cable routing.
Page 667: Spec
Spec 138 place the damper locating between the fuel tank and sheet. To the tail/brake light. Sub-wire harness brake hose fuel sender lead cover auxiliary dc jack coupler headlight lead coupler to the meter assembly. Clamp the headlight lead. Rout the headlight stay. Align the hole of dia. 3 mm (0.12...
Page 668: Spec
Spec 139 cable routing.
Page 669: Spec
Spec 140 right handlebar switch tube lead handlebar holder (route the wire harness, parking brake cable, throttle cable.) parking brake cable left handlebar switch pass all the wire harness, brake hose, brake cable and throttle cable through it. Arrange the line of cables and hoses as shown in the i...
Page 670: Spec
Spec 141 cable routing.
Page 671: Spec
Spec 142 route the fuel tank breather hose along the steering gate. Clamp the compression spring section of the fuel tank breather hose. Compression spring point the clip position to the upward. Insert the fuel tank breather hose until it contacts the projec- tion. To insert the hose, it is allowed ...
Page 672: Spec
Spec 143 cable routing.
Page 673: Spec
Spec 144 route the fuel tank breather hose behind the steering gate. Wire harness bracket when the gear position switch lead is equipped with reverse, route it to the reverse gear. If it is not equipped with reverse, insert it to the inner side. Fuse box coolant reservoir tank clamp brake hose parki...
Page 674: Spec
Spec 145 cable routing.
Page 675: Spec
Spec 146 fit it to the rear suspension lead. (other types are attached with plugs.) (rx10gtl) clamp the wire harness and radi- ator fan motor lead. (rx10rtl, rx10rl, rx10rtrl, rxw10l, rx10ml) clamp the wire harness, radiator fan motor lead and electronic rear suspension lead. (rx10gtl) tighten the f...
Page 676: Spec
Spec 147 cable routing.
Page 677: Spec
Spec 148 coolant recovery tank coolant reservoir tank 10 ~ 30 mm (0.4 ~ 1.2 in) 20 ~ 40 mm (0.8 ~ 1.6 in) clamp the fuel pipe and sub- wire lead. Pass the fuel tank breather hose between the relay harness and the speed sensor harness. Two harness untis should not contact the pipe end. Clamp the fuel...
Page 678: Spec
Spec 149 cable routing.
Page 679: Spec
Spec 150 tail/brake light lead coupler (place the tail/brake light lead coupler leads so that they are not caught between the seat bottom and tail light bracket.) tail/brake light lead coupler (rx10ml) clamp (rx10ml) tail/brake light lead (rx10ml) tail/brake light lead cover (rx10ml) cover plate (rx...
Page 680
Wire harness main harness b gy b/l gy w w w w w w b r w w w b r off on start r/w r br/w br l/w r/y b br run stop close open b/y b/l hi lo g l lg l/w r w br/l br r r r r r r br/w b/l l/w y b g lg b w b lg b b y/r b /r off on l/r g l/r g w l b/l p o/r b/w r/b ch g b gb ch y/l y/w b/l o/l o/w ch lg/l l...
Page 681
A.C. Magneto rectifier/regulator main switch load relay fuse (main) fuse (fuel injection system) starter relay starter motor battery diode engine stop switch throttle switch grip warmer thumb warmer oil presser switch fuse (electronic control suspension) (rx10gtl) electronic control suspension sole-...
Page 682
Color code b . . . . . . Black br . . . . . Brown ch . . . . . Chocolate g . . . . . . Green gy . . . . . Gray l . . . . . . Blue lg . . . . . Light green o . . . . . . Orange p . . . . . . Pink r . . . . . . Red w . . . . . White y . . . . . . Yellow b/l . . . . Black/blue b/r . . . . Black/red b/y...
Page 683
Printed on recycled paper 2005. 06 (e) itp.


