- DL manuals
- Anritsu
- Test Equipment
- MG3710A
- Operation Manual
Anritsu MG3710A Operation Manual
Summary of MG3710A
Page 1
Document no.: m-w3580ae-9.0 anritsu corporation mg3710a vector signal generator mg3740a analog signal generator operation manual for safety and warning information, please read this manual before attempting to use the equipment. Keep this manual with the equipment. Ninth edition.
Page 2: Danger
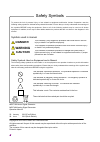
Ii safety symbols to prevent the risk of personal injury or loss related to equipment malfunction, anritsu corporation uses the following safety symbols to indicate safety-related information. Ensure that you clearly understand the meanings of the symbols before using the equipment. Some or all of t...
Page 3: Warning
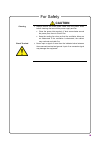
For safety iii warning • always refer to the operation manual when working near locations at which the alert mark shown on the left is attached. If the advice in the operation manual is not followed, there is a risk of personal injury or reduced equipment performance. The alert mark shown on the lef...
Page 4: Warning
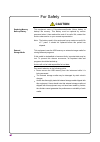
For safety iv warning • this equipment should always be positioned in the correct manner. If the cabinet is turned on its side, etc., it will be unstable and may be damaged if it falls over as a result of receiving a slight mechanical shock. Always set up the equipment in a position where the power ...
Page 5: Caution
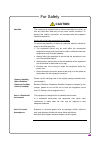
For safety v caution • always remove the main power cable from the power outlet before cleaning dust around the power supply and fan. • clean the power inlet regularly. If dust accumulates around the power pins, there is a risk of fire. • keep the cooling fan clean so that the ventilation holes are ...
Page 6: Caution
For safety vi caution this equipment uses a poly-carbomonofluoride lithium battery to backup the memory. This battery must be replaced by service personnel when it has reached the end of its useful life; contact the anritsu sales section or your nearest representative. Note: the battery used in this...
Page 7: Caution
For safety vii caution the equipment is equipped with an internal hard disk from which, as with any hard disk, data may be lost under certain conditions. To prevent this chance occurrence, all important data and programs should be backed-up. Anritsu will not be held responsible for lost data. To red...
Page 8: Equipment Certificate
Viii equipment certificate anritsu corporation certifies that this equipment was tested before shipment using calibrated measuring instruments with direct traceability to public testing organizations recognized by national research laboratories, including the national institute of advanced industria...
Page 9
Ix note: for the purpose of this warranty, "unusual environments" means use: • in places of direct sunlight • in dusty places • outdoors • in liquids, such as water, oil, or organic solvents, and medical fluids, or places where these liquids may adhere • in salty air or in places where chemically ac...
Page 10
X notes on export management this product and its manuals may require an export license/approval by the government of the product's country of origin for re-export from your country. Before re-exporting the product or manuals, please contact us to confirm whether they are export-controlled items or ...
Page 11
Xi software end-user license agreement (eula) please read this software end-user license agreement (hereafter this eula) carefully before using (includes executing, copying, registering, etc.) this software (includes programs, databases, scenarios, etc., used to operate, set, etc., anritsu electroni...
Page 12
Xii 4. Export restrictions you may not use or otherwise export or re-export directly or indirectly this software except as authorized by japanese and united states law. In particular, this software may not be exported or re-exported (a) into any japanese or us embargoed countries or (b) to anyone on...
Page 13
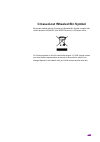
Xiii crossed-out wheeled bin symbol equipment marked with the crossed-out wheeled bin symbol complies with council directive 2002/96/ec (the “weee directive”) in european union. For products placed on the eu market after august 13, 2005, please contact your local anritsu representative at the end of...
Page 14
Xiv notice the following actions are strictly prohibited for all of the software installed in this product or otherwise provided by anritsu: 1. Copying, except for archival purposes. 2. Transferring to a third party separately from this product. 3. Analyzing the incorporated software including but n...
Page 15: Ce Conformity Marking
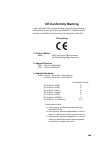
Xv ce conformity marking anritsu affixes the ce conformity marking on the following product(s) in accordance with the council directive 93/68/eec to indicate that they conform to the emc and lvd directive of the european union (eu). Ce marking 1. Product model model: mg3710a vector signal generator ...
Page 16
Xvi harmonic current emissions: en 61000-3-2: 2006 +a1:2009 a2:2009 : no limits apply for this equipment with an active input power under 75 w. • lvd: en 61010-1: 2010 (pollution degree 2) 4. Authorized representative name: murray coleman head of customer service emea anritsu emea ltd. Address, city...
Page 17: C-Tick Conformity Marking
Xvii c-tick conformity marking anritsu affixes the c-tick mark on the following product(s) in accordance with the regulation to indicate that they conform to the emc framework of australia/new zealand. C-tick mark 1. Product model model: mg3710a vector signal generator mg3740a analog signal generato...
Page 18: About Eco Label
Xviii about eco label the label shown on the left is attached to anritsu products meeting our environmental standards. Details about this label and the environmental standards are available on the anritsu website at http://www.Anritsu.Com.
Page 19: About This Manual
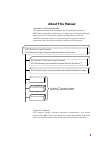
I about this manual composition of operation manuals the operation manuals for the mg3710a vector signal generator mg3740a analog signal generator are comprised as shown in the figure below. Details on the software application iqproducer tm and the standard waveform pattern are provided in each oper...
Page 20: Table of Contents
Ii table of contents for safety .................................................... Iii about this manual........................................ I chapter 1 outline ....................................... 1-1 1.1 product overview .......................................................... 1-2 1.2 p...
Page 21: 5-1
Iii chapter 5 output level .............................. 5-1 5.1 output level .................................................................. 5-2 5.2 output level setting method: level .............................. 5-7 5.3 output level setting item ............................................. ...
Page 22: 9-1
Iv chapter 9 other functions ........................ 9-1 9.1 auxiliary function .......................................................... 9-2 9.2 power meter .................................................................. 9-3 9.3 alarm history ......................................................
Page 23: D-1
V appendix d performance test report form ................................................. D-1 appendix e remote control ....................... E-1 appendix f native device message details ................................................. F-1 appendix g scpi compatible command .. G-1 appendix h pa...
Page 24
Vi..
Page 25
Chapter 1 outline 1-1 this section provides an outline of the product and describes the product composition. 1.1 product overview ......................................................... 1-2 1.2 product configuration ................................................... 1-3 1.2.1 standard configurati...
Page 26: 1.1 Product Overview
Chapter 1 outline 1-2 1.1 product overview the mg3710a is a vector signal generator that includes an arbitrary waveform generator. It can be used for a wide range of applications, from r&d to manufacturing of digital mobile communication systems, devices, and equipment. The mg3710a has the following...
Page 27
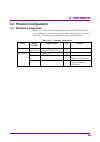
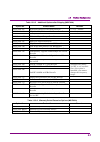
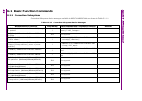
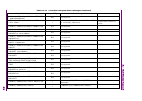
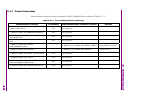
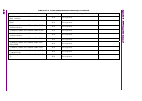
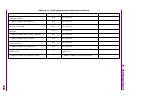
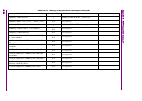
1.2 product configuration 1-3 1.2 product configuration 1.2.1 standard configuration table 1.2.1-1 lists the standard composition of the mg3710a/mg3740a. At unpacking, check that all items are included. If anything is missing or damaged, contact anritsu corporation or one of its distributors. Table ...
Page 28: 1.2.2 Options
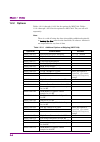
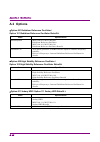
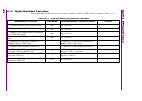
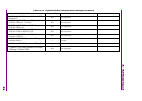
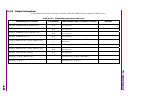
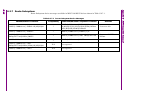
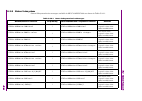
Chapter 1 outline 1-4 1.2.2 options tables 1.2.2-1 through 1.2.2-3 list the options for mg3710a. Tables 1.2.2-4 through 1.2.2-6 list the options for mg3740a. They are all sold separately. Note: there is a risk of losing the data when adding additional option(s), so back up the data stored on the har...
Page 29
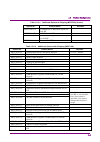
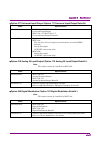
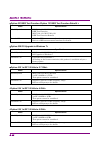
1.2 product configuration 1-5 table 1.2.2-1 additional options at shipping (mg3710a) (cont'd) option no. Product name remarks mg3710a-078 combination of baseband signal for 2nd rf mg3710a-079 awgn for 2nd rf mg3710a-080 additional analog modulation input for 2nd rf mg3710a-313 removable hdd table 1....
Page 30
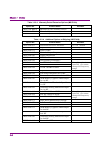
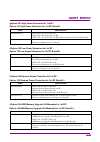
Chapter 1 outline 1-6 table 1.2.2-3 warranty period extension options (mg3710a) option no. Product name remarks mg3710a-es210 extended 2-year warranty service mg3710a-es310 extended 3-year warranty service mg3710a-es510 extended 5-year warranty service table 1.2.2-4 additional options at shipping (m...
Page 31
1.2 product configuration 1-7 table 1.2.2-5 additional options after shipping (mg3740a) option no. Product name remarks mg3740a-101 rubidium reference oscillator retrofit ±1 × 10 -10 /month mg3740a-102 high stability reference oscillator retrofit ±1 × 10 -7 /year mg3740a-111 2ndary hdd retrofit mg37...
Page 32: 1.2.3 Applicable Parts
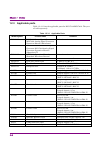
Chapter 1 outline 1-8 1.2.3 applicable parts table 1.2.3-1 lists the applicable parts for mg3710a/mg3740a. They are all sold separately. Table 1.2.3-1 applicable parts model/symbol product name remarks w3580ae mg3710a vector signal generator mg3740a analog signal generator operation manual (mainfram...
Page 33
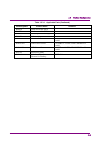
1.2 product configuration 1-9 table 1.2.3-1 applicable parts (continued) model/symbol product name remarks b0635a rack mount kit (eia) b0657a rack mount kit (jis) b0636a carrying case (hard type) with casters b0645a soft carrying case ma24106a usb power sensor (50 mhz to 6 ghz, with usb/mini b cable...
Page 34
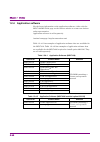
Chapter 1 outline 1-10. 1.2.4 application software for the latest information on the application software, either visit the mg3710a/mg3740a page on the anritsu website or contact an anritsu sales representative. Application software is sold separately. Anritsu homepage: http://www.Anritsu.Com/ table...
Page 35
Chapter 2 preparation 2-1 this section describes items that you should know before using the mg3710a/mg3740a. Be sure to read this section at least once as it contains safety tips and cautions for avoiding equipment failure during use. 2.1 installation location .........................................
Page 36: 2.1 Installation Location
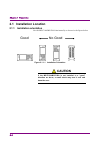
Chapter 2 preparation 2-2 2.1 installation location 2.1.1 installation orientation set the mg3710a/mg3740a horizontally as shown in the figure below. Good no good figure 2.1.1-1 installation orientation caution if the mg3710a/mg3740a is not installed in a “good” direction as above, a small shock may...
Page 37
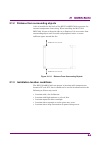
2.1 installation location 2-3 2.1.2 distance from surrounding objects a fan is installed at the back of the mg3710a/mg3740a to prevent the internal temperature from rising. When installing the mg3710a/ mg3740a, be sure to keep its sides at a distance of 10 cm or more from surrounding objects such as...
Page 38: 2.2.1 Safety
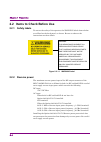
Chapter 2 preparation 2-4 2.2 items to check before use 2.2.1 safety labels to ensure the safety of the operator, the warning labels shown below are affixed on the back panel, as shown. Be sure to observe the instructions on these labels. Figure 2.2.1-1 warning label 2.2.2 reverse power the maximum ...
Page 39: 2.2.3 Electrostatic
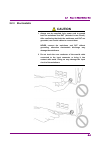
2.2 items to check before use 2-5 2.2.3 electrostatic caution 1 always use the supplied 3-pin power cord to ground both the mainframe and dut (included in test circuit). After confirming that both the mainframe and dut are grounded, use coaxial cables to connect them. Never connect the mainframe and...
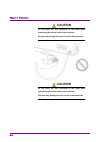
Page 40: Caution
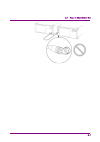
Chapter 2 preparation 2-6 caution do not touch the core conductor to the metal when connecting the coaxial cable to the connector. Doing so may damage the input circuit of the mainframe. Caution do not touch the core conductor to the metal when connecting the coaxial cable to the connector. Doing so...
Page 41
2.2 items to check before use 2-7.
Page 42: 2.3 Power Connection
Chapter 2 preparation 2-8 2.3 power connection this section describes the procedures for supplying power. 2.3.1 power requirements for normal operation of the instrument, observe the power voltage range described below. Power supply voltage range frequency 100 vac system 100 to 120 v 50 to 60 hz 200...
Page 43: 2.3.2 Connecting
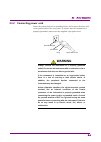
2.3 power connection 2-9 2.3.2 connecting power cord insert the power plug into a grounded outlet, and connect the other end to the power inlet on the rear panel. To ensure that the instrument is properly grounded, always use the supplied 3-pin power cord. G round terminal 3-pin power cord g round p...
Page 44: Caution
Chapter 2 preparation 2-10. Caution if an emergency arises causing the instrument to fail or malfunction, disconnect the instrument from the power supply by disconnecting either end of the power cord. When installing the instrument, arrange the power inlet and outlet so that an operator may easily c...
Page 45
Chapter 3 operation 3-1 this chapter describes information you should know to operate the mg3710a/mg3740a, including names of parts and how to set basic parameters. Note on remote command: when the language mode is scpi, the target sg can be selected with the beginning node of commands for controlli...
Page 46: 3.1 Part Names
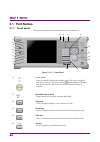
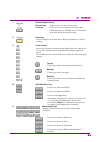
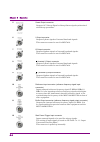
Chapter 3 operation 3-2 3.1 part names 3.1.1 front panel this section describes the front-panel keys and connectors. 2 1 3 4 17 6 8 9 11 10 12 19 14 18 20 13 16 5 7 15 figure 3.1.1-1 front panel 1 power switch press to switch between the standby state (ac power supplied) and power-on state. The powe...
Page 47
3.1 part names 3-3 7 remote lamp/local key remote lamp lights when in remote-control state local key press to reset the remote-control state with gpib, ethernet, or usb (b) to the local-control state and enable the panel setting. 8 preset key press to display the preset menu. Resets parameters to in...
Page 48
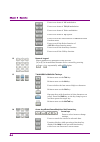
Chapter 3 operation 3-4 press to set items of am modulation. Press to set items of fm/φm modulation. Press to set items of pulse modulation. Press to set items of i/q signals. Press to recall the load function of arb/waveform function menu. Press to recall the select function of arb/waveform functio...
Page 49
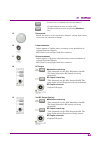
3.1 part names 3-5 press to set a resolution for each parameter. Context:behaves same as right-click. Windows:behaves same as pressing windows key. 15 rotary knob rotate the knob to select an item or change a setting. Spin faster to increase the amount of change. 16 i input connector inputs signals ...
Page 50
Chapter 3 operation 3-6 20 usb connector (type a) connect the accessory usb keyboard, mouse or usb memory..
Page 51: 3.1.2 Rear Panel
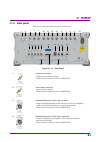
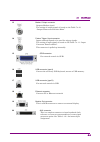
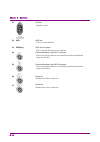
3.1 part names 3-7 3.1.2 rear panel this section describes the rear-panel connectors. 7 2 3 4 5 6 1 8 9 13 14 12 11 10 16 15 19 18 17 22 23 20 21 24 25 26 27 figure 3.1.2-1 rear panel 1 local input connector outputs external local signal. This connector cannot be used in mg3740a. 2 local output conn...
Page 52
Chapter 3 operation 3-8 5 sweet output connector outputs 10 v sweep signal or sweep status signal synchronized with sweep operations. 6 i output connector outputs i-phase signals of internal baseband signals. This connector cannot be used in mg3740a. 7 q output connector outputs q-phase signals of i...
Page 53
3.1 part names 3-9 13 marker1 output connector outputs marker signal. The setting of output signals is based on the table 7.4.2-1 “output connectors function menu”. 14 pattern trigger1 input connector inputs external signals to be used for trigger signals. The setting of input signals is based on th...
Page 54
Chapter 3 operation 3-10 21 ac inlet supplies power. 22 hdd hdd slot this is a hard disk slot. 23 hdd(opt) hdd slot for options this is a hard disk slot for the options. 24 external modulation input sg1 connector this is an option connector for additional analog modulation input for the sg1. 25 exte...
Page 55
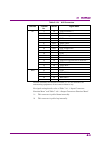
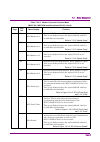
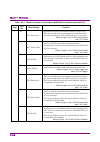
3.1 part names 3-11 table 3.1.2-1 aux connectors function terminal no. In/out signal name sg 2 in pattern status1 * 2 6 gnd 15 in pattern trigger3/pattern status3 * 2 16 gnd 26 gnd 27 out pulse video 28 out pulse sync 29 out sync trigger out 31 gnd 36 gnd 38 out marker 2 39 out marker 3 40 in patter...
Page 56: 3.2 Power On/off
Chapter 3 operation 3-12 3.2 power on/off 3.2.1 power on the procedure for turning the power on is as follows: 1. Connect the jack-side end of power cord to the ac power inlet on the rear panel. Plug in the cord deep into the inlet. 2. Connect the plug-side end of power cord to the ac power outlet. ...
Page 57: 3.2.2 Power Off
3.2 power on/off 3-13 3.2.2 power off the procedure for turning the power off is as follows: to use panel keys to turn the power off: 1. When you press the power switch, the applications start closing, shutdown starts, the lamp (green) of the power switch goes off, lamp lights orange, and the power ...
Page 58
Chapter 3 operation 3-14 restoring parameters after the power on, parameters are restored to the state of the last time the power was off or the state of defaults setting..
Page 59: 3.3 Screen Layout
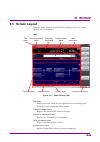
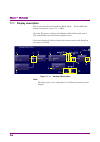
3.3 screen layout 3-15 3.3 screen layout after the power turns on and self check completes, the basic screen (figure 3.3-1) is displayed. 1sg: function menu frame footer frame function display common indicator frame frequency information f level information active function frame title frame resident...
Page 60
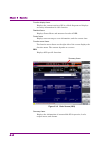
Chapter 3 operation 3-16 function display frame displays the current setting of sg in a block diagram and displays necessary information for each function. Resident frame displays power meter and measured results of ber. Footer frame displays error messages, error information, and the current time. ...
Page 61
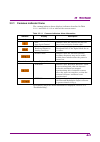
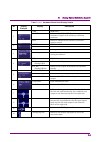
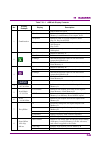
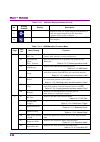
3.3 screen layout 3-17 3.3.1 common indicator frame the common indicator frame displays indicators described in table 3.3.1-1 and table 3.3.1-2 to indicate the current status. Table 3.3.1-1 common indicators alarm information indicator display description alarm information may be displayed even when...
Page 65
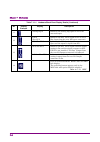
3.3 screen layout 3-21 table 3.3.1-2 common indicator status information status information arb indicates that the arb function is being used. Sweep indicates that the sweep function is being used. Am indicates am modulation is being executed. Fm indicates fm modulation is being executed. φΜ indicat...
Page 66
Chapter 3 operation 3-22 3.3.2 frequency information frame the frequency information frame displays the information of frequencies. There are two modes: frequency display and channel display. Refer to chapter 4 “frequency”. Figure 3.3.2-1 frequency information frame (frequency display) figure 3.3.2-...
Page 67
3.3 screen layout 3-23 3.3.4 active function frame on the active function frame, you can enter numbers and characters for setting all parameters. When you select a parameter on the function menu, a dialog box is displayed. This frame is not displayed when there is no parameter to be set or when it i...
Page 68
Chapter 3 operation 3-24 displays available characters. The character selection cursor and the mouse can be used for input. Refer to 3.5.2 “setting character strings”. Note: character types available for file names and for names other than file names are different..
Page 69
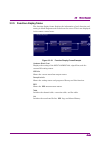
3.3 screen layout 3-25 3.3.5 function display frame the function display frame displays the information of each function and setting in block diagrams and controls on the screen. This is not displayed in the remote-control state. Figure 3.3.5-1 function display frame example hardware block chart dis...
Page 70
Chapter 3 operation 3-26 table 3.3.5-1 keys available for creating and editing lists and tables key name function rotary knob clockwise moves the cursor from the left top to the right bottom sequentially. Counter clockwise moves the cursor in reverse to the above. Moves the cursor horizontally. Move...
Page 71: 3.3.6 Resident Frame
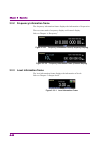
3.3 screen layout 3-27 3.3.6 resident frame the resident frame displays parameters of arb, power meter, ber setting, and measured results. 2 1 3 4 6 5 7 8 9 10 12 11 figure 3.3.6-1 resident frame arb (refer to table 7.1.1-2 “resident display frame arb”.) 1 arb on/off information 2 displays the combi...
Page 72: 3.3.7 Footer Frame
Chapter 3 operation 3-28 3.3.7 footer frame the footer frame displays reasons and time of error messages or error information of indicators. Figure 3.3.7-1 footer frame 1 displays the error message id. 2 displays the error message. (ex: data out of range) 3 displays the error information (cause of t...
Page 73
3.3 screen layout 3-29 3.3.8 function menu frame the function menu frame is displayed on the right side of the screen and contains the following items. Items on the menu depend on the screen. Function menu name others displays the current function menu name. Top key press to open the top function me...
Page 74
Chapter 3 operation 3-30 • function key without a symbol. There are 2 types. The function key with multiple options: each time you press the function key, the underline of option moves in the function menu. Figure 3.3.8-3 function key without a symbol the function key to execute operation immediatel...
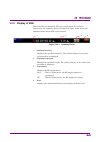
Page 75: 3.3.9 Display Of 2Sg
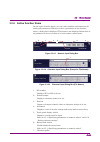
3.3 screen layout 3-31 3.3.9 display of 2sg when two sgs are installed, sg that is not selected for control is displayed in the summary frame as below. The figure below shows the summary frame when sg2 is not selected. Figure 3.3.9-1 summary frame 1 displayed frequency displays the specified frequen...
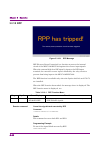
Page 76: 3.3.10 Rpp
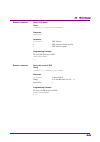
Chapter 3 operation 3-32 3.3.10 rpp figure 3.3.10-1 rpp message rpp (reverse power protection) is a function to protect the internal circuit of the mg3710a/mg3740a against the reverse input signals. When the external high level rf signal is input to the rf output terminal, the excessive reverse inpu...
Page 78: 3.4 Top Function Menu
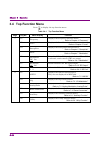
Chapter 3 operation 3-34 3.4 top function menu press to display the top function menu. Table 3.4-1 top function menu page key no. Menu display function 1 f1 frequency displays the frequency function menu. Refer to chapter 4 “frequency” f2 level displays the level function menu. Refer to chapter 5 “l...
Page 79: 3.4.1 Modulation
3.4 top function menu 3-35 3.4.1 modulation or top>modulation turns on/off the rf signal modulation . Press f6 modulation to set the sg output signal modulation to on/off. This behaves same as mod on/off on the front panel. Off turns the modulation of sg output signals off (no modulation, default). ...
Page 80: 3.4.2 Rf Output
Chapter 3 operation 3-36 3.4.2 rf output or top>rf output enables/disables the rf signal output. Press f7 rf output to turn the output of sg signals on/off. When rf output is on, the sg on/off led (yellow) on the front panel and "rf" display of the output status (yellow) in the level information fra...
Page 81: 3.4.3 Sg Port
3.4 top function menu 3-37 3.4.3 sg port or top>sg port selects the sg to be controlled. Press f8 sg port to select sg to be controlled. This is available when sg2 (option 062/162, 064/164, 066/166) is installed. These behave same as sg1 and sg2 on the front panel. 1 controls sg1 (default). 2 contro...
Page 82
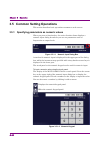
Chapter 3 operation 3-38 3.5 common setting operations this section describes basic operations common to each screens. 3.5.1 specifying parameters as numeric values when you press a function key, the active function frame displays a numeric input dialog box where you can set parameters such as frequ...
Page 83
3.5 common setting operations 3-39 to input a numeric value using the numeric keypad: when you enter a numeric value using the numeric keypad, the value you entered is displayed in the text box. After inputting a numeric value, press the enter, enter item, or unit key on the function menu to finaliz...
Page 84
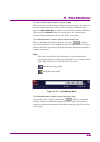
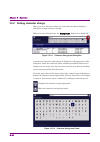
Chapter 3 operation 3-40 3.5.2 setting character strings when you set a character string, the active function frame displays a dialog box to input character strings. When you enter group name, the group name dialog box is displayed. Figure 3.5.2-1 character string input dialog box a text box for cha...
Page 85
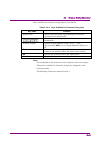
3.5 common setting operations 3-41 keys available for character string input are as follows: table 3.5.2-2 keys available for character string input key name function rotary knob moves character string input pallet/panel character selection cursor horizontally arrow keys, moves character string inpu...
Page 86
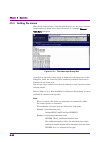
Chapter 3 operation 3-42 3.5.3 setting file names when a file name such as a channel table must be set, the active function frame displays a dialog box to input file names, for example channel table save dialog box. Figure 3.5.3-1 file name input dialog box a text box for character string input is d...
Page 88
Chapter 3 operation 3-44..
Page 89
Chapter 4 frequency 4-1 this chapter describes the functions for setting frequencies. Note on remote command: when the language mode is scpi, the target sg can be selected with the beginning node of commands for controlling individual functions. Refer to appendix e, 7.6 “selecting sg1/2” for details...
Page 90: 4.1 Frequency
Chapter 4 frequency 4-2 4.1 frequency or top>frequency when you press frequency of the main function key or f1 frequency on the top function menu, the mg3710a/mg3740a becomes the frequency setting mode and the frequency or channel dialog box is displayed in the active function frame. The frequency f...
Page 91
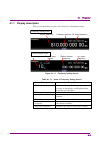
4.1 frequency 4-3 4.1.1 display description this section describes screens of the frequency information frame. Frequency display mode: channel display mode: display frequency frequency indicator channel rf output frequency display channel frequency rf output frequency channel group number figure 4.1...
Page 92
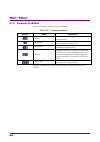
Chapter 4 frequency 4-4 4.1.2 frequency indicator items of frequency indicators are as follows: table 4.1.2-1 frequency indicator display name description offset indicates that the frequency offset function is on. Reference indicates that the frequency relative value display function is on. Multipli...
Page 94
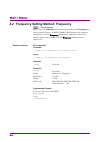
Chapter 4 frequency 4-6 4.2 frequency setting method: frequency or top>frequency when you press frequency of the main function key or f1 frequency on the top function menu, the mg3710a/mg3740a becomes the frequency setting mode and the frequency dialog box is displayed in the active function frame. ...
Page 95: 4.2.1 Frequency Setting
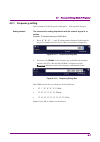
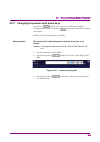
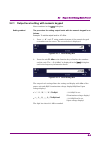
4.2 frequency setting method: frequency 4-7 4.2.1 frequency setting enter numbers in the frequency dialog box. With numeric keypad setting method the procedure for setting frequencies with the numeric keypad is as follows. Example: to set the frequency to 360.3 mhz 1. Press “ 3”, “6”, “0”, “.”, and ...
Page 96
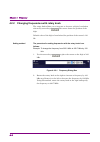
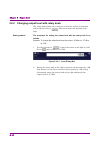
Chapter 4 frequency 4-8 4.2.2 changing frequencies with rotary knob the rotary knob allows you to increase or decrease a digit of resolution selected by arrow keys . The cursor shows the position of the digit. Default value of the digit of resolution (the position of the cursor): 0.01 hz. Setting me...
Page 97
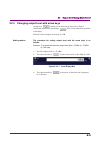
4.2 frequency setting method: frequency 4-9 4.2.3 changing frequencies with arrow keys arrow keys enable you to increase or decrease a digit of resolution selected by arrow keys . The cursor shows the position of the digit. Default value of frequency step: 100 khz setting method the procedure for se...
Page 98
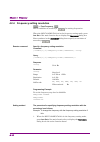
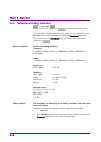
Chapter 4 frequency 4-10 4.2.4 frequency setting resolution or top>frequency sets a resolution of arrow keys for setting frequencies. When the mg3710a/mg3740a is in the frequency setting mode, press incr set of the main function key to display the increment dialog box. Enter numbers in the increment...
Page 99
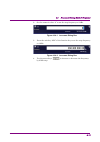
4.2 frequency setting method: frequency 4-11 2. Set the numeric value “9” to set the step frequency to 9 khz. Figure 4.2.4-1 increment dialog box 3. Press the unit key “khz” of the function key to set the step frequency to 9 khz. Figure 4.2.4-2 increment dialog box 4. Use the arrow keys to increase ...
Page 100
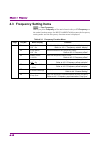
Chapter 4 frequency 4-12 4.3 frequency setting items or top>frequency when you press frequency of the main function key or f1 frequency on the main function menu, the mg3710a/mg3740a becomes the frequency setting mode and the frequency function menu is displayed. Table 4.3-1 frequency function menu ...
Page 101
4.3 frequency setting items 4-13 table 4.3-1 frequency function menu (cont’d) page key no. Menu display function 2 f1 phase noise opt. 300 khz sets the phase noise optimization. Refer to 4.6.2 “phase noise optimization: phase noise optimize”. F2 rf spectrum normal reverse inverts the spectrum of rf ...
Page 102
Chapter 4 frequency 4-14 4.3.1 frequency relative display or top>frequency, >freq ref: freq ref enables/disables the frequency relative display. The frequency relative display shows a difference from the reference output frequency. When you turn the frequency relative display from off to on, a diffe...
Page 103
4.3 frequency setting items 4-15 programming example to enable the frequency relative display. Freq:ref:stat on freq:ref:stat? > 1.
Page 104: 4.3.2 Frequency Offset
Chapter 4 frequency 4-16 4.3.2 frequency offset freq offset or top>frequency,>freq offset enables/disables the frequency offset. When the frequency offset is on, the frequency offset value specified with f3 offset value is added to the display frequency, and the actual output frequency is displayed ...
Page 105
4.3 frequency setting items 4-17 frequency offset value: offset value or top>frequency,>offset value sets the frequency offset value. Press f3 offset value to set a frequency offset value in the offset value dialog box in the active function frame. Setting range –200 ghz to 200 ghz resolution 0.01 h...
Page 106
Chapter 4 frequency 4-18 4.3.3 frequency offset multiplier frequency offset multiplier: freq multiplier or top>frequency, >freq multiplier sets a frequency offset multiplier. When this function is on, the actual output frequency is multiplied by a frequency offset multiplier and the result is displa...
Page 107
4.3 frequency setting items 4-19 programming example to enable the frequency offset multiplier. Freq:mult:stat 1 freq:mult:stat? > 1 frequency offset multiplier: multiplier value or top>frequency, >multiplier value sets the value of the frequency offset multiplier. Press f5 multiplier value to set a...
Page 108: 4.4 Channel Setting
Chapter 4 frequency 4-20 4.4 channel setting or top>frequency, >channel settings when you press frequency of the main function key or f1 frequency on the main function menu, the mg3710a/mg3740a becomes the frequency setting mode. When you press f7 channel settings on the frequency function menu, the...
Page 109
4.4 channel setting 4-21 4.4.1 frequency/channel display: display or top>frequency, >channel settings >display selects either frequency or channel for inputting and displaying the rf frequency. Press f1 display on the channel settings function menu to switch “freq” and “channel”. Freq frequency disp...
Page 110
Chapter 4 frequency 4-22 4.4.2 frequency display: frequency or top>frequency, >channel settings>frequency displays/hides the frequency when a channel number is displayed on the screen. This function is available only in the channel setting mode. Press f2 frequency on the channel settings function me...
Page 111
4.4 channel setting 4-23 4.4.3 channel selection: channel or top>frequency, >channel settings>channelsets a channel specified in the channel table. This function is available only in the channel setting mode. Press f3 channel on the channel settings function menu to set a channel in the channel dial...
Page 112
Chapter 4 frequency 4-24 next channel group. This rule, however, does not apply to the end channel number of the end channel group. If the rotary knob is turned counterclockwise or is pressed with the start channel number selected, the cursor moves to the end channel of the previous channel group. T...
Page 113: 4.4.4 Channel Group
4.4 channel setting 4-25 4.4.4 channel group or top>frequency, >channel settings>channel group sets a channel group specified in the channel table. This function is available only in the channel setting mode. Press f4 channel group on the channel settings function menu to display the channel group f...
Page 114
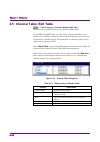
Chapter 4 frequency 4-26 4.5 channel table: edit table or top>frequency, >channel settings>edit table this function is available only in the channel setting mode. On the mg3710a/mg3740a, you can assign a channel number to any frequency. In addition, channels with a certain frequency interval can be ...
Page 115
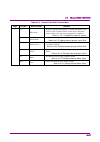
4.5 channel table: edit table 4-27 table 4.5-2 channel table edit function menu page key no. Menu display function 1 f1 edit item displays input dialog boxes for items selected by the cursor in the channel table of the active function frame where you can enter appropriate numbers. Refer to 4.5.1 “re...
Page 117
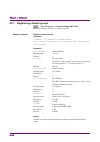
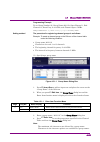
4.5 channel table: edit table 4-29 programming example to set group number 03: group name 802.11b, start channel 1, end channel 13, start freq. 2.412 ghz, and channel space 5 mhz. Freq:chan:edit 3,”802.11b”,1,13,2.412ghz,5mhz setting method the procedure for registering channel groups is as follows:...
Page 118
Chapter 4 frequency 4-30 the following restrictions apply to group names with long character strings: channel setting,channel group function menus if the display range is exceeded, the display is zoomed-out. If the display range is still exceeded after zooming-out, the out-of-range parts are omitted...
Page 119
4.5 channel table: edit table 4-31 7. Use the numeric keypad to enter “13” in the end number dialog box. 8. Press f1 enter item to set the end channel in the channel table and close the end number dialog box. Note: the channel setting ranges 0 to 20000. The end channel, however, must be set to a num...
Page 120
Chapter 4 frequency 4-32 5. Place the cursor on the “channel spacing” of the first row. 6. Press f1 edit item to display the channel spacing dialog box in the active function frame. Settable range 1 hz to 999.999999 mhz resolution 1 hz default 16 khz 7. Use the numeric keypad to enter “5” in the cha...
Page 121
4.5 channel table: edit table 4-33 4.5.2 adding channel groups: insert row or top>frequency, >channel settings>edit table>insert row adds a row to create a channel group. Use the following procedure to add a row using f2 insert row. • when editing by creating a new setting, a row is added to the top...
Page 122
Chapter 4 frequency 4-34 4.5.3 deleting channel groups: delete row or top>frequency, >channel settings>edit table>delete row deletes the selected channel group. Use the cursor to select a group to delete, and press f3 delete row to delete it. Remote command delete a channel group command [:source[1]...
Page 125
4.5 channel table: edit table 4-37 figure 4.5.5-1 channel table recall dialog box 4. Use the rotary knob or arrow keys to select a channel table file to recall. 5. Press f7 open to recall the selected channel table file. Press f8 chancel to return to the previous screen without recall the channel ta...
Page 127
4.5 channel table: edit table 4-39 1. Press f8 save to open the save function menu. Table 4.5.6-1 channel table save function menu page key no. Menu display function 1 f1 drive c: specifies a drive where the channel table is saved. F4 change focus moves the cursor between dialog box and file list. F...
Page 128
Chapter 4 frequency 4-40 the maximum 100 characters are allowed for a file name. Destination path: anritsu\mg3710a\user data\channeltable\ default destination name: channel_[date]_[additional number].Ch the additional number will be the minimum three-digit numerical number within 000 to 999 which do...
Page 129
4.6 frequency-related functions 4-41 4.6 frequency-related functions when you press frequency of the main function key or f1 frequency on the main function menu, the mg3710a/mg3740a becomes the frequency setting mode. This section assumes that you press frequency and the mg3710a/mg3740a is in the fr...
Page 130
Chapter 4 frequency 4-42 frequency synchronization on/off: freq sync or top>frequency, >freq sync>freq sync with sg enables/disables the frequency synchronization of sg1 and sg2. Press f1 freq sync on the freq sync function menu to set the frequency synchronization of sg1 and sg2. Off does not synch...
Page 131
4.6 frequency-related functions 4-43 frequency synchronization: freq sync mode or top>frequency, >freq sync>freq sync mode sets a frequency synchronization mode when freq sync with sg is on. Press f2 freq sync mode on the freq sync function menu to set values. Parallel parallel mode (default) when y...
Page 132
Chapter 4 frequency 4-44 4.6.2 phase noise optimization: phase noise optimize or top>frequency, > > phase noise opt. Switching a loop character of pll synthesizer circuit allows you to select a character of phase noise between close-in phase and wide-offset phase. Press to switch the function menu t...
Page 133
4.6 frequency-related functions 4-45 4.6.3 spectrum reverse: rf spectrum or top>frequency, > > rf spectrum you can use the spectrum reverse function when reversed modulation signals must be input, for example evaluating dut for if. In mg3740a, you can use the spectrum reverse function only when opti...
Page 134
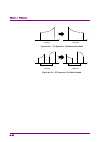
Chapter 4 frequency 4-46 f normal f reverse figure 4.6.3-1 rf spectrum: two waves not added f normal f reverse freqoffset freqoffset figure 4.6.3-2 rf spectrum: two waves added.
Page 135
4.6 frequency-related functions 4-47 4.6.4 reference oscillator reference oscillator: ref source or top>frequency, > > ref source sets reference frequency source. Press to switch the function menu to page 2. Press f3 ref source to select a reference frequency source between int and auto. The “extref...
Page 136
Chapter 4 frequency 4-48 external signal frequency: ref freq or top>frequency, > > ref freq set a frequency of external reference signal for the mg3710a/mg3740a. When an external signal is used for a reference signal source, the frequency of the external signal must be set for the mg3710a/mg3740a. P...
Page 137
4.6 frequency-related functions 4-49 4.6.5 local signal source local signal source: lo source or top>frequency, > > lo source sets a local signal source. This is available when the mg3710a-017/117 is installed. This is not available in mg3740a. This is an independent parameter for each sg. It can be...
Page 138
Chapter 4 frequency 4-50 programming example to set a local signal source to the external local signal source. Loc:sour ext loc:sour? > ext local signal output: lo out or top>frequency, > > lo out selects the external output of local signal between on and off. This is available when the 017/117 is i...
Page 141
4.6 frequency-related functions 4-53 4.6.6 ref clock adjustment or top>frequency, > >ref clock adjustment used for frequency calibration. For the calibration method, refer to 11.4 “calibration”. Press to switch the function menu to page 2. Press f8 ref clock adjustment to display the freq adjustment...
Page 142
Chapter 4 frequency 4-54. Remote command set the adjustment value of the internal reference frequency signals command :calibration:rclock[:value] query :calibration:rclock[:value]? Response parameter adjustment value setting range 0 to 1023 resolution 1 default factory shipment defaults programming ...
Page 143
Chapter 5 output level 5-1 this chapter describes the functions related to the level setting. Note on remote command: when the language mode is scpi, the target sg can be selected with the beginning node of commands for controlling individual functions. Refer to appendix e, 7.6 “selecting sg1/2” for...
Page 144: 5.1 Output Level
Chapter 5 output level 5-2 5.1 output level or top>level when you press level of the main function key or f2 level on the top function menu, the mg3710a/mg3740a enters the output level setting mode and the level dialog box is displayed in the active function frame. This section assumes that you pres...
Page 145: 5.1.1 Display
5.1 output level 5-3 5.1.1 display description or top>level this section describes screens of the level information frame. Displayed output level level indicator output status display rf output level figure 5.1.1-1 output level setting screen table 5.1.1-1 output level setting screen display item di...
Page 146
Chapter 5 output level 5-4 example of use to query the actual output level. Pow:curr? > 10.00
Page 147: 5.1.2 Level
5.1 output level 5-5 5.1.2 level indicator shows the display items of the level indicator. Table 5.1.2-1 level indicator display name description level offset indicates the level offset function is on. Reference indicates the relative level display function is on. Attenuator hold indicates the att h...
Page 149
5.2 output level setting method: level 5-7 5.2 output level setting method: level or top>level when you press level of the main function menu or f2 level on the top function menu, the level dialog box is displayed in the active function frame. Enter numbers in the level dialog box to set levels. Rem...
Page 150
Chapter 5 output level 5-8 parameter output level unit dbm dbm (default) dbuv db v (termination voltage display) dbuvemf db vemf (open voltage display) details only the unit changes. Example of use to set the level setting unit to db vemf (open voltage display). Unit:pow dbuvemf unit:pow? > dbuve...
Page 151
5.2 output level setting method: level 5-9 5.2.1 output level setting with numeric keypad enter numbers in the level dialog box. Setting method the procedure for setting output levels with the numeric keypad is as follows. Example: to set the output level to –47 dbm. 1. Press “–“, “4”, and “7” using...
Page 152
Chapter 5 output level 5-10 5.2.2 changing output level with rotary knob the rotary knob allows you to increase or decrease a digit of resolution selected by arrow keys . The cursor shows the position of the digit. Setting method the procedure for setting the output level with the rotary knob is as ...
Page 153
5.2 output level setting method: level 5-11 5.2.3 changing output level with arrow keys arrow keys enable you to increase or decrease a digit of resolution selected by arrow keys . The cursor shows the position of the digit. Default value of output level step: 0.1 db setting method the procedure for...
Page 154
Chapter 5 output level 5-12 5.2.4 output level setting resolution or top>level, sets a resolution of arrow keys for setting the output level. When the mg3710a/mg3740a is in the output level setting mode, press incr set of the main function key to display the increment dialog box. Enter numbers in th...
Page 155
5.2 output level setting method: level 5-13 2. Set 0.3 db. Figure 5.2.4-1 increment dialog box 3. Press f1 db to set the level setting resolution and return to the level dialog box. 4. Use the arrow keys to increase or decrease the frequency by 0.3 db step..
Page 156
Chapter 5 output level 5-14 5.3 output level setting item or top>level when you press level of the main function key or f2 level in the top function menu, the mg3710a/mg3740a enters the output level setting mode and the level function menu is displayed. Table 5.3-1 level function menu page key no. M...
Page 157
5.3 output level setting item 5-15 table 5.3-1 level function menu (cont’d) page key no. Menu display function 2 f6 start ber measurement starts the ber measurement. If measurestart is executed during measurement, the measurement is stopped once and restarted. It is displayed when the ber measuremen...
Page 158
Chapter 5 output level 5-16 5.3.1 relative level display: reference or top>level, >reference enables/disables the relative level display. The relative level display displays the output level difference from the reference output level. When you turn the relative level display from off to on, a differ...
Page 160
Chapter 5 output level 5-18 3. Set the relative level to 7.5 db. At this time the displayed level is also “7.50 db”, however, the actual level output from sg is –47 dbm + 7.5 db = –39.5 dbm as the rf output level..
Page 161
5.3 output level setting item 5-19 5.3.2 level offset: offset offset or top>level, >offset enables/disables the output level offset. When the frequency offset is on, the output level offset value specified with f3 offset value is added to the display output level, and the actual output level is disp...
Page 163
5.3 output level setting item 5-21 setting method the output offset level setting procedure is as follows. Example: to set for the offset level to be –1.7 db and output level after offset to be –47 dbm. 1. Press f3 offset value to display the offset value dialog box in the active function frame. Dis...
Page 164: 5.3.3 Output Level Limit
Chapter 5 output level 5-22 5.3.3 output level limit output level limit: limit level or top>level, >limit level enables/disables the limit level function to limit the output level. Press f4 limit level to set the limit level function to on/off. Selecting “on” displays “lmt” in the level indicator. O...
Page 165
5.3 output level setting item 5-23 output limit level: limit value or top>level, >limit value sets the output level limit value (limit level). Press f5 limit value to set the limit level in the limit value dialog box in the active function frame. Setting range rflevelmin + leveloffset + unitcoef to ...
Page 166
Chapter 5 output level 5-24 example of use to set the limit level to 30 dbm. Pow:user:max 30 pow:user:max? > 30.00 setting method the limit level setting procedure is as follows. Example: to set the limit level to 10 dbm. 1. Press f5 limit value to display the limit value dialog box in the active fu...
Page 167: 5.3.4 Att
5.3 output level setting item 5-25 5.3.4 att hold or top>level, >att hold enables/disables the att hold function to prevent the signal dropout on att switching. Press f7 att hold to set the att hold function to on. Off sets the att hold function to off(default). Signal dropouts occur on att switchin...
Page 169
5.3 output level setting item 5-27 5.3.5 level synchronization: sync or top>level, >sync enables/disables the function to synchronize the 1st sg with 2nd sg output level settings. It is used when the levels of sg1 and sg2 are to be changed simultaneously. This is available when the mg3710a/mg3740a-0...
Page 170: 5.3.6 Calibrate
Chapter 5 output level 5-28 5.3.6 calibrate level or top>level, > >calibrate level, or > calibrate level calibrates the output level. Pressing switches the function menu to the second page, and pressing f3 calibrate level calibrates the output level. In the normal operation status, signals with the ...
Page 171: 5.3.7 Optimize
5.3 output level setting item 5-29 5.3.7 optimize s/n or top>level, > >optimize s/n the function to improve the s/n of cw signals. When it is set to on, cw is output with s/n priority. When it is set to off, cw is output with distortion characteristic priority. When modulated waves are output, this ...
Page 172
Chapter 5 output level 5-30 5.4 user correction: correction or top>level, > >correction this function is to adjust the rf output level of arbitrary frequency points to correct the external loss or external gain. Interpolate the correction value linearly with a logarithm. When it becomes the value be...
Page 173
5.4 user correction: correction 5-31 press to switch the function menu to the second page, and press f1 correction to set the user correction function to on. Off sets the user correction function to off. (default) on sets the user correction set with f2 configure correction to on. The “corr” is disp...
Page 174
Chapter 5 output level 5-32 5.4.1 user correction setting: configure correction or top>level, > >configure correction sets the user correction value. Press to switch the function menu to the second page, and press f2 configure correction to display the correction table and correction function menu. ...
Page 175
5.4 user correction: correction 5-33 table 5.4.1-1 correction function menu page key no. Menu display function 1 f1 edit item sets the user correction table correction value. Refer to 5.4.2 “edit item”. F2 insert row adds the correction value to the user correction table. Refer to 5.4.3 “adding corr...
Page 177
5.4 user correction: correction 5-35 setting method the user correction value setting procedure is as follows. Example: to create a user correction table under the following conditions. frequency: 2.412 ghz correction value: 3 db (1) setting the frequency figure 5.4.2-1 frequency setting 1. Alig...
Page 178
Chapter 5 output level 5-36 3. Enter “2.412” of frequency to the frequency dialog box. 4. Press the unit f1 ghz on the function menu to set a frequency and close the correction table dialog box. At this time the order of user correction tables changes in the order of frequencies. In this case, moves...
Page 179
5.4 user correction: correction 5-37 5.4.3 adding correction data: insert row or top>level, > >configure correction>insert row inserts a row to add the correction value to the correction table. Press f2 insert row at the user correction function menu to copy only the frequency and add a correction d...
Page 180
Chapter 5 output level 5-38 5.4.4 deleting correction data: delete row or top>level, > >configure correction>delete row one row of the correction value of the correction table expanded in the memory is deleted. Press f3 delete row at the user correction function menu to delete the correction data of...
Page 183
5.4 user correction: correction 5-41 figure 5.4.6-1 correction recall dialog box 4. Use the rotary knob or arrow keys to select the user correction table file to recall. 5. Press f7 open to recall the selected user correction table file. Press f8 cancel to return to the previous screen without recal...
Page 185
5.4 user correction: correction 5-43 setting method the user correction table saving procedure is as follows. Example: to name the user correction table currently displayed as “w-lan” and save it. 1. Press f8 save to open the correction save function menu. Table 5.4.7-1 correction save function menu...
Page 186
Chapter 5 output level 5-44 note: when you input a file name, an extension is automatically added. You cannot specify an extension. The maximum 100 characters are allowed for a file name. Destination path: anritsu\mg3710a\user data\corrections\ default destination name: corr[date]_[additional number...
Page 187: 5.5 Use Power Sensor
5.5 use power sensor 5-45 5.5 use power sensor or top>level, > >configure correction>use power sensor the power sensor to be used for the user correction is set. Press f5 use power sensor in the correction function menu to open the usb power sensor function menu. Table 5.5-1 usb power sensor functio...
Page 188: 5.5.1 Connection
Chapter 5 output level 5-46 5.5.1 connection settings or top>level, > >configure correction>use power sensor >connection settings press f1 connection settings in the use power sensor function menu to open the pm connection function menu. Table 5.5.1-1 pm connection function menu page key no. Menu di...
Page 189
5.5 use power sensor 5-47 parameter com port number setting range 2 to 8 resolution 1 default 2 example of use to set the com port number of sg1 power sensor to 8. Corr:pmet:comm:usb:port 8 corr:pmet:comm:usb:port? > 8 model setting :model or top>level, > >configure correction>use power sensor >conn...
Page 191: 5.5.2 Settings
5.5 use power sensor 5-49 5.5.2 settings or top>level, > >configure correction>use power sensor >settings press f2 settings in the use power sensor function menu to open the settings function menu. Table 5.5.2-1 settings function menu page key no. Menu display function 1 f1 start freq 1.00000000000 ...
Page 192
Chapter 5 output level 5-50 start freq or top>level, > >configure correction>use power sensor >settings>start freq sets the start frequency when the correction table is created with the power sensor. Press f1 start freq in the settings function menu to display the start freq dialog box in the active...
Page 193
5.5 use power sensor 5-51 example of use to set the start frequency to 600 mhz. Corr:flat:step:star 600mhz corr:flat:step:star? > 600000000.00 stop freq or top>level, > >configure correction>use power sensor >settings>stop freq sets the stop frequency when the correction table is created with the po...
Page 194
Chapter 5 output level 5-52 level offset or top>level, > >configure correction>use power sensor >settings>level offset enables/disables the offset level adding for the power sensor reading. Press f3 level offset in the settings function menu to set the level offset on/off. Off does not add the offse...
Page 195
5.5 use power sensor 5-53 example of use to set the level offset to on. Corr:pmet:gain2:stat on corr:pmet:gain2:stat? > 1 level offset value or top>level, > >configure correction>use power sensor >settings>level offset value sets the offset level value to be added to the power sensor reading. Press ...
Page 196
Chapter 5 output level 5-54 correction points or top>level, > >configure correction>use power sensor>settings>correction points sets the measurement point number when the correction table is created with the power sensor. The measurement point interval is by the following: (start frequency – stop fr...
Page 197
5.5 use power sensor 5-55 averaging or top>level, > >configure correction>use power sensor >settings>averaging enables/disables the averaging for the measurement value with the power sensor. Pressing f6 averaging in the setting function menu sets the averaging. Off does not execute the averaging(def...
Page 198
Chapter 5 output level 5-56 averaging count or top>level,> >configure correction>use power sensor >settings>averaging count sets the averaging count for the measurement values with the power sensor. Press f7 averaging count in the settings function menu to display the averaging count dialog box in t...
Page 199: Caution
5.5 use power sensor 5-57 5.5.3 zero adjustment: zero sensor or top>level, > >configure correction>use power sensor >zero sensor executes the zero adjustment for the power sensor. Press f4 zero sensor in the use power sensor function menu to execute the zero adjustment for the power sensor. “zeroing...
Page 200
Chapter 5 output level 5-58 5.5.4 creating correction table: create correction file or top>level, > >configure correction>use power sensor >create correction file this connects the powersensor and creates the correction table. The correction table cannot be created if it is not executed when a usb p...
Page 201: Caution
5.5 use power sensor 5-59 example of use to create the correction table, confirms the execution status, and stops the execution. Corr:pmet:cre corr:pmet:stat? > 1 corr:pmet:cre:abor setting method example: to create the correction table. 1. Connect the usb terminal of the power sensor to the usb ter...
Page 202
Chapter 5 output level 5-60. 5. Press f6 create correction file in the usb power sensor function menu to output the cw signal from the mg3710a/mg3740a and sweep frequency between start frequency and stop frequency. The signal is received by the power sensor, and the difference from the mg3710a/mg374...
Page 203
Chapter 6 sweep/list 6-1 this chapter describes the operations and screen display of the sweep/list function. Note on remote command: when the language mode is scpi, the target sg can be selected with the beginning node of commands for controlling individual functions. Refer to appendix e, 7.6 “sele...
Page 204: 6.1 Sweep/list
Chapter 6 sweep/list 6-2 6.1 sweep/list function or top>sweep/list mg3710a/mg3740a has the sweep function for frequencies and levels to be changed within the specified range and the list function for frequencies and levels to be changed according to the list created with setting values in advance. T...
Page 205
6.1 sweep/list function 6-3 figure 6.1.1-2 sweep/list info dialog box (sweep type : “list”) table 6.1.1-1 sweep/list info display items type display description sweep /list sweep indicates items, frequency (freq), and level (lvl) to execute the sweep/list function. Sweep type distinguishes the sweep...
Page 206
Chapter 6 sweep/list 6-4 recalling sweep point being executed: current point this command recalls the sweep point being executed. Remote command query the current sweep point query [:source]:sweep:cpoint? [:source]:list:cpoint? Response parameter sweep point being executed programming example to rec...
Page 207: 6.2 Setting
6.2 setting item 6-5 6.2 setting item the sweep/list function menu is described below. Sweep/list function menu: sweep/list table 6.2.1-1 sweep/list function menu page key no. Menu display function 1 f1 sweep off opens the sweep mode function menu and sets the execution of sweep/list function. Refer...
Page 208
Chapter 6 sweep/list 6-6 6.2.1 setting operation item: sweep or top>sweep/list, >sweep selects the items (frequency and level) to be executed with the setting parameters of the sweep/list function. Press f1 sweep to display the sweep mode function menu. The parameters to execute the sweep/list funct...
Page 209
6.2 setting item 6-7 sweep/list function for frequency: freq or top>sweep/list, >sweep>frequency the sweep/list function for frequency is set. Press f2 freq to set the sweep/list function for frequency to on/off. On executes off stops (default) remote command enables/disables the sweep/list function...
Page 210
Chapter 6 sweep/list 6-8 sweep/list function for level:level or top>sweep/list, >sweep>level sets the sweep/list function for output level. Press f3 level to set the sweep/list function for output level to on/off. On executes off stops (default) remote command enables/disables the sweep/list functio...
Page 212: 6.2.3 Sweep
Chapter 6 sweep/list 6-10 6.2.3 sweep repeat or top>sweep/list, >sweep repeat selects the operation count for the sweep/list function from continuous/single. Press f3 sweep repeat to select. Cont continuous (default) single once (single) remote command select the operation count for the sweep/list f...
Page 213: 6.2.5 Sweep
6.2 setting item 6-11 remote command execute the sweep operation command :initiate[:immediate][:all] [:source]:tsweep programming example to execute the sweep operation. Init tsw 6.2.5 sweep direction or top>sweep/list, >sweep direction sets the execution order for sweep/list function. Press f5 swee...
Page 214: 6.2.6 Manual
Chapter 6 sweep/list 6-12 6.2.6 manual mode sets the method to move to the next point on sweep function and list function. Manual mode or top>sweep/list, > >manual mode enables/disables the manual mode on sweep function and list function. Press f1 manual mode in the second page of the sweep/list fun...
Page 215
6.2 setting item 6-13 manual point or top>sweep/list, > >manual point sets the sweep point manually on sweep function and list function. Press f2 manual point in the second page of the sweep/list function menu to display the manual point dialog box in the active function frame. Set the manual point....
Page 216: 6.2.7 Sweep
Chapter 6 sweep/list 6-14 6.2.7 sweep out or top>sweep/list, > >sweep out sets the signal (information) output from the sweepout terminal. To use this function, the general purpose input/output option is required. This function is unavailable when sweep/list type is set to sweep for sg2. Press f4 sw...
Page 218: 6.2.8 Trigger
Chapter 6 sweep/list 6-16 6.2.8 trigger out polarity or top>sweep/list, > >trigger out polarity sets the polarity of point trigger out signal. Note: for the output connector setting, refer to 7.4.2 “route output connectors”. Press f5 trigger out polarity in the second page of the sweep/list function...
Page 219
6.2 setting item 6-17 programming example to set the signal polarity to negative. Trig:outp:pol neg trig:outp:pol? > neg.
Page 220: 6.3 Sweep
Chapter 6 sweep/list 6-18 6.3 sweep function 6.3.1 configure step sweep or top>sweep/list, >configure step sweep execute the settings to execute the sweep function. Press f6 configure step sweep in the sweep/list function menu to display the sweep function menu. Table 6.3.1-1 sweep function menu pag...
Page 221
6.3 sweep function 6-19 sweep start frequency: freq start or top>sweep/list, >configure step sweep>freq start sets the start frequency of the sweep function. Press f1 freq start to display the freq start dialog box in the active function frame. Set the start frequency. Range same as the frequency se...
Page 222
Chapter 6 sweep/list 6-20 sweep stop frequency: freq stop or top>sweep/list, >configure step sweep>freq stopsets the stop frequency of the sweep function. Press f2 freq stop to display the freq stop dialog box in the active function frame. Set the stop frequency. Range same as the frequency setting ...
Page 223
6.3 sweep function 6-21 related command this command sets the sweep center frequency of the sweep function. Using this command with the command to set the span frequency sets the start and stop frequencies as a result. This is a function only with remote commands. Remote command set the sweep center...
Page 225
6.3 sweep function 6-23 sweep start level: level start or top>sweep/list, >configure step sweep>level start sets the start output level of the sweep function. Press f3 level start to display the level start dialog box in the active function frame. Set the start output level. Range same as the output...
Page 226
Chapter 6 sweep/list 6-24 sweep stop level:level stop or top>sweep/list, >configure step sweep>level stop sets the stop output level of the sweep function. Press f4 level stop to display the level stop dialog box in the active function frame. Set the stop output level. Range same as the output level...
Page 227
6.3 sweep function 6-25 sweep points: points or top>sweep/list, >configure step sweep>points sets the point number on the sweep function. Press f5 points to display the points dialog box in the active function frame. Set the point number. Range minimum value 2 maximum value 1000 normal sweep 500 tri...
Page 228
Chapter 6 sweep/list 6-26 dwell time or top>sweep/list, >configure step sweep>dwell time sets the dwell time at each point on the sweep function execution. Press f6 dwell time to display the dwell time dialog box in the active function frame. Set the dwell time. Range 100 s to 16 s resolution 1 s ...
Page 229
6.3 sweep function 6-27 step shape or top>sweep/list, >configure step sweep>step shape selects the sweep shape from normal sweep or triangle sweep on the sweep function. Press f8 step shape to switch the normal sweep/triangle sweep. Saw tooth normal sweep (default) triangle triangle sweep time freq ...
Page 231
6.4 list function: configure step sweep 6-29 6.4 list function: configure step sweep or top>sweep/list, >configure list sweep configures the settings to execute the list function. Press f7 configure list sweep in the sweep/list function menu to display the listtable function menu and list table. Tab...
Page 232: 6.4.1 List Table Setting
Chapter 6 sweep/list 6-30 6.4.1 list table setting or top>sweep/list, >configure list sweep f1 key in the function menu depends on the item selected with the cursor on list table. Move the cursor with the rotary knob or step key to set items. Figure 6.4.1-1 list table sg setting: sg or top>sweep/lis...
Page 233
6.4 list function: configure step sweep 6-31 parameter list number range 1 to 500 resolution 1 default 1 sg number 1 sg1 (default) 2 sg2 programming example to set sg2 to the list number 20. List:sour:spec 20,2 list:sour:spec? 20 > 2 setting frequency: edit item or top>sweep/list, >configure list sw...
Page 234
Chapter 6 sweep/list 6-32 response unit: hz parameter list number range 1 to 500 resolution 1 default 1 frequency range depends on the frequency setting range of mg3710a/mg3740a. Resolution 0.01 hz default 1 ghz suffix code hz, khz, kz, mhz, mz, ghz, gz when omitted hz programming example to set 800...
Page 235
6.4 list function: configure step sweep 6-33 setting level: edit item or top>sweep/list, >configure list sweep>edit item when the cursor is on “level”, f1 key is “edit item”. Press f1 edit item to display the level dialog box in the active function frame. Set the level. Range same as the output leve...
Page 236
Chapter 6 sweep/list 6-34 programming example to set –30.00 dbm to the list number 1. List:pow:spec 1,–30.00 list:pow:spec? 1 > –30.00 setting dwell time: edit item or top>sweep/list, >configure list sweep>edit item when the cursor is on “dwell”, f1 key is “edit item”. Press f1 edit item to display ...
Page 237
6.4 list function: configure step sweep 6-35 parameter list number range 1 to 500 resolution 1 default 1 dwell time range 100 s to 16 s resolution 1 s (990 ns) default 2 ms suffix code s, ms, us, ns, ps s when omitted programming example to set 200 s to the list number 1. List:dwel:spec 1,200us l...
Page 238
Chapter 6 sweep/list 6-36 2. For sg with two lists it is same as the sg with one list that the signal output of the next element is started after dwell time; however, the other sg which is not the target sg for the next element keeps unchanged status (the signal output is not stopped). Table 6.4.1-2...
Page 239
6.4 list function: configure step sweep 6-37 6.4.2 inserting/deleting row for list table insertion/deletion of input row for list table is executed. Inserting row to list table: insert row or top>sweep/list, >configure list sweep>insert rowpress f2 insert row to add a row beneath the row where the c...
Page 240
Chapter 6 sweep/list 6-38 deleting row from list table: delete row or top>sweep/list, >configure list sweep>delete row press f3 delete row to delete the row where the cursor is positioned and existed rows are replaced up by one row. Figure 6.4.2-2 delete row remote command delete the specified row (...
Page 241
6.4 list function: configure step sweep 6-39 figure 6.4.2-3 clear remote command delete all rows of list table command [:source]:list:type:list:initialize:preset programming example to delete all rows of list table. List:type:list:init:pres.
Page 242
Chapter 6 sweep/list 6-40 6.4.3 selecting dwell time: dwell type or top>sweep/list, >configure list sweep>dwell type selects the dwell time used on the list function. Press f6 dwell type to switch list/sweep. List applies the dwell time in list. (default) sweep applies the dwell time set with the sw...
Page 243
6.4 list function: configure step sweep 6-41 6.4.4 recalling list table: open or top>sweep/list, >configure list sweep>open recalls the saved list table file. Remote command recall the saved list table file command :mmemory:load:list [,] parameter file name without an extension character string with...
Page 244
Chapter 6 sweep/list 6-42 figure 6.4.4-1 list table recall screen 4. Select the list table file to be recalled. 5. Press f7 open to recall the selected list table file. Note: file names starting with numbers are displayed, and after that those starting with alphabets are displayed. If no list table ...
Page 245
6.4 list function: configure step sweep 6-43 6.4.5 saving list table: save or top>sweep/list, >configure list sweep>save saves the list table with set parameters in the internal hard disk. Remote command save the list table with set parameters command :mmemory:store:list [[,]] parameter file name wi...
Page 246
Chapter 6 sweep/list 6-44 setting method example: to save the currently displayed list table with the file name of “abc”. 1. Press f8 save in the list table function menu to display the list table save dialog box in the active function frame, file list dialog box in the function display frame, and l...
Page 247
6.4 list function: configure step sweep 6-45 5. Enter “abc” in the text box and press f7 save. The list table file with the entered file name is saved, and the list table save dialog box closes. Press f8 cancel to return to the previous screen without saving the list table file. Note: when you input...
Page 248: 6.5 Point
Chapter 6 sweep/list 6-46 6.5 point trigger or top>sweep/list, >point trigger sets the point trigger to move to the next point on sweep/list function. Note: the point trigger uses the trigger signal input as pattern trigger1. For the input connector setting, refer to section 7.4.1 “route input conne...
Page 249
6.5 point trigger 6-47 point trigger or top>sweep/list, >point trigger>point trigger enables/disables the trigger on sweep/list function. Press f1 point trigger to switch the trigger on/off. Off does not use the trigger (default). On uses the trigger. When manual mode is on, manual has priority and ...
Page 250
Chapter 6 sweep/list 6-48 trigger mode: mode or top>sweep/list, >point trigger>mode the trigger mode on sweep/list function is selected. Press f2 mode to switch start/point trigger. Start start trigger (default) point point trigger remote command set the trigger mode command [:source]:list:trigger:m...
Page 251
6.5 point trigger 6-49 sg output point trigger transition to next state with trigger time point trigger figure 6.5-2 point trigger trigger source: source or top>sweep/list, >point trigger>source sets the trigger source on sweep/list function. Press f3 source to display the point trigger function men...
Page 252
Chapter 6 sweep/list 6-50 programming example to set the trigger source to the internal timer. List:trig:sour tim list:trig:sour? > tim trigger delay: delay or top>sweep/list, >point trigger>delay sets the delay time from point trigger input to hardware settings on sweep/list function. Press f4 dela...
Page 254
Chapter 6 sweep/list 6-52. Timer period or top>sweep/list, >point trigger>timer period sets the timer trigger period. Press f6 timer period to display the timer period dialog box in the active function frame. Set the period. Range 500 s to 4000 s resolution 1 s default 1 ms remote command set the ...
Page 255
Chapter 7 modulation 7-1 this chapter describes the operations and input/output signal settings related to the modulation function of mg3710a/mg3740a. Note on remote command: when the language mode is scpi, the target sg can be selected with the beginning node of commands for controlling individual ...
Page 256
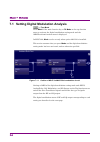
Chapter 7 modulation 7-2 7.1 setting digital modulation analysis or top>mode press mode of the main function key or f4 mode on the top function menu to activate the digital modulation setting mode and the arb/waveform function menu is displayed. In mg3740a, mode can be set only when option-020/120 i...
Page 257
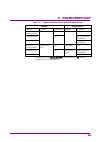
7.1 setting digital modulation analysis 7-3 table 7.1-1 digital modulation setup state and signal output settings output signal i/q src i/q out modulation i/q out rf output internal, analog i/q in rf off no output cw analog i/q in on external vector modulation internal internal vector modulation int...
Page 258
Chapter 7 modulation 7-4 7.1.1 display description this section describes the hardware block chart. For the arb info display description, refer to 7.3.1 “arb”. Press the top menu to display the hardware block chart and each of sg1 and sg2 has the independent display screen. Press each displayed bloc...
Page 259
7.1 setting digital modulation analysis 7-5 table 7.1.1-1 hardware block chart display details no . Display example display description 1 arb arb block on/off indicates on/off of arb (function to generate modulated signals with arbitrary waveform patterns). Out: indicates on/off of the arbitrary wav...
Page 260
Chapter 7 modulation 7-6 table 7.1.1-1 hardware block chart display details (continued) no . Display example display description 11 analog i/q in indicates the analog i/q signal is set to the external input. 12 lo in (for sg1) indicates the sg1 local signal source is set to ext (input from the rear ...
Page 262
Chapter 7 modulation 7-8 resident display frame arb information of the waveform pattern selected with arb function is displayed in the resident display frame in the lower function display frame. In mg3740a, resident display frame arb is available only when option-020/120 is installed. 1 2 3 figure 7...
Page 263
7.1 setting digital modulation analysis 7-9 table 7.1.1-2 resident display frame arb (cont’d) no function display example description 3 rate mismatch display rate mismatch displays the rate mismatch information. This is displayed when the rate matching is unavailable due to internal operation clock ...
Page 265
7.1 setting digital modulation analysis 7-11 fir error the fir error message is displayed for the condition of no correct signal output when the waveform is to be output which uses the internal fir filter of the mg3710a/mg3740a. With the internal fir function, the signal to which the fir filter is a...
Page 266
Chapter 7 modulation 7-12 7.2 analog modulation: analog/pulse top> > analog/pulse executes the analog modulation (am/fm/φm) for modulated signals created by cw signal or arb. In addition, when additional analog modulation input option (mg3710a/mg3740a-050/080/150/180) is installed, the analog modula...
Page 267
7.2 analog modulation: analog/pulse 7-13 table 7.2-1 analog pulse function menu page key no. Menu display function 1 f1 am displays the am function menu to set the settings related to am (amplitude) modulation. Refer to 7.2.1 “am modulation: am”. F2 fm/φm displays the fm/φm function menu to set the ...
Page 268: 7.2.1 Am Modulation: Am
Chapter 7 modulation 7-14 7.2.1 am modulation: am or top> > analog/pulse>am sets the settings related to am (amplitude) modulation. Press am on the main function menu or f1 am on the analog pulse function menu to open the am function menu. Note: settings related to the am modulation are disabled whe...
Page 269
7.2 analog modulation: analog/pulse 7-15 table 7.2.1-2 am function menu page key no. Menu display function 1 f1 am off on enables/disables the am (amplitude) modulation. F2 am depth type lin exp selects the am modulation application type. F3 am depth (lin) 0.1 % sets the am modulation depth with the...
Page 270
Chapter 7 modulation 7-16 am modulation on/off: am or top> > analog/pulse>am>am1 setup (am2 setup), am enables/disables am (amplitude) modulation. Press f1 am on the am1 setup (am2 setup) function menu to turn on/off. Off disables am modulation (default). On enables am modulation. Remote command to ...
Page 273
7.2 analog modulation: analog/pulse 7-19 am depth (log) or top> > analog/pulse>am>am1 setup (am2 setup), am depth (log) sets the am modulation depth with the log value. This cannot be set when the external modulation signal is selected (ext is selected in the am source). Press f4 am depth (log) on t...
Page 274
Chapter 7 modulation 7-20 details this can be set when an exponential function waveform is set at am depth type. Programming example to set the am modulation depth to 5 db with the log value. Am:exp 5 am:exp? > 5.00 am rate or top> > analog/pulse>am>am1 setup (am2 setup), am rate sets the am modulat...
Page 275
7.2 analog modulation: analog/pulse 7-21 programming example to set the am modulation frequency to 500 hz. Am:int:freq 500 am:int:freq? > 500.0 setup am source or top> > analog/pulse>am>am1 setup (am2 setup), setup am source sets the am modulation signals. This is available only when additional anal...
Page 276
Chapter 7 modulation 7-22 switching am source: am source or top> > analog/pulse>am>am1 setup (am2 setup)> setup am source, am source switches the am modulation signal. This is available only when additional analog modulation input option (mg3710a/mg3740a-050/080/150/180) is installed. Press f1 am so...
Page 277
7.2 analog modulation: analog/pulse 7-23 am waveform: waveform or top> > analog/pulse>am>am1 setup (am2 setup)> setup am source, waveform selects the waveform of the internal modulation signal. This is available only when additional analog modulation input option (mg3710a/mg3740a-050/080/150/180) is...
Page 279
7.2 analog modulation: analog/pulse 7-25 parameter waveform sine sine (default) triangle triangle square square ramp ramp programming example to set the waveform of the internal am modulation signal to the triangle. Am:int:func:shap tri am:int:func:shap? > tri remote command select the shape of the ...
Page 280
Chapter 7 modulation 7-26 coupling: coupling or top> > analog/pulse>am>am1 setup (am2 setup)> setup am source, coupling sets the dc coupling or ac coupling for the external modulation signal. This is available only when additional analog modulation input option (mg3710a/mg3740a-050/080/150/180) is i...
Page 281
7.2 analog modulation: analog/pulse 7-27 impedance: impedance or top> > analog/pulse>am>am1 setup (am2 setup)> setup am source, impedance sets the termination for the external modulation signal. This is available only when additional analog modulation input option (mg3710a/mg3740a-050/080/150/180) i...
Page 282
Chapter 7 modulation 7-28 ext dc cal: ext dc cal or top> > analog/pulse>am>am1 setup (am2 setup)> setup am source, ext dc cal adjusts the dc offset for external modulation signal. This is available only when additional analog modulation input option (mg3710a/mg3740a-050/080/150/180) is installed. Th...
Page 283
7.2 analog modulation: analog/pulse 7-29 am phase adjust: phase adjust or top> > analog/pulse>am>am1 setup (am2 setup), phase adjust adjusts a phase of internal am modulation signal. This is available only when additional analog modulation input option (mg3710a/mg3740a-050/080/150/180) is installed....
Page 284: 7.2.2 Fm/φm
Chapter 7 modulation 7-30 7.2.2 fm/φm or top> > analog/pulse>fm/φm sets the settings related to fm (frequency) modulation or φm (phase) modulation. Press fm/φm on the main function menu or f2 fm/φm on the analog mod function menu to open the fm /φm function menu. Notes: • the fm modulation and φm mo...
Page 285
7.2 analog modulation: analog/pulse 7-31 table 7.2.2-1 fm/φm1 setup / fm/φm2 setup function menu page key no. Menu display function 1 f1 fm off on enables/disables the fm (frequency modulation). F2 fm deviation 1.0000 khz sets the fm frequency deviation. F3 fm rate 400.0 hz sets the fm modulation fr...
Page 286
Chapter 7 modulation 7-32 fm modulation on/off: fm or top> > analog/pulse>fm/φm>fm/φm1 setup (fm/φm2 setup), fm enables/disables the fm (frequency) modulation. Press f1 fm on the fm/φm1 setup (fm/φm2 setup) function menu to set on/off. Off disables fm modulation (default). On enables fm modulation. ...
Page 287
7.2 analog modulation: analog/pulse 7-33 fm deviation or top> > analog/pulse>fm/φm>fm/φm1 setup (fm/φm2 setup), fm deviation the fm frequency deviation is set. Press f2 fm deviation on the fm/φm1 setup (fm/φm2 setup) function menu to set with the fm deviation dialog box. Range when fm waveform is si...
Page 289
7.2 analog modulation: analog/pulse 7-35 fm modulation frequency: fm rate or top> > analog/pulse>fm/φm>fm/φm1 setup (fm/φm2 setup), fm rate sets the fm modulation frequency. Press f3 fm rate on the fm/φm1 setup (fm/φm2 setup) function menu to set with the fm rate dialog box. Range when fm waveform i...
Page 290
Chapter 7 modulation 7-36 programming example to set the fm modulation frequency to 500 hz. Fm:int:freq 500 fm:int:freq? > 500.0 setup fm source or top> > analog/pulse>fm/φm>fm/φm1 setup (fm/φm2 setup), setup fm source sets the fm modulation signals. This is available only when additional analog mod...
Page 291
7.2 analog modulation: analog/pulse 7-37 switching fm source: fm source or top> > analog/pulse>fm/φm>fm/φm1 setup (fm/φm2 setup)>setup fm source, fm source switches the fm modulation signal. This is available only when additional analog modulation input option (mg3710a/mg3740a-050/080/150/180) is in...
Page 292
Chapter 7 modulation 7-38 fm waveform: waveform or top> > analog/pulse>fm/φm>fm/φm1 setup (fm/φm2 setup)>setup fm source, waveform selects the waveform of the internal modulation signal. This is available only when additional analog modulation input option (mg3710a/mg3740a-050/080/150/180) is instal...
Page 294
Chapter 7 modulation 7-40 parameter coupling dc dc coupling (default) ac ac coupling programming example to set the dc coupling for the external modulation. Extm:coup dc extm:coup? > dc impedance: impedance or top> > analog/pulse>fm/φm>fm/φm1 setup (fm/φm2 setup)>setup fm source, impedance sets the ...
Page 295
7.2 analog modulation: analog/pulse 7-41 ext dc cal: ext dc cal or top> > analog/pulse>fm/φm>fm/φm1 setup (fm/φm2 setup)>setup fm source, ext dc cal adjusts the dc offset for external modulation signal. This is available only when additional analog modulation input option (mg3710a/mg3740a-050/080/15...
Page 296
Chapter 7 modulation 7-42 fm phase adjust: phase adjust or top> > analog/pulse>fm/φm>fm/φm1 setup (fm/φm2 setup), phase adjust adjusts a phase of internal fm modulation signal. This is available only when additional analog modulation input option (mg3710a/mg3740a-050/080/150/180) is installed. Press...
Page 297
7.2 analog modulation: analog/pulse 7-43 φ m modulation on/off: φm or top> > analog/pulse>fm/φm>fm/φm1 setup (fm/φm2 setup)> , φm enables/disables the φm (phase) modulation. Press f1 φm in the second page of the fm/φm1 setup (fm/φm2 setup) function menu to set on/off. Off disables φm modulation (def...
Page 298
Chapter 7 modulation 7-44 φ m deviation or top> > analog/pulse>fm/φm>fm/φm1 setup (fm/φm2 setup)> , φ m deviation sets the φm deviation angle. Press f2 φm deviation in the second page of the fm/φm1 setup (fm/φm2 setup) function menu to set with the φm deviation dialog box. Range when φm waveform is ...
Page 299
7.2 analog modulation: analog/pulse 7-45 parameter φ m deviation angle range when φm waveform is sine: 0 rad to 160 rad, or (40 mhz ÷ φm rate) rad, whichever smaller *1 when φm waveform is other than sine: 0 rad to 160 rad, or (4 mhz ÷ φm rate) rad, whichever smaller *2 resolution 0.001 rad default ...
Page 301
7.2 analog modulation: analog/pulse 7-47 setup φm source or top> > analog/pulse>fm/φm>fm/φm1 setup (fm/φm2 setup)> , setup φm source sets the φm modulation signals. This is available only when additional analog modulation input option (mg3710a/mg3740a-050/080/150/180) is installed. Press f4 setup φm...
Page 302
Chapter 7 modulation 7-48 switching φm source: φm source or top> > analog/pulse>fm/φm>fm/φm1 setup (fm/φm2 setup)> > setup φm source, φm source switches the φm modulation signal. This is available only when additional analog modulation input option (mg3710a/mg3740a-050/080/150/180) is installed. Pre...
Page 303
7.2 analog modulation: analog/pulse 7-49 φ m waveform: waveform or top> > analog/pulse>fm/φm>fm/φm1 setup (fm/φm2 setup)> > setup φm source, waveform selects the waveform of the φm internal modulation signal. This is available only when additional analog modulation input option (mg3710a/mg3740a-050/...
Page 305
7.2 analog modulation: analog/pulse 7-51 parameter coupling dc dc coupling (default) ac ac coupling programming example to set the dc coupling for the external modulation. Extm:coup dc extm:coup? > dc impedance: impedance or top> > analog/pulse>fm/φm>fm/φm1 setup (fm/φm2 setup)> > setup φm source,im...
Page 306
Chapter 7 modulation 7-52 ext dc cal: ext dc cal or top> > analog/pulse>fm/φm>fm/φm1 setup (fm/φm2 setup)> > setup φm source,ext dc cal adjusts the dc offset for external modulation signal. This is available only when additional analog modulation input option (mg3710a/mg3740a-050/080/150/180) is ins...
Page 307
7.2 analog modulation: analog/pulse 7-53 φ m phase adjust: phase adjust or top> > analog/pulse>fm/φm>fm/φm1 setup (fm/φm2 setup)> , phase adjust adjusts a phase of internal φm modulation signal. This is available only when additional analog modulation input option (mg3710a/mg3740a-050/080/150/180) i...
Page 308: 7.2.3 Pulse
Chapter 7 modulation 7-54 7.2.3 pulse or top> > analog/pulse>pulse sets the settings related to pulse modulation. Press pulse of the main function key or f3 pulse on the analog mod function menu to display the pulse function menu. Settings related to pulse modulation are disabled when sweep/list is ...
Page 309
7.2 analog modulation: analog/pulse 7-55 example: to execute the pulse modulation. 1. Set the pulse modulation to on with f1 pulse. 2. Select the pulse modulation signal source with f2 pulse source. 3. Set the settings of f3 pulse rate to f8 pulse 2 width according to the pulse modulation signal sou...
Page 310
Chapter 7 modulation 7-56 pulse or top> > analog/pulse>pulse,pulse enables/disables the pulse modulation. Press f1 pulse on the pulse function menu to set on/off. Off disables pulse modulation (default). On enables pulse modulation. Remote command enable/disable the pulse modulation command [:source...
Page 311
7.2 analog modulation: analog/pulse 7-57 pulse source or top> > analog/pulse>pulse,pulse source selects the pulse modulation signal source. Press f2 pulse source on the pulse function menu to open the pulse source function menu for selection. Table 7.2.3-2 pulse source function menu page key no. Men...
Page 312
Chapter 7 modulation 7-58 table 7.2.3-2 pulse source function menu (cont’d) page key no. Menu display function f4 adjustable doublet generates two pulses in synchronization with the trigger event. The delay time after the trigger event and pulse width are set with pulse delay and pulse 2 delay, and ...
Page 313
7.2 analog modulation: analog/pulse 7-59 table 7.2.3-2 pulse source function menu (cont’d) page key no. Menu display function f6 gated generates the internal pulse string. However, pulses are valid only when the trigger is being input. The period and pulse width are set with pulse period and pulse w...
Page 315
7.2 analog modulation: analog/pulse 7-61 programming example to set the pulse modulation signal source to freerun. Pulm:sour:int frun pulm:sour:int? > frun pulse rate or top> > analog/pulse>pulse, pulse rate sets the pulse modulation frequency. Press f3 pulse rate on the pulse function menu to set w...
Page 316
Chapter 7 modulation 7-62 pulse period or top> > analog/pulse>pulse,pulse period sets the pulse modulation period. Press f4 pulse period on the pulse function menu to set with the pulse period dialog box. This can be set when freerun,gated is selected at pulse source. Range 10 ns to 20 s resolution ...
Page 317
7.2 analog modulation: analog/pulse 7-63 pulse delay or top> > analog/pulse>pulse, pulse delay sets the pulse modulation delay time after the trigger event. Press f5 pulse delay on the pulse function menu to set with the pulse delay dialog box. This can be set when triggered, adjustable doublet, tri...
Page 318
Chapter 7 modulation 7-64 pulse width or top> > analog/pulse>pulse, pulse width sets the pulse modulation width. Press f6 pulse width on the pulse function menu to set with the pulse width dialog box. This can be set when freerun, triggered, adjustable doublet, trigger doublet, gated is selected at ...
Page 322
Chapter 7 modulation 7-68 programming example to set the output polarity of the pulse sync signal and pulse video signal to the negative polarity. Pulm:int:vid:pol inv pulm:int:vid:pol? > inv pulse mod input signal polarity: ext. In polarity or top> > analog/pulse>pulse, > > ext. In polarity selects...
Page 323
7.2 analog modulation: analog/pulse 7-69 7.2.4 optimize function for the analog modulation: optimize or > (back key)> optimize, or top> > analog/pulse>optimize selects spurious mode or distortion mode to optimize analog modulation. Because the mg3710a/mg3740a performs analog modulation by quadrature...
Page 324
Chapter 7 modulation 7-70 programming example to enable the frequency offset of the analog modulation. Aopt:mode dist aopt:mode? > dist.
Page 325: 7.3 Baseband Mode
7.3 baseband mode 7-71 7.3 baseband mode or top>mode mg3710a/mg3740a allows reproducing the waveform pattern to execute the vector modulation with the pattern. Note: mg3740a allows to execute the vector modulation only when option-020/120 is installed. The waveform patterns are stored as the pattern...
Page 326
Chapter 7 modulation 7-72 pattern11 pattern12 pattern21 pattern22 pattern31 pattern32 combination1 combination2 pattern combination is specified. Figure 7.3-1 relation of pattern file and combination file pattern11 pattern12 pattern13 package1 package2 pattern21 pattern22 pattern23 internal hdd memo...
Page 327
7.3 baseband mode 7-73 the following are methods to add a new package pattern to the internal hard disk: • uses an usb memory or others. For the method using a usb memory, refer to 7.3.6 “copying external waveform pattern: copy”. • transfers from an external personal computer using iqproducer tm (su...
Page 328: 7.3.1 Arb
Chapter 7 modulation 7-74 7.3.1 arb or top>mode generates modulated signals with arbitrary waveform patterns. In mg3740a, the arb function can be used only when option-020/120 is installed. Press mode of the main function key or f4 mode on the top function menu to display the arb info dialog box and...
Page 329
7.3 baseband mode 7-75 table 7.3.1-1 arb info display contents no. Display example display description 1 combination --- other than the below combination indicates to combine the waveform patterns of memory a and memory b to output. A+b sequence indicates that it is in the sequence mode. Seq.(a), se...
Page 330
Chapter 7 modulation 7-76 table 7.3.1-1 arb info display contents (cont’d) no. Display example display description 9 --- indicates that the signal output from memory a and the signal output from the waveform memory b are being combined. 10 --- click to switch hardware block chart and arb info displa...
Page 331
7.3 baseband mode 7-77 arb on/off: arb or top>mode, >arb enables/disables the function to generate modulated signals with arbitrary waveform patterns. In mg3740a, this can be used only when option-020/120 is installed. Press f1 arb of the arb function menu for setting. Off does not generate modulate...
Page 332
Chapter 7 modulation 7-78 restart or top>mode, >restart restarts the waveform pattern being played. Both pattern a and b are targeted. In mg3740a, this can be used only when option-020/120 is installed. Press f8 restart on the arb function menu for execution. Remote command restart the waveform patt...
Page 333
7.3 baseband mode 7-79 parameter iq waveform data input amplitude range –8.00 db to 8.00 db resolution 0.01 db default 0.00 db suffix code db, when omitted: db programming example to tune the iq waveform data input amplitude to 1 db. Rad:arb:rmst 1.00 rad:arb:rmst? > 1.00 operational explanation to ...
Page 334
Chapter 7 modulation 7-80 7.3.2 pattern generation mode: combination mode or top>mode, >combination mode sets the function mode to generate the pattern with baseband. In mg3740a, this can be used only when option-020/120 is installed. Press f2 combination mode on the arb/waveform function menu for s...
Page 335
7.3 baseband mode 7-81 to execute modulation with defined mode or top>mode>combination mode figure 7.3.2-1 arb info (combination) with the defined mode, the digital modulation setting screen display depends on the contents of the selected waveform file. However, the pattern is output according to th...
Page 336
Chapter 7 modulation 7-82 to execute continuous operations in defined mode. Or top>mode>combination mode figure 7.3.2-2 arb info (sequence+) selecting the combination file with the definition of continuous operations in the defined mode activates the sequence mode. The sequence mode allows the conti...
Page 337
7.3 baseband mode 7-83 5. Press f7 sequence mode on page 2 of the arb/waveform function menu to display the sequence progress dialog box where the continuous operations state can be confirmed. The highlighted element indicates the pattern which is currently being output. The operations are repeated ...
Page 338
Chapter 7 modulation 7-84 “frame” switches the base unit to the frame length of the waveform of each element. Frame length data length switching time (pattern) external trigger signal waveform pattern output switching time (frame) figure 7.3.2-4 switching time.
Page 339
7.3 baseband mode 7-85 to output the pattern loaded into memory a for modulation in edit mode or top>mode>combination mode figure 7.3.2-5 arb info the pattern file is selected (the combination file cannot be selected) for modulation in the edit mode. The pattern is selected for each memory for outpu...
Page 340
Chapter 7 modulation 7-86 to combine outputs from memory a and b for modulation in edit mode or top>mode>arb setup the output level, sampling rate, frequency offset, start offset, and spectrum reverse of memory a and b can be set on the screen for combination of two patterns in the edit mode. Using ...
Page 341
7.3 baseband mode 7-87 start offset different play start timing is set for the patterns of memory a and b. Memory a is the reference, and offset is applied to the b side. This function is enabled when the same pattern is output from memory a and b and the correlation of both is to be decreased. Star...
Page 342
Chapter 7 modulation 7-88 figure 7.3.2-7 rate mismatch display note: when the rate mismatch is displayed, the sampling rate of memory b side is changed to the frequency which is the same as the sampling rate of memory a side. Therefore, the pattern of memory b side operates with the sampling clock w...
Page 343
7.3 baseband mode 7-89 to add two waves with same frequency in edit mode or top>mode figure 7.3.2-9 two waves added output when the center frequencies of two patterns are to be set to the same value, set the frequency offset to 0 hz. This function is useful when the transmission signal pattern of me...
Page 344
Chapter 7 modulation 7-90 the procedure is explained below. Example: to combine pattern files loaded into memory a and b with the same frequency. 1. Press f4 load to select the waveform file and load into the memory. Refer to 7.3.4 “loading waveform pattern: load”. 2. Press f2 combination mode on th...
Page 345
7.3 baseband mode 7-91 to give offsets to frequencies of two waves in edit mode or top>mode>arb setup figure 7.3.2-11 frequency offset output when the center frequencies of two patterns are to be displaced, set the frequency offset to the arbitrary value. This function is useful when the transmissio...
Page 346
Chapter 7 modulation 7-92 the procedure is explained below. Example: to combine pattern files loaded into memory a and b with the different frequency. 1. Press f4 load to select the waveform file and load into the memory. Refer to 7.3.4 “loading waveform pattern: load”. 2. Press f2 combination mode ...
Page 347
7.3 baseband mode 7-93 various settings for pattern output or top>mode in mg3740a, this can be used only when option-020/120 is installed. To re-output the pattern from the beginning. Without the external trigger signal input, when the end of the waveform pattern is output, the pattern is automatica...
Page 348: 7.3.3 Arb Setup
Chapter 7 modulation 7-94 7.3.3 arb setup or top>mode, >arb setup press f3 arb setup on the arb function menu to open the arb setup function menu. In mg3740a, this can be used only when option-020/120 is installed. Table 7.3.3-1 arb setup function menu page key no. Menu display function 1 f1 output ...
Page 349
7.3 baseband mode 7-95 output a/output b or top>mode,>arb setup>output a or output b enables/disables the pattern a/b output. In mg3740a, this can be used only when option-020/120 is installed. Press f1 output a/f3 output b on the arb setup function menu for setting. Off does not output pattern a/b....
Page 350
Chapter 7 modulation 7-96 level a/level b or top>mode,>arb setup>level a or level b sets the pattern a/b output level. In mg3740a, this can be used only when option-020/120 is installed. Press f2 level a/f4 level b on the arb setup function menu for setting. Resolution 0.01 db default minimum value ...
Page 351
7.3 baseband mode 7-97 a/b signal setting or top>mode,>arb setup>a/b signal setting selects the target for level change on a/b ratio change (the option which is not selected is fixed). In mg3740a, this can be used only when option-020/120 is installed. Press f5 a/b signal setting on the arb setup fu...
Page 352
Chapter 7 modulation 7-98 a/b ratio or top>mode, >arb setup>a/b ratio sets the level ratio of pattern a and pattern b. A/b is indicated with db. In mg3740a, this can be used only when option-020/120 is installed. Press f6 a/b ratio on the arb setup function menu for setting. Range – 80 db to 80 db r...
Page 353
7.3 baseband mode 7-99 sampling rate a/sampling rate b or top>mode, >arb setup>sampling rate a or sampling rate b sets the waveform signal sampling rate. In mg3740a, this can be used only when option-020/120 is installed. Press f7 sampling rate a/f8 sampling rate b on the arb setup function menu for...
Page 354
Chapter 7 modulation 7-100 freq offset or top>mode,>arb setup> > freq offset sets the frequency offset between pattern a and b with this parameter, when centersignal is a or b. The parameter is available only when the waveform is selected in memory a and b and output a and b are on at the same time....
Page 355
7.3 baseband mode 7-101 details when centersignal is a, the value is offset of b for a. When centersignal is b, the value is offset of a for b. Freqoffseta = +10mhz freqoffsetb = –15mhz centersignal = baseband dc freqoffset = –15mhz centersignal = a 0hz 10mhz –15mhz a b freqoffset = 10mhz centersign...
Page 356
Chapter 7 modulation 7-102 freq offset a/freq offset b or top>mode, >arb setup> > freq offset a or freq offset b sets the frequency offset of pattern a/pattern b based on baseband center frequency in mg3740a, this can be used only when option-020/120 is installed. Press f1 freq offset a/f2 freq offs...
Page 357
7.3 baseband mode 7-103 center signal or top>mode,>arb setup> > center signal selects the pattern to be the reference on frequency display. In mg3740a, this can be used only when option-020/120 is installed. Press f3 center signal on page 2 of arb setup function menu to open the center signal functi...
Page 358
Chapter 7 modulation 7-104 start offset or top>mode, >arb setup> > start offset sets the time offset of pattern b based on pattern a side. The parameter is available only when the waveform is selected in memory a and b and output a and b are on at the same time. In mg3740a, this can be used only whe...
Page 359
7.3 baseband mode 7-105 spectrum a/spectrum b or top>mode, >arb setup> > spectrum a or spectrum b i/q swap for pattern a is executed and the spectrum is revered. Spectrum a reverses the spectrum of the waveform memory a, and spectrum b reverses the spectrum of the waveform memory b. Similar to this,...
Page 360
Chapter 7 modulation 7-106 7.3.4 loading waveform pattern: load or top>mode>load loads the waveform pattern from hdd into the waveform memory. In mg3740a, this can be used only when option-020/120 is installed. Notes: • to load the waveform pattern to the memory, the license file corresponding to ea...
Page 361
7.3 baseband mode 7-107 table 7.3.4-1 waveform list to load no. Display example description 1 drive c: drive number 2 pattern in packages : test name of package displaying pattern 3 package name package file name 4 pattern name pattern file name 5 type file type 6 status* status file type comment 1/...
Page 362
Chapter 7 modulation 7-108 remote command query the waveform pattern file version on the hard disk query to query the version of the single pattern file (wvi/wvd). The version of the combination file (wvc) cannot be confirmed with this command. :mmemory:waveform:version? ,[,] :mmemory:waveform:singl...
Page 363
7.3 baseband mode 7-109 remote command query the hard disk free space information query :mmemory:free[:all]? [] response , unit: byte parameter source drive number a to z, drive c when omitted number of bytes in whole hdd number of bytes of the remaining space –999.0 is returned when no devices exis...
Page 364
Chapter 7 modulation 7-110 example: to load the waveform pattern into the waveform memory of mg3710a/mg3740a. The explanation is provided below with the assumption that the load waveform function menu is displayed. 1. Press f1 drive to select the device which includes the waveform pattern to be load...
Page 365
7.3 baseband mode 7-111 drive or top>mode>load, >drive selects the device which includes the waveform pattern to be loaded. In mg3740a, this can be used only when option-020/120 is installed. Press f1 drive on the waveform load function menu to display the device function menu for selection. Options...
Page 366
Chapter 7 modulation 7-112 parameter package name character string within 31 characters enclosed by double quotes (“ ”) or single quotes (‘ ’) pattern name (excluding extensions) character string within 100 characters enclosed by double quotes (“ ”) or single quotes (‘ ’) source drive number a to z,...
Page 367
7.3 baseband mode 7-113 show details or top>mode>load, >show details displays the details of the selected waveform pattern information in hdd. In mg3740a, this can be used only when option-020/120 is installed. Select pattern in the waveform list to load dialog box and press f5 show details on the w...
Page 369
7.3 baseband mode 7-115 details if a waveform pattern is loaded when the same waveform pattern has already been loaded, the existing waveform pattern is overwritten. Programming example to start loading “rmc15k” pattern file in package “wcdma” in drive e into the sg2 waveform memory a. Mmem2:load:wa...
Page 370
Chapter 7 modulation 7-116 table 7.3.4-3 confirmation function menu page key no. Menu display function 1 f7 confirm overwriting all loaded pattern deletes contents of memory a and memory b and loads long pattern f8 cancel returns to the menu before this menu is opened. Select is executed by pressing...
Page 371
7.3 baseband mode 7-117 loading destination: to memory or top>mode>load, >to memory selects the waveform memory for the pattern to be loaded into. In mg3740a, this can be used only when option-020/120 is installed. This function specifies the loading destination waveform memory when the pattern file...
Page 372
Chapter 7 modulation 7-118 remote command delete the selected waveform pattern in hdd command to delete the combination file (wvc) or single pattern (wvi/wvd). If there is a wvc/wvi with the same name, the combination file has priority. :mmemory:delete:waveform[:name] ,,[] to delete the single patte...
Page 373
7.3 baseband mode 7-119 7.3.5 selecting output waveform pattern: select or top>mode>select selects the waveform pattern to be output. In mg3740a, this can be used only when option-020/120 is installed. Press select of the main function key or f5 select on the arb/waveform function menu to display th...
Page 374
Chapter 7 modulation 7-120 table 7.3.5-1 waveform list to play no. Display example description 1 in memory a indicates the displayed memory when combination mode is edit. 2 pattern in packages : test name of package displaying pattern 3 package name package file name 4 pattern name pattern file name...
Page 375
7.3 baseband mode 7-121 table 7.3.5-2 waveform select function menu page key no. Menu display function 1 f2 focus package pattern moves the cursor between package/pattern frames. F4 subitem status switches the subitem displayed items in waveform list to play dialog box. F6 select selects the wavefor...
Page 376
Chapter 7 modulation 7-122 example: to delete the waveform file from the waveform memory. The explanation is provided below with the assumption that the waveform select function menu is displayed. 1. The list of waveform patterns is displayed in the waveform list to play dialog box. Select package w...
Page 378
Chapter 7 modulation 7-124 programming example to query the sg1 waveform memory a free space. Mem:wav:wma:free? > 1234567890,12345678,123456789 moving cursor: focus or top>mode>select, >focus moves the cursor between package/pattern frames in the waveform list to play dialog box. In mg3740a, this ca...
Page 380
Chapter 7 modulation 7-126 selecting waveform pattern: on memory or top>mode>select, >on memory switches the memory of the waveform pattern information to be displayed in waveform list to play dialog box. In mg3740a, this can be used only when option-020/120 is installed. Press f8 on memory on the w...
Page 381
7.3 baseband mode 7-127 parameter package name character string within 31 characters enclosed by double quotes (“ ”) or single quotes (‘ ’) pattern name (excluding extensions) character string within 100 characters enclosed by double quotes (“ ”) or single quotes (‘ ’) details this command does not ...
Page 383
7.3 baseband mode 7-129 7.3.6 copying external waveform pattern: copy or top>mode,>copy copies the waveform pattern of the external device such as usb memory to the internal hdd of mg3710a/mg3740a. In mg3740a, this can be used only when option-020/120 is installed. Press f6 copy on the arb/waveform ...
Page 384
Chapter 7 modulation 7-130 table 7.3.6-2 waveform copy function menu page key no. Menu display function 1 f1 drive c selects the copy source device for the waveform pattern. F2 focus package pattern moves the cursor between package/pattern frames. F6 copy pattern/package copies the selected waveform...
Page 385
7.3 baseband mode 7-131 notes: even when only the combination file is copied to the internal hard disk, if the pattern file specified with the combination file does not exist in the internal hard disk, the combination file cannot be loaded into the memory. When copying waveform file, copy the wavefo...
Page 386
Chapter 7 modulation 7-132 copy source drive: drive or top>mode,>copy>drive selects the copy source drive for the waveform pattern. In mg3740a, this can be used only when option-020/120 is installed. Press f1 drive on the waveform copy function menu to display the drive function menu for selection. ...
Page 387
7.3 baseband mode 7-133 copy pattern/copy package or top>mode, >copy>copy pattern/copy package copies the selected waveform pattern of the specified drive to hdd. In mg3740a, this can be used only when option-020/120 is installed. Press f6 copy pattern/copy package on the waveform copy function menu...
Page 388
Chapter 7 modulation 7-134 programming example to copy all waveform patterns included in the package “wcdma” in e drive to d drive. Mmem:copy:wav:all e,"wcdma",d to copy the waveform file “test” included in the root folder in e drive to d drive. Mmem:copy:wav e,root,"test",d to copy the single patte...
Page 389
7.3 baseband mode 7-135 note: press f7 delete all on the waveform copy function menu to delete all waveform patterns according to the setting with f2 focus regardless of settings in step 2 and 3. 5. The progress bar window is displayed during copying of pattern files. 6. When copying waveform patter...
Page 390: 7.3.7 Rf Gate
Chapter 7 modulation 7-136 7.3.7 rf gate or top>mode, > > rf gate controls the rf output on/off for the modulated wave to execute the pulse modulation. This function is used for the pulse modulation for the rf output when the burst signal such as tdma is used. The rf on/off control can be executed w...
Page 391
7.3 baseband mode 7-137 rf gate or top>mode,> > rf gate>rf gate enables/disables the rf gate function. In mg3740a, this can be used only when option-020/120 is installed. Press f1 rf gate on the rf gate function menu to set on/off. Off rf gate is not used. Constant output. On rf output on/off contro...
Page 392
Chapter 7 modulation 7-138 sync rf gate is edited. Rf gate cycle synchronizes with the pattern cycle. Rf gate bit in pattern is disabled. The mg3710a/mg3740a allows handling up to 16 bits of waveform data bit length. In this case, the rf gate signal cannot be embedded in the waveform data; therefore...
Page 393
7.3 baseband mode 7-139 rf gate line: type or top>mode, > > rf gate>type selects the number of rf gate lines to be edited. In mg3740a, this can be used only when option-020/120 is installed. Press f3 type on the rf gate function menu for selection. Single the output signal is gated with one rf gate ...
Page 394
Chapter 7 modulation 7-140 rf gate offset 1/2: offset 1/ offset 2 or top>mode,> > rf gate>offset 1/offset 2 sets the offset from the top output of pattern to rf gate1/2. In mg3740a, this can be used only when option-020/120 is installed. Press f4 offset 1/f6 offset 2 on the rf gate function menu for...
Page 396
Chapter 7 modulation 7-142 systemunit a/b data unit for each system (symbol, bit, chip, and others) datapointa/b waveform pattern cycle note: the following are applied: when pattern a is output, oversampling a, systemunit a. When pattern b is output, oversampling b, systemunit b. When both a/b is ou...
Page 397
7.3 baseband mode 7-143 rf gate cycle: cycle or top>mode,> > rf gate>cycle sets the cycle for rf gate1 and rf gate2. The cycle for rf gate1 and rf gate2 is common. In mg3740a, this can be used only when option-020/120 is installed. Press f8 cycle on the rf gate function menu for setting. Range lower...
Page 398
Chapter 7 modulation 7-144 parameter cycle for rf gate1 and rf gate2 range 1 ÷ oversampling a/b to (2^24 – 1) ÷ oversampling a/b resolution 0.01 default 1 unit systemunit a/b suffix code none programming example to set the cycle for rf gate1 and rf gate2 to 1. Rad:arb:puls:edit:cycl 1 rad:arb:puls:e...
Page 399
7.3 baseband mode 7-145 7.3.8 start/frame trigger or top>mode,> > start/frame trigger sets the settings related to start/frame trigger. This is used to interlock the waveform pattern play operation with the external trigger input. Press f2 start/frame trigger on the arb/waveform function menu to ope...
Page 400
Chapter 7 modulation 7-146 start/frame trigger or top>mode, > > start/frame trigger>start/frame trigger enables/disables the trigger to be used for baseband signal output start. In mg3740a, this can be used only when option-020/120 is installed. Press f1 start/frame trigger on the start/frame trigge...
Page 401
7.3 baseband mode 7-147 (2) when the waveform pattern is generated with the application to generate the signal which is the option of iqproducer tm the frame length supporting each communications system is set automatically. In this case, the values of l f and l g change depending on whether the sys...
Page 402
Chapter 7 modulation 7-148 frame trigger operation in frame trigger operation, one frame of waveform pattern is output according to the rising timing of the external trigger signal. When the frame output is finished, it'll be in trigger wait state again. The relation between the external trigger sig...
Page 403
7.3 baseband mode 7-149 system frame cycle external trigger signal input earlier than frame cycle by nsample or more is invalid, and waveform pattern is not output. External trigger signal invalid trigger n sample frame cycle waveform pattern output frame cycle (l f + l g ) waveform pattern output i...
Page 404
Chapter 7 modulation 7-150 trigger mode: mode or top>mode,> > start/frame trigger>mode selects the operation mode for the trigger to be used for baseband signal output start. In mg3740a, this can be used only when option-020/120 is installed. Press f2 mode on the start/frame trigger function menu fo...
Page 405
7.3 baseband mode 7-151 trigger source: source or top>mode,> > start/frame trigger>source selects start/frame trigger source. In mg3740a, this can be used only when option-020/120 is installed. Press f3 source on the start/frame trigger function menu to open the s/f trigger function menu for selecti...
Page 406
Chapter 7 modulation 7-152 delay or top>mode,> > start/frame trigger>delay sets the delay time from the trigger input to rf signal output. In mg3740a, this can be used only when option-020/120 is installed. Press f4 delay on the start/frame trigger function menu for setting. Range varies depending o...
Page 407
7.3 baseband mode 7-153 parameter start trigger delay time range varies depending on the selected waveform pattern. Resolution 0.01 default 0 unit systemunit suffix code none start trigger delay time unit s resolution 1 ps programming example to set the start trigger delay time to 30 systemunit. Rad...
Page 408
Chapter 7 modulation 7-154 parameter trigger input detection edge positive rise, signal rising edge (default) negative fall, signal falling edge programming example to set the external trigger polarity to fall. Rad:arb:trig:slop neg rad:arb:trig:slop? > neg trigger key or top>mode,> > start/frame tr...
Page 409
7.3 baseband mode 7-155 7.3.9 setting frame trigger operation:event or top>mode,> > start/frame trigger>event frame trigger has four types of operations. The trigger operation when it is used is set. In mg3740a, this can be used only when option-020/120 is installed. Press f6 event on the start/fram...
Page 410
Chapter 7 modulation 7-156 programming example to set the trigger operation when frame trigger is used to no retrigger. Rad:arb:trig:retr nor rad:arb:trig:retr? > nor operation description the trigger operations are described below. No retrigger when frame trigger is received in the section where th...
Page 411
7.3 baseband mode 7-157 buffered trigger when frame trigger is received in the section where the pattern signal output is not finished, the second pattern start position is placed to meet the first pattern finish position for output to avoid pattern output overlap. Trigger delay start frame trigger ...
Page 412: 7.3.10 Frame Count
Chapter 7 modulation 7-158 7.3.10 frame count or top>mode, > > start/frame trigger>frame count sets the number of frames to output when frame trigger is input during frame trigger operation. This is enabled when the trigger mode is set to frame. In mg3740a, this can be used only when option-020/120 ...
Page 413
7.3 baseband mode 7-159 when event is no retrigger when frame trigger is received in the section where the pattern signal output for the number of frames, which is set to frame count, is not finished and the second pattern start position is in the section where the first pattern signal output is not...
Page 414
Chapter 7 modulation 7-160 when event is restart on trigger when frame trigger is received in the section where the pattern signal output for the number of frames, which is set to frame count, is not finished, the first pattern output is stopped, and the second pattern is overwritten. The frame numb...
Page 415
7.3 baseband mode 7-161 7.3.11 baseband clock or top>mode, > > baseband clock sets the settings related to baseband clock. This cannot be used in mg3740a. The baseband clock function menu is used when the external reference clock is input to be used for baseband. The arbitrary sampling clock can be ...
Page 416
Chapter 7 modulation 7-162 for sg1 int the internal signal source is the reference (default). Ext the clock input from the rear panel bb ref clock input is the reference. Used for inputting dut clock or others. Ext(bb ref sync) the clock input from the rear panel bb ref clock input is the reference....
Page 417
7.3 baseband mode 7-163 clock division ratio: division or top>mode,> > baseband clock>division sets the division ratio for the external input clock for generation of baseband reference clock. This cannot be used in mg3740a. Press f2 division on the baseband clock function menu to open the baseband c...
Page 419
7.3 baseband mode 7-165 clock output: out or top>mode, > > baseband clock>out enables/disables the baseband clock reference output. This cannot be used in mg3740a. Press f3 out on the baseband clock function menu for setting. This is a shared parameter for each sg. It can be set when either sg1 is i...
Page 420
Chapter 7 modulation 7-166 sampling clock queries the baseband signal output sampling clock. This is a function only with a remote command. Remote command query the baseband signal sampling clock query [:source]:radio:arb:sclock:rate? Response unit: hz parameter sampling clock range 140 mhz to 200 m...
Page 421: 7.3.12 Marker Setup
7.3 baseband mode 7-167 7.3.12 marker setup or top>mode, > > marker setup sets the settings related to marker. In mg3740a, this can be used only when option-020/120 is installed. The marker function is used as the trigger out function when the waveform pattern specified positions (the top of frame, ...
Page 422
Chapter 7 modulation 7-168 set the selected waveform pattern marker output (output from the rear panel aux connector). Marker 1 a setup function menu is described in the table below. Table 7.3.12-2 marker 1 a function menu page key no. Menu display function 1 f1 edit mode off on sync enables/disable...
Page 423
7.3 baseband mode 7-169 edit mode or top>mode, > > marker setup>marker 1/2/3 a(b)>edit mode enables/disables the marker 1 edit function. When set to on/sync, marker bit in waveform pattern is disabled. In mg3740a, this can be used only when option-020/120 is installed. Press f1 edit mode on the mark...
Page 426
Chapter 7 modulation 7-172 upper limit when marker1/2/3 edit modea/b is set to “on”: (2^24 – 1) ÷ oversampling a/b (rounded to two decimal places) or marker1/2/3 cyclea/b, whichever smaller when marker1/2/3 edit modea/b is set to “sync”: (2^24 – 1) ÷ oversampling a/b (rounded to two decimal places) ...
Page 427
7.3 baseband mode 7-173 cycle or top>mode, > > marker setup>marker 1/2/3 a/b>cycle sets the output cycle of marker. In mg3740a, this can be used only when option-020/120 is installed. Press f4 cycle on the marker 1/2/3 a(b) function menu for setting. Setting range lower limit 1 ÷ oversampling a/b (r...
Page 428
Chapter 7 modulation 7-174 polarity or top>mode, > > marker setup>marker 1/2/3 a/b>polarity sets the output polarity of marker. In mg3740a, this can be used only when option-020/120 is installed. Press f8 polarity on the marker 1/2/3 a(b) function menu for setting. Positive positive polarity (defaul...
Page 429: 7.3.13 Sequence Mode
7.3 baseband mode 7-175 7.3.13 sequence mode or top>mode, > > sequence mode sequence mode is to play the waveform patterns in the specified sequence. In mg3740a, this can be used only when option-020/120 is installed. For the creation method for combination files for sequence mode, refer to mg3700a/...
Page 430
Chapter 7 modulation 7-176 note: for add pattern, refer to 4.8.2 “combination file edit screen” in mg3700a/mg3710a vector signal generator mg3740a analog signal generator operation manual (iqproducer tm ) . Table 7.3.13-1 sequence mode function menu page key no. Menu display function 1 f1 next patte...
Page 431
7.3 baseband mode 7-177 sequence restart or top>mode,> > sequence mode>sequence restart restarts the elements from the top in the sequence mode. In mg3740a, this can be used only when option-020/120 is installed. Press f2 sequence restart on the sequence mode function menu for execution. Remote comm...
Page 432
Chapter 7 modulation 7-178 play mode or top>mode,> > sequence mode>play mode selects the play mode for elements of the sequence mode. In mg3740a, this can be used only when option-020/120 is installed. Press f3 play mode on the sequence mode function menu for selection. Auto proceeds with elements a...
Page 433
7.3 baseband mode 7-179 repeat mode or top>mode,> > sequence mode>repeat mode selects the operation after the last element is executed in the sequence mode. In mg3740a, this can be used only when option-020/120 is installed. Press f4 repeat mode on the sequence mode function menu for selection. Cont...
Page 435: 7.3.14 Pattern Trigger
7.3 baseband mode 7-181 7.3.14 pattern trigger or top>mode,> > sequence mode>patterntrigger uses the pattern trigger to proceed with patterns to the next pattern in the sequence mode. In mg3740a, this can be used only when option-020/120 is installed. Note: in the sequence mode, the pattern trigger ...
Page 436
Chapter 7 modulation 7-182 pattern trigger or top>mode, > > sequence mode>patterntrigger > patterntrigger sets whether the trigger is to be used or not to be used for sequence mode pattern switching. In mg3740a, this can be used only when option-020/120 is installed. Press f1 pattern trigger on the ...
Page 437
7.3 baseband mode 7-183 pattern trigger 1/2/3 or top>mode, > > sequence mode>patterntrigger > patterntrigger 1/2/3 sets the pattern trigger 1/2/3. In mg3740a, this can be used only when option-020/120 is installed. Press f2 pattern trigger 1 to f4 pattern trigger 3 on the pattern trigger function me...
Page 439
7.3 baseband mode 7-185 programming example to set the pattern trigger 1 trigger source to trigger key. Rad:arb:seq:trig1:sour key rad:arb:seq:trig1:sour? > key pattern status the pattern status is a type of trigger to be used to proceed with patterns to the next pattern in the sequence mode. In mg3...
Page 440
Chapter 7 modulation 7-186 edge or top>mode, > > sequence mode>patterntrigger > patterntrigger 1/2/3>edge sets the pattern trigger 1/2/3 edge. In mg3740a, this can be used only when option-020/120 is installed. Press f3 edge on the pattern trigger 1/2/3 function menu for setting. Rise applies the tr...
Page 441
7.3 baseband mode 7-187 switching point or top>mode, > >sequence mode>patterntrigger >switching point selects the switching timing to move to the next element on pattern trigger input. In mg3740a, this can be used only when option-020/120 is installed. Press f5 switching point on the sequence mode f...
Page 442
Chapter 7 modulation 7-188 parameter switching timing to move to the next element pattern switched to the next element with the data length of the waveform pattern of each element as the base unit (default). Frame switched to the next element with the frame length of the waveform pattern of each ele...
Page 443: 7.3.15 Sync Multi Sg
7.3 baseband mode 7-189 7.3.15 sync multi sg or top>mode,> > sync multi sg sync multi sg function is used to output signals with synchronized timings or phases among multiple sgs. In mg3740a, the sync multi sg function cannot be used. The mg3710a can have the synchronization system with up to four u...
Page 444
Chapter 7 modulation 7-190 mg3710a sync type:master mg3710a sync type:slave slave position: 2 mg3710a sync type:slave slave position: 1 mg3710a sync type:slave slave position: 3 ext trig start frame trig input common setting number of slaves: 3 lo sync: on 4. Sync trigger output to sg1 s/f trigger i...
Page 445
7.3 baseband mode 7-191 1.2 execute the synchronization setting for sg1 and sg2. Sync type sg1&2 lo sync on when the option-017/117 is installed, sg1/2 local signal and baseband reference clock are connected within the unit. The synchronization can be executed without change. 1.3 execute i/q dc cal ...
Page 446
Chapter 7 modulation 7-192 1.6 adjust the i/q phase of sg1 (coarse adjustment). Estimate the phase difference between sg1/2 using the behavior where cw signals with the phase difference of 180 degrees negate each other. Adjust the sg1 i/q phase to the values where the mixed wave output level becomes...
Page 447
7.3 baseband mode 7-193 display description press f8 sync multi sg on the arb/waveform function menu page 2 to display the sync multi sg. 1 2 4 3 7 9 8 5 6 figure 7.3.15-3 sync multi sg notes: • the figure above is for explanation; it is different from the actual display. • sg2-related blocks are di...
Page 448
Chapter 7 modulation 7-194 table 7.3.15-1 sync multi sg display contents no. Display example display description 1 master, slave#1 to slave#3 displays the order of connecting mg3710a units when using several mg3710a units. This is displayed when sync type is master or slave. The number of slaves dis...
Page 449
7.3 baseband mode 7-195 press f8 sync multi sg on page 2 of arb/waveform function menu to open the sync multi sg function menu. Also the sync multi sg control is also displayed. Table 7.3.15-2 sync multi sg function menu page key no. Menu display function 1 f1 sync type off sets the synchronization ...
Page 451
7.3 baseband mode 7-197 remote command set the number of connected slaves command [:source]:radio:arb:mbsync:nslaves query [:source]:radio:arb:mbsync:nslaves? Response parameter the number of connected slaves range 1 to 3 resolution 1 default 1 suffix code none programming example to set the number ...
Page 452
Chapter 7 modulation 7-198 remote command set the position of mg3710a when synctype is slave command [:source]:radio:arb:mbsync:sreference query [:source]:radio:arb:mbsync:sreference? Response parameter position of mg3710a range 1 to 3 resolution 1 default 1 suffix code none programming example to s...
Page 454
Chapter 7 modulation 7-200 waveform restart or top>mode, > > sync multi sg>waveform restart simultaneously restarts each waveform pattern selected by sg1 and sg2 when sg2 (option 062/162, 064/164 or 066/166) is installed. Sg1 and sg2 enter the waiting-for-trigger state when the trigger is to be used...
Page 455
7.3 baseband mode 7-201 i/q phase or top>mode, > > sync multi sg>i/q phase adjusts the baseband signal iq phase. This is used to adjust multiple sgs signal phases with mimo or beam forming. The setting is same as f5 i/q phase in table 7.6.4-1 “internal baseband adjust function menu”. Press f7 i/q ph...
Page 456
Chapter 7 modulation 7-202 i/q delay or top>mode,> > sync multi sg>i/q delay adjusts the baseband signal output timings. This is used when multiple sgs are to be synchronized and timings for signals to reach to dut are to be adjusted. The setting is same as f7 i/q delay in table 7.6.4-1 “internal ba...
Page 457: 7.4 Route Connectors
7.4 route connectors 7-203 7.4 route connectors top> > route connectors sets signals of the input and output connectors. This setting is common for the entire mg3710a/mg3740a. Press f4 route connectors on page 2 of the top function menu to open the route connectors function menu. Table 7.4-1 route c...
Page 458
Chapter 7 modulation 7-204 7.4.1 route input connectors top> > route connectors>route input connectors sets signals input to input connectors displayed on the menu. Press f1 route input connectors on the route connectors function menu to display the input connectors function menu. Table 7.4.1-1 inpu...
Page 459
7.4 route connectors 7-205 setting each input connector top> > route connectors>route input connectors>f1 to f6 press f1 to f6 on the input connectors function menu to display the input connectors function menu. You can set signals in the table below regardless of names of input connectors. Table 7....
Page 460
Chapter 7 modulation 7-206 table 7.4.1-3 input connector function menu (mg3740a not installed option-020/120) page key no. Menu display function 1 f1 off does not use the input signal. F3 pattern trigger 1 handles the input signal as pattern trigger 1/point trigger. Refer to 7.3.14 “pattern trigger”...
Page 461
7.4 route connectors 7-207 parameter signal input to the s/f trigger connector options refer to the table below. Table 7.4.1-4 input connector parameter signal to be input remarks sft sg1 s/f trigger default (mg3710a, mg3740a-020/120) in mg3740a, this cannot be selected when option-020/120 is not in...
Page 464
Chapter 7 modulation 7-210 response parameter signal input to the pattern trigger 3 connector options listed in table 7.4.1-3 “input connector”. Default pt3 programming example to set the signal input to the pattern trigger 3 connector to sg1 s/f trigger. Rout:inp:trig:patt3 sft rout:inp:trig:patt3?...
Page 465
7.4 route connectors 7-211 programming example to set the signal input to the pattern status 1 connector to sg1 s/f trigger. Rout:inp:stat:patt1 sft rout:inp:stat:patt1? > sft pulse mod top> > route connectors>route input connectors>pulse mod selects the signal input to the pulse mod connector. Pres...
Page 466
Chapter 7 modulation 7-212 selects the usage of patterntrig1, 2, 3, and patternstatus1. In mg3740a, this can be selected only when option-020/120 is installed. Press f7 pattern trigger type on the input connectors function menu to select the usage. Shared patterntrig1,2,3 and patternstatus1 are hand...
Page 468
Chapter 7 modulation 7-214 7.4.2 route output connectors top> > route connectors>route output connectors sets signals output from output connectors displayed on the menu. Press f2 route output connectors on the route connectors function menu to display the output connectors function menu. Table 7.4....
Page 469
7.4 route connectors 7-215 table 7.4.2-2 marker connector function menu (mg3710a, mg3740a installed option-020/120) page key no. Menu display function 1 f1 sg1 marker 1 a outputs sg1 waveform memory a side marker 1 signal. Refer to 7.3.12 “marker setup”. F2 sg1 marker 2 a outputs sg1 waveform memory...
Page 470
Chapter 7 modulation 7-216 table 7.4.2-2 marker connector function menu (mg3710a, mg3740a installed option-020/120, cont’d) page key no. Menu display function 2 f1 sg1 settled outputs the settling signal of sg1. This is used when the measurement synchronized with the signal transmission after freque...
Page 471
7.4 route connectors 7-217 table 7.4.2-2 marker connector function menu (mg3710a, mg3740a installed option-020/120, cont’d) page key no. Menu display function 3 f1 sg2 marker 2 a outputs sg2 waveform memory a side marker 2 signal. This is not displayed when the option 062/162, 064/164 or 066/166 is ...
Page 472
Chapter 7 modulation 7-218 table 7.4.2-3 marker connector function menu (mg3740a not installed option-020/120) page key no. Menu display function 1 f1 sg1 pulse sync outputs the signal synchronized with sg1 pulse cycle. This is used when the measurement synchronized with the pulse modulation of the ...
Page 473
7.4 route connectors 7-219 sg1/2 marker 1a to 3a: output level is ttl. Outputs the waveform pattern-defined marker signal or user-defined marker signal. Sg1/2 marker 1b to 3b: output level is ttl. Outputs the waveform pattern-defined marker signal or user-defined marker signal. Sync trigger out: out...
Page 474
Chapter 7 modulation 7-220 sg1/2 pulse sync: output level is ttl. Outputs the signal synchronized with the start position of the pulse modulation cycle. Positive =ttl high negative =0v on off pulse modulation pulse sync figure 7.4.2-3 sg1/2 pulse sync sg1/2 pulse video: output level is ttl. Outputs ...
Page 475
7.4 route connectors 7-221 positive negative status of mg3710a/mg3740a source settled frequency switching cal completed figure 7.4.2-5 sg1/2 source settled marker 1 connector: marker 1 top> > route connectors>route output connectors>marker 1 selects the signal output from the marker 1 connector. Pre...
Page 476
Chapter 7 modulation 7-222 table 7.4.2-4 marker connector parameter signal to be output remarks m1a sg1 marker 1 a default (mg3710a, mg3740a-020/120) in mg3740a, this cannot be selected when option-020/120 is not installed. M2a sg1 marker 2 a in mg3740a, this cannot be selected when option-020/120 i...
Page 477
7.4 route connectors 7-223 programming example to set the signal output from the marker 1 connector to sg1 marker 1 a. Rout:outp:mark1 m1a rout:outp:mark1? > m1a marker 2 connector: marker 2 top> > route connectors>route output connectors>marker 2 selects the signal output from the marker 2 connecto...
Page 478
Chapter 7 modulation 7-224 marker 3 connector: marker 3 top> > route connectors>route output connectors>marker 3 selects the signal output from the marker 3 connector. In mg3740a, this can be selected only when option-020/120 is installed. Press f3 marker 3 on the output connectors function menu to ...
Page 479
7.4 route connectors 7-225 pulse video top> > route connectors>route output connectors>pulse video selects the signal output from the pulse video connector. Press f4 pulse video on the output connectors function menu to select the signal. Options listed in table 7.4.2-2 “marker connector function me...
Page 480
Chapter 7 modulation 7-226 pulse sync top> > route connectors>route output connectors>pulse sync selects the signal output from the pulse sync connector. Press f5 pulse sync on the output connectors function menu to select the signal. Options listed in table 7.4.2-2 “marker connector function menu”....
Page 481
7.4 route connectors 7-227 sync trig out top> > route connectors>route output connectors>sync trig out selects the signal output from the sync trig out connector. In mg3740a, this can be selected only when option-020/120 is installed. Press f6 sync trig out on the output connectors function menu to ...
Page 482: 7.5 Awgn
Chapter 7 modulation 7-228 7.5 awgn top> > awgn executes the digital-addition of awgn signal or outputs independently for the selected waveform pattern. This cannot be used in mg3740a. This can be used when awgn option (mg3710a-049/079/149/179) is installed. Waveform pattern awgn rf output figure 7....
Page 483
7.5 awgn 7-229 awgn on/off: awgn top> > awgn>awgn enables/disables the awgn addition. Press f1 awgn on the awgn function menu to set on/off. On outputs awgn. Off does not output awgn (default). The signal with awgn added is output when awgn is on. While the combination of baseband signal (a+b) is be...
Page 484
Chapter 7 modulation 7-230 noise bandwidth top> > awgn>noise bandwidth sets the bandwidth of awgn. Press f2 noise bandwidth on the awgn function menu to set with the noise bandwidth dialog box. Range see table below. Note: the table below describes the setting range when it is output with single awg...
Page 485
7.5 awgn 7-231 parameter frequency range refer to table 7.5-2 resolution 1 hz default 128 mhz suffix code hz, khz, kz, mhz, mz, ghz, gz when omitted: hz programming example to set the bandwidth of awgn to 10 mhz. Rad:arb:nois:bandw 10mhz rad:arb:nois:bandw? > 10000000 carrier level top> > awgn>carri...
Page 486
Chapter 7 modulation 7-232 programming example to set the carrier signal level when awgn is on to –55.00 dbm. Rad:arb:nois:pow:carr –55 rad:arb:nois:pow:carr? > –55.00 noise level top> > awgn>noise level sets the noise level of awgn. The noise level of the noise bandwidth conversion is set when no c...
Page 487
7.5 awgn 7-233 parameter output level resolution 0.01 db default –20 dbm suffix code dbm, dm, dbuv, dbuve when omitted: dbm programming example to set the awgn noise level to –30.00 dbm. Rad:arb:nois:pow:nois –30.00 rad:arb:nois:pow:nois? > –30.00 c/n ratio top> > awgn>c/n ratio sets the ratio of in...
Page 488
Chapter 7 modulation 7-234 parameter c/n range –40 db to 40 db resolution 0.01 default 40.00 suffix code db, when omitted: db details when the rf output level is near the upper limit or lower limit, the settable range may become narrow. Programming example to set the c/n to 3 db. Rad:arb:nois:cn 3db...
Page 489
7.5 awgn 7-235 parameter parameter to be changed carrier changes carrier. Noise changes noise. Total fixes the output level and changes carrier and noise (default). Programming example to set the parameter to be changed when c/n is set to awgn. Rad:arb:nois:pow:cont nois rad:arb:nois:pow:cont? > noi...
Page 490: 7.6 I/q Modulation
Chapter 7 modulation 7-236 7.6 i/q modulation or top> > i/q sets the vector modulation with the external i/q signal and correction, adjustment, and routing for the vector modulation. In mg3740a, this can be used only when option-020/120 is installed. Press i/q of the main function key or f2 i/q on p...
Page 491
7.6 i/q modulation 7-237 i/q source or top> > i/q, >i/q source selects the i/q signal source for the vector modulation with the external i/q signal. This can be used only when option-018/118 is installed in mg3710a. This cannot be used in mg3740a. Press f1 i/q source on the i/q function menu to sele...
Page 492
Chapter 7 modulation 7-238 operation description the setting procedure for the vector modulation with the external i/q signal is described below. Figure 7.6-1 analog i/q input connector the analog i/q input connectors are internally terminated with 50 Ω. When the effective value voltage of 2 2 q i +...
Page 493
7.6 i/q modulation 7-239 example: to execute the vector modulation with the external i/q signal. 1. Press f1 i/q source on the i/q function menu to switch f1 internal to f2 analog i/q in. The display for “src:” is switched to “analog i/q in” in the i/q block in the figure below. Figure 7.6-3 externa...
Page 494
Chapter 7 modulation 7-240 i/q output or top> > i/q, >i/q output can output the i/q signal generated at the digital modulation unit from the i/q signal output connector on the rear panel. This cannot be used in mg3740a. Figure 7.6-5 analog i/q output connector select the output destination for the b...
Page 495
7.6 i/q modulation 7-241 programming example to set the output destination for baseband signals to analog i/q out terminal. Dm:outp aext dm:outp? > aext operation method example: to output the i/q signal from the i/q signal output connector. Note: when the power is turned on while the i/q signal out...
Page 496
Chapter 7 modulation 7-242 baseband in-band correction: internal channel correction or top> > i/q, internal channel correction, or > internal channel correction enables/disables the baseband in-band correction. This cannot be set in mg3740a. Press f3 internal channel correction on the i/q function m...
Page 497
7.6 i/q modulation 7-243 baseband in-band correction: wideband or top> > i/q, >wideband selects the switching mode for rf output bandwidth. This cannot be used in mg3740a. Press f6 wideband on the i/q function menu to select the mode. Off harmonics distortion characteristic has priority (default). O...
Page 498: 7.6.1 I/q Calibration
Chapter 7 modulation 7-244 7.6.1 i/q calibration or top> > i/q, >i/q calibration, or > i/q cal sets the settings related to the i/q quadrature modulator calibration. Press f5 i/q calibration on the i/q function menu to open the i/q calibration info dialog box and i/q calibration function menu. Figur...
Page 502
Chapter 7 modulation 7-248 7.6.2 analog i/q input adjustments or top> > i/q, > > analog i/q input adjustments adjusts/sets the analog i/q input. This is available in mg3710a only when option-018/118 is installed. This is not available in mg3740a. Press f1 analog i/q input adjustments on page 2 of th...
Page 503
7.6 i/q modulation 7-249 remote command set the offset for the i-phase command [:source[1]]:dm:iqadjustment:external:ioffset query [:source[1]]:dm:iqadjustment:external:ioffset? Response unit: v parameter i-phase offset value range –100 mv to 100 mv resolution 1 mv default 0 mv suffix code v, mv, uv...
Page 504
Chapter 7 modulation 7-250 remote command set the offset for the q-phase command [:source[1]]:dm:iqadjustment:external:qoffset query [:source[1]]:dm:iqadjustment:external:qoffset? Response unit: v parameter q-phase offset value range –100 mv to 100 mv resolution 1 mv default 0 mv suffix code v, mv, ...
Page 505
7.6 i/q modulation 7-251 7.6.3 analog i/q output adjustments or top> > i/q, > > analog i/q output adjustments adjusts/sets the analog i/q output. This is available in mg3710a only when option-018/118 is installed. This is not available in mg3740a. Press f2 analog i/q output adjustments on page 2 of ...
Page 506
Chapter 7 modulation 7-252 set the i/q signal output the i/q signal output voltage and dc offset can be adjusted. The output voltage is set with the ratio (%) to the output voltage defined with the setting of the digital modulation unit. These voltages are always indicated by open voltage. Setting r...
Page 507
7.6 i/q modulation 7-253 1. Press f1 i level trimming to display the i level trimming dialog box. 2. Set “106%” (150/141 × 100 = 106 [%]) to the i level trimming dialog box. 3. Press f2 q level trimming to display the q level trimming dialog box. 4. Set “106%” (150/141 × 100 = 106 [%]) to the q leve...
Page 508
Chapter 7 modulation 7-254 i level trimming or top> > i/q, > > analog i/q output adjustments>i level trimming adjusts the i-phase output level gain. This is available in mg3710a only when option-018/118 is installed. This is not available in mg3740a. Press f1 i level trimming on the analog i/q outpu...
Page 509
7.6 i/q modulation 7-255 q level trimming or top> > i/q, > > analog i/q output adjustments>q level trimming adjusts the q-phase output level gain. This is available in mg3710a only when option-018/118 is installed. This is not available in mg3740a. Press f2 q level trimming on the analog i/q output ...
Page 510
Chapter 7 modulation 7-256 i/q common offset or top> > i/q, > > analog i/q output adjustments>i/q common offset adjusts the i/q inphase output dc offset level. This is available in mg3710a only when option-018/118 is installed. This is not available in mg3740a. Press f3 i/q common offset on the anal...
Page 511
7.6 i/q modulation 7-257 i diff offset or top> > i/q, > > analog i/q output adjustments>i diff offset adjusts the i-phase differential output dc offset level. This is available in mg3710a only when option-018/118 is installed. This is not available in mg3740a. Press f4 i diff offset on the analog i/...
Page 512
Chapter 7 modulation 7-258 q diff offset or top> > i/q, > > analog i/q output adjustments>q diff offset adjusts the q-phase differential output dc offset level. This is available in mg3710a only when option-018/118 is installed. This is not available in mg3740a. Press f5 q diff offset on the analog ...
Page 513
7.6 i/q modulation 7-259 7.6.4 internal baseband adjustments or top> > i/q, > > internal baseband adjustments adjusts the i/q signal generated in the internal baseband. In mg3740a, this can be used only when option-020/120 is installed. Press f3 internal baseband adjustments on page 2 of i/q functio...
Page 515
7.6 i/q modulation 7-261 q offset or top> > i/q, > > internal baseband adjustments>q offset sets the dc offset for the q-phase. Press f2 q offset on the internal baseband adjust function menu to set with the q offset dialog box. Range –20% to 20% resolution 0.025% default 0% remote command set the d...
Page 516
Chapter 7 modulation 7-262 gain balance or top> > i/q, > > internal baseband adjustments>gain balance adjusts the i/q phase gain balance. Press f3 gain balance on the internal baseband adjust function menu to set with the gain balance dialog box. Range –1 db to 1 db resolution 0.001 db default 0 db ...
Page 517
7.6 i/q modulation 7-263 programming example to set the gain balance of i/q phase to 1 db. Dm:iqad:gain 1 dm:iqad:gain? > 1.000 quad. Angle or top> > i/q, > > internal baseband adjustments>quad. Angle adjusts the quadrature angle of i/q phase. Press f4 quad. Angle on the internal baseband adjust fun...
Page 518
Chapter 7 modulation 7-264 parameter quadrature angle of the i/q phase range –10 deg to 10 deg resolution 0.01 deg default 0 deg suffix code deg, when omitted: deg programming example to adjust the quadrature angle of i/q phase to 90 deg + 5 deg. Dm:iqad:qsk 5 dm:iqad:qsk? > 5.00 i/q phase or top> >...
Page 519
7.6 i/q modulation 7-265 programming example to set the baseband signal iq phase to 5 deg. Dm:iqad:phas 5 dm:iqad:phas? > 5.00 i/q time difference: i/q skew or top> > i/q, > > internal baseband adjustments>i/q skew adjusts the i/q phase time difference (timing). Press f6 i/q skew on the internal bas...
Page 520
Chapter 7 modulation 7-266. I/q delay or top> > i/q, > > internal baseband adjustments>i/q delay adjusts the baseband signal output timing. This is used when multiple sgs are to be synchronized and timings for signals to reach to dut are to be adjusted. The setting is same as f8 i/q delay in table 7...
Page 521
Chapter 8 ber measurement 8-1 this chapter describes the operations and screen display of the ber measurement function. Note on remote command: when the language mode is scpi, the target sg can be selected with the beginning node of commands for controlling individual functions. Refer to appendix e,...
Page 522
Chapter 8 ber measurement 8-2 8.1 function, performance, and communication or top> > auxiliary, >ber when the mg3710a/mg3740a has the option 021/121 ber measurement function installed, it can measure bit error rates (ber) of externally input signals. To switch the mg3710a/mg3740a to the ber measurem...
Page 523
8.1 function, performance, and communication 8-3 synchronization establishing condition depends on measured patterns. Pn 9, 11, 15, 20, 23 : (pn order × 2) bit continuous error free pn_fix pattern : establish the synchronization with pn signal by pn order × 2 bits error free, and then establish the ...
Page 524
Chapter 8 ber measurement 8-4 display status, error rate, error count, syncloss count, number of measurement bits measurement result clearing function this function can start the measurement from 0 by clearing the measurement values while keeping synchronization during the ber measurement..
Page 525
8.1 function, performance, and communication 8-5 8.1.2 external connection ber measurement requires signals to be input externally. The signals are input via the aux connector on the rear panel. Refer to table 3.1.2-1 “aux connectors”. Figure 8.1.2-1 ber measurement input connector ber measurement u...
Page 526: 8.2 Display Description
Chapter 8 ber measurement 8-6 8.2 display description this section describes display items of the ber measurement function. 8.2.1 ber dialog box or top> > auxiliary, >ber press aux fnct on the main function menu or f5 auxiliary on page 2 of the top function menu to display the auxiliary function men...
Page 527
8.2 display description 8-7 status indicates the status of the ber measurement. Table 8.2.1-2 measurement status display description stop measurement stopped. Synchronizing synchronization is being established. Measuring measurement is in progress. Overflowdatacount measurement stopped because the n...
Page 528
Chapter 8 ber measurement 8-8 error indicates the error information of the ber measurement. Table 8.2.1-3 explanation of errors display description bit error an error bit occurred. Syncloss syncloss occurred. Clockerror the input clock signal was abnormal. Enableerror the input enable signal was abn...
Page 529
8.2 display description 8-9 details 0 is returned if both sg and ber operate normally. Programming example to query the current operation status. Bert:err? > 0 syncloss count displays a sync loss count of the ber measurement. Remote command query a sync loss count of the ber measurement query [:sens...
Page 531
8.2 display description 8-11 number of measurement bits: data count displays the number of measurement bits of the ber measurement. Remote command query the number of measurement bits of the ber measurement query :fetch:bert:data:count? Response parameter number of measurement bits range 0 to 2 32 –...
Page 532
Chapter 8 ber measurement 8-12 8.3 performing ber measurement or top> > auxiliary, >ber use the ber function menu to set and perform the ber measurement. 1. Following the explanation in 8.1.2 “external connection”, input signals externally. 2. Use f4 measure mode to select a mode for the ber measure...
Page 533
8.3 performing ber measurement 8-13 table 8.3-1 ber function menu (cont’d) page key no. Menu display function 2 f1 resync condition sets the automatic resynchronization function. Refer to 8.3.5 “resync condition”. F2 ber interface sets the interface for the ber measurement. Refer to 8.3.6 “ber inter...
Page 534
Chapter 8 ber measurement 8-14 8.3.1 starting/stopping ber measurement start ber test or top> > auxiliary, >ber>start ber test starts the ber measurement. Press f1 start ber test to start the ber measurement. If this is pressed during measurement, measurement values obtained during measurement are c...
Page 535
8.3 performing ber measurement 8-15 table 8.3.1-1 measurement end conditions of ber measurement (single measurement mode) auto resync count mode on off data • reaches the specified number of the measurement bits. • reaches the maximum syncloss count (65535). • reaches the specified number of the mea...
Page 536
Chapter 8 ber measurement 8-16 clear ber count or top> > auxiliary, >ber>clear ber count clears the result of the ber measurement. Press f3 clear ber count to clear the result of the ber measurement. This is not available when measurement mode is continuous. Remote command clear the result of the be...
Page 537
8.3 performing ber measurement 8-17 2. Press f3 clear ber count. When the key is pressed, the number of count bits is 35612, but the “0 bit” is displayed. Start end bit display: 0 bit press count clear 3. When the measurement finishes, the total count bit is 100000 bits, but the “64388 bit” (100000 ...
Page 538
Chapter 8 ber measurement 8-18 bert:rst:auto on bert:rst:auto? > 1.
Page 539: 8.3.2 Measure Mode
8.3 performing ber measurement 8-19 8.3.2 measure mode or top> > auxiliary, >ber>measure mode selects a mode for the ber measurement. Press f4 measure mode to display the measure mode function menu to select a measurement mode. Single measures selected data patterns until a result reaches the specif...
Page 540
Chapter 8 ber measurement 8-20 operation description display the ber measurement mode displayed measurement results by ber measurement modes are shown below. Refer to figure 8.2.1-1 “ber dialog box” for displayed status and error rates during measurement. When measure mode is continuous: status, err...
Page 541
8.3 performing ber measurement 8-21 8.3.3 measurement end conditions: count mode or top> > auxiliary, >ber>count mode sets the measurement end conditions. This function is not available when measure mode is set to endless. Press f5 count mode to display the ber count mode function menu to set the me...
Page 542
Chapter 8 ber measurement 8-22 programming example to set the count mode to the number of measurement bits. Bert:stop:crit none bert:stop:crit? > none setting the number of measurement bits: data or top> > auxiliary, >ber>count mode>data sets the number of measurement bits when count mode is data. T...
Page 543
8.3 performing ber measurement 8-23 setting the number of measurement error bits: error or top> > auxiliary, >ber>count mode>error sets the number of measurement error bits when count mode is error. This function is not available if measure mode is set to endless. Press f3 error on the count mode fu...
Page 544: 8.3.4 Data Type
Chapter 8 ber measurement 8-24 8.3.4 data type or top> > auxiliary, >ber>data type select a data type. Press f6 data type to display the data type function menu to select a data pattern for the measurement. Use to display page 2. Options pn9, pn11, pn15, pn20, pn23, pn9fix, pn11fix, pn15fix, pn20fix...
Page 545
8.3 performing ber measurement 8-25 programming example to set the data pattern for measurement to pn23. Bert:prbs pn23 bert:prbs? > pn23.
Page 546: 8.3.5 Resync Condition
Chapter 8 ber measurement 8-26 8.3.5 resync condition or top> > auxiliary, >ber> > resync condition sets the automatic resynchronization function. Press to display page 2 of the ber function menu. Press f1 resync condition to display the resync condition function menu and set the automatic resynchro...
Page 547
8.3 performing ber measurement 8-27 measured error rates and the corresponding recommended settings are as follows: table 8.3.5-2 measured error rates and recommended settings value measured error rate autoresync on autoresync off threshold value 50/500 threshold value 200/500 less than 0.3% optimal...
Page 548
Chapter 8 ber measurement 8-28 auto resync off the mg3710a/mg3740a performs synchronization when it starts measurement. It starts measurement after the synchronization is established. Syncloss is not detected during measurement. Start measure synchroniz sync. Established figure 8.3.5-2 auto resync o...
Page 549
8.3 performing ber measurement 8-29 note: to get ber curve, set auto sync to on and establish synchronization in good s/n condition, and then change auto sync to off and perform measurement with varying s/n. Auto resync or top> > auxiliary, >ber> > resync condition>auto resync enables/disables the a...
Page 550
Chapter 8 ber measurement 8-30 conditions for detecting sync loss: threshold x, threshold y threshold x or top> > auxiliary,>ber> > resync condition> threshold x sets conditions for detecting sync loss of the ber measurement. Set values of x and y so that when x bits in y bits become error, it is de...
Page 551
8.3 performing ber measurement 8-31 programming example to set conditions for determining sync loss to 123/500 bits. Bert:rsyn:thr 123,500 bert:rsyn:thr? > 123,500 operations when detecting sync loss: at syncloss or top> > auxiliary,>ber> > resync condition>at syncloss specifies to clear or hold the...
Page 552: 8.3.6 Ber Interface
Chapter 8 ber measurement 8-32 8.3.6 ber interface or top> > auxiliary,>ber> > ber interface sets input signals for the ber measurement. Press to display page 2 of the ber function menu. Press f2 ber interface to display the ber interface function menu to set an input interface for the ber measureme...
Page 553
8.3 performing ber measurement 8-33 parameter detection edge of clock signals positive detects data at the rising edge of clock signals (default). Negative detects data at the falling edge of clock signals. Programming example to specify to detect data at the rising edge of clock signals. Inp:bert:c...
Page 554
Chapter 8 ber measurement 8-34 enable active or top> > auxiliary,>ber> > resync condition> ber interface>enable active sets the logic for enable signals of the ber measurement. Press f3 enable active on the ber interface function menu to select a value on the enable active function menu. Disable doe...
Page 555: 8.4 Pn Fix Pattern
8.4 pn fix pattern 8-35 8.4 pn fix pattern for the ber measurement, you can use special pn patterns known as pn_fix patterns. The pn_fix pattern is a pattern consisting of repeated parts of pn patterns and pn patterns with length shorter than 1 cycle. Pnx (2 x - 1 bit) pnx not completed (y bit) pnx ...
Page 556
Chapter 8 ber measurement 8-36 8.4.1 setting pn_fix pattern:pn fix pattern or top> > auxiliary,>ber>pn fix pattern sets a pn_fix pattern. A pn_fix pattern can be set when pn9fix, pn11fix, pn15fix, pn20fix, or pn23fix is selected for data type. Press f7 pn fix pattern on the ber function menu to disp...
Page 557
8.4 pn fix pattern 8-37 remote command set an initial pattern of pn_fix patterns command [:sense]:bert[:baseband]:prbs:pnfix:initial query [:sense]:bert[:baseband]:prbs:pnfix:initial? Response parameter based on table 8.4.1-2 “initial pattern setting value”. Details you can set patterns using this f...
Page 558
Chapter 8 ber measurement 8-38 remote command set a length of pn_fix patterns command [:sense]:bert[:baseband]:prbs:pnfix:length query [:sense]:bert[:baseband]:prbs:pnfix:length? Response parameter based on table 8.4.1-3 “setting range”. Details you can set patterns using this function only when pn ...
Page 559
8.4 pn fix pattern 8-39 8.4.2 synchronization establishing conditions of pn_fix patterns this section describes synchronization establishing conditions of pn_fix patterns. Assumptions: x: pn order(if pn9, x = 9) synchronization is established in 3 phases: 1. Establish synchronization with pn pattern...
Page 560
Chapter 8 ber measurement 8-40 pn9 (511 bit) pn9 (511 bit) pn9 not completed (200 bit) pn9fix 1 cycle 1. Detect 18 bit error free (pn9 synchronization establishing condition) pn9 (511 bit) pn9 (511 bit) pn9 not completed (200 bit) 2. Detect discontinuity discontinuity pn9 not completed bit) disconti...
Page 561
8.4 pn fix pattern 8-41 8.4.3 examples of using pn_fix patterns this section describes examples of how to use pn_fix patterns. Imagine that a communication system has a frame format shown in figure 8.4.3-1, in which the fixed bit a is 10 bits and the communication channel b is 1000 bits. When the co...
Page 562
Chapter 8 ber measurement 8-42 waveform pattern (pn_fix data) dut clock, data, enable rf or i/q signal figure 8.4.3-2 ber measurement with pn_fix data.
Page 563
8.5 user defined pattern 8-43 8.5 user defined pattern the ber measurement can use a pattern created by a user, which is called a user defined pattern. A user defined pattern is an arbitrary binary string that is 8 to 1024 bit length and that consists of a data bit string to determine if synchroniza...
Page 564
Chapter 8 ber measurement 8-44 example 2: #userpattern start 0000 0000 1111 1111 #mark001 0101 0101 #mark002 1111 1111 0000 0000
Page 565
8.5 user defined pattern 8-45 8.5.1 displaying user defined patterns or top> > auxiliary,>ber>user pattern to use user defined patterns, press f6 data type on the bertest function menu and select f6 user defined on page 2 of the berdatatype function menu. When you press f8 user pattern, loaded param...
Page 566
Chapter 8 ber measurement 8-46 pattern file name displays a loaded user defined pattern name of the ber measurement. Remote command query a loaded user defined pattern name of the ber measurement query [:sense]:bert[:baseband]:prbs:user:pattern? Response , details if there is no user defined pattern...
Page 567
8.5 user defined pattern 8-47 programming example to query the pattern length of the user defined pattern. Bert:prbs:user:leng? > 1024 bit string of user defined pattern: user defined pattern displays a bit string of a user defined pattern for the ber measurement. Remote command query a bit string o...
Page 568
Chapter 8 ber measurement 8-48 8.5.2 setting user defined patterns: user pattern or top> > auxiliary,>ber>user pattern loads and sets user defined patterns. Select user defined on the data type function menu, and then press f8 user pattern. The user pattern function menu is displayed and you can set...
Page 569
8.5 user defined pattern 8-49 setting the start bit: sync start or top> > auxiliary,>ber>user pattern>sync start sets the start bit of the part for judging the synchronization establishment. Press f1 sync start on the user pattern function menu to set a length to set the start bit of the part for ju...
Page 570
Chapter 8 ber measurement 8-50 sync length or top> > auxiliary,>ber>user pattern>sync length sets a length to determine if synchronization is established. Press f2 sync length on the user pattern function menu to set a length to determine if synchronization is established in the sync length dialog b...
Page 571
8.5 user defined pattern 8-51 8.5.3 loading user defined patterns: open or top> > auxiliary,>ber>user pattern>open loads user defined patterns for the ber measurement. Place user defined pattern files directly below the specified usb memories or hard disk (internal hard disk) (root) or [device]:\anr...
Page 572
Chapter 8 ber measurement 8-52 details if there is no user defined pattern file, the command returns ***. Files are listed alphabetically in a response message. Programming example to load a list of user pattern files in c drive for the ber measurement. Mmem:list:bert:patt? > test1,test2,test3 opera...
Page 573
8.5 user defined pattern 8-53 if no user defined pattern file exists, “file not found” is displayed. If no user defined pattern file exists, the “no file to read” is displayed. If the length of user defined patterns are out of available range, the following errors are displayed: less than 8 bits : “...
Page 574: 8.6 Ber Log
Chapter 8 ber measurement 8-54 8.6 ber log or top> > auxiliary,>ber> > show log displays the past results of the ber measurement and saves them as files. Press to display page 2 of the ber function menu and press f3 show log to display ber test log. You can display up to 1000 logs. The ber log funct...
Page 575
8.6 ber log 8-55 table 8.6-2 end reasons display description ok indicates that the specified bits or error bits were exceeded and the test completed successfully. Stop indicates that you pressed f2 stop ber test to stop the measurement or specified parameters and the measurement stopped. Overflow_ d...
Page 576
Chapter 8 ber measurement 8-56 ber test log count queries a count of logs for the ber measurement results. Remote command query a count of logs for the ber measurement results query [:sense]:bert[:baseband]:log:count? Response parameter count of logs for the measurement results range 0 to 1000 detai...
Page 577
8.6 ber log 8-57 8.6.1 deleting ber logs: clear or top> > auxiliary,>ber> > show log>clear deletes logs of the ber measurement. Press f1 clear on the ber log function menu to delete logs stored in the memory. Turning the power of the mg3710a/mg3740a off also deletes logs. Remote command delete logs ...
Page 578
Chapter 8 ber measurement 8-58 8.6.2 saving ber logs: save or top> > auxiliary,>ber> > show log>save saves logs of the ber measurement as a text file. The latest 1000 logs are kept. Logs are not stored in hdd unless savelog is performed. Therefore, turning the power off deletes the data. Remote comm...
Page 579
8.6 ber log 8-59 operation method example: to name a log file of the measurement results as “abc” and save it 1. Press f8 save on the ber log function menu to display the ber log save function menu, file list in the function information frame, and the ber log save dialog box in the active function f...
Page 580
Chapter 8 ber measurement 8-60 a space or dot “.” at the beginning or the end of a file name causes a file name error, and the file cannot be saved. Up to 1000 files can be saved in a single folder. Saving more than 1000 files in a folder cause an error, and the file cannot be saved. Deleting ber lo...
Page 581
8.7 about ber measurement operations 8-61 8.7 about ber measurement operations this section describes the ber measurement operations from synchronization to finishing. Auto resync off: overview of the measurement operations when auto resync is set to off is as follows: in this mode, an error rate is...
Page 582
Chapter 8 ber measurement 8-62 sync. Established * 1 sync. Check cleared sync. Failed single endless continuous synchronizing display end continue synchronize count stop measurement ber measurement start end sync. Checked * 2 check measure mode check end condition * 3 measuring display stop display ...
Page 583
8.7 about ber measurement operations 8-63 *1: if the number of measurement bits is less than 1000 bits and the measurement finishes, an error rate is not checked. The measurement result, therefore, may not be correct. *2: if the error rate is 30% or more and the number of measurement bits is 1000 or...
Page 584
Chapter 8 ber measurement 8-64 synchronize count stop measurement sync. Established single endless continuous stop display ber measurement start end check end condition * 3 end continue receive bits required for syncloss condition check * 1 syncloss *2 ok syncronizing display measuring display check...
Page 585
8.7 about ber measurement operations 8-65 *1: to check syncloss conditions, bits specified with the denominator of syncloss threshold must be received. Therefore, it may take time to start counting after synchronization is established. *2: when a syncloss occurs, the operation specified with at sync...
Page 586
Chapter 8 ber measurement 8-66..
Page 587
Chapter 9 other functions 9-1 this chapter describes other functions such as auxiliary, utility, and panel key functions. Note on remote command: when the language mode is scpi, the target sg can be selected with the beginning node of commands for controlling individual functions. Refer to appendix ...
Page 588: 9.1 Auxiliary Function
Chapter 9 other functions 9-2 9.1 auxiliary function or top> > auxiliary press aux fctn on the main function key or f5 auxiliary on page 2 of the top function menu to display the auxiliary function menu. On this menu, you can set power meter, the ber measurement, and alarm history. This section desc...
Page 589: 9.2 Power Meter
9.2 power meter 9-3 9.2 power meter or top> > auxiliary, >power meter you can connect two usb power sensors to the mg3710a/mg3740a, simultaneously control them, and show their measurement values individually. The two power sensor measurements are displayed at ch. A and ch. B of the power meter. Pres...
Page 591
9.2 power meter 9-5 connection displays the connection status of power sensor. Off power sensor is turned off. (default) connected power sensor is turned on and measuring disconnected power sensor is turned on but not measuring. (disconnected) remote command querying the power sensor connection stat...
Page 592
Chapter 9 other functions 9-6 information about the connection and measurement results are displayed in the resident frame below the function display frame. 1 2 figure 9.2-2 power meter in resident frame table 9.2-2 power meter in resident frame no display description 1 a : connection status or a me...
Page 594
Chapter 9 other functions 9-8 9.2.1 power meter setting:channel a/b setup or top> > auxiliary, >power meter>channel a setup or channel b setup press f2 channel a set up or f4 channel b setup on the power meter function menu to display the ch a/b setup function menu. Ch. A and ch. B can be set indivi...
Page 595: Caution
9.2 power meter 9-9 operation method example: to execute the zero adjustment for the power sensor. 1. Connect the usb terminal of the power sensor to the usb terminal of the mg3710a/mg3740a. 2. Enter the information of the connected power sensor with comport number and model to the mg3710a/mg3740a. ...
Page 596
Chapter 9 other functions 9-10 9.2.2 setting connection to power meters : connection settings or top> > auxiliary, >power meter>channel a setup or channel b setup, >connection settings sets the connection to power meters. Press f1 connection settings on the ch a/b setup function menu to display the ...
Page 599
9.2 power meter 9-13 9.2.3 power meter setting: channel settings or top> > auxiliary, >power meter>channel a setup or channel b setup, >channel settings performs the measurement-related settings. Press f2 channel settings on the ch a/b setup function menu to display the ch a/b settings function menu...
Page 600
Chapter 9 other functions 9-14 channel freq or top> > auxiliary, >power meter>channel a setup or channel b setup, >channel settings>channel freq sets a measurement frequency for the power sensor. Press f1 channel freq on the ch a/b settings function menu to display the channel freq dialog box. Enter...
Page 602
Chapter 9 other functions 9-16 programming example to set a level offset for the ch. B power sensor to on. Syst:pmet2:sens:corr:gain2:stat on syst:pmet2:sens:corr:gain2:stat? > 1 channel offset value or top> > auxiliary, >power meter>channel a setup or channel b setup, >channel settings>channel offs...
Page 603
9.2 power meter 9-17 programming example to set an offset level for the ch. B power sensor to -15.00 db. Syst:pmet2:sens:corr:gain2 –15.00 syst:pmet2:sens:corr:gain2? > –15.00 averaging or top> > auxiliary, >power meter>channel a setup or channel b setup, >channel settings>averaging enables/disables...
Page 604
Chapter 9 other functions 9-18 averaging count value or top> > auxiliary, >power meter>channel a setup or channel b setup, >channel settings>averaging count valuesets the averaging count for the measurement values with the power sensor. Press f5 averaging count value on the ch a/b settings function ...
Page 605
9.2 power meter 9-19 measurement units or top> > auxiliary, >power meter>channel a setup or channel b setup, >channel settings>measurements units sets a unit to be used for displaying the value measured by the power sensor. Press f6 measurement units on the ch a/b settings function menu to set it. D...
Page 606: 9.3 Alarm History
Chapter 9 other functions 9-20 9.3 alarm history or top> > auxiliary, >alarm history the mg3710a/mg3740a can store occurred alarm histories up to 100 in files. Press f4 alarm history on the auxiliary function menu to display the alarm history dialog box and the alarm history function menu. Figure 9....
Page 607
9.3 alarm history 9-21 9.3.1 saving alarm history: save or top> > auxiliary, >alarm history>save: when an error occurs during operation of the mg3710a/mg3740a, an alarm is displayed, describing details. The alarm is kept as alarm history. Using this function, you can save histories of alarms. Remote...
Page 608
Chapter 9 other functions 9-22 operation method example: to name the currently displayed file as "alarm20110624_000" and save it. 1. Press f8 save on the alarm history function menu to display the alarm save dialog box on the active function menu, the file list dialog box in the function display fra...
Page 609
9.3 alarm history 9-23 note: when you input a file name, an extension is automatically added. You cannot specify an extension. The maximum 100 characters are allowed for a file name. Destination path: anritsu\mg3710a\user data\alarm history\ default destination name: alarm[date]_[additional number]....
Page 610: 9.4 Utility Function
Chapter 9 other functions 9-24 9.4 utility function or top> > utility when you press the utility of the main function key, the mg3710a/mg3740a becomes the utility setting mode and displays the utility function menu. On this menu, you can save or call parameters or set networks and other functions. T...
Page 611: 9.4.1 Interface Settings
9.4 utility function 9-25 9.4.1 interface settings or top> > utility, >interface settings the mg3710a/mg3740a allows the remote control with gpib, ethernet, and usb. Press f1 interface settings on the utility function menu to display the interface settings function menu. Set the interface for remote...
Page 612
Chapter 9 other functions 9-26 parameter gpib address setting range 1 to 30 default 3 resolution 1 programming example to set gpib address to 2. Syst:comm:gpib:addr 2 syst:comm:gpib:addr? > 2 terminator or top> > utility, >interface settings>terminator sets a terminator (end code) for a response mes...
Page 613
9.4 utility function 9-27 selecting control language: language or top> > utility, >interface settings>language selects a language mode during remote control. Press f3 language on the interface settings function menu to select an assignment from options displayed on the function menu. Scpi sets a lan...
Page 614
Chapter 9 other functions 9-28 tcp/ip port number: raw socket port number or top> > utility, >interface settings>raw socket port number specifies a tcp/ip port number for transmitting the waveform data from iqproducer, which locates on an external pc, to the mg3710a/mg3740a. Press f4 raw socket port...
Page 615: 9.4.2 System Settings
9.4 utility function 9-29 9.4.2 system settings or top> > utility, >system settings press f2 system settings on the utility function menu to display the system setting function menu. Set common items in the system. Table 9.4.2-1 system settings function menu page key no. Menu display function 1 f1 b...
Page 616
Chapter 9 other functions 9-30 parameters at power-on: power on or top> > utility, >system setting>power on specifies status of parameters when the power is on. Press f3 power on of the system setting function menu to set the status. Last keeps the status when the power is on and recovers them if th...
Page 617: 9.4.3 Instrument Info
9.4 utility function 9-31 9.4.3 instrument info or top> > utility, >instrument info press f3 instrument info on the utility function menu to display the instrument info function menu. This function displays the status and factory shipment defaults of the system. Table 9.4.3-1 instrument info functio...
Page 618
Chapter 9 other functions 9-32 sg2 frequency setting range sg2 frequency setting range sg2 level setting range sg2 level setting range sg2 arb memory size sg2 waveform memory size (msamples) sg2 awgn sg2 awgn function on/off sg2 rpp count number of circuit breaker trips by sg2 rpp note: rpp count is...
Page 619
9.4 utility function 9-33 remote command query the product type (product model name) query :system:information:model? Response parameter product model name programming example to query the product model name. Syst:inf:mod? > mg3710a remote command query product name (product name) query :system:info...
Page 620
Chapter 9 other functions 9-34 remote command query running time (available time) query :system:information:rtime? Response parameter running time suffix code none, unit: m (minutes) programming example to query the running time. Syst:inf:rtim? > 100 remote command query firmware version (the versio...
Page 621
9.4 utility function 9-35 programming example to query the option information. Syst:hard:opt:cat? > 1,001,on,rubidium reference oscillator board info or top> > utility, >instrument info>board info displays revision of the system board. Press f3 board info on the instrument info function menu to disp...
Page 622
Chapter 9 other functions 9-36 details this command queries the revision number of the specified hardware. “-” is returned when reading a version number of hardware not installed. To query in batch all hardware names and revision numbers, use: :system:hardware:revision:catalog? Programming example t...
Page 623
9.4 utility function 9-37 fpga info or top> > utility, >instrument info>fpga info displays fpga version of the system. Press f4 fpga info on the instrument info function menu to display the fpga info dialog box in the function display frame. Name fpga name board installed fpga board name version ver...
Page 624
Chapter 9 other functions 9-38 remote command query the version numbers of all fpgas query :system:fpga:version:catalog? Response ,,,... Parameter fpga type controlpldandpanel controlpldandpanel hardwarecontrolfpga hardwarecontrolfpga measurecomdsp measurecomdsp measurecorefpga measurecorefpga measu...
Page 625
9.4 utility function 9-39 waveform licenses or top> > utility, >instrument info>waveform licensesdisplays waveform licenses. Press f5 waveform licenses on the instrument info function menu to display the waveform licenses dialog box and the waveform licenses function menu. License name names of wave...
Page 626
Chapter 9 other functions 9-40 parameter number setting range 0 to (license count – 1) resolution 1 license name of the waveform license character string within 100 characters enclosed by double quotes (" ") or single quotes (' ') (excluding extension) programming example to query the license name o...
Page 627
9.4 utility function 9-41 remote command install a waveform license by specifying a license file command :system:waveform:license:install [,] parameter name of a license file character string within 100 characters enclosed by double quotes (" ") or single quotes (' ') (excluding extension) drive num...
Page 628
Chapter 9 other functions 9-42 4. When waveform license install is selected from the dialog box and f7 install is pressed, the confirmation function menu is displayed. Table 9.4.3-4 confirmation function menu page key no. Menu display function 1 f7 confirm installation performs installation. F8 canc...
Page 629: 9.4.4 Install
9.4 utility function 9-43 9.4.4 install or top> > utility, >install updates the firmware and adds or deletes waveform licenses. Press f4 install on the utility function menu to display the install function menu. Table 9.4.4-1 install function menu page key no. Menu display function 1 f1 firmware upd...
Page 630
Chapter 9 other functions 9-44 table 9.4.4-3 confirmation function menu page key no. Menu display function 1 f7 confirm installation performs installation. F8 cancel returns to the previous menu. 5. Press f7 confirm installation. 6. Install is performed after quitting the application and uninstallin...
Page 631
9.4 utility function 9-45 adding options: options or top> > utility, >install>options adds options. Press f3 options on the install function menu to display the option install dialog box and the option install function menu. Number number of the option name name of the option state indicates on/off ...
Page 632
Chapter 9 other functions 9-46 factory preset or top> > utility, >install>factory preset factory preset is initialization with the largest target range available with normal panel operations and remote control commands. It initializes parameters to the level at which past status before the initializ...
Page 633
9.4 utility function 9-47 confirm reset to factory default or top> > utility, >install>factory preset>confirm reset to factory default performs factory preset and initialize parameters to the level at which past status does not affect operations at all. Remote command initialize parameters to the le...
Page 634
Chapter 9 other functions 9-48 9.4.5 displaying error information: error info or top> > utility, >error info displays the error information. Refer to appendix b “error messages”. Note: the error queue dialog box displays the most recent 30 screen operation errors. Press f5 error info on the utility ...
Page 635
9.4 utility function 9-49 remote command to read remote control error code query :system:error:code[:next]? Response error code number “0” returns where there is no error. Programming example syst:err:code? > 0 remote command select the mode to display error messages when an error occurs during remo...
Page 636
Chapter 9 other functions 9-50 table 9.4.5-1 error info function menu page key no. Menu display function 1 f7 clear deletes error information. Deleting error information: clear or top> > utility, >error info>clear deletes the error information..
Page 637
9.4 utility function 9-51 9.4.6 changing boot loader service the boot loader service program runs immediately after the mg3710a/mg3740a is powered-up to read and boot from the mg3710a/mg3740a firmware. This section explains the procedure for changing the boot loader service program. The procedure is...
Page 638: 9.5 Panel Keys
Chapter 9 other functions 9-52 9.5 panel keys this section describes functions available only from keys on the front panel. 9.5.1 preset press preset of the panel key to display the preset function menu. Table 9.5.1-1 preset function menu page key no. Menu display function 1 f1 preset performs prese...
Page 639
9.5 panel keys 9-53 remote command initialize the settings and status of the currently selected application command :system:preset programming example to initialize the settings and status of the currently selected application. Syst:pres preset all > preset all resets parameters managed by this appl...
Page 640
Chapter 9 other functions 9-54 remote command restart command :system:reboot details this function turns the power off and executes restart. It resets remote/local to local, display on/off to on, signalgenerator function menu to the default values, and ieee488. 2 event status processing to the power...
Page 641
9.5 panel keys 9-55 9.5.2 switching remote/local: local when you press local of the panel key, the remote-control state is changed to the local-control state. Then, the lit remote led (remote) goes off (local). Remote command switch the remote-control state to the local-control state command :system...
Page 642
Chapter 9 other functions 9-56 9.5.3 saving parameter file: save the mg3710a/mg3740a can restore the settings by saving and loading settings of frequencies, output levels, or modulation parameters. This section describes how to save the settings. Press save of the panel key to display the parameter ...
Page 643
9.5 panel keys 9-57 options a to z, currently selected drive when omitted details a space or dot “.” at the beginning or the end of a file name causes a file name error, and the file cannot be saved. A destination path to save the file is the following directory in the specified drive. Anritsu\mg371...
Page 644
Chapter 9 other functions 9-58 operation method the procedure of saving parameters is as follows: example: to save the currently displayed parameters in “abc”. Figure 9.5.3-1 file name input window 1. Press save of the panel key to display the parameter save function menu, the parameter save dialog ...
Page 645
9.5 panel keys 9-59 a space or dot “.” at the beginning or the end of a file name causes a file name error, and the file cannot be saved. Up to 1000 files can be saved in a single folder. Saving more than 1000 files in a folder cause an error, and the file cannot be saved..
Page 646
Chapter 9 other functions 9-60 description of function this function allows you to save the following items: *: setting item common to sg1 and sg2. Other items are saved for sg1 or sg2. Table 9.5.3-3 items saved in a parameter file system items frequency setting function frequency frequency relative...
Page 647
9.5 panel keys 9-61 table 9.5.3-3 items saved in a parameter file (continued) system items sweep/list function sweep/list freq on/off sweep/list freq on/off sweep/list type * sweep repeat * sweep direction * manual mode on/off * manual point * sweep out setting * sweep start frequency sweep stop fre...
Page 648
Chapter 9 other functions 9-62 table 9.5.3-3 items saved in a parameter file (continued) system items modulation function modulation on/off am modulation on/off am depth scale am depth (lin) am depth (log) am modulation frequency fm modulation on/off fm frequency deviation fm modulation frequency φ ...
Page 649
9.5 panel keys 9-63 selected waveform pattern name * waveform copy list focus * rf gate on/off rf gate edit on/off rf gate line rf gate offset 1 rf gate width 1 rf gate offset 2 rf gate width 2 rf gate frequency start/frame trigger on/off start/frame trigger mode start/frame trigger source start/fra...
Page 650
Chapter 9 other functions 9-64 pattern trigger on/off pattern trigger 1 on/off pattern trigger 1 source pattern trigger 1 edge pattern trigger 2 on/off pattern trigger 2 source pattern trigger 2 edge pattern trigger 3 on/off pattern trigger 3 source pattern trigger 3 edge pattern trigger switching p...
Page 651
9.5 panel keys 9-65 table 9.5.3-3 items saved in a parameter file (continued) system items i/q modulation i/q source i/q output internal channel correction cal type wideband analog i/q input i offset * analog i/q input q offset * analog i/q output i level trimming * analog i/q output q level trimmin...
Page 652
Chapter 9 other functions 9-66 table 9.5.3-3 items saved in a parameter file (continued) system items power meter channel a on/off * channel a com port * channel a model * channel a freq * channel a offset on/off * channel a offset value* channel a averaging on/off * channel a averaging count value ...
Page 653
9.5 panel keys 9-67 9.5.4 recalling parameter file: recall press the recall key of the panel key to display the parameter recall function menu, the parameter recall dialog box, and the file list dialog box. Note: do not turn the power off when loading a parameter file. When you turn the power off du...
Page 654
Chapter 9 other functions 9-68 displaying a parameter file list reads out a list of all parameter files in the specified device. Remote command query a list of all parameter files in the specified device query :mmemory:catalog:state? Response ,,・・・ parameter number of the drive options a to z, curre...
Page 655
9.5 panel keys 9-69 operation method the procedure of loading parameters is as follows: example: to load a parameter file. Figure 9.5.4-1 parameter recall dialog box 1. Press recall of the panel key to display the parameter recall function menu, the parameter recall dialog box, and the file list dia...
Page 656: 9.5.5 Screen Copy: Copy
Chapter 9 other functions 9-70 9.5.5 screen copy: copy copies the screen displayed on the mg3710a/mg3740a and saves it in the specified folder. Press copy of the panel key to display the screen copy dialog box, the file list dialog box, and the screen copy function menu. Table 9.5.5-1 screen copy fu...
Page 658
Chapter 9 other functions 9-72 response norm,rev,mono or mrev parameter settings of colors normal color, the same as the displayed screen (default) reverse color, reversed monochrome monochrome mreverse monochrome, reversed programming example to set the screen hardcopy to reverse color. Mmem:stor:s...
Page 659
9.5 panel keys 9-73 details a space or dot “.” at the beginning or the end of a file name causes a file name error, and the file cannot be saved. A destination path to save the file is the following directory in the specified drive. Anritsu\mg3710a\user data\copy files\ up to 1000 files can be saved...
Page 661
9.5 panel keys 9-75 9.5.6 functions specific to remote commands this section describes the functions available only for remote commands. Screen display on/off function turns the lcd backlight and the display on/off. Turning off the display quickens operations because drawing is omitted. Remote comma...
Page 662
Chapter 9 other functions 9-76 screen power on/off function turns the screen power and display on/off. Turning the screen power off with this command can reduce the radiated interference from the monitor. However, operating a mouse, key board, panel key, and touch panel turns the power on again with...
Page 663: 9.5.7 Calibration
9.5 panel keys 9-77 9.5.7 calibration press cal of the panel key to display the calibration function menu. Table 9.5.7-1 calibration function menu page key no. Menu display function 1 f1 calibrate level performs the level calibration. Refer to 5.3.6 “calibrate level”. F2 i/q cal displays the iq cali...
Page 664: 9.6 Touch Panel
Chapter 9 other functions 9-78 9.6 touch panel the mg3710a/mg3740a has the touch panel function. Aged deterioration of touch panels may cause constellations to be less accurate than at the time of deployment. In such a case, we recommend you to calibrate them again. This section describes how to cal...
Page 665: 9.7 Setting Windows
9.7 setting windows 9-79 9.7 setting windows the mg3710a/mg3740a uses microsoft windows embedded standard 2009 or windows 7 professional (hereinafter, referred to as “windows”) as the operating system. Settings for windows and the system can be operated by connecting a mouse and a keyboard. This sec...
Page 666
Chapter 9 other functions 9-80 9.7.1 displaying windows desktop connect a mouse and a keyboard to operate windows. Use the usb mouse included as standard equipment and a compatible keyboard (usb). The following are methods to display the windows desktop. To display applications of the mg3710a/mg3740...
Page 667
9.7 setting windows 9-81 9.7.2 setting control panel various windows settings can be configured using the control panel. The following describes general notes on each setting. Although each setting can be set without using the control panel, use within the scope of the following restrictions (table ...
Page 668
Chapter 9 other functions 9-82 table 9.7.2-1 description of control panel (windows embedded) setting type description add hardware • do not delete devices already installed, or update or remove drivers. • the mg3710a/mg3740a may not operate normally due to conflicts with device drivers when new hard...
Page 669
9.7 setting windows 9-83 table 9.7.2-1 description of control panel (windows embedded) (continued) setting type description network connections • tcp/ip settings may change when the mg3710a/mg3740a is remote-controlled via the ethernet. Refer to appendix e.3.2 “ethernet interface settings” for detai...
Page 670
Chapter 9 other functions 9-84 table 9.7.2-1 description of control panel (windows embedded) (continued) setting type description system • the computer name can be changed. The name is set as “sn” + “serial number” at factory shipment. • do not change hardware or advanced settings. Taskbar and start...
Page 671
9.7 setting windows 9-85 figure 9.7.2-2 control panel (windows 7).
Page 672
Chapter 9 other functions 9-86 table 9.7.2-2 control panel (windows 7) setting type description administrative tools • configures computer management related settings. • do not change this setting. Date and time • sets date, time and time zone. • these settings may be changed if necessary. • interne...
Page 673
9.7 setting windows 9-87 table 9.7.2-2 control panel (windows 7) (continued) setting type description power options • selects computer power management methods to optimize performance with different power sources. • the settings for the auto power off function (turn off monitor) of the display can b...
Page 674
Chapter 9 other functions 9-88 table 9.7.2-2 control panel (windows 7) (continued) setting type description windows anytime upgrade • not available windows firewall • helps assure security against hackers and malicious software by setting firewall security. • firewall settings are set to off at fact...
Page 675
9.7 setting windows 9-89 9.7.3 using external display an external display can be connected to the vga connector on the rear side of the mg3710a/mg3740a, to display screens of the mg3710a/mg3740a and show multiple displays. The following describes the operation procedure for this function. Figure 9.7...
Page 676: Caution
Chapter 9 other functions 9-90 3. Change the display devices settings as shown below: when not using an external display • single display notebook when using only an external display • single display monitor when displaying the mg3710a/mg3740a display to an external display • multiple display twin o...
Page 677: 9.7.4 General Notes
9.7 setting windows 9-91 9.7.4 general notes besides the general notes on the previous section, note the following operations. • operation of the mg3710a/mg3740a is guaranteed at factory shipment status. Operation is not guaranteed when programs, including windows update, are added or updated. • whe...
Page 678
Chapter 9 other functions 9-92 9.7.5 storage device configuration the mg3710a/mg3740a has a built-in hard disk for storing the operating system, application software, user data, and the like. The hard disk of the mg3710a/mg3740a consists of the following partitions. Volume c : system disk windows, a...
Page 679: Caution
9.7 setting windows 9-93 9.7.6 system recovery functions the mg3710a/mg3740a has system recovery functions to restore data on the hard disk to the factory shipment status. These functions can be used in the event of system instability. Restore system drive (partition) only this function restores onl...
Page 680
Chapter 9 other functions 9-94. 1. Disconnect the mg3710a/mg3740a from the network if connected. 2. Connect the keyboard and mouse to the mainframe then turn the mg3710a/mg3740a power on. The bios screen will appear a few seconds after later. 3. Press f4 on the keyboard while the screen in step 2 is...
Page 681
Chapter 10 performance test 10-1 this chapter describes measurement devices, setup methods, configuration procedures, and performance test procedures required for performing performance tests as preventive maintenance. 10.1 overview of performance test ................................... 10-2 10.1.1...
Page 682: 10.1.1 Performance Test
Chapter 10 performance test 10-2 10.1 overview of performance test 10.1.1 performance test performance tests are performed as preventive maintenance in order to prevent degradation of the performance. Perform the tests when required for acceptance inspection, routine inspection, and performance veri...
Page 683: Used
10.1 overview of performance test 10-3 10.1.2 mg3710a/mg3740a performance test items and instruments used the mg3710a/mg3740a performance test items and instruments to be used for each item are described in table 10.1.2-1. Table 10.1.2-1 performance test items and instruments used item summary main ...
Page 684: 10.2.1 Frequency
Chapter 10 performance test 10-4 10.2 frequency performance test 10.2.1 frequency set the frequency of the mg3710a/mg3740a within 9 khz to upper limit frequency and measure the frequency with the frequency counter (mf2412c) to confirm the set frequency is correctly output. Test standards frequency r...
Page 685
10.2 frequency performance test 10-5 4. Set the output frequency of the mg3710a/mg3740a to the value [fr (x)] in table 10.2.1-1. 4.1 when x = 1 connect rf output of this equipment to input2 of the frequency counter. Select input2 at input >f1 input ch. Select 1 m at input >f2 impd2. Set the measur...
Page 686
Chapter 10 performance test 10-6 table 10.2.1-1 frequency setting table x fr (x) (mhz) 1 0.009 2 100 3 300 4 600 5 1000 6 1500 7 2000 8 2500 9 2700 10 3000 11 3500 12 4000 13 4500 14 5000 15 5500 16 6000 x ≥ 10 are available only when the upper limit frequency 4 ghz and 6 ghz options are installed. ...
Page 687
10.3 output level performance test 10-7 10.3 output level performance test 10.3.1 output level frequency characteristics measure the level of each frequency of the mg3710a/mg3740a for the reference level with the power meter (anritsu ml2437a) and power sensor (ma24002a). Test standards absolute accu...
Page 688
Chapter 10 performance test 10-8 a it ml2437a (power meter) mg3710a/mg3740a sensor input 1st rf output ma24002a (power sensor) 2nd rf output measure the level according to table 10.3.1-2 “frequency table”. Test procedure 1. Press on the mg3710a/mg3740a and ml2437a to preset them. 2. Connect the ma24...
Page 689
10.3 output level performance test 10-9 table 10.3.1-2 absolute accuracy measurement frequency setting table 1 x fr (x) (mhz) lev (x) (dbm) 1 50 –5 2 97 –5 3 98 –7 4 100 –7 5 399 –7 6 400 –7 7 500 –7 8 1000 –7 9 1500 –7 10 2000 –7 11 2500 –7 12 2700 –7 13 3000 –7 14 3001 –7 15 3500 –7 16 4000 –7 17 ...
Page 690
Chapter 10 performance test 10-10 table 10.3.1-3 absolute accuracy measurement frequency setting table 2 x fr (x) (mhz) lev (x) (dbm) 1 50 –5 2 97 –5 3 98 –10 4 100 –10 5 399 –10 6 400 –10 7 500 –10 8 1000 –10 9 1500 –10 10 2000 –10 11 2500 –10 12 2700 –10 13 3000 –10 14 3001 –10 15 3500 –10 16 4000...
Page 691: 10.4.1 Vector Accuracy
10.4 vector modulation performance test 10-11 10.4 vector modulation performance test 10.4.1 vector accuracy the baseband signal is generated with the internal waveform pattern, and the vector modulation is performed with the mg3710a. The vector error in the modulated rf signal is measured by using ...
Page 692
Chapter 10 performance test 10-12 output level ≤ +7 dbm (when mg3710a-041/141/071/171 is not installed), output level ≤ +13 dbm (when mg3710a-041/141/071/171 is installed), output frequency 600 m to 2700 mhz, after cal execution at 18º to 28ºc ≤ 0.8% (rms) typ output level ≤ +4 dbm (when mg3710a-041...
Page 693
10.4 vector modulation performance test 10-13 lte (20 mhz test model 3.1) output level ≤ +4 dbm (when mg3710a-041/141/071/171 is not installed), output level ≤ +10 dbm (when mg3710a-041/141/071/171 is installed), output frequency 600 m to 2700 mhz, after cal execution at 18º to 28ºc ≤ 0.8% (rms) typ...
Page 694
Chapter 10 performance test 10-14 5. Turn on the rf output of the mg3710a. 6. Turn on the vector modulation of the mg3710a to apply modulation with the testmodel_4 of standard waveform pattern. 7. Set the output level of the mg3710a and the input level of the ms2690a/91a/92a to the values in table 1...
Page 695
10.4 vector modulation performance test 10-15 test procedure gsm 1. Press of the mg3710a and ms2690a/91a/92a to preset them. 2. Load the gsm/edge measurement software (mx269013a) to the ms2690a/91a/92a. 3. Perform band cal. For the ms2690a/91a/92a. 4. Set the ms2690a/91a/92a as follows: rf signal ...
Page 696
Chapter 10 performance test 10-16 11. Change the output level and frequency [fr (x)] according to table 10.4.1-1 and 10.4.1-4 to repeat step 7 to 10 to obtain measured values. 12. If the 2nd rf is installed, change the connection of the ms2690a/91a/92a to the 2nd rf output to perform step 5 to 11. T...
Page 697
10.4 vector modulation performance test 10-17 table 10.4.1-1 modulation accuracy measurement level composition for the 1st rf, when option-043/143 is not installed for the 2nd rf, when option-073/173 is not installed for the 1st rf, when option-043/143 is installed for the 2nd rf, when option-073/17...
Page 698
Chapter 10 performance test 10-18. Table 10.4.1-3 gsm modulation accuracy measurement frequency table x fr (x) (mhz) 1 800 2 900 3 1800 4 1900 table 10.4.1-4 edge modulation accuracy measurement frequency table x fr (x) (mhz) 1 800 2 900 3 1800 4 1900 table 10.4.1-5 lte (20 mhz test model 3.1) modul...
Page 699
Chapter 11 maintenance 11-1 this chapter describes cautions related to daily maintenance, storage, and shipping of the mg3710a/mg3740a, as well as the calibration procedure to be used as preventive maintenance. 11.1 daily maintenance and storage .................................. 11-2 11.1.1 daily m...
Page 700: 11.1.1 Daily Maintenance
Chapter 11 maintenance 11-2 11.1 daily maintenance and storage 11.1.1 daily maintenance before maintenance, be sure to turn the power off and unplug it from the ac outlet. Panel surface dirt when the panel surface dirt is noticeable, or when the mg3710a/mg3740a has been used in a dusty place, or bef...
Page 701
11.1 daily maintenance and storage 11-3 recommended storage conditions for long-term storage, it is recommended that the mg3710a/mg3740a is stored within the ranges of the environmental conditions below along with that the conditions for cautions before storage above are met. temperature the range...
Page 702: 11.2.1 Repacking
Chapter 11 maintenance 11-4 11.2 repacking and transportation upon return cautions needed on transportation of the mg3710a/mg3740a are explained. 11.2.1 repacking repacking repack the mg3710a/mg3740a using the packing material (box) in which the mg3710a/mg3740a had been packed first. If the packing ...
Page 703: 11.3 Disposal
11.3 disposal 11-5 11.3 disposal when the mg3710a/mg3740a is to be discarded, comply with regulations of each country and local government. Before discarding the mg3710a/mg3740a, dismantle or physically destroy any memory media it contains to ensure that any data saved in memory cannot be recovered ...
Page 704: 11.4 Calibration
Chapter 11 maintenance 11-6 11.4 calibration 11.4.1 calibration calibration is performed as preventive maintenance in order to prevent degradation of the performance. It should be performed regularly to maintain the performance of the mg3710a/mg3740a even if it operates normally. It is desired that ...
Page 705
11.4 calibration 11-7 11.4.3 calibrating frequency with oscilloscope calibrate the reference oscillator frequency using an oscilloscope. Use a frequency standard device (signal synchronized with a standard electric wave and rubidium atomic standard device) with accuracy sufficiently better than the ...
Page 706
Chapter 11 maintenance 11-8 1. Connect the signal of 10 mhz output from the frequency standard device to the reference signal input connector (reference in) of the signal generator 1. 2. Connect the reference signal output (buffer out) on the rear side of the mg3710a/mg3740a to the reference signal ...
Page 707
11.4 calibration 11-9 6. For synchronization, adjust the value of reference clock. For the adjustment method for reference clock, refer to 4.6.6 “ref clock adjustment”. 7. When it is adjusted and the output frequency of the mg3710a/mg3740a meets the standard frequency, the displayed waveform of the ...
Page 708
Chapter 11 maintenance 11-10 11.5 how to replace hard disk use the following procedure to replace the internal hard disk (main hdd) of the equipment with the exchange hdd (mg3710a/mg3740a-313). The reference waveforms have been written to the exchange hdd already at factory shipment. Waveform patter...
Page 709
11.5 how to replace hard disk 11-11 note: if the hard disk lamp on the front panel keeps lighting after hdd assy replacement, the hdd assy may not be inserted correctly. If so, turn off the power, disconnect the power cable from the power outlet, remove the hdd assy once, and insert it again..
Page 710: 11.6 Troubleshooting
Chapter 11 maintenance 11-12 11.6 troubleshooting this section explains possible causes and measures for them when the mg3710a/mg3740a does not operate correctly. If any troubles are not described in this section or taking measures below does not improve the symptoms, contact anritsu corporation or ...
Page 711
11.6 troubleshooting 11-13 table 11.6-1 troubleshooting (continued) problem possible cause measure the remote control mode is not enabled with gpib. Remote control has been executed with ethernet. Disconnect ethernet, press to switch to the local control mode, and then execute the connection with gp...
Page 712
Chapter 11 maintenance 11-14. Table 11.6-1 troubleshooting (continued) problem possible cause measure a modulated signal is not output from the i/q output. I/q output is off. Press to enable the i/q setting mode and switch the i/q output to “analog i/q out”. Refer to 7.6 “iq modulation”. The ber mea...
Page 713
Appendix a specifications a-1 a.1 electrical characteristics typ. Value is not the guaranteed performance with this specification; it is for reference. Nominal values are not guaranteed. It is a common specification for mg3710a and mg3740a, if not specified. Conditions> unless otherwise noted, funct...
Page 714
Appendix a specifications a-2 frequency> items specifications range 1st sg 9 khz to 2.7 ghz (mg3710a/mg3740a-032) 9 khz to 4 ghz (mg3710a/mg3740a-034) 9 khz to 6 ghz (mg3710a/mg3740a-036) 2nd sg 9 khz to 2.7 ghz (mg3710a/mg3740a-062/162) 9 khz to 4 ghz (mg3710a/mg3740a-064/164) 9 khz to 6 ghz (mg371...
Page 715
Appendix a specifications a-3 output level> items specifications setting range 1st sg: mg3710a/mg3740a-043/143 not installed, 2nd sg: mg3710a/mg3740a-073/173 not installed 1st sg: mg3710a/mg3740a-041/141 not installed, 042/142 not installed, 2nd sg: mg3710a/mg3740a-071/171 not installed, 072/172 not...
Page 716
Appendix a specifications a-4 output level> continued items specifications accuracy cw, at 18° to 28°c 1st sg: mg3710a/mg3740a-043/143 not installed, 2nd sg: mg3710a/mg3740a-073/173 not installed 1st sg: mg3710a/mg3740a-041/141/042/142 not installed, 2nd sg: mg3710a/mg3740a-071/171/072/172 not insta...
Page 717
Appendix a specifications a-5 output level> continued items specifications accuracy 1st sg: mg3710a/mg3740a-041/141 installed, 042/142 not installed, 2nd sg: mg3710a/mg3740a-071/171 installed, 072/172 not installed level frequency 100 khz ≤ , –100 dbm ≤ +5 dbm ±0.5 db typ. Level frequency 1 mhz ≤ , ...
Page 718
Appendix a specifications a-6 output level> continued items specifications accuracy 1st sg: mg3710a/mg3740a-041/141 not installed, 042/142 installed, 2nd sg: mg3710a/mg3740a-071/171 not installed, 072/172 installed level frequency 100 khz ≤ , –100 dbm ≤ +5 dbm ±0.5 db typ. Level frequency 1 mhz ≤ , ...
Page 719
Appendix a specifications a-7 output level> continued items specifications accuracy 1st sg: mg3710a/mg3740a-041/141/042/142 installed, 2nd sg: mg3710a/mg3740a-071/171/072/172 installed level frequency 100 khz ≤ , –100 dbm ≤ +5 dbm ±0.5 db typ. Level frequency 1 mhz ≤ , 10 mhz 10 mhz ≤ , 50 mhz +5 db...
Page 720
Appendix a specifications a-8 output level> continued items specifications accuracy level frequency 5 ghz, ≤ 6 ghz +1 dbm ≤ , ≤ +11 dbm ±0.8 db –40 dbm ±0.8 db –100 dbm ≤ –40 dbm ±0.8 db –110 dbm ≤ –100 dbm ±0.8 db –120 dbm ≤ –110 dbm ±1.0 db –127 dbm ≤ –120 dbm ±2.5 db typ. 1st sg: mg3710a/mg3740a-...
Page 721
Appendix a specifications a-9 output level> continued items specifications accuracy level frequency 5 ghz, ≤ 6 ghz –2 dbm ≤ , ≤ +8 dbm ±0.8 db –40 dbm ±0.8 db –100 dbm ≤ –40 dbm ±0.8 db –110 dbm ≤ –100 dbm ±0.8 db 1st sg: mg3710a/mg3740a-041/141 installed, 042/142 not installed, 2nd sg: mg3710a/mg37...
Page 722
Appendix a specifications a-10 output level> continued items specifications accuracy level frequency 5 ghz, ≤ 6 ghz –2 dbm ≤ , ≤ +8 dbm ±0.8 db –40 dbm ±0.8 db –100 dbm ≤ –40 dbm ±0.8 db –110 dbm ≤ –100 dbm ±0.8 db 1st sg: mg3710a/mg3740a-041/141 not installed, 042/142 installed, 2nd sg: mg3710a/mg3...
Page 723
Appendix a specifications a-11 output level> continued items specifications accuracy level frequency 5 ghz, ≤ 6 ghz –2 dbm ≤ , ≤ +8 dbm ±0.8 db –40 dbm ±0.8 db –100 dbm ≤ –40 dbm ±0.8 db –110 dbm ≤ –100 dbm ±0.8 db –120 dbm ≤ –110 dbm ±1.0 db –127 dbm ≤ –120 dbm ±2.5 db typ. 1st sg: mg3710a/mg3740a-...
Page 724
Appendix a specifications a-12 output level> continued items specifications accuracy level frequency 50 mhz ≤ , 400 mhz 400 mhz ≤ , ≤ 3 ghz +17 dbm ≤ +20 dbm ±0.6 db +10 dbm ≤ +17 dbm ±0.6 db ±0.6 db –2 dbm ≤ , ≤ +10 dbm ±0.6 db ±0.5 db –40 dbm ±0.5 db ±0.5 db –110 dbm ≤ –40 dbm ±0.5 db ±0.5 db –120...
Page 725
Appendix a specifications a-13 output level> continued items specifications linearity cw, at 18° to 28°c 1st sg: mg3710a/mg3740a-043/143 not installed, 2nd sg: mg3710a/mg3740a-073/173 not installed 1st sg: mg3710a/mg3740a-041/141/042/142 not installed, 2nd sg: mg3710a/mg3740a-071/171/072/172 not ins...
Page 726
Appendix a specifications a-14 output level> continued items specifications linearity 1st sg: mg3710a/mg3740a-041/141 not installed, 042/142 installed, 2nd sg: mg3710a/mg3740a-071/171 not installed, 072/172 installed reference: –7 dbm level frequency 50 mhz ≤ , 400 mhz 400 mhz ≤ , ≤ 3 ghz –40 dbm ≤ ...
Page 727
Appendix a specifications a-15 output level> continued items specifications linearity 1st sg: mg3710a/mg3740a-043/143 installed, 2nd sg: mg3710a/mg3740a-073/173 installed 1st sg: mg3710a/mg3740a-041/141/042/142 not installed, 2nd sg: mg3710a/mg3740a-071/171/072/172 not installed reference: –10 dbm l...
Page 728
Appendix a specifications a-16 output level> continued items specifications linearity 1st sg: mg3710a/mg3740a-041/141 not installed, 042/142 installed, 2nd sg: mg3710a/mg3740a-071/171 not installed, 072/172 installed reference: –10 dbm level frequency 50 mhz ≤ , 400 mhz 400 mhz ≤ , ≤ 3 ghz –40 dbm ≤...
Page 729
Appendix a specifications a-17 att hold> items specifications att hold with reference to the level when att hold is turned on, level adjustment of continuous signal generation is available in 0.01 db step between the range from – 10 db to +10 db. However, each upper and lower limit of the adjustment...
Page 730
Appendix a specifications a-18 signal purity> items specifications harmonic spurious at cw, optimize s/n = off 1st sg: mg3710a/mg3740a-043/143 not installed, 2nd sg: mg3710a/mg3740a-073/173 not installed 1st sg: mg3710a/mg3740a-041/141 not installed, 2nd sg: mg3710a/mg3740a-071/171 not installed lev...
Page 731
Appendix a specifications a-19 signal purity> continued items specifications non-harmonic spurious under the conditions of –30 dbm ≤ output level ≤ +5 dbm, cw generation, 10 khz or more frequency offset from the output frequency. Ssb phase noise at phase noise opt.:.
Page 732
Appendix a specifications a-20 items specifications optimize function • spurious mode mode to control spurious problem. Controls spurious generated by the modulator. • distortion mode mode to control distortion problem. Optimizes the setting automatically to avoid distortions. This mode can be used ...
Page 733
Appendix a specifications a-21 continued items specifications distortion (mg3710a) under the conditions: peak level ≤ 4 dbm, 100 khz ≤ frequency range am depth type = lin, after cal execution, modulation rate = 1 khz, am source = sine, and modulation ratio m = 30%. Under the conditions: peak level ≤...
Page 734
Appendix a specifications a-22 continued items specifications distortion (mg3740a) under the conditions: peak level ≤ 4 dbm, 98 mhz ≤ frequency range ≤ 2700 mhz, am depth type = lin, after cal execution, modulation rate = 1 khz, am source = sine, and modulation ratio m = 90%. Modulation frequency re...
Page 735
Appendix a specifications a-23 continued items specifications modulation frequency response in mg3740a, under the conditions: peak level ≤ 4 dbm, 100 khz ≤ frequency range am depth type = lin, modulation ratio m = 90%, after cal execution, and bandwidth within ±1.5 db. Int: 0.1 hz ≤ modulation rate ...
Page 736
Appendix a specifications a-24 continued items specifications deviation accuracy in mg3740a, under the conditions: output level≤ 4 dbm, 250 khz + 2 ×(modulation rate + 2 × deviation) ≤ frequency ≤ 2700 mhz, after cal execution, modulation rate = 1 khz, fm source = sine, and 200 hz ≤ deviation ≤ 40 k...
Page 737
Appendix a specifications a-25 continued items specifications distortion (mg3740a) under the conditions: output level≤ 4 dbm, 1 mhz + 2 ×(modulation rate + 2 × deviation) ≤ frequency ≤ 2700 mhz, after cal execution, modulation rate = 1 khz, fm source = sine, and deviation = 3.5 khz. Modulation frequ...
Page 738
Appendix a specifications a-26 continued items specifications deviation accuracy in mg3710a, under the conditions: output level ≤ 4 dbm, 100 khz + 2 × (modulation rate + 2 × deviation × modulation rate) ≤ frequency ≤ 2700 mhz, after cal execution, modulation rate = 1 khz, φm source = sine, and devia...
Page 739
Appendix a specifications a-27 continued items specifications pulse modulation on/off ratio >70 db (50 mhz ≤ output frequency ≤ 3 ghz >60 db (3 ghz minimum pulse width 1 µs (nominal) rising/falling time ≤50 ns (10 to 90%) (nominal) pulse repetition frequency dc to 1 mhz (duty 50%) external pulse mod...
Page 740
Appendix a specifications a-28 items specifications vector accuracy 1st sg (mg3710a) after cal execution when mg3710a-043/143 is not installed: when w-cdma (test model 4) is modulated: output frequency: 800 mhz to 900 mhz, 1800 mhz to 2200 mhz, output level≤+7 dbm (when mg3710a-041/141 is not instal...
Page 741
Appendix a specifications a-29 continued items specifications vector accuracy 1st sg (mg3710a) when mg3710a-043/143 is installed: when w-cdma (test model 4) is modulated: output frequency: 800 mhz to 900 mhz, 1800 mhz to 2200 mhz, output level≤+4 dbm (when mg3710a-041/141 is not installed), output l...
Page 742
Appendix a specifications a-30 continued items specifications vector accuracy 2nd sg (mg3710a) when lte (20mhz test model 3.1) is modulated: output frequency: 600 mhz to 2700 mhz, output level≤+7 dbm (when mg3710a-071/171 is not installed), output level≤+13 dbm (when mg3710a-071/171 is installed), ≤...
Page 743
Appendix a specifications a-31 continued items specifications image rejection mg3740a with mg3740a-020/120 installed under the conditions of the temperature range between 18°c and 28°c, rms value = 0 db, after cal execution, and complex cw at 1mhz or less. ≤–50 dbc (200 mhz≤frequency ≤–43 dbc (4 ghz...
Page 744
Appendix a specifications a-32 continued items specifications aclr when mg3710a-043/143 is installed: 1st sg (mg3710a) 300 mhz≤output frequency output level≤–5 dbm (when mg3710a-041/141 is not installed), output level≤+2 dbm (when mg3710a-041/041 is installed), 5 mhz offset: ≤–68 dbc/3.84 mhz 10 mhz...
Page 745
Appendix a specifications a-33 continued items specifications aclr 2nd sg (mg3710a) when mg3710a-073/173 is not installed: 300 mhz≤output frequency output level≤–2 dbm (when mg3710a-071/171 is not installed), output level≤+5 dbm (when mg3710a-071/071 is installed), 5 mhz offset: ≤–68 dbc/3.84 mhz 10...
Page 746
Appendix a specifications a-34 continued items specifications aclr 2nd sg (mg3710a) when mg3710a-073/173 is installed: 300 mhz≤output frequency output level≤–5 dbm (when mg3710a-071/171 is not installed), output level≤+2 dbm (when mg3710a-071/071 is installed), 5 mhz offset: ≤–68 dbc/3.84 mhz 10 mhz...
Page 747
Appendix a specifications a-35 continued items specifications level error from cw during vector modulation under the conditions of the temperature between 18°c and 28°c and awgn signal of bandwidth = 5 mhz. 1st sg (mg3710a) when mg3710a-043/143 is not installed: output level ±0.3 db (50 mhz≤output f...
Page 748
Appendix a specifications a-36 continued items specifications iq input/output base band iq adjustment mg3710a or mg3740a with mg3740a-020/120 installed dc offset function range: –20.000% to +20.000% resolution: 0.025% gain balancing function range: –1.000 db to +1.000 db resolution: 0.001 db iq adju...
Page 749
Appendix a specifications a-37 continued items specifications iq output when mg3710a-018/118 is installed: output voltage range under open circuit output conditions, with output voltage amplitude +dc offset: –2.5 v to +5 v dc offset function under an open circuited output conditions inphase dc offse...
Page 750
Appendix a specifications a-38 continued items specifications internal baseband reference clock signal in mg3710a or mg3740a with mg3740a-020/120 installed range 20 khz to 200 mhz resolution 0.001 hz external baseband reference clock signal when mg3710a-017/117 is installed: range 20 khz to 50 mhz d...
Page 751
Appendix a specifications a-39 continued items specifications frequency offset in mg3710a: ± ((200 mhz × 0.8 – wave form data bandwidth))/2 at the maximum when mg3740a-020/120 is installed: ± ((8 mhz × 0.8 – wave form data bandwidth))/2 at the maximum sequence function in mg3710a or mg3740a with mg3...
Page 752
Appendix a specifications a-40 items specifications awgn generating function 1st sg when mg3710a-049/149 is installed: absolute value of cn ratio: ≤40 db 2nd sg when mg3710a-079/179 is installed: absolute value of cn ratio≤40 db band restriction filter when mg3710a-049/079/149/179 is installed: the ...
Page 753
Appendix a specifications a-41 items specifications when mg3710a/mg3740a-021/121 is installed: connector connector: rear panel, aux connector input level: ttl input signal data, clock, enable input bit rate 100 bps to 40 mbps measurable patterns pn,9, pn,1, pn,5, pn,0, pn,3, al,0, al,1, repeat of “0...
Page 754
Appendix a specifications a-42 items specifications output connector (rf output) refer to for details. Output connector (2nd rf output) when mg3710a/mg3740a- 062/064/066/162/164/166 is installed: refer to for details. Analog iq input (i input) (q input) when mg3710a-018/118 is installed: refer to , ...
Page 755
Appendix a specifications a-43 continued items specifications sweep output when mg3710a/mg3740a-017/117 is installed: connector bnc-j at output level 0 to 10 v (while 10v level sweep is being executed), 0 to 5 v (when sweep status is selected) lo input when mg3710a-017/117 is installed: connector re...
Page 756
Appendix a specifications a-44 display xga color lcd (resolution 1024 × 768) 8.4 inches (213 mm) items specifications dimensions and mass dimensions 177 mm (h) × 426 mm (w) × 390 mm (d) (excluding protrusions) mass ≤13.7 kg (with ms3710a/mg3740a-032,034 or 036 installed; excludes all other options) ...
Page 757
Appendix a specifications a-45 items specifications conducted interference conforms to en 61326-1: 2006 radiated interference conforms to en 61326-1: 2006 harmonic current emission conforms to en 61000-3-2: 2006 +a1:2009 a2:2009 electrostatic discharge conforms to en 61326-1: 2006 electromagnetic im...
Page 758: A.2 Options
Appendix a specifications a-46 a.2 options option 001 rubidium reference oscillator / option 101 rubidium reference oscillator retrofit > items specifications model/symbol mg3710a-001, mg3740a-001 rubidium reference oscillator mg3710a-101, mg3740a-101 rubidium reference oscillator retrofit intended ...
Page 759
Appendix a specifications a-47 option 017 universal input/output /option 117 universal input/output retrofit> items specifications model/symbol mg3710a-017, mg3740a-017 universal input/output mg3710a-117, mg3740a-117 universal input/output retrofit intended use supplies the following interfaces. Mg3...
Page 760
Appendix a specifications a-48 option 021 ber test function /option 121 ber test function retrofit > items specifications model/symbol mg3710a-021, mg3740a-021 ber test function mg3710a-121, mg3740a-121 ber test function retrofit intended use adds the ber measurement function. Refer to for details. ...
Page 761
Appendix a specifications a-49 option 041 high power extension for 1st rf / option 141 high power extension for 1st rf retrofit> items specifications model/symbol mg3710a-041, mg3740a-041 high power extension for 1st rf mg3710a-141, mg3740a-141high power extension for 1st rf retrofit intended use ex...
Page 762
Appendix a specifications a-50 option 146 arb memory upgrade 1024 msample for 1st rf retrofit > note: this option cannot be installed in mg3740a. Items specifications model/symbol mg3710a-046 arb memory upgrade 1024 msample for 1st rf mg3710a-146 arb memory upgrade 1024 msample for 1st rf retrofit i...
Page 763
Appendix a specifications a-51 option 150 additional analog modulation input for 1st rf retrofit> items specifications model/symbol mg3710a-050, mg3740a-050 additional analog modulation input for 1st rf mg3710a-150, mg3740a-150 additional analog modulation input for 1st rf retrofit intended use adds...
Page 764
Appendix a specifications a-52 option 171 high power extension for 2nd rf retrofit> items specifications model/symbol mg3710a-071, mg3740a-071 high power extension for 2nd rf mg3710a-171, mg3740a-171 high power extension for 2nd rf retrofit intended use extends the maximum 2nd rf output level. Refer...
Page 765
Appendix a specifications a-53 option 176 arb memory upgrade 1024 msample for 2nd rf retrofit> note: this option cannot be installed in mg3740a. Items specifications model/symbol mg3710a-076 arb memory upgrade 1024 msample for 2nd rf mg3710a-176 arb memory upgrade 1024 msample for 2nd rf retrofit in...
Page 766
Appendix A specifications a-54. Option 180 additional analog modulation input for 2nd rf retrofit> items specifications model/symbol mg3710a-080, mg3740a-080 additional analog modulation input for 2nd rf mg3710a-180, mg3740a-180 additional analog modulation input for 2nd rf retrofit intended use add...
Page 767
Appendix b error messages b-1 b.1 error messages list ................................................... B-2.
Page 768: B.1 Error Messages List
A ppe ndi x b e rro r m es sa ge s b -2 b.1 error messages list id message description -1 operation is canceled — -100 command error failed to analyze command syntax. -108 parameter not allowed received more-than-required number of parameters for header. -109 missing parameter received less-than-req...
Page 769
B .1 e rro r m ess ag es list b -3 id message description -200 execution error there is insufficient space on memory to load long pattern. -200 execution error the waveform already exists on memory a. -200 execution error the waveform already exists on memory b. -200 execution error the same long pa...
Page 770
A ppe ndi x b e rro r m es sa ge s b -4 id message description -221 settings conflict operation restricted by multi sg sync. -221 settings conflict operation disabled when pattern combination is edit. -221 settings conflict operation disabled when digital modulation (opt-020) not installed. -221 set...
Page 771
B .1 e rro r m ess ag es list b -5 id message description -221 settings conflict operation disabled when sequence pattern file is selected. -221 settings conflict operation disabled when carrier is not included in output signal. -221 settings conflict operation disabled when carrier is included in o...
Page 772
A ppe ndi x b e rro r m es sa ge s b -6 id message description -221 settings conflict cannot find waveform a specified with combination. -221 settings conflict cannot find waveform b specified with combination. -221 settings conflict invalid waveform a file information -221 settings conflict invalid...
Page 773
B .1 e rro r m ess ag es list b -7 id message description -222 data out of range setting value out of range -240 hardware error failed to communicate with power sensor. -241 hardware missing operation disabled when both option 018 and option 019 not installed. -241 hardware missing operation disable...
Page 774
A ppe ndi x b e rro r m es sa ge s b -8 ..
Page 775
Appendix c default value list c-1 the default values are common to sg port 1 and 2, if not specified. Item default sg port sg1 item default frequency setting frequency 1 ghz frequency relative display on/off off frequency relative display 0 hz frequency offset on/off off frequency offset 0 hz freque...
Page 776
Appendix c default value list c-2 item default output rf output on/off off output level –144.00 dbm display unit dbm output level relative display on/off off output level relative value 0 db output level offset on/off off output level offset 0.00 db output level step 0.10 db limit level on/off off l...
Page 777
Appendix c default value list c-3 item default sweep sweep/list freq on/off off sweep/list level on/off off sweep/list type sweep sweep repeat continuous sweep direction up manual mode on/off off manual point 1 output setting sweep out setting sweep status trigger out polarity positive sweep functio...
Page 778
Appendix c default value list c-4 item default modulation modulation on/off off analog/pulse modulation am modulation on/off off am depth scale linear am depth (lin) 0.1% am depth (log) 3.00 db am modulation frequency 400.0 hz switching am source int am waveform sine am phase adjust 0 deg fm modulat...
Page 779
Appendix c default value list c-5 item default optimize function for the analog modulation optimize spurious (mg3710a) distortion (mg3740a) digital modulation arb on/off on rms adjustment 0.00 db pattern generation mode defined arb setup pattern a on/off on pattern b on/off off pattern a output leve...
Page 780
Appendix c default value list c-6 item default rf gate rf gate on/off on rf gate edit on/off off rf gate line single rf gate offset 1 0.00 rf gate width 1 1.00 rf gate offset 2 0.00 rf gate width 2 1.00 rf gate frequency 1.00 start/frame trigger start/frame trigger on/off off start/frame trigger mod...
Page 781
Appendix c default value list c-7 item default marker2 polarity b positive marker3 edit mode a on/off off marker3 offset a 0.00 marker3 width a 1.00 marker3 cycle a 1.00 marker3 polarity a positive marker3 edit mode b on/off off marker3 offset b 0.00 marker3 width b 1.00 marker3 cycle b 1.00 marker3...
Page 782
Appendix c default value list c-8 item default route input connectors s/f trigger sg1 s/f trigger (mg3710a, mg3740a-020/120) off (when mg3740a-020/120 is not installed) pattern trigger 1 pattern trigger 1 (mg3710a, mg3740a-020/120) off (when mg3740a-020/120 is not installed) pattern trigger 2 patter...
Page 783
Appendix c default value list c-9 item default i/q i/q source internal i/q output rf internal channel correction off i/q calibration cal type dc wideband off analog i/q input adjustments i offset 0.000 v q offset 0.000 v analog i/q output adjustments i level trimming 100.0% q level trimming 100.0% i...
Page 784
Appendix c default value list c-10 item default ber measure mode continuous data type pn9 count mode count mode data data 1000 error 1 resync condition auto resync on threshold x 200 threshold y 500 bits at syncloss clear ber interface clock edge rise data polarity positive enable active disable pn ...
Page 785
Appendix c default value list c-11 item default channel a on/off off channel b on/off off connection settings channel a com port 2 channel a model ma24106a channel b com port 2 channel b model ma24106a channel settings channel a freq 1.00000000000 ghz channel a offset on/off off channel a offset 0.0...
Page 786
Appendix c default value list c-12. Item default copy file type png color normal others screen display on/off on knob hold on/off off item default saving/reading media c.
Page 787
Appendix d performance test report form d-1 performance test result form test location report no. Date test person in charge equipment name: mg3710a vector signal generator / mg3740a analog signal generator serial no. Ambient temperature ºc power frequency relative humidity % remarks:.
Page 788
Appendix d performance test report form d-2 output frequency (section 10.2.1) 1st rf setting results 0.009 mhz 100 mhz 300 mhz 600 mhz 1000 mhz 1500 mhz 2000 mhz 2500 mhz 2700 mhz □ ok □ ng □ ok □ ng □ ok □ ng □ ok □ ng □ ok □ ng □ ok □ ng □ ok □ ng □ ok □ ng □ ok □ ng 3000 mhz 3500 mhz 4000 mhz □ o...
Page 789
Appendix d performance test report form d-3 2nd rf setting results 0.009 mhz 100 mhz 300 mhz 600 mhz 1000 mhz 1500 mhz 2000 mhz 2500 mhz 2700 mhz □ ok □ ng □ ok □ ng □ ok □ ng □ ok □ ng □ ok □ ng □ ok □ ng □ ok □ ng □ ok □ ng □ ok □ ng 3000 mhz 3500 mhz 4000 mhz □ ok □ ng □ ok □ ng □ ok □ ng 4500 mh...
Page 790
Appendix d performance test report form d-4 output level frequency characteristics (section 10.3.1) 1st rf, without option 043/143 setting minimum rating results maximum rating uncertainty frequency frequency output level 50 mhz 97 mhz –5 dbm –5.5 dbm –4.5 dbm ± 0.27 db 98 mhz 100 mhz 399 mhz 400 mh...
Page 791
Appendix d performance test report form d-5 2nd rf, without option 073/173 setting minimum rating results maximum rating uncertainty frequency frequency output level 50 mhz 97 mhz –5 dbm –5.5 dbm –4.5 dbm ± 0.27 db 98 mhz 100 mhz 399 mhz 400 mhz –7 dbm –7.5 dbm –6.5 dbm ± 0.27 db 500 mhz 1000 mhz 15...
Page 792
Appendix d performance test report form d-6 1st rf, with option 043/143 setting minimum rating results maximum rating uncertainty frequency frequency output level 50 mhz 97 mhz –8 dbm –8.5 dbm –7.5 dbm ± 0.27 db 98 mhz 100 mhz 399 mhz 400 mhz –10 dbm –10.5 dbm –9.5 dbm ± 0.27 db 500 mhz 1000 mhz 150...
Page 793
Appendix d performance test report form d-7 2nd rf, with option 073/173 setting minimum rating results maximum rating uncertainty frequency frequency output level 50 mhz 97 mhz –8 dbm –8.5 dbm –7.5 dbm ± 0.27 db 98 mhz 100 mhz 399 mhz 400 mhz –10 dbm –10.5 dbm –9.5 dbm ± 0.27 db 500 mhz 1000 mhz 150...
Page 794
Appendix d performance test report form d-8 vector accuracy (section 10.4.1) note: waveform patterns are not included in the mg3740a; therefore the vector modulation performance test is not required. 1st rf setting maximum rating results system frequency output level w-cdma (test model 4) 800 mhz 90...
Page 795
Appendix d performance test report form d-9 2nd rf setting maximum rating results frequency system frequency output level w-cdma (test model 4) 800 mhz 900 mhz 1800 mhz 1900 mhz □ (1) +7 dbm □ (2) +13 dbm □ (3) +4 dbm □ (4) +10 dbm 0.6% (rms) typ. Gsm 800 mhz 900 mhz 1800 mhz 1900 mhz 0.8% (rms) typ...
Page 796
Appendix d peformance test report form d-10..
Page 797
Appendix e remote control e-1 this chapter provides an overview of the remote control operation of the mg3710a/mg3740a. E.1 overview ....................................................................... E-3 e.2 connection .................................................................... E-4 e.2...
Page 798
Appendix e remote control e-2 (main application) ........................................... E-61 e.9.14 extended error event status register (sub application) ............................................ E-62 e.9.15 extended end event status register (sub application) .................................
Page 799: E.1 Overview
E.1 overview e-3 e.1 overview automatic measurement can be performed in combination with an external controller (pc). The mg3710a/mg3740a is equipped with gpib, ethernet and usb interfaces as standard. The following functions are supported via these interfaces: control of all functions, except for...
Page 800: E.2 Connection
Appendix e remote control e-4 e.2 connection connect the mg3710a/mg3740a and an external controller (pc) to be used for remote control using the dedicated connector for the applicable interface on the rear panel. Connection cables are provided as additional parts with the mg3710a/mg3740a. Gpib usb (...
Page 801: E.2.1 Gpib
E.2 connection e-5 e.2.1 gpib connection connect the gpib connector on the rear panel of the ms2690a/ms2691a /ms2692a and an external device using a gpib cable. Note: be sure to connect the gpib cable before turning power on to the mg3710a/mg3740a. Connecting it while the power is on may damage inte...
Page 802: E.2.2 Ethernet
Appendix e remote control e-6 e.2.2 ethernet connection connect the ethernet connector on the rear panel and external devices using lan cables. Note: check the network settings before lan connection. The destination lan may be affected depending on settings. Use a lan crossover cable to connect the ...
Page 803: E.2.3 Usb
E.2 connection e-7 e.2.3 usb connection connect the usb (remote) connector on the rear panel and external devices using usb cables. The external controller (pc) can be connected to multiple devices via a usb hub, etc. External controller (pc) connect using an usb cable. Figure e.2.3-1 sample connect...
Page 804: E.3 Interface Settings
Appendix e remote control e-8 e.3 interface settings this section describes setting methods for the mg3710a/mg3740a and the external controller (pc) for remote control. Connecting a mouse or keyboard may be required to perform settings. E.3.1 gpib interface settings 1. Sets the gpib address refer to...
Page 805
E.3 interface settings e-9 e.3.2 ethernet interface settings 1. Sets the terminator (a terminator code). Refer to 9.4.1 “interface setting” for how to set it. 2. Sets the raw socket port number. Refer to 9.4.1 “interface setting” for how to set it. 3. Confirms and configures the network settings of ...
Page 806
Appendix e remote control e-10 for windows embedded 1. Connect a keyboard. Press the windows key to open the start menu and then click control panel. (or connect a mouse and move the pointer to the bottom of the screen by using it to open the start menu.) the control panel window is displayed. 2. On...
Page 807
E.3 interface settings e-11 3. On the local area connection properties window, click internet protocol (tcp/ip) to display the internet protocol (tcp/ip) properties window. Change the settings according to the connection conditions..
Page 808
Appendix e remote control e-12 for windows 7 1. Press the windows key on the connected keyboard, and click the control panel from the start menu. The start menu is also displayed by moving the pointer of the connected mouse to the bottom of the screen. The control panel window is displayed..
Page 809
E.3 interface settings e-13 2. Click network and sharing center in the control panel window to display the network and sharing center window. Click change adapter settings on the upper left to display the network connections window. Right-click the local area connection icon and click properties to ...
Page 810
Appendix e remote control e-14 3. Select the internet protocol version 4 (tcp/ipv4) and click properties to display the internet protocol version 4 (tcp/ipv4) properties window. Change the setting to meet the conditions of connection..
Page 811
E.3 interface settings e-15 e.3.3 usb interface settings or top > > utility 1. Sets the terminator (a terminator code). Refer to 9.4.1 “interface setting” for how to set it. 2. Check vendor id, product id, and serial number displayed in the usb(b) settings field. Refer to 9.4.3 “instrument info” for...
Page 812
Appendix e remote control e-16 e.4 interface selection/changing the mg3710a/mg3740a supports gpib, ethernet and usb as remote control interfaces. Only one of these can be used at once. The interface to be used is determined automatically according to the communication start command received from the...
Page 813: E.5 Initialization
E.5 initialization e-17 e.5 initialization initialization types and targets for the mg3710a/mg3740a are shown in the table below. Table e.5-1 initialization level item ifc dcl/sdc power on *rst *cls interface bus initialization – – – message exchange initialization input buffer and output queue mess...
Page 814: E.6 Language Mode
Appendix e remote control e-18 e.6 language mode as a command to remotely control the mg3710a/mg3740a, you can select scpi mode, which is a command format defined by the scpi consortium, or compatible modes, in which you can use commands for anritsu's measuring instruments mg3700a, mg364x, ms269xa, ...
Page 815
E.7 scpi device message details e-19 e.7 scpi device message details e.7.1 scpi program message formats among all device messages, those that are transmitted from the external controller (pc) to the mg3710a/mg3740a are called “program messages”. Program messages fall into two groups: program command...
Page 816
Appendix e remote control e-20 program message ; program message unit print @1; “conf:acp;read:acp?” multiple commands can be transmitted separately by separating them with semicolons (“;”). Program message unit program data program header , sp program header sp control header common command header.
Page 817
E.7 scpi device message details e-21 control header : long form data short form data numeric data : short form data corresponds to the short form of scpi. Long form data corresponds to the long form of scpi. Refer to the character program data for each specification. The numeric data is specified as...
Page 818
Appendix e remote control e-22 character program data defined strings of data are composed of any of the lowercase and uppercase alphanumeric characters a to z and 0 to 9, and the underscore (“_”). Numeric program data numeric program data is grouped into four types: integral (nr1), fixed-point deci...
Page 819
E.7 scpi device message details e-23 fixed-point decimal (nr2) + – sp (integer part) (fraction part) decimal point the digits in the integer part can be omitted. The decimal point cannot be omitted. The digits in the fraction part can be omitted. An integer is represented in the integral part. No sp...
Page 820
Appendix e remote control e-24 floating-point decimal (nr3) + – (mantissa part) sp * (exponent part) sp + – e/e * e denotes the power of 10, or the exponent. Spaces are allowed both before and after, only before or only after e/e. A numeric value is required in the mantissa. Alternatively selectable...
Page 821
E.7 scpi device message details e-25 hexadecimal data a/a b/b d/d f/f c/c e/e # h/h binary data 0 / 1 # b/b.
Page 822
Appendix e remote control e-26 suffix data the table below lists the suffix data that is used in the mg3710a/mg3740a. The suffix codes available vary depending on the function. Table e.7.1-1 suffix codes category suffix code unit frequency ghz or gz mhz or mz khz or kz hz ghz mhz khz hz level db db ...
Page 823
E.7 scpi device message details e-27 string program data an arbitrary character string is enclosed by one pair of double quotation marks (“ ”) or single quotation marks (‘ ’). The characters that can be used vary depending on their function. Ascii character other than ’ ’ ’ ’ ascii character other t...
Page 824
Appendix e remote control e-28 e.7.2 scpi response message formats the formats in which the external controller (pc) transmits response messages from the mg3710a/mg3740a by way of input and other statements are described below. Response message response message terminator response message ; response...
Page 825
E.7 scpi device message details e-29 response data numeric response data character response data string response data character response data defined strings of data are composed of any of the lowercase and uppercase alphanumeric characters a to z and the digits 0 to 9, and the underscore (“_”). Num...
Page 826
Appendix e remote control e-30 hexadecimal data a b d f c e # h binary data 0 / 1 # b string response data ascii character other than a double quotation mark ” ” ”.
Page 827
E.7 scpi device message details e-31 e.7.3 structure of scpi command the scpi commands are based on a layered structure. The commands are grouped according to their related functions, and each of them has a layer structure called a “sub-system”. Sense example of scpi command tree frequency center ce...
Page 828
Appendix e remote control e-32 e.7.4 command definition method :sense:frequency:center :sense:frequency:center? :sense:frequency:span :sense:frequency:span? Example of scpi command the command tree in the previous page comprises the scpi commands listed above. Overviews of the scpi command definitio...
Page 829: E.7.6 Selecting
E.7 scpi device message details e-33 there must be at least one space between a command and a parameter. Furthermore, if there is more than one parameter, they need to be separated by commas. E.7.5 composition of commands as in the following examples, commands can be combined by a semi-colon (“;”). ...
Page 831
E.8 native device message details e-35 e.8 native device message details e.8.1 native program message formats among all device messages, those that are transmitted from the external controller (pc) to the mg3710a/mg3740a are called “program messages”. Program messages fall into two groups: program c...
Page 832
Appendix e remote control e-36 program message ; program message unit print @1;”cnf 1ghz;rlv 0dbm” multiple commands can be transmitted separately by separating them with semicolons (;). Program message unit program data program header ; sp the program header of each ieee488.2 common command begins ...
Page 833
E.8 native device message details e-37 numeric program data numeric program data is grouped into four types: integral (nr1), fixed-point decimal (nr2), floating-point decimal (nr3), and hexadecimal. Integral (nr1) sp + integral data can have leading zeros (e.G., 005, +005). No space is allowed betwe...
Page 834
Appendix e remote control e-38 floating-point decimal (nr3) + – (mantissa part) sp * (exponent part) sp + – e/e * e denotes the power of 10, or the exponent. Spaces are allowed both before and after, only before or only after e/e. A numeric value is required in the mantissa. Alternatively selectable...
Page 835
E.8 native device message details e-39 hexadecimal data a/a b/b d/d f/f c/c e/e # h/h binary data 0 / 1 # b/b.
Page 836
Appendix e remote control e-40 suffix data the table below lists the suffix data that is used. The suffix codes available vary depending on the function. Table e.8.1-1 suffix codes category suffix code unit frequency ghz or gz mhz or mz khz or kz hz ghz mhz khz hz level db db dbm or dm dbm dbuv db v...
Page 837
E.8 native device message details e-41 string program data arbitrary character string enclosed by one pair of “ ” (double quotation marks) or ‘ ’ (single quotation marks). The characters that can be used vary depending on the function. Ascii character other than ’ ’ ’ ’ ascii character other than ” ...
Page 838
Appendix e remote control e-42 e.8.2 native response message formats the formats in which the external controller (pc) transmits response messages from the mg3710a/mg3740a by way of input and other statements are described below. Response message response message terminator response message ; respon...
Page 839
E.8 native device message details e-43 character response data defined strings of data are composed of any of the alphabetical lower case and upper case characters a to z, the digits 0 through 9, and the underscore (_). Numeric response data integer (nr1) – the leading digit must be non-zero. 123, 1...
Page 840
Appendix e remote control e-44 hexadecimal data a b d f c e # h binary data 0 / 1 # b string response data ascii character other than ” ” ” ”.
Page 842: E.9 Status Structure
Appendix e remote control e-46 e.9 status structure the status byte (stb) that is transmitted to the external controller (pc) complies with the ieee488.1 standard. Its bit string, called a “status summary message,” provides summary information about the current data placed in a register or queue. E....
Page 843
E.9 status structure e-47 in the status model, an ieee488.1 status byte is used as the lowest-level status, which consists of seven summary message bits that are supplied from an upper status structure. The status data structure is organized into a register model and a queue model to generate these ...
Page 844
Appendix e remote control e-48 e.9.2 status byte (stb) register the stb register consists of an stb device and an rqs (or mss) message. (1) esb and mav summary messages the esb and mav summary messages are described below. Esb summary message the esb (event summary bit) summary message is a message ...
Page 845
E.9 status structure e-49 e.9.3 scpi device-dependent summary messages the structure of the status byte register is as shown below when the scpi mode is selected. Que ques oper operation status register questionable status register error/event que status summary message figure e.9.3-1 status byte re...
Page 846: E.9.4 Native
Appendix e remote control e-50 e.9.4 native device-dependent summary messages when language mode is native, in addition to the status bite register defined by ieee488.2, extended event status bits (eesb) are defined individually. Eesb 0 to 3 are used as summary bits for application-specific extended...
Page 847
E.9 status structure e-51 e.9.5 reading and clearing stb register the stb register is read by serial polling or by using an stb? Query. Either way, an stb message as defined by ieee488.1 is read, but the value that is transmitted to bit6 (position) varies with each method used. The stb register can ...
Page 848
Appendix e remote control e-52 e.9.6 service request (srq) enable operation bits 0 to 7 of the service request enable (sre) register control whether the corresponding bits of the stb register will generate an srq. The srb register bits are associated with the stb register bits. If the stb register b...
Page 849
E.9 status structure e-53 read from sre register the sre register is read using an *sre? Common query. A response message to this query is given as an integer between 0 and 255, equaling the sum of the values of the sre register bits. Update sre register the sre register is written to using an *sre ...
Page 850
Appendix e remote control e-54 e.9.7 standard event status register model bit definitions of standard event status register the operations of the standard event status register are shown below. User request (usr) figure e.9.7-1 standard event status register the standard event status enable (ese) re...
Page 851
E.9 status structure e-55 e.9.8 standard event status register operation the operation methods for the standard event status registers and standard event status enable registers are shown in the table below. Table e.9.8-1 standard event status register operation register operation standard event sta...
Page 852
Appendix e remote control e-56 the scpi specification status register has the following configuration. Condition register transition filter event register 0 1 2 3 15 0 1 2 3 15 0 1 2 3 15 0 1 2 3 15 event enable register logic O R summary message figure e.9.9-1 configuration of scpi specification st...
Page 853
E.9 status structure e-57 e.9.10 scpi specification status register operation how to operate the scpi specification status register and error/event queue is shown below. Table e.9.10-1 scpi status register operation register operation scpi event register (main application) read :status:...:event? Th...
Page 854
Appendix e remote control e-58 table e.9.10-1 scpi status register operation (cont’d) register operation scpi transition filter (main application) read :status:...:ptransition? :status:...:ntransition? This register is read using a query . Write :status:...:ptransition :status:...:ntransition this r...
Page 855
E.9 status structure e-59 e.9.11 extended event status register when the language mode is native, the application running on the mg3710a/mg3740a has a specific extended event status register and an enable register. The extended event status register transmits a summary message to eesb0 to eesb3 bits...
Page 856
Appendix e remote control e-60 e.9.12 extended error event status register (main application) the operation model of the extended error event status registers for the main applications is shown below. Main application indicates 1st sg. The target of the status register and the enable register is 1st...
Page 857
E.9 status structure e-61 e.9.13 extended end event status register (main application) the operation model of the extended end event status registers of main applications is shown below. Main application indicates 1st sg. The target of the status register and the enable register is 1st sg. Figure e....
Page 858
Appendix e remote control e-62 e.9.14 extended error event status register (sub application) the operation model of the extended error event status registers for sub applications (an example with application a) is shown below. Sub application indicates 2nd sg. The target of the status register and t...
Page 859
E.9 status structure e-63 e.9.15 extended end event status register (sub application) the operation model of the extended end event status registers of sub applications (an example with application a) is shown below. Sub application indicates 2nd sg. The target of the status register and the enable ...
Page 860
Appendix e remote control e-64 e.9.16 extended event status register operation the operation methods for the extended event status registers and extended event status enable registers are shown in the table below. Table e.9.16-1 extended event status register operation register operation extended er...
Page 861
E.9 status structure e-65 table e.9.16-1 extended event status register operation (cont’d) register operation extended error event status register (sub application) read this register is read using an esr1? Query. Write this register cannot be written externally. Clear this register is cleared when:...
Page 862: E.10 Synchronization
Appendix e remote control e-66 e.10 synchronization this section describes synchronized control of the mg3710a/mg3740a (completing processing of a command message before proceeding to the next one). The following methods can be used for controlling synchronization: (1) using the *wai command (2) usi...
Page 863
E.10 synchronization e-67 ( 2 ) using the *opc this method transmits *opc (operation complete), which is the ieee488.2 common command, to wait until bit0 (opc) of the standard event status register is enabled, indicating the operation completes. To wait an event, query a standard event status regist...
Page 865
E.11 ieee488.2 common device messages e-69 e.11 ieee488.2 common device messages described below are the ieee488.2 common device messages intended to execute the functions of the mg3710a/mg3740a. E.11.1 ieee488.2 common device messages list table e.11-1 ieee488.2 common device messages function comm...
Page 866
Appendix e remote control e-70 table e.11-1 ieee488.2 common device messages (continued) function comman d query response remarks service request enable register command/query *sre n *sre? N n = scpi mode bit7 : oper bit6 : mss/rqs bit5 : esb bit4 : mav bit3 : ques bit2 : que bit1 : not used bit0 : ...
Page 867
E.11 ieee488.2 common device messages e-71 e.11.2 ieee488.2 common device messages details this section describes detailed specifications on ieee488.2 common device message remote control commands for executing mg3710a/mg3740a functions in alphabetical order. *cls clear status command function clear...
Page 868
Appendix e remote control e-72 *ese/*ese? Standard event status enable command/query function sets the standard event status enable register. The standard event status enable register value is returned for the query. This is a common ieee488.2 command/query. Command *ese n query *ese? Response n par...
Page 869
E.11 ieee488.2 common device messages e-73 *esr? Standard event status register query function returns the standard event status register value. If this is queried, the standard event status register is cleared. This is a common ieee488.2 query. Query *esr? Response n parameter n standard event stat...
Page 870
Appendix e remote control e-74 *idn? Identification query function this command queries the device information. This is a common ieee488.2 query. Query *idn? Response company,model,serialnumber,firmware parameter company manufacturer (anritsu) model product model (7-character alphanumeric) serialnum...
Page 871
E.11 ieee488.2 common device messages e-75 *opc/*opc? Operation complete command/query function *opc / *opc? Is a command/query to synchronize between the device and the external controller (pc). This is a common ieee488.2 command/query. If a *opc command is received, the operation completion bit (b...
Page 872
Appendix e remote control e-76 *rst reset command function initializes the device. This is a common ieee488.2 command. Command *rst details initializes the settings and status of all loaded applications. Example of use to initialize the device *rst.
Page 873
E.11 ieee488.2 common device messages e-77 *sre/*sre? Service request enable command/query function sets the service request enable register. The service request enable register value is returned for the query. This is a common ieee488.2 command/query. Command *sre n query *sre? Response n parameter...
Page 874
Appendix e remote control e-78 details this is not initialized by the system reset (preset) command. This is initialized by power on. Example of use enables the esb service request. *sre 32 *sre? >32.
Page 875
E.11 ieee488.2 common device messages e-79 *stb? Status byte register query function returns the status byte register value. This is a common ieee488.2 query. Query *stb? Response n parameter n status byte register value = bit0 + bit1 + bit2 + bit3 + bit4 + bit5 + bit6 + bit7 scpi mode bit0 : 2 0 = ...
Page 876
Appendix e remote control e-80 *trg trigger control function this command requests the trigger execution. Command message *trg explanation this command executes processing related to trigger input. Example of use to execute trigger. *trg controller mg3710a/mg3740a.
Page 877
E.11 ieee488.2 common device messages e-81 *tst? Self-test query function returns the result of the self test. This is a common ieee488.2 query. Query *tst? Response n parameter n status byte register value = bit0 + bit1 + bit2 + bit3 + bit4 + bit5 + bit6 + bit7 bit0 : 2 0 = 1 not used bit1 : 2 1 = ...
Page 878: E.12 Scpi Device Message
Appendix e remote control e-82 e.12 scpi device message this section describes scpi device messages for status registers. E.12.1 operation status register the following table and figure show the layer structure of the operation status register. Not used db0 not used db1 not used db2 sweeping db3 ber...
Page 879
E.12 scpi device message e-83 table e.12-2 lists device messages for the operation status register. Table e.12-2 device messages related to operation status register function device message operation status register event :status:operation[:event]? Operation status register condition :status:operati...
Page 880
Appendix e remote control e-84 e.12.2 scpi device message details this section describes scpi device messages for the operation status register. :status:operation[:event]? Operation status register event function this command queries the event register of the operation status register. Query :status...
Page 881
E.12 scpi device message e-85 :status:operation:condition? Operation status register condition function this command queries the content of the condition register of the operation status register. Query :status:operation:condition? Response parameter bit sum of condition register resolution 1 range ...
Page 882
Appendix e remote control e-86 :status:operation:enable operation status register enable function this command sets the event enable register of the operation status register. Command :status:operation:enable parameter bit sum of event enable register resolution 1 range 0 to 65535 details this comma...
Page 883
E.12 scpi device message e-87 :status:operation:ntransition operation status register negative transition function this command sets the transition filter (negative transition) of the operation status register. Command :status:operation:ntransition parameter bit sum of transition filter (negative tr...
Page 884
Appendix e remote control e-88 :status:operation:ptransition operation status register positive transition function this command sets the transition filter (positive transition) of the operation status register. Command :status:operation:ptransition parameter bit sum of transition filter (positive t...
Page 885
E.12 scpi device message e-89 :status:operation:ptransition? Operation status register positive transition query function this command queries the transition filter (positive transition) of the operation status register. Query :status:operation:ptransition? Response parameter bit sum of transition f...
Page 886
Appendix e remote control e-90..
Page 887
Appendix f native device message details f-1 this chapter describes the compatible commands for controlling the mg3710a/mg3740a with the remote-control commands of the mg3700a. For the detailed specifications of each command, refer to mg3700a vector signal generator operational manual (mainframe) an...
Page 888
Appendix f native device message details f-2 f.1 native device messages described below are the commands that do not exist on the mg3700a when controlling the mg3710a/mg3740a using the mg3700a compatible commands. Table f.1-1 mg3710a-mg3740a-mg3700a common device messages function command query resp...
Page 889
F.1 native device messages f-3 table f.1-1 mg3710a-mg3700a common device messages (cont’d) function command query response remarks extended error event status enable register ese3 n ese3? N n = bit7 : memory optimization check error bit6 : memory optimization error bit5 : not used bit4 : waveform pa...
Page 890: Equipment
Appendix f native device message details f-4 f.1.1 functions device messages common to measurement equipment ese0/ese0? Extended end event status enable register function this command sets the extended end event status enable register of sg2. When an end event occurs, the end summary bit (esb) value...
Page 891
F.1 native device messages f-5 example of use to enable the waveform pattern loaded and the level setting complete of 2nd sg. Ese0 20 ese0? > 20 related command esr0? Queries the extended end event status register of 2nd sg. Ese1/ese1? Extended error event status enable register function this comman...
Page 892
Appendix f native device message details f-6 details this command is available only in native mode. Example of use to enable the waveform pattern load error and the level setting error of 2nd sg. Ese1 20 ese1? > 20 related command esr1? Queries the extended error event status register of 2nd sg..
Page 893
F.1 native device messages f-7 ese2/ese2? Extended end event status enable register function this command sets the extended end event status enable register of 1st sg. When an end event occurs at 1st sg, the end summary bit (esb) value of the corresponding status byte register is set to 1 (true). Th...
Page 894
Appendix f native device message details f-8 ese3/ese3? Extended error event status enable register function this command sets the extended error event status enable register of 1st sg. When an error event occurs at 1st sg, the error summary bit (esb) value of the corresponding status byte register ...
Page 895
F.1 native device messages f-9 esr0? Extended end event status register query function this command queries the extended end event status register of 2nd sg. After the query, this register is reset to 0. This command does not exist on the mg3700a. Query esr0? Response n parameter n extended end even...
Page 896
Appendix f native device message details f-10 esr1? Extended error event status register query function this command queries the extended error event status register of 2nd sg. After the query, this register is reset to 0. This command does not exist on the mg3700a. Query esr1? Response n parameter ...
Page 897
F.1 native device messages f-11 esr2? Extended end event status register query function this command queries the extended end event status register of 1st sg. After the query, this register is reset to 0. Query esr2? Response n parameter n extended end event status register of 1st sg value = bit0 + ...
Page 898
Appendix f native device message details f-12 esr3? Extended error event status register query function this command queries the extended error event status register of 1st sg. After the query, this register is reset to 0. Query esr3? Response n parameter n extended error event status register of 1s...
Page 899
F.1 native device messages f-13 selectsg/selectsg? Select sg function this command selects the corresponding sg to be operated with the remote command. This command does not exist on the mg3700a. It is used to select sg of the mg3710a/mg3740a. Setting a numeric value other than “1” and “2” causes an...
Page 900
F-14 a pp en dix f n ati ve d ev ice m es sa ge d et ail s f.2 mg3710a-mg3700a common functions note: column sg1/2 of the compatible list shows whether the behavior changes according to the selectsg command. √: the selectsg command 1 is for sg1, and 2 is for sg2. N/a: command not related to sg1/2. F...
Page 901
F. 2 m g 3710 a -m g 370 0a c om m on f un ctio ns f-15 table f.2.1-1 compatible list of device messages common to applications (cont’d) mg3700a commands com- patibility mg3710a/mg3740a compatible command sg 1/2 remarks mg3710a/mg3740a original commands — √ ese1? N/a reads the extended status enable...
Page 903
F. 2 m g 3710 a -m g 370 0a c om m on f un ctio ns f-17 table f.2.1-1 compatible list of device messages common to applications (cont’d) mg3700a commands com- patibility mg3710a/mg3740a compatible command sg 1/2 remarks mg3710a/mg3740a original commands screen? √ screen? N/a current screen returns t...
Page 904: F.3.1
A pp en dix f n ati ve d ev ice m es sa ge d et ail s f-18 f.3 frequency & channel function f.3.1 frequency & channel function given below is the compatible list of the frequency & channel functions device messages. Table f.3.1-1 compatible list of frequency & channel functions device messages mg370...
Page 905
F. 3 fr eq ue nc y & c ha nn el f un cti on f-19 table f.3.1-1 compatible list of frequency & channel functions device messages (cont’d) mg3700a commands com- patibility mg3710a/mg3740a compatible command sg 1/2 remarks mg3710a/mg3740a original commands fis? √ fis? √ increments the step of the frequ...
Page 906
A pp en dix f n ati ve d ev ice m es sa ge d et ail s f-20 table f.3.1-1 compatible list of frequency & channel functions device messages (cont’d) mg3700a commands com- patibility mg3710a/mg3740a compatible command sg 1/2 remarks mg3710a/mg3740a original commands screen chan_edit √ screen chan_edit ...
Page 907
F. 3 fr eq ue nc y & c ha nn el f un cti on f-21 table f.3.1-1 compatible list of frequency & channel functions device messages (cont’d) mg3700a commands com- patibility mg3710a/mg3740a compatible command sg 1/2 remarks mg3710a/mg3740a original commands chtblallclr √ chtblallclr √ entirely clears th...
Page 908
A pp en dix f n ati ve d ev ice m es sa ge d et ail s f-22 table f.3.1-1 compatible list of frequency & channel functions device messages (cont’d) mg3700a commands com- patibility mg3710a/mg3740a compatible command sg 1/2 remarks mg3710a/mg3740a original commands chcurfile? √ chcurfile? √ obtains th...
Page 909: F.4 Level Function
F. 4 le ve l fu nc tio n f-23 f.4 level function f.4.1 level function given below is the compatible list of the level function device messages. Table f.4.1-1 compatible list of level function device messages mg3700a commands com- patibility mg3710a/mg3740a compatible command sg 1/2 remarks mg3710a/m...
Page 912
A pp en dix f n ati ve d ev ice m es sa ge d et ail s f-26 table f.4.1-1 compatible list of level functions device messages (cont’d) mg3700a commands com- patibility mg3710a/mg3740a compatible command sg 1/2 remarks mg3710a/mg3740a original commands orlr? √ orlr? √ relative reference level [:source[...
Page 913: F.5 Modulation Functions
F. 5 m odu la tio n f un cti on s f-27 f.5 modulation functions f.5.1 common to modulation functions given below is the compatible list of device messages common to modulation functions table f.5.1-1 compatible list of device messages common to modulation functions mg3700a commands com- patibility m...
Page 914: F.5.2 Modulation
A pp en dix f n ati ve d ev ice m es sa ge d et ail s f-28 f.5.2 modulation given below is the compatible list of the modulation device messages. Table f.5.2-1 compatible list of modulation device messages mg3700a commands com- patibility mg3710a/mg3740a compatible command sg 1/2 remarks mg3710a/mg3...
Page 915
F. 5 m odu la tio n f un cti on s f-29 table f.5.2-1 compatible list of modulation device messages (cont’d) mg3700a commands com- patibility mg3710a/mg3740a compatible command sg 1/2 remarks mg3710a/mg3740a original commands loadedfilesel long,s1,s2 √ loadedfilesel long,,g2> √ selects waveform files...
Page 917
F. 5 m odu la tio n f un cti on s f-31 table f.5.2-1 compatible list of modulation device messages (cont’d) mg3700a commands com- patibility mg3710a/mg3740a compatible command sg 1/2 remarks mg3710a/mg3740a original commands patwmblvl l √ patwmblvl √ pattern (wm(b)) level does not depend on the awgn...
Page 918
A pp en dix f n ati ve d ev ice m es sa ge d et ail s f-32 table f.5.2-1 compatible list of modulation device messages (cont’d) mg3700a commands com- patibility mg3710a/mg3740a compatible command sg 1/2 remarks mg3710a/mg3740a original commands patwmpowratio l √ patwmpowratio √ a/b output ratio [:so...
Page 921: F.5.3 Load Pattern
F. 5 m odu la tio n f un cti on s f-35 f.5.3 load pattern given below is the compatible list of load pattern device messages. Table f.5.3-1 compatible list of load pattern device messages mg3700a commands com- patibility mg3710a/mg3740a compatible command sg 1/2 remarks mg3710a/mg3740a original comm...
Page 922
A pp en dix f n ati ve d ev ice m es sa ge d et ail s f-36 table f.5.3-1 compatible list of load pattern device messages (cont’d) mg3700a commands com- patibility mg3710a/mg3740a compatible command sg 1/2 remarks mg3710a/mg3740a original commands ldfile? Long √ ldfile? Long, ,[,evice>] √ loads wavef...
Page 928
A pp en dix f n ati ve d ev ice m es sa ge d et ail s f-42 table f.5.3-1 compatible list of load pattern device messages (cont’d) mg3700a commands com- patibility mg3710a/mg3740a compatible command sg 1/2 remarks mg3710a/mg3740a original commands combtotalsize? S1,s2 √ combtotalsize? ,,[vice>] n/a q...
Page 929: F.5.4 Ext I/o Setup
F. 5 m od ula tio n f un cti on s f-43 f.5.4 ext i/o setup given below is the compatible list of the ext i/o setup device messages: table f.5.4-1 compatible list of ext i/o setup device messages mg3700a commands com- patibility mg3710a/mg3740a compatible command sg 1/2 remarks mg3710a/mg3740a origin...
Page 930
A pp en dix f n ati ve d ev ice m es sa ge d et ail s f-44 table f.5.4-1 compatible list of ext i/o setup device messages (cont’d) mg3700a commands com- patibility mg3710a/mg3740a compatible command sg 1/2 remarks mg3710a/mg3740a original commands stdly n √ stdly √ start/frame trigger delay setting ...
Page 932
A pp en dix f n ati ve d ev ice m es sa ge d et ail s f-46 table f.5.4-1 compatible list of ext i/o setup device messages (cont’d) mg3700a commands com- patibility mg3710a/mg3740a compatible command sg 1/2 remarks mg3710a/mg3740a original commands markerpol? N √ markerpol? √ marker polarity valid on...
Page 933: F.5.5 I/q Tuning
F. 5 m odu la tio n f un cti on s f-47 f.5.5 i/q tuning given below is the compatible list of the i/q tuning device messages: table f.5.5-1 compatible list of i/q tuning device messages mg3700a commands com- patibility mg3710a/mg3740a compatible command sg 1/2 remarks mg3710a/mg3740a original comman...
Page 934
A pp en dix f n ati ve d ev ice m es sa ge d et ail s f-48 table f.5.5-1 compatible list of i/q tuning device messages (cont’d) mg3700a commands com- patibility mg3710a/mg3740a compatible command sg 1/2 remarks mg3710a/mg3740a original commands icomos l √ icomos n/a i common offset while i-phase and...
Page 935
F. 5 m odu la tio n f un cti on s f-49 table f.5.5-1 compatible list of i/q tuning device messages (cont’d) mg3700a commands com- patibility mg3710a/mg3740a compatible command sg 1/2 remarks mg3710a/mg3740a original commands qcomos? √ qcomos? N/a q common offset while i-phase and q-phase can be set ...
Page 936: F.5.6 Edit Hdd
A pp en dix f n ati ve d ev ice m es sa ge d et ail s f-50 f.5.6 edit hdd given below is the compatible list of edit hdd device messages. Table f.5.6-1 compatible list of edit hdd device messages mg3700a commands compat ibility mg3710a/mg3740a compatible command sg 1/2 remarks mg3710a/mg3740a origin...
Page 937: F.5.7 Sequence Progress
F. 5 m odu la tio n f un cti on s f-51 f.5.7 sequence progress given below is the compatible list of sequence progress device messages. Table f.5.7-1 compatible list of sequence progress device messages mg3700a commands com- patibility mg3710a/mg3740a compatible command sg 1/2 remarks mg3710a/mg3740...
Page 938: F.6 Utility Function
A pp en dix f n ati ve d ev ice m es sa ge d et ail s f-52 f.6 utility function f.6.1 common to utility functions given below is the compatible list of device messages common to utility functions. Table f.6.1-1 compatible list of device messages common to utility functions mg3700a commands com- pati...
Page 939: F.6.2 Save/recall
F. 6 u tili ty fu nc tio n f-53 f.6.2 save/recall given below is the comp able list of save/recall device messages. Table f.6.2-1 compatible list of save/recall device messages mg3700a commands com- patibility mg3710a/mg3740a compatible command sg 1/2 remarks mg3710a/mg3740a original commands screen...
Page 941: F.6.3 Ber Measurement
F. 6 u tili ty fu nc tio n f-55 f.6.3 ber measurement given below is the compatible list of the ber measurement device messages. Table f.6.3-1 compatible list of ber measurement device messages mg3700a commands com- patibility mg3710a/mg3740a compatible command sg 1/2 remarks mg3710a/mg3740a origina...
Page 942
A pp en dix f n ati ve d ev ice m es sa ge d et ail s f-56 table f.6.3-1 compatible list of ber measurement device messages (cont’d) mg3700a commands com- patibility mg3710a/mg3740a compatible command sg 1/2 remarks mg3710a/mg3740a original commands berdata? √ berdata? N/a sets the data polarity. :i...
Page 943
F. 6 u tili ty fu nc tio n f-57 table f.6.3-1 compatible list of ber measurement device messages (cont’d) mg3700a commands com- patibility mg3710a/mg3740a compatible command sg 1/2 remarks mg3710a/mg3740a original commands berenblthld? N/a — - enable level threshold level — berdatadelay n n/a — - se...
Page 944
A pp en dix f n ati ve d ev ice m es sa ge d et ail s f-58 table f.6.3-1 compatible list of ber measurement device messages (cont’d) mg3700a commands com- patibility mg3710a/mg3740a compatible command sg 1/2 remarks mg3710a/mg3740a original commands bermode? √ bermode? N/a sets the measurement mode ...
Page 945
F. 6 u tili ty fu nc tio n f-59 table f.6.3-1 compatible list of ber measurement device messages (cont’d) mg3700a commands com- patibility mg3710a/mg3740a compatible command sg 1/2 remarks mg3710a/mg3740a original commands berlog s √ berlog [,] n/a log output device specified by bermedia when is omi...
Page 947
F. 6 u tili ty fu nc tio n f-61 f.6.4 ber measurement (data type detail setup) given below is the compatible list of ber measurement (data type detail setup) device messages. Table f.6.4-1 compatible list of ber measurement (data type detail setup) device messages mg3700a commands com- patibility mg...
Page 948
A pp en dix f n ati ve d ev ice m es sa ge d et ail s f-62 table f.6.4-1 compatible list of ber measurement (data type detail setup) device messages (cont’d) mg3700a commands com- patibility mg3710a/mg3740a compatible command sg 1/2 remarks mg3710a/mg3740a original commands bersyncstartpos? √ bersyn...
Page 949
F. 6 u tili ty fu nc tio n f-63 table f.6.4-1 compatible list of ber measurement (data type detail setup) device messages (cont’d) mg3700a commands com- patibility mg3710a/mg3740a compatible command sg 1/2 remarks mg3710a/mg3740a original commands beruserpat? √ beruserpat? N/a current user defined p...
Page 950: F.6.5 Alarm Monitor
A pp en dix f n ati ve d ev ice m es sa ge d et ail s f-64 f.6.5 alarm monitor given below is the compatible list of alarm monitor device messages. Table f.6.5-1 compatible list of alarm monitor device messages mg3700a commands com- patibility mg3710a/mg3740a compatible command sg 1/2 remarks mg3710...
Page 952: F.6.6 Interface Setup
A pp en dix f n ati ve d ev ice m es sa ge d et ail s f-66 f.6.6 interface setup given below is the compatible list of the interface setup device messages. Table f.6.6-1 compatible list of interface setup device messages mg3700a commands com- patibility mg3710a/mg3740a compatible command sg 1/2 rema...
Page 953: F.6.7 Network Setup
F. 6 u tili ty fu nc tio n f-67 f.6.7 network setup given below is the compatible list of the network setup device messages: table f.6.7-1 compatible list of network setup device messages mg3700a commands com- patibility mg3710a/mg3740a compatible command sg 1/2 remarks mg3710a/mg3740a original comm...
Page 954
A pp en dix f n ati ve d ev ice m es sa ge d et ail s f-68 table f.6.7-1 compatible list of network setup device messages (cont’d) mg3700a commands com- patibility mg3710a/mg3740a compatible command sg 1/2 remarks mg3710a/mg3740a original commands subnet? N/a — - subnet mask to be set on windows — d...
Page 955
F. 6 u tili ty fu nc tio n f-69 table f.6.7-1 compatible list of network setup device messages (cont’d) mg3700a commands com- patibility mg3710a/mg3740a compatible command sg 1/2 remarks mg3710a/mg3740a original commands iprelease n/a — - ip address release to be set on windows — macad? N/a — - mac ...
Page 956: F.6.8 Common Setup
A pp en dix f n ati ve d ev ice m es sa ge d et ail s f-70 f.6.8 common setup given below is the compatible list of the common setup device messages: table f.6.8-1 compatible list of common setup device messages mg3700a commands com- patibility mg3710a/mg3740a compatible command sg 1/2 remarks mg371...
Page 958: F.6.9 Maintenance Check
A pp en dix f n ati ve d ev ice m es sa ge d et ail s f-72 f.6.9 maintenance check given below is the compatible list of maintenance check device messages: table f.6.9-1 compatible list of maintenance check device messages mg3700a commands com- patibility mg3710a/mg3740a compatible command sg 1/2 re...
Page 959: F.6.10 Hardware Check
F. 6 u tili ty fu nc tio n f-73 f.6.10 hardware check given below is the compatible list of hardware check device messages. Table f.6.10-1 compatible list of hardware check device messages mg3700a commands com- patibility mg3710a/mg3740a compatible command sg 1/2 remarks mg3710a/mg3740a original com...
Page 960
A pp en dix f n ati ve d ev ice m es sa ge d et ail s f-74 table f.6.10-1 compatible list of hardware check device messages (cont’d) mg3700a commands com- patibility mg3710a/mg3740a compatible command sg 1/2 remarks mg3710a/mg3740a original commands sernumcpu? N/a not supported due to the different ...
Page 961
F. 6 u til ity f un cti on f-75 table f.6.10-1 compatible list of hardware check device messages (cont’d) mg3700a commands com- patibility mg3710a/mg3740a compatible command sg 1/2 remarks mg3710a/mg3740a original commands screen util_prdinf √ screen util_prdinf n/a moves to the product information ...
Page 962: F.6.11 Install
A pp en dix f n ati ve d ev ice m es sa ge d et ail s f-76 f.6.11 install given below is the compatible list of install device messages. Table f.6.11-1 compatible list of install device messages mg3700a commands com- patibility mg3710a/mg3740a compatible command sg 1/2 remarks mg3710a/mg3740a origin...
Page 963: F.7.1
F. 7 ie e e 488. 2 c om m on c om m an ds f-77 f.7 ieee488.2 common commands f.7.1 common to ieee488.2 given below is the ieee488.2 common command device messages available on the mg3710a/mg3740a table f.7.1-1 ieee488.2 common device messages mg3700a commands com- patibility mg3710a/mg3740a compatib...
Page 964
F-78 . A pp en dix f n ati ve d ev ice m es sa ge d etail s table f.7.1-1 ieee488.2 common device messages (cont’d) mg3700a commands com- patibility mg3710a/mg3740a compatible command sg 1/2 remarks mg3710a/mg3740a original commands *stb √ *stb n/a read status byte query same as the compatible comma...
Page 965
Appendix g scpi compatible command g-1 this appendix describes scpi commands for signal generators supported by the mg3710a/mg3740a. Supported signal generators agilent n5162a/n5182a g.1 basic function commands .......................................... G-2 g.1.1 correction subsystem ..................
Page 966: G.1.1 Correction
G-2 a ppen dix g scpi co mp atibl e co mm and g.1 basic function commands g.1.1 correction subsystem correction subsystem device messages available in mg3710a/mg3740a are shown in table g.1.1-1. Table g.1.1-1 correction subsystem device messages n5162a/n5182a commands compatibility mg3710a/mg3740a c...
Page 968
G-4 a ppen dix g scpi co mp atibl e co mm and g.1.2 digital modulation subsystem digital modulation subsystem device messages available in mg3710a/mg3740a are shown in table g.1.2-1. Table g.1.2-1 digital modulation subsystem device messages n5162a/n5182a commands compatibility mg3710a/mg3740a compa...
Page 969
G.1 basic function co mm and s g-5 table g.1.2-1 digital modulation subsystem device messages (continued) n5162a/n5182a commands compatibility mg3710a/mg3740a compatible command remarks [:source]:dm:internal:channel:opti mization? N/a not supported. [:source]:dm:internal:equalization :filter:select ...
Page 970
G-6 a ppen dix g scpi co mp atibl e co mm and table g.1.2-1 digital modulation subsystem device messages (continued) n5162a/n5182a commands compatibility mg3710a/mg3740a compatible command remarks [:source]:dm:iqadjustment:external :cmrange? N/a not supported. [:source]:dm:iqadjustment:external :cof...
Page 971
G.1 basic function co mm and s g-7 table g.1.2-1 digital modulation subsystem device messages (continued) n5162a/n5182a commands compatibility mg3710a/mg3740a compatible command remarks [:source]:dm:iqadjustment:external :dqoffset [:source[1]]:dm:iqadjustment:external: dqoffset [:source]:dm:iqadjust...
Page 974: G.1.3 Frequency
G-10 a ppen dix g scpi co mp atibl e co mm and g.1.3 frequency subsystem frequency subsystem device messages available in mg3710a/mg3740a are shown in table g.1.3-1. Table g.1.3-1 frequency subsystem device messages n5162a/n5182a commands compatibility mg3710a/mg3740a compatible command remarks [:so...
Page 976
G-12 a ppen dix g scpi co mp atibl e co mm and table g.1.3-1 frequency subsystem device messages (continued) n5162a/n5182a commands compatibility mg3710a/mg3740a compatible command remarks [:source]:frequency:stop? [:source[1]]:frequency:stop? [:source]:phase:reference n/a not supported. [:source]:p...
Page 977: G.1.4 List/sweep
G.1 basic function co mm and s g-13 g.1.4 list/sweep subsystem list/sweep subsystem device messages available in mg3710a/mg3740a are shown in table g.1.4-1. Table g.1.4-1 list/sweep subsystem device messages n5162a/n5182a commands compatibility mg3710a/mg3740a compatible command remarks [:source]:li...
Page 979
G.1 basic function co mm and s g-15 table g.1.4-1 list/sweep subsystem device messages (continued) n5162a/n5182a commands compatibility mg3710a/mg3740a compatible command remarks [:source]:list:waveform {,} n/a not supported. [:source]:list:waveform? N/a not supported. [:source]:list:waveform:points...
Page 980: G.1.5 Fast
G-16 a ppen dix g scpi co mp atibl e co mm and g.1.5 fast subsystem fast subsystem device messages available in mg3710a/mg3740a are shown in table g.1.5-1. Table g.1.5-1 fast subsystem device messages n5162a/n5182a commands compatibility mg3710a/mg3740a compatible command remarks :fast:fp , n/a not ...
Page 981: G.1.6 Marker
G.1 basic function co mm and s g-17 g.1.6 marker subsystem marker subsystem device messages available in mg3710a/mg3740a are shown in table g.1.6-1. Table g.1.6-1 marker subsystem device messages n5162a/n5182a commands compatibility mg3710a/mg3740a compatible command remarks [:source]:marker:amplitu...
Page 983: G.1.7 Power
G.1 basic function co mm and s g-19 g.1.7 power subsystem power subsystem device messages available in mg3710a/mg3740a are shown in table g.1.7-1. Table g.1.7-1 power subsystem device messages n5162a/n5182a commands compatibility mg3710a/mg3740a compatible command remarks [:source]:power:alc:bandwid...
Page 984
G-20 a ppen dix g scpi co mp atibl e co mm and table g.1.7-1 power subsystem device messages (continued) n5162a/n5182a commands compatibility mg3710a/mg3740a compatible command remarks [:source]:power:alc:search:reference:l evel n/a not supported. [:source]:power:alc:search:reference:l evel? N/a not...
Page 988
G-24 a ppen dix g scpi co mp atibl e co mm and table g.1.7-1 power subsystem device messages (continued) n5162a/n5182a commands compatibility mg3710a/mg3740a compatible command remarks [:source]:power:stop [:source[1]]:power:stop [:source]:power:stop? [:source[1]]:power:stop? [:source]:power:user:ma...
Page 989: G.2 System Commands
G.2 system commands g-25 g.2 system commands g.2.1 calibration subsystem calibration subsystem device messages available in mg3710a/mg3740a are shown in table g.2.1-1. Table g.2.1-1 calibration subsystem device messages n5162a/n5182a commands compatibility mg3710a/mg3740a compatible command remarks ...
Page 991: G.2.2 Communication
G.2 system commands g-27 g.2.2 communication subsystem communication subsystem device messages available in mg3710a/mg3740a are shown in table g.2.2-1. Table g.2.2-1 communication subsystem device messages n5162a/n5182a commands compatibility mg3710a/mg3740a compatible command remarks :system:capabi...
Page 994: G.2.3 Display
G-30 a ppen dix g scpi co mp atibl e co mm and g.2.3 display subsystem display subsystem device messages available in mg3710a/mg3740a are shown in table g.2.3-1. Table g.2.3-1 display subsystem device messages n5162a/n5182a commands compatibility mg3710a/mg3740a compatible command remarks :display:a...
Page 996
G-32 a ppen dix g scpi co mp atibl e co mm and g.2.4 ieee 488.2 common commands ieee 488.2 common commands device messages available in mg3710a/mg3740a are shown in table g.2.4-1. Table g.2.4-1 ieee 488.2 common commands device messages n5162a/n5182a commands compatibility mg3710a/mg3740a compatible...
Page 997
G.2 system commands g-33 table g.2.4-1 ieee 488.2 common commands device messages (continued) n5162a/n5182a commands compatibility mg3710a/mg3740a compatible command remarks *stb? *stb? *trg *trg *tst? *tst? *wai *wai.
Page 998: G.2.5 Memory
G-34 a ppen dix g scpi co mp atibl e co mm and g.2.5 memory subsystem memory subsystem device messages available in mg3710a/mg3740a are shown in table g.2.5-1. Table g.2.5-1 memory subsystem device messages n5162a/n5182a commands compatibility mg3710a/mg3740a compatible command remarks :memory:catal...
Page 1000
G-36 a ppen dix g scpi co mp atibl e co mm and table g.2.5-1 memory subsystem device messages (continued) n5162a/n5182a commands compatibility mg3710a/mg3740a compatible command remarks :memory:delete:mtone n/a not supported. :memory:delete:ptrain n/a not supported. :memory:delete:seq n/a not suppor...
Page 1001
G.2 system commands g-37 table g.2.5-1 memory subsystem device messages (continued) n5162a/n5182a commands compatibility mg3710a/mg3740a compatible command remarks :memory:size? N/a not supported. :memory:state:comment ,,"" n/a not supported. :memory:state:comment? , n/a not supported. :memory:store...
Page 1002
G-38 a ppen dix g scpi co mp atibl e co mm and table g.2.5-1 memory subsystem device messages (continued) n5162a/n5182a commands compatibility mg3710a/mg3740a compatible command remarks :mmemory:load:wfm:all :mmemory:load:wfm:all [] :mmemory:move "","" n/a not supported. :mmemory:store:list "" :mmem...
Page 1004: G.2.7 Route
G-40 a ppen dix g scpi co mp atibl e co mm and g.2.7 route subsystem route subsystem device messages available in mg3710a/mg3740a are shown in table g.2.7-1. Table g.2.7-1 route subsystem device messages n5162a/n5182a commands compatibility mg3710a/mg3740a compatible command remarks :route[:connecto...
Page 1005: G.2.8 Status
G.2 system commands g-41 g.2.8 status subsystem status subsystem device messages available in mg3710a/mg3740a are shown in table g.2.8-1. Table g.2.8-1 status subsystem device messages n5162a/n5182a commands compatibility mg3710a/mg3740a compatible command remarks :status:operation:condition? :statu...
Page 1006
G-42 a ppen dix g scpi co mp atibl e co mm and table g.2.8-1 status subsystem device messages (continued) n5162a/n5182a commands compatibility mg3710a/mg3740a compatible command remarks :status:preset :status:preset :status:questionable:calibration:condit ion? N/a not supported. :status:questionable...
Page 1007
G.2 system commands g-43 table g.2.8-1 status subsystem device messages (continued) n5162a/n5182a commands compatibility mg3710a/mg3740a compatible command remarks :status:questionable:frequency:ptransit ion n/a not supported. :status:questionable:frequency:ptransit ion? N/a not supported. :status:q...
Page 1008: G.2.9 System
G-44 a ppen dix g scpi co mp atibl e co mm and g.2.9 system subsystem system subsystem device messages available in mg3710a/mg3740a are shown in table g.2.9-1. Table g.2.9-1 system subsystem device messages n5162a/n5182a commands compatibility mg3710a/mg3740a compatible command remarks :system:date ...
Page 1010
G-46 a ppen dix g scpi co mp atibl e co mm and table g.2.9-1 system subsystem device messages (continued) n5162a/n5182a commands compatibility mg3710a/mg3740a compatible command remarks :system:license:remove n/a not supported. :system:opt "string" n/a not supported. :system:pdown :system:pdown :sys...
Page 1014: G.2.10 Trigger Subsystem
G-50 a ppen dix g scpi co mp atibl e co mm and g.2.10 trigger subsystem trigger subsystem device messages available in mg3710a/mg3740a are shown in table g.2.10-1. Table g.2.10-1 trigger subsystem device messages n5162a/n5182a commands compatibility mg3710a/mg3740a compatible command remarks :abort ...
Page 1016
G-52 a ppen dix g scpi co mp atibl e co mm and g.3 analog modulation commands g.3.1 amplitude modulation subsystem amplitude modulation subsystem device messages available in mg3710a/mg3740a are shown in table g.3.1-1. Table g.3.1-1 amplitude modulation subsystem device messages n5162a/n5182a comman...
Page 1018: G.3.2 Frequency
G-54 a ppen dix g scpi co mp atibl e co mm and g.3.2 frequency modulation subsystem frequency modulation subsystem device messages available in mg3710a/mg3740a are shown in table g.3.2-1. Table g.3.2-1 frequency modulation subsystem device messages n5162a/n5182a commands compatibility mg3710a/mg3740...
Page 1020
G-56 a ppen dix g scpi co mp atibl e co mm and g.3.3 phase modulation subsystem phase modulation subsystem device messages available in mg3710a/mg3740a are shown in table g.3.3-1. Table g.3.3-1 phase modulation subsystem device messages n5162a/n5182a commands compatibility mg3710a/mg3740a compatible...
Page 1022
G-58 a ppen dix g scpi co mp atibl e co mm and g.3.4 pulse modulation subsystem pulse modulation subsystem device messages available in mg3710a/mg3740a are shown in table g.3.4-1. Table g.3.4-1 phase modulation subsystem device messages n5162a/n5182a commands compatibility mg3710a/mg3740a compatible...
Page 1025: G.4 Arb Commands
G.4 arb comma nds g-61 g.4 arb commands g.4.1 all subsystem all subsystem device messages available in mg3710a/mg3740a are shown in table g.4.1-1. Table g.4.1-1 all subsystem device messages n5162a/n5182a commands compatibility mg3710a/mg3740a compatible command remarks [:source]:radio:all:off [:sou...
Page 1026: G.4.2 Dual
G-62 a ppen dix g scpi co mp atibl e co mm and g.4.2 dual arb subsystem dual arb subsystem device messages available in mg3710a/mg3740a are shown in table g.4.2-1. Tableg.4.2-1 dual arb subsystem device messages n5162a/n5182a commands compatibility mg3710a/mg3740a compatible command remarks [:source...
Page 1030
G-66 a ppen dix g scpi co mp atibl e co mm and table g.4.2-1 dual arb subsystem device messages (continued) n5162a/n5182a commands compatibility mg3710a/mg3740a compatible command remarks [:source]:radio:arb:noise:cnformat? N/a not supported. [:source]:radio:arb:noise:ebno db> n/a not supported. [:s...
Page 1031
G.4 arb comma nds g-67 table g.4.2-1 dual arb subsystem device messages (continued) n5162a/n5182a commands compatibility mg3710a/mg3740a compatible command remarks [:source]:radio:arb:phase:noise:f1? N/a not supported. [:source]:radio:arb:phase:noise:f2 n/a not supported. [:source]:radio:arb:phase:n...
Page 1036
G-72. A ppen dix g scpi co mp atibl e co mm and.
Page 1037
Appendix h panel keys and keyboard operations h-1 table h-1 correspondences between panel keys and keyboard operations panel key usb keyboard preset ctrl+shift+r local ctrl+shift+o cal ctrl+shift+9 save ctrl+s recall ctrl+o copy ctrl+shift+8 top ctrl+shift+↑ f1 f1 f2 f2 f3 f3 f4 f4 f5 f5 f6 f6 f7 f7...
Page 1038
Appendix h panel keys and keyboard operations h-2 table h-1 correspondences between panel keys and keyboard operations (continued) panel key usb keyboard 0 0 1 1 2 2 3 3 4 4 5 5 6 6 7 7 8 8 9 9 + a a + b b + c c + d d + e e + f f . . –/+ – tab tab shift shift bs back space ctrl ctrl alt alt alt tab ...
Page 1039
Appendix h panel keys and keyboard operations h-3 table h-1 correspondences between panel keys and keyboard operations (continued) panel key usb keyboard ↑ ↑ → → ↓ ↓ ← ← rotary knob, clockwise mouse wheel up rotary knob, counter-clockwise mouse wheel down rf output mod on/off ctrl+shift+q rf output ...
Page 1040
Appendix h panel keys and keyboard operations h-4..
Page 1041
Appendix i scanning for virus i-1 for the mg3710a/mg3740a, we recommend not installing virus scanning software to ensure the best possible performance of the equipment. In some user operating environments, however, the mg3710a/mg3740a might not be completely protected from virus infection, and perio...
Page 1042
Appendix i scanning for virus i-2 i.2.9 making mg3710a/mg3740a drives unshared ............................................... I-25 i.2.10 restoring previous user account setting for mg3710a/mg3740a ....................................... I-25 i.2.11 enabling sharing settings ..........................
Page 1043
I.1 for windows xp embedded i-3 i.1 for windows xp embedded i.1.1 connecting external pc to mg3710a/mg3740a connect mg3710a/mg3740a and the external pc with a lan cable. For details about how to set up the network for the mg3710a/mg3740a, refer to appendix e “remote control”. I.1.2 checking ip addre...
Page 1044
Appendix i scanning for virus i-4.
Page 1045
I.1 for windows xp embedded i-5 i.1.3 configuring shared settings simple file sharing is enabled for the mg3710a/mg3740a by default. If authentication is performed by way of a network while simple file sharing is enabled, the accessing user is regarded as having a guest account and cannot access imp...
Page 1046
Appendix i scanning for virus i-6 i.1.4 changing user account for mg3710a/mg3740a this section describes how to change the user account used when the mg3710a/mg3740a drives are mounted to network drives. 1. From the start menu, select control panel. 2. Select administrative tools from the control pa...
Page 1047
I.1 for windows xp embedded i-7 4. In the computer management tree, select users under local users and groups. 5. Right-click the user account “anritsu” to use, and select the set password...Menu. 6. When the message below is shown during the password setting, select proceed..
Page 1048
Appendix i scanning for virus i-8 7. Type “anritsu” for the password. 8. After setting the password, click ok in the dialog for confirmation..
Page 1049
I.1 for windows xp embedded i-9 i.1.5 shared settings for mg3710a/mg3740a 1. From the start menu, select my computer. 2. Right-click the c drive. 3. Select sharing and security. 4. Select the sharing tab. 5. To disable the default sharing setting, select do not share this folder. 6. Click the apply ...
Page 1050
Appendix i scanning for virus i-10 7. A dialog appears. Select yes. (7) 8. Select share this folder. 9. Click the permissions button. 10. Select the allow check box for full control. 11. Click ok to close two dialogs displayed. (9) (8).
Page 1051
I.1 for windows xp embedded i-11 12. Repeat steps 3 to 11 to the d drive. I.1.6 mounting mg3710a/mg3740a drives to external pc drives 1. On the pc connected by way of the network (which is used to run the virus scanning software), mount (assign) all the shared drives of the mg3710a/mg3740a as networ...
Page 1052: I.1.7 Scanning For Virus
Appendix i scanning for virus i-12 6. Click ok – finish to complete mounting the network drive. 7. Repeat steps 2 to 6 to the d drive. I.1.7 scanning for virus scan the network drives mounted on the external pc for viruses. Even if network drives cannot be scanned using your software, scanning might...
Page 1053
I.1 for windows xp embedded i-13 i.1.11 enabling simple file sharing simple file sharing has been disabled in section i.1.3 “configuring shared settings” for sharing drives. To restore the original settings, enable simple file sharing by using the following procedure: 1. On the mg3710a/mg3740a, clic...
Page 1054: I.2 For Windows 7
Appendix i scanning for virus i-14 i.2 for windows 7 i.2.1 connecting external pc to mg3710a/mg3740a connect mg3710a/mg3740a and the external pc with a lan cable. For details about how to set up the network for the mg3710a/mg3740a, refer to appendix e “remote control”. I.2.2 checking ip address of m...
Page 1055
I.2 for windows 7 i-15.
Page 1056: I.2.3
Appendix i scanning for virus i-16 i.2.3 configuring shared settings sharing settings is enabled for the mg3710a/mg3740a by default. If authentication is performed by way of a network while sharing settings is enabled, the accessing user is regarded as having a guest account and cannot access import...
Page 1057
I.2 for windows 7 i-17 4. In the advanced sharing settings dialog box, click turn off network discovery, turn off file and printer sharing, and turn on password protected sharing. 5. Click save changes..
Page 1058: I.2.4
Appendix i scanning for virus i-18 i.2.4 changing user account for mg3710a/mg3740a this section describes how to change the user account used when the mg3710a/mg3740a drives are mounted to network drives. 1. From the start menu, select control panel. 2. From the control panel menu, click system and ...
Page 1059
I.2 for windows 7 i-19 4. From the administrative tools menu, select computer management. 5. In the computer management tree, select users under local users and groups. 6. Right-click the user account “anritsu” to use, and select the set password...Menu..
Page 1060
Appendix i scanning for virus i-20 7. When the message below is shown, select proceed. 8. Type “anritsu” for the password. 9. After setting the password, click ok in the dialog for confirmation..
Page 1061: I.2.5 Shared
I.2 for windows 7 i-21 i.2.5 shared settings for mg3710a/mg3740a 1. From the start menu, select computer. 2. Right-click the c drive and select properties. 3. Select the sharing tab and click the advanced sharing…button..
Page 1062
Appendix i scanning for virus i-22 4. Select the share this folder check box and click the permission button. 5. Make sure everyone is selected, and select the allow check boxes for full control and change. 6. Click ok to close two dialogs displayed. 7. Repeat steps 2 to 7 to the d drive..
Page 1063
I.2 for windows 7 i-23 i.2.6 mounting mg3710a/mg3740a drives to external pc drives 1. On the pc connected by way of the network (which is used to run the virus scanning software), mount (assign) all the shared drives of the mg3710a/mg3740a as network drives. 2. On the pc, click start and then click ...
Page 1064
Appendix i scanning for virus i-24 6. Enter anritsu for the user name, and also anritsu for the password (as specified in section i.2.4, step 7). 7. Click ok – finish to complete mounting the network drive. 8. Repeat steps 2 to 7 to the d drive..
Page 1065: I.2.7
I.2 for windows 7 i-25 i.2.7 scanning for virus scan the network drives mounted on the external pc for viruses. Even if network drives cannot be scanned using your software, scanning might be possible by dragging and dropping a network drive onto the virus software icon in windows explorer. I.2.8 di...
Page 1066
Appendix i scanning for virus i-26. I.2.11 enabling sharing settings sharing settings has been disabled in section i.2.3 “configuring shared settings” for sharing drives. To restore the original settings, enable sharing settings by using the following procedure: 1. On the mg3710a/mg3740a, click the ...
Page 1067
Appendix j mg3641a/42a compatible command j-1 this appendix describes scpi commands for signal generators supported by the mg3710a/mg3740a. Supported signal generators anritsu mg3641a/mg3642a j.1 basic function commands ........................................... J-2 j.1.1 frequency setting ...........
Page 1068: J.1.1 Frequency Setting
J-2 a pp en di x j m g 3641 a /42 a c om pa tible c om m an d j.1 basic function commands j.1.1 frequency setting frequency setting device messages available in mg3710a/mg3740a are shown in table j.1.1-1. Table j.1.1-1 frequency setting device messages mg3641a/mg3642a commands mg3710a/mg3740a compat...
Page 1070: J.1.2 Output Setting
J-4 a pp en di x j m g 3641 a /42 a c om pa tible c om m an d j.1.2 output setting output setting device messages available in mg3710a/mg3740a are shown in table j.1.2-1. Table j.1.2-1 output setting device messages mg3641a/mg3642a commands mg3710a/mg3740a compatible command mg3710a/mg3740a original...
Page 1072: J.1.3 Sweep Function
J-6 a pp en di x j m g 3641 a /42 a c om pa tible c om m an d j.1.3 sweep function sweep function device messages available in mg3710a/mg3740a are shown in table j.1.3-1. Table j.1.3-1 sweep function device messages mg3641a/mg3642a commands mg3710a/mg3740a compatible command mg3710a/mg3740a original...
Page 1074
J-8 a pp en di x j m g 3641 a /42 a c om pa tible c om m an d j.1.4 amplitude modulation amplitude modulation device messages available in mg3710a/mg3740a are shown in table j.1.4-1. Table j.1.4-1 amplitude modulation device messages mg3641a/mg3642a commands mg3710a/mg3740a compatible command mg3710...
Page 1075
J.1 b as ic f un cti on c om m an ds j-9 j.1.5 frequency modulation frequency modulation device messages available in mg3710a/mg3740a are shown in table j.1.5-1. Table j.1.5-1 frequency modulation device messages mg3641a/mg3642a commands mg3710a/mg3740a compatible command mg3710a/mg3740a original co...
Page 1076: J.1.6 Phase Modulation
J-10 a pp en di x j m g 3641 a /42 a c om pa tible c om m an d j.1.6 phase modulation phase modulation device messages available in mg3710a/mg3740a are shown in table j.1.6-1. Table j.1.6-1 phase modulation device messages mg3641a/mg3642a commands mg3710a/mg3740a compatible command mg3710a/mg3740a o...
Page 1077
J.1 b as ic f un cti on c om m an ds j-11 j.1.7 modulation signal source modulation signal source device messages available in mg3710a/mg3740a are shown in table j.1.7-1. Table j.1.7-1 modulation signal source device messages mg3641a/mg3642a commands mg3710a/mg3740a compatible command mg3710a/mg3740...
Page 1079: J.1.8 Memory Setting
J.1 b as ic f un cti on c om m an ds j-13 j.1.8 memory setting memory setting device messages available in mg3710a/mg3740a are shown in table j.1.8-1. Table j.1.8-1 memory setting device messages mg3641a/mg3642a commands mg3710a/mg3740a compatible command mg3710a/mg3740a original command /remarks :m...
Page 1080: J.2 System Commands
J-14 a pp en di x j m g 3641 a /42 a c om pa tible c om m an d j.2 system commands j.2.1 display subsystem display subsystem device messages available in mg3710a/mg3740a are shown in table j.2.1-1. Table j.2.1-1 display subsystem device messages mg3641a/mg3642a commands mg3710a/mg3740a compatible co...
Page 1081: J.2.2 Scpi Commands
J.2 sy ste m c om m an ds j-15 j.2.2 scpi commands scpi device messages available in mg3710a/mg3740a are shown in table j.2.2-1. Table j.2.2-1 scpi device messages mg3641a/mg3642a commands mg3710a/mg3740a compatible command mg3710a/mg3740a original command /remarks :status:questionable [:event]? Mg3...
Page 1082
J-16 a pp en di x j m g 3641 a /42 a c om pa tible c om m an d j.2.3 ieee 488.2 common commands ieee 488.2 common commands device messages available in mg3710a/mg3740a are shown in table j.2.3-1. Table j.2.3-1 ieee 488.2 common commands device messages mg3641a/mg3642a commands mg3710a/mg3740a compat...
Page 1083
J.2 sy ste m c om m an ds j-17 table j.2.3-1 modulation signal source device messages (continued) mg3641a/mg3642a commands mg3710a/mg3740a compatible command mg3710a/mg3740a original command /remarks *pcs not supported. *pcs? Not supported. *sav not supported. *rcl not supported. *opt? Not supported...
Page 1084
J-18 . A pp en di x j m g 3641 a /42 a c om pa tible c om m an d.
Page 1085: Symbol And Numbers
Index index-1 references are to page numbers. Symbol and numbers φ φ m ................................................................... 7-43 φ m deviation ................................................. 7-44 φ m source ...................................................... 7-48 A a/b ratio .......
Page 1086
Index index-2. Channel a/b ..................................................... 9-6 channel a/b setup .......................................... 9-8 channel freq ................................................. 9-14 channel group regsitering ................................................. 4-28 c...
Page 1087
Index index-3 edit table ....................................................... 4-26 enable active ................................................. 8-34 enter key ......................................................... 3-4 equipment certificate .................................... Viii error ......
Page 1088
Index index-4. I/q phase ........................................... 7-201, 7-264 i/q skew ....................................................... 7-265 i/q source .................................................... 7-237 impedance .................................... 7-27, 7-40, 7-51 incr set key ...
Page 1089
Index index-5 user defined patterns ................................ 8-51 optimize ......................................................... 7-69 optimize s/n ................................................. 5-29 options adding ......................................................... 9-45 out .......
Page 1090
Index index-6. Reference input connector .............................. 3-8 reference oscillator ....................................... 4-47 relative level display .................................... 5-16 remote lamp .................................................... 3-3 repacking .................
Page 1091
Index index-7 sync .............................................................. 7-199 level ........................................................... 5-27 sync length ................................................... 8-50 sync loss conditions for detecting ............................ 8-30 ope...
Page 1092
Index index-8..

