- DL manuals
- Hach
- Measuring Instruments
- polymetron 9240
- User Manual
Hach polymetron 9240 User Manual
Summary of polymetron 9240
Page 1
Doc024.52.93034 polymetron model 9240 multi-channel sodium analyzer user manual 08/2016, edition 15.
Page 2: Table of Contents
1 table of contents section 1 general information ......................................................................................................... 5 1.1 disclaimer ..................................................................................................................................
Page 3
2 table of contents 4.4.2 rs485 connection .............................................................................................................45 4.4.3 input/output connections ..................................................................................................47 4.4.4 sample ...
Page 4
3 table of contents 7.4.3 test ................................................................................................................................... 90 7.5 rs485 (or profibus) .................................................................................................................
Page 5
4 table of contents section 12 default configuration ................................................................................................121 12.1 user configuration table .........................................................................................................121 section ...
Page 6: Section 1
5 section 1 general information 1.1 disclaimer the information in this manual has been carefully checked and is believed to be accurate. However, hach lange assumes no responsibility for any inaccuracies that may be contained in this manual. In no event will hach lange be liable for direct, indirect...
Page 7
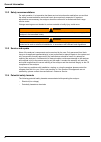
6 general information 1.3.2 safety recommendations for safe operation, it is imperative that these service instructions be read before use and that the safety recommendations mentioned herein be scrupulously respected. If repairs or adjustments are necessary, the analyzer should be returned to an au...
Page 8
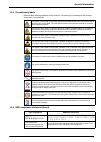
7 general information 1.3.5 precautionary labels read all labels and tags attached to the analyzer. Personal injury or damage to the analyzer could occur if not observed. 1.3.6 emc compliance statement (korea) this symbol, when noted on a product, indicates a potential hazard which could cause serio...
Page 9
8 general information 1.4 product recycling information english electrical equipment marked with this symbol may not be disposed of in european public disposal systems after 12 august 2005. In conformity with european local and national regulations (eu directive 2002/96/ec), european electrical equi...
Page 10
9 general information svenska elektronikutrustning som är märkt med denna symbol kanske inte kan lämnas in på europeiska offentliga sopstationer efter 2005-08-12. Enligt europeiska lokala och nationella föreskrifter (eu-direktiv 2002/96/ec) måste användare av elektronikutrustning i europa nu återläm...
Page 11: 1.5 Product Disposal
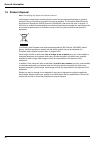
10 general information 1.5 product disposal note: the following only applies to european customers. Hach lange is committed to ensuring that the risk of any environmental damage or pollution caused by any of its products is minimized as far as possible. The european waste electrical and electronic e...
Page 12
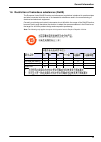
11 general information 1.6 restriction of hazardous substances (rohs) the european union rohs directive and subsequent regulations introduced in member states and other countries limits the use of six hazardous substances used in the manufacturing of electrical and electronic equipment. Currently, m...
Page 13
12 general information.
Page 14: Section 2
13 section 2 specifications 2.1 technical specifications specifications are subject to change without notice. Table 1 technical specifications performance specifications measuring range 0 to 10,000 ppb freely programmable 0 to 200 ppm with k-kit option accuracy non-cationic application: ± 0.1 ppb or...
Page 15
14 specifications mechanical specifications maximum panel dimension (h x l x d) 850 x 450 x 252.5mm [33.46 x 17.71 x 9.94in] inlet simple fittings for 6 mm o.D. Tubing or ¼" o.D. In pe-low density. ¼" od in phed-ptfe-ss as option outlet barbed stem for 12 mm (½" i.D.) hose protection rate transmitte...
Page 16: 2.3 Warranty
15 specifications 2.2 model identification system the analyzer identification number and the instrument serial number are located on the label on the back panel, and can be found on order confirmation and invoice papers. Each analyzer has the following features: • fully automatic conditioning adjust...
Page 17
16 specifications • damage caused by not sufficient maintenance, cleaning or calibration. • any product not used in accordance with the instructions furnished by hach company.
Page 18: Section 3
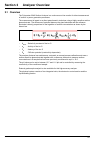
17 section 3 analyzer overview 3.1 overview the polymetron 9240 sodium analyzer is a continuous on-line monitor for direct measurement of sodium in power generation processes. The measurement is based on a direct potentiometric technique using a highly sensitive sodium glass electrode. The differenc...
Page 19
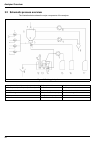
18 analyzer overview 3.2 schematic process overview the illustration below shows the major components of the analyzer. Figure 2 working principal 1 - sample inlet flow adjustment (one per channel) 7 - sample level detector 13 - sodium ion-selective electrode 2 - fast loop sample outlet (one per chan...
Page 20
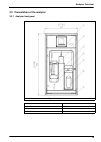
19 analyzer overview 3.3 presentation of the analyzer 3.3.1 analyzer front panel figure 3 analyzer front panel 1 - user interface 5 - door lock 2 - overflow vessel 6 - reagent shelf 3 - measuring cell 7 - frame for panel mounting 4 - flow rate adjustment for each channel.
Page 21
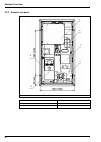
20 analyzer overview 3.3.2 analyzer rear panel figure 4 analyzer rear panel 1 - local controller box 4 - sample inlet valves 2 - electrolyte reservoir 5 - calibration canister 3 - pump box (see also pumps box on page 21 ) 6 - reactivation reagent canister.
Page 22
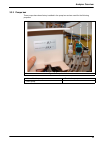
21 analyzer overview 3.3.3 pumps box three pumps have been factory installed in the pump box and are used for the following purposes: figure 5 pumps box interior 1 - auto-calibration pump 3 - reactivation pump 2 - drain pump.
Page 23: 3.4 Conditioning Reagent
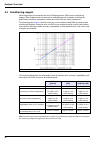
22 analyzer overview 3.4 conditioning reagent hach lange highly recommends the use of diisopropylamine (dipa) as the conditioning reagent. Other reagents such as ammonia or ethanolamine can be applied, providing the specification limitations imposed by amines other than dipa are clearly understood. ...
Page 24: 3.5 Ph Regulation
23 analyzer overview 3.5 ph regulation 3.5.1 non-cationic applications in order to ensure the accuracy and the repeatability of low sodium concentrations, ph must be constant and preferably maintained at or above 11.2 to maintain the lowest proton interference. The 9240 uses the injection of vapor o...
Page 25
24 analyzer overview the usual t gas /t water ratio values are as follows: refer to sample ph conditioning check on page 53 for the procedure to select the correct ratio in relation to the initial ph sample. Dipa consumption the consumption of dipa will depend on the values defined in the above tabl...
Page 26: 3.6 Measurement Process
25 analyzer overview 3.6 measurement process 3.6.1 smart rinse option the measurement cell is rinsed by the analyzer after a calibration, grab sample, or sensor reactivation process and prior to resuming sample measurements. Set the smart rinsing parameter to no (see measure steps on page 81 ) for a...
Page 27
26 analyzer overview 3.6.2 measurement steps the 9240 is designed as a multi channel analyzer, though it can be used as a single channel analyzer. The measurement parameters are different depending on whether the analyzer is set up as a single or multi channel analyzer. If the analyzer is configured...
Page 28
27 analyzer overview 3.6.2.1 search stability set to no - fixed measurement mode as the cycle and on-line measurement times defined by the user are fixed and identical for each channel, they need to be long enough to have an efficient rinsing step for all configurations in order to achieve accurate ...
Page 29
28 analyzer overview 3.6.2.2 search stability set to yes - automatic measurement mode in this configuration, a maximum cycle time not to be exceeded has to be configured. This is the sum of the maximum rinse time plus the fixed on-line measurement time. As with the fixed measurement mode, the cycle ...
Page 30
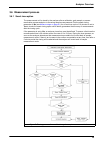
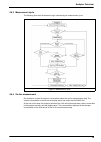
29 analyzer overview 3.6.3 measurement cycle the following flow chart illustrates the logic used during the measurement cycle. 3.6.4 on-line measurement on completion of each rinsing time, the analyzer starts the on-line measurement step. The sodium concentration is shown on the display panel and ou...
Page 31
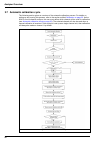
30 analyzer overview 3.7 automatic calibration cycle the following section gives an overview of the automatic calibration process. For details on setting up and running this process, refer to the section entitled calibration on page 93 . As the 9240 is a multi channel analyzer, the user must define ...
Page 32
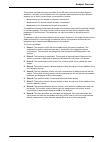
31 analyzer overview this process calculates the slope and offset of the ise sodium electrode and the reference electrode. It is based on the measurement of the potential and temperature of three different samples, two of which contain known concentrations of sodium: • measurement of a first sample ...
Page 33
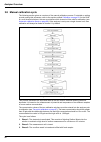
32 analyzer overview 3.8 manual calibration cycle the following section gives an overview of the manual calibration process. For details on setting up and running this processes, refer to the section entitled calibration on page 93 . As the 9240 is a multi channel analyzer, the user must define whic...
Page 34
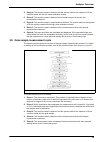
33 analyzer overview 4. Phase 4: the overflow vessel is drained, and the system waits for the operator to fill the overflow vessel with the low value calibration solution. 5. Phase 5: the overflow vessel is drained into the measurement cell and the first concentration measured. 6. Phase 6: the overf...
Page 35: 3.10 Analyzer Outputs
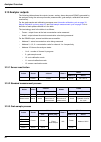
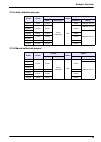
34 analyzer overview 3.10 analyzer outputs the following tables shows the outputs (screen, analog, alarm relays and rs485) generated by the analyzer during the various processes (measurement, grab sample, calibration and sensor reactivation). For the grab sample and calibration processes, see automa...
Page 36
35 analyzer overview 3.10.4 auto calibration process 3.10.5 manual calibration process action screen 4-20 ma alarms rs485 conc. Other prog. Address 0 others phase 1 actual actual event calibration n/a actual address 163=10 phase 2 frozen frozen frozen address 163=13 phase 3 phase 4 address 163=10 ph...
Page 37: 3.11 Available Options
36 analyzer overview 3.11 available options 3.11.1 k-kit (cationic) for a high acidity water such as that from a cation exchanger outlet, the regular gaseous conditioning is not sufficient to raise the ph to values superior to 10.3. The forced-gas conditioning system (k-kit) is then needed. The k-ki...
Page 38: Section 4
37 section 4 installation 4.1 analyzer inspection and unpacking the instrument has been factory tested and checked prior to shipping. We nevertheless recommend that you perform a visual inspection in order to ensure that it has not been damaged. Any marked packaging is a potential sign of damage tha...
Page 39: 4.3 Instrument Mounting
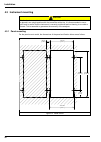
38 installation 4.3 instrument mounting 4.3.1 panel mounting for the panel mount model, the dimensions of the panel and fixation holes are as follows: caution whether the instrument is to be mounted on a panel or wall, it is important to note that it must be placed in an upright position with the tr...
Page 40
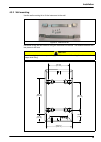
39 installation 4.3.2 wall mounting use the wall mounting kit to fix the instrument to the wall. Use these to drill the four holes for fixing the instrument on the wall. The distance between the two pieces is 460 mm. Figure 14 wall mount kit caution it is extremely important to respect this gap of 4...
Page 41
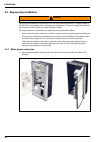
40 installation 4.4 step-by-step installation the electrical installation should be carried out by duly qualified personnel. A supply voltage of 100-240 vac is acceptable without changing the configuration. The power supply terminals can be removed from their housing to make connection easier. For s...
Page 42
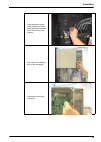
41 installation 2. Pass the power supply cable through the cable gland located at the back left of the bottom of the cabinet. 3. Open the i/o connection box on the rear panel. 4. Unscrew the two fixing elements....
Page 43
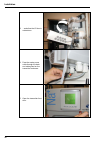
42 installation 5. ...And allow the i/o box to rotate down. 6. Pass the mains power cable through the back end cable gland on the transmitter enclosure. 7. Open the transmitter front door..
Page 44
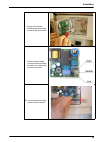
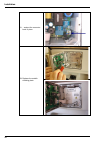
43 installation 8. Remove the metallic shielding plate protecting access to the main board. 9. Take the power supply connector and note where the earth, live, and neutral must be connected. 10. Connect the power supply cables to the connector....
Page 45
44 installation 11. ...And put the connector back in place. 12. Replace the metallic shielding plate..
Page 46
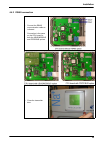
45 installation 4.4.2 rs485 connection 1. Connect the rs485 communication cable as indicated. Connection is the same on the cpu board for both the jbus/modbus and profibus options. 2. Close the transmitter door..
Page 47
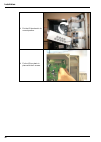
46 installation 3. Put the i/o box back in its normal position. 4. Fix the i/o box back in place with the 2 screws..
Page 48
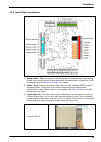
47 installation 4.4.3 input/output connections 1. Analog output – iout 0 is used for the current signals of the measurement. Other analog outputs can be freely linked to different parameters like measurement, temperature – refer to the section entitled user setup on page 79 for details. 2. Relays – ...
Page 49
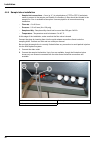
48 installation 4.4.4 sample tubes installation • sample inlet connections - 6 mm (or ¼'') in polyethylene or ptfe or fep. If particulate matter is present in the sample, pre-filtration is necessary. A filter should be inserted in the sample line. One is available as an option. Use new pipes for all...
Page 50
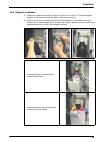
49 installation 4.4.5 reagents installation 1. Prepare the reagents according to reagent preparation on page 137 . Install the reagent canisters in their place and connect them to their respective tubes. 2. Install and connect the conditioning solution (diisopropylamine). The diagrams show an analyz...
Page 51
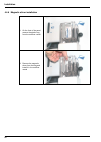
50 installation 4.4.6 magnetic stirrer installation 1. On the front of the panel, remove the plastic bag from the overflow vessel 2. Remove the magnetic stirrer from the bag and install it in the overflow vessel.
Page 52
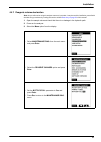
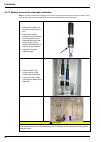
51 installation 4.4.7 reagents volume declaration note: as you will now be using the analyzer menus to input data, it may be useful to familiarize yourself with the data entry procedures by reading the section entitled data entry on page 59 of this manual. 1. Open the sample valve and check that the...
Page 53
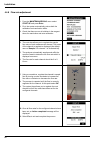
52 installation 4.4.8 flow rate adjustment 1. From the maintenance/diag. Menu select start up and press enter 2. First, the system automatically primes both the calibration and reactivation tubes. 3. Check that there are no air bubbles in the reagent tubes for reactivation and auto calibration. 4. T...
Page 54
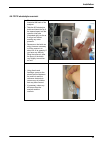
53 installation 4.4.9 sample ph conditioning check note: at this stage, the electrodes should not have been installed. 4.4.9.1 non-cationic applications 4.4.9.2 cationic applications 1. With a calibrated ph sensor, measure the ph of the sample for each channel outside of the analyzer. Note down thes...
Page 55
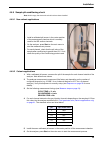
54 installation 7. For each channel, measure the ph in the conditioned sample to check if the pump ratios are efficient enough to obtain a ph of around 11.0. 8. If necessary, update the ratios of each channel to maintain a final constant ph of 11.0 ± 0.2. 4.4.10 reference electrode installation 1. R...
Page 56
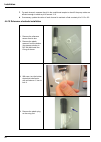
55 installation 5. Install the reference electrode in the extreme left measurement chamber. 6. Connect the reference cable (the one without the blue label on it) to the reference electrode. 7. Connect the electrolyte tube to the reference electrode..
Page 57
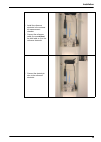
56 installation 4.4.11 sodium ion selective electrode installation note: it is critical to preserve the integrity of the sodium ion selective electrode as much as possible. This is why this electrode must be installed at the very last moment after all other adjustments. 1. Remove the sodium ion sele...
Page 58
57 installation 4.4.12 fill electrolyte reservoir 1. The electrolyte reservoir is located at the back of the analyzer. 2. Take the kcl electrolyte bottle and insert the tip of the tapered spout into the reservoir inlet tube (illustrated right) as far as it will go but without exerting any extra pres...
Page 59: 4.5 Analyzer Stabilization
58 installation 4.5 analyzer stabilization at this stage the analyzer has been completely installed, but needs to run for a period of time to stabilize. 1. On the analyzer, press start on the main menu to start the measurement process. 2. Leave the system to run for a couple of hours before starting...
Page 60: Section 5
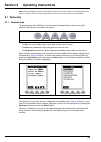
59 section 5 operating instructions note: all screen display examples in the following sections are shown as black on a white background for reasons of clarity, and do not necessarily reflect the actual colors used on the instrument display. 5.1 data entry 5.1.1 function keys the display panel of th...
Page 61
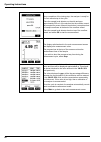
60 operating instructions 5.1.2 numeric fields these fields require that the user enter one or more numeric values into a field. The type of field determines the available input. In some fields only digits 0 through 9 would be available to select whereas in other fields the decimal point and/or minu...
Page 62
61 operating instructions 5.1.3 alphanumeric fields these fields require that the user enter one or more alphanumeric values into a field. The type of field determines the available input. In some fields only upper case alpha characters may be allowed, in others upper and lower case alphanumeric cha...
Page 63
62 operating instructions 5.1.4 list element fields this type of data entry is where a pre-defined list of available data values are available to the user who must select the one which is applicable. Free-format text is not allowed. 5.1.5 incremental value fields these are fields where a value is di...
Page 64: 5.2 Measurement Screens
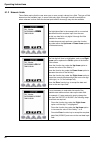
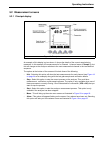
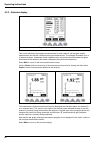
63 operating instructions 5.2 measurement screens 5.2.1 principal display an example of this display is given above. It shows the details of the current sample being measured. In this example, the measurement is for channel 1 (channel name of sample 1 ), but this will change as the analyzer switches...
Page 65
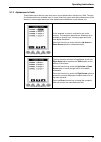
64 operating instructions 5.2.2 historical display this screen shows the last sample measurements for each channel, the last grab sample measurement and the last verification and gap measurements. The example illustrated is for a 4-channel analyzer. Underneath these measurements, the actual potentia...
Page 66
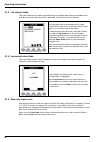
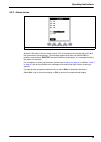
65 operating instructions 5.2.3 alarms screen alarms s1-s4 relate to the four alarm outputs. This is followed by the warning alarm (w!) and the system alarm (small graphic). The message against each alarm will indicate ok (no problems encountered), inactive (the alarm has been deactivated), or a mes...
Page 67: 5.3 Main Menu
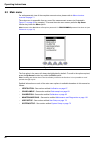
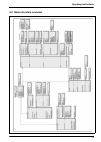
66 operating instructions 5.3 main menu for a diagrammatic view of the complete menu structure, please refer to menu structure overview on page 71 . The main menu is accessible from any one of the measurement screens (as illustrated in figure 17 on page 63 for example). To access the main menu scree...
Page 68
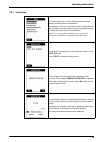
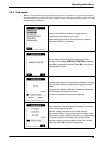
67 operating instructions 5.3.1 verification this option allows you to verify the measurement using a solution of known sodium concentration. Concentration of the known solution should be higher than 20 ppb (100 ppb is recommended) to ensure a preparation step in a range with lower risks of contamin...
Page 69
68 operating instructions upon completion of the rinsing step, the analyzer is ready for the first manual step in the cycle. Place the sample level detector on the side and pour approximately 200 ml of the solution into the overflow vessel, as prompted on screen. Manual introduction is complete when...
Page 70
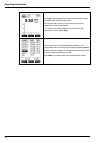
69 operating instructions 5.3.2 grab sample note: it is recommended that the grab sample should have a concentration of > 10 ppb and should be at the same temperature as during calibration for better accuracy. Under these conditions, measurement with manual introduction gives 5% accuracy from 10 ppb...
Page 71
70 operating instructions the display switches back to the main measurement screen and displays the measurement value. The progress bar at the top of the screen monitors the measurement time of the sample. If you wish to abort the process at any time during the measurement cycle, select stop . Once ...
Page 72: 5.4 Menu Structure Overview
71 operating instructions 5.4 menu structure overview.
Page 73
72 operating instructions.
Page 74: Section 6
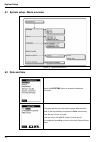
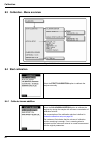
73 section 6 system setup before attempting to setup the analyzer, ensure that you have read and understood how to enter and update data fields as described in the section entitled function keys on page 59 . Press the up arrow function key under the menu option on the measurement screen to display t...
Page 75: 6.2 Date and Time
74 system setup 6.1 system setup - menu overview 6.2 date and time figure 21 system setup menu select the date/time option to access the date/time sub-menu. This option allows you to set up the system date and time. Scroll to the required day and press the enter function key. Enter the day, month, a...
Page 76: 6.3 Display Options
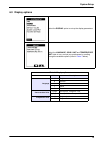
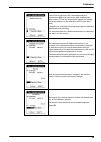
75 system setup 6.3 display options select the display option to set up the display parameters. Select the language , conc. Unit and temperature unit fields in turn, and set your preferences by scrolling through the available options (listed in table 3 below). Table 3 display options value descripti...
Page 77: 6.4 Passwords
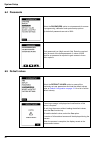
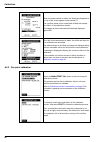
76 system setup 6.4 passwords 6.5 default values select the passwords option to set passwords for access to programming, calibration and system setup options. By default all passwords are set to 0000. Each password is a 4-digit numeric field. Enter the required value for each of the three passwords....
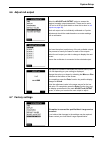
Page 78: 6.6 Adjust Ma Output
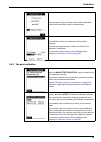
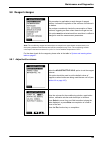
77 system setup 6.6 adjust ma output 6.7 factory settings select the adjust ma output option to access the analyzer’s analog output parameters. These can be set to 0-20 ma or 4-20 ma (see details on how this is done in ma outputs on page 88 ). Each ma output can be individually calibrated on 2 point...
Page 79
78 system setup.
Page 80: Section 7
79 section 7 user setup before attempting to setup the analyzer, ensure that you have read and understood how to enter and update data fields as described in the section entitled function keys on page 59 . The default and available settings for these options are listed in default configuration on pa...
Page 81
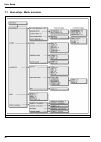
80 user setup 7.1 user setup - menu overview figure 22 user setup menu.
Page 82: 7.2 Measurement
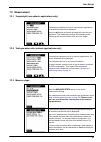
81 user setup 7.2 measurement 7.2.1 targeted ph (non-cationic applications only) 7.2.2 total gas/water ratio (cationic applications only) 7.2.3 measure steps if the analyzer has been set up for non-cationic applications, the screen illustrated left is displayed. Select the ph option and enter the ta...
Page 83
82 user setup 7.2.4 reactivation frequency if the analyzer has been set up as a multi channel analyzer the screen illustrated left will be displayed. The on line measurement time is the time when the analyzer displays the true sodium measurement. This value must be at least 1 minute and less than th...
Page 84
83 user setup 7.2.5 datalogger setup this option allows you to view data held in the analyzer’s internal memory. Select the view data option to display the requested data. All information matching the parameters selected in the view setup option is displayed on the screen. If the data covers more th...
Page 85: 7.3 Alarms
84 user setup 7.2.6 graph time base 7.3 alarms for graphical displays, enter the number of hours as the base line for the graph. This can be 4, 8, 12, 16, 20 or a 24 hour period. Select the alarms option to set up the parameters for all the alarms including the system and warning alarms. Select the ...
Page 86
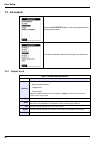
85 user setup 7.3.1 alarms 1 to 4 table 4 alarms 1 to 4 parameters value description mode limit trigger the alarm when the measurement is above or below a pre-defined limit sample flow trigger the alarm when the sample flow rate is too low active channel trigger the alarm when the channel is active ...
Page 87
86 user setup 7.3.2 warning alarm 7.3.3 system alarm table 5 warning alarm parameters value description alarm yes activate the warning alarm no deactivate the warning alarm accept manual when the alarm is triggered, turn it off by pressing the enter function key auto when the alarm is triggered, it ...
Page 88
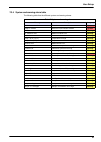
87 user setup 7.3.4 system and warning alarm table the following table lists the different system and warning alarms: table 7 system and warning alarms message description category reset measure mod. Reset the measure module system reset lc module reset the local controller module system lc error lo...
Page 89: 7.4 Ma Outputs
88 user setup 7.4 ma outputs 7.4.1 outputs 0 to 5 select the ma outputs option to set up the parameters for all the analog outputs. From the list available, select the ma output you wish to set. Table 8 analog output parameters description attribute choose the attribute that triggers the analog outp...
Page 90
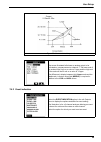
89 user setup 7.4.2 event indication figure 23 linear and dual slopes the screen illustrated left shows an analog output to be activated on a measurement on channel 1. The lower end of the scale will be 0 ma on a value of 1 ppm and the high end of the scale will be 20 ma on a value of 12 ppm. The di...
Page 91: 7.5 Rs485 (Or Profibus)
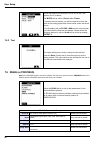
90 user setup 7.4.3 test 7.5 rs485 (or profibus) note: if the profibus option has been installed, then the menu option will show profibus rather than rs485, and the profibus parameters will need to be installed. Define the attribute for the event. This is one of the 6 ma outputs (0 to 5) or none. Th...
Page 92: 7.6 Sample Channels
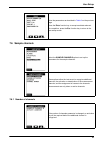
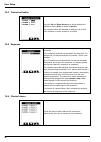
91 user setup 7.6 sample channels 7.6.1 number of channels enter the parameters as described in table 9 on the previous page. Press the enter function key to accept each data element. On completion, press the esc function key to return to the user setup screen. Select the sample channels option to s...
Page 93
92 user setup 7.6.2 channel activation 7.6.3 sequence 7.6.4 channel names using the up and down arrow keys, define whether the channel is active ( activ ) or inactive ( inactiv ). The example shown left indicates an analyzer set up with three channels, of which channel 2 is inactive. The sequence de...
Page 94: Section 8
93 section 8 calibration 8.1 general before attempting to calibrate the analyzer, ensure that you have read and understood how to enter and update data fields as described in the section entitled function keys on page 59 . Note: the instrument cannot be calibrated until at least one complete measure...
Page 95: 8.4 Start Calibration
94 calibration 8.3 calibration - menu overview 8.4 start calibration 8.4.1 calibrate known addition figure 24 calibration menu select the start calibration option to calibrate the analyzer manually. Select the cal.Known addition option to calibrate the analyzer by mixing the sample with a known conc...
Page 96
95 calibration if the volume of solution is ok, the background point measurement ( p0 ) to be used as the base measurement value is taken. This is the measurement against the sample before any additions of the calibration solution have been made. A progress bar is displayed showing the progress to d...
Page 97
96 calibration 8.4.2 one point calibration when the measurement is stable, the details are displayed at the top of the screen against measurement p1. The overflow vessel is then rinsed and re-filled with sample plus 20ml of the calibration solution. This sample is then measured and the details displ...
Page 98
97 calibration 8.4.3 two point calibration when prompted, fill the overflow vessel with the calibration solution and select ok to start the measurement. The calibration solution is measured and the results displayed. Once the final measurement is stable, the offset for the calibration is calculated....
Page 99
98 calibration 8.5 automatic calibration setup select the auto. Cal. Setup option to access its sub-menu and set the calibration parameters. This allows the analyzer to be automatically calibrated at pre-defined and regular intervals. The process is the same as described in calibrate known addition ...
Page 100: 8.6 Calibration Results
99 calibration 8.6 calibration results after the slope and offset have been calculated, the default parameters, last calibration details and current calibration details are displayed, along with a “ calibration ok ” or “ calibration error ” message. The criteria for accepting or rejecting the calibr...
Page 101: 8.8 Custom Adjustment
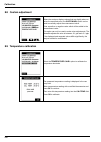
100 calibration 8.8 custom adjustment 8.9 temperature calibration where the analyzer displays values that are slightly above or below the expected value, the custom.Adj option can be used to manually adjust the measurement value. Enter a positive or negative value which will be added to the measurem...
Page 102: Section 9
101 section 9 maintenance and diagnostics periodic maintenance will ensure accurate and consistent analysis results. Verify the levels of the calibration solution and reagents and refill where necessary. 9.1 maintenance schedule the following table shows the suggested maintenance schedule for the 92...
Page 103
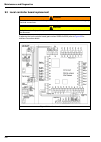
102 maintenance and diagnostics 9.3 local controller board replacement if replacing the local controller board (part number 09200=a=5036) refer to figure 25 for interface connection details. Warning potential electrocution hazard. Always disconnect power to the instrument before making any electrica...
Page 104: 9.4 Fuse Replacement
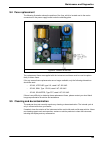
103 maintenance and diagnostics 9.4 fuse replacement the following illustration shows the position of the fuse, which is located next to the mains connectors on the power supply board under the shielding plate. Two replacement fuses are supplied with the instrument and these must be used to replace ...
Page 105
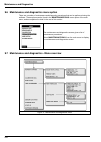
104 maintenance and diagnostics 9.6 maintenance and diagnostics menu option there are a number of maintenance and diagnostic procedures that can be performed using the software. These options can be found in the maintenance/diag. Menu option of the main menu, and are explained in detail in the rest ...
Page 106: 9.8 Reagent Changes
105 maintenance and diagnostics 9.8 reagent changes note: the conditioning reagent and electrolyte consumption are approximate measurements, so a discrepancy between measurement and actual consumption may occur. The conditioning solution consumption has been measured for a ph of 11.2 at an ambient t...
Page 107
106 maintenance and diagnostics 9.8.2 priming tubes 9.8.3 bottles full after refilling the bottles (reference electrolyte, calibration solution and reactivation solution) and/or after exchanging the empty bottle of conditioning reagent with a new one, select the priming tubes option. This will set o...
Page 108: 9.9 Calibration Diagnostics
107 maintenance and diagnostics 9.9 calibration diagnostics 9.10 raw values 9.11 test accessories this option is used by after sales service technicians to verify that the last calibration was working correctly. This option is used by after sales service technicians to verify that the electrodes are...
Page 109
108 maintenance and diagnostics 9.11.1 hydraulics 9.11.2 relays test hydraulics allows you to check that all accessories apart from relays and logical inputs are working correctly. The screen allows selection of the solenoid valves, the conditioning valve, the pumps, the mixer or the drain. Select t...
Page 110: 9.12 Sensor Reactivation
109 maintenance and diagnostics 9.11.3 logical inputs 9.12 sensor reactivation choose this option to check the logical inputs status. Each logical input shows either open or closed to indicate its current status. Press esc to exit the screen. Usually, the electrode is reactivated automatically based...
Page 111: 9.13 Extended Stop
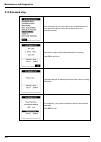
110 maintenance and diagnostics 9.13 extended stop if the instrument is not to be used for an extended period of time, select this option to shut the analyzer down in a controlled manner. Place all the tubes in demineralized water for cleaning. Press ok to continue a progress bar will be displayed w...
Page 112: 9.14 Startup
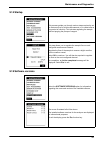
111 maintenance and diagnostics 9.14 startup 9.15 software versions this process guides you through various steps required to set the instrument up for initial measurements, or to restart after a long period of inactivity. This includes regulating the sample flow and purging the pumps of reagent. Th...
Page 113
112 maintenance and diagnostics.
Page 114: Section 10
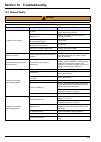
113 section 10 troubleshooting 10.1 general faults warning before opening the instrument, ensure the power supply has been switched off. Table 11 general faults malfunction possible cause remedies no display on the screen. No power. The instrument is not properly connected. Check power and connectio...
Page 115
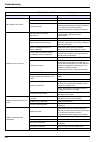
114 troubleshooting grab sample is not correct. Calibration is not correct. See below. Activation has been skipped. Start a new grab sample again. Electrode too slow. Set activation setup to 24 hours frequency. Manually activate the electrode by immersing it for 10 minutes in activation solution. If...
Page 116
115 troubleshooting pump not working (cationic applications). Option not activated. Call a service technician. Pump is not connected. Verify the electrical connections and voltage. If the voltage is around 70 volts change the pump. Instrument not in start mode. Verify the instrument is in start mode...
Page 117: 10.3 Miscellaneous Problems
116 troubleshooting 10.2 detection of functional faults 10.3 miscellaneous problems table 12 lack of precision problem cause/solution electrolyte is polluted. Check parts and change the electrolyte. Electrolyte leaks. Check parts and change the electrolyte. Error during calibration or incorrect cali...
Page 118: Section 11
117 section 11 spare parts and accessories 11.1 accessories - options - maintenance kits table 14 accessories, options & maintenance kits description part number optional kit for profibus dp: board + operator manual 09125=a=1485 optional rs485 jbus/modbus: board + instruction manual (5 languages) 09...
Page 119
118 spare parts and accessories 11.2 spare parts - in contact with sample 11.3 spare parts - in contact with cell or electrodes table 15 spare parts - in contact with sample description part number cleaning brush for static heat exchanger system 09240=a=9840 sample level detector kit (cable, level d...
Page 120: 11.5 Electronics
119 spare parts and accessories 11.4 spare parts - in contact with reagents or standard solution 11.5 electronics table 17 spare parts - in contact with reagents or standard solution description part number porous cartridge for gaseous conditioning in 9245-9240 09073=c=0340 dipa merck bottle cap ada...
Page 121: 11.6 Additional Hardware
120 spare parts and accessories 11.6 additional hardware table 19 additional hardware description part number locking key for 924x enclosure 32965 elbow torque screw driver t6 820=000=006.
Page 122: Section 12
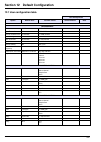
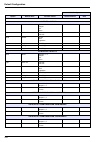
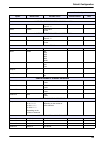
121 section 12 default configuration 12.1 user configuration table user configuration option default value possible values selected values date measurement ph 11.20 10.00 - 12.00 tgaz/twater % 20 0000 - 0250 on-line measure time 10 minutes 0 - 9999 minutes smart rinsing no yes or no max. Rinse time ...
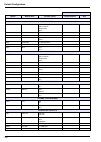
Page 123
122 default configuration alarms / alarm 3 mode limit limit active channel sample flow none attrib channel 1 channel 1 - 4 limit 1.00 ppm 0 - 9990 ppm direction up up down delay 0 seconds 0 - 999 seconds hysteresis 0% 0 - 10% relay n.O. N.O. N.C. Alarms / alarm 4 mode limit limit active channel samp...
Page 124
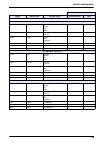
123 default configuration ma outputs / output 1 attrib channel 1 channel 1 - 4 temper. Mv none type 0-20 ma 0-20 ma 4-20 ma mode linear linear dual logarithm low 0 ppb 0 - 9990 ppm middle 100 ppb 0 - 9990 ppm high 1 ppm 0 - 9990 ppm ma outputs / output 2 attrib none channel 1 - 4 temper. Mv none typ...
Page 125
124 default configuration ma outputs / output 4 attrib none channel 1 - 4 temper. Mv none type 0-20 ma 0-20 ma 4-20 ma mode linear linear dual logarithm low 0 ppb 0 - 9990 ppm middle 100 ppb 0 - 9990 ppm high 1 ppm 0 - 9990 ppm ma outputs / output 5 attrib none channel 1 - 4 temper. Mv none type 0-2...
Page 126
125 default configuration ma outputs / event indication / warning alarm attrib none none output 0 - 5 mode frozen preset value frozen ma outputs / event indication / system alarm attrib none none output 0 - 5 mode frozen preset value frozen rs485 device no. 0 0 - 33 baud 19200 600 1200 2400 4800 960...
Page 127
126 default configuration.
Page 128: Section 13
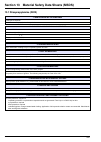
127 section 13 material safety data sheets (msds) 13.1 diisopropylamine (dipa) 1. Identification of the substance catalogue no: 803646 product name: diisopropylamine for synthesis 2. Composition / information on ingredients cas no: 108-18-9 molecular weight: 101.19 chemical formula: c 6 h 15 n ec in...
Page 129
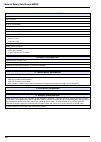
128 material safety data sheets (msds) 9. Physical and chemical properties form: liquid color: colorless odor: amine-like ph value: not available melting temperature: -96°c boiling temperature: 83 - 84°c ignition temperature: 295°c din51794 flash point: -17°c din51755 explosion limits: • lower: 1.5 ...
Page 130
129 material safety data sheets (msds) 14. Transport information dot: • shipping name: diisopropylamine • un number: un1158 • hazard class: 3,8 • packing group: pg ii • label(s): flammable liquid, corrosive iata: • shipping name: diisopropylamine • un number: un1158 • hazard class: 3,8 • packing gro...
Page 131: 13.2 Potassium Chloride
130 material safety data sheets (msds) 13.2 potassium chloride 1. Identification of the substance intended/recommended use: electrolyte for reference electrode in 9245 sodium analyzer chemical formula: kcl 3m in water molecular weight: 74.55 g/mol product name: potassium chloride 2. Composition / in...
Page 132
131 material safety data sheets (msds) 8. Exposure controls and personal protection protective clothing: none: overalls: glasses: gloves: x other: ventilation: none: vent hood: mechanical (general): special: individual protection : protective clothing should be selected specifically for the working ...
Page 133: 13.3 Sodium Chloride
132 material safety data sheets (msds) 13.3 sodium chloride 1. Identification of the substance intended/recommended use: 10 ppm (na) calibration standard for 9245 sodium analyzer chemical formula: nacl 10 ppm in water molecular weight: 58.44 g/mol product name: sodium chloride 2. Composition / infor...
Page 134
133 material safety data sheets (msds) 8. Exposure controls and personal protection protective clothing: none: x overalls: glasses: gloves: other: ventilation: none: x vent hood: mechanical (general): special: 9. Physical and chemical properties appearance : liquid. Odor : odorless. Color : colorles...
Page 135: 13.4 Sodium Nitrate
134 material safety data sheets (msds) 13.4 sodium nitrate 1. Identification of the substance intended/recommended use: 0.5 m nano 3 reactivation solution for 9245 sodium analyzer chemical formula: nano 3 0.5 m (42.5 g/l) in water molecular weight: 85 g/mol product name: sodium nitrate 2. Compositio...
Page 136
135 material safety data sheets (msds) 8. Exposure controls and personal protection protective clothing: none: x overalls: glasses: gloves: x other: ventilation: none: x vent hood: mechanical (general): special: 9. Physical and chemical properties appearance : liquid. Odor : odorless. Color : colorl...
Page 137
136 material safety data sheets (msds).
Page 138: Section 14
137 section 14 reagent preparation 14.1 conditioning reagent • use of diisopropylamine in the conditioning bottle is the hach lange recommended solution (cas no: 108-18-9; see diisopropylamine (dipa) on page 127 for the msds). Other reagents can be used but are not recommended (refer back to conditi...
Page 139
138 reagent preparation standard solution 100 ppb this solution is of low concentration for manual calibration and verification samples. 1. Rinse at least 3 times a 1l volumetric flask (“a” class) with ultra pure water. The cleanliness of the flask is essential. 2. Measure very precisely 10 ml of th...
Page 140: 14.4 3M Kcl
139 reagent preparation 14.4 3m kcl 1. To prepare 1l of 3m kcl, rinse at least 3 times a 1l volumetric flask (“a” class) with ultra pure water. The cleanliness of the flask is essential. 2. Put 223.5 g of kcl inside this flask and add ultra pure water almost to the line delimiting the volume. 3. Sha...
Page 141
140 reagent preparation.
Page 142
Hach company world headquarters p.O. Box 389, loveland, co 80539-0389 u.S.A. Tel. (970) 669-3050 (800) 227-4224 (u.S.A. Only) fax (970) 669-2932 orders@hach.Com www.Hach.Com hach lange gmbh willstätterstraße 11 d-40549 düsseldorf, germany tel. +49 (0) 2 11 52 88-320 fax +49 (0) 2 11 52 88-210 info-d...


