- DL manuals
- IAI
- Controller
- ROBO Cylinder RCP2 Series
- Operating Manual
IAI ROBO Cylinder RCP2 Series Operating Manual
Motor reversing type:
IAI America, Inc.
Motor coupling type:
RCP2-SA5C, SA6C,SA7C
RCP2-SA5R, SA6R, SA7R
SS7C, SS8C, HS8C
Standard type:
SS7R, SS8R, HS8R
Cleanroom type:
Motor coupling type:
RCP2CR-SA5C, SA6C, SA7C
SS7C, SS8C, HS8C
ROBO Cylinder
RCP2/RCP2CR Actuators
Slider Type
Operating Manual
Fifteen Edition
Summary of ROBO Cylinder RCP2 Series
Page 1
Motor reversing type: iai america, inc. Motor coupling type: rcp2-sa5c, sa6c,sa7c rcp2-sa5r, sa6r, sa7r ss7c, ss8c, hs8c standard type: ss7r, ss8r, hs8r cleanroom type: motor coupling type: rcp2cr-sa5c, sa6c, sa7c ss7c, ss8c, hs8c robo cylinder rcp2/rcp2cr actuators slider type operating manual fift...
Page 3: Please Read Before Use
Please read before use thank you for purchasing our product. This operation manual explains the handling methods, structure and maintenance of this product, among others, providing the information you need to know to use the product safely. Before using the product, be sure to read this manual and f...
Page 4
4 caution be sure to check screw length. Damage can occur if too long of screws are used! Model actuator base thread depth sa5 4 mm or more and 7 mm or less sa6 5 mm or more and 9 mm or less sa7 5 mm or more and 9 mm or less ss7 5 mm or more and 8 mm or less ss8 8 mm or more and 10 mm or less hs8 8 ...
Page 5
5 note greasing actuators of cleanroom specification for robo cylinder actuators of cleanroom specification, use grease of low-dust-raising type for cleanroom applications. The grease specified in the maintenance/inspection sections of the operating manual is for actuators of standard specification....
Page 6
6.
Page 7: Table of Contents
Table of contents safety guide .................................................................................................................................................................1 handling precautions.........................................................................................
Page 8
9. Maintenance and inspection ...............................................................................................................................52 9.1 inspection items and schedule .............................................................................................................
Page 9
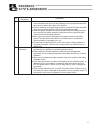
1 safety guide when designing and manufacturing a robot system, ensure safety by following the safety precautions provided below and taking the necessary measures. Safety precautions for our products the common safety precautions for the use of any of our robots in each operation. No. Operation desc...
Page 10
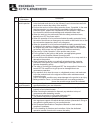
2 no. Operation description description (1) installation of robot main body and controller, etc. Make sure to securely hold and fix the product (including the work part). A fall, drop or abnormal motion of the product may cause a damage or injury. Do not get on or put anything on the product. Failur...
Page 11
3 no. Operation description description (4) safety measures when the work is carried out with 2 or more persons, make it clear who is to be the leader and who to be the follower(s) and communicate well with each other to ensure the safety of the workers. When the product is under operation or in the...
Page 12
4 no. Operation description description 6 trial operation when the work is carried out with 2 or more persons, make it clear who is to be the leader and who to be the follower(s) and communicate well with each other to ensure the safety of the workers. After the teaching or programming operation, pe...
Page 13
5 no. Operation description description 8 maintenance and inspection when the work is carried out with 2 or more persons, make it clear who is to be the leader and who to be the follower(s) and communicate well with each other to ensure the safety of the workers. Perform the work out of the safety p...
Page 14: Alert Indication
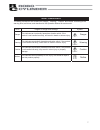
6 alert indication the safety precautions are divided into “danger”, “warning”, “caution” and “notice” according to the warning level, as follows, and described in the operation manual for each model. L o b m y s e g a m a d d n a r e g n a d f o e e r g e d l e v e l danger this indicates an immine...
Page 15: Alert Indication
7 alert indication the safety precautions are divided into “danger”, “warning”, “caution” and “notice” according to the warning level, as follows, and described in the operation manual for each model. Level degree of danger and damage symbol danger this indicates an imminently hazardous situation wh...
Page 16
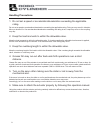
8 handling precautions 1. Do not set a speed or acceleration/deceleration exceeding the applicable rating. Do not set a speed or acceleration/deceleration exceeding the applicable rating. Doing so may result in vibration, failure or shorter life. If an acceleration/deceleration exceeding the rating ...
Page 17
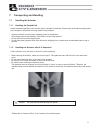
9 7. Transporting and handling 7.1 handling the actuator 7.1.1 handling the packed unit unless otherwise specified, each actuator (axis) is shipped individually. Please make sure that the shipping box is not dropped or subjected to strong impact during transport. • operators should not carry heavy s...
Page 18
10 7.2 handling the actuator assembly when transporting the actuator with its axes already assembled, take note of the following items. 7.2.1 shipping from iai already assembled after assembly at iai, your machine undergoes a shipping inspection, is packed in a crate with skids, and finally shipped....
Page 19
11 international standards compliances this actuator complies with the following overseas standards. Refer to overseas standard compliance manual (me0287) for more detailed information. G n i k r a m e c e v it c e ri d s h o r.
Page 20
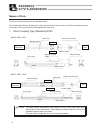
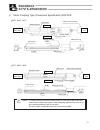
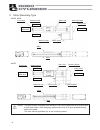
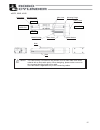
12 names of parts the names of the actuator parts are indicated below. The left and right sides are indicated by looking at the actuator from the motor end with the actuator set down horizontally. Front end means the side opposite the motor end. 1. Motor coupling type (standard) rcp2 sa5c, sa6c, sa7...
Page 21
13 2. Motor coupling type (cleanroom specification) rcp2cr sa5c, sa6c, sa7c ss7c, ss8c, hs8c caution: the cable directly connected to the actuator is not a robot cable even when ordered with a robot cable option. When designing, please make sure not to give repeated bending loads to this cable. The ...
Page 22
14 3. Motor reversing type Ɣsa5r, sa6r Ɣsa7r caution: the cable directly connected to the actuator is not a robot cable even when ordered with a robot cable option. When designing, please make sure not to give repeated bending loads to this cable. The robot cable is applicable only to the connecting...
Page 23
15 Ɣss7r, ss8r, hs8r caution: the cable directly connected to the actuator is not a robot cable even when ordered with a robot cable option. When designing, please make sure not to give repeated bending loads to this cable. The robot cable is applicable only to the connecting cables. Stainless sheet...
Page 24
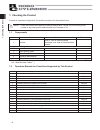
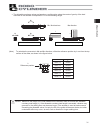
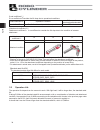
16 1. Checking the product 1. Checking the product if based on a standard configuration, this product consists of the items listed below. Caution: check the packed items against the packing specification. Should you find a wrong model number or any missing item, please contact your iai dealer or iai...
Page 25
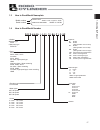
17 1. Checking the product model number serial number modelrcp2 sa5ci42p1250p1pbe serialno.600090266 made in japan model rcp2 1.3 how to read model nameplate 1.4 how to read model number aluminum bas sa5c, sa6c, sa7c iron base ss7c, ss8c iron base, high-speed type hs8c aluminum base motor reversing ...
Page 26
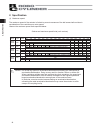
18 2. Specification 2. Specification (1) maximum speed the maximum speed of the actuator is limited to prevent resonance of the ball screw shaft and also in consideration of the restrictions on motor speed. Observe the maximum speed limits specified below. Strokes and maximum speed limits (unit: mm/...
Page 27
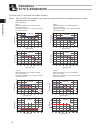
19 2. Specification rcp2crsa5c rcp2crsa6c (2) acceleration and payload capacity caution: 1. The payload capacities at different accelerations, other than those at the rated accelerations of 0.2 g and 0.3 g, are provided for reference purposes only. Use these values only as a rough guide, as they are...
Page 28
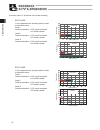
20 2. Specification 0.2g 0.3g 0.5g 0.7g 0.2g 0.3g 0.1g 0.2g 0.3g 0.5g 0.7g 0.2g 0.3g 0.1g 0.5g 0.7g 0.2g 0.3g 0.1g 0.2g 0.3g 0.5g 0.7g 0.2g 0.3g 0.1g 0.2g [controller (with “h” at the end of the model number)] (note) with the sa5c type and sa6c type (except for models of lead 20), the specific perfo...
Page 29
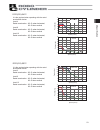
21 2. Specification 0.5g 0.7g 0.2g 0.3g 0.1g 0.5g 0.7g 0.2g 0.3g 0.1g 0.2g 0.3g 0.1g 0.5g 0.7g 0.2g 0.3g 0.2g 0.3g 0.2g 0.3g 0.5g 0.7g 0.2g 0.3g 0.2g 0.1g payload (kg) payload (kg) payload (kg) payload (kg) payload (kg) payload (kg) payload (kg) payload (kg) speed (mm/s) speed (mm/s) rcp2 (cr)-sa6c ...
Page 30
22 2. Specification rcp2sa5r payload (kg) payload (kg) payload (kg) payload (kg) speed (mm/s) speed (mm/s) lead 3 lead 6 lead 12 lead 3 lead 6 lead 12 lead 3 lead 6 lead 12 lead 3 lead 6 lead 12 vertical horizontal vertical horizontal speed (mm/s) [controller (with “h” at the end of the model number...
Page 31
23 2. Specification 0 0 100 200 300 400 500 600 700 10 20 30 40 50 60 70 0 100 200 300 400 500 600 700 0 5 10 15 20 25 30 35 rcp2(cr)-sa7c 0 0 100 200 300 400 500 600 700 5 10 15 20 25 30 35 2 6 0 100 200 300 400 500 600 700 0 2 4 6 8 10 12 14 2 1 payload (kg) payload (kg) payload (kg) payload (kg) ...
Page 32
24 2. Specification rcp2(cr)-ss8c 0 0 100 200 300 400 500 600 700 10 20 30 40 50 60 70 2 4 55 0 100 200 300 400 500 600 700 0 5 10 15 20 25 30 35 0.5 2 0.5 12 0 0 200 400 600 800 1000 1200 1400 5 10 15 20 25 30 35 0.3g 0.5g 0.3g 0.5g 1 2 12 0 100 200 300 400 500 600 700 800 0 1 2 3 4 5 6 7 0.2g 0.2g...
Page 33
25 2. Specification rcp2-sa7r 0 0 100 200 300 400 500 600 700 10 20 30 40 50 60 70 7 25 4 0 100 200 300 400 500 600 700 0 5 10 15 20 25 30 35 1 1.5 3 0 0 100 200 300 400 500 600 700 5 10 15 20 25 30 35 12 3 5.5 2.5 0 100 200 300 400 500 600 700 0 2 4 6 8 10 12 14 12 1.5 5 0.5 0.5 rcp2-ss7r payload (...
Page 34
26 2. Specification rcp2-ss8r rcp2-hs8r 0 0 100 200 300 400 500 600 700 10 20 30 40 50 60 70 1.5 55 28 23 23 4 1 0 50 100 150 200 250 300 350 0 5 10 15 20 25 30 35 0 0 0.5 0.5 9 3 0.5 0 0 200 400 600 800 1000 1200 1400 5 10 15 20 25 30 35 1 0 100 200 300 400 500 600 700 800 0 1 2 3 4 5 6 7 vertical ...
Page 35
27 2. Specification rcp2cr-sa7c 0 0 100 200 300 400 500 600 700 5 10 15 20 25 30 35 0 100 200 300 400 500 600 700 0 3 6 9 12 15 18 21 4 1 1 10 5 0 0 100 200 300 400 500 600 700 5 10 15 20 25 30 35 3 0 100 200 300 400 500 600 700 0 2 4 6 8 10 12 14 1 0.5 rcp2cr-ss7c payload (kg) payload (kg) payload ...
Page 36
28 2. Specification rcp2cr-ss8c rcp2cr-hs8c 0 0 100 200 300 400 500 600 700 10 20 30 40 50 60 70 8 55 5 4 0 100 200 300 400 500 600 700 0 5 10 15 20 25 30 35 0.5 0.5 0.5 12 payload (kg) payload (kg) vertical horizontal vertical horizontal lead 5 lead 10 lead 20 lead 5 lead 10 lead 20 acceleration: 0...
Page 37
29 2. Specification (3) driving method type motor type lead [mm] encoder pulses *1 driving method 2.5 5 sa5c, sa5r 42p 10 ball screw 10 mm rolled, c10 sa5c 42p 20 ball screw 10 mm rolled, c10 3 6 sa6c, sa6r 42p 12 ball screw 10 mm rolled, c10 sa6c 42p 20 ball screw 10 mm rolled, c10 4 8 sa7c, sa...
Page 38
30 2. Specification (6) load on the actuator do not exceed the load shown in the load specification column. Please note the slider moment, allowable overhang length and the load weight. Dynamic allowable moments c m b m a m l e d o m sa5c, r 5.81 n• m (0.59 kgf•m) 11.6 n• m (1.18 kgf•m) 20.7 n• m (2...
Page 39
31 2. Specification mb, mc directions ma direction directions of moment forces directions of allowable overhangs 0e 0d 0f / / x the allowable overhang values are based on a configuration where the center of gravity of the load mounted on the actuator corresponds to 1/2 of the overhang length. (note)...
Page 40
32 2. Specification the body of the base warps easily when the actuator is used as the y-axis in an x-y overhang setup. In this case, use the actuator so that the ma and mc moments are kept to one-half the allowable moment or less (see the figure below). Caution: allowing the slider to receive an ex...
Page 41
33 3. Life 3. Life the mechanical life of the actuator is represented by that of the guide receiving the greatest moment load.Operation life of the linear guide is to be determined by the total driving distance which can reach without having 90% flaking (peeling on rail surface). Operation life can ...
Page 42
34 3. Life [load coefficient f w ] it is a coefficient to consider the life drop due to operational conditions. Load coefficient f w operation condition reference for acceleration/deceleration 1.0 to 1.5 small vibration or impact in slow operation 0.7g or less [attachment coefficient f 䃐 ] attachmen...
Page 43
35 4. Installation and storage/preservation environment 4. Installation and storage/preservation environment 4.1 installation environment the actuator should be set up in an environment, which meets the following criteria: • avoid direct sunlight. • avoid radiant heat from strong heat sources such a...
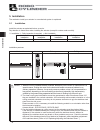
Page 44
36 5. Installation 5. Installation the method to install your actuator in a mechanical system is explained. 5.1 installation install the actuator as explained below, as a rule. Pay attention to these items when installing the actuator (except for custom-order models). { : installable : daily inspect...
Page 45
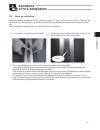
37 5. Installation 5.2 notes on installation the stainless sheet is designed very thin (thickness: approx. 0.1 mm) in order to ensure flexibility. Therefore, the stainless sheet is easily dented or scratched. Once dented or scratched, the stainless sheet may break during use. When installing the sta...
Page 46
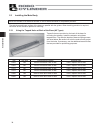
38 5. Installation 5.3 installing the main body mount the actuator to a machined surface or one of the flat surfaces of comparable precision. The side faces and lower surface of the base run parallel with the guides. When traveling precision is required, use these as the reference planes for mountin...
Page 47
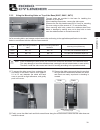
39 5. Installation slider sheet right and left clearances are nearly equal 5.3.2 using the mounting holes on top of the base (sa5c, sa6c, sa7c) through holes are provided in the base for installing the actuator on its top face. When installing the actuator, remove the side covers. (remove the two th...
Page 48
40 5. Installation tapped hole reamed hole 5.4 installing the load to the slider • tapped holes are provided on the slider for installing the load. The method of clamping varies according to how to mount the main body. • in case of moving the main body with the slider secured, use the same tapped ho...
Page 49
41 5. Installation reference plane (side face of the base) reference plane (side face of the base) 5.5 reference surface and mounting surface • the mounting table should have sufficient rigidity to avoid generating vibration. • the surface where the actuator will be mounted should be machined or be ...
Page 50
42 5. Installation 5.6 clamp screws • the male screws for mounting the base should be m4 for sa5c, m5 for ss7c/sa6c/sa7c, and m8 for ss8c/hs8c. (use hexagon socket-head bolts.) • for the bolts, we recommend high strength bolts of iso-10.9 or higher. • when using a foot base to attach to a mounting t...
Page 51
43 5. Installation 5.7 cleanroom specification this actuator can deliver performance which ensures its operation in conformance with the requirements of cleanliness class 10 (0.1 m) by suctioning air into the suction joint. The recommended suction rate of each model at the maximum speed is specified...
Page 52
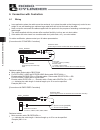
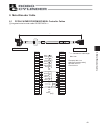
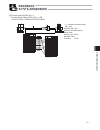
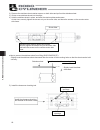
44 6. Connection with controllers encoder cable cb-rcs2-pb□□□ / encoder cable • robot cable cb-rcp2-pb□□□-rb rcp2 rcp2cr r r rcp2 rcp2cr r 6. Connection with controllers 6.1 wiring in an application where the cable cannot be anchored, try to place the cable so that it sags only under its own weight ...
Page 53
45 6. Connection with controllers warning: for wiring, please follow the warnings stated below. When constructing a system as the machinery equipment, pay attention to the wiring and connection of each cable so they are conducted properly. Not following them may cause not only a malfunction such as ...
Page 54
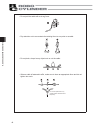
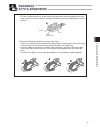
46 6. Connection with controllers • do not pull the cable with a strong force. • pay attention not to concentrate the twisting force to one point on a cable. • do not pinch, drop a heavy object onto or cut the cable. • when a cable is fastened to affix, make sure to have an appropriate force and do ...
Page 55
47 6. Connection with controllers • pio line, communication line, power and driving lines are to be put separately from each other and do not tie them together. Arrange so that such lines are independently routed in the duct. Power line duct i/o line (flat cable, etc.) follow the instructions below ...
Page 56
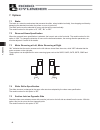
48 7. Options ml left mr right 7. Options 7.1 brake the brake is a retention mechanism that prevents the slider, when installed vertically, from dropping and thereby damaging the attached load when the power or servo is turned off. The brake option must be selected for every axis that will be used v...
Page 57
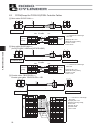
49 8. Motor/encoder cable 8. Motor/encoder cable 8.1 pcon-ca/pmec/psep/msep/msel controller cables [1] integrated motor/encoder cable cb-psep-mpa□□□ mechanical end 1 2 3 4 5 6 9 10 11 12 7 8 13 14 15 16 17 18 19 20 21 22 23 24 1 2 4 5 3 6 16 17 5 6 13 14 1 2 3 4 10 11 9 12 15 7 8 18 a vmm b vmm /a /...
Page 58
50 8. Motor/encoder cable 8.2 pcon(except for pcon-ca)/psel controller cables [3] encoder cable cb-rcp2-pb□□□ encoder robot cable cb-rcp2-pb□□□-rb * □□□ indicates the cable length. Max. 20m. Example) 080 = 8 m [minimum bending radius] robot cable movable: 54 mm standard cable fixed: 75 mm cable colo...
Page 59
51 8. Motor/encoder cable [4] encoder cable cb-rfa-pa□□□ encoder robot cable cb-rfa-pa□□□-rb (for rcp2-hs8c, hs8r and rcp2cr-hs8c) l c n 2 cn4 (5) (8) (13) (15) (18) (9 ) (35) (25) housing : phdr-16vs (j.S.T. Mfg.) contact : sphd-001t-p0.5 housing : xmp-18v (j.S.T. Mfg.) contact : bxa-001t-p0.6 reta...
Page 60
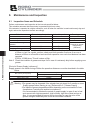
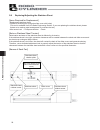
52 9. Maintenance and inspection 9. Maintenance and inspection 9.1 inspection items and schedule perform maintenance and inspection at the intervals specified below. This schedule assumes that the actuator is operated eight hours a day. If the actuator is operated at a higher utilization, such as wh...
Page 61
53 9. Maintenance and inspection 9.2 visual inspection of the machine exterior check the following items when carrying out visual inspection. Body loose mounting bolts cables damage to cables or connection to connector box stainless sheet damage, foreign deposit or slacks general unusual noise or vi...
Page 62
54 9. Maintenance and inspection 9.5 interior inspection turn off the power, remove the side covers, and then visually inspect the interior. Check the following items during interior inspection. Body loose mounting bolts? Guides lubrication appropriate? Soiling? Ball screw lubrication appropriate? S...
Page 63
55 9. Maintenance and inspection 9.6 internal cleaning • wipe off dirt with a soft cloth. • do not use strong compressed air on the actuator as this may force dust into the crevices. • do not use petroleum-based solvent, neutral detergent or alcohol. Caution: do not use flushing oil, molybdenum grea...
Page 64
56 9. Maintenance and inspection [cleanroom specification] (1) what grease to use on the guide and ball screw for guides and ball screw, a urea-based grease of low-dust-raising type which has stable torque characteristics and superior lubrication performance as well as the anti-rust effect equivalen...
Page 65
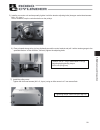
57 9. Maintenance and inspection 9.7.2 how to apply grease 1) when greasing the guide, use a spatula or grease applicator to squeeze or inject grease into the space between the slider and base, and then move the slider back and forth several times to let grease spread evenly. Apply grease on the gui...
Page 66
58 9. Maintenance and inspection 9.8 replacing/adjusting the stainless sheet [items required for replacement] • replacement stainless sheet • clearance-checking tool (a regular slider cover with holes) (this tool is available from iai’s sales engineering section. If you are replacing the stainless s...
Page 67
59 9. Maintenance and inspection [procedure] 1) remove the slider-cover affixing screws and remove the covers. After the slider covers have been removed [1] standard specification (slider structure) • sa5c/sa6c • sa7c/ss7c/ss8c/hs8c [2] cleanroom specification (slider roller specification (optional)...
Page 68
60 9. Maintenance and inspection peripheral openings center openings install the clearance-checking tool instead of the slider covers. 2) remove the stainless-sheet retainer screws on both sides and pull out the stainless sheet. 3) guide a new stainless sheet into the slider. 4) hold the stainless s...
Page 69
61 9. Maintenance and inspection 6) adjust the tension of the stainless sheet. [1] while looking through the center opening in the clearance-checking tool, move the stainless sheet on the loose end in the directions of arrows until the clearance between the top face of the stainless sheet and the ba...
Page 70
62 9. Maintenance and inspection checkpoint 1: check if the clearance between the top face of the stainless sheet and the back of the clearance-checking tool falls within the specified range along the entire stroke. Checkpoint 2: look through the peripheral openings and confirm that the stainless sh...
Page 71
63 9. Maintenance and inspection [4] when proper clearances are obtained between the slider body and stainless sheet and an absence of contact between the two is confirmed, tighten the two screws on the loose end alternately, and then finally tighten all screws to a uniform torque to securely affix ...
Page 72
64 9. Maintenance and inspection 9.9 reduction belt [motor reversing type]: sa5r, sa6r, sa7r, ss7r, ss8r, hs8r 9.9.1 inspecting the belt remove the pulley cover and visually inspect the belt. Durability of the reduction belt is affected significantly by the operating condition, and there is no stand...
Page 73
65 9. Maintenance and inspection sa7r ss7r, ss8r, hs8r tension adjusting bolts (4 pcs.) use an allen wrench of 3mm across flats. Motor bracket tensile load: tension adjusting bolts (4 pcs.) use an allen wrench of 3mm across flats. Motor bracket tensile load: tension adjusting bolt tightening torque:...
Page 74
66 9. Maintenance and inspection 9.9.4 replacing the belt : sa5r, sa6r, sa7r, ss7r, ss8r, hs8r Ɣsa5r, sa6r [items required for replacement] • replacement reduction belt • allen wrench set • tension gauge (capable of tensioning to 3kgf or greater) • strong string, looped (or long tie-band) [procedure...
Page 75
67 9. Maintenance and inspection 8) attach the pulley cap. Tighten the hexagon socket-head bolts (m3 x 8mm, 2 pcs.) using an allen wrench of 2.5mm across flats. Tightening torque: 83 n·cm (8.47 kgf·cm) 5) remove the pulley assembly. 䈄 remove the four affixing bolts using an allen wrench of 2.5mm acr...
Page 76
68 9. Maintenance and inspection tightening torque: 83 n·cm (8.47 kgf·cm) tightening torque: 87.2 n·cm (8.90 kgf·cm) 9) install the pulley assembly. 䈄 align the angles of projections and depressions on the couplings. • tighten the hexagon socket-head screws (m3 × 22, 4 pcs.) using an allen wrench of...
Page 77
69 9. Maintenance and inspection Ɣsa7r [items required for replacement] • replacement reduction belt • allen wrench set • tension gauge (capable of tensioning to 8kgf or greater) • strong string, looped (or long tie-band) [procedure] 1) remove the pulley cover. Remove the four affixing thin-head scr...
Page 78
70 9. Maintenance and inspection 7) install the pulley cap. Tighten the hexagon socket-head bolts (m3 × 10, 4 pcs.) using an allen wrench of 2.5 mm across flats. Tightening torque: 83 n·cm (8.47 kgf·cm) 5) remove the pulley assembly. • remove the four affixing bolts using an allen wrench of 2.5 mm a...
Page 79
71 9. Maintenance and inspection 8) install the pulley assembly. 䈄 align the angles of projections and depressions on the couplings. • tighten the hexagon socket-head screws (m3 × 40, 4 pcs.) using an allen wrench of 2.5 mm across flats. Align the angles of projections and depressions. 9) loop the b...
Page 80
72 9. Maintenance and inspection Ɣss7r, ss8r, hs8r [items required for replacement] • replacement reduction belt • allen wrench set • tension gauge (capable of tensioning to 12kgf or greater) • strong string, looped (or long tie-band) [procedure] 1) remove the pulley cover. Remove the four affixing ...
Page 81
73 9. Maintenance and inspection 6) install the pulley cover. Tighten the thin-head screws (m4 × 6, 4 pcs.) using an allen wrench of 2 mm across flats. Tightening torque: 204 n·cm (20.8 kgf·cm).
Page 82
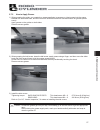
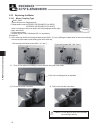
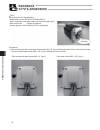
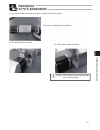
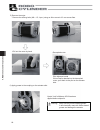
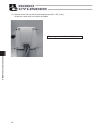
74 9. Maintenance and inspection 9.10 replacing the motor 9.10.1 motor coupling type sa5c, sa6c [items required for replacement] • replacement motor m-p2sa5c-iap42n-mb-co (for sa5c) m-p2sa6c-iap42n-mb-co (for sa6c) (with a coupling on the motor shaft: see the photograph at the right) • allen wrench ...
Page 83
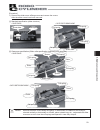
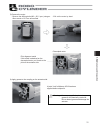
75 9. Maintenance and inspection 6) apply grease to the coupling on the actuator side. Pilot alignment metal if this metal is attached on the decoupled motor, put it back to the pilot on the actuator side. Kyodo yushi’s multemp lrl3 has been applied before shipment. 5) remove the motor. 䈄 remove the...
Page 84
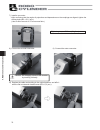
76 9. Maintenance and inspection 7) install a new motor. • after confirming that the angles of projections and depressions on the couplings are aligned, tighten the affixing bolts (m3 × 50, 2 pcs.). (use an allen wrench of 2.5 mm across flats.) tightening torque: 59 n·cm (6 kgf·cm) 8) connect the en...
Page 85
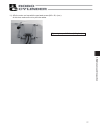
77 9. Maintenance and inspection 11) affix the motor end cap with the pan-head screws (m3 × 80, 4 pcs.). At this time, make sure not to pinch the cables. Tightening torque: 61.5 n·cm (6.3 kgf·cm).
Page 86
78 9. Maintenance and inspection sa7c [items required for replacement] • replacement motor m-p2sa7c-iap56n-mb-co (with a coupling on the motor shaft; see the photograph right.) • allen wrench set • phillips screwdriver • grease (kyodo yushi’s multemp lrl3 or equivalent) [procedure] 1) after removing...
Page 87
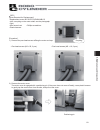
79 9. Maintenance and inspection 2) push in the cable-end molding to create a slack along the inner cable. Push in the molding as far as possible. 3) pull out the motor connector. 4) pull out the encoder connector. Caution: do not apply a force to the encoder by touching it directly..
Page 88
80 9. Maintenance and inspection pilot alignment metal if this metal is attached on the decoupled motor, put it back to the pilot on the actuator side. Kyodo yushi’s multemp lrl3 has been applied before shipment. 5) remove the motor. 䈄 remove the affixing bolts (m4 × 15, 4 pcs.) using an allen wrenc...
Page 89
81 9. Maintenance and inspection 7) install a new motor. • after confirming that the angles of projections and depressions on the couplings are aligned, tighten the affixing bolts (m4 × 15, 4 pcs.). (use an allen wrench of 3 mm across flats.) tightening torque: 176 n·cm (18 kgf·cm) 8) connect the en...
Page 90
82 9. Maintenance and inspection 11) affix the motor end cap with the pan-head screws (m3 × 105, 4 pcs.). At this time, make sure not to pinch the cables. Tightening torque: 61.5 n·cm (6.3 kgf·cm).
Page 91
83 9. Maintenance and inspection ss7c [items required for replacement] • replacement motor m-p2ss7c-iap42n-mb-co (with a coupling on the motor shaft; see the photograph right.) • allen wrench set • phillips screwdriver • plastic hammer [procedure] 1) remove the pan-head screws affixing the motor-end...
Page 92
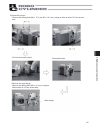
84 9. Maintenance and inspection 3) push in the motor-end cap into the motor cover. 4) pull out the motor connector. 5) pull out the encoder connector. Caution: do not apply a force to the encoder by touching it directly..
Page 93
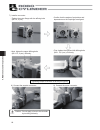
85 9. Maintenance and inspection motor flange 6) remove the motor. 䈄 remove the affixing bolts (m3 × 15, 2 pcs./m3 × 18, 2 pcs.) using an allen wrench of 2.5 mm across flats. • decoupled motor • pull out the motor by hand. • remove the motor flange. Remove the affixing bolts (m3 × 8, 4 pcs.) using a...
Page 94
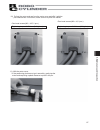
86 9. Maintenance and inspection 7) install a new motor. 8) connect the encoder connector. 9) connect the motor connector. • confirm that the angles of projections and depressions on the couplings are aligned. • tighten the motor flange with the affixing bolts (m3 × 8, 4 pcs.). • first, tighten the ...
Page 95
87 9. Maintenance and inspection 11) affix the motor cover. • if the positioning pin does not go in smoothly, gently tap the motor-end cap using a plastic hammer to push in the pin. 10) pull out the motor-end cap from the motor cover and affix it with the pan-head screws. At this time, make sure not...
Page 96
88 9. Maintenance and inspection ss8c, hs8c [items required for replacement] • replacement motor m-p2ss8c-iap56n-mb-co (for ss8c), m-p2hs8c-iap56n-mb-co (for hs8c) (with a coupling on the motor shaft; see the photograph right.) • allen wrench set • phillips screwdriver • plastic hammer [procedure] 3...
Page 97
89 9. Maintenance and inspection 4) push in the motor-end cap into the motor cover. 5) pull out the motor connector. 6) pull out the encoder connector. Caution: do not apply a force to the encoder by touching it directly..
Page 98
90 9. Maintenance and inspection 7) remove the motor. 䈄 remove the affixing bolts (m4 × 15, 4 pcs.) using an allen wrench of 3 mm across flats. • decoupled motor • pull out the motor by hand. 8) install a new motor. • after confirming that the angles of projections and depressions on the couplings a...
Page 99
91 9. Maintenance and inspection 9) connect the encoder connector. 10) connect the motor connector. 11) pull out the motor-end cap from the motor cover and affix it with the pan-head screws (m3 × 105, 4 pcs.). At this time, make sure not to pinch the cables. Tightening torque: 61.5 n·cm (6.3 kgf·cm)...
Page 100
92 9. Maintenance and inspection 9.10.2 motor reversing type sa5r, sa6r [items required for replacement] • replacement motor m-p2sa5r-iap42n-mb-pu (for sa5r), m-p2sa6r-iap42n-mb-pu (for sa6r) (with a coupling on the motor shaft; see the photograph at the right) • allen wrench set • phillips screwdri...
Page 101
93 9. Maintenance and inspection 4) pull out the four tension adjusting bolts and two motor cover affixing bolts, and remove the motor unit. 6) pull out the motor connector. 5) remove the four pan-head screws affixing the motor-end cap of the motor unit, and pull out the motor. 7) pull out the encod...
Page 102
94 9. Maintenance and inspection 8) connect the encoder connector and motor connector to a new motor. • connection of the encoder connector • connection of the motor connector 9) couple the motor cover to the motor end cap with the affixing pan-head screws (m3 × 6, 4 pcs.). At this time, make sure n...
Page 103
95 9. Maintenance and inspection 11) install the motor cover. Tighten the hexagon socket-head screws (m3 × 12, 2 pcs.) using an allen wrench of 2.5 mm across flats. Tightening torque: 83 n·cm (8.47 kgf·cm) 12) install the pulley cover. Tighten the thin-head screws (m3 × 6, 4 pcs.) using an allen wre...
Page 104
96 9. Maintenance and inspection sa7r [items required for replacement] • replacement motor unit m-p2sa7r-iap56u-mb-pu * (see the photograph at the right.) • allen wrench set • tension gauge (capable of tensioning to 8kgf or greater) • strong string, looped (or long tie-band) [procedure] 1) remove th...
Page 105
97 9. Maintenance and inspection 5) install a new motor unit and temporarily tighten it with the tension adjusting bolts (hexagon socket-head screws: m4 × 20, 4 pcs.). In this condition, loop the reduction belt over the pulleys. 7) tighten the thin-head screws (m3 × 6, 4 pcs.) using an allen wrench ...
Page 106
98 9. Maintenance and inspection ss7r, ss8r, hs8r [items required for replacement] • replacement motor unit m-p2hs8r-iap56u-mb-ml(or mr)-pu (for hs8r) (see the photograph at the right.) m-p2ss7r-iap42u-mb-ml(or mr)-pu (for ss7r), m-p2ss8r-iap56u-mb-ml(or mr)-pu (for ss8r), • allen wrench set • tensi...
Page 107
99 9. Maintenance and inspection 5) install a new motor unit and temporarily tighten it with the tension adjusting bolts (hexagon socket-head screws: m4 × 20, 4 pcs.). In this condition, loop the reduction belt over the pulleys. 7) install the pulley cover. Tighten the thin-head screws (m4 × 6, 4 pc...
Page 108
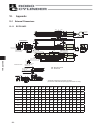
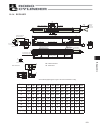
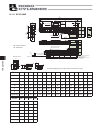
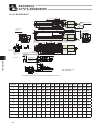
100 10. Appendix 240 19 0.02 30 26 20 6 6 15.5 9 15.5 13.8 57.5 50 52 50 52 26 40 10 7.5 57.5 5.1 13.3 14.5 41.5 13.3 16.5 2.7 2.8 16.5 35.5 43 52 43 4.5 14 6. 5 2. 5 2.1 3 119 94 2.7 16 2.8 me se l 8 4.5 4.5 4.5 3 50 52 a 0 +0.012 4 5 39 24 26 81 33 56 50 20 100 c 100 stroke me : mechanical end se ...
Page 109
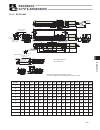
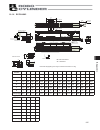
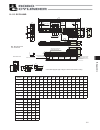
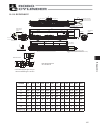
101 10. Appendix 82 3 8 19.5 21 19.5 31 50 2.2 3 119 115 16 2.7 3.1 l 13.8 59.5 56 58 28 43 10 6.5 59.5 56 a 58 50 240 me se 14.3 41.7 13.3 18.5 3.1 2.7 18.5 3.5 37.5 6.5 43 48.5 1 43 58 13.3 5.1 8 4.5 4.5 5 5 56 58 32 0.02 b c 0 +0.012 4 5 40 20 31 31 100 81 33 19.5 a 75 50 100 150 200 250 300 350 ...
Page 110
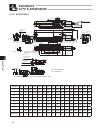
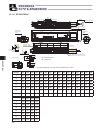
102 10. Appendix stroke 50 100 150 200 250 300 350 400 450 500 550 600 650 700 750 800 l 353 403 453 503 553 603 653 703 753 803 853 903 953 1003 1053 1103 a 0 100 100 200 200 300 300 400 400 500 500 600 600 700 700 800 b 0 0 0 1 1 2 2 3 3 4 4 5 5 6 6 7 c 0 0 1 1 2 2 3 3 4 4 5 5 6 6 7 7 d 4 6 6 8 8 ...
Page 111
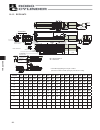
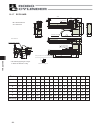
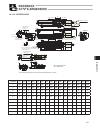
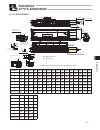
103 10. Appendix 57 60 55 41.5 27 60 a 55 4.5 1 55 60 126 60 50 32 0.02 40.6 32 23.4 19.5 19.5 21 12 25 a l 5 113 90 55 15 25 5 16 s 126 s.E. M.E. M.E. 240 36.5 52 1 55 53 27 60 0 +0.012 4 5 36 18 18 c 30 10.1.4 rcp2-ss7c reference position for ma moment offset detail view of a oblong hole, depth 6 ...
Page 112
104 10. Appendix 50 100 150 200 250 300 350 400 450 500 550 600 650 700 750 800 l 435 485 535 585 635 685 735 785 835 885 935 985 1035 1085 1135 1185 a 280 330 380 430 480 530 580 630 680 730 780 830 880 930 980 1030 b 50 100 150 200 250 300 350 400 450 500 550 600 650 700 750 800 d 8 8 8 10 12 12 1...
Page 113
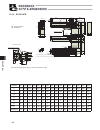
105 10. Appendix 50 0.5 70 59 34 80 43 170 90 75 15 15 7.5 7.5 56 45 34 l 5 a 138 116 30 14 m.E. 68 14 17 30 5 170 s.E. M.E. 240 73 77 70 55 34 80 a 74 74 80 45 0.02 +0.012 5 0 6 48 f 15 15 45 stroke 50 100 150 200 250 300 350 400 450 500 550 600 650 700 750 800 l 435 485 535 585 635 685 735 785 835...
Page 114
106 10. Appendix 0 +0.012 4 5 l 19 0.02 5.5 5 5.5 30 5 40 26 20 6 6 67 94 3 2.1 me 2.7 2.8 16 24 6 76 120 26 40 10 0.5 52 9.5 58 0.5 120 49 48 0.5 49 0.5 0.5 240 13.3 5.1 35.5 16.5 43 41.5 32 62 56 b stroke 50 100 150 200 250 300 350 400 450 500 550 600 650 700 750 800 l 227 277 327 377 427 477 527 ...
Page 115
107 10. Appendix 2.2 50 16 3.1 se me 2.7 115 me 3 67 88 23 31 60 5 5 50 9 9 32 0.02 123 24 6 76 l 1.5 1.5 50 0.5 48 123 0.5 58 6.5 58 1.5 10 43 28 240 b 0 +0.012 4 5 18.5 5.1 43 13.3 37.5 41.7 32 31 19.5 a 75 50 100 150 200 250 300 350 400 450 500 550 600 650 700 750 800 l 248 298 348 398 448 498 54...
Page 116
108 10. Appendix 60 61 3 0.5 0.5 60 161 2 80 6 73 0.5 14 50 33 32 0.02 18 4.8 me se 3 me 3 99 30 39 60 5 5 50 9 9 3 126 106.2 125.5 10 41.2 160 l 51 18 80 40 0 +0.012 4 5 5.1 15.3 18 48 52 44.7 240 b 50 100 150 200 250 300 350 400 450 500 550 600 650 700 750 800 l 300.2 350.2 400.2 450.2 500.2 550.2...
Page 117
109 10. Appendix 94 240 130 54 m.E. 5 25 126 10 a l 126 60 50 32 0.02 5 9 5 9 s.E. 57 40.6 32 23.4 25 5 12 m.E. 55 0.5 41.5 27 1 3 27.5 50 21 6.3 2.7 67 57 32.7 61.3 36 1 55 53 27 60 51.3 36.5 18 18 c 30 m n 0 +0.012 4 5 50 100 150 200 250 300 350 400 450 500 550 600 l 305 355 405 455 505 555 605 65...
Page 118
110 10. Appendix 68 35 2 75 6 70 55 340.5 1 17 30 m.E. 5 170 90 75 7.5 7.5 15 15 a l 5 m.E. 10 73 56 45 34 35 35 20 138 42 165 170 67 57 78 45 s.E. 30 59 0.5 70 34 80 50 43 240 +0.012 5 0 6 45 0.02 f 15 15 45 50 100 150 200 250 300 350 400 450 500 550 600 650 700 750 800 l 364 414 464 514 564 614 66...
Page 119
111 10. Appendix 68 35 2 75 6 70 55 340.5 1 17 30 m.E. 5 170 90 75 7.5 7.5 15 15 a l 5 m.E. 10 73 56 45 34 35 35 20 138 42 165 170 67 57 78 45 s.E. 30 59 0.5 70 34 80 50 43 240 +0.012 5 0 6 45 0.02 f 15 15 45 50 100 150 200 250 300 350 400 450 500 550 600 650 700 750 800 l 364 414 464 514 564 614 66...
Page 120
112 10. Appendix 5.1 13.3 14.0 41.5 13.3 16.5 2.7 2.3 05 16.5 35.5 43 52 43 4.5 14 6. 5 2.5 8 4.5 4.5 4.5 3 50 52 0 +0.012 4 5 7.5 me 15.5 1.6 30 l 19 0.02 20 26 2.7 3 se 57.5 10 26 66 52 40 50 118.5 2.3 95 13.8 57.5 50 52 5.5 40 5.5 5 5 24 39 240 a 24 26 81 33 56 50 20 b c 50 100 150 200 250 300 35...
Page 121
113 10. Appendix me se 12.8 41.7 13.3 18.5 1.6 2.7 18.5 3.5 37.5 6.5 43 48.5 1 43 58 13.3 5.1 8 4.5 4.5 5 5 56 58 0 +0.012 4 5 117.5 3 118 l 13.8 59.5 56 58 28 43 10 6.5 59.5 56 58 2.7 1.6 14.5 se me 82 3 8 9 9 60 31 32 0.02 5 50 5 0.7 24 40 240 a 20 31 31 100 81 33 19.5 a 75 b c 50 100 150 200 250 ...
Page 122
114 10. Appendix 18 18 3.8 15.3 44.7 13.3 52 73 5.1 13.3 48 58 1 52 7 5 05 9.5 6 5.5 6 6 71 73 14.5 5 3 17 3 me 128 se 4 158 l 60 32 0.02 48 4.5 39 39 4.5 33 50 14 12 76 71 73 71 73 76 50 9 9 5 5 24 240 a 43 103.5 51.5 18 80 30 100 40 40 0 +0.012 4 5 b c 50 100 150 200 250 300 350 400 450 500 550 60...
Page 123
115 10. Appendix 36.5 52 1 55 53 27 60 4.5 1 55 60 15 90 27 1 60 57 113 126 55 l 16 55 25 5 25 5 41.5 32 32 25.4 9 5 5 32 0.02 60 50 9 40.6 a 12 60 21 36 240 a 18 c 18 30 0 +0.012 4 5 n m 50 100 150 200 250 300 350 400 450 500 550 600 l 351 401 451 501 551 601 651 701 751 801 851 901 a 226 276 326 3...
Page 124
116 10. Appendix 50 0.5 70 59 34 80 43 5 1 74 80 5 5 138 68 14 30 30 a 170 l 116 14 170 90 15 45 0.02 75 15 7.5 56 45 45 35 17 70 80 55 34 77 73 24 240 a 48 f 15 15 45 0 +0.012 5 6 n n 50 100 150 200 250 300 350 400 450 500 550 600 650 700 750 800 l 435 485 535 585 635 685 735 785 835 885 935 985 10...
Page 125
117 10. Appendix 50 0.5 70 59 34 80 43 5 1 74 80 5 5 138 68 14 30 30 a 170 l 116 14 170 90 15 45 0.02 75 15 7.5 56 45 45 35 17 70 80 55 34 77 73 24 240 a 48 f 15 15 45 0 +0.012 5 6 n n 50 100 150 200 250 300 350 400 450 500 550 600 650 700 750 800 l 435 485 535 585 635 685 735 785 835 885 935 985 10...
Page 126
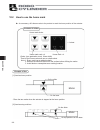
118 10. Appendix 10.2 how to use the home mark as necessary, affix these marks to the product to mark the home position of the actuator. Contents of sticker home mark sticker × 1 sheet home mark scale × 4 home mark × 4 (scale: 1mm graduation mark, 10mm width) 䈄 peel off the home marks and use as a b...
Page 127
119 11. W arranty 11. Warranty 11.1 warranty period one of the following periods, whichever is shorter: 18 months after shipment from iai 12 months after delivery to the specified location 2,500 hours of operation 11.2 scope of warranty our products are covered by warranty when all of the following ...
Page 128
120 11. W arranty 11.5 conditions of conformance with applicable standards/regulations, etc., and applications (1) if our product is combined with another product or any system, device, etc., used by the customer, the customer must first check the applicable standards, regulations and/or rules. The ...
Page 129
121 change history change history revision date description of revision first edition added information on rcs3 and rcs3cr actuators. March 2010 second edition “please read before use”: entirely revised the content. “safety guide”: entirely revised the content. P. 37 to 39: changed to 7, “wiring cab...
Page 130
122 change history revision date description of revision december 2011 february 2012 contents changed in safety guide caution notes added for when working with two or more persons eighth edition ninth edition rcp2cr-sa6c cannot be ensured for cleanliness class 10 in vertical orientation, horizontall...
Page 132
Manual no.: me3660-15f (october 2016) the information contained in this document is subject to change without notice for purposes of product improvement. Copyright © 2016. Oct. Iai corporation. All rights reserved. 16.10.000 head office: 577-1 obane shimizu-ku shizuoka city shizuoka 424-0103, japan ...

