- DL manuals
- Riso
- Printer
- Comcolor X1 Series
- Technical Manual
Riso Comcolor X1 Series Technical Manual
ComColor Series (Revision 2.4)
Maintenance
[ 1-1 ]
Chapter 1. Maintenance Notes
Contents
[ Handling of Lithium Battery ] ............................................................. 1-2
1.Precautions ........................................................................1-5
1-1.General precautions ................................................................... 1-5
1-3.Other precautions for inspection and maintenance .................... 1-7
2.Tools ...................................................................................1-9
2-1.List of general tools .................................................................... 1-9
2-2.List of special tools for servicing ComColor ............................. 1-10
3.Printer setup procedure ..................................................1-15
3-1.Confirmations to be performed during printer setup ................. 1-15
3-2.Setup Wizard ............................................................................ 1-15
Summary of Comcolor X1 Series
Page 1
Comcolor series (revision 2.4) maintenance [ 1-1 ] chapter 1. Maintenance notes contents [ handling of lithium battery ] ............................................................. 1-2 !! Warning !! ........................................................................................ 1-3 1.Prec...
Page 2: Caution
Comcolor series (revision 2.4) [ 1-2 ] maintenance perchlorate material-special handling may apply, see www.Dtsc.Ca.Gov/hazardouswaste/perchlorate this product may contain certain substances which are restricted when disposed. Therefore, be sure to consult your contracted service dealer. Caution [ h...
Page 3: Important Safety Precautions
Comcolor series (revision 2.4) maintenance [ 1-3 ] press the sub power key, after the machine main power is off and power cord is unplugged, to discharge the electrical charge remaining in the capacitors on the power supply unit. The main power lamp is still lit after the machine power is turned off...
Page 4
Comcolor series (revision 2.4) [ 1-4 ] maintenance (4) always connect electrical connectors firmly. 1) to avoid electrical failure: the connectors must be connected firmly together and onto the pcbs. 2) protection of the electrical components: the electrical components may be damaged due to short ci...
Page 5: 1. Precautions
Comcolor series (revision 2.4) maintenance [ 1-5 ] 1. Precautions 1-1. General precautions * unplug the power cord from the ac outlet before performing maintenance. * be careful to avoid getting neckties, clothing, or long hair tangled in moving parts. * if you must perform work while the machine po...
Page 6
Comcolor series (revision 2.4) [ 1-6 ] maintenance cleaning is repeated several times, the print heads may need to be replaced. * differences between display and print colors - the colors on prints may differ slightly from the colors seen on your display device. - the difference in the colors may be...
Page 7
Comcolor series (revision 2.4) maintenance [ 1-7 ] 1-3.Other precautions for inspection and maintenance precautions for inspections * if a defect or abnormality is found during inspections, correct the problem and replace parts, if necessary. Precautions for parts removal * when ascertaining the loc...
Page 8: 1-4.Sensors
Comcolor series (revision 2.4) [ 1-8 ] maintenance 1-4.Sensors * be sure to turn off power before disconnecting or connecting sensors. Photosensor types * in general, photo sensors can be divided into four types: the interrupt type (u-shaped), the actuator type, the reflection type, and the transmis...
Page 9: 2.Tools
Comcolor series (revision 2.4) maintenance [ 1-9 ] type tip size shaft length, etc. Phillips screwdriver no. 2 no. 2 no. 2 no. 1 (250 mm) (100 mm–150 mm) (stubby type) (75 mm–100 mm) standard screwdriver 6 mm 3 mm 1.8 mm (100 mm–150 mm) (100 mm–150 mm) (precision type) nut driver (box driver) 8 mm 7...
Page 10
Comcolor series (revision 2.4) [ 1-10 ] maintenance 2-2.List of special tools for servicing comcolor comcolor lifting jig. The machine lifting jig must be comcolor dedicted type to prevent an accident. Lint-free paper towel this is used to wipe ink off inside the machine. The paper towel must be lin...
Page 11
Comcolor series (revision 2.4) maintenance [ 1-11 ] 5.5mm 7.0mm ij matte paper (a3 or ledger size) comcolor dedicated matte paper is required for executing image adjustment. Lupe required to check the print quality. Air filter required when working on the ink flow system to prevent dust from enterin...
Page 12
Comcolor series (revision 2.4) [ 1-12 ] maintenance or at least 250mm in shaft length 15mm or less long screw driver or rachet wrench either of these tools will become necessary in mounting the front bottom cover on the machine during the machine installation. Normal millimeter size screw driver wit...
Page 13
Comcolor series (revision 2.4) maintenance [ 1-13 ] print head positioning jig required in removing and replacing the print head on the machine. One piece comes with the machine. If extra pieces are needed, order the required quantity as spare part. Plastic forceps needed in working on the ink flow ...
Page 14
Comcolor series (revision 2.4) [ 1-14 ] maintenance laptop pc required in making the image adjustments on comcolor machines when there is no hs4000 scanner is not available. Canon lide scanner is also needed. Canon lide scanner required in making the image adjustments on comcolor machines when there...
Page 15: 3.Printer Setup Procedure
Comcolor series (revision 2.4) maintenance [ 1-15 ] 3.Printer setup procedure 3-1.Confirmations to be performed during printer setup * follow the installation instruction guide (inculded in the shipment) step-by-step. * after opening the package, the machine control card and the ink cartridges must ...
Page 16
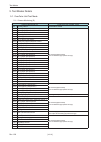
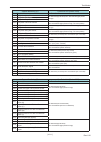
Comcolor series (revision 2.4) [ 1-16 ] maintenance pages on the lcd display items notes 00 setup wizard cover page - 01 displayed language - 02 metric/inch switch - 03 time zone setting - 04 clock/date - 05 network setting - 06 function key entry - 07 color mode selectable only when hs4000 scanner ...
Page 17
Comcolor series (revision 2.4) maintenance [ 1-17 ] time zone setting select the correct time zone of the country in which the machine is installed. The time zone setting can only be set on the setup wizard. Clock/date set the year, month, day, hour and minute. Also select in which order the year, m...
Page 18
Comcolor series (revision 2.4) [ 1-18 ] maintenance color mode selects the default color mode for the copy and scanner modes. The selection is available only whe hs4000 scanner is connected. Since it is only selecting the default setting, the selection can be changed to another on each operation. Ou...
Page 19
Comcolor series (revision 2.4) maintenance [ 1-19 ] need to change the setting to on. Need to change the setting to permitted. Security level setting selection of the security level from the three choices. Refer to the chart given below for the details on the three security settings. Admin. Settings...
Page 20
Comcolor series (revision 2.4) [ 1-20 ] maintenance user category selection of the user category. The difference is in the selection tab. The items in the selections tab can be changed. Different same same.
Page 21: Contents
Machine covers [ 2-1 ] comcolor series (revision 2.4) contents 1.Exterior covers ................................................................................... 2-2 2.Removal .............................................................................................. 2-3 2-1.Operation panel as...
Page 22
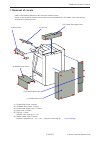
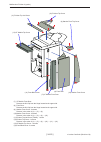
Machine covers [ 2-2 ] comcolor series (revision 2.4) comcolor top right cover top left cover rear cover face-down receiving tray switchback guide operation panel rear left cover external paper feed tray cover left bottom side cover tray cover front left cover front right cover right side cover rear...
Page 23
Machine covers [ 2-3 ] comcolor series (revision 2.4) metal bottom plate a b operation panel 2-2.Front bottom cover this cover is not assembled on the machine. It needs to be mounted on the machine at the time of the machine installation. * two screws, one in the center and the other on the right ha...
Page 24
Machine covers [ 2-4 ] comcolor series (revision 2.4) center inner cover right inner cover and right front door as an assembly. Left inner cover and left front door as an assembly. Right inner cover and right front door as an assembly. Left inner cover and left front door as an assembly. 2-3.Front d...
Page 25
Machine covers [ 2-5 ] comcolor series (revision 2.4) 2-4.Rear cover it is best to remove the rear cover with the left rear cover and right rear cover attached for easier replacement. * left and right top covers should be removed first for smooth removal and replacement of the rear cover. Rear cover...
Page 26
Machine covers [ 2-6 ] comcolor series (revision 2.4) front door lock mechanism screw screw screw screw front door lock mechanism front view rear view 2-5.Front door lock mechanism it is best to remove the rear cover with the left rear cover and right rear cover attached for easier replacement. 1) r...
Page 27
Machine covers [ 2-7 ] comcolor series (revision 2.4) grounding plate. Controller pcb box supporting screw on the right. Supporting screw on the left. 2-6.Opening the pcbs and ink supply unit to the service mode. 1) remove the left and right top covers. 2) remove the rear cover assembly (rear cover ...
Page 28
Machine covers [ 2-8 ] comcolor series (revision 2.4) controller pcb ink supply unit engine controll pcb power supply unit the following photograph indicates the screw numbers used to identify the screws mentioned on the exploration on the previous page..
Page 29
Machine covers [ 2-9 ] comcolor series (revision 2.4) paper elevation motor head drive ic cooling fan 1 head drive ic cooling fan 2 ink cooling fan 1 ink cooling fan 2 maintenance unit drive motor bellows arm drive motor switchback motor switchback clutch registration motor upper transfer motor re-f...
Page 30
Machine covers [ 2-10 ] comcolor series (revision 2.4) ink circulation pump tray 1 elevation motor internal paper feed motor.
Page 31: Contents
Structural overview [ 3-1 ] comcolor series (revision 2.4) chapter 3. Structural overview contents 1.Comcolor series specifications........................................................ 3-2 2.Hs4000 scanner specifications ........................................................ 3-8 3.Multifunction...
Page 32
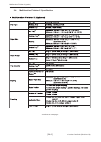
Structural overview [ 3-2 ] comcolor series (revision 2.4) 1.Comcolor series specifications comcolor 9050/9050r specifications basic functions and print functions model se-h301 type console color support full color print type line-type inkjet system ink type oil-based pigment ink (cyan, magenta, yel...
Page 33
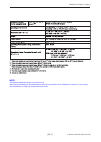
Structural overview [ 3-3 ] comcolor series (revision 2.4) note: this machine specification sheet is for reference only. Check with your marketing department for the precise specification of the comcolor to your country. The specifications are subject to change without prior notice. * 1 within 10 mi...
Page 34
Structural overview [ 3-4 ] comcolor series (revision 2.4) comcolor 7050/7050r/3050/3050r specifications basic functions and print functions model comcolor 7050/7050r:se-m301 comcolor 3050/3050r:se-m401 type console color support full color print type line-type inkjet system ink type oil-based pigme...
Page 35
Structural overview [ 3-5 ] comcolor series (revision 2.4) * 1 within 10 minutes after the last print job * 2 when using plain paper and recycled paper (85 g/m 2 (23-lb bond)), and density setting 3 (standard) chart used: print measurement pattern [color measurement sample 2 (jeita standard pattern ...
Page 36
Structural overview [ 3-6 ] comcolor series (revision 2.4) comcolor 7010/7010r/3010/3010r specifications basic functions and print functions model comcolor 7010/7010r:se-l301 comcolor 3010/3010r:se-l401 type console color support full color print type line-type inkjet system ink type oil-based pigme...
Page 37
Structural overview [ 3-7 ] comcolor series (revision 2.4) * 1 within 10 minutes after the last print job * 2 when using plain paper and recycled paper (85 g/m 2 (23-lb bond)), and density setting 3 (standard) chart used: print measurement pattern [color measurement sample 2 (jeita standard pattern ...
Page 38
Structural overview [ 3-8 ] comcolor series (revision 2.4) memo.
Page 39
Structural overview [ 3-9 ] comcolor series (revision 2.4) note: this machine specification sheet is for reference only. Check with your marketing department for the precise specification. The specifications are subject to change without prior notice. Scanner hs4000 (optional) copy/scan functions * ...
Page 40
Structural overview [ 3-10 ] comcolor series (revision 2.4) memo.
Page 41
Structural overview [ 3-11 ] comcolor series (revision 2.4) multifunction finisher (optional) * 1 w hen color printing on pa per that is longer than 432 mm (17"), the image printed beyond 432 mm (17") may be distorted . * 2 w hen using plain paper and recycled pa per (85 g/ m 2 (23-lb bond)) * 3 w h...
Page 42
Structural overview [ 3-12 ] comcolor series (revision 2.4) memo.
Page 43
Structural overview [ 3-13 ] comcolor series (revision 2.4) ic card authentication kit (optional) applicable card iso 14443 typea/typec (felica /mifare ) radio law category guided read-write communication equipment power source power received from usb port operating environment temperature: 15ºc to ...
Page 44
Structural overview [ 3-14 ] comcolor series (revision 2.4) memo.
Page 45: 5.Structural Overview
Structural overview [ 3-15 ] comcolor series (revision 2.4) 5.Structural overview 5-1. Overall block structure the unit consists of the following blocks. 1) external paper feed section this section feeds a single sheet of paper from paper stacked in the paper feed tray, sending it to the registratio...
Page 46
Structural overview [ 3-16 ] comcolor series (revision 2.4) external paper feed section switchback section paper ejection section (face down) paper transfer section bp section internal paper feed section paper ejection section (face up) registration section waste ink section ink flow section overall...
Page 47
Structural overview [ 3-17 ] comcolor series (revision 2.4) paper receiving tray unit switchback unit a vertical paper feed unit b vertical paper feed unit a internal paper feed unit external paper feed unit switchback unit b upper transfer unit paper elevation unit registration roller unit face dow...
Page 48
Structural overview [ 3-18 ] comcolor series (revision 2.4) pressurized ink tank air valve negative pressure ink tank air valve bellows unit pressurized ink tank negative pressure ink tank circulation pump overflow pan ink supply unit structure of ink supply unit (rear of the machine).
Page 49
Structural overview [ 3-19 ] comcolor series (revision 2.4) external paper feed internal paper feed printing paper elevation face up paper ejection/finisher upper transfer switchback face down paper ejection waste ink tank print heads ink cartridges switchback external paper feed internal paper feed...
Page 50
Structural overview [ 3-20 ] comcolor series (revision 2.4) 2) paper transfer sensors • the status of paper transferred from the paper feed tray is checked by vertical paper feed sensors 1–5. If the timing of paper is detected to be off as it passes vertical paper feed sensor 5, the transfer speed i...
Page 51
Structural overview [ 3-21 ] comcolor series (revision 2.4) 5-3. Overview of ink flow path • ink flow paths can be broadly divided into two types of paths: paths to supply the ink required in printing and a waste ink path for ink from print head cleaning and other maintenance. • ink from ink cartrid...
Page 52
Structural overview [ 3-22 ] comcolor series (revision 2.4) ink supply unit 3) schematic diagram of ink path tag rfid board joint ink cartridge direction of cartridge attachment/removal s m s m s ink supply valve (solenoid) from other colors joint connection/ disconnection motor ink level detection ...
Page 53
Structural overview [ 3-23 ] comcolor series (revision 2.4) 4) cross section of ink supply unit.
Page 54
Structural overview [ 3-24 ] comcolor series (revision 2.4) memo.
Page 55: Contents
External paper feed section [ 4-1 ] comcolor series (revision 2.4) chapter 4. External paper feed section contents 1. Mechanisms ....................................................................................... 4-2 1-1. Basic structure .............................................................
Page 56: 1. Mechanisms
External paper feed section [ 4-2 ] comcolor series (revision 2.4) paper guides elevation mechanism paper guide lever elevator motor external paper feed unit paper feed tray unit paper feed tray paper width potentiometer paper feed tray paper length detection sensor 1. Paper feed tray unit • the pap...
Page 57
External paper feed section [ 4-3 ] comcolor series (revision 2.4) upper limit adjustment assembly paper feed roller assembly scraper roller paper feed stay assembly paper feed pressure assembly pickup roller stripper unit assembly paper feed tray upper limit sensor a paper feed tray upper limit sen...
Page 58
External paper feed section [ 4-4 ] comcolor series (revision 2.4) paper feed pressure lever 2. External paper feed unit this unit feeds paper in the paper feed tray to the paper transfer section, one sheet at a time. Feeding starts when paper reaches the feeding position by means of the elevator. A...
Page 59
External paper feed section [ 4-5 ] comcolor series (revision 2.4) during printing after the paper feed tray is raised, paper is fed one sheet at a time by the paper feed rollers, and the paper feed tray is repeatedly raised to maintain the same upper limit position. This operation to maintain the u...
Page 60
External paper feed section [ 4-6 ] comcolor series (revision 2.4) 3. Elevator switch • used to raise or lower the paper feed tray manually. → when in the lower limit position pressing the switch once raises the elevator to the upper limit position and positions it. Pressing the switch again as the ...
Page 61
External paper feed section [ 4-7 ] comcolor series (revision 2.4) 1-3. Paper feed mechanism paper in the paper feed tray is fed to the paper transfer section one sheet at a time. Feeding starts when paper reaches the feeding position by means of the elevator. After each sheet is separated by the pa...
Page 62
External paper feed section [ 4-8 ] comcolor series (revision 2.4) 2. Paper stripping mechanism paper in the paper feed tray is sent between the pickup roller and stripper plate by rotation of the scraper. Additionally, paper is carefully handled by the pickup roller and stripper plate so that only ...
Page 63
External paper feed section [ 4-9 ] comcolor series (revision 2.4) 1-4. Paper size detection mechanism paper size is detected by the following two methods. 1. Paper transfer system: paper length is detected by the timing of activation and deactivation of top edge sensor 1. 2. System: paper size is d...
Page 64
External paper feed section [ 4-10 ] comcolor series (revision 2.4) 1-5. Paper volume detection mechanism the amount of paper left in the paper feed tray is determined by the status of paper volume detection sensors a and b when the paper feed tray is at the upper limit position. Detection is only p...
Page 65
External paper feed section [ 4-11 ] comcolor series (revision 2.4) 1-6. Multiple paper feed detection mechanism a multiple paper feed occurs when multiple loaded sheets are accidentally transferred on top of each other. This condition is detected to prevent problems from the sheets striking and dam...
Page 66
External paper feed section [ 4-12 ] comcolor series (revision 2.4) 1-7. Noise reduction paper feed assisting action noise reduction paper feed assisting action refers to operation to reduce noise created by flattening paper that has buckled as it is fed in the registration section. As feeding in th...
Page 67: 2. Disassembly
External paper feed section [ 4-13 ] comcolor series (revision 2.4) 2-1. Elevator motor 1. Turn off the machine power and disconnect the power cable from the power source. 2. Lower the paper feed tray to the lower limit and turn the unit off. 3. Remove the center inner cover. (refer to chapter 2.) 4...
Page 68
External paper feed section [ 4-14 ] comcolor series (revision 2.4) 2-2. Paper feed tray unit removing the unit 1. Turn off the machine power and disconnect the power cable from the power source. 2. Lower the paper feed tray to the lower limit and turn the unit off. 3. Remove the wire harness cover ...
Page 69
External paper feed section [ 4-15 ] comcolor series (revision 2.4) 2-3. Paper feed tray paper detection sensor 1. Turn off the machine power and disconnect the power cable from the power source. 2. Remove the paper feed tray unit. (refer to the instructions for removal.) 3. Remove the paper guides....
Page 70
External paper feed section [ 4-16 ] comcolor series (revision 2.4) 2-5. Paper feed tray paper length detection sensor 1. Turn off the machine power and disconnect the power cable from the power source. 2. Remove the paper feed tray unit. (refer to the instructions for removal.) 3. Remove the paper ...
Page 71
External paper feed section [ 4-17 ] comcolor series (revision 2.4) 2-9. External paper feed unit 1. Turn off the machine power and disconnect the power cable from the power source. 2. Lower the paper feed tray to the lower limit and turn the unit off. 3. Remove the rear cover center assembly. (refe...
Page 72
External paper feed section [ 4-18 ] comcolor series (revision 2.4) 10. Remove the elevator motor assembly. (see section 2) hold the external paper feed tray to prevent it from dropping when removing the motor. 11. Remove the external paper feeding tray. (see section 2) 12. Remove the elevator suppo...
Page 73
External paper feed section [ 4-19 ] comcolor series (revision 2.4) 18. Remove the connector. (1 pc) 19. Remove the external paper feed motor assembly. (see section 2-8.) 20. Remove the external paper feed unit. (it3c screw 4x8 (4 pcs)) machine rear view connectors wire saddle external paper feed mo...
Page 74
External paper feed section [ 4-20 ] comcolor series (revision 2.4) 2-10. Stripper interlock switch 1. Turn off the machine power and disconnect the power cable from the power source. 2. Remove the external paper feed unit. 3. Remove the stripper interlock switch assembly. (round tip it3c screw 3x6 ...
Page 75
External paper feed section [ 4-21 ] comcolor series (revision 2.4) 2-12. Paper feed tray upper safety switch 1. Turn off the machine power and disconnect the power cable from the power source. 2. Remove the paper feed cover. (binding screw 3x8 (2 pcs)) 3. Remove the three connectors. 4. Remove the ...
Page 76
External paper feed section [ 4-22 ] comcolor series (revision 2.4) 2-13. Paper feed tray elevation switch 1. Turn off the machine power and disconnect the power cable from the power source. 2. Remove the paper feed cover. (binding screw 3x8 (2 pcs)) 3. Remove the three connectors. 4. Remove the upp...
Page 77
External paper feed section [ 4-23 ] comcolor series (revision 2.4) 2-17. Stripper plate 1. Turn off the machine power and disconnect the power cable from the power source. 2. Lower the sliding lock on the left side of the stripper unit and slide the locking knob down. 3. Push the removal lever on t...
Page 78
External paper feed section [ 4-24 ] comcolor series (revision 2.4) memo.
Page 79: 3. Adjustment
External paper feed section [ 4-25 ] comcolor series (revision 2.4) 3. Adjustment 3-1. Upper limit position adjustment (1) standard adjustment (perform mainly if the upper limit position has changed due to wear of the scraper roller) insert a phillips screwdriver in the adjustment hole on the paper ...
Page 80
External paper feed section [ 4-26 ] comcolor series (revision 2.4) 3-2. Adjusting the paper width potentiometer (1) adjusting the paper width potentiometer • test mode no.1421 : set the paper guides at a width of 297 mm and activate. • test mode no.1422: set the paper guides at a width of 105 mm an...
Page 81: Contents
Registration section [ 5-1 ] last update : 2012/09/07 15:38 comcolor series (revision 2.4) chapter 5. Internal paper feed contents 1. Mechanisms ....................................................................................... 5-2 1-1. Basic structure .............................................
Page 82: 1. Mechanisms
Registration section [ 5-2 ] comcolor series (revision 2.4) 1. Mechanisms 1-1. Basic structure the internal paper feed section is a unit that transfers paper from the internal paper feed tray unit to vertical paper feed unit b. It is comprised of the internal paper feed unit and internal paper feed ...
Page 83
Registration section [ 5-3 ] comcolor series (revision 2.4) 1-2. Internal paper feed action (1) pull the internal paper feed tray unit toward the front to supply paper. (2) after paper is supplied, once a tray is loaded in the main unit, the tray elevator motor is activated and the bottom plate is r...
Page 84
Registration section [ 5-4 ] comcolor series (revision 2.4) • paper is easy to remove when a tray is pulled out because the stripper plate and pickup roller are separated. • the end paper guide can be smoothly adjusted to match the length of paper. • action of elevator motor the following actions ar...
Page 85
Registration section [ 5-5 ] comcolor series (revision 2.4) 1-5. Paper volume detection mechanism this the amount of paper left is detected from the position of the tray bottom plate (by the paper volume detection sensor) and whether there is paper left (indicated by the paper detection sensor). The...
Page 86
Registration section [ 5-6 ] comcolor series (revision 2.4) 1-6. Paper size detection mechanism paper size is detected by the following two methods. 1. Paper transfer system: paper length is detected by the timing of activation and deactivation of top edge sensor 1. 2. System: the pattern formed by ...
Page 87
Registration section [ 5-7 ] comcolor series (revision 2.4) 1-7. Assist action for information about the assist action of the internal paper feed tray, see section 1-4, "assist action," in chapter 6, "registration section.".
Page 88
Registration section [ 5-8 ] comcolor series (revision 2.4) 1-8. Paper transfer action (1) paper feeding (internal paper feed clutch 1 on) (2) vertical paper feed clutch 1 on (30 ms after internal paper feed clutch 1 on) (3) internal paper feed clutch 1 off (simultaneously vertical paper feed sensor...
Page 89
Registration section [ 5-9 ] comcolor series (revision 2.4) paper transfer: paper transfer action 1. Name ou ti n notes 2. 3. 2. 3. 5. 6. 1. 4. Timing start transfer started finish transfer ended 4. 5. 6. 7. 8. "not arrived" error 1. Error : external paper feed motor lock error (error: 1034) : inter...
Page 90
Registration section [ 5-10 ] comcolor series (revision 2.4) internal paper feed clutch 2 paper feed roller 2 vertical paper feed sensor 3 vertical paper feed clutch 1 vertical paper feed sensor 5 vertical paper feed roller 5 vertical paper feed roller 3 vertical paper feed clutch 2 vertical paper f...
Page 91
Registration section [ 5-11 ] comcolor series (revision 2.4) paper transfer (tray 2) timing chart paper transfer: paper transfer action 1. Name ou ti n notes 2. 3. 2. 3. 5. 6. 1. 4. Timing start transfer started finish transfer ended 4. 5. 6. 7. 8. "not arrived" error 1. Error internal paper feed mo...
Page 92
Registration section [ 5-12 ] comcolor series (revision 2.4) internal paper feed clutch 3 paper feed roller 3 vertical paper feed sensor 3 vertical paper feed clutch 1 vertical paper feed sensor 5 vertical paper feed roller 5 vertical paper feed roller 3 vertical paper feed clutch 2 vertical paper f...
Page 93
Registration section [ 5-13 ] comcolor series (revision 2.4) paper transfer: paper transfer action 1. Name 2. 3. 2. 3. 5. 1. 4. Timing start transfer started finish transfer ended 4. 5. 6. 7. "not arrived" error : external paper feed motor lock error (error: 1034) : internal paper feed motor lock er...
Page 94
Registration section [ 5-14 ] comcolor series (revision 2.4) memo.
Page 95
Registration section [ 5-15 ] comcolor series (revision 2.4) 2. Disassembly 2-1. Internal paper feed unit (tray 1) 1. Turn off the machine power and disconnect the power cable from the power source. 2. Remove the center inner cover. (refer to chapter 2.) 3. Remove the left inner cover. (refer to cha...
Page 96
Registration section [ 5-16 ] comcolor series (revision 2.4) 15. Remove the mounting screw of the internal paper feed unit (tray 1) in back. (it3c screw 4x8 (1 pc)) 16. Remove the mounting bracket of the internal paper feed unit (tray 1) in front. (it3c screw 4x8 (3 pcs)) 17. Disconnect the wire con...
Page 97
Registration section [ 5-17 ] comcolor series (revision 2.4) 2-2. Internal paper feed unit (tray 2) 1. Turn off the machine power and disconnect the power cable from the power source. 2. Remove the center inner cover. (refer to chapter 2.) 3. Remove the left inner cover. (refer to chapter 2.) 4. Rem...
Page 98
Registration section [ 5-18 ] comcolor series (revision 2.4) 2-3. Internal paper feed unit (tray 3) 1. Turn off the machine power and disconnect the power cable from the power source. 2. Remove the center inner cover. (refer to chapter 2.) 3. Remove the left inner cover. (refer to chapter 2.) 4. Rem...
Page 99
Registration section [ 5-19 ] comcolor series (revision 2.4) 2-4. Internal paper feed motor 1. Turn off the machine power and disconnect the power cable from the power source. 2. Remove the rear cover center assembly. (refer to chapter 2.) 3. Remove the left top cover. (refer to chapter 2.) 4. Put t...
Page 100
Registration section [ 5-20 ] comcolor series (revision 2.4) 2-5. Internal paper feed clutches 1, 2 and 3. 1. Turn off the machine power and disconnect the power cable from the power source. 2. Remove the rear cover center assembly. (refer to chapter 2.) 3. Put the power supply unit in maintenance p...
Page 101
Registration section [ 5-21 ] comcolor series (revision 2.4) 2-7. Paper detection sensors of trays 1 to 3 (3 sets) 1. Turn off the machine power and disconnect the power cable from the power source. 2. Follow the instruction given on the previous pages of this chapter and remove the internal paper f...
Page 102
Registration section [ 5-22 ] comcolor series (revision 2.4) 2-9. Internal paper feed rollers 1, 2 and/or 3. (scraper and pickup rollers) 1. Turn off the machine power and disconnect the power cable from the power source. 2. Pull out and remove all three internal paper feed trays from the machine. 3...
Page 103
Registration section [ 5-23 ] comcolor series (revision 2.4) 2-10. Elevator motors for trays 1, 2 and 3. 1. Turn off the machine power and disconnect the power cable from the power source. 2. Remove the rear cover center assembly. (refer to chapter 2.) 3. Put the power supply unit in maintenance pos...
Page 104
Registration section [ 5-24 ] comcolor series (revision 2.4) 2-11. Set interlock switch for trays 1, 2 and 3. 1. Turn off the machine power and disconnect the power cable from the power source. 2. Remove the rear cover center assembly. (refer to chapter 2.) 3. Put the power supply unit in maintenanc...
Page 105
Registration section [ 5-25 ] comcolor series (revision 2.4) 2-13. Paper size detection sensors (1 to 4) for trays 1, 2 and 3. 1. Turn off the machine power and disconnect the power cable from the power source. 2. Pull out and remove all three internal paper feed trays from the machine 3. Remove the...
Page 106
Registration section [ 5-26 ] comcolor series (revision 2.4) memo.
Page 107: 3. Adjustment
Registration section [ 5-27 ] comcolor series (revision 2.4) 3. Adjustment 3-1. Stripper plate angle adjustment adjust the stripper angle by pulling out the tray and turning the stripper angle adjust dial in the stripper section of the internal paper feed unit. Adjustment is possible in a range of 1...
Page 108
Registration section [ 5-28 ] comcolor series (revision 2.4) 3-3. Internal paper feed tray - end fence & slider (sensor actuator) position adjustment the paper size in the internal paper feed trays are detected by the position of the end fence in the tray. If the position between the end fence and t...
Page 109
Registration section [ 5-29 ] comcolor series (revision 2.4) 4) remove the flat gear; m1x36x4. 5) slide the slider to match the 3 mm diameter positioning hole on the slider against the 3 mm diameter hole on the tray. 6) while the two 3 mm hole are aligned, put back the previously removed flat gear; ...
Page 110
Registration section [ 5-30 ] comcolor series (revision 2.4) memo.
Page 111: Contents
Registration section [ 6-1 ] comcolor series (revision 2.4) chapter 6. Registration section contents 1. Mechanisms ....................................................................................... 6-2 1-1. Basic structure ...........................................................................
Page 112: 1. Mechanisms
Registration section [ 6-2 ] comcolor series (revision 2.4) 1. Mechanisms 1-1. Basic structure the registration section transfers paper into the printing area from the internal or external paper feed unit or switchback unit. This section is comprised of vertical paper feed units b and a, the registr...
Page 113
Registration section [ 6-3 ] comcolor series (revision 2.4) 1-2. Vertical paper feed unit b mechanism paper feeding from tray 1 1) vertical paper feed clutch 1 is activated about 30 ms after the paper feed start signal is received, and vertical paper feed roller 4 starts rotating. 2) the internal pa...
Page 114
Registration section [ 6-4 ] comcolor series (revision 2.4) 1-3. Vertical paper feed unit a mechanism 1) paper from the trays (1–3), passing through the internal paper feed and vertical paper feed unit b, is detected by upstream sensors (vertical paper feed sensors 4 and 3). After a specific period,...
Page 115
Registration section [ 6-5 ] comcolor series (revision 2.4) vertical paper feed roller 5 vertical paper feed sensor 5 progression of paper drive side guide plate driven side guide plate fulcrum (appearance when closed) (appearance when open) jam release lever points of attachment (affixed to unit fr...
Page 116
Registration section [ 6-6 ] comcolor series (revision 2.4) 1-4. Assist action assist control by the vertical paper feed unit is as follows. Assist control by the vertical paper feed section (paper feeding from the internal paper feed tray) serves the following two purposes. 1. To control slippage d...
Page 117
Registration section [ 6-7 ] comcolor series (revision 2.4) 1-5. Registration roller mechanism the registration roller section is comprised of the registration rollers (made of rubber), the guide rollers (plastic), the registration sensor, and top edge sensor 1. The registration and guide rollers ar...
Page 118
Registration section [ 6-8 ] comcolor series (revision 2.4) 1-6. Paper position detection unit mechanism this unit is between the registration rollers and the head that is closest to the registration area. The unit is comprised of a section for paper lift/crease detection (including paper retainer),...
Page 119
Registration section [ 6-9 ] comcolor series (revision 2.4) plate spring for correcting torsion reference for attachment (front) reference for attachment (rear) registration rollers top edge sensor 1 top edge sensor 2 transfer belt suction fan paper lift detection sensor on (lift detected) (1) paper...
Page 120
Registration section [ 6-10 ] comcolor series (revision 2.4) 1-7. Detection mechanism for leading and trailing edges (1) paper detection leading and trailing edges are constantly detected by top edge sensors 1 and 2 (incorporated in the head holder). (2) ink drop timing leading-edge detection data f...
Page 121: 2. Disassembly
Registration section [ 6-11 ] 2. Disassembly 2-1. Vertical paper feed unit a 1. Turn off the machine power and disconnect the power cable from the power source. 2. Remove the center inner cover. (refer to chapter 2.) 3. Remove the left inner cover. (refer to chapter 2.) 4. Remove the rear cover cent...
Page 122
Registration section [ 6-12 ] 2-2. Vertical paper feed sensor 5 (vertical paper feed unit a) 1. Turn off the machine power and disconnect the power cable from the power source. 2. Remove vertical paper feed unit a. (refer to the instructions for removal.) 3. Remove the sensor cover plate. (w sems sc...
Page 123
Registration section [ 6-13 ] 2-4. Vertical paper feed unit b 1. Turn off the machine power and disconnect the power cable from the power source. 2. Remove the bottom left-side cover. (refer to chapter 2.) 3. Remove the rear cover center assembly. (refer to chapter 2.) 4. Remove the left inner cover...
Page 124
Registration section [ 6-14 ] 2-5. Vertical paper feed sensor 1 (vertical paper feed unit b) 1. Turn off the machine power and disconnect the power cable from the power source. 2. Remove vertical paper feed unit b. (refer to the instructions for removal.) 3. Remove the sensor bracket for sensor 1. (...
Page 125
Registration section [ 6-15 ] 2-9. Vertical paper feed roller 1 (vertical paper feed unit b) 1. Turn off the machine power and disconnect the power cable from the power source. 2. Remove vertical paper feed unit b. (refer to the instructions for removal.) 3. Remove pulley assembly s2m30. (6 mm dia. ...
Page 126
Registration section [ 6-16 ] 2-13. Internal feed paper jam door interlock switch (vertical paper feed unit b) 1. Turn off the machine power and disconnect the power cable from the power source. 2. Remove the external paper feed unit. (refer to chapter 4.) 3. Remove vertical paper feed unit b. (refe...
Page 127
Registration section [ 6-17 ] 2-16. Registration motor assembly 1. Turn off the machine power and disconnect the power cable from the power source. 2. Remove the rear cover center assembly. (refer to chapter 2.) 3. Put the engine control pcb in maintenance position. (pan-head screw 4x8 (2 pcs)) 4. R...
Page 128
Registration section [ 6-18 ] 2-17. Registration sensor (send) 1. Turn off the machine power and disconnect the power cable from the power source. 2. Open vertical paper feed unit a. 3. Unhook the plastic hook of the sensor cover from the sensor bracket, and then unhook the relay connector. 4. Remov...
Page 129
Registration section [ 6-19 ] 2-19. Top edge sensor 1 (send) 1. Turn off the machine power and disconnect the power cable from the power source. 2. Unhook the plastic hook of the sensor cover from the mounting bracket, and then unhook the relay connector. 3. Remove top edge sensor 1 (send). Note: af...
Page 130
Registration section [ 6-20 ] 2-21. Registration roller 1. Turn off the machine power and disconnect the power cable from the power source. 2. Remove the center inner cover. (refer to chapter 2.) 3. Remove the left inner cover. (refer to chapter 2.) 4. Remove the rear cover center assembly. (refer t...
Page 131
Registration section [ 6-21 ] 2-22. Guide roller note: be careful not to touch print heads during this work. 1. Turn off the machine power and disconnect the power cable from the power source. 2. Remove the center inner cover. (refer to chapter 2.) 3. Remove the left inner cover. (refer to chapter 2...
Page 132
Registration section [ 6-22 ] 2-23. Paper position detection unit 1. Turn off the machine power and disconnect the power cable from the power source. 2. Remove the center inner cover. (refer to chapter 2.) 3. Remove the left inner cover. (refer to chapter 2.) 4. Remove the rear cover center assembly...
Page 133
Registration section [ 6-23 ] 2-24. Paper lift detection sensor 1. Turn off the machine power and disconnect the power cable from the power source. 2. Remove the paper position detection unit. (refer to the instructions for removal.) 3. Remove the paper lift detection sensor assembly. (w sems screw ...
Page 134
Registration section [ 6-24 ] comcolor series (revision 2.4) memo.
Page 135: 3. Adjustment
Registration section [ 6-25 ] comcolor series (revision 2.4) 3. Adjustment 3-1. Adjustment to make the registration roller and bp unit parallel adjust the alignment of the registration roller after replacing the registration roller or registration roller unit. Refer to chapter 11, section 3, "adjust...
Page 136
Registration section [ 6-26 ] comcolor series (revision 2.4) > loading position 2: place an a4 size sheet (297 mm) sideways in the position shown on the photograph below left. Confirm that the outside edge of the black plastic plate on the bp unit in the front is approximately 70 mm from the edge of...
Page 137
Registration section [ 6-27 ] comcolor series (revision 2.4) 4) close the right front cover. 5) execute the following cis shading compensation test modes, depending on the paper loading position. Loading position 1: test mode 2461 (shading compensation for the left and right cis at same time) loadin...
Page 138
Registration section [ 6-28 ] comcolor series (revision 2.4) 2. An error occurs if paper is not detected. (see note 2 on this page.) • w59-0228-1: edge detection error when confirming action of the left cis • w59-0228-2: edge detection error when confirming action of the right cis • w59-0228-3: edge...
Page 139
Registration section [ 6-29 ] comcolor series (revision 2.4) 2. No reference paper during shading compensation (w58-0226-4) criteria: if the average maximum value of five measurements outside the cis masking area (the area 400 pixels from the left and right edges) after black adjustment is 6,600 or ...
Page 140
Registration section [ 6-30 ] comcolor series (revision 2.4) [registration sensor] & [top edge sensor 1] sensitivity adjustment sequence: top edge sensor 1 (receive) top edge sensor 1 (send) registration roller registration sensor (receive) transfer belt registration sensor (send) place a white shee...
Page 141
Registration section [ 6-31 ] comcolor series (revision 2.4) 2. Top edge sensor 2 (reflecting type sensor) make following adjustment when the tope edge sensor 2 is replaced. 1) confirm that the bp unit is all the up to the printing position. If not, activate test mode no.2405 to raise the bp unit to...
Page 142
Registration section [ 6-32 ] comcolor series (revision 2.4) memo.
Page 143: Chapter 7. Bp Section
Bp section [ 7-1 ] comcolor series (revision 2.4) chapter 7. Bp section contents 1. Mechanisms ....................................................................................... 7-2 1-1. Basic structurecdr4 ................................................................ 7-2 1-2. Raising and lo...
Page 144: 1. Mechanisms
Bp section [ 7-2 ] comcolor series (revision 2.4) 1. Mechanisms 1-1. Basic structure the bp unit is comprised of the transfer belt, transfer belt motor, belt platen, transfer belt fan (6), and the belt hp sensor. 1. Paper received from the registration rollers is transferred and conveyed to the pape...
Page 145
Bp section [ 7-3 ] comcolor series (revision 2.4) 1-2. Raising and lowering of the belt platen the bp unit is raised or lowered to move into the printing or idle position. 1. The bp unit is raised or lowered by means of four wires suspended from the head holder. (see figure 5.) 2. The wires are held...
Page 146
Bp section [ 7-4 ] comcolor series (revision 2.4) 1-3. Paper transfer mechanism 1. The bp unit keeps paper against the belt during transfer by means of suction fans (6). 2. The belt forms the shape of a trapezoid around the drive roller, driven roller, guide roller, and two tension rollers. It is dr...
Page 147
Bp section [ 7-5 ] comcolor series (revision 2.4) 1-5. Paper suction action this action applies suction to paper in the printing section. Because there is only a head gap of about 1.5 mm, paper that lifts up as it is transferred may damage the head. Suction is required when paper is transferred unde...
Page 148
Bp section [ 7-6 ] comcolor series (revision 2.4) 1-6. Ink drop position adjustment ink drop position adjustment in the bp unit refers to compensating for inconsistency in ink impact. Two types of adjustment are performed in ink drop position adjustment: belt profile and roller profile compensation....
Page 149
Bp section [ 7-7 ] comcolor series (revision 2.4) convenient test modes to know for the bp contact detection mechanism test mode number process name description 2170 bp hit detection (rl) on: contact detected / off: contact not detected 2171 bp hit detection (rr) on: contact detected / off: contact ...
Page 150
Bp section [ 7-8 ] comcolor series (revision 2.4) 1-8. Gap adjuster mechanism mechanism for switching the gap between the print head and paper a mechanism for adjusting the distance between the head nozzle surface and paper on the belt platen, by means of the protrusion below the head unit. Four hea...
Page 151
Bp section [ 7-9 ] comcolor series (revision 2.4) place the bp tension spring over the rotary guide by matching the marking on the green colored line shown on the sketch on the left. The green colored line indicates how the spring guide hook should be pushed up. Push the bp tension spring and spring...
Page 152
Bp section [ 7-10 ] comcolor series (revision 2.4) detects loose wires (caused by winding the wires in the reverse, for example). Micro-switch to detect loose wire. 1-9. Bp wire loose detection mechanism.
Page 153: 2. Disassembly
Bp section [ 7-11 ] comcolor series (revision 2.4) 2. Disassembly caution : do not remove the front frame of the bp unit. (the front frame is positioned with a factory jig.) 2-1. Removing the bp unit note: be careful not to touch the print head during this work. 1. Turn off the machine power and dis...
Page 154
Bp section [ 7-12 ] comcolor series (revision 2.4) 8. Loosen the mounting screws of the elevation guide (it3c screw 4x8 (4 pcs)), slide the guide upward, and affix it temporarily by tightening one of the four screws. 9. Unhook the wires from the wire hooks on the bp unit (in 4 positions). 10. Unhook...
Page 155
Bp section [ 7-13 ] comcolor series (revision 2.4) 2-2. Transfer belt motor assembly 1. Turn off the machine power and disconnect the power cable from the power source. 2. Remove the bp front cover. (binding screw 4x8 (3 pcs)) 3. Remove the belt hp sensor. (w sems screw 3x12 (1 pc)) 4. Remove the re...
Page 156
Bp section [ 7-14 ] comcolor series (revision 2.4) 2-4. Bp upper limit sensor 1. Turn off the machine power and disconnect the power cable from the power source. 2. Move the maintenance unit manually to the retracted position. 3. Remove the sensor cover plate. (it3c screw 3x6 (1 pc)) 4. Disconnect t...
Page 157
Bp section [ 7-15 ] comcolor series (revision 2.4) 2-6. Belt shaft fg sensor assembly (encoder) note: do not remove unless the sensor is actually damaged. 1. Turn off the machine power and disconnect the power cable from the power source. 2. Remove the bp unit. (refer to the instructions for removal...
Page 158
Bp section [ 7-16 ] comcolor series (revision 2.4) 6. Remove the belt tension shaft from the rear of the bp unit. (6 mm dia. E-ring (1 pc)) 7. Remove the belt guide shaft from the rear of the bp unit. (6 mm dia. E-ring (1 pc)) 8. Remove the drive roller bearing from the rear of the bp unit. (8 mm di...
Page 159
Bp section [ 7-17 ] comcolor series (revision 2.4) 12. Remove the driven roller, with the encoder attached, from over the top of the bp unit. (unhook the bearing from the frame.) 13. Pull out the driven roller from the rear of the bp unit. 14. Remove the guide pulley mounting bracket. (it3c screw 4x...
Page 160
Bp section [ 7-18 ] comcolor series (revision 2.4) 17. Turn the bp unit up-side-down on the table, and then remove the rear frame of the belt platen unit. (w sems screw 4x10 (4 pcs), p-tight screw 3x8 (1 pc), and binding p-tight screw 4x10 (6 pcs)). Note: keeping the unit facing down prevents four m...
Page 161
Bp section [ 7-19 ] comcolor series (revision 2.4) 2-9. Bp lift wires removing the bp lift wires involve working inside the print head carriage, such as working on the print head pcbs and the print head flat cables are involved. The instructions for the bp lift wire replacement procedure is therefor...
Page 162
Bp section [ 7-20 ] comcolor series (revision 2.4) memo.
Page 163: 3. Adjustment
Bp section [ 7-21 ] comcolor series (revision 2.4) 3. Adjustment 3-1. Ink drop position enhancement adjustment the particular unevenness of the transfer belt along with vibration and eccentricity of transfer rollers causes inconsistency in ink droplet position. However, the precision of ink droplet ...
Page 164
Bp section [ 7-22 ] comcolor series (revision 2.4) in this compensation, the amount of eccentricity existing on the transfer belt rollers is quantified and applied on the ink drop timing. The roller profile parameters must be re-input by test modes after the encoder is once removed from the transfer...
Page 165
Bp section [ 7-23 ] comcolor series (revision 2.4) print out samples of test mode numbers 1478 and 1479 head binding area uneven in color, density and width. The binding area is smooth in width and in color density. The binding area is not smooth in the width and color density. Good bad.
Page 166
Bp section [ 7-24 ] comcolor series (revision 2.4) 3-2. Transfer belt alignment perform this adjustment when replacing the transfer belt or after the belt was removed for replacement of the fan motor, rollers, or other parts. Inaccurate positioning of the belt causes deformation of the belt edge sur...
Page 167
Bp section [ 7-25 ] comcolor series (revision 2.4) the position of the bp belt edge against the flange on the belt driven roller can only be checked at one location,at the left-front of the bp unit. At no other location the observation can be made. Use a mirror and a flashlight to confirm the bp bel...
Page 168
Bp section [ 7-26 ] comcolor series (revision 2.4) flange roller transfer belt (top surface) correct: belt edge aligned with the flange incorrect: deflected incorrect: lifted incorrect: separation driven roller flange belt edge drive roller bp belt insulation plate bp belt belt edge left-hand side r...
Page 169
Bp section [ 7-27 ] comcolor series (revision 2.4) 3-3. Adjustment to make the bp unit and registration roller parallel if the bp unit and registration roller are not parallel, when the registration roller transfers a sheet aligned on its leading edge to the bp unit, it will be transferred crooked, ...
Page 170
Bp section [ 7-28 ] comcolor series (revision 2.4) memo.
Page 171: Contents
Paper transfer section [ 8-1 ] comcolor series (revision 2.4) chapter 8. Paper transfer section contents 1. Mechanisms ....................................................................................... 8-2 1-1. Basic structure .......................................................................
Page 172: 1. Mechanisms
Paper transfer section [ 8-2 ] comcolor series (revision 2.4) 1. Mechanisms 1-1. Basic structure the paper transfer section, which handles paper feeding, is comprised of the paper elevation unit and upper transfer unit. 1-2. Paper elevation unit mechanism the paper elevation unit is comprised of the...
Page 173
Paper transfer section [ 8-3 ] comcolor series (revision 2.4) 1-3. Upper transfer unit mechanism the upper transfer unit is comprised of the upper transfer motor and upper transfer rollers 3–5. This unit transfers paper from the paper elevation unit to switchback unit b or the face down paper ejecti...
Page 174
Paper transfer section [ 8-4 ] comcolor series (revision 2.4) description 1) when printing starts, the upper transfer rollers start rotating. (except during simplex printing when face up paper ejection is specified.) during simplex printing, rollers of the upper transfer unit rotate at the same circ...
Page 175: 2. Disassembly
Paper transfer section [ 8-5 ] comcolor series (revision 2.4) 2. Disassembly 2-1. Paper elevation motor 1. Turn off the machine power and disconnect the power cable from the power source. 2. Remove the rear cover center assembly. (refer to chapter 2.) 3. Put the controller pcb box in maintenance pos...
Page 176
Paper transfer section [ 8-6 ] comcolor series (revision 2.4) 2-3. Paper elevation in sensor (paper elevation unit) 1. Turn off the machine power and disconnect the power cable from the power source. 2. Remove the paper elevation unit. (refer to the instructions for removal.) 3. Remove the paper ele...
Page 177
Paper transfer section [ 8-7 ] comcolor series (revision 2.4) 2-6. Driven roller (paper elevation unit) 1. Turn off the machine power and disconnect the power cable from the power source. 2. Remove the paper elevation unit. (refer to the instructions for removal.) 3. Remove the mounting base of the ...
Page 178
Paper transfer section [ 8-8 ] comcolor series (revision 2.4) 2-8. Flipper sensor 1. Turn off the machine power and disconnect the power cable from the power source. 2. Remove the center inner cover. (refer to chapter 2.) 3. Remove the two stoppers and pull out the upper transfer unit. (round tip it...
Page 179
Paper transfer section [ 8-9 ] comcolor series (revision 2.4) 2-10. Upper transfer roller 3 (upper transfer unit) 1. Turn off the machine power and disconnect the power cable from the power source. 2. Remove the upper transfer unit. (refer to the instructions for removal.) 3. Remove the clip. 4. Rem...
Page 180
Paper transfer section [ 8-10 ] comcolor series (revision 2.4) memo.
Page 181: Contents
Paper ejection section [ 9-1 ] comcolor series (revision 2.4) chapter 9. Paper ejection section contents 1. Mechanisms ....................................................................................... 9-2 1-1. Basic structure .......................................................................
Page 182: 1. Mechanisms
Paper ejection section [ 9-2 ] 1. Mechanisms 1-1. Basic structure the face down paper ejection section is comprised of the fd paper ejection unit, fd fence unit, and (optionally) the paper receiving tray unit. Comcolor series (revision 2.4) fd paper ejection unit fd fence unit paper receiving tray u...
Page 183
Paper ejection section [ 9-3 ] comcolor series (revision 2.4) flipper solenoid face down paper ejection motor encoder paper ejection sensor paper ejection roller (driven) when a jam is cleared jam release lever paper ejection roller (drive) end wall full detection sensor de-electricity brush.
Page 184
Paper ejection section [ 9-4 ] comcolor series (revision 2.4) 1-2. Fd paper ejection unit the basic structure of the fd paper ejection unit is shown below. Normal action of the face down paper ejection unit normal action of the face down paper ejection unit is not affected by the action of other uni...
Page 185
Paper ejection section [ 9-5 ] comcolor series (revision 2.4) > flipper sensor on (calculation/measurement started) (1) being transferred flipper sensor flipper on timing reached (2) target sheet previous sheet target sheet previous sheet flipper sensor off (3) target sheet next sheet (4) off timing...
Page 186
Paper ejection section [ 9-6 ] comcolor series (revision 2.4) > paper path switching: paper transfer action 1. Name ou ti n notes 2. 3. 4. 2. 3. 5. 6. 1. 4. Timing start transfer started finish transfer ended 5. 6. 7. 8. 1. Error 2. Fd paper ejection flipper solenoid on/off: : flipper sensor "not ar...
Page 187
Paper ejection section [ 9-7 ] 1-4. Paper receiving full detection mechanism fd paper receiving full detection is described below. Paper receiving full detection relies on the fd paper ejection full sensor. After detection by the fd paper ejection full sensor, the fd paper ejection motor remains on ...
Page 188
Paper ejection section [ 9-8 ] 1-5. Fd fence unit the paper ejection fence is moved to match the paper size so that paper can be uniformly ejected without transferred paper becoming disorderly. Unit structure the face down paper fence unit is summarized below. Fence movement 1. Determination of fenc...
Page 189
Paper ejection section [ 9-9 ] 2. Home positioning the fd paper ejection fence moves to the home position in the following situations. • when the unit is turned on • during recovery after an emergency stop when the fence was moving • when the unit is reset 1-6. Paper receiving tray unit (optional) t...
Page 190
Paper ejection section [ 9-10 ] comcolor series (revision 2.4) memo.
Page 191: 2. Disassembly
Paper ejection section [ 9-11 ] comcolor series (revision 2.4) 2. Disassembly 2-1. Removing the unit 1. Turn off the machine power and disconnect the power cable from the power source. 2. Remove the left top cover. (refer to chapter 2.) 3. Remove the screws affixing the paper receiving tray unit, an...
Page 192
Paper ejection section [ 9-12 ] comcolor series (revision 2.4) 1. Turn off the machine power and disconnect the power cable from the power source. 2. Remove the left top cover. (refer to chapter 2.) 3. Remove the fd paper receiving tray unit. 4. Remove the fd fence unit. 5. Unplug the wire connector...
Page 193
Paper ejection section [ 9-13 ] comcolor series (revision 2.4) 2-2. Fd paper ejection fence motor (fd fence unit) 1. Turn off the machine power and disconnect the power cable from the power source. 2. Remove the fd fence unit. (refer to the instructions for removal.) 3. Unplug the motor wire connect...
Page 194
Paper ejection section [ 9-14 ] paper ejection section comcolor series (revision 2.4) 2-4. Fd paper ejection full detection sensor (fd paper ejection unit) 1. Turn off the machine power and disconnect the power cable from the power source. 2. Remove the fd paper ejection unit. (refer to the instruct...
Page 195
Paper ejection section comcolor series (revision 2.4) 2-7. Fd paper ejection flipper solenoid (fd paper ejection unit) 1. Turn off the machine power and disconnect the power cable from the power source. 2. Remove the paper ejection unit. (refer to the instructions for removal.) 3. Remove the solenoi...
Page 196
Paper ejection section [ 9-16 ] comcolor series (revision 2.4) 2-10. Fd ejection driven roller (fd paper ejection unit) 1. Turn off the machine power and disconnect the power cable from the power source. 2. Remove the paper ejection unit. (refer to the instructions for removal.) 3. Remove the socket...
Page 197: 3. Adjustment
Paper ejection section [ 9-17 ] comcolor series (revision 2.4) 3. Adjustment 3-1. Fd paper ejection flipper solenoid (fd paper ejection unit) the flipper and its adjustment position must be checked each time the flipper solenoid is replaced. 1. With the solenoid in activated condition (the plunger i...
Page 198
Paper ejection section [ 9-18 ] comcolor series (revision 2.4) 3-2. Phase adjustment of the fence rack (fd fence unit) when replacing the fd paper ejection fence motor of the fence unit, adjust the phase of the fence rack gears in assembly. 1. Open wide the both fence rack gears, all the way maximum...
Page 199: Contents
Switchback section [ 10-1 ] comcolor series (revision 2.4) chapter 10. Switchback section contents 1. Mechanisms ..................................................................................... 10-2 1-1. Basic structure ........................................................................ 10...
Page 200: 1. Mechanisms
Switchback section [ 10-2 ] comcolor series (revision 2.4) 1. Mechanisms 1-1. Basic structure the switchback section, which handles paper feeding in duplex printing, is comprised of switchback units a and b. 1-2. Mechanisms of switchback units a and b the switchback unit incorporates the switchback ...
Page 201
Switchback section [ 10-3 ] comcolor series (revision 2.4) unit positioning pins upper transfer out sensor attachment section upper transfer motor switchback unit b upper transfer roller 6 switchback unit a switchback sensor switchback clutch re-feed sensor jam release lever jam release dial switchb...
Page 202
Switchback section [ 10-4 ] comcolor series (revision 2.4) summary of switchback section action switchback motor stopped (stops at last 30 mm of the trailing edge, emerging from the switchback roller) switchback roller starts (normal rotation) (30 ms after upper transfer out sensor activated) (1) sw...
Page 203
Switchback section [ 10-5 ] comcolor series (revision 2.4) switchback section timing chart paper transfer: paper transfer action 1. Name ou t in note s 2. 3. 2. 3. 5. 1. 4. Timing start paper transfer started finish paper transfer ended 4. 5. 6. 7. 8. 1. Error : switchback sensor "paper not arrived"...
Page 204
Switchback section [ 10-6 ] comcolor series (revision 2.4) 1-3. Noise reduction paper feed assisting action noise reduction paper feed assisting action refers to operation to reduce noise created by flattening paper that has buckled as it is fed in the registration section. As feeding in the registr...
Page 205: 2. Disassembly
Switchback section [ 10-7 ] comcolor series (revision 2.4) 2. Disassembly 2-1. Switchback motor 1. Turn off the machine power and disconnect the power cable from the power source. 2. Remove the rear cover center assembly. (refer to chapter 2.) 3. Remove the left top cover. (refer to chapter 2.) 4. P...
Page 206
Switchback section [ 10-8 ] comcolor series (revision 2.4) 2-3. Switchback unit a 1. Turn off the machine power and disconnect the power cable from the power source. 2. Remove the external paper feed unit. (refer to chapter 4 of this book) 3. Remove the fd paper receiving tray. (refer to chapter 4 o...
Page 207
Switchback section [ 10-9 ] comcolor series (revision 2.4) 7. Remove the re-feed motor. (roud tip it3c screw 4x8 (2 pcs)) 8. Remove two wire connectors. (4 and 6 pins in back.) 9. Open the jam release door. 10. Remove the safety cover plate. (round tip it3c screw 3x6 (1 pc)) 11. Remove the external ...
Page 208
Switchback section [ 10-10 ] comcolor series (revision 2.4) 13. Remove switchback unit a. (round tip it3c screw 4x8 (4 pcs)) 2-4. Switchback unit b 1. Turn off the machine power and disconnect the power cable from the power source. 2. Remove the center inner cover. (refer to chapter 2 of this book) ...
Page 209
Switchback section [ 10-11 ] comcolor series (revision 2.4) 2-5. Switchback door interlock switch (switchback unit a) 1. Turn off the machine power and disconnect the power cable from the power source. 2. Remove switchback unit a. (refer to the instructions in this chapter.) 3. Remove the switchback...
Page 210
Switchback section [ 10-12 ] comcolor series (revision 2.4) 2-7. Re-feed sensor (switchback unit a) 1. Turn off the machine power and disconnect the power cable from the power source. 2. Remove switchback unit a. (refer to the instructions in this chapter.) 3. Unplug the wire connector of the re-fee...
Page 211
Switchback section [ 10-13 ] comcolor series (revision 2.4) 2-10. Upper transfer out sensor (switchback unit b) 1. Turn off the machine power and disconnect the power cable from the power source. 2. Remove the switchback unit b. (refer to the instructions in this chapter.) 3. Remove the out sensor a...
Page 212
Switchback section [ 10-14 ] comcolor series (revision 2.4) memo.
Page 213: Contents
Ink flow section [ 11a-1 ] comcolor series (revision 2.4) chapter 11a. Ink flow section contents 1. Mechanisms ...................................................................................11a-2 1-1. Ink supply mechanisms ........................................................11a-2 1-2. Ink pa...
Page 214: 1. Mechanisms
Ink flow section [ 11a-2 ] comcolor series (revision 2.4) 1. Mechanisms 1-1. Ink supply mechanisms the ink supply mechanism is comprised of mechanisms to supply ink to the printer and heads, a mechanism for ink circulation, and a mechanism for generating purging pressure to recover from head nozzle ...
Page 215
Ink flow section [ 11a-3 ] comcolor series (revision 2.4) tag rfid board joint ink cartridge direction of cartridge attachment/removal ink supply valve (solenoid) from other colors joint connection/ disconnection motor ink level detection sensor heater pressurized ink tank air chamber in common to a...
Page 216
Ink flow section [ 11a-4 ] comcolor series (revision 2.4) 1-3. Ink circulation unit structure ink cartridge holder unit this unit holds the four ink cartridge units and controls ink supply based on "no ink" signals from the printer. The unit has an antenna for receiving data from ink cartridge tags....
Page 217
Ink flow section [ 11a-5 ] comcolor series (revision 2.4) heat exchanger tower pressurized ink tank air valve negative pressure ink tank air valve pressurized ink tank negative pressure ink tank ink overflow pan pressurized ink tank common air chamber heater ink circulation pump negative pressure in...
Page 218
Ink flow section [ 11a-6 ] comcolor series (revision 2.4) negative pressure ink tank this tank, positioned lower than the head nozzles, also stores ink separately for all four colors. An ink level detection sensor is incorporated in the tank, for detecting the level of ink in the tank. (the sensor d...
Page 219
Ink flow section [ 11a-7 ] comcolor series (revision 2.4) structure of circulation pump view with the cover removed one-way valve ink flows only in the direction indicated. Flow in the opposite direction is stopped. Made of soft rubber. From the negative pressure ink tank to the heat sink (heat exch...
Page 220
Ink flow section [ 11a-8 ] comcolor series (revision 2.4) bellows unit comprised of the bellows and motor connected to the common air chamber, in turn connected to the negative pressure ink tank for each color. Raising and lowering the bellows adjusts the pressure in the negative pressure ink tank. ...
Page 221
Ink flow section [ 11a-9 ] comcolor series (revision 2.4) bellows unit sensors sensors are incorporated at four positions on the bottom of the bellows unit to detect the position of the bellows, which rises and lowers. Bellows sensor the unit is stopped when the bellows sensor detects that the bello...
Page 222
Ink flow section [ 11a-10 ] comcolor series (revision 2.4) head unit ink bus the print head unit is arranged in the order c, k, m, and y relative to the paper feed direction, and all the heads face the same direction. The ink bus is positioned over the second row of the heads of another color. (for ...
Page 223
Ink flow section [ 11a-11 ] comcolor series (revision 2.4) 1-4. Standard action of ink supply mechanisms the status of principal units during various printer operations is as follows. Printer status pressurized ink tank sensor negative pressure ink tank sensor ink supply valve pressurized ink tank a...
Page 224
Ink flow section [ 11a-12 ] comcolor series (revision 2.4) printer status pressurized ink tank sensor negative pressure ink tank sensor ink supply valve pressurized ink tank air valve negative pressure ink tank air valve bellows pump sensor position ink circulation pump notes cartridge replacement d...
Page 225
Ink flow section [ 11a-13 ] comcolor series (revision 2.4) printer status pressurized ink tank sensor negative pressure ink tank sensor ink supply valve pressurized ink tank air valve negative pressure ink tank air valve bellows pump sensor position ink circulation pump notes filling the system with...
Page 226
Ink flow section [ 11a-14 ] comcolor series (revision 2.4) memo.
Page 227: 2. Disassembly
Ink flow section [ 11a-15 ] comcolor series (revision 2.4) 2. Disassembly 2-1. Cutting the ink tubes follow this ink tube cutting procedure when instructed in replacing certain ink circulation parts. 1. Cut the ink tubes at the cut-mark line. Use a nipper to cut the ink tube. The nipper should cut t...
Page 228
Ink flow section [ 11a-16 ] comcolor series (revision 2.4) 3. The cutting angle should be within 1.5 mm (approx. 10 degrees) from the imprinted marking. 4. Check with the eye for any left over tube on the cut area. If any leftover piece(s) are left on the tube, cut the leftover piece off. 5. Insert ...
Page 229
Ink flow section [ 11a-17 ] comcolor series (revision 2.4) 2-2. Ink spill prevention from the ink cartridge holder unit follow this procedure before swing opening the ink cartridge holder unit in the vertical open position to prevent ink spillage from the ink cartridge holder. Ignoring this procedur...
Page 230
Ink flow section [ 11a-18 ] comcolor series (revision 2.4) 7. Make four cuts of ink absorbent papers in the shape of about 150 mm x 200 mm rectangular shape, and then fold each piece into approx. 20 mm x 100 mm piece. 8. Hook these four folded papers between the ink cartridge holder and ink tubes of...
Page 231
Ink flow section [ 11a-19 ] comcolor series (revision 2.4) 10. Remove one thumb screw and one it screw 4x8 (1 pc) from the ink cartridge holder unit and the unit to the vertical position. > caution: make sure to remove the ink absorbent paper the each time the ink cartridge is pulled out or plugged ...
Page 232
Ink flow section [ 11a-20 ] comcolor series (revision 2.4) 2-3. Removing the scissor clamps scissor clamps, used for clamping tubes, are attached on the top of the head holder cover. Remove them as follows. 1. Turn off the machine power and disconnect the power cable from the power source. 2. Open t...
Page 233
Ink flow section [ 11a-21 ] comcolor series (revision 2.4) 2-4. Bellows unit 1. Turn off the machine power and disconnect the power cable from the power source. 2. Remove the left and right top covers, rear cover, and right-side cover. (refer to the section on covers in chapter 2.) 3. Open the power...
Page 234
Ink flow section [ 11a-22 ] comcolor series (revision 2.4) 7. Remove the bellows unit mounting screws. (it screw 4x8 (4 pcs)), and remove the bellows unit from the machine caution: 1. If the bellows unit contains ink from the past ink overflow, the ink may drip out from the bellows air tube if the b...
Page 235
Ink flow section [ 11a-23 ] comcolor series (revision 2.4) note: test mode 2711 (head replacement mode) will be done later in the procedure. 1. Turn off the machine power and disconnect the power cable from the power source. 2. Remove the 4 scissor clamps from the head holder cover. (refer to the "r...
Page 236
Ink flow section [ 11a-24 ] comcolor series (revision 2.4) note: insert drainage tubes so that they go into the groove (ink drain port) on the overflow pan. 6. Disconnect the four drainage tubes on the overflow pan side. Insert the ends in the port in the overflow pan. Sponge exists.> note: be caref...
Page 237
Ink flow section [ 11a-25 ] comcolor series (revision 2.4) following photographs show how the ink drainage tubes should be inserted into the ink drain port of the overflow pan. Ink drain port of the overflow pan in which the end of the ink drainage tube should be inserted. Ink drain port of the over...
Page 238
Ink flow section [ 11a-26 ] comcolor series (revision 2.4) 7. Unplug the air tube between the negative pressure ink tank common air chamber and negative pressure ink tank air valve, on the air valve side. 8. Drop the unplugged end of the air tube into the overflow pan in order that any overflown ink...
Page 239
Ink flow section [ 11a-27 ] comcolor series (revision 2.4) in replacing the ink supply valve(s) , negative pressure ink tank(s) or entire ink circulation system , do all the following steps including [10] to [15]. In replacing only the ink bus , skip the steps [10] , [12] , [13] and [14] , as the in...
Page 240
Ink flow section [ 11a-28 ] comcolor series (revision 2.4) 17. Connect back the air tube between the air chamber (in common to the negative pressure ink tanks) and negative pressure ink tank air valve, unplugged in step-7, on the negative pressure ink tank air valve. 19. Proceed to the replacement o...
Page 241
Ink flow section [ 11a-29 ] comcolor series (revision 2.4) 2-6. Initial ink filling caution: the machine must have test mode no. 2711 set to [1] and power turned off in order to make the initial ink filling action without dripping ink on the bp belt from the print heads on the next machine power on....
Page 242
Ink flow section [ 11a-30 ] comcolor series (revision 2.4) before going to step-1, bellow, confirm that the flat cable has a good fold, or the ink cartridge joint drive motor may hit on the flat cable, when the ink cartridge holder unit is raised up, and damage the cable. 1. Follow the instructions ...
Page 243
Ink flow section [ 11a-31 ] comcolor series (revision 2.4) 2-7. Removing the head holder cover the procedure for removing the head holder cover is as follows. This procedure applies during disassembly and assembly of all sections in the head unit. 1. Turn off the machine power and disconnect the pow...
Page 244
Ink flow section [ 11a-32 ] comcolor series (revision 2.4) 6. Remove the stoppers at two positions (it3c screw 4x8 (1 pc) and remove the upper transfer unit. 7. Open the ink cartridge holder unit to the vertical position following the instruction given in the, “ink spill prevention from the ink cart...
Page 245
Ink flow section [ 11a-33 ] comcolor series (revision 2.4) 8. Disconnect the connector and remove the sensor bracket. (it screw 3x6 (2 pcs)) 9. Remove the head holder cover. (it screw 3x6 (6 pcs)) engraved arrow marks on the head holder cover indicates the position of the mounting screws in all 6 po...
Page 246
Ink flow section [ 11a-34 ] comcolor series (revision 2.4) 2-8. Ink cartridge 1. Open the right front cover. 2. Pull and remove the ink cartridges for replacement. The ink cartridge is now separated from the joint portion connected to the ink path. 3. Load new ink cartridges and close the front cove...
Page 247
Ink flow section [ 11a-35 ] comcolor series (revision 2.4) 8. Using scissor clamps, clamp the tubes between the ink cartridges and ink supply valves, near the ink supply valve port on all four colors. (4 scissor clamps) 9. Disconnect the tubes between the ink cartridges and ink supply valves from th...
Page 248
Ink flow section [ 11a-36 ] comcolor series (revision 2.4) 12. Wait few minutes for the ink from the ink cartridge holder unit to drain down into the waste ink tank. Then at the three-way joint of the ink drain tubes, use scissor clamps to clamp the tubes from the overflow pan of the ink cartridge h...
Page 249
Ink flow section [ 11a-37 ] comcolor series (revision 2.4) assembly precautions 1. Thread the ink drain tube of the ink cartridge holder unit from inside to the outside of the machine frame. Push the ink drain tube through and down until the plastic band hits the machine frame and stops. 2. On the r...
Page 250
Ink flow section [ 11a-38 ] comcolor series (revision 2.4) 2-10. Cartridge holder joint drive motor 1. Turn off the machine power and disconnect the power cable from the power source. 2. Open the right front cover. 3. Remove the ink cartridges. (4 cartridges) 4. Remove the left and right top covers....
Page 251
Ink flow section [ 11a-39 ] comcolor series (revision 2.4) 4. Unhook the rfid pcb from the two plastic hooks, and then pull out the rfid pcb. 2-11. Ink cartridge rfid pcb 1. Turn off the machine power and disconnect the power cable from the power source. 2. When removing the rfid pcb for the black c...
Page 252
Ink flow section [ 11a-40 ] comcolor series (revision 2.4) 2-12. Ink supply valve 1. Turn off the machine power and disconnect the power cable from the power source. 2. Remove the left and right top covers, rear cover, and right side cover. (refer to the section on covers in chapter 2.) 3. Remove th...
Page 253
Ink flow section [ 11a-41 ] comcolor series (revision 2.4) 10. Cut the ink supply tube at the cut-marking located above the negative pressure ink tank, and cap the cut end of the ink tube, and cap the cut end of the ink tube with the rubber cap included in the replacement kit. 11. Also cap the cut t...
Page 254
Ink flow section [ 11a-42 ] comcolor series (revision 2.4) 14. Use the rubber cap included in the ink supply valve replacement kit to cap the unplugged end of the ink tube on the previous step and dispose of the tube together with the ink supply valve. Assembly precautions (1) replace the drainage t...
Page 255
Ink flow section [ 11a-43 ] comcolor series (revision 2.4) 2-13. Negative pressure ink tank 1. Turn off the machine power and disconnect the power cable from the power source. 2. Remove the left and right top covers, rear cover, and right side cover. (refer to the section on covers in chapter 2.) 3....
Page 256
Ink flow section [ 11a-44 ] comcolor series (revision 2.4) 13. Unplug the wire connector to the ink detection sensor on the negative pressure ink tank from the tank to remove. 14. Unplug the wire connector from the extension wire from the ink pump pcb for the negative pressure ink tank to remove. 15...
Page 257
Ink flow section [ 11a-45 ] comcolor series (revision 2.4) 18. Release the air tube from the tube guide on the ink circulation tower of the negative pressure ink tank to replace. 19. Pull and unplug the negative pressure ink tank straight out, gently from the ink circulation tower. Circulation tower...
Page 258
Ink flow section [ 11a-46 ] comcolor series (revision 2.4) 18) pull the negative pressure ink tank gently forward to disengage from the ink supply unit. 19) a rubber o-ring may stay inside the heat exchanger tower. If so, take out the o-ring from the tower. Caution: leakage when the new o-ring on th...
Page 259
Ink flow section [ 11a-47 ] comcolor series (revision 2.4) note : the negative pressure ink tank on the old type and new type ink circulation unit are different. 1) turn off the machine power. 2) remove the left and right top covers, rear cover, and right side cover. (refer to the section on covers ...
Page 260
Ink flow section [ 11a-48 ] comcolor series (revision 2.4) 11) disconnect the ink pump junction connector for the negative pressure ink tank to be replaced. 12) disconnect the all 4 air tubes of the negative pressure ink tank from the common air chamber. 13) cap the 4 open ports on the common air ch...
Page 261
Ink flow section [ 11a-49 ] comcolor series (revision 2.4) 17) pull the negative pressure ink tank gently forward to disengage from the ink supply unit. 18) a rubber o-ring may stay inside the heat exchanger tower. If so, take out the o-ring from the tower. Caution: leakage when the new o-ring on th...
Page 262
Ink flow section [ 11a-50 ] comcolor series (revision 2.4) pressurized ink tank note : the pressurized ink tank on the old type and new type ink circulation unit are different. 1) remove the left and right top covers, rear cover, and right side cover. (refer to the section on covers in chapter 2.) 2...
Page 263
Ink flow section [ 11a-51 ] comcolor series (revision 2.4) 7) unplug the air valve tube of the pressurized ink tank from the common air chamber. Then plug the port on the common air chamber with a cap included in the pressurized ink tank parts kit. 8) cap the air valve port of the pressurized ink ta...
Page 264
Ink flow section [ 11a-52 ] comcolor series (revision 2.4).
Page 265
Ink flow section [ 11a-53 ] comcolor series (revision 2.4).
Page 266
Ink flow section [ 11a-54 ] comcolor series (revision 2.4).
Page 267
Ink flow section [ 11a-55 ] comcolor series (revision 2.4) ink bus 1) remove the head holder cover. (follow the instructions in "removing the head holder cover.") to keep the unit clean and free of ink, put a sheet of paper between the belt platen and maintenance unit. 2) remove the rear cover. (ref...
Page 268
Ink flow section [ 11a-56 ] comcolor series (revision 2.4) 7) when removing the magenta or yellow ink bus, loosen the screws (it screw 3x6 (3 pcs)) on the right hand side head drive pcb, remove the entire pcb bracket, and hook it over the left head drive pcb.) rear view front view front rear (1) sli...
Page 269
Ink flow section [ 11a-57 ] comcolor series (revision 2.4) 8) disconnect the print head ink tube of the ink bus to replace at the print head side. (be careful of the ink that may drip.) unplugged in step-(9) cut in step-(11) remove ink tubes from 6 heads. Showing the cyan ink bus as an example. 9) u...
Page 270
Ink flow section [ 11a-58 ] comcolor series (revision 2.4) 12) remove ink circulation tubes out from the tube harness bands for easy tube removal from the machine. 13) remove the ink bus mounting screws. (it screw 3x6 (2 pcs)) showing the yellow ink bus as an example. Screw in the front screw in the...
Page 271
Ink flow section [ 11a-59 ] comcolor series (revision 2.4) (6) to prevent the ink tubes from being unplugged accidentally when the ink circulation tower is opened or closed, check again the ink tubing layout, as shown on the photograph below. The yellow ink tube from the ink bus to the negative pres...
Page 272
Ink flow section [ 11a-60 ] comcolor series (revision 2.4) entire ink circulation system 1) remove the left and right top covers, rear cover, and right-side cover. (refer to the section on covers in chapter 2.) 2) remove the scissor clamps. (follow the instructions in "removing the scissor clamps.")...
Page 273
Ink flow section [ 11a-61 ] comcolor series (revision 2.4) 7) cut the 4 ink tubes, which connects the ink bus and negative pressure ink tank, at the cut-mark line above the negative ink tank. Cap the cut ink tubes with the caps included in the ink circulation system spare part kit. Old type ink circ...
Page 274
Ink flow section [ 11a-62 ] comcolor series (revision 2.4) 8) cut the 4 ink supply tubes, running from the ink supply valve to the negative pressure ink tank at the cut- mark line above the negative pressure ink tank. Cap the cut tubes with the caps supplied in the spare parts kit of the ink supply ...
Page 275
Ink flow section [ 11a-63 ] comcolor series (revision 2.4) 12) disconnect the waste ink tube from the overflow pan on the upstream side of the three-way joint. Insert stoppers in the end of the disconnected tube and in the joint port. 13) remove the 2 scissor clamps from the remaining waste ink tube...
Page 276
Ink flow section [ 11a-64 ] comcolor series (revision 2.4) 6) to prevent the ink tubes from being unplugged accidentally when the ink circulation tower is opened or closed, check again the ink tubing layout, as shown on the photograph below. The yellow ink tube from the ink bus to the negative press...
Page 277
Ink flow section [ 11a-65 ] comcolor series (revision 2.4) 7) insert the 4 ink cartridge in the ink cartridge holder unit. Raise the ink cartridge holder unit in the vertical position and fix in that position using the arm. This will allow faster ink filling action from the ink cartridge into the in...
Page 278
Ink flow section [ 11a-66 ] comcolor series (revision 2.4) 8) reboot the machine manually to make the newly set test mode settings effective. 9) error message [z05-1212 close the front doors] displays. --- close the front door. 10) error message [w51-1301 recovery operation] may display -- press the...
Page 279
Ink flow section [ 11a-67 ] comcolor series (revision 2.4) print head removal 1) remove the head holder cover. (follow the instructions in "removing the head holder cover.") 2) remove the rear cover. (refer to the section on covers in chapter 2.) 3) open the power supply unit, engine control pcb, co...
Page 280
Ink flow section [ 11a-68 ] comcolor series (revision 2.4) 8) when removing the magenta and yellow heads, loosen the screw on the right head drive pcb, remove the entire bracket, and lay it over the left head drive pcb. (it screw 3x6 (3 pcs)) do not use any thing with hard-tip , such as ballpoint pe...
Page 281
Ink flow section [ 11a-69 ] comcolor series (revision 2.4) 11) attach the head adjust jig to the head. (it screw 3x6 (2 pcs)) note: before removing the head, always attach the head adjust jig. The actual instruction on how to use the head adjust jig is explained from the next page. Print head head a...
Page 282: Good
Ink flow section [ 11a-70 ] comcolor series (revision 2.4) 2 tighten the two screws of the head adjust jig loosely. (it screw 3x6 (2 pcs)) by pulling the head ink tube lightly towards the direction of the arrow mark makes it easier for the head adjust jig to be set. Mounting screws of the head adjus...
Page 283
Ink flow section [ 11a-71 ] comcolor series (revision 2.4) 3 lock the plate spring firmly against the print head. 1 2 to hook the plate spring: 1 hook the plate spring at the top of the head adjust jig. 2 push the plate spring down firmly to lock. Confirm before locking the plate spring that the pla...
Page 284
Ink flow section [ 11a-72 ] comcolor series (revision 2.4) 12) unplug the flat cable of the print head from the head drive pcb. 13) using two scissor clamps, clamp the two ink tubes going to the print head from the ink bus, for the print head to remove. Clamp the ink tubes in the area between the pr...
Page 285
Ink flow section [ 11a-73 ] comcolor series (revision 2.4) when removing heads under the ink bus when removing heads under the ink bus, move the ink bus on top of the print head out of the way by the procedure given below. Ink bus print head remove the two mounting screws of the ink bus, which is in...
Page 286
Ink flow section [ 11a-74 ] comcolor series (revision 2.4) 14) gently unplug the two ink tubes from the print head. Ink from the print head surface when removing the print head.> 15) unhook the spring plate of the head adjust jig from the print head. The lock release groove on the head adjust jig. L...
Page 287
Ink flow section [ 11a-75 ] comcolor series (revision 2.4) 3 tilt the print head towards the front and lift the rear to fully clear the rear adjusting screw. Front rear 4 when the front portion of the print head clears away from the head adjust jig, gently lift the print head out of the machine. Fro...
Page 288
Ink flow section [ 11a-76 ] comcolor series (revision 2.4) head mounting procedure and precautions 1) mount the new print head, and keep the head adjust jig on the print head. 2) connect head ink tubes and remove the scissor clamps. 3) connect the print head flat cables onto the head drive pcb and f...
Page 289
Ink flow section [ 11a-77 ] comcolor series (revision 2.4) head drive pcb remove the head holder cover. (follow the instructions in “removing the head holder cover.”) if removing both the left (cyan/black) and right (magenta/yellow) head drive pcbs, it is best to remove the right (magenta/yellow) he...
Page 290
Ink flow section [ 11a-78 ] comcolor series (revision 2.4) removing cyan/black head drive pcb 1) make sure that all the flat cables of the print heads are numbered. If not, number all the print head cables to match with the head color and head location, referring to page 11a-72 of this chapter. Othe...
Page 291
Ink flow section [ 11a-79 ] comcolor series (revision 2.4).
Page 292
Ink flow section [ 11a-80 ] comcolor series (revision 2.4).
Page 293
Ink flow section [ 11a-81 ] comcolor series (revision 2.4) overflow pan 1) remove the left and right top covers, rear cover, and right-side cover. 2) remove the scissor clamps from the machine. 3) open the power supply unit, engine control pcb, and ink circulation unit. 4) follow the procedure in “d...
Page 294
Ink flow section [ 11a-82 ] comcolor series (revision 2.4) 10) remove the overflow pan. Tilt it to drain remaining ink into the waste ink tank. Note: remember to drain the remaining ink. If the ink is not drained, it may spill out. Note: alternatively, you can use the drainage tube (3 mm dia.) on th...
Page 295
Ink flow section [ 11a-83 ] comcolor series (revision 2.4) assembly precautions 1) at the markings on the ink drainage tube, 75mm and 290mm from where the tube connects to the overflow pan, fix the ink drainage tube on metal brackets on the machine with plastic bands as shown on the sketch below. Wa...
Page 296
Ink flow section [ 11a-84 ] comcolor series (revision 2.4) cooling fan the number of fan differ between the old and new ink circulation system, but the fan itself is a same part. 1) remove the rear cover. 2) disconnect the fan connector(s), and free the wire harnesses attached around the fan assembl...
Page 297
Ink flow section [ 11a-85 ] comcolor series (revision 2.4) 4) remove the cooling fan. Cooling fan.
Page 298
Ink flow section [ 11a-86 ] comcolor series (revision 2.4) pressurized ink tank air valve 1) remove the left and right top covers, rear cover, and right-side cover. 2) remove the scissor clamps from the machine. 3) open the power supply unit, engine control pcb, and ink supply unit. 4) follow the pr...
Page 299
Ink flow section [ 11a-87 ] comcolor series (revision 2.4) 8) disconnect the connector of the air valve. 9) remove two mounting screws of the air valve and remove the valve. (it screw 3x4 (2 pcs)). Two mounting screws to remove connector 3) using the new tubes supplied with the new pressurized ink t...
Page 300
Ink flow section [ 11a-88 ] comcolor series (revision 2.4) negative pressure ink tank air valve draining the ink from the ink circulation unit is not required when replacing the negative pressure ink tank air valve. 1) remove the left and right top covers, rear cover, and right-side cover. 2) open t...
Page 301
Ink flow section [ 11a-89 ] comcolor series (revision 2.4) left and right wire units, and black and white torque limiters 1) open the right and left front covers. 2) remove the center and right inner covers, the right side cover, the ejection cover, the left and right top covers, and the rear cover....
Page 302
Ink flow section [ 11a-90 ] comcolor series (revision 2.4) 8) unlock the two flexible cable connectors of the head drive pcb, and then remove the ffc connectors (4 pcs). 9) remove the two connectors from the head drive pcb. 10) remove the 12 print head fpcs on the magenta-yellow side of the head dri...
Page 303
Ink flow section [ 11a-91 ] comcolor series (revision 2.4) 15) put the controller pcb box in maintenance position. (refer to the section on covers in chapter 2.) 16) remove the paper elevation motor. (refer to paper transfer section information in chapter 8.) 17) remove the stay plate next to the pa...
Page 304
Ink flow section [ 11a-92 ] comcolor series (revision 2.4) 20) remove the screw on the front of the cyan ink bus, loosen the screw on the back, and move the ink bus out of the way (it screw 3x6 (2 pcs)). Remove the wire cover on the left and right. 21) remove the wires hung on the wire guide. (4 pcs...
Page 305
Ink flow section [ 11a-93 ] comcolor series (revision 2.4) removing wire from the wire guide 22) remove the spring attached to the loose wire detection plate of the head holder. 23) remove the clip on the support shaft of the loose wire detection plate, and then remove the detection plate. Loose wir...
Page 306
Ink flow section [ 11a-94 ] comcolor series (revision 2.4) 24) lay a sheet of paper by the harness hole under the pulley for winding the wire on the paper feed side. (this is a precaution against dropping the parallel pin of the wire shaft.) note: after removing the wire unit, also remove the paper....
Page 307
Ink flow section [ 11a-95 ] comcolor series (revision 2.4) 28) remove the e-ring (one 6 mm dia. E-ring) on the paper feed side of the elevation wire shaft. Remove the elevation wire shaft from the head holder. 29) remove the wire-winding pulley for the black and white torque limiters. Note: be caref...
Page 308
Ink flow section [ 11a-96 ] comcolor series (revision 2.4) installation precautions note: install the wire unit with wire completely pulled out from the wire-winding pulley. Note: install the torque limiter after rotating it so that the rectangular peg and parallel pin groove are perpendicular, as s...
Page 309
Ink flow section [ 11a-97 ] comcolor series (revision 2.4) structural diagram of elevation wire shaft be careful about winding of the ball and wire be careful about winding of the ball and wire front rear be careful about wire emerging be careful about wire emerging.
Page 310
Ink flow section [ 11a-98 ] comcolor series (revision 2.4) bp elevation motor 1) remove the left and right top covers. (refer to the section on covers in chapter 2.) 2) remove the operation panel (the entire bracket; round tip it3c screw 4x8 (3 pcs)) and rest it on the left side of the ink cartridge...
Page 311
Ink flow section [ 11a-99 ] comcolor series (revision 2.4) 12) remove the connector to the bp elevation motor. 13) remove the bp unit elevating unit screw, pull out the shaft for manually raising and lowering from the shaft holder, and remove the bp unit elevating unit from the head holder. (it scre...
Page 312
Ink flow section [ 11a-100 ] comcolor series (revision 2.4) gap adjuster 1) open the front cover and remove the inner cover. (refer to the section on covers in chapter 2.) 2) lower the bp unit to the lower limit position. 3) remove the wires from the bp unit wire hooks (in 4 positions). 4) pull out ...
Page 313
Ink flow section [ 11a-101 ] comcolor series (revision 2.4) star wheel 1) turn off the machine power and open the right side cover. (refer to the section on covers in chapter 2.) 2) remove the paper elevation unit. (refer to paper transfer section information in chapter 8.) 3) remove the star wheel ...
Page 314
Ink flow section [ 11a-102 ] comcolor series (revision 2.4) kg roller 1) turn off the machine power and open the right and left front covers. 2) remove the center inner cover. (refer to the section on covers in chapter 2.) 3) manually lower the bp unit to the lower limit position. 4) pull out the be...
Page 315
Ink flow section [ 11a-103 ] comcolor series (revision 2.4) kg base assembly 1) turn off the machine power and open the right and left front covers. 2) remove the center inner cover. (refer to the section on covers in chapter 2.) 3) manually lower the bp unit to the lower limit position. 4) remove a...
Page 316
Ink flow section [ 11a-104 ] comcolor series (revision 2.4) sketches showing the steps to remove and to put back the kg base assembly on comcolor 3050 and 3010. The basic instruction is the same as to that for comcolor 9050, 7050 and 7010. Side view rear front slide while pulling head holder unit kg...
Page 317
Ink flow section [ 11a-105 ] comcolor series (revision 2.4).
Page 318
Ink flow section [ 11a-106 ] comcolor series (revision 2.4).
Page 319: 3. Adjustment
Ink flow section [ 11a-107 ] comcolor series (revision 2.4) 3. Adjustment image adjustment refer to chapter 11b for the details on the comcolor image adjustment. Adjusting belt platen orientation refer to chapter 11b for the details on the comcolor image adjustment. Adjusting the registration roller...
Page 320: Contents
Waste ink section [ 12-1 ] comcolor series (revision 2.4) contents 1. Mechanisms ..................................................................................... 12-2 1-1. Head maintenance mechanism .............................................. 12-2 1-2. Waste ink detection mechanism ............
Page 321: 1. Mechanisms
Waste ink section [ 12-2 ] comcolor series (revision 2.4) 1. Mechanisms 1-1. Head maintenance mechanism the maintenance unit (also called as ink pan) is equipped with a wiper to clean the print head nozzle surface. The wiper comes into contact with the head holder by means of raising and lowering th...
Page 322
Waste ink section [ 12-3 ] comcolor series (revision 2.4) the operation position sensor and storage position sensors are cut by the sensor actuator on the maintenance unit arm. 4) the maintenance unit arm comes into contact with the stopper on the main unit, and the maintenance unit stops. 5) after ...
Page 323
Waste ink section [ 12-4 ] comcolor series (revision 2.4) 1-2. Waste ink detection mechanism waste ink tank holder unit this unit has sensors and a tray holding the waste ink tank. Changes in the level of the tray (caused by changes in the weight of the waste ink tank) are detected by two sensors, w...
Page 324
Waste ink section [ 12-5 ] comcolor series (revision 2.4) detection of when the waste ink tank is full the relative positions of the shield plate and sensors as the waste ink tank fills up are as follows. No waste ink tank loaded waste ink tank loaded nearly full full waste ink tank sensor 1 off on ...
Page 325
Waste ink section [ 12-6 ] comcolor series (revision 2.4) memo.
Page 326: 2. Disassembly
Waste ink section [ 12-7 ] comcolor series (revision 2.4) 2. Disassembly 2-1. Maintenance unit 1. Turn off the machine power and disconnect the power cable from the power source. 2. Remove the ejection cover and waste ink tank cover. (refer to the section on covers in chapter 2.) 3. Remove the right...
Page 327
Waste ink section [ 12-8 ] comcolor series (revision 2.4) note: be careful not to drop the clip and sleeve during removal or installation. 6. Pull out left and right hinge pins, from the inner side. 7. Push-in the pins on the waste ink tube mount with your fingers and remove the plastic mount from t...
Page 328
Waste ink section [ 12-9 ] comcolor series (revision 2.4) 8. Manually rotate the gear (the second gear of the four, looking from the rear of the machine) in counter- clockwise direction. Rotate the gear until the maintenance unit arm moves to the position shown on the second photograph, below, so th...
Page 329
Waste ink section [ 12-10 ] comcolor series (revision 2.4) 10. Unplug the waste ink tube off the maintenance unit. Caution in assembly: in putting the maintenance unit back in the machine, make sure that the waste ink tube is not twisted. The maximum twist on the waste ink tube on the maintenance un...
Page 330
Waste ink section [ 12-11 ] comcolor series (revision 2.4) following photographs show the good and bad examples of how the waste ink tube should be when the cap is placed on the waste ink tank or when the maintenance unit (ink pan) is put back in the machine. If the waste ink tube is twisted or bent...
Page 331
Waste ink section [ 12-12 ] comcolor series (revision 2.4) 2-2. Maintenance unit slide motor 1. Turn off the machine power and disconnect the power cable from the power source. 2. Remove the right rear cover. (refer to the section on covers in chapter 2.) 3. Disconnect the spring from the overload p...
Page 332
Waste ink section [ 12-13 ] comcolor series (revision 2.4) 2-3. Maintenance unit wiper and wiper motor 1. Turn off the machine power and disconnect the power cable from the power source. 2. Remove the maintenance unit from the machine. (refer to the instruction on this chapter.) 3. Manually rotate b...
Page 333
Waste ink section [ 12-14 ] comcolor series (revision 2.4) 2-4. Wiper hp sensor 1. Turn off the machine power and disconnect the power cable from the power source. 2. Remove the maintenance unit from the machine. (refer to the instruction on this chapter.) 3. Unplug the sensor wire connector. 4. Unh...
Page 334
Waste ink section [ 12-15 ] comcolor series (revision 2.4) 2-6. Storage position sensor 1. Turn off the machine power and disconnect the power cable from the power source. 2. Open the waste ink cover. (refer to the section on covers in chapter 2.) 3. Unplug the wire connector of the storage position...
Page 335
Waste ink section [ 12-16 ] comcolor series (revision 2.4) 2-8. Waste ink tank & waste ink tank holder 1. Turn off the machine power and disconnect the power cable from the power source. 2. Remove the waste ink cover. (refer to chapter 2) 3. Unhook the ink tube mount from the machine. (1) on the pho...
Page 336
Waste ink section [ 12-17 ] comcolor series (revision 2.4) following photographs show the good and bad examples of how the waste ink tube should be when the cap is placed on the waste ink tank or when the maintenance unit (ink pan) is put back in the machine. If the waste ink tube is twisted or bent...
Page 337
Waste ink section [ 12-18 ] comcolor series (revision 2.4) memo.
Page 338
Gdi controller rev.1.00 [ 13-1 ] chapter 13. Gdi controller contents 1. Gdi controller specifi cations ...................................................................................... 13-2 1-1. Main specifi cations ..................................................................................
Page 339
Main specifi cations printer gdi controller type built-in compatible printers integrated in printer hardware confi guration processor intel® atom™ processor d510 chipset intel® ich8 memory type ddr2 800mhz (small outline-dimm socket) standard memory capacity 1gb maximum memory capacity 2gb hdd 2.5in...
Page 340
Main functions printer gdi controller color management using standard comcolor color profi les image processing resolution standard (300x300 dpi) and fi ne (300x600 dpi) screening error diffusion (default) and dot screen (70 and 100 lines) gamma control lightness, chroma, and contrast (each in a ran...
Page 341
Cntroller pc cntroller pc cntroller pc gdi controller rev.1.00 [ 13-4 ] 2. Built-in controller (gdi) 2-1. Connecting a computer computers can only be connected to the unit over a network. The unit has two network ports as an interface. Connect computer cables to the port labeled "pc." connection exa...
Page 342
Y m c k admin. Idle logout printer copy scanner ? Status admin mode settings front door release y m c k admin. Idle logout printer copy scanner ? Status admin mode settings front door release admin mode settings y m c k admin logout login setting login method authentication servers user setting prin...
Page 343
Riso printer printer name cancel network setting (ipv4) dhcp server ip address subnet mask gateway address ok not use use 0 0 0 0 0 0 0 0 0 0 0 0 / riso printer printer name cancel network setting (ipv6) manual ip address gateway address ok stateless address stateful address 0000:0000:0000:0000:0000...
Page 344
Gdi controller rev.1.00 [ 13-7 ] 2-3. Compatible computers (operating systems) the operating system of computers used for printing must be one of the following. Microsoft® windows® xp (sp2), 32-bit edition only microsoft® windows® vista (32-bit/64-bit) microsoft® windows® 7 (32-bit/64-bit) microsoft...
Page 345
Computer running windows windows os gdi included printer driver spooler source application photos text illustrations bitmap data is compressed and converted to rinc/c iii format by the printer driver. Text and illustrations are converted to 300x300 or 300x600 dpi bitmap data to match the printer dri...
Page 346
192.168.1.200 00:60:0a:02:fa:01 riso printer 192.168.1.200 gdi controller rev.1.00 [ 13-9 ] 3-1. Installing the printer driver (windows 7 - raw port) the unit is provided with a printer driver cd used for installation of the printer driver. Installation instructions are as follows. Before installing...
Page 347
Riso comcolor 9150 riso comcolor 9150 192.168.1.200 00:60:0a:02:fa:01 riso printer 192.168.1.200 192.168.1.200 00:60:0a:02:fa:01 riso printer gdi controller rev.1.00 [ 13-10 ] if only one unit is involved, simply click next. If multiple units are listed, select the desired printer and then click nex...
Page 348
Printer name: riso comcolor 9150 port: riso_192.168.1.200 model: riso comcolor 9150 gdi controller rev.1.00 [ 13-11 ] confi rm the printer name (the name you entered for the printer), the port number (in particular, confi rm that the ip address is correct), and the printer driver name (model). Click...
Page 349
Com1: serial port com2: serial port com3: serial port com4: serial port file: print to file riso_192.168.1.200 standard tcp/ip port riso comcolor 9150 riso comcolor 9150 riso comcolor 9150 riso_192.168.1.200 riso comcolor ex9050 192.168.1.200 gdi controller rev.1.00 [ 13-12 ] in the properties of th...
Page 350
Com2: com3: com4: file: riso_192.168.1.200 local port standard tcp/ip port https://xxx.Xxx.Xxx.Xxx/ipp/lp 192.168.1.200 00:60:0a:02:fa:01 riso printer 192.168.1.200 192.168.1.200 00:60:0a:02:fa:01 riso printer lpt1: lpt2: lpt3: com1: com2: local port standard tcp/ip port https://xxx.Xxx.Xxx.Xxx/ipp/...
Page 351
Gdi controller rev.1.00 [ 13-14 ] memo.
Page 352
Electronic components [ 14-1 ] rev.1.00 chapter 14. Electronic components contents 1. Overall structure of boards ......................................................................................... 14-2 1-1. Board wiring.............................................................................
Page 353
X3-engine-pcb x3-option-pcb power suuply unit ps25-nww controller pcb decouple pcb x3-i-pf -pcb x3-ip-pcb electronic compnents [ 14-2 ] rev.1.00 1. Overall structure of boards 1-1. Board wiring the principal boards are as follows: power supply unit (ps25-hww), engine control pcb (x3-engine-pcb), con...
Page 354
Sd power supply unit operation panel unit decouple pcb controller pcb recording data generating pcb head control pcb1 head control pcb2 engine control pcb option pcb internal paper feed drive pcb paper feed relay pcb paper feed tray pcb high capacity feeder perfect binder mail maker high capacity st...
Page 355
Primary secondary cn008 cnac1 cnac2 f003 cn10 cn2 cn13 cn5 f002 f001 f005 f004 f014 f008 f007 f10 f11 f12 f13 cn007 cn6 cn4 cn3 cn1 cn12 cn1 1 f006 3 1 black 7 1 6 1 red black red 3 1 green red green red 6 1 2 1 4 1 7 1 4 1 5 1 5 1 7 1 t6.3al/250v for psu cooling fan -12v/+5vsb (t o panel control pc...
Page 356
Electronic components [ 14-5 ] rev.1.00 2-1-2. Information on changeable fuses 2-1-3. Information on connectors changeable fuse name rated value voltage system psu connector pin no. Corresponding board or unit control actuator parts f006 15a ac input f007 3.15a 30vop cn12_1 option pcb_cn1 30v for ne...
Page 357
Electronic compnents [ 14-6 ] rev.1.00 2-2. Engine control pcb (x3-engine-pcb) 2-2-1. Role of board main roles of the engine control pcb are as follows. • controlling the power supply (transition to sleep, recovering, and so on) • system management (managing machine code and internal data, processin...
Page 358
Pcb version no. Reset switch rmga2 dsp cpu (sh2a) flash memory cn2 cn45 cn43 cn7 cn6 cn69 cn5 cn60 cn3 cn10 cn75 cn66 cn53 cn51 cn18 cn64 cn62 cn4 cn63 cn68 cn44 cn49 cn57 cn37 cn71 cn59 cn70 cn61 cn9 cn14 cn74 cn65 cn52 cn73 cn54 cn55 cn56 cn72 fu7 fu8 4 1 14 1 80 1 4 1 7 1 2 1 19 36 18 1 17 1 13 1...
Page 359
Electronic compnents [ 14-8 ] rev.1.00 2-2-4. Information on connectors name no. Of pins silk-screened on pcb connected to diag page cn1 4 debug not equipped n/a cn2 4 fa-chk not used n/a cn3 26 pf-side-snr paper feed relay pcb cn1 (control signal for various sensors, +5v signal) 46 cn4 7 f2mc-bgm n...
Page 360
Electronic components [ 14-9 ] rev.1.00 2-2-6. Led information 2-2-5. Changeable fuse changeable fuse name rated value voltage system control actuator parts fu7 2.5a/250v 30v-il for external paper feed motor fu8 2.5a/250v 30v-il for registration motor name no. Of pins silk-screened on pcb connected ...
Page 361
7 6 5 4 3 2 1 0 7 6 5 4 3 2 1 0 ǡ ǡ ǡ ǡ electronic compnents [ 14-10 ] rev.1.00 engine control pcb version control, based on resistance if there is resistance in the 0 position: 1 if there is resistance in the 1 position: 2 if there is resistance in the 2 position: 4 if there is resistance in the 3 ...
Page 362
Electronic components [ 14-11 ] rev.1.00 2-3. Controller pcb (including recording data generating pcb) 2-3-1. Role of board main roles of the controller pcb are as follows. • functions to generate image data. • converts data supplied from a computer, scanner, or usb memory to image data and transfer...
Page 363
Memory chip set cpu j3 j2 j4 connect with x3-ip-pcb lan2 (cn9) lan1 fan j1 j17 usb usb j22 40 2 39 1 1 4 5 8 8 1 2 14 1 13 9 1 10 2 to decouple pcb cn2 controller pcb controller-pcb to decouple pcb cn8 to decouple pcb cn4 to decouple pcb cn4 to decouple pcb cn4 hdd power connect with controller pcb ...
Page 364
Electronic components [ 14-13 ] rev.1.00 2-3-3. Information on connectors controller pcb recording data generating pcb 2-3-4. Purpose of primary components cpu the central processing unit, for data processing. This cpu is directly mounted on the control pcb. It is an intel® atomd510 processor (1.66 ...
Page 365
Cntroller pc electronic compnents [ 14-14 ] rev.1.00 lvds (low-voltage differential signaling) a communication specifi cation enabling high-speed transmission at several hundred mbps. Controlled by the northbridge (described above). Used in high-speed digital communication with the lcd panel. Expans...
Page 366
Scanner cmyk based image data risorinc/ciii format data controller pcb recording data generating pcb ethernet usb (1) (2) electronic components [ 14-15 ] rev.1.00 2-3-5. Functions to generate image data 1. When using the printer driver provided with the unit to send print jobs from a computer data i...
Page 367
Cn2 cn11 cn1 cn12 cn13 cn6 cn19 cn23 cn17 cn18 cn21 cn5 cn7 cn14 cn4 cn16 cn3 1 14 13 24 12 1 80 1 1 4 1 8 1 3 1 1 13 2 4 12 14 1 5 1 14 28 15 14 26 13 1 7 1 2 1 14 1 80 1 b1 b5 a1 a5 1 14 28 15 1 14 28 15 12 22 1 1 1 +24vop / +30vop (t o power supply unit cn1 1/12) to warning light option pcb x3-op...
Page 368
Cn8 cn1 cn5 cn4 cn9 cn2 cn10 cn3 cn7 cn1 1 cn12 cn6 1 6 1 2 1 8 1 4 14 26 13 1 1 10 19 1 18 1 15 1 1 16 17 1 19 36 18 1 t o internal & v e rtical paper feed clutches to tray elevator motors internal paper feed drive pcb x3-i-pf-pcb t o internal feed paper jam door interlock switch t o t ray paper vo...
Page 369
Cn1 cn2 cn4 cn7 cn5 cn6 13 1 14 26 5 1 1 10 1 20 1 17 1 19 to engie control pcb cn3 t o engine control pcb cn68 t o paper feed tray pcb cn1 t o various sensors & switch t o various sensors & switch t o various sensors paper feed relay pcb pf-relay-pcb electronic compnents [ 14-18 ] rev.1.00 2-5-2. P...
Page 370
Cn7 (ldvs) cn1 cn2 cn8 cn3 cn4 1 19 1 5 1 4 1 14 16 1 1 19 2 20 to panel control pcb cn6 +12v (t o power supply unit cn5) decouple-pcb to controller pcb j3 t o controller pcb j2 to controller pcb j1,4,17 to panel control pcb cn5 electronic components [ 14-19 ] rev.1.00 2-5-5. Decouple pcb converts s...
Page 371
䊃䊧䉟1 䊃䊧䉟2 䊃䊧䉟3 fd ឃ⚕࡙࠾࠶࠻ ↪⚕⟎ᬌ ࡙࠾࠶࠻ ࡌ࡞࠻ࡊ࠹ࡦ࡙࠾࠶࠻ 㕙៝ㅍ࡙࠾࠶࠻ ៝ㅍ ↪⚕ォ࡙࠾࠶࠻b ࠻ࠗ1ࠛࡌ࠲assy ࠻ࠗ2ࠛࡌ࠲assy ࠻ࠗ3ࠛࡌ࠲assy 䊒䊥䊮䊃䊓䉾䊄 ࠟࠗ࠼᧼assy(ਅ) ࠟࠗ࠼᧼assy() ❑៝ㅍ ࡙࠾࠶࠻ a ❑៝ㅍ ࡙࠾࠶࠻b ࡋ࠶࠼ࡎ࡞࠳࡙࠾࠶࠻ ㅍ ⚕ ⚕ 1 2 3 4 5 6 7 8 9 10 3-1 3-2 3-3 3-4 electronic compnents [ 14-20 ] rev.1.00 3. Interlock circuit the interlock cir...
Page 372
Electronic components [ 14-21 ] rev.1.00 4. Electronic parts search table 4-1. Sensors sensor name (alphabetical order) section pcb name connected pin no. Referred page fig. Diag authorization cam hp sensor ink path engine cn72-10_12 37a 48 bellows arm hp sensor ink path engine cn69-16_18 35l 50 bel...
Page 373
Electronic compnents [ 14-22 ] rev.1.00 sensor name (alphabetical order) section pcb name connected pin no. Referred page fig. Diag pressurized ink tank ink sensor c ink path engine cn69-1_4 35a 50 pressurized ink tank ink sensor k ink path engine cn69-33_36 35b 50 pressurized ink tank ink sensor m ...
Page 374
Electronic components [ 14-23 ] rev.1.00 4-2. Switches 4-3. Motors switch name (alphabetical order) section pcb name connected pin no. Referred page fig. Diag bp wire loose detection switch bp unit pf-relay cn4-13_14 31c 53 internal feed paper jam door interlock switch registration i-pf cn12-1_4 29f...
Page 375
Electronic compnents [ 14-24 ] rev.1.00 4-4. Actuators 4-5. Sub pcbs actuator name (alphabetical order) section pcb name connected pin no. Referred page fig. Diag counter main unit engine cn54-5_6 25c 47 fd paper ejection fl ipper solenoid fd paper eject engine cn65-5_6 33h 49 head drive ic cooling ...
Page 376
A b c d electronic components [ 14-25 ] rev.1.00 5. Electronic parts structural fi gure 5-1. Unit front view name pcb name connected pin no. Type relevant test mode diag page a right front door interlock switch engine cn56-5_8 micro switch 1181 47 b left front door interlock switch engine cn56-1_4 m...
Page 377
A b c d e f g h i j k l electronic compnents [ 14-26 ] rev.1.00 5-2. Unit rear view name pcb name connected pin no. Type relevant test mode diag page a external paper feed motor fg sensor pf-relay cn4-7_9 interrup type 1023 53 b external paper feed motor engine cn64-5_6 dc (direct current) motor 122...
Page 378
E d c b a j i h g f o n m l k t s r q p u electronic components [ 14-27 ] rev.1.00 5-3. External paper feed & registration name pcb name connected pin no. Type relevant test mode diag page a registration motor fg sensor pf-relay cn7-5_7 interrup type 1024 53 b p-f tray paper volume detection sensor ...
Page 379
E d c b a j i h g f o n m l k t s r q p u v w x y z aa electronic compnents [ 14-28 ] rev.1.00 5-4. Internal paper feed (with trays) name pcb name connected pin no. Type relevant test mode diag page a tray 1 paper detection sensor i-pf cn5-1_3 interrup type 1007 52 b tray 2 paper detection sensor i-...
Page 380
E d c b a f electronic components [ 14-29 ] rev.1.00 5-5. Vertical papaer feed (a & b) name pcb name connected pin no. Type relevant test mode diag page a vertical paper feed sensor 1 i-pf cn4-1_3 refl ection type 1027 52 b vertical paper feed sensor 2 i-pf cn4-4_6 refl ection type 1028 52 c vertica...
Page 381
E d c b a f f g h i j k l m n electronic compnents [ 14-30 ] rev.1.00 5-6. Bp unit name pcb name connected pin no. Type relevant test mode diag page a cis paper width detection sensor (front) ip-pcb cn10-1_7 contact image sensor 2461, 2462, 2464 44 b cis paper width detection sensor (rear) ip-pcb cn...
Page 382
D c b a electronic components [ 14-31 ] rev.1.00 5-7. Bp elevation name pcb name connected pin no. Type relevant test mode diag page a bp hit detection sensor (rr, rl, fr, fl) engine cn10-1_4 metal contact plate 2170, 2171, 2172, 2173 47 b top edge sensor 2 pf-relay cn7-12_15 refl ection type 1495 5...
Page 383
B a electronic compnents [ 14-32 ] rev.1.00 5-8. Paper transfer name pcb name connected pin no. Type relevant test mode diag page a paper elevation in sensor engine cn72-17_19 refl ection type 1105 48 b flipper sensor engine cn72-1_3 refl ection type 1106 48.
Page 384
B a d c f e h g electronic components [ 14-33 ] rev.1.00 5-9. Fd paper ejection name pcb name connected pin no. Type relevant test mode diag page a fd paper ejection paper detection sensor engine cn66-8_10 refl ection type 1152 49 b fd paper ejection motor fg sensor engine cn65-7_9 interrup type 115...
Page 385
B a d c electronic compnents [ 14-34 ] rev.1.00 5-10. Switchback name pcb name connected pin no. Type relevant test mode diag page a switchback sensor pf-relay cn6-15_17 refl ection type 1108 53 b upper transfer out sensor pf-relay cn6-18_20 refl ection type 1107 53 c re-feed sensor pf-relay cn6-12_...
Page 386
B a d c f e h g j i l k n m p o r q t s v u x w z y ab aa ac electronic components [ 14-35 ] rev.1.00 5-11. Ink supply see next page for parts details.
Page 387
Electronic compnents [ 14-36 ] rev.1.00 name pcb name connected pin no. Type relevant test mode diag page a pressurized ink tank ink sensor c engine cn69-1_4 reed switch 2108, 2161 50 b pressurized ink tank ink sensor k engine cn69-33_36 reed switch 2107, 2160 50 c pressurized ink tank ink sensor m ...
Page 388
B a d c f e h g j i electronic components [ 14-37 ] rev.1.00 5-12. Ink cartridge holder name pcb name connected pin no. Type relevant test mode diag page a authorization cam hp sensor engine cn72-10_12 interrup type 2169 48 b ink cartridge detection sensor k engine cn72-23_25 interrup type 2165 48 c...
Page 389
B a c electronic compnents [ 14-38 ] rev.1.00 5-13. Print heads name pcb name connected pin no. Type relevant test mode diag page a head drive ic cooling fan 1 engine cn61-1_2 silent brower 2327 49 b head drive ic cooling fan 2 engine cn61-3_4 silent brower 2328 49 c print heads (total 24) n/a.
Page 390
B a c e d f electronic components [ 14-39 ] rev.1.00 5-14. Print heads name pcb name connected pin no. Type relevant test mode diag page a wiper motor hp sensor engine cn71-13_15 interrup type 2126 49 b ink pan operating position sensor engine cn71-7_9 interrup type 2119 49 c ink pan storage sensor ...
Page 391
B a electronic compnents [ 14-40 ] rev.1.00 5-15. Waste ink tank name pcb name connected pin no. Type relevant test mode diag page a waste ink tank sensor 1 (nearly full) engine cn71-22_24 interrup type 2116, 2117 49 b waste ink tank sensor 2 (full) engine cn71-1_3 interrup type 2116, 2117 49.
Page 392
Cn62 cn71 cn63 cn61 cn59 cn69 cn70 cn74 cn9 cn72 cn5 cn14 cn6 cn49 cn18 cn10 cn1 cn3 cn6 cn52 cn53 cn54 cn56 cn64 cn65 cn66 cn51 cn73 cn75 cn55 cn3 cn68 cn57 cn37 cn1 cn2 cn6 cn5 cn4 cn7 cn3 cn1 cn2 cn3 cn4 cn5 cn6 cn7 cn8 cn9 cn10 cn1 1 cn12 cn1 1 cn60 cn12 cn4 cn6 cn12 cn10 cn1 cn2 cn7/cn43/cn45 c...
Page 393
Cn13 cn1 j16 j16 cn1 cn2 usb cn13 cn7 cn3 cn1 cn5 cn2 cn9 cn6 cn1 cn8 cn1 cn9 cn10 j1 j2 j1 j2 cn4 cn1 1 cn12 cn5 cn6 cn2 cn2 cn3 cn4 cn14 cn16 j3 cn6 cn7 cn1 1 cn12 cn45 cn43 cn19 cn21 cn23 cn007 cn008 cn4 cn7 cn7 cn2 cn4 cn8 j2 j1,j4,j17 j3 cn3 cn9 (ethernet) j3 j4-j9 j10-j15 j4-j9 j10-j15 cn3 cn1...
Page 394
1 2 3 4 5 6 7 8 1 2 1 2 3 4 5 6 7 1 2 1 2 3 4 5 1 2 1 2 3 4 1 2 3 4 5 6 1 2 3 4 5 6 7 8 9 10 7 6 5 4 3 2 1 1 2 3 4 5 6 7 8 9 10 11 12 13 14 1 2 3 4 1 2 3 4 5 1 2 3 4 5 6 7 1 3 2 4 1 2 3 4 5 6 7 1 2 3 4 1 2 3 4 1 2 3 4 5 1 2 3 4 5 6 7 8 1 2 3 4 5 6 1 2 3 1 2 3 cn1 1 cn4 cn3 cn6 cn12 cn1 cn10 cn3 cn3 ...
Page 395
1 2 3 4 5 6 7 8 9 10 11 12 13 14 15 16 17 18 19 20 21 22 23 24 25 26 27 28 29 30 31 32 33 34 35 36 37 38 39 40 1 2 3 4 5 6 7 8 9 10 11 12 13 14 15 16 17 18 19 20 21 22 23 24 25 26 27 28 29 30 31 32 33 34 35 36 37 38 39 40 41 42 43 44 45 46 47 48 49 50 40 39 38 37 36 35 34 33 32 31 30 29 28 27 26 25 ...
Page 396
1 2 3 4 5 6 7 8 9 10 11 12 13 14 15 16 17 18 19 20 21 22 23 24 25 26 27 28 29 30 31 32 33 34 35 36 37 38 39 40 1 2 3 4 1 2 3 4 5 6 6 5 4 3 2 1 1 2 3 4 5 6 7 8 9 10 11 12 13 14 15 16 17 18 19 20 21 22 1 2 3 4 5 6 7 8 9 1 2 3 4 5 6 7 8 9 10 11 12 13 14 15 16 1 2 3 4 1 2 3 4 5 1 2 3 4 5 6 7 8 9 10 11 1...
Page 397
19 18 17 16 15 14 13 12 11 10 9 8 7 6 5 4 3 2 1 13 12 11 10 9 8 7 6 5 4 3 2 1 26 25 24 23 22 21 20 19 18 17 16 15 14 10 9 8 7 6 5 4 3 2 1 13 12 11 10 9 8 7 6 5 4 3 2 1 26 25 24 23 22 21 20 19 18 17 16 15 14 1 2 3 4 5 6 7 8 9 10 11 12 13 14 15 16 17 18 19 1 2 3 4 5 6 7 8 9 10 11 12 13 14 15 16 17 18 ...
Page 398
1 3 5 7 9 11 1 3 5 7 9 11 2 1 1 䇭㩷 3 1 䇭㩷 3 1 䇭㩷 3 1 䇭㩷 3 1 䇭㩷 3 1 䇭㩷 3 6 5 4 3 2 1 1 2 +30v heater 1 2 3 4 5 1 2 3 4 5 6 7 8 9 10 11 12 13 14 15 16 17 18 1 2 8 7 6 5 4 3 2 1 9 8 7 6 5 4 3 2 1 1 2 8 7 6 5 4 3 2 1 1 2 3 4 5 6 7 8 9 10 11 1 2 3 4 5 6 7 8 9 10 11 12 13 14 15 16 17 18 19 20 1 2 3 4 5 6 ...
Page 399
6 5 4 3 2 1 1 2 3 1 2 3 1 2 3 1 2 3 1 2 3 1 2 3 1 2 3 1 2 3 1 2 3 1 2 3 6 5 4 3 2 1 6 5 4 3 2 1 6 5 4 3 2 1 5 4 3 2 1 1 2 3 4 5 6 7 8 9 10 11 12 13 14 15 16 17 18 19 20 21 22 23 24 25 26 27 28 29 30 31 32 1 2 8 7 6 5 4 3 2 1 1 2 3 4 5 6 7 8 9 10 11 12 13 14 15 16 17 1 2 3 4 5 6 7 8 9 10 11 12 13 14 ...
Page 400
3 2 1 3 2 1 3 2 1 3 2 1 6 5 4 3 2 1 3 2 1 3 2 1 4 3 2 1 4 3 2 1 3 2 1 3 2 1 3 2 1 3 2 1 1 2 3 4 5 6 7 8 9 10 11 12 13 14 15 16 1 2 3 4 5 6 7 8 9 10 11 12 13 14 15 1 2 3 4 5 6 7 8 9 10 1 2 3 4 5 6 7 8 9 10 11 12 13 14 15 16 17 18 19 20 21 22 23 24 cn65 cn66 cn61 cn71 1 2 2 1 15 14 13 12 11 10 9 8 7 6...
Page 401
3 2 1 3 2 1 4 3 2 1 4 3 2 1 4 3 2 1 4 3 2 1 4 3 2 1 4 3 2 1 4 3 2 1 4 3 2 1 4 3 2 1 3 2 1 3 2 1 9 8 7 6 5 4 3 2 1 4 3 2 1 +24v a gnd pump_lp signal pump_on signal 4 3 2 1 +24v a gnd pump_lp signal pump_on signal 4 3 2 1 +24v a gnd pump_lp signal pump_on signal 4 3 2 1 +24v a gnd pump_lp signal pump_...
Page 402
3 2 1 3 2 1 3 2 1 3 2 1 3 2 1 3 2 1 3 2 1 3 2 1 3 2 1 3 2 1 3 2 1 3 2 1 1 䇭㩷 3 3 2 1 1 䇭㩷 3 3 2 1 1 䇭㩷 3 3 2 1 8 7 6 5 4 3 2 1 1 2 1 2 3 4 5 6 7 8 9 10 11 12 13 14 15 16 17 18 19 20 21 22 23 24 25 26 27 28 29 30 31 32 33 34 35 36 1 2 3 4 5 6 1 2 3 4 5 6 7 8 9 10 11 12 13 14 15 16 1 2 3 4 5 6 7 8 9 1...
Page 403
3 2 1 3 2 1 3 2 1 3 2 1 3 2 1 3 2 1 1 3 3 2 1 3 2 1 3 2 1 3 2 1 3 2 1 4 3 2 1 4 3 2 1 4 3 2 1 4 3 2 1 4 3 2 1 1 2 3 4 5 6 7 8 9 10 11 12 13 14 15 16 17 18 1 2 3 4 5 6 7 8 9 10 11 12 13 14 15 1 2 3 4 1 2 3 4 5 6 7 8 9 10 cn5 cn4 cn12 cn6 1 2 3 4 5 6 6 5 4 3 2 1 1 2 3 4 4 3 2 1 1 2 3 3 2 1 1 2 3 3 2 1...
Page 404
3 2 1 3 2 1 3 2 1 3 2 1 3 2 1 3 2 1 1 2 3 2 1 3 2 1 3 2 1 3 2 1 3 2 1 3 2 1 3 2 1 3 2 1 4 3 2 1 3 2 1 3 2 1 3 2 1 1 2 3 4 5 6 7 8 9 10 11 12 13 14 15 16 17 1 2 3 4 5 6 7 8 9 10 11 12 13 14 15 16 17 18 19 20 1 2 3 4 5 6 7 8 9 10 11 12 13 14 15 16 17 18 19 1 2 3 4 5 1 2 3 4 5 1 2 3 4 5 6 7 8 9 cn4 cn6...
Page 405
14 13 12 11 10 9 8 7 6 5 4 3 2 1 1 2 3 4 5 6 7 8 9 10 11 12 13 14 15 16 17 18 19 20 21 22 23 24 25 26 27 28 29 30 31 32 33 34 35 36 37 38 39 40 41 42 43 44 45 46 47 48 49 50 51 52 53 54 55 56 57 58 59 60 61 62 63 64 65 66 67 68 69 70 71 72 73 74 75 76 77 78 79 80 1 2 3 4 5 6 7 8 9 10 11 12 13 14 15 ...
Page 406
Cn2 cn1 cn3 cn2 cn2 cn1 p8005 p8006 p8167 p8003 p8004 p8001 p8002 p8704 p8703 p8702 1a 2a 1b 2b 1a 2a 1b 2b e n l 1a 2a 1b 2b 1a 2a 1b 2b 3 2 1 3 2 1 1 2 6 5 4 3 2 1 1 2 3 4 5 6 7 8 9 10 11 12 13 14 15 16 17 18 19 20 21 22 23 24 1 2 8 7 6 5 4 3 2 1 12 11 10 9 8 7 6 5 4 3 2 1 1 2 3 4 1 2 3 4 5 6 1 2 ...
Page 407
3 2 1 3 2 1 3 2 1 6 5 4 3 2 1 auto control stacking tray coin vendor unit or card vendor unit 1 2 8 7 6 5 4 3 2 1 1 2 3 4 5 6 7 1 2 3 4 5 6 7 8 9 10 11 12 13 14 15 16 17 18 19 20 21 22 1 2 3 4 5 6 7 8 9 10 11 12 13 14 15 16 17 18 19 20 21 22 23 24 25 26 1 2 1 2 3 4 5 6 7 8 9 10 11 12 13 14 15 16 17 ...
Page 408
E n l 1 2 3 4 1 2 3 1 2 3 1 2 3 4 cn12 usb cn10 cn8 cn4 cn5 cn2 cn4-7 usb ethernet cn9 1 2 3 4 1 2 3 4 5 6 7 1 2 3 4 5 6 7 8 1 2 3 4 5 6 7 8 9 10 11 12 1 2 3 4 1 2 3 4 5 6 7 8 9 9 8 7 6 5 4 3 2 1 1 2 3 4 5 6 7 8 9 1 2 3 1 2 3 4 1 2 3 4 5 6 7 8 1 2 3 4 4 3 2 1 1 2 3 4 3 2 1 1 2 3 controller pcb cs5-m...
Page 409
3 2 1 cn6 cn2 cn5 cn4 cn7 cn3 cn1 1 cn2 cn1 cn1 cn3 1 2 3 4 5 6 7 8 9 1 2 3 1 2 3 4 5 6 7 8 9 10 11 12 13 14 15 16 17 18 19 20 21 22 23 24 25 26 27 28 29 30 31 32 33 34 35 36 37 38 39 40 41 42 43 44 45 46 47 48 49 50 51 52 53 54 55 56 57 58 59 60 61 62 63 64 65 66 67 68 69 70 71 72 73 74 75 76 77 78...
Page 410
Snall_v123456 header section (text data) data downloaded to the finisher system data downloaded to the scanner system data downloaded to the panel system data downloaded to the engine system data downloaded to the controller system dsp sh2a fpga pms fb 78ko sfx(d) tag af sd power supply unit hdd pap...
Page 411
Electronic compnents [ 14-60 ] rev.1.00 7-2. Sequence of downloading firmware data 1. The snall fi rmware data package in the usb memory device is saved to the hard disk (hdd) in the controller pcb unit, but scanner-related fi rmware (8) and (9) is managed by the scanner itself. 2. Downloading of fi...
Page 412
U 㐽ߓࠆ ᱛਛ 01423 ⛎⚕บ㒢⟎⒖േ confirm [reset key] cancels download. [stop key] downloads all by overwriting. [start key] downloads only the differential. Current version new version snall -sneg -snps bsm -snpl baf snall -sneg -snps bsm -snpl baf 10.10.10 0.10. 1 20.20.20 1.10. 1 0.20. 1 1. 1. 1 20. 0.01...
Page 413
X3-engine-pcb x3-option-pcb power suuply unit ps25-nww controller pcb decouple pcb x3-i-pf -pcb x3-ip-pcb electronic compnents [ 14-62 ] rev.1.00 8. Pcb replacements 8-1. Pcb location and names.
Page 414
Electronic components [ 14-63 ] rev.1.00 hard disk (hdd) controller pcb (pms) recording data generating pcb controller box.
Page 415
U 㐽ߓࠆ ᱛਛ 01423 ⛎⚕บ㒢⟎⒖േ confirm [reset key] cancels download. [stop key] downloads all by overwriting. [start key] downloads only the differential. Current version new version snall -sneg -snps bsm -snpl baf snall -sneg -snps bsm -snpl baf 10.10.10 0.10. 1 20.20.20 1.10. 1 0.20. 1 1. 1. 1 20. 0.01...
Page 416
Electronic components [ 14-65 ] rev.1.00 7. If the usb memory stick contains the correct machine fi rmware version, proceed with the fi rmware installation. 8. If the usb memory stick does not contain the correct machine fi rmware, press the reset key to cancel the fi rmware downloading. Press the p...
Page 417
Electronic compnents [ 14-66 ] rev.1.00 8-2. Hard disk (hdd) replacement do not replace the hard disk and engine control pcb at the same time. Either one must be left on the machine while the other is replaced. This is to allow existing test mode setting backup data to transfer from the existing har...
Page 418: Concept
Electronic components [ 14-67 ] rev.1.00 concept hard disk (hdd) engine control pcb data backup area test mode setting on engine control pcb (image adjustment test modes included) counters user information area admin. Settings & user settings image adjustment parameter backup area by test mode no. 4...
Page 419
Electronic compnents [ 14-68 ] rev.1.00 hard disk (hdd) engine control pcb data backup area test mode setting on engine control pcb (image adjustment test modes included) counters user information area default admin. Settings & user settings image adjustment parameter backup area by test mode no. 44...
Page 420
Electronic components [ 14-69 ] rev.1.00 hard disk (hdd) replacement - supplementary information when turning the machine power on for the fi rst time, after the new spare part hard disk replacement, the machine touch panel shows the display in japanese language (setup wizard display). The panel dis...
Page 421
Electronic compnents [ 14-70 ] rev.1.00 the japanese language display, shown on the left hand side of the page, will display when the comcolor machine is powered on for the fi rst time after the hard disk replacement. The english language display, shown on the right hand side of the page, is the eng...
Page 422
Electronic components [ 14-71 ] rev.1.00 4. Select the correct time zone and then push the next button on the following display. Note: it is of no problem if the next button is pushed with a wrong selection. Use test mode no. 505 [setup wizard initialize] later and choose the correct selection. 5. I...
Page 423
Electronic compnents [ 14-72 ] rev.1.00 7. Input the function key entry and then push the next button on the following display. Note: it is of no problem if the next button is pushed without entering the function key entry selection. Use test mode no. 505 [setup wizard initialize] later and input th...
Page 424
Electronic components [ 14-73 ] rev.1.00 10. Make the feed tray auto/manual selection and then push the next button on the following display. Note: it is of no problem if the next button is pushed without making the selection. Use test mode no. 505 [setup wizard initialize] later and make the select...
Page 425
Electronic compnents [ 14-74 ] rev.1.00 13. Select the user category and then push the ok button on the following display. Note: it is of no problem if the ok button is pushed without making the selection. Use test mode no. 505 [setup wizard initialize] later and make the selection if needed. 14. Th...
Page 426
Cpu cpu memory lan lan rgb usb usb usb usb lineout ich connect to recording data generating pcb controller pcb electronic components [ 14-75 ] rev.1.00 8-3. Controller pcb (pms pcb) replacement 1. Turn off the machine power. 2. Open the controller box top cover. 3. Disconnect wire harnesses and meta...
Page 427
Electronic compnents [ 14-76 ] rev.1.00 8-4. X3-ip-pcb (recording data generating pcb) replacement 1. Turn off the machine power. 2. Open the controller box top cover. 3. Disconnect wire harnesses from the recording data generating pcb. 4. Remove the recording data generating pcb. (screws x 2 pcs) 5...
Page 428
Electronic components [ 14-77 ] rev.1.00 8-6. Engine control pcb replacement do not replace the hard disk and engine control pcb at the same time. Either one must be left on the machine while the other is replaced. This is to allow existing test mode setting backup data to transfer from the existing...
Page 429
Electronic compnents [ 14-78 ] rev.1.00 concept hard disk (hdd) engine control pcb data backup area test mode setting on engine control pcb (image adjustment test modes included) counters user information area admin. Settings & user settings image adjustment parameter backup area by test mode no. 44...
Page 430
Electronic components [ 14-79 ] rev.1.00 hard disk (hdd) engine control pcb data backup area test mode setting on engine control pcb (image adjustment test modes included) counters user information area admin. Settings & user settings image adjustment parameter backup area by test mode no. 440. Imag...
Page 431
Electronic compnents [ 14-80 ] rev.1.00 8-7. Power supply unit replacement 1. Turn off the machine power. 2. Wait until all the electrical power is discharged out from the condensers on the power supply unit. 3. Disconnect all the wire harness from the power supply unit. 4. Replace the existing powe...
Page 432
Panel messages [ 15-1 ] chapter 15. Panel messages contents 1. Error code display ....................................................................................................... 15-2 1-1. Error type ................................................................................................
Page 433
Panel messages [ 15-2 ] 1. Error code display error display consists of these three elements. 1) error type: classifi cation based on how to clear errors (from the panel display) and similar criteria 2) error point: errors are numbered according to where they occur 3) variation code: an attribute of...
Page 434
Panel messages [ 15-3 ] s service call errors details a problem affecting the system as a whole has been detected, for which the fundamental solution cannot be implemented by users alone. (problems in independent units, which do not affect the system as a whole, for which fundamental solutions are n...
Page 435
Panel messages [ 15-4 ] x jam errors details a problem has occurred that prevents normal paper transfer. Solution users resolve these errors. Notifi cation users are only notifi ed in modes where there is a possibility that the relevant unit may be used. If users switch to a mode in which the unit i...
Page 436
Panel messages [ 15-5 ] error point associated system 0001 - 0999 main unit (pms or other system (power supply, hardware, software, or operation panel)) 1000 - 1999 engine system (standard paper transfer system) 2000 - 2499 print head system (print head, ink) 2500 - 2999 reserved 3000 - 3999 optiona...
Page 437
Panel messages [ 15-6 ] 2. Comcolor paper jams information about paper jams identifi es the reason for the jam and the position of paper still in the printer. 2-1. Reason for jams the following three reasons for paper jams are reported in the error point as factors for detection. 1. "not arrived" er...
Page 438
Panel messages [ 15-7 ] group point button in display requirement to clear jam front door h5 b open/close front door and deactivate registration sensor, top edge sensor, and fu paper ejection sensor h6 unused h7 c open/close front door and deactivate paper elevation in sensor h8 d open/close front d...
Page 439
Panel messages [ 15-8 ] service call errors page type name s01 belt platen transfer error 12 s02 elevator motor locked 12 s03 belt platen raising/lowering error 12 s04 ink temperature adjustment error 13 s05 head thermistor error 13 s06 ink high-temperature error 13 s07 ink low-temperature error 14 ...
Page 440
Panel messages [ 15-9 ] warnings page type name w01 af communication warning 52 w02 specifi ed paper not loaded 52 w03 no paper loaded (all trays) 52 w04 no paper loaded (paper feed tray) 53 w05 no paper loaded (tray 1) 53 w06 no paper loaded (tray 2) 53 w07 no paper loaded (tray 3) 54 w08 no slip s...
Page 441
Panel messages [ 15-10 ] warnings page type name w115 option power off error 72 w116 original not suitable, no data 72 w117 ef envelope size error 72 w118 original not suitable mix form 73 w120 pb cover length error 73 w121 pb cover inserter error 73 W 122 pb body stacker error 73 w123 pb missing pa...
Page 442
Panel messages [ 15-11 ] supply errors page type name y01 replace ink cartridge (name: no ink) 91 y02 unused 91 y03 punch waste box full 91 y04 staples empty 91 y05 booklet staples empty 91 y07 offset stapler staple empty 91 y08 mm water tank refi ll error 92 y09 pb glue sheet set error 92 y10 pb cu...
Page 443
Panel messages [ 15-12 ] type s01: belt platen transfer error display !!System error!! Reboot by press the sub power key. If recovery has failed, call service. Clear turn off the printer. (turn off the printer through sub power key.) point description 1038 transfer belt motor locked error 1130 after...
Page 444
Panel messages [ 15-13 ] type s03: belt platen raising/lowering error display !!System error!! Reboot by press the sub power key. If recovery has failed, call service. Clear turn off the printer. (turn off the printer through sub power key.) point description 2014 1 the ink pan and belt platen are s...
Page 445
Panel messages [ 15-14 ] type s07: ink low-temperature error display !!System error!! Reboot by press the sub power key. If recovery has failed, call service. Details in common head thermistors have detected that the ink is lower than the specifi ed temperature. Clear turn off the printer. (turn off...
Page 446
Panel messages [ 15-15 ] type s13: transfer belt fan locked display !!System error!! Press reset key or reboot by press the sub power key if recovery has failed, call service. Clear turn off the printer. (turn off the printer through sub power key.) point description 1206 the transfer belt fan is no...
Page 447
Panel messages [ 15-16 ] type s30: switchback motor locked display !!System error!! Press reset key or reboot by press the sub power key if recovery has failed, call service. Clear turn off the printer. (turn off the printer through sub power key.) point description 1041 switchback motor locked erro...
Page 448
Panel messages [ 15-17 ] type s35: ink supply unit error display !!System error!! Reboot by press the sub power key if recovery has failed, call service. Clear turn off the printer. (turn off the printer through sub power key.) point description 2050 the bellows arm was raised to the upper limit pos...
Page 449
Panel messages [ 15-18 ] type s35: ink supply unit error display !!System error!! Reboot by press the sub power key if recovery has failed, call service. Clear turn off the printer. (turn off the printer through sub power key.) point description 2079 1 the k ink detection sensor on/off detection cyc...
Page 450
Panel messages [ 15-19 ] type s36: ink circulation pump error display !!System error!! Reboot by press the sub power key if recovery has failed, call service. Clear turn off the printer. (turn off the printer through sub power key.) point description 2068 1 the black ink circulation pump is not conn...
Page 451
Panel messages [ 15-20 ] type s40: belt encoder error display !!System error!! Press reset key or reboot by press the sub power key if recovery has failed, call service. Clear turn off the printer. (turn off the printer through sub power key.) point description 1153 the bp belt encoder count was not...
Page 452
Panel messages [ 15-21 ] type s44: check tray 3 display the tray 3 has an error. Press reset key. (the job has been cancelled.) if recovery has failed, call service. Other trays are available. Clear turn off the printer. (turn off the printer through sub power key.) point description 1033 tray 3 ele...
Page 453
Panel messages [ 15-22 ] type s87: high capacity stacker unit error display the high capacity stacker has an error. Reboot by press the sub power key if recovery has failed, call service. Clear turn off the printer. (turn off the printer through sub power key.) point description 3625 1-9 detected th...
Page 454
Panel messages [ 15-23 ] type s93: test mode execution error display !!System error!! Reboot by press the sub power key if recovery has failed, call service. Clear turn off the printer. (turn off the printer through sub power key.) point description 0167 1 completion notifi cation status error for m...
Page 455
Panel messages [ 15-24 ] type s95: downloading error (pms, panel, or scanner) display firmware download error! To continue processing, press the start key. Clear press the start key. Point description 0046 after fi rmware downloading was started, the processor failed to expand the snall package tar ...
Page 456
Panel messages [ 15-25 ] type s96: pcb or hardware disconnected display !!System error!! Reboot by press the sub power key if recovery has failed, call service. Clear turn off the printer. (turn off the printer through sub power key.) note: for a permanent solution, connect the pcb. Point descriptio...
Page 457
Panel messages [ 15-26 ] type s98: hardware error display !!System error!! Reboot by press the sub power key if recovery has failed, call service. Clear turn off the printer. (turn off the printer through sub power key.) point description 0001 the cpu detected a checksum error during cpu-dsp communi...
Page 458
Panel messages [ 15-27 ] type s98: hardware error display !!System error!! Reboot by press the sub power key if recovery has failed, call service. Clear turn off the printer. (turn off the printer through sub power key.) point description 0069 after or during touch panel updates, a checksum error oc...
Page 459
Panel messages [ 15-28 ] type s98: hardware error display !!System error!! Reboot by press the sub power key if recovery has failed, call service. Clear turn off the printer. (turn off the printer through sub power key.) point description 0110 1-6 variation code: number of black head. (1 = head no.1...
Page 460
Panel messages [ 15-29 ] type s98: hardware error display !!System error!! Reboot by press the sub power key if recovery has failed, call service. Details in common there is a discrepancy exceeding 5v between the drive voltage acquired from rows of head nozzles (a) and the drive voltage of rows of h...
Page 461
Panel messages [ 15-30 ] type s98: hardware error display !!System error!! Reboot by press the sub power key if recovery has failed, call service. Clear turn off the printer. (turn off the printer through sub power key.) point description 2350 1 black head precursor control not possible before the n...
Page 462
Panel messages [ 15-31 ] type s99: software error display !!System error!! Reboot by press the sub power key if recovery has failed, call service. Clear turn off the printer. (turn off the printer through sub power key.) point description 0006 0007 1 error occurs> 0007 2 error being solved> 0007 3 o...
Page 463
Panel messages [ 15-32 ] type s99: software error display !!System error!! Reboot by press the sub power key if recovery has failed, call service. Clear turn off the printer. (turn off the printer through sub power key.) point description 0076 communication could not be established in pci communicat...
Page 464
Panel messages [ 15-33 ] type s99: software error display !!System error!! Reboot by press the sub power key if recovery has failed, call service. Clear turn off the printer. (turn off the printer through sub power key.) point description 0151 1 error from software bugs related to the sheet queue 01...
Page 465
Panel messages [ 15-34 ] type s99: software error display !!System error!! Reboot by press the sub power key if recovery has failed, call service. Clear turn off the printer. (turn off the printer through sub power key.) point description 0157 1 the recovery operations during cleaning> 0157 2 operat...
Page 466
Panel messages [ 15-35 ] type s99: software error display !!System error!! Reboot by press the sub power key if recovery has failed, call service. Clear turn off the printer. (turn off the printer through sub power key.) point description 0163 1 mechanical control software errors 10 maintenance unit...
Page 467
Panel messages [ 15-36 ] type s99: software error display !!System error!! Reboot by press the sub power key if recovery has failed, call service. Clear turn off the printer. (turn off the printer through sub power key.) point description 0284 1-4 one of sub-system failed during the transition to po...
Page 468
Panel messages [ 15-37 ] type s99: software error display !!System error!! Reboot by press the sub power key if recovery has failed, call service. Clear turn off the printer. (turn off the printer through sub power key.) point description 3032 1 communication is impaired between the fi nisher system...
Page 469
Panel messages [ 15-38 ] type s100: pb communication error display the perfect binder has an error. Reboot by press the sub power key if recovery has failed, call service. Clear turn off the printer. (turn off the printer through sub power key.) point description 3591 1-9 unable to communicate betwe...
Page 470
Panel messages [ 15-39 ] type u01: scanner connection error display communication with the scanner is disconnected. Check the scanner for power supply or connection and press reset key. If recovery has failed, call service. Clear press the reset key, or turn off the printer. (turn off the printer th...
Page 471
Panel messages [ 15-40 ] type u04: af error display the scanner has an error. Press reset key or reboot by press the sub power key if recovery has failed, call service. Clear press the reset key, or turn off the printer. (turn off the printer through sub power key.) point description 4420 the af is ...
Page 472
Panel messages [ 15-41 ] type u06: scanner lock settings error display the scanner setting has not been completed. Call service. (the lock not yet released.) clear press the reset key, or turn off the printer. (turn off the printer through sub power key.) note: to resolve the underlying problem, acc...
Page 473
Panel messages [ 15-42 ] type u10: scanner eeprom error display the scanner settings are not realized properly. Call service. Clear press the reset key, or turn off the printer. (turn off the printer through sub power key.) note: to resolve the underlying problem, access test mode 5406 (scanner prof...
Page 474
Panel messages [ 15-43 ] type u14: 3-fold tray error display the fi nisher 3-fold tray has an error. Press reset key or reboot by press the sub power key if recovery has failed, call service. Clear press the reset key, or turn off the printer. (turn off the printer through sub power key.) point desc...
Page 475
Panel messages [ 15-44 ] type u19: booklet tray power reboot request display set booklet unit properly and reboot by press the sub power key. If recovery has failed, call service. Clear press the reset key, or turn off the printer. (turn off the printer through sub power key.) point description 3327...
Page 476
Panel messages [ 15-45 ] type u54: offset stapler motor lock display the offset stapler has an error. Press reset key or reboot by press the sub power key if recovery has failed, call service. Clear press the reset key point description 3362 1-2 1:[discharge roller] error (during elevation) 2:[disch...
Page 477
Panel messages [ 15-46 ] type u56: high cap feeder software error display the high capacity feeder has an error. Press reset key or reboot by press the sub power key if recovery has failed, call service. Clear press the reset key point description 2527 1-9 detected error at sh side. Variation code: ...
Page 478
Panel messages [ 15-47 ] type u89: pb temperature error display an error has occurred in the perfect binder. Press the reset key or reboot by press the sub power key if recovery fails, contact a service provider. Clear press the reset key, or turn off the printer. (turn off the printer through sub p...
Page 479
Panel messages [ 15-48 ] type u91: hcs motor lock display the high capacity stacker has an error. Press reset key or reboot by press the sub power key if recovery has failed, call service. Clear press the reset key, or turn off the printer. (turn off the printer through sub power key.) point descrip...
Page 480
Panel messages [ 15-49 ] type u98: scanner hardware error display the scanner has an error. Press reset key or reboot by press the sub power key if recovery has failed, call service. Clear press the reset key, or turn off the printer. (turn off the printer through sub power key.) point description 4...
Page 481
Panel messages [ 15-50 ] type u106: pb glue empty error display an error has occurred in the perfect binder. Press the reset key or reboot by press the sub power key if recovery fails, contact a service provider. Clear press the reset key, or turn off the printer. (turn off the printer through sub p...
Page 482
Panel messages [ 15-51 ] type u125: hcs unit hardware error display the high capacity stacker has an error. Press reset key or reboot by press the sub power key if recovery has failed, call service. Clear press the reset key, or turn off the printer. (turn off the printer through sub power key.) poi...
Page 483
Panel messages [ 15-52 ] type w01: af communication warning display an error has occurred in the scanner. Clear press the confi rm button on the touch panel. Point description 4460 scanner–af communication: successful af initialization following communication failure after three attempts by the scan...
Page 484
Panel messages [ 15-53 ] type w04: no paper loaded (paper feed tray) display load paper in the standard tray. (1)(2) note: the paper size is indicated in position (1) and the type of paper in parentheses in position (2). Example: a4 (standard) clear do one of the following. • load paper of any size ...
Page 485
Panel messages [ 15-54 ] type w07: no paper loaded (tray 3) display load paper in feed tray 3. (1)(2) note: the paper size is indicated in position (1) and the type of paper in parentheses in position (2). Example: a4 (standard) clear do one of the following. • load paper of any size in tray 3. • sw...
Page 486
Panel messages [ 15-55 ] type w11: stacking tray full display the fi nisher stacking tray is full. Remove the paper. Clear do one of the following. • press the cancel button. • delete the job. Point description 3221 1 the stacking tray has almost reached the stacking limit for standard paper (detect...
Page 487
Panel messages [ 15-56 ] type w16 : cannot move for auto stacking display check the auto control stacking tray. Clear do one of the following. • press the continue button. • press the cancel button. • delete the job. Point description 3301 hp sensor detection does not change from off to on during th...
Page 488
Panel messages [ 15-57 ] type w21: scratch sheets in stacking tray display unfi nished printed paper is ejected to the fi nisher stacking tray. Check and remove the paper. Clear do one of the following. • press the continue button. • press the cancel button. • delete the job. Point description 3232 ...
Page 489
Panel messages [ 15-58 ] type w27: top tray not connected display the fi nisher top tray unit is not connected. Check the connection. (the job has been deleted) clear do one of the following. • press the close button. • delete the job. Point description 3227 a job was sent specifying ejection to the...
Page 490
Panel messages [ 15-59 ] type w33: puncher unit not available display job name: ( ) this printing job is not acceptable because the fi nisher punching unit is faulty. Printing without using the stapling unit is possible. (the job has been cancelled.) clear do one of the following. • press the close ...
Page 491
Panel messages [ 15-60 ] type w38: offset stapler staple over limit display job name: ( ) the stack of paper cannot be stapled as it exceeds the maximum stapling capacity. Remove the paper from the output tray. Printing can be continued without stapling. Clear do one of the following. • press the cl...
Page 492
Panel messages [ 15-61 ] type w43: specifi ed size not loaded in slip sheet tray display load slip sheets in the following tray. Selected tray: (1) note: as (1) in the message displayed, the paper feed tray or a tray from 1 to 3 is indicated. Clear do one of the following. • load paper of the correc...
Page 493
Panel messages [ 15-62 ] type w47: image adjustment failed display no message clear press the close button. Point description 0224 invalid calibration pattern scanned by the scanner when executing image adjustment in test mode. 0255 no image adjustment fi le in the usb memory device. Exist in the us...
Page 494
Panel messages [ 15-63 ] type w51: request to start recovery operations display ready to resume. Press the [confi rm] button. Clear press the confi rm button. Point description 1301 when the belt platen must be lowered to recover from a paper jam, this message is issued when user confi rmation is re...
Page 495
Panel messages [ 15-64 ] type w57: adjustment values not saved display no message clear press the close button. Point description 0172 with test mode 1497 (save adjustment values) not executed, the test mode area could not be cleared or defaults could not be restored. Type w58: cis auto adjustment f...
Page 496
Panel messages [ 15-65 ] type w62: press start key display turn off the power of this printer and then on again. Clear press the start button. Note: when the printer is automatically deactivated after completion of downloading, it cannot be restarted automatically, so press the power button to start...
Page 497
Panel messages [ 15-66 ] type w70: test mode non-completion display no message clear press the close button. Point description 0247 1 unable to execute test modes due to exclusive condition. 0247 2 error fi nish due to wrong control card installed on the machine. 0247 3 executed test mode ended in e...
Page 498
Panel messages [ 15-67 ] type w76: paper size error(booklet) display paper of this size cannot be output with the current booklet setting. Check the paper setting orientation or the printer settings. Clear press the close button. Point description 0317 booklet printing was instructed in the paper si...
Page 499
Panel messages [ 15-68 ] type w82: print control device error display [when the job is proceeding] operation interrupted login to device then press continue to resume. Job name : (1) [when the job not existing] authentication required login to external device before operation is available clear oper...
Page 500
Panel messages [ 15-69 ] type w88: kerberos server error display transmission error to the kerberos server. Contact the administrator. Clear press close button. Point description 0263 1 failed to communicate with kerberos server. 0263 2 unauthorized search login name was used when communicating with...
Page 501
Panel messages [ 15-70 ] type w95: email data size over the limit display email transmission error. The email size exceeds the capacity. Change the scan function settings. Clear press close button. Point description 0232 failed to send a email. (email size exceeds the capacity) smtp response code is...
Page 502
Panel messages [ 15-71 ] type w100: pb cover size error display set paper with a size suitable for the cover of the perfect binding in the tray below. Clear do one of the following. • if the cover size is auto detectable: place the correct cover size. • if the cover size is undetectable: place the c...
Page 503
Panel messages [ 15-72 ] type w106: cannot execute mail creation display job name: ( ) this printing job is not acceptable because mail maker is unavailable. Printing without using the mail maker is possible. (the job has been deleted). Clear press the close button or delete the job point descriptio...
Page 504
Panel messages [ 15-73 ] type w118: original not suitable mix form display some data have different envelope sizes. Check the settings. (the job has been deleted.) clear press close button. Point description 3658 mixed envelope form size detected. Type w120: pb cover length error display this cover ...
Page 505
Panel messages [ 15-74 ] type w126: offset staple tray not attach display the offset stapler is not connected. Check the connection. (the job has been deleted). Clear do one of the following. • delete the close button. • delete the print job. Point description 3244 1-2 despite offset staple tray is ...
Page 506
Panel messages [ 15-75 ] type w132: hcs stack tray check error display paper stays in the high capacity stacker ejector. Print cannot be run. Remove paper from the ejector. Clear do one of the following. • open the hcs door, then pull the paper out, then close the door. • press the close button. Poi...
Page 507
Panel messages [ 15-76 ] type w157: envelope form set error 1 display set envelope form ( ) in the direction below. Standard tray: star to right front feed tray1–3: circle to left front clear do one of the following. • place the paper on the tray. (empty tray that targetted to auto tray) • press the...
Page 508
Panel messages [ 15-77 ] type w161: envelope form set error 3 display set envelope form ( ) in the direction below. High capacity feeder: star to right front feed tray1–3: circle to left front. Clear do one of the following. • place the paper on the tray. (empty tray that targetted to auto tray) • p...
Page 509
Panel messages [ 15-78 ] type w172: env form set error (try1/spx) display set envelope form in feed tray1 so that the circle mark comes to the left front side. Clear do one of the following. • place the paper on the paper tray 1. • press the tray change button. (select the tray other than the paper ...
Page 510
Panel messages [ 15-79 ] type w176: env form set error (try3/smp) display set envelope form in feed tray3 so that the circle mark comes to the left front side. Clear do one of the following. • place the paper on the paper tray 3. • press the tray change button. (select the tray other than the paper ...
Page 511
Panel messages [ 15-80 ] type w184: mm ejection tray error display paper stays in the mail maker ejector. Print cannot be run. Remove paper from the ejector. Clear do one of the following. • press the cancel button. • delete the print job. • remove the object from the sensor, then press the continue...
Page 512
Panel messages [ 15-81 ] type w190: hcf p-.F-.T limit sensor error display the high capacity feeder is overloaded with paper. Check the standard tray. Clear press close button. Point description 2600 too many papers are stacked on the tray. Type w191: hcf p-.F-.T mainte pos error display the high ca...
Page 513
Panel messages [ 15-82 ] type x01: no paper transfer from tray display paper has been possibly misfed. Check the paper-feed tray. Clear see pages 15-7, paper jam errors. Point description 1050 externally fed paper did not reach the registration sensor in time, based on the transfer speed. 1070 exter...
Page 514
Panel messages [ 15-83 ] type x06: paper jam in duplex switchback entry section display paper has jammed. A button appears in the jam. Touch the button to view the removal method. Clear see pages 15-7, paper jam errors. Point description 1061 paper being transferred did not reach the upper transfer ...
Page 515
Panel messages [ 15-84 ] type x12: paper jam in vertical path, lower section display paper has jammed. A button appears in the jam. Touch the button to view the removal method. Clear see pages 15-7, paper jam errors. Point description 1055 1-2 paper being transferred did not reach vertical paper fee...
Page 516
Panel messages [ 15-85 ] type x21: paper jam affecting 3-fold tray display paper has jammed. A button appears in the jam. Touch the button to view the removal method. Clear see pages 15-7, paper jam errors. Point description 3151 jam before paper reached folder entrance sensor 3152 paper jammed at f...
Page 517
Panel messages [ 15-86 ] type x25: paper jam affecting af display an original has jammed in the scanner. Open the adf cover and remove the jammed original. Clear remove paper in the af original paper path and open and close the af feed cover. Press the cancel or stop button to delete the job. Press ...
Page 518
Panel messages [ 15-87 ] type x32: paper jam in paper gate display paper is not possibly suitable for print. Do not use the following paper. -wrinkled, curled, folded, or torn -extremely thick or heavy -paper having holes clear see pages 15-7 & 15-9, paper jam errors. Point description 1100 1-6 pape...
Page 519
Panel messages [ 15-88 ] type x54: mm paper jam display paper has jammed. A button appears in the jam. Touch the button to view the removal method. Clear see pages 15-12, paper jam errors. Point description 3502 the paper (body) in transporting could not reach to the mm tamper eject sensor from the ...
Page 520
Panel messages [ 15-89 ] type x70: hcf paper jam display paper has jammed. A button appears in the jam. Touch the button to view the removal method. Clear see pages 15-9, paper jam errors. Point description 2550 fed paper from hcf being transferred did not reach the registration sensor in time, base...
Page 521
Panel messages [ 15-90 ] type x73: pb paper jam display paper has jammed. A button appears in the jam. Touch the button to view the removal method. Clear at mechanical initialization (remove the jam paper and close the door) point description 3582 s30 position paper jam (body) the sensor remains on ...
Page 522
Panel messages [ 15-91 ] type y01: replace ink cartridge display replace the ink cartridge. Do not install the removed ink cartridge back again. Doing so may cause a failure. Clear remove relevant ink cartridges. Point description 2100 the black ink cartridge is empty. Ink supply valve k was opened,...
Page 523
Panel messages [ 15-92 ] type y08: mm water tank refi ll error display water is in short supply. Refi ll the water supply tank with water. Clear do one of the following. • add water. • press the cancel button. • delete the job. Point description 3535 detected [no water] by the mm water level detecti...
Page 524
Panel messages [ 15-93 ] type z01: af loading error display close the af cover. Clear close the af feed cover. Point description 4400 the af feed cover is open (issued from af side). Type z02: ink cartridge not loaded display install the ink cartridge. Clear load a compatible ink cartridge with an r...
Page 525
Panel messages [ 15-94 ] type z06: switchback cover open display close the jam release cover (g). Clear close the switchback cover. Point description 1213 the switchback cover is open. Type z08: check paper feed tray display safety sw on standard tray is activated. Reset paper on standard tray. Clea...
Page 526
Panel messages [ 15-95 ] type z21: internal paper feed jam door open display close the jam release cover (h). Clear close the jam release door on the base. Point description 1095 internal feed paper jam release door open type z22: front cover open (bp lower limit) display close the front doors. Clea...
Page 527
Panel messages [ 15-96 ] type z52: offset stapler jam cover open display close the transfer cover of offset stapler. Clear close ost jam cover point description 3423 undetermined type z53: offset stapler staple cover open display close the staple cover of the offset stapler. Clear close ost staple n...
Page 528
Panel messages [ 15-97 ] type z60: incorrect ink cartridge display replace the ink cartridge or contact your administrator. Clear set appropriate ink cartridge point description 2375 despite administrator of the unit owner approved to use the ink cartridge other than riso, actual user selected not t...
Page 529
Panel messages [ 15-98 ] type i01: maintenance call display !!Maintenance!! Call service. Clear do one of the following. • press the close button. • in test mode 01900, set the maintenance guideline value to 0. Note: to resolve the underlying problem, change the setting in test mode 01900. Point des...
Page 530
Panel messages [ 15-99 ] type i06: outgoing queue nearly full display transmission error to the control server. Call service. Clear do one of the following. • press the close button. • access test mode 00414 to save data for which transmission failed on a usb memory device. Note: to resolve the unde...
Page 531
Panel messages [ 15-100 ] code type page 0001 s98 26 0002 s98 26 0003 s98 26 0004 s98 26 0005 s98 26 0006 s99 31 0007 1-9 s99 31 0008 1-4 s99 31 0010 s99 31 0011 s98 26 0012 s99 31 0013 s99 31 0018 1-2 s98 26 0019 1-8 s98 26 0020 s98 26 0021 s98 26 0022 1-3 s98 26 0023 s98 26 0024 s98 26 0025 s98 26...
Page 532
Panel messages [ 15-101 ] code type page 0242 w64 65 0243 w66 65 0244 1-4 w67 65 0245 w68 65 0246 s99 35 0247 1-4 w70 66 0248 s98 28 0250 s98 28 0251 s98 28 0252 w70 66 0253 s98 28 0255 w47 62 0256 u01 39 0257 u01 39 0260 s94 23 0261 s94 23 0262 u90 47 0263 1-3 w88 69 0264 w89 69 0265 w90 69 0267 w9...
Page 533
Panel messages [ 15-102 ] code type page 1402 s99 36 1403 i01 98 1404 1-5 s99 36 1405 s98 28 1406 1-5 s98 28 1407 s98 28 1408 s98 28 1409 s98 28 1410 s98 28 1411 s98 28 1412 s98 28 1413 s98 28 1414 s98 28 1415 s99 36 1800 1-9 s98 28 1801 1-6 s98 28 1801 7-9 s98 28 1810 s98 28 1811 1-3 s98 28 1812 1-...
Page 534
Panel messages [ 15-103 ] code type page 2174 s07 14 2175 s07 14 2176 s07 14 2177 s07 14 2178 s07 14 2179 s07 14 2180 s07 14 2181 s07 14 2182 s07 14 2183 s07 14 2184 s07 14 2185 s07 14 2186 s07 14 2187 s07 14 2188 s07 14 2189 s07 14 2190 s07 14 2191 s07 14 2192 s07 14 2193 s07 14 2200 s06 13 2201 s0...
Page 535
Panel messages [ 15-104 ] code type page 3005 s20 15 3006 s20 15 3007 s20 15 3015 s94 23 3020 s98 30 3021 s98 30 3022 s98 30 3023 s98 30 3030 1-2 s99 36 3031 1-9 s99 36 3032 1-5 s99 37 3033 1-3 s99 37 3034 s99 37 3035 s99 37 3036 1-6 s99 37 3037 1-6 s99 37 3060 u11 42 3061 u12 42 3062 u12 42 3063 u1...
Page 536
Panel messages [ 15-105 ] code type page 3503 x54 88 3504 x54 88 3505 x54 88 3506 x54 88 3507 x54 88 3508 x54 88 3509 x54 88 3510 x54 88 3511 x54 88 3512 x54 88 3513 x54 88 3514 x54 88 3515 x54 88 3516 x54 88 3517 x54 88 3518 u09 41 3519 x54 88 3520 x54 88 3521 x54 88 3522 x54 88 3523 x54 88 3524 x5...
Page 537
Panel messages [ 15-106 ] code type page 3867 u125 51 3868 u125 51 3869 u125 51 3870 u126 51 3871 u125 51 3872 u125 51 3873 u125 51 3874 u125 51 3875 u125 51 3876 u126 51 3877 u126 51 3880 u91 48 3881 u91 48 4100 s95 24 4101 s95 24 4102 s95 24 4103 s95 24 4104 s95 24 4105 s95 24 4106 s95 24 4120 u01...
Page 538: X??-????
Panel messages [ 15-107 ] group procedure for clearing jam on the lcd panel 1 f1, f2 and h14 2 f3, f4, f5 and f6 3 f7, f8, f9, f10, f11and f12 4 f13 and f14 6-1. Requirements to clear jams in finisher if paper jams occur in the fi nisher or in some parts involved in ejection by the printer, an error...
Page 539
Panel messages [ 15-108 ] group point button in display requirement to clear jam ost-1 c1 m [m] paper jam has been cleared + (close button has been pressed or all covers has been closed) ost-2 c2 m/q [m], [q] paper jam has been cleared + (close button has been pressed or all covers has been closed) ...
Page 540
Panel messages [ 15-109 ] group point button in display requirement to clear jam hcs-1 a1 a1 [a1] paper jam has been cleared + (close button has been pressed or all covers has been closed) hcs-2 a2 a2 [a2] paper jam has been cleared + (close button has been pressed or all covers has been closed) hcs...
Page 541
Panel messages [ 15-110 ] group point button in display requirement to clear jam pb-1 b01 b1 [b1] paper jam has been cleared + (close button has been pressed or all covers has been closed) pb-2 b02 b2 [b2] paper jam has been cleared + (close button has been pressed or all covers has been closed) pb-...
Page 542
Panel messages [ 15-111 ] group point button in display requirement to clear jam mm-1 c1 c1 [c1] paper jam has been cleared + (close button has been pressed or all covers has been closed) mm-2 c2 c2 [c2] paper jam has been cleared + (close button has been pressed or all covers has been closed) mm-3 ...
Page 543
Panel messages [ 15-112 ].
Page 544
[ 16-1 ] test modes rev.1.00 chapter 16. Test modes contents 1. Entering into test mode ............................................................................................... 16-2 1-1. Mode screen..................................................................................................
Page 545
[ 16-2 ] test modes rev.1.00 1. Entering into test mode 1-1. Mode screen test modes can be accessed only when the operation panel is in the mode screen. 1-2. Keypad operation to enter into test mode as shown, 8 button * button # button press these three buttons simultaneously to display the pass-cod...
Page 546
[ 16-3 ] test modes rev.1.00 test mode standby screen 2. Exiting out of test mode to exit test mode, press the mode key on the operation panel in standby mode or when operation is stopped. The printer will then be idle in regular mode. Test mode test mode no. To finish, press the mode key catergory ...
Page 547: 0 1 2 3 4
[ 16-4 ] 4th digit category category details 0 system controller pcb software, etc. Image adjustment items associated with image adjustment test printing execution of printing operations; settings that affect printing 1 engine paper supply and ejection, transfer, engine system, etc. Image adjustment...
Page 548: 0 1 0 2 5
[ 16-5 ] 3rd digit processing category test mode execution details 0-1 sensor monitoring (s) checks the status of various sensors and switches. Status can be checked by letters or tones indicating the status. 2-3 drive checking (m) enables individual units such as motors to be activated or deactivat...
Page 549
[ 16-6 ] test modes rev.1.00 entering numbers directly with this method, the numeric keypad on the operation panel is used to enter the number when the printer is awaiting input of the test mode. To clear input errors, press the c button and enter the correct number. Note: leading zeros need not be ...
Page 550
[ 16-7 ] test modes rev.1.00 4-2-2. Drive checking (m) after you select or enter the test mode number in step 4-1, pressing the start key on the operation panel will display a screen indicating the operation is paused. To cancel execution of test mode at this point, press the stop key. To continue w...
Page 551
[ 16-8 ] test modes rev.1.00 4-2-5. Data monitoring (c) after you select or enter the test mode number in step 4-1, pressing the start key on the operation panel will display a screen with information. To return to the test mode standby screen, press the stop key on the operation panel. Details in t...
Page 552
[ 16-9 ] test modes rev.1.00 4-2-6. Data editing (d) after you select or enter the test mode number in step 4-1, pressing the start key on the operation panel will display a screen for numerical input, with the current setting value (selected value) in an orange row. Changing values enter values in ...
Page 553
[ 16-10 ] sensor monitoring (s) comcolor unit (series 1000) no. Process name confi rmation items 1000 p-feed tray upper-limit sensor a on: detected (light blocked) off: not detected (light passes through) 1001 p-feed tray upper-limit sensor b 1002 p-feed tray lower limit sensor 1003 tray 1 upper lim...
Page 554
[ 16-11 ] sensor monitoring (s) comcolor unit (series 1000) no. Process name confi rmation items 1150 fd ejection motor encoder on: detected (light blocked) off: not detected (light passes through) 1151 fd ejection full sensor 1152 fd ejection paper detection sensor 1153 fd ejection fence hp sensor ...
Page 555
[ 16-12 ] sensor monitoring (s) comcolor unit (series 2000) no. Process name confi rmation items 2123 bp lower limit position sensor on: detected (light blocked) off: not detected (light passes through) 2124 bp upper limit position sensor 2126 wiper motor hp sensor 2127 24v a-voltage detection on: d...
Page 556
[ 16-13 ] sensor monitoring (s) comcolor unit (series 3000) no. Process name confi rmation items 3000 as side fence hp sensor on: light blocked (home position) off: light passes through (other position) 3001 as end fence hp sensor 3002 as paper remove switch on: detected (switch pressed) off: not de...
Page 557
[ 16-14 ] drive checking (m) comcolor unit (series 1000) no. Process name description 1225 external paper feed motor starts and stops the external paper feed motor (straight paper feeding). 1226 registration motor starts and stops the registration motor. 1227 internal paper feed motor starts and sto...
Page 558
[ 16-15 ] unit checking (u) comcolor unit (0001-0999) upper: no./process name, lower: description 401 count information print prints a list of information detailed count (1–21), maintenance count (paper supply and ejection system), fi nisher count (1–8), cleaning count (extra, strong, normal). Print...
Page 559
[ 16-16 ] unit checking (u) comcolor unit (0001-0999) upper: no./process name, lower: description 414 transmission fail data save saves source csv fi les of xml transmission fi les for which transmission failed (between the transmission module and remote admin server, when the remote agent function ...
Page 560
[ 16-17 ] unit checking (u) comcolor unit (0001-0999) upper: no./process name, lower: description 426 overlap print width adjustment auto image adjustment adjusts the overlap width in the printing area of adjacent heads. The overlap width in the printing area of adjacent heads is measured, and this ...
Page 561
[ 16-18 ] unit checking (u) comcolor unit (0001-0999) upper: no./process name, lower: description 445 print timing fine adjustment/overlap width adjustment calculates adjusted values on both & , by single scan. Then, adjusted values will be set to the engine system. (automatic) 451 engine factory va...
Page 562
[ 16-19 ] unit checking (u) comcolor unit (0001-0999) upper: no./process name, lower: description 461 hdd value restore restores (copies) the user setting data, from the usb memory stick onto the initialized hdd or newly replaced hdd. Above test mode no.460.> error message w49-0280 (failure in store...
Page 563
[ 16-20 ] unit checking (u) comcolor unit (series 1000) upper: no./process name, lower: description 1421 external paper feed tray paper width potentiometer adjustment (wide) specifi es an a/d value of 297 mm as the width for paper size detection. * execute this test mode after loading paper of this ...
Page 564
[ 16-21 ] unit checking (u) comcolor unit (series 1000) upper: no./process name, lower: description 1465 fu ejection fence 1 cycle action operates the fu paper ejection fence for one cycle. 1. Move to home position. 2. Move to "min." position and stop for one second. 3. Move to "max." position and s...
Page 565
[ 16-22 ] unit checking (u) comcolor unit (series 2000) upper: no./process name, lower: description 2411 wiper motor to front moves the wiper motor to the front. Note: you must check the bp unit and the ink pan mechanism positions before this operation. 2412 wiper motor to rear moves the wiper motor...
Page 566
[ 16-23 ] unit checking (u) comcolor unit (series 2000) upper: no./process name, lower: description 2471 k-md recovery action makes solid black color prints and does normal head cleaning for the number of times set by test mode no.2749, and then makes the fi nal result print in the quantity set by t...
Page 567
[ 16-24 ] unit checking (u) comcolor unit (series 3000) upper: no./process name, lower: description 3400 as side fence hp position moves the as side paper guide for paper ejection to the home position. 3401 as side fence custom position moves the as side paper guide for paper ejection to the specifi...
Page 568
[ 16-25 ] initialization (i) comcolor unit (0001-0999) upper: no./process name, lower: description 502 test mode clear (all) restores default values (factory default) for test modes that can be set by service technicians and are stored on the pms (controller hard disk) and engine control pcb. Values...
Page 569
[ 16-26 ] initialization (i) comcolor unit (series 1000) upper: no./process name, lower: description 1502 test mode clear (engine) restores default values for test modes that can be set by service technicians and are stored on the engine control pcb. Values stored on multi-fi nishers are not cleared...
Page 570
[ 16-27 ] data monitoring (c) comcolor unit (0001-0999) no. Process name confi rmation items/description 600 snall package data version range: 000000000000–999999999999 example: ver. 123.456.789.123 is indicated as 123456789123. 601 engine package data version same as 00600 602 pms firmware version ...
Page 571
[ 16-28 ] data monitoring (c) comcolor unit (0001-0999) no. Process name confi rmation items/description 650 count display (pms) range: 00000000–99999999 displays the value of detailed count 1 * the master is the count value stored on the engine. This is used for recovery if there are problems with ...
Page 572
[ 16-29 ] data monitoring (c) comcolor unit (0001-0999) no. Process name confi rmation items/description 692 mail maker count display (pms) 0-9,999,999 displays the value of mail maker count (number of creating mail) 695 coin vendor firmware version does not apply on your machine. 696 card vendor fi...
Page 573
[ 16-30 ] data monitoring (c) comcolor unit (series 1000) no. Process name confi rmation items/description 1625 paper feed tray paper size i.D. 0-24, 51, 52 displays the paper id detected by the mechanism (the value as detected by the sensor). 1626 tray 1 paper size i.D. 0, 2-7 , 17-19 displays the ...
Page 574
[ 16-31 ] data monitoring (c) comcolor unit (series 1000) no. Process name confi rmation items/description 1677 maintenance count fd ejection (engine) displays the value of face down paper ejection. 1678 maintenance count fu ejection (engine) displays the value of face up paper ejection. 1679 finish...
Page 575
[ 16-32 ] data monitoring (c) comcolor unit (series 8000) no. Process name confi rmation items/description 8611 ink volume display c displays cyan ink remaining amount as detected by the tag. 8612 ink volume display m displays magenta ink remaining amount as detected by the tag. 8613 ink volume disp...
Page 576
[ 16-33 ] data editing (d) comcolor unit (0001-0999) no. Process name default unit/range description 707 log output level setting 1 0: level 0 1: level 1 2: level 2 sets the detail level of the log information kept in the controller. 708 gmt time zone selection 14: (overseas) 27: (china) 1: gmt -1 2...
Page 577
[ 16-34 ] data editing (d) comcolor unit (0001-0999) no. Process name default unit/range description 722 rev event extension set 0 0: normal 1: extended for rev. Event selection. 0: normal: events are generated when the printer is turned on, when errors occur, and when manual events are confi gured....
Page 578
[ 16-35 ] data editing (d) comcolor unit (0001-0999) no. Process name default unit/range description 732 mail file encode 0 0: utf-8 encoding. 1: no utf-8 encoding keep the setting to the default [0] setting. Problem may occur on the attached fi le to the e-mail when setting [1] is selected. Setting...
Page 579
[ 16-36 ] data editing (d) comcolor unit (0001-0999) no. Process name default unit/range description 745 error history information 0 0: disable 1: enable remote agent functions specifi es whether rev. Information (error information and log) is transmitted. * activating 00740 (enable/disable remote f...
Page 580
[ 16-37 ] data editing (d) comcolor unit (0001-0999) no. Process name default unit/range description 761 security package key code 2 0000 0000 to 9999 (step = 1) xxxx-yyyy- zzzz test mode to input the key code to activate the optional riso security package. This test mode is for the second set of 4-...
Page 581
[ 16-38 ] data editing (d) comcolor unit (series 1000) no. Process name default unit/range description 1743 registration sensor paper non-arrival jam detection timing 0 (-100 - 100)ms specifi es the adjustment value for jams before the registration sensor. 1744 registration sensor paper jam detectio...
Page 582
[ 16-39 ] data editing (d) comcolor unit (series 1000) no. Process name default unit/range description 1776 registration sensor setting 128 0–255 specifi es the light intensity for the registration sensor. The higher the value, the brighter the light intensity. This value is not subject to clearing ...
Page 583
[ 16-40 ] data editing (d) comcolor unit (series 1000) no. Process name default unit/range description 1815 re-feed sensor paper non-arrival jam detection timing adjustment 0 (-100 - 100)ms specifi es the adjustment value for jams before the re-feed sensor. 1816 bp belt hp sensor on/off 1 0: inactiv...
Page 584
[ 16-41 ] data editing (d) comcolor unit (series 1000) no. Process name default unit/range description 1838 fu paper ejection jump motor speed adjustment 990 800–1200 specifi es the speed of the fu paper ejection jump motor relative to the printer when a multi-fi nisher is connected. (1= 0.1%; 2 at ...
Page 585
[ 16-42 ] data editing (d) comcolor unit (series 1000) no. Process name default unit/range description 1865 paper feed speed setting 632 197-665mm/s specifi es the speed of 01643 and 01644. Values to be used during printing operation of 01481. 1867 paper feed tray selection 0 specifi es the paper fe...
Page 586
[ 16-43 ] data editing (d) comcolor unit (series 1000) no. Process name default unit/range description 1893 roller profi le on/off 1 0: disable 1: enable activates or deactivates the roller profi le. 1894 roller profi le gain adjustment 100 80: 80%, 85: 85%, 90: 90%, 95: 95%, 100: 100%, 105: 105%, 1...
Page 587
[ 16-44 ] data editing (d) comcolor unit (series 1000) no. Process name default unit/range description 1945 fd ejection fence hp adjustment 0 (-500–500) adjusts the position of the fd paper ejection fence (home position adjustment). (1=0.1mm) 1946 fd ejection fence hp adjustment (card) 0 (-500–500) ...
Page 588
[ 16-45 ] data editing (d) comcolor unit (series 2000) no. Process name default unit/range description 2759 ink circulation duration 10 1-1440minutes hr> this test mode sets the ink circulation time for test mode no.2452 ink circulation action. After tm_2452 is activated, the ink circulation ends au...
Page 589
[ 16-46 ] data editing (d) comcolor unit (series 2000) no. Process name default unit/range description 2940 print timing parameter (k) head parameters for 02900 (print timing adustment) 2941 print timing parameter (c) 2942 print timing parameter (m) 2943 print timing parameter (y) 2944 print positio...
Page 590
[ 16-47 ] data editing (d) comcolor unit (series 3000) no. Process name default unit/range description 3700 as side fence specifi c position 2970 1060–3380 specifi es the position designated for 03401. (1= 0.1mm) 3701 as end fence specifi c position 4200 1080–4320 specifi es the position designated ...
Page 591
[ 16-48 ] data editing (d) comcolor unit (series 6000) fd paper ejection common adjusts the fd paper ejection speed no. Process name default unit/range description following test modes adopted when [1] is selected on test mode no.01855. 6700 fd speed (a3-std) rib 860 391-1500mm/s standard a3, a3w, l...
Page 592
[ 16-49 ] data editing (d) comcolor unit (series 6000) paper feed-2 common compensates the paper pitch. No. Process name default unit/range description standard papers 6750 paper pitch (duplex - standard long paper) 0 (1=0.1ms) 0-2000 duplex/standard paper/ long paper of 356 mm or longer. 6751 paper...
Page 593
[ 16-50 ] data editing (d) comcolor unit (series 6000) paper feed-2 common compensates the paper pitch. No. Process name default unit/range description post card 6810 paper pitch (duplex - post card) 0 (1=0.1ms) 0-2000 duplex/post card. 6811 extenal paper feed tray: paper pitch (simplex - post card)...
Page 594
[ 16-51 ] data editing (d) comcolor unit (series 6000) paper feed-2 common compensates the paper pitch. No. Process name default unit/range description u3-user paper 3 6890 paper pitch (duplex - u3 long paper) (1=0.1ms) 0-2000 duplex/u3 paper/ long paper of 356 mm or longer. 6891 paper pitch (duplex...
Page 595
[ 16-52 ] data editing (d) comcolor unit (series 6000) paper feed-2 common compensates the paper pitch. No. Process name default unit/range description u5-user paper 5 6930 paper pitch (duplex - u5 long paper) 0 (1=0.1ms) 0-2000 duplex/u5 paper/ long paper of 356 mm or longer. 6931 paper pitch (dupl...
Page 596
[ 16-53 ] data editing (d) comcolor unit (series 7000) no. Process name default unit/range description 7700 pft up lmt pos (std) 1 specifi es the upper limit position of the paper feed tray. 0: top 1: middle 2: bottom 7701 pft p-buckle (std) 3 (-10 - 20)mm specifi es the amount of slackness in exter...
Page 597
[ 16-54 ] data editing (d) comcolor unit (series 7000) no. Process name default unit/range description 7741 env flap margn (std) 0 0-720 specifi es the length of the overlap width for envelopes. (1=0.1ms) 7743 tr1 shrt-p bkl (std) 3 (-10 - 20)mm specifi es the amount of slackness when short paper is...
Page 598
[ 16-55 ] data editing (d) comcolor unit (series 7000) no. Process name default unit/range description 7795 pft ast on/off (thn) 1 0: off 1: on specifi es whether assist control is executed when paper is transferred from external paper feeding. 7796 pft ast start (thn) 0 (-100 - 100)ms specifi es th...
Page 599
[ 16-56 ] data editing (d) comcolor unit (series 7000) no. Process name default unit/range description 7835 tr1 shrt-p bkl (thn) 3 (-10 - 20)mm specifi es the amount of slackness when short paper is transferred from tray 1. 7836 tr2 shrt-p bkl (thn) 4 (-10 - 20)mm specifi es the amount of slackness ...
Page 600
[ 16-57 ] data editing (d) comcolor unit (series 7000) no. Process name default unit/range description 7905 re-feed p-bkl (env) 6 0-20mm specifi es the amount of slackness in re-feeding. 7912 fd eject speed compensation (thin) 0 (-300 - 300)mm/s compensates the fd ejection speed. 7914 belt spd ratio...
Page 601
[ 16-58 ] paper feed settings (u1-u5, light paper) comcolor unit (series 9000) test mode number u1 u2 u3 u4 u5 lp process name default unit/range description 9700 9746 9792 9838 9884 9931 pft up lmt pos 1 0: top 1: middle 2: bottom specifi es the upper limit position of the paper feed tray. 9701 974...
Page 602
[ 16-59 ] paper feed settings (u1-u5, light paper) comcolor unit (series 9000) test mode number u1 u2 u3 u4 u5 lp process name default unit/range description 9729 9775 9821 9867 9913 9960 re-feed arrival timing (u-long sheet) 20 (-50 - 50)ms compensates the re-feed paper arrival timing. (long paper ...
Page 603
[ 16-60 ] sensor monitoring (s) options / finisher no. Process name confi rmation items 4020 decurler in sensor detectionects whether paper ejected from the unit is on the decurler in sensor of the if unit. 4021 decurler out sensor detectionects whether paper from the decurler in sensor of the if un...
Page 604
[ 16-61 ] sensor monitoring (s) options / finisher no. Process name confi rmation items 4058 stacker no paper sensor detectionects paper in the stacker tray. 4059 stack height sensor detectionects raised and lowered positions of the stacking tray. (this sensor is used during normal printing.) 4060 t...
Page 605
[ 16-62 ] sensor monitoring (s) options / finisher no. Process name confi rmation items 4098 end guide home sensor 1 detectionects the home position of the end guide in the folder unit. 4099 end guide home sensor 2 detectionects the home position of the end guide in the folder unit. 4100 envelope tr...
Page 606
[ 16-63 ] drive checking (m) options / finisher no. Process name description 4243 compile eject motor normal direction drive (speed 3) drives the compile eject roller at 404 mm/s in the normal direction. 4244 compile eject motor normal direction drive (speed 4) drives the compile eject roller at 320...
Page 607
[ 16-64 ] unit checking (u) options / finisher upper: no./process name, lower: description 4405 finisher nvm data store reads fi nisher nvm information and stores it in nonvolatile memory on the engine. 4406 finisher nvm data re-store writes nvm information stored by 04405 (store fi nisher nvm infor...
Page 608
[ 16-65 ] unit checking (u) options / finisher upper: no./process name, lower: description 4435 stapler move motor low speed front on/off moves the staple unit position toward the front at 530 pps. 4436 stapler move motor high speed rear on/off moves the staple unit position toward the rear at 1000 ...
Page 609
[ 16-66 ] unit checking (u) options / finisher upper: no./process name, lower: description 4464 booklet end guide motor high up drives the booklet end guide upward at 1002 pps. 4465 booklet staple on executes stapling by the booklet stapler (f/r). 4468 booklet gate solenoid push the booklet gate sol...
Page 610
[ 16-67 ] unit checking (u) options / finisher upper: no./process name, lower: description 4491 booklet tamper motor r front 3 drives booklet tamper motor r in the tamping direction at 465 pps. 4492 booklet tamper motor r front 4 drives booklet tamper motor r in the tamping direction at 235 pps. 449...
Page 611
[ 16-68 ] data editing (d) options / finisher no. Process name default unit/range description 4650 booklet tray belt timing 1 210 0-255 paper length - under 297.0mm 0 to 4, 5 to 9, more than 16: conventional timing 10 to 15: on timing change to specifi ed timing. Off timing-use specifi ed timing bef...
Page 612
[ 16-69 ] data editing (d) options / finisher no. Process name default unit/range description 4668 booklet staple fold calibration 8-s 100 0-200pulse for 18th and 19th sheet (same as tm4665) 4669 booklet staple fold calibration 9-s 100 0-200pulse for 20th and 21st sheet (same as tm4665) 4670 booklet...
Page 613
[ 16-70 ] data editing (d) options / finisher no. Process name default unit/range description 4687 booklet tray belt timing 7 177 0-255 paper length - over 364.0mm to 389.0mm. (include thick paper 1or 2) same as tm4685 4688 booklet tray belt timing 8 24 0-255 paper length - over 389.0mm. (include th...
Page 614
[ 16-71 ] data editing (d) options / finisher no. Process name default unit/range description 4729 z-fold 50 sheets stack 0 0: prohibited 1: permitted enables high stack on z-fold paper when the z-fold high stack spacer mounted. However, permitted is selected, tm4958 [z-fold 100sht stack] must selec...
Page 615
[ 16-72 ] data editing (d) options / finisher no. Process name default unit/range description 4748 eject rear reverse timing 92 92-152 adjusts the eject roller reverse timing. 1pulse=0.361mm 4749 rear staple position 2 100 50-150 adjusts the rear staple position (for a4lef and a3sef). 4750 no paper ...
Page 616
[ 16-73 ] data editing (d) options / finisher no. Process name default unit/range description 4768 booklet staple position adjustment (large) 100 0-200 adjusts the staple position when paper is folded twice in booklet staple mode. (paper larger than b4s) [• when the staple is higher than the fold po...
Page 617
[ 16-74 ] data editing (d) options / finisher no. Process name default unit/range description 4783 z-fold 1 8k 50 10-90 adjusts the roller position when the fi rst fold is made during z-folding, and adjusts the position where the leading edge of paper stops. 4784 z-fold 2 a3 50 10-90 adjusts the rol...
Page 618
[ 16-75 ] data editing (d) options / finisher no. Process name default unit/range description 4802 punch registration timing a4s 8 1-255 with a4sef and let sef paper and 2-hole punching, adjusts the time until punch side registration detection starts. 4808 booklet add tamping setting 1 0 0-2 set add...
Page 619
[ 16-76 ] data editing (d) options / finisher no. Process name default unit/range description 4833 enable mix job punch 1 0: prohibited 1: permitted controls puncher initialization during mixed jobs. 4834 eject speed setting 60 1-255sheet limit of sheets for control of ejection speed from the stacke...
Page 620
[ 16-77 ] data editing (d) options / finisher no. Process name default unit/range description 4849 puddle down (thin-paper) 0 specifi es operation for activating and deactivating the paddle solenoid for each fi ve sheets beginning with the 50th sheet. 0: operational under all conditions 1: only oper...
Page 621
[ 16-78 ] data editing (d) options / finisher no. Process name default unit/range description 4861 stacker tray eject single staple 0 0: not ejected 1: ejected indicates the state of ejection to the stacker for single-staple sets. 4862 stacker tray eject double staple 0 0: not ejected 1: ejected ind...
Page 622
[ 16-79 ] data editing (d) options / finisher no. Process name default unit/range description 4883 envelope folder tray full check number 30 10-40sheet specifi es the quantity of ejected sheets to use when detecting whether the envelope folder tray is full based on the quantity of sheets ejected. En...
Page 623
[ 16-80 ] data editing (d) options / finisher no. Process name default unit/range description 4894 booklet staple 15 (small) 100 0-200 automatically adjusts the staple position for each set of sheets based on input of the staple offset in booklet stapling mode when sets of 15 sheets are folded. (pap...
Page 624
[ 16-81 ] data editing (d) options / finisher no. Process name default unit/range description 4907 3 tamping paper setting 30 1-100sheet changes the quantity of sheets for tamping three times at step 6 of tamping. By default, sheets are tamped 3 times from the 31st sheet. 4908 z-fold staple 50 pin 0...
Page 625
[ 16-82 ] data editing (d) options / finisher no. Process name default unit/range description 4922 c-fold solenoid on 8ktfx 100 80 (ap) 0-160 when 8ktfx z-folding is used with folder c-folding, this test mode specifi es the time when the folder c solenoid is activated after activation of the folder ...
Page 626
[ 16-83 ] data editing (d) options / finisher no. Process name default unit/range description 4943 compile exit speed b5 thin 4 conditions: lightweight paper, 182 mm or shorter in the direction of transfer, and 257 mm or narrower (b5lef or smaller), and other than z-folding. Specifi es the speed of ...
Page 627
[ 16-84 ] data editing (d) options / finisher no. Process name default unit/range description 4964 z-fold decurler control setting 1 0: by iotcommand 1: when decurler control is set as [automatic], adds correction on up-curl direction on the z-fold job only. 4965 z-fold paper pitch setting (a3) 2206...
Page 628
[ 16-85 ] data editing (d) options / finisher no. Process name default unit/range description 4982 flapper up move time 12 5-20 flapper rise time setting. To enable this test mode, need to select permitted on tm4958. (1=100ms) 4983 flapper down move time 12 5-20 flapper fall time setting. To enable ...
Page 629
[ 16-86 ] data editing (d) options / finisher no. Process name default unit/range description 4995 booklet forward/reverse action time (a4s or less) 1 3 (tarzan) 0-3 forward and reverse fold action times of booklet folder roll. Paper length is a4s (310mm) or less. 4996 booklet forward/reverse action...
Page 630
[ 16-87 ] sensor monitoring (s) options / scanner no. Process name confi rmation items 5010 fb original detection sensor on: original loaded (light passes through) off: no original (light blocked) 5011 fb original size sensor 1 5012 fb original size sensor 2 5013 fb original size sensor 3 5014 fb or...
Page 631
[ 16-88 ] unit checking (u) options / scanner upper: no./process name, lower: description 5400 scanner test print prints a test pattern generated by the scanner. Rgb gradation data generated by the ccd board is converted to a cmyk image and printed. Uses the resolution set in 05700 (test operation r...
Page 632
[ 16-89 ] unit checking (u) options / scanner upper: no./process name, lower: description 5431 af original feed action transfers af originals continuously, for as many cycles as there are loaded originals. Transfers originals at the speed set in 05702 (test operation speed setting). Scans the surfac...
Page 633
[ 16-90 ] data editing (d) options / scanner no. Process name default unit/range description 5700 test print resolution 0 specifi es the test resolution applied in test pattern printing, or in tests in which the scanner is operated for one cycle or continuously, the af unit is operated continuously,...
Page 634
[ 16-91 ] no. Process name default unit/range description 5715 scanner lock/unlock 0 0: operation permitted 1: operation prohibited specifi es whether scanner operation is locked. (operation permitted/operation prohibited) when you specify 1 (operation prohibited), the scanner does not function exce...
Page 635
[ 16-92 ] data editing (d) options / scanner no. Process name default unit/range description 5727 r1/gain adjustment 0 0-127 specifi es the gain adjustment value for r1 data. The setting value is stored in eeprom. During gain adjustment, this setting value is used. After gain adjustment, the setting...
Page 636
[ 16-93 ] data editing (d) options / scanner no. Process name default unit/range description 5740 edge enhancement c/ln/ clr 5 1-7 specifi es the default edge enhancement value. Copy, line, color 5741 edge enhancement c/ln/ mc 5 1-7 specifi es the default edge enhancement value. Copy, line, monochro...
Page 637
[ 16-94 ] data editing (d) options / scanner no. Process name default unit/range description 5770 moire s/du/mc 4 1-7 specifi es the default moire elimination value. Scanner, line/photo, monochrome 5771 moire s/ph/mc 4 1-7 specifi es the default moire elimination value. Scanner, photo, monochrome 57...
Page 638
[ 16-95 ] data editing (d) options / scanner no. Process name default unit/range description 5798 achromatic color offset value 2 (scanner / acs) 0 0-100 sets the offset value of the (second) the distance from the (scanner / acs / achromatic color axis). This offset value increase, blue-green system...
Page 639
[ 16-96 ] data editing (d) options / scanner no. Process name default unit/range description 5900 fb scan default horizontal position 128 81-175 specifi es the default value of 0571 0 (fb scanning lateral position adjustment). (1=0.04233mm) 5901 fb scan default start position 128 98-158 specifi es t...
Page 640
[ 16-97 ] sensor monitoring (s) options / high capacity feeder no. Process name confi rmation items 3017 hcf p-f tray elevation switch on:on(switch pressed) off:off(switch released) 3018 hcf p-f tray interlock switch on: detected (switch pressed) off: not detected (switch released) 3019 hcf p-f tray...
Page 641
[ 16-98 ] unit checking (u) options / high capacity feeder upper: no./process name, lower: description 3415 hcf p-f tray paper length (wide) for paper size detection, set 297mm a/d value. 3416 hcf p-f tray paper length (narrow) for paper size detection, set 105mm a/d value. 3417 hcf p-f tray move to...
Page 642
[ 16-99 ] data monitoring (c) options / high capacity feeder no. Process name confi rmation items/description 3600 hcf p-f tray width detection check displays the measurement of the paper feed tray paper width potentiometer 3601 hcf intermediate exit sensor emit value display displays the intensity ...
Page 643
[ 16-100 ] data editing (d) options / high capacity feeder no. Process name default unit/range description 3763 hcf prior roller assist speed setting 977 800-1200 sets the assist speed of the prior roller against the registration roller transport speed. If set the prior roller assist speed slower th...
Page 644
[ 16-101 ] data editing (d) options / high capacity feeder no. Process name default unit/range description 7754 hcf paper buckle (card- long) 6 (-4 - 15)mm sets the amount of slackness of hcf unit. (card & long paper) 7755 hcf paper buckle (card- short) 0 (-4 - 15)mm sets the amount of slackness of ...
Page 645
[ 16-102 ] paper feed settings (u1-u5, light paper) options / high capacity feeder test mode number u1 u2 u3 u4 u5 lp process name default unit/range description 9600 9602 9604 9606 9608 9978 hcf paper buckle (long) 6 (-4 - 15)mm sets the amount of slackness of hcf unit. (long paper) 9601 9603 9605 ...
Page 646
[ 16-103 ] sensor monitoring (s) options / offset staple tray no. Process name confi rmation items 3008 ost switchback pass sensor on: light blocked off: light passes through 3009 ost staple protect lever hp sensor 3037 ost middle feed sensor 1 on: detected (light blocked) off: not detected (light p...
Page 647
[ 16-104 ] unit checking (u) options / offset staple tray upper: no./process name, lower: description 3456 ost eject roller motor (upward) raise the ost eject roller. Note: do not leave driving the motor, because it may damage the mechanism. 3457 ost eject roller motor (downward) lowering the ost ej...
Page 648
[ 16-105 ] unit checking (u) options / offset staple tray upper: no./process name, lower: description 3494 ost tray elevation motor up/down is 1 cycle. Complete 1 cycle then stops automatially. 3495 ost tray shift motor move to rear side then front side is 1 cycle. Complete 1 cycle then stops automa...
Page 649
[ 16-106 ] data editing (d) options / offset staple tray no. Process name default unit/range description 3739 ost guide adjustment value 0 (-5 - 5) adjust distance between left and right ost guide plates. (1=0.3665mm) 3740 ost ejection speed setting (simplex-large paper) 0 (-100 - 100)mm/s adjust pa...
Page 650
[ 16-107 ] sensor monitoring (s) options / high capacity stacker no. Process name confi rmation items 3065 hcs entrance sensor on: detected (light blocked) off: not detected (light passes through) 3066 hcs switchback sensor 3067 hcs sb sensor 3068 hcs middle sensor 3069 hcs fu sensor 3070 hcs vertic...
Page 651
[ 16-108 ] unit checking (u) options / high capacity stacker upper: no./process name, lower: description 3405 hcs offset unit move to offset position moves the hcs offset unit to the offset position. 3406 hcs unit move to lock release hp moves the side fence to hp. Moves the end fence to hp. Moves t...
Page 652
[ 16-109 ] initialization (i) options / high capacity stacker upper: no./process name, lower: description 3535 hcs eeprom initialization all data in hcs eeprom are put back to default. Data monitoring (c) options / high capacity stacker no. Process name confi rmation items/description 3612 hcs sh fi...
Page 653
[ 16-110 ] data editing (d) options / high capacity stacker no. Process name default unit/range description 3817 hcs end fence adjustment (offset) 300 250-450 set the moving value of the end fence to downward direction at offset operation. 3942 hcs serial number setting 0 0-32500 set the serial numb...
Page 654
[ 16-111 ] sensor monitoring (s) options / mail maker no. Process name confi rmation items 3091 mm guide sensor on: detected (light blocked) off: not detected (light passes through) 3092 mm end tamper hp sensor on: home position (light blocked) off: other position (light passes through) 3093 mm side...
Page 655
[ 16-112 ] drive checking (m) options / mail maker no. Process name description 3263 mm guide motor rotates the mm guide motor in transport direction. 3264 mm body fold motor rotates the mm body fold motor in transport direction. 3265 mm wrapping fold motor rotates the mm wrapping fold motor in tran...
Page 656
[ 16-113 ] unit checking (u) options / mail maker upper: no./process name, lower: description 3420 mm end tamp motor home position moves the mm end tamp motor to the home position. 3421 mm side tamp motor home position moves the mm side tamp motor to the home position. 3422 mm top tamp motor home po...
Page 657
[ 16-114 ] data monitoring (c) options / mail maker no. Process name confi rmation items/description 3619 mm loader version displays the mm loader version. 3620 mm firmware version displays the mm fi rmware version. 3621 mm paper feed number displays the mm papaer feed number. 3673 mm pcb area tempe...
Page 658
[ 16-115 ] data editing (d) options / mail maker no. Process name default unit/range description 6030 mm end tamp motor start timing (speed 1) 348 100-600ms adjust the time in various speeds. Rear end edge of the body paper (n-th paper) been detected by the mm guide sensor ↔ mm end tamp motor starts...
Page 659
[ 16-116 ] data editing (d) options / mail maker no. Process name default unit/range description 6065 mm body hit 1 home position adjustment (a4-inner 3 fold) 0 (-479 - 10000) pulse adjust home position of the mm body hit plate 1 at home position return operation. (adjust home position movement stop...
Page 660
[ 16-117 ] data editing (d) options / mail maker no. Process name default unit/range description 6102 mm form home position adjustment pulse 502 443-564pulse pulse number for form fi ne adjustment on form home position movement. 6103 mm form registration motor stop timing 483 458-534pulse adjust a p...
Page 661
[ 16-118 ] data editing (d) options / mail maker no. Process name default unit/range description 6158 mm ejection tray full detection 1 0: disable 1: enable tray full detection by the mm eject tray full detection sensor 6159 mm eject tray full detection timing adjustment 6 2-16time adjust number of ...
Page 662
[ 16-119 ] data editing (d) options / mail maker no. Process name default unit/range description 6333 mm eject remaining jam timing 10 1-60s adjust a jam determination time on remaining jam detection by the mm eject sensor. 6335 mm da1 barcode sensor light emission amount adjustment 60 0-255 adjust ...
Page 663
[ 16-120 ] data editing (d) options / mail maker no. Process name default unit/range description 6624 mm low temperature stop mode selection 0 select mm low temperature stop mode. 0: automatic (stop time determined by ambient temperature) 1: manual (stop time will not determined by ambient temperatu...
Page 664
[ 16-121 ] sensor monitoring (s) options / perfect binder no. Process name confi rmation items 7001 pb paper feed cover length sensor on: detected (light blocked) off: not detected (light passes through) 7002 pb paper feed check sensor 7003 pb body text exit sensor 7004 pb cover registration sensor ...
Page 665
[ 16-122 ] drive checking (m) options / perfect binder no. Process name description 7200 pb paper feed motor 1 (cw) starts and stops the pb paper feed motor 1 (cw) 7201 pb paper feed motor 1 (ccw) starts and stops the pb paper feed motor 1 (ccw) 7202 pb paper feed motor 2 (cw) starts and stops the p...
Page 666
[ 16-123 ] unit checking (u) options / perfect binder upper: no./process name, lower: description 7414 pb clamp insert position move the pb clamp to insert position. 7415 pb clamp home position move the pb clamp to home position. 7416 pb clamp glue position move the pb clamp to glue position. 7417 p...
Page 667
[ 16-124 ] unit checking (u) options / perfect binder upper: no./process name, lower: description 7445 pb cover tray lift down starts and stops the pb cover tray lift-down. 7446 pb glue blade height check 1 at fi rst, clamp the body text, then glue it, fi nally stops after used the glue cut blade. N...
Page 668
[ 16-125 ] data monitoring (c) options / perfect binder no. Process name confi rmation items/description 7602 pb total number of book binding displays accumulated number of book binding. 7603 pb total number of paper transportation displays accumulated number of paper transportation. (accumulated nu...
Page 669
[ 16-126 ] data editing (d) options / perfect binder no. Process name default unit/range description 7616 pb cool down start time setting 10 10-60minute set time period for the system goes into cool down process. 7618 pb clamp body insert horizontal position adjustment 0 (-150 - 150) adjust value fo...
Page 670
[ 16-127 ] data editing (d) options / perfect binder no. Process name default unit/range description 7641 pb left side glue amount adjustment 1 15 5-99 adjust left side glue amount. [body thickness: between 0.1mm and 4.9mm] (1=0.1mm) 7642 pb left side glue amount adjustment 2 15 5-99 adjust left sid...
Page 671
[ 16-128 ] data editing (d) options / perfect binder no. Process name default unit/range description 7668 pb cover length measurement resolution (interposer) 4050 4000-4100pulse measurement resolution for calculating pb cover length. (1pulse = 0.01um) 7669 pb body stack size setting (body size) 0 se...
Page 672
[ 16-129 ] tm p unit cat 401 15 comcolor u 402 15 comcolor u 404 15 comcolor u 407 15 comcolor u 408 15 comcolor u 409 15 comcolor u 410 15 comcolor u 411 15 comcolor u 412 15 comcolor u 413 15 comcolor u 414 16 comcolor u 415 16 comcolor u 416 16 comcolor u 417 16 comcolor u 420 16 comcolor u 421 1...
Page 673
[ 16-130 ] tm p unit cat 1010 10 comcolor s 1011 10 comcolor s 1012 10 comcolor s 1013 10 comcolor s 1014 10 comcolor s 1015 10 comcolor s 1016 10 comcolor s 1017 10 comcolor s 1018 10 comcolor s 1019 10 comcolor s 1020 10 comcolor s 1021 10 comcolor s 1022 10 comcolor s 1023 10 comcolor s 1024 10 c...
Page 674
[ 16-131 ] tm p unit cat 1687 31 comcolor c 1688 31 comcolor c 1689 31 comcolor c 1690 31 comcolor c 1691 31 comcolor c 1692 31 comcolor c 1693 31 comcolor c 1694 31 comcolor c 1695 31 comcolor c 1696 31 comcolor c 1743 38 comcolor d 1744 38 comcolor d 1745 38 comcolor d 1746 38 comcolor d 1747 38 c...
Page 675
[ 16-132 ] tm p unit cat 2173 12 comcolor s 2174 12 comcolor s 2175 12 comcolor s 2176 12 comcolor s 2177 12 comcolor s 2305 14 comcolor m 2327 14 comcolor m 2328 14 comcolor m 2400 21 comcolor u 2401 21 comcolor u 2402 21 comcolor u 2404 21 comcolor u 2405 21 comcolor u 2406 21 comcolor u 2407 21 c...
Page 676
[ 16-133 ] tm p unit cat 3051 103 ost s 3052 103 ost s 3053 103 ost s 3054 103 ost s 3055 103 ost s 3056 103 ost s 3057 103 ost s 3058 103 ost s 3059 103 ost s 3060 103 ost s 3061 103 ost s 3062 103 ost s 3063 97 hcf s 3065 107 hcs s 3066 107 hcs s 3067 107 hcs s 3068 107 hcs s 3069 107 hcs s 3070 1...
Page 677
[ 16-134 ] tm p unit cat 3496 105 ost u 3497 105 ost u 3498 105 ost u 3499 105 ost u 3525 98 hcf i 3535 109 hcs i 3600 99 hcf c 3601 99 hcf c 3602 99 hcf c 3603 99 hcf c 3604 99 hcf c 3605 99 hcf c 3606 99 hcf c 3608 99 hcf c 3609 99 hcf c 3610 99 hcf c 3611 99 hcf c 3612 99 hcf c 3612 109 hcs c 361...
Page 678
[ 16-135 ] tm p unit cat 4242 62 finisher m 4243 63 finisher m 4244 63 finisher m 4245 63 finisher m 4246 63 finisher m 4247 63 finisher m 4248 63 finisher m 4249 63 finisher m 4250 63 finisher m 4251 63 finisher m 4252 63 finisher m 4253 63 finisher m 4254 63 finisher m 4255 63 finisher m 4256 63 f...
Page 679
[ 16-136 ] tm p unit cat 4738 71 finisher d 4739 71 finisher d 4740 71 finisher d 4741 71 finisher d 4742 71 finisher d 4743 71 finisher d 4744 71 finisher d 4745 71 finisher d 4746 71 finisher d 4747 71 finisher d 4748 72 finisher d 4749 72 finisher d 4750 72 finisher d 4751 72 finisher d 4752 72 f...
Page 680
[ 16-137 ] tm p unit cat 4959 83 finisher d 4960 83 finisher d 4961 83 finisher d 4962 83 finisher d 4963 83 finisher d 4964 84 finisher d 4965 84 finisher d 4966 84 finisher d 4967 84 finisher d 4968 84 finisher d 4969 84 finisher d 4970 84 finisher d 4971 84 finisher d 4972 84 finisher d 4973 84 f...
Page 681
[ 16-138 ] tm p unit cat 5818 95 scanner d 5819 95 scanner d 5820 95 scanner d 5821 95 scanner d 5850 95 scanner d 5851 95 scanner d 5900 96 scanner d 5901 96 scanner d 5902 96 scanner d 5903 96 scanner d 5904 96 scanner d 5905 96 scanner d 5911 96 scanner d 5912 96 scanner d 5913 96 scanner d 5914 ...
Page 682
[ 16-139 ] tm p unit cat 6695 120 mm d 6698 120 mm d 6699 120 mm d 6700 48 comcolor d 6701 48 comcolor d 6702 48 comcolor d 6703 48 comcolor d 6704 48 comcolor d 6705 48 comcolor d 6706 48 comcolor d 6707 48 comcolor d 6708 48 comcolor d 6709 48 comcolor d 6710 48 comcolor d 6711 48 comcolor d 6712 ...
Page 683
[ 16-140 ] tm p unit cat 7201 122 pb m 7202 122 pb m 7203 122 pb m 7205 122 pb m 7206 122 pb m 7207 122 pb m 7208 122 pb m 7209 122 pb m 7210 122 pb m 7211 122 pb m 7212 122 pb m 7213 122 pb m 7214 122 pb m 7215 122 pb m 7216 122 pb m 7217 122 pb m 7218 122 pb m 7220 122 pb m 7221 122 pb m 7227 122 ...
Page 684
[ 16-141 ] tm p unit cat 7745 54 comcolor d 7746 54 comcolor d 7747 54 comcolor d 7748 54 comcolor d 7749 54 comcolor d 7750 54 comcolor d 7751 54 comcolor d 7752 54 comcolor d 7753 54 comcolor d 7754 101 hcf d 7755 101 hcf d 7767 54 comcolor d 7768 101 hcf d 7770 101 hcf d 7771 101 hcf d 7772 101 h...
Page 685
[ 16-142 ] tm p unit cat 9705 58 comcolor d 9706 58 comcolor d 9707 58 comcolor d 9708 58 comcolor d 9709 58 comcolor d 9710 58 comcolor d 9711 58 comcolor d 9712 58 comcolor d 9713 58 comcolor d 9714 58 comcolor d 9715 58 comcolor d 9716 58 comcolor d 9717 58 comcolor d 9718 58 comcolor d 9719 58 c...
Page 686
[ 16-143 ] tm p unit cat 9897 58 comcolor d 9898 58 comcolor d 9899 58 comcolor d 9900 58 comcolor d 9901 58 comcolor d 9902 58 comcolor d 9903 58 comcolor d 9904 58 comcolor d 9905 58 comcolor d 9906 102 hcf d 9908 102 hcf d 9909 102 hcf d 9910 102 hcf d 9911 102 hcf d 9912 58 comcolor d 9913 59 co...
Page 687
[ 16-144 ] test modes rev.1.00 memo.
Page 688: Contents
Face down offset stapler [ 19-1 ] [ 19-1 ] option contents 1. Brief summary ................................................................................. 19-5 1-1. Summary ................................................................................. 19-5 1-2. Major functions ...................
Page 689
[ 19-2 ] face down offset stapler [ 19-2 ] option 4-19. Eject roller (drive side) removal ................ 19-61 4-20. Eject roller (driven side) removal ....................................... 19-62 4-21. Reverse roller removal ....................................................... 19-63 4-22. Tra...
Page 690: 1. Brief Summary
Face down offset stapler [ 19-3 ] [ 19-3 ] option 1. Brief summary 1-1. Summary 1) does not slow down the printing speed in simplex printing nor in duplex printing. 150 ppm (pages per minute) in non-sort mode. 120 ppm in sort mode. 2) offset function and staple function become selectable compared to...
Page 691
[ 19-4 ] face down offset stapler [ 19-4 ] option 1-3. Specification.
Page 692
Face down offset stapler [ 19-5 ] [ 19-5 ] option 1-4. Major components ˂ paper ejection roller ˃ • ejects the papers onto the paper stacking tray. • pulls each paper back into the staple area when the staple function is selected. • the roller nip is released while the papers are aligned for staplin...
Page 693
[ 19-6 ] face down offset stapler [ 19-6 ] option 1-5. Periodic replacement parts no. Parts name estimated durability estimated durability 1 transfer roller 1 1,000,000. Pages test mode no. 401: count information print. 2 transfer roller 2 1,000,000. Pages test mode no. 401: count information print....
Page 694: 2. Mechanism
Face down offset stapler [ 19-7 ] [ 19-7 ] option 2. Mechanism 2-1. Paper transfer the unit has two paper ejection selection. 1) non-staple paper ejection, with or without offset function. 2) stapled paper ejection. The paper paths differs between stapling and non-stapling. • when not stapling, rega...
Page 695
[ 19-8 ] face down offset stapler [ 19-8 ] option ●explanation 1. Paper feeding feeds the paper from the printer into the face down offset stapler via the transfer roller 1. The paper speed is equivalent to the printer ejection speed. 2. Paper acceleration transfer roller 2 accelerates the paper spe...
Page 696
Face down offset stapler [ 19-9 ] [ 19-9 ] option 2-2-3. Stapled paper ejection the printed papers from the printer are pooled on the staple tray until stapled and ejected onto the paper stacking tray. The staple positions are selectable one in front, one in rear or two on the side. ●explanation 1. ...
Page 697
[ 19-10 ] face down offset stapler [ 19-10 ] option 4. Machine movement from the second paper (2): before the paper ejects out, the eject roller comes down and with its reverse rotation sends the paper to the staple tray, together with the rake roller. Note: the tamper plates on the photograph is co...
Page 698
Face down offset stapler [ 19-11 ] [ 19-11 ] option 2-3. Initialization movement ●explanation when the unit is powered on or opened cover is closed with the machine powered on, the equipment performs initialization movement to ready for the paper receiving. ●detailed explanation ˂the condition for t...
Page 699
[ 19-12 ] face down offset stapler [ 19-12 ] option ・ tamper plate ready position movement: the tamper plates slide to the paper width position to guide and align the oncoming papers. ・ eject roller ready position movement: the eject roller lowers down and starts its rotation. ・ stapler unit ready p...
Page 700
Face down offset stapler [ 19-13 ] [ 19-13 ] option stapled or not paper ejection mode paper type reverse roller position stapled non-sorted standard low position (45 degrees) thick (small) thick (large) / envelope retrieved position non-stapled either non-sorted or offset sorted. Standard high posi...
Page 701
[ 19-14 ] face down offset stapler [ 19-14 ] option 2-5-3. Paper stacking tray paper surface position detecting action. 1) set the paper stacking tray to the paper receiving position. 1. Activates the tray elevator motor to loser the paper stacking tray. - when paper is on the tray: the tray is lowe...
Page 702
Face down offset stapler [ 19-15 ] [ 19-15 ] option.
Page 703
[ 19-16 ] face down offset stapler [ 19-16 ] option.
Page 704
Face down offset stapler [ 19-17 ] [ 19-17 ] option オフセットガイドAssy 排出ローラ 積載トレイ.
Page 705
[ 19-18 ] face down offset stapler [ 19-18 ] option 30mm OST積載トレイシフトセンサ2 OST積載トレイシフトセンサ1 OST積載トレイシフトモータAssy 円板 溝カム.
Page 706
Face down offset stapler [ 19-19 ] [ 19-19 ] option.
Page 707
[ 19-20 ] face down offset stapler [ 19-20 ] option.
Page 708
Face down offset stapler [ 19-21 ] [ 19-21 ] option.
Page 709
[ 19-22 ] face down offset stapler [ 19-22 ] option.
Page 710
Face down offset stapler [ 19-23 ] [ 19-23 ] option.
Page 711
[ 19-24 ] face down offset stapler [ 19-24 ] option.
Page 712
Face down offset stapler [ 19-25 ] [ 19-25 ] option.
Page 713
[ 19-26 ] face down offset stapler [ 19-26 ] option.
Page 714
Face down offset stapler [ 19-27 ] [ 19-27 ] option.
Page 715
[ 19-28 ] face down offset stapler [ 19-28 ] option.
Page 716
Face down offset stapler [ 19-29 ] [ 19-29 ] option.
Page 717
[ 19-30 ] face down offset stapler [ 19-30 ] option.
Page 718
Face down offset stapler [ 19-31 ] [ 19-31 ] option.
Page 719
[ 19-32 ] face down offset stapler [ 19-32 ] option 間欠ギア 掻き込みローラ昇降HPセンサ 駆動ギア OST掻き込みローラ昇降ソレノイド バネ ロック板 掻き込みローラ ステープルユニット.
Page 720
Face down offset stapler [ 19-33 ] [ 19-33 ] option 針傷防止レバー 積載トレイ 溝カムギア 溝カム部 掻き込みローラ レバー.
Page 721
[ 19-34 ] face down offset stapler [ 19-34 ] option paper stacking t ray transport motor eject roller elevation hp sensor illustration details eject roller elevation motor ejection roller staple tray paper detection sensor reverse roller front guide plate hp sensor rear guide plate hp sensor sta cki...
Page 722
Face down offset stapler [ 19-35 ] [ 19-35 ] option 3.ユニットの説明 3-1.主要部品レイアウト図 3-2.主要部品リスト.
Page 723
[ 19-36 ] face down offset stapler [ 19-36 ] option.
Page 724: 4. Disassembly
Face down offset stapler [ 19-37 ] [ 19-37 ] option 4. Disassembly 4-1. Detaching of the face down offset stapler from the printer. 1. Turn off the printer power. (the face down offset stapler power goes off together with the printer power.) 2. Unplug the power cable from the face down offset staple...
Page 725
[ 19-38 ] face down offset stapler [ 19-38 ] option 2. Remove the front cover. (bind screw 4x8 (4 pcs)). 4-3. Rear cover removal 1. Remove cover-frame right. (bind screw 4x8 (1 pcs)) rear cover cover-frame right front cover.
Page 726
Face down offset stapler [ 19-39 ] [ 19-39 ] option 2. Remove rear sub-cover. (bind screw 4x8 (1 pc)) 3. Remove rear cover. (bind screw 4x8 (3 pcs)) rear cover cover-frame right rear sub-cover rear sub-cover.
Page 727
[ 19-40 ] face down offset stapler [ 19-40 ] option 4-4. Jam release cover assembly removal 1. Open the jam release cover assembly. 2. Detach the stopper arm from the jam release cover assembly. (shoulder screw 4x8 (1 pc)) 3. Lift off the jam release cover assembly. (the pivot shaft is flattened on ...
Page 728
Face down offset stapler [ 19-41 ] [ 19-41 ] option 4-5. Switchback guide removal 1. Detach the switchback guide. ˂ pushing the switchback guide in the dissection of the arrow mark enables the guide to detach.˃ 4-6. Jam release cover switch removal 1. Remove the front cover. 2. Remove the jam releas...
Page 729
[ 19-42 ] face down offset stapler [ 19-42 ] option 4-7. Staple change cover switch removal 1. Remove the front cover. 2. Remove the staple change cover switch. (it screw 3x6 (2 pcs)). 3. Remove wire saddles. (2 pcs)) 4. Unplug the connector. (1 pc)) 4-8. Offset guide assembly removal 1. Remove the ...
Page 730
Face down offset stapler [ 19-43 ] [ 19-43 ] option 3. Remove the paper tray bracket cover front. (bind screw 4x8 (1 pc)) 4. Remove the paper tray bracket cover rear. (bind screw 4x8 (1 pc)) 5. Remove the paper tray bracket assembly. (bind screw 4x8 (4 pcs)) 6. Remove the offset guide assembly. (fla...
Page 731
[ 19-44 ] face down offset stapler [ 19-44 ] option 4-9. Staple scratch protection arm assembly removal 1. Remove the offset guide assembly. 2. Remove the cover plate front. (it screw 3x6 (2 pcs)) 3. Remove the cover plate rear. (it screw 3x6 (2 pcs)) 4. Remove the staple scratch protection arm asse...
Page 732
Face down offset stapler [ 19-45 ] [ 19-45 ] option 4-10. Staple tray assembly removal 1. Remove the offset guide assembly. 2. Remove the staple scratch protection arm assembly. 3. Remove the staple tray assembly. (it 3x6 (2 pcs)) 4-11. Paper receive guide plate assembly removal 1. Remove the jam re...
Page 733
[ 19-46 ] face down offset stapler [ 19-46 ] option 6. Remove the paper receive guide plate assembly. (bind screw 4x8 (4 pcs), and unhook the wire harness.) 4-12. Stapler assembly removal 1. Remove the front cover. 2. Remove the stapler cover. (w-sems screw 3x6 (1 pcs)) 3. Remove the stapler assembl...
Page 734
Face down offset stapler [ 19-47 ] [ 19-47 ] option 4-13. Control board (pcb) tilting 1. Remove the rear cover. 2. Unplug wire connectors. (6 pcs) 3. Detach the control board (pcb) from the unit and gently tilt and hang it down, paying caution not to scratch the pcb surface. (w-sems screw 3x6 (4 pcs...
Page 735
[ 19-48 ] face down offset stapler [ 19-48 ] option 4-14. Control board (pcb) 1. Remove the rear cover. 2. Disconnect all the wire connectors from the control board (pcb). 3. Remove the pcb mounting screw from the bottom right-hand corner of the pcb. (w-sems screw 4x8 (1 pc)) 4. Release the control ...
Page 736
Face down offset stapler [ 19-49 ] [ 19-49 ] option 4-15. Power supply unit removal. 1. Remove the rear cover. 2. Remove the power supply unit. (it3c screw 4x8 (4 pcs)) 3. Release one wire from the wire saddle on the right-hand bottom. 4. Unplug connectors from the right-hand side. (2 pcs) 5. Unplug...
Page 737
[ 19-50 ] face down offset stapler [ 19-50 ] option 4-16. Transfer roller 1 & transfer roller 2 removal (these two rollers are interchangeable) 1. Remove the jam release cover assembly. 2. Remove the paper receive guide plate assembly. 3. Remove the transfer guide plate assembly. (it screw 3x6 (2 pc...
Page 738
Face down offset stapler [ 19-51 ] [ 19-51 ] option 4-17. Entrance roller removal 1. Remove the front cover. 2. Open the jam release cover assembly. 3. Remove the transfer guide plate. (it screw 3x6 (2 pcs)) 4. Remove the top transfer guide plate. (it screw 3x6 (4 pcs)) entrance roller top transfer ...
Page 739
[ 19-52 ] face down offset stapler [ 19-52 ] option 5. Remove the thin snap ring from the front end f the roller shaft. 6. Remove dark gay colored snap ring from the entrance roller shaft from the location as shown on the photograph below. 7. Remove the entrance roller. Dark gray colored snap ring. ...
Page 740
Face down offset stapler [ 19-53 ] [ 19-53 ] option 4-18. Rake roller assembly removal 1. Remove the front cover. 2. Remove the rear cover. 3. Remove the paper stacking tray. (bind screw 4x8 (2 pcs)) 4. Unscrew and free the ground wire. (it screw 3x6 (1 pc)) 5. Remove the top cover. (it3c screw 4x8 ...
Page 741
[ 19-54 ] face down offset stapler [ 19-54 ] option 6. Remove the eject roller elevation motor assembly. 7. Remove the black colored plastic sector gear. (1 claw hook) 8. Remove black plastic snap rings from both end of the swing shaft assembly. (2 pcs) black plastic snap ring (front) black plastic ...
Page 742
Face down offset stapler [ 19-55 ] [ 19-55 ] option 9. Remove the two ejection guide assist spring from the shaft. 10. Remove the swing shaft assembly by sliding the shaft to the rear and clearing the spring pin out through the front frame of the unit. (match the shape of the hole and the spring pin...
Page 743
[ 19-56 ] face down offset stapler [ 19-56 ] option 11. Remove the transfer driven roller assembly. (it screw 3x6 (2 pcs)) 12. Lift up the eject roller assembly eject roller assembly transfer driven roller assembly transfer driven roller assembly.
Page 744
Face down offset stapler [ 19-57 ] [ 19-57 ] option 13. Slide the stapler unit to the center of the unit. 14. Gently slide the front and rear tamper plates to the maximum outer position, making sure that the stapler unit is centered not to interfere with the taper plate movement. 15. Remove the whit...
Page 745
[ 19-58 ] face down offset stapler [ 19-58 ] option 17. Unhook the link hook (white plastic) of the rake roller assembly from the hanger hook (black plastic hook) for both the front and rear. 18. Remove the rake roller assembly from the unit. Rake roller assembly rake roller assembly the white link ...
Page 746
Face down offset stapler [ 19-59 ] [ 19-59 ] option 4-19. Eject roller (drive side) removal 1. Remove the paper stacking tray. (bind screw 4x8 (2 pcs)) 2. Remove the top cover. (it3c screw 4x8 (2 pcs)) 3. Remove the paper drop guide assembly. 4. Remove the white plastic snap ring from the both ends ...
Page 747
[ 19-60 ] face down offset stapler [ 19-60 ] option 4-20. Eject roller (driven side) removal 1. Remove the paper stacking tray. (bind screw 4x8 (2 pcs)) 2. Remove the top cover (it3c screw 4x8 (2 pcs)) 3. Remove the paper drop guide assembly. 4. Remove thin white plastic snap ring from the outer mos...
Page 748
Face down offset stapler [ 19-61 ] [ 19-61 ] option 5. Push down the reverse roller to make the room and pull out the shaft of the eject roller (driven) inward to free the eject roller (driven) 6. Remove the eject roller (driven). Pay caution to the direction of the ejection roller (driven) in assem...
Page 749
[ 19-62 ] face down offset stapler [ 19-62 ] option 4-22. Transfer sensor 1 removal. 1. Remove the jam release cover assembly. 2. Remove the paper receive guide plate assembly. 3. Remove the transfer guide plate assembly. 4. Remove the transfer sensor 1. (it screw 3x6 (1 pc)) 5. Detach wire saddle. ...
Page 750
Face down offset stapler [ 19-63 ] [ 19-63 ] option 4-23. Entrance sensor removal 1. Remove jam release cover assembly. 2. Paper receive guide plate assembly. 3. Transfer guide plate assembly. (it screw 3x6 (2 pcs)) 4. Remove the top transfer guide plate. (it screw 3x6 (4 pcs)) 5. Remove the entranc...
Page 751
[ 19-64 ] face down offset stapler [ 19-64 ] option 4-24. Staple tray paper detection sensor 1. Remove the offset guide assembly. 2. Staple scratch protection arm assembly. 3. Remove the staple tray assembly. 4. Disconnect wire connectors. (2 pcs) 5. Remove the staple tray paper detection sensor ass...
Page 752
Face down offset stapler [ 19-65 ] [ 19-65 ] option 4-25. Switchback pass sensor removal 1. Remove the jam release cover assembly. 2. Remove the paper receive guide plate assembly. 3. Remove the transfer guide plate. (it screw 3x6 (2 pcs)) 4. Using a stubby screwdriver, remove the stay with the sens...
Page 753
[ 19-66 ] face down offset stapler [ 19-66 ] option 4-26. Eject roller elevation hp sensor removal 1. Remove the front cover. 2. Unplug the wire connector from the eject roller elevation motor. 3. Remove the eject roller elevation motor assembly. 4. Unplug the wire connector from the eject roller el...
Page 754
Face down offset stapler [ 19-67 ] [ 19-67 ] option 4-28. Paper stacking tray upper limit sensor removal 1. Remove the rear cover. 2. Tilt the control board (pcb). 3. Unplug the wire connector from the sensor. 4. Remove the paper stacker tray upper limit sensor from the metal bracket. 4-29. Paper st...
Page 755
[ 19-68 ] face down offset stapler [ 19-68 ] option 4-30. Paper stacking tray lower limit sensor removal 1. Remove the rear cover. 2. Remove the control board (pcb). 3. Remove the tray elevation motor assembly. 4. Unplug total of 3 wire harness connectors. 5. Remove the paper stacking tray lower lim...
Page 756
Face down offset stapler [ 19-69 ] [ 19-69 ] option 4-32. Tray shift sensor 1 & tray shift sensor 2 removal 1. Remove the tray shift motor assembly. 2. Remove the disc. (1 thin white plastic snap ring.) 3. Remove the parallel pin, snap ring and metal bushing. 4. Remove the tray shift sensor assembly...
Page 757
[ 19-70 ] face down offset stapler [ 19-70 ] option precaution in assembly: make sure to match the positions between the white cam and black disc. 4-33. Stapler slide hp sensor removal 1. Remove the front cover. 2. Remove the offset guide assembly. 3. Remove the cover plate (front). (it screw 3x6 (2...
Page 758
Face down offset stapler [ 19-71 ] [ 19-71 ] option precaution in assembly: make sure to engage the hook on the sensor bracket firmly through the slit on the machine beam in assembly. 4-34. Reverse roller elevation hp sensor removal 1. Remove the offset guide assembly. 2. Remove the black plastic co...
Page 759
[ 19-72 ] face down offset stapler [ 19-72 ] option 3. Elevation motor by hand to move the sensor actuator away from the hp position (out of the sensor). 4. Unplug the sensor connector. 5. Unhook and detach the reverse roller elevation hp sensor from the metal bracket. 4-35. Stacking tray paper dete...
Page 760
Face down offset stapler [ 19-73 ] [ 19-73 ] option 4-36. Front tamper hp sensor & rear tamper hp sensor removal 1. Remove the offset guide assembly. 2. Remove the staple scratch protection arm assembly. 3. Remove the staple tray assembly. 4. Detach the front tamper hp sensor. (it screw 3x6 (1 pc)) ...
Page 761
[ 19-74 ] face down offset stapler [ 19-74 ] option 4-37. Tray paper top detection sensors 1, 2 and 3 removal OST針傷防止レバーHPセンサ 1. Remove the offset guide assembly. 2. Remove the staple scratch protection arm assembly. The detailed procedure for removal of each sensor is described below. Tray paper to...
Page 762
Face down offset stapler [ 19-75 ] [ 19-75 ] option tray paper top detection sensor 1 & 3 removal 3. Remove wire saddle. (1 pc) 4. Remove wire protection edge saddles. (3 pcs) 5. Remove tray paper top detection sensor assembly 1 & 3. (it screw 3x6 (1 pc)) 6. Unplug the wire connectors from the senso...
Page 763
[ 19-76 ] face down offset stapler [ 19-76 ] option 4-39. Stapler slide motor removal 1. Remove the front cover. 2. Remove the stapler slide motor assembly. (it screw 3x6 (2 pcs)) 3. Unplug the wire connector from the motor assembly. Stapler slide motor.
Page 764
Face down offset stapler [ 19-77 ] [ 19-77 ] option 4-40. Eject roller elevation motor removal 1. Remove the front cover. 2. Remove the eject roller elevation motor assembly. (it screw 3x6 (2 pcs)) 3. Unplug the wire connector from the motor and the sensor, as shown on the photograph below. 4. Remov...
Page 765
[ 19-78 ] face down offset stapler [ 19-78 ] option 4-42. Transfer roller motor 1 removal 1. Remove the rear cover. 2. Unplug the wire connector from the transfer roller motor 1. 3. Remove the spring. 4. Remove the transfer roller motor 1 assembly. (it screw 3x6 (2 pcs)) > hold the timing belt with ...
Page 766
Face down offset stapler [ 19-79 ] [ 19-79 ] option 4-43. Transfer roller motor 2 removal 1. Remove the rear cover. 2. Unplug the wire connector from the transfer roller motor 2. 3. Remove the spring. 4. Remove the transfer roller motor 2 assembly. (it screw 3x6 (2 pcs)) > hold the timing belt with ...
Page 767
[ 19-80 ] face down offset stapler [ 19-80 ] option 4-44. Transport motor removal 1. Remove the rear cover. 2. Tilt down the control board (pcb). 3. Remove the cop cover. (it3c screw 4x8 (2 pcs)) 4. Remove the wire saddle (1 pc). 5. Remove the metal plate mounted above the control board. (it screw 3...
Page 768
Face down offset stapler [ 19-81 ] [ 19-81 ] option 4-45. Ejection motor removal 1. Remove the rear cover. 2. Tilt down the control board (pcb) 3. Remove the top cover. (it3c screw 4x8 (2 pcs)) 4. Remove the wire saddle. (1 pc) 5. Remove the metal plate mounted above the control board. (it screw 3x6...
Page 769
[ 19-82 ] face down offset stapler [ 19-82 ] option ˂ 1 screw accessed from the paper receiving side. ˃ 6. Remove the plastic wire harness guide. (3 hooks) 7. Unplug wire connector from the ejection motor. 8. Remove the spring. (1 pc) 9. Remove the ejection motor. Connector spring ejection motor pla...
Page 770
Face down offset stapler [ 19-83 ] [ 19-83 ] option > hold the timing belt with a finger and insert the motor pulley to hook onto the timing belt. Timing belt tension adjustment: apply automatic tension on the motor by hooking the spring while the mounting screws of the motor assembly is loosened. T...
Page 771
[ 19-84 ] face down offset stapler [ 19-84 ] option 4-47. Cooling fan removal. 1. Remove the rear cover. 2. Tilt down the control board (pcb). 3. Remove the cooling fan assembly. (it screw 3x6 (4 pcs)) 4. Detach the ground wire. (it screw 3x6 (1 pc) 5. Release wires from wire saddles. (10 places) 6....
Page 772
Face down offset stapler [ 19-85 ] [ 19-85 ] option 4-48. Tray shift motor removal 1. Remove the offset guide assembly. 2. Remove the cover plate (rear). (it screw 3x6 (2 pcs) 3. Unplug wire connectors. (2 pcs) 4. Remove the tray shift motor assembly. (it screw 3x6 (3 pcs) 5. Separate the tray shift...
Page 773
[ 19-86 ] face down offset stapler [ 19-86 ] option 4-49. Staple scratch protection arm motor 1. Remove the offset guide assembly. 2. Remove cover plate (front). (it screw 3x6 (2 pcs)) 3. Remove the spring. 4. Remove the staple scratch protection arm motor assembly. (w-sems screw 3x6 (2 pcs)) 5. Unp...
Page 774
Face down offset stapler [ 19-87 ] [ 19-87 ] option 4-50. Reverse roller motor 1. Remove the offset guide assembly. 2. Remove the spring. 3. Remove the reverse roller motor assembly. (w-sems 3x6 (2 pcs)) 4. Unplug wire connector from the motor.. (1 pc) 4-51. Reverse roller elevation motor removal 1....
Page 775
[ 19-88 ] face down offset stapler [ 19-88 ] option grounding plate 4-52. Front tamper motor & rear tamper motor removal 1. Remove the offset guide assembly. 2. Remove the staple scratch protection arm assembly. 3. Remove the stapling tray assembly. 4. Unplug the wire connectors. (2 pcs) 5. Remove t...
Page 776
Face down offset stapler [ 19-89 ] [ 19-89 ] option 4-53. Stapler cable removal 1. Remove the front cover. 2. Remove the rear cover. 3. Remove the jam release cover assembly. 4. Remove paper receive guide plate assembly. 5. Remove the transfer guide plate. (it3c screw 3x6 (2 pcs) 6. Unplug the stapl...
Page 777
[ 19-90 ] face down offset stapler [ 19-90 ] option front rear timing belt timing belt stapler rail the location of the two screws to remove. There is actually a plate blocking the view. Stapler rail rear front 9. Remove the stapler slide motor assembly, loosen the timing belt and unhook the belt fr...
Page 778
Face down offset stapler [ 19-91 ] [ 19-91 ] option 11. Remove two mounting shoulder-screws of the stapler cable guide (plastic). 12. Removing the stapler rail completely out of the unit enables the stapler cable to come out. Precaution in assembly: the base on which the stapler assembly is to be mo...
Page 779
[ 19-92 ] face down offset stapler [ 19-92 ] option eep-rom memory control board 5.Other removals 1. Control board (pcb) replacement 1. Remove the control board (pcb). 2. Remove the eep-rom from the detached control board (pcb) to re-use on the new replacement pcb. 3. Attach the eep-rom, previously ...
Page 780: Contents
Hs5000 scanner option [ 20-1 ] x1 series comcolor (revision 0.9) chapter 20. Hs5000 scanner (option) contents 1. Specification .................................................................................... 20-3 2. Fb unit ...........................................................................
Page 781
Hs5000 scanner (option) [ 20-2 ] x1 series comcolor (revision 0.9).
Page 782: 1. Specification
Hs5000 scanner option [ 20-3 ] x1 series comcolor (revision 0.9) 1. Specification.
Page 783: 2. Fb Unit
Hs5000 scanner (option) [ 20-4 ] x1 series comcolor (revision 0.9) 2. Fb unit 2-1. Original set section setting the original • place the original on the stage glass and close the stage cover. • unlike the af unit in which the original is placed on the center of the unit, the original is placed flat ...
Page 784
Hs5000 scanner option [ 20-5 ] x1 series comcolor (revision 0.9) 2-2. Original scanning mechanism main parts layout drawing (scanner top view) 1. Scanner module the input is paper image. The output is image signal. It is a box type unit with the function to scan paper originals by moving in parallel...
Page 785
Hs5000 scanner (option) [ 20-6 ] x1 series comcolor (revision 0.9) the scanner module movement : a pulse motor and a timing belt is used for the movement of the scanner module along the guide shaft. 2-3. Functional positions of the scanner • the carriage hp (home position) is detected by the scanner...
Page 786
Hs5000 scanner option [ 20-7 ] x1 series comcolor (revision 0.9) shading plate scanner module maximum movement shading compensation (white) shading compensation (black) af scanning position offset/gain adjustment fb scanning start position hp sensor scanner module fix position hp position original g...
Page 787: 3. Af Unit
Hs5000 scanner (option) [ 20-8 ] x1 series comcolor (revision 0.9) 3. Af unit 3-1. Original set section setting the original • place the original on the original feed tray and slide the original fence against the original. • compared to the fb unit in which the original is placed on the top edge of ...
Page 788
Hs5000 scanner option [ 20-9 ] x1 series comcolor (revision 0.9) 3-2. Original path simplex scanning (1) the original is transferred to the registration roller by the pickup roller, feed roller and separation roller. • the drive for these rollers is taken from the feed motor. • the registration sens...
Page 789
Hs5000 scanner (option) [ 20-10 ] x1 series comcolor (revision 0.9) 3-3. Roller rotation rotation of each roller • the feed roller is driven by the feed motor. • the pickup roller is driven by the feed motor via the feed roller. • the separation roller rotates by the friction against the feed roller...
Page 790
Hs5000 scanner option [ 20-11 ] x1 series comcolor (revision 0.9) original stopper • when the originals are stacked on the original feed tray, the leading edge of the originals rests hitting against the original stopper. • the original stopper is locked in down position when the pickup roller is in ...
Page 791
Hs5000 scanner (option) [ 20-12 ] x1 series comcolor (revision 0.9) nip solenoid of the ejection roller • in order to allow easy removal of a jammed original, the nip solenoid of the ejection roller is switched off to release the nip of the ejection roller when the af unit is in standby mode. • duri...
Page 792: Disassembly
Hs5000 scanner option [ 20-13 ] x1 series comcolor (revision 0.9) disassembly 1. Fb unit 1-1. Covers turn off the scanner power, disconnect the power cable from the power source and remove the covers listed below. (1) left cover • remove 4 screws (binding screw 3x6 (2 pcs), binding screw 4x6 (2 pcs)...
Page 793
Hs5000 scanner (option) [ 20-14 ] x1 series comcolor (revision 0.9) 1-2. Stage glass (1) turn off the scanner power, disconnect the power cable from the power source and remove following two covers. • stage glass support on the right. • left cover (2) remove 2 screws and lift the stage glass off the...
Page 794
Hs5000 scanner option [ 20-15 ] x1 series comcolor (revision 0.9) 1-3. Original detection sensor (1) turn off the scanner power, disconnect the power cable from the power source and remove the stage glass. (2) remove the sensor cover. (it screw 3x6 (11 pcs)). (3) disconnect 2 wire connectors while r...
Page 795
Hs5000 scanner (option) [ 20-16 ] x1 series comcolor (revision 0.9) 1-4. Original size detection sensors (1) turn off the scanner power, disconnect the power cable from the power source and remove the stage glass. (2) remove the sensor cover. (it screw 3x6 (11 pcs)). Disconnect two wire connectors w...
Page 796
Hs5000 scanner option [ 20-17 ] x1 series comcolor (revision 0.9) 1-6. Scanner module transfer motor (1) turn off the scanner power, disconnect the power cable from the power source and remove the covers listed below. (2) right cover • remove 2 shoulder-screws to detach the stage glass support on th...
Page 797
Hs5000 scanner (option) [ 20-18 ] x1 series comcolor (revision 0.9) 1-7. Cooling fan (1) turn off the scanner power, disconnect the power cable from the power source and remove the rear cover. (2) remove two mounting screws of the cooling fan assembly. (it screw 3x6 (2 pcs)) (3) disconnect the wire ...
Page 798
Hs5000 scanner option [ 20-19 ] x1 series comcolor (revision 0.9) 1-9. Scanner module (1) turn off the scanner power, disconnect the power cable from the power source and remove the stage glass. (2) remove the left cover. (binding screw 4x6 (2 pcs)). (3) remove the right cover. (binding screw 4x6 (2...
Page 799
Hs5000 scanner (option) [ 20-20 ] x1 series comcolor (revision 0.9) (7)remove the guide shaft support plate on the right-hand surface of the scanner. (w sems screw 3x8 (2 pcs)). (8) rotate the removed guide shaft support plate, up-side-down, so the wide projected surface is on the bottom. Using only...
Page 800
Hs5000 scanner option [ 20-21 ] x1 series comcolor (revision 0.9) (11) lay the scanner module up-side-down on top of right-hand-side scanner frame. (12) detach the scanner module locking plate. (p-tight-washer-head-screw 3x10 (1 pc)). (13) detach the ffc holder. (14) disconnect the ffc (flexible fla...
Page 801
Hs5000 scanner (option) [ 20-22 ] x1 series comcolor (revision 0.9) (15) detach the ffc holder. (the ffc holder and ffc are in one assembly.) ● mounting back the scanner module. (1) connect the two ffc onto the ccd pcb. The ferrite cores should be positioned as shown on the photograph below. (2) ali...
Page 802
Hs5000 scanner option [ 20-23 ] x1 series comcolor (revision 0.9) (5) rotate the scanner module in its original direction. Mount the ffc holder and fix in position using the mounting screw (it screw 3x6 (1 pc)). (6) insert the guide shaft from the right-hand-side. (7) confirm that the guide shaft is...
Page 803
Hs5000 scanner (option) [ 20-24 ] x1 series comcolor (revision 0.9) (9) rotate the guide shaft support plate back to its original condition and mount it back on the scanner unit. Press the guide shaft support plate down when tightening the mounting screws (w sems screw 3x8 (2 pcs)). (10) hook the ti...
Page 804
Hs5000 scanner option [ 20-25 ] x1 series comcolor (revision 0.9) (12) apply the grease. Follow the instruction given along with the photographs, in applying the grease. The step-4, given earlier on this series of instruction, also uses this same grease. Step-1: showing how the grease is supplied in...
Page 805
Hs5000 scanner (option) [ 20-26 ] x1 series comcolor (revision 0.9) step-9: slide the carriage to the right. Step-10: confirm the grease injection nozzle on the carriage. Step-11: insert the tip of the grease bag into the injection nozzle on the carriage and squeeze the grease into the carriage. Ste...
Page 806
Hs5000 scanner option [ 20-27 ] x1 series comcolor (revision 0.9) 2. Disassembly 2-1. Stripper area stripper unit (1) open the original feed cover. (2) the stripper unit by rotating it up. Separation roller (1) remove the stripper unit. (2) remove the separation roller, as a unit, by rotating it for...
Page 807
Hs5000 scanner (option) [ 20-28 ] x1 series comcolor (revision 0.9) 3. Remove the feed roller unit. (1) remove the black clip on the front and remove black colored metal from the shaft. (2) remove the black clip on the rear and push gold colored metal out from the frame and remove the metal from the...
Page 808
Hs5000 scanner option [ 20-29 ] x1 series comcolor (revision 0.9) af original detection sensor (1) remove the original detection sensor after disconnecting the connector. Af original detection sensor rear front actuator of the original detection sensor. Arm arm is positioned above the stopper. Stopp...
Page 809
Hs5000 scanner (option) [ 20-30 ] x1 series comcolor (revision 0.9) af post separation sensor (1) detach the af post separation sensor assembly from the af unit. (p-tight bind head screw 3x10 (1 pc). (2) detach the grounding spring. (3) remove the af post separation sensor from the assembly. (4) unp...
Page 810
Hs5000 scanner option [ 20-31 ] x1 series comcolor (revision 0.9) 2-3. Parts on the original feed tray (1) open the original feed cover. (2) flip open the original feed tray after removing 1 screw from the original feed tray stopper. (p-tight pan-head- washer-screw 3x10 (1 pc)). (3) remove 4 screws ...
Page 811
Hs5000 scanner (option) [ 20-32 ] x1 series comcolor (revision 0.9) (5) from the front of the unit, remove the solenoid spring, solenoid and lever. Watch out with the pin falling. (6) remove the stopper mounting screw from the original feed cover. (p-tight pan head washer screw 3x10 (1 pc)). (7) det...
Page 812
Hs5000 scanner option [ 20-33 ] x1 series comcolor (revision 0.9) motors and cooling fan assembly (detaching from the af unit) (1) disconnect 1 ground wire, 1 sensor connector and 1 reusable wire harness band. (2) remove two mounting screws. (3) disconnect one connector and free the wires. Ejection ...
Page 813
Hs5000 scanner (option) [ 20-34 ] x1 series comcolor (revision 0.9) white roller and nearby parts (1) loosen the tension on the 2 tensioners on the rear of the af unit. (2) remove 2 e-rings and detach the pulleys. (refer to the above photograph) (3) remove 3 e-rings and 2 bearings. (4) from the fron...
Page 814: Adjustment
Hs5000 scanner option [ 20-35 ] x1 series comcolor (revision 0.9) 3. Af & fb firmware downloading the scanner firmware can be downloaded at the same time the printer firmware is downloaded using a usb memory stick. Refer to the firmware downloading method for the printer, explained on the separate c...
Page 815
Hs5000 scanner (option) [ 20-36 ] x1 series comcolor (revision 0.9) electrical parts and related test modes parts name description test modes comments 1 fb original detection sensor sensor 5010 2 fb original size sensor 1 sensor 5011 3 fb original size sensor 2 sensor 5012 4 fb original size sensor ...
Page 816: Contents
Chapter 24. Multifunction finisher ii (option) contents overview ............................................................................................................... 24-2 1. Structure of multifunction finisher ......................................................... 24-2 2. Overview of f...
Page 817: Overview
Multipurpose finisher saddle stitching finisher booklet tray top tray stacker tray stapler puncher i/f module overview 1. Structure of multifunction finisher i/f module (transfer section) • the interface module (i/f module) connects the multipurpose finisher to the comcolor printer and transports th...
Page 818: 2. Overview of Functions
Technical manua l front cover stapling punching holes offset output add cover booklet 2-fold 2. Overview of functions 2-1. Main functions (folding, booklet production) multipurpose finisher 1) punch holes you can select number of holes (2 or 4 holes on millimeter machine / 2 or 3 holes on inch machi...
Page 819
2-2. Main functions (detailed explanation) booklet production 1) printed paper sheets are folded in half and stapled at the center to form booklets. 2) you can select "2-fold + staple" or "2-fold (without staple). 3) select from a3 sef, b4 sef, and a4 sef. Lef fed paper cannot be used. 4) pagination...
Page 820
Punching 1) this function creates holes in each sheet before discharge. 2) if only the punching function is set, punched sheets can be discharged onto the top tray or stacker tray. Binding margin 1) this function provides a margin for punching or stapling. 2) the margin can be set to a value of betw...
Page 821
2-4. Multifunction finisher ii specification - continues on next page - multifunction finisher ii (option) [ 24-6 ] x1 series comcolor (revision 0.9).
Page 822
Note: this machine specification sheet is for reference only. Check with your marketing or sals department for the precise specification of the "multifunction finisher ii" to your country. The specifications are subject to change without prior notice. Multifunction finisher ii (option) [ 24-7 ] x1 s...
Page 823: Memo
Memo multifunction finisher ii (option) [ 24-8 ] x1 series comcolor (revision 0.9).
Page 824: 3. Overall Structure
3. Overall structure 3-1. Paper transport paths (1) paper printed by comcolor is sent to the if unit via the optional fu paper ejection attachment. (2) paper transported from the if unit is sent to the puncher section. (3) when the punching function is set, paper is processed at the puncher section....
Page 825
3-2. Rollers in paper transport paths (2) (3) (15) (16) (17) (18) (19) (23) (20) (21) (22) (24) (26) (27) (28) (25) no. Roller name - - - - - - - 2 if transfer roller 3 assist roller 15 entrance roller 16 punch reverse roller 17 t/a1 roller 18 t/a2 roller 19 top ejection roller 20 buffer reverse rol...
Page 826
3-3. Sensors in paper transport paths (1) (11) (2) (9) (10) (12) (13) (14) (15) (16) (11) (17) (18) no. Sensor name 1 decurler in sensor 2 decurler out sensor 9 punch out sensor 10 top tray ejection sensor 11 compile ejection sensor 12 compile tray no paper sensor no. Sensor name 13 stacker no paper...
Page 827: Memo
Memo multifunction finisher ii (option) [ 24-12 ] x1 series comcolor (revision 0.9).
Page 828
4. Printed wiring boards and set switches 4-1. Main printed wiring boards (pwbs) and switches (sws) (1) finisher main pwb (2) i/f pwb (3) booklet pwb (4) lvps (5) relay pwb (6) finisher front door sw (7) i/f module front door sw (9) booklet tray belt sw two interlock switches are located on the i/f ...
Page 829
Pwbs (pcbs) (1) finisher main pwb this pwb controls the puncher section, stapler section, stacker tray section, top tray section and finisher. It also produces +5 vdc from the +24 vdc supplied from the lvps (low voltage power supply). (2) i/f pwb this pwb controls the connection section between comc...
Page 830
5. Procedure for replacing finisher pwb 5-1. Replacement procedure • since the finisher nvm data (parameters set in the test mode data setting) is stored in the finisher pwb, it is necessary to save and restore the setting data for the replacement of the finisher pwb. If it is not possible to save t...
Page 831
5-2. Power supply system • the 100-240 vac power supplied from the power inlet is fed to the lvps (low voltage power supply) for conversion to 24 vdc. • the 24-vdc power supply output from the lvps is turned on/off by the control signal from the comcolor. • the 24-vdc power is supplied to the finish...
Page 832
6. Cautions regarding disassembly and reassembly • turn off the machine power and unplug the power cord from the finisher before disassembly and reassembly. • when moving or transporting the equipment, use the stays, which offer sufficient strength. Supporting the equipment by other parts can cause ...
Page 833: Memo
Memo multifunction finisher ii (option) [ 24-18 ] x1 series comcolor (revision 0.9).
Page 834: 7. Removal of Covers
7. Removal of covers • refer to the following diagram for the removal of external covers. • some covers cannot be removed unless other covers are detached first. For details, refer to the removal directions for individual covers. (1) finisher rear cover: 4 screws (2) i/f module rear cover: 3 screws ...
Page 835
(12) finisher top cover (11) finisher top left cover (13) i/f module top cover (9) stacker front top cover (10) stacker front cover (8) front door (7) i/f module front door (14) front blind cover (7) i/f module front door: remove the kl-clip from the hinge located at the upper side. (8) front door: ...
Page 836: 8. Removal of Units
8. Removal of units 8-1. Removal of i/f module from the finisher main unit. (1) remove following covers. • top cover • i/f module front door • rear cover • front blind cover (2) unplug the connectors of the wires from the finisher main body, and free the wires from the wire clamps. Front blind cover...
Page 837
(3) remove the i/f module by removing 4 mounting screws. Little to unhook from the finisher main body after the 4 mounting screws are removed.> 4 mounting screws multifunction finisher ii (option) [ 24-22 ] x1 series comcolor (revision 0.9).
Page 838
(1) open the front door of the finisher and gently pull the booklet unit forward. Remove the lock plate. (1 screw). (2) press the rail stoppers on both sides and pull the booklet unit forward to dismount. ● when the booklet unit is removed, the stopper on the back of the rail will drop, preventing r...
Page 839
8-3. Removal of the stacker tray from the finisher main unit opening the stacker tray assembly to the service position. (1) remove the following covers: • finisher front door • finisher rear cover • eject cover • top tray • stacker front top cover • finisher top left cover • finisher top cover • fin...
Page 840
Removing the stacker tray • although the tray can be removed without performing steps (1) through (3) below, skipping these steps may make removal more difficult and render the removed stacker tray unstable when placed on the floor. (1) remove the metal plate located above the booklet tray. (2) unpl...
Page 841: Memo
Memo multifunction finisher ii (option) [ 24-26 ] x1 series comcolor (revision 0.9).
Page 842: I/f Module
I/f module 1. Basic mechanism explanation • the papers ejected out from the optional fu ejection unit are transferred to the i/f module and then transferred further into the multifunction finisher. • the circumferential speed of the i/f transfer roller is 99% to that of bp belt running at circumfere...
Page 843
I/f module bp unit fu ejection unit (option) fu ejection roller decurler in sensor i/f transfer roller decurler out sensor assist roller if module front door switch connection of the multipurpose finisher to the comcolor. Multifunction finisher ii (option) [ 24-28 ] x1 series comcolor (revision 0.9).
Page 844
Front view with the doors open front view with the doors closed structure of the i/f module i/f module i/f module booklet unit multifunction finisher ii (option) [ 24-29 ] x1 series comcolor (revision 0.9).
Page 845
Photograph showing the gates 1b and 1d opened. Assist roller (drive side) decurler out sensor decurler in sensor i/f module front door interlock switch i/f transfer roller (driven side) assist roller (driven side) multifunction finisher ii (option) [ 24-30 ] x1 series comcolor (revision 0.9).
Page 846
Assist roller drive motor decurler transport motor multifunction finisher ii (option) [ 24-31 ] x1 series comcolor (revision 0.9).
Page 847: Memo
Memo multifunction finisher ii (option) [ 24-32 ] x1 series comcolor (revision 0.9).
Page 848: 2. Disassembly
1. Remove the rear cover. (3x6 screw; 4 pcs) 2. Disassembly 1. Assist roller drive motor rear cover 2. Remove the assist roller drive motor assembly. (3x6 screw; 4 pcs) 3. Unplug two wire connectors from the motor assembly to detach the motor assembly from the finisher. Two connectors multifunction ...
Page 849
Multifunction finisher ii (option) [ 24-34 ] x1 series comcolor (revision 0.9).
Page 850
Multifunction finisher ii (option) [ 24-35 ] x1 series comcolor (revision 0.9).
Page 851
Multifunction finisher ii (option) [ 24-36 ] x1 series comcolor (revision 0.9).
Page 852
Multifunction finisher ii (option) [ 24-37 ] x1 series comcolor (revision 0.9).
Page 853
Multifunction finisher ii (option) [ 24-38 ] x1 series comcolor (revision 0.9).
Page 854
Puncher section and stapler section 1. Basic mechanism of puncher section 1-1. Paper transport in puncher section • paper transported from the comcolor passes through the i/f module, and then to the entrance roll to the puncher section. • the entrance roll receives drive power as described below. • ...
Page 855
1-2. Overview of puncher unit position adjustment mechanism this mechanism adjusts the position of the puncher unit based on paper size to ensure consistent punching position. The puncher unit is available with 2/4 holes (millimeter paper machine) or 2/3 holes (inch paper machine). • when paper is s...
Page 856
1-3. Puncher unit positioning operation the three puncher unit positions are adjusted by the following three operations: initialization operation, position adjustment based on paper size, and movement during punching operation. (1) initialization the puncher unit moves to the position for a4 lef and...
Page 857
2. Basic mechanism of top tray paper going through the puncher section is sent to the top tray, stacker tray, or booklet tray, according to the position of the s1 gate and s2 gate. Top tray exit sensor entrance roll top tray s1 gate buffer roll compile exit roll buffer rev. Roll compile exit sensor ...
Page 858
Paper transport to the stacker tray • when the s2 gate switches the paper path toward the stacker tray, the paper is sent toward the stacker tray by the buffer roll, buffer rev. Roll, and compile exit roll, which are all driven by the compile exit motor. Detection by the sensors • the paper transpor...
Page 859
3. Basic mechanism of compile section 3-1. Basic flow of stapler operations when a print job is made with staple mode selected, the printed papers are pooled in the compile tray in each set and stapled. (1) the shelf under the compile tray is extended out. (2) papers are transported to the compile t...
Page 860
3-3. Buffer path when several sets of paper are discharged, paper cannot be transported to the compile tray while the stapling/ ejection operation for the preceding set is underway. The buffer path is provided for this purpose. When stapling/ejection for the preceding set is underway, the first shee...
Page 861
3-4. Eject clamp • paper is transported toward the stacker tray by the compile eject roll and compile feed roll, which are both driven by the compile eject motor. • paper transport status is detected by the compile exit sensor. • the clamp section attached to the compile feed roll is designed to mov...
Page 862
3-5. Shelf • when a set of sheets is collected on the compile tray, the leading edge of each sheet extends toward the stacker tray. • the shelf extends in the direction of the stacker tray to support the leading edge of the papers hanging out from the compile tray. After a stapling operation is comp...
Page 863
3-7. Paddles paper-pulling operation • paper sheets accumulated in the compile tray are pushed toward the end wall by the rotating compile main paddle and compile sub paddle. These paddles are rotated by the paddle motor. • while the compile main paddle always contacts the paper, the sub paddle is g...
Page 864
Tamper tamper home sensor tamper motor 3-8. Tamper • when paper is received by the compile tray, the tamper on the rear moves to the front to align the paper width- wise. (the tamper on the front is stationary.) • the tamper is driven by the tamper motor. The tamper home position (the rearmost posit...
Page 865
3-9. Stapler • when paper sheets for a full booklet accumulate in the compile tray, the stapler moves to the specified position to staple the paper. • during this operation, the end wall remains open to prevent interference with the stapler. To keep paper from sliding down, the eject clamp section d...
Page 866: 4. Disassembly
4. Disassembly 4-1. Removing the main paddle and sub paddle > the main paddle and sub paddle must be replaced periodically as a pair (at the same time). > to determine when to replace the main paddle and sub paddle, check the counters using test mode no. 4601 "stacker sub-paddle count" and test mode...
Page 867
Main paddle (1) unplug the connector attached to the lower exit chute from the rear and release the wires from the wire saddle and clamp. (2) fold the end wall at the staple center position and move the stapler head to the rear. (3) remove the two mounting screws from the front and dismount the lowe...
Page 868
Sub paddle (1) remove the kl-clips (medium) from both ends of the sub paddle assembly and dismount the belt and pulley on the assembly shaft on the rear side of the machine. (2) remove the kl-clips (small) from both sides of the links, detach the links from the shaft, and dismount the sub paddle tog...
Page 869
4-2. Removing the punch unit (1) remove the punch inner cover located on the front. (2 screws) (2) remove the punch box. (3) remove the entrance roll unit. (2 screws) punch inner cover mounting screws of entrance roll punch box multifunction finisher ii (option) [ 24-54 ] x1 series comcolor (revisio...
Page 870
(4) separate the wires connected to the punch unit located on the rear. (6) remove the four mounting screws and dismount the punch unit. 2 screws on front, 2 screws on rear. Precaution in assembly: after installing the punch unit back on the finisher, gently shake the punch motor lightly, and confir...
Page 871
4-3. Removing the s1 gate (1) remove the punch unit. (2) remove folder gate solenoid 1 together with the bracket. (2 screws) > if the screws are removed from the solenoid bracket by mistake, install the solenoid at the center of the scale. (3) pull out the link from the rear and remove the s1 gate. ...
Page 872
4-4. Removing the eject unit (1) separate the wires connected to the eject unit. > since some parts are designed to move vertically, do not allow wires to become too taut during reassembly. Unplug the clutch connector release the wires from the clamps unplug the sensor connector and undo wire harnes...
Page 873
(2) loosen the tensioner retaining screw and remove the belts. (3) detach the bracket (1 screw) from the front and remove the two eject unit mounting screws. (4) remove the two mounting screws from the rear. (5) the upper section of the eject unit hooks with the main unit at two locations. Lift the ...
Page 874
4-5. Removing the compile unit (1) separate the wires connected to the compile unit. (2) remove the clip from the pulley, detach the pulley, and take off the belt. (3) loosen the tensioner retaining screw and remove the belt. Unplug these two intermediate connectors undo wires from these clamps undo...
Page 875
(4) bring the stapler to the center position and fold the end wall assembly. (5) remove the four mounting screws and dismount the compile unit. Mounting screws in the rear mounting screws in the front multifunction finisher ii (option) [ 24-60 ] x1 series comcolor (revision 0.9).
Page 876
4-6. Removing the stapler unit > described below is the procedure to remove the stapler unit including the staple move motor and railing. To remove just the stapler head, remove the two screws shown in the below photograph and disconnect the wires. (1) remove the staple inner cover located on the fr...
Page 877
(5) disconnect the ground wire located on the rear. Unplug the three connectors from the pwb (printed-wire board), detach the reusable band, and disconnect one intermediate connector. (6) remove the mounting screws (2 screws each) from front and rear, and remove the stapler unit. > note that there a...
Page 878: Stacker Tray Section
Stacker tray section 1. Basic mechanism parts location set clamp stacker safety switch set clamp solenoid stacker flap motor elevator motor stacker no paper sensor half stack sensor mix stack sensor stacker front position sensor full stack sensor tray height sensor lower stack height sensor 1 stack ...
Page 879
1-1. Offset output • when paper is output to the stacker tray, the output offset function shifts the stacker tray position slightly for each set of paper output. • without staple: 2 output positions at front and rear • with staple: 3 output positions at front, rear, and center • stacker tray motions...
Page 880
Mix stack sensor half stack sensor full stack sensor lower limit stack sensor solid black indicates the sensor light path status in blocked condition. Upper limit lower limit full half mix height sens-or normal movement range of the tray. Mechanical upper limit. Mechanical lower limit. Lower limit w...
Page 881: 2. Disassembly
2. Disassembly 2-1. Removing the set clamp (1) remove the spring, and detach the spring bracket. (1 screw) (2) remove the two e-ring and dismount the gear. (3) remove the set clamp together with the shaft by sliding toward the rear. > when reinstalling the gear, align the gear teeth on the cam with ...
Page 882
2-2. Removing the stacker tray assembly (1) remove the stacker tray bottom cover by removing the e-rings and spacers from the two locations. > after these parts are reassembled, make sure that the stacker tray bottom cover moves up-and-down to actuate the stacker safety switch. (2) unplug the two co...
Page 883
(3) remove screw (1 pc) from the bottom of the stacker tray, dismount the wire harness guide, and place the wires inside the side plate. Then, remove the two reusable wire bands from the assembly. Wire harness guide (4) remove the six mounting screws from the tray, loosen the two screws installed in...
Page 884: Booklet Section
Booklet section 1. Basic mechanism parts location booklet compile no paper sensor booklet paper path motor tamper home sensor (rear) knife folding sensor booklet tamper motor booklet fold motor booklet in roll tamper tamper home sensor (front) knife solenoid knife home sensor knife booklet pre-foldi...
Page 885
Booklet end guide motor booklet end guide paddle booklet end guide home sensor booklet paddle motor 1-1. Paper feed • in booklet production or 2-fold operations, paper passing the puncher section reaches the s1 gate where the paper is routed toward the booklet section via the booklet in roll. • pape...
Page 886
1-3. Stapling and folding operations • the end guide lifts to the staple position to perform stapling. Stapling is performed at a position below the fold position. • the end guide lifts the paper to the fold position. • the knife moves, and the booklet pre-folding roll and booklet folding roll fold ...
Page 887
• the booklet tray is positioned below the paper outlet. Each time a set of paper is discharged, the paper transfer belts rotate for a preset duration to offset each set of paper slightly. • the paper transfer belts are driven by the tray belt drive motor. • if the end tip of the tray is tilted down...
Page 888: 2. Disassembly
2. Disassembly 2-1. Removing the paddle shaft assembly > the paddles must be replaced at regular intervals. Check the counter using test mode no. 4603 "booklet paddle count" to determine when to replace the paddles. (1) pull out the booklet drawer unit. (2) remove the kl-clip from the shaft of the p...
Page 889
2-2. Removing the stapler assembly (1) pull out the stapler unit. Press the stopper on the right-hand-side rail and pull the stapler unit further out. (2) remove the two mounting screws on the left-hand-side railing and dismount the stapler unit. (1) stopper mounting screws on the left-hand-side rai...
Page 890
2-3. Removing the knife (1) remove the booklet unit from the finisher main unit. (refer to page no. 24-21 of this chapter.) (2) remove the left cover. (remove 1 upper screw and loosen 2 lower screws.) (3) remove the four mounting screws (wood screws) of the white resin guide on the knife, then turn ...
Page 891
2-4. Removing the tamper unit (1) remove the booklet unit from the finisher main unit. (refer to page no. 24-21 of this chapter.) (2) fully open the tampers at both ends before initiating the removal procedure. > if the knife is extended out while the tampers are positioned toward the inside, the kn...
Page 892
(6) detach the spring and remove the spring bracket by unscrewing the single screw (ordinary screw). (7) unplug the connectors of the booklet fold motor and knife solenoid and release the wires from the clip. (8) remove the two kl-clips and four screws (ordinary screws) and dismount the bracket. > t...
Page 893
(9) remove the e-ring and dismount the black gear for the knife and also the white gear shown in the photo. > make care to avoid dropping the pin when removing the black gear for the knife. > during reassembly, pay attention to the installation position of the black gear. (make sure the gear is not ...
Page 894
(11) release the wires, referring to the following photo. (12) slide the front tamper all the way inside. Slide the rear tamper inside until it contacts the front tamper. Position the tampers to the opening in the plate so that the tamper tips do not contact the plate of the booklet exit roll. Unplu...
Page 895
(13) remove the four mounting screws located on both ends and remove the tamper unit by tilting it slightly. > caution ! The knife must be positioned accurately relative to the pre-folding roll. Note that the stay for the knife unit is factory adjusted. Do not remove the screws on the front or rear ...
Page 896
2-5. Removing the folding roll and pre-folding roll (1) perform tamper unit removal procedure steps (1) through (10). (2) from the rear of the unit, remove the e-rings and dismount 1 white gear and 4 black gears. (3) remove the e-ring and dismount 1 black gear. (4) remove the springs of the folding ...
Page 897
(5) remove 1 e-ring from the folding roll and 3 e-rings from the pre-folding roll. Dismount the four bearings. (6) repeat the same removal procedure on the front of the unit. (7) remove the e-ring on the front of the unit and dismount the gear, pre-folding roll lever, spacer, and folding roll lever....
Page 898: Adjustment
Adjustment 1. Staple and fold position adjustments in the booklet section perform fold adjustments in the booklet section in the following sequence: 1) fold skew adjustment. 2) staple position adjustment against the fold position, and the fold position adjustment. 3) lateral staple position adjustme...
Page 899
1-1. Fold skew adjustment > this adjustment is a mechanical adjustment and is not affected by the paper size, number of sheets per booklet, with or without staples. (1) perform printing or print test pattern to check for fold inclination. (dimension a and dimension b in the diagram must be equal.) >...
Page 900
1-2. Staple position adjustment against the fold position, and the fold position adjustment. > make this adjustment after completing the fold skew adjustment described on the previous page. > this adjustment is done by the test mode setting. Adjustments are made separately for the various parameters...
Page 901
(1) perform printing or print test pattern to check for fold position deviation and staple position deviations. • dimension a and dimension b in the diagram must be equal. • the staple position must align with the fold position. > check the staple position deviation by determining whether the staple...
Page 902
Comcolor multipurpose finisher test mode no. Hc finisher test mode no. Item type description ( program default setting is in ) 4769 763-249 staple position adjustment for 2 sheets. (smaller than b4 paper) d setting range: 0 to 200 pulses (1 pulse = 0.1 mm) 4767 763-247 fold position adjustment for 2...
Page 903
Comcolor multipurpose finisher test mode no. Hc finisher test mode no. Item type description ( program default setting is in ) 4895 763-375 staple position adjustment for 3 sheets. D setting range: 0 to 200 pulses (1 pulse = 0.1 mm) 4896 763-376 staple position adjustment for 4 sheets. D setting ran...
Page 904
1-3. Staple position adjustment in lateral direction. > make this adjustment after completing the fold skew adjustment. > the two stapler mechanisms in the booklet section are mechanically in fixed in position, and perform stapling operations after paper sheets for one booklet are aligned and center...
Page 905
2. Punch position adjustment (1) perform printing or print test pattern to check for punch position deviations. (2) if punch position deviation is detected, adjust the test mode parameters. • increasing the test mode parameter value moves the punch position toward the rear. Note: the puncher pin pit...
Page 906: 6.0 ± 2.0 Mm
4. Staple position adjustment 4-1. Staple angle position adjustment > this is a mechanical adjustment. (1) perform printing or print test pattern to check for staple position deviations. Specification for the staple position is shown on the sketch, below: (2) make the necessary mechanical adjustment...
Page 907
If both the staples a and b are stapled straight, but if a and b measurements both need to be adjusted together, the mounting position of the stapler unit to the base needs to be adjusted. Remove this screw out and re-screw it into the elongated hole, and adjust the mounting position of the stapler ...
Page 908
4-2. Staple position adjustment > the adjustment is made by changing the parameter settings of the test modes. > separate adjustments must be made for each paper size and stapling layout. (1) perform printing or print test pattern to check for staple position deviations. (2) if staple position devia...
Page 909: Memo
Memo multifunction finisher ii (option) [ 24-94 ] x1 series comcolor (revision 0.9).


