- DL manuals
- Vega
- Transmitter
- VEGABAR 51
- Operating Instructions Manual
Vega VEGABAR 51 Operating Instructions Manual
Summary of VEGABAR 51
Page 1
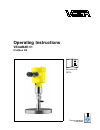
Operating instructions vegabar 51 profibus pa document id: 36714 process pressure/ hydrostatic.
Page 2: Contents
Contents 1 about this document 1.1 function. . . . . . . . . . . . . . . . . . . . . . . . . . . . . . . . . . 4 1.2 target group . . . . . . . . . . . . . . . . . . . . . . . . . . . . . . 4 1.3 symbolism used. . . . . . . . . . . . . . . . . . . . . . . . . . . . 4 2 for your safety 2.1 authorised...
Page 3
7 setup with pactware and other adjustment programs 7.1 connect the pc via vegaconnect . . . . . . . . . . . . 46 7.2 parameter adjustment with pactware . . . . . . . . . . . . 47 7.3 parameter adjustment with pdm . . . . . . . . . . . . . . . . 47 7.4 saving the parameter adjustment data . . . . . ...
Page 4: About This Document
1 about this document 1 .1 function this operating instructions manual provides all the information you need for mounting, connection and setup as well as important instructions for maintenance and fault rectification. Please read this information before putting the instrument into operation and keep...
Page 5: For Your Safety
2 for your safety 2 .1 authorised personnel all operations described in this operating instructions manual must be carried out only by trained specialist personnel authorised by the plant operator. During work on and with the device the required personal protective equipment must always be worn. 2 ....
Page 6
2 .5 safety label on the instrument the safety approval markings and safety tips on the device must be observed. 2 .6 ce conformity this device fulfills the legal requirements of the applicable ec guidelines. By attaching the ce mark, vega provides a confirmation of successful testing. You can find the...
Page 7
L chapter "packaging, transport and storage" l chapter "disposal" vegabar 51 • profibus pa 7 2 for your safety 36714 - en -091008.
Page 8: Product Description
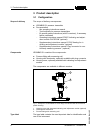
3 product description 3 .1 configuration the scope of delivery encompasses: l vegabar 51 pressure transmitter l documentation - this operating instructions manual - test certificate for pressure transmitters - ex specific safety instructions (with ex versions), if necessary further certificates - operat...
Page 9
L instrument type l article number instrument l technical data: measuring range, process pressure, process temperature, signal output, voltage supply, protection, protection class l order number l article numbers, documentation l serial number the serial number allows you to access the delivery data...
Page 10
The optional heating requires its own operating voltage. You can find details in the supplementary instructions manual "heating for indicat- ing and adjustment module". This function is generally not available for approved instruments. The gsd (instrument master files) and bitmap files necessary for pl...
Page 11
Up to the time of installation, the packages must be left closed and stored according to the orientation and storage markings on the outside. Unless otherwise indicated, the packages must be stored only under the following conditions: l not in the open l dry and dust free l not exposed to corrosive ...
Page 12
You will find additional information in the supplementary instructions manual "flanges according to din-en-asme-jis" (document-id 31088). The protective cover protects the sensor housing against soiling and intense heat from solar radiation. You will find additional information in the supplementary in...
Page 13: Mounting
4 mounting 4 .1 general instructions make sure that all parts of the instrument exposed to the process, in particular the sensor element, process seal and process fitting, are suitable for the existing process conditions. These include above all the process pressure, process temperature as well as th...
Page 14
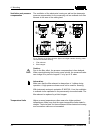
The ventilation of the electronics housing as well as the atmosperic pressure compensation for the measuring cell are realised via a filter element in the area of the cable gland. 2 1 2 1 2 1 1 2 fig. 3: position of the filter element. Upper row single chamber housing, lower row double chamber housing...
Page 15
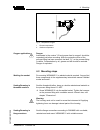
1 2 fig. 4: temperature ranges 1 process temperature 2 ambient temperature danger: instruments in the version "oil and grease free for oxygen" should be unpacked just before mounting. After the protective cover of the process fitting has been removed, the label "o₂" on the process fitting is visible. ...
Page 16
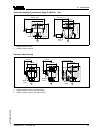
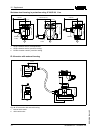
Use the seal suitable for the respective process fitting. You can find the components in the supplementary instructions manual "welded socket and seals". 4 .3 mounting steps, tube isolating diaphragm the isolating systems are temperature and pressure-aged at 80 °c and 18 bar. The zero point is adjuste...
Page 17
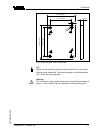
90 mm (3.54") r 3,5 mm (0. 14 ") 3mm (0.12") 70 mm (2.76") 8 mm (0.32") 9 3 mm (3 .6 6 ") 1 1 0 mm (4 .3 3 ") fig. 5: drilling template - wall mounting plate tip: mount the wall mounting plate so that the cable entry of the socket housing points downward. The socket housing can be displaced by 180° ...
Page 18
5 connecting to power supply 5 .1 preparing the connection always keep in mind the following safety instructions: l connect only in the complete absence of line voltage l if overvoltage surges are expected, overvoltage arresters should be installed according to profibus specifications tip: we recommen...
Page 19
In systems with potential equalisation, connect the cable screen directly to ground potential at the power supply unit, in the connection box and at the sensor. The screen in the sensor must be connected directly to the internal ground terminal. The ground terminal outside on the housing must be con...
Page 20
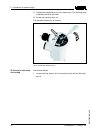
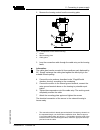
11 tighten the compression nut of the cable entry. The seal ring must completely encircle the cable 12 screw the housing cover on the electrical connection is finished. Fig. 6: connection steps 6 and 7 proceed as follows: 1 loosen the four screws on the housing socket with an allen key size 4 ip 68 v...
Page 21
2 remove the housing socket from the mounting plate 3 2 1 fig. 7: components of the external housing 1 screw 2 wall mounting plate 3 cable gland 3 loop the connection cable through the cable entry on the housing base 2) information: the cable gland can be mounted in three positions each displaced by...
Page 22
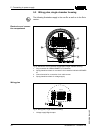
5 .3 wiring plan, single chamber housing the following illustrations apply to the non-ex as well as to the ex-ia version. I²c display 1 2 5 6 7 8 3 4 1 2 fig. 8: electronics and connection compartment, single chamber housing 1 plug connector for vegaconnect (i²c interface) 2 spring-loaded terminals ...
Page 23
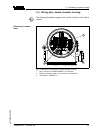
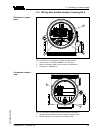
5 .4 wiring plan, double chamber housing the following illustrations apply to the non-ex as well as to the ex-ia version. 1 3 2 display 1 2 5 6 7 8 i²c fig. 10: electronics compartment, double chamber housing 1 plug connector for vegaconnect (i²c interface) 2 internal connection cable to the connect...
Page 24
3 1 2 display 1 2 i²c fig. 11: connection compartment, double chamber housing 1 plug connector for vegaconnect (i²c interface) 2 ground terminal for connection of the cable screen 3 spring-loaded terminals for voltage supply i2c 1 1 2 fig. 12: wiring plan with double chamber housing 1 voltage supply...
Page 25
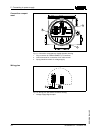
5 .5 wiring plan double chamber housing ex d 1 3 2 display 1 2 5 6 7 8 i²c fig. 13: electronics compartment, double chamber housing 1 plug connector for vegaconnect (i²c interface) 2 internal connection cable to the connection compartment 3 terminals for vegadis 61 1 2 1 2 fig. 14: connection compar...
Page 26
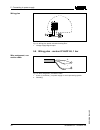
1 1 2 fig. 15: wiring plan double chamber housing ex d 1 voltage supply/signal output 5 .6 wiring plan - version ip 66/ip 68, 1 bar + - 1 2 fig. 16: wire assignment, connection cable 1 brown (+) and blue (-) to power supply or to the processing system 2 shielding wiring plan wire assignment, con- ne...
Page 27
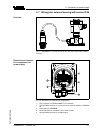
5 .7 wiring plan, external housing with version ip 68 fig. 17: vegabar 51 in ip 68 version 25 bar and axial cable outlet, external housing 5 6 7 8 1 2 d ispl ay i²c 4 5 1 2 3 fig. 18: electronics and connection compartment 1 plug connector for vegaconnect (i²c interface) 2 spring-loaded terminals fo...
Page 28
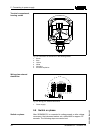
1 2 3 4 6 3 4 1 2 5 fig. 19: connection of the sensor in the housing socket 1 brown 2 blue 3 yellow 4 white 5 shielding 6 breather capillaries i2c display 1 1 2 5 6 7 8 fig. 20: wiring plan external electronics 1 power supply 5 .8 switch on phase after vegabar 51 is connected to voltage supply or af...
Page 29
L internal check of the electronics l indication of the instrument type, the firmware as well as the sensor tags (sensor designation) l status byte goes briefly to fault value then the current measured value will be displayed and the corresponding digital output signal will be outputted to the cable. ...
Page 30: Module Plicscom
6 set up with the indicating and adjustment module plicscom 6 .1 short description the indicating and adjustment module is used for measured value display, adjustment and diagnosis. It can be mounted in the following housing versions and instruments: l all sensors of the plics ® instrument family, i...
Page 31
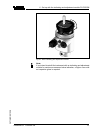
Fig. 21: insert indicating and adjustment module note: if you intend to retrofit the instrument with an indicating and adjustment module for continuous measured value indication, a higher cover with an inspection glass is required. Vegabar 51 • profibus pa 31 6 set up with the indicating and adjustmen...
Page 32
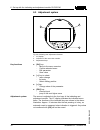
6 .3 adjustment system 1.1 2 3 1 fig. 22: indicating and adjustment elements 1 lc display 2 indication of the menu item number 3 adjustment keys l [ok] key: - move to the menu overview - confirm selected menu - edit parameter - save value l [->] key to select: - menu change - list entry - select edit...
Page 33
6 .4 setup procedure before starting the actual parameter adjustment of a profibus pa sensor, the address setting must first be carried out. You will find a detailed description in the operating instructions manual of the indicating and adjustment module or in the online help of pactware or dtm. Vegaba...
Page 34
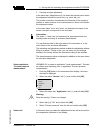
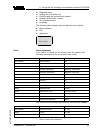
To select the adjustment unit (in the example switching over from bar to mbar) you have to proceed as follows: 4) 1 push the [ok] button in the measured value display, the menu overview is displayed. ▶ basic adjustment display diagnostics service info 2 confirm the menu "basic adjustment" with [ok], ...
Page 35
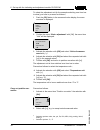
Unit of measurement density 0001000 kg/dm³ 6 enter the requested density value with [->] and [+], confirm with [ok] and move to position correction with [->]. The adjustment unit is thus switched over from bar to m. Proceed as follows to select the temperature unit: 5) à activate the selection with [...
Page 36
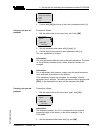
4 set the requested mbar value with [+] and [->]. 5 confirm with [+] and move to max. Adjustment with [->]. The min. Adjustment is finished. Information: for an adjustment with filling, simply enter the actual measured value indicated at the bottom of the display. If the adjustment ranges are exceeded,...
Page 37
5 carrying out span adjustment in the menu item "adjustment unit" you select the physical unit in which the adjustment should be carried out, e.G. Mbar, bar, psi… the position correction compensates the influence of the mounting position or static pressure on the measurement. It does not influence the...
Page 38
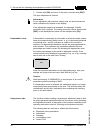
To select the adjustment unit (in the example switching over from bar to mbar) you have to proceed as follows: 6) 1 push the [ok] button in the measured value display, the menu overview is displayed. ▶ basic adjustment display diagnostics service info 2 confirm the menu "basic adjustment" with [ok], ...
Page 39
Position correction accept current measured value? ▶ accept edit 3 confirm with [ok] and move to min.(zero) adjustment with [->]. Proceed as follows: 1 edit the mbar value in the menu item "zero" with [ok]. Zero adjustment 000 .0 % p = +0000 .0 mbar 0000.0 mbar 2 set the requested mbar value with [+]...
Page 40
3 confirm with [ok] and move to the menu overview with [esc]. The span adjustment is finished. Information: for an adjustment with pressure, simply enter the actual measured value indicated at the bottom of the display. If the adjustment ranges are exceeded, the message "outside parameter limits" appe...
Page 41
L displayed value l scaling unit (out-scale unit) l positions after the decimal point (scaled) l scaling pa/out-scale 4 values l unit of measurement l language the following safety-relevant data are not read out or written: l sensor address l pin l application copy sensor data copy sensor data? Basi...
Page 42
Menu section function reset value application no reset factory setting like basic adjustment, in addition, special parameters are reset to default values. 9) pointer the min. And max. Distance values are reset to the actual value. Additional adjustment and diagnosis options such as e.G. Scaling, sim...
Page 43
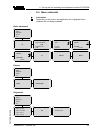
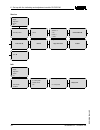
6 .5 menu schematic information: depending on the version and application, the highlighted menu windows are not always available. Basic adjustment 1 ▶ basic adjustment display diagnostics service info 1.1 sensor address 126 1.1 unit unit of measurement bar ▼ temperature unit °c ▼ 1.2 position correc...
Page 44
Service 4 basic adjustment display diagnostics ▶ service info 4.1 additional pa value secondary value 1 4.2 out-scale-unit volume l 4.3 pa-out-scale 100.00 lin % = 0.0 l 0.00 lin % = 100.0 l 4.2 simulation start simulation ▼ 4.3 reset select reset ▼ 4.6 language deutsch 4.7 copy sensor data copy sen...
Page 45
6 .6 saving the parameter adjustment data it is recommended noting the adjusted data, e.G. In this operating instructions manual and archive them afterwards. They are hence available for multiple use or service purposes. If vegabar 51 is equipped with an indicating and adjustment module, the most im...
Page 46: Programs
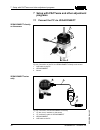
7 setup with pactware and other adjustment programs 7 .1 connect the pc via vegaconnect 3 1 2 fig. 23: connection of the pc via vegaconnect directly to the sensor 1 usb cable to the pc 2 vegaconnect 3 sensor 1 2 3 4 open twist usb lock fig. 24: connection via vegaconnect externally 1 i²c bus (com.) ...
Page 47
Necessary components: l vegabar 51 l pc with pactware and suitable vega dtm l vegaconnect l power supply unit or processing system 7 .2 parameter adjustment with pactware further setup steps are described in the operating instructions manual "dtm c ollection/pactware" attached to each cd and which c...
Page 48
8 maintenance and fault rectification 8 .1 maintain when the instrument is used properly, no special maintenance is required in normal operation. In some applications, product buildup on the diaphragm can influence the measuring result. Depending on the sensor and application, take precautions to ensu...
Page 49
The hotline is available to you 7 days a week round-the-clock. Since we offer this service world-wide, the support is only available in the english language. The service is free of charge, only the standard telephone costs will be charged. ? When an additional instrument is connected, the segment fai...
Page 50
? E 013 l no measured value available 10) à exchange instrument or return instrument for repair ? E 017 l adjustment span too small à repeat with modified values ? E 036 l no operable sensor software à carry out a software update or send the instrument for repair ? E 041 l hardware error, electronics...
Page 51
You can view all software histories on our website www.Vega.Com. Make use of this advantage and get registered for update information via e-mail. The following components are required to update the sensor software: l sensor l power supply l vegaconnect l pc with pactware l current sensor software as...
Page 52: Dismount
9 dismount 9 .1 dismounting steps warning: before dismounting, be aware of dangerous process conditions such as e.G. Pressure in the vessel, high temperatures, corrosive or toxic products etc. Take note of chapters "mounting" and "connecting to power supply" and carry out the listed steps in reverse...
Page 53: Supplement
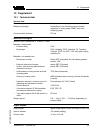
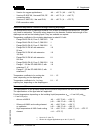
10 supplement 10 .1 technical data general data pressure type gauge pressure or gauge pressure measuring principle depending on the measuring range ceramic- capacitive or strain gauge (dms), each with isolating system communication interface i ²c bus materials and weights material 316l corresponds t...
Page 54
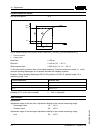
Dynamic behaviour output run-up time approx. 10 s 90 % 100 % 10 % t t t a t t s 2 1 fig. 25: sudden change of the process variable, dead time t t , rise time t a and step response time t s 1 process variable 2 output signal dead time ≤ 150 ms rise time ≤ 100 ms (10 … 90 %) step response time ≤ 250 m...
Page 55
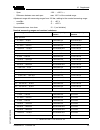
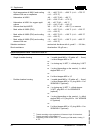
- span -120 … +120 % 11) - difference between zero and span max. 120 % of the nominal range adjustment range with measuring ranges from 100 bar, relating to the nominal measuring range: - zero/min. -5 … +95 % - span/max. -5 … +105 % recommended max. Turn down 10 : 1 (no limitation) nominal measuring ...
Page 56
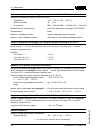
Reference conditions and actuating variables (similar to din en 60770-1) reference conditions according to din en 61298-1 - temperature + 18 … +30 °c (+64 … +86 °f) - relative humidity 45 … 75 % - air pressure 860 … 1060 mbar/86 … 106 kpa (12.5 … 15.4 psig) determination of characteristics limit poi...
Page 57
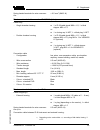
- version for oxygen applications 13) -40 … +60 °c (-40 … +140 °f) - versions ip 66/ip 68, 1 bar and ip 68, pe connection cable -20 … +60 °c (-4 … +140 °f) - versions ip 66/ip 68, 1 bar and ip 68, pur connection cable -20 … +80 °c (-4 … +176 °f) additional temperature influence through isolating diap...
Page 58
- high temperature oil kn3.2 and cooling element 300 mm or capillaries -10 … +400 °c/-10 … +200 °c (+14 … +752 °f/ + 14 … +572 °f) - halocarbon oil kn21 -40 … +150 °c/-40 … +80 °c (-40 … +302 °f/-40 … +176 °f) - halocarbon oil kn21 for oxygen appli- cations -40 … +60 °c/-40 … +60 °c (-40 … +140 °f/-...
Page 59
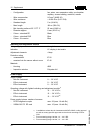
Spring-loaded terminals for wire cross-sec- tion 2.5 mm² (awg 14) electromechanical data - version ip 66/ip 68 (1 bar) cable entry - single chamber housing l 1 x ip 68 cable gland m20 x 1.5; 1 x blind stopper m20 x 1.5 or: l 1 x closing cap ½ npt, 1 x blind plug ½ npt - double chamber housing l 1 x ...
Page 60
- configuration four wires, one suspension cable, one breather capillary, screen braiding, metal foil, mantle - wire cross-section 0.5 mm² (awg 20) - wire resistance 0.036 Ω/m (0.011 Ω/ft) - standard length 5 m (16.40 ft) - max. Length 180 m (590.5 ft) - min. Bending radius at 25 °c/77 °f 25 mm (0.98...
Page 61
Electrical protective measures protection rating - housing, standard ip 66/ip 67 23) - aluminium and stainless housing (op- tionally available) ip 68 (1 bar) 24) - process component in ip 68 version ip 68 - external housing ip 65 overvoltage category iii protection class ii approvals depending on th...
Page 62
10 .2 information on profibus pa instrument master file the instrument master file (gsd) contains the characteristic data of the profibus pa instrument. These data are, e.G. The permissible transmission rates as well as information on diagnostics values and the format of the measured value outputted by ...
Page 63
Cyclical data traffic the master class 1 (e.G. Plc) cyclically reads out measured values from the sensor during operation. The below block diagram below shows which data can be accessed by the plc. Bar % lin% min-max adjustment linearization profibus pa-output primary value secondary value 1 secondary...
Page 64
- pa-out value of the fb2 after scaling l additional cyclic value - additional cyclical value (depending on the source) l free place - this module must be used if a value should not be used in the data telegram of the cyclical data traffic (e.G. Replacement of the temperature and additional cyclic val...
Page 65
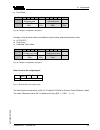
L free place byte-no. 1 2 3 4 5 6 7 8 9 10 format value ieee-754- flieskommazahl pa-out (fb1) status status (fb1) ieee-754- flieskommazahl temperature (fb2) status status (fb2) fig. 29: telegram configuration example 2 example 3 with pressure value and additional cyclical value without temperature va...
Page 66
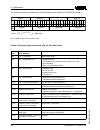
The measured value is transferred as a 32 bit floating point number in the ieee-754 format. Byte n byte n+1 bit 7 vz exponent bit 6 2 bit 5 2 bit 4 2 bit 3 2 bit 2 2 bit 1 2 bit 0 2 bit 7 2 bit 6 2 bit 5 2 bit 4 2 bit 3 2 bit 2 2 bit 1 2 bit 0 2 sign bit significant 7 6 5 4 3 2 1 0 -1 -2 -3 -4 -5 -6 ...
Page 67
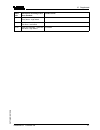
Status code description according to pro- fibus standard possible cause 0 x 8a good (non-cascade) - active ad- visory alarm - high limited hi-alarm 0 x 8d good (non-cascade) - active crit- ical alarm - low limited lo-lo-alarm 0 x 8e good (non-cascade) - active crit- ical alarm - high limited hi-hi-al...
Page 68
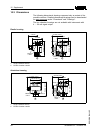
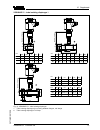
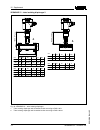
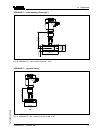
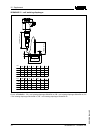
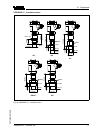
10 .3 dimensions the following dimensional drawings represent only an extract of the possible versions. Detailed dimensional drawings can be downloaded on www.Vega.Com under "d ownloads" and "drawings". The two chamber housings are not available with instruments with 4 … 20 ma signal output plastic ...
Page 69
Aluminium housing in protection rating ip 66/ip 68, 1 bar 1 2 0 mm (4 .7 2 ") ~ 105 mm (4.13") 1 16 m m (4.57 ") ~ 150 mm (5.91") ø 84 mm (3.31") ø 84 mm (3.31") m20x1,5/ ½ npt m16x1,5 2 m20x1,5 m20x1,5 1 1 single chamber version 2 double chamber version stainless steel housing ~ 69 mm (2.72") ø 77 ...
Page 70
Stainless steel housing in protection rating ip 66/ip 68, 1 bar 1 17 m m (4.61 ") ~ 103 mm (4.06") ø 77 mm (3.03") 1 20 m m (4. 7 2 ") ~ 105 mm (4.13") ø 84 mm (3.31") ~ 93 mm (3.66") ø 80 mm (3.15") 1 12 m m (4.41 ") m20x1,5/ ½ npt m20x1,5 3 m20x1,5/ ½ npt m16x1,5 2 1 1 single chamber version, elec...
Page 71
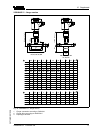
Vegabar 51 - flange version 1 2 2 mm (4 5 1 / 6 4 ") 1 2 2 mm (4 5 1 / 6 4 ") 5 1 mm (2 1 / 6 4 ") 3 5 / 8 " 7 1 / 2 " 1 / 8 " 1 / 8 " 4xø 5 / 8 " 4xø 5 / 8 " 4 3 / 4 " 6“ 5“ 3 / 4 " 2“ 1 / 8 " 4xø 5 / 8 " 3 7 / 8 " 3 / 4 " 3 5 / 8 " 1 / 8 " 4xø 5 / 8 " 4 3 / 4 " 3 / 4 " 3 / 4 " 7 1 / 2 " 1 / 8 " 4xø...
Page 72
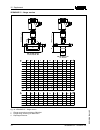
Vegabar 51 - flange version 3 5 / 8 " 7 1 / 2 " 1 / 8 " 1 / 8 " 4xø 5 / 8 " 4xø 5 / 8 " 4 3 / 4 " 6 6 3 / 4 " 3 7 / 8 " 2 9 / 32 " 2 43 / 64 " 3 15 / 32 " 4 1 / 64 " 4 1 / 64 " 1 29 / 32 " 1 31 / 32 " 3 15 / 16 " 7 7 / 8 " 3 15 / 16 " 1 31 / 32 " 1 27 / 32 " 1 27 / 32 " 1 27 / 32 " 1 29 / 32 " 1 29 /...
Page 73
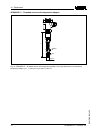
Vegabar 51 - tube isolating diaphragm 1 4 31 / 64 " 1 13 / 16 " 1 1 / 32 " 5 33 / 64 " 2 3 / 64 " 1 17 / 64 " 6 9 / 64 " 2 3 / 4 " 1 31 / 32 " dn mm pn g1 d2 l2 rt 25 40 rd52x1,6 rd58x1,6 rd78x1,6 g1 rd52x1,6 rd58x1,6 rd78x1,6 114 46 mb 26 rq 32 40 140 52 32 rw 50 25 156 70 50 dn inch pn d d rh 25 4...
Page 74
Vegabar 51 - tube isolating diaphragm 2 4 31 / 64 " 5 3 / 64 " 1 1 / 32 " 6 9 / 64 " 6 11 / 16 " 1 31 / 32 " 6 17 / 32 " 7 11 / 64 " 3 3 / 16 " dn mm pn g1 lg l re 25 40 rd52x 1 / 6 rd78x 1 / 6 rd110x 1 / 4 g1 rd52x 1 / 6 rd78x 1 / 6 rd110x 1 / 4 114 128 mb 26 rp 50 25 140 170 50 ro 80 25 156 182 81...
Page 75
Vegabar 51 - tube isolating diaphragm 3 128 mm (5 3 / 64 ") m55x2 ø 56mm (2 13 / 64 ") ø 44,5mm (3 3 / 4 ") ~ 132 mm (5 13 / 64 ") ø 38,5 mm (1 33 / 64 ") fig. 43: vegabar 51 - tube isolation diaphragm - eco vegabar 51 - hygienic fitting rv 115 m m ( 4 17 / 32 ") ø 78 mm (3 5/ 64 ") fig. 44: vegabar ...
Page 76
Vegabar 51 - cell isolating diaphragm 135 m m ( 5 5 / 16 ") 100 m m ( 3 15 / 16 ") b 4 17 / 32 " 45 / 64 " 2 43 / 64 " 5 29 / 32 " 45 / 64 " 3 15 / 32 " 6 1 / 2 " 25 / 32 " 4 1 / 64 " dn mm pn b d za 25 40 115 18 d4 68 zb 40 40 150 18 88 zc 50 40 165 20 102 d2 k 85 14 110 18 125 18 zd 80 40 200 24 1...
Page 77
Vegabar 51 - threaded version sw32 sw41 sw55 sw55 g¾b g1b 1½”npt g1½b ø 22 mm (0.87") ø 32 mm (1.26") 2 0 mm (0 .7 9 ") ~1 0 5 mm (4 .1 3 ") ~1 0 5 mm (4 .7 2 ") ~1 0 5 mm (4 .1 3 ") ~1 2 0 mm (4 .7 2 ") ø 25 mm (0.98") ø 39 mm (1.54") 2 8 mm (1 .1 ") ø 40 mm (1.58") ø 60 mm (2.36") 3 0 mm (1 .1 8 "...
Page 78
Vegabar 51 - threaded version with temperature adapter sw27 g1a ø 26 mm (1 1 / 32 ") l fig. 47: vegabar 51 - threaded version with temperature adapter. The length depends on the respective temperature stage, e.G. L = 152 mm (6 in) at 200 °c (392 °f) 78 vegabar 51 • profibus pa 10 supplement 36714 -en...
Page 79
10 .4 industrial property rights vega product lines are global protected by industrial property rights. Further information see http://www.Vega.Com . Only in u.S.A.: further information see patent label at the sensor housing. Vega produktfamilien sind weltweit geschützt durch gewerbliche schutzrecht...
Page 80: Index
Index a accessory - external indicating and adjustment unit 11 - flanges 11 - indicating and adjustment module 11 - interface adapter 11 - protective cover 12 application area 9 b bus communication 9 c causes of malfunction 48 connection compartment 25 - double chamber 24 connection vegaconnect - di...
Page 81
Vegabar 51 • profibus pa 81 index 36714 - en -091008.
Page 82
82 vegabar 51 • profibus pa index 36714 -en -091008.
Page 83
Vegabar 51 • profibus pa 83 index 36714 - en -091008.
Page 84
Vega grieshaber kg am hohenstein 113 77761 schiltach germany phone +49 7836 50-0 fax +49 7836 50-201 e-mail: info@de.Vega.Com www.Vega.Com printing date: iso 9001 all statements concerning scope of delivery, application, practical use and operating conditions of the sensors and processing systems co...

