- DL manuals
- Vega
- Accessories
- VEGAFLEX 61
- Operating Instructions Manual
Vega VEGAFLEX 61 Operating Instructions Manual
Summary of VEGAFLEX 61
Page 1
Operating instructions vegaflex 62 4 … 20 ma/hart two-wire d ocument id: 31837 g uided microwave.
Page 2: Contents
Contents 1 about this document 1.1 f unction. . . . . . . . . . . . . . . . . . . . . . . . . . . . . . . . . . 4 1.2 t arget group . . . . . . . . . . . . . . . . . . . . . . . . . . . . . . 4 1.3 s ymbolism used. . . . . . . . . . . . . . . . . . . . . . . . . . . . 4 2 for your safety 2.1 a uthor...
Page 3
8 maintenance and fault rectification 8.1 m aintenance . . . . . . . . . . . . . . . . . . . . . . . . . . . . . . 44 8.2 r emove interferences . . . . . . . . . . . . . . . . . . . . . . . . 44 8.3 e xchange or shorten cable/rod . . . . . . . . . . . . . . . . . 45 8.4 e xchanging the electronics mo...
Page 4: About This Document
1 about this document 1 .1 function t his operating instructions manual provides all the information you need for mounting, connection and setup as well as important instructions for maintenance and fault rectification. Please read this information before putting the instrument into operation and kee...
Page 5: For Your Safety
2 for your safety 2 .1 authorised personnel a ll operations described in this operating instructions manual must be carried out only by trained specialist personnel authorised by the plant operator. D uring work on and with the device the required personal protective equipment must always be worn. 2...
Page 6
2 .5 safety label on the instrument t he safety approval markings and safety tips on the device must be observed. 2 .6 ce conformity t his device fulfills the legal requirements of the applicable ec guidelines. By attaching the ce mark, vega provides a confirmation of successful testing. You can find t...
Page 7: Product Description
3 product description 3 .1 configuration t he scope of delivery encompasses: l vegaflex 62 level sensor l d ocumentation - this operating instructions manual - s afety manual 31339 "vegaflex series 60 - 4 … 20 ma/ hart" ( optionally) - o perating instructions manual 27835 "indicating and adjust- ment...
Page 8
1 2 3 fig. 1: vegaflex 62 in cable version with plastic housing 1 housing cover with integrated indicating and adjustment module (optional) 2 housing with electronics 3 process fitting t he type label contains the most important data for identification and use of the instrument: l a rticle number l s ...
Page 9
T wo-wire electronics 4 … 20 ma/hart for power supply and measured value transmission over the same cable. T he supply voltage range can differ depending on the instrument version. T he data for power supply are specified in chapter "technical data". T he optional background lighting of the indicating...
Page 10
U nless otherwise indicated, the packages must be stored only under the following conditions: l n ot in the open l d ry and dust free l n ot exposed to corrosive media l p rotected against solar radiation l a voiding mechanical shock and vibration l s torage and transport temperature see chapter "su...
Page 11: Mounting
4 mounting 4 .1 general instructions m ake sure that all parts of the instrument exposed to the process, in particular the sensor element, process seal and process fitting, are suitable for the existing process conditions. These include above all the process pressure, process temperature as well as t...
Page 12
Fig. 2: measures against moisture penetration t he reference plane for the measuring range of the sensors is the sealing surface of the thread or flange. K eep in mind that a min. Distance must be maintained below the reference plane and possibly also at the end of the probe - measurement in these ar...
Page 13
Keep in mind that measurement down to the tip of the probe is not possible. The exact value of the min. Distance (lower dead band) is stated in chapter "technical data". Fig. 3: vessel with conical bottom i n case of difficult installation conditions, the probe can be also mounted laterally. For this ...
Page 14
L x ø 16 mm ( 5 / 8 ") 1 2 3 fig. 4: extension rod ø 16 mm (0.63 in) 1 probe 2 retaining ring 3 extension rod l rod length 100 … 2000 mm (3.937 … 78.74 in) x thread length 18 mm (0.709 in) m ake sure that the rod of the probe is at least 300 mm (11.811 in) away from the vessel wall 14 vegaflex 62 • ...
Page 15
≥ 300 mm (11 13 / 16 ") 150 mm (5 29 / 32 ") 1 5 0 mm (5 2 9 / 3 2 ") 1 sw 13 l fig. 5: bow-shaped segment ø 16 mm (0.63 in) 1 max. filling height l 150 mm (5.91 in) p lastic vessel/glass vessel t he guided microwave principle requires a metal surface on the process fitting. Therefore use in plastic v...
Page 16
1 2 fig. 6: installation in plastic silo 1 flange 2 metal sheet c oncrete vessel w hen installed in thick concrete ceilings, vegaflex 62 should be mounted front flush to the lower edge. In concrete silos, the distance to the wall should be at least 500 mm (20 in). ø >160 mm (ø >6.3") fig. 7: installa...
Page 17
I f possible, avoid sockets. Mount the sensor flush with the vessel top. If this is not possible, use short sockets with small diameter. H igher sockets or sockets with a bigger diameter can generally be used. They simply increase the upper dead band. Check if this is relevant for your measurement. I...
Page 18
S tandpipes or bypass tubes are normally metal tubes with a diameter of 30 … 200 mm (1.18 … 7.87 in). In measurement technology such a tube corresponds to a coax probe. It does not matter if the standpipe is perforated or slotted for better mixing. Lateral inlets with bypass tubes also do not influen...
Page 19
M ake sure that the probe is not subjected to strong lateral forces. M ount vegaflex 62 at a position in the vessel where no disturbances, e.G. From filling openings, agitators, etc., can occur. Fig. 11: lateral load i f there is a danger of the probe touching the vessel wall during operation due to ...
Page 20: Connect To Power Supply
5 connect to power supply 5 .1 preparing the connection a lways keep in mind the following safety instructions: l c onnect only in the complete absence of line voltage l i f overvoltage surges are expected, overvoltage arresters should be installed tip: w e recommend using vega overvoltage arresters...
Page 21
U se cable with round cross-section. A cable outer diameter of 5 … 9 mm (0.2 … 0.35 in) ensures the seal effect of the cable gland. If you are using cable with a different diameter or cross-section, exchange the seal or use a suitable cable gland. W e generally recommend the use of screened cable for ...
Page 22
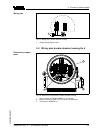
7 i nsert the wire ends into the open terminals according to the wiring plan fig. 12: connection steps 6 and 7 8 p ress down the opening levers of the terminals, you will hear the terminal spring closing 9 c heck the hold of the wires in the terminals by lightly pulling on them 10 c onnect the scree...
Page 23
I²c display 1 2 5 6 7 8 3 4 1 2 fig. 13: electronics and connection compartment, single chamber housing 1 plug connector for vegaconnect (i²c interface) 2 spring-loaded terminals for connection of the external indication vegadis 61 3 ground terminal for connection of the cable screen 4 spring-loaded...
Page 24
1 3 2 display 1 2 5 6 7 8 i²c fig. 15: electronics compartment, double chamber housing 1 plug connector for vegaconnect (i²c interface) 2 internal connection cable to the connection compartment 3 terminals for vegadis 61 3 1 2 display 1 2 i²c fig. 16: connection compartment double chamber housing 1 ...
Page 25
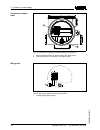
I2c 1 1 2 fig. 17: wiring plan, double chamber housing 1 voltage supply/signal output 5 .5 wiring plan double chamber housing ex d 1 3 2 display 1 2 5 6 7 8 i²c fig. 18: electronics compartment, double chamber housing 1 plug connector for vegaconnect (i²c interface) 2 internal connection cable to th...
Page 26
1 2 1 2 fig. 19: connection compartment double chamber housing ex d 1 spring-loaded terminals for power supply and cable screen 2 ground terminal for connection of the cable screen 1 1 2 fig. 20: wiring plan double chamber housing ex d 1 voltage supply/signal output connection compart- ment wiring p...
Page 27
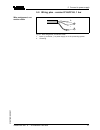
5 .6 wiring plan - version ip 66/ip 68, 1 bar + - 1 2 fig. 21: wire assignment, connection cable 1 brown (+) and blue (-) to power supply or to the processing system 2 screening wire assignment, con- nection cable vegaflex 62 • 4 … 20 ma/hart two-wire 27 5 c onnect to power supply 31837 - en -090831.
Page 28: Module Plicscom
6 set up with the indicating and adjustment module plicscom 6 .1 short description t he indicating and adjustment module is used for measured value display, adjustment and diagnosis. It can be mounted in the following housing versions and instruments: l a ll sensors of the plics ® instrument family,...
Page 29
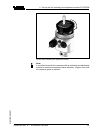
Fig. 22: insert indicating and adjustment module note: i f you intend to retrofit the instrument with an indicating and adjustment module for continuous measured value indication, a higher cover with an inspection glass is required. Vegaflex 62 • 4 … 20 ma/hart two-wire 29 6 s et up with the indicati...
Page 30
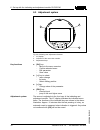
6 .3 adjustment system 1.1 2 3 1 fig. 23: indicating and adjustment elements 1 lc display 2 indication of the menu item number 3 adjustment keys l [ok] key: - m ove to the menu overview - c onfirm selected menu - e dit parameter - s ave value l [->] key to select: - menu change - list entry - s elect...
Page 31
6 .4 setup procedure a fter connecting vegaflex 62 to power supply or after a voltage recurrence, the instrument carries out a self-check for approx. 30 seconds: l i nternal check of the electronics l i ndication of the instrument type, the firmware as well as the sensor tags (sensor designation) l o...
Page 32
K eep in mind that interfaces can cause faulty measurements. I f you want to measure the total height of both liquids reliably, please contact our service department or use an instrument specially designed for interface measurement. S tart your parameter adjustment with the following menu items of t...
Page 33
2 e nter the appropriate distance value in m (corresponding to the percentage value) for the full vessel. Keep in mind that the max. Level must lie below the dead band. 3 s ave the settings with [ok]. E ach product has different reflective properties. In addition, there are various interfering factors...
Page 34
A linearization is necessary for all vessels in which the vessel volume does not increase linearly with the level - e. G. In a horizontal cylindrical or spherical tank - and the indication or output of the volume is required. Corresponding linearization curves are preprogrammed for these vessels. Th...
Page 35
G ating out of false signals c hange now? P roceed as follows: 1 m ove from the measured value display to the main menu by pushing [ok]. 2 s elect the menu item "service" with [->] and confirm with [ok]. N ow the menu item "false signal suppression" is displayed. 3 c onfirm "false signal suppression -...
Page 36
C opy sensor data? Basic adjustment i f the function "reset" is carried out, the sensor resets the values of the following menu items to the reset values (see chart): 1) t he following values will be reset: function reset value m ax. Adjustment d istance, upper dead zone m in. Adjustment - rod/coax ...
Page 37
A dditional adjustment and diagnosis options such as e.G. Scaling, simulation or trend curve presentation are shown in the following menu schematic. You will find a detailed description of these menu items in the operating instructions manual "indicating and adjustment module". Optional settings vega...
Page 38
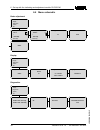
6 .5 menu schematic basic adjustment 1 ▶ b asic adjustment d isplay d iagnostics s ervice i nfo 1.1 m in. Adjustment 0 .00 % = 10 .000 m(d) 8.000 m(d) 1.2 m ax. Adjustment 100 .00 % = 1 .000 m(d) 2.000 m(d) 1.3 d amping 0 s 1.4 l inearisation curve linear 1.5 s ensor-tag sensor display 2 b asic adju...
Page 39
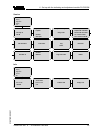
Service 4 b asic adjustment d isplay d iagnostics ▶ s ervice i nfo 4.1 s ensor 5 .00 m(d) ▼ rod ▼ 4.2 a pplication liquid ▼ standard (dk ≥ 2) ▼ 4.3 g ating out of false signals change now? 4.4 c urrent output output mode: 4-20 ma ▼ failure mode: 20.5 ma ▼ min. Current: 4 ma ▼ max. Current: 20.5 ma ▼...
Page 40
6 .6 saving the parameter adjustment data i t is recommended noting the adjusted data, e.G. In this operating instructions manual and archive them afterwards. They are hence available for multiple use or service purposes. I f vegaflex 62 is equipped with an indicating and adjustment module, the most...
Page 41: Programs
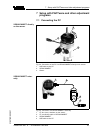
7 setup with pactware and other adjustment programs 7 .1 connecting the pc 3 1 2 fig. 24: connection of the pc via vegaconnect directly to the sensor 1 usb cable to the pc 2 vegaconnect 3 sensor 1 2 3 4 open twist usb lock fig. 25: connection via vegaconnect externally 1 i²c bus (com.) interface on ...
Page 42
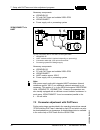
N ecessary components: l vegaflex 62 l pc with pactware and suitable vega dtm l vegaconnect l p ower supply unit or processing system 1 2 4 3 open twist usb lo ck fig. 26: connecting the pc via hart to the signal cable 1 vegaflex 62 2 hart resistance 250 Ω (optional depending on processing) 3 connec...
Page 43
Note: k eep in mind that for setup of vegaflex 62, dtm-collection in the actual version must be used. A ll currently available vega dtms are included as a dtm collection on a cd. They can be purchased for a token fee from the responsible vega agency. In addition, the actual pactware version is also ...
Page 44
8 maintenance and fault rectification 8 .1 maintenance w hen used correctly, no special maintenance is required in normal operation. 8 .2 remove interferences t he operator of the system is responsible for taken suitable measures to remove interferences. A maximum of reliability is ensured. Neverthel...
Page 45
L o perating voltage too low or load resistance too high à check, adapt if necessary ? C urrent signal greater than 22 ma or less than 3.6 ma l e lectronics module defective à exchange instrument or return instrument for repair i n ex applications, the regulations for the wiring of intrinsically saf...
Page 46
Caution: m ake sure that the two components of the double washer remain together. 4 s crew in a new measuring part manually 5 e xert counterforce with the second fork spanner and tighten the measuring component on the flat surfaces with a torque of 15 nm (11 lbf ft). Fig. 27: exchanging the cable or ...
Page 47
Fig. 28: shortening the cable probe 8 .4 exchanging the electronics module i f the electronics module is defective, it can be replaced by the user. I n ex applications only one instrument and one electronics module with respective ex approval may be used. I f there is no electronics module available...
Page 48
8 .5 instrument repair i f a repair is necessary, please proceed as follows: y ou can download a return form (23 kb) from our internet homepage www.Vega.Com under: "downloads - forms and certificates - repair form". B y doing this you help us carry out the repair quickly and without having to call ba...
Page 49: Dismounting
9 dismounting 9 .1 dismounting steps warning: b efore dismounting, be aware of dangerous process conditions such as e.G. Pressure in the vessel, high temperatures, corrosive or toxic products etc. T ake note of chapters "mounting" and "connecting to power supply" and carry out the listed steps in re...
Page 50: Supplement
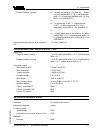
10 supplement 10 .1 technical data general data m aterial 316l corresponds to 1.4404 or 1.4435 m aterials, wetted parts - p rocess fitting 316l and ptfe, hastelloy c22 (2.4602) and ptfe - p rocess seal on the instrument side ( cable/rod leadthrough) fkm (v iton), ffkm (kalrez 6375), epdm, fkm (v iton...
Page 51
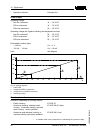
- t rimming accuracy - rod 1 mm (0.039 in) - c able: ø 6 mm (0.236 in) 1 … 60 m (3.281 … 196.9 ft) - t rimming accuracy - cable ± 0.05 % l ateral load with rod: ø 16 mm (0.63 in) 30 n m (22 lbf ft) m ax. Tensile load with cable: ø 6 mm (0.236 in) 30 kn (6745 lbf) t hread in gravity weight (cable ver...
Page 52
F ailure signal current output (adjustable) ma-value unchanged 20.5 ma, 22 ma, ( adjustable) m ax. Output current 22 ma l oad see load diagram under power supply d amping (63 % of the input variable) 0 … 999 s, adjustable f ulfilled namur recommendations ne 43 hart output values - 1. Hart value (prim...
Page 53
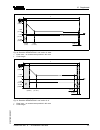
L 0 -3 mm (-0.118 ") 3 mm (0.118 ") 15 mm (0.591 " ) -10 mm (-0.394 ") 0,3 m (11.811 " ) 0,08 m (3.15 " ) 0,02 m (0.787 ") 1 fig. 30: deviation vegaflex 62 in rod version in water 1 dead zone - no measurement possible in this area l probe length l 5 mm (0.197 ") 0 -5 mm (-0.197 ") 15 mm (0.591 " ) -...
Page 54
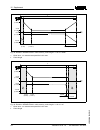
0 3 mm (0.118 ") -3 mm (-0.118 ") 15 mm (0.591 ") 15 mm (0.591 ") 0,08 m (3.15 ") 0,3 m (11.811 ") 0,3 m (11.811 ") l 1 fig. 32: deviation vegaflex 62 in cable version, probe length l 1 dead zone - no measurement possible in this area l probe length l 0 -15 mm (-0.591 " ) 5 mm (0.197 ") -5 mm (-0.19...
Page 55
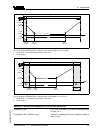
L 3 mm (0.118 ") 0 -3 mm (-0.118 ") 15 mm (0.591 ") 20 mm (0.787”) 0,08 m (3.15 ") 0,3 m (11.811 ") 20 m (787.4 ") 1 fig. 34: deviation vegaflex 62 in cable version, probe length l > 20 m in water 1 dead zone - no measurement possible in this area l probe length l 0 20 mm (0.787 ") 0,25 m (9.843 ") ...
Page 56
Ambient conditions a mbient, storage and transport temperature -40 … +80 °c (-40 … +176 °f) process conditions p rocess pressure -1 … 40 bar/-100 … 4000 kpa (-14.5 … 580 psig), depending on the process fitting p rocess temperature (thread or flange temperature) - fkm (v iton) -40 … +150 °c (-40 … +302...
Page 57
- d ouble chamber housing l 1 x cable entry m20 x 1.5 (cable: ø 5 … 9 mm), 1 x blind stopper m20 x 1.5; 1 x blind stopper m 16 x 1.5 or optionally available with 1 x plug m 12 x 1 for vegadis 61 or: l 1 x closing cap ½ npt, 1 x blind stopper ½ npt , 1 x blind stopper m16 x 1.5 or optionally 1 x plug...
Page 58
- i nspection window p olyester foil power supply o perating voltage - n on-ex instrument 14 … 36 v dc - ee x-ia instrument 14 … 30 v dc - ee x-d-ia instrument 20 … 36 v dc o perating voltage with lighted indicating and adjustment module - n on-ex instrument 20 … 36 v dc - ee x-ia instrument 20 … 30...
Page 59
O vervoltage category iii p rotection class ii functional safety (sil) f unctional safety is already activated on instruments with sil qualification ex factory. On instruments without sil qualification ex factory, the functional safety must be activated by the user via the indicating and adjustment mo...
Page 60
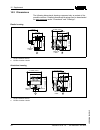
10 .2 dimensions t he following dimensional drawings represent only an extract of the possible versions. Detailed dimensional drawings can be downloaded on www.Vega.Com under "downloads" and "drawings". Plastic housing 1 2 ~ 69 mm (2.72") ø 77 mm (3.03") 1 1 2 mm (4 .4 1 ") m20x1,5/ ½ npt ~ 87 mm (3...
Page 61
Aluminium housing in protection rating ip 66/ip 68, 1 bar 1 2 0 mm (4 .7 2 ") ~ 105 mm (4.13") 1 16 m m (4.57 ") ~ 150 mm (5.91") ø 84 mm (3.31") ø 84 mm (3.31") m20x1,5/ ½ npt m16x1,5 2 m20x1,5 m20x1,5 1 1 single chamber version 2 double chamber version stainless steel housing ~ 69 mm (2.72") ø 77 ...
Page 62
Vegaflex 62 l g1½, 1½ npt 2 2 mm (0 .8 7 ") 7 3 mm (2 .8 7 ") 1 5 0 mm (5 .9 1 ") 5 3 mm (2 .0 9 ") ø 16 mm (0.63") 12 mm (0.47") ø 54 mm (2.13") ø 30 mm (1.18") ø 30 mm (1.18") ø 6 mm (0.24") sw 60 mm (2.36") fig. 42: vegaflex 62 l sensor length, see chapter "technical data" lug optionally 62 vegaf...
Page 63
10 .3 industrial property rights vega product lines are global protected by industrial property rights. Further information see http://www.Vega.Com . Only in u.S.A.: further information see patent label at the sensor housing. Vega produktfamilien sind weltweit geschützt durch gewerbliche schutzrecht...
Page 64
Vega g rieshaber kg a m hohenstein 113 77761 s chiltach g ermany p hone +49 7836 50-0 f ax +49 7836 50-201 e- mail: info@de.Vega.Com www.Vega.Com p rinting date: iso 9001 a ll statements concerning scope of delivery, application, practical use and operating conditions of the sensors and processing s...

