- DL manuals
- Yamaha
- Boating Equipment
- XLT1200 WaveRunner 2003
- Service Manual
Yamaha XLT1200 WaveRunner 2003 Service Manual
Summary of XLT1200 WaveRunner 2003
Page 1
Waverunner xlt1200 f0v-28197-2d-c1 service manual manuel d’entretien wartungshandbuch manual de servicio e f d es 460068.
Page 2: Notice
E notice this manual has been prepared by yamaha primarily for use by yamaha dealers and their trained mechanics when performing maintenance procedures and repairs to yamaha equip- ment. It has been written to suit the needs of persons who have a basic understanding of the mechanical and electrical ...
Page 3
F d es avis ce manuel a été préparé par yamaha principalement à l’intention des conces- sionnaires yamaha et de leurs mécani- ciens qualifiés afin de les assister lors de l’entretien et la réparation des produits yamaha. Ce manuel est destiné à des personnes possédant les connaissances de base en mé...
Page 4: How to Use This Manual
E how to use this manual manual format all of the procedures in this manual are organized in a sequential, step-by-step format. The information has been compiled to provide the mechanic with an easy to read, handy refer- ence that contains comprehensive explanations of all disassembly, repair, assem...
Page 5
F d es utilisation du manuel format du manuel toutes les procédures décrites dans ce manuel sont organisées de manière séquentielle, pas à pas. Les informations ont été rassemblées afin de fournir au mécanicien une référence simple à lire et pratique qui comporte néanmoins toutes les explications né...
Page 6
E important information in this service manual particularly important information is distinguished in the following ways. The safety alert symbol means attention! Become alert! Your safety is involved! Warning failure to follow warning instructions could result in severe injury or death to the machi...
Page 7
F d es informations importantes les informations particulièrement importantes contenues dans ce manuel d’entretien sont signalées de diverses manières. Le symbole d’alerte sécurité signifie attention! Soyez attentif! Votre securite est mena- cee! Avertissement le non-respect d’une instruction averti...
Page 8
E how to use this manual 1 to help identify parts and clarify procedure steps, there are exploded diagrams at the start of each removal and disassembly section. 2 numbers are given in the order of the jobs in the exploded diagram. 3 symbols indicate parts to be lubricated or replaced (see “symbols”)...
Page 9
F d es utilisation du manuel 1 pour vous aider à identifier les diffé- rentes pièces et à comprendre les diverses étapes opératoires, vous trouverez des vues éclatées au début de chaque partie de dépose et de démontage. 2 les chiffres sont indiqués dans l’ordre des opérations à effectuer sur le sché...
Page 10: Gen
E a50001-1-4 symbols symbols 1 to 9 are designed as thumb- tabs to indicate the content of a chapter. 1 general information 2 specifications 3 periodic inspection and adjustment 4 fuel system 5 power unit 6 jet pump unit 7 electrical system 8 hull and hood 9 trouble analysis symbols 0 to e indicate ...
Page 11
F d es a50001-1-4 symboles les symboles 1 à 9 servent d’onglets et indiquent le contenu des différents chapitres. 1 informations générales 2 spécifications 3 inspection périodique et réglage 4 système d’alimentation 5 moteur 6 pompe de propulsion 7 equipement électrique 8 coque et capot 9 dépannage ...
Page 12: Index
E index general information specifications periodic inspection and adjustment fuel system power unit jet pump unit electrical system hull and hood trouble analysis a30000-0
Page 13: Table Des
F d es table des matieres informations generales specifications inspection periodique et reglage systeme d’alimentation moteur pompe de propulsion equipement electrique coque et capot depannage inhalt allgemeine informationen spezifikationen regelmÄßige inspektionen und einstellungen kraftstoff- anl...
Page 14: Gen
E gen info chapter 1 general information identification numbers ......................................................................... 1-1 primary l.D. Number........................................................................... 1-1 engine serial number .........................................
Page 15
1 2 3 4 5 6 7 8 9 f d es chapitre 1 informations generales numeros d’identification... 1-1 numero d’identification primaire ...................................... 1-1 numero de serie du moteur ........................................ 1-1 numero de serie de la pompe de propulsion ............ 1-1 num...
Page 16: Gen
1-1 e gen info identification numbers a60700-0* identification numbers primary l.D. Number the primary l.D. Number is stamped on a label attached to the inside of the engine compartment. Starting primary l.D. Number: f0v: 800101 engine serial number the engine serial number is stamped on a label att...
Page 17: Gen
F d es 1- gen info a60700-0* numeros d’identification numero d’identification primaire le numéro d’identification primaire est imprimé sur une étiquette collée à l’inté- rieur du compartiment moteur. Numero de serie du moteur le numéro de série du moteur est imprimé sur une étiquette collée sur le b...
Page 18: Gen
1-2 e gen info safety while working safety while working the procedures given in this manual are those recommended by yamaha to be fol- lowed by yamaha dealers and their mechanics. Fire prevention gasoline (petrol) is highly flammable. Gasoline vapor is explosive if ignited. Do not smoke while handl...
Page 19: Gen
F d es 1- gen info mesures de securite les procédures décrites dans ce manuel sont recommandées par yamaha et doi- vent être respectées par les concession- naires yamaha et leurs mécaniciens. Mesures de securite contre les incendies l’essence est un produit très inflamma- ble. Les vapeurs d’essence ...
Page 20: Gen
1-3 e gen info safety while working under normal conditions of use there should be no hazards from the use of the lubricants mentioned in this manual, but safety is all-important, and by adopting good safety practises any risk is minimized. A summary of the most important precau- tions is as follows...
Page 21: Gen
F d es 1- gen info en conditions normales d’utilisation, il ne devrait pas y avoir de danger lié à l’utilisation des lubrifiants indiqués dans ce manuel. Néanmoins, il convient de prendre toutes les mesures de sécurité nécessaires afin de minimiser les risques. Observez les principales consignes sui...
Page 22: Gen
1-4 e gen info safety while working 3. Non-reusable items always use new gaskets, packings, o- rings, oil seals, split-pins, circlips, etc., on reassembly. Disassembly and assembly 1. Clean parts with compressed air when disassembling. 2. Oil the contact surfaces of moving parts during assembly. 3. ...
Page 23: Gen
F d es 1- gen info 3. Pièces à usage unique lors du remontage, toujours utili- ser des joints, garnitures, joints toriques, bagues d’étanchéité, gou- pilles fendues, circlips, etc. Neufs. Demontage et remontage 1. Nettoyer les pièces à l’air com- primé lors du démontage. 2. Lors du montage, huiler l...
Page 24: Gen
1-5 e gen info special tools special tools using the correct special tools recom- mended by yamaha, will aid the work and enable accurate assembly and tune-up. Improvisations and using improper tools can damage the equipment. Note: ● for u.S.A. And canada, use part numbers starting with “j-”, “yb-”,...
Page 25: Gen
F d es 1- gen info outils speciaux pour une plus grande précision dans votre travail de montage et de mise au point, yamaha vous recommande l’emploi d’outils spéciaux. Les improvi- sations ou l’utilisation d’outils non appropriés peuvent endommager le matériel. N.B.: ● pour les etats-unis et le cana...
Page 26: Gen
1-6 e gen info special tools removal and installation 1 coupler wrench p/n. Yw-06551 90890-06551 2 flywheel holder p/n. Yw-06550 90890-06550 3 flywheel puller p/n. Yb-06117 90890-06521 4 drive shaft holder (impeller) p/n. Yb-06151 90890-06519 5 slide hammer set (jet pump bearing) p/n. Yb-06096 6 sto...
Page 27: Gen
F d es 1- gen info depose et installation 1 clé d’accouplement p/n. Yw-06551 90890-06551 2 outil de maintien de rotor p/n. Yw-06550 90890-06550 3 extracteur de rotor p/n. Yb-06117 90890-06521 4 outil de maintien de l’arbre d’entraînement (rotor) p/n. Yb-06151 90890-06519 5 jeu de percuteurs (rouleme...
Page 28: Spec
E spec chapter 2 specifications general specifications ......................................................................... 2-1 maintenance specifications................................................................ 2-3 engine ....................................................................
Page 29
1 2 3 4 5 6 7 8 9 f d es chapitre 2 specifications specifications generales .. 2-1 caracteristiques d’entretien ................................. 2-3 moteur ......................................... 2-3 pompe de propulsion ............. 2-4 coque et capot ........................ 2-4 systeme electri...
Page 30: Spec
2-1 spec e general specifications general specifications item unit model xlt1200 model code hull f0v engine/jet 68n (with catalytic converter) dimensions length mm (in) 3,160 (124.4) width mm (in) 1,220 (48.0) height mm (in) 1,130 (44.5) dry weight kg (lb) 364 (803) maximum capacity person/kg (lb) 3...
Page 31: Spec
2-2 spec e pon*: pump octane number = (motor octane number + research octane number)/2 ron*: research octane number yamalube 2-w*: yamalube 2-w is developed for this watercraft and available from a yamaha dealer. Caution: use only yamalube 2-w oil. Using another oil can seriously damage the catalyti...
Page 32: Spec
F spec 2- specifications generales specifications generales désignation unité modèle xlt1200 code modele coque f0v moteur/tuyère 68n (avec convertisseur catalytique) dimensions longueur mm (in) 3.160 (124,4) largeur mm (in) 1.220 (48,0) hauteur mm (in) 1.130 (44,5) poids à sec kg (lb) 364 (803) capa...
Page 33: Spec
F spec 2- pon*: indice d’octane pompe = (indice d’octane moteur + indice d’octane recherche)/2 ron*: indice d’octane recherche yamalube 2-w*: la yamalube 2-w est développée pour ce véhicule nautique et est disponible chez tous les concessionnaires yamaha. Attention: n’utilisez que l’huile yamalube 2...
Page 34: Spec
D spec 2- allgemeine technische daten bezeichnung einheit modell xlt1200 modellkode rumpf f0v motor/düse 68n (mit katalysator) abmessungen länge mm (in) 3.160 (124,4) breite mm (in) 1.220 (48,0) höhe mm (in) 1.130 (44,5) trockengewicht kg (lb) 364 (803) maximale belastungskapazität personen/kg (lb) ...
Page 35: Spec
D spec 2- pon*: pumpen oktanzahl = (motoroktanzahl + forschungsoktanzahl)/2 ron*: research oktanzahl yamalube 2-w*: yamalube 2-w ist speziell für dieses wasserfahrzeug entwickelt worden und erhältlich durch einem yamaha-vertragshändler. Achtung: ausschließlich yamalube 2-w Öl verwenden. Wird ein and...
Page 36: Spec
Es spec 2- especificaciones generales Ítem unidad modelo xlt1200 cÓdigo de modelo casco f0v motor/boquilla 68n (con convertidor catalítico) dimensiones longitud mm (in) 3.160 (124,4) anchura mm (in) 1.220 (48,0) altura mm (in) 1.130 (44,5) peso seco kg (lb) 364 (803) capacidad máxima persona/kg (lb)...
Page 37: Spec
Es spec 2- pon*: octanaje pump = (número de octanos de motor + número de octanos de investigación)/2 ron*: octanaje research yamalube 2-w*: yamalube 2-w ha sido desarrollado para este vehículo acuático y se puede adquirir en un concesionario yamaha. Precaucion: utilice únicamente aceite yamalube 2-w...
Page 38: Spec
2-3 spec e maintenance specifications maintenance specifications engine item unit model xlt1200 cylinder head warpage limit mm (in) 0.05 (0.002) compression pressure *1 kpa (kg/cm 2 ) 500 (5.0) cylinders bore size mm (in) 80.000–80.018 (3.1496–3.1503) taper limit mm (in) 0.08 (0.003) out-of-round li...
Page 39: Spec
F d es spec 2- caracteristiques d’entretien moteur désignation culasse limite de déformation pression de compression *1 cylindres alésage limite de conicité limite de faux-rond limite d’usure pistons diamètre point de mesure* jeu piston/cylindre limite d’usure diamètre intérieur de l’alésage de l’ax...
Page 40: Spec
2-4 spec e maintenance specifications jet pump unit hull and hood crankshaft assembly crank width a mm (in) 72.95–73.00 (2.872–2.874) deflection limit b mm (in) 0.05 (0.002) deflection limit c mm (in) 0.15 (0.006) big end side clearance d mm (in) 0.25–0.75 (0.010–0.030) maximum small end axial play ...
Page 41: Spec
F d es spec 2- pompe de propulsion coque et capot ensemble de vilebrequin largeur de tourillon a limite de déflexion b limite de déflection c jeu latéral de tête de bielle d jeu axial maximal de pied de bielle e carburateurs type marque d’identification tube d’émulsion gicleur principal gicleur de r...
Page 42: Spec
2-5 spec e maintenance specifications electrical item unit model xlt1200 battery type fluid capacity v/ah (kc) 12/19 (68.4) cdi unit (b/o – b for cylinder #1) (b/w – b for cylinder #2) (b/y – b for cylinder #3) output peak voltage lower limit @cranking 1 v 200 @cranking 2 v 180 @2,000 r/min v 190 @3...
Page 43: Spec
F d es spec 2- systeme electrique désignation batterie type capacité bloc cdi (b/o – b pour cylindre n˚1) (b/w – b pour cylindre n˚2) (b/y – b pour cylindre n˚3) limite inférieure de la tension de crête de sortie au démarrage 1 au démarrage 2 à 2.000 tr/mn à 3.500 tr/mn stator bobine exploratrice (w...
Page 44: Spec
2-6 spec e maintenance specifications rectifier/regulator (r – b) output peak voltage lower limit (unloaded) @cranking v 7 @2,000 r/min v 12.6 @3,500 r/min v 12.6 starter motor brush length mm (in) 12.5 (0.49) wear limit mm (in) 6.5 (0.26) commutator undercut mm (in) 0.7 (0.03) limit mm (in) 0.2 (0....
Page 45: Spec
F d es spec 2- redresseur/regulateur (r – b) limite inférieure de la tension de crête de sortie (non charge) au démarrage à 2.000 tr/mn à 3.500 tr/mn demarreur longueur des balais limite d’usure dégagement du commutateur limite diamètre du commutateur limite fusible ampérage désignation gleichrichte...
Page 46: Spec
2-7 spec e tightening torques tightening torques specified torques part to tightened part name thread size q’ty tightening torque remarks n•m kgf•m ft•lb engine muffler cover – muffler bolt m6 3 12 1.2 8.7 242 lt exhaust chamber stay/ cylinder head – cylinder 1st bolt m8 2 15 1.5 11 2nd 35 3.5 25 ex...
Page 47: Spec
F d es spec 2- couples de serrage couples specifies pièce à serrer moteur cache de silencieux – silencieux chambre d’échappement/ culasse – cylindre 1er 2ème chambre d’échappement – support joint de la chambre d’échappement – collecteur d’échappement chambre d’échappement – joint de la chambre d’éch...
Page 48: Spec
2-8 spec e tightening torques cylinder – crankcase 1st bolt m10 12 22 2.2 16 572 lt 2nd 39 3.9 28 generator cover – crankcase 1st bolt m10 7 15 1.5 11 271 lt 2nd 50 5.0 36 generator cover/ground lead – crankcase 1st bolt m10 1 15 1.5 11 2nd 50 5.0 36 bracket – crankcase bolt m10 4 39 3.9 28 271 lt p...
Page 49: Spec
F d es spec 2- cylindre – carter 1er 2ème cache de générateur – carter 1er 2ème cache de générateur/fil de masse – carter 1er 2ème support de montage – carter bobine de capteur – cache de générateur bobine de stator – cache de générateur accouplement d’entraînement – axe volant magnétique – vilebreq...
Page 50: Spec
2-9 spec e tightening torques handlebar – handlebar cover stay screw m6 4 1.1 0.11 0.8 handle boss cover – steering master screw m6 4 0.9 0.09 0.7 qsts converter – hull bolt m6 2 5 0.5 3.6 throttle lever assembly – handlebar screw m5 2 3 0.3 2.2 handlebar switch assembly – handlebar screw m5 2 3 0.3...
Page 51: Spec
F d es spec 2- guidon – support de cache de guidon cache de moyeu de poignée – direction principale convertisseur qsts – coque ensemble de manette des gaz – guidon ensemble de contacteur de guidon – guidon ensemble de poignée qsts – guidon extrémité de poignée – guidon gaine du câble – ensemble poig...
Page 52: Spec
2-10 spec e tightening torques hand grip – deck nut m6 4 5 0.5 3.6 front seat stay – deck nut m6 4 5 0.5 3.6 seat lock notch – deck nut — 2 26 2.6 19 rear seat stay – deck nut m10 2 26 2.6 19 seat lock assembly – seat bolt m6 4 6 0.6 4.3 572 lt plate/exhaust rubber hose – hull bolt m6 6 6 0.6 4.3 sp...
Page 53: Spec
F d es spec 2- serrage general ce tableau montre les couples de serrage des fixations standards à pas de filetage iso standard. Les couples de serrage des éléments ou ensembles spéciaux sont donnés dans les chapitres concernés de ce manuel. Pour éviter les voilages, ser- rer les ensembles à fixation...
Page 54: Spec
2-11 spec e cable and hose routing cable and hose routing a-a g-g f-f d-d e-e c b h-h i n o k-k l-l j-j m-m 1 90 ° f e a a d c b 0 a 9 8 7 3 6 5 3 4 4 3 2 1 1 3 g 9 i j h d k c l m n 1 a a b o n c d d e e f f g g h h h h i m m l l j j l l l k k h h a a 1 fuel tank breather hose 2 cooling water hose ...
Page 55: Spec
F d es spec 2- cheminement des cables et des flexibles 1 reniflard du réservoir de carburant 2 flexible d’admission d’eau 3 câble qsts 4 câble de starter 5 flexible de carburant 6 câble de sélecteur 7 câble de direction 8 filtre de carburant 9 flexible de ventilation 0 câble du démarreur a fil du bo...
Page 56: Spec
2-12 spec e cable and hose routing a c b b c g-g f-f d j i 3 a i j b 0 0 c d e e 4 h g f 3 g g d e e 1 2 3 4 5 6 7 8 9 e-e a f f a 1 throttle cable 2 handlebar switch lead 3 qsts cable 4 buzzer lead 5 to generator 6 to battery positive terminal 7 to starter motor 8 to multifunction meter 9 to water/...
Page 57: Spec
F d es spec 2- 1 câble d’accélérateur 2 fil de contacteur de guidon 3 câble qsts 4 fil de l’avertisseur sonore 5 vers le générateur 6 vers le fil positif de la batterie 7 vers le démarreur 8 vers le compteur multi-fonctions 9 vers le capteur de température d’eau/ d’échappement 0 fil négatif de la ba...
Page 58: Insp
E insp adj chapter 3 periodic inspection and adjustment maintenance interval chart .............................................................. 3-1 periodic service ........................................................................................ 3-2 control system ............................
Page 59
1 2 3 4 5 6 7 8 9 f d es chapitre 3 inspection periodique et reglage tableau des intervalles d’entretien ................................. 3-1 entretien periodique ............ 3-2 systeme de commande ......... 3-2 inspection de la direction principale ..................................... 3-2 inspe...
Page 60: Insp
3-1 insp adj e maintenance interval chart maintenance interval chart the following chart should be considered strictly as a guide to general maintenance intervals. Depending on operating conditions, the intervals of maintenance should be changed. *1: after every ride *2: inspect fluid level before e...
Page 61: Insp
F insp adj 3- tableau des intervalles d’entretien le tableau ci-après ne constitue qu’un guide général des intervalles d’entretien. Selon les conditions d’utilisation, les intervalles d’entretien devront être modifiés. *1: après chaque utilisation *2: contrôler le niveau de liquide avant chaque util...
Page 62: Insp
D insp adj 3- tabelle fÜr wartungsintervalle die nachstehende tabelle dient als richtlinie für die wartungsintervalle. Je nach betriebsbedingungen kann es erforderlich sein, die wartungsintervalle anzupassen. *1: nach jeder fahrt *2: den flüssigkeitsstand vor jeder fahrt überprüfen *3: schmiermittel...
Page 63: Insp
Es insp adj 3- tabla de intervalos de mantenimiento la tabla siguiente debe considerarse estrictamente como una guía de los intervalos de mantenimiento generales. Dependiendo de las condiciones de operación, deberán cambiarse los intervalos de mantenimiento. *1: después de cada utilización *2: compr...
Page 64: Insp
3-2 insp adj e control system periodic service control system steering master inspection 1. Inspect: ● steering master excessive play → replace the steer- ing master. Refer to “steering master” in chapter 8. Inspection steps: ● move the handlebar up and down and back and forth. ● check the excessive...
Page 65: Insp
F d es insp adj 3- entretien periodique systeme de commande inspection de la direction principale 1. Inspecter: ● direction principale trop de jeu → remplacer la direction principale. Se reporter à “direction principale” au chapitre 8. Inspection et réglage du câble de direction 1. Inspecter: ● jeu ...
Page 66: Insp
3-3 insp adj e control system note: if the steering cable cannot be properly adjusted by the cable joint at the steering master end, adjust the cable joint at the jet pump end so that the same clearances are obtained. Refer to “remote control cables and speed sensor lead” in chapter 8. Throttle cabl...
Page 67: Insp
F d es insp adj 3- n.B.: s’il n’est pas possible de régler correcte- ment le câble de direction à l’aide du rac- cord de câble du côté de la direction principale, ajuster le raccord de câble du côté de la pompe de propulsion, de manière à obtenir les mêmes jeux. Se reporter à “cables de telecom- man...
Page 68: Insp
3-4 insp adj e control system warning after adjusting the free play, turn the han- dlebar to the right and left and make sure that the trolling speed does not increase. Turn in free play is increased. Turn out free play is decreased. ● tighten the locknut. ● install the handlebar cover. Choke cable ...
Page 69: Insp
F d es insp adj 3- avertissement avertissement après avoir réglé le jeu libre, tourner le guidon vers la droite et la gauche et assurez-vous que le régime embrayé n’augmente pas. Inspection et réglage du câble de starter 1. Inspecter: ● bouton de starter (tirer le bouton de starter au maximum) le bo...
Page 70: Insp
3-5 insp adj e control system 2. Adjust: ● qsts cable note: if the qsts cable cannot be properly adjusted by the cable joint at the qsts con- verter end, adjust the cable joint at the jet pump end so that the same lengths are obtained. Refer to “remote control cables and speed sensor lead” in chapte...
Page 71: Insp
F d es insp adj 3- 2. Régler: ● câble qsts n.B.: s’il n’est pas possible de régler correcte- ment le câble qsts à l’aide du raccord de câble côté convertisseur qsts, ajus- ter le raccord de câble du côté de la pompe de propulsion, de manière à obte- nir les mêmes jeux. Se reporter à “cables de telec...
Page 72: Insp
3-6 insp adj e control system shift cable inspection and adjustment 1. Check: ● reverse gate stopper lever position incorrect → adjust. Checking steps: ● set the shift lever to the reverse posi- tion. ● check that the reverse gate 1 contacts the stopper 2 on the bracket and the lever 3 contacts the ...
Page 73: Insp
F d es insp adj 3- inspection et réglage du câble de sélecteur 1. Vérifier: ● position du levier de butée de secteur de marche arrière incorrect → régler. 2. Régler: ● raccord de câble de sélecteur etapes de la vérification: ● mettre le levier de sélecteur en position de marche arrière. ● vérifier q...
Page 74: Insp
3-7 insp adj e control system ypvs cable adjustment 1. Check: ● ypvs valve position incorrect position → adjust the ypvs cable. Checking steps: ● start the engine and then stop it. Note: when the engine has been stopped for 3 seconds, the ypvs valve assembly will retract and extend one time. ● check...
Page 75: Insp
F d es insp adj 3- réglage du câble ypvs 1. Vérifier: ● position de la soupape ypvs position incorrecte → régler le câble ypvs. 2. Mesurer: ● mou du câble ypvs a hors spécifications → régler. Etapes de la vérification: ● démarrer le moteur puis l’arrêter. N.B.: pendant un arrêt de 3 secondes du mote...
Page 76: Insp
3-8 insp adj e control system/fuel system 3. Adjust: ● ypvs cables 1 and 2 fuel system warning ● stop the engine, set the fuel cock to “off” before servicing the fuel system. ● when removing fuel system parts, wrap them in a cloth and take care that no fuel spills into the engine compartment. Fuel l...
Page 77: Insp
F d es insp adj 3- 3. Régler: ● câbles ypvs 1 et 2 systeme de carburant avertissement avertissement ● arrêter le moteur, tourner le robi- net de carburant sur “off” avant de commencer l’entretien du sys- tème de carburant. ● lors de la dépose d’éléments du sys- tème de carburant, les envelopper dans...
Page 78: Insp
3-9 insp adj e fuel system 2. Inspect: ● water separator 1 water accumulation → drain. Note: if need the water draining, remove the drain plug 2. Trolling speed check and adjustment 1. Check: ● trolling speed out of specification → adjust. Trolling speed: 1,350 ± 50 r/min checking steps (with the wa...
Page 79: Insp
F d es insp adj 3- 2. Inspecter: ● séparateur d’eau 1 accumulation d’eau → vidan- ger. N.B.: si l’eau doit être vidangée, retirer le bou- chon de vidange 2. Vérification et réglage du régime embrayé 1. Vérifier: ● régime embrayé hors spécifications → régler. 2. Régler: ● régime embrayé régime embray...
Page 80: Insp
3-10 insp adj e oil injection system/power unit oil injection system oil line inspection 1. Inspect: ● oil filter contaminants → clean. Frays/tears → replace. ● rubber seal cracks/wear → replace. ● oil hoses ● oil tank ● oil filler cap cracks/damage → replace. ● check valve malfunction → replace. Ca...
Page 81: Insp
F d es insp adj 3- systeme d’injection d’huile inspection de la canalisation d’huile 1. Inspecter: ● filtre à huile encrassement → nettoyer. Usure/déchirures → remplacer. ● joint en caoutchouc fissures/usure → remplacer. ● tuyaux d’huile ● réservoir d’huile ● capuchon de remplissage d’huile fissures...
Page 82: Insp
3-11 insp adj e power unit/electrical 3. Measure: ● spark plug gap a out of specification → regap. Spark plug gap: 1.0–1.1 mm (0.039–0.043 in) 4. Tighten: ● spark plug note: ● before installing the spark plug, clean the gasket surface and spark plug surface. Also, it is suggested to apply a thin fil...
Page 83: Insp
F d es insp adj 3- 3. Mesurer: ● ecartement des électrodes a hors spécifications → modifier l’écartement. 4. Serrer: ● bougie n.B.: ● avant de monter une bougie, nettoyer la surface du joint et la surface de la bougie. Nous suggérons également d’appliquer une légère couche d’un composé anti-grippant...
Page 84: Insp
3-12 insp adj e electrical batteries produce explosive gases. Keep sparks, flame, cigarettes, etc., well away. If using or charging the battery in an enclosed space, make sure that it is well ventilated. Always shield your eyes when working near batteries. Keep out of the reach of children. Caution:...
Page 85: Insp
F d es insp adj 3- les batteries produisent des gaz explo- sifs. Toujours les tenir bien à l’écart de toute source d’étincelles, de flam- mes, des cigarettes, etc. Si l’on utilise ou charge une batterie dans un espace clos, veiller à ce qu’il soit bien ventilé. Toujours se protéger les yeux lorsque ...
Page 86: Insp
3-13 insp adj e electrical 2. Inspect: ● electrolyte level low → add distilled water. The electrolyte level should be between the upper a and lower b level marks. Caution: use only distilled water. Other types of water contain minerals which are harmful to batteries. Filling steps: ● remove each fil...
Page 87: Insp
F d es insp adj 3- 2. Inspecter: ● niveau de l’électrolyte bas → ajouter de l’eau distillée. Le niveau de l’électrolyte doit être compris entre le repère supé- rieur a et le repère inférieur b. Attention: utiliser uniquement de l’eau distillée. De l’eau autre que distillée contient des sels minéraux...
Page 88: Insp
3-14 insp adj e electrical/jet pump unit 5. Install: ● battery breather hose 1 ● battery ● battery positive lead 2 ● battery negative lead 3 ● bands caution: ● connect the positive lead to the battery terminal first. ● make sure the battery leads are con- nected properly. Reversing the leads can ser...
Page 89: Insp
F d es insp adj 3- 5. Installer: ● reniflard de la batterie 1 ● batterie ● câble positif de la batterie 2 ● fil négatif de la batterie 3 ● sangles attention: ● connecter d’abord le câble positif à la borne de la batterie. ● s’assurer que les câbles de la batte- rie sont connectés correctement. Inver...
Page 90: Insp
3-15 insp adj e jet pump unit/general water inlet strainer inspection 1. Inspect: ● water inlet strainer contaminants → clean. Cracks/damage → replace. Inspection steps: ● remove the ride plate. Refer to “jet pump unit” in chapter 6. ● remove the water inlet cover 1. ● inspect the water inlet strain...
Page 91: Insp
F d es insp adj 3- inspection du filtre d’admission d’eau 1. Inspecter: ● filtre d’admission d’eau encrassement → nettoyer. Fissures/endommagement → remplacer. Inspection de la crépine de cale 1. Inspecter: ● crépine de cale encrassement → nettoyer. Fissures/endommagement → remplacer. Generalites in...
Page 92: Insp
3-16 insp adj e general lubrication points 1. Lubricate: ● throttle cable (handlebar end) note: before lubricating the throttle cable, squeeze the throttle lever and remove the rubber seal 1. Recommended lubricant: rust inhibitor 2. Lubricate: ● qsts control cables (handlebar end) note: before lubri...
Page 93: Insp
F d es insp adj 3- points de lubrification 1. Lubrifier: ● câble d’accélérateur (extrémité guidon) n.B.: avant de lubrifier le câble d’accéléra- teur, presser la manette des gaz et dépo- ser le joint en caoutchouc 1. 2. Lubrifier: ● câbles de commande qsts (extrémité guidon) n.B.: avant de lubrifier...
Page 94: Insp
3-17 insp adj e general 3. Lubricate: ● throttle cable (carburetor end) ● oil pump cable ● qsts cables (pulley end) ● ypvs cables recommended grease: yamaha marine grease, yamaha grease a (water resistant grease) 4. Lubricate: ● nozzle pivot shaft ● steering cable (nozzle end) ● qsts cable (nozzle e...
Page 95: Insp
F d es insp adj 3- 3. Lubrifier: ● câble d’accélérateur (côté carburateur) ● câble de pompe à huile ● câbles qsts (côté poulie) ● câbles ypvs 4. Lubrifier: ● boulon d’articulation de la tuyère ● câble de direction (côté tuyère) ● câble qsts (côté tuyère) graisse recommandée: graisse maritime yamaha,...
Page 96: Insp
3-18 insp adj e general 5. Lubricate: ● steering cable ● steering cable joint ● shift cable ● shift cable joint note: disconnect the joints and apply a small amount of grease. Recommended grease: yamaha marine grease, yamaha grease a (water resistant grease) 6. Fill: ● intermediate housing note: fil...
Page 97: Insp
F d es insp adj 3- 5. Lubrifier: ● câble de direction ● raccord du câble de direction ● câble de sélecteur ● raccord de câble de sélecteur n.B.: déconnecter les raccords et appliquer une petite quantité de graisse. 6. Remplir: ● logement intermédiaire n.B.: garnir le logement intermédiaire de la gra...
Page 98: Fuel
E fuel chapter 4 fuel system fuel cock and fuel filter ..................................................................... 4-1 exploded diagram ............................................................................. 4-1 removal and installation chart ............................................
Page 99
1 2 3 4 5 6 7 8 9 f d es chapitre 4 systeme d’alimentation robinet de carburant et filtre de carburant ............. 4-1 vue en eclate............................ 4-1 tableau de depose et d’installation ........................ 4-1 points d’entretien ................. 4-2 inspection du filtre de car...
Page 100: Fuel
E fuel carburetor .............................................................................................. 4-20 exploded diagram ........................................................................... 4-20 removal and installation chart ............................................. 4-20 se...
Page 101
F d es carburateur ............................. 4-20 vue en eclate.......................... 4-20 tableau de depose et d’installation ...................... 4-20 points d’entretien ............... 4-23 inspection du diaphragme ........... 4-23 inspection du corps de la pompe d’accélérateur............
Page 102: Fuel
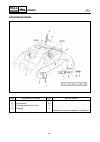
4-1 fuel e fuel cock and fuel filter fuel cock and fuel filter exploded diagram removal and installation chart step procedure/part name q’ty service points fuel cock and fuel filter removal follow the left “step” for removal. 1 screw 1 2 knob 1 3 nut 1 4 washer 1 5 fuel cock assembly 1 6 fuel hose 3...
Page 103: Fuel
F d es 4- fuel robinet de carburant et filtre de carburant vue en eclate tableau de depose et d’installation etape procédé/nom de pièce qté points d’entretien depose du robinet de carburant et du filtre de carburant suivre l’“étape” de gauche pour la dépose. 1 vis 1 2 bouton 1 3 ecrou 1 4 rondelle 1...
Page 104: Fuel
4-2 fuel e fuel cock and fuel filter service points fuel filter inspection refer to “fuel system” in chapter 3. Fuel cock inspection 1. Check: ● fuel cock contaminants → clean. Rough movement → replace..
Page 105: Fuel
F d es fuel 4- points d’entretien inspection du filtre de carburant se reporter à “systeme de carburant” au chapitre 3. Inspection du robinet de carburant 1. Vérifier: ● robinet de carburant encrassement → nettoyer. Mouvement irrégulier → rem- placer. Wartungspunkte inspektion des kraftstoffilters s...
Page 106: Fuel
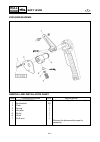
4-3 fuel e choke cable choke cable exploded diagram removal and installation chart step procedure/part name q’ty service points choke cable removal follow the left “step” for removal. 1 screw 1 2 knob 1 3 friction adjusting nut 1 4 nut 1 5 choke cable 1 reverse the removal steps for installation..
Page 107: Fuel
F d es 4- fuel cable de starter vue en eclate tableau de depose et d’installation etape procédé/nom de pièce qté points d’entretien depose du cable de starter suivre l’“étape” de gauche pour la dépose. 1 vis 1 2 bouton 1 3 ecrou de réglage de friction 1 4 ecrou 1 5 câble de starter 1 pour l’installa...
Page 108: Fuel
4-4 fuel e oil tank oil tank exploded diagram removal and installation chart step procedure/part name q’ty service points oil tank removal follow the left “step” for removal. Engine unit refer to “engine unit” in chapter 5. 1 hose clamp 1 2 nut 1 disconnect the oil filler hose from the oil filler ne...
Page 109: Fuel
F d es 4- fuel reservoir d’huile vue en eclate tableau de depose et d’installation etape procédé/nom de pièce qté points d’entretien depose du reservoir d’huile suivre l’“étape” de gauche pour la dépose. Moteur se reporter à “moteur” au chapitre 5. 1 bride de flexible 1 2 ecrou 1 déconnecter le flex...
Page 110: Fuel
4-5 fuel e oil tank exploded diagram step procedure/part name q’ty service points 7 oil hose 1 face the white mark a to the stern. 8 bolt 2 9 tank belt 2 10 oil tank assembly 1 11 hose clamp 1 12 oil filler hose 1 13 oil level sensor 1 reverse the removal steps for installation..
Page 111: Fuel
F d es 4- fuel vue en eclate etape procédé/nom de pièce qté points d’entretien 7 flexible d’huile 1 tourner le repère blanc a vers la poupe. 8 boulon 2 9 courroie de réservoir 2 10 ensemble de réservoir d’huile 1 11 bride de flexible 1 12 flexible de remplissage d’huile 1 13 capteur de niveau d’huil...
Page 112: Fuel
4-6 fuel e oil tank service points oil line inspection 1. Inspect: ● oil filter contaminants → clean. Frays/tears → replace. ● rubber seal cracks/wear → replace. ● oil hoses ● oil tank ● oil filler cap cracks/damage → replace. ● check valve malfunction → replace. Oil level sensor inspection refer to...
Page 113: Fuel
F d es fuel 4- points d’entretien inspection de la canalisation d’huile 1. Inspecter: ● filtre à huile encrassement → nettoyer. Usure/déchirures → remplacer. ● joint en caoutchouc fissures/usure → remplacer. ● tuyaux d’huile ● réservoir d’huile ● capuchon de remplissage d’huile fissures/endommagemen...
Page 114: Fuel
4-7 fuel e fuel tank fuel tank exploded diagram removal and installation chart step procedure/part name q’ty service points fuel tank removal follow the left “step” for removal. Oil tank refer to “oil tank”. 1 hose clamp 1 2 nut 1 disconnect the fuel filler hose from the fuel filler neck. 3 fuel fil...
Page 115: Fuel
F d es 4- fuel reservoir de carburant vue en eclate tableau de depose et d’installation etape procédé/nom de pièce qté points d’entretien depose du reservoir de carbu- rant suivre l’“étape” de gauche pour la dépose. Réservoir d’huile se reporter à “reservoir d’huile”. 1 bride de flexible 1 2 ecrou 1...
Page 116: Fuel
4-8 fuel e fuel tank exploded diagram step procedure/part name q’ty service points 7 fuel hose 1 8 fuel return hose 1 fasten the fuel return hose to the band that is used to fasten the front ventilation hose. 9 fuel breather hose 1 10 fuel tank assembly 1 11 hose clamp 1 12 fuel filler hose 1 13 hos...
Page 117: Fuel
F d es 4- fuel vue en eclate etape procédé/nom de pièce qté points d’entretien 7 flexible de carburant 1 8 flexible de refoulement de carburant 1 fixez le tuyau de retour de carburant à la bande utilisée pour fixer le tuyau de ventilation avant. 9 reniflard de carburant 1 10 ensemble de réservoir de...
Page 118: Fuel
4-9 fuel e fuel tank exploded diagram step procedure/part name q’ty service points 15 check valve 1 16 fuel breather hose 1 17 screw/washer 1/1 18 filter 1 19 screw/washer 1/1 20 sleeve 1 21 bolt 2 22 tank belt 2 reverse the removal steps for installation..
Page 119: Fuel
F d es 4- fuel vue en eclate etape procédé/nom de pièce qté points d’entretien 15 soupape de contrôle 1 16 reniflard de carburant 1 17 vis/rondelle 1/1 18 filtre 1 19 vis/rondelle 1/1 20 manchon 1 21 boulon 2 22 courroie de réservoir 2 pour l’installation, inverser les étapes de la dépose. Explosion...
Page 120: Fuel
4-10 fuel e fuel tank service points check valve inspection 1. Check: ● check valve faulty → replace. Fuel level sensor inspection refer to “indication system” in chapter 7. Fuel tank inspection 1. Inspect: ● fuel tank cracks/damage → replace. Checking steps: ● connect a hose to the end of check val...
Page 121: Fuel
F d es fuel 4- points d’entretien inspection du clapet antiretour 1. Vérifier: ● soupape de contrôle défectueux → remplacer. Inspection du capteur de niveau de carburant se reporter à “systeme d’indication” au chapitre 7. Inspection du réservoir de carburant 1. Inspecter: ● réservoir de carburant fi...
Page 122: Fuel
4-11 fuel e intake duct and silencer intake duct and silencer exploded diagram removal and installation chart step procedure/part name q’ty service points intake duct and silencer removal follow the left “step” for removal. Muffler assembly refer to “muffler assembly” in chapter 5. 1 hose clamp 2 2 ...
Page 123: Fuel
F d es 4- fuel conduite d’admission et silencieux vue en eclate tableau de depose et d’installation etape procédé/nom de pièce qté points d’entretien depose de la conduite d’admis- sion et du silencieux suivre l’“étape” de gauche pour la dépose. Ensemble de silencieux se reporter à “silencieux” au c...
Page 124: Fuel
4-12 fuel e intake duct and silencer exploded diagram step procedure/part name q’ty service points 4 intake duct 1 5 silencer case 1 6 bolt 6 7 spark arrester 1 8 silencer plate 1 9 o-ring 3 reverse the removal steps for installation..
Page 125: Fuel
F d es 4- fuel vue en eclate etape procédé/nom de pièce qté points d’entretien 4 conduite d’admission 1 5 boîtier silencieux 1 6 boulon 6 7 pare-étincelles 1 8 plaque silencieux 1 9 joint torique 3 pour l’installation, inverser les étapes de la dépose. Explosionszeichnung schritt verfahren/teilebeze...
Page 126: Fuel
4-13 fuel e carburetor unit carburetor unit exploded diagram removal and installation chart step procedure/part name q’ty service points carburetor unit removal follow the left “step” for removal. Silencer plate refer to “intake duct and silencer”. 1 oil pump cable 1 note: before removing the oil pu...
Page 127: Fuel
F d es 4- fuel carburateur vue en eclate tableau de depose et d’installation etape procédé/nom de pièce qté points d’entretien depose du carburateur suivre l’“étape” de gauche pour la dépose. Plaque silencieux se reporter à “conduite d’admission et silen- cieux”. 1 câble de pompe à huile 1 n.B.: ava...
Page 128: Fuel
4-14 fuel e carburetor unit exploded diagram step procedure/part name q’ty service points 5 fuel return hose 1 fasten the fuel return hose to the band that is used to fasten the front ventilation hose. 6 oil delivery hose 3 7 clamp/fuel pump vacuum hose 3/3 8 remote throttle stop screw 1 9 bolt 4 10...
Page 129: Fuel
F d es 4- fuel vue en eclate etape procédé/nom de pièce qté points d’entretien 5 flexible de refoulement de carburant 1 fixez le tuyau de retour de carburant à la bande utilisée pour fixer le tuyau de ventilation avant. 6 flexible d’alimentation en huile 3 7 sangle/flexible de carburant à dépression...
Page 130: Fuel
4-15 fuel e carburetor unit exploded diagram removal and installation chart step procedure/part name q’ty service points carburetor unit separation follow the left “step” for removal. 1 hose 2 fuel suction 2 hose 2 fuel return 3 accelerator pump hose 1 4 remote throttle stop screw assembly 1 5 bolt ...
Page 131: Fuel
F d es 4- fuel vue en eclate tableau de depose et d’installation etape procédé/nom de pièce qté points d’entretien separation du carburateur suivre l’“étape” de gauche pour la dépose. 1 flexible 2 aspiration du carburant 2 flexible 2 refoulement du carburant 3 flexible de la pompe de l’accélérateur ...
Page 132: Fuel
4-16 fuel e carburetor unit exploded diagram step procedure/part name q’ty service points 7 throttle link 1 8 choke link 1 9 bolt 6 10 carburetor 3 11 gasket 3 12 plate 1 reverse the removal steps for installation. Not reusable.
Page 133: Fuel
F d es 4- fuel vue en eclate etape procédé/nom de pièce qté points d’entretien 7 tringle d’accélérateur 1 8 tringle de starter 1 9 boulon 6 10 carburateur 3 11 joint 3 12 plaque 1 pour l’installation, inverser les étapes de la dépose. Non réutilisable explosionszeichnung schritt verfahren/teilebezei...
Page 134: Fuel
4-17 fuel e carburetor unit service points throttle valve synchronization inspection and adjustment 1. Check: ● throttle valve synchronization not synchronized → adjust. Checking steps: ● loosen the remote throttle stop screw 1 until untouched the screw end from the throttle lever. ● check the each ...
Page 135: Fuel
F d es fuel 4- points d’entretien inspection et réglage de la synchronisation du papillon des gaz 1. Vérifier: ● synchronisation du papillon des gaz non synchronisé → régler. 2. Régler: ● synchronisation du papillon des gaz etapes de la vérification: ● desserrer la vis de butée de papillon 1 jusqu’à...
Page 136: Fuel
4-18 fuel e carburetor unit choke valve synchronization inspection and adjustment 1. Check: ● choke valve synchronization not synchronized → adjust. Checking steps: ● turn the choke lever 1 and check the each choke valve is fully closed. 2. Adjust: ● choke valve synchronization adjustment steps: ● l...
Page 137: Fuel
F d es fuel 4- inspection et réglage de la synchronisation du volet de starter 1. Vérifier: ● synchronisation du volet de star- ter non synchronisé → régler. 2. Régler: ● synchronisation du volet de star- ter etapes de la vérification: ● faire tourner le levier de starter 1 et vérifier que chaque vo...
Page 138: Fuel
4-19 fuel e carburetor unit choke cable and throttle cable installation 1. Install: ● choke cable 1 ● throttle cable 2 choke cable guide installation position a: 16–18 mm (0.63–0.71 in) throttle cable guide installation position b: 18–20 mm (0.71–0.79 in) 2. Adjust: ● throttle lever free play refer ...
Page 139: Fuel
F d es fuel 4- installation du câble d’accélérateur et du câble de starter 1. Installer: ● câble de starter 1 ● câble d’accélérateur 2 2. Régler: ● jeu libre de la manette des gaz se reporter à “systeme de commande” au chapitre 3. Installation du câble de pompe à huile 1. Régler: ● câble de pompe à ...
Page 140: Fuel
4-20 fuel e carburetor carburetor exploded diagram removal and installation chart step procedure/part name q’ty service points carburetor disassembly follow the left “step” for disassembly. 1 accelerator pump delivery hose 2 for carburetor #3 2 accelerator pump fuel hose 1 3 screw 4 4 accelerator pu...
Page 141: Fuel
F d es 4- fuel carburateur vue en eclate tableau de depose et d’installation etape procédé/nom de pièce qté points d’entretien demontage du carburateur suivre l’“étape” de gauche pour le démontage. 1 flexible de carburant de la pompe d’accélérateur 2 carburateur n˚3 2 flexible de carburant de la pom...
Page 142: Fuel
4-21 fuel e carburetor exploded diagram step procedure/part name q’ty service points 10 pilot jet 1 11 screw 1 12 arm 1 13 arm pin 1 14 spring 1 15 screw 1 16 needle valve 1 17 needle valve seat 1 18 o-ring 1 reverse the disassembly steps for assembly..
Page 143: Fuel
F d es 4- fuel vue en eclate etape procédé/nom de pièce qté points d’entretien 10 gicleur de ralenti 1 11 vis 1 12 bras de flotteur 1 13 goupille de bras de flotteur 1 14 ressort 1 15 vis 1 16 soupape à pointeau 1 17 siège de soupape à pointeau 1 18 joint torique 1 pour le montage, inverser les étap...
Page 144: Fuel
4-22 fuel e carburetor exploded diagram removal and installation chart step procedure/part name q’ty service points accelerator pump disassembly follow the left “step” for disassembly. 1 screw 1 2 stay 1 3 spring 1 4 spring seat 1 5 screw 4 6 accelerator pump cover assembly 1 7 spring 1 8 diaphragm ...
Page 145: Fuel
F d es 4- fuel vue en eclate tableau de depose et d’installation etape procédé/nom de pièce qté points d’entretien demontage de la pompe d’accelerateur suivre l’“étape” de gauche pour le démontage. 1 vis 1 2 support 1 3 ressort 1 4 logement de ressort 1 5 vis 4 6 corps de pompe d’accélérateur 1 7 re...
Page 146: Fuel
4-23 fuel e carburetor service points note: before disassembling the carburetor, make sure to note the number of times the pilot screw is turned in from its set position to the seated position. Caution: do not use steel wire for cleaning the jets. This may enlarge the jet diameters and seriously aff...
Page 147: Fuel
F d es fuel 4- points d’entretien n.B.: avant de démonter le carburateur, n’oubliez pas de noter le nombre de tours dont la vis de ralenti est dévissée par rap- port à sa position de base. Attention: ne pas utiliser un fil d’acier pour net- toyer les gicleurs. Cela risque d’agran- dir le diamètre de...
Page 148: Fuel
4-24 fuel e regulator body inspection 1. Inspect: ● regulator body contaminants → clean. Damage → replace. ● valve (clear film) 1 damage → replace. Needle valve inspection 1. Inspect: ● needle valve ● needle valve seat contaminants a → clean. Wear b → replace. Note: always replace the needle valve a...
Page 149: Fuel
F d es fuel 4- inspection du corps du régulateur 1. Inspecter: ● corps de régulateur encrassement → nettoyer. Endommagement → remplacer. ● soupape (pellicule transparente) 1 endommagement → remplacer. Inspection de la soupape à pointeau 1. Inspecter: ● soupape à pointeau ● siège de soupape à pointea...
Page 150: Fuel
4-25 fuel e carburetor jet and carburetor body inspection 1. Inspect: ● main jet ● pilot jet ● carburetor body clog/contaminants → clean. Damage/wear → replace. Caution: do not use a steel wire to clean the jets. This may enlarge the jet diameters and seriously affect performance. Carburetor assembl...
Page 151: Fuel
F d es fuel 4- inspection du gicleur et du corps de carburateur 1. Inspecter: ● gicleur principal ● gicleur de ralenti ● corps de carburateur bouché/encrassement → net- toyer. Détérioration/usure → rempla- cer. Attention: ne pas utiliser de fil en acier pour net- toyer les gicleurs. Cela risque d’ag...
Page 152: Fuel
4-26 fuel e fuel pump fuel pump exploded diagram removal and installation chart step procedure/part name q’ty service points fuel pump disassembly follow the left “step” for disassembly. Carburetors refer to “carburetor”. 1 screw 4 2 fuel pump cover 1 3 gasket 1 4 diaphragm 1 5 o-ring 1 6 diaphragm ...
Page 153: Fuel
F d es 4- fuel pompe de carburant vue en eclate tableau de depose et d’installation etape procédé/nom de pièce qté points d’entretien demontage de la pompe de car- burant suivre l’“étape” de gauche pour le démontage. Carburateur se reporter à “carburateur”. 1 vis 4 2 couvercle de la pompe à carburan...
Page 154: Fuel
4-27 fuel e fuel pump exploded diagram step procedure/part name q’ty service points 7 rubber diaphragm 1 8 diaphragm 1 9 packing 1 10 fuel filter 1 reverse the disassembly steps for assembly..
Page 155: Fuel
F d es 4- fuel vue en eclate etape procédé/nom de pièce qté points d’entretien 7 diaphragme en caoutchouc 1 8 diaphragme 1 9 garniture 1 10 filtre de carburant 1 pour le montage, inverser les étapes du démontage. Explosionszeichnung schritt verfahren/teilebezeichnung menge wartungspunkte 7 gummimemb...
Page 156: Fuel
4-28 fuel e fuel pump service points fuel pump inspection 1. Inspect: ● diaphragm ● rubber diaphragm ● diaphragm body damage → replace. Fuel filter inspection 1. Inspect: ● fuel filter clog/contaminants → clean. Damage → replace..
Page 157: Fuel
F d es fuel 4- points d’entretien inspection de la pompe de carburant 1. Inspecter: ● diaphragme ● diaphragme en caoutchouc ● corps de diaphragme endommagement → remplacer. Inspection du filtre de carburant 1. Inspecter: ● filtre de carburant bouché/encrassement → net- toyer. Endommagement → remplac...
Page 158: Fuel
4-29 fuel e oil pump oil pump exploded diagram removal and installation chart step procedure/part name q’ty service points oil pump removal follow the left “step” for removal. Exhaust chamber assembly refer to “exhaust chamber assembly” in chapter 5. Intake duct refer to “intake duct and silencer”. ...
Page 159: Fuel
F d es 4- fuel pompe a huile vue en eclate tableau de depose et d’installation etape procédé/nom de pièce qté points d’entretien depose de la pompe a huile suivre l’“étape” de gauche pour la dépose. Ensemble de chambre d’échappement se reporter à “ensemble de chambre d’echappe- ment” au chapitre 5. ...
Page 160: Fuel
4-30 fuel e oil pump exploded diagram step procedure/part name q’ty service points 4 bleed hose stay 1 5 bolt 2 6 oil pump assembly 1 7 gasket 1 8 oil suction hose 1 9 oil return hose 1 reverse the removal steps for installation. Not reusable.
Page 161: Fuel
F d es 4- fuel vue en eclate etape procédé/nom de pièce qté points d’entretien 4 sangle du flexible de purge 1 5 boulon 2 6 ensemble de pompe à huile 1 7 joint 1 8 flexible d’arrivée d’huile 1 9 flexible de retour d’huile 1 pour l’installation, inverser les étapes de la dépose. Non réutilisable expl...
Page 162: Fuel
4-31 fuel e oil pump exploded diagram removal and installation chart step procedure/part name q’ty service points oil pump hoses and cable removal follow the left “step” for removal. 1 bleed hose 1 2 air bleed screw 1 3 gasket 1 4 bleed hose stay 1 5 oil delivery hose 1 3 6 oil delivery hose 2 3 7 c...
Page 163: Fuel
F d es 4- fuel vue en eclate tableau de depose et d’installation etape procédé/nom de pièce qté points d’entretien depose des flexibles et cables de pompe a huile suivre l’“étape” de gauche pour la dépose. 1 flexible de purge 1 2 vis de purge d’air 1 3 joint 1 4 sangle du flexible de purge 1 5 flexi...
Page 164: Fuel
4-32 fuel e oil pump service points oil pump inspection 1. Inspect: ● oil pump contaminants → clean. Damage/wear → replace. ● oil pump joint piece damage/wear → replace. Oil hose inspection 1. Inspect: ● oil hose cracks/damage → replace. Caution: ● if the oil delivery hoses are not full of oil, fill...
Page 165: Fuel
F d es fuel 4- points d’entretien inspection de la pompe à huile 1. Inspecter: ● pompe à huile encrassement → nettoyer. Endommagement/usure → rem- placer. ● pièce de raccord de la pompe à huile endommagement/usure → rem- placer. Inspection du flexible d’huile 1. Inspecter: ● flexible d’huile fissure...
Page 166: Fuel
4-33 fuel e oil pump oil pump cable adjustment 1. Check: ● oil pump lever position incorrect → adjust. Checking steps: ● fully close the carburetor throttle valves. ● check that the mark a on the oil pump lever is aligned with the mark b on the oil pump body. 2. Adjust: ● oil pump cable note: if the...
Page 167: Fuel
F d es fuel 4- réglage du câble de la pompe à huile 1. Vérifier: ● position du levier de pompe à huile incorrect → régler. 2. Régler: ● câble de pompe à huile n.B.: si la position d’installation a été mar- quée sur le câble intérieur du côté carbu- rateur tandis que les marques blanches a et b coïnc...
Page 168: Fuel
4-34 fuel e oil pump oil injection pump air bleeding 1. Bleed: ● air air bleeding steps: ● place rags around the air bleed screw 1 to catch any oil that might spill. ● fill the oil tank with the recommended oil. Note: if the oil pump is replaced or the oil suc- tion hose is reinstalled, bleed air fr...
Page 169: Fuel
F d es fuel 4- purge d’air de la pompe d’injection d’huile 1. Purger: ● air etapes de la purge d’air: ● placer des chiffons autour de la vis de purge d’air 1 pour recueillir l’huile qui pourrait déborder. ● remplir le réservoir avec l’huile recommandée. N.B.: si la pompe à huile est remplacée ou si ...
Page 170: Powr
E powr chapter 5 power unit exhaust chamber assembly ................................................................ 5-1 exploded diagram ............................................................................. 5-1 removal and installation chart ............................................... ...
Page 171
1 2 3 4 5 6 7 8 9 f d es chapitre 5 moteur ensemble de chambre d’echappement .......................... 5-1 vue en eclate............................ 5-1 tableau de depose et d’installation ........................ 5-1 silencieux...................................... 5-5 vue en eclate..................
Page 172: Powr
E powr cylinders ................................................................................................... 5-27 exploded diagram ........................................................................... 5-27 removal and installation chart ............................................. 5-2...
Page 173
F d es cylindres ..................................... 5-27 vue en eclate.......................... 5-27 tableau de depose et d’installation ...................... 5-27 points d’entretien ............... 5-28 inspection du cylindre................. 5-28 pistons .........................................
Page 174: Powr
5-1 powr e exhaust chamber assembly exhaust chamber assembly exploded diagram removal and installation chart step procedure/part name q’ty service points exhaust chamber assembly removal follow the left “step” for removal. 1 exhaust temperature sensor coupler 1 2 cap/bolt 3/3 3 cover 1 4 clamp/cooli...
Page 175: Powr
F d es 5- powr ensemble de chambre d’echappement vue en eclate tableau de depose et d’installation etape procédé/nom de pièce qté points d’entretien depose de l’ensemble de la chambre d’echappement suivre l’“étape” de gauche pour la dépose. 1 coupleur du capteur de température d’échappement 1 2 bouc...
Page 176: Powr
5-2 powr e exhaust chamber assembly exploded diagram step procedure/part name q’ty service points 7 bolt 2 8 bolt 2 9 exhaust chamber stay 1 10 bolt 3 11 bolt 1 12 exhaust chamber assembly 1 note: before installing the exhaust chamber assembly, place the bolts (step no.10) in the bolts holes of the ...
Page 177: Powr
F d es 5- powr vue en eclate etape procédé/nom de pièce qté points d’entretien 7 boulon 2 8 boulon 2 9 entretoise de chambre d’échappement 1 10 boulon 3 11 boulon 1 12 ensemble de chambre d’échappement 1 n.B.: avant d’installer la chambre d’échappement, insérer les boulons (étape n˚10) dans les trou...
Page 178: Powr
5-3 powr e exhaust chamber assembly exploded diagram step procedure/part name q’ty service points 13 clamp/cooling water hose 1/1 14 gasket 1 15 pin 2 16 outer exhaust joint 1 17 inner exhaust joint 1 reverse the removal steps for installation. Not reusable.
Page 179: Powr
F d es 5- powr vue en eclate etape procédé/nom de pièce qté points d’entretien 13 pince/tuyau d’eau de refroidissement 1/1 14 joint 1 15 goupille 2 16 joint d’échappement extérieur 1 17 joint d’échappement intérieur 1 pour l’installation, inverser les étapes de la dépose. Non réutilisable explosions...
Page 180: Powr
5-4 powr e exhaust chamber assembly exploded diagram removal and installation chart step procedure/part name q’ty service points exhaust chamber disassembly follow the left “step” for disassembly. 1 bolt 5 2 bolt 1 3 exhaust chamber joint 1 4 gasket 1 5 pin 2 6 exhaust chamber 1 reverse the disassem...
Page 181: Powr
F d es 5- powr vue en eclate tableau de depose et d’installation etape procédé/nom de pièce qté points d’entretien demontage de la chambre d’echappement suivre l’“étape” de gauche pour le démontage. 1 boulon 5 2 boulon 1 3 joint de la chambre d’échappement 1 4 joint 1 5 goupille 2 6 chambre d’échapp...
Page 182: Powr
5-5 powr e muffler assembly muffler assembly exploded diagram removal and installation chart step procedure/part name q’ty service points muffler assembly removal follow the left “step” for removal. Exhaust chamber assembly refer to “exhaust chamber assembly”. 1 band 1 2 screw 4 3 ventilation duct 1...
Page 183: Powr
F d es 5- powr silencieux vue en eclate tableau de depose et d’installation etape procédé/nom de pièce qté points d’entretien depose du silencieux suivre l’“étape” de gauche pour la dépose. Ensemble de chambre d’échappement se reporter à “ensemble de chambre d’echappe- ment”. 1 sangle 1 2 vis 4 3 co...
Page 184: Powr
5-6 powr e muffler assembly exploded diagram step procedure/part name q’ty service points 7 hose clamp 1 8 water lock band 1 slide the water lock. 9 nut 2 10 bolt 4 11 intermediate housing grease hose 1 12 eye 2 note: remove the spark plug before removing the eye, and reinstall it to make removing t...
Page 185: Powr
F d es 5- powr vue en eclate etape procédé/nom de pièce qté points d’entretien 7 bride de flexible 1 8 sangle de la pièce de blocage d’eau 1 repousser la pièce de blocage d’eau. 9 ecrou 2 10 boulon 4 11 flexible du carter de graissage intermédiaire 1 12 oeil 2 n.B.: retirer la bougie avant d’ôter l’...
Page 186: Powr
5-7 powr e muffler assembly exploded diagram step procedure/part name q’ty service points 13 bolt 2 14 bolt 1 15 bolt 1 16 bolt 1 17 muffler stay 2 1 18 muffler assembly 1 note: remove the cylinder head if it is difficult to remove the muffler assembly. Reverse the removal steps for installation..
Page 187: Powr
F d es 5- powr vue en eclate etape procédé/nom de pièce qté points d’entretien 13 boulon 2 14 boulon 1 15 boulon 1 16 boulon 1 17 sangle de silencieux 2 1 18 ensemble de silencieux 1 n.B.: retirer la culasse s’il s’avère difficile de retirer le silen- cieux. Pour l’installation, inverser les étapes ...
Page 188: Powr
5-8 powr e muffler assembly exploded diagram removal and installation chart step procedure/part name q’ty service points muffler disassembly follow the left “step” for disassembly. 1 exhaust temperature sensor 1 2 water temperature sensor 1 3 bolt 2 4 muffler stay 1 5 bolt 6 6 cover 1 7 gasket 1 8 c...
Page 189: Powr
F d es 5- powr vue en eclate tableau de depose et d’installation etape procédé/nom de pièce qté points d’entretien demontage du silencieux suivre l’“étape” de gauche pour le démontage. 1 capteur de température d’échappement 1 2 capteur de température d’eau 1 3 boulon 2 4 support de silencieux 1 5 bo...
Page 190: Powr
5-9 powr e muffler assembly exploded diagram step procedure/part name q’ty service points 9 gasket 1 10 catalyst 1 11 gasket 1 12 pin 2 13 bolt 6 14 mixing joint 1 15 gasket 1 16 muffler 1 reverse the disassembly steps for assembly. Not reusable not reusable not reusable.
Page 191: Powr
F d es 5- powr vue en eclate etape procédé/nom de pièce qté points d’entretien 9 joint 1 10 catalyseur 1 11 joint 1 12 goupille 2 13 boulon 6 14 joint de mélange 1 15 joint 1 16 silencieux 1 pour le montage, inverser les étapes du démontage. Non réutilisable non réutilisable non réutilisable explosi...
Page 192: Powr
5-10 powr e muffler assembly service point catalyst inspection 1. Inspect: ● catalyst cracks/damage → replace..
Page 193: Powr
F d es powr 5- point d’entretien inspection du catalyseur 1. Inspecter: ● catalyseur fissures/endommagement → remplacer. Wartungspunkte inspektion des katalysator 1. Überprüfen: ● katalysator risse/beschädigung → ersetzen. Puntos de servicio inspección del catalizador 1. Inspeccione: ● catalizador g...
Page 194: Powr
5-11 powr e exhaust manifold and leads exhaust manifold and leads exploded diagram removal and installation chart step procedure/part name q’ty service points exhaust manifold and leads removal follow the left “step” for removal. Battery lead (negative and positive) refer to “electrical box” in chap...
Page 195: Powr
F d es 5- powr collecteur d’echappement et cbles vue en eclate tableau de depose et d’installation etape procédé/nom de pièce qté points d’entretien depose du collecteur d’echap- pement et des fils suivre l’“étape” de gauche pour la dépose. Fil de batterie (négatif et positif) se reporter à “boitier...
Page 196: Powr
5-12 powr e exhaust manifold and leads exploded diagram step procedure/part name q’ty service points 6 bolt 4 7 bolt 6 8 nut 2 9 exhaust manifold 1 note: before installing the exhaust manifold place the bolts (step no.6) in the bolts holes of the exhaust manifold. 10 gasket 1 11 pin 2 12 bolt 1 not ...
Page 197: Powr
F d es 5- powr vue en eclate etape procédé/nom de pièce qté points d’entretien 6 boulon 4 7 boulon 6 8 ecrou 2 9 collecteur d’échappement 1 n.B.: avant d’installer le collecteur d’échappement, insérer les boulons (étape n˚6) dans les trous prévus à cet effet dans le collecteur. 10 joint 1 11 goupill...
Page 198: Powr
5-13 powr e exhaust manifold and leads exploded diagram step procedure/part name q’ty service points 13 battery negative lead 1 14 nut/washer 1/1 15 starter motor lead 1 reverse the removal steps for installation..
Page 199: Powr
F d es 5- powr vue en eclate etape procédé/nom de pièce qté points d’entretien 13 fil négatif de la batterie 1 14 ecrou/rondelle 1/1 15 fil du démarreur 1 pour l’installation, inverser les étapes de la dépose. Explosionszeichnung schritt verfahren/teilebezeichnung menge wartungspunkte 13 batterie-mi...
Page 200: Powr
5-14 powr e exhaust manifold and leads exploded diagram removal and installation chart step procedure/part name q’ty service points exhaust manifold disassembly follow the left “step” for disassembly. 1 clamp/cooling water hose 1/1 2 bolt 6 3 water pipe 1 4 o-ring 3 5 exhaust manifold 1 reverse the ...
Page 201: Powr
F d es 5- powr vue en eclate tableau de depose et d’installation etape procédé/nom de pièce qté points d’entretien demontage du collecteur d’echappement suivre l’“étape” de gauche pour le démontage. 1 pince/tuyau d’eau de refroidissement 1/1 2 boulon 6 3 flexible d’admission d’eau 1 4 joint torique ...
Page 202: Powr
5-15 powr e engine unit engine unit exploded diagram removal and installation chart step procedure/part name q’ty service points engine unit removal follow the left “step” for removal. Carburetor refer to “carburetor” in chapter 4. Oil pump refer to “oil pump” in chapter 4. Muffler assembly refer to...
Page 203: Powr
F d es 5- powr moteur vue en eclate tableau de depose et d’installation etape procédé/nom de pièce qté points d’entretien depose du moteur suivre l’“étape” de gauche pour la dépose. Carburateur se reporter à “carburateur” au chapitre 4. Pompe à huile se reporter à “pompe a huile” au chapitre 4. Ense...
Page 204: Powr
5-16 powr e engine unit exploded diagram step procedure/part name q’ty service points 4 bolt/washer 4/4 5 engine assembly 1 6 shim * install the shims original position. Reverse the removal steps for installation. *: as required lt lt lt 572 lt lt lt 572 8 × 40 mm 17 n • m (1.7 kgf • m, 12 ft • ib) ...
Page 205: Powr
F d es 5- powr vue en eclate etape procédé/nom de pièce qté points d’entretien 4 boulon/rondelle 4/4 5 ensemble moteur 1 6 cale * installer dans la position d’origine. Pour l’installation, inverser les étapes de la dépose. *: si nécessaire explosionszeichnung schritt verfahren/teilebezeichnung menge...
Page 206: Powr
5-17 powr e engine unit service points shim removal 1. Remove: ● shims note: to ease reassembly and coupling align- ment, remove the shims and organize them in their respective groups (e.G., front right, rear left) prior to removing the mounting bolts. Engine mount inspection 1. Inspect: ● engine mo...
Page 207: Powr
F d es powr 5- points d’entretien dépose de cale 1. Déposer: ● cales n.B.: avant de déposer les boulons de mon- tage, démonter les cales et les disposer dans leurs groupes respectifs (par exem- ple avant droit, arrière gauche) afin de faciliter leur remontage et le jeu de cou- plages. Inspection du ...
Page 208: Powr
5-18 powr e reed valves reed valves exploded diagram removal and installation chart step procedure/part name q’ty service points reed valve removal follow the left “step” for removal. Carburetor unit refer to “carburetor unit” in chapter 4. 1 bolt 18 note: tighten the bolts in the proper sequence as...
Page 209: Powr
F d es 5- powr clapets flexibles vue en eclate tableau de depose et d’installation etape procédé/nom de pièce qté points d’entretien depose du clapet flexible suivre l’“étape” de gauche pour la dépose. Carburateur se reporter à “carburateur” au chapitre 4. 1 boulon 18 n.B.: serrer les boulons dans l...
Page 210: Powr
5-19 powr e reed valves service points reed valve inspection 1. Inspect: ● reed valves cracks/damage → replace. 2. Measure: ● valve bending a out of specification → replace. 3. Measure: ● valve stopper height b out of specification → adjust or replace. Max. Valve bending: 0.2 mm (0.01 in) valve stop...
Page 211: Powr
F d es powr 5- points d’entretien inspection du clapet flexible 1. Inspecter: ● clapets fissures/endommagement → remplacer. 2. Mesurer: ● courbure de clapet flexible a hors spécifications → rempla- cer. 3. Mesurer: ● hauteur de butée de clapet b hors spécifications → régler ou remplacer. Coubure de ...
Page 212: Powr
5-20 powr e ypvs ypvs exploded diagram removal and installation chart step procedure/part name q’ty service points ypvs removal follow the left “step” for removal. Exhaust chamber assembly refer to “exhaust chamber assembly”. 1 bolt 12 2 ypvs valve cover 3 3 gasket 3 4 spacer 2 5 link joint/cover 2/...
Page 213: Powr
F d es 5- powr ypvs vue en eclate tableau de depose et d’installation etape procédé/nom de pièce qté points d’entretien depose du cable ypvs suivre l’“étape” de gauche pour la dépose. Ensemble de chambre d’échappement se reporter à “ensemble de chambre d’echappe- ment”. 1 boulon 12 2 cache de soupap...
Page 214: Powr
5-21 powr e ypvs exploded diagram step procedure/part name q’ty service points 7 washer 5 8 bolt 3 note: during installation, align the hole a in the ypvs shaft with the bolt. 9 shaft 3 1 10 shaft 2 1 11 shaft 1 1 12 ypvs valve arm 3.
Page 215: Powr
F d es 5- powr vue en eclate etape procédé/nom de pièce qté points d’entretien 7 rondelle 5 8 boulon 3 n.B.: lors de l’installation, aligner le trou a sur l’axe ypvs avec le boulon. 9 axe 3 1 10 axe 2 1 11 axe 1 1 12 bras de soupape ypvs 3 explosionszeichnung schritt verfahren/teilebezeichnung menge...
Page 216: Powr
5-22 powr e ypvs exploded diagram step procedure/part name q’ty service points 13 bolt 3 14 ypvs valve assembly 3 15 oil seal 6 note: if the ypvs shaft is removed, the oil seal must be replaced. Reverse the removal steps for installation..
Page 217: Powr
F d es 5- powr vue en eclate etape procédé/nom de pièce qté points d’entretien 13 boulon 3 14 ensemble de soupape ypvs 3 15 bague d’étanchéité 6 n.B.: si l’axe ypvs est déposé, il faut remplacer la bague d’étan- chéité. Pour l’installation, inverser les étapes de la dépose. Explosionszeichnung schri...
Page 218: Powr
5-23 powr e ypvs service points ypvs valve inspection 1. Eliminate: ● carbon deposits (with a rounded scraper 1) caution: do not use a sharp instrument to avoid damaging or scratching the surfaces. 2. Inspect: ● ypvs valve assembly crack/damage/wear → replace. Ypvs valve installation 1. Install: ● o...
Page 219: Powr
F d es powr 5- points d’entretien inspection de la soupape ypvs 1. Eliminer: ● dépôts de carbone (utiliser un grattoir arrondi 1) attention: ne pas utiliser un instrument coupant pour éviter d’endommager ou de rayer les surfaces. 2. Inspecter: ● ensemble de soupape ypvs fissures/endommagement/usure ...
Page 220: Powr
5-24 powr e cylinder head exploded diagram removal and installation chart step procedure/part name q’ty service points cylinder head removal follow the left “step” for removal. Muffler assembly refer to “muffler assembly”. 1 spark plug 3 2 bolt 1 note: tighten the bolts in the proper sequence as sho...
Page 221: Powr
F d es 5- powr culasse vue en eclate tableau de depose et d’installation etape procédé/nom de pièce qté points d’entretien depose de la culasse suivre l’“étape” de gauche pour la dépose. Ensemble de silencieux se reporter à “silencieux”. 1 bougie 3 2 boulon 1 n.B.: serrer les boulons dans l’ordre in...
Page 222: Powr
5-25 powr e cylinder head exploded diagram step procedure/part name q’ty service points 7 cylinder head cover 1 8 gasket 1 9 cylinder head 1 10 gasket 1 11 clamp/cooling water hose 2/2 a white mark reverse the removal steps for installation. Not reusable not reusable.
Page 223: Powr
F d es 5- powr vue en eclate etape procédé/nom de pièce qté points d’entretien 7 cache de culasse 1 8 joint 1 9 culasse 1 10 joint 1 11 pince/tuyau d’eau de refroidissement 2/2 repère blanc a pour l’installation, inverser les étapes de la dépose. Non réutilisable non réutilisable explosionszeichnung...
Page 224: Powr
5-26 powr e cylinder head service points cylinder head inspection 1. Eliminate: ● carbon deposits (with a rounded scraper 1) caution: do not use a sharp instrument to avoid damaging or scratching the cylinder head or spark plug bore threads. 2. Inspect: ● cylinder head water jacket corrosion/mineral...
Page 225: Powr
F d es powr 5- points d’entretien inspection de la culasse 1. Eliminer: ● dépôts de carbone (utiliser un grattoir arrondi 1) attention: ne pas utiliser un instrument coupant pour éviter d’endommager ou de rayer la culasse ou le filetage de la bougie. 2. Inspecter: ● chemise d’eau de la culasse corro...
Page 226: Powr
5-27 powr e cylinders cylinders exploded diagram removal and installation chart step procedure/part name q’ty service points cylinder removal follow the left “step” for removal. Ypvs refer to “ypvs”. Cylinder head refer to “cylinder head”. 1 bolt 12 note: tighten the bolts in a crisscross pattern an...
Page 227: Powr
F d es 5- powr cylindres vue en eclate tableau de depose et d’installation etape procédé/nom de pièce qté points d’entretien depose du cylindre suivre l’“étape” de gauche pour la dépose. Ypvs se reporter à “ypvs”. Culasse se reporter à “culasse”. 1 boulon 12 n.B.: serrer les boulons dans le sens de ...
Page 228: Powr
5-28 powr e cylinders service points cylinder inspection 1. Eliminate: ● carbon deposits (with a rounded scraper 1) 2. Inspect: ● cylinder water jacket corrosion/mineral deposits → clean or replace. ● cylinder inner surface score marks → replace. 3. Measure: ● cylinder bore “d” (with a cylinder gaug...
Page 229: Powr
F d es powr 5- points d’entretien inspection du cylindre 1. Eliminer: ● dépôts de carbone (utiliser un grattoir arrondi 1) 2. Inspecter: ● chemise d’eau du cylindre corrosion/dépôts minéraux → nettoyer ou remplacer. ● surface intérieure du cylindre rayures → remplacer. 3. Mesurer: ● alésage de cylin...
Page 230: Powr
5-29 powr e pistons pistons exploded diagram removal and installation chart step procedure/part name q’ty service points piston removal follow the left “step” for removal. Cylinders refer to “cylinders”. 1 piston pin clip 2 caution: do not align the open end of the clip with the piston pin slot a. 2...
Page 231: Powr
F d es 5- powr pistons vue en eclate tableau de depose et d’installation etape procédé/nom de pièce qté points d’entretien depose du piston suivre l’“étape” de gauche pour la dépose. Cylindres se reporter à “cylindres”. 1 agrafe d’axe de piston 2 attention: ne pas aligner l’extrémité ouverte de l’ag...
Page 232: Powr
5-30 powr e pistons exploded diagram step procedure/part name q’ty service points 5 bearing 1 6 piston ring 2 caution: align each end gap with its respective locating pin. Reverse the removal steps for installation..
Page 233: Powr
F d es 5- powr vue en eclate etape procédé/nom de pièce qté points d’entretien 5 roulement 1 6 segment de piston 2 attention: aligner chaque écartement du bec avec son goujon de positionnement respectif. Pour l’installation, inverser les étapes de la dépose. Explosionszeichnung schritt verfahren/tei...
Page 234: Powr
5-31 powr e pistons service points piston pin clip removal and installation 1. Remove and install: ● piston pin clip note: before removing or installing the piston pin clip, cover the crankcase opening with a clean rag to prevent the piston pin clip from falling into the crankcase. Piston inspection...
Page 235: Powr
F d es powr 5- points d’entretien dépose et installation de l’agrafe d’axe de piston 1. Déposer et installer: ● agrafe d’axe de piston n.B.: avant de déposer ou d’installer l’agrafe d’axe de piston, recouvrir l’ouverture du carter d’un chiffon propre afin d’empê- cher l’agrafe de tomber dans le cart...
Page 236: Powr
5-32 powr e pistons 4. Calculate: ● piston-to-cylinder clearance out of specification → replace the piston, piston rings and cylinder as a set. Cylinder and piston combination select the appropriate piston to match the cylinder size by the table as follows. Note: new cylinder bore size = 80.000 + a/...
Page 237: Powr
F d es powr 5- 4. Calculer: ● jeu piston/cylindre hors spécifications → rempla- cer le piston, les segments de piston et le cylindre en même temps. Combinaison cylindre et piston sélectionner le piston approprié pour faire correspondre la dimension du cylin- dre à l’aide du tableau suivant. N.B.: no...
Page 238: Powr
5-33 powr e pistons 2. Measure: ● end gap (with a thickness gauge 1) out of specification → replace the piston rings as a set. Note: push the piston ring into the cylinder with the piston crown. End gap: 0.45–0.60 mm (0.018–0.024 in) piston pin and bearing inspection 1. Inspect: ● piston pins ● bear...
Page 239: Powr
F d es powr 5- 2. Mesurer: ● jeu à la coupe (utiliser une jauge d’épaisseur 1) hors spécifications → rempla- cer les segments de piston en même temps. N.B.: pousser le segment de piston dans le cylindre avec le chapeau de piston. Inspection de l’axe de piston et du roulement 1. Inspecter: ● axes de ...
Page 240: Powr
5-34 powr e pistons 4. Check: ● piston pin-to-small end bearing-to- connecting rod free play (at the small end of the connecting rod as shown) free play/small end wear → replace the piston pin, connecting rod, small end bearing or both..
Page 241: Powr
F d es powr 5- 4. Vérifier: ● axe de piston-roulement de pied de bielle-jeu de bielle (au pied de la bielle comme illus- tré) jeu libre/usure du pied de bielle → remplacer l’axe de piston, la bielle, le roulement du pied de bielle, ou les deux. 4. Kontrollieren: ● spiel des kolbenbolzen-an- pleuelfu...
Page 242: Powr
5-35 powr e generator and starter motor generator and starter motor exploded diagram removal and installation chart step procedure/part name q’ty service points generator cover removal follow the left “step” for removal. Oil pump refer to “oil pump” in chapter 4. 1 bolt 1 2 bolt 7 note: do not apply...
Page 243: Powr
F d es 5- powr alternateur et demarreur vue en eclate tableau de depose et d’installation etape procédé/nom de pièce qté points d’entretien depose du capot du generateur suivre l’“étape” de gauche pour la dépose. Pompe à huile se reporter à “pompe a huile” au chapitre 4. 1 boulon 1 2 boulon 7 n.B.: ...
Page 244: Powr
5-36 powr e generator and starter motor exploded diagram step procedure/part name q’ty service points 6 spring 1 7 packing 1 8 pin 2 9 bolt 2 10 bolt 2 11 bracket 1 reverse the removal steps for installation..
Page 245: Powr
F d es 5- powr vue en eclate etape procédé/nom de pièce qté points d’entretien 6 ressort 1 7 garniture 1 8 goupille 2 9 boulon 2 10 boulon 2 11 support 1 pour l’installation, inverser les étapes de la dépose. Explosionszeichnung schritt verfahren/teilebezeichnung menge wartungspunkte 6 feder 1 7 dic...
Page 246: Powr
5-37 powr e generator and starter motor exploded diagram removal and installation chart step procedure/part name q’ty service points stator coil and pickup coil removal follow the left “step” for removal. 1 bolt 3 note: this washer holds the pickup coil lead. Make sure to not pinch the lead between ...
Page 247: Powr
F d es 5- powr vue en eclate tableau de depose et d’installation etape procédé/nom de pièce qté points d’entretien depose de la bobine de stator et de la bobine exploratrice suivre l’“étape” de gauche pour la dépose. 1 boulon 3 n.B.: cette rondelle maintient le fil de la bobine exploratrice. Veiller...
Page 248: Powr
5-38 powr e generator and starter motor exploded diagram removal and installation chart step procedure/part name q’ty service points generator rotor and starter motor removal follow the left “step” for removal. 1 drive coupling 1 2 flywheel magneto bolt 1 3 flywheel magneto 1 4 woodruff key 1 5 star...
Page 249: Powr
F d es 5- powr vue en eclate tableau de depose et d’installation etape procédé/nom de pièce qté points d’entretien depose du rotor du generateur et du moteur de demarreur suivre l’“étape” de gauche pour la dépose. 1 accouplement d’entraînement 1 2 boulon de volant magnétique 1 3 volant magnétique 1 ...
Page 250: Powr
5-39 powr e generator and starter motor exploded diagram removal and installation chart step procedure/part name q’ty service points starter clutch disassembly follow the left “step” for disassembly. 1 clip 1 2 clip stopper 1 3 spring seat 1 4 spring 1 5 washer 1 6 idle gear 1 7 circlip 1 not reusab...
Page 251: Powr
F d es 5- powr vue en eclate tableau de depose et d’installation etape procédé/nom de pièce qté points d’entretien demontage de l’embrayage de demarreur suivre l’“étape” de gauche pour le démontage. 1 agrafe 1 2 butée d’agrafe 1 3 logement de ressort 1 4 ressort 1 5 rondelle 1 6 pignon libre 1 7 cir...
Page 252: Powr
5-40 powr e generator and starter motor exploded diagram step procedure/part name q’ty service points 8 plate 1 9 weight 3 10 spring ring 1 note: install the spring ring after installing the weights, plate and circlip. 11 pinion gear 1 reverse the disassembly steps for assembly..
Page 253: Powr
F d es 5- powr vue en eclate etape procédé/nom de pièce qté points d’entretien 8 plaque 1 9 poids 3 10 bague à ressort 1 n.B.: installer la bague à ressort après avoir installé les poids, la plaque et le circlip. 11 pignon d’attaque 1 pour le montage, inverser les étapes du démontage. Explosionszeic...
Page 254: Powr
5-41 powr e generator and starter motor service points drive coupling removal and installation 1. Remove: ● drive coupling note: install the drive coupling with the same special tools that were used for removal. Coupler wrench: yw-06551/90890-06551 flywheel holder: yw-06550/90890-06550 flywheel magn...
Page 255: Powr
F d es powr 5- points d’entretien dépose et installation de l’accouplement de transmission 1. Déposer: ● accouplement d’entraînement n.B.: installer l’accouplement d’entraînement avec le même outillage spécial que celui utilisé pour la dépose. Dépose et installation du volant magnétique 1. Déposer: ...
Page 256: Powr
5-42 powr e generator and starter motor drive coupling inspection 1. Inspect: ● drive coupling damage/wear → replace. Flywheel magneto inspection 1. Inspect: ● ring gear damage/wear → replace. Starter clutch assembly inspection 1. Inspect: ● pinion gear 1 ● idle gear 2 damage/wear → replace. 2. Chec...
Page 257: Powr
F d es powr 5- inspection de l’accouplement d’entraînement 1. Inspecter: ● accouplement d’entraînement endommagement/usure → rem- placer. Inspection du volant magnétique 1. Inspecter: ● pignon annulaire endommagement/usure → rem- placer. Inspection de l’ensemble d’embrayage de démarreur 1. Inspecter...
Page 258: Powr
5-43 powr e crankcase crankcase exploded diagram removal and installation chart step procedure/part name q’ty service points crankcase disassembly follow the left “step” for disassembly. Pistons refer to “pistons”. Generator cover and starter motor refer to “generator and starter motor”. 1 bolt 6 2 ...
Page 259: Powr
F d es 5- powr carter vue en eclate tableau de depose et d’installation etape procédé/nom de pièce qté points d’entretien demontage du carter suivre l’“étape” de gauche pour le démontage. Pistons se reporter à “pistons”. Alterna et démarreur se reporter à “alternateur et demarreur”. 1 boulon 6 2 sup...
Page 260: Powr
5-44 powr e crankcase exploded diagram step procedure/part name q’ty service points 7 bolt 1 note: tighten the bolts in sequence as shown. 8 bolt 16 9 lower crankcase 1 10 pin 2 11 crankshaft assembly 1 12 upper crankcase 1 reverse the disassembly steps for assembly..
Page 261: Powr
F d es 5- powr vue en eclate etape procédé/nom de pièce qté points d’entretien 7 boulon 1 n.B.: serrer les boulons dans l’ordre comme indiqué. 8 boulon 16 9 carter inférieur 1 10 goupille 2 11 ensemble de vilebrequin 1 12 carter supérieur 1 pour le montage, inverser les étapes du démontage. Explosio...
Page 262: Powr
5-45 powr e crankcase service points crankcase inspection 1. Inspect: ● mating surfaces scratches → replace the crankcase. ● crankcase cracks/damage → replace. Crankcase installation 1. Apply: ● gasket maker ® (onto the crankcase mating surfaces) note: before applying gasket maker ® , clean the cran...
Page 263: Powr
F d es powr 5- points d’entretien inspection du carter 1. Inspecter: ● surface de jointement rayures → remplacer le carter. ● carter fissures/endommagement → remplacer. Installation du carter 1. Appliquer: ● gasket maker ® (sur les surfaces de jointement du carter) n.B.: avant d’appliquer du gasket ...
Page 264: Powr
5-46 powr e crankshaft crankshaft exploded diagram removal and installation chart step procedure/part name q’ty service points crankshaft removal follow the left “step” for removal. Crankcase refer to “crankcase”. 1 oil seal 1 2 bearing 1 3 oil seal 2 4 crankshaft assembly 1 caution: install the bea...
Page 265: Powr
F d es 5- powr vilebrequin vue en eclate tableau de depose et d’installation etape procédé/nom de pièce qté points d’entretien depose du vilebrequin suivre l’“étape” de gauche pour la dépose. Carter se reporter à “carter”. 1 bague d’étanchéité 1 2 roulement 1 3 bague d’étanchéité 2 4 ensemble de vil...
Page 266: Powr
5-47 powr e crankshaft service points crankshaft inspection 1. Measure: ● crank width a out of specification → replace. Crank width: 72.95–73.00 mm (2.872–2.874 in) 2. Measure: ● deflection b (with a dial gauge) out of specification → replace. Max. Deflection: b 0.05 mm (0.002 in) c 0.15 mm (0.006 i...
Page 267: Powr
F d es powr 5- points d’entretien inspection du vilebrequin 1. Mesurer: ● largeur de tourillon a hors spécifications → rempla- cer. 2. Mesurer: ● déflexion b (utiliser une jauge à cadran) hors spécifications → rempla- cer. 3. Mesurer: ● jeu latéral de tête de bielle d (utiliser une jauge d’épaisseur...
Page 268: Powr
5-48 powr e crankshaft 5. Inspect: ● bearings damage/pitting → replace. Note: ● before inspection, thoroughly clean the bearings. ● immediately after inspection, lubricate the bearings to prevent rust. 6. Inspect: ● oil seals damage/wear → replace..
Page 269: Powr
F d es powr 5- 5. Inspecter: ● roulements endommagement/corrosion → remplacer. N.B.: ● avant de procéder à l’inspection, net- toyer soigneusement les roulements. ● immédiatement après les avoir exami- nés, lubrifier les roulements afin d’éviter la rouille. 6. Inspecter: ● bagues d’étanchéité endomma...
Page 270: Jet
E jet pump chapter 6 jet pump unit jet pump unit ............................................................................................. 6-1 exploded diagram ............................................................................. 6-1 removal and installation chart ..........................
Page 271
1 2 3 4 5 6 7 8 9 f d es chapitre 6 pompe de propulsion pompe de propulsion .............. 6-1 vue en eclate............................ 6-1 tableau de depose et d’installation ........................ 6-1 secteur de marche arriere ........................................... 6-4 vue en eclate..........
Page 272: Jet
E jet pump bearing housing..................................................................................... 6-20 exploded diagram ........................................................................... 6-20 removal and installation chart ............................................. 6-20 ser...
Page 273
F d es logement de roulement ... 6-20 vue en eclate.......................... 6-20 tableau de depose et d’installation ...................... 6-20 points d’entretien ............... 6-23 dépose et installation de l’accouplement mené ................. 6-23 dépose de l’arbre de transmission intermédia...
Page 274: Jet
6-1 e jet pump jet pump unit jet pump unit exploded diagram removal and installation chart step procedure/part name q’ty service points jet pump unit removal follow the left “step” for removal. 1 bolt 2 2 bolt 2 3 intake grate 1 4 bolt 4 5 intake duct 1 6 screw 4 7 speed sensor 1 note: route the spe...
Page 275: Jet
F d es 6- jet pump pompe de propulsion vue en eclate tableau de depose et d’installation etape procédé/nom de pièce qté points d’entretien depose de la pompe de propulsion suivre l’“étape” de gauche pour la dépose. 1 boulon 2 2 boulon 2 3 grille d’admission 1 4 boulon 4 5 conduite d’admission 1 6 vi...
Page 276: Jet
6-2 e jet pump jet pump unit exploded diagram step procedure/part name q’ty service points 9 ride plate 1 10 shift cable joint 1 11 qsts cable joint 1 12 bilge hose 1 13 nut/washer 1/2 14 steering cable joint 1 15 clamp/spout hose 1/1 16 bolt 1 17 bolt 4 18 jet pump unit assembly 1 19 dowel pin 2 re...
Page 277: Jet
F d es 6- jet pump vue en eclate etape procédé/nom de pièce qté points d’entretien 9 plaque de support 1 10 raccord de câble de sélecteur 1 11 raccord de câble qsts 1 12 tuyau de fond de cale 1 13 ecrou/rondelle 1/2 14 raccord de câble de direction 1 15 bride/flexible d’écoulement 1/1 16 boulon 1 17...
Page 278: Jet
6-3 e jet pump jet pump unit exploded diagram removal and installation chart step procedure/part name q’ty service points speed sensor disassembly follow the left “step” for disassembly. 1 paddle wheel set 1 2 speed sensor housing 1 reverse the disassembly steps for assembly. Fwd 1 2 not reusable.
Page 279: Jet
F d es 6- jet pump vue en eclate tableau de depose et d’installation etape procédé/nom de pièce qté points d’entretien demontage du capteur de vitesse suivre l’“étape” de gauche pour le démontage. 1 ensemble roue à ailettes 1 2 boîtier du capteur de vitesse 1 pour le montage, inverser les étapes du ...
Page 280: Jet
6-4 e jet pump reverse gate reverse gate exploded diagram removal and installation chart step procedure/part name q’ty service points reverse gate removal follow the left “step” for removal. 1 clamp/spout hose 1/1 2 bolt 2 3 washer 2 4 collar 2 5 reverse gate assembly 1 6 nut 1 7 bolt 1 8 washer 2.
Page 281: Jet
F d es 6- jet pump secteur de marche arriere vue en eclate tableau de depose et d’installation etape procédé/nom de pièce qté points d’entretien depose du secteur de marche arriere suivre l’“étape” de gauche pour la dépose. 1 bride/flexible d’écoulement 1/1 2 boulon 2 3 rondelle 2 4 collier 2 5 ense...
Page 282: Jet
6-5 e jet pump reverse gate exploded diagram step procedure/part name q’ty service points 9 roller 1 10 bolt 6 11 reverse gate stay 2 12 nut 1 13 washer 1 14 bolt 1 15 lever 1 1 16 spacer 1 17 nut 1.
Page 283: Jet
F d es 6- jet pump vue en eclate etape procédé/nom de pièce qté points d’entretien 9 rouleau 1 10 boulon 6 11 support de secteur de marche arrière 2 12 ecrou 1 13 rondelle 1 14 boulon 1 15 levier 1 1 16 entretoise 1 17 ecrou 1 explosionszeichnung schritt verfahren/teilebezeichnung menge wartungspunk...
Page 284: Jet
6-6 e jet pump reverse gate exploded diagram step procedure/part name q’ty service points 18 washer 1 19 bolt 1 20 washer 1 21 collar 1 22 spring 1 23 lever 2 1 24 washer 1 reverse the removal steps for installation..
Page 285: Jet
F d es 6- jet pump vue en eclate etape procédé/nom de pièce qté points d’entretien 18 rondelle 1 19 boulon 1 20 rondelle 1 21 collier 1 22 ressort 1 23 levier 2 1 24 rondelle 1 pour l’installation, inverser les étapes de la dépose. Explosionszeichnung schritt verfahren/teilebezeichnung menge wartung...
Page 286: Jet
6-7 e jet pump reverse gate service points lever 1 installation 1. Install: ● bolt 1 ● lever 1 2 ● spacer 3 ● reverse gate 4 ● washer 5 ● nut 6 lever 2 installation 1. Install: ● bolt 1 ● washer 2 ● collar 3 ● spring 4 ● lever 2 5 ● washer 6 note: ● when installing the spring, hook the spring end a ...
Page 287: Jet
F d es 6- jet pump points d’entretien installation du levier 1 1. Installer: ● boulon 1 ● levier 1 2 ● entretoise 3 ● secteur de marche arrière 4 ● rondelle 5 ● ecrou 6 installation du levier 2 1. Installer: ● boulon 1 ● rondelle 2 ● collier 3 ● ressort 4 ● levier 2 5 ● rondelle 6 n.B.: ● lors de l’...
Page 288: Jet
6-8 e jet pump jet thrust nozzle and nozzle ring jet thrust nozzle and nozzle ring exploded diagram removal and installation chart step procedure/part name q’ty service points jet thrust nozzle and nozzle ring removal follow the left “step” for removal. Jet pump unit refer to “jet pump unit”. Revers...
Page 289: Jet
F d es 6- jet pump tuyere de propulsion et anneau de tuyere vue en eclate tableau de depose et d’installation etape procédé/nom de pièce qté points d’entretien depose de la tuyere de propul- sion et de l’anneau de tuyere suivre l’“étape” de gauche pour la dépose. Pompe de propulsion se reporter à “p...
Page 290: Jet
6-9 e jet pump impeller duct, impeller housing, and intake duct impeller duct, impeller housing, and intake duct exploded diagram removal and installation chart step procedure/part name q’ty service points impeller duct and impeller housing removal follow the left “step” for removal. Nozzle ring ref...
Page 291: Jet
F d es 6- jet pump conduite de roue d’helice, logement de roue d’helice, et conduite d’admission vue en eclate tableau de depose et d’installation etape procédé/nom de pièce qté points d’entretien depose de la conduite et du logement de la roue d’helice suivre l’“étape” de gauche pour la dépose. Ann...
Page 292: Jet
6-10 e jet pump impeller duct, impeller housing, and intake duct exploded diagram step procedure/part name q’ty service points 7 bolt 4 8 water inlet cover 1 9 packing 1 10 water inlet strainer 1 11 packing 1 reverse the removal steps for installation..
Page 293: Jet
F d es 6- jet pump vue en eclate etape procédé/nom de pièce qté points d’entretien 7 boulon 4 8 cache d’admission d’eau 1 9 garniture 1 10 filtre d’admission d’eau 1 11 garniture 1 pour l’installation, inverser les étapes de la dépose. Explosionszeichnung schritt verfahren/teilebezeichnung menge war...
Page 294: Jet
6-11 e jet pump impeller duct and drive shaft impeller duct and drive shaft exploded diagram removal and installation chart *1 : epnoc grease ap #0 step procedure/part name q’ty service points impeller duct and drive shaft disassembly follow the left “step” for disassembly. 1 impeller 1 left-hand th...
Page 295: Jet
F d es 6- jet pump conduite de rotor et arbre d’entrainement vue en eclate tableau de depose et d’installation *1 : graisse epnoc ap n˚0 etape procédé/nom de pièce qté points d’entretien demontage de la conduite de rotor et de l’arbre d’entraine- ment suivre l’“étape” de gauche pour le démontage. 1 ...
Page 296: Jet
6-12 e jet pump impeller duct and drive shaft exploded diagram *1 : epnoc grease ap #0 step procedure/part name q’ty service points 8 drive shaft 1 9 rear bearing 1 10 spacer 1 11 front bearing 1 12 oil seal 1 13 oil seal 1 reverse the disassembly steps for assembly. Not reusable not reusable not re...
Page 297: Jet
F d es 6- jet pump vue en eclate *1 : graisse epnoc ap n˚0 etape procédé/nom de pièce qté points d’entretien 8 arbre d’entraînement 1 9 roulement arrière 1 10 entretoise 1 11 roulement avant 1 12 bague d’étanchéité 1 13 bague d’étanchéité 1 pour le montage, inverser les étapes du démontage. Non réut...
Page 298: Jet
6-13 e jet pump impeller duct and drive shaft service points drive shaft removal 1. Remove: ● impeller note: the impeller has left-hand threads. Turn the impeller clockwise to loosen it. 2. Remove: ● nut 1 drive shaft holder: yb-06151/90890-06519 drive shaft holder: yb-06151/90890-06519 3. Remove: ●...
Page 299: Jet
F d es 6- jet pump conducto del rodete y eje de transmisiÓn flÜgelradrohr und antriebswelle points d’entretien dépose de l’arbre de transmission 1. Déposer: ● rotor n.B.: la roue d’hélice a un filetage à gauche. La tourner dans le sens des aiguilles d’une montre pour la desserrer. 2. Déposer: ● ecro...
Page 300: Jet
6-14 e jet pump impeller duct and drive shaft 5. Remove: ● front bearing note: remove the front bearing with a press. 6. Remove: ● oil seal note: remove the oil seals with press. Impeller inspection refer to “jet pump unit” in chapter 3. Drive shaft inspection 1. Inspect: ● drive shaft damage/wear →...
Page 301: Jet
F d es 6- jet pump 5. Déposer: ● roulement avant n.B.: déposer le roulement avant à l’aide d’une presse. 6. Déposer: ● bague d’étanchéité n.B.: déposer les bagues d’étanchéité à l’aide d’une presse. Inspection de la roue d’hélice se reporter à “pompe de pro- pulsion” au chapitre 3. Inspection de l’a...
Page 302: Jet
6-15 e jet pump impeller duct and drive shaft 2. Install: ● front bearing ● drive shaft note: install the front bearing and drive shaft with a press. 3. Install: ● drive shaft (with front bearing) ● spacer ● impeller duct note: press the spacer and the front bearing with a 36-mm deep socket. 4. Add:...
Page 303: Jet
F d es 6- jet pump 2. Installer: ● roulement avant ● arbre d’entraînement n.B.: installer le roulement avant et l’arbre d’entraînement à l’aide d’une presse. 3. Installer: ● arbre d’entraînement (avec roulement avant) ● entretoise ● conduite de rotor n.B.: appuyer sur l’entretoise et le roulement av...
Page 304: Jet
6-16 e jet pump impeller duct and drive shaft 6. Add: ● epnoc grease ap #0 (into the cap) quantity: approximately 1/3 of capacity 7. Install: ● nut ● impeller drive shaft holder: yb-06151/90890-06519.
Page 305: Jet
F d es 6- jet pump 6. Ajouter: ● graisse epnoc ap n˚0 (dans le capuchon) 7. Installer: ● ecrou ● roue d’hélice quantité: environ 1/3 de la capacité outil de maintien de l’arbre d’entraînement: yb-06151/90890-06519 6. Nachfüllen: ● epnoc fett ap nr. 0 (in die kappe) 7. Einbauen: ● mutter ● flügelrad ...
Page 306: Jet
6-17 e jet pump transom plate and hoses transom plate and hoses exploded diagram removal and installation chart step procedure/part name q’ty service points transom plate and hoses removal follow the left “step” for removal. Exhaust system refer to “exhaust system” in chapter 8. Jet pump unit refer ...
Page 307: Jet
F d es 6- jet pump varangue de voute et flexibles vue en eclate tableau de depose et d’installation etape procédé/nom de pièce qté points d’entretien depose de la varangue de voute et des flexibles suivre l’“étape” de gauche pour la dépose. Système d’échappement se reporter à “systeme d’echappement”...
Page 308: Jet
6-18 e jet pump transom plate and hoses exploded diagram step procedure/part name q’ty service points 4 cooling water hose 1 cooling water inlet 5 nut/washer 4/4 6 transom plate 1 7 bilge hose 2 1 8 screw 1 9 bilge strainer holder 1 10 bilge strainer 1 reverse the removal steps for installation..
Page 309: Jet
F d es 6- jet pump vue en eclate etape procédé/nom de pièce qté points d’entretien 4 flexible d’admission d’eau 1 entrée d’eau de refroidissement 5 ecrou/rondelle 4/4 6 varangue de voûte 1 7 flexible de cale 2 1 8 vis 1 9 support de flexible de vidange 1 10 crépine de cale 1 pour l’installation, inv...
Page 310: Jet
6-19 e jet pump transom plate and hoses service points bilge strainer inspection refer to “jet pump unit” in chapter 3. Bilge hose inspection 1. Inspect: ● bilge hose cracks/damage/wear → replace..
Page 311: Jet
F d es 6- jet pump points d’entretien inspection de la crépine de cale se reporter à “pompe de pro- pulsion” au chapitre 3. Inspection du flexible de cale 1. Inspecter: ● tuyau de fond de cale fissures/endommagement/usure → remplacer. Wartungspunkte inspektion des bilgensiebs siehe “jetpumpenein- he...
Page 312: Jet
6-20 e jet pump bearing housing bearing housing exploded diagram removal and installation chart step procedure/part name q’ty service points bearing housing removal follow the left “step” for removal. Engine unit refer to “engine unit” in chapter 5. 1 rubber coupling 1 2 bolt 3 3 intermediate housin...
Page 313: Jet
F d es 6- jet pump logement de roulement vue en eclate tableau de depose et d’installation etape procédé/nom de pièce qté points d’entretien depose du logement de roulement suivre l’“étape” de gauche pour la dépose. Moteur se reporter à “moteur” au chapitre 5. 1 caoutchouc d’accouplement 1 2 boulon ...
Page 314: Jet
6-21 e jet pump bearing housing exploded diagram removal and installation chart step procedure/part name q’ty service points bearing housing disassembly follow the left “step” for disassembly. 1 grease hose 1 2 grease nipple 1 3 grease nipple stay 1 4 nipple 2 5 driven coupling 1 6 washer 1 7 interm...
Page 315: Jet
F d es 6- jet pump vue en eclate tableau de depose et d’installation etape procédé/nom de pièce qté points d’entretien demontage du logement de roulement suivre l’“étape” de gauche pour le démontage. 1 flexible de graissage 1 2 graisseur 1 3 flexible de graissage 1 4 raccord 2 5 accouplement mené 1 ...
Page 316: Jet
6-22 e jet pump bearing housing exploded diagram step procedure/part name q’ty service points 8 o-ring 2 9 oil seal 1 10 oil seal 1 11 oil seal 1 12 circlip 1 13 bearing 1 14 circlip 1 reverse the disassembly steps for assembly. Not reusable not reusable not reusable not reusable.
Page 317: Jet
F d es 6- jet pump vue en eclate etape procédé/nom de pièce qté points d’entretien 8 joint torique 2 9 bague d’étanchéité 1 10 bague d’étanchéité 1 11 bague d’étanchéité 1 12 circlip 1 13 roulement 1 14 circlip 1 pour le montage, inverser les étapes du démontage. Non réutilisable non réutilisable no...
Page 318: Jet
6-23 e jet pump bearing housing service points driven coupling removal and installation 1. Remove and install: ● driven coupling note: install the driven coupling with the same special tools that were used for removal. Intermediate drive shaft removal 1. Remove: ● intermediate drive shaft note: supp...
Page 319: Jet
F d es 6- jet pump points d’entretien dépose et installation de l’accouplement mené 1. Déposer et installer: ● accouplement mené n.B.: installer l’accouplement mené avec le même outillage spécial que celui utilisé pour sa dépose. Dépose de l’arbre de transmission intermédiaire 1. Déposer: ● arbre de...
Page 320: Jet
6-24 e jet pump bearing housing bearing, intermediate drive shaft, and grease hose inspection 1. Inspect: ● bearing rotate the inner race by hand. Damage/rough movement → replace. ● intermediate drive shaft damage/pitting → replace. ● grease hose cracks/wear → replace. Driven coupling inspection 1. ...
Page 321: Jet
F d es 6- jet pump inspection du roulement, de l’arbre de transmission intermédiaire et du flexible de graissage 1. Inspecter: ● roulement faire tourner la bague intérieure avec la main. Endommagement/mouvement irrégulier → remplacer. ● arbre de transmission intermé- diaire endommagement/corrosion →...
Page 322: Jet
6-25 e jet pump bearing housing oil seal installation 1. Install: ● oil seal note: before installing the oil seal, lubricate the clip glove with water resistant grease. Driver rod: yb-06071/90890-06606 bearing outer race attachment: yb-06156/90890-06626 distance a: 6.8–7.2 mm (0.27–0.28 in) 2. Insta...
Page 323: Jet
F d es 6- jet pump installation de la bague d’étanchéité 1. Installer: ● bague d’étanchéité n.B.: avant d’installer la bague d’étanchéité, lubrifier la gorge de l’agrafe avec de la graisse hydrofuge. 2. Installer: ● arbre de transmission intermé- diaire n.B.: poser le logement de roulement sur des b...
Page 324: Jet
6-26 e jet pump bearing housing intermediate housing installation 1. Install: ● intermediate housing ● shim note: install the shim(s) to the original position if the intermediate housing is not replaced. Installation steps: ● install the intermediate housing. ● measure the clearance a at each bolt h...
Page 325: Jet
F d es 6- jet pump installation du logement intermédiaire 1. Installer: ● logement intermédiaire ● cale n.B.: installer la ou les cales à la position d’origine si le logement de roulement n’est pas remplacé. Etapes de l’installation: ● installer le logement intermédiaire. ● mesurer le jeu a à chaque...
Page 326: Elec
E – + elec chapter 7 electrical system electrical components ......................................................................... 7-1 electrical box ........................................................................................... 7-2 exploded diagram ....................................
Page 327
1 2 3 4 5 6 7 8 9 f d es chapitre 7 equipement electrique composants electriques .... 7-1 boitier electrique.................. 7-2 vue en eclate............................ 7-2 tableau de depose et d’installation ........................ 7-2 analyse electrique................ 7-9 inspection ...........
Page 328: Elec
E – + elec charging system .................................................................................... 7-27 wiring diagram................................................................................. 7-27 fuse ................................................................................
Page 329
F d es systeme de charge ................ 7-27 plan de cablage .................... 7-27 fusible ........................................ 7-28 batterie ..................................... 7-28 bobine d’eclairage.............. 7-28 redresseur/regulateur ... 7-28 ypvs ..................................
Page 330: Elec
7-1 e – + elec electrical components electrical components 1 2 3 4 5 6 7 8 9 0 a b c d 1 fuel level sensor 2 oil level sensor 3 buzzer 4 lighting coil and pickup coil 5 spark plugs 6 exhaust temperature sensor 7 electrical box 8 battery 9 speed sensor 0 water temperature sensor a starter motor b eng...
Page 331: Elec
F d es – + elec 7- composants electriques 1 capteur de niveau de carburant 2 capteur de niveau d’huile 3 avertisseur sonore 4 bobine d’éclairage et bobine exploratrice 5 bougies 6 capteur de température d’échappement 7 boîtier électrique 8 batterie 9 capteur de vitesse 0 capteur de température d’eau...
Page 332: Elec
7-2 e – + elec electrical box electrical box exploded diagram removal and installation chart step procedure/part name q’ty service points electrical box removal follow the left “step” for removal. Ventilation hose, water temperature sensor coupler refer to “muffler assembly” in chapter 5. Exhaust te...
Page 333: Elec
F d es 7- – + elec boitier electrique vue en eclate tableau de depose et d’installation etape procédé/nom de pièce qté points d’entretien depose du boitier electrique suivre l’“étape” de gauche pour la dépose. Flexible de ventilation, coupleur du capteur de température d’eau se reporter à “silencieu...
Page 334: Elec
7-3 e – + elec electrical box exploded diagram step procedure/part name q’ty service points 4 band 2 5 battery 1 6 damper 1 7 bolt 4 8 battery box 1 9 coupler 4 for multifunction meter, handlebar switch and ypvs servomotor 10 bolt 4 11 electrical box 1 reverse the removal steps for installation..
Page 335: Elec
F d es 7- – + elec vue en eclate etape procédé/nom de pièce qté points d’entretien 4 sangle 2 5 batterie 1 6 amortisseur 1 7 boulon 4 8 boîtier de batterie 1 9 coupleur 4 pour le compteur multifonction, l’interrupteur du guidon et le servomoteur ypvs 10 boulon 4 11 boîtier électrique 1 pour l’instal...
Page 336: Elec
7-4 e – + elec electrical box exploded diagram removal and installation chart step procedure/part name q’ty service points electrical box disassembly follow the left “step” for disassembly. 1 clamp 5 2 coupler 3 for water temperature sensor, exhaust temperature sensor, lighting coil and pick up coil...
Page 337: Elec
F d es 7- – + elec vue en eclate tableau de depose et d’installation etape procédé/nom de pièce qté points d’entretien demontage du boitier electrique suivre l’“étape” de gauche pour le démontage. 1 bride 5 2 coupleur 3 pour le capteur de température d’eau, la bobine d’éclairage et la bobine détectr...
Page 338: Elec
7-5 e – + elec electrical box exploded diagram step procedure/part name q’ty service points 9 screw 6 10 ground lead 3 11 ignition coil 3 12 ignition coil lead 3 13 spark plug lead/cap 3/3 14 bolt 3 15 ground lead 6 16 lead 3 black/orange 17 nut 2 18 starter motor lead 1.
Page 339: Elec
F d es 7- – + elec vue en eclate etape procédé/nom de pièce qté points d’entretien 9 vis 6 10 fil de masse 3 11 bobine d’allumage 3 12 fil de la bobine d’allumage 3 13 fil/capuchon de la bougie 3/3 14 boulon 3 15 fil de masse 6 16 fil 3 noir/orange 17 ecrou 2 18 fil du démarreur 1 explosionszeichnun...
Page 340: Elec
7-6 e – + elec electrical box exploded diagram step procedure/part name q’ty service points 19 battery positive lead 1 20 fuse lead 1 21 starter relay lead 1 22 starter relay 1 23 lead holder 1 24 fuse lead 5 25 screw 2 26 fuse holder 1 27 lead/coupler 1/6 28 screw 2.
Page 341: Elec
F d es 7- – + elec vue en eclate etape procédé/nom de pièce qté points d’entretien 19 fil positif de la batterie 1 20 fil du fusible 1 21 fil du relais de démarreur 1 22 relais de démarreur 1 23 support du fil 1 24 fil du fusible 5 25 vis 2 26 support de fusible 1 27 fil/coupleur 1/6 28 vis 2 explos...
Page 342: Elec
7-7 e – + elec electrical box exploded diagram step procedure/part name q’ty service points 29 coupler bracket 1 30 cdi unit 1 31 screw 8 32 lead holder plate 2 reverse the disassembly steps for assembly..
Page 343: Elec
F d es 7- – + elec vue en eclate etape procédé/nom de pièce qté points d’entretien 29 fixation du coupleur 1 30 bloc cdi 1 31 vis 8 32 support du fil 2 pour le montage, inverser les étapes du démontage. Explosionszeichnung schritt verfahren/teilebezeichnung menge wartungspunkte 29 stecker-halterung ...
Page 344: Elec
7-8 e – + elec electrical box 1 ignition coil 2 cdi unit 3 rectifier/regulator 4 fuse holder 5 starter relay 6 tape 7 clear tube 8 red tube 9 white tape o : orange r : red w : white b/o : black/orange b/w : black/white b/y : black/yellow gy/b : gray/black gy/r : gray/red gy/y : gray/yellow r/l : red...
Page 345: Elec
F d es – + elec 7- 1 bobine d’allumage 2 bloc cdi 3 redresseur/régulateur 4 support de fusible 5 relais de démarreur 6 bande 7 tube clair 8 tube rouge 9 ruban adhésif blanc Å vers le fil positif de la batterie ı vers le démarreur Ç fixez le connecteur de la bobine d’allu- mage au support du boîtier ...
Page 346: Elec
7-9 e – + elec electrical analysis electrical analysis inspection caution: ● all measuring instruments should be han- dled with special care. Damaged or mis- handled instruments will not measure properly. ● on an instrument powered by dry batter- ies, check the battery’s voltage periodi- cally and r...
Page 347: Elec
F d es – + elec 7- analyse electrique inspection attention: ● tous les instruments de mesure doi- vent être manipulés avec soin. Un instrument endommagé ou mal uti- lisé ne pourra effectuer de mesures correctes. ● sur un instrument alimenté par bat- teries sèches, vérifier périodique- ment la tensio...
Page 348: Elec
7-10 e – + elec electrical analysis low resistance measurement note: ● when measuring a resistance of 10 Ω or less with the digital tester, the correct measurement cannot be obtained because of the tester’s internal resistance. ● to obtain the correct value, subtract the internal resistance from the...
Page 349: Elec
F d es – + elec 7- mesure de faible résistance n.B.: ● quand on mesure une résistance égale ou inférieure à 10 Ω avec le testeur numérique, il n’est pas possible d’obtenir une valeur correcte en raison de la résistance interne du testeur. ● pour obtenir la valeur correcte, il con- vient de soustrair...
Page 350: Elec
7-11 e – + elec electrical analysis ● when measuring the peak voltage, con- nect the peak voltage adaptor to the digi- tal tester and switch the selector to the dc voltage mode. Note: ● make sure that the adaptor leads are properly installed in the digital tester. ● make sure that the positive pin (...
Page 351: Elec
F d es – + elec 7- ● lors de la mesure de la tension de crête, connecter l’adaptateur de ten- sion de crête au testeur numérique et commuter le sélecteur sur le mode de tension cc. N.B.: ● s’assurer que les fils de l’adaptateur sont installés correctement dans le tes- teur numérique. ● s’assurer que...
Page 352: Elec
7-12 e – + elec ignition system ignition system wiring diagram 1 engine stop switch 2 engine shut-off switch 3 lighting coil 4 pickup coil 5 cdi unit 6 ignition coil 7 spark plug 8 fuse (20a) 9 battery 0 rectifier/regulator a exhaust temperature sensor b water temperature sensor b : black g : green ...
Page 353: Elec
F d es – + elec 7- systeme d’allumage plan de cablage 1 contacteur d’arrêt du moteur 2 coupe-circuit 3 bobine d’éclairage 4 bobine exploratrice 5 bloc cdi 6 bobine d’allumage 7 bougie 8 fusible (20 a) 9 batterie 0 redresseur/régulateur a capteur de température d’échappement b capteur de température ...
Page 354: Elec
7-13 e – + elec ignition system ignition spark gap warning ● when checking the spark gap, do not touch any of the connections of the spark gap tester lead wires. ● when performing the spark gap test, take special care not to let sparks leak out of the removed spark plug cap. ● when performing the sp...
Page 355: Elec
F d es – + elec 7- longueur d’etincelle d’allumage avertissement avertissement ● pendant le contrôle de la tension de crête, veiller à ne toucher aucune des connexions des fils du testeur numérique. ● pendant le test de l’écartement des électrodes, veiller particulièrement à ce qu’il n’y ait pas de ...
Page 356: Elec
7-14 e – + elec ignition system ignition system peak voltage warning when checking the electrical components, do not touch any of the connections of the digital tester lead wires. Note: ● if there is no spark, or the spark is weak, continue with the ignition system test. ● if a good spark is obtaine...
Page 357: Elec
F d es – + elec 7- tension de crete du systeme d’allumage avertissement avertissement pendant le contrôle des composants électriques, veiller à ne toucher aucune des connexions des fils du tes- teur numérique. N.B.: ● en cas d’absence d’étincelle ou en présence d’une étincelle faible, conti- nuer le...
Page 358: Elec
7-15 e – + elec ignition system 2. Measure: ● pickup coil output peak voltage below specification → replace the pickup coil. Note: the starter motor will not operate when the test harness on the output side coupler is disconnected to measure the unloaded peak voltage for the pickup coil(s). There- f...
Page 359: Elec
F d es – + elec 7- 2. Mesurer: ● tension de crête de sortie de la bobine exploratrice en-dessous des spécifications → remplacer la bobine explora- trice. N.B.: le moteur du démarreur ne fonctionnera pas si le faisceau de test du coupleur côté sortie est déconnecté pour mesurer la tension en crête ho...
Page 360: Elec
7-16 e – + elec 4. Measure: ● rectifier/regulator output peak voltage below specification → replace the rectifier/regulator. Note: make sure the output lead (red lead) of the rectifier/regulator is disconnected when measuring the output peak voltage. Rectifier/regulator output peak voltage: red (r) ...
Page 361: Elec
F d es – + elec 7- 4. Mesurer: ● tension de crête de sortie du redresseur/régulateur en dessous des spécifications → remplacer le redresseur/régula- teur. N.B.: s’assurer que le fil de sortie (fil rouge) du redresseur/régulateur est déconnecté pendant la mesure de la tension de crête de sortie. Batt...
Page 362: Elec
7-17 e – + elec ignition coil 1. Measure: ● primary coil resistance out of specification → replace. Note: when measuring a resistance of 10 Ω or less with the digital tester, the correct mea- surement cannot be obtained because of the tester’s internal resistance. Refer to “low resistance measuremen...
Page 363: Elec
F d es – + elec 7- bobine d’allumage 1. Mesurer: ● résistance de la bobine primaire hors spécifications → rempla- cer. N.B.: quand on mesure une résistance égale ou inférieure à 10 Ω avec le testeur numéri- que, il n’est pas possible d’obtenir une valeur correcte en raison de la résistance interne d...
Page 364: Elec
7-18 e – + elec ignition system water temperature sensor 1. Measure: ● water temperature sensor resistance (at the specified temperature) out of specification → replace. Water temperature sensor resistance: 0 ˚c (32 ˚f): 24.0–37.1 k Ω 100 ˚c (212 ˚f): 0.87–1.18 k Ω 200 ˚c (392 ˚f): 104–153 Ω measure...
Page 365: Elec
F d es – + elec 7- capteur de temperature d’eau 1. Mesurer: ● résistance du capteur de tempé- rature d’eau (à la température spécifiée) hors spécifications → rempla- cer. Capteur de temperature d’echappement 1. Mesurer: ● résistance du capteur de tempé- rature d’échappement (à la tem- pérature spéci...
Page 366: Elec
7-19 e – + elec starting system starting system wiring diagram 1 cdi unit 2 engine shut-off switch 3 start switch 4 multifunction meter 5 fuse (10a) 6 fuse (20a) 7 starter relay 8 starter motor 9 battery b : black br : brown r : red r/w : red/white r/y : red/yellow.
Page 367: Elec
F d es – + elec 7- systeme de demarrage plan de cablage 1 bloc cdi 2 coupe-circuit 3 contacteur de démarrage 4 compteur multifonction 5 fusible (10a) 6 fusible (20 a) 7 relais de démarreur 8 démarreur 9 batterie b : noir br : brun r : rouge r/w : rouge/blanc r/y : rouge/jaune startersystem schaltpla...
Page 368: Elec
7-20 e – + elec starting system battery refer to “electrical” in chapter 3. Wiring connections 1. Check: ● wiring connections poor connections → properly connect. Fuse 1. Check: ● fuse holder continuity no continuity → check the fuse or replace the fuse holder. Fuse holder continuity: between 1 and ...
Page 369: Elec
F d es – + elec 7- batterie se reporter à “systeme electrique” au chapitre 3. Connexions des cables 1. Vérifier: ● connexions des câbles mauvaises connexions → con- necter correctement. Fusible 1. Vérifier: ● continuité du support de fusible pas de continuité → vérifier le fusible ou remplacer le su...
Page 370: Elec
7-21 e – + elec starting system start switch 1. Check: ● continuity out of specification → replace. Start continuity (natural color coupler) clip position leads red brown installed free push removed free push starter relay 1. Inspect: ● brown lead terminal ● black lead terminal loose → tighten. 2. C...
Page 371: Elec
F d es – + elec 7- contacteur de demarrage 1. Vérifier: ● continuité hors spécifications → rempla- cer. Relais de demarreur 1. Inspecter: ● borne de fil brun ● borne de fil noir serrage incorrect → serrer. 2. Vérifier: ● relais de démarreur défectueux → remplacer. Continuité du contacteur de démarra...
Page 372: Elec
7-22 e – + elec starter motor starter motor exploded diagram removal and installation chart step procedure/part name q’ty service points starter motor disassembly follow the left “step” for disassembly. Starter motor refer to “generator and starter motor” in chapter 5. 1 o-ring 1 2 bolt 2 3 starter ...
Page 373: Elec
F d es 7- – + elec demarreur vue en eclate tableau de depose et d’installation etape procédé/nom de pièce qté points d’entretien demontage du demarreur suivre l’“étape” de gauche pour le démontage. Démarreur se reporter à “alternateur et demarreur” au chapitre 5. 1 joint torique 1 2 boulon 2 3 cache...
Page 374: Elec
7-23 e – + elec starter motor exploded diagram step procedure/part name q’ty service points 8 starter motor rear cover 1 9 o-ring 1 10 shim * t = 0.2 mm, 0.8 mm 11 armature assembly 1 12 nut/spring washer/washer 1/1/4 13 o-ring 1 14 brush holder 1 15 brush spring 4 16 bolt 1 17 brush assembly 1 *: a...
Page 375: Elec
F d es 7- – + elec vue en eclate etape procédé/nom de pièce qté points d’entretien 8 cache arrière du démarreur 1 9 joint torique 1 10 cale * t = 0,2 mm, 0,8 mm 11 ensemble d’induit 1 12 ecrou/rondelle frein/rondelle 1/1/4 13 joint torique 1 14 porte-balais 1 15 ressort de balai 4 16 boulon 1 17 ens...
Page 376: Elec
7-24 e – + elec starter motor exploded diagram step procedure/part name q’ty service points 18 spacer 1 19 holder 1 20 starter motor yoke 1 reverse the disassembly steps for assembly..
Page 377: Elec
F d es 7- – + elec vue en eclate etape procédé/nom de pièce qté points d’entretien 18 entretoise 1 19 outil de maintien 1 20 culasse du démarreur 1 pour le montage, inverser les étapes du démontage. Explosionszeichnung schritt verfahren/teilebezeichnung menge wartungspunkte 18 distanzstück 1 19 halt...
Page 378: Elec
7-25 e – + elec starter motor service points armature inspection 1. Inspect: ● armature shaft 1 damage/wear → replace. 1 2. Inspect: ● commutator dirt → clean with 600 grit sandpaper. 3. Measure: ● commutator diameter out of specification → replace. Min. Commutator diameter: 27.0 mm (1.06 in) 4. Che...
Page 379: Elec
F d es – + elec 7- points d’entretien inspection de l’induit 1. Inspecter: ● axe de l’induit 1 endommagement/usure → rem- placer. 2. Inspecter: ● collecteur saletés → nettoyer avec du papier de verre d’un grain de 600. 3. Mesurer: ● diamètre du collecteur hors spécifications → rempla- cer. 4. Vérifi...
Page 380: Elec
7-26 e – + elec starter motor 6. Inspect: ● armature coil continuity out of specification → replace. Armature coil continuity: commutator segments 1 continuity segment - laminations 2 no continuity segment - armature shaft no continuity brush holder inspection 1. Measure: ● brush length a out of spe...
Page 381: Elec
F d es – + elec 7- 6. Inspecter: ● continuité de bobine d’induit hors spécifications → rempla- cer. Inspection du porte-balais 1. Mesurer: ● longueur de balais a hors spécifications → rempla- cer. 2. Vérifier: ● continuité du porte-balais hors spécifications → rempla- cer. Inspection du cache avant ...
Page 382: Elec
7-27 e – + elec charging system charging system wiring diagram 1 lighting coil 2 battery 3 fuse (20a) 4 rectifier/regulator b : black g : green r : red.
Page 383: Elec
F d es – + elec 7- systeme de charge plan de cablage 1 bobine d’éclairage 2 batterie 3 fusible (20 a) 4 redresseur/régulateur b : noir g : vert r : rouge ladesystem schaltplan 1 lichtmaschinenspule 2 batterie 3 sicherung (20a) 4 gleichrichter/regler b : schwarz g : grün r : rot sistema de carga diag...
Page 384: Elec
7-28 e – + elec charging system fuse refer to “starting system”. Battery refer to “electrical” in chapter 3. Lighting coil refer to “ignition system”. Rectifier/regulator refer to “ignition system”..
Page 385: Elec
F d es – + elec 7- fusible se reporter à “systeme de demarrage”. Batterie se reporter à “systeme electrique” au chapitre 3. Bobine d’eclairage se reporter à “systeme d’allumage”. Redresseur/regulateur se reporter à “systeme d’allumage”. Sicherung siehe “startersystem”. Batterie siehe “elektrische an...
Page 386: Elec
7-29 e – + elec ypvs ypvs wiring diagram 1 lighting coil 2 pickup coil 3 cdi unit 4 ypvs servomotor 5 fuse (10a) 6 fuse (20a) 7 battery 8 rectifier/regulator b : black g : green gy : gray r : red b/o : black/orange r/l : red/blue r/w : red/white w/r : white/red.
Page 387: Elec
F d es – + elec 7- ypvs plan de cablage 1 bobine d’éclairage 2 bobine exploratrice 3 bloc cdi 4 moteur asservi ypvs 5 fusible (10a) 6 fusible (20 a) 7 batterie 8 redresseur/régulateur b : noir g : vert gy : gris r : rouge b/o : noir/orange r/l : rouge/bleu r/w : rouge/blanc w/r : blanc/rouge ypvs sc...
Page 388: Elec
7-30 e – + elec ypvs fuse refer to “starting system”. Battery refer to “electrical” in chapter 3. Pickup coil refer to “ignition system”. Cdi unit refer to “ignition system”. Lighting coil refer to “ignition system”. Rectifier/regulator refer to “ignition system”..
Page 389: Elec
F d es – + elec 7- fusible se reporter à “systeme de demarrage”. Batterie se reporter à “systeme electrique” au chapitre 3. Bobine exploratrice se reporter à “systeme d’allumage”. Bloc cdi se reporter à “systeme d’allumage”. Bobine d’eclairage se reporter à “systeme d’allumage”. Redresseur/regulateu...
Page 390: Elec
7-31 e – + elec ypvs servomotor ypvs servomotor exploded diagram removal and installation chart step procedure/part name q’ty service points ypvs servomotor removal follow the left “step” for removal. 1 bolt 2 2 ypvs cable bracket 1 3 ypvs servomotor coupler 1 4 bolt 2 5 ypvs servomotor 1 6 spacer 2...
Page 391: Elec
F d es 7- – + elec moteur asservi ypvs vue en eclate tableau de depose et d’installation etape procédé/nom de pièce qté points d’entretien depose du moteur asservi ypvs suivre l’“étape” de gauche pour la dépose. 1 boulon 2 2 support de câble ypvs 1 3 coupleur du moteur asservi ypvs 1 4 boulon 2 5 mo...
Page 392: Elec
7-32 e – + elec ypvs servomotor service points ypvs cable removal and installation 1. Remove: ● ypvs cables 1 and 2 note: there is a “22222.....” mark a on ypvs cable 2. Removal steps: ● remove the ypvs cable holder 1. ● remove the ypvs cables 2 from the both drams. Ypvs cable inspection 1. Inspect:...
Page 393: Elec
F d es – + elec 7- points d’entretien dépose et installation du câble ypvs 1. Déposer: ● câbles ypvs 1 et 2 n.B.: il y a un repère “22222.....” a sur le câble ypvs 2. Inspection du câble ypvs 1. Inspecter: ● câbles ypvs 1 et 2 torons brisés/déformations/ mouvement irrégulier → rem- placer. Inspectio...
Page 394: Elec
7-33 e – + elec ypvs servomotor caution: do not disassemble the ypvs servomotor unit. It is a sealed unit and if it is faulty it must be replaced. Ypvs cable adjustment refer to “control system” in chapter 3. ● make sure the servomotor operates properly. Note: make sure the pulley operates three sec...
Page 395: Elec
F d es – + elec 7- attention: ne pas démonter le moteur asservi ypvs. Il est scellé et doit donc être remplacé s’il est défectueux. Réglage du câble ypvs se reporter à “systeme de commande” au chapitre 3. ● s’assurer que le moteur asservi fonctionne correctement. N.B.: s’assurer que la poulie foncti...
Page 396: Elec
7-34 e – + elec indication system indication system wiring diagram 1 cdi unit 2 fuel level sensor 3 oil level sensor 4 buzzer 5 multifunction meter 6 speed sensor 7 engine shut-off switch 8 start switch 9 battery 0 fuse (10a) a fuse (20a) b exhaust temperature sensor c water temperature sensor b : b...
Page 397: Elec
F d es – + elec 7- systeme d’indication plan de cablage 1 bloc cdi 2 capteur de niveau de carburant 3 capteur de niveau d’huile 4 avertisseur sonore 5 compteur multifonction 6 capteur de vitesse 7 coupe-circuit 8 contacteur de démarrage 9 batterie 0 fusible (10a) a fusible (20a) b capteur de tempéra...
Page 398: Elec
7-35 e – + elec indication system fuse refer to “starting system”. Battery refer to “electrical” in chapter 3. Lighting coil refer to “ignition system”. Rectifier/regulator refer to “ignition system”. Cdi unit refer to “ignition system”. Water temperature sensor refer to “ignition system”. Exhaust t...
Page 399: Elec
F d es – + elec 7- fusible se reporter à “systeme de demarrage”. Batterie se reporter à “systeme electrique” au chapitre 3. Bobine d’eclairage se reporter à “systeme d’allumage”. Redresseur/regulateur se reporter à “systeme d’allumage”. Bloc cdi se reporter à “systeme d’allumage”. Capteur de tempera...
Page 400: Elec
7-36 e – + elec indication system fuel level sensor 1. Measure: ● fuel level sensor resistance out of specification → replace. White/blue (w/l) – black (b) float position resistance ( Ω ) a 757–803 b 0–8 multifunction meter multifunction meter 1. Check: ● multifunction meter cracked meter housing → ...
Page 401: Elec
F d es – + elec 7- capteur de niveau de carburant 1. Mesurer: ● résistance du capteur de niveau de carburant hors spécifications → rempla- cer. Compteur multifonction compteur multifonction 1. Vérifier: ● compteur multifonction logement de compteur fendu → remplacer le compteur multi- fonction. Le c...
Page 402: Elec
7-37 e – + elec indication system exploded diagram removal and installation chart step procedure/part name q’ty service points multifunction meter removal follow the left “step” for removal. 1 multifunction meter coupler 8 2 nut 2 3 holder 1 4 multifunction meter 1 reverse the removal steps for inst...
Page 403: Elec
F d es 7- – + elec vue en eclate tableau de depose et d’installation etape procédé/nom de pièce qté points d’entretien depose du compteur multifonc- tion suivre l’“étape” de gauche pour la dépose. 1 coupleur du compteur multi-fonctions 8 2 ecrou 2 3 outil de maintien 1 4 compteur multifonction 1 pou...
Page 404: Elec
7-38 e – + elec indication system display function 1. Check: ● display function not operate → replace the multifunc- tion meter. 1 oil level sensor 2 fuel level sensor 3 buzzer 4 electrical box 5 start switch 6 battery 7 speed sensor *: disconnected b : black br : brown ch : chocolate g : green gy :...
Page 405: Elec
F d es – + elec 7- fonction d’affichage 1. Vérifier: ● fonction d’affichage ne fonctionne pas → remplacer le compteur multifonction. 1 capteur de niveau d’huile 2 capteur de niveau de carburant 3 avertisseur sonore 4 boîtier électrique 5 contacteur de démarrage 6 batterie 7 capteur de vitesse *: déc...
Page 406: Elec
7-39 e – + elec indication system checking steps: ● connect the battery terminals to the natural six-pin connector as shown. Note: if the multifunction meter has been removed from the watercraft, supply dc 12 voltage to the connector (+: red, –: black) with a battery. ● disconnect the blue one-pin c...
Page 407: Elec
F d es – + elec 7- etapes de la vérification: ● connecter les bornes de la batterie au connecteur de couleur naturelle six broches comme indiqué. N.B.: si le compteur multi-fonctions a été retiré du véhicule nautique, fournir une tension de 12 v cc au connec- teur (+: rouge, –: noir) à l’aide d’une ...
Page 408: Elec
7-40 e – + elec indication system fuel level gauge 1. Check: ● fuel level gauge not operating → replace the multi- function meter. Checking steps: ● supply dc 12 voltage to the natural six-pin connector (+: red, –: black) with a battery. ● disconnect the green two-pin connec- tor (white/blue and bla...
Page 409: Elec
F d es – + elec 7- jauge de niveau de carburant 1. Vérifier: ● jauge de niveau de carburant ne fonctionne pas → remplacer le compteur multifonction. Etapes de la vérification: ● fournir une tension de 12 v cc au connecteur de couleur naturelle six broches (+: rouge, –: noir) à l’aide d’une batterie....
Page 410: Elec
7-41 e – + elec indication system oil level gauge 1. Check: ● oil level gauge not operating → replace the multi- function meter. Checking steps: ● supply dc 12 voltage to the natural six-pin connector (+: red, –: black) with a battery. ● disconnect the white two-pin connec- tor (blue and black leads...
Page 411: Elec
F d es – + elec 7- jauge de niveau d’huile 1. Vérifier: ● jauge de niveau d’huile ne fonctionne pas → remplacer le compteur multifonction. Etapes de la vérification: ● fournir une tension de 12 v cc au connecteur de couleur naturelle six broches (+: rouge, –: noir) à l’aide d’une batterie. ● déconne...
Page 412: Elec
7-42 e – + elec indication system overheat warning indicator 1. Check: ● overheat 1 warning indicator not operating → replace the multi- function meter. Checking steps: ● supply dc 12 voltage to the natural six-pin connector (+: red, –: black) with a battery. ● connect the gray/black and black ter- ...
Page 413: Elec
F d es – + elec 7- indicateur d’avertissement de surchauffe 1. Vérifier: ● indicateur d’avertissement de surchauffe 1 ne fonctionne pas → remplacer le compteur multifonction. Etapes de la vérification: ● fournir une tension de 12 v cc au connecteur de couleur naturelle six broches (+: rouge, –: noir...
Page 414: Elec
7-43 e – + elec indication system 2. Check: ● overheat 2 warning indicator not operating → replace the multi- function meter. Checking steps: ● supply dc 12 voltage to the natural six-pin connector (+: red, –: black) with a battery. ● connect the gray/red and black termi- nals with a jumper lead 1. ...
Page 415: Elec
F d es – + elec 7- 2. Vérifier: ● indicateur d’avertissement de surchauffe 2 ne fonctionne pas → remplacer le compteur multifonction. Etapes de la vérification: ● fournir une tension de 12 v cc au connecteur de couleur naturelle six broches (+: rouge, –: noir) à l’aide d’une batterie. ● connecter le...
Page 416: Elec
7-44 e – + elec indication system 3. Check: ● exhaust temperature warning indicator not operating → replace the multi- function meter. Checking steps: ● supply dc 12 voltage to the natural six-pin connector (+: red, –: black) with a battery. ● connect the gray/yellow and black ter- minals with a jum...
Page 417: Elec
F d es – + elec 7- 3. Vérifier: ● indicateur d’avertissement de température d’échappement ne fonctionne pas → remplacer le compteur multifonction. Etapes de la vérification: ● fournir une tension de 12 v cc au connecteur de couleur naturelle six broches (+: rouge, –: noir) à l’aide d’une batterie. ●...
Page 418: Elec
7-45 e – + elec indication system speed meter 1. Check: ● speed meter output voltage within specification → check the speed sensor output voltage and pulses. Out of specification → replace. Speed meter output voltage: 10.5 v checking steps: ● supply dc 12 voltage to the natural six-pin connector (+:...
Page 419: Elec
F d es – + elec 7- compteur de vitesse 1. Vérifier: ● tension de sortie de l’indicateur de vitesse comprise dans les limites spéci- fiées → vérifier la tension et les impulsions de sortie du capteur de vitesse. Hors spécifications → rempla- cer. Tension de sortie de l’indicateur de vitesse: 10,5 v e...
Page 420: Elec
7-46 e – + elec indication system speed sensor 1. Check: ● speed sensor output voltage and pulses out of specification → repair or replace. Speed sensor output voltage (dependant on the paddle wheel position): less than 400 mv/ more than 11.6 v output pulse: 2 pulses/one-full turn checking steps: ● ...
Page 421: Elec
F d es – + elec 7- capteur de vitesse 1. Vérifier: ● tension et impulsions de sortie du capteur de vitesse hors spécifications → réparer ou remplacer. Tension de sortie du capteur de vitesse (dépend de la position de la roue à aubes): inférieure à 400 mv/ supérieure à 11,6 v impulsion de sortie: 2 i...
Page 422: Hull
E hull hood chapter 8 hull and hood handlebar................................................................................................... 8-1 exploded diagram ............................................................................. 8-1 removal and installation chart ........................
Page 423
1 2 3 4 5 6 7 8 9 f d es chapitre 8 coque et capot guidon .............................................. 8-1 vue en eclate............................ 8-1 tableau de depose et d’installation ........................ 8-1 points d’entretien ................. 8-6 inspection du guidon......................
Page 424: Hull
E hull hood hoses........................................................................................................... 8-26 exploded diagram ........................................................................... 8-26 removal and installation chart ............................................
Page 425
F d es flexibles ...................................... 8-26 vue en eclate.......................... 8-26 tableau de depose et d’installation ...................... 8-26 points d’entretien ............... 8-28 inspection du clapet antiretour.... 8-28 levier de selecteur ............. 8-29 vue en ecl...
Page 426: Hull
8-1 e hull hood handlebar handlebar exploded diagram removal and installation chart step procedure/part name q’ty service points handlebar cover removal follow the left “step” for removal. 1 screw 4 2 handlebar cover 1 3 band 2 4 pad 1 note: position the corrugated tube for the throt- tle cable as s...
Page 427: Hull
F d es 8- hull hood guidon vue en eclate tableau de depose et d’installation etape procédé/nom de pièce qté points d’entretien depose du cache de guidon suivre l’“étape” de gauche pour la dépose. 1 vis 4 2 cache de guidon 1 3 sangle 2 4 rembourrage 1 5 boulon 2 6 support de cache de guidon 1 n.B.: p...
Page 428: Hull
8-2 e hull hood handlebar exploded diagram removal and installation chart step procedure/part name q’ty service points handlebar removal follow the left “step” for removal. Qsts cable (to jet thrust nozzle) refer to “remote control cables and speed sensor lead”. 1 bolt 2 2 qsts converter 1 3 qsts ca...
Page 429: Hull
F d es 8- hull hood explosionszeichnung ausbau- und einbautabelle schritt verfahren/teilebezeichnung menge wartungspunkte ausbau des lenkers den punkten der spalte “schritt” links zum ausbau folgen. Qsts-seilzug (zur strahlschubdüse) siehe “fernbedienungskabel und geschwindigkeitssensorkabel”. 1 sch...
Page 430: Hull
8-3 e hull hood handlebar exploded diagram step procedure/part name q’ty service points 6 buzzer coupler 1 7 band 2 8 screw 4 9 handle boss cover 1 10 buzzer 1 reverse the removal steps for installation..
Page 431: Hull
F d es 8- hull hood explosionszeichnung schritt verfahren/teilebezeichnung menge wartungspunkte 6 stecker für den warnsummer 1 7 band 2 8 schraube 4 9 lenkernabenabdeckung 1 10 warnsummer 1 zum einbauen die ausbauschritte in umgekehrter reihenfolge ausführen. Diagrama detallado paso procedimiento/de...
Page 432: Hull
8-4 e hull hood handlebar exploded diagram removal and installation chart step procedure/part name q’ty service points handlebar disassembly follow the left “step” for disassembly. 1 bolt 2 2 grip end 2 3 spacer 1 4 screw/spring washer/washer 1/1/1 5 qsts grip assembly 1 6 screw 2 note: tighten the ...
Page 433: Hull
F d es 8- hull hood explosionszeichnung ausbau- und einbautabelle schritt verfahren/teilebezeichnung menge wartungspunkte demontage des lenkers den punkten der spalte “schritt” links zum zerlegen folgen. 1 schraube 2 2 griffende 2 3 distanzstück 1 4 schraube/federscheibe/unterlegscheibe 1/1/1 5 qsts...
Page 434: Hull
8-5 e hull hood handlebar exploded diagram step procedure/part name q’ty service points 7 handlebar switch assembly 1 8 screw 2 9 throttle lever assembly 1 10 handlebar grip 1 note: apply adhesive to the handlebar and the inner surface of the handlebar grip. 11 handlebar 1 reverse the disassembly st...
Page 435: Hull
F d es 8- hull hood explosionszeichnung schritt verfahren/teilebezeichnung menge wartungspunkte 7 lenkerschalterbauteil 1 8 schraube 2 9 drosselventilhebelbauteil 1 10 lenkergriff 1 hinweis: kleber auf den lenker und die innenfläche des lenkergriffs auftragen. 11 lenker 1 zum zusammenbauen die zerle...
Page 436: Hull
8-6 e hull hood handlebar service points handlebar inspection 1. Inspect: ● handlebar bends/cracks/damage → replace. Handlebar switch inspection refer to “starting system” in chapter 7. Handlebar assembly installation 1. Install: ● bands 1 note: after inserting the qsts cables, buzzer lead, handleba...
Page 437: Hull
F d es 8- hull hood wartungspunkte inspektion des lenkers 1. Überprüfen: ● lenker verbiegung/risse/beschädi- gung → ersetzen. Inspektion des lenkerschalters siehe “startersystem” in kapitel 7. Einbau des lenkerbauteils 1. Einbauen: ● bänder 1 hinweis: nach dem einführen der qsts- seilzüge, des warns...
Page 438: Hull
8-7 e hull hood handlebar 3. Install: ● throttle cable note: fit the seal into the groove in the bracket. 4. Adjust: ● qsts cable length a note: ● before adjusting the qsts cables, set the trim grip to the neutral position. ● adjust the qsts cable lengths a to the specified length and be sure to tak...
Page 439: Hull
F d es 8- hull hood 3. Einbauen: ● gasseilzug hinweis: die dichtung in die nut der halte- rung einpassen. 4. Einstellen: ● qsts-seilzuglänge a hinweis: ● vor dem einstellen des qsts- seilzugs, den trimmgriff in die neutralstellung drehen. ● die qsts-seilzuglänge a auf die vorgeschriebene länge ein- ...
Page 440: Hull
8-8 e hull hood qsts grip qsts grip exploded diagram removal and installation chart step procedure/part name q’ty service points qsts grip disassembly follow the left “step” for disassembly. Qsts grip assembly refer to “handlebar”. 1 screw/washer 1/1 2 cover 1 3 ball 2 4 spring 2 5 qsts cable 1 1 6 ...
Page 441: Hull
F d es 8- hull hood qsts-griff explosionszeichnung ausbau- und einbautabelle schritt verfahren/teilebezeichnung menge wartungspunkte demontage des qsts-griffs den punkten der spalte “schritt” links zum zerlegen folgen. Qsts-griff-bauteil siehe “lenker”. 1 schraube/unterlegscheibe 1/1 2 abdeckung 1 3...
Page 442: Hull
8-9 e hull hood qsts grip exploded diagram step procedure/part name q’ty service points 7 screw/washer 2/2 8 spacer 1 9 qsts shift lock lever 1 10 spring 1 11 spacer 1 12 cable housing 1 13 qsts grip 1 reverse the disassembly steps for assembly..
Page 443: Hull
F d es 8- hull hood explosionszeichnung schritt verfahren/teilebezeichnung menge wartungspunkte 7 schraube/unterlegscheibe 2/2 8 distanzstück 1 9 qsts-schaltsperrhebel 1 10 feder 1 11 distanzstück 1 12 kabelgehäuse 1 13 qsts-griff 1 zum zusammenbauen die zerlegenschritte in umgekehrter reihenfolge a...
Page 444: Hull
8-10 e hull hood qsts grip service points qsts cable inspection 1. Inspect: ● qsts cables frays/kinks/rough movement → replace. Qsts grip inspection 1. Inspect: ● qsts grip damage/wear → replace..
Page 445: Hull
F d es 8- hull hood wartungspunkte inspektion des qsts-seilzugs 1. Überprüfen: ● qsts-seilzüge durchgescheuerte stellen/ knicke/ungleichmäßige → ersetzen. Inspektion des qsts-griffs 1. Überprüfen: ● qsts-griff beschädigung/verschleiß → ersetzen. Puntos de servicio inspección del cable qsts 1. Inspec...
Page 446: Hull
8-11 e hull hood steering master steering master exploded diagram removal and installation chart step procedure/part name q’ty service points steering master removal follow the left “step” for removal. Steering console cover refer to “steering console cover”. Steering cable end refer to “remote cont...
Page 447: Hull
F d es 8- hull hood lenkersÄule explosionszeichnung ausbau- und einbautabelle schritt verfahren/teilebezeichnung menge wartungspunkte ausbau der lenkersÄule den punkten der spalte “schritt” links zum ausbau folgen. Abdeckung der steuerkonsole siehe “steuerkonsolen abdeckung”. Steuerseilzugsende sieh...
Page 448: Hull
8-12 e hull hood steering master exploded diagram removal and installation chart step procedure/part name q’ty service points steering master disassembly follow the left “step” for disassembly. 1 bolt/washer 2/2 2 stay 1 3 spring 1 4 bolt/washer 6/6 5 lower housing 1 6 spring 1 7 bushing 1 8 bushing...
Page 449: Hull
F d es 8- hull hood explosionszeichnung ausbau- und einbautabelle schritt verfahren/teilebezeichnung menge wartungspunkte demontage der lenkersÄule den punkten der spalte “schritt” links zum zerlegen folgen. 1 schraube/unterlegscheibe 2/2 2 strebe 1 3 feder 1 4 schraube/unterlegscheibe 6/6 5 unteres...
Page 450: Hull
8-13 e hull hood steering master exploded diagram step procedure/part name q’ty service points 11 tilt stopper 1 12 bolt/nut 4/4 13 retainer 2 14 steering shaft assembly 1 15 steering tube 1 16 bolt/washer/spring washer 2/2/2 17 cap 1 18 shaft 1 1 19 cross piece 1 reverse the disassembly steps for a...
Page 451: Hull
F d es 8- hull hood explosionszeichnung schritt verfahren/teilebezeichnung menge wartungspunkte 11 kippanschlag 1 12 schraube/mutter 4/4 13 käfig 2 14 lenkerwellenbauteil 1 15 steuerröhre 1 16 schraube/unterlegscheibe/ federunterlegscheibe 2/2/2 17 kappe 1 18 welle 1 1 19 kreuzstück 1 zum zusammenba...
Page 452: Hull
8-14 e hull hood steering master service points steering master components inspection 1. Inspect: ● each component part damage/wear → replace the steer- ing master..
Page 453: Hull
F d es 8- hull hood wartungspunkte inspektion der bestandteile der lenkersäule 1. Überprüfen: ● jedes bestandteil beschädigung/verschleiß → die lenkersäule ersetzen. Puntos de servicio inspección de los componentes del elemento principal de la dirección 1. Inspeccione: ● cada pieza del componente da...
Page 454: Hull
8-15 e hull hood remote control cables and speed sensor lead remote control cables and speed sensor lead exploded diagram removal and installation chart step procedure/part name q’ty service points remote control cables and speed sensor lead removal follow the left “step” for removal. 1 speed sensor...
Page 455: Hull
F d es 8- hull hood fernbedienungskabel und geschwindigkeitssensorkabel explosionszeichnung ausbau- und einbautabelle schritt verfahren/teilebezeichnung menge wartungspunkte ausbau der fernbedienungska- bel und des geschwindigkeits- sensorkabels den punkten der spalte “schritt” links zum ausbau folg...
Page 456: Hull
8-16 e hull hood remote control cables and speed sensor lead exploded diagram step procedure/part name q’ty service points 9 nut 2 10 steering cable holder 1 11 cap 1 12 nut 1 13 steering cable 1 14 shift cable end 1 15 bolt 2 16 shift cable holder 1 17 cap 1.
Page 457: Hull
F d es 8- hull hood explosionszeichnung schritt verfahren/teilebezeichnung menge wartungspunkte 9 mutter 2 10 steuerseilzughalterung 1 11 kappe 1 12 mutter 1 13 steuerseilzug 1 14 schaltseilzugsende 1 15 schraube 2 16 schaltseilzughalterung 1 17 kappe 1 diagrama detallado paso procedimiento/denomina...
Page 458: Hull
8-17 e hull hood remote control cables and speed sensor lead exploded diagram step procedure/part name q’ty service points 18 nut 1 19 shift cable 1 20 nut 1 21 pin 1 22 qsts cable end 1 23 cap 1 24 nut 1 25 qsts cable 1 reverse the removal steps for installation..
Page 459: Hull
F d es 8- hull hood explosionszeichnung schritt verfahren/teilebezeichnung menge wartungspunkte 18 mutter 1 19 schaltseilzug 1 20 mutter 1 21 stift 1 22 qsts-seilzugsende 1 23 kappe 1 24 mutter 1 25 qsts-seilzug 1 zum einbauen die ausbauschritte in umgekehrter reihenfolge ausführen. Diagrama detalla...
Page 460: Hull
8-18 e hull hood remote control cables and speed sensor lead service points warning when routing the cables, do not grasp the cable by the outer crimped sheath or steel end. This could deform or loosen the cable end due to extreme angles and or pressure. Always hold the cables by the outer cover bel...
Page 461: Hull
F d es 8- hull hood wartungspunkte warnung warnung beim verlegen der kabel, diese nicht an der äußeren gefalzten ummantelung oder am stahlende greifen. Dies könnte die kabelen- den aufgrund von zu starker win- kelneigung oder zu starkem druck deformieren oder lösen. Die kabel immer an der äußeren um...
Page 462: Hull
8-19 e hull hood remote control cables and speed sensor lead qsts cable (jet pump end) installation 1. Install: ● qsts cable (jet pump end) a warning the qsts cable must be screwed in more than 8 mm (0.31 in). Qsts cable set length (jet pump end): 12.0–14.0 mm (0.47–0.55 in) qsts cable stopper insta...
Page 463: Hull
F d es 8- hull hood einbau des qsts-seilzugs (jetpumpenende) 1. Einbauen: ● qsts-steuerseilzug (jetpumpenende) a warnung warnung der qsts-steuerseilzug muß mehr als 8 mm (0,31 in) tief einge- schraubt sein. Einbau des qsts-seilzugan- schlags 1. Einbauen: ● qsts-seilzuganschlag warnung warnung darauf...
Page 464: Hull
8-20 e hull hood remote control cables and speed sensor lead shift cable stopper installation 1. Install: ● shift cable stopper warning be sure to fit the projection 1 on the shift cable stopper into the groove in the outer cable. Remote control cables adjustment refer to “control system” in chapter...
Page 465: Hull
F d es 8- hull hood einbau des schaltseilzugan- schlags 1. Einbauen: ● schaltseilzuganschlag warnung warnung darauf achten, den zapfen 1 am schaltseilzuganschlag in die nut des seilzugmantels einzupassen. Einstellung der fernbedienungs- kabel siehe “kontrollsy- stem” in kapitel 3. Instalación del to...
Page 466: Hull
8-21 e hull hood front hood front hood exploded diagram removal and installation chart step procedure/part name q’ty service points front hood removal follow the left “step” for removal. 1 nut/washer 4/4 2 front hood assembly 1 3 bolt 4 4 hinge assembly 1 5 screw 2 6 hood lock assembly 1 7 bolt 4 8 ...
Page 467: Hull
F d es 8- hull hood vordere haube explosionszeichnung ausbau- und einbautabelle schritt verfahren/teilebezeichnung menge wartungspunkte ausbau der vorderen haube den punkten der spalte “schritt” links zum ausbau folgen. 1 mutter/unterlegscheibe 4/4 2 vorderes haubenbauteil 1 3 schraube 4 4 scharnier...
Page 468: Hull
8-22 e hull hood exploded diagram step procedure/part name q’ty service points 9 nut 1 10 washer 1 11 notch 1 12 collar 1 13 damper 1 reverse the removal steps for installation. Front hood.
Page 469: Hull
F d es 8- hull hood explosionszeichnung schritt verfahren/teilebezeichnung menge wartungspunkte 9 mutter 1 10 unterlegscheibe 1 11 rastzahn 1 12 muffe 1 13 dämpfer 1 zum einbauen die ausbauschritte in umgekehrter reihenfolge ausführen. Diagrama detallado paso procedimiento/denominación de la pieza c...
Page 470: Hull
8-23 e hull hood front hood exploded diagram removal and installation chart step procedure/part name q’ty service points hinge disassembly follow the left “step” for disassembly. 1 circlip 3 2 pin (long) 1 3 pin (short) 2 4 wire 1 5 spacer 1 6 spacer 1 7 damper 1 8 hinge 1 reverse the disassembly st...
Page 471: Hull
F d es 8- hull hood explosionszeichnung ausbau- und einbautabelle schritt verfahren/teilebezeichnung menge wartungspunkte demontage des scharniers den punkten der spalte “schritt” links zum zerlegen folgen. 1 sicherungsring 3 2 stift (lang) 1 3 stift (kurz) 2 4 drahtkabel 1 5 distanzstück 1 6 distan...
Page 472: Hull
8-24 e hull hood steering console cover exploded diagram removal and installation chart step procedure/part name q’ty service points steering console cover removal follow the left “step” for removal. Handlebar assembly refer to “handlebar”. Fuel cock assembly refer to “fuel cock and fuel filter” in ...
Page 473: Hull
F d es 8- hull hood steuerkonsolen abdeckung explosionszeichnung ausbau- und einbautabelle schritt verfahren/teilebezeichnung menge wartungspunkte ausbau der steuerkonsolen- abdeckung den punkten der spalte “schritt” links zum ausbau folgen. Lenkerbauteil siehe “lenker”. Kraftstoffhahn-bauteil siehe...
Page 474: Hull
8-25 e hull hood steering console cover exploded diagram step procedure/part name q’ty service points 4 bolt 8 5 nut/washer 2/2 6 bolt 2 7 steering console cover 1 reverse the removal steps for installation..
Page 475: Hull
F d es 8- hull hood explosionszeichnung schritt verfahren/teilebezeichnung menge wartungspunkte 4 schraube 8 5 mutter/unterlegscheibe 2/2 6 schraube 2 7 abdeckung der steuerkonsole 1 zum einbauen die ausbauschritte in umgekehrter reihenfolge ausführen. Diagrama detallado paso procedimiento/denominac...
Page 476: Hull
8-26 e hull hood hoses hoses exploded diagram removal and installation chart step procedure/part name q’ty service points hoses removal follow the left “step” for removal. Steering console cover refer to “steering console cover”. 1 band 2 2 ventilation hose 1 3 band 1 4 check valve 1 5 oil tank brea...
Page 477: Hull
F d es 8- hull hood schlÄuche explosionszeichnung ausbau- und einbautabelle schritt verfahren/teilebezeichnung menge wartungspunkte ausbau der schlÄuche den punkten der spalte “schritt” links zum ausbau folgen. Abdeckung der steuerkonsole siehe “steuerkonsolen abdeckung”. 1 band 2 2 belüftungsschlau...
Page 478: Hull
8-27 e hull hood hoses exploded diagram step procedure/part name q’ty service points 7 clamp/cooling water hose 2/2 8 nut/washer 2/2 9 cooling water pilot outlet 2 10 packing 2 reverse the removal steps for installation..
Page 479: Hull
F d es 8- hull hood explosionszeichnung schritt verfahren/teilebezeichnung menge wartungspunkte 7 klemme/kühlwasserschlauch 2/2 8 mutter/unterlegscheibe 2/2 9 kühlwasserkontrollstrahl-auslaß 2 10 dichtung 2 zum einbauen die ausbauschritte in umgekehrter reihenfolge ausführen. Diagrama detallado paso...
Page 480: Hull
8-28 e hull hood hoses service points check valve inspection 1. Check: ● check valve faulty → replace. Checking steps: ● connect a hose to the end of check valve “a” and blow into it. Air should come out from end “b”. ● connect the hose to the end of check valve “b” and blow into it. Air should not ...
Page 481: Hull
F d es 8- hull hood wartungspunkte inspektion des rückschlagventils 1. Kontrollieren: ● rückschlagventil fehlerhaft → ersetzen. Prüfschritte: ● den schlauch am ende des rückschlagventils “a” an- schließen und hineinblasen. Es sollte am ende “b” luft herauskommen. ● den schlauch am ende des rückschla...
Page 482: Hull
8-29 e hull hood shift lever shift lever exploded diagram removal and installation chart step procedure/part name q’ty service points shift lever removal follow the left “step” for removal. Steering console cover refer to “steering console cover”. Shift cable refer to “remote control cables and spee...
Page 483: Hull
F d es 8- hull hood schalthebel explosionszeichnung ausbau- und einbautabelle schritt verfahren/teilebezeichnung menge wartungspunkte ausbau des schalthebels den punkten der spalte “schritt” links zum ausbau folgen. Abdeckung der steuerkonsole siehe “steuerkonsolen abdeckung”. Schaltseilzug siehe “f...
Page 484: Hull
8-30 e hull hood shift lever exploded diagram step procedure/part name q’ty service points 4 screw 3 5 base assembly 1 6 nut/washer 3/3 7 screw 3 8 plate 1 reverse the removal steps for installation..
Page 485: Hull
F d es 8- hull hood explosionszeichnung schritt verfahren/teilebezeichnung menge wartungspunkte 4 schraube 3 5 grundbauteil 1 6 mutter/unterlegscheibe 3/3 7 schraube 3 8 platte 1 zum einbauen die ausbauschritte in umgekehrter reihenfolge ausführen. Diagrama detallado paso procedimiento/denominación ...
Page 486: Hull
8-31 e hull hood shift lever exploded diagram removal and installation chart step procedure/part name q’ty service points base disassembly follow the left “step” for disassembly. 1 bolt/washer 2/2 2 plate 1 3 spring 1 4 actuator 1 5 roller 1 6 shaft 1 7 shift arm 1 reverse the disassembly steps for ...
Page 487: Hull
F d es 8- hull hood explosionszeichnung ausbau- und einbautabelle schritt verfahren/teilebezeichnung menge wartungspunkte demontage des grundbauteils den punkten der spalte “schritt” links zum zerlegen folgen. 1 schraube/unterlegscheibe 2/2 2 platte 1 3 feder 1 4 aktuator 1 5 walze 1 6 welle 1 7 sch...
Page 488: Hull
8-32 e hull hood shift lever service points base assembly 1. Install: ● shift arm ● shaft installation steps: ● install the shift arm 1 so that it comes in contact with the stopper 2 as shown. ● install the shaft 3 to the base so that it come in contact with the stopper 4 as shown..
Page 489: Hull
F d es 8- hull hood wartungspunkte grundbauteil 1. Einbauen: ● schaltarm ● welle einbauschritte: ● den schaltarm 1 so ein- bauen, daß er den anschlag 2 wie dargestellt berührt. ● die welle 3 so in das grund- bauteil einbauen, daß sie den anschlag 4 wie dargestellt berührt. Puntos de servicio conjunt...
Page 490: Hull
8-33 e hull hood seats and hand grip seats and hand grip exploded diagram removal and installation chart step procedure/part name q’ty service points seats and hand grip removal follow the left “step” for removal. 1 rear seat assembly 1 2 front seat assembly 1 3 bolt 4 4 seat lock assembly 2 5 nut/w...
Page 491: Hull
F d es 8- hull hood sitze und handgriff explosionszeichnung ausbau- und einbautabelle schritt verfahren/teilebezeichnung menge wartungspunkte ausbau der sitze und des handgriffs den punkten der spalte “schritt” links zum ausbau folgen. 1 hinterer sitz 1 2 vorderer sitz 1 3 schraube 4 4 sitzverriegel...
Page 492: Hull
8-34 e hull hood seats and hand grip exploded diagram step procedure/part name q’ty service points 8 rear seat stay 1 9 nut/washer 4/4 10 bolt 4 11 front seat stay 2 12 nut/washer 4/4 13 bolt 4 14 hand grip 1 reverse the removal steps for installation..
Page 493: Hull
F d es 8- hull hood explosionszeichnung schritt verfahren/teilebezeichnung menge wartungspunkte 8 strebe des hinteren sitzes 1 9 mutter/unterlegscheibe 4/4 10 schraube 4 11 strebe des vorderen sitzes 2 12 mutter/unterlegscheibe 4/4 13 schraube 4 14 handgriff 1 zum einbauen die ausbauschritte in umge...
Page 494: Hull
8-35 e hull hood seats and hand grip service points seat lock inspection 1. Inspect: ● front seat lock ● rear seat lock damage/wear → replace..
Page 495: Hull
F d es 8- hull hood wartungspunkte inspektion des sitzverschlusses 1. Überprüfen: ● vorderer sitzverschluß ● hinterer sitzverschluß beschädigung/verschleiß → ersetzen. Puntos de servicio inspección del bloqueo del asiento 1. Inspeccione: ● cierre del asiento delantero ● cierre del asiento trasero da...
Page 496: Hull
8-36 e hull hood exhaust system exhaust system exploded diagram removal and installation chart step procedure/part name q’ty service points exhaust system removal follow the left “step” for removal. Jet pump unit assembly refer to “jet pump unit” in chapter 6. 1 band 1 2 hose clamp 2 3 exhaust joint...
Page 497: Hull
F d es 8- hull hood abgassystem explosionszeichnung ausbau- und einbautabelle schritt verfahren/teilebezeichnung menge wartungspunkte ausbau des abgassystems den punkten der spalte “schritt” links zum ausbau folgen. Jetpumpeneinheit-bauteil siehe “jetpumpeneinheit” in kapitel 6. 1 band 1 2 schlauchk...
Page 498: Hull
8-37 e hull hood exhaust system exploded diagram step procedure/part name q’ty service points 8 hose clamp 2 note: remove parts 8 to 14 as a set. 9 resonator assembly 1 10 rubber hose 1 11 hose clamp 1 12 water tank 1 13 rubber hose 1 14 plate 1 reverse the removal steps for installation..
Page 499: Hull
F d es 8- hull hood explosionszeichnung schritt verfahren/teilebezeichnung menge wartungspunkte 8 schlauchklemme 2 hinweis: die teile 8 bis 14 als ganzen satz ausbauen. 9 resonatorbauteil 1 10 gummischlauch 1 11 schlauchklemme 1 12 wassertank 1 13 gummischlauch 1 14 platte 1 zum einbauen die ausbaus...
Page 500: Hull
8-38 e hull hood exhaust system service points exhaust system inspection 1. Inspect: ● water lock band cracks/damage → replace. 2. Inspect: ● rubber hoses burns/cracks/damage → replace. 3. Inspect: ● water lock cracks/leaks → replace. 4. Inspect: ● water tank cracks/damage/leaks → replace. Exhaust c...
Page 501: Hull
F d es 8- hull hood wartungspunkte inspektion des abgassystems 1. Überprüfen: ● wassersperrehalteriemen risse/beschädigung → ersetzen. 2. Überprüfen: ● gummischläuche brandstellen/risse/beschä- digung → ersetzen. 3. Überprüfen: ● wassersperre risse/undichtigkeiten → ersetzen. 4. Überprüfen: ● wasser...
Page 502: Hull
8-39 e hull hood deck and hull deck and hull exploded diagram removal and installation chart step procedure/part name q’ty service points deck and hull disassembly follow the left “step” for disassembly. 1 nut/washer 2/2 2 bow eye 1 3 nut 2 4 rope hole fitting 2 5 nut 1 6 spout 1 7 nut 2 8 plate 1.
Page 503: Hull
F d es 8- hull hood deck und rumpf explosionszeichnung ausbau- und einbautabelle schritt verfahren/teilebezeichnung menge wartungspunkte demontage von rumpf und deck den punkten der spalte “schritt” links zum zerlegen folgen. 1 mutter/unterlegscheibe 2/2 2 bugöse 1 3 mutter 2 4 seilloch-fassung 2 5 ...
Page 504: Hull
8-40 e hull hood deck and hull exploded diagram step procedure/part name q’ty service points 9 cleat 1 10 nut 6 for m6 stud bolts 11 nut 2 for m8 stud bolts 12 sponson 2 13 nut/washer 4/4 14 screw/washer 4/4 15 drain plug 2 16 packing 2 reverse the disassembly steps for assembly..
Page 505: Hull
F d es 8- hull hood explosionszeichnung schritt verfahren/teilebezeichnung menge wartungspunkte 9 belegklampe 1 10 mutter 6 für m6 gewindebolzen 11 mutter 2 für m8 gewindebolzen 12 seitlicher ausleger 2 13 mutter/unterlegscheibe 4/4 14 schraube/unterlegscheibe 4/4 15 ablaßstopfen 2 16 dichtung 2 zum...
Page 506: Hull
8-41 e hull hood engine mount engine mount exploded diagram removal and installation chart step procedure/part name q’ty service points engine mount removal follow the left “step” for removal. Engine assembly refer to “engine unit” in chapter 5. 1 bolt 4 2 damper 2 3 bolt 8 4 engine mount 4 reverse ...
Page 507: Hull
F d es 8- hull hood motoraufhÄngung explosionszeichnung ausbau- und einbautabelle schritt verfahren/teilebezeichnung menge wartungspunkte ausbau der motoraufhÄngung den punkten der spalte “schritt” links zum ausbau folgen. Motor-bauteil siehe “motorblock” in kapitel 5. 1 schraube 4 2 dämpfer 2 3 sch...
Page 508: Hull
8-42 e hull hood engine mount hull repair shallow scratches 1. Sand the scratches with 400 grit sand- paper (either wet or dry) until the scratches are smooth. Then, sand the scratches once again with 600 grit sand- paper (either wet or dry). Deep scratches 1. Remove any sharp or rough edges from th...
Page 509: Hull
F d es 8- hull hood reparaturen am rumpf leichte kratzer 1. Die kratzer mit einem 400- körnigen sandpapier (naß oder trocken) glattschmirgeln. Anschließend nochmals mit einem 600-körnigen sandpa- pier (trocken oder naß) nach- schmirgeln. Tiefe kratzer 1. Scharfe oder rauhe kanten von der rumpfoberfl...
Page 510: Hull
8-43 e hull hood engine mount cracks and punctures note: before attempting to repair any cracks or punctures, refer to “watercraft frp repair manual”. 1. Remove any damaged fiberglass. 2. Cut the damaged area and separate it approximately 0.25 inch. 3. On the outside of the hull, grind the separated...
Page 511: Hull
F d es 8- hull hood risse und lecks hinweis: vor der reparatur von rissen und lecks, auf das “wasserfahr- zeug frp reparaturhand- buch” bezug nehmen. 1. Beschädigtes fiberglas ent- fernen. 2. Die beschädigte stelle ein- schneiden und um ca.0,25 inch (6,5 mm) trennen. 3. An der rumpfaußenseite die se...
Page 512: Hull
8-44 e hull hood engine mount insert nut note: use the insert nut when: ● a pop nut which was attached to the hull slipped off or, ● when a bolt which was fastened to an insert nut or pop nut broke. ● nut 1 ● thread direction 2 ● slot to be threaded 3 note: drilling size part no. Part name remarks e...
Page 513: Hull
F d es 8- hull hood gewindeeinsatz hinweis: einen gewindeeinsatz verwen- den, wenn: ● eine im rumpf eingesetzte mut- ter sich gelöst hat, oder ● wenn eine schraube die an einem gewindeeinsatz oder einer alten spannmutter festge- schraubt war, abgebrochen ist. ● mutter 1 ● gewinderichtung 2 ● mit gew...
Page 514: Hull
8-45 e hull hood engine mount 4. First, apply tape 1 to the inner surface of the hull and then laminate fiberglass mats over the tape with resin. Note: when it is possible to work inside the hull, laminate the mats from the inside. 5. Sand the outer surface of the hull until it is smooth. 6. Install...
Page 515: Hull
F d es 8- hull hood 4. Zuerst das klebeband 1 auf die innenfläche des rumpfes auftragen und anschließend lagenweise die mit kunst- haars beschichteten fiberglas- gewebestücke anbringen. Hinweis: wenn die stelle von der innenseite des rumpfes her zugänglich ist, die fiberglas-gewebelagen von innen he...
Page 516: Hull
8-46 e hull hood engine mount 2. To prevent water from entering the ure- thane foam, apply silicone sealant to the inside of the hole as shown. 3. Install the insert nut as explained in “example 1”. ● brass insert nut 1 ● hull 2 ● urethane foam 3 ● silicone sealant 4 graphic removal 1. Hold a hair d...
Page 517: Hull
F d es 8- hull hood 2. Um das eindringen von was- ser in den urethanschaum zu verhindern, silikondichtmasse auf die innenseite des loches auftragen, wie dargestellt. 3. Den gewindeeinsatz ein- bauen, wie in “beispiel 1”. ● messing-gewindeeinsatz 1 ● rumpf 2 ● urethanschaum 3 ● silikondichtungsmittel...
Page 518: Trbl
E trbl anls chapter 9 trouble analysis trouble analysis ..................................................................................... 9-1 trouble analysis chart ................................................................. 9-1.
Page 519
1 2 3 4 5 6 7 8 9 f d es chapitre 9 depannage depannage ..................................... 9-1 tableau de depannage ........ 9-1 kapitel 9 stÖrungssuche stÖrungssuche ....................... 9-1 stÖrungssuchtabelle ...... 9-1 capitulo 9 localizaciÓn de averÍas inspecciÓn de problemas .....9-1 tab...
Page 520: Trbl
9-1 trbl anls e trouble analysis trouble analysis note: the following items should be checked before the “trouble analysis” chart is consulted. 1. The battery is charged and its specified gravity is within specification. 2. There are no incorrect wiring connections. 3. Wiring connections are properl...
Page 521: Trbl
9-2 trbl anls e trouble analysis rubber coupling 5 pilot water hose 5 water hose 5 water passage 5 jet pump unit duct 6 impeller 6 intake grate 6 bearings 6 intake duct 6 water inlet hose 6 bilge hose 6 bilge strainer 6 bilge hose joint 6 valve body 6 electrical cdi unit 7 lighting coil 7 pickup coi...
Page 522: Trbl
F 9- trbl anls depannage n.B.: les points suivants doivent être vérifiés avant de consulter le tableau de “dépannage”. 1. La batterie est chargée et sa densité correspond aux spécifications. 2. Toutes les connexions de fils sont correctes. 3. Les connexions de fils sont bien serrées et ne présentent...
Page 523: Trbl
F 9- trbl anls caoutchouc d’accouplement 5 flexible de gicleur primaire 5 flexible d’eau 5 passage d’eau 5 pompe de propulsion conduite 6 roue d’hélice 6 grille d’admission 6 roulements 6 conduite d’admission 6 flexible d’admission d’eau 6 flexible de cale 6 crépine de cale 6 raccord de flexible de ...
Page 524: Trbl
D 9- trbl anls stÖrungssuche hinweis: bevor die “störungssuchtabelle” durchgegangen wird, sollten folgende punkte nachgeprüft werden. 1. Die batterie ist geladen, und die spezifische dichte der batteriesäure ist innerhalb des sollbereichs. 2. Alle kabelverbindungen sind korrekt hergestellt. 3. Alle ...
Page 525: Trbl
D 9- trbl anls ruckdämpfer 5 kühlwasserkontrollschlauch 5 wasserschlauch 5 wasserdurchlauf 5 jetpumpeneinheit rohr 6 flügelrad 6 einlaßsieb 6 lager 6 einlaßrohr 6 wassereinlaßschlauch 6 bilgenschlauch 6 bilgensieb 6 bilgenschlauch-verbindungsstück 6 ventilgehäuse 6 elektrische anlage cdi-einheit 7 l...
Page 526: Trbl
Es 9- trbl anls inspecciÓn de problemas nota: debe comprobar los siguientes ítems antes de consultar la tabla de “inspección de problemas”. 1. La batería debe estar cargada y su gravedad específica debe estar dentro del valor especificado. 2. Que no haya ninguna conexión eléctrica incorrecta. 3. Que...
Page 527: Trbl
Es 9- trbl anls acoplamiento de goma 5 manguera de agua piloto 5 manguera de agua 5 conducto de agua 5 unidad de la bomba de inyecciÓn conducto 6 rodete 6 rejilla de admisión 6 cojinetes 6 conducto de admisión 6 manguera de entrada de agua 6 manguera de sentina 6 colador de sentina 6 junta de mangue...
Page 528: Wiring Diagram
Br br r br br r w w b b r/y r r/y b pull + – n s m w b r br set g w/r w/r b/o g b b/y b/o w/r gy/r gy/y g br gy w o gy/b b/w b/o b/y br r b b/y b/o b/y b/o b/o o gy/y w g gy gy/r gy/b b/y b/o b/o o r/w gy/y r gy/r g b gy/b b g b r/y br r/l r b gy b l b w/l b w/l l/r l/b b/y r/y b r/w y ch br g g b r...
Page 529
F d es plan de cablage 1 bobine d’éclairage 2 bobine exploratrice 3 bloc cdi 4 capteur de niveau d’huile 5 capteur de niveau de carburant 6 avertisseur sonore 7 compteur multifonction 8 capteur de vitesse 9 contacteur d’arrêt du moteur 0 coupe-circuit a contacteur de démarrage b moteur asservi ypvs ...
Page 531
Printed in japan jan. 2001 — 0.3 × 1 cr f0v-28197-2d-c1 (xa1200a-z) yamaha motor co., ltd. Printed on recycled paper.


