- DL manuals
- Banner
- Security Camera
- VE200G1A
- Instruction Manual
Banner VE200G1A Instruction Manual
Summary of VE200G1A
Page 1
Ve series smart camera instruction manual original instructions 191666 rev. B 31 october 2016 © banner engineering corp. All rights reserved 191666.
Page 2: Contents
Contents 1 product description ....................................................................................................... 6 1.1 models ....................................................................................................................................6 2 overview ..........
Page 3
7.5 camera tool: results ..............................................................................................................48 8 using the inspection tools: vision tools ......................................................................49 8.1 average gray tool ...........................
Page 4
11.7 image menu (image) .......................................................................................................... 133 11.8 information menu (info) .....................................................................................................133 11.9 system error menu (syserr)...
Page 5
16 product support and maintenance ........................................................................... 214 16.1 repairs ..............................................................................................................................214 16.2 maintenance ............................
Page 6: 1 Product Description
1 product description self-contained smart camera with user-friendly vision manager software • banner’s free and easy-to-use vision manager software provides a number of tools and capabilities that enable ve series smart cameras to solve a wide range of vision applications, such as item detection, p...
Page 7: 2 Overview
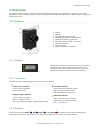
2 overview the ve series smart camera is easy to use and has advanced visual inspection capabilities for automation or control applications. Users can quickly set up the sensor using the vision manager software to solve a diverse range of applications on the factory floor. 2.1 features 1 2 3 4 5 7 6...
Page 8
2.2 vision manager software the ve series smart camera is set up using the free vision manager software, available for download at www.Bannerengineering.Com . This easy-to-use image processing software provides a variety of tools and capabilities to solve a wide range of vision applications such as ...
Page 9
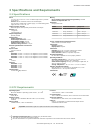
3 specifications and requirements 3.1 specifications power 12 v dc to 30 v dc (24 v dc ± 10% if a banner light source is powered by the sensor) current: 400 ma maximum (exclusive of load and lights) use only with a suitable class 2 power supply, or current limiting power supply rated 12 v to 30 v dc...
Page 10
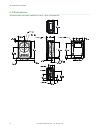
3.3 dimensions all measurements are listed in millimeters [inches], unless noted otherwise. Ve series smart camera 10 www.Bannerengineering.Com - tel: 763.544.3164.
Page 11
3.4 banner engineering corp. Software copyright notice this software is protected by copyright, trade secret, and other intellectual property laws. You are only granted the right to use the software and only for the purposes described by banner. Banner reserves all other rights in this software. For...
Page 12: 4 Installation Instructions
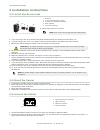
4 installation instructions 4.1 install the accessories 1 2 3 5 4 figure 3. Install the accessories 1. Ve sensor 2. O-ring (used with the lens cover) 3. C-mount lens (available separately) 4. Filter (optional) 5. Lens cover (optional) an external light (optional) is not shown. Note: a lens cover and...
Page 13
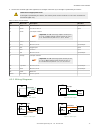
3. Connect the external light cable (optional) to the light connection (2) if the light is powered by the sensor. Caution: use appropriate power if the light is powered by the sensor, the sensor power source must be 24 v dc. This connection is for banner lights only. Table 1: power and i/o pinouts p...
Page 14: Pnp Inputs & Outputs
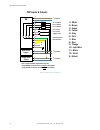
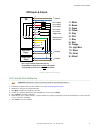
Pnp inputs & outputs + - s s + + - - ve input power supply output power supply this is a typical example. Applications may vary. *programmable i/o shown set as an output in this example **programmable i/o shown set as an input in this example 1 = white 2 = brown 3 = green 4 = yellow 5 = gray 6 = pin...
Page 15: Npn Inputs & Outputs
Npn inputs & outputs + - s s + + - - ve input power supply output power supply this is a typical example. Applications may vary. *programmable i/o shown set as an output in this example **programmable i/o shown set as an input in this example 1 = white 2 = brown 3 = green 4 = yellow 5 = gray 6 = pin...
Page 16: 5 Getting Started
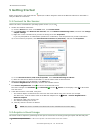
5 getting started power up the sensor, and verify that the power/error led is on green and that the ethernet indicator is on amber to verify the ethernet connection. 5.1 connect to the sensor these instructions use windows ® operating system version 7, 8, or 10. 5 1. Confirm the network connections....
Page 17
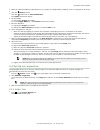
1. Make sure that the lighting is appropriate for your target. Use supplementary lighting, such as a ring light, if necessary. 2. Click the sensor screen. 3. Click the camera tool on tools and results. The inputs parameters display. 4. Set the trigger. A) expand the trigger parameters. B) in the tri...
Page 18
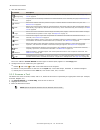
2. Click the desired tool. Tool name description average gray evaluates pixel brightness within an roi and computes the average grayscale value. See average gray tool on page 49. Bead inspects parts for uniformity of adhesive or sealant material, or for uniformity of a gap. See bead tool on page 53....
Page 19
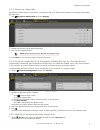
5.3.3 name an inspection the default inspection name is inspection01, inspection02, and so on. Rename the inspection to something meaningful to the application. 1. Click inspection management, then click manage. Figure 12. Manage 2. Double-click the name of the desired inspection. 3. Enter the new i...
Page 20
2. Make the desired modifications to the inspection. Important: changes are automatically saved as they are made. Save a copy of the inspection if you want to be able to go back to previous settings. Use the emulator to set up or make changes to an inspection offline. 5.3.6 copy a tool duplicate (co...
Page 21
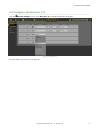
5.4 configure the discrete i/o from the system settings screen, select discrete i/o to change the discrete i/o settings. Figure 15. Discrete i/o for more details, see discrete i/o on page 34. Ve series smart camera www.Bannerengineering.Com - tel: 763.544.3164 21.
Page 22: 6 Vision Manager Workspace
6 vision manager workspace vision manager has five main working areas, or screens: • home screen on page 22—the home screen provides access to connect to a sensor or emulator, update firmware, and view sensor and vision manager software information. • sensor screen on page 26— the sensor screen disp...
Page 23
Figure 17. Active sensors tab to connect to a sensor, click next to the desired sensor. To disconnect from a sensor, click . To view or change sensor status, mac address, sensor name, ip address, subnet mask, and gateway, click . To add the sensor to a favorites group, click . The icon changes to . ...
Page 24
Network adapters tab use the network adapters tab on sensor neighborhood to view the network adapters that the system searches to find sensors. Navigate: home > sensor neighborhood > network adapters. Figure 19. Network adapters tab network adapter information including link status (connected/not co...
Page 25
Backup or restore the sensor system settings and inspections can be backed up and restored. Firmware is not included in the backup or restore. The backup file is saved to the location of your choice. 1. From the home screen, click sensor maintenance. 2. Make sure that no sensors or emulators are con...
Page 26
6.1.4 about use about to view vision manager software information, including the version number. 6.2 sensor screen the sensor screen displays the information needed to create or modify an inspection. 1. Screens—home, sensor, inspection logs, inspection management, system settings 2. Manual trigger b...
Page 27
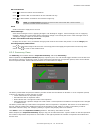
Roi view buttons click to view all tool rois and annotations. Click to view the roi and annotations for the selected tool only. Click to hide all rois annotations and view the image only. Note: the image overlays parameter for each tool also control which roi is shown and this parameter overrides th...
Page 28
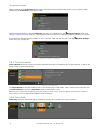
When expanded, the i/o summary displays input and output status information and system errors, if present. When collapsed, no i/o summary information is visible. Figure 25. I/o summary inputs and outputs display on the i/o summary after they are configured from the system settings screen (see config...
Page 29
Use tools only to add and configure tools in an inspection. Click a camera tool or inspection tool on tools only to access the parameters pane for that camera or tool. See using the camera tool on page 45, using the inspection tools: vision tools on page 49, and using the inspection tools: analysis ...
Page 30
6.3 inspection logs screen the inspection logs screen displays saved images and inspection information. Inspections logs can be viewed when the camera is offline. 1. Log sources pane—choose the source for the inspections logs to view, and set the criteria for collecting logs 2. Loaded logs pane—view...
Page 31
• remote teach pass • remote teach fail set the strategy: • first n logs • last n logs set the capture limit (limits the number of inspection logs the sensor holds in internal memory): • low count • medium count • high count filter logs to be viewed by pass , fail , remote teach , or inspection numb...
Page 32
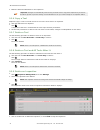
6.4.1 manage use manage to add new inspections, delete existing inspections, rename inspections, set an inspection to run at startup, or copy an inspection. Figure 31. Manage also displayed are the sensor name, inspection name, and whether the inspection is running. Copy an inspection duplicate (cop...
Page 33
Set an inspection to begin at startup note: only one inspection can begin at startup. 1. On the inspection management screen, click manage. 2. Locate the desired inspection and click . The turns green and the inspection will begin at the next startup. 6.4.2 transfer use transfer to transfer inspecti...
Page 34
2. Select the desired location. A) click above the right column. B) navigate to the desired folder. The path to the location displays above the right column. 3. In the list on the left, select (next empty slot) to add the inspection to the list or select an existing inspection to replace. 4. Select ...
Page 35
Figure 36. Discrete i/o i/o the ve has five configurable i/o. These are pins 1, 5, 8, 10, and 11. Pin # the pin number on the cable connection. See table 1 on page 13. Wire color the corresponding wire color for each pin. See table 1 on page 13. Status indicates whether or not the i/o is active. Gre...
Page 36
Latch type select the behavior of the i/o pin when in active state; available when the i/o is configured as an output. • latched—maintains state until the condition of the associated function changes; available for the following functions: general output, pass, fail, ready, system error, online, and...
Page 37
Figure 37. Ethernet settings tab on the ethernet settings tab , click to access the sensor properties editing window and view or change the following: • ip address—view or change the ip address of the sensor • subnet mask—view or change the subnet address of the sensor • gateway—view or change the g...
Page 38
Figure 39. Industrial protocols tab—eithernet/ip selected a customizable map to output camera or inspection tool-specific results also displays. The map includes the following: • register/byte/word (depending on the protocol selected) • inspection slot # • tool type • tool name • result • type • act...
Page 39
Figure 40. Image export tab on the image export tab, set the image export parameters: export set which images to export: • disabled • all (default) • pass only • fail only port number set the port number to use for the export. The default is 32200. Hold ready select to prevent new triggers from bein...
Page 40
Figure 41. System tab to clear a system error flag (or state), click clear system error. Note: the system error log entry will not be cleared from the log. To export system logs, click export log and follow the prompts. Logs are exported as a .Slog file. To clear the log, click clear log. View a sys...
Page 41
Figure 42. View exported log tab 6.5.5 units use units to select a unit to display and to publish results that represent distance, size, and location calculations. Figure 43. Units by default, distance, size, and location calculations are shown in pixels. To change the displayed units, from the mode...
Page 42
• feet (ft) • yard (yd) click apply changes to save the changes. Applying a scaling factor changes the measurements listed in the tools and results to the selected unit and applies the scale to all inspections. Scale units using a known measurement use a known measurement, such as ruler, to configur...
Page 43
9. Write down the distance (px) show in tools & results. In this example, the distance is 101.00 px. Figure 45. Distance measurement between the two points 10. On the system settings screen, click units. 11. From the mode list, select scaling. The scaling parameters display. 12. Select the desired m...
Page 44
15. Click apply changes. Applying a scaling factor affects all existing inspections. The currently running inspection is immediately modified on the next trigger and other inspections are modified when they are loaded. Figure 47. Tools and results showing the new units 6.5.6 system reset use system ...
Page 45: Using The Camera Tool
7 using the camera tool the camera tool controls the sensor's camera function during an inspection. Configure the camera tool using the parameters in the parameters pane: • imager • focus info • trigger • external strobe • image histogram figure 48. Camera tool input parameters when the camera tool ...
Page 46
Gain gain is an electronic boost to the image signal. Increasing gain increases image brightness without increasing exposure time. Use the slider or enter the desired gain number. Note: gain brightens both the light pixels and the dark pixels. High gain values will make the image appear grainy. Auto...
Page 47
Free run the sensor immediately issues a new trigger at the end of an inspection. Industrial ethernet the industrial ethernet communications channel controls the trigger. A plc or hmi triggers the camera tool over an industrial ethernet protocol such as ethernet/ip or profinet. 7.3 focus information...
Page 48
Exposure delay the external light turns on after a user-defined time delay, in milliseconds, after a valid trigger. Available only when the mode is exposure based or time based. Duration the external light is on for a user-defined amount of time, in milliseconds. Available only when the mode is time...
Page 49
8 using the inspection tools: vision tools vision sensor tools include average gray, bead, blemish, blob, edge, locate, match, and object. Click a tool on tools & results or on tools only to access the parameters pane for that tool. The parameters pane contains both an inputs tab and a test tab. Def...
Page 50
Masks add and define a mask to exclude a group of pixels from the tool analysis. Figure 56. Masks parameters a mask created for a tool will not apply to any other tool in the inspection. Up to 10 masks can be added to a tool. 1. Expand masks on the inputs tab. 2. Click . The mask roi automatically d...
Page 51
Tool histogram the tool histogram graphically displays pixel intensity information within the current roi. Figure 59. Example histogram select the tool histogram checkbox to enable the histogram. The default is enabled. Expand the tool histogram parameter to view the histogram. The histogram is a di...
Page 52
Figure 61. Average gray tool—test parameters average grayscale the grayscale value range. Standard deviation the standard deviation range. 8.1.3 average gray tool: results tools & results and all results list information from the current and previous inspections. A red box around a tool indicates th...
Page 53
4. Test a complete range of good and bad samples to make sure that the sensor accepts good parts and rejects bad parts. Figure 62. Average gray—pass figure 63. Average gray—fail 8.2 bead tool use the bead tool to inspect parts for uniformity of adhesive or sealant material, or for uniformity of a ga...
Page 54
Roi the region of interest (roi) is the user-defined group of pixels in the image that the sensor analyzes. Figure 65. Bead tool roi the roi is configurable to follow the desired path of the adhesive or sealant being analyzed. Adjust the width of the roi and set the sample rate. From the list select...
Page 55
The previous threshold value; it will not move the value of the threshold above or below the minimum and maximum limits. Adaptive threshold: bead/blob type defines whether the bead/blob is dark against a relatively brighter background or bright against a darker background. This parameter defines the...
Page 56
Reject level when the bead/blob type is set to bright, use the reject level to narrow the range of pixel intensities to be considered in an inspection. Leaving the defaults at 0 for low and 255 for high means that the tool takes into consideration all grayscale levels in the roi from 0 (black) to 25...
Page 57
These options override the roi view buttons on the image pane parameters when no tool is selected. When a specific tool is selected, the roi information is shown. Hide annotations hides the annotations on the live image for the tool, even when the tool is selected. Figure 72. Show bead tool annotati...
Page 58
8.2.2 bead tool: test parameters use the test parameters to configure the pass/fail conditions for the tool. Select the parameter checkbox to enable it. Where applicable, the vertical green bar shows the current parameter information and the light gray backgrounds show the range over which a value h...
Page 59
Adaptive threshold the grayscale value used to detect the bead when the threshold type is adaptive. If the tool cannot calculate this value, or if the threshold type is fixed, this value displays as --. Execution time the execution time, in milliseconds, for the currently selected tool in the curren...
Page 60
5. Click on a line to add an inline anchor point. A) point to the roi line; the pointer changes to a +. Figure 80. Add inline anchor point b) click to select the location for the new anchor point; is added on the line. Figure 81. Inline anchor point location selected c) click the point again to set ...
Page 61
8. Use the good bead width parameter under characteristics to define the good bead width. Green indicates that the bead width is acceptable. Red indicates that the bead width is too narrow or that a gap exists. Blue indicates that the bead width is too wide. Figure 85. Good, narrow, and wide adhesiv...
Page 62
3. Set the threshold. A) expand the threshold parameters. B) from the threshold type list, select fixed. Select fixed when the lighting and image content remain relatively constant for all inspections. C) from the bead type list, select dark because in this case the adhesive is dark against a bright...
Page 63
5. Set the test parameters to set the pass/fail criteria. A) on the test tab, select the count - good checkbox to enable the test parameter. This option sets the number of good beads that must be present with the tool parameters so that a part passes. B) expand count - good and move the sliders or e...
Page 64
8.3.1 blemish tool: input parameters use the input parameters to configure how the tool analyzes an image. Figure 92. Blemish tool—input parameters roi the region of interest (roi) is the user-defined group of pixels in the image that the sensor analyzes. Figure 93. Roi shape selection resize and ro...
Page 65
Sensitivity set the sensitivity to define how sensitive the sensor is to finding blemish or other edges within the roi. The sensitivity value helps account for light variations that can affect how well the sensor detects edges on inspected parts. Figure 95. Sensitivity the sensitivity scale is from ...
Page 66
Hide masks hides the mask roi when the tool is not selected. Tool histogram the tool histogram graphically displays pixel intensity information within the current roi. Figure 100. Example histogram select the tool histogram checkbox to enable the histogram. The default is enabled. Expand the tool hi...
Page 67
8.3.3 blemish tool: results tools & results and all results list information from the current and previous inspections. A red box around a tool indicates that the tool failed. Status provides information about the specific failure. All results displays the result, time, pass count, and fail count in...
Page 68
6. Test a complete range of good and bad samples to make sure that the sensor accepts good parts and rejects bad parts. Figure 105. Bad part—missing date/lot code 8.4 blob tool use the blob tool to detect and count groups of like-colored pixels within the roi. A user-selected range of brightness lev...
Page 69
Resize and rotate the roi around the feature to be analyzed. Change the shape of the roi to a square, ellipse, or circle as needed by expanding roi on the parameters pane and selecting the desired shape. An roi can be as large as the entire field of view (fov). The roi automatically displays on the ...
Page 70
Adaptive threshold: threshold use the sliders or enter the desired minimum and maximum possible grayscale threshold. The green line is the current threshold value, chosen by the tool, and the sliders represent boundaries beyond which you do not want the tool to move the threshold settings. Reject le...
Page 71
Filters set filters for tool analysis. Figure 113. Blob tool filters discard blobs that touch roi select to exclude blobs that touch the perimeter of the roi. Fill holes within blob select to ignore (by filling) small features such as scratches and glare that might otherwise appear as small imperfec...
Page 72
Tool histogram the tool histogram graphically displays pixel intensity information within the current roi. Figure 117. Example histogram select the tool histogram checkbox to enable the histogram. The default is enabled. Expand the tool histogram parameter to view the histogram. The histogram is a d...
Page 73
Figure 119. Blob tool—test parameters count the number of blobs found. Total area the total area of all of the blobs found. Individual blobs from the specific blob dropdown list, select all blobs, first blob, or specific blob, to view area and centroid information about the blobs. When specific blob...
Page 74
Area the area (a) is a count of the total number of pixels that belong to the blob. Centroid the centroid (x c , y c ) is the point at the center of mass of the blob. For simple blobs such as solid circles, ellipses, or rectangles, this is the center of the shape. For more complicated shapes it is h...
Page 75
This method of counting slightly overestimates the "true" perimeter. For example, a circle with a radius of 100 pixels has a computed perimeter of approximately 660 pixels, compared with the expected value of 628 pixels. If the sensor is configured to convert pixel distances to other units, (for exa...
Page 76
The following table gives a more practical perspective on how to interpret these results. If the sensor is configured to convert pixels to other units, the major and minor axis lengths are given in those units. The major axis angle is always given in degrees. Blob shape meaning of major axis length ...
Page 77
1. Add a blob tool to the inspection. 2. Adjust the roi to frame the first set of pills in the blister pack. Figure 121. Adjust roi 3. Set the threshold. A) expand the threshold parameters. B) from the threshold type list, select fixed. Select fixed when the lighting and image content remain relativ...
Page 78
4. Set the area range. This defines the size range of pixel groups to include or exclude. A) expand the area range parameters. B) move the sliders to define the minimum and maximum size of pixel groups. Yellow indicates that a group of pixels is outside of the set range. Figure 123. Area range 5. Se...
Page 79
8.5 edge tool use the edge tool to detect and count transitions between bright and dark pixels (edges). The edge tool counts the total number of edges, and determines the position of each edge. Edge position information can be used for distance or angle measurements when used with a measure tool. Ex...
Page 80
Roi width the roi width increases in increments of 4 pixels (for example, 1, 5, 9, 13, ...) up to the total fov size. Note that: • narrow rois execute faster but could miss the edge • wide rois are more consistent but don't execute as fast • a wide roi provides an average value/location, which resul...
Page 81
Absolute threshold: edge profile graph figure 131. Absolute threshold—edge profile graph for absolute threshold, the x axis is the length of the roi. The y axis is the actual grayscale value from 0 to 255. The light blue line shows the absolute pixel intensity. The horizontal gray threshold line mov...
Page 82
Relative threshold: edge profile graph figure 133. Relative threshold—edge profile graph for relative threshold, the x axis is the length of the roi. The y axis is the pixel intensity along the roi, with 0% as the darkest pixel in the roi and 100% as the lightest pixel in the roi. The light blue lin...
Page 83
Edge strength threshold: edge profile graph figure 135. Edge strength threshold—edge profile graph for edge strength threshold, the x axis is the length of the roi. The y axis has two measurements. The first is the light blue axis. It represents edge strength, a measure of the rate of change of pixe...
Page 84
Edge profile the edge profile graph changes depending on which threshold type is selected. Refer to the threshold section and the specific threshold types for details on the edge profile graph. Image overlays chose whether to display or hide the annotations or the roi when this tool is not selected....
Page 85
The pass/fail contribution influences the following: • discrete output pass • discrete output fail • pass/fail results counter • pass (green) and fail (red) leds on the sensor select this checkbox if the overall pass/fail status of the inspection is dependent on the current tool. 8.5.2 edge tool: te...
Page 86
8.5.4 using the edge and measure tools follow these steps for an example edge inspection to check the position of a plunger in a syringe. This procedure uses two edge tools and a measure tool to determine the position of the plunger in the barrel. Note: this procedure is an example only. 1. Add an e...
Page 87
7. Add a measure tool. A) expand measure from... And select edge02 from the tool list. B) expand measure to... And select edge01 from the tool list. Figure 145. Measure tool 8. Set the test parameters to set the pass/fail criteria. A) on the test tab, select the distance y checkbox to enable the tes...
Page 88
8.6.1 locate tool: input parameters use the input parameters to configure how the tool analyzes an image. Figure 149. Locate tool—input parameters note that the use as reference parameter appears as an error until the reference point is set. Roi the region of interest (roi) is the user-defined group...
Page 89
Threshold the threshold parameter marks the grayscale transition point. The tool marks the edge where the pixel intensity crosses the threshold level. From the threshold type list, select one of the following: • absolute • relative (default) • edge strength threshold type: relative finds an edge at ...
Page 90
Note: because the pixel intensity is relative to what is seen in the roi, this does not necessarily mean that 0% = pure black or that 100% = pure white. Point to a location on the graph—the corresponding location is the yellow line on the tool roi displayed on the image. Threshold type: absolute fin...
Page 91
Threshold type: edge strength measures the rate of change of grayscale values and needs sharply-defined transitions to find edges. Figure 157. Edge strength threshold parameters edge strength ignores gradual changes in light levels across the tool better than other threshold types and it filters out...
Page 92
Filters set filters for tool analysis. Figure 159. Locate tool filters smoothing runs a rolling average along the roi length. It filters out sharp changes in the edge profile. Note: a high filter number may miss the edge of a narrow line. Minimum edge width filters out small spike-of-intensity chang...
Page 93
Image overlays chose whether to display or hide the annotations or the roi when this tool is not selected. Figure 162. Image overlays—default these options override the roi view buttons on the image pane parameters when no tool is selected. When a specific tool is selected, the roi information is sh...
Page 94
• pass/fail results counter • pass (green) and fail (red) leds on the sensor select this checkbox if the overall pass/fail status of the inspection is dependent on the current tool. 8.6.2 locate tool: test parameters use the test parameters to configure the pass/fail conditions for the tool. Select ...
Page 95
Offset the offset between the edge point and the reference point. Expand offset to see the coordinates of the reference point, the reference angle, the offset point, and the offset angle. Maximum edge strength the greatest rate of change value observed by the tool. Available when the threshold type ...
Page 96
3. Find the edge that you want the tool to locate. A) expand the edge profile parameters. Use the graph as a guide for the remaining steps. To make sure that you find the edge you want, observe how the edge profile graph changes as the inputs change. Point to a location on the graph—the correspondin...
Page 97
10. Add a measure tool to measure from edge02 (the left side of the vial) to edge03 (the right side of the vial). Figure 173. Measure tool from edge02 to edge03 11. Add a measure tool to measure from edge01 to measure01 to determine the position of the stopper in the vial. Figure 174. Measure tool f...
Page 98
8.7 match tool use the match tool to verify that a pattern, shape, or part in any orientation matches a reference pattern. The match tool can also compensate for translation and rotation of downstream tools (if selected). The reference pattern is taught during setup. A reference pattern might includ...
Page 99
Search roi the search region of interest (roi) is the user-defined group of pixels in the image that the sensor analyzes. Figure 179. Search roi the search roi is indicated by a red or green box that is always rectangular. By default the search roi is 20% to 30% larger than the teach roi, which is b...
Page 100
Percent match set the percent match to indicate the quality of the match (10% is a slight match; 100% is a perfect match). The default is 60%. Figure 183. Percent match rotation range select the range within which the pattern may be rotated and still count as a match to the reference image. The defa...
Page 101
Use as reference choose whether to use this tool as a reference for other tools. Figure 187. Use as reference—no reference point set figure 188. Use as reference—reference point set adjust downstream tool rois select adjust downstream tool rois to have tools added after this tool use the this tool t...
Page 102
Tool histogram the tool histogram graphically displays pixel intensity information within the current roi. Figure 192. Example histogram select the tool histogram checkbox to enable the histogram. The default is enabled. Expand the tool histogram parameter to view the histogram. The histogram is a d...
Page 103
Figure 194. Match tool—test parameters count the number of matching patterns. Individual matches specific match—select first match or specific match. Centroid x—the location of the point of the center of mass of the selected match on the x axis. Centroid y—the location of the point of the center of ...
Page 104
8.7.4 using the match tool follow these steps for an example match inspection. The match tool requires that a reference pattern be taught during set up. The match tool uses two rois. The larger, green/red roi is the search roi and defines the area that the sensor searches for the desired feature. Th...
Page 105
3. On the parameters pane, expand pattern and click teach. Figure 196. Teach required figure 197. Pattern taught note: if the inspection uses more than one match tool, teach only one match tool at a time. "applying changes" displays, and then the reference pattern displays in the pattern pane and to...
Page 106
10. Test a complete range of good and bad samples to make sure that the sensor accepts good parts and rejects bad parts. Figure 199. Rotated good part figure 200. Bad part—missing letter 8.7.5 using remote teach with the match tool if multiple match tools are used in the same inspection, remote teac...
Page 107
Roi the region of interest (roi) is the user-defined group of pixels in the image that the sensor analyzes. Figure 202. Roi parameters the roi is a line of pixels that can be shortened, lengthened, or widened as needed for the inspection. Tool analysis follows the direction of the arrow. Set the wid...
Page 108
Relative threshold: percent choose the percentage value at which the edge should be marked. Object type select the type of object the inspection is looking for. • bright—finds objects brighter than the threshold value • dark—finds objects darker than the threshold value • bright or dark—finds any ob...
Page 109
Absolute threshold: value enter a specific grayscale value from 0 to 255. Object type select the type of object the inspection is looking for. • bright—finds objects brighter than the threshold value • dark—finds objects darker than the threshold value • bright or dark—finds any object absolute thre...
Page 110
• dark—finds objects darker than the threshold value • bright or dark—finds any object edge strength threshold: edge profile graph figure 210. Edge strength threshold—edge profile graph for edge strength threshold, the x axis is the length of the roi. The y axis has two measurements. The first is th...
Page 111
Edge profile the edge profile graph changes depending on which threshold type is selected. Refer to the threshold section and the specific threshold types for details on the edge profile graph. Image overlays chose whether to display or hide the annotations or the roi when this tool is not selected....
Page 112
Inspection pass/fail select the contribute to inspection pass/fail check box (default) if the tool will influence the pass/fail status of the inspection. Figure 216. Inspection pass/fail the pass/fail contribution influences the following: • discrete output pass • discrete output fail • pass/fail re...
Page 113
Total widths the minimum and maximum total widths of the objects found. Expand total widths to view the widths and location of the objects found. Dark widths the minimum and maximum widths of the dark objects found. Expand dark widths to view the widths and location of the dark objects found. Bright...
Page 114
5. Test a complete range of good and bad samples to make sure that the sensor accepts good parts and rejects bad parts. Figure 219. Good part figure 220. Bad part—bent pin ve series smart camera 114 www.Bannerengineering.Com - tel: 763.544.3164.
Page 115
9 using the inspection tools: analysis tools analysis tools include math, measure, and logic. Click a tool on tools & results or tools only to access the parameters pane for that tool. 9.1 math tool use the math tool to perform basic arithmetic and inequality expressions, and calculate statistical i...
Page 116
Table 3: dual operand operations dual operand operations require two inputs (operand a and operand b). For each operand, specify the tool (or a constant) and the specific attribute of interest for that tool. Operator summary description a + b 1 + 1 = 2 add a - b 1 - 1 = 0 subtract a * b 1 × 1 = 1 mu...
Page 117
Operand b choose the second variable from the vision tools in the inspection, or select a user-defined constant value. Figure 224. Operand b inspection pass/fail select the contribute to inspection pass/fail check box (default) if the tool will influence the pass/fail status of the inspection. Figur...
Page 118
Integer result the integer value result of the math tool operation. Decimal result the decimal result of the math tool operation. Boolean the boolean result for the math tool operation. Execution time the execution time, in milliseconds, for the currently selected tool in the current inspection. Exp...
Page 119
9. Set the test parameters to set the pass/fail criteria. A) on the test tab, select the boolean checkbox. This option sets whether the mathematical expression is true or false so that the part passes. B) select true. Edge01 must find more edges than edge02 for a part to pass. 10. Test a complete ra...
Page 120
Intersect two lines in this operation, the results of the intersection of two lines is generated. These results are: • the angle of intersection between the two lines, measure from line 1 to line 2 • the intersection point, even if this point in not in the image how the tool measures two lines this ...
Page 121
Measure from... Select either a constant or another tool where the measure tool will start measuring from. Figure 232. Measure from...—specific tool selected if selecting a constant, enter the x and y coordinates to begin the measurement from. The coordinates are entered in pixels, however if units ...
Page 122
Figure 236. Show measure tool annotations figure 237. Hide measure tool annotations inspection pass/fail select the contribute to inspection pass/fail check box (default) if the tool will influence the pass/fail status of the inspection. Figure 238. Inspection pass/fail the pass/fail contribution in...
Page 123
Distance the straight-line distance between two constants or tools. Distance x the x dimension vector component of the straight line distance. Distance y the y dimension vector component of the straight line distance. Angle the angle with respect to the x axis, along which the straight line measurem...
Page 124
3. Set the threshold. A) expand the threshold parameters. B) set the threshold type to edge strength. C) leave edge strength at the default (20). D) select bright to dark from the edge polarity list. The tool finds the top of the plunger. 4. Add a second edge tool. 5. Adjust the roi position, length...
Page 125
10. Test a complete range of good and bad samples to make sure that the sensor accepts good parts and rejects bad parts. Figure 244. Good part figure 245. Bad part—plunger too high 9.3 logic tool use the logic tool to combine or convert tool results, or to drive discrete outputs from tool results. T...
Page 126
Operator select the type of logical expression used for the logic tool operator. Figure 247. Operator operator summary/examples description and (all) and(true, true, true)=true and(true, false, true)=false a true output results if all inputs are true. Or (any) or(true, true, true)=true or(true, fals...
Page 127
Inspection pass/fail select the contribute to inspection pass/fail check box (default) if the tool will influence the pass/fail status of the inspection. Figure 250. Inspection pass/fail the pass/fail contribution influences the following: • discrete output pass • discrete output fail • pass/fail re...
Page 128
1. Add a match tool to the inspection. A) configure match01 to recognize the logo on the small box. B) expand inspection pass/fail and remove the checkmark to disable the parameter. C) on the test tab, select the count checkbox to enable the count test parameter. D) expand count and set it to a mini...
Page 129
15. Expand the i/o summary so that you can see the results. Figure 254. I/o summary—small box passes with output figure 255. I/o summary—large box passes with no output 16. Test a complete range of good and bad samples to make sure that the sensor accepts good parts and rejects bad parts. Ve series ...
Page 130: 10 Emulators
10 emulators use emulators on the home screen to connect to the emulator. Figure 256. Emulators click to connect to the desired emulator. This tab also displays the image location on the computer, as well as the emulator version information. Click under image location to change the directory for the...
Page 131: 11 Sensor Display
11 sensor display the lcd display on the top of the sensor provides access to view or change several settings without using vision manager. The display provides limited programming options: • ether—ethernet settings • pchange—product change • io—input/output settings • image—image settings • info—se...
Page 132: Top Menu
11.3 sensor menu enter shortcuts menu no yes yes 100 hd 100 fd focus# home screen ether pchange io ve series user interface enter top menu top menu image info sub menus or or go back to parent menu select menu item press to save setting press and hold to go back to home screen speed link subnet gate...
Page 133
11.4 ethernet menu (ether) use this menu to view or change network connection information. Status link—view the connection status (up or none). Up indicates that an ethernet link as been established. None indicates that a link has not been established. Speed—view the speed (100hd/100fd/1000fd). Ip v...
Page 134
Fw ver view the firmware version. Boot view the boot number. Hour view the hour count. Serial view the sensor serial number. 11.9 system error menu (syserr) use this menu to view or clear system errors, when present. View view the latest system error, when present. Clear select yes to clear a system...
Page 135: 12 Communications Guide
12 communications guide 12.1 communication summary the ve series camera communicates with other devices via ethernet. To establish an ethernet connection to the sensor, the external device must be configured with the correct ip address and support a communication protocol supported by the sensor. 12...
Page 136
During the image export operation the sensor's output channels might become full. This can occur if the sensor is producing export data (images) faster than the data can be exported from the device (due to bandwidth limitations) or faster than the client is reading the channel export data. The hold ...
Page 137
5. In internet protocol (tcp/ipv4) properties, select use the following ip address. 6. Make sure that the ip address is 192.168.0.2, and the subnet mask is 255.255.255.0. 12.2.3 communications channel ports the following is the default ethernet port setting for the communication channels: image expo...
Page 138
13 industrial ethernet overview 13.1 industrial ethernet setup 13.1.1 set the industrial ethernet protocol (ethernet/ip, profinet ® , modbus/tcp, pccc) the industrial ethernet communication channel is disabled by default. To enable this channel, use the following instructions: 1. From the system set...
Page 139
• read output indicators (pass/fail/ready/error) • read counters (pass, fail, error code, missed trigger, frame count, inspection time) 13.2.1 sensor input values the ve series camera operation can be controlled through input bits. Table 6: input bits the following commands can be executed only usin...
Page 140
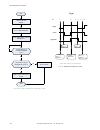
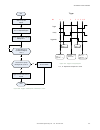
No write 0 to input bits register start make sure camera is ready – bit 0 is set to 1 in output bits register execute trigger: set bit 2 of the input bits register to 1 trigger successful. Read values as required is trigger ack (bit 2 in input bits ack register) set to 1? Yes no read error code. Cor...
Page 141
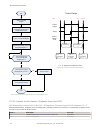
No write 0 to input bits register start make sure camera is ready – bit 0 is set to 1 in output bits register execute teach latch: set bit 1 of the input bits register to 1 teach latch successful. The next valid trigger teaches camera the new condition. After that trigger, examine bit 1 in the outpu...
Page 142
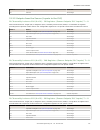
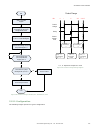
No write 0 to input bits register start write desired program number (as a 32-bit integer) into the product change number location make sure camera is ready – bit 0 is set to 1 in output bits register execute product change: set bit 0 of the input bits register to 1 product change successful is prod...
Page 143
Word # word name data type 3-5 reserved 16-bit integer 13.3.2 outputs from the sensor (inputs to the plc) plc assembly instance 100 (0×64) - 30 registers (sensor outputs/plc inputs) t > o data transfer direction: target (ve) to originator (plc). Assembly instance 100 (0×64) is a small block of regis...
Page 144
Word # word name data type 8-9 pass count 32-bit integer 10-11 fail count 32-bit integer 12-13 missed triggers 32-bit integer 14-15 current inspection time 32-bit float 16 sensor pass/fail bits (see sensor pass/fail bits on page 144) 16-bit integer 17-59 user-defined (see tool-specific results: ethe...
Page 145
Figure 265. Industrial protocols tab—ethernet/ip the results are configurable only for the current inspection. However, all user-defined results in the custom map are shown on the industrial protocols tab whether or not they are included in the current inspection. To make changes to a different insp...
Page 146
Tool name select the desired tool name from the list. The list includes the tools available in the current inspection only. Select a different inspection from the inspection list, if necessary. Result the information to output. Data type the type of information to output. Actions click to delete a r...
Page 147
3. Select the register an eds file(s) option. Figure 267. Rockwell automations's esd wizard—options 4. Browse to locate the eds file and click next. If vision manager is installed on the computer, a copy of the eds file is available at c: > users > public > documents > banner vision manager > ve ser...
Page 148
5. Click next to register the tested file. Figure 269. Register the tested file 6. Click next when you see the icon associated with the eds file. Figure 270. Rockwell automations's esd wizard ve series smart camera 148 www.Bannerengineering.Com - tel: 763.544.3164.
Page 149
7. Click next to register the eds file. Figure 271. Register the eds file 8. Click finish to close the eds wizard window. 9. Right-click on the plc's ethernet adapter and select new module... Figure 272. New module ve series smart camera www.Bannerengineering.Com - tel: 763.544.3164 149.
Page 150
10. Locate ve series camera from the catalog and click create. Figure 273. Select module type 11. Enter a name, description (optional), and ip address for the ve series camera. Figure 274. New module ve series smart camera 150 www.Bannerengineering.Com - tel: 763.544.3164.
Page 151
12. Click change in the module definition field. Figure 275. Module definition 13. Select the desired connection in the module definition window. Each of the items in the name list represents a fixed grouping of input and output assembly instances: small assemblies • o>t plc input/sensor output asse...
Page 152
13.3.10 rslogix5000 configuration to create an implicit class 1 configuration to the ve series camera using eip when using a controllogix family plc, configure the ve as a “generic ethernet module” under the enet_module. The following is a sample setup of a banner sensor: 1. Add a generic ethernet m...
Page 153
Figure 279. Select module 3. Configure module properties. Note: the data type in the comm format must be changed to an int. See inputs to the sensor (outputs from the plc) on page 142 and outputs from the sensor (inputs to the plc) on page 143 for more information on each specific assembly instance....
Page 154
Figure 280. Plc input assembly (100), plc output assembly (112) figure 281. Plc input assembly (101), plc output assembly (113) ve series smart camera 154 www.Bannerengineering.Com - tel: 763.544.3164.
Page 155
Figure 282. Plc input assembly (102), plc output assembly (114) figure 283. Select or deselect unicast connection as desired note: the minimum allowed rpi is 50 ms. 4. If the module configuration was successful, the following information should display: ve series smart camera www.Bannerengineering.C...
Page 156
Figure 284. Successful configuration if the module configuration was not successful, the rslogix 5000 software will indicate errors similar to the following: figure 285. Error: assembly instance number and/or size incorrect figure 286. Error: ve series camera not powered up or ethernet cable not att...
Page 157
C = configuration (not used) i = inputs to plc (outputs from the sensor) o = outputs from plc (inputs to the sensor) figure 287. Memory map ve series smart camera www.Bannerengineering.Com - tel: 763.544.3164 157.
Page 158
The ve series camera memory map expanded. I = inputs to plc (outputs from the sensor). Figure 288. Memory map expanded 13.4 modbus/tcp the modbus/tcp protocol provides device information using register and coil banks defined by the slave device. This section defines the register and coil banks. By s...
Page 159
Table 11: input bits (coils 00001-00016) 05: force single coil register bit position word name 00001 0 product change 00002 1 teach latch 00003 2 trigger 00004 3 reserved 00005 4 reserved 00006 5 reserved 00007 6 reserved 00008 7 reserved 00009 8 reserved 00010 9 reserved 00011 10 reserved 00012 11 ...
Page 160
02: read input status register bit position word name 10018 1 pass/fail 10019 2 reserved 10020 3 ready latch 10021 4 reserved 10022 5 output 1 10023 6 output 2 10024 7 output 3 10025 8 output 4 10026 9 output 5 10027 10 reserved 10028 11 reserved 10029 12 missed trigger 10030 13 teach error 10031 14...
Page 161
No write 0 to input bits register start make sure camera is ready – bit 0 is set to 1 in output bits register execute trigger: set bit 2 of the input bits register to 1 trigger successful. Read values as required is trigger ack (bit 2 in input bits ack register) set to 1? Yes no read error code. Cor...
Page 162
No write 0 to input bits register start make sure camera is ready – bit 0 is set to 1 in output bits register execute teach latch: set bit 1 of the input bits register to 1 teach latch successful. The next valid trigger teaches camera the new condition. After that trigger, examine bit 1 in the outpu...
Page 163
No write 0 to input bits register start write desired program number (as a 32-bit integer) into the product change number location make sure camera is ready – bit 0 is set to 1 in output bits register execute product change: set bit 0 of the input bits register to 1 product change successful is prod...
Page 164
06: preset single register or 16: preset multiple registers reg # word name data type 2-3 product change number 32-bit integer 4-500 reserved 16-bit integer 13.4.2 sensor output values the ve series camera sends output data to the plc or hmi via a bank of input registers (30000). Some devices, like ...
Page 165
Read-only status bits are outputs from the ve series camera (inputs to the plc or hmi). They are used to report the basic status of the sensor and the last inspection run. This information is available as input registers or holding registers. Use either function code 04 (read input registers) or fun...
Page 166
The results are configurable only for the current inspection. However, all user-defined results in the custom map are shown on the industrial protocols tab whether or not they are included in the current inspection. To make changes to a different inspection, switch to the desired inspection and then...
Page 167
No write 0 to input bits register start make sure camera is ready – bit 0 is set to 1 in output bits register execute trigger: set bit 2 of the input bits register to 1 trigger successful. Read values as required is trigger ack (bit 2 in input bits ack register) set to 1? Yes no read error code. Cor...
Page 168
No write 0 to input bits register start make sure camera is ready – bit 0 is set to 1 in output bits register execute teach latch: set bit 1 of the input bits register to 1 teach latch successful. The next valid trigger teaches camera the new condition. After that trigger, examine bit 1 in the outpu...
Page 169
No write 0 to input bits register start write desired program number (as a 32-bit integer) into the product change number location make sure camera is ready – bit 0 is set to 1 in output bits register execute product change: set bit 0 of the input bits register to 1 product change successful is prod...
Page 170
Plc read message command this controller communications command = plc5 read data table address = integer table "nx" target device data table address = n7:x figure 302. General tab: example message command reading from n7 table on the ve and sending the data to the n7 table on the plc ve series smart...
Page 171
To address = ip address of the sensor figure 303. Multihop tab: ip address of the ve is entered here ve series smart camera www.Bannerengineering.Com - tel: 763.544.3164 171.
Page 172
Plc write message command this controller communications command = plc5 write data table address = integer table "nx" target device data table address = n14:x figure 304. General tab: example message command writing to n14 table on the ve from the n14 table of the plc ve series smart camera 172 www....
Page 173
To address = ip address of the sensor figure 305. Multihop tab: ip address of the ve is entered here 13.5.2 inputs to the sensor (outputs from the plc) the registers below are used by the plc to push values to the ve series camera. Msg (message) commands are used to write (n14) to the sensor. Table ...
Page 174
Word # word name data type 14-15 current inspection time float 16 sensor pass/fail bits (see sensor pass/fail bits on page 144) 16-bit integer 17-500 user-defined (see tool-specific results: pccc on page 174) 16-bit integer 13.5.4 input and output bits the input bits are used to command execution of...
Page 175
Figure 306. Industrial protocols tab—pccc the results are configurable only for the current inspection. However, all user-defined results in the custom map are shown on the industrial protocols tab whether or not they are included in the current inspection. To make changes to a different inspection,...
Page 176
Tool name select the desired tool name from the list. The list includes the tools available in the current inspection only. Select a different inspection from the inspection list, if necessary. Result the information to output. Data type the type of information to output. Actions click to delete a r...
Page 177
13.6.4 description of modules and submodules table 26: module slot assignment module slot 1 ve control and status module slot 2 ve output module table 27: ve control and status module (ident 0×00000010) submodule notes subslot 1 ve inspection results submodule always present. Subslot 2 ve device con...
Page 178
13.6.5 description of submodules ve inspection results submodule the ve inspection result submodule contains inspection results and sends input data into the controller (plc). This submodule is plugged into slot 1 subslot 1 and cannot be removed. Table 29: ve inspection result submodule (ident 0x010...
Page 179
Ve device control submodule the ve device control submodule contains controller (plc) input and output data, including device controls for the ve. The device control submodule is plugged into slot 1, subslot 2 by default but it can be removed. Table 30: ve device control submodule (ident 0x0001) plc...
Page 180
No write 0 to device control command word start make sure camera is ready – bit 0 is set to 1 in inspection status word execute trigger: set bit 2 of the device command word to 1 trigger successful. Read values as required is trigger ack (bit 2 in device control ack word) set to 1? Yes no read error...
Page 181
No write 0 to device control command word start make sure camera is ready – bit 0 is set to 1 in inspection status word execute teach latch: set bit 1 of the device command word to 1 teach latch successful. The next valid trigger teaches camera the new condition. After that trigger, examine bit 1 in...
Page 182
No write 0 to device control command word start write desired program number (as a 32-bit integer) into the product change number location make sure camera is ready – bit 0 is set to 1 in inspection status word execute product change: set bit 0 of the device command word to 1 product change successf...
Page 183
Submodule plc input data plc output data name ident no. Name type name type 32-byte custom map 0×00029 user-mapped sensor result data block 32-byte octetstring not applicable not applicable 64-byte custom map 0×00030 user-mapped sensor result data block 64-byte octetstring not applicable not applica...
Page 184
Inspection slot # shows whether this tool result applies to the current inspection only (inspection number) or to any inspection (any) that includes the selected tool. An inspection slot # of any means that if an inspection includes a tool with the exact name (for example, averagegray01), the result...
Page 185
4. Click devices & networks after the project has been uploaded. Figure 314. Devices and networks 5. Click configure networks. Figure 315. Configure networks network view displays. Ve series smart camera www.Bannerengineering.Com - tel: 763.544.3164 185.
Page 186
6. Click options and select install general station description file (gsd). Figure 316. Options—install the gsd the install general station description file window opens. 7. Click the browse button (...) to the right of the source path field. Figure 317. Manage gsd files 8. Navigate to c: > users > ...
Page 187
10. Click install. Figure 318. Hardware catalog the system installs the ve gsd file and places it in the hardware catalog. In the above example, the ve gsd file is located under other field devices > profinet io > sensors > banner engineering corp. > banner vision sensors > ve series vision sensor >...
Page 188
4. Click devices & networks after the project has been uploaded. Figure 319. Devices and networks 5. Click configure networks. Figure 320. Configure networks network view displays. Note: for step 6 through step 10, network view must be open. Ve series smart camera 188 www.Bannerengineering.Com - tel...
Page 189
6. Locate the ve series camera in the hardware catalog. Figure 321. Hardware catalog in the above example, the ve device is located under other field devices > profinet io > sensors > banner engineering corp. > banner vision sensors > ve series vision sensor > ve series > ve. 7. Select the device an...
Page 190
1. Start the siemens tia portal (v13) software. 2. Click open existing project. 3. Select a project an open it. 4. Click devices & networks after the project has been uploaded to go to network view. Figure 323. Network view network view displays. 5. Double-click on the ve icon to open the device vie...
Page 191
12. Right-click on the device icon and select online & diagnostics. Figure 326. Select online & diagnostics figure 327. Online & diagnostics the online & diagnostics window displays. 13. Select assign ip address under functions. 14. Click accessible devices. Figure 328. Assign ip address—accessible ...
Page 192
16. Click apply. Figure 329. Select the device and apply changes the ip address for the device is updated. 17. Click assign ip address to complete the step. This step is completed for every device. Changing the device name use these instructions to change the name of the ve device, using the siemens...
Page 193
6. Deselect generate profinet device name automatically. Figure 332. Profinet device name 7. Enter a unique name in the profinet device name field. 8. Enter a unique device number in the device number field. Note: each device number is used only once. 9. Right-click on the device icon and select onl...
Page 194
12. Click assign name to start the process. The name is assigned. Figure 335. Assign name 13.7 troubleshooting 13.7.1 industrial ethernet error codes the ve series camera camera provides error codes when coil bit commands fail to execute successfully. If such an error occurs, the execution error fla...
Page 195
6. Click the accessible devices icon. The accessible devices window opens. 7. Select an interface connection in the type of the pg/pc interface list. 8. Select an interface connection in the pg/pc interface list. Figure 336. Pg/pc interface the pc scans the network for profinet ® devices. If the dev...
Page 196
2. Select a message in the table, display cpu time stamps in pg/pc local time. Figure 339. Diagnostics buffer the respective information displays in the description field under details on event. 3. Read the message to learn about the error and resolve it. When the error is resolved, the icon that co...
Page 197: 14 Troubleshooting
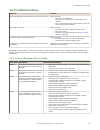
14 troubleshooting problem solution the vision manager software will not connect to my sensor make sure that: • the sensor is powered on • the sensor is connected to the computer or the network • you are connecting to the correct sensor (verify the sensor name and ip address) the image is not clear ...
Page 198
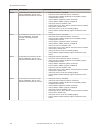
Error code description recommended solution 10011 a connection to the sensor could not be established. One or more required channels failed to connect • verify the sensor is energized • verify the sensor ethernet cable is connected • verify all inline network equipment is energized, properly configu...
Page 199
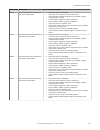
Error code description recommended solution 10022 the connection to the sensor was lost while sending data. • verify the sensor is energized • verify the sensor ethernet cable is connected • verify all inline network equipment is energized, properly configured and connect • verify network equipment ...
Page 200
Error code description recommended solution 10026 the connection to the sensor was lost while receiving data. • verify the sensor is energized • verify the sensor ethernet cable is connected • verify all inline network equipment is energized, properly configured and connect • verify network equipmen...
Page 201
Error code description recommended solution 10053 the connection to the sensor was lost while receiving data. • verify the sensor is energized • verify the sensor ethernet cable is connected • verify all inline network equipment is energized, properly configured and connect • verify network equipmen...
Page 202
Error code description recommended solution 10086 the connection to the sensor was lost while receiving data. • verify the sensor is energized • verify the sensor ethernet cable is connected • verify all inline network equipment is energized, properly configured and connect • verify network equipmen...
Page 203
Error code description recommended solution 10120 the connection to the sensor was closed by this application due to a internal processing error. • install a newer version of this application • verify the device at the specified ip address is a banner vision sensor • verify the sensor's firmware ver...
Page 204
Error code description recommended solution 10912 the firmware update process timed out. • verify the sensor is energized • verify sensor not stalled, or in shutdown mode • reboot the sensor 20000 an application error occurred while refreshing the display. An unhandled exception was detected. Go to ...
Page 205
Error code description recommended solution 20073 an application error occurred while refreshing the display. There was a problem releasing display elements. Go to sensor neighborhood and reconnect to the sensor. 20100 there was a problem using the specified file. Verify user has access to the file....
Page 206
Error code description recommended solution 20208 downloading the inspection from the sensor failed due to a timeout. • reboot the sensor • verify the sensor ethernet cable is connected • verify all inline network equipment is energized, properly configured and connect • verify network equipment cab...
Page 207
Error code description recommended solution 20231 a firmware update error was detected. • verify the sensor is energized • verify sensor not stalled, or in shutdown mode • reboot the sensor • verify the sensor ethernet cable is connected • verify all inline network equipment is energized, properly c...
Page 208: 15 Accessories
15 accessories 15.1 cordsets all measurements are listed in millimeters [inches], unless noted otherwise. Power, discrete i/o cordsets i/o sealed high-flex cordsets, 12 flying leads 12-pin m12/euro-style cordsets with open shield model length style dimensions pinout (female) mqdc2s-1206 1.83 m (6 ft...
Page 209
Smbvera • right-angle mounting bracket with curved slots • 12-gauge stainless steel • m3 × 0.5 mounting hardware included 81 73 47 4xø3.5 1/4-20 smbvemp • painted black aluminum • adapter holes for mounting hardware 4 x ø3.3 thru ø7.0 2 x m8 x 1.25 3 x 10-32 2 x 1/4-20 7 60 88 15.3 lenses additional...
Page 210
Fov horizontal ver tical wd figure 340. Working distance and field of view 15.3.2 1.3 mp lens working distance and field of view for use with ve201g1a models. Table 35: c-mount megapixel lens focal length—working distance and field of view 6 mm 8 mm 12 mm 16 mm 25 mm 35 mm 50 mm 75 mm wd (mm) approx...
Page 211
Fov horizontal ver tical wd figure 342. Working distance and field of view 15.4 c-mount lens filter models use filters to improve the image contrast and system reliability in vision applications. For additional filter information, see p/n 173239. Family color - size flt b470 ( blue) g525 (green) i85...
Page 212
15.6 display cover use the display cover to protect the display and buttons from the elements. Vedc-bd • painted anodized aluminum with borosilicate glass window • mounting hardware included 15.7 ring lights for additional ring light information, see p/n 192656 for standard lights and p/n 192657 for...
Page 213
15.9 product cd part number description 97733 cd that includes the vision manager software and applicable documentation. Available for purchase for those without access to download the software and documentation from the internet. Ve series smart camera www.Bannerengineering.Com - tel: 763.544.3164 ...
Page 214
16 product support and maintenance 16.1 repairs contact banner engineering for troubleshooting of this device. Do not attempt any repairs to this banner device; it contains no field-replaceable parts or components. If the device, device part, or device component is determined to be defective by a ba...
Page 215
Mexico address: banner engineering de mexico monterrey head office edificio vao av. David alfaro siqueiros no.103 col. Valle oriente c.P.66269 san pedro garza garcia, nuevo leon, mexico phone: +52 81 8363 2714 or 01 800 bannere (toll free) website: www.Bannerengineering.Com.Mx email: mexico@banneren...
Page 216: Index
Index a absolute threshold edge profile 81, 90, 109 value 80, 90, 109 active sensors tab 22 adaptive threshold bead type 55, 69 blob type 55, 69 all results 29 area 74 area range 70 auto exposure 45 average gray tool test parameters 51 input parameters 49–51 results 52 using 52 b backup 25, 130 bead...
Page 217
Transfer 33 inspection logs sources 30 inspection logs screen 30, 31 inspection management screen 31–33 inspection results 178 interface 131 interface module 212 io 133 l lens 1.3 mp 210 2 mp 210 cover 12, 211 filter 12, 211 wvga 209 light ring 12, 212 locate tool input parameters 88–93 results 94 t...
Page 218
System settings screen 34, 36–39, 41, 42, 44 t tab about 26 active sensors 22 all results 29 favorites 23 network adapters 24 tools & results 28 tools only 28 teach , see remote teach teach roi 99 test average gray tool 51 bead tool 58 blemish tool 66 blob tool 72 edge tool 85 locate tool 94 logic t...

