- DL manuals
- Banner
- Security Camera
- VE200G1A
- Instruction manual
Banner VE200G1A Instruction manual
Summary of VE200G1A
Page 1
Ve series smart camera instruction manual original instructions 191666 rev. D 7 june 2017 © banner engineering corp. All rights reserved 191666.
Page 2: Contents
Contents 1 product description .........................................................................................................................................................6 1.1 models ..........................................................................................................
Page 3
7.4 external strobe .................................................................................................................................................................................... 49 7.5 camera tool: results ..........................................................................
Page 4
9.3.3 logic tool: results ................................................................................................................................................................ 138 9.3.4 using the logic tool .....................................................................................
Page 5
15 accessories ................................................................................................................................................................. 223 15.1 cordsets ............................................................................................................
Page 6: 1 Product Description
1 product description self-contained smart camera with user-friendly vision manager software • banner’s free and easy-to-use vision manager software provides a number of tools and capabilities that enable ve series smart cameras to solve a wide range of vision applications, such as item detection, p...
Page 7: 2 Overview
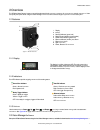
2 overview the ve series smart camera is easy to use and has advanced visual inspection capabilities for automation or control applications. Users can quickly set up the sensor using the vision manager software to solve a diverse range of applications on the factory floor. 2.1 features 1 2 3 4 5 7 6...
Page 8
This easy-to-use image processing software provides a variety of tools and capabilities to solve a wide range of vision applications such as item detection, part positioning, feature measurement and flaw analysis. Run-time editing allows you to make changes to an inspection while the sensor is runni...
Page 9
3 specifications and requirements 3.1 specifications power 12 v dc to 30 v dc (24 v dc ± 10% if a banner light source is powered by the sensor) current: 400 ma maximum (exclusive of load and lights) use only with a suitable class 2 power supply, or current limiting power supply rated 12 v dc to 30 v...
Page 10
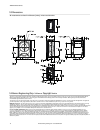
3.3 dimensions all measurements are listed in millimeters [inches], unless noted otherwise. 3.4 banner engineering corp. Software copyright notice this software is protected by copyright, trade secret, and other intellectual property laws. You are only granted the right to use the software and only ...
Page 11
3.5 additional copyright information the vision manager software includes code that is copyright (c) 1985, 1989 regents of the university of california. All rights reserved. Redistribution and use in source and binary forms, with or without modification, are permitted provided that the following con...
Page 12
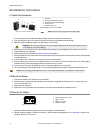
4 installation instructions 4.1 install the accessories 1 2 3 5 4 figure 3. Install the accessories 1. Ve sensor 2. O-ring (used with the lens cover) 3. C-mount lens (available separately) 4. Filter (optional) 5. Lens cover (optional) an external light (optional) is not shown. Note: a lens cover and...
Page 13
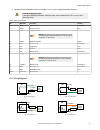
3. Connect the external light cable (optional) to the light connection (2) if the light is powered by the sensor. Caution: use appropriate power if the light is powered by the sensor, the sensor power source must be 24 v dc. This connection is for banner lights only. Table 1: power and i/o pinouts p...
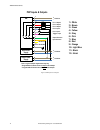
Page 14: Pnp Inputs & Outputs
Pnp inputs & outputs + - + + - - ve input power supply output power supply this is a typical example. Applications may vary. *programmable i/o shown set as an output in this example **programmable i/o shown set as an input in this example 1 = white 2 = brown 3 = green 4 = yellow 5 = gray 6 = pink 7 ...
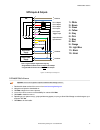
Page 15: Npn Inputs & Outputs
Npn inputs & outputs + - rs-232 tx rs-232 rx + + - - ve input power supply output power supply this is a typical example. Applications may vary. *programmable i/o shown set as an output in this example **programmable i/o shown set as an input in this example 1 = white 2 = brown 3 = green 4 = yellow ...
Page 16: 5 Getting Started
5 getting started power up the sensor, and verify that the power/error led is on green and that the ethernet indicator is on amber to verify the ethernet connection. 5.1 connect to the sensor these instructions use windows ® operating system version 7, 8, or 10. 5 1. Confirm the network connections....
Page 17
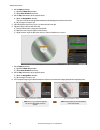
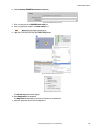
1. Make sure that the lighting is appropriate for your target. Use supplementary lighting, such as a ring light, if necessary. 2. Click the sensor screen. 3. Click the camera tool on tools and results. The inputs parameters display. 4. Set the trigger. A) expand the trigger parameters. B) in the tri...
Page 18
2. Click the desired tool. Tool name description average gray evaluates pixel brightness within an roi and computes the average grayscale value. See average gray tool on page 51. Bead inspects parts for uniformity of adhesive or sealant material, or for uniformity of a gap. See bead tool on page 55....
Page 19
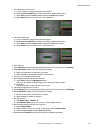
5.3.3 name an inspection the default inspection name is inspection01, inspection02, and so on. Rename the inspection to something meaningful to the application. 1. Click inspection management, then click manage. Figure 12. Manage 2. Double-click the name of the desired inspection. 3. Enter the new i...
Page 20
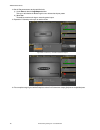
5.3.5 modify a currently running inspection 1. On the sensor screen, select the desired inspection from the inspection list. The inspection tools and parameters display. 2. Make the desired modifications to the inspection. Important: changes are automatically saved as they are made. Save a copy of t...
Page 21
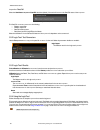
3. Click . The inspection name turns red and "inspection marked for deletion" displays. Figure 14. Inspection marked for deletion 4. Click to another tab to delete the inspection, or click undo to keep the inspection. 5.4 configure the discrete i/o from the system settings screen, select discrete i/...
Page 22: 6 Vision Manager Workspace
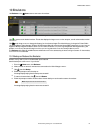
6 vision manager workspace vision manager has five main working areas, or screens: • home screen on page 22—the home screen provides access to connect to a sensor or emulator, update firmware, and view sensor and vision manager software information. • sensor screen on page 26— the sensor screen disp...
Page 23
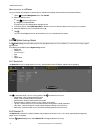
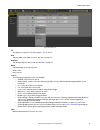
Figure 17. Active sensors tab to connect to a sensor, click next to the desired sensor. To disconnect from a sensor, click . To view or change sensor status, mac address, sensor name, ip address, subnet mask, and gateway, click . To add the sensor to a favorites group, click . The icon changes to . ...
Page 24
Figure 19. Network adapters tab network adapter information including link status (connected/not connected), adapter name, ip address, and subnet mask is also available. 6.1.2 sensor maintenance use sensor maintenance on the home screen to update the firmware on a sensor and to backup or restore the...
Page 25
4. Follow the prompts to save a backup file. A message displays saying that the backup was successful. 5. To restore the sensor data, click , then click restore. 6. Follow the prompts to restore the sensor data. An emulator backup file can be used to restore the sensor. Note: this process can take s...
Page 26
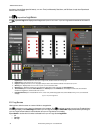
6.2 sensor screen the sensor screen displays the information needed to create or modify an inspection. 1. Screens—home, sensor, inspection logs, inspection management, system settings 2. Manual trigger button—click to manually trigger the sensor 3. Inspection list—select the desired inspection to st...
Page 27
Roi view buttons click to view all tool rois and annotations. Click to view the roi and annotations for the selected tool only. Click to hide all rois annotations and view the image only. Note: the image overlays parameter for each tool also control which roi is shown and this parameter overrides th...
Page 28
• blue indicates that a change was made to the inspection • pink indicates that a product change was made—either a new inspection was added or the inspection was changed to a different one the history trend holds up to 400 entries and updates after an inspection is completed. The entries are recorde...
Page 29
6.2.3 tools & results tools & results shows the camera tool and the inspection tools that are included in the current inspection, as well as the results for the currently selected tool. Figure 28. Tools & results use tool & results to add and configure tools in an inspection and to view results. Cli...
Page 30
At a glance, view the result (pass/fail/status), execution time (in milliseconds), pass count, and fail count for each item. Expand each item for additional details. 6.3 inspection logs screen the inspection logs screen displays saved images and inspection information. Inspections logs can be viewed...
Page 31
• by slot number • remote teach all • remote teach pass • remote teach fail set the strategy: • first n logs • last n logs set the capture limit (limits the number of inspection logs the sensor holds in internal memory): • low count • medium count • high count filter logs to be viewed by pass , fail...
Page 32
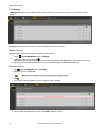
6.4.1 manage use manage to add new inspections, delete existing inspections, rename inspections, set an inspection to run at startup, or copy an inspection. Figure 33. Manage also displayed are the sensor name, inspection name, and whether the inspection is running. Copy an inspection duplicate (cop...
Page 33
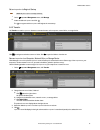
Set an inspection to begin at startup note: only one inspection can begin at startup. 1. On the inspection management screen, click manage. 2. Locate the desired inspection and click . The turns green and the inspection will begin at the next startup. 6.4.2 transfer use transfer to transfer inspecti...
Page 34
Save inspections to a ve sensor inspections stored on a computer or network drive or created in the emulator can be saved to the connected ve sensor. 1. On the inspection management screen, click transfer. 2. Select the desired location. A) click above the right column. B) navigate to the desired fo...
Page 35
Figure 38. Discrete i/o i/o the ve has five configurable i/o. These are pins 1, 5, 8, 10, and 11. Pin # the pin number on the cable connection. See table 1 on page 13. Wire color the corresponding wire color for each pin. See table 1 on page 13. Status indicates whether or not the i/o is active. Gre...
Page 36
Output delay (ms) the time from when a trigger starts an inspection until the sensor output turns on. It is available for the general output, pass, fail, and missed trigger functions of the selected pin. Note: if the inspection execution time is longer than the output delay, the output becomes activ...
Page 37
6.5.3 communications use communications to view or change communication information, to set the industrial protocol, and to set image export, data export, and serial connection settings. Ethernet settings tab use the ethernet settings tab to view or change some ethernet settings. Navigate: system se...
Page 38
Data bits • 8 bits (default) • 7 bits parity control • none (default) • even • odd stop bits • 1 bits (default) • 2 bits note: because there is no flow control for the serial connections, the sensor will not detect or log a lost or broken connection. Industrial protocols tab use the industrial proto...
Page 39
Figure 42. Industrial protocols tab—eithernet/ip selected a customizable map to output camera or inspection tool-specific results also displays. The map includes the following: • register/byte/word (depending on the protocol selected) • inspection # • tool type • tool name • result • type • actions ...
Page 40
Figure 43. Data export tab on the data export tab, set the data export parameters, including which results to export, which channel to use, and the port number to use. Note that the port number cannot be the same as the image export port number or any other port in use. Use the data export map to se...
Page 41
Ethernet protocol choose which protocol to use to export images: • tcp/ip • ftp figure 44. Tcp/ip settings figure 45. Ftp settings see image export: tcp/ip on page 148 and image export: ftp on page 149 for more information. 6.5.4 logs the logs default view is the system tab. Use the system tab to vi...
Page 42
Figure 46. System tab to clear a system error flag (or state), click clear system error. Note: the system error log entry will not be cleared from the log. To export system logs, click export log and follow the prompts. Logs are exported as a .Slog file. To clear the log, click clear log. View a sys...
Page 43
Figure 47. View exported log tab 6.5.5 units use units to select a unit to display and to publish results that represent distance, size, and location calculations. Figure 48. Units by default, distance, size, and location calculations are shown in pixels. To change the displayed units, from the mode...
Page 44
Click apply changes to save the changes. Applying a scaling factor changes the measurements listed in the tools and results to the selected unit and applies the scale to all inspections. Scale units using a known measurement use a known measurement, such as ruler, to configure the scaling factor for...
Page 45
9. Write down the distance (px) show in tools & results. In this example, the distance is 101.00 px. Figure 50. Distance measurement between the two points 10. On the system settings screen, click units. 11. From the mode list, select scaling. The scaling parameters display. 12. Select the desired m...
Page 46
15. Click apply changes. Applying a scaling factor affects all existing inspections. The currently running inspection is immediately modified on the next trigger and other inspections are modified when they are loaded. Figure 52. Tools and results showing the new units 6.5.6 system reset use system ...
Page 47: 7 Using The Camera Tool
7 using the camera tool the camera tool controls the sensor's camera function during an inspection. Configure the camera tool using the parameters in the parameters pane: • imager • focus info • trigger • external strobe • image histogram figure 53. Camera tool input parameters when the camera tool ...
Page 48
Auto exposure during auto exposure, the exposure time and gain are optimized for the current inspection. Click start to begin auto exposure. Note: several triggers may be required to calculate the optimized values for exposure and gain. 7.2 trigger use the trigger parameters to set the method and ra...
Page 49
7.3 focus information select the focus info checkbox and expand the parameter to view the current focus number for the installed lens. Figure 56. Focus info the focus number is a number between 1 and 255. Use the image pane to determine when the image is sharp enough, or use the focus number as a gu...
Page 50
7.5 camera tool: results click the camera tool on tools & results or expand the camera tool on all results to view camera information. Figure 58. Camera tool results focus number the focus number for the frame being viewed, if the focus number parameter is enabled in the camera tool. See focus infor...
Page 51
8 using the inspection tools: vision tools vision sensor tools include average gray, bead, blemish, blob, edge, locate, match, and object. Click a tool on tools & results or on tools only to access the parameters pane for that tool. The parameters pane contains both an inputs tab and a test tab. Def...
Page 52
Masks add and define a mask to exclude a group of pixels from the tool analysis. Figure 61. Masks parameters a mask created for a tool will not apply to any other tool in the inspection. Up to 10 masks can be added to a tool. 1. Expand masks on the inputs tab. 2. Click . The mask roi automatically d...
Page 53
Tool histogram the tool histogram graphically displays pixel intensity information within the current roi. Figure 64. Example histogram select the tool histogram checkbox to enable the histogram. The default is enabled. Expand the tool histogram parameter to view the histogram. The histogram is a di...
Page 54
Figure 66. Average gray tool—test parameters average grayscale the grayscale value range. Standard deviation the standard deviation range. 8.1.3 average gray tool: results tools & results and all results list information from the current and previous inspections. A red box around a tool indicates th...
Page 55
4. Test a complete range of good and bad samples to make sure that the sensor accepts good parts and rejects bad parts. Figure 67. Average gray—pass figure 68. Average gray—fail 8.2 bead tool use the bead tool to inspect parts for uniformity of adhesive or sealant material, or for uniformity of a ga...
Page 56
Roi the region of interest (roi) is the user-defined group of pixels in the image that the sensor analyzes. Figure 70. Bead tool roi the roi is configurable to follow the desired path of the adhesive or sealant being analyzed. Adjust the width of the roi and set the sample rate. From the list select...
Page 57
An adaptive threshold is a technique that adjusts the threshold for the tool based upon lighting changes and image content within the roi. It performs best if used with bi-modal images, which have a clear contrast in the roi. Adaptive threshold chooses the current threshold value by converging to a ...
Page 58
Reject level when the bead/blob type is set to bright, use the reject level to narrow the range of pixel intensities to be considered in an inspection. Leaving the defaults at 0 for low and 255 for high means that the tool takes into consideration all grayscale levels in the roi from 0 (black) to 25...
Page 59
Hide annotations hides the annotations on the live image for the tool, even when the tool is selected. Figure 77. Show bead tool annotations figure 78. Hide bead tool annotations hide roi hides the roi when the tool is not selected. Hide masks hides the mask roi when the tool is not selected. Tool h...
Page 60
Where applicable, use the sliders or enter the minimum and maximum for the selected test parameters. Figure 81. Test parameters count - good the number of good beads. Count - narrow/gap the number of narrow beads. Count - wide the number of wide beads. Largest width the maximum width found. Smallest...
Page 61
Execution time the execution time, in milliseconds, for the currently selected tool in the current inspection. Expand execution time to see the historical minimum and maximum execution times up to this point for the selected tool. Use the reset button in the inspection summary to reset these histori...
Page 62
5. Click on a line to add an inline anchor point. A) point to the roi line; the pointer changes to a +. Figure 85. Add inline anchor point b) click to select the location for the new anchor point; is added on the line. Figure 86. Inline anchor point location selected c) click the point again to set ...
Page 63
8. Use the good bead width parameter under characteristics to define the good bead width. Green indicates that the bead width is acceptable. Red indicates that the bead width is too narrow or that a gap exists. Blue indicates that the bead width is too wide. Figure 90. Good, narrow, and wide adhesiv...
Page 64
3. Set the threshold. A) expand the threshold parameters. B) from the threshold type list, select fixed. Select fixed when the lighting and image content remain relatively constant for all inspections. C) from the bead type list, select dark because in this case the adhesive is dark against a bright...
Page 65
5. Set the test parameters to set the pass/fail criteria. A) on the test tab, select the count - good checkbox to enable the test parameter. This option sets the number of good beads that must be present with the tool parameters so that a part passes. B) expand count - good and move the sliders or e...
Page 66
8.3.1 blemish tool: input parameters use the input parameters to configure how the tool analyzes an image. Figure 97. Blemish tool—input parameters roi the region of interest (roi) is the user-defined group of pixels in the image that the sensor analyzes. Figure 98. Roi shape selection resize and ro...
Page 67
Sensitivity set the sensitivity to define how sensitive the sensor is to finding blemish or other edges within the roi. The sensitivity value helps account for light variations that can affect how well the sensor detects edges on inspected parts. Figure 100. Sensitivity the sensitivity scale is from...
Page 68
Tool histogram the tool histogram graphically displays pixel intensity information within the current roi. Figure 105. Example histogram select the tool histogram checkbox to enable the histogram. The default is enabled. Expand the tool histogram parameter to view the histogram. The histogram is a d...
Page 69
All results displays the result, time, pass count, and fail count information at a glance. Expand the inspection tool to see specific results for that tool. Count the total number of edge pixels counted. Length range the minimum and maximum edge lengths found. Expand length range to see the minimum ...
Page 70
6. Test a complete range of good and bad samples to make sure that the sensor accepts good parts and rejects bad parts. Figure 110. Bad part—missing date/lot code 8.4 blob tool use the blob tool to detect and count groups of like-colored pixels within the roi. A user-selected range of brightness lev...
Page 71
Resize and rotate the roi around the feature to be analyzed. Change the shape of the roi to a square, ellipse, or circle as needed by expanding roi on the parameters pane and selecting the desired shape. An roi can be as large as the entire field of view (fov). The roi automatically displays on the ...
Page 72
Adaptive threshold: threshold use the sliders or enter the desired minimum and maximum possible grayscale threshold. The green line is the current threshold value, chosen by the tool, and the sliders represent boundaries beyond which you do not want the tool to move the threshold settings. Reject le...
Page 73
Filters set filters for tool analysis. Figure 118. Blob tool filters discard blobs that touch roi select to exclude blobs that touch the perimeter of the roi. Fill holes within blob select to ignore (by filling) small features such as scratches and glare that might otherwise appear as small imperfec...
Page 74
Tool histogram the tool histogram graphically displays pixel intensity information within the current roi. Figure 122. Example histogram select the tool histogram checkbox to enable the histogram. The default is enabled. Expand the tool histogram parameter to view the histogram. The histogram is a d...
Page 75
8.4.3 blob tool: results tools & results and all results list information from the current and previous inspections. A red box around a tool indicates that the tool failed. Status provides information about the specific failure. All results displays the result, time, pass count, and fail count infor...
Page 76
A pixel with no neighbors that belong to the same blob contributes 3.14 linear pixels to the perimeter of the blob. This can happen only in a blob that has an area of one. Since such small blobs are usually ignored, this circumstance is rare. A pixel with one neighbor that belongs to the same blob c...
Page 77
Figure 125. Best fit ellipse these three results combine to give information about the elongation and orientation of a blob . The equations used to compute these statistics are complicated, but the results usually have an intuitively useful meaning, described below. The first step in computing these...
Page 78
Blob shape meaning of major axis length meaning of minor axis length meaning of major axis angle any shape with holes results vary depending on exact shape—experiment on your particular shape results vary depending on exact shape—experiment on your particular shape results vary depending on exact sh...
Page 79
3. Set the threshold. A) expand the threshold parameters. B) from the threshold type list, select fixed. Select fixed when the lighting and image content remain relatively constant for all inspections. C) expand the second threshold parameters. D) move the sliders to define the minimum and maximum t...
Page 80
6. Copy the blob tool. A) with the blob tool selected, click . The tool and all of the settings are duplicated (copied) and all of the tools are deselected. B) select one of the blob tools and click a second time. There are now three blob tools with the same settings. 7. Click blob02 (the second blo...
Page 81
8.5.1 circle detect tool: input parameters use the input parameters to configure how the tool analyzes an image. Figure 131. Circle detect tool—input parameters roi the region of interest (roi) is the user-defined group of pixels in the image that the sensor analyzes. Figure 132. Circle detect tool ...
Page 82
Threshold indicates the rate of change of grayscale values that is needed to detect an edge. Figure 133. Threshold parameters edges are detected by measuring transitions from bright to dark or dark to bright. Enter a threshold in the range from 1 to 255. The default value is 20. As this value is red...
Page 83
Hide annotations hides the annotations on the live image for the tool, even when the tool is selected. Figure 135. Show circle detect tool annotations figure 136. Hide circle detect tool annotations hide roi hides the roi when the tool is not selected. Tool histogram the tool histogram graphically d...
Page 84
Figure 139. Circle detect tool—test parameters radius the distance from the center of the detected circle to its edges. Use this value to determine if a circle is the correct size. Min radius the distance from the center of the circle to the closest included edge point. Use this value to look for fl...
Page 85
Arc length the distance along the arc. Available when search for is set to circular arc. Arc angle the angle between the start and the end of the arc. Available when search for is set to circular arc. Arc start the angle between the x-axis and the beginning of the arc. This is between -180 and +180 ...
Page 86
3. Set the input parameters. A) expand the search for parameter. B) select circle, all points from the list. 4. Set the test parameters to set the pass/fail criteria. A) select the average error checkbox. This option looks at the average distance between included edge points and the circle found. B)...
Page 87
8.6 edge tool use the edge tool to detect and count transitions between bright and dark pixels (edges). The edge tool counts the total number of edges, and determines the position of each edge. Edge position information can be used for distance or angle measurements when used with a measure tool. Ex...
Page 88
Sample rate the sample rate sets the number of samples per pixels (one sample per pixel, two samples per pixel, etc.). The sample rate determines the sub-pixel resolution, which increases the resolution of the tool, and increases the inspection time. Figure 146. 1 px wide roi figure 147. 13 px wide ...
Page 89
Absolute threshold: edge profile graph figure 149. Absolute threshold—edge profile graph for absolute threshold, the x axis is the length of the roi. The y axis is the actual grayscale value from 0 to 255. The light blue line shows the absolute pixel intensity. The horizontal gray threshold line mov...
Page 90
Relative threshold: edge profile graph figure 151. Relative threshold—edge profile graph for relative threshold, the x axis is the length of the roi. The y axis is the pixel intensity along the roi, with 0% as the darkest pixel in the roi and 100% as the lightest pixel in the roi. The light blue lin...
Page 91
Edge strength threshold: edge profile graph figure 153. Edge strength threshold—edge profile graph for edge strength threshold, the x axis is the length of the roi. The y axis has two measurements. The first is the light blue axis. It represents edge strength, a measure of the rate of change of pixe...
Page 92
Edge profile the edge profile graph changes depending on which threshold type is selected. Refer to the threshold section and the specific threshold types for details on the edge profile graph. Image overlays choose whether to display or hide the annotations or the roi when this tool is not selected...
Page 93
• discrete output pass • discrete output fail • pass/fail results counter • pass (green) and fail (red) leds on the sensor select this checkbox if the overall pass/fail status of the inspection is dependent on the current tool. 8.6.2 edge tool: test parameters use the test parameters to configure th...
Page 94
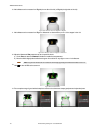
8.6.4 using the edge and measure tools follow these steps for an example edge inspection to check the position of a plunger in a syringe. This procedure uses two edge tools and a measure tool to determine the position of the plunger in the barrel. Note: this procedure is an example only. 1. Add an e...
Page 95
7. Add a measure tool. A) expand measure from... And select edge02 from the tool list. B) expand measure to... And select edge01 from the tool list. Figure 163. Measure tool 8. Set the test parameters to set the pass/fail criteria. A) on the test tab, select the distance y checkbox to enable the tes...
Page 96
8.7.1 line detect tool: input parameters use the input parameters to configure how the tool analyzes an image. Figure 167. Line detect tool—input parameters roi the region of interest (roi) is the user-defined group of pixels in the image that the sensor analyzes. Figure 168. Line detect tool roi th...
Page 97
Threshold indicates the rate of change of grayscale values that is needed to detect an edge. Figure 171. Threshold parameters edges are detected by measuring transitions from bright to dark or dark to bright. Enter a threshold in the range from 1 to 255. The default value is 20. As this value is red...
Page 98
Tool histogram the tool histogram graphically displays pixel intensity information within the current roi. Figure 173. Example histogram select the tool histogram checkbox to enable the histogram. The default is enabled. Expand the tool histogram parameter to view the histogram. The histogram is a d...
Page 99
All results displays the result, time, pass count, and fail count information at a glance. Expand the inspection tool to see specific results for that tool. Midpoint the x and y coordinates of the middle point of the found line segment. Start point the x and y coordinates of the start point of the f...
Page 100
3. Set the threshold. A) expand the threshold parameters. B) move the sliders until the edge of the needle is found with few extra points included. Figure 176. Good part 4. Set the edge polarity. A) expand the edge polarity parameters. B) select bright to dark because the needle is dark against a li...
Page 101
8.8.1 locate tool: input parameters use the input parameters to configure how the tool analyzes an image. Figure 179. Locate tool—input parameters note that the use as reference parameter appears as an error until the reference point is set. Roi the region of interest (roi) is the user-defined group...
Page 102
Threshold the threshold parameter marks the grayscale transition point. The tool marks the edge where the pixel intensity crosses the threshold level. From the threshold type list, select one of the following: • absolute • relative (default) • edge strength threshold type: relative finds an edge at ...
Page 103
Threshold type: absolute finds an edge at a specific grayscale level. Figure 185. Absolute threshold parameters while absolute threshold is less likely to find a false edge than relative threshold, it may miss edges if the light level changes between inspections. Absolute threshold: value enter a sp...
Page 104
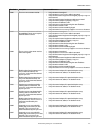
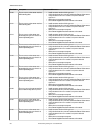
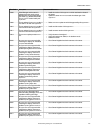
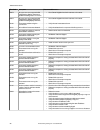
Threshold type: edge strength measures the rate of change of grayscale values and needs sharply-defined transitions to find edges. Figure 187. Edge strength threshold parameters edge strength ignores gradual changes in light levels across the tool better than other threshold types and it filters out...
Page 105
Filters set filters for tool analysis. Figure 189. Locate tool filters smoothing runs a rolling average along the roi length. Smoothing filters out sharp changes in the edge profile. Note: a high filter number may miss the edge of a narrow line. Minimum edge width filters out small spike-of-intensit...
Page 106
Image overlays choose whether to display or hide the annotations or the roi when this tool is not selected. Figure 192. Image overlays—default these options override the roi view buttons on the image pane parameters when no tool is selected. When a specific tool is selected, the roi information is s...
Page 107
8.8.2 locate tool: test parameters use the test parameters to configure the pass/fail conditions for the tool. Select the parameter checkbox to enable it. Where applicable, the vertical green bar shows the current parameter information and the light gray backgrounds show the range over which a value...
Page 108
Status status and error messages display as appropriate. 8.8.4 using the locate tool follow these steps for an example locate inspection to adjust for a target that moves in the field of view, allowing for the precise placement of the vision tools that follow the locate tool. This procedure uses a l...
Page 109
5. Set the reference point. A) expand the use as reference parameters. B) leave adjust downstream tool rois checked so that it is enabled (default). C) click set reference point. A blue circle displays on the image pane at the location of the reference point and all following tools use this point as...
Page 110
10. Add a measure tool to measure from edge02 (the left side of the vial) to edge03 (the right side of the vial). Figure 203. Measure tool from edge02 to edge03 11. Add a measure tool to measure from edge01 to measure01 to determine the position of the stopper in the vial. Figure 204. Measure tool f...
Page 111
8.9 match tool use the match tool to verify that a pattern, shape, or part in any orientation matches a reference pattern. The match tool can also compensate for translation and rotation of downstream tools (if selected). The reference pattern is taught during setup. A reference pattern might includ...
Page 112
Search roi the search region of interest (roi) is the user-defined group of pixels in the image that the sensor analyzes. Figure 209. Search roi the search roi is indicated by a red or green box that is always rectangular. By default the search roi is 20% to 30% larger than the teach roi, which is b...
Page 113
Percent match set the percent match to indicate the quality of the match (10% is a slight match; 100% is a perfect match). The default is 60%. Figure 213. Percent match rotation range select the range within which the pattern may be rotated and still count as a match to the reference image. The defa...
Page 114
Adjust downstream tool rois select adjust downstream tool rois to have tools added after this tool use the this tool to set the location of the additional rois. Click set reference point button so that the tool affects the related tools, otherwise the tool and all related tools will fail. If changes...
Page 115
Inspection pass/fail select the contribute to inspection pass/fail check box (default) if the tool will influence the pass/fail status of the inspection. Figure 223. Inspection pass/fail the pass/fail contribution influences the following: • discrete output pass • discrete output fail • pass/fail re...
Page 116
Offset the offset between the match and the reference point. Available when adjust downstream tool rois is enabled. Expand offset to see the coordinates of the reference point, the reference angle, the offset point, and the offset angle. Execution time the execution time, in milliseconds, for the cu...
Page 117
3. On the parameters pane, expand pattern and click teach. Figure 226. Teach required figure 227. Pattern taught note: if the inspection uses more than one match tool, teach only one match tool at a time. "applying changes" displays, then the reference pattern displays in the pattern pane, and tools...
Page 118
10. Test a complete range of good and bad samples to make sure that the sensor accepts good parts and rejects bad parts. Figure 229. Rotated good part figure 230. Bad part—missing letter 8.9.5 using remote teach with the match tool if multiple match tools are used in the same inspection, remote teac...
Page 119
Roi the region of interest (roi) is the user-defined group of pixels in the image that the sensor analyzes. Figure 232. Roi parameters the roi is a line of pixels that can be shortened, lengthened, or widened as needed for the inspection. Tool analysis follows the direction of the arrow. Set the wid...
Page 120
Relative threshold: percent choose the percentage value at which the edge should be marked. Object type select the type of object the inspection is looking for. • bright—finds objects brighter than the threshold value • dark—finds objects darker than the threshold value • bright or dark—finds any ob...
Page 121
Absolute threshold: value enter a specific grayscale value from 0 to 255. Object type select the type of object the inspection is looking for. • bright—finds objects brighter than the threshold value • dark—finds objects darker than the threshold value • bright or dark—finds any object absolute thre...
Page 122
• bright or dark—finds any object edge strength threshold: edge profile graph figure 240. Edge strength threshold—edge profile graph for edge strength threshold, the x axis is the length of the roi. The y axis has two measurements. The first is the light blue axis. It represents edge strength, a mea...
Page 123
Edge profile the edge profile graph changes depending on which threshold type is selected. Refer to the threshold section and the specific threshold types for details on the edge profile graph. Image overlays choose whether to display or hide the annotations or the roi when this tool is not selected...
Page 124
• discrete output pass • discrete output fail • pass/fail results counter • pass (green) and fail (red) leds on the sensor select this checkbox if the overall pass/fail status of the inspection is dependent on the current tool. 8.10.2 object tool: test parameters use the test parameters to configure...
Page 125
Maximum edge strength the greatest rate of change value observed by the tool. Available when the threshold type is set to edge strength. Execution time the execution time, in milliseconds, for the currently selected tool in the current inspection. Expand execution time to see the historical minimum ...
Page 126
9 using the inspection tools: analysis tools analysis tools include math, measure, and logic. Click a tool on tools & results or tools only to access the parameters pane for that tool. 9.1 math tool use the math tool to perform basic arithmetic and inequality expressions, and to calculate statistica...
Page 127
Operator summary description a + b 1 + 1 = 2 add a - b 1 - 1 = 0 subtract a * b 1 × 1 = 1 multiply a / b 1 ÷ 1 = 1 divide mod {a, b} 1 % 1 = 0 modulus; the modulus, or remainder, operator divides operand a by operand b and returns the remainder div {a, b} 1 ÷ 1 = 1 integer division; returns the inte...
Page 128
Operand b choose the second variable from the vision tools in the inspection, or select a user-defined constant value. Figure 254. Operand b inspection pass/fail select the contribute to inspection pass/fail check box (default) if the tool will influence the pass/fail status of the inspection. Figur...
Page 129
Decimal result the decimal result of the math tool operation. Boolean the boolean result for the math tool operation. Execution time the execution time, in milliseconds, for the currently selected tool in the current inspection. Expand execution time to see the historical minimum and maximum executi...
Page 130
10. Test a complete range of good and bad samples to make sure that the sensor accepts good parts and rejects bad parts. Figure 259. Edge02 roi figure 260. Edge02 roi 9.2 measure tool use the measure tool to determine distances, calculate angles, and create points and lines for use as inputs to othe...
Page 131
For example, if you have two inputs that are both existing measure tools, measure01 and measure02, the output, called measure03, is the angle between the lines of each of the inputs. Measure03 is a curved arrow from the first input, measure01, towards the arrowhead of the second input, measure02. Th...
Page 132
If selecting a specific tool, select the specific characteristic in the tool to measure from. Measure to... Select either a constant or another tool where the measure tool will stop measuring. Figure 263. Measure to...—constant selected if selecting a constant, enter in the x and y coordinates to en...
Page 133
Inspection pass/fail select the contribute to inspection pass/fail check box (default) if the tool will influence the pass/fail status of the inspection. Figure 268. Inspection pass/fail the pass/fail contribution influences the following: • discrete output pass • discrete output fail • pass/fail re...
Page 134
Projection point the x and y coordinates of the intersection point between the input line and a virtual line passing through the input point. The virtual line is orthogonal (perpendicular) to the input line. The intersection point is on the input line because the other line does not exist (virtual)....
Page 135
5. Adjust the roi position, length, and width. A) position the roi vertically over the top of the barrel. B) expand roi, then expand roi width. C) set the roi width to 97 px. Figure 271. Roi over the top of the barrel 6. Set the threshold. A) expand the threshold parameters. B) set the threshold typ...
Page 136
10. Test a complete range of good and bad samples to make sure that the sensor accepts good parts and rejects bad parts. Figure 274. Good part figure 275. Bad part—plunger too high 9.3 logic tool use the logic tool to combine or convert tool results, or to drive discrete outputs from tool results. T...
Page 137
Operator select the type of logical expression used for the logic tool operator. Figure 277. Operator operator summary/examples description and (all) and(true, true, true)=true and(true, false, true)=false a true output results if all inputs are true. Or (any) or(true, true, true)=true or(true, fals...
Page 138
Inspection pass/fail select the contribute to inspection pass/fail check box (default) if the tool will influence the pass/fail status of the inspection. Figure 280. Inspection pass/fail the pass/fail contribution influences the following: • discrete output pass • discrete output fail • pass/fail re...
Page 139
1. Add a match tool to the inspection. A) configure match01 to recognize the logo on the small box. B) expand inspection pass/fail and remove the checkmark to disable the parameter. C) on the test tab, select the count checkbox to enable the count test parameter. D) expand count and set it to a mini...
Page 140
14. Set the test parameters to set the pass/fail criteria. A) on the test tab, select the logic output checkbox. This option sets whether the boolean logic is true or false so that the part passes. B) select true. The small box must have the logo to create the general output. 15. Expand the i/o summ...
Page 141: 10 Emulators
10 emulators use emulators on the home screen to connect to the emulator. Figure 286. Emulators click to connect to the desired emulator. This tab also displays the image location on the computer, as well as the emulator version information. Click under image location to change the directory for the...
Page 142: 11 Sensor Display
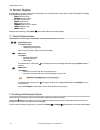
11 sensor display the lcd display on the top of the sensor provides access to view or change several settings without using vision manager. The display provides limited programming options: • ether—ethernet settings • pchange—product change • io—input/output settings • image—image settings • info—se...
Page 143: Top Menu
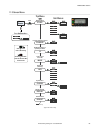
11.3 sensor menu enter shortcuts menu no yes yes 100 hd 100 fd focus# home screen ether pchange io ve series user interface enter top menu top menu image info sub menus or or go back to parent menu select menu item press to save setting press and hold to go back to home screen speed link subnet gate...
Page 144
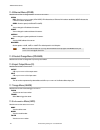
11.4 ethernet menu (ether) use this menu to view or change network connection information. Status link—view the connection status (up or none). Up indicates that an ethernet link has been established. None indicates that a link has not been established. Speed—view the speed (100hd/100fd/1000fd). Ip ...
Page 145
Boot view the boot number. Hour view the hour count. Serial view the sensor serial number. 11.9 system error menu (syserr) use this menu to view or clear system errors, when present. View view the latest system error, when present. Clear select yes to clear a system error state. Select no to return ...
Page 146: 12 Communications Guide
12 communications guide 12.1 communication summary the ve series camera communicates with other devices via ethernet. To establish an ethernet connection to the sensor, the external device must be configured with the correct ip address and support a communication protocol supported by the sensor. 12...
Page 147
• inspection # • tool type • tool name—the tool name must match the tool name included in the inspection for the results to export • result—choose the desired result based on the tool selected note: an inspection # of any means that if an inspection includes a tool with the exact name (for example, ...
Page 148
12.1.4 image export: tcp/ip image export tcp/ip is a proprietary tcp/ip protocol that is supported only on ethernet ports. Navigate: system settings > communications > image export, select which images to export, and select tcp/ip from the ethernet protocol list. Port number set the port number to u...
Page 149
The banner image export sample program installs automatically when the vision manager software is installed. The source code to write your own application is located at c:\users\public\documents\banner vision manager\sample programs\source\image export. Figure 289. Image export sample application 12...
Page 150
Hold ready during the image export operation the sensor's output channels might become full. This can occur if the sensor is producing export data (images) faster than the data can be exported from the device (due to bandwidth limitations) or faster than the client is reading the channel export data...
Page 151
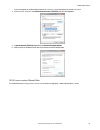
If you are prompted for an administrator password or confirmation, enter the password or provide confirmation. 4. In the connection properties, click internet protocol version 4 (tcp/ipv4), and then click properties. 5. In internet protocol (tcp/ipv4) properties, select use the following ip address....
Page 152
13 industrial ethernet overview 13.1 industrial ethernet setup 13.1.1 set the industrial ethernet protocol (ethernet/ip, profinet ® , modbus/tcp, pccc) the industrial ethernet communication channel is disabled by default. To enable this channel, use the following instructions: 1. From the system set...
Page 153
• read counters (pass, fail, error code, missed trigger, frame count, inspection time) • ftp filename string note: if an input or an output register or a bit is marked as reserved, its value at any time is indeterminate. 13.2.1 sensor input values the ve series camera operation can be controlled thr...
Page 154
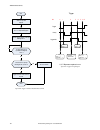
No write 0 to input bits register start make sure camera is ready – bit 0 is set to 1 in output bits register execute trigger: set bit 2 of the input bits register to 1 trigger successful. Read values as required is trigger ack (bit 2 in input bits ack register) set to 1? Yes no read error code. Cor...
Page 155
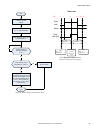
No write 0 to input bits register start make sure camera is ready – bit 0 is set to 1 in output bits register execute teach latch: set bit 1 of the input bits register to 1 teach latch successful. The next valid trigger teaches camera the new condition. After that trigger, examine bit 1 in the outpu...
Page 156
No write 0 to input bits register start write desired program number (as a 32-bit integer) into the product change number location make sure camera is ready – bit 0 is set to 1 in output bits register execute product change: set bit 0 of the input bits register to 1 product change successful is prod...
Page 157
Word # word name data type 3-5 reserved 16-bit integer plc assembly instance 117 (0×75) - 34 registers (sensor inputs/plc outputs) o > t data transfer direction: originator (plc) to target (ve). Assembly instance 117 (0×75) is a group of registers used for the ftp file name. Word # word name data ty...
Page 158
Word # word name data type 16 sensor pass/fail bits (see sensor pass/fail bits on page 158) 16-bit integer 17-239 user-defined (see tool-specific results: ethernet/ip on page 159) selection dependent plc assembly instance 102 (0×66) - 60 registers (sensor outputs/plc inputs) t > o data transfer dire...
Page 159
Table 10: sensor pass/fail bits bit position 15 14 13 12 11 10 9 8 7 6 5 4 3 2 1 0 vision tool 15 pass/ fail vision tool 14 pass/ fail vision tool 13 pass/ fail vision tool 12 pass/ fail vision tool 11 pass/ fail vision tool 10 pass/ fail vision tool 9 pass/fail vision tool 8 pass/fail vision tool 7...
Page 160
Word # the data location. Inspection # shows whether this tool result applies to the current inspection only (inspection number) or to any inspection (any) that includes the selected tool. An inspection # of any means that if an inspection includes a tool with the exact name (for example, averagegra...
Page 161
13.3.9 ve series smart camera eds file installation in controllogix software use the eds hardware installation tool to register the electronic data sheet (eds) file. 1. On the tools menu, click eds hardware installation tool. The rockwell automation's eds wizard dialog displays. Figure 297. Tools—ed...
Page 162
4. Browse to locate the eds file and click next. If vision manager is installed on the computer, a copy of the eds file is available at c:\users\public\documents\banner vision manager\ve series\industrial protocols\ethernetip. Figure 299. Select file to register 5. Click next to register the tested ...
Page 163
6. Click next when you see the icon associated with the eds file. Figure 301. Rockwell automation's eds wizard 7. Click next to register the eds file. Figure 302. Register the eds file 8. Click finish to close the eds wizard . Ve series smart camera www.Bannerengineering.Com - tel: 763.544.3164 163.
Page 164
9. Right-click on the plc's ethernet adapter and select new module... Figure 303. New module 10. Locate the ve series camera from the catalog and click create. Figure 304. Select module type ve series smart camera 164 www.Bannerengineering.Com - tel: 763.544.3164.
Page 165
11. Enter a name, description (optional), and ip address for the ve series camera. Figure 305. New module 12. Click change in the module definition field. Figure 306. Module definition 13. Select the desired connection in the module definition window. Each of the items in the name list represents a ...
Page 166
14. Select int as the data type. Figure 307. Module definition—data type 15. Click ok twice and download the program to the plc. Figure 308. Download to the plc the connection looks like the one in figure 308 on page 166. 13.3.10 rslogix5000 configuration to create an implicit class 1 configuration ...
Page 167
Figure 309. Add ethernet module 2. Select module. Ve series smart camera www.Bannerengineering.Com - tel: 763.544.3164 167.
Page 168
Figure 310. Select module 3. Configure the module properties. Note: the data type in the comm format must be changed to an int. See inputs to the sensor (outputs from the plc) on page 156 and outputs from the sensor (inputs to the plc) on page 157 for more information on each specific assembly insta...
Page 169
Figure 311. Plc input assembly (100), plc output assembly (112) figure 312. Plc input assembly (101), plc output assembly (113) ve series smart camera www.Bannerengineering.Com - tel: 763.544.3164 169.
Page 170
Figure 313. Plc input assembly (102), plc output assembly (114) figure 314. Select or clear the unicast connection checkbox as desired note: the minimum allowed rpi is 50 ms. 4. If the module configuration was successful, the following information displays: ve series smart camera 170 www.Bannerengin...
Page 171
Figure 315. Successful configuration if the module configuration was not successful, the rslogix 5000 software will indicate errors similar to the following: figure 316. Error: assembly instance number and/or size incorrect figure 317. Error: ve series camera not powered up or ethernet cable not att...
Page 172
C = configuration (not used) i = inputs to plc (outputs from the sensor) o = outputs from plc (inputs to the sensor) figure 318. Memory map ve series smart camera 172 www.Bannerengineering.Com - tel: 763.544.3164.
Page 173
The ve series camera memory map expanded. I = inputs to plc (outputs from the sensor). Figure 319. Memory map expanded 13.4 modbus/tcp the modbus/tcp protocol provides device information using register and coil banks defined by the slave device. This section defines the register and coil banks. By s...
Page 174
Table 11: input bits (coils 00001-00016) 05: force single coil register bit position word name 00001 0 product change 00002 1 teach latch 00003 2 trigger 00004 3 reserved 00005 4 reserved 00006 5 reserved 00007 6 reserved 00008 7 input string 00009 8 reserved 00010 9 reserved 00011 10 reserved 00012...
Page 175
Table 13: status bits (inputs 10017-10032) 02: read input status register bit position word name 10017 0 ready 10018 1 pass/fail 10019 2 reserved 10020 3 ready latch 10021 4 reserved 10022 5 output 1 10023 6 output 2 10024 7 output 3 10025 8 output 4 10026 9 output 5 10027 10 reserved 10028 11 reser...
Page 176
No write 0 to input bits register start make sure camera is ready – bit 0 is set to 1 in output bits register execute trigger: set bit 2 of the input bits register to 1 trigger successful. Read values as required is trigger ack (bit 2 in input bits ack register) set to 1? Yes no read error code. Cor...
Page 177
No write 0 to input bits register start make sure camera is ready – bit 0 is set to 1 in output bits register execute teach latch: set bit 1 of the input bits register to 1 teach latch successful. The next valid trigger teaches camera the new condition. After that trigger, examine bit 1 in the outpu...
Page 178
No write 0 to input bits register start write desired program number (as a 32-bit integer) into the product change number location make sure camera is ready – bit 0 is set to 1 in output bits register execute product change: set bit 0 of the input bits register to 1 product change successful is prod...
Page 179
06: preset single register or 16: preset multiple registers reg # word name data type 2-3 product change number 32-bit integer 4-6 reserved 16-bit integer 7-8 ftp filename string length 32-bit integer 9-34 ftp filename string string (52 characters) 35-500 reserved 16-bit integer 13.4.2 sensor output...
Page 180
Table 17: input ack bits: plc input register 1 or holding register 1001, also inputs 10001-16 input 16 input 15 input 14 input 13 input 12 input 11 input 10 input 9 input 8 input 7 input 6 input 5 input 4 input 3 input 2 input 1 bit 15 bit 14 bit 13 bit 12 bit 11 bit 10 bit 9 bit 8 bit 7 bit 6 bit 5...
Page 181
Figure 326. Industrial protocols tab—modbus/tcp the results are configurable only for the current inspection. However, all user-defined results in the custom map are shown on the industrial protocols tab whether or not they are included in the current inspection. To make changes to a different inspe...
Page 182
Result the information to output. Data type the type of information to output. Actions click to delete a result. You cannot delete system-defined results that contain the symbol. 13.5 plc5 and slc 5 (pccc) allen-bradley’s plc5 and slc 500 family of devices use pccc communications protocol. The ve se...
Page 183
No write 0 to input bits register start make sure camera is ready – bit 0 is set to 1 in output bits register execute trigger: set bit 2 of the input bits register to 1 trigger successful. Read values as required is trigger ack (bit 2 in input bits ack register) set to 1? Yes no read error code. Cor...
Page 184
No write 0 to input bits register start make sure camera is ready – bit 0 is set to 1 in output bits register execute teach latch: set bit 1 of the input bits register to 1 teach latch successful. The next valid trigger teaches camera the new condition. After that trigger, examine bit 1 in the outpu...
Page 185
No write 0 to input bits register start write desired program number (as a 32-bit integer) into the product change number location make sure camera is ready – bit 0 is set to 1 in output bits register execute product change: set bit 0 of the input bits register to 1 product change successful is prod...
Page 186
Plc read message command this controller communications command = plc5 read data table address = integer table "nx" target device data table address = n7:x figure 333. General tab: example message command reading from n7 table on the ve and sending the data to the n7 table on the plc ve series smart...
Page 187
To address = ip address of the sensor figure 334. Multihop tab: ip address of the ve is entered here ve series smart camera www.Bannerengineering.Com - tel: 763.544.3164 187.
Page 188
Plc write message command this controller communications command = plc5 write data table address = integer table "nx" target device data table address = n14:x figure 335. General tab: example message command writing to n14 table on the ve from the n14 table of the plc ve series smart camera 188 www....
Page 189
To address = ip address of the sensor figure 336. Multihop tab: ip address of the ve is entered here 13.5.2 inputs to the sensor (outputs from the plc) the registers below are used by the plc to push values to the ve series camera. Msg (message) commands are used to write (n14) to the sensor. Table ...
Page 190
Word # word name data type 8-9 pass count 32-bit integer 10-11 fail count 32-bit integer 12-13 missed triggers 32-bit integer 14-15 current inspection time float 16 sensor pass/fail bits (see sensor pass/fail bits on page 158) 16-bit integer 17-500 user-defined (see tool-specific results: pccc on pa...
Page 191
Figure 337. Industrial protocols tab—pccc the results are configurable only for the current inspection. However, all user-defined results in the custom map are shown on the industrial protocols tab whether or not they are included in the current inspection. To make changes to a different inspection,...
Page 192
Result the information to output. Data type the type of information to output. Actions click to delete a result. You cannot delete system-defined results that contain the symbol. 13.6 profinet profinet ® 8 is a data communication protocol for industrial automation and processes. Profinet io defines ...
Page 193
13.6.4 description of modules and submodules table 26: module slot assignment module slot 1 ve control and status module slot 2 ve output module slot 3 ve input module table 27: ve control and status module (ident 0×000010) submodule notes subslot 1 ve inspection results submodule (see ve inspection...
Page 194
13.6.5 description of submodules ve inspection results submodule the ve inspection result submodule contains inspection results and sends input data into the controller (plc). This submodule is plugged into slot 1 subslot 1 and cannot be removed. Table 30: ve inspection result submodule (ident 0x000...
Page 195
Ve device control submodule the ve device control submodule contains controller (plc) input and output data, including device controls for the ve. The device control submodule is plugged into slot 1, subslot 2 by default but it can be removed. Table 31: ve device control submodule (ident 0x000001) p...
Page 196
No write 0 to device control command word start make sure camera is ready – bit 0 is set to 1 in inspection status word execute trigger: set bit 2 of the device command word to 1 trigger successful. Read values as required is trigger ack (bit 2 in device control ack word) set to 1? Yes no read error...
Page 197
No write 0 to device control command word start make sure camera is ready – bit 0 is set to 1 in inspection status word execute teach latch: set bit 1 of the device command word to 1 teach latch successful. The next valid trigger teaches camera the new condition. After that trigger, examine bit 1 in...
Page 198
No write 0 to device control command word start write desired program number (as a 32-bit integer) into the product change number location make sure camera is ready – bit 0 is set to 1 in inspection status word execute product change: set bit 0 of the device command word to 1 product change successf...
Page 199
Submodule plc input data plc output data name ident no. Name type name type 32-byte custom map 0×000029 user-mapped sensor result data block 32-byte octetstring not applicable not applicable 64-byte custom map 0×000030 user-mapped sensor result data block 64-byte octetstring not applicable not appli...
Page 200
Column descriptions: byte the data location. Inspection # shows whether this tool result applies to the current inspection only (inspection number) or to any inspection (any) that includes the selected tool. An inspection # of any means that if an inspection includes a tool with the exact name (for ...
Page 201
4. Click devices & networks after the project has been uploaded. Figure 345. Devices and networks 5. Click configure networks. Figure 346. Configure networks network view displays. Ve series smart camera www.Bannerengineering.Com - tel: 763.544.3164 201.
Page 202
6. Click options and select install general station description file (gsd). Figure 347. Options—install the gsd the install general station description file window opens. 7. Click the browse button (...) to the right of the source path field. Figure 348. Manage gsd files 8. Navigate to c:\users\publ...
Page 203
10. Click install. Figure 349. Hardware catalog the system installs the ve gsd file and places it in the hardware catalog. In the above example, the ve gsd file is located under other field devices > profinet io > sensors > banner engineering corp. > banner vision sensors > ve series vision sensor >...
Page 204
4. Click devices & networks after the project has been uploaded. Figure 350. Devices and networks 5. Click configure networks. Figure 351. Configure networks network view displays. Note: for step 6 through step 10, network view must be open. Ve series smart camera 204 www.Bannerengineering.Com - tel...
Page 205
6. Locate the ve series camera in the hardware catalog. Figure 352. Hardware catalog in the above example, the ve device is located under other field devices > profinet io > sensors > banner engineering corp. > banner vision sensors > ve series vision sensor > ve series > ve. 7. Select the device an...
Page 206
Changing the device ip address use these instructions to change the ip address of the ve device, using the siemens tia portal (v13) software. Use these instructions as a basis if you are using another controller (plc). 1. Start the siemens tia portal (v13) software. 2. Click open existing project. 3...
Page 207
12. Right-click on the device icon and select online & diagnostics. Figure 357. Select online & diagnostics figure 358. Online & diagnostics the online & diagnostics window displays. 13. Select assign ip address under functions. 14. Click accessible devices. Figure 359. Assign ip address—accessible ...
Page 208
16. Click apply. Figure 360. Select the device and apply changes the ip address for the device is updated. 17. Click assign ip address to complete the step. This step is completed for every device. Changing the device name use these instructions to change the name of the ve device, using the siemens...
Page 209
6. Deselect generate profinet device name automatically. Figure 363. Profinet device name 7. Enter a unique name in the profinet device name field. 8. Enter a unique device number in the device number field. Note: each device number is used only once. 9. Right-click on the device icon and select onl...
Page 210
12. Click assign name to start the process. The name is assigned. Figure 366. Assign name 13.7 troubleshooting 13.7.1 industrial ethernet error codes the ve series camera provides error codes when coil bit commands fail to execute successfully. If such an error occurs, the execution error flag is se...
Page 211
6. Click the accessible devices icon. The accessible devices window opens. 7. Select an interface connection in the type of the pg/pc interface list. 8. Select an interface connection in the pg/pc interface list. Figure 367. Pg/pc interface the pc scans the network for profinet ® devices. If the dev...
Page 212
2. Select a message in the table, display cpu time stamps in pg/pc local time. Figure 370. Diagnostics buffer the respective information displays in the description field under details on event. 3. Read the message to learn about the error and resolve it. When the error is resolved, the icon that co...
Page 213: 14 Troubleshooting
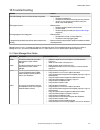
14 troubleshooting problem solution the vision manager software will not connect to my sensor make sure that: • the sensor is powered on • the sensor is connected to the computer or the network • you are connecting to the correct sensor (verify the sensor name and ip address) the image is not clear ...
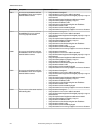
Page 214
Error code description recommended solution 10011 a connection to the sensor could not be established. One or more required channels failed to connect • verify the sensor is energized • verify the sensor communication cable is connected • verify all inline network equipment is energized, properly co...
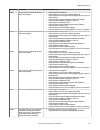
Page 215
Error code description recommended solution 10023 the connection to the sensor was lost while receiving data. • verify the sensor is energized • verify the sensor communication cable is connected • verify all inline network equipment is energized, properly configured and connected • verify all requi...
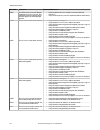
Page 216
Error code description recommended solution 10041 the device at the specified ip address rejected the connection attempt. This can happen when the network device does not support the vision manager protocol. • verify the sensor's firmware version is compatible with this application • verify the devi...
Page 217
Error code description recommended solution 10080 the connection to sensor was lost. • verify the sensor is energized • verify the sensor communication cable is connected • verify all inline network equipment is energized, properly configured and connected • verify all required network equipment cab...
Page 218
Error code description recommended solution 10100 the connection to the sensor was lost while sending data. • install an newer version of this application • verify the device at the specified ip address is a banner vision sensor • verify the sensor's firmware version is compatible with this applicat...
Page 219
Error code description recommended solution 10300 vision manager and the sensor's release types must exactly match. Release types are specified as part of the version (e.G. Alpha, beta, eval). The connection was aborted by this application. • install the version of this application which matches the...
Page 220
Error code description recommended solution 20072 an application error occurred while refreshing the display. There was a problem releasing vector annotations. • go to sensor neighborhood and reconnect to the sensor 20073 an application error occurred while refreshing the display. There was a proble...
Page 221
Error code description recommended solution 20208 downloading the inspection from the sensor failed due to a timeout. • reboot the sensor • verify the sensor communication cable is connected • verify all inline network equipment is energized, properly configured and connected • verify all required n...
Page 222
Error code description recommended solution 20232 a firmware update timeout was detected. • reboot the sensor • verify the sensor communication cable is connected • verify all inline network equipment is energized, properly configured and connected • verify all required network equipment cables are ...
Page 223: 15 Accessories
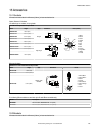
15 accessories 15.1 cordsets all measurements are listed in millimeters [inches], unless noted otherwise. Power, discrete i/o cordsets i/o sealed high-flex cordsets, 12 flying leads 12-pin m12/euro-style cordsets with open shield model length style dimensions pinout (female) mqdc2s-1206 1.83 m (6 ft...
Page 224
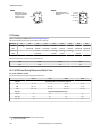
Smbvera • right-angle mounting bracket with curved slots • 12-gauge stainless steel • m3 × 0.5 mounting hardware included 81 73 47 4xø3.5 1/4-20 smbvemp • painted black aluminum • adapter holes for mounting hardware 4 x ø3.3 thru ø7.0 2 x m8 x 1.25 3 x 10-32 2 x 1/4-20 7 60 88 15.3 lenses additional...
Page 225
Fov horizontal ver tical wd figure 371. Working distance and field of view 15.3.2 1.3 mp lens working distance and field of view for use with ve201g1a models. Table 36: c-mount megapixel lens focal length—working distance and field of view 6 mm 8 mm 12 mm 16 mm 25 mm 35 mm 50 mm 75 mm wd (mm) approx...
Page 226
Fov horizontal ver tical wd figure 373. Working distance and field of view 15.4 c-mount lens filter models use filters to improve the image contrast and system reliability in vision applications. For additional filter information, see p/n 173239. Family color - size flt b470 ( blue) g525 (green) i85...
Page 227
15.6 display cover use the display cover to protect the display and buttons from the elements. Vedc-bg • painted anodized aluminum with borosilicate glass window • mounting hardware included 15.7 ring lights for additional ring light information, see p/n 192656 for standard lights and p/n 192657 for...
Page 228
Models trigger connections vesim-pt current sourcing (pnp) two 13-pin terminals ve series smart camera 228 www.Bannerengineering.Com - tel: 763.544.3164.
Page 229
16 product support and maintenance 16.1 repairs contact banner engineering for troubleshooting of this device. Do not attempt any repairs to this banner device; it contains no field- replaceable parts or components. If the device, device part, or device component is determined to be defective by a b...
Page 230
Mexico address: banner engineering de mexico monterrey head office edificio vao av. David alfaro siqueiros no.103 col. Valle oriente c.P.66269 san pedro garza garcia, nuevo leon, mexico phone: +52 81 8363 2714 or 01 800 bannere (toll free) website: www.Bannerengineering.Com.Mx email: mexico@banneren...
Page 231: Index
Index a absolute threshold edge profile 89, 103, 121 value 88, 103, 121 active sensors tab 22 adaptive threshold bead type 57, 71 blob type 57, 71 all results 29 area 75 area range 72 auto exposure 47 average gray tool test parameters 53 input parameters 51–53 results 54 using 54 b backup 24, 25, 14...
Page 232
Inspection begin at startup 33 copy 32 delete 20, 32 manage 32, 33 modify 20 name 19 save 19, 33, 34 set up 17–20 summary 27 transfer 33, 34 inspection logs sources 30 inspection logs screen 30, 31 inspection management screen 31–34 inspection results 194 interface 142 interface module 227 io 144 l ...
Page 233
Sensor neighborhood 22, 23 sensor screen 26–29 serial 37 software information 25 version number 25 vision manager 7 strobe external 49 submodule description 194, 195, 198–200 supported submodules 194, 195, 198–200 syserr 145 system error menu 145 system settings screen 34, 36–41, 43, 44, 46 t tab ab...

