- DL manuals
- CAKEWALK
- Stereo System
- Cakewalk SONAR
- User Manual
CAKEWALK Cakewalk SONAR User Manual
Summary of Cakewalk SONAR
Page 1
Sonar user’s guide.
Page 2
Information in this document is subject to change without notice and does not represent a commit- ment on the part of cakewalk, inc. The software described in this document is furnished under a license agreement or nondisclosure agreement. The software may be used or copied only in accor- dance of t...
Page 3: Table of Contents
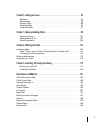
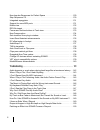
Table of contents preface . . . . . . . . . . . . . . . . . . . . . . . . . . . . . . . . . . . . . . . . . . . . . . . . . . . . . . . . . . . . . . . . . . . 9 about this manual . . . . . . . . . . . . . . . . . . . . . . . . . . . . . . . . . . . . . . . . . . . . . . . . . 9 conventions used in ...
Page 4
4 working on a project . . . . . . . . . . . . . . . . . . . . . . . . . . . . . . . . . . . . . . . . . . .46 windows taskbar indicators . . . . . . . . . . . . . . . . . . . . . . . . . . . . . . . . . . . . . . . . .46 screen colors and wallpaper . . . . . . . . . . . . . . . . . . . . . . . . . ...
Page 5
5 tutorial 6 – editing your music . . . . . . . . . . . . . . . . . . . . . . . . . . . . . . . . . . . . . . . . . . . . . . 93 selection. . . . . . . . . . . . . . . . . . . . . . . . . . . . . . . . . . . . . . . . . . . . . . . . . . . . 93 moving clips . . . . . . . . . . . . . . . . . . . . . ...
Page 6
6 new impulse responses for perfect space . . . . . . . . . . . . . . . . . . . . . . . . . . .129 step sequencer 2.0 . . . . . . . . . . . . . . . . . . . . . . . . . . . . . . . . . . . . . . . . . . . . . .130 integrated arpeggiator . . . . . . . . . . . . . . . . . . . . . . . . . . . . . . . . ...
Page 7
7 i can’t open my project . . . . . . . . . . . . . . . . . . . . . . . . . . . . . . . . . . . . . . . . . . 151 audio distorts at greater than 16 bits. . . . . . . . . . . . . . . . . . . . . . . . . . . . . . . . 151 no sound from my soft synth. . . . . . . . . . . . . . . . . . . . . . . . . . ....
Page 8
8.
Page 9: Preface
Preface sonar user’s guide is designed to help you learn and use sonar. This book explains how sonar works and how to use it to create, edit, produce, and perform. The sonaruser’s guide is task-oriented, with lots of cross-references, so that you can find the information you need. The user’s guide b...
Page 10
10 conventions used in this book conventions used in this book the following table describes the text conventions in this book: convention meaning bold text that appears in bold is a command in sonar. For example: click ok. Right guillemet (file > open) a right guillemet is a menu item separator and...
Page 11: Introduction
Introduction sonar is a professional tool for authoring sound and music on your personal computer. It’s designed for musicians, composers, arrangers, audio and production engineers, multimedia and game developers, and recording engineers. Sonar supports wave, mp3, acidized waves, wma, aiff and other...
Page 12: About Sonar
12 about sonar about sonar sonar lets you work with music on your own level. Here are some of the ways you can make music with sonar: publish publishing usually means printing your music; it’s one way to share your finished product with other performers. After you’ve recorded and arranged a song in ...
Page 13
13 about sonar sound production and engineering if you want to produce music cds or master tapes, sonar has virtually everything you need from recording to mixing and mastering. Multichannel recording lets you capture studio or live performances track by track. Reconfigurable buses provide full cont...
Page 14: Computers, Sound, and Music
14 computers, sound, and music flexibility sonar works the way you want to work—you can customize screen layouts, toolbars, and audio and midi system configurations to make your work more efficient. Sonar integrates with other sound editing tools so you can access them in an instant without leaving ...
Page 15
15 computers, sound, and music there are several important advantages of the midi format: • large amounts of music can be stored in a very compact form • different parts of a piece can easily be assigned to any instrument you can imagine • the music contains information on notes, tempos, and key sig...
Page 16: Setup
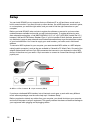
16 setup setup you can install sonar on any computer that runs windows xp or x64 and has a sound card or built-in sound module. If you want to hook up other devices, like a midi keyboard, an electric guitar, or a microphone, you need the right cables, and you need to find the right connectors on you...
Page 17
17 setup user accounts previous versions of sonar required a user to have windows administrator status. This is no longer the case. Any level of user can now install and run sonar. Only one copy of sonar per machine is necessary for multiple users to run sonar with each user’s personal settings. Whe...
Page 18
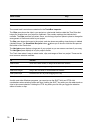
18 setup have a stereo input) while digital inputs allow you to record 1 to 8 signals depending on the type of digital connection. The following table describes the various analog inputs and outputs. The following table describes the various digital inputs and outputs. Read your hardware documentati...
Page 19
19 setup to connect a microphone to your computer • if your sound card has a 1/8 inch input jack (built-in sound cards that come with your pc usually do), and your microphone cable has a 1/4 inch plug on the end, plug the mic cable into a 1/8 inch stereo adapter, and then plug the 1/8 inch adapter i...
Page 20
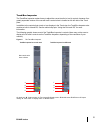
20 setup figure 1. Standard midi cable—use this if your midi interface has standard 5-pin input and output ports • joystick connector. This is becoming less common. This is the type of connection seen on older soundblaster type sound cards. To use this type of connection, find the end of one of the ...
Page 21
21 setup modes and the existing enabled devices will be remembered for the next time when you switch back to that mode. Loading a project after changing audio devices when loading a project after changing audio devices, sonar will attempt to automatically remap any missing device to an equivalent ne...
Page 22
22 setup remapping using friendly driver names when use friendly names to represent audio drivers is selected in options > audio > drivers, sonar can intelligently remap devices across different hardware configurations or driver models by using your assigned friendly driver names, even if the hardwa...
Page 23: Starting Sonar
23 starting sonar starting sonar there are many different ways to start sonar. Here are a few: • double-click the sonar icon on your desktop. • click the start button, and choose programs > cakewalk > sonar 8.5 (studio or producer) > sonar 8.5 (studio or producer). • click the start button, point to...
Page 24
24 starting sonar if you don’t want to see the quick start dialog box in the future, uncheck the box at the bottom of the dialog box, and click close. You can see the quick start dialog box later by choosing help > quick start. Riff/mid will not launch sonar when double-clicked migrating preferences...
Page 25
25 starting sonar when wave profiler determines the kind of card you have, always accept the default settings. Setting up the midi in and midi out devices when you start sonar for the first time, it checks your computer to find all the midi input and output devices you have installed (such as sound ...
Page 26: Sonar Basics
26 sonar basics 4. Check one device at a time in the outputs window and click move selected devices to top to change its order. Then check all the devices that appear in the window to select them for output. Using midi devices after making driver changes if you later add or remove drivers using the ...
Page 27
27 sonar basics tracks are used to store the sound or music made by each instrument or voice in a project. For example, a song that is arranged for four instruments and one vocalist may have 5 tracks—one for each instrument and one for the vocals. Each project can have an unlimited number of tracks....
Page 28
28 sonar basics opening a file use the following procedure to open a file. To open a file in sonar 1. If you haven't already done so, start sonar. 2. Choose file > open. 3. In the open dialog box, navigate to the directory where the project you want to open is located and select it. 4. Click the ope...
Page 29
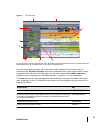
29 sonar basics figure 5. The track view a. The track pane b. The clips pane c. Clips d. Splitter bars e. Show/hide bus pane f. Track/bus inspector g. Minimized tracks h. Expanded track i. The video thumbnails pane all of the current track’s controls, plus a few that are only available in the consol...
Page 30
30 sonar basics the current track’s controls are contained in the track/bus inspector. The clips pane shows the clips in your project on a horizontal timeline called the time ruler that helps you visualize how your project is organized. Clips contain markings that indicate their contents. The clips ...
Page 31
31 sonar basics track/bus inspector the track/bus inspector makes it easy to adjust the current track’s (or bus’s) controls, because it’s a greatly expanded version of the current track’s controls that is located on the left side of the track pane. In addition to the controls that a track or bus dis...
Page 32
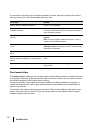
32 sonar basics you can hide or show any of the track/bus inspector’s controls, and use it to display the controls from any track or bus. The following table shows you how. The console view the console view is where you can mix the sounds on all the different tracks to create the final mix of your p...
Page 33
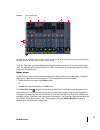
33 sonar basics figure 7. The console view a. Audio module b. Midi module c. Midi velocity d. Bus out e. Main out f. Show/hide strip controls buttons g. Widen all strips h. Show/hide for tracks, buses, mains as in the track view, you can change track settings or record new music or sound in the cons...
Page 34
34 sonar basics figure 8. The piano roll view the staff view : displays the notes from one or more midi tracks using standard music notation, similar to the way the notation would appear on a printed page. You can add, edit, or delete notes; create percussion parts; add guitar chords and other notat...
Page 35
35 sonar basics the loop construction view : allows you to create and edit groove clips (sonar loops that “know” the tempo and key in which they were recorded), and export these clips as acidized files. Figure 10. The loop construction view the media browser view : allows you to preview acidized fil...
Page 36
36 sonar basics view how you use it meter/key to change the meter (time signature) or key signature, or to insert changes in the meter or key signature at specific times in a project. Big time to display the now time in a large, resizable font that you can read more easily. Markers to add, move, ren...
Page 37
37 sonar basics zoom controls many of the views contain zoom tools that let you change the horizontal and vertical scale of the view. Figure 13. Zoom controls a. Zoom clips pane out vertically b. Vertical zoom fader for clips pane c. Zoom clips pane in vertically d. Zoom bus pane out vertically e. V...
Page 38
38 sonar basics you can also zoom with the keyboard: docking views you can dock any view other than the console view in the lower-right corner of the track view by enabling a view’s enable tabbed option. You can have as many views open in tabbed format as you want. You can toggle through the differe...
Page 39
39 sonar basics locking views by default sonar allows only one instance of each view, but you can lock the contents of most views, preserving the current view by forcing a new instance of the view to appear if necessary. Locking views is the only way you can have multiple instances of the same view ...
Page 40
40 sonar basics the x-ray windows feature works on the following windows: • audiosnap palette • synth rack • piano roll view (when float-enabled) • snap to grid dialog • plug-in effects and synths • controller/surface plug-ins to select key bindings for x-ray windows 1. Use the options > key binding...
Page 41
41 sonar basics 3. To x-ray or un-x-ray a single window, move the mouse cursor over the window, and press the keyboard shortcut (default is shift+x) for the x-ray command. The window does not need to have focus (does not need to be the highlighted window). 4. To x-ray or un-x-ray all plug-in windows...
Page 42
42 sonar basics 8. At the end of the file, find the [effectprops view] section. You will see entries such as the following: ; waves ssl eq stereo xrayexclude11=1397510483 xrayexclude12={e451379e-f7e1-4e82-98d9-beb87ac45e90} 9. Exclude your plug-in by creating a blank line below the last entry in the...
Page 43
43 sonar basics to do this do this hide items in a menu click a menu item (ctrl-click to select multiple items) and press the hide button. The hidden command(s) will only be visible in the submenu that is automatically created at the bottom of the menu. You can display the submenu by clicking one of...
Page 44
44 sonar basics altering your menus may affect your menus’ hotkeys, which allow you to navigate through the application’s menus without using a mouse. You can view the hotkeys in your menus by pressing alt and observing the underlined letters. Pressing the underlined letter on your keyboard will lau...
Page 45
45 sonar basics to customize a toolbar: 1. Right-click the toolbar that you want to customize, and choose customize from the pop-up menu to open the customize toolbar dialog. 2. In the available toolbar buttons field, select a component that you want to see in the toolbar, and click the add button t...
Page 46: Windows Taskbar Indicators
46 windows taskbar indicators working on a project much of your time in sonar is spent recording and listening to your project as it develops. The transport toolbar, shown below, contains the most important tools and other pieces of information you’ll need to record and play back your project. Every...
Page 47: Screen Colors And Wallpaper
47 screen colors and wallpaper in this case, your sound card probably came with a separate program to control input and output levels. See your sound card documentation for more information. Screen colors and wallpaper sonar lets you customize the colors that are used for virtually all parts of the ...
Page 48
48 screen colors and wallpaper to change the wallpaper 1. Choose options > colors to display the configure colors dialog box. 2. Choose the desired wallpaper according to the table: 3. Click ok when you are done. Color presets once you create a color arrangement that you like, you can save it as a p...
Page 49
49 screen colors and wallpaper figure 15. The configure colors dialog a. Presets menu b. Import and export buttons to load a color preset 1. Open the configure colors dialog by using the options > colors command. 2. Click the drop-down arrow on the presets menu to display the list of presets, then c...
Page 50
50 screen colors and wallpaper to export the current color arrangement 1. Open the configure colors dialog by using the options > colors command. 2. Arrange or load the color arrangement you want to export. 3. Click the export colors button in the configure colors dialog. The export color set dialog...
Page 51: Installing Sonar
51 installing sonar installing sonar sonar is easy to install. All you need to do is choose the folder where the program and sample project files should be stored. Before you start, make sure you have your serial number handy. Your serial number is located on the back of your dvd case. To install so...
Page 52: Starting to Use Sonar
52 starting to use sonar starting to use sonar this chapter has provided you with an overview of sonar and basic information on how to install the software and configure your system. The following tutorials will give you some hands-on practice in playing, recording, and mixing your projects. If you ...
Page 53: Projects
Tutorial 1 – creating, playing, and saving projects understanding and managing project files is central to your work flowin sonar. In this tutorial, we are going to cover the basics of getting started with project files and some of the operations that can be performed with them. Whenever you write o...
Page 54: Creating A New Project
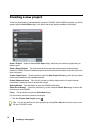
54 creating a new project creating a new project there are several ways to get started with a project in sonar. When sonar is opened, you will be greeted with the quick start dialog. Let’s take a look at the options available in this dialog. Open a project. Opens a standard file open dialog, which l...
Page 55
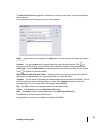
55 creating a new project the new project filedialog appears. Whenever you create a new project, you will be presented with this dialog. Let’s explore some of the things you can do in this window. Name. Type the name of your project in the name box. For this exercise, let’s name your project tutoria...
Page 56: Opening Project Files
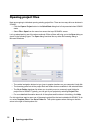
56 opening project files opening project files next we are going to talk about opening existing project files. There are two ways this can be done in sonar: • click the open a project button in the quick startdialog that is first presented when sonar starts. • select file > open from the menu bar ac...
Page 57
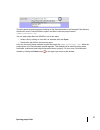
57 opening project files this will refresh the browsing pane to display all the files and folders in the template files directory. Double-click on the tutorials folder to open it and then locate the project named sonar_audiodemo1.Cwp. You can load project files into sonar in one of two ways: • selec...
Page 58: Playing Project Files
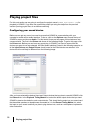
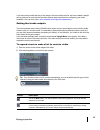
58 playing project files playing project files for this next section we are going to configure the project named sonar_audiodemo1.Cwpfor playback in sonar. If you have not opened the project yet using the steps from the previous section opening project files, do so before continuing. Configuring you...
Page 59
59 playing project files if you are having trouble with any of the steps in the last section thus far, we have created a helpful set-up guide on our web site that provides step-by-step instructions for configuring your audio hardware. You can find it here: www.Cakewalk.Com/support/hardwaresetup . Se...
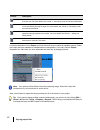
Page 60
60 playing project files locate the dropdown list for output and click the small arrow to show all available outputs. Select the output that your speakers or headphones are connected to. If you can’t find the output dropdown list, make sure you have expanded the track fully by dragging it down. Next...
Page 61
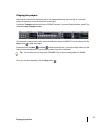
61 playing project files playing the project now that all of the track’s outputs are set to the appropriate device, the next step is to play the project to make sure it can be heard and sounds right. Locate the transporttool bar at the top of sonar’s screen. If you can’t find this toolbar, press f4 ...
Page 62: Looping Project Files
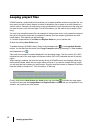
62 looping project files looping project files sonar features a really handy tool that allows you to repeat specified sections of a project file. You may want to do this for many reasons, such as to rehearse a part or phase or to listen closely to a specific section. Perhaps you might set up a loop ...
Page 63: Saving Project Files
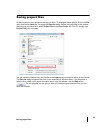
63 saving project files saving project files sonar offers you many options for saving your work. To investigate these options, click on the file menu and choose save as. This opens the save as dialog. Before doing anything in this window, the first thing you should do is select project files in the ...
Page 64
64 saving project files take a look at the dropdown list labeled save as type. Click the save as type arrow to see a list of supported file formats. Let’s look at these different files formats now: • normal. This is the first option listed and the most common format used for saving project files. Ch...
Page 65
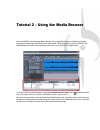
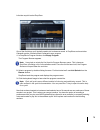
Tutorial 2 – using the media browser new to sonar is the enhanced media browser view; designed to improve workflow and make working with audio loops and midi groove clips simple. When you open a project in sonar, the media browser will open underneath the track view. It is outlined in the image belo...
Page 66
66 first, let’s review the controls on the left side of the toolbar. The content location drop down box shown below allows you to quickly jump to popular locations on your hard drive. The audio preview bus drop down box shown below allows you to select the output device used to listen to loops and f...
Page 67
67 the next three controls are used for software synths. Below the toolbar, the media browser is split into two or three panes. From left to right they are the preview synth list, the folders pane and the explorer pane. Control description the insert soft synth button allows you to add an instrument...
Page 68
68 finding and previewing audio loops finding and previewing audio loops now that we have a general idea of how the media browser is laid out, let’s find some of the content that is included with sonar and give it a listen. 1. Make sure the media browser view is open and visible. If it is not, click...
Page 69
69 finding and previewing audio loops 6. Click the play button in the media browser toolbar. The selected file is previewed. If you don’t hear anything, revisit the settings of your audio preview bus, as discussed above, and ensure that it is set to the audio device that your headphones or speakers ...
Page 70
70 finding and previewing audio loops 4. Now that sonar knows what synth to play midi groove clips through, select the groove clip named bangin 10.Mid just as you did with the audio loop previously. 5. Click the play button in the media browser toolbar. Just like with audio loops, you can set midi g...
Page 71: Musical Instruments
Tutorial 3 – recording vocals and musical instruments one of the most important aspects of creating music in sonar is digital audio recording. This is the process of taking the sound from a microphone or an instrument and recording it to an audio track. Once this step is completed you can edit and m...
Page 72
72 4. Select the physical jack that you're instrument is plugged in to. If you know, for instance, that your guitar is plugged into input 1, click the input control and select the first option. Some audio interfaces refer to their stereo inputs as pairs, like 1/2, 3/4 or 5/6. Most often left channel...
Page 73
73 recording your performance now that everything is set up, let's record something! 1. On the options menu, select project and then click the metronome tab. 2. Set the metronome for a 2 measure count-in. • click use audio metronome, select the recording check box and set record count-in to 2 measur...
Page 74
74 troubleshooting if you weren't able to record successfully by following this tutorial, please check the following: i only get one side of my guitar/microphone recorded you may be recording a mono signal through a stereo input. Guitars and microphones produce mono signals. Right-click the track an...
Page 75
75 the windows mixer looks like this: when you open the windows mixer it may be labeled play control or recording control. We want to see the recording controls. To view the recording controls in windows xp: 1. On the options menu, click properties. The properties dialog appears. 2. In the adjust vo...
Page 76
76.
Page 77: Software Instruments
Tutorial 4 – playing and recording software instruments software instruments, which are also referred to as soft synths, are a major part of computer music. Our goal in this tutorial is to add a software instrument to a project. We'll explore a few different ways they can be used with sonar and look...
Page 78
78 adding an instrument track to your project adding instrument tracks to your project is easy and something you’ll find yourself doing often, so let’s explore some of the basics. For this exercise, we'll start with a blank project: 1. On the file menu, click new. 2. Select the blank (no tracks or b...
Page 79
79 let's take a quick look at dropzone. One of the first things you'll typically need to do is choose a sound. In dropzone and most other cakewalk synths, a sound preset is referred to as a program. 1. In dropzone's program window, click empty program. The program browser appears. 2. Select a progra...
Page 80
80 recording midi first, we'll try recording. This only works if you have a midi controller. If you do not have a midi controller, skip ahead to the next section of this tutorial. For recording, you don't need the dropzone window open. You can close an instrument by clicking in the upper right corne...
Page 81
81 the ruler at the top of this view represents musical measures and beats. The keyboard image on the left represents what notes are being played. Click on the draw tool . You can also enable this tool by pressing the d key on your computer keyboard. The draw tool allows you to click on the grid to ...
Page 82
82 click ok. You can now draw notes at shorter distances from each other. What if i already have a project that contains midi tracks? If you already have a midi track that you would like to play through a software instrument, the steps are a bit different. Let's start by opening a sample project. 1....
Page 83
83 3. In the open these windows area, click synth property page. 4. Click ok. A new synth track is inserted in your project. On some computers, the tracks may play back through the tts-1 at this point. However, on computers that have hardware midi outputs available, you may need to specify the tts-1...
Page 84
84.
Page 85
Tutorial 5 – working with music notation a great way to compose in sonar is by using the staff view. The staff pane displays midi note events as musical notation. For some musicians, this may be the most familiar and comfortable view in which to work. The staff pane provides many features that make ...
Page 86
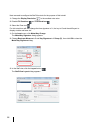
86 next we need to configure the staff view tools for the purpose of this tutorial: 1. Change the display resolution to the smallest note value. 2. Disable fill durations and trim durations . 3. Select the draw tool . For this tutorial we will also change the time signature to ¾, the key to g and th...
Page 87
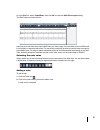
87 4. In the clef list, select treble/bass, then click ok to close the staff view layout dialog. The staff view now looks like this: now that you know how to set up the staff view, it's time to play! You can either record a midi track in this project or manually add notes. The rest of this tutorial ...
Page 88
88 selecting notes to select notes: 1. Click the select tool . 2. Do one of the following: • to select a single note, click the note head. • to select multiple adjacent notes, click outside the first note you want to select and drag the mouse to draw a rectangle around the desired notes. • to select...
Page 89
89 the following table shows the relationship between note durations and ticks (with the default timebase of 960 ticks per quarter note). Deleting a note select the erase tool and click the note you want to delete. Note duration in ticks whole 4:000 half 2:000 quarter 1:000 eighth 480 sixteenth 240 ...
Page 90
90 adding lyrics to add a lyric event below a note: 1. Click the draw tool . 2. Enable the lyric button . 3. Position the pointer just below the note and click. A box appears where lyrics can be typed. 4. Press the space bar to quickly jump to the next note. Adding chord symbols to add a chord symbo...
Page 91
91 adding expressions 1. Click the draw tool . 2. Enable the expression button . 3. Position the pointer just below a note and click. A box appears where expressions can be entered. Adding a crescendo or decrescendo/diminuendo 1. Click the draw tool . 2. Enable the hairpin button . 3. Position the p...
Page 92
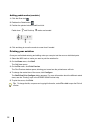
92 adding pedal marks (sustain) 1. Click the draw tool . 2. Enablen the pedal button . 3. Position the pointer below the staff and click. Pedal down and pedal up marks are inserted. 4. Click and drag to move the marks to a new time if needed. Printing your notation once you are finished entering and...
Page 93
Tutorial 6 – editing your music while working on your music, you are likely to find that editing is a major part of the song creation process. Before people started making music on computers, all of the editing was done by cutting tape with a razor blade and piecing it together. You can imagine how ...
Page 94
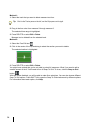
94 method 1: 1. Select the track that you want to delete measure two from. 2. Drag in the time ruler from measure 2 through measure 3. The selected time range is highlighted. 3. Press delete or select edit > delete. Measure two is deleted from the selected track. Method 2: 1. Select the free edit to...
Page 95
95 moving clips from time to time, you may need to move clips around. If you understand selection, you're half way there already. 1. Select the section you want to move. 2. With the free edit tool, click the top or bottom of the selection and drag the clip to the desired location. The drag and drop ...
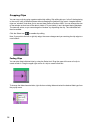
Page 96
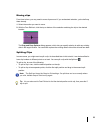
96 cropping clips you can crop a clip by using a gesture called slip editing. Slip editing lets you “roll out” the beginning or the end of a clip to different places without changing the position of the music. Imagine that the clips are “windows” that allow you to see and hear pieces of audio or mid...
Page 97
97 undo and redo while editing a project, you might make mistakes or experiment with an idea that doesn't produce the desired results. Sonar has unlimited undo for such occasions. You can undo one step at a time by selecting edit > undo or by pressing ctrl+z. You can also look at your edit history a...
Page 98
98.
Page 99
Tutorial 7 – mixing and adding effects mixing is an important part of recording that can really help the music you create in sonar sound its best. Mixing involves placing different instruments and sounds in layers of the frequency spectrum, adjusting levels so that tracks blend nicely, spreading the...
Page 100
100 volume and pan adjusting volume and pan is always a good place to start when mixing. One of the biggest benefits of sonar's console view is that you can easily see the volume and pan controls for many tracks simultaneously, in addition to large meters. Some people also enjoy working in the conso...
Page 101
101 the next thing we'll try is panning. As with mixing in general, there are no rules when it comes to panning. Be creative, trying different ideas to see how they sound. One important thing to consider is that when you pan two tracks that share the same frequency range away from each other they wi...
Page 102
102 eq. Eq can accentuate or turn down a certain frequency range in a sound. For example, if you have an unwanted high-pitched buzz on one of your tracks, an eq may be able to turn that high frequency down without affecting the sound of the instrument. Reverb. Reverb creates an artificial space. It ...
Page 103
103 3. Grab one of the numbered nodes and drag it around. Boost the selected band until you find the frequency range that interferes with chirppy synth. When you find it, turn down the selected band by dragging the node downward. Experiment with the other controls on the eq to get the best possible ...
Page 104
104 3. Configure the send assistant as follows: • click new bus. This will create a new reverb bus instead of routing the tracks to an existing bus. • select stereo • in the name box, type reverb. • click choose effect and select audio effects > sonitus:fx > reverb. • make sure pre fader is not sele...
Page 105
105 when a send is enabled, you will hear the reverb effect during playback. To adjust how much reverb is applied to each track, use the send's level control. Enable the send control for each track that you want reverb on. You'll probably want at least a little reverb on every track except for the k...
Page 106
106 automation allows you to make gradual or sudden changes to make your song more dynamic. For example, in the tutorial project, you might find that whiney synth should become lower in volume at measure 25, when the drums and bass change. Try it: 1. Click the write automation button on the whiney s...
Page 107: Importing Video
Tutorial 8 – working with video sonar allows you to add music and sound to your videos. This tutorial will guide you through the basics of working with video inside sonar. If you are new to sonar, it is highly recommended you review “tutorial 1 – creating, playing, and saving projects” on page 53 be...
Page 108
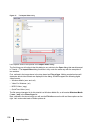
108 importing video figure 17. The import video dialog let’s explore some of the options in the import video dialog. The first thing you will notice is that this dialog is very similar to the open dialog that was discussed in tutorial 1. The import video dialog functions in very much the same way wi...
Page 109
109 importing video for now, let’s leave the import audio stream and show file info check boxes selected. Just as you would with the open dialog, navigate to the following location: my documents/cakewalk/sonar/sample content/tutorials locate and import the file named boarding.Wmv. You can open it by...
Page 110
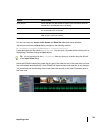
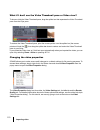
110 importing video what if i don’t see the video thumbnail pane or video view? To show or hide the video thumbnail pane, drag the splitter bar that separates the video thumbnail pane from the clips pane. To restore the video thumbnail pane, point the mouse pointer over the splitter bar (the mouse p...
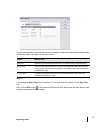
Page 111
111 importing video there are three options on this tab that are very important to understand and extremely helpful when working with video. Let's take a closer look at them let’s change the start time value to measure 2. To do this, enter the number 2 in the start time box. Now, click the rtz butto...
Page 112: Working With Markers
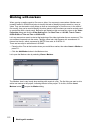
112 working with markers working with markers when syncing up audio events to film cues or video, it is common to use markers. Markers are a powerful feature in sonar that helps to simplify the task of identifying major events in a song or video. They can be used to clarify where a verse or chorus b...
Page 113
113 working with markers from this dialog you can do a lot of very important things. First let’s name this marker by typing intro in the name field. Next, select the lock to smpte (real world) time check box. This option is very important when working with video. If a marker is not locked to smpte t...
Page 114: Exporting Your Video
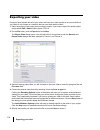
114 exporting your video exporting your video once you have finished with all of your music and have your video synced up as you would like it, you’ll want to mix it down to a video file that you can share with the world. 1. Select everything in the project that you want to export. If you want to ex...
Page 115: Sharing
Tutorial 9 – exporting, cd burning and sharing once your sonar project is complete, you will want to share it with the world or burn a cd. Sonar offers many tools to help you do this. In this tutorial, we are going to explore some of the basics of these tools. Before we get started, let’s open one o...
Page 116
116 figure 18. The export audio dialog you should notice that the top half of this window is very similar to the open and save dialogs that were discussed in “tutorial 1 – creating, playing, and saving projects” on page 53. This is used to navigate to locations on your computer’s hard drive and tell...
Page 117
117 if you would like to burn an audio cd of your music 1. Click file > export > audio to open the export audio dialog. 2. In the channel format list, select stereo. 3. In the sample rate list, select 44100. 4. In the bit-depth list, select 16. 5. Enter a name for you mix in the file name box. 6. In...
Page 118
118 depending on the type of blank cd you are using, you can fit up to 80 minutes of audio on one cd. Make note of the space available and space used fields; these will let you know how many more tracks you can fit on your cd. For the best compatibility with most consumer cd players, you should use ...
Page 119
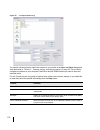
119 cakewalk publisher sonar includes cakewalk publisher, which is a powerful tool to share your music, artwork and playlists on the internet. A detailed description of publisher is beyond the scope of this tutorial, but let’s take a quick look at its basic features and how it integrates with sonar....
Page 120
120 the following table describes a few of the buttons in the publisher interface. If you would like to explore all of the features in publisher, click the button labeled help in the upper right corner of the publisher window. Control function used to configure the player and generate the html code ...
Page 121: New Features In Sonar 8.5
New features in sonar 8.5 sonar 8.5 has many new features (some features are in sonar producer only). The following is a list and description of each new feature. New sound shaping effects: px-64 percussion strip . . . . . . . . . . . . . . . . . . . . . . . . . . . . . . . . . . . . . . . . 123 vx-...
Page 122
122 recording and mixing enhancements: matrix view. . . . . . . . . . . . . . . . . . . . . . . . . . . . . . . . . . . . . . . . . . . . . . . . . . . 132 rex file import. . . . . . . . . . . . . . . . . . . . . . . . . . . . . . . . . . . . . . . . . . . . . . . . 133 freeze and archive buttons in...
Page 123: Px-64 Percussion Strip
123 px-64 percussion strip px-64 percussion strip figure 21. Px-64 percussion strip px-64 percussion strip is a multi-functional plug-in that combines a series of effects specifically optimized and streamlined for drum and percussion processing. Combining transient shaping, compression, expansion, e...
Page 124: Vx-64 Vocal Strip
124 vx-64 vocal strip vx-64 vocal strip figure 22. Vx-64 vocal strip vx-64 vocal strip is a multi-functional plug-in that combines a series of effects specifically optimized and streamlined for vocal processing. Combining compression, expansion, equalization, deessing, doubling, delay and tube satur...
Page 125: Session Drummer 3
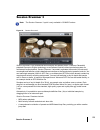
125 session drummer 3 session drummer 3 figure 23. Session drummer 3 session drummer 3 is a professional drum sampler and pattern player. It features cakewalk’s patented expression engine technology, an anti-aliased, real-time sound production system for multisample audio playback. Session drummer 3...
Page 126: Alias Factor
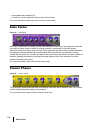
126 alias factor • an animated user interface (ui). • controls for volume, pan and tuning of each drum kit piece. For more information, see the session drummer 3 online help. Alias factor figure 24. Alias factor alias factor combines bit crushing and low pass filtering in a unique way, allowing you ...
Page 127: Hf Exciter
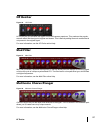
127 hf exciter hf exciter figure 26. Hf exciter hf exciter lets you enhance the higher end of the frequency spectrum. This produces the psycho- acoustic affect that the signal is brighter and clearer. This is done by adding harmonic content that is not present in the original signal. For more inform...
Page 128: Para-Q
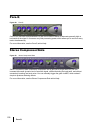
128 para-q para-q figure 29. Para-q para-q is a two-band true parametric eq that can be used to boost or attenuate generally high or low bands of the signal. It consumes very little processing power, which allows you to use it on many tracks simultaneously. For more information, see the para-q onlin...
Page 129: Stereo Delay
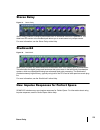
129 stereo delay stereo delay figure 31. Stereo delay stereo delay produces a tempo-synchronized echo on whichever channel it is patched to. The three-band eq section in the feedback path allows you to create some truly unique sounds. For more information, see the stereo delay online help. Studiover...
Page 130: Step Sequencer 2.0
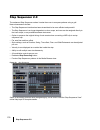
130 step sequencer 2.0 step sequencer 2.0 the enhanced step sequencer makes it easier than ever to compose patterns using a grid. New enhancements include: • the step sequencer interface has been streamlined to be more efficient and powerful. • the step sequencer is no longer dependent on drum maps,...
Page 131: Integrated Arpeggiator
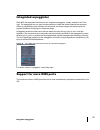
131 integrated arpeggiator integrated arpeggiator each midi and instrument track has its own integrated arpeggiator, visually located in the track view. The arpeggiator lets you play intricate patterns of notes that would otherwise be extremely difficult or impossible to play manually and at speeds ...
Page 132: Matrix View
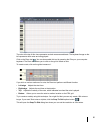
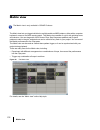
132 matrix view matrix view the matrix view lets you trigger individual or multiple audio and midi patterns, either with a computer keyboard, mouse or via midi remote control. The matrix view consists of a grid, with unlimited rows and columns. You can drag audio, midi groove clips, step sequencer p...
Page 133: Rex File Import
133 rex file import rex file import like acidized wave files, rex files are audio files that are designed to be looped and follow the project’s tempo. The time stretching technology that rex files use is well suited for percussive sounds, such as drums. You can import rex files into a sonar project....
Page 134: New Freeze Option
134 new freeze option new freeze option the freeze options dialog has a new track fx option, which allows you to either include or exclude track fx bins during freeze operations. When freezing audiosnap clips in order to conserve cpu resources, it is often desirable to not render track fx bins. Solo...
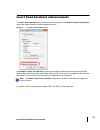
Page 135
135 insert send assistant enhancements insert send assistant enhancements the insert send assistant dialog has an improved layout and a new match track’s pan and gain option that makes it easier to create headphone mixes. Figure 38. The insert send assistant dialog when match track’s pan and gain is...
Page 136: Dc Offset Meter In Analyst
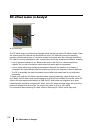
136 dc offset meter in analyst dc offset meter in analyst a. Dc offset meter the dc offset meter is a bi-directional bargraph meter that lets you detect dc offset in audio. There are various ways dc offset can be introduced into a mix. Dc offset can come from recording sources, software instruments,...
Page 137: Audiosnap 2.0
137 audiosnap 2.0 audiosnap 2.0 audiosnap 2.0 provides simplified workflow and introduces many enhancements that make it easier to fix timing problems in audio and align audio with the project tempo. Audiosnap 2.0 highlights include: • audio clips are always ready to be processed via audiosnap, with...
Page 138: Tab to Transients
138 tab to transients tab to transients you can use the tab and shift+tab keys to jump to audio transients, and midi note events. In sonar 8.5, tab to transients is always available when the transport is idle, and is no longer dependent on audiosnap. Tab to transients is now selection-based, which m...
Page 139
139 change i/o devices without restarting sonar change i/o devices without restarting sonar you can add or remove usb/firewire audio and midi devices while sonar is running, and the audio and midi engines will dynamically respond to any changes. When a device is added or removed, sonar prompts you t...
Page 140: Media Browser Enhancements
140 media browser enhancements jbridge support similar to bitbridge, jbridge allows you to use 32-bit vst effects and instruments when using the x64 version of sonar, as well as use 64-bit plug-ins when using the x86 version of sonar. Jbridge can also bridge 32-bit plug-ins in the x86 version of son...
Page 141: Troubleshooting
Troubleshooting if you’re having a problem with sonar, don’t panic. This chapter lists some common problems and how to solve them. If you don’t find an answer here, there are two other important places to look for help: • check the readme file that came with your software. It contains additional inf...
Page 142: Files At Maximum Latency
142 i can’t open my project. . . . . . . . . . . . . . . . . . . . . . . . . . . . . . . . . . . . . . . . . 151 audio distorts at greater than 16 bits . . . . . . . . . . . . . . . . . . . . . . . . . . . . . . 151 no sound from my soft synth . . . . . . . . . . . . . . . . . . . . . . . . . . . . ...
Page 143
143 when i play a file, i don’t hear anything open a project (.Cwp) and click the play button. If you don’t hear any music, try the following suggestions: if none of these suggestions works, check our website for additional suggestions or contact technical support. Possible problem what to do your s...
Page 144
144 i can’t record from my midi instrument if you are unable to record music from your electronic keyboard, synthesizer, or other midi instrument, first test to see if you are able to play back a project through the keyboard. Then try the following: if none of these suggestions works, check our web ...
Page 145: Portion Doesn’T Play
145 when i play a file containing audio, the audio portion doesn’t play open a bundle file (.Cwb) and click the play button. Do you hear the audio tracks in the project (there may be midi tracks in the bundle file, so you must mute them). If not, try the following: if none of these suggestions works...
Page 146: I Can’T Record Any Audio
146 i can’t record any audio if you are unable to record audio through your sound card, try the following suggestions: if these suggestions don’t work, check our website for additional suggestions or contact technical support. The music is playing back with the wrong instrument sounds if the tracks ...
Page 147
147 my keyboard doubles every note i play when your keyboard doubles the notes, each note seems heavier or thicker than usual, as if two notes of the same pitch are emitted when you press the key. Also, you may find that you can play only half as many notes at one time before some of the held notes ...
Page 148: Sound Or Level
148 why do i get errors from the wave profiler? Audio devices such as voice modems or speakerphone devices can cause an error message when running the wave profiler. Sometimes these errors are harmless; on other occasions you need to disable the voice modem or speaker-phone device before running the...
Page 149: My Midi Instrument?
149 how do i use sonar to access all the sounds on my midi instrument? Sonar is normally set up to access the 128 sounds that are part of the general midi standard. Sonar also includes custom instrument definitions that match the sounds on many popular instruments. To use a custom instrument definit...
Page 150: Rate Audio
150 to mute your sound card’s direct sound: 1. Open the software mixer that controls your sound card. If your sound card uses the windows mixer, open the mixer by using the start > programs > accessories > entertainment > volume control command, or by double-clicking the speaker icon on the windows ...
Page 151: I Can’T Open My Project
151 i can’t open my project your project may have become corrupted. You can attempt to open the project using safe mode. To use safe mode • if you are opening a file from the most recently used files list in the file menu, hold down the shift key while selecting file name. • if you are opening the f...
Page 152: No Sound From My Soft Synth
152 no sound from my soft synth use the following table to troubleshoot problems hearing a synth in sonar: possible problem what to do synth doesn’t sound when a recorded midi track is sent to it. • make sure you select a midi channel in the midi track’s output field; you may also need to select a p...
Page 153: Open Them In Sonar
153 my pro audio 9 files sound louder/softer when i open them in sonar pro audio 9 has a setting in the audio options dialog box called midi volume mapping. This setting determines how many db that a movement of a volume fader produces. This setting is not stored in each project file, so sonar can’t...
Page 154
154 bouncing tracks takes a long time by default, sonar uses a buffer for bouncing tracks that is the same size as the mixing latency value that you set in the audio options dialog. But with some projects, especially ones that use certain soft synths, the bounce buffer needs to have its own value. Y...
Page 155
155 7. Use notepad to open the xrayexclude.Ini file that's in your sonar program folder (c:\documents and settings\\application data\cakewalk\sonar 8 producer edition). 8. At the end of the file, find the [effectprops view] section. You will see entries such as the following: ; waves ssl eq stereo x...
Page 156: File Recovery Mode
156 file recovery mode sonar 5 introduced a special diagnostic mode called safe mode to fix problems with project files that would not open. Safe mode is activated when you open a file while the shift key is pressed. In certain rare circumstances, on attempting to open a project file you may see the...
Page 157
157 what does file recovery mode do? File recovery mode applies the following behavior when opening a project file: • opens only the track view, skipping all other opened views in the project including effects windows, console view etc. • prompts you if you want to open the plug-ins saved with your ...
Page 158
158.
Page 159: Glossary
Glossary aftertouch midi property controlling how much pressure is applied after sending a note on message. See “channel aftertouch (chanaft)” on page 160 and “key aftertouch (keyaft)” on page 164. Aiff short for audio interchange file format, the audio file format on the macintosh platform. Files i...
Page 160
160 automation ability to change controllable parameters over the length of a track. This is achieved by referencing “snapshots” or “nodes” assigned to specific parameter values in relation to their position on the timeline and is achieved with envelopes. See the online help topic quick automation g...
Page 161
161 clip a reference to a portion or entire audio or midi file stored on your computer. Clips can be edited, moved, linked, copied etc. As a means of creating your project. Clone a command that allows you to copy a track along with its properties. You can choose to copy the clips or events or both. ...
Page 162
162 drm (dump request macro) utility for getting synthesizer data into a bank. Duration in sonar’s step record dialog box, duration means the actual length of time that a note sounds, as opposed to the notated value of the note, which could be different. If you check the follow step size option in t...
Page 163
163 frame one of the many single photographic images in a motion picture or video. It the smallest unit used for smpte synchronization. See the online help topic smpte/midi time code synchronization. Frame rate indicates the number of frames displayed per second. From time the beginning of a selecti...
Page 164
164 hairpin symbol crescendo or decrescendo mark. See the online help topic chords and marks input the selection for which channel of a device you wish to receive signal from. See the online help topic choosing an input. Input monitoring hearing real-time playback of a track's input as it is being s...
Page 165
165 live mode temporary condition of a project with all automation turned off. You can toggle back and forth between live mode and regular mode by clicking the live mode button. Locked (smpte) time locks a marker to a specified time from the start of the music. Not affected by changes in tempo or ti...
Page 166
166 midi musical instrument digital interface. The means by which computers communicate with most sound cards, keyboards, and other electronic instruments. Mixdown combination of two or more audio tracks into a stereo submix. See the online help topic routing and mixing digital audio. Mmc (midi mach...
Page 167
167 offset shift (time, key, velocity) by a specified number of units. For example, you could offset the start of a track by two measures. Overload loss of audio information caused by the audio level exceeding 0 db. Pan degree to which a sound or piece of music comes from the left or right speaker. ...
Page 168
168 project pitch also known as the default project pitch. The project pitch is the pitch that all groove clips and acidized loops in your project follow if there are no pitch markers in the project. You can set the project pitch in the markers toolbar. Property any attribute or value belonging to a...
Page 169
169 sensitivity (window) distance from a timing grid a note has to be to be unaffected, or affected less, by quantizing. Shape an automation envelope created in the track view or console view. Size the number of events in a track, listed in the size column of the tracks window. This number changes e...
Page 170
170 sysx short for system exclusive, refers to midi messages that only a specific device can use and understand. Cakewalk's system exclusive library, which can store, record, and display for viewing or editing 256 banks, each holding any number of patches. See the online help topic system exclusive ...
Page 171
171 timebase same as ppq. Timing resolution, measured in pulses (ticks) per quarter note. Determines how finely you can specify notes. See the online help topic setting the midi timing resolution. Tpq same as timebase or ppq. Short for ticks per quarter note. Track cakewalk's representation of one o...
Page 172
172.
Page 173: Index
Index .Clr 48 .Cwp files 26 24-bit problems 153 a audio digital 15 recording see recording audio audio data playback problems 145 recording problems 146 b big time view 36 bouncing tracks takes too long 154 bus pane docking views in 38 buses 32 c cakewalk publisher 119 clips 27 selecting 30 selectin...
Page 174
174 index errors wave profiler 148 event list view 35 f faqs 141 file opening 28 file extensions .Cwp 26 file menu open 28 file recovery mode 156 files studioware 27 floating views dual monitor support 39 g game sound 12 groove clips 27 h help menu quick start 24 i input monitoring disabling 149 ins...
Page 175
175 index n notation working with 85 notes doubling 147 now time 46 o options menu colors 47 midi devices 25 p partial clips selecting 30 patches downloading 141 piano roll view 33 overview 33 playback controlling using transport toolbar 46 problems 143 port address settings 24 preferences migrating...
Page 176
176 index tracks 154 see also recording; track properties transport toolbar 46 troubleshooting 141 tutorial 5 working with music notation 85 u uninstalling sonar 51 updates 141 usb audio 24 bit problems 153 v views 28 – 45 allowing multiple instances of the same 39 docking in bus pane 38 floating 39...
Page 177
Cakewalk, inc. License agreement you should carefully read all of the following terms and conditions before using this product. Install- ing and using the product indicates your acceptance of these terms and conditions. If you do not agree with them, you should promptly return the product unused and...
Page 178
6.2. Limitations on warranties. The express warranty set forth in this article 4 is the only warranty given by cake- walk with respect to the entire product; cakewalk makes no other warranties, express, implied or arising by custom or trade usage, and specifically disclaims the implied warranties of...

