- DL manuals
- CAKEWALK
- Stereo System
- Cakewalk SONAR
- User Manual
CAKEWALK Cakewalk SONAR User Manual
Summary of Cakewalk SONAR
Page 1
Cakewalk sonar user’s guide © ™.
Page 2
Information in this document is subject to change without notice and does not repre- sent a commitment on the part of twelve tone systems, inc. The software described in this document is furnished under a license agreement or nondisclosure agreement. The software may be used or copied only in accord...
Page 3: Table Of Contents
Preface . . . . . . . . . . . . . . . . . . . . . . . . . . . . . . . . . . . . . . . . . . . . . . . . . . . . . . . . . . . . . Xix about this book . . . . . . . . . . . . . . . . . . . . . . . . . . . . . . . . . . . . . . . . . . . . Xix registering sonar today . . . . . . . . . . . . . . . . . ...
Page 4
Iv 2 tutorials . . . . . . . . . . . . . . . . . . . . . . . . . . . . . . . . . . . . . . . . . . . . . . . . . . . . . . . . . 47 tutorial 1—the basics . . . . . . . . . . . . . . . . . . . . . . . . . . . . . . . . . . . . . . . . 48 opening a project file . . . . . . . . . . . . . . . . . . . . ...
Page 5
V tutorial 6—using groove clips . . . . . . . . . . . . . . . . . . . . . . . . . . . . . . . . 85 adding groove clips to a project . . . . . . . . . . . . . . . . . . . . . . . . . . . . 86 looping groove clips . . . . . . . . . . . . . . . . . . . . . . . . . . . . . . . . . . . . . 87 changing th...
Page 6
Vi changing track settings . . . . . . . . . . . . . . . . . . . . . . . . . . . . . . . . . . . . . 127 setting up output devices . . . . . . . . . . . . . . . . . . . . . . . . . . . . . . . . 134 assigning tracks to outputs . . . . . . . . . . . . . . . . . . . . . . . . . . . . . . . 136 choosin...
Page 7
Vii confidence recording . . . . . . . . . . . . . . . . . . . . . . . . . . . . . . . . . . . . . . . 179 input monitoring . . . . . . . . . . . . . . . . . . . . . . . . . . . . . . . . . . . . . . . . . . . 180 the audio engine button . . . . . . . . . . . . . . . . . . . . . . . . . . . . . . . ...
Page 8
Viii clip muting and isolating (clip soloing) . . . . . . . . . . . . . . . . . . . . . . . . 234 clip muting with the default style . . . . . . . . . . . . . . . . . . . . . . . . . 235 clip muting with the alternate style . . . . . . . . . . . . . . . . . . . . . . . . 236 audition (selection play...
Page 9
Ix selecting and editing events . . . . . . . . . . . . . . . . . . . . . . . . . . . . . . . . . 283 transposing . . . . . . . . . . . . . . . . . . . . . . . . . . . . . . . . . . . . . . . . . . . . 284 shifting events in time . . . . . . . . . . . . . . . . . . . . . . . . . . . . . . . . . . 28...
Page 10
X using drum maps . . . . . . . . . . . . . . . . . . . . . . . . . . . . . . . . . . . . . . . . . . 340 assigning a midi track to a drum map . . . . . . . . . . . . . . . . . . . . . 340 opening a drum map . . . . . . . . . . . . . . . . . . . . . . . . . . . . . . . . . . . . 340 displaying track...
Page 11
Xi fades and crossfades . . . . . . . . . . . . . . . . . . . . . . . . . . . . . . . . . . . . . . . 380 using fades and crossfades in real time . . . . . . . . . . . . . . . . . . . 380 applying fades and crossfades offline . . . . . . . . . . . . . . . . . . . . . . 384 audio effects (audio plug-...
Page 12
Xii routing and mixing digital audio . . . . . . . . . . . . . . . . . . . . . . . . . . . . . . 430 audio tracks . . . . . . . . . . . . . . . . . . . . . . . . . . . . . . . . . . . . . . . . . . . 432 stereo buses . . . . . . . . . . . . . . . . . . . . . . . . . . . . . . . . . . . . . . . . . ....
Page 13
Xiii surround effects . . . . . . . . . . . . . . . . . . . . . . . . . . . . . . . . . . . . . . . . . . . 488 the surroundbridge . . . . . . . . . . . . . . . . . . . . . . . . . . . . . . . . . . . . . 488 effect property pages . . . . . . . . . . . . . . . . . . . . . . . . . . . . . . . . . . ....
Page 14
Xiv 15 working with notation and lyrics . . . . . . . . . . . . . . . . . . . . . . . . . . . . . . . . . . . 525 the staff view . . . . . . . . . . . . . . . . . . . . . . . . . . . . . . . . . . . . . . . . . . . . . 526 opening the staff view . . . . . . . . . . . . . . . . . . . . . . . . . . . ...
Page 15
Xv opening the meter/key view . . . . . . . . . . . . . . . . . . . . . . . . . . . . . . 561 adding and editing meter/key changes . . . . . . . . . . . . . . . . . . . . . 562 music notation for non-concert-key instruments . . . . . . . . . . . . . 563 working with lyrics . . . . . . . . . . . . . ...
Page 16
Xvi transmitting banks during playback . . . . . . . . . . . . . . . . . . . . . . . . . . 595 real-time recording of system exclusive messages . . . . . . . . . . . . . . . 596 sysx echo . . . . . . . . . . . . . . . . . . . . . . . . . . . . . . . . . . . . . . . . . . . . . . . . . 596 sysx . Ini...
Page 17
Xvii improving performance with digital audio . . . . . . . . . . . . . . . . . . . . . . 634 getting the most out of your pc . . . . . . . . . . . . . . . . . . . . . . . . . . . 635 mixing latency . . . . . . . . . . . . . . . . . . . . . . . . . . . . . . . . . . . . . . . . . 637 wdm vs. Mme dri...
Page 18
Xviii appendix c: cyclone . . . . . . . . . . . . . . . . . . . . . . . . . . . . . . . . . . . . . . . . . . . . . . . . . 661 overview . . . . . . . . . . . . . . . . . . . . . . . . . . . . . . . . . . . . . . . . . . . . . . . . . . 661 cyclone dxi toolbar . . . . . . . . . . . . . . . . . . . ....
Page 19: Preface
The sonar user’s guide is designed to help you learn and use sonar. This guide explains how sonar works and how to use it to create, edit, produce, and perform. The sonar user’s guide is task-oriented, with lots of cross-references, so that you can find the information you need. The user’s guide als...
Page 20
Xx conventions used in this book the following table describes the text conventions in this book: getting help in addition to this user’s guide, sonar includes online help that can provide you with quick reference information whenever you need it. Simply press f1 or click the help button in any dial...
Page 21: Introduction
Introduction sonar is a professional tool for authoring sound and music on your personal computer. It’s designed for musicians, composers, arrangers, audio and production engineers, multimedia and game developers, and recording engineers. Sonar supports wave, mp3, acidized waves, wma, aiff and other...
Page 22
22 : about sonar sonar is the flagship product of the cakewalk line of integrated midi and digital audio sequencers for the windows platform. Sonar has a comprehensive feature set that makes it the single most productive tool for sound and music authoring. Here are some of the ways you can use sonar...
Page 23
23 inserts, in effects loops, or to the master mix. Sonar supports 44.1 khz sampling for cd-quality sound and lets you choose from lower or higher sample rates as well. All audio effects are 32-bit floating point for faster processing and high- quality sound reproduction. Web authoring sonar is the ...
Page 24
24 : the midi language conveys information and instructions, both from the computer to the instrument and from the instrument to the computer. For example, if your computer wants your keyboard to play a note, it sends a midi “note on” message and tells the keyboard which note to play. When your comp...
Page 25
25 these vibrations are very fast. The slowest vibration frequency you can hear is about 20 vibrations per second, and the fastest is around 16,000 to 20,000 vibrations per second. Recording digital audio to record digital audio, your computer monitors the electrical signal generated by a microphone...
Page 26
26 : before you attach or detach any cables from your computer, you should shut down your computer and turn off the power to all your equipment. This greatly reduces the chance of electrical damage to your equipment while plugging and unplugging cables. To connect a midi keyboard to your computer 1....
Page 27
27 to install sonar 1. Start your computer. 2. Close any open programs you have running. 3. Place the sonar cd-rom in your cd-rom drive. If you have autorun enabled, the sonar autorun menu opens automatically, showing you a dialog box with several buttons. If autorun is not enabled, you can open the...
Page 28
28 : when you start sonar, you see the quick start dialog box. The quick start dialog box has several options: if you don’t want to see the quick start dialog box in the future, uncheck the box at the bottom of the dialog box, and click close. You can see the quick start dialog box later by choosing...
Page 29
29 when you choose to migrate preferences, sonar migrates the following settings from an earlier cakewalk version: running wave profiler the first time you start sonar, it automatically runs the wave profiler utility. Wave profiler determines the proper midi and audio timings for your sound card and...
Page 30
30 : setting up the midi in and midi out devices when you start sonar for the first time, it checks your computer to find all the midi input and output devices you have installed (such as sound cards and midi interfaces). However, sometimes you need to tell sonar exactly which devices you want it to...
Page 31
31 using midi devices after making driver changes if you later add or remove drivers using the drivers icon of the windows control panel, sonar reacts in the following way: • if you remove a control panel driver, sonar will not use the device it belongs to the next time you run the program. Any othe...
Page 32
32 : tracks are used to store the sound or music made by each instrument or voice in a project. For example, a song that is arranged for four instruments and one vocalist may have 5 tracks—one for each instrument and one for the vocals. Each project can have an unlimited number of tracks. Some of th...
Page 33
33 opening a file use the following procedure to open a file. To open a file in sonar 1. If you haven't already done so, start sonar. 2. Choose file-open. 3. In the open dialog box, navigate to the directory where the project you want to open is located and select it. 4. Click the open button. 5. If...
Page 34
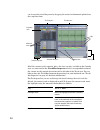
34 : can change the size of the panes by dragging the vertical or horizontal splitter bars that separate them. All of the current track’s controls, plus a few that are only available in the console view, are contained in the track/bus inspector which is an expanded version of the current track’s con...
Page 35
35 the current track’s controls are contained in the track/bus inspector. The clips pane shows the clips in your project on a horizontal timeline called the time ruler that helps you visualize how your project is organized. Clips contain markings that indicate their contents. The clips pane lets you...
Page 36
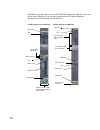
36 : the following graphic shows most of the track/bus inspector’s controls (there may not be room to display all of a track’s controls on the track/bus inspector, depending on the resolution of your monitor): track/bus inspector for an audio track phase, mono, input echo mute, solo, arm pan volume ...
Page 37
37 you can hide or show any of the track/bus inspector’s controls, and use it to display the controls from any track or bus. The following table shows you how: to do this… do this… hide or show the track/bus inspector press i on your keyboard. Display a certain track’s or bus’s controls in the track...
Page 38
38 : the console view the console view is where you can mix the sounds on all the different tracks to create the final mix of your project. While the track view provides most of the same controls, you may want to use the more familiar interface of the console view for mixing. You use the console vie...
Page 39
39 the console view: as in the track view, you can change track settings or record new music or sound in the console view. You may choose to use one view or the other, or the choice you make may depend on which project you are working on. Other views sonar has a number of other views you can use to ...
Page 40
40 : you can also use the piano roll view to display and edit midi velocity, controllers, and other types of information. The piano roll view also contains the drum editor, which allows you to “paint” drum patterns using the pattern brush tool and play different drum modules from a single track. The...
Page 41
41 the loop construction view : allows you to create and edit groove clips (sonar loops that “know” the tempo and key in which they were recorded), and export these clips as acidized files. The loop explorer view : allows you to preview acidized files and other wave files; and drag and drop them int...
Page 42
42 : sonar has several other views that are used for very specific purposes: zoom controls many of the views contain zoom tools that let you change the horizontal and vertical scale of the view: the zoom tools are used as described in the following table: view… how you use it… meter/key to change th...
Page 43
43 the zoom tool is automatically disarmed after use. Double-click the zoom tool to make the selection stick. You can also zoom with the keyboard: locking views by default sonar allows only one instance of each view, but you can lock the contents of most views, preserving the current view by forcing...
Page 44
44 : floating views when a view is float enabled, you can move it outside of the confines of sonar. This is particularly useful if you take advantage of sonar’s dual monitor support. Using dual monitor support, you can keep the track or console view on one monitor and “float” other views to the othe...
Page 45
45 windows taskbar indicators when sonar is running, you’ll normally see two indicators in your windows taskbar, right next to the clock. The midi activity monitor contains two lights that indicate midi input and output. When you play your midi keyboard, the first light flashes when each note is pre...
Page 46
46 : sonar uses the colors you have chosen. To restore the default colors 1. Choose options-colors to display the colors dialog box. 2. Click the defaults button. 3. Click ok. Sonar uses the default colors for all screen elements. To change the wallpaper 1. Choose options-colors to display the color...
Page 47: Tutorials
Tutorials now that you’ve learned some of the basics, it’s time to put that knowledge to work. These tutorials will give you some hands-on practice in playing, recording, and mixing your projects. If you want to learn more about any topic, you’ll find references to the appropriate part of the user’s...
Page 48
48 tutorial 1—the basics the first tutorial teaches you the basics of sonar. You'll learn how to: • open and play a project file • make the project repeat automatically • use markers • speed or slow the tempo • mute a track and play a track solo • change a track's instrument • play a track on a midi...
Page 49
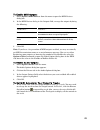
49 to enable midi outputs 1. Select options-midi devices from the menu to open the midi devices dialog box. 2. In the midi devices dialog in the outputs field, arrange the outputs by doing the following: 3. Click ok. Note: if you have a large number of midi outputs enabled, you may occasionally get ...
Page 50
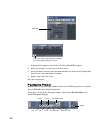
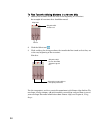
50 a popup menu appears, containing a list of enabled midi outputs. 2. Select the output you want to use for that track. 3. Press the down arrow on your computer keyboard to move to the output field for the next track and choose an output. 4. Repeat step 3 for each track. Let's play the project! Pla...
Page 51
51 to start playback • to play the project, click the play button , or press the spacebar. Do you hear music? If you don't hear anything, see the online help topic called troubleshooting for some troubleshooting tips. To restart the project when sonar gets to the end of the project, it stops. To pla...
Page 52
52 you don’t see the markers toolbar, then choose view-toolbars and check markers. The current project contains several markers. Let’s try starting playback from the marker labeled c: 1. If the project is playing, pause playback by clicking the stop button . 2. In the current marker dropdown menu in...
Page 53
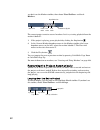
53 to loop over the entire project, do the following: 1. In the loop toolbar, click the loop start time. The time display changes to an edit box with spin controls. 2. To loop over the entire project, the loop must start at 1:01:000. If the loop start time is not already set to 1:01:000, use the key...
Page 54
54 5. Press f5 to open the markers dialog box. 6. In the markers dialog box, select marker d and click ok. 7. Click the loop on/off button to enable looping. 8. Click rewind. The project rewinds to the loop start time. 9. Click play. A quicker way of selecting the loop times in the preceding example...
Page 55
55 setting the tempo let’s pick up the pace a little. Do the following: 1. With the project playing, click on the tempo value in the tempo toolbar. The tempo will be highlighted and spin controls will appear. 2. Use the spin controls to increase the tempo to 100 beats per minute. 3. Press enter. The...
Page 56
56 muting and soloing tracks muting a track causes it not to sound when you play your project. Soloing a track mutes all the tracks except the ones that are soloed. You can change a track’s mute or solo status while your project is playing. Muting a track frequently you will want to temporarily turn...
Page 57
57 playing a track solo if you want to hear one track by itself, you could mute all other tracks. But there’s a quicker way to do it—the solo button. For example, to play the drum part by itself, do the following: 1. Click the solo button in the drum track (track 5). Voila, a percussion solo! 2. To ...
Page 58
58 changing a track's instrument if your sound card is like most, its internal synthesizer is capable of producing at least 128 different instrument sounds, plus several dozen percussion sounds. Now you'll find out how to get some of those other instruments into the act. Let’s try changing the instr...
Page 59
59 midi is dedicated to percussion. The note determines the instrument, and the patch is irrelevant. Changing the patch in the track/bus inspector you can also change a track’s patch in the track/bus inspector, which is a vertically expanded version of the current track’s controls at the far left si...
Page 60
60 routing midi data to the keyboard let’s play back the piano track through your midi keyboard. First, turn your keyboard on and make sure it is set up to receive midi input on channel one. Then, do the following: 1. In the track view, in the piano track (track 1), click the output field to open th...
Page 61
61 tutorial 2—recording midi this tutorial teaches you how to record midi data with sonar. You’ll learn how to: • set up the metronome • record midi tracks • use loop recording • use punch recording creating a new project if you haven’t already done so, the first thing you need to do is create a pro...
Page 62
62 let’s set up the metronome to play audio for two count-in measures when recording. Here's what to do: 1. In the metronome toolbar, click in the count-in box. 2. Use the + or - buttons to set the count-in value to 2. 3. Click the count-in measures option to select it. 4. Deselect the metronome dur...
Page 63
63 record options dialog box, which you open with the transport-record options command). To mute any track, click the track's mute button . Since this is a new project, there is no need to mute or solo any track. You can also set other playback options, such as the tempo ratio, to make your recordin...
Page 64
64 7. Choose view-staff to open the staff view. 8. Choose view-event list to open the event list view. 9. Choose window-tile in rows to tile the views. 10. To return to the start of the project, click the rewind button, or press w. 11. Click play or press the spacebar. It’s almost as easy to listen ...
Page 65
65 sonar saves the project under the new name. From now on, you can click the save button to save this project. Loop recording if you'd like to record several takes successively, you can set up sonar to loop over the entire project, or just some section of it. Sonar will record a new take during eac...
Page 66
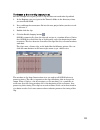
66 loop recording finally, let's record our takes: 1. Choose transport-record options to display the record options dialog box. 2. Choose the store takes in separate tracks option to store each new take in a separate track. Each time a new take starts, the settings from the first track will be copie...
Page 67
67 let's try it. Suppose you want to replace several measures in the recording you made earlier in this tutorial. 1. Display the record toolbar by choosing view-toolbars-record. 2. In the record toolbar, click the punch in time. 3. Type the number of the measure at which you want to begin punch reco...
Page 68
68 when auto punch is enabled, the time ruler displays special markers that indicate the punch in and punch out times. You can drag these markers to change the punch in and punch out times. Tutorial 3—recording digital audio to record digital audio, you need some sort of device hooked up to your sou...
Page 69
69 setting the sampling rate each sonar project has a parameter that specifies the sampling resolution for all digital audio data in the project. You should set this rate before recording any digital audio. To set the sampling rate: 1. Choose options-audio to open the audio options dialog box. 2. Cl...
Page 70
70 setting the file bit depth the file bit depth is the size of the blocks of memory that sonar allocates to store your project’s audio data. Sonar allocates memory in 8-bit bytes. If you are using an audio driver bit depth of 16, choose a file bit depth of 16. If you are using an audio driver bit d...
Page 71
71 note: sonar has a button called the audio engine button in the transport toolbar, which you click to stop any feedback you may experience if there is a loop somewhere in your mixer setup. Whenever you play a project, sonar automatically enables the audio engine, which you can tell by watching the...
Page 72
72 4. Go ahead and perform! 5. When you finish recording, click the stop button , or press the spacebar. A new clip appears in the clips pane. If no new clip appears, see “i can’t record any audio” on page 645 for some troubleshooting hints. Also, right-click in the clips pane and choose view-option...
Page 73
73 input echo button that’s on the playback state toolbar (to display, use the view- toolbars-playback state command). Caution: if you have any kind of a loop in your mixer setup that causes the output of your sound card to be fed back into the input, you can get feedback, and input monitoring can m...
Page 74
74 tutorial 4—editing midi sonar has too many powerful midi features to look at in one tutorial, so let’s look at some of the most basic features and also cover some exciting new ones, such as slip editing and midi envelopes. In this tutorial, start by opening the file tutorial 4. Cwp in the tutoria...
Page 75
75 copying clips with drag and drop the first clip in the bass track is two measures long; we can easily drag-copy it to make it eight measures long. When we drag-copy some of the clips, we can make them into linked clips. When you edit a linked clip, sonar performs the exact same edits on all other...
Page 76
76 3. In the piano roll toolbar, right-click the snap to grid button to open the snap to grid dialog box (snap to grid settings in each view are independent of each other). 4. Make sure the musical time radio button is selected, and in the window to the right of it, select eighth. 5. In the mode fie...
Page 77
77 when you move the draw tool over a note, it changes into one of 3 different editing tools, depending on what part of the note you move it over: • if you move the draw tool over the beginning or end of a note, the draw tool changes into a cross. When you drag one end of a note with the cross icon,...
Page 78
78 3. In the organ track in the clips pane, move the cursor over the right end of the first clip until the cursor changes to a square. Drag the right border to the left until the midi data at the end of the clip is hidden. Now you can’t hear those notes. 4. Drag the end of the second clip to the lef...
Page 79
79 horizontal zoom control so that the beat markers are visible in the time ruler. 3. At the fourth beat of measure eight, add a node to the envelope by moving the cursor over it until a double-ended, vertical arrow appears under it, right- clicking to open the envelope editing menu, and choosing ad...
Page 80
80 to convert midi to audio 1. Pick a destination audio track (or create a new one) and set the input field to stereo (name of your sound card). Note: if you have more than one sound card installed, select the one that has the built-in synth that your midi tracks use. 2. Arm the destination track. M...
Page 81
81 tutorial 5—editing audio in this tutorial we will be editing a bundle file with drums, bass, guitar and organ. We will add some additional percussion, and edit some of the existing tracks. This tutorial covers the following: • importing wave files • dragging and looping clips • slip editing • usi...
Page 82
82 8. Open the tutorials folder located in the directory where sonar is installed. 9. Select organ . Wav and click open. A new clip appears in the selected track at the specified now time—measure 18. 10. Double-click the track name, and type in a new name: “organ,” and press enter. 11. Move the now ...
Page 83
83 slip editing a clip solo the two guitar tracks and listen to the project. We are going to combine these two tracks and create an automatic crossfade between them. Before we do, we have to hide the beginning of the second guitar part so it doesn’t affect the crossfade. We’ll do this using slip edi...
Page 84
84 bouncing tracks when you finish editing a certain number of audio tracks, you can conserve memory and simplify your mix by bouncing (combining) some tracks down to one or two tracks. You can choose to include any effects and automation in the new track that are on the tracks that you want to comb...
Page 85
85 tutorial 6—using groove clips groove clips are audio clips that “know” their tempo and root note pitch. Sonar uses this information to stretch the clips to match changes in tempo and to transpose the root note pitch to match the project’s pitch and pitch changes. Sonar also has midi groove clips ...
Page 86
86 adding groove clips to a project there are two ways to add a groove clip to your project. Let’s use both. To import a groove clip 1. Select file-new to create a new project. 2. Set the default pitch to e by clicking the dropdown arrow in the markers toolbar and choosing e (if you don’t see the ma...
Page 87
87 7. Navigate to the tutorials folder in the directory where you installed sonar. 8. Select 100 onetwo . Wav and drag it into the clips pane below the sound effect track at measure 3. Repeat step 8 by dragging 100 beat 2. Wav below track 2 at measure 7 and 100 organ . Wav below track 3 at measure 1...
Page 88
88 to loop a groove clip 1. Move the cursor over the end of the first groove clip in track 2 until the cursor looks like this . 2. When the cursor changes, click the end of the clip and drag it to the right until you have created one repetition of the clip (through the end of measure 6). You can als...
Page 89
89 5. Click on the clip and drag it one measure to the left. Like this: the drag and drop options dialog appears. 6. In the drag and drop options dialog, click blend old and new and click ok. You have added groove clips and edited them. Your project should look like this: let’s take a listen to what...
Page 90
90 it sounds different because the groove clip on track 4 is no longer following the default project pitch of e, instead it follows its own root note of c. Next, let’s add some pitch markers. To add pitch markers 1. Click the solo button in track 4 to solo the track. 2. Right-click in the time ruler...
Page 91
91 creating your own groove clips any audio clip (of a reasonable size) can be a groove clip. We are going to take a clip, slip-edit it so that it contains just the parts we want, and open it in the loop construction view to add tempo and pitch information to it. To create a groove clip (example 1) ...
Page 92
92 your clip should look something like this: 10. Click the enable looping button on the loop construction view toolbar to enable the clip’s groove clip characteristics. Sonar automatically slices the clip and assigns in a number of beats. Notice that sonar has sliced this clip at eighth note interv...
Page 93
93 to create a groove clip (example 2) for this example we are going to use a clip that does not need to be slip-edited. 1. In the explorer view, navigate to the tutorials folder in the directory where you installed sonar. 2. Drag and drop the drums . Wav file into the new project below your bass tr...
Page 94
94 to fine tune the slicing markers in a groove clip 1. Identify the markers which are close to the beginning of a transient. An example of transients that should be moved: 2. Click the select tool . 3. Click and drag the slicing markers that need to be fine tuned so that they are at the very beginn...
Page 95
95 tutorial 7—mixing sonar has an almost unlimited number of tools to help you mix down. You can automate almost any knob, fader, or button by using any of several methods. You can even automate the internal settings of some effects—not just the bus controls but the controls on some individual effec...
Page 96
96 automating an individual effect’s settings let’s draw an envelope to automate one of the flanger’s controls: 1. In the clips pane, right-click in the first guitar track (the track you added the fxflange effect to) and choose envelopes-create track envelope- fxflange 1 from the popup menu. The fxf...
Page 97
97 grouping controls to assist in manipulating the controls, you can tie faders to one another. For example, if you want to increase the volume level on several tracks at the same time, you can assign them to a group. Then, when you move one volume fader, you move them all. You can even have the con...
Page 98
98 or show envelopes by using the dropdown arrow that’s on the side of the envelope tool button in the track view toolbar, or by using the clips pane popup menu, or the envelope editing menu. Now let’s listen to the project again and watch the fader move automatically: 1. Rewind to the beginning. 2....
Page 99
99 7. In the format field, select one of the following options: • export to stereo file(s)—all exported tracks are mixed down to a single stereo file. • export to separate left and right files—all exported tracks are mixed down to two mono files, left and right. • export to mono file(s)—all exported...
Page 100
100 sonar compresses and mixes your project to a file with the extension . Mp 3 that is located in the folder you chose in the look in field of the export audio dialog box. That’s the end of the mixing tutorial. For more information, see “mixing and effects patching” on page 419 and “using automatio...
Page 101
101 inserting cakewalk tts-1 into a project inserting a dxi into a project means that the name of the dxi appears in the dropdown menus of midi track output fields and audio track input fields. To insert cakewalk tts-1 into a project 1. Open a midi project—for this tutorial use tutorial 8. Cwp . 2. ...
Page 102
102 playing midi tracks through a dxi now that you have verified that cakewalk tts-1 is installed, let’s try some of its sounds on some pre-recorded midi data. To play midi tracks through cakewalk tts-1 1. Drag cakewalk tts-1 property page out of the way for now, and in the first midi track (guitar ...
Page 103
103 4. Use the edit-bounce to track(s) command. The bounce to track(s) dialog box appears. 5. In the source category field, choose tracks. 6. In the channel format field, choose mono if you want mono tracks, and stereo if you want stereo tracks. 7. In the source/buses field, make sure all 4 outputs ...
Page 104
104 tutorial 9—drum maps in sonar drum maps allow you to assign a single midi track to multiple outputs. Midi drum tracks appear in the piano roll view’s drum grid pane. In the note map pane you can map pitches to notes in any number of software or hardware outputs. In this tutorial we are going to ...
Page 105
105 create a drum track you can use any blank midi track for your drums. If you don’t have a midi track, create using the insert-midi track command. To assign a midi track to a drum map 1. Display the track view if it is minimized. 2. In the track you want to assign to a drum map, click the output d...
Page 106
106 map drum notes to different outputs first, we need to create an output to use, so lets open cakewalk tts-1 and use that soft synth for this part of the tutorial. To open cakewalk tss-1 1. Select view-synth rack from the menu. 2. Click the insert synth button in the synth rack toolbar and select ...
Page 107
107 to change other drum map settings you can open the drum map manager from either a midi track’s output menu, or with the options-drum map manager command. Change map settings in the drum map manager as described in the following table: when you are happy with the drum sounds you have mapped, you ...
Page 108
108 tutorial 10—cyclone dxi this tutorial explains how to use cyclone dxi. You will learn how to open, play and edit loops as you create a short song. Cyclone overview cyclone dxi allows you to trigger individual parts or “slices” of riff wave files and acidized files. There are 16 pads, and you can...
Page 109
109 to import files to the loop bin 1. Click the load files button in the loop bin. The open dialog appears. 2. Open the tutorials folder located in the directory where you installed sonar. 3. In the tutorials folder select 100fx. Wav and click open. The loop 100fx. Wav appears in the loop bin and t...
Page 110
110 playing cyclone now that we have added loops and adjusted some of the pad group controls, let’s use cyclone as a real-time instrument and as a synth device. To play an existing midi track through cyclone first, we’ll create a midi track which will trigger the pads in cyclone. 1. In the track vie...
Page 111
111 to play cyclone with your mouse as soon as you click on a pad in cyclone the first loop begins to play. Simply click pads to turn them on and click on them again to turn them off. To play cyclone with a midi keyboard or controller for the purposes of this part of the tutorial we assume you have ...
Page 112
112.
Page 113: Controlling Playback
Controlling playback when you play your sonar project, you have full control over the tempo or speed of playback, which tracks are played, which sound cards or other devices are used to produce the sound, and what the tracks sound like. Sonar’s multi-midi enhancements give you the ability to play mu...
Page 114
114 the now time and how to use it every project has a current time, known as the now time, which keeps track of where you are in a project. The now time appears as a vertical line in the track view and is displayed in both the large transport toolbar and the position toolbar, in two formats: the me...
Page 115
115 here are some examples of times expressed in this format (assuming that zero is the start time): sonar provides many ways to set the now time. Here are just a few: to change the now time • click the desired time on the time ruler in the track view, piano roll view, or staff view • in the navigat...
Page 116
116 when entering a time in smpte format, you can enter a single number (hour), two numbers (hour and minutes), three numbers (hour, minutes, and seconds), or all four numbers. If you click in the time ruler while the snap grid is enabled, the now time will be snapped to the nearest point in the gri...
Page 117
117 to change the now time marker behavior 1. Select options-global from the sonar menu. The global options dialog appears. 2. Click the general tab. 3. Uncheck the on stop, rewind to now marker option to have the now time marker move to follow the current now time when you stop playback. Or check t...
Page 118
118 other ways to set the now time there are a variety of commands and keyboard shortcuts you can use to set the now time: if your project has markers, you can use the marker toolbar to set the now time: for more information about markers, see “creating and using markers” on page 224. Command... Sho...
Page 119
119 the time ruler the time ruler appears in the track view, tempo view, staff view and piano roll view. It has several functions, including: • making a time selection the time ruler follows the snap to grid settings, if enabled. For more information about using the snap to grid, see “defining and u...
Page 120
120 to set the time ruler format to samples 1. Right-click in the track view time ruler. 2. In the menu that appears, select time ruler format-samples. Controlling playback to control playback, you have your choice of tools, menu commands, and shortcut keys for most common operations. When you start...
Page 121
121 to start and stop playback note: the default behavior for the now time when you click the stop button is for it to return to the now time marker where playback began. If you want the now time to remain where it is when you stop playback, you can use the keyboard shortcut ctrl+spacebar. If you wa...
Page 122
122 looping sometimes you want to listen to one portion of a project over and over, either so you can play along and rehearse or because you want to edit that section of the project while it is playing and hear the results as you make changes. Sonar has a playback looping feature that makes this sim...
Page 123
123 if you start playback before the loop start time, sonar will play until the loop end time is reached, then jump back to the loop start time. Note: if you stop playback while looping is enabled, the now time jumps to the now time marker. If you disable the on stop rewind to now marker option in t...
Page 124
124 track-by-track playback sonar lets you play back any combination of tracks at one time by changing each track’s status. You can control the status of each track with the individual controls that are on every track, or with the global controls on the playback state toolbar or the status bar that’...
Page 125
125 the track status is saved with the sonar project file. If you save a sonar project as a standard midi file, however, all tracks are saved without mute, solo, or archive indicators. The playback state toolbar to display the playback state toolbar, use the view-toolbars command to open the toolbar...
Page 126
126 to archive or unarchive tracks 1. Select one or more tracks in the track view. 2. Choose track-archive, or right-click and choose archive from the menu to toggle the archive status of the selected tracks. Soloing tracks sometimes you want to hear a single track, or a few tracks at once, without ...
Page 127
127 changing tracks’ mono/stereo status sonar has a mono/stereo button in each track module in the track and console views. The buttons in the track modules force each track to play in either stereo or mono, but preserve the tracks’ pan positions in the stereo mix. The mono/stereo button in each tra...
Page 128
128 here is a summary table of the different track parameters and how they are used. Audio track parameters the following parameters apply to audio tracks: setting... What it means... Number a sequential track number used only for reference name a name that you assign the track for easy reference. N...
Page 129
129 trim (volume trim) volume trim is a pre-fader control which allows the fine tuning of a single track’s volume. For example, let’s say you have four tracks, three tracks have their volume fader set to 0 db while the fourth track’s fader is set to +10 db. You want to group the faders and do a slow...
Page 130
130 midi track parameters the following parameters apply to midi tracks: to change a track name 1. Double-click on the current track name. 2. Enter the new track name. 3. Click enter. The default track names (track 1, track 2, etc.) are not actually names, but placeholders until you name a track. If...
Page 131
131 you can rearrange and resize the panes in the track view as shown in the following table: you can customize which tracks are displayed or not displayed, and enlarge or maximize individual tracks while other tracks remain minimized. You can also manually set the exact size of a track’s display. T...
Page 132
132 changing audio track settings in the track pane you can change the values in the track pane in a number of ways: fx • fx • bus enable/disable (audio tracks only) • bus output level (audio tracks only) • bus output pan (audio tracks only) • bus pre/post fader (audio tracks only) • mono/stereo (au...
Page 133
133 changing midi track settings in the track pane you can change numeric values in midi tracks as shown in the following table: for numeric fields, you can press and hold both mouse buttons to change the value by increments of 10 (12, a full octave, for key+). Control how to change the value channe...
Page 134
134 you can also edit track properties in the track properties dialog box. To open this dialog box, right-click on the track bar and select track properties. You can change the value of a track parameter for several tracks at once using commands on the track-property menu. For example, to assign a g...
Page 135
135 you can purchase midi interfaces that plug into your parallel, serial, or usb port to add midi ports to your computer. For more information on complex system configurations, see appendix b: hardware setup. If your computer has several midi outs, choose the ones you want to use and put them in a ...
Page 136
136 to choose midi devices 1. Choose options-midi devices to display the midi devices dialog box. 2. Click on any midi device in the outputs list. 3. To move any device to the top of the list, deselect all other devices and click move to top to move the selected device to the top of the list. 4. Whe...
Page 137
137 many instruments have descriptive names for their banks and patches. Sonar stores these names in an instrument definition. For more information about instrument definitions, see chapter 16, using instrument definitions. If you are using an instrument that supports general midi, your patch list w...
Page 138
138 3. To search for a patch containing specific text, click the patch browser button to the right of the dropdown lists. You can also open the patch browser by right-clicking a bank or patch control in the track or console views. 4. Click ok. Another way to assign a patch to a track 1. Select the p...
Page 139
139 adding effects you can add both midi and audio effects directly from the track view. Sonar adds these effects in real-time, preserving your track’s original data. To add an audio effect in the track pane 1. In an audio track, right-click in the fx field, choose audio effects- cakewalk, and selec...
Page 140
140 you can also change the pan and volume settings in a variety of other ways, as described on page 132. To change the pan settings for more than one track at a time, select the tracks you want to change and choose track-property-pan. Configurable panning laws you can choose from six different pann...
Page 141
141 to set the volume trim level 1. Move your cursor to the volume trim control of the track you want to change. 2. Click and drag to the left to lower volume trim level or to the right to raise volume trim level. Assigning a midi channel (chn) midi transmits information on 16 channels, numbered 1 t...
Page 142
142 if the key offset value transposes the key number (midi note) outside the allowable midi range (0–127), the key number will be transposed to the lowest or highest octave within that range. You can use the key+ parameter to assist in preparing scores for instruments whose music is written in some...
Page 143
143 to set the velocity offset for a track • in the track you want to change, click and drag the vel+ control to the desired setting. You can also change the velocity offset in a variety of other ways, as described on page 132. To change the velocity offset for more than one track at a time, select ...
Page 144
144 other midi playback settings two other midi settings can affect what happens when you play back your project, as described in the following table: to set these options, choose options-project and click the midi out tab. If you have set up a playback loop, enabling either of these options can cau...
Page 145
145 determines what instrument will sound when the track receives the data. Each track’s input echo button determines whether the track echoes midi data. The input echo button each midi track has an input echo button, which controls whether the track will echo midi data or not. The button has three ...
Page 146
146 to disable the default midi echo setting • if you want to turn off the automatic midi echoing of the current track, disable the always echo current midi track option in the general tab of the global options dialog (options-global command). If you then turn off the current track’s input echo butt...
Page 147
147 now, when you choose inputs for other tracks, you can choose the preset you saved by clicking the presets option in the track’s input dropdown menu. If you want to edit a preset, select it in the top window of the midi input presets dialog, edit it, and click the disk icon. If you want to delete...
Page 148
148 to automatically disable all local control whenever you launch sonar 1. In the directory where sonar is installed, double-click on the ttseq . Ini file to open it. 2. In the options section, add the line: sendlocaloff=1 3. Save the file and close it. 4. When you launch sonar, it automatically se...
Page 149
149 to create and edit a play list • to create and edit a play list in the play list view, follow the instructions in the table: to play files from the play list view • to play back files from the play list view, follow the instructions in the table. To do this… do this… open an existing play list c...
Page 150
150 video playback, import, and export video files play in the video view in real time as your project plays. The file-import-video command lets you include the following video file types in your project: • avi (also called video for windows) • mpeg • windows media video • quicktime (. Mov files onl...
Page 151
151 inserting and playing back videos here are step-by-step procedures for inserting and playing back videos: to load a video file into a project 1. Choose file-import-video, or choose insert from the video view’s popup menu. The import video dialog appears. 2. In the files of type field, select the...
Page 152
152 to enable or disable video playback 1. Open the video view by choosing view-video. 2. Right-click in the video view and choose animate. If your computer is not fast enough to play back video efficiently, you can get better performance by temporarily disabling video animation during playback. To ...
Page 153
153 option is used to recalculate the video display size whenever you resize the video view. To set the background color • right-click in the video view and choose a color option from the background color menu. To set the start and trim times 1. Right-click in the video view and choose video propert...
Page 154
154 6. Click the audio mixdown options button to open a dialog of audio mixdown options. Click the help button in the dialog for help choosing options. 7. Click save to export your video. Optimizing video performance here are a few tips to optimize video performance: • if you intend to do a lot of s...
Page 155
155 here are the various commands and functions of the video thumbnails pane: • you can show or hide the pane. • you can show or hide the video thumbnails. • you can display absolute frame numbers. • you can resize the thumbnails while preserving the aspect ratio by dragging the splitter bar. • the ...
Page 156
156 for step-by-step instructions, see the following procedures: to hide or show the video thumbnails pane • drag the splitter bar that separates the video thumbnails pane from the clips pane. Or • use the view-video thumbnails menu command. Or • click the show/hide video pane button in the track vi...
Page 157
157 to use the video thumbnails context menu 1. Right-click the video thumbnails pane or the video thumbnails track strip. 2. Choose any of these options from the popup menu that appears: • show/hide thumbnails • display absolute frames • open video view • insert video • delete video • export video ...
Page 158
158 to restore missing audio files 1. In the locate missing audio dialog, click the search button. The search for missing audio dialog appears and sonar begins searching all available hard drives for the missing file or files. 2. When sonar is finished searching, the files that it has found appear i...
Page 159
159 to configure sonar to share external files sonar allows you to share external files (files not in the project’s audio data directory). There are some exceptions, however. Files that have a different sampling rate or bit depth are always copied to the project’s audio data directory. Also, if the ...
Page 160
160
Page 161: Recording
Recording you can add sound or music to a sonar™ project in many different ways. You can record your own material using a midi-equipped instrument, use a microphone or another audio input to record digital audio information, or import sound or music data from an existing digital data file. With the ...
Page 162
162 creating a new project you can add music and sound to an existing project or to a new project. Just as in any windows program, you open an existing project file using the file-open command, and create a new project file using the file-new command. When you create a new sonar project, there are s...
Page 163
163 template with two midi and two audio tracks (called the normal template). If you are creating a new project that will contain only audio material, use the audio only template. If you are creating a new project that will contain only midi material, use the midi only template. You can create your ...
Page 164
164 if you are creating a new project that will contain only audio material (no midi material), you do not need to set the meter and key signature. The key signature controls how sonar displays notes in the staff view, the event list view, and elsewhere. The meter tells sonar the number of beats per...
Page 165
165 the meter/key signature dialog appears. 6. Enter the top and bottom meter values in the beats per measure and beat value fields. 7. Choose the key signature from the key signature list. 8. Click ok. You can also set the meter and key signature in the large transport toolbar display. Setting the ...
Page 166
166 most metronome options can be set in the metronome toolbar: if you don’t see the metronome toolbar, use the view-toolbars command to open the toolbars dialog box, and check the metronome checkbox. The metronome midi note parameters must be set in the metronome settings dialog box. To set the tem...
Page 167
167 your tempo and metronome settings are now ready. When you save the project file, the metronome and tempo settings will be saved as well. To change your metronome settings 1. Open the metronome settings dialog box in one of the following ways: • click metronome settings in the metronome toolbar. ...
Page 168
168 setting the audio sampling rate and bit depth each sonar project has an audio sampling rate and an audio driver bit depth that indicate the level of accuracy with which audio data are sampled and processed. The same parameters are used for all the digital audio in a project. When you create a ne...
Page 169
169 to set the sampling rate and audio driver bit depth for new projects 1. Choose options-audio to display the audio options dialog box. 2. On the general tab of the dialog, select a value in the sampling rate dropdown menu, and a value from the audio driver bit depth dropdown menu. 3. If you choos...
Page 170
170 preparing to record to prepare for recording, you need to do the following: • set the recording mode. • choose your input(s). • arm one or more tracks for recording. • check your recording levels (audio only). • tune your instrument if necessary (audio only). • set the now time to the point wher...
Page 171
171 to choose a recording mode • select a mode from the dropdown list in the record toolbar. Or • choose transport-record options or click to display the record options dialog box, then select the desired mode. Sonar saves your recording options with each project, so you can save a different recordi...
Page 172
172 record input that’s on the midi channel you chose, from the named input driver. • preset—if you want to record multiple data from multiple ports and/or channels, you need to select a preset collection of those ports and channels. You can select one here (to create presets, see next line). • mana...
Page 173
173 to choose an audio input in the console view 1. At the top of an audio track module, click the input button. A popup menu of audio drivers appears. 2. Select the audio driver for the sound card you want to record with from these options: • none—this choice ensures that you do not record to the t...
Page 174
174 arming tracks for recording sonar lets you record any number of tracks at one time. You indicate the tracks you want to record by arming the tracks. You can arm a single track or several tracks at one time. Each track records material received though its selected input. Whenever a track is armed...
Page 175
175 recording music from a midi instrument once you have set your tempo and metronome, and armed one or more tracks, you are ready to start recording. To record midi 1. Set the now time to the point in the project where you want to start recording. 2. Click , press r, or choose transport-record. If ...
Page 176
176 see “metering” on page 436. To maximize the dynamic range of your recording, you want to set the levels as high as possible without clipping. When the audio level exceeds 0db, some of the audio information is lost. This is known as overload. Many sound cards use clipping to deal with an overload...
Page 177
177 to check the input levels 1. In the track view, choose the inputs for the tracks you want to record, and arm the tracks for recording. Make sure that the show/hide all meters button at the top of the track view is enabled. 2. The default meter range is from 0 db to -60 db. To change the range, r...
Page 178
178 to tune an instrument 1. In the track you want to record your instrument on, right-click in the effects bin. 2. From the menu that appears, select audio effects-cakewalk-tuner. 3. Click the track’s input monitor button. If you don’t click the input monitor button on the track the tuner is patche...
Page 179
179 important: make sure you have enough space on your hard disk when recording digital audio. Running out of hard disk space when recording can lead to unpredictable results. Confidence recording when you’re recording audio or midi data, sonar gives you many visual cues that tracks are armed and th...
Page 180
180 input monitoring being able to hear plug-in audio effects applied to a live signal is an exciting feature of sonar. However, there are two issues that users commonly stumble upon when using the input monitoring feature. The first is that the monitored signal seems to have an echo associated with...
Page 181
181 the bottom block of the picture represents the sound card. The shaded area above it represents the audio drivers. The unshaded area at the top represents the main environment of the operating system. As the diagram shows, analog audio flows into the card's line input (on the left), and is immedi...
Page 182
182 traveling at the speed of light, so it is immediately present across all analog audio paths inside the sound card. Next, you say "2." in the time it takes you do that, the adc has converted the "1" to digital form and the wave in driver has fed it to sonar for processing. Sonar processes the buf...
Page 183
183 happen with or without input monitoring, but since input monitoring can add several levels of gain to the signal flow, it’s of greater concern when you have input monitoring enabled. Input monitoring is disabled by default when you install sonar, and you enable it with the following procedure. T...
Page 184
184 if you experience feedback during input monitoring, you can click the audio engine button to turn off the audio engine. However, if playback or recording are in progress, the button is unavailable, and you should click the reset button that’s just to the right of it instead, or else stop recordi...
Page 185
185 to use loop recording 1. Choose the input for the track(s) you want to record, and arm the track(s) for recording. 2. Set the loop start and end times in either the loop/auto shuttle dialog box or in the loop toolbar. 3. Choose transport-record options, or click on the record toolbar, to display...
Page 186
186 for example, suppose you recorded a 32-bar keyboard solo but made some mistakes in the 24 th and 25 th bars. With punch recording, you can play the entire solo again, so you make sure you can get the feel you want. However, only the bars you want to correct are actually recorded. That way, you d...
Page 187
187 in the example mentioned previously, you could loop from bar 17 to bar 26 but record only bars 24 and 25. Here’s what this looks like: to punch record 1. Choose the input(s) for the track(s) you want to record, and arm the track(s) for recording. 2. Enable the auto punch button in the record too...
Page 188
188 6. Set the now time to the beginning of the loop. 7. Click , or press r, or choose transport-record. If your metronome count-in is turned on, it will play the count-in measures. 8. Play or perform the material you want to record. At the end of the loop, sonar will return to the start of the loop...
Page 189
189 the step size and the duration can each be set to one of three things: the auto advance option automatically advances recording to the next step when all midi input stops. For example, if you press the three keys that make up a c major chord, as soon as you release all three keys, sonar automati...
Page 190
190 5. Follow the instructions in the following table: 6. Click ok. As always, you can use the edit-undo and edit-redo commands after you have finished recording. Note that these commands erase or restore all the material you recorded while in step record mode. Remember that step record always uses ...
Page 191
191 step pattern recording the pattern option lets you define a repeating rhythmic pattern of notes and rests so that you can use step recording more efficiently. For example, suppose your project is in 4/4 time, and one track has a pattern that is two measures long: quarter notes in the first measu...
Page 192
192 6. Press the spacebar, period, or the letter r to indicate a beat on which there is a rest. 7. When the pattern is complete, click elsewhere in the dialog box. 8. Step record as before. From now on, after you record each step, sonar automatically advances past all rests to the next step on which...
Page 193
193 to assign input ports and channels to midi tracks 1. Click the dropdown arrow on an individual track’s input field to display the input dropdown menu (jump to step 4, below). Or 1. Use the track-property-inputs command to display the track inputs dialog box. 2. In the track column, select a midi...
Page 194
194 to create or edit a preset input configuration 1. In the input field of a track that you want to select inputs for, click the dropdown arrow and choose manage presets from the dropdown menu (this menu is also available from the midi inputs button in the track inputs dialog). The midi input prese...
Page 195
195 importing music and sound while recording is perhaps the most common way of adding material to a sonar project, there are several other methods you can also use. Sonar lets you import music into a project from several different types of digital data files, including midi files; audio files in wa...
Page 196
196 broadcast wave files broadcast wave files are wave files with some additional information stored in them. Broadcast wave files have the following information: • description—a brief description of the contents of the broadcast wave. Limited to 256 characters. • originator—the author of the broadc...
Page 197
197 to paste all the material from the clipboard into a single destination track in the target project. You can also copy material from one project to another by displaying the track view for both projects side by side, then using drag-and-drop editing. To import material from another project 1. Ope...
Page 198
198 sonar imports the material and displays it in the track view. Saving your work like most windows programs, sonar has a file-save command and a file-save as command to save your work. Normally, you save your projects in the standard project file format, with a file extension of . Cwp . This file ...
Page 199
199 if there is a power failure or if you make a significant mistake, you can recover the last-saved version of your project by opening this file. You should then save your project under a different name by using the file-save as command. To save a project 1. Choose file-save as to display the save ...
Page 200
200 this information is shown in the file info dialog box, which is displayed using the file-info command. If the file info window is open when you save a file, then this window is displayed automatically the next time the file is opened. This is useful if you: • share files with others and want the...
Page 201
201 file statistics to open the file statistics dialog, select file-info and click the stats button in the file info dialog. The file statistics dialog box displays the following information about the contents of the project file: statistic... What it means... Created the date the project was first ...
Page 202
202.
Page 203: Arranging
Arranging the track view makes it easy to arrange and mix your projects from a single view. From one location, you can select, copy, move, mix, and rearrange the parts of your project, using menu commands or drag-and-drop tools. You can add real-time audio and midi effects from the effects bin and b...
Page 204
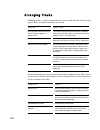
204 arranging tracks sonar provides a variety of commands that let you work with the tracks in your project. Here are some of the things you can do: all the commands you use to arrange tracks work on selected tracks. The current track (the one with the gold titlebar) is always selected. You can sele...
Page 205
205 changing the order of tracks there are several ways you can change the order of tracks in the track view: • drag a track to a new position in the track view. • use the track-sort command to rearrange the tracks in order based on the track name, status, or other setting. • insert new, blank track...
Page 206
206 to sort the tracks 1. Choose track-sort to display the sort tracks dialog box. 2. Choose the attribute by which to sort from the sort by list: 3. Choose the order in which to sort from the order list. 4. Click ok. Sonar sorts the tracks according to the settings you chose. Attribute… how it work...
Page 207
207 to insert a blank track 1. Right-click in the track pane at the place where you want to insert a track, and select insert audio track to add an audio track or insert midi track to add a midi track. Or 1. Press insert to add a track of the same type (audio or midi) as the current track. Sonar shi...
Page 208
208 copying tracks when you copy a track using the track-clone command, you can choose any of the following options: • events • properties • effects • link to original clip(s) by default, sonar copies the entire track to the next blank track, which is usually below the last track in the track view. ...
Page 209
209 arranging clips the track view provides many ways for you to rearrange, copy, and paste clips to arrange your music the way you want. The easiest is to select the clips or portions of clips you want to arrange and then drag and drop them wherever you want. You can drag and drop clips in the trac...
Page 210
210 to inspect the clip contents more closely, use the zoom tools to increase the size in which clips are displayed. Note that displaying the contents of each clip makes your computer work a little harder. As a result, if your computer has an older, slower cpu you may want to turn off the display of...
Page 211
211 zoom command keyboard shortcuts: to display clip names and contents 1. Right-click in the clips pane, and choose view options from the menu. 2. Check the display clip names option to show clip names, or leave it unchecked to hide them. 3. Check the display clip contents option to show clip conte...
Page 212
212 to change clip names 1. Select the clips you want to rename. 2. Right-click on one of the selected clips and choose clip properties. Sonar opens the clip properties dialog box. 3. Enter a name for the selected clips, and click ok. Sonar renames the selected clips. To change clip colors 1. Select...
Page 213
213 using the navigator view the navigator view displays a large part of your project so you can see an overview of your song. The navigator view is a floating version of the navigator pane found at the top of the track view. Track rectangle the track rectangle appears as a green rectangle within th...
Page 214
214 selecting clips before you move, copy, edit, or delete clips you need to select them. There are several ways to select whole clips, as shown in the table: moving and copying clips you can copy or move clips using drag-and-drop editing or the cut, copy, and paste commands. If you copy or move cli...
Page 215
215 when you use the edit-paste command to add information to a track that contains existing material, there is one final option you can choose. Note that if you copy or move clips to new, empty tracks, you don’t have to worry about these settings. In this case, the track properties that go with the...
Page 216
216 clips pane and select drag & drop options from the menu that appears), and click ok. Sonar moves the clips to their new location. To move clips using cut and paste 1. Select the clips you want to move. 2. Choose edit-cut to display the cut dialog box. 3. Choose the options you want and click ok....
Page 217
217 6. Choose edit-paste to display the paste dialog box. 7. Choose the options you want and click ok. Sonar places the clips in their new location. To move a clip to a specific start time 1. Select the clip you want to move. 2. Right-click on the selected clip and choose clip properties. Sonar open...
Page 218
218 to copy clips using copy and paste 1. Select the clips you want to copy. 2. Choose edit-copy to display the copy dialog box. 3. Choose the options you want and click ok. Sonar copies the clips to the windows clipboard. 4. Click in the track pane to set the current track to be the one where clips...
Page 219
219 to nudge a clip up and down use the following procedure to nudge a clip (in the track view) or midi note (in the piano roll view) up or down. 1. Select the clip or note you want to nudge. 2. Select process-nudge-up to move the clip or note up or process-nudge- down to move a clip or note down. C...
Page 220
220 to nudge a clip using keyboard shortcuts 1. Select the clip you want to nudge. 2. If necessary, turn on num lock (press the num lock key on your keyboard). 3. Press the appropriate num key. • left 1—numpad 1 • right 1—numpad 3 • left 2—numpad 4 • right 2—numpad 6 • left 3—numpad 7 • right 3—nump...
Page 221
221 to select a portion of several clips 1. Press and hold the alt key. 2. Drag the mouse across part of several clips in adjacent tracks. Sonar highlights the selected portions of all the clips. You can edit these portions of clips using all the normal editing commands. To select partial clips usin...
Page 222
222 showing gridlines displaying gridlines, or vertical rules, in the clips pane of the track view makes it easy to see at a glance how clips align with each other, how they align with measure boundaries, and when they start and end. To show or hide gridlines 1. Right-click in the clips pane and cho...
Page 223
223 to enable or disable the snap grid 1. Press n to toggle the snap to grid button on or off. Or 1. To enable the snap to grid, click the snap to grid combo button in the track view toolbar. 2. To disable the snap to grid, click the snap to grid combo button once again. To change the snap options 1...
Page 224
224 snap offsets snap offsets allow you to set a point other than the beginning of a clip as the “snap” point used by the snap to grid. A snap offset is the number of samples from the beginning of the clip. Snap offsets affect all edits that obey the snap to grid setting. Once the snap offset is add...
Page 225
225 the time associated with a marker can be expressed in musical time or as a locked smpte time. If a marker has a musical time (measures, beats, and ticks), the marker stays at that musical time regardless of changes in tempo. If a marker has a locked smpte time (hours, minutes, seconds, and frame...
Page 226
226 sonar displays the marker dialog box. 2. Enter a name for the marker in the name box. 3. The time is set to the now time. If you want, use the spinners to change the time or type in a new marker time. 4. Check the locked to smpte box if you want to lock the marker to the smpte time. 5. Click ok....
Page 227
227 to lock or unlock several markers 1. In the markers view, select one or more markers. Use the ctrl and shift keys if necessary to modify the selection. 2. Select or deselect . Sonar updates the markers. To move a marker • drag the marker in the time ruler. Sonar updates the marker time and shows...
Page 228
228 to select a time range using markers you can select a range of times by clicking in the marker section of the time ruler: • click to the left of the first marker to select the time between the start of the project and the first marker. • click to the right of the last marker to select the time b...
Page 229
229 if you attempt to copy only a portion of a linked clip, the copy will not be linked to the original. Copies of a clip can be linked to the original only when you select and copy the entire clip. To make linked copies of a clip using drag and drop 1. Right-click in the clips pane and choose drag ...
Page 230
230 sonar creates copies of the selected clips that are linked in the way you chose. To unlink linked clips 1. In the clips pane, select the clips you want to unlink. 2. Right-click on any selected clip and choose unlink from the popup menu. Sonar displays the unlink clips dialog box. 3. Choose the ...
Page 231
231 the split command lets you split clips four different ways: while the split command works for both midi and audio clips, for audio clips, the split command provides sample accurate editing and snap-to-zero capability. Note that the edit-undo and edit-redo commands work with all three of these ed...
Page 232
232 to split clips into smaller clips 1. Select the clips you want to split. 2. Right-click on any selected clip, and choose split from the popup menu. Sonar shows the split dialog box or press the s key to split the clip(s) at the now time. 3. Choose the split option you want to use, and enter the ...
Page 233
233 note 1: you can create as many lanes as you want. Note 2: a multi-lane track has only one set of automation envelopes. To enhance multi-lane editing, sonar has a cropping tool (see procedure below), which automatically crops two overlapping clips that are in adjacent lanes so that they don’t ove...
Page 234
234 to crop overlapping clips to eliminate overlap 1. In a multi-lane track, move either the select tool or the mute tool between two overlapping clips until the cursor turns into the overlap cropping tool. 2. In the space between the clips, hold down the left mouse button and drag to the spot where...
Page 235
235 clip muting with the default style when youchoose mute time ranges under click+drag behavior in the mute tool dropdown menu, you can use the following procedures to mute all or parts of clips. This is the default behavior. To enable or disable the mute tool • click the tool or press k on your ke...
Page 236
236 note: if the clip you’re muting or unmuting with this method already has one or more muted time ranges, these time ranges remain muted while you alt-click the clip, so you don’t lose any precise mute edits you’ve performed. To completely unmute the clip in the picture below, first alt-click the ...
Page 237
237 to unmute a time range using alternate style 1. Make sure that mute entire clips under click+drag behavior in the mute tool dropdown menu has a check mark. 2. Using the mute tool, alt-click inside the upper half of a clip in the muted area. You can mute or unmute a clip without using the mute to...
Page 238
238 track folders a track folder contains tracks in the track pane of the track view. The main characteristics of a track folder are: • you can edit all the tracks in the folder as if you were editing a single track— the track folder displays a composite clip in the clips pane. Selecting a time rang...
Page 239
239 to add a track to a track folder • in the track view, move the mouse cursor just to the right of the track number of a pre-existing track until the cursor turns into a black, double-ended arrow, and then click and drag the track’s titlebar onto the track folder. Release the mouse. Or • insert a ...
Page 240
240 to hide or show the tracks in a track folder • click the folder icon that’s just left of the track folder’s name. To select or deselect all the tracks in a track folder • click just to the left of the folder icon. To rename a track folder • double-click the track folder’s name, type a new name, ...
Page 241
241 an effects popup menu appears. Sonar displays midi effects if you are editing a midi track, and audio effects for an audio track. 2. Select an effect from the menu. The name of the effect appears in the effects bin and the effect’s property page appears. To delete the effect, right-click the eff...
Page 242
242 with groove clips” on page 260. Audio clips that are not groove clips change in size when moved to a part of your project that has a different tempo. Sometimes you don’t want to adjust the speed of your audio. Here are some examples: • if your project contains background music and a voice-over, ...
Page 243
243 to change the current tempo in the tempo toolbar 1. Enable groove clip looping on any audio clips that you want to follow the tempo changes. Do this by selecting one or more clips, right-clicking a selected clip, and choosing groove-clip looping from the popup menu. Each clip that has groove cli...
Page 244
244 using the tempo commands the insert-tempo change and insert-series of tempos commands can be used to change the existing tempo of a project or to introduce one or more tempo changes at various points in a project. You can enter tempo values directly, introduce smooth increase or decreases in tem...
Page 245
245 to insert a series of tempos 1. Enable groove clip looping on any audio clips that you want to follow the tempo changes. Do this by selecting one or more clips, right-clicking a selected clip, and choosing groove-clip looping from the popup menu. Each clip that has groove clip looping enabled ha...
Page 246
246 sonar changes the most recent tempo to the new value. Using the tempo view the tempo view provides a graphic display of the tempo. In the tempo view you can use your mouse to draw tempo changes directly onto the graph. Choose view- tempo or click on the toolbar to display the tempo view the temp...
Page 247
247 if you make a mistake using any of these tools, you can use edit-undo to correct the error. When you use the draw tool, the speed with which you drag the mouse determines the density of tempo events. To insert a larger number of relatively small tempo changes, move the mouse slowly. To insert a ...
Page 248
248 to draw a series of tempo changes in the tempo view 1. Enable groove clip looping on any audio clips that you want to follow the tempo changes. Do this by selecting one or more clips, right-clicking a selected clip, and choosing groove-clip looping from the popup menu. Each clip that has groove ...
Page 249
249 to edit a tempo change in the tempo view 1. Enable groove clip looping on any audio clips that you want to follow the tempo changes. Do this by selecting one or more clips, right-clicking a selected clip, and choosing groove-clip looping from the popup menu. Each clip that has groove clip loopin...
Page 250
250 undo later and asked if you want to go ahead anyway. If you do choose to perform the operation, you will not be able to undo it. Therefore, you may want to save your project first. The edit-history command displays a complete history of the commands and actions you can undo for the current proje...
Page 251: Using Loops
Using loops loops are short digital audio clips which are often designed to be repeated over and over or “looped,” although some loops, called one-shots, are intended to play just once. Groove clips, often used as loops, are digital audio clips that “know” their tempo and pitch information. Groove c...
Page 252
252 the loop construction view the loop construction view is where you create and edit groove clips. The loop construction view toolbar has tools for editing slicing markers and controls for previewing loops. Loop construction controls the following is a list of the tools and controls in the loop co...
Page 253
253 beats in clip the number of beats in the clip. Original bpm the tempo at which the clip was recorded. Follow project pitch the follow project pitch option transposes the loop, if necessary, to the project pitch which you can set in the markers toolbar. A loop recorded in the key of c, used in a ...
Page 254
254 slices menu the slices menu sets the resolution for the creation of markers, or the “slicing” of the looped clip. This menu uses note lengths, so the settings are: • whole notes • half notes • quarter notes • eighth notes • sixteenth notes • thirty-second notes the automatic markers appear at th...
Page 255
255 erase use the erase tool to delete markers in the markers bar. Default all markers the default all markers tool restores all automatically generated markers to the original position and enables all those that were disabled. Manually created markers remain as is. Previous slice moves slice select...
Page 256
256 audio scaling audio scaling is the increase or decrease in the size (scale) of the waveform in clip. Audio scaling allows you to make detailed edits by zooming in on the parts of the waveform closest to the zero crossing (silence) while preserving the track size. By showing just the quietest par...
Page 257
257 the loop explorer view toolbar has the following controls: folders pane the folders pane shows all of the available files and folders in the selected drive. Tool... Name... What it does... Move up opens the folder one level above the active folder. Refresh refreshes the active folder. Windows ex...
Page 258
258 contents list pane the contents list pane displays the folders and files contained in the active folder. To preview a groove clip 1. Click the auto-preview button in the loop explorer toolbar. 2. Click on a wave file in the content list pane. Each successive wave file you select is previewed. Yo...
Page 259
259 working with loops you can make any audio clip into a loop by checking the enable looping checkbox in the clip properties dialog. Once looping is enabled, you can drag out loops to create multiple repetitions. There are several other ways to enable looping: to enable or disable a clip for loopin...
Page 260
260 working with groove clips groove clips are . Wav files that behave similarly to sonic foundry’s acidized loops (sonar also has midi groove clips—see “midi groove clips” on page 267). Groove clips contain information about the audio content, including the original tempo, original reference pitch,...
Page 261
261 using groove clips groove clips are easy to use because they automatically adjust to your project’s pitch markers and tempo. You can import existing loops or create your own, using the loop construction view. To import a groove clip into your project 1. Select a track in the track view. 2. Set t...
Page 262
262 creating and editing groove clips any audio clip can be converted to a groove clip. Groove clips contain tempo, beat, and pitch information which sonar uses to stretch and transpose the clips to match the project. Most groove clips are loop-enabled, meaning that you can use the mouse to drag cli...
Page 263
263 to set the tempo of a groove clip when creating a new groove clip, sonar sets the clip’s tempo to the current project tempo. To ensure proper stretching behavior you must set the value in the original bpm field to the tempo at which you recorded the clip. The tempo value of a clip can only be ch...
Page 264
264 to transpose a groove clip to match your project’s pitch follow this procedure to force the groove clip to follow the project’s default pitch. 1. Double-click the clip you want to transpose to the project’s pitch. The clip appears in the loop construction view. 2. Click the follow project pitch ...
Page 265
265 editing slices each slice (space between the slicing markers) can be adjusted in the loop construction view. You can adjust the following slice attributes: • gain • pan • pitch to preview a groove clip slice 1. Double-click on a clip to open the loop construction view. 2. Click the enable slice ...
Page 266
266 saving groove clips as wave files/acidized wave files once you have created a groove clip in sonar, you can save the clip as a groove clip/wave file, compatible with acidized wave files. To save a groove clip as a riff wave file/acidized wave file 1. If you have not already done so, create a gro...
Page 267
267 to change your project’s default pitch 1. Display the markers toolbar, if it’s not already displayed, by using the view- toolbars-markers command. 2. In the default groove-clip pitch dropdown menu at the right end of the toolbar, choose your project’s default pitch. Sonar transposes each groove ...
Page 268
268 • you can import midi groove clips from the import midi dialog, the loop explorer view, and by dragging and dropping from the windows explorer. • you can preview midi groove clips in the import midi dialog. • you can edit midi groove clips wherever you can edit regular midi clips. For step-by-st...
Page 269
269 if you use pitch markers to transpose a clip, any transposition value you add to the clip by the above two methods changes the final pitch by whatever transposition value you’ve added. To transpose a midi groove clip with pitch markers use the same method you use for audio groove clips: see “usi...
Page 270
270 to import midi groove clips with the file command 1. Move the now time to the place where you want to import the clip. 2. Highlight the track you want to import the clip into. 3. Use the file-import-midi command. The import midi dialog appears, 4. Navigate to a folder where you store midi groove...
Page 271
271 importing project5 patterns project5 is cakewalk’s pattern-based soft synth work station that has its own library (pattern bin) full of midi and audio patterns, stored on disk. If you have project5 midi patterns on your hard disk, you can import them directly into sonar. To import a project5 pat...
Page 272
272.
Page 273: Editing Midi Events
Editing midi events and controllers sonar lets you edit the events in your projects in dozens of different ways. The piano roll view lets you add and edit notes, controllers, and automation data interactively, using a graphic display. Sonar’s many editing commands can improve the quality of recorded...
Page 274
274 event inspector toolbar the event inspector toolbar is available from the view menu by selecting view- toolbars and checking event inspector in the toolbars dialog. The event inspector has the following: • time • pitch • velocity • duration • channel to display a note’s properties in the event i...
Page 275
275 the piano roll view the piano roll view displays all notes and other events from one or more midi tracks in a grid format that looks much like a player piano roll. Notes are displayed as horizontal bars, and drum notes as diamonds. Pitch runs from bottom to top, with the left vertical margin ind...
Page 276
276 drum grid pane in the drum grid pane you can add, delete and edit notes and note properties in any midi track(s) assigned to a drum map. For more information, see “the drum grid pane” on page 344. Note pane in this pane you can add, edit, and delete notes in any midi track(s) not assigned to a d...
Page 277
277 selecting and editing notes the piano roll view is a very convenient place to select, edit, and copy notes within a track or tracks. You must make the track you want to edit the current track. The current track appears with a dotted line around it in the track list pane. To display the track lis...
Page 278
278 to select notes with the selection tool 1. Click to select the select tool. 2. Select notes as shown in the table: selected notes are highlighted (50% gray mask) in the piano roll view, and the time selection is set to the range of note start times. To select all notes of certain pitches • click...
Page 279
279 to edit a note 1. Click to select the draw line tool (or the draw tool , if you have do not have auto erase enabled). 2. Edit notes as described in the table: if the snap grid is enabled and set to snap to, the start time of each note is restricted to points on the snap grid, and the length of e...
Page 280
280 to move notes 1. Click or press s to select the select tool. 2. Select one or more notes. 3. Drag the selected notes to a new location. The drag and drop options dialog appears. If you have unchecked the ask this every time checkbox in the drag and drop options dialog, sonar uses that last optio...
Page 281
281 to erase several notes 1. Click the erase button or press e to select the erase tool. 2. Drag the cursor across notes to delete them. 3. Release the mouse button when you are done. To select and erase notes 1. Click the select button or press s to select the select tool. 2. Select one or more no...
Page 282
282 working with multiple tracks in the piano roll view you can simultaneously edit as many tracks as you want in the piano roll view. When you display several tracks at the same time in the piano roll view, you control which track(s) you can see and/or edit by using the buttons in the track list pa...
Page 283
283 note names you can change the instrument definition for the active track in the piano roll view. Right-click the piano keys in the note pane to open the note names dialog where you can use note names that are defined as part of any instrument definition. For more information about instrument def...
Page 284
284 transposing the process-transpose command transposes the pitches of selected note events up or down by a fixed number of steps. It does so by changing the midi key numbers of note events. Simply enter the number of half-steps—a negative number to transpose down, a positive number to transpose up...
Page 285
285 shifting events in time the track view lets you move entire clips forward or backward in time by using drag and drop editing or by changing the start time of selected clips. The process- slide command is slightly more flexible—you can use it to shift individual events and markers (or selected ev...
Page 286
286 3. Choose insert-time/measures to display the insert time/measures dialog box. 4. Verify that the settings are correct and click ok. Sonar inserts a blank measure at the now time. To insert blank time or measures into a project 1. Press the 5 key on the numeric keypad (num lock must be off) or s...
Page 287
287 sonar inserts the desired amount of blank time into the project. Deleting measures or time from one or more tracks there are two methods for deleting time or measures: • if there is any audio or midi data in the area you want to delete, you can use the edit-delete command to delete the area that...
Page 288
288 to delete time when there is no audio or midi data in the area you want to delete (or if there is data, but you like to drag and drop): 1. Set the snap to grid value to the unit of time you want to delete. For example, if you want to delete whole measures, set the snap to grid value to a whole m...
Page 289
289 you can also use the process-length command to alter only the start times or the durations of notes. For example, changing the durations of notes to 50 percent of their original length can create a staccato effect. To stretch or shrink using percentages 1. Select the events you want to change. 2...
Page 290
290 4. Choose one of the following: • tempo map–choose this option if you want the tempo to change but not the duration of notes and events. For example, if your clip contains quarter notes, and you want those notes to stay quarter notes even though the elapsed time of the clip changes, choose tempo...
Page 291
291 you can also edit note velocities in the controllers pane of the piano roll view, which lets you draw shapes other than straight line changes. For more information, see “using the controllers pane” on page 313. To scale velocities 1. Select the events whose velocity data you want to change. 2. C...
Page 292
292 scroll-trimming you can also shift the clip’s contents in time, in relation to either the beginning or end of the clip itself, by scroll-trimming. Using slip editing for midi clips when slip editing the beginning of a midi clip, if you drag the start of the clip past the beginning of a note (not...
Page 293
293 the hidden information in the slip-edited clips remains intact but is not heard during playback to permanently delete slip-edited midi data 1. Select the clips that contain the slip-edited data you want to delete. 2. Select the edit-apply trimming command. Sonar permanently deletes the slip-edit...
Page 294
294 changing the timing of a recording when you record a performance, there may be problems you’d like to correct. For example, the note timing may not have been as accurate as you would like. Or, you may have recorded without using a metronome and strayed from the tempo in one direction or another....
Page 295
295 sonar has two different quantize commands: these commands have quite a few settings, making them very flexible and powerful. In addition, both of these commands lets you create, save, and re-use presets. This means that once you find the settings you like, you can save them and then apply them t...
Page 296
296 offset normally, the resolution grid is aligned evenly with the start of measures and beats. As an option, you can shift the grid earlier or later by any desired number of clock ticks. If the resolution is a quarter note and you’ve set the offset to +3 ticks, then a note that is originally near ...
Page 297
297 swing many projects do not have notes positioned on a perfectly even time grid. For example, projects with a swing feel, though they may be written entirely in eighth notes, are often played more like eighth-note triplets, with the first note extended and the second one shortened. The swing opti...
Page 298
298 when you use groove quantize, you can also perform adjustments on out-of- window events. There are four options: other settings if you want, you can restrict the types of events that are affected by the quantize commands to only notes, lyrics, and audio clips. If you choose this option, sonar wi...
Page 299
299 3. Choose one of your own presets from the list, or enter the settings you want according to the table: 4. Click audition if you want to hear how the quantization will sound; press stop to stop auditioning the change. 5. Make adjustments as necessary. 6. Click ok when you are done. Sonar quantiz...
Page 300
300 5. Use the following fields to configure your pattern: 6. Click audition if you want to hear how the quantization will sound; press stop to stop auditioning the change. 7. Make adjustments as necessary. 8. Optionally, type a name in the preset field (located at the top of the dialog box) and cli...
Page 301
301 entirely new feel. If you like the groove pattern you have created, you can save it to a groove file. Groove files can store one or more groove patterns. Sonar supports two types of groove files: • dna™ grooves, which contain only timing information but are compatible with some other midi sequen...
Page 302
302 5. Click the define button to display the define groove dialog box. 6. Select an existing groove file, or enter the name for a new groove file. 7. Enter a pattern name, or choose an existing pattern to replace. 8. Click ok. 9. If you are replacing a groove, verify that you want to delete the exi...
Page 303
303 to delete a groove 1. Choose process-groove quantize to display the groove quantize dialog box. 2. Click the define button to display the define groove dialog box. 3. Select the file containing the groove to delete. 4. Select the pattern name of the groove. 5. Click the delete button, and confir...
Page 304
304 correcting off-tempo tracks. Suppose you have both rhythm and melody tracks recorded, but the melody was played erratically. First, copy the rhythm track to the windows clipboard. Then use groove quantize with a whole-note resolution, a window of 25 percent or less, and with the scale time optio...
Page 305
305 to fit tempos to an improvisation 1. Record the reference track. 2. Select the reference track. 3. If necessary, combine all clips in the reference track into a single clip using the edit-bounce to clip(s) command. 4. Choose process-fit improvisation. Sonar adds tempo changes as necessary to fit...
Page 306
306 these capabilities can help you find problem spots or errors in a project or make systematic changes to events that have particular attributes. All of these capabilities rely on the use of an event filter, which lets you choose the types of events you want to work with and the range of values in...
Page 307
307 different types of events have different parameters, as shown in the table: the event filter only accepts events that meet all the specified ranges. This means that a note event must fall within the pitch range, the velocity range, and the duration range in order to be included. The event filter...
Page 308
308 in any place in the event filter where you would normally enter a pitch string, you can also enter the pitch by pressing a key on your midi keyboard. Also, you can use the question mark in place of the octave number as a wild card. This lets the event filter accept a single note, regardless of t...
Page 309
309 to select events using the event filter 1. First, select an initial set of tracks, clips, or events. 2. Choose edit-select-by filter to display the event filter dialog box. 3. Set up the event filter to find the events you want. 4. Click ok. Sonar searches the currently selected events and weeds...
Page 310
310 a few examples will illustrate some of the many uses of the process-interpolate command. These examples apply to the note event type, though the command can be used on any type of event. Parameter... Search range... Replacement range... Effect... Pitch (key) from c2 to c4 from c4 to c6 transpose...
Page 311
311 controllers, rpns, nrpns, and automation data sonar projects contain a lot more information than the notes and digital audio files that are at the heart of your work. Controllers, rpns, and nrpns (xrpns, for short) are special types of events used by midi software and hardware to control the det...
Page 312
312 controllers in the same way, creating bends, volume swells, and other effects that make sounds more realistic and more fun to listen to. Your computer can work the controllers on your electronic instrument by sending midi controller messages. The midi specification allows for 128 different types...
Page 313
313 automation data the track and console views allow you to record automation data that define changes in volume, pan and many other parameters throughout a project. The automation data can include step changes recorded using the snapshot button or continuous changes recorded while using the knobs,...
Page 314
314 the controllers pane looks like a graph; the horizontal axis represents time, and the vertical axis represents the event values. Each event appears as a single vertical line, and the height of this line shows the value of the event. The controllers pane shows events for all the clips in a track ...
Page 315
315 number of controller events with relatively large changes in value, drag the mouse quickly. Creating a change that sounds smooth does not always require making the value change by one on each tick. Bigger jumps may sound very gradual if the tempo is fast. Also, many devices round off the control...
Page 316
316 sonar adds a controller at the indicated point. To draw a linear series of controllers 1. Choose the data type, controller or xrpn number, and channel (if applicable) from the lists in the toolbar. 2. Select the tool. 3. Drag a line in the controllers pane from the starting time and value to the...
Page 317
317 controllers of the type you have selected already exist in the time region, sonar deletes these before inserting the new ones. To remove or erase controllers 1. Choose the data type, controller or xrpn number, and channel (if applicable) from the lists in the toolbar. 2. Select the eraser tool ....
Page 318
318 the event list view the event list view shows events in a list format. You can insert, delete, or modify any kind of event, including notes, pitch-wheel data, velocity, midi controllers, patch changes, wave files, lyrics, text strings, mci commands, system exclusive meta-events, and more. There ...
Page 319
319 when the event list view includes more than one track, events are mixed together in chronological order. For example, if you select tracks 1 and 3 when you open the event list view, you see a single list of intermingled events from tracks 1 and 3. You can have any number of event list views, eac...
Page 320
320 nrpn non-registered parameter number parameter number (0-16383), parameter value (0-16383), midi channel (1-16) sysx bank system exclusive data bank sysx bank number (0-8191) sysx data system exclusive data message sysx message up to 255 bytes long text text text lyric lyric text (a single word ...
Page 321
321 here are some notes about events and their parameters: • the channel parameter in the track view can force an event to play on a different midi channel from the one shown in the event list. • pedal marks entered in the staff view are displayed in the event list view as controller events (64). • ...
Page 322
322 event list display filter you can configure the event list view to display different event types, as described in the following table: editing events and event parameters the event list view lets you add, delete, or change events one by one. You can also print the list of events or audition the ...
Page 323
323 if you try to change the event type (kind of event), sonar lets you choose the kind of event you want from a dialog box. When you change one kind of midi event into another kind of midi event, sonar preserves the parameters as fully as possible. Note: shape events cannot be edited, only deleted....
Page 324
324 to play events step by step 1. Using the keyboard, hold the shift key and press the spacebar to play the currently highlighted event. If the event is a note event, it plays until you release the spacebar. 2. When you release the spacebar, the highlight moves to the next event. 3. Continue pressi...
Page 325
325 mcicmd events media control interface (mci) commands are special events that let you control other multimedia hardware and software (e.G., cd-rom drives, laserdiscs, sound cards, animations, video) during playback. Mci commands are part of the multimedia extensions in windows. Mcicmd events have...
Page 326
326 midi effects can be applied to whole or partial clips. For example, you can apply an echo to just one note. Midi effects can also be applied to midi tracks in real time (during playback) in the track and console views. Unlike any of the processing described so far, using effects in real time is ...
Page 327
327 quantizing the quantize command moves events to (or towards) an evenly-spaced timing grid. The quantize effect is similar to the process-midi effects-cakewalk fx- quantize command. For more information, see “other settings” on page 298. The quantize effect parameters are as follows: to quantize ...
Page 328
328 sonar applies the specified quantization to the selected data. Adding echo/delay the echo delay command creates a series of repeating echoes of each note. The echo notes can decrease or increase in velocity, and can be transposed from the original by regular intervals. The parameters used to spe...
Page 329
329 filtering events the event filter command lets you remove events from the midi data, keeping or passing through only those events that you specify. The event filter effect works almost identically to the event filter used by the edit-select-by filter command. For more information, see “event fil...
Page 330
330 to apply the arpeggiator to midi data 1. Select the data to be affected. 2. Choose midi effects-cakewalk fx-arpeggiator from the process menu or from the popup menu to open the arpeggiator dialog box. 3. Set the arpeggiator parameters, as described in the table above. 4. Click ok. Sonar applies ...
Page 331
331 the chord analyzer has a single parameter: to analyze a chord 1. Select the notes to be analyzed. 2. Choose midi effects-cakewalk fx-chord analyzer from the process menu or from the popup menu to open the transpose dialog box. 3. Click the audition key. Sonar displays the chord and its name. To ...
Page 332
332 to change note velocities 1. Select the data to be affected. 2. Choose midi effects-cakewalk fx-velocity from the process menu or from the popup menu to open the velocity dialog box. 3. Select options as described in the table above. 4. Click ok. Sonar changes note velocities according to the sp...
Page 333
333 to transpose midi data 1. Select the data to be affected. 2. Choose midi effects-cakewalk fx-transpose from the process menu or from the popup menu to open the transpose dialog box. 3. Set the transposition options as described in the table above. 4. Click ok. Sonar transposes the selected data ...
Page 334
334.
Page 335: Drum Maps and The
Drum maps and the drum grid pane there are several panes in the piano roll view designed for use with midi drum tracks: the note map pane which lists the original pitch values and the mapped values for each note, and the drum grid pane which displays your drum tracks (any track assigned to a drum ma...
Page 336
336 the basics drum maps are virtual midi ports that you create and edit. Drum maps give you total control over all the midi drum sounds you have access to either in the form of software (dxi synths) or hardware (external midi sound modules). Drum maps in sonar allow you to do the following: • re-ma...
Page 337
337 drum maps used in current project this field displays all the currently available drum maps. Click the new button to create a new drum map and delete to delete a drum map. Select a drum map to display the drum mappings in the drum map manager. All drum maps in this field are saved with the curre...
Page 338
338 settings the settings section is where you map the following for each in note (source): • in note—the source midi note value. • out note—the midi note value that plays on the destination sound source. • name—the user-defined name for the row. • chn—the channel on which the note is transmitted. •...
Page 339
339 the map properties dialog the map properties dialog lets you change all the settings for an individual mapped note in your drum map. The settings in the map properties dialog are the same as a single row in the drum map manager. If you want to edit more than one drum note pitch mapping, click th...
Page 340
340 using drum maps the following topics cover using drum-mapped tracks, including how to display drum tracks in the drum grid pane and how to edit note velocities. Assigning a midi track to a drum map use the following procedure to assign a midi track to a drum map: to assign a midi track to a drum...
Page 341
341 velocity tails in the drum grid pane, you have the option of showing the velocity of each note as a series of bars. The higher the bars, the higher the velocity value. To display velocity tails in the drum grid pane • click the show/hide velocity tails button in the piano roll view toolbar. Or •...
Page 342
342 to edit multiple note velocities in the drum grid editor when you edit multiple notes that have different initial velocities, the velocities are adjusted on a relative basis, so if you reduce a velocity by 50%, all other selected notes have their velocities reduced by the same percentage. For ex...
Page 343
343 changing mapped-note settings you can change the following settings in the note map pane: • mapped-note name • note out • mute • solo to change the name setting the name of a mapped note in the note map pane is a user-assigned variable. Make it descriptive for easy reference. To change the name ...
Page 344
344 to mute or solo a mapped note the mute and solo controls in the note map pane allow you to mute or solo an individual mapped note. To mute or solo a mapped note, use the following procedure: • in the note map pane, click the mute or solo button in the appropriate row. Or • right-click on the row...
Page 345
345 to turn on grid lines in the drum map pane • click the show/hide grid lines combo button in the piano roll view toolbar. Or • press the i key. To set the drum map pane grid line resolution • click the down arrow on the show/hide grid lines combo button and select an option from the menu that app...
Page 346
346 to paint notes using the pattern brush tool 1. Open a track in the drum grid pane or the note pane. 2. In the pattern brush tool’s dropdown menu, select note duration. 3. In the piano roll view toolbar, select a note duration. This value is the interval between notes when using the pattern brush...
Page 347
347 to use a custom pattern’s pitch values 1. Open a track in the drum grid pane. 2. In the pattern brush tool’s dropdown menu, select the custom pattern you want to use. In the pattern brush tool’s dropdown menu, select use pattern polyphony. 3. Click the pattern brush tool to select it. Your curso...
Page 348
348.
Page 349: Editing Audio
Editing audio the track view lets you edit and arrange audio clips. You can perform basic tasks such as cut, copy, paste, and move; apply simple audio processing such as gain change, fades, and equalization; and use sophisticated audio effects such as stereo chorus and reverb. The track view lets yo...
Page 350
350 digital audio fundamentals digital audio is a numeric representation of sound; it is sound stored as numbers. In order to understand what the numbers mean, you need to start with the basic principles of acoustics, the science of sound. Basic acoustics sound is produced when molecules in the air ...
Page 351
351 the displacement of the string changes as the string vibrates, as shown here: the segment marked “a” represents the string as it is pulled back by the pick; “b” shows it moving back towards its resting point, “c” represents the string moving through the resting point and onward to its outer limi...
Page 352
352 vibrations are added together to form a complex or composite sound that our ear perceives as a single tone. This composite waveform still doesn't account for the uniqueness of the sound of different instruments. For example, stringed instruments usually have a resonator. In the case of the guita...
Page 353
353 example, the waveform of the sound of the plucked guitar string might look like this: the waveform of a trumpet blast might look like this: and the waveform of a spoken word might look like this: the three waveforms shown above are quite different from one another, both in appearance and sound. ...
Page 354
354 each has its own complex combination of frequency components, which can change across the duration of the sound. The center line of a waveform is the zero line; it corresponds to the rest position (displacement of 0) of the original vibrating object. (a waveform for perfect silence would be a ho...
Page 355
355 since humans can hear frequencies well above 10 khz, most sound cards and digital recording systems are capable of sampling at much higher rates than that. Typical sampling rates used by modern musicians and audio engineers are 22 khz, 44.1 khz, and 48 khz. The 44.1 khz rate is called cd-quality...
Page 356
356 in sonar, decibels are used in several places: • to scale the amplitude of the waveform (3db louder and 3db quieter commands) • to indicate volume levels of audio tracks in the track view and console view • to indicate the effects of filters and equalizers the reference level (0 db) usually corr...
Page 357
357 basic audio editing the track view lets you perform basic editing tasks such as cut, copy, paste, delete, drag-and-drop, split, and bounce. You can drag fade-ins and fade-outs onto a clip using your mouse or you can set complex envelopes on both clips and tracks. You can use envelopes to change ...
Page 358
358 editing clip properties audio clips have several properties that you can change: to change an audio clip’s name 1. Right-click the audio clip and choose clip properties. 2. Type a new name in the name box. 3. Click ok. The new clip name appears in the upper left corner of the clip. To change a c...
Page 359
359 moving, copying, pasting and deleting audio clips clips can be cut, copied, pasted, and deleted with edit menu commands, or moved and copied with drag-and-drop techniques. For more information, see “arranging” on page 203 for details. Audio scaling audio scaling is the increase or decrease in th...
Page 360
360 to change the audio scale display option 1. Right-click on the audio scale ruler in any track. A menu appears. The current display option is checked. 2. Select an option from the menu. To scale all audio tracks together to scale all audio tracks together, follow the instructions in the table bel...
Page 361
361 increase to maximum scale hold down the ctrl and shift keys and click the vertical zoom in button. When you hold down the shift and ctrl keys and position your cursor over the vertical zoom in button, your cursor looks like this: decrease to minimum scale hold down the ctrl and shift keys and cl...
Page 362
362 to scale a single track to scale a single audio track, follow the instructions in the table below: to undo audio scaling • press the u key. To scale a single track using the audio scale ruler • in the track in which you want to change the audio scale, click in the audio scale ruler and drag. Dra...
Page 363
363 to hide the audio scale ruler 1. Right-click in the clips pane. 2. Select view options from the menu that appears. The track view options dialog appears. 3. In the track view options dialog, uncheck the show audio scale checkbox and click ok. Splitting audio clips you can split long audio clips ...
Page 364
364 sonar splits the audio clip according to your specifications. Each new clip has the same name as the original clip. Note: a shortcut to split a selected clip is to move the now time to where you want to split it, and press s on your computer keyboard. Bouncing to clips individual audio clips in ...
Page 365
365 scrubbing you can use the scrub tool to locate or audition a particular sound or passage as you drag the mouse. You can scrub a single audio track by dragging over that track or all tracks by dragging in the time ruler. Note: the scrub tool is not affected by current mute and solo settings of a ...
Page 366
366 the audition duration is three seconds by default. You can change this value by choosing options-global, selecting the general tab and changing audition commands for ( ) seconds. Presets are a way to store dialog box settings so that you can apply the exact same processing or effect again in the...
Page 367
367 when increasing or decreasing the volume of audio clips, you should consider the following points: • normalize and 3db louder raise the noise floor; that is, while they increase the volume of the signal, they also amplify the noise it contains. (this is true when you raise the volume by other me...
Page 368
368 reversing audio data by reversing audio data, you can make it play backwards. You may wish to do this to obtain unusual sounds for special effects. The reverse command does not reverse the musical position of audio data. Use the process-retrograde command to invert the order of clips in time. To...
Page 369
369 4. Click audition to hear a preview of the first three seconds of the selected audio with the equalization applied. 5. Click ok when the settings are the way you want. Sonar applies the specified equalization to the selected audio. Advanced audio processing sonar provides a number of advanced au...
Page 370
370 the digital noise gate parameters are described in the following table. Parameter... Meaning... Open level (db) the loudness threshold for opening the noise gate. The gate officially opens when loudness rises above this level, although it can open earlier because of the attack time. Close level ...
Page 371
371 to remove silence 1. Select the audio data to be affected. 2. Choose process-audio-remove silence to open the remove silence dialog box. 3. Set the digital noise gate parameters as described in the table above. 4. Check the split clips box to delete the silent sections of audio. 5. Click ok to r...
Page 372
372 adjust the pulse analysis parameters, then click audition to see the results and decide if the pulses are satisfactory. The pulse analysis parameters are as follows: in the second step, you set the timing synthesis parameters to determine how the pulses are converted to musically meaningful data...
Page 373
373 when using extract timing, keep in mind the following: • it knows nothing about the musical context of the audio. • it does not know, and cannot figure out, the approximate tempo of the audio, the feel, or the time signature. It only knows how to listen for sudden changes in volume. You must gui...
Page 374
374 parametric equalization the parametric eq command lets you apply a high-pass, low-pass, band-pass, or band-stop filter to your audio data. You must specify the filter type and parameters as follows: parameter... Meaning... High pass removes frequencies that are below the cutoff f1. Low pass remo...
Page 375
375 to apply the parametric equalizer to audio data 1. Select the audio data to be affected. 2. Choose process-audio-parametric eq, or right-click and choose parametric eq from the menu, to open the parametriceq dialog box. 3. Set the filter type and parameters as described in the table above. 4. Cl...
Page 376
376 slip-editing modes slip-editing has three modes: trimming as a default, when slip-editing a clip, the clip’s contents always remains fixed in time. If the first measure of a clip is hidden using slip editing, the remaining material does not shift forward in time by a measure. The first measure o...
Page 377
377 6. Make edits according to the following table: to do this... Do this... Trim the beginning of a clip move the cursor over the beginning of a clip. When the cursor changes in appearance to look like this , click and drag the clip to the right until you have removed the unwanted information. Trim...
Page 378
378 scroll-trimming a clip (moving the clip contents in time while maintaining the clips start and end time) press the alt+shift keys while moving the cursor over the middle of the clip. When the cursor changes to look like this , click and drag the clip to the left or right as desired. The contents...
Page 379
379 the hidden information in the slip edited clips remains intact but is not heard during playback to permanently delete slip-edited data 1. Select the clips that contain the slip-edited data you want to delete. 2. Select the edit-apply trimming command. Sonar permanently deletes the slip-edited da...
Page 380
380 fades and crossfades fades are a gradual increase or decrease in volume at the beginning (fade-in) or end (fade-out) of a clip. A crossfade is when one clip fades out while another fades in. There are two ways to create fades and crossfades in sonar: offline (destructive) and real-time (non-dest...
Page 381
381 to create a real-time fade-in in an audio clip use the following procedure to create a fade-in in an audio clip: 1. In the track view’s clips pane, move your mouse over the top part of the beginning of a clip until the cursor looks like this: . 2. When your cursor changes, click and drag to the ...
Page 382
382 as you drag your mouse a fade-in appears on your clip. To create a real-time fade-out in an audio clip use the following procedure to create a fade-out in an audio clip: 1. In the track view’s clips pane, move your mouse over the top part of the end of a clip until the cursor looks like this: . ...
Page 383
383 6. The two clips now overlap with a crossfade, looking something like this: you can edit fade-ins and fade-outs. You can change the start, end and position of a fade. The following procedures all demonstrate edits to a fade-in, but fade-outs work exactly the same. To edit the start time of a fad...
Page 384
384 to edit the start time of a fade while maintaining the length of the fade use this procedure to change the start time of the fade-in while maintaining the current end time of the fade: 1. In the clips pane, move your cursor over the middle part of the beginning of a clip which has a fade-in. 2. ...
Page 385
385 can move the intermediate points, and create new intermediate points, to change the shape of the curve. The second command, crossfade, lets you create a smooth transition from one audio clip to another, by fading two overlapping audio clips simultaneously (one fades out, the other fades in). As ...
Page 386
386 to crossfade two overlapping clips 1. Select two overlapping audio clips. They need not be on the same track, but they must overlap in time for the command to have any effect. 2. Choose process-audio-crossfade to open the crossfade dialog box. 3. Select an envelope from the dropdown list. 4. If ...
Page 387
387 you can add audio effects, like midi effects, to audio tracks in real time (during playback) in the console and track views. Unlike any of the audio processing discussed so far, using effects in real time is non-destructive. This means that the audio clip data itself is not modified, and no new ...
Page 388
388 mixing audio effects the dialog box for each plug-in effect has a mixing tab that provides three options for processing the data. Option... Meaning... Process in-place, mono to mono audio is processed clip-by-clip, in mono format. The processed output of the plug-in replaces the original clip's ...
Page 389
389 adding parametric equalization the cakewalk-fxeq command lets you apply a complex filter to your audio data. The complex filter is a combination of up to eight simple filters or bands, each defined individually. Parameters for each filter are described in the following table: parameter/option......
Page 390
390 the horizontal axis shows increasing frequency; the vertical axis shows the gain or attenuation at each frequency. If the curve is above the horizontal center line, parts of the signal at that frequency will be boosted; if the curve is below the center line, the signal will be attenuated. Parame...
Page 391
391 the parameters used to specify the chorus effect are as follows: to apply chorusing to audio data 1. Select the audio data to be affected. Select a stereo pair for stereo chorusing. 2. Choose audio effects-cakewalk-fxchorus from the process menu or from the popup menu to open the cakewalk fxchor...
Page 392
392 the parameters used to specify the chorus effect are as follows: to apply delay to audio data 1. Select the audio data to be affected. Select a stereo pair for stereo delay. 2. Choose audio effects-cakewalk-fxdelay from the process menu or from the popup menu to open the cakewalk fxdelay dialog ...
Page 393
393 adding flanging the cakewalk-fxflange command mixes the original signal with a slightly delayed version of the signal, so that the two are out of phase. This creates a spacey, ethereal sound. The parameters used to specify the chorus effect are as follows: to apply flanging to audio data 1. Sele...
Page 394
394 applying reverb the cakewalk-fxreverb command adds many small echoes to a signal to create the illusion of spaciousness. By changing the parameters, you can simulate a stage, a hall, an arena, or a variety of other room types. The reverb parameters are as follows: to apply reverb to audio data 1...
Page 395
395 shifting pitch the cakewalk-pitch shifter raises or lowers the pitch of an audio signal, while leaving the duration of the audio clip unchanged. The pitch shift parameters are as follows: to apply pitch shift to audio data 1. Select the audio data to be affected. 2. Choose process-audio effects-...
Page 396
396 the time/pitch stretch parameters are as follows: the time and pitch parameters can be set by typing numbers in the appropriate boxes, or by dragging the sliders or the crosshair in the graph. Holding shift while dragging the crosshair snaps the crosshair to the nearest axis: x (time), y (pitch)...
Page 397
397 for the most natural-sounding results, choose low settings; transpose by no more than a third or a fourth. Higher values, though, can be used for special effects. To apply time/pitch stretch to audio data 1. Select the audio data to be affected. 2. Choose audio effects-cakewalk-time/pitch stretc...
Page 398
398.
Page 399: Working With Software
Working with software synthesizer you can use a variety of software synthesizer formats with sonar™, including dxi’s, vsti’s, rewire instruments, soundfonts, and stand-alone soft synths. Sonar includes the cyclone dxi, which allows you to stack up to 16 acidized loop tracks side-by-side for editing ...
Page 400
400 kinds of soft synths there are several basic kinds of soft synths: • dxi (plug-in synths built with directx technology)—these programs appear as plug-ins for audio tracks or buses, just like plug-in effects. They can also be inserted in sonar’s synth rack view. • rewire instruments—these instrum...
Page 401
401 there is much more information about the synth rack view in the online help. Press f1 when the synth rack view is open and on top to display the appropriate help topic. Dx instruments (dxi’s) in order to play a dxi from a midi controller or with recorded midi data, you need to have at least one ...
Page 402
402 multi-port dxi’s a multi-port dxi allows you the option of using a different audio track for every output that the dxi has. This allows you to use different plug-in effects for each sound (or in some cases, group of sounds) that a dxi produces. For example, if a dxi can produce 16 sounds at the ...
Page 403
403 number after the name. Every copy appears in a separate row in the synth rack view, and in the drop-down menus of audio track inputs and midi track outputs. To insert a dxi from the synth rack view or menu 1. If you want to use the synth rack view, open the synth rack view with the view-synth ra...
Page 404
404 5. Click ok, if you haven’t already. Sonar adds the dxi to the audio track input and midi track output menus, and creates any new tracks that you requested. The new tracks already have the correct inputs and outputs patched. Now you can record midi data in the dxi midi tracks, and/or play the dx...
Page 405
405 playing a dxi there are several ways to play a dxi: • you can record midi data and use the dxi as a playback device. Note: wdm or asio drivers do not improve performance when you play back recorded midi data—the improvement comes only when you play a dxi in real time from an external midi contro...
Page 406
406 bank, patch, and channel are selected; your monitor speakers or headphones are turned up; and that none of the relevant tracks are muted. You can add effects to each of the dxi audio tracks. You can also add midi effects to your dxi midi tracks. To play a dxi from a midi controller 1. Make sure ...
Page 407
407 to remove a dxi from a project • if your dxi is patched into the fx field of an audio track or bus, right-click the name of the dxi, and choose delete from the popup menu. • if your dxi is patched into the input field of an audio track, go to the synth rack view, click the name of the dxi to sel...
Page 408
408 4. In the channel format field, choose mono if you want mono tracks, and stereo if you want stereo tracks. 5. In the source/buses field, make sure all 4 outputs are selected. This will create a separate audio track for each selected output. 6. In the mix enables field, make sure all choices are ...
Page 409
409 to record midi input from a dxi’s interface 1. If you want to be able to record on any armed midi track, make sure that the echo dxi input to all midi tracks option on the midi tab of the global options dialog (options-global command) is enabled. Otherwise, you can only record on a midi track wh...
Page 410
410 to automate a dxi’s controls in the piano roll view 1. Select a midi track that uses the dxi as an output and open the piano roll view. 2. In the controller pane in the piano roll, select control, rpn, or nrpn. 3. In the value menu below the controller menu, click the drop-down arrow to see the ...
Page 411
411 • you can insert rewire devices into sonar projects from the synth rack view or insert menu, and you can tell sonar to create the necessary audio tracks and one midi track at that time. You can also tell sonar to open the rewire application’s property page, because, unlike dxi’s, rewire applicat...
Page 412
412 inserting a rewire instrument after you install your rewire applications and reboot your computer, the names of the rewire applications appear in sonar’s insert menu under rewire devices, and also in the synth rack view’s insert button popup menu. To insert a rewire instrument 1. Open a sonar pr...
Page 413
413 uncheck this option so you don’t have to deal with the dialog each time. To open the dialog when the option is unchecked, click the insert dxi synth options button in the synth rack view toolbar. 5. Click ok to close the dialog. Sonaradds your rewire devices to the audio track in menus and the m...
Page 414
414 3. In sonar, set the output field of a midi track to the name of your rewire application, and set the ch. Field to the name of the rewire device you want to play with this track. 4. Record some midi data in the track and play it. Find the audio track whose input field lists the output channel yo...
Page 415
415 • my midi controller works in sonar or my rewire application, but not both—choose different midi in ports for both sonar and your rewire application. Do this in sonar by using the options-midi devices command, and highlighting the midi in port you want to use in sonar. If you only have one midi ...
Page 416
416 make sure you’re playing in the right range and that your monitor speakers or headphones are turned up, and that none of the relevant tracks are muted. Recording a stand-alone synth there are several ways to record a stand-alone synth: • you can use the synth’s wave capture function, if it has o...
Page 417
417 sonar records all the midi tracks that are assigned to the stand-alone synth as a stereo audio track. After you finish recording, mute the midi tracks that you just recorded so you don’t hear them and the new audio track at the same time. Using vst synths and plug-ins you can use vst synths and ...
Page 418
418 5. Select a plug-in you want to configure, and click properties. The vst plug-in dialog appears, with the selected plug-in listed, and some plug-in options: • details—clicking this button opens a properties dialog that lists the pathname and a few other details about the plug-in. • enable as dxi...
Page 419: Mixing And Effects
This chapter describes sonar™ as a live digital mixer that gives you full track- by-track control over recording and playback of your project. You can mix in either the track view or the console view. The console view now has a 4-band eq patched to every audio track (producer edition only). The cons...
Page 420
420 sonar lets you mix together the digital audio portions of a project, including all real-time effects and control movements, to a stereo track or stereo pair of audio tracks. You can use the mixed-down tracks to create a cd master or to put your work on the world wide web. Preparing to mix the co...
Page 421
421 sound controls in the console view are grouped in modules. There are four types of modules: one module’s name is always outlined with a white line. This corresponds to the track with the focus. You can change the focus by clicking to the right of the module’s volume fader. Module type... What yo...
Page 422
422 the console view contains several different types of controls. Here’s how they are used: you can adjust console view controls in the following ways: • click on the center of the knob and drag the mouse up or down to adjust the knob • click and drag a fader up or down • double-click the center of...
Page 423
423 the controls and effects patch points all have tool tips associated with them. To see a description of a particular control or effect, simply rest the cursor over the item for a few seconds. There are three types of modules in the track view: track type... What you can do... Midi track set the t...
Page 424
424 the track view contains several different types of controls. Here’s how they are used: for information on using the controls in the track view, see chapter 3, changing track settings. Volume, pan, bus send level and bus send pan also have snap-to positions; double- click the control to return it...
Page 425
425 meters are helpful in determining the relative volumes of your audio tracks and in detecting and preventing overload. By default, the console view displays output level meters in main out modules at all times, and displays record level meters in individual tracks whenever they are armed and have...
Page 426
426 to hide a bus or track • right-click on the module and choose hide track or hide bus. To narrow a module (console view only) 1. Right-click in the space next to the module’s volume fader. 2. Select narrow strip from the menu that appears. To narrow or widen all modules in the console view • clic...
Page 427
427 to delete a bus 1. Right-click in the bus pane over an existing bus. 2. Select delete bus from the menu that appears. The bus is deleted from the bus pane. Note: if you have any track or bus routed through the bus you delete, the signal will be rerouted to the bus’s output. To create a bus send ...
Page 428
428 mixing midi sonar gives you many tools to control your midi mix. When your midi tracks sound the way you want them to, there are several ways to convert them to audio (see “converting midi to audio” on page 429). Mixing a midi track you can control the mixing and playback of a midi track as foll...
Page 429
429 converting midi to audio the following options cover three basic midi setups: • if your midi tracks play back through a dxi soft synth, use either the file- export-audio or edit-bounce to track(s) commands (see the procedures in “to export your dxi tracks as wave, mp3, or other type files” on pa...
Page 430
430 routing and mixing digital audio this section covers mixing your project’s digital audio. Audio clips in each track are processed by any real-time audio effects you have patched in place, passed through the track pan control and volume fader, and then sent to the designated bus or main out, in s...
Page 431
431 passes through the track’s send level knob on its way to the bus. This is shown in the diagram below: the audio in each bus passes through the send level and pan controls, is processed by any real-time effects you have patched, sent through the output level and pan controls, and then sent to the...
Page 432
432 audio tracks the following graphic shows an audio track’s signal flow: stereo bus volume trim clip fades input meters (record) audio clip clip envelopes clip mute hardware input dxi synth input phase/interleave playback meter (pre fader/pre fx) playback meter (post fader) pan playback meter (pos...
Page 433
433 you control the mixing and playback of an audio track as follows: sonar displays volume in db (decibels). When adjusting the volume or bus send level controls, a value of 0 db indicates full signal strength; positive values, up to 6 db, indicate a signal gain; negative values indicate an attenua...
Page 434
434 stereo buses buses are useful for mixing together different audio tracks (in stereo) and applying effects to the mix. You can mix the tracks at different volume levels by adjusting each track’s bus send level. Buses output to either other buses or to a main out. You control the bus as follows: t...
Page 435
435 surround buses (producer edition only) surround buses are useful for mixing and adding effects to create a surround mix. As with audio strips, the value box in the toolbar displays the send and return levels in decibels and the send and return balance values on a scale of 100%l to 100%r. To patc...
Page 436
436 main outs each enabled hardware channel has a main out channel strip in the console view. Main outs are the final destination for all of your audio in sonar. Main outs accept input from both tracks and buses. Main outs contains a left channel and a right channel, but only one volume fader. You c...
Page 437
437 what the meters measure the following table summarizes what each kind of meter measures: hiding and showing meters the display and configuration of the meters in the track view is independent of the meters in the console view, and vice versa. Buttons in the track view and console view toolbars h...
Page 438
438 to show or hide individual record meters in the track view • right-click the title bar of a track to display the track popup menu and click the show record meter option to show or hide the record meter for that track. To show or hide all playback meters • in the console view, click the dropdown ...
Page 439
439 the dropdown menus give you the following display options: menu option... What it does... Peak choosing this option causes the meter to display the highest amplitude in the signal that occurs in a complete cycle of a frequency. Rms choosing this option causes the meter to display more of an aver...
Page 440
440 changing the meters’ performance there are two major factors that determine the performance of meters in sonar. One is audio latency which you can adjust, within the limits of your audio hardware drivers, in the general tab of the audio options dialog. The second is the settings in the audio met...
Page 441
441 freeze tracks and synths the freeze feature allows you to temporarily bounce your track, including soft synths and effects, to reduce the amount of cpu power needed. The freeze feature also works for synths patched in the synth rack. Note: if you delete or replace any part of the bounced track, ...
Page 442
442 mind that windows does not necessarily release freed memory until it is needed, so you may not see an immediate drop in usage when a synth is frozen or disabled. To freeze a track 1. Right-click on a track. 2. Select freeze track from the menu that appears. Sonar bounces the audio in the track t...
Page 443
443 sonar discards bounced audio, enables the dxi and the dxi audio track’s fx bin. Sonar will be re-bounce the audio if you choose freeze again. To do a quick unfreeze of a synth (dxi) • right-click a frozen dxi midi or audio track, and choose quick unfreeze synth from the menu that appears. Or • i...
Page 444
444 using real-time effects in the console view and track view, you can use plug-in effects non-destructively, in real time. You can also hear your plug-in effects in real time on any live instruments you are recording—just make sure input monitoring is enabled (see “input monitoring” on page 180). ...
Page 445
445 effects parameters each effect in an effects patch point has its own independent set of parameter values. For example, you can apply a short reverb in one track and a long reverb in another track. The dialog boxes for real-time effects contain the same parameters as the offline effects, though t...
Page 446
446 using the per-track eq (producer edition only) each audio track in the console view in the producer version of sonar has a 4- band eq patched into it by default. You can hide the eq, hide its graph (plot), display only one band, or display all four bands here’s a graphic of the eq and its contro...
Page 447
447 to choose what band you’re controlling when only one band is showing • click the band menu that’s at the bottom of the eq display, and choose the band number you want to control. To enable or disable the eq • click the enable/disable button that’s next to the band menu: . To choose the filter ty...
Page 448
448 to apply multiple audio effects offline 1. Add one or more audio effects to one or more tracks in either the track view or the console view. 2. In the track view, select the tracks or clips you want to be affected. 3. Select process-apply audio effects. The apply audio effects dialog appears. 4....
Page 449
449 using control groups sonar lets you link faders, knobs, or buttons in the track and console views into groups. Groups are collections of controls whose movements are linked together. For example: • two volume faders or controls can be grouped so that when you increase or decrease the volume of o...
Page 450
450 same direction. The controls do not necessarily need to start at the same level. Here are two examples: example 1 example 2 the first control is lowered to minimum the controls are grouped in this position the first control’s raised to maximum the controls are grouped in this position the first ...
Page 451
451 relative the range of motion for controls in the group is not the same. All controls in the group have the same value at one point—the lowest level for send, return, and volume levels, and zero for pan controls. Here are two examples: custom sometimes you want to define a more complex relationsh...
Page 452
452 when you have defined a custom group, you can adjust the starting and ending position of each control using the group settings dialog box or using popup menus on the controls in the group. To add a control to a group 1. Right-click on the control. 2. Choose a group from the group submenu. Sonar ...
Page 453
453 to create a custom group 1. Right-click on any control in the group and choose group properties to display the group properties dialog box. 2. Choose custom as the group type. The starting and ending values for each control are displayed. 3. To change the starting or ending value for a control, ...
Page 454
454 using remote control this section explains how to assign knobs or sliders on a midi controller to control specific parameters on specific tracks. If you have a control surface with groups of faders such as a tascam us-428 or cm labs motormix, see the online help topic “working with external devi...
Page 455
455 the type of midi message used to work a control is selected in the remote control dialog box. The options are as follows: to set up remote control for a knob, button, or fader 1. Right-click on the control and choose remote control from the popup menu. 2. Choose the remote control type, as descr...
Page 456
456 to disable remote control • right-click on the control and choose disable remote control from the popup menu. To prevent sonar from sending controller data to your midi device • right-click each knob or fader in sonar that is sending unwanted controller data to your midi device and choose disabl...
Page 457
457 here are some reasons to use edit-bounce to track(s): • your mix is so complex that real-time playback is impossible. Edit-bounce to track(s) produces the correct mix, and store the result in a new track or tracks. • you require more cpu time for your real-time effects. With edit-bounce to track...
Page 458
458 7. In the source category field, select the source you want to use for your bounced track(s) from the following options: • tracks—choosing this option creates new separate tracks for each track you highlight in the source buses/tracks field. Each track you highlight will produce a new mono track...
Page 459
459 sonar mixes the audio data and a new track or tracks appear in your project. Preparing to create an audio cd you can create an audio cd from any wave file or files (extension . Wav ) of up to either 74 or 80 minutes (depending on the recordable cd media you have). If your projects are audio only...
Page 460
460 if your audio hardware is configured for stereo playback, wave files are created in stereo; if your audio hardware is configured for monophonic playback, the wave file is created in mono. To export audio to realaudio format 1. Set all volume, pan, effects, and automation settings just as you wan...
Page 461
461 13. In the mix enables field, choose the elements you want to include in the mixdown. If you want to exclude muted tracks and/or include only soloed tracks, make sure track mute/solo is checked. Note: if you have patched a dxi (plug-in synth) into a track or bus, make sure you check track fx to ...
Page 462
462 you may choose several formats if you wish. The realaudio 2.0 formats are good for backwards compatibility with older players and for 14.4 kb capability. The remaining formats let you choose mono or stereo playback. Stereo formats trade bandwidth for stereo, so use these only when the stereo asp...
Page 463
463 10. In the channel format field, select one of the following options: • stereo—all exported tracks and clips are mixed down to a stereo file or files. • mono—all exported tracks and clips are mixed down to a mono file or files. • split mono—all exported tracks and clips are mixed down to separat...
Page 464
464 if you chose broadcast wave as the export format, the following information is stored in the file(s): • description—a brief description of the contents of the broadcast wave. Limited to 256 characters. • originator—the author of the broadcast wave. This information is taken from the author field...
Page 465
465 10. In the channel format field, select one of the following options: • stereo—all exported tracks and clips are mixed down to a stereo file or files. • mono—all exported tracks and clips are mixed down to a mono file or files. • split mono—all exported tracks and clips are mixed down to separat...
Page 466
466 to export a project in mp3 format 1. Set all volume, pan, effects, and automation settings just as you want them. 2. If you only want to mix down parts of tracks, select those clips now. 3. If you are using effects on the tracks and want to mix the effects down at this time, select the whole len...
Page 467
467 13. In the mix enables field, choose the elements you want to include in the mixdown. If you want to exclude muted tracks and/or include only soloed tracks, make sure track mute/solo is checked. Note: if you have patched a dxi (plug-in synth) into a track or bus, make sure you check track fx to ...
Page 468
468 8. Check mix each groove clip as a separate clip option if you want to save groove clips (acidized files) as separate clips. This may increase significantly the amount of time it takes to export your project, if there are many groove clips in your project. 9. Click save. Note: omf files save the...
Page 469
469 sonar offers four kinds of dithering: • rectangular—basically white noise, and the least cpu-intensive, this type of dither is more audible than the pow-r dither types, but works well with loud projects, or ones that use distortion. • pow-r 1—adds a fairly consistent amount of noise below 10k, t...
Page 470
470
Page 471: Surround Mixing
Surround mixing sonar producer fully supports surround mixing (sonar studio can open surround projects created in producer, converting them to stereo). Sonar (producer) can create finished surround mixes in all popular surround formats, including windows media 9 pro. You can use a joystick to contro...
Page 472
472 surround basics surround sound is a common name for various techniques for positioning audio in reference to the listener. Whereas regular stereo is limited to left/right positioning, within a relatively narrow field, surround sound opens possibilities of positioning an audio source anywhere aro...
Page 473
473 configuring sonar for surround mixing this section covers setting up sonar for surround sound. Using surround format templates a surround format template specifies the number of speakers and the order in which the speakers are arranged. There are several different surround formats, including lcr...
Page 474
474 to mix in surround sound in sonar, you must insert at least one surround bus. A project can include multiple surround buses, but all surround buses in a project use the same surround format (5.1, 7.1, etc.). The project’s surround format is based on one of the following surround format templates...
Page 475
475 • 7.0 (film/alternative) • 7.0 (music/alternative) • 7.1 (film/alternative) • 7.1 (music/alternative) • 7.1 (smpte/itu) • 8.0 (octagon) • 8.0 (film/alternative) • 8.0 (music/alternative) • 8.1 (film/alternative) • 8.1 (music/alternative) • 8.1 (smpte/itu) 5.1 (smpte/itu) is the default template....
Page 476
476 settings as a preset (except for downmixing parameters—you can change these, but they aren’t saved in presets). To save a group of settings as a preset, type a name in the presets field and then click the disk icon that’s to the right of the field. When you want to use this preset in a project, ...
Page 477
477 routing in surround tracks can send output to a surround bus, the surround main, or a hardware output. If a track is routed to a surround bus or the surround main, it has surround meters and a surround panner. You can route any track or bus to another bus, the surround main or a hardware out. Ho...
Page 478
478 downmixing downmixing is a way of previewing your surround project in stereo only. There are various cases where surround is not available and it may be that someone plays your project in stereo only. A radio broadcast is a good example. Downmixing is a valuable tool for determining if your proj...
Page 479
479 to downmix a project 1. If you do not have a stereo bus in your project, create one by right-clicking in the bus pane in the track view or console view and selecting insert stereo bus from the menu that appears. 2. Open the project options dialog (options-project command), select a center downmi...
Page 480
480 the small and large panners are always synchronized; the large panner simply provides increased resolution when you adjust the surround pan position. The large surround panner can be resized like any other floating window. Note 1: surround panning is not available for tracks/sends that are route...
Page 481
481 the large surround panner has some sliders at the bottom that the medium surround panner doesn’t have, except for the lfe send slider, which the medium panner has. Except for the sliders, the large and medium surround panners have the following controls: • angle and focus marker—a small sphere t...
Page 482
482 • width slider (large panner only)—this slider both displays and controls the width value. Width is a measure of how wide an area the sound seems to be coming from on a scale of 0 to 360 degrees. At 0 and 360 degrees, the sound seems to all come from a single speaker. At 180 degrees the sound se...
Page 483
483 to mute a surround speaker • in the large surround panner, click a speaker icon to mute its output. The speaker icon turns grey when the speaker is muted. Or • in the small surround panner, click a white square to mute a speaker’s output. The square turns grey when the speaker is muted. To solo ...
Page 484
484 note: if you group sliders that are in the same surround panner, you can no longer move the markers that represent those sliders’ values. You can only move a grouped marker by moving its associated slider. Keyboard shortcuts the following shortcuts allow you to control a surround panner from the...
Page 485
485 • 9 = r • / = lc, • * = rc automating surround panning you can arm or disarm for automation all the controls in a surround panner by clicking any control in the surround panner (except lfe solo), and choosing arm for automation from the popup menu. Joystick support sonar producer allows you to u...
Page 486
486 6. Now select button 2, and select engage pan nav mode in the button actions field. 7. Select any other buttons your joystick has (one at a time), and connect them to any transport or menu commands you want in the button actions field; close the joystick panner dialog. Now when you hold down but...
Page 487
487 bass management a bass management system takes all the frequencies below a certain frequency (normally 80hz) from the main channels, and the signal from the lfe channel, and mixes them together into the speaker that is best equipped to handle them. This is usually a subwoofer, but sometimes the ...
Page 488
488 surround effects sonar lets you use your existing stereo or mono effects as surround effects. Sonar does this through the surroundbridge, which automatically sets up your existing mono & stereo plug-ins so you can patch them into surround buses (buses, not tracks). The surroundbridge the surroun...
Page 489
489 effect presets you can use existing (non-surround) effects presets when you patch an effect to a surround bus—selecting a non-surround preset sets all of a plug-in’s instances to the settings of the preset; selecting a surround preset sets each instance’s parameters individually, according to th...
Page 490
490 to view a list of the automatable parameters in a particular effect, uncheck one of the controls linked to group checkboxes on the surroundbridge tab, and read the list in the unlinked controls field. To relink individual effect parameters to other effect instances 1. In the unlinked controls fi...
Page 491
491 importing surround mixes sonar imports multi-channel (surround) files as a group of mono files. If the files contain information that labels the speaker location of each channel in the file, sonar copies these labels to the clips in your audio tracks, but does not pan the tracks according to the...
Page 492
492 exporting surround mixes you can export your surround mixes as multi-channel pcm wave files, or as windows media pro files. To export a surround multi-channel file 1. Use the file-export-audio command to open the export audio dialog. 2. Type a name for your file. 3. In the files of type field, c...
Page 493: Using Automation
Automation means to record the movement of a fader, knob, or other control so that the next time you play your project, that control moves automatically. Sonar allows you to graphically automate much more than just volume and pan controls—you can automate individual controls, faders, and knobs that ...
Page 494
494 quick automation guide the following table summarizes console and track view automation: in addition, sonar allows you to copy and paste envelopes between tracks. The only controls that you can’t automate are the arm, solo, pre/post, interleave (mono/stereo selector), bus enable, and phase butto...
Page 495
495 the automation toolbar display the automation toolbar by using the view-toolbars command to open the toolbars dialog box, and making sure that the automation checkbox is checked. If you slide the cursor over each button or field in the toolbar, tool tips pop up to tell you each function. The aut...
Page 496
496 recording individual fader or knob movements this method works in both the track view and console view. Arming a parameter for automation and clicking the record automation button starts automation recording and plays your project while you record automation. You can only record or erase automat...
Page 497
497 drawing audio envelopes in the track view this method is only available in the clips pane and bus pane, and works for both tracks and buses. Drawing an automation envelope for audio data overwrites any preexisting envelope for the same parameter that occurs at the same time in the same track or ...
Page 498
498 8. Move the cursor over the segment of the envelope that lies between the two nodes until the double-ended arrow appears, and right-click the envelope to open the envelope editing menu. 9. Choose one of the following shapes from the envelope editing menu: • jump—this choice causes the envelope t...
Page 499
499 drawing midi envelopes in the track view this method is only available in the clips pane. You can also draw midi controller data in the piano roll view, but the technique is different (see “using the controllers pane” on page 313). Note: midi envelopes you create in the piano roll controllers pa...
Page 500
500 3. If you want to create an envelope to control any other midi controller, choose envelopes-create track envelope-midi.... The midi envelope dialog box appears: • in the type field, choose what kind of midi event you want to control with your envelope. • in the value field, choose the name of th...
Page 501
501 sonar adds a shape between the nodes. You can drag any shape except a jump up or down and it maintains its curve or angle. To edit a jump, drag the node that’s at either end of the jump. Play your track and listen to the results. You can undo any step by using the edit- undo command (ctrl+z) dir...
Page 502
502 showing or hiding envelopes you can choose to show or hide any or all envelopes in a track or bus. To show or hide all envelopes 1. In the track view toolbar, click the drop-down arrow that’s next to the envelope tool to display the envelope options menu. 2. Choose either show all envelopes or h...
Page 503
503 to delete several or all envelopes 1. Select the data that contains the envelopes you want to delete—you can select parts of tracks, one or more whole tracks, or all tracks. 2. Use the edit-cut command to open the cut dialog box. 3. Select track/bus automation if it’s listed. 4. Select clip auto...
Page 504
504 to paste an envelope 1. Select the track(s) and location (now time) you want to paste the data to. 2. Press ctrl+v or use the edit-paste command. The paste dialog box appears. 3. Choose a track and location to paste to, if you haven’t already. 4. Click ok. Sonar pastes the automation data and an...
Page 505
505 parameter is now set to hard right. Setting the pan in offset mode to 50% right would set the pan to the center. Note: any position that you set a fader to in offset mode remains in effect when you switch back to envelope mode. For example, if you set a volume fader to -inf while in offset mode,...
Page 506
506 the following midi controls support both envelope and offset modes: to open non-sonar envelope display on a percentage scale you can globally configure the placement of 0 db for your envelopes in the clips pane. The default placement in the clips pane of 0 db is roughly 1/3 from the top of the c...
Page 507
507 to create a snapshot 1. Move the now time to the location where you want to create the snapshot. 2. Make sure that the automation toolbar is visible—use the view-toolbars command and make sure that the automation checkbox is checked. 3. Set all controls the way you want them to be at this partic...
Page 508
508 automating individual effects parameters you can automate the parameters of some of sonar’s effects by drawing envelopes, or recording fader movements, or creating snapshots. To record fader or knob movements for an individual effect’s parameters 1. Patch an automatable effect into the track or ...
Page 509
509 4. Check all the parameters you want to create envelopes for; as you check each envelope choice, you can choose a color for the envelope by clicking the choose color button that’s in the lower right corner of the dialog box. Note: you can change a plug-in envelope’s color whenever you want by hi...
Page 510
510 recording automation data from an external controller you can record automation data from an external controller or a midi keyboard. To record automation data from an external controller 1. In either the track view or console view, right-click the control or knob that you want to control externa...
Page 511
511 the envelope editing and node editing menus the envelope editing menu appears when you move the cursor over an envelope until a double-ended arrow appears under it, and right-click the envelope. The node editing menu is almost identical, and appears when you move the cursor over a node until a c...
Page 512
512 automated muting the mute buttons in the track view and console view work in two ways: • you can record or draw automation for each mute button, and the automation data controls the buttons. • you can click a mute button while playback is in progress and manually override any automation data for...
Page 513: Layouts, Templates
Layouts, templates and key bindings a layout is the current arrangement of all the views that pertain to a particular project. The layout of each project is stored automatically as part of every project file. In addition, you can save the current layout or load any saved layout and apply it to the c...
Page 514
514 layouts the layout of the views that are displayed for a project is stored automatically in the project file when you save the project. By default, the layout of all the views is restored when the file is opened. You can automatically arrange all open views so that they are all visible by using ...
Page 515
515 there are two options in windows layouts dialog (select view-layouts to open) that control how layouts are used, as described in the following table: to create or save a layout 1. Arrange the views for the current project the way you want. 2. Choose view-layouts to display the window layouts dia...
Page 516
516 to delete a layout 1. Choose view-layouts to display the window layouts dialog box. 2. Choose the layout you want to delete from the list. 3. Click delete. 4. Click ok to confirm that you want to delete the layout. The layout is removed from the list. 5. Click close to exit the window layouts di...
Page 517
517 floating views and dual monitor support sonar supports dual monitors and allows you to float most of your views to a second monitor giving you more options when working and increasing the number of views that you can have open at one time. Important: dual monitor support requires that you have a...
Page 518
518 as a rule, any parameter that is saved in a project file is also saved in a template file. Following are some useful parameters that are saved in template files: • track configuration and track parameters • timebase • sysx banks • file information and comments • tempo settings • meter and key se...
Page 519
519 to create a template 1. Create a new file using the file-new command. 2. Add tracks. 3. Set one or more parameters to be the way you want. 4. Choose file-save as to display the save as dialog box. 5. Choose template from the save as type list. 6. Enter a template file name and click save. Sonar ...
Page 520
520 6. Name each track and set any track parameters, such as starting patch, volumes, panning, reverb, chorus, and transposition. 7. If you like, configure other parameters needed in your projects, such as auto- send sysx banks, tempo settings, window positions, and comments. 8. Choose file-save, an...
Page 521
521 you can choose one of two options to define the key binding shift key: • midi key (typically, the very lowest or highest key on your midi keyboard) • controller event (typically, one of the pedals) if you use a midi key as the key binding shift key, then you lose the ability to play that note by...
Page 522
522 9. If you want to save these key bindings for other sessions, make sure that the save changes for next session checkbox is checked. 10. Click ok when you are done. Sonar assigns the key(s) you chose. To create a key binding using a midi keyboard 1. Choose options-key bindings to display the key ...
Page 523
523 importing key bindings sonar can use key bindings from other sequencer applications. Clicking the import button in the key bindings dialog allows you to choose a new set of key bindings. After you import new key bindings, you can edit and save them the way you do with the default key bindings. T...
Page 524
524.
Page 525: Working With Notation
Working with notation and lyrics this chapter describes three sonar™ views that are used to edit the music notation and lyrics of your project. • sonar’s staff view lets you work with your composition in a standard musical staff, guitar tablature and a virtual guitar fretboard. You can add, move, an...
Page 526
526 the staff view the staff view is composed of a staff pane and a fretboard. When you first open the staff view, you may see only the staff and not the fretboard. Resize the staff view by dragging its edges until you can see everything easily. When you save your file, whatever size the staff view ...
Page 527
527 opening the staff view there are three ways to open the staff view: • in the track view, select the midi tracks you want to see, then click the staff view button . • in the track view, select the midi tracks you want to see, then choose view- staff. • right-click on a track in the clips pane and...
Page 528
528 the staff pane right-click menu the staff pane right-click menu offers the following editing options: menu command result midi effects opens the midi effects submenu. See “midi effects (midi plug-ins)” on page 325 for more information. Layout opens the staff view layout dialog box. Regenerate ta...
Page 529
529 to change the staff pane layout 1. Click the staff view layout button to open the staff view layout dialog box. 2. Select a track from the list (if the track you want to edit is not in the list, click the pick tracks button in the staff view toolbar and select it). The clef option shows the trac...
Page 530
530 the fretboard is the same as the color of the corresponding clip in the track view. (see “arranging clips” on page 209 for information about setting clip properties.) to turn the display of the fretboard on or off, click . Fretboard popup menu when you right-click the fretboard in the staff view...
Page 531
531 basic musical editing the staff view's tools let you edit a project by manipulating the elements of standard music notation. Using these tools, you can create and edit notes, pedal marks, expression marks, hairpins, and lyrics. Inserting notes on the staff you can add notes to your composition w...
Page 532
532 to insert a note on the staff 1. Disable the fill durations and trim durations buttons in the staff view toolbar, if desired (this is usually the best way when you’re entering notes). 2. Click the display resolution button in the staff view toolbar and choose a resolution that’s as small or slig...
Page 533
533 selecting notes use the selection tool to make selections. Selection methods in the staff view are similar to those in other views. Here is a summary: moving, copying, and deleting notes on the staff selections can be cut, copied, pasted, and deleted with edit menu commands. The techniques are s...
Page 534
534 to move a single note in the staff view 1. Click the select tool or the draw tool . 2. Click the note to be moved. 3. Drag the note to a new time, pitch, or staff. Sonar moves the note to the new location. To move several notes in the staff view 1. Click the select tool . 2. Select the notes to ...
Page 535
535 to change the pitch of a single note in the fretboard 1. Click in the time ruler to set the now time to the time of the note you want to change. 2. Click the select tool or the draw tool . 3. Drag the note along the string to a new fret. Sonar moves the note to the new pitch. To change the pitch...
Page 536
536 to play notes with step play 1. Set the now time by clicking in the time ruler. 2. Step through the music as follows: changing note properties the staff view lets you edit all the midi parameters for a note, including those not normally portrayed by standard musical notation. Note properties are...
Page 537
537 to edit a note’s properties 1. Right-click the note to open the note properties dialog box. 2. Edit the note’s properties, as described in the table. 3. Click ok. Sonar changes the note’s parameters and redraws the note if necessary. Deglitch dialog when recording midi guitar, even the best play...
Page 538
538 to use the deglitch filter 1. Select a track or a section of track. 2. Select process-deglitch from the menu. The deglitch dialog box appears. 3. Check each of the filters you want to use. 4. Enter the parameters (maximum or minimum values) you want for each of the filters you are using. 5. Clic...
Page 539
539 to enable beaming of rests 1. Click layout button to open the staff view layout dialog box. 2. Select the beam rests option. 3. Click ok. Thereafter, the staff view beams rests as though they were notes. Changing the way notes are displayed unlike musical notation programs, sonar uses the midi e...
Page 540
540 here’s what the staff view looks like with and without these options: on the other hand, if you are entering notes into the staff view with the mouse, fill and trim durations may produce confusing results. For example, with fill durations, an inserted eighth note in 4/4 time would look like a qu...
Page 541
541 using enharmonic spellings any musical note can be referred to by several different names. For example, c#3 and db3 identify the same pitch, as do g#4 and ab4. The most appropriate name depends upon the current key signature, but can also depend on musical context. Sonar uses a set of rules to a...
Page 542
542 to change a note’s enharmonic spelling 1. Right-click the note to open the note properties dialog box. 2. In the pitch textbox, type a new spelling for the note. 3. Click ok. Sonar displays the note with the new enharmonic spelling. You can change enharmonic spellings in other views, such as the...
Page 543
543 each individual track to record on the corresponding midi channel. The gr- 30 guitar synthesizer template is designed to do this, so you may want to open that from the quick start menu or from the file menu. To use the file menu method, choose file-open and choose cakewalk template from the file...
Page 544
544 sonar stores its library of chords in the file chords.Liw. The chords in the library are sorted into groups. You can add and remove chords from the library, create new groups (i.E., for alternative guitar tunings), and add chords from a different library file. You edit chords in the chord proper...
Page 545
545 to edit a chord symbol 1. Right-click the symbol to open the chord properties dialog box. 2. Edit information about the chord according to the table: 3. If desired, select a group from the list and/or create a guitar chord grid. 4. Click ok. The staff view displays the chord with the new propert...
Page 546
546 to add a guitar chord grid 1. Right-click the chord symbol to open the chord properties dialog box. 2. Follow the instructions in the table: 3. Click ok. The staff view displays the chord with the new guitar chord grid. To manage the chord library 1. Right-click the chord symbol to open the chor...
Page 547
547 3. Click ok. Sonar saves the chord library with the changes you made. Adding expression marks expression marks tell a performer how to interpret the notes and durations on the page. They provide a necessary supplement to simple notation, in which notes have only pitch and duration, but no hint o...
Page 548
548 sonar inserts the new expression mark below the staff. To edit an expression mark 1. Right-click the expression mark to open the expression text properties dialog box. 2. Edit the time and text of the expression mark as desired. 3. Click ok. The staff view displays the expression mark with the n...
Page 549
549 to add a hairpin symbol 1. Click the draw tool . 2. Select the hairpin tool . 3. Position the pointer below the staff (the pointer changes to a pencil when you are in a legal position). 4. Click to place a hairpin symbol. Sonar inserts a copy of the most recently added hairpin symbol, which you ...
Page 550
550 you can suppress the display of all pedal marks by deselecting the show pedal events option in the staff view's layout dialog box. To add a pedal mark 1. Click the draw tool . 2. Select the pedal tool . 3. Position the pointer below the staff (the pointer changes to a pencil when you are in a le...
Page 551
551 in the staff view layout dialog box you can choose a preset style of tablature by choosing from the preset popup menu, or you can define your own style by clicking the define button in the staff view layout dialog box to open the tablature settings dialog box. To define a tablature style 1. In t...
Page 552
552 7. Save your settings by typing a name into the preset field at the top of the dialog box and clicking the disk icon next to it. You can remove presets from the list by clicking the x button next to the disk icon. The next time you want to use these settings for a track, choose your preset in th...
Page 553
553 press the spacebar to play your file. Notice that the fretboard displays the name of each note above the string and fret you would play it on as the note plays. Regenerate tab the regenerate tab command works on selected regions in a track to modify the fingering according to the method you choo...
Page 554
554 4. Click the draw tool. 5. Enter a note by clicking a line in the tab staff. 6. Without letting go of the mouse, click and drag the cursor up to set the fret number. Single note editing from the tab staff sonar enables you to edit single notes from the tab staff in several ways: • with the draw ...
Page 555
555 to export to an ascii tab file 1. Select the track you want to export. 2. Open the staff view. 3. In the staff view, click the export to ascii tab button. The save as dialog appears. 4. Enter a file name in the file name field. 5. Click ok. Sonar saves the track with the file extension . Txt . E...
Page 556
556 4. Enter a note by clicking the string and fret where you would play the note. The note appears on the fretboard, in the staff, and in the tab if you have generated one (you can generate a quick tab by choosing quick tab from the tablature dropdown menu that you open by clicking the dropdown arr...
Page 557
557 to set up a percussion track 1. Right-click on the track in the track pane and choose track properties to open the track properties dialog box. 2. Assign the output and channel for your percussion instrument. For example, if the output is assigned to a sound card that supports general midi, use ...
Page 558
558 to assign a percussion staff or line to a track 1. Click the staff view layout button to open the staff view layout dialog box. 2. Select your percussion track from the list. 3. Select percussion staff or percussion line from the clef dropdown list. 4. Click percussion settings to set up the app...
Page 559
559 5. Click ok to close the percussion notation key dialog box. 6. Click close to close the staff view layout dialog box. The staff view shows the percussion clef with the note bindings and noteheads you assigned. Ghost strokes in percussion notation, parentheses around a note mean that it is a gho...
Page 560
560 the meter/key view the meter/key view lets you enter meter and key changes at measure boundaries. Meter and key changes affect all tracks. What is meter? The meter—also known as the time signature—describes how to divide time into rhythmic pulses. When you set the meter, you are specifying the n...
Page 561
561 what is key? In musical terms, a key is a system of related notes based on the tonic (the base pitch) of a major or minor scale. A key signature is a group of sharps or flats placed immediately to the right of the clef sign. The key signature tells a performer that certain notes are to be system...
Page 562
562 each meter/key change has the following properties: adding and editing meter/key changes the meter/key view displays a list of all the meter/key changes in the project. You can add, delete, or edit meter/key changes by clicking the buttons at the top of the view. You can also insert meter/key ch...
Page 563
563 to delete a meter/key change 1. Select the meter/key change to be deleted from the list. 2. Select additional meter/key changes by using shift-click and ctrl-click. 3. Click delete . Sonar removes the meter/key change from the project. You cannot delete the first meter/key change from measure 1 ...
Page 564
564 concert pitch, and should have key+ set to -2 to transpose it two chromatic steps back down. Remember, not all trumpets are bb instruments! To notate a bb trumpet part 1. Record or enter the notes using the pitches that the musician who will be reading the part needs to see. For example, if the ...
Page 565
565 working with lyrics sonar lets you create, edit, and display lyrics, the words and syllables associated with notes in a track. Lyrics can be the words to a song, the text of a vocal passage, a narration to be read along with the music, cues of some type, or text totally unrelated to the music. E...
Page 566
566 to add lyrics to a track 1. Click the draw tool . 2. Select the lyrics tool . 3. Position the pointer below the staff, under the first note to be assigned lyrics. (the pointer changes to a pencil when you are in a legal position.) 4. Click to open an insertion box. 5. Follow the instructions in ...
Page 567
567 to select a font for the display, use one of the following: adding and editing lyrics in the lyrics view lyrics appear in the lyrics view as a stream of syllables, each one associated with a note in the track. In this context, a syllable is any continuous string of characters, without a hyphen. ...
Page 568
568 to enter lyrics in the lyrics view 1. Click in the upper left corner of the view to position the cursor at the start of the text. 2. Follow the instructions in the table: to edit lyrics in the lyrics view editing in the lyrics view follows standard windows conventions for cursor movement, select...
Page 569: Using Instrument
Using instrument definitions instrument definitions are a powerful feature of sonar™ that makes it easier for you to find the banks, patches, and controllers of your midi instruments. An instrument definition is a file that contains the names of the banks, patches, note names, bank select method, an...
Page 570
570 assigning instruments sonar lets you assign a midi instrument definition to each available midi output and channel. The assignments you make determine the midi bank names, patch names, note names, and controller names that you see during your sonar session. Suppose that you have a roland gs-comp...
Page 571
571 to assign instrument definitions to midi outputs and channels 1. Choose options-instruments to display the assign instruments dialog box. 2. Select one or more midi outputs and channels from the output/channel list (use shift-click and ctrl-click to select multiple outputs and channels). You can...
Page 572
572 to clear instrument assignments 1. Choose options-instruments to display the assign instruments dialog box. 2. Select the midi outputs and channels whose assignments you want to remove from the output/channel list. 3. Choose from the uses instrument list. A black line connects the two lists. 4. ...
Page 573
573 to import instrument definitions 1. Choose options-instruments to display the assign instruments dialog box. 2. Click define to display the define instruments and names dialog box. 3. Click import to display the import instrument definitions dialog box. 4. Choose the file that contains instrumen...
Page 574
574 you define instruments in the define instruments and names dialog box, shown below: the define instruments and names dialog box contains two trees: • the instruments tree in the left half of the dialog box lists all defined instruments and their characteristics • the names tree in the right half...
Page 575
575 there are six components to an instrument definition: • method for bank selection • patch names, such as piano and bass • note names, which are most frequently used to name drum notes, such as kick or snare • controller names, like volume and pan • names for registered parameter numbers (rpns) •...
Page 576
576 to save an instrument definition 1. Click close to close the define instruments and names dialog box. 2. Click ok. Sonar saves the instrument definition in the master . Ins file. To export an instrument definition 1. In the define instruments and names dialog box, right-click an instrument name ...
Page 577
577 copying name lists you can easily create new lists that are similar to other lists. For example, suppose you want to create a new patch name list called newlist that is almost identical to the general midi patch list, but with one or two small changes. Here’s how you proceed: • create a new patc...
Page 578
578 the bank select method you choose affects the bank numbers that you assign to each patch list, as described in the following section. Here’s how you compute the bank numbers: here is an example of the normal bank select method. According to the documentation for the roland jv-1080 synthesizer, t...
Page 579
579 will display drum notes as diamonds, and the staff view will use percussion notation. To see the assignment of patch name lists to banks 1. Expand the instrument definition by clicking the + sign next to the instrument name. 2. Expand the patch names for banks folder by clicking the + sign. The ...
Page 580
580 assigning note names each patch may have a list of up to 128 names for notes. Usually, note names are labels for percussion instruments. For example, the pitch c3 may really be “kick drum,” and d3 may be “snare.” because a drum machine may provide different drum kits for each patch, sonar lets y...
Page 581
581 to change the note names for a patch 1. Drag a note name list from the names tree onto the note names for patches folder of the instrument and bank you’re editing in the instruments tree. 2. Enter the patch number that should use these note names, or enter –1 to indicate that this list of note n...
Page 582
582 usesnotesascontrollers=n some midi devices, certain mixers for example, use midi note events instead of continuous controller events for automation. It is often desirable to treat the note events as controller events in order for them to obey the “zero controllers when play stops” and “patch/con...
Page 583
583 why use instrument definitions? The main reason to import or create an instrument definition is so you can use patch names that are specific to the midi module you’re using, instead of using generic general midi patch names. It’s much easier to find a particular sound on a midi module when the a...
Page 584
584 to import a roland instrument definition 1. Choose options-instruments to display the assign instruments dialog box. 2. Click define to display the define instruments and names dialog box. 3. Click import to display the import instrument definitions dialog box. 4. Choose the file that contains i...
Page 585
585 128; sonar numbers patches from 0 to 127, so patch #004 in sonar is the same patch number as patch #005 on the roland). Let’s look at some of the other roland xp-10 patch name lists in the right window of the define instruments and names dialog box to see if another one has the right patch names...
Page 586
586 checking bank numbers you can calculate bank numbers by using the methods described in “assigning the bank select method” on page 577, but you might find it easier to use the following method: to check the bank numbers 1. Set up a midi track to record from your midi keyboard or module. 2. Click ...
Page 587: Using System
Using system exclusive data sonar™’s system exclusive (sysx) librarian provides you with 8192 banks in which to hold midi system exclusive messages. A bank is a storage area plus some associated parameters such as a destination output and an optional description. Each bank can hold any number of mes...
Page 588
588 what is system exclusive? System exclusive data is midi’s way of letting each synthesizer manufacturer transmit private data about its products. A system exclusive message has a manufacturer id; the rest of the message is completely proprietary and varies for each manufacturer, even for each of ...
Page 589
589 of bytes in the message), however, sending a sysx bank stops playback until all of the sysx bank is transmitted. Sysx banks are usually sent to your instrument when you load your work file. Sonar asks you each time you load a project file if you want to send any existing sysx banks the file cont...
Page 590
590 importing, creating, and dumping sysx banks there are several ways to get a sysx bank into sonar: • you can import (load) an external . Syx file. • you can edit an empty bank to create a new bank from scratch. • you can dump a bank into sonar from the synthesizer itself. To import a sysx bank in...
Page 591
591 to dump a sysx bank into sonar 1. Choose options-global and click the midi tab, and make sure that the system exclusive item is checked. If it isn’t, sonar won’t receive system exclusive messages. 2. In the sysx view, select an empty bank to dump the new bank into (unless you want to add to or o...
Page 592
592 when your instrument starts sending the bank, the sysx receive window counts the bytes as sonar receives them. If the count stays at zero for more than a couple of seconds, something is wrong. The synthesizer may not be hooked up to the midi interface in both directions, or you may have answered...
Page 593
593 redistribute such drms on an as-is basis. Additional user-supplied drms may be available on the cakewalk web site (www.Cakewalk.Com). Editing sysx banks editing a sysx bank is very similar to creating one. To edit a sysx bank 1. In the sysx view, select the bank you want to edit, and click the e...
Page 594
594 clear bank this deletes the selected bank. The shortcut key is d. Name you may enter a description for a bank by clicking this button. Names are saved only in . Cwp and . Cwb files. The shortcut key is n. Auto the auto option tells sonar to transmit that bank every time it loads the project file...
Page 595
595 you may also use this feature to copy a sysx bank between two sonar project files. Save the bank into a file, load the other sonar project file, then load the bank again. This is also a good way to copy one bank to another in the same project file. The shortcut keys are o and v respectively. To ...
Page 596
596 real-time recording of system exclusive messages you can record short system exclusive messages in real time. These will end up in the track as the new sysx data types of events, which can hold system exclusive messages up to 255 bytes long. Before you record any sysx messages, choose options-gl...
Page 597
597 sysx . Ini file settings the ttsseq . Ini initialization file contains settings that govern the sending and receiving of system exclusive information. If you are experiencing difficulties using sysx, you will probably be able to correct the problem by adjusting these settings. The options descri...
Page 598
598 troubleshooting sonar is not receiving sysx messages • make sure all your devices are connected correctly. • make sure you have the right midi input selected by using the options- midi devices command. • make sure that your instrument is set up to transmit system exclusive data. Sysx bank names ...
Page 599
599 timing requirements when receiving sysx some midi devices have special timing requirements when receiving system exclusive transmissions. If your equipment has problems receiving system exclusive data from sonar, you might need to introduce some small delays to allow the equipment to digest the ...
Page 600
600
Page 601: Synchronizing Your
Synchronizing your gear your computer is often used with other equipment: sound cards, midi equipment, and digital tape decks or other digital recording tools. All these devices can have their own built-in clocks or timing mechanisms. When several pieces of equipment are used together, it’s importan...
Page 602
602 synchronization overview sonar supports several different types of synchronization, which rely on a variety of different clock sources: when you use either the internal or audio clock, sonar can control other midi devices using midi sync. In this case, sonar is the “master” device and the other ...
Page 603
603 the sync toolbar lets you change back and forth quickly between the different clock settings: you can also choose the sync mode as follows: 1. Choose options-project, and click the clock tab. 2. Choose the desired clock source from the clock list. 3. Click ok. The clock source and the type of sy...
Page 604
604 synchronization” on page 604. If you need to send midi time code (mtc), sonar will send this data regardless of the clock setting. To use the internal clock source 1. Click on the sync toolbar. Or 1. Choose options-project, and click the clock tab. 2. Check the internal box. 3. Click ok. To use ...
Page 605
605 the following midi messages are sent by the master device to support midi sync: when you start playback on the master midi device, for example, it sends a start message to all slave devices, announcing that playback has started. If the slave devices are set up correctly, they receive the message...
Page 606
606 to use midi sync with sonar as the slave 1. Configure the external midi device you want to use as the master device to transmit midi sync. 2. Configure external slave devices to receive midi sync. 3. Choose options-midi devices to display the midi devices dialog box. 4. Make sure that your midi ...
Page 607
607 to use midi sync with sonar as the master 1. Configure your external midi devices to receive midi sync. 2. Click or on the sync toolbar to use the internal or audio clock source. 3. Choose options-project, and click the sync tab. 4. Check the transmit midi start/continue/stop/clock box. 5. For m...
Page 608
608 troubleshooting midi sync if you experience problems with midi sync when sonar is the master device, verify that your external devices are configured correctly to respond to midi sync. Most devices have a clock option that should be set to external or midi. If sonar does not respond to midi sync...
Page 609
609 frame rates seven time code frame rates are supported in sonar, which are normally used for the following types of applications: for more information on frame rate time formats, see the documentation for your time code hardware. Refer to the documentation for your midi interface or external midi...
Page 610
610 to use sonar as the master mtc generator 1. Configure the clocks on each external device that you want to synchronize to receive smpte/mtc. Make sure they’re connected to midi outputs from your computer or midi interface. 2. Click or on sonar’s sync toolbar to use the internal or audio clock sou...
Page 611
611 to configure sonar to sync to smpte/mtc 1. Click the smpte/mtc mode button in the sync toolbar. 2. Select options-global and click on the timecode tab. 3. Select one of the following options: • ask first, then switch to clock source and start—this option prompts sonar to alert you when it detect...
Page 612
612 note: if you want sonar to switch its clock source to smpte/mtc automatically when sonar receives a smpte/mtc signal, you can choose this option on the timecode tab of the global options dialog. Playing digital audio under smpte/mtc sync sonar gives you two choices for controlling audio playback...
Page 613
613 smpte/mtc sync and full chase lock when using smpte/mtc sync with full chase lock, the first time you play any audio the pitch may fluctuate wildly for up to 30 seconds. Also, you may occasionally note the pitch of the audio sounding consistently high or low pitch. A simple analogy makes this be...
Page 614
614 troubleshooting smpte/mtc sync the most common problems with smpte/mtc sync, and ways to correct or avoid them, are shown in the following table: problem… what to do… the tape is striped incorrectly check the tape stripe using your time code generator and, if necessary, restripe the tape. The mi...
Page 615
615 midi machine control (mmc) midi machine control (mmc) is a protocol that controls an mmc-equipped remote device via midi. Sonar lets you use mmc to start and stop playback and recording on remote midi devices such as tape decks, video recorders, and even other software packages. If you have seve...
Page 616
616 to configure midi machine control 1. Choose options-project, and click the clock tab. 2. Select smpte/mtc as the clock source. 3. Click the midi out tab. 4. Check the transmit mmc box. 5. Enter the id of the master timing device in the time code master’s unit id box. 6. Click ok. Mmc is now enab...
Page 617: Audio File
Audio file management project files in sonar do not contain the digital audio itself. A sonar project file (. Cwp ) references the audio contained in the project, so care must be taken when backing up your digital audio projects. This chapter covers file management, including backing up your project...
Page 618
618 the project files dialog sonar projects, extension . Cwp , contain all your project information with the exception of your digital audio data. This data is stored in a separate folder or folders. You can opt to save the data for all of your projects in a single audio folder, or create multiple f...
Page 619
619 project files and bundle files sonar project files contain various project settings, any midi data, and references which "point" to audio clip data. The audio data (and video data) itself is not saved in a project file. To save audio as well, save your project as a bundle file (extension . Cwb )...
Page 620
620 to unpack a bundle file 1. Choose file-open to display the open dialog box. 2. Choose a file with a . Cwb extension. 3. Click open if you have the per-project audio folders option enabled in the global options dialog, the unpack bundle dialog appears. If this option is not enabled, the bundle fi...
Page 621
621 windows explorer, or open the project and use the missing audio dialog to find and move the missing files. To change the global audio folder 1. Choose options-global and click the audio data tab. 2. Enter the pathname of the new global audio folder in the global audio folder field, or click the ...
Page 622
622 to create a new project using per-project audio 1. Select file-new. The new project file dialog appears. 2. Enter a filename in the name field the location and audio path directories are automatically updated in the following format: • c:\default directory\project name. The default directory for...
Page 623
623 imported audio files by default, sonar will make a copy of any audio data imported using the file- import-audio command and place the imported audio into the project’s audio folder. You can configure sonar to simply reference audio from its current location if, for example, you want to import la...
Page 624
624 backing up projects with digital audio there are several ways to back up your projects in sonar. You can use per-project audio folders to keep all a project’s audio in its own folder, use the consolidate project audio command to create a backup copy of all your project’s audio, or you can save a...
Page 625
625 5. Close the project. 6. Using windows explorer, copy the project folder and its contents, including the project’s audio folder, to its backup location (cd-r, cd-rw, zip or jaz drive, another hard drive, network drive, etc.). You have now created a copy of your project. It is a good idea to open...
Page 626
626 to delete unused audio files 1. Make sure all project files that contain audio are immediately accessible on a hard disk. 2. Choose tools-clean audio folder to display the clean audio folder dialog box. 3. Click the browse button to the right of the audio path field and navigate to the folder yo...
Page 627: Improving Audio
Improving audio performance digital audio presents several challenges: it is large, gobbling up enormous amounts of disk space, especially at higher sampling rates and bit-depths, and it is cpu-intensive. Added to this mix is the wide variety of audio hardware available today. This chapter covers so...
Page 628
628 system configuration this section covers optimizing your system configuration to work with sonar. The wave profiler the wave profiler is a utility that analyzes the sound cards in your computer and determines the best dma (direct memory access) settings for communicating with sonar. These dma se...
Page 629
629 all of your audio settings are listed in the audio options dialog box, which you open with the options-audio command. The following list summarizes all the settings that the wave profiler sets. You can override all of them except what audio drivers are listed in the drivers tab: • input and outp...
Page 630
630 enabling and disabling audio devices your computer may have several installed devices like fax modems and software synthesizers that windows recognizes as sound cards containing audio drivers. You do not want to use these devices for audio input or output. If they are listed as audio drivers in ...
Page 631
631 operation when first installed, sonar is configured to create 16-bit audio sampled at 44.1khz. Nearly all sound cards support this kind of audio data. A growing number of "professional" cards are capable of recording and playing back audio at higher bit depths (18-bit, 20-bit, and 24-bit) and sa...
Page 632
632 for more information about working at 24-bit depth, see the online help topic “24- bit tips.” converting sample rates and bit depths in general, it’s better to keep the sample rate and audio bit depth of a project consistent from start to finish, but sonar has tools and procedures to accomplish ...
Page 633
633 8. Final step: use the file-export audio command. Be sure to select 16 for the bit depth and uncheck all mix enables. Now you can burn your exported audio file to cd, using cakewalk mediaworks, or other software. To rewrite audio files at different bit depths 1. Use the tools-change audio format...
Page 634
634 7. Click ok. Sonar rewrites the audio clips at 16 bits. 8. Open the 16-bit project that you want to import the audio into. 9. Drag or paste the rewritten audio clips into the 16-bit project. To import 16-bit audio into a 24-bit project • just use the file-import audio command to import the 16-bi...
Page 635
635 getting the most out of your pc the maximum number of audio tracks you can expect to play on your computer depends on the audio sample rate, the speed of your hard disk, and the speed of your computer’s cpu. The effect of your cpu on audio track throughput is much more difficult to quantify. Thr...
Page 636
636 digital audio files and storage digital audio requires a large amount of disk storage. The table below shows the disk space requirements in megabytes for a single minute of digital audio in mono and stereo at various sampling rates: defragment your hard disk if your hard disk is fragmented, play...
Page 637
637 for more information, consult the online help topic, dropouts and other audio problems. Mixing latency sonar has a slider in the audio options dialog box, on the general tab, to set mixing latency. Mixing latency is the amount of time sonar allocates to prepare a buffer full of audio data for pl...
Page 638
638 wdm vs. Mme drivers in almost every situation, the newer wdm (windows driver model) sound card drivers that most sound card vendors are creating are a much better choice than the older mme (multi-media extensions) drivers. If your sound card vendor has a wdm driver, by all means use it. The foll...
Page 639
639 status bar/cpu meter/disk meter sonar has several tools to help you identify and correct audio problems, including the cpu meter, the disk meter, and the dropout indicator. These tools are all located on the status bar, which is at the bottom of the screen. The status bar also contains a measure...
Page 640
640 of the allowed time sonar is taking to complete each cycle of disk input/ output. • if you experience a dropout or your cpu or disk meters are reading high, there are steps you can take to improve your audio performance. For more information, see dropouts and other audio problems in the online h...
Page 641: Appendix A:
Appendix a: troubleshooting if you’re having a problem with sonar™, don’t panic. This appendix lists some common problems and how to solve them. If you don’t find an answer here, there are two other important places to look for help: • check the readme file that came with your software. It contains ...
Page 642
642 if none of these suggestions works, check our web site for additional suggestions or contact technical support. You don’t have bank and patch settings in your midi track check the bank and patch settings for each track. Make sure that each track has a bank and patch assigned to it. You don’t hav...
Page 643
643 i can’t record from my midi instrument if you are unable to record music from your electronic keyboard, synthesizer, or other midi instrument, first test to see if you are able to play back a project through the keyboard. Then try the following: if none of these suggestions works, check our web ...
Page 644
644 when i play a file containing audio, the audio portion doesn’t play open a bundle file ( . Cwb ) and click the play button. Do you hear the audio tracks in the project (there may be midi tracks in the bundle file, so you must mute them). If not, try the following: if none of these suggestions wo...
Page 645
645 i can’t record any audio if you are unable to record audio through your sound card, try the following suggestions: if these suggestions don’t work, check our web site for additional suggestions or contact technical support. My track or bus fader is maximized, but there’s no sound or level sonar ...
Page 646
646 negative value such as -inf in the vol field, even though the volume envelope is at its maximum level, the sum of the two values is still inaudible because the negative value is so large. Whenever you have mysterious levels in a track or bus, click the envelope/offset mode button that is in the ...
Page 647
647 7. Click on the instrument in the uses instrument list. 8. Click ok when you are done. If your manufacturer or instrument doesn’t appear, check our web site to see if an updated instrument definition is available. You can also create your own instrument definition. For more information on instru...
Page 648
648 why can’t sonar find my audio files? Sonar looks for all audio data in a certain directory or folder, called the data directory, in cakewalk projects (or the wavedata directory in previous versions of cakewalk products). If you have renamed or moved either sonar or the data directory, sonar may ...
Page 649
649 why do i get errors from the wave profiler? Audio devices such as voice modems or speakerphone devices can cause an error message when running the wave profiler. Sometimes these errors are harmless; on other occasions you need to disable the voice modem or speaker-phone device before running the...
Page 650
650 2. In the play control window of the mixer, check the mute checkbox in the line- in column, or in the column of whatever jack your instrument is plugged into, and close the mixer window. Audio distorts at greater than 16 bits there are several settings in the audio options dialog box (options-au...
Page 651
651 my pro audio 9 files sound louder/softer when i open them in sonar pro audio 9 has a setting in the audio options dialog box called midi volume mapping. This setting determines how many db that a movement of a volume fader produces. This setting is not stored in each project file, so sonar can’t...
Page 652
652 sonar can’t find the wavetable synth or mpu401 follow this procedure: 1. Open the audio options dialog (options-audio command), and on the advanced tab, check the always use mme interface, even when wdm drivers are available option. 2. Click ok to close the dialog. 3. Close sonar and reopen it. ...
Page 653: Appendix B:
Appendix b: hardware setup this appendix contains additional details on configuring your equipment for use with sonar. Connect your midi equipment if you are using a midi interface (such as an mpu-401 or sound blaster midi option) with an external midi keyboard, you need to connect the equipment usi...
Page 654
654 if your keyboard has a midi thru jack if your keyboard has three midi jacks—in, out, and thru—then use the following diagram. If you are using a 15-pin joystick adapter cable that splits into two midi cables: • connect the 15-pin jack to your computer’s joystick port. • connect the in cable to y...
Page 655
655 each midi device should be set to a unique midi channel or range of channels to avoid note-doubling. Refer to the manuals for your midi devices for information on how to set their midi channels. Your midi interface may have a thru jack as well as in and out jacks. If your master keyboard lacks m...
Page 656
656 each midi device should be set to a unique midi channel or range of channels to avoid note-doubling. Refer to the manuals for your midi devices for information on how to set their midi channels. If your master keyboard now seems to double notes (they sound thicker), or if you can play only one h...
Page 657
657 the 1/8” jack should be plugged into the sound card’s mic input, although plugging into the line input may also work. Electric guitar through effects rack you can also plug an electric guitar into an effects rack, then send the output of the rack to the sound card’s input, as shown in the follow...
Page 658
658 microphone direct-in microphones can be plugged into the sound card’s mic input. Some inexpensive microphones are made especially for use with sound cards and come equipped with 1/8” jacks. However, better quality microphones take better quality cables, which do not terminate in 1/8” jacks. The ...
Page 659
659 mixer you can connect a mixer to the sound card with a setup of the following kind: note: if your mixer has buses, use them! This helps avoid feedback..
Page 660
660
Page 661: Appendix C: Cyclone
Appendix c: cyclone overview the graphic below illustrates the cyclone dxi views and controls. Stop button loops import sound bank export sound bank trash button play button auto preview button loop button sync button pad group volume knob pan knob track handles tracks selected pad key map view tab ...
Page 662
662 cyclone dxi toolbar the following graphic shows each of cyclone dxi’s toolbar buttons: the following table describes each of cyclone dxi’s buttons: pad groups the following graphic shows a close-up of a cyclone dxi pad group: button... Description... Import sound bank opens the open dialog so yo...
Page 663
663 a pad group in cyclone dxi has the following controls: pad inspector the pad inspector has additional pad group controls: control... Description... Pad the trigger for playing a loop. Volume knob adjusts the volume of the pad group. The volume value is displayed in the pad inspector. Pan knob ad...
Page 664
664 in the pad inspector there are the following controls: control… description… output you can select from one of 16 audio outputs or use the mix only setting to use the master out. Midi in you can set which midi channel the pad group responds to. Each pad group could have a unique midi input chann...
Page 665
665 loop bin the loop bin, located right below the cyclone dxi toolbar, is where you can place loops you want to use in cyclone dxi. From the loop bin you can drag and drop loops onto a pad or into the pad editor. Loop view and key map view the loop view displays the content of the loop you have sel...
Page 666
666 note to change its value. Drag the white triangles to extend the range of midi note values that trigger the pad group. Pad editor the pad editor displays up to 16 “tracks,” one for each pad in cyclone dxi. Each track has the same number as the pad it represents. Each track is made up of events. ...
Page 667
667 using cyclone dxi cyclone dxi is a multi-output dxi, and you launch it the same way you launch other dxi’s: by inserting it into a sonar project. There are two basic ways to insert dxi’s in sonar: • you can insert dxi’s from the synth rack view or with the insert-dx synth command. If you use thi...
Page 668
668 to play loops 1. Assign a loop to a pad or pads“to assign a loop to a pad” on page 668. 2. Select the pad or pads you want to play by clicking on them. 3. Click the preview button to play the selected pads. If the loop button for that pad is depressed the loop plays indefinitely; you can stop it...
Page 669
669 to assign midi keys to a pad 1. Click the pad that you want to trigger. 2. Click the keyboard button in the loop view to display the key map view. The blue keys between the pitch range markers show what midi keys trigger the pad. The yellow key is the root note, which triggers the loop at its or...
Page 670
670 controlling individual pads—volume, pan, mute, solo, sync, looping, and content each pad has the following controls: • volume knob—turn to adjust. • pan knob—turn to adjust. • folder icon—click this to import a loop to an individual pad. • mute button—click this to mute or unmute the loop that’s...
Page 671
671 mixing down cyclone dxi you mix down a cyclone dxi session the same ways you mix down any dxi. For step-by-step instructions, see “converting your dxi tracks to audio” on page 407. Loop editing clicking a loop in the loop bin displays that loop in the loop view. The loop view displays the select...
Page 672
672 • 3/beat • 4/beat • 8/beat • 12/beat • 16/beat the number of divisions per beat in cyclone dxi is set. Keyboard shortcuts in cyclone dxi the following table lists the keyboard shortcuts in cyclone dxi and explains what they do: undo and redo you can undo any edit you make in cyclone dxi. If you ...
Page 673: Appendix D: New
Appendix d: new features in sonar 4 sonar 4 has several new features (some features are in sonar producer only). The following is a listing of each new feature, and a brief description. Surround mixing sonar producer fully supports surround mixing. For more information, see chapter 12, surround mixi...
Page 674
674 freeze synths or tracks the freeze feature allows synths and plug-ins you to temporarily bounce audio, saving on cpu usage. Freeze options can be found in the synth rack view and the track menu. For more information, see “freeze synths or tracks” on page 674. Loop construction view enhancements ...
Page 675
675 enhanced import/export/bounce features sonar now has preset controls for the bounce to tracks and export audio dialogs, allows you to export individual tracks to new files, and has friendly bounce-to-track names. Sonar producer allows you to import and export surround-encoded files, including wi...
Page 676
676 joystick support sonar allows you to use a joystick to control surround panning, and also many transport and menu commands. For more information, see “joystick support” on page 485. Pow-r dither sonar offers the new pow-r dithering process, short for psycho-acoustically optimized wordlength redu...
Page 677: Symbols
Symbols . Cwb files 198 size limitation of 619 . Cwp files 31 . Cwt files 517 . Mid files 198 . Syx files 587 , 594 . Tpl files 517 numerics 16-bit audio importing into a 24-bit project 634 18 and 24 bit operation 630 24-bit audio importing into a 16-bit project 633 24-bit problems 648 3db louder 35...
Page 678
678 editing tutorial 81 effects 386 exporting 459 finding missing 157 importing 195 metronome 165 mixing 430 plug-ins 386 recording see recording audio routing 430 scrubbing 365 under smpte/mtc sync 613 where it is stored 620 audio 169 , 629 audio cd how to create 459 audio clips 356 bounce to clip(...
Page 679
679 auto save changing settings 199 auto send banks 594 auto-erase toggle off 281 using 281 automatic crossfades 380 automatic midi echo turning off 146 automating effects 507 automation automated muting 512 automating a dxi’s controls 408 automating groups of controls 509 converting piano roll enve...
Page 680
680 bounce to track(s) combining tracks using 364 bounce to tracks how to 457 bouncing tracks 456 takes too long 648 broadcast wave files description of 463 how to export 462 bundle files creating 619 opening 620 size limit of 619 unpacking 620 burning a cd 459 bus no level despite fader volume 645 ...
Page 681
681 linked 228 – 230 moving 214 – 217 moving to a specific start time 217 pasting as new 215 pasting into existing 215 performance effects of 636 properties 212 , 217 renaming 212 reversing notes in 283 , 290 selecting 35 , 214 selecting partial 35 splitting 230 splitting options 231 trimming non-de...
Page 682
682 crossfades applying offline 384 automatic 382 non-destructive 380 current track 144 current track midi echo turning off 146 curves types in fades and crossfades 380 cut (db) 374 cycle 350 cycles per second 350 cyclone dxi editing loops in 671 key map view 665 keyboard shortcuts in 672 loading lo...
Page 683
683 drum maps assigning a midi track to 340 creating 336 editing 336 opening 340 saving 339 the basics 336 tutorial 104 dual monitor support 517 dump request macros (drm) 591 , 592 duration 189 fill 539 note 296 , 324 note property 536 parameter 319 time 539 dx instruments 399 dxi 399 , 405 automati...
Page 684
684 relinking surround parameters 490 unlinking surround parameters 489 effects with surround sound 488 electric guitar connecting 26 enable automation playback button 493 end 118 ensoniq instruments 599 envelope display on a percentage scale 506 envelope mode 504 troubleshooting 645 envelope tool 4...
Page 685
685 exporting surround mixes 492 exporting video 153 expression event 320 expression marks 320 , 547 – 548 editing 548 extract timing 371 f fade changing curve type of 384 fade/envelope 384 – 385 faders 449 fades 380 faqs 641 fax modems 630 features, new 673 file opening 33 file extensions . Cwb 198...
Page 686
686 front/rear balance slider 482 full chase lock 612 g gain (db) 374 game sound 22 ghost strokes 559 global 162 , 366 global audio folder 620 global audio folder changing 621 global options autosave 199 default folder 514 , 517 midi filter tab 194 go menu beginning 118 end 118 from 118 next marker ...
Page 687
687 home stereo connecting to 658 hz 350 i importing audio files 195 from a cakewalk project 196 – 198 music 195 – 200 importing different sample rates 634 importing key bindings 523 importing midi groove clips 269 importing surround mixes 491 input 130 input echo button 145 input filtering 194 inpu...
Page 688
688 key bindings 520 creating using midi keyboard 522 exporting 523 importing 523 key+ 130 keyaft event 319 keyboard connecting midi 25 – 26 local control setting 147 notes doubling on 647 parameters 321 patches 136 – 138 recording accompaniments 192 kilohertz 350 l large transport toolbar 116 laten...
Page 689
689 m mapped note changing the mapping of 343 muting and soloing 344 markers 44 , 221 adding 225 adding on the fly 226 copying 226 creating 224 – 228 deleting 227 deleting from the markers view 227 editing 226 jump to 227 locking/unlocking 227 moving 227 pitch 266 setting now time with 118 setting t...
Page 690
690 note velocities 313 notes 539 omni 171 output devices 134 – 136 outputs 134 – 136 pitch wheel 313 pitch-bend 313 playback settings 127 – 144 recording music from 175 routing data 134 setting up in and out devices 30 synchronization 604 synchronization status messages 606 time code 602 timing res...
Page 691
691 mixing audio effects 388 options 388 mme drivers compared to wdm drivers 638 modules 421 mono to mono 388 mono/stereo buttons 127 mp3 creating 98 mp3 files, creating and exporting 466 mpeg video, importing 150 mpex time/pitch stretch algorithm 396 mpu401 can’t find 652 mtc sending and receiving ...
Page 692
692 selecting 278 , 533 selecting all of certain pitches 278 selecting and editing 277 – 281 size of 299 stuck 121 , 144 transposing 141 – 142 using enharmonic spellings 541 – 542 now time rewind on stop 117 now time 44 , 114 , 118 changing 115 keyboard shortcuts 118 large print 117 nrpn (non-regist...
Page 693
693 patch 130 , 136 – 138 , 319 assigning note names to 580 – 581 assigning to a track 137 event 319 names 578 – 579 numbers 307 patch/controller searchback before play starts 144 patches downloading 641 pattern brush tool 345 creating custom patterns for 347 how it works 345 painting a custom patte...
Page 694
694 playback 628 – 630 audio drop-out during 634 controlling 120 , 428 , 433 , 612 controlling using transport toolbar 44 incorrect 628 – 630 problems 630 , 641 – 642 settings, midi 127 – 144 speed 608 starting 121 stopping 121 track-by-track 124 – 126 transmitting banks 595 playback loop cancelling...
Page 695
695 reversing midi notes using 290 process-scale velocity 290 process-slide shifting midi events in time using 285 project creating a 161 definition of 31 importing material from another 196 , 197 – 198 information 199 – 200 inserting measures into 285 – 287 labeling 199 – 200 opening 28 , 33 saving...
Page 696
696 recording arming tracks for 174 arming tracks for 174 at low sampling rate 636 audio 175 choosing an input 171 definition troubleshooting 644 automation 496 background noise in 175 – 176 changing timing of 294 , 304 channel-by-channel 192 checking input levels 177 checking levels 175 confidence ...
Page 697
697 s safe mode 651 sample rate definition 354 setting 168 , 169 sample rates converting 633 importing audio at different rates 634 sampling rate setting 169 sampling resolution 355 save bank 594 save options 198 bundle file 198 standard midi 198 saving projects as omf files 467 saving a project 199...
Page 698
698 snapshots creating 506 soft synths tutorial 100 soft synths kinds 400 software synthesizers 399 and wdm drivers 405 dx instruments 399 dxi 399 playing a dxi 405 recording a hardware-emulating synth 416 removing from a track 406 solo 126 soloing a dxi 407 soloing clips 234 , 237 sonar as master 6...
Page 699
699 types of 602 – 604 synth rack 402 synth rack view 400 synthesizer dxi 399 patches 136 – 138 software 630 with handshaking dump protocols 592 system exclusive see sysx system sounds turning off 120 sysx 587 – 599 dump request macros 592 defined 588 editing sysx banks 593 events 588 importing, cre...
Page 700
700 setting for new project 166 setting the 165 – 167 settings 165 view 246 – 248 tempo change 241 , 244 tempo commands using 244 tempo view 42 text 320 text event 320 thru 118 time chord property 544 event 288 inserting blank 285 – 287 mbt 114 , 115 note property 536 pedal event parameter 549 smpte...
Page 701
701 track properties channel 557 key+ 141 output 134 , 136 , 557 see also tracks track see tracks track status archive 124 mute 124 normal 124 solo 124 track view 33 – 35 , 203 adding effects in 139 , 240 bank settings in 136 clips pane not visible in 647 keyboard shortcuts in 34 patch settings in 1...
Page 702
702 step record 191 stop 121 transport toolbar 44 large 116 transpose 141 , 284 , 533 transposing 284 notes 141 – 142 parameter 130 trigger and freewheel 612 trim durations 539 triplets 538 troubleshooting 641 i can’t open my project 651 midi sync 608 no volume despite maximum envelope level 645 smp...
Page 703
703 video thumbnails 154 video view setting background color of 153 view options display clip names 211 views 33 – 44 allowing multiple instances of the same 43 event list 318 floating 44 , 517 fretboard 526 loop construction 252 loop explorer 256 lyrics 42 , 525 , 566 – 567 markers 42 meter/key 42 ...
Page 704
704 z zero controllers when play stops 144 zero-crossings 354 zoom keyboard shortcuts 43 zoom controls 42 zoom factor audio scaling by 256 , 359 zooming configuring the display of tracks in the track view 207 entire project 207.
Page 705
Twelve tone systems, inc. D/b/a cakewalk license agreement you should carefully read all of the following terms and conditions before using this product. Installing and using the product indicates your acceptance of these terms and conditions. If you do not agree with them, you should promptly retur...
Page 706
Warranty assistance shall be directed to cakewalk at the following address: cakewalk 268 summer st. Boston, ma 02210 u.S.A. 617 423-9004 5.2. Limitations on warranties. The express warranty set forth in this article 4 is the only warranty given by cakewalk with respect to the entire product; cakewal...

