- DL manuals
- Vega
- Transmitter
- VEGABAR 52
- Operating Instructions Manual
Vega VEGABAR 52 Operating Instructions Manual
Summary of VEGABAR 52
Page 1
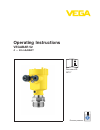
Operating instructions vegabar 52 4 … 20 ma/hart d ocument id: 36717 p rocess pressure.
Page 2: Contents
Contents 1 about this document 1.1 f unction. . . . . . . . . . . . . . . . . . . . . . . . . . . . . . . . . . 4 1.2 t arget group . . . . . . . . . . . . . . . . . . . . . . . . . . . . . . 4 1.3 s ymbolism used. . . . . . . . . . . . . . . . . . . . . . . . . . . . 4 2 for your safety 2.1 a uthor...
Page 3
7 set up with pactware and other adjustment programs 7.1 c onnect the pc via vegaconnect . . . . . . . . . . . . 44 7.2 p arameter adjustment with pactware . . . . . . . . . . . . 45 7.3 p arameter adjustment with ams™ and pdm . . . . . . . 46 8 maintenance and fault rectification 8.1 m aintenance . ...
Page 4: About This Document
1 about this document 1 .1 function t his operating instructions manual provides all the information you need for mounting, connection and setup as well as important instructions for maintenance and fault rectification. Please read this information before putting the instrument into operation and kee...
Page 5: For Your Safety
2 for your safety 2 .1 authorised personnel a ll operations described in this operating instructions manual must be carried out only by trained specialist personnel authorised by the plant operator. D uring work on and with the device the required personal protective equipment must always be worn. 2...
Page 6
2 .5 safety label on the instrument t he safety approval markings and safety tips on the device must be observed. 2 .6 ce conformity t his device fulfills the legal requirements of the applicable ec guidelines. By attaching the ce mark, vega provides a confirmation of successful testing. You can find t...
Page 7: Product Description
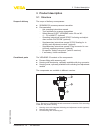
3 product description 3 .1 structure t he scope of delivery encompasses: l vegabar 52 process pressure transmitter l d ocumentation - this operating instructions manual - t est certificate for pressure transmitters - s afety manual 31637 "vegabar series 50 and 60 - 4 … 20 ma/hart" (optional) - o pera...
Page 8
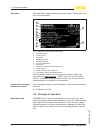
T he type label contains the most important data for identification and use of the instrument: 2 1 11 10 5 4 3 6 7 8 9 fig. 2: structure of the type label (example) 1 instrument type 2 product code 3 approvals 4 measuring range 5 process pressure 6 process temperature 7 electronics 8 protection, mate...
Page 9
S ensor element is the certec ® measuring cell with robust, dependent on the process fitting also front-flush, abrasion-resistant ceramic diaphragm. The process pressure causes a capacitance change in the measuring cell via the ceramic diaphragm. This change is converted into an appropriate output sig...
Page 10
T he packaging of standard instruments consists of environment- friendly, recyclable cardboard. For special versions, pe foam or pe foil is also used. Dispose of the packaging material via specialised recycling companies. T ransport must be carried out under consideration of the notes on the transpo...
Page 11
Vegadis 62 is suitable for measured value indication and adjustment of sensors with hart protocol. It is looped into the 4 … 20 ma/hart signal cable. Vegadis 62 is suitable for measured value indication with sensors without hart protocol. Y ou can find further information in the operating instruction...
Page 12: Mounting
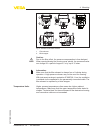
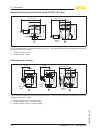
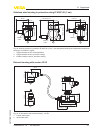
4 mounting 4 .1 general instructions m ake sure that all parts of the instrument exposed to the process, in particular the sensor element, process seal and process fitting, are suitable for the existing process conditions. These include above all the process pressure, process temperature as well as t...
Page 13
2 1 2 1 2 1 1 2 fig. 4: position of the filter element 1 filter element 2 blind stopper caution: d ue to the filter effect, the pressure compensation is time delayed. W hen opening/closing the housing cover quickly, the measured value can change for a period of approx. 5 s by up to 15 mbar. Information...
Page 14
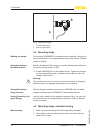
1 2 fig. 5: temperature ranges 1 process temperature 2 ambient temperature 4 .2 mounting steps f or mounting vegabar 52, a welded socket is required. You can find these components in the supplementary instructions manual "welded socket and seals". S eal the thread with teflon, hemp or a similar resist...
Page 15
90 mm (3.54") r 3,5 mm (0. 14 ") 3mm (0.12") 70 mm (2.76") 8 mm (0.32") 9 3 mm (3 .6 6 ") 1 1 0 mm (4 .3 3 ") fig. 6: drilling template - wall mounting plate tip: m ount the wall mounting plate so that the cable entry of the socket housing points downward. The socket housing can be displaced by 180°...
Page 16
5 connecting to power supply 5 .1 preparing the connection a lways keep in mind the following safety instructions: l c onnect only in the complete absence of line voltage l i f overvoltage surges are expected, overvoltage arresters should be installed tip: w e recommend using vega overvoltage arrest...
Page 17
Caution: n o grease should be used when screwing the npt cable gland or steel tube into the threaded insert. Standard grease can contain additives that corrode the connection between threaded insert and housing. This would influence the stability of the connection and the tightness of the housing. I ...
Page 18
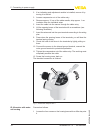
2 i f an indicating and adjustment module is installed, remove it by turning it to the left. 3 l oosen compression nut of the cable entry 4 r emove approx. 10 cm of the cable mantle, strip approx. 1 cm insulation from the individual wires 5 i nsert the cable into the sensor through the cable entry 6...
Page 19
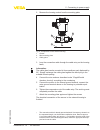
2 r emove the housing socket from the mounting plate 3 2 1 fig. 8: components of the external housing 1 screws 2 wall mounting plate 3 cable gland 3 l oop the connection cable through the cable entry on the housing base 1) information: t he cable gland can be mounted in three positions each displace...
Page 20
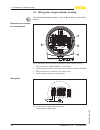
5 .3 wiring plan, single chamber housing t he following illustrations apply to the non-ex as well as to the ex-ia version. I²c display 1 2 5 6 7 8 3 4 1 2 fig. 9: electronics and connection compartment, single chamber housing 1 plug connector for vegaconnect (i²c interface) 2 spring-loaded terminals...
Page 21
5 .4 wiring plan, double chamber housing t he following illustration apply to non-ex as well as ex ia versions. The e xd version is described in the next subchapter. 1 3 2 display 1 2 5 6 7 8 i2c fig. 11: electronics compartment, double chamber housing 1 plug connector for vegaconnect (i²c interface...
Page 22
1 2 3 d isp la y 1 2 i2c fig. 12: connection compartment double chamber housing 1 spring-loaded terminals for voltage supply 2 plug connector for vegaconnect (i²c interface) 3 ground terminal for connection of the cable screen i2c 1 1 2 fig. 13: wiring plan, double chamber housing 1 voltage supply, ...
Page 23
5 .5 wiring plan, double chamber housing ex d 1 3 2 display 1 2 5 6 7 8 i2c fig. 14: electronics compartment, double chamber housing 1 plug connector for vegaconnect (i²c interface) 2 internal connection cable to the connection compartment 3 terminals for vegadis 61 1 2 1 2 fig. 15: connection compa...
Page 24
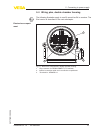
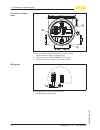
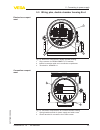
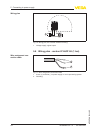
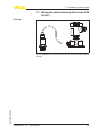
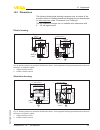
1 1 2 fig. 16: wiring plan, ex-d double chamber housing 1 voltage supply, signal output 5 .6 wiring plan - version ip 66/ip 68 (1 bar) 1 2 fig. 17: wire assignment connection cable 1 brown (+) and blue (-) to power supply or to the processing system 2 shielding wiring plan wire assignment con- necti...
Page 25
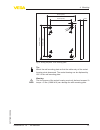
5 .7 wiring plan, external housing with version ip 68 (25 bar) fig. 18: vegabar 52 in ip 68 version 25 bar and axial cable outlet, external housing overview vegabar 52 • 4 … 20 ma/hart 25 5 c onnecting to power supply 36717 - en -120324.
Page 26
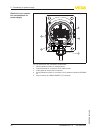
5 6 7 8 1 2 d ispl ay i²c 2 1 5 4 3 fig. 19: electronics and connection compartment 1 spring-loaded terminals for voltage supply 2 ground terminal for connection of the cable screen 3 cable gland to the process component 4 spring-loaded terminals for connection of the external indication vegadis 61 ...
Page 27
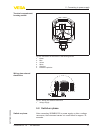
1 2 3 4 6 3 4 1 2 5 fig. 20: connection of the sensor in the housing socket 1 brown 2 blue 3 yellow 4 white 5 shielding 6 breather capillaries i2c display 1 1 2 5 6 7 8 fig. 21: wiring plan external electronics 1 voltage supply 5 .8 switch-on phase a fter connecting vegabar 52 to power supply or aft...
Page 28
L i nternal check of the electronics l i ndication of the instrument type, the firmware as well as the sensor tags (sensor designation) l o utput signal jumps briefly (approx. 10 seconds) to the set fault current t hen the corresponding current is outputted to the cable (the value corresponds to the a...
Page 29: Module Plicscom
6 set up with the indicating and adjustment module plicscom 6 .1 short description t he indicating and adjustment module is used for measured value display, adjustment and diagnosis. It can be mounted in the following housing versions and instruments: l a ll continuously measuring sensors in single ...
Page 30
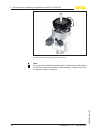
Fig. 22: insert indicating and adjustment module note: i f you intend to retrofit the instrument with an indicating and adjustment module for continuous measured value indication, a higher cover with an inspection glass is required. 30 vegabar 52 • 4 … 20 ma/hart 6 s et up with the indicating and adj...
Page 31
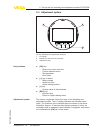
6 .3 adjustment system 2 3 1 1.1 fig. 23: indicating and adjustment elements 1 lc display 2 indication of the menu item number 3 adjustment keys l [ok] key: - m ove to the menu overview - c onfirm selected menu - e dit parameter - s ave value l [->] key to select: - m enu change - s elect list entry ...
Page 32
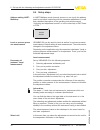
6 .4 setup steps i n hart-multidrop mode (several sensors on one input) the address must be set before continuing with the parameter adjustment. You will fi nd a detailed description in the operating instructions manual "indicating and adjustment module" or in the online help of pactware or dtm. Hart...
Page 33
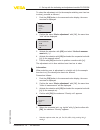
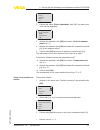
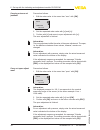
T o select the adjustment unit (in the example switching over from bar to mbar), proceed as follows: 2) 1 p ush the [ok] button in the measured value display, the menu overview is displayed. ▶ b asic adjustment d isplay d iagnostics s ervice i nfo 2 c onfirm the menu "basic adjustment" with [ok], the...
Page 34
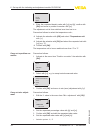
U nit of measurement d ensity 0001000 kg/dm³ 6 e nter the requested density value with [->] and [+], confirm with [ok] and move to position correction with [->]. T he adjustment unit is thus switched over from bar to m. P roceed as follows to select the temperature unit: 3) à activate the selection w...
Page 35
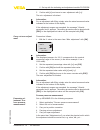
5 c onfirm with [+] and move to max. Adjustment with [->]. T he min. Adjustment is finished. Information: f or an adjustment with filling, simply enter the actual measured value indicated at the bottom of the display. I f the adjustment ranges are exceeded, the message "outside parameter limits" appear...
Page 36
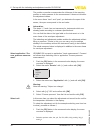
T he position correction compensates the influence of the mounting position or static pressure on the measurement. It does not influence the adjustment values. I n the menu items "zero" and "span" you determine the span of the sensor, the span corresponds to the end value. Information: t he steps 1, 3...
Page 37
▶ b asic adjustment d isplay d iagnostics s ervice i nfo 2 c onfirm the menu "basic adjustment" with [ok], the menu item "unit" will be displayed. U nit u nit of measurement bar ▼ t emperature unit °c ▼ 3 a ctivate the selection with [ok] and select "units of measure- ment with [->]. 4 a ctivate the ...
Page 38
P roceed as follows: 1 e dit the mbar value in the menu item "zero" with [ok]. Z ero 000 .0 % p = +0000 .0 mbar 0000.0 mbar 2 s et the requested mbar value with [+] and [->]. 3 c onfirm with [+] and move to span adjustment with [->]. T he zero adjustment is finished. Information: t he zero adjustment ...
Page 39
A linearization is necessary for all vessels in which the vessel volume does not increase linearly with the level - e.G. In a horizontal cylindrical or spherical tank - and the indication or output of the volume is required. Corresponding linearization curves are preprogrammed for these vessels. The...
Page 40
L a pplication c opy sensor data c opy sensor data? Basic adjustment i f the "reset" (sensor-specific basic adjustment) is carried out, the sensor resets the values of the following menu items to the reset values (see chart): menu section function reset value b asic settings z ero/min. Adjustment m e...
Page 41
Factory setting l ike basic adjustment, in addition, special parameters are reset to default values. 8) peak value t he min. And max. Temperature or pressure values are each reset to the actual value. A dditional adjustment and diagnosis options such as e.G. Scaling, simulation or trend curve presen...
Page 42
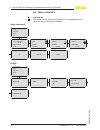
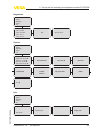
6 .5 menu schematic information: d epending on the version and application, the highlighted menu windows may not always be available. Basic adjustment 1 ▶ b asic adjustment d isplay d iagnostics s ervice i nfo 1.1 u nit u nit of measurement bar ▼ t emperature unit °c ▼ 1.2 p osition correction off se...
Page 43
Diagnostics 3 b asic adjustment d isplay ▶ d iagnostics s ervice i nfo 3.1 p eak value p-min.: -5.8 mbar p-max.: 167.5 mbar t- min.: -12.5 °c t- max.: +85.5 °c 3.2 s ensor status ok 3.3 t rend curve s tart trend curve? Service 4 b asic adjustment d isplay d iagnostics ▶ s ervice i nfo 4.1 c urrent o...
Page 44: Programs
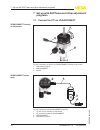
7 set up with pactware and other adjustment programs 7 .1 connect the pc via vegaconnect 3 1 2 fig. 24: connection of the pc via vegaconnect directly to the sensor 1 usb cable to the pc 2 vegaconnect 3 sensor 1 2 3 4 open twist usb lock fig. 25: connection via vegaconnect externally 1 i²c bus (com.)...
Page 45
N ecessary components: l vegabar 52 l pc with pactware and suitable vega dtm l vegaconnect l p ower supply unit or processing system 1 2 4 3 open twist usb lo ck fig. 26: connecting the pc via hart to the signal cable 1 vegabar 52 2 hart resistance 250 Ω (optional depending on processing) 3 connecti...
Page 46
A ll currently available vega dtms are included as a dtm collection on a cd. They can be purchased for a token fee from the responsible vega agency. In addition, the actual pactware version is also available on this cd. I n addition, this dtm collection incl. The basic version of pactware can be dow...
Page 47
8 maintenance and fault rectification 8 .1 maintenance i f the instrument is used properly, no special maintenance is required in normal operation. I n some applications, product buildup on the diaphragm can influence the measuring result. Depending on the sensor and application, take precautions to e...
Page 48
? 4 … 20 ma signal not stable l l evel fluctuations à set the integration time via the indicating and adjustment module or pactware l no atmospheric pressure compensation à check the pressure compensation in the housing and clean the filter element, if necessary ? 4 … 20 ma signal missing l c onnectio...
Page 49
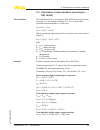
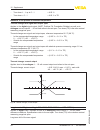
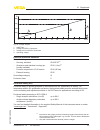
8 .3 calculation of total deviation (according to din 16086) t he total deviation f total according to din 16086 is the sum of basic accuracy f perf and longterm stability f stab . F total is also called maximum practical deviation or utility error. F total = f perf + f stab f perf = √((f t ) 2 + (f...
Page 50
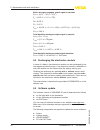
Basic accuracy analogue output signal in percent: f perf = √((f t ) 2 + (f k l ) 2 + (f a ) 2 ) f t = (0.05 % + 0.1 % x td) f k l = 0.075 % f a = 0.15 % f perf = √((0.05 % + 0.1 % x 1.25) 2 + (0.075 %) 2 + (0.15 %) 2 ) f perf = 0.24 % total deviation analogue output signal in percent: f total = f pe...
Page 51
L c urrent sensor software as file a t "www.Vega.Com/downloads" go to "software". Select under "plics sensors and instruments", "firmware updates" the respective instru- ment series and software version. Load the zip file via the right mouse key with "save target as" e.G. On the desktop of your pc. Mo...
Page 52: Dismounting
9 dismounting 9 .1 dismounting steps warning: b efore dismounting, be aware of dangerous process conditions such as e.G. Pressure in the vessel, high temperatures, corrosive or toxic products etc. T ake note of chapters "mounting" and "connecting to power supply" and carry out the listed steps in re...
Page 53: Supplement
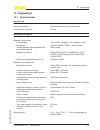
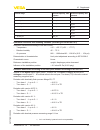
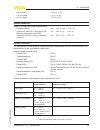
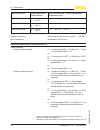
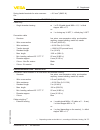
10 supplement 10 .1 technical data general data p arameter, pressure g auge pressure, absolute pressure, vacuum m easuring principle c eramic-capacitive, dry measuring cell c ommunication interface i ²c bus materials and weights m aterial 316l corresponds to 1.4404 or 1.4435 m aterials, wetted parts...
Page 54
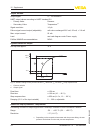
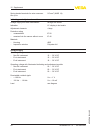
Output variable o utput signal 4 … 20 ma/hart hart output values according to hart standard 5.0 - p rimary value p ressure - s econdary value t emperature 10) s ignal resolution 1.6 µa f ailure signal current output (adjustable) ma-value unchanged 20.5 ma, 22 ma, m ax. Output current 22 ma l oad see...
Page 55
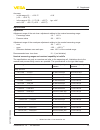
A ccuracy - in the range of 0 … +100 °c (+32 … +212 °f) ± 3 k - in the range of -50 … 0 °c (-58 … +32 °f) and +100 … +150 °c (+212 … +302 °f) typ. ±4 k input variable adjustment a djustment range of the min./max. Adjustment relating to the nominal measuring range: - p ercentage value -10 … 110 % - p...
Page 56
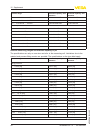
Nominal range overload capacity, max. Pressure overload capacity, min. Pressure -0.1 … +0.1 bar/-10 … +10 kpa + 20 bar/+2000 kpa -0.4 bar/-40 kpa -0.2 … +0.2 bar/-20 … +20 kpa + 30 bar/+3000 kpa -0.8 bar/-80 kpa -0.5 … +0.5 bar/-50 … +50 kpa + 35 bar/+3500 kpa -1 bar/-100 kpa a bsolute pressure 0 … ...
Page 57
Nominal range overload capacity, max. Pressure overload capacity, min. Pressure 0 … 1.405 psi 217.6 psi 0 psi 0 … 14.5 psi 507.6 psi 0 psi 0 … 36.26 psi 725.2 psi 0 psi 0 … 72.52 psi 942.7 psi 0 psi 0 … 145.0 psi 1305 psi 0 psi 0 … 362.6 psi 1885 psi 0 psi 0 … 870.2 psi 2901 psi 0 psi reference cond...
Page 58
- t urn down 1 : 1 up to 5 : 1 0.25 % - t urn down > 5 : 1 0.05 % x td influence of the product or ambient temperature thermal change zero signal and output span a pplies to the digital signal output (hart, profibus pa, foundation fieldbus) as well as to analogue current output 4 … 20 ma and refers to...
Page 59
- f or one year 0.05 % x td - f or five years 0.1 % x td - f or ten years 0.2 % x td ambient conditions a mbient, storage and transport temperature - s tandard version -40 … +80 °c (-40 … +176 °f) - v ersions ip 66/ip 68 (1 bar) and ip 68 (25 bar), connection cable pur -20 … +80 °c (-4 … +176 °f) - v...
Page 60
Measuring cell seal product temperature - standard version product temperature - version with extended temperature range ffkm (k alrez 6375) -20 … +120 °c (-4 … +248 °f) -20 … +150 °c (-4 … +302 °f) ffkm (p erlast g75s) -15 … +120 °c (-4 … +248 °f) -15 … +150 °c (5 … +302 °f) ffkm (p erlast g75b) -1...
Page 61
S pring-loaded terminals for wire cross-sec- tion 2.5 mm² (awg 14) electromechanical data - version ip 66/ip 68 (1 bar) c able entry - s ingle chamber housing l 1 x ip 68 cable gland m20 x 1.5; 1 x blind stopper m20 x 1.5 or: l 1 x closing cap ½ npt, 1 x blind plug ½ npt c onnection cable - s tructu...
Page 62
S pring-loaded terminals for wire cross-sec- tion up to 2.5 mm² (awg 14) indicating and adjustment module v oltage supply and data transmission through the sensor i ndication lc display in dot matrix a djustment elements 4 keys p rotection rating - unassembled ip 20 - mounted into the sensor without...
Page 63
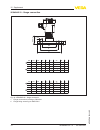
1000 750 500 250 12 18 16 14 20 22 24 26 28 30 32 34 36 Ω v 4 1 2 3 fig. 29: voltage diagram 1 hart load 2 voltage limit eex-ia instrument 3 voltage limit non-ex/ex-d instrument 4 operating voltage electrical protective measures p rotection rating - h ousing, standard ip 66/ip 67 18) - a luminium an...
Page 64
Approvals i nstruments with approvals can have different technical data depending on the version. T hat's why the associated approval documents have to be noted with these instruments. They are part of the delivery or can be downloaded under www.Vega.Com via "vega tools" and "serial number search" as...
Page 65
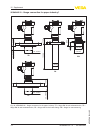
10 .2 dimensions t he following dimensional drawings represent only an extract of the possible versions. Detailed dimensional drawings can be downloaded on www.Vega.Com under "downloads" and "drawings". T he two chamber housings are not available with instruments with 4 … 20 ma signal output plastic...
Page 66
Aluminium housing in protection rating ip 66/ip 68 (1 bar) 1 2 0 mm (4 .7 2 ") ~ 105 mm (4.13") 1 16 m m (4.57 ") ~ 150 mm (5.91") ø 84 mm (3.31") ø 84 mm (3.31") m20x1,5/ ½ npt m16x1,5 2 m20x1,5 m20x1,5 1 fig. 32: housing versions in protection ip 66/ip 68 (1 bar) - with integrated indicating and a...
Page 67
Stainless steel housing in protection rating ip 66/ip 68 (1 bar) 1 17 m m (4.61 ") ~ 103 mm (4.06") ø 77 mm (3.03") 1 20 m m (4. 7 2 ") ~ 105 mm (4.13") ø 84 mm (3.31") ~ 93 mm (3.66") ø 80 mm (3.15") 1 12 m m (4.41 ") m20x1,5/ ½ npt m20x1,5 3 m20x1,5/ ½ npt m16x1,5 2 1 fig. 34: housing versions in ...
Page 68
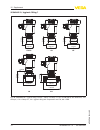
Vegabar 52 - threaded fitting 1 gi gm/gn gv/gc gb gs gl/gu g½a g¼a g½a g¼a g½a ½ "npt m20x1,5 sw 27 mm (1 1 / 16 ") g½a 2 3 mm ( 2 9 / 3 2 ") 7 3 mm (2 7 / 8 ") 7 0 mm (2 3 / 4 ") 1 7 mm ( 4 3 / 6 4 ") 8 5 mm (3 1 1 / 3 2 ") 1 7 mm ( 4 3 / 6 4 ") 3 mm ( 1 / 8 ") 2 0 mm ( 2 5 / 3 2 ") 1 5 m m ( 1 9 / ...
Page 69
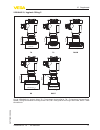
Vegabar 52 - threaded fitting 2 gf ge gw gg sw46 sw55 g1 ½ a g2 a g1 ½ a 5 0 mm (1 .9 7 ") 5 5 mm (2 .1 7 ") 2 2 mm (0 .8 7 ") sw60 5 7 mm (2 .2 4 ") 3 0 mm (1 .1 8 ") 2 5 mm (0 .8 7 ") ø 55 mm (2.17") ø 68 mm (2.68") ø 60 mm (2.36") sw 46 1 ½”npt 5 0 mm (1 .9 7 ") 2 2 mm (0 .8 7 ") ø 55 mm (2.17") f...
Page 70
Vegabar 52 , hygienic fitting 1 sw46 51 mm (2 1 / 64 ") 51 mm (2 1 / 64 ") 51 mm (2 1 / 64 ") 60 mm (2 23 / 64 ") ø 64 mm (2 33 / 64 ") ø 51 mm (2 1 / 64 ") ø 78 mm (3 5 / 64 ") ø 78 mm (3 5 / 64 ") 55 mm (2 11 / 64 ") ø 66 mm (2 19 / 32 ") ø 105 mm (4 9 / 64 ") ca cd/cc aa ce la ø 38mm (1 1 / 2 ") ø...
Page 71
Vegabar 52 , hygienic fitting 2 sw46 50 mm (1 31 / 32 ") 51 mm (2 1 / 64 ") 60 mm (2 23 / 64 ") 51 mm (2 1 / 64 ") 51 mm (2 1 / 64 ") ø 78 mm (3 5 / 64 ") ø 92 mm (3 5 / 8 ") ø 92 mm (3 5 / 8 ") ø 74 mm (2 29 / 32 ") ø 84 mm (3 5 / 16 ") ø 84 mm (3 5 / 16 ") ø 66 mm (2 19 / 32 ") ta tc ra/rb rs/rt rd...
Page 72
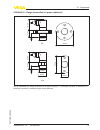
Vegabar 52 - flange connection 3 15 / 32 " 4 1 / 64 " 5 7 / 16 " 1 / 8 " 1 / 8 " 1 / 8 " 4xø 45 / 64 " 4xø 45 / 64 " 8xø 45 / 64 " 4 21 / 64 " 4 59 / 64 " 6 19 / 64 " 5 29 / 32 " 6 1 / 2 " 7 7 / 8 " 45 / 64 " 25 / 32 " 15 / 16 " 15” 1 / 8 " 12xø 45 / 64 " 16 9 / 64 " 1 7 / 64 " 18 7 / 64 " dn mm pn d...
Page 73
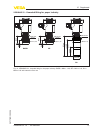
Vegabar 52 - threaded fitting for paper industry m 44 x 1,25 sw 46 mm ( 1.81") m 56 x 1,25 m 48 x 1,5 sw 60 mm ( 2.36") sw 50 mm ( 1.97") dg ba/bb be 2 1 mm (0 .8 3") 5 2 mm (2 .0 5") 2 1 mm (0 .8 3") 5 2 mm (2 .0 5") 5 6 mm (2 .2 1") 1 0 3 mm (4 .0 6") 1 2 5 mm (2 .9 2") ø 40 mm (1.58") fig. 41: veg...
Page 74
Vegabar 52 - flange connection for paper industry 1 fg tr ts ew 1 5 8 mm (6 .2 2 ") 4 0 mm (1 .5 8 ") ø 38 mm (1.50") ø 59 mm (2.32") ø 48 mm (1.89") ø 32...60 mm (1.26...2.36") ø 48...90 mm (1.89...3.54") 5 2 mm (2 .0 5 ") 2 4 mm (0 .9 5 ") 3 0 .. .3 0 0 mm (1 .1 8 .. .1 1 .8 1 ") 4 0 mm (1 .5 8 ") ...
Page 75
Vegabar 52 - flange connection for paper industry 2 4 3 mm (1 .6 9 ") ø 48 mm (1.89") 2 3 mm (0 .9 1 ") 4 3 mm (1 .6 9 ") ø 48 mm (1.89") 2 3 mm (0 .9 1 ") 50 mm (1.97") 50 mm (1.97") 115 mm (4.53") 1 1 5 mm (4 .5 3 ") 6 8 mm (2 .6 8 ") 6 8 mm (2 .6 8 ") ft ev fig. 43: vegabar 52 - flange connection f...
Page 76
10 .3 industrial property rights vega product lines are global protected by industrial property rights. Further information see http://www.Vega.Com . Only in u.S.A.: further information see patent label at the sensor housing. Vega produktfamilien sind weltweit geschützt durch gewerbliche schutzrecht...
Page 77: Index
Index a a ccessory - external indicating and adjustment unit 10 - external indicating and adjustment unit vegadis 62 11 - flanges 11 - indicating and adjustment module 10 - interface adapter 10 - measuring instrument holder 11 - protective cover 11 a pplication area 8 c c able entry 16 c able screen...
Page 78
78 vegabar 52 • 4 … 20 ma/hart i ndex 36717 -en -120324.
Page 79
Vegabar 52 • 4 … 20 ma/hart 79 i ndex 36717 - en -120324.
Page 80
Vega g rieshaber kg a m hohenstein 113 77761 s chiltach g ermany p hone +49 7836 50-0 f ax +49 7836 50-201 e- mail: info.De@vega.Com www.Vega.Com p rinting date: iso 9001 a ll statements concerning scope of delivery, application, practical use and operating conditions of the sensors and processing s...

