- DL manuals
- Vega
- Transmitter
- VEGABAR 53
- Operating Instructions Manual
Vega VEGABAR 53 Operating Instructions Manual
Summary of VEGABAR 53
Page 1
Operating instructions vegabar 53 profibus pa p.
Page 2: Contents
Contents 1 about this document 1.1 function . . . . . . . . . . . . . . . . . . . . . . . . . . . . . 5 1.2 target group . . . . . . . . . . . . . . . . . . . . . . . . . . 5 1.3 symbolism used . . . . . . . . . . . . . . . . . . . . . . . 5 2 for your safety 2.1 authorised personnel. . . . . . . . ...
Page 3
7 setup with pactware™ and other adjustment programs 7.1 connecting the pc . . . . . . . . . . . . . . . . . . . . . 35 7.2 parameter adjustment with pactware™. . . . . . 35 7.3 parameter adjustment with pdm. . . . . . . . . . . . 36 7.4 saving the parameter adjustment data . . . . . . . 36 8 mainte...
Page 4: 1 About This Document
1 about this document 1.1 function this operating instructions manual has all the information you need for quick setup and safe operation of vegabar 53. Please read this manual before you start setup. 1.2 target group this operating instructions manual is directed to trained personnel. The contents ...
Page 5: 2 For Your Safety
2 for your safety 2.1 authorised personnel all operations described in this operating instructions manual must be carried out only by trained, specialised personnel authorised by the operator. For safety and warranty reasons, any internal work on the instruments must be carried out only by personnel...
Page 6
L instruments with max. Permissible pressures less than 200 bar do not need a ce marking. 2.6 safety information for ex areas please note the ex-specific safety information for installation and operation in ex areas. These safety instructions are part of the operating instructions manual and come wit...
Page 7: 3 Product Description
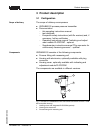
3 product description 3.1 configuration the scope of delivery encompasses: l vegabar 53 process pressure transmitter l documentation - this operating instructions manual - test certificate - ex-specific safety instructions (with ex versions) and, if necessary, further certificates - operating instructio...
Page 8
3.2 principle of operation vegabar 53 is a pressure transmitter for measurement of gauge pressure, absolute pressure or vacuum. Measured products are gases, vapours and liquids up to 600 bar. With flush version also viscous liquids. The process pressure acts via the stainless steel diaphragm to the s...
Page 9
3.4 storage and transport your instrument was protected by packaging during transport. Its capacity to handle normal loads during transport is assured by a test acc. To din 55439. The packaging of standard instruments consists of environ- ment-friendly, recyclable cardboard. For special versions, pe...
Page 10: 4 Mounting
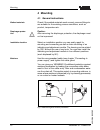
4 mounting 4.1 general instructions check if the wetted materials such as seal, process fitting etc. Are suitable for the existing process conditions, such as product, temperature etc. Caution: after removing the diaphragm protection, the diaphragm must not be impressed. Select an installation positi...
Page 11
Danger: instruments for oxygen applications should be unpacked just before mounting. After removing the protective cover of the process fitting, the label "o₂" will be visible on the process fitting. Penetration of oil, grease and dirt should be avoided. Danger of explosion! 4.2 mounting information v...
Page 12
Warning: the housing must not be used to screw the instrument in! Applying tightening force to the housing can damage its internal mechanical components. 12 vegabar 53 - profibus pa mounting 28250 -en -051004.
Page 13
5 connecting to power supply 5.1 preparing the connection always observe the following safety instructions: l connect only in the complete absence of line voltage l if overvoltages are expected, overvoltage arresters should be installed acc. To profibus specification. In hazardous areas you should tak...
Page 14
Must be connected directly to the internal ground terminal. The ground terminal outside on the housing must be connected to the potential equalisation (low impedance). In systems without potential equalisation, connect the cable screen directly to ground potential at the power supply unit and at the...
Page 15
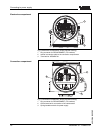
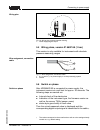
Fig. 3: connection steps 6 and 7 8 press down the opening levers of the terminals, you will hear the terminal spring closing 9 check the hold of the wires in the terminals by lightly pulling on them 10 connect the screen to the internal ground terminal and the external ground terminal to potential e...
Page 16
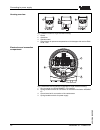
1 4 4 4 2 3 fig. 4: material versions, single chamber housing 1 plastic 2 aluminium 3 stainless steel 4 filter element for pressure compensation or blind stopper with version ip 66/ ip 68, 1 bar i2c display 1 2 5 6 7 8 3 4 1 2 fig. 5: electronics and connection compartment, single chamber housing 1 ...
Page 17
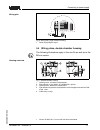
I2c display 1 1 2 5 6 7 8 fig. 6: wiring plan, single chamber housing 1 power supply/signal output 5.4 wiring plans, double chamber housing the following illustrations apply to the non-ex as well as to the eex ia version. 1 2 3 4 5 fig. 7: double chamber housing 1 housing cover, connection compartme...
Page 18
1 3 2 display 1 2 5 6 7 8 i2c fig. 8: electronics compartment, double chamber housing 1 plug connector for vegaconnect (i²c interface) 2 internal connection cable to the connection compartment 3 terminals for vegadis 61 3 1 2 display 1 2 i2c fig. 9: connection compartment, double chamber housing 1 p...
Page 19
I2c 1 1 2 fig. 10: wiring plan, double chamber housing 1 power supply/signal output 5.5 wiring plans, version ip 66/ip 68 (1 bar) this version is only available for instruments with absolute pressure measuring ranges. + - 1 2 fig. 11: wire assignment, connection cable 1 br (+) and bl (–) for power s...
Page 20: Adjustment Module Plicscom
6 setup with the indicating and adjustment module plicscom 6.1 short description the indicating and adjustment module plicscom is used for measured value display, adjustment and diagnosis. It can be mounted in the following housing versions and instruments: l all sensors of the plics ® instrument fa...
Page 21
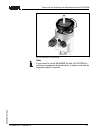
Fig. 12: installation of plicscom note: if you intend to retrofit vegabar 53 with a plicscom for continuous measured value indication, a higher cover with an inspection glass is required. Vegabar 53 - profibus pa 21 setup with the indicating and adjustment module plicscom 28250 -en -051004.
Page 22
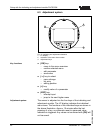
6.3 adjustment system 1.1 2 3 1 fig. 13: indicating and adjustment elements 1 lc display 2 indication of the menu item number 3 adjustment keys l [ok] key: - move to the menu overview - confirm selected menu - edit parameter - save value l [–>] key to select: - menu change - list entry - editing posi...
Page 23
6.4 setup procedure before starting the actual parameter adjustment of a profibus pa sensor, the address setting must first be carried out. You will find a detailed description in the operating instructions manual of plicscom or in the online help of pactware™ or dtm. Vegabar 53 can be used for process...
Page 24
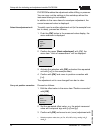
Plicscom enables the adjustment without filling or pressure. You can carry out the settings in the workshop without the instrument having to be installed. In addition to the menu items for zero/span adjustment, the current measured value is displayed. To switch over to another adjustment unit (in the...
Page 25
[–>]. Proceed as follows: 1 edit the mbar value in the menu item "zero" with [ok]. Zero adjustment 000.0 % p = +0000.0 mbar 0000.0 mbar 2 set the requested mbar value with [+] and [–>]. 3 confirm with [ok] and move to span adjustment with [–>]. The zero adjustment is finished. Information: the zero ad...
Page 26
Information: to adjust with pressure, you simply enter the indicated actual measured value. If the adjustment ranges are exceeded, the message is displayed "outside parameter limits". The editing procedure can be interrupted with [esc] or the displayed limit value can be accepted with [ok]. The setu...
Page 27
Vegabar 53 is preset to application "process pressure measurement". Proceed as follows when switching over to application "level measurement": 1 push the [ok] button in the measured value display, the menu overview is displayed. 2 select the menu service with "[–>]" and confirm with [ok]. Basic adjus...
Page 28
4 confirm with [ok] and move to position correction with [–>]. The adjustment unit is now changed from bar to mbar. Information: when changing over to a height unit (in the example from bar to m), also the density has to be entered. Proceed as follows: 1 push the [ok] button in the measured value dis...
Page 29
2 set the requested offset value, e.G. The actual measured value with reciprocal sign with [–>] and [+]. 3 confirm with [ok] and move to min. (zero) adjustment with [–>]. Proceed as follows: 1 edit in the menu item "min. Adjustment" the % value with [ok]. Min. Adjustment +000.0 % = +0000.0 mbar 0000.0...
Page 30
3 edit the requested mbar value with [ok]. 4 set the requested mbar value with [+] and [–>]. 5 confirm with [ok] and move to the menu overview with [esc]. The max. Adjustment is finished. Information: to adjust with a filling, you simply enter the indicated actual measured value. If the adjustment rang...
Page 31
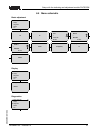
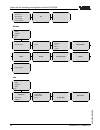
6.5 menu schematic basic adjustment 1 ▶ basic adjustment display diagnostics service info 1.1 sensor address 126 1.2 units of measurement bar 1.3 position correction offset p = +0000 mbar 53 mbar 1.4 zero 000.0 % p = 000 mbar 53 mbar 1.5 span 100.00 % p = 1000 mbar 53 mbar 1.6 linearization curve lin...
Page 32
3.1 peak values tmin: -12.5°c tmax: +85.5°c p-min: -0.58 bar p-max: 16.765 bar 3.2 sensor status ok 3.4 trend recording service 4 basic adjustment display diagnostics ▶ service info 4.1 additional pa value secondary value 1 4.2 out scale-unit volume l 4.3 pa-out scale 100.00 lin % = 0.0 l 0.00 lin %...
Page 33
6.6 saving the parameter adjustment data it is recommended noting the adjusted data, e.G. In this operating instructions manual and archive them afterwards. They are hence available for multiple use or service purposes. If vegabar 53 is equipped with an indicating and adjustment module plicscom, the...
Page 34: Adjustment Programs
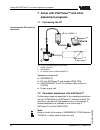
7 setup with pactware™ and other adjustment programs 7.1 connecting the pc ~ = power supply vegaconnect 3 pactware / tm >pa 2 3 1 fig. 14: pc connected directly to the sensor 1 rs232 connection 2 vegabar 53 3 i²c adapter cable for vegaconnect 3 necessary components: l vegabar 53 l pc with pactware™ ...
Page 35
All currently available vega-dtms are provided in the dtm collection on cd and can be obtained from the responsible vega agency for a token fee. This cd includes also the up-to- date pactware™ version. The basic version of this dtm collection incl. Pactware™ is also available as a free-of- charge do...
Page 36
8 maintenance and fault rectification 8.1 maintenance when used as directed in normal operation, vegabar 53 is completely maintenance-free. 8.2 fault rectification vegabar 53 offers maximum reliability. Nevertheless faults can occur during operation. These may be caused by the following, e.G.: l sensor...
Page 37
? In simatic s7 the measured value is always presented as 0 l only four bytes are consistently loaded in the plc à use function component sfc14 to load 5 bytes consistently ? Measured value on plicscom does not correspond to the plc l pa-out is not set in the menu "display" à set pa-out in the menu ...
Page 38
? E017 l adjustment span too small à repeat with modified values ? E036 l no operable sensor software à carry out a software update or return instrument for repair ? E041 l hardware error à exchange instrument or return it for repair ? E113 l communication conflict à repair 8.3 exchanging the electron...
Page 39
Without serial number includes no order-specific data. The serial number can be found on the type label of vegabar 53 or on the delivery note. In both cases, the function of vegabar 53 is ensured. 8.4 instrument repair if it is necessary to repair vegabar 53 please proceed as follows: you can downloa...
Page 40: 9 Dismounting
9 dismounting 9.1 dismounting procedure warning: before dismounting, be aware of dangerous process con- ditions such as e.G. Pressure in the vessel, high temperatures, corrosive or toxic products etc. Take note of chapters "mounting" and "connecting to power supply" and carry out the listed steps in...
Page 41: 10 Supplement
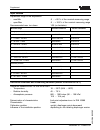
10 supplement 10.1 technical data general data manufacturer vega grieshaber kg, d-77761 schiltach type name vegabar 53 pressure gauge pressure or gauge pressure measuring principle depending on the measuring range piezore- sistive with internal transmission liquid or strain gauge (dms) dry communica...
Page 42
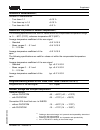
Input variable adjustment range of the adjustment: - zero/min -5 … +95 % of the nominal measuring range - span/max -5 … +105 % of the nominal measuring range recommended max. Turn down 1:30 (no limitation) nominal range overload resistance vacuum resistance gauge pressure 0…0.4 bar/0…40 kpa 2 bar/20...
Page 43
Deviation in characteristics 10) deviation in characteristics - turn down 1:1 - turn down up to 1:5 - turn down bis 1:20 influence of the product or ambient temperature 11) the following specifications are valid for values within the compensated temperature range, i.E. 0 … 80°c (176°f), reference temp...
Page 44
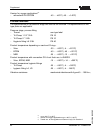
Version for oxygen applications 13) - without/with plicscom -40 … +60°c (-40 … +140°f) process conditions the specifications of the pressure stage are used as an overview. The specifications on the type plate are applicable. Pressure stage, process fitting - thread see type label - tri-clamp 1 1/2" 316...
Page 45
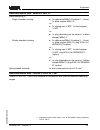
Electromechanical data - version ip 66/ip 67 cable entry/plug 16) - single chamber housing l 1x cable entry m20x1.5 (cable-ø 5 … 9 mm), 1x blind stopper m20x1.5 or: l 1x closing cap ½ npt, 1x blind stopper ½ npt or: l 1x plug depending on the version, 1x blind stopper m20x1.5 - double chamber housin...
Page 46
Cable entry - single chamber housing l 1x ip 68 cable entry m20x1.5; 1x blind stopper m20x1.5 or: l 1x closing cap ½ npt, 1x blind stopper ½ npt - double chamber housing l 1x ip 68 cable entry m20x1.5; 1x blind stopper m20x1.5; plug m12x1 for vegadis 61 (option) or: l 1x closing cap ½ npt, 1x blind ...
Page 47
Supply voltage supply voltage - non-ex instrument 9 … 32 v dc - eex ia instrument 9 … 24 v dc power supply by/max. Number of sensors - dp/pa segment coupler max. 32 (max. 10 with ex) - vegalog 571 ep card max. 15 (max. 10 with ex) electrical protective measures protection - all housings standard ip ...
Page 48
10.2 information on profibus pa instrument master file the instrument master file (gds) contains the characteristic data of the profibus pa instrument. These data are, e.G. The permissible transmission rates as well as information on diagnostics values and the format of the measured value outputted by t...
Page 49
Bar % lin% min-max adjustment linearization profibus pa-output primary value secondary value 1 secondary value 2 target mode failure mode alarms scaling source for scaling t i damping sensor characteristics pa-out tb fb select additional cyclic value sensor mounting correction fig. 15: vegabar 53: b...
Page 50
- pa-out value of the fb1 after scaling l temperature - pa-out value of the fb2 after scaling l additional cyclic value - additional cyclical value (depending on the source) l free place - this module must be used if a value in the data telegram of the cyclical data traffic should not be used (e.G. Re...
Page 51
Byte-no. 1 2 3 4 5 6 7 8 9 10 format value ieee-754- flieskommazahl pa-out (fb1) status status (fb1) ieee-754- flieskommazahl temperature (fb2) status status (fb2) fig. 18: telegram configuration example 2 example 3 with pressure value and additional cyclical value without temperature value: l ai (pa...
Page 52
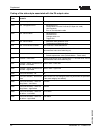
Coding of the status byte associated with the pa output value status code description acc. To profibus standard possible cause 0x00 bad - non-specific flash-update active 0x04 bad - configuration error l adjustment error l configuration error with pv-scale (pv-span too small) l unit irregularity l error...
Page 53
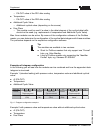
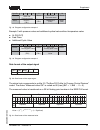
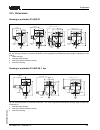
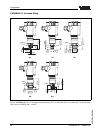
10.3 dimensions housing in protection ip 66/ip 67 112mm (4 13 / 32 ") 117mm (4 39 / 64 ") 116mm (4 9 / 16 ") 120mm (4 23 / 32 ") ~ 69mm (2 23 / 32 ") ø 77mm (3 1 / 32 ") ~ 69mm (2 23 / 32 ") ~ 116mm (4 9 / 16 ") ~ 87mm (3 27 / 64 ") ø 77mm (3 1 / 32 ") ø 84mm (3 5 / 16 ") ø 84mm (3 5 / 16 ") m20x1,5...
Page 54
Vegabar 53, threaded fitting sw27 sw41 sw41 23mm ( 29 / 32 ") g ½ a g ½ b 63mm (2 31 / 64 ") 65mm (2 9 / 16 ") g1b 65mm (2 9 / 16 ") 20,5mm ( 13 / 16 ") 10mm ( 25 / 64 ") 20,5mm ( 13 / 16 ") 10mm ( 25 / 64 ") 3mm ( 1 / 8 ") ø 3mm ( 1 / 8 ") ø 6mm ( 15 / 64 ") ø 18mm ( 45 / 64 ") ø30mm (1 3 / 16 ") ½“...
Page 55
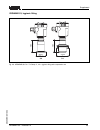
Vegabar 53, hygienic fitting la ca ø64mm (2 33 / 64 ") ø78mm (3 5 / 64 ") 82mm (3 15 / 64 ") 82mm (3 15 / 64 ") fig. 25: vegabar 53 ca = tri-clamp 2", la = hygienic fitting with compression nut vegabar 53 - profibus pa 55 supplement 28250 -en -051004.
Page 56
10.4 certificate ce declaration of conformity fig. 26: ce declaration of conformity 56 vegabar 53 - profibus pa supplement 28250 -en -051004.
Page 57
Manufacturer declaration fig. 27: manufacturer declaration vegabar 53 - profibus pa 57 supplement 28250 -en -051004.
Page 58
10.5 industrial property rights 58 vegabar 53 - profibus pa supplement 28250 -en -051004.
Page 59
Vegabar 53 - profibus pa 59 supplement 28250 -en -051004.
Page 60
Vega grieshaber kg am hohenstein 113 77761 schiltach germany phone +49 7836 50-0 fax +49 7836 50-201 e-mail: info@de.Vega.Com www.Vega.Com iso 9001 all statements concerning scope of delivery, application, practical use and operating conditions of the sensors and processing systems correspond to the...

