- DL manuals
- Vega
- Measuring Instruments
- VEGABAR 65
- Operating Instructions Manual
Vega VEGABAR 65 Operating Instructions Manual
Summary of VEGABAR 65
Page 1
Operating instructions vegabar 66 4 ... 20 ma/hart d ocument id: 27537 p rocess pressure/ h ydrostatic p.
Page 2: Contents
Contents 1 about this document 1.1 f unction. . . . . . . . . . . . . . . . . . . . . . . . . . . . . . . . . . 4 1.2 t arget group . . . . . . . . . . . . . . . . . . . . . . . . . . . . . . 4 1.3 s ymbolism used. . . . . . . . . . . . . . . . . . . . . . . . . . . . 4 2 for your safety 2.1 a uthor...
Page 3
7 setup with pactware and other adjustment programs 7.1 c onnect the pc via vegaconnect . . . . . . . . . . . . 50 7.2 p arameter adjustment with pactware . . . . . . . . . . . . 51 7.3 p arameter adjustment with ams™ and pdm . . . . . . . 52 7.4 s aving the parameter adjustment data . . . . . . . ....
Page 4: 1 About This Document
1 about this document 1.1 function t his operating instructions manual provides all the information you need for mounting, connection and setup as well as important instructions for maintenance and fault rectification. Please read this information before putting the instrument into operation and keep...
Page 5: 2 For Your Safety
2 for your safety 2.1 authorised personnel a ll operations described in this operating instructions manual must be carried out only by trained specialist personnel authorised by the plant operator. D uring work on and with the device the required personal protective equipment must always be worn. 2....
Page 6
2.5 safety approval markings and safety tips t he safety approval markings and safety tips on the device must be observed. 2.6 ce conformity t his device fulfills the legal requirements of the applicable ec guidelines. By attaching the ce mark, vega provides a confirmation of successful testing. You c...
Page 7
L c hapter "packaging, transport and storage" l c hapter "disposal" vegabar 66 • 4 ... 20 ma/hart 7 2 f or your safety 27537 - en -081209.
Page 8: 3 Product Description
3 product description 3.1 configuration t he scope of delivery encompasses: l vegabar 66 pressure transmitter with suspension cable l s training clamp (optionally available with screwed fitting) l e xternal electronics l or vegabar 66 pressure transmitter with connection tube l d ocumentation - this o...
Page 9
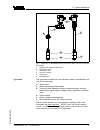
1 2 3 4 4 5 6 fig. 1: example of a vegabar 66 with suspension cable (left) and connection tube (right) 1 housing with integrated electronics 2 suspension cable 3 connection tube 4 screw connection 5 transmitter 6 protective cap t he type label contains the most important data for identification and u...
Page 10
3.2 principle of operation vegabar 66 is a suspension pressure transmitter for level measurement in wells, basins and atmospherically open vessels. F or use in atmospherically closed vessels under vacuum, the instrument is available with absolute pressure measuring ranges. T he actual sensor element...
Page 11
3.4 packaging, transport and storage y our instrument was protected by packaging during transport. Its capacity to handle normal loads during transport is assured by a test according to din en 24180. T he packaging of standard instruments consists of environment- friendly, recyclable cardboard. For ...
Page 12: 4 Mounting
4 mounting 4.1 general instructions m ake sure that all parts of the instrument in contact with the measured product, especially the sensor element, process seal and process fi tting, are suitable for the existing process conditions such as process pressure, process temperature as well as the chemica...
Page 13
2 1 2 2 2 1 1 1 fig. 3: position of the filter elements 1 filter element for ventilation of the electronics housing 2 filter element for ventilation of the measuring cell information: m ake sure that the filter elements are always free of buildup during operation. A pressure washer must not be used fo...
Page 14
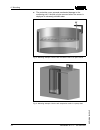
L t he protective cover prevents mechanical damage to the measuring cell. It should only be removed when the sensor is deployed in extremely polluted water. Fig. 4: mounting example: version with connection tube in an open vessel fig. 5: mounting example: version with suspension cable in a pump shaf...
Page 15
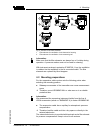
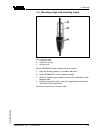
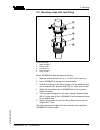
4.3 mounting steps with straining clamp 2 3 1 fig. 6: straining clamp 1 suspension cable 2 suspension opening 3 clamping jaws m ount vegabar 66 with straining clamp as follows: 1 h ang the straining clamp on a suitable wall hook 2 l ower vegabar 66 to the requested height 3 s lide the clamping jaws ...
Page 16
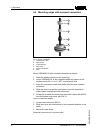
4.4 mounting steps with screwed connection 1 2 3 4 5 6 fig. 7: screw connection 1 suspension cable 2 seal screw 3 cone bushing 4 seal cone 5 screw connection 6 seal m ount vegabar 66 with screwed connection as follows: 1 w eld the welded socket into the vessel top 2 l ower vegabar 66 to the requeste...
Page 17
4.5 mounting steps with lock fitting 1 3 2 4 5 fig. 8: lock fitting 1 upper hexagon 2 fixing screws 3 clamping disc 4 lower hexagon 5 fixing screws m ount vegabar 66 with lock fitting as follows: 1 w eld the welded socket g1½ a or 1½ npt to the vessel top 2 l ower vegabar 66 through the welded socket. ...
Page 18
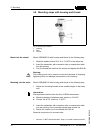
4.6 mounting steps with housing and thread fig. 9: housing and thread 1 housing 2 seal 3 thread m ount vegabar 66 with housing and thread in the following way: 1 w eld the welded socket g1½ a or 1½ npt to the vessel top 2 i nsert the transmitter with connection tube or suspension cable into the open...
Page 19
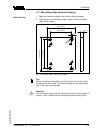
4.7 mounting steps external housing 1 m ark the holes according to the following drilling template 2 d epending on the mounting surface, fasten the wall mounting plate with 4 screws 90 mm (3.54") r 3,5 mm (0. 14 ") 3mm (0.12") 70 mm (2.76") 8 mm (0.32") 9 3 mm (3 .6 6 ") 1 1 0 mm (4 .3 3 ") fig. 10:...
Page 20
5 connecting to power supply 5.1 preparing the connection a lways keep in mind the following safety instructions: l c onnect only in the complete absence of line voltage l i f overvoltage surges are expected, overvoltage arresters should be installed tip: w e recommend using vega overvoltage arreste...
Page 21
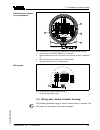
Caution: n o grease should be used when screwing the npt cable gland or steel tube into the threaded insert. Standard grease can contain additives that corrode the connection between threaded insert and housing. This would influence the stability of the connection and the tightness of the housing. I ...
Page 22
11 t ighten the compression nut of the cable entry. The seal ring must completely encircle the cable 12 s crew the housing cover on t he electrical connection is finished. Fig. 11: connection steps 6 and 7 p roceed as follows: 1 l oosen the four screws on the housing socket with an allen key size 4 i...
Page 23
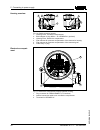
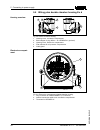
2 r emove the housing socket from the mounting plate 3 2 1 fig. 12: components of the external housing for plics ® devices 1 screws 2 wall mounting plate 3 cable gland 3 l oop the connection cable through the cable entry on the housing base 2) information: t he cable gland can be mounted in three po...
Page 24
5.3 wiring plan, single chamber housing t he following illustrations apply to the non-ex as well as to the ex-ia version. 1 2 4 3 fig. 13: material versions, single chamber housing 1 plastic 2 aluminium 3 stainless steel 4 stainless steel casting housing overview 24 vegabar 66 • 4 ... 20 ma/hart 5 c...
Page 25
I²c display 1 2 5 6 7 8 3 4 1 2 fig. 14: electronics and connection compartment, single chamber housing 1 plug connector for vegaconnect (i²c interface) 2 spring-loaded terminals for connection of the external indication vegadis 61 3 ground terminal for connection of the cable screen 4 spring-loaded...
Page 26
1 2 3 4 6 5 fig. 16: double chamber housing 1 housing cover, connection compartment 2 blind stopper or plug m12 x 1 for vegadis 61 (optional) 3 housing cover, electronics compartment 4 filter element for pressure compensation of the electronics housing 5 filter element for pressure compensation of t...
Page 27
3 1 2 display 1 2 i²c fig. 18: connection compartment, double chamber housing 1 plug connector for vegaconnect (i²c interface) 2 ground terminal for connection of the cable screen 3 spring-loaded terminals for voltage supply i2c 1 1 2 fig. 19: wiring plan, double chamber housing 1 voltage supply/sig...
Page 28
5.5 wiring plan double chamber housing ex d 1 2 3 4 5 fig. 20: double chamber housing 1 housing cover, connection compartment 2 blind stopper or plug m12 x 1 for vegadis 61 (optional) 3 housing cover, electronics compartment 4 filter element for air pressure compensation 5 cable gland 1 3 2 display ...
Page 29
1 2 1 2 fig. 22: connection compartment double chamber housing ex d 1 spring-loaded terminals for power supply and cable screen 2 ground terminal for connection of the cable screen 1 1 2 fig. 23: wiring plan double chamber housing ex d 1 voltage supply/signal output 5.6 wiring plan - version ip 66/i...
Page 30
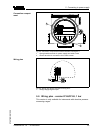
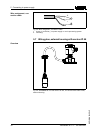
+ - 1 2 fig. 24: wire assignment, connection cable 1 brown (+) and blue (-) to power supply or to the processing system 2 shielding 5.7 wiring plan, external housing with version ip 68 fig. 25: vegabar 66 in ip 68 version 25 bar, non-ex and axial cable outlet, external housing wire assignment, con- ...
Page 31
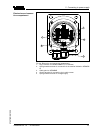
5 6 7 8 1 2 displa y i²c 4 5 1 2 3 fig. 26: electronics and connection compartment 1 plug connector for vegaconnect (i²c interface) 2 spring-loaded terminals for connection of the external indication vegadis 61 3 cable gland to vegabar 4 ground terminal for connection of the cable screen 5 spring-lo...
Page 32
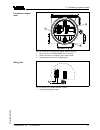
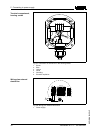
1 2 3 4 6 3 4 1 2 5 fig. 27: connection of the sensor in the housing socket 1 brown 2 blue 3 yellow 4 white 5 shielding 6 breather capillaries i2c display 1 1 2 5 6 7 8 fig. 28: wiring plan external electronics 1 power supply terminal compartment, housing socket wiring plan external electronics 32 v...
Page 33
5.8 switch on phase a fter connecting vegabar 66 to power supply or after a voltage recurrence, the instrument carries out a self-check for approx. 30 seconds: l i nternal check of the electronics l i ndication of the instrument type, the firmware as well as the sensor tags (sensor designation) l o u...
Page 34: Module Plicscom
6 set up with the indicating and adjustment module plicscom 6.1 short description t he indicating and adjustment module is used for measured value display, adjustment and diagnosis. It can be mounted in the following housing versions and instruments: l a ll sensors of the plics ® instrument family, ...
Page 35
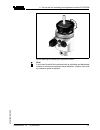
Fig. 29: mounting the indicating and adjustment module note: i f you intend to retrofit the instrument with an indicating and adjustment module for continuous measured value indication, a higher cover with an inspection glass is required. Vegabar 66 • 4 ... 20 ma/hart 35 6 s et up with the indicating...
Page 36
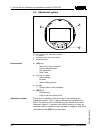
6.3 adjustment system 1.1 2 3 1 fig. 30: indicating and adjustment elements 1 lc display 2 indication of the menu item number 3 adjustment keys l [ok] key: - m ove to the menu overview - c onfirm selected menu - e dit parameter - s ave value l [->] key to select: - menu change - list entry - s elect ...
Page 37
6.4 setup procedure i n hart-multidrop mode (several sensors on one input) the address must be set before continuing with the parameter adjustment. You will fi nd a detailed description in the operating instructions manual "indicating and adjustment module" or in the online help of pactware or dtm. H...
Page 38
T o select the adjustment unit (in the example switching over from bar to mbar) you have to proceed as follows: 3) 1 p ush the [ok] button in the measured value display, the menu overview is displayed. ▶ b asic adjustment d isplay d iagnostics s ervice i nfo 2 c onfirm the menu "basic adjustment" wit...
Page 39
U nit of measurement d ensity 0001000 kg/dm³ 6 e nter the requested density value with [->] and [+], confirm with [ok] and move to position correction with [->]. T he adjustment unit is hence switched over from bar to m. P roceed as follows to select the temperature unit: 4) à activate the selection ...
Page 40
5 c onfirm with [+] and move to max. Adjustment with [->]. T he min. Adjustment is finished. Information: f or an adjustment with filling, you simply enter the displayed actual measured value. If the adjustment ranges are exceeded, the message "outside parameter limits" appears. The editing procedure c...
Page 41
T he position correction compensates the influence of the mounting position or static pressure on the measurement. It does not influence the adjustment values. I n the menu items "zero" and "span" you determine the span of the sensor, the span corresponds to the end value. Information: t he steps 1, 3...
Page 42
▶ b asic adjustment d isplay d iagnostics s ervice i nfo 2 c onfirm the menu "basic adjustment" with [ok], the menu item "unit" will be displayed. U nit u nit of measurement bar ▼ t emperature unit °c ▼ 3 a ctivate the selection with [ok] and select "units of measure- ment with [->]. 4 a ctivate the ...
Page 43
P roceed as follows: 1 e dit the mbar value in the menu item "zero" with [ok]. Z ero adjustment 000.0 % p = +0000 .0 mbar 0000.0 mbar 2 s et the requested mbar value with [+] and [->]. 3 c onfirm with [+] and move to span adjustment with [->]. T he zero adjustment is finished. Information: t he zero a...
Page 44
A linearization is necessary for all vessels in which the vessel volume does not increase linearly with the level - e. G. With a cylindrical or spherical tank - and the indication or output of the volume is required. C orresponding linearization curves are preprogrammed for these vessels. They repre...
Page 45
C opy sensor data c opy sensor data? Basic adjustment i f the "reset" (sensor-specific basic adjustment) is carried out, the sensor resets the values of the following menu items to the reset values (see chart): menu section function reset value b asic settings u nit of measurement bar t emperature un...
Page 46
Factory setting l ike basic adjustment, furthermore special parameters are reset to default values. 7) pointer t he min. And max. Temperature or pressure values are each reset to the actual value. A dditional adjustment and diagnosis options such as e.G. Scaling, simulation or trend curve presentati...
Page 47
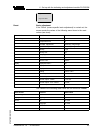
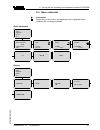
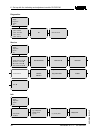
6.5 menu schematic information: d epending on the version and application, the highlighted menu windows are not always available. Basic adjustment 1 ▶ b asic adjustment d isplay d iagnostics s ervice i nfo 1.1 u nit u nit of measurement bar ▼ t emperature unit °c ▼ 1.2 p osition correction off set p ...
Page 48
Diagnostics 3 b asic adjustment d isplay ▶ d iagnostics s ervice i nfo 3.1 p ointer p-min.: -5.8 mbar p-max.: 167.5 mbar t- min.: -12.5 °c t- max.: +85.5 °c 3.2 s ensor status ok 3.3.1 t rend curve s tart trend curve? Service 4 b asic adjustment d isplay d iagnostics ▶ s ervice i nfo 4.1 c urrent ou...
Page 49
6.6 saving the parameter adjustment data i t is recommended noting the adjusted data, e.G. In this operating instructions manual and archive them afterwards. They are hence available for multiple use or service purposes. I f vegabar 66 is equipped with an indicating and adjustment module, the most i...
Page 50: Programs
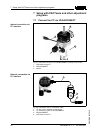
7 setup with pactware and other adjustment programs 7.1 connect the pc via vegaconnect 3 1 2 fig. 31: connection of the pc via vegaconnect directly to the sensor 1 usb cable to the pc 2 vegaconnect 3 sensor 1 2 3 4 open twist usb lock fig. 32: connection via i²c connection cable 1 i²c bus (com.) int...
Page 51
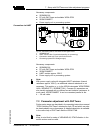
N ecessary components: l vegabar 66 l pc with pactware and suitable vega dtm l vegaconnect l p ower supply unit or processing system 1 2 4 3 open twist usb lo ck fig. 33: connecting the pc via hart to the signal cable 1 vegabar 66 2 hart resistor 250 Ω (optional depending on processing) 3 connection...
Page 52
A ll currently available vega dtms are provided in the dtm collection on cd and can be obtained from the responsible vega agency for a token fee. This cd includes also the up-to-date pactware version. T he basic version of this dtm collection incl. Pactware is also available as a free-of-charge down...
Page 53
8 maintenance and fault rectification 8.1 maintain w hen used in the correct way, no special maintenance is required in normal operation. I n some applications, product buildup on the sensor diaphragm can influence the measuring result. Depending on the sensor and application, take precautions to ensu...
Page 54
? 4 … 20 ma signal not stable l l evel fluctuations à set the integration time via the indicating and adjustment module or pactware l no atmospheric pressure compensation à check the pressure compensation in the housing and clean the filter element, if necessary ? 4 … 20 ma signal missing l w rong con...
Page 55
8.3 calculation of total deviation (similar to din 16086) t he total deviation f total according to din 16086 is the sum of basic accuracy f perf and longterm stability f stab . F total is also called maximum practical deviation or utility error. F total = f perf + f stab f perf = √((f t ) 2 + (f k ...
Page 56
Basic accuracy analogue output signal in percent: f perf = √((f t ) 2 + (f k l ) 2 + (f a ) 2 ) f t = 0.05 %/10 k x td f k l = 0.1 % f a = 0.15 % f perf = √((0.05 %/10 k x 20 k x 1.4) 2 + (0.1 %) 2 + (0.15 %) 2 ) f perf = 0.23 % total deviation analogue output signal in percent: f total = f perf + f...
Page 57
C onnect the sensor to power supply and provide connection from pc to the instrument via vegaconnect. Start pactware and provide connection to the sensor, e.G. Via the vega project assistant. Close the parameter window of the sensor, as far as open. G o in the pactware menu bar to "instrument data",...
Page 58: 9 Dismounting
9 dismounting 9.1 dismounting steps warning: b efore dismounting, be aware of dangerous process conditions such as e.G. Pressure in the vessel, high temperatures, corrosive or toxic products etc. T ake note of chapters "mounting" and "connecting to power supply" and carry out the listed steps in rev...
Page 59: 10 Supplement
10 supplement 10.1 technical data general data m easured value l evel m easuring principle c eramic-capacitive, dry measuring cell c ommunication interface i ²c bus materials and weights m aterial 316l corresponds to 1.4404 or 1.4435 m aterials, wetted parts - t ransmitter 316l, pvdf - t ransmitter ...
Page 60
- c onnection cable between ip 68 housing and external electronics pur, fep, pe - t ype plate support with ip 68 version on cable pe hard w eight approx. - b asic weight 0.7 kg (1.543 lbs) - s uspension cable 0.1 kg/m (0.07 lbs/ft) - c onnection tube 1.5 kg/m (1 lbs/ft) - s training clamp 0.2 kg (0....
Page 61
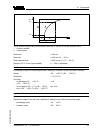
90 % 100 % 10 % t t t a t t s 2 1 fig. 34: sudden change of the process variable, dead time t t , rise time t a and step response time t s 1 process variable 2 output signal d ead time ≤ 150 ms r ise time ≤ 100 ms (10 … 90 %) s tep response time ≤ 250 ms (ti: 0 s, 10 … 90 %) d amping (63 % of the in...
Page 62
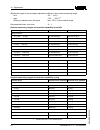
A djustment range of the zero/span adjustment relating to the nominal measuring range: - zero -20 … +95 % - span -120 … +120 % 9) - d ifference between zero and span max. 120 % of the nominal range r ecommended max. Turn down 10 : 1 nominal measuring ranges and overload capability in bar/kpa nominal ...
Page 63
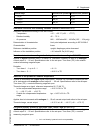
Nominal range overload, max. Pressure overload, min. Pressure 0 … 70 psi 900 psi 0 psi 0 … 150 psi 1300 psi 0 psi 0 … 350 psi 1900 psi 0 psi reference conditions and actuating variables (similar to din en 60770-1) r eference conditions according to din en 61298-1 - t emperature + 15 … +25 °c (+59 … ...
Page 64
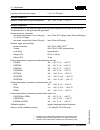
L ong-term drift of the zero signal x td)/year ambient conditions a mbient, storage and transport temperature -40 … +80 °c (-40 … +176 °f) process conditions t he specifications to the pressure stage and the product temperature are used as an overview. T he specifications of the type label are applica...
Page 65
V ibration resistance mechanical vibrations with 4 g and 5 … 100 hz 14) s hock resistance a cceleration 100 g/6 ms 15) electromechanical data - version ip 66/ip 67 c able entry/plug 16) - s ingle chamber housing l 1 x cable gland m20 x 1.5 (cable: ø 5 … 9 mm), 1 x blind stopper m20 x 1.5 or: l 1 x c...
Page 66
Electromechanical data - version ip 66/ip 68, 1 bar c able entry - s ingle chamber housing l 1 x ip 68 cable gland m20 x 1.5; 1 x blind stopper m20 x 1.5 or: l 1 x closing cap ½ npt, 1 x blind plug ½ npt - d ouble chamber housing l 1 x ip 68 cable gland m20 x 1.5; 1 x blind stopper m20 x 1.5; plug m...
Page 67
C onnection cable between ip 68 instrument and external housing: - c onfiguration four wires, one suspension cable, one breather capillary, screen braiding, metal foil, mantle - w ire cross-section 0.5 mm² (awg 20) - w ire resistance 0.036 Ω/ m (0.011 Ω/ft) - s tandard length 5 m (16.4 ft) - m ax. Le...
Page 68
1000 750 500 250 12 18 16 14 20 22 24 26 28 30 32 34 36 Ω v 4 1 2 3 fig. 35: voltage diagram 1 hart load 2 voltage limit eex-ia instrument 3 voltage limit non-ex/exd instrument 4 operating voltage electrical protective measures p rotection class - t ransmitter ip 68 (25 bar) - h ousing, standard ip ...
Page 69
Y ou can find detailed information in the supplied safety manual of the instrument series or under " www.Vega.Com", "downloads", "approvals". Approvals d epending on the version, instruments with approvals can have different technical data. F or these instruments, the corresponding approval documents ...
Page 70
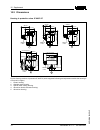
10.2 dimensions housing in protection class ip 66/ip 67 ~ 69 mm (2.72") ø 77 mm (3.03") 1 1 2 m m (4 13 / 32 ") m20x1,5/ ½ npt ~ 69 mm (2.72") ø 77 mm (3.03") 1 1 7 m m (4 .6 1 ") m20x1,5/ ½ npt ~ 87 mm (3.43") m16x1,5 ø 84 mm (3.31") 1 2 0 m m (4 .7 2 ") m20x1,5/ ½ npt ~ 116 mm (4.57") ø 84 mm (3.3...
Page 71
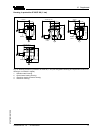
Housing in protection ip 66/ip 68 (1 bar) 1 1 7 mm (4 .6 1 ") 1 2 0 mm (4 .7 2 ") ~ 103 mm (4.06") ~ 105 mm (4.13") ø 77 mm (3.03") 1 1 6 mm (4 .5 7 ") ~ 150 mm (5.91") ø 84 mm (3.31") ø 84 mm (3.31") ~ 93 mm (3.66") ø 80 mm (3.15") 1 1 2 mm (4 .4 1 ") m20x1,5/ ½ npt m20x1,5 m20x1,5/ ½ npt m16x1,5 4...
Page 72
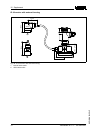
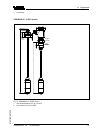
Ip 68 version with external housing 1 2 65 mm (2 9 / 16 ") 68 mm (2 43 / 64 ") 92 mm (3 5 / 8 ") 42mm (1 21 / 32 ") 40mm (1 37 / 64 ") 90 mm (3 35 / 64 ") 110 mm (4 21 / 64 ") ~ 66 mm (2 19 / 32 ") 59 mm (2 21 / 64 ") fig. 38: ip 68 version with external housing 1 lateral cable outlet 2 axial cable ...
Page 73
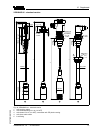
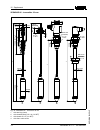
Vegabar 66 - standard version 1 2 3 4 5 1 7 5 mm (6 5 7 / 6 4 ") 5 2 mm (2 3 / 6 4 ") 1 3 2 mm (5 1 3 / 6 4 ") ø 8 mm ( 5 / 16 ") ø 21,3 mm ( 27 / 32 ") ø 44 mm (1 47 / 64 ") ø 40 mm (1 37 / 64 ") 48-52 mm (1 57 / 64 " - 2 3 / 64 ") 22 mm ( 55 / 64 ") 1 4 mm ( 3 5 / 6 4 ") 3 8 ,5 mm (1 3 3 / 6 4 ") ...
Page 74
Vegabar 66 - transmitter 32 mm 1 2 3 4 5 1 7 5 mm (6 5 7 / 6 4 ") 5 2 mm (2 3 / 6 4 ") 1 7 8 mm (7 1 / 6 4 ") ø 8 mm ( 5 / 16 ") ø 21,3 mm ( 27 / 32 ") ø 32 mm (1 17 / 64 ") 48-52 mm (1 57 / 64 " - 2 3 / 64 ") 22 mm ( 55 / 64 ") 1 4 mm ( 3 5 / 6 4 ") 3 8 ,5 mm (1 3 3 / 6 4 ") 2 2 mm ( 5 5 / 6 4 ") 2...
Page 75
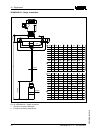
5 lock fitting vegabar 66 - pvdf version 1 2 l l 2 0 mm ( 2 5 / 3 2 ") 2 2 mm ( 5 5 / 6 4 ") 4 0 mm (1 3 7 / 6 4 ") sw 46 mm (1 13 / 16 ") g1½a / 1½”npt sw 46 mm (1 13 / 16 ") g1½a / 1½”npt fig. 41: vegabar 66 - pvdf version 1 with threaded fitting g1½ a (1½ npt) 2 with thread g1½ a (1½ npt) vegabar 6...
Page 76
Vegabar 66 - flange connection 2 43 / 64 " 3 15 / 32 " 4 1 / 64 " 5 7 / 16 " 6 3 / 8 " 3 5 / 64 " 5 / 64 " 5 / 64 " 1 / 8 " 1 / 8 " 1 / 8 " 1 / 8 " 4xø 35 / 64 " 4xø 45 / 64 " 4xø 45 / 64 " 4xø 45 / 64 " 8xø 45 / 64 " 8xø 55 / 64 " 4 21 / 64 " 4 59 / 64 " 6 19 / 64 " 9 29 / 64 " 3 15 / 16 " 3 11 / 32...
Page 77
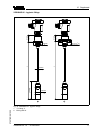
Vegabar 66 - hygienic fittings ø 78 mm (3 5 / 64 ") ø 92 mm (3 5 / 8 ") 51 mm (2 1 / 64 ") l 51 mm (2 1 / 64 ") l ø 64 mm (2 33 / 64 ") ø 40 mm (1 37 / 64 ") ø 8 mm ( 5 / 16 ") 132 mm (5 13 / 64 ") 1 2 fig. 43: vegabar 66 - hygienic fittings 1 tri-clamp 2" 2 bolting dn 50 vegabar 66 • 4 ... 20 ma/hart...
Page 78
10.3 industrial property rights vega product lines are global protected by industrial property rights. Further information see http://www.Vega.Com . Only in u.S.A.: further information see patent label at the sensor housing. Vega produktfamilien sind weltweit geschützt durch gewerbliche schutzrechte...
Page 79
Vegabar 66 • 4 ... 20 ma/hart 79 10 s upplement 27537 - en -081209.
Page 80
Vega g rieshaber kg a m hohenstein 113 77761 s chiltach g ermany p hone +49 7836 50-0 f ax +49 7836 50-201 e- mail: info@de.Vega.Com www.Vega.Com p rinting date: iso 9001 a ll statements concerning scope of delivery, application, practical use and operating conditions of the sensors and processing s...

