- DL manuals
- Vega
- Measuring Instruments
- VEGABAR 65
- Operating Instructions Manual
Vega VEGABAR 65 Operating Instructions Manual
Summary of VEGABAR 65
Page 1
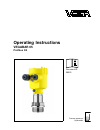
Operating instructions vegabar 65 profibus pa document id: 28253 process pressure/ hydrostatic p.
Page 2: Contents
Contents 1 about this document 1.1 function. . . . . . . . . . . . . . . . . . . . . . . . . . . . . . . . . . 4 1.2 target group . . . . . . . . . . . . . . . . . . . . . . . . . . . . . . 4 1.3 symbolism used. . . . . . . . . . . . . . . . . . . . . . . . . . . . 4 2 for your safety 2.1 authorised...
Page 3
7.2 parameter adjustment with pactware . . . . . . . . . . . . 45 7.3 parameter adjustment with pdm . . . . . . . . . . . . . . . . 45 7.4 saving the parameter adjustment data . . . . . . . . . . . . 45 8 maintenance and fault rectification 8.1 maintain. . . . . . . . . . . . . . . . . . . . . . . . ...
Page 4: 1 About This Document
1 about this document 1.1 function this operating instructions manual provides all the information you need for mounting, connection and setup as well as important instructions for maintenance and fault rectification. Please read this information before putting the instrument into operation and keep ...
Page 5: 2 For Your Safety
2 for your safety 2.1 authorised personnel all operations described in this operating instructions manual must be carried out only by trained specialist personnel authorised by the plant operator. During work on and with the device the required personal protective equipment must always be worn. 2.2 ...
Page 6
2.5 safety approval markings and safety tips the safety approval markings and safety tips on the device must be observed. 2.6 ce conformity this device fulfills the legal requirements of the applicable ec guidelines. By attaching the ce mark, vega provides a confirmation of successful testing. You can...
Page 7
L chapter "packaging, transport and storage" l chapter "disposal" vegabar 65 • profibus pa 7 2 for your safety 28253 - en -081209.
Page 8: 3 Product Description
3 product description 3.1 configuration the scope of delivery encompasses: l vegabar 65 pressure transmitter l documentation - this operating instructions manual - test certificate for pressure transmitters - ex specific safety instructions (with ex versions), if necessary further certificates - operati...
Page 9
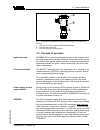
2 1 3 fig. 1: example of a vegabar 65 with process fitting g1½ a and plastic housing 1 housing cover with integrated plicscom (optional) 2 housing with electronics 3 process fitting with measuring cell 3.2 principle of operation vegabar 65 is a pressure transmitter for use in the chemical, food proces...
Page 10
The backlight of the indicating and adjustment module is powered by the sensor. Prerequisite is a certain level of operating voltage. The data for power supply are specified in chapter "technical data". The optional heating requires its own power supply. You can find further details in the supplementa...
Page 11
L protected against solar radiation l avoiding mechanical shock and vibration l storage and transport temperature see chapter "supplement - technical data - ambient conditions" l relative humidity 20 … 85 % storage and transport temperature vegabar 65 • profibus pa 11 3 product description 28253 - en...
Page 12: 4 Mounting
4 mounting 4.1 general instructions make sure that all parts of the instrument in contact with the measured product, especially the sensor element, process seal and process fitting, are suitable for the existing process conditions such as process pressure, process temperature as well as the chemical ...
Page 13
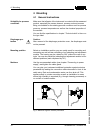
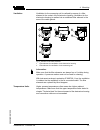
Ventilation for the measuring cell is realised by means of a filter element in the socket of the electronics housing. Ventilation for the electronics housing is realised via an additional filter element in the area of the cable glands. 2 1 2 2 2 1 1 1 fig. 3: position of the filter elements 1 filter el...
Page 14
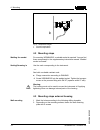
1 2 fig. 4: temperature ranges 1 process temperature 2 ambient temperature 4.2 mounting steps for mounting vegabar 65, a welded socket is required. You can find these components in the supplementary instructions manual "welded socket and seals". Use the seal corresponding to the instrument: - or - se...
Page 15
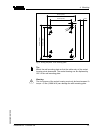
90 mm (3.54") r 3,5 mm (0. 14 ") 3mm (0.12") 70 mm (2.76") 8 mm (0.32") 9 3 mm (3 .6 6 ") 1 1 0 mm (4 .3 3 ") fig. 5: drilling template - wall mounting plate tip: mount the wall mounting plate so that the cable entry of the socket housing points downward. The socket housing can be displaced by 180° ...
Page 16
5 connecting to power supply 5.1 preparing the connection always keep in mind the following safety instructions: l connect only in the complete absence of line voltage l if overvoltage surges are expected, overvoltage arresters should be installed according to profibus specifications tip: we recommend...
Page 17
In systems with potential equalisation, connect the cable screen directly to ground potential at the power supply unit, in the connection box and at the sensor. The screen in the sensor must be connected directly to the internal ground terminal. The ground terminal outside on the housing must be con...
Page 18
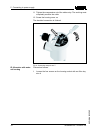
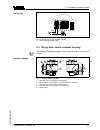
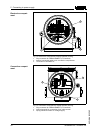
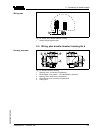
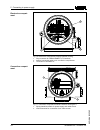
11 tighten the compression nut of the cable entry. The seal ring must completely encircle the cable 12 screw the housing cover on the electrical connection is finished. Fig. 6: connection steps 6 and 7 proceed as follows: 1 loosen the four screws on the housing socket with an allen key size 4 ip 68 v...
Page 19
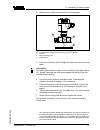
2 remove the housing socket from the mounting plate 3 2 1 fig. 7: components of the external housing for plics ® devices 1 screws 2 wall mounting plate 3 cable gland 3 loop the connection cable through the cable entry on the housing base 1) information: the cable gland can be mounted in three positi...
Page 20
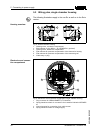
5.3 wiring plan, single chamber housing the following illustrations apply to the non-ex as well as to the ex-ia version. 1 2 3 4 6 5 fig. 8: double chamber housing 1 housing cover, connection compartment 2 blind stopper or plug m12 x 1 for vegadis 61 (optional) 3 housing cover, electronics compartme...
Page 21
I2c display 1 1 2 5 6 7 8 fig. 10: wiring plan, single chamber housing 1 voltage supply/signal output 5.4 wiring plan, double chamber housing the following illustrations apply to the non-ex as well as to the ex-ia version. 1 2 3 4 5 fig. 11: double chamber housing 1 housing cover, connection compart...
Page 22
1 3 2 display 1 2 5 6 7 8 i²c fig. 12: electronics compartment, double chamber housing 1 plug connector for vegaconnect (i²c interface) 2 internal connection cable to the connection compartment 3 terminals for vegadis 61 3 1 2 display 1 2 i²c fig. 13: connection compartment, double chamber housing 1...
Page 23
I2c 1 1 2 fig. 14: wiring plan, double chamber housing 1 voltage supply/signal output 5.5 wiring plan double chamber housing ex d 1 2 3 4 5 fig. 15: double chamber housing 1 housing cover, connection compartment 2 blind stopper or plug m12 x 1 for vegadis 61 (optional) 3 housing cover, electronics c...
Page 24
1 3 2 display 1 2 5 6 7 8 i²c fig. 16: electronics compartment, double chamber housing 1 plug connector for vegaconnect (i²c interface) 2 internal connection cable to the connection compartment 3 terminals for vegadis 61 1 2 1 2 fig. 17: connection compartment double chamber housing ex d 1 spring-lo...
Page 25
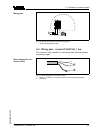
1 1 2 fig. 18: wiring plan double chamber housing ex d 1 voltage supply/signal output 5.6 wiring plan - version ip 66/ip 68, 1 bar this version is only available for instruments with absolute pressure measuring ranges. + - 1 2 fig. 19: wire assignment, connection cable 1 brown (+) and blue (-) to po...
Page 26
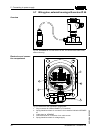
5.7 wiring plan, external housing with version ip 68 fig. 20: vegabar 65 in ip 68 version 25 bar, non-ex and axial cable outlet, external housing 5 6 7 8 1 2 displa y i²c 4 5 1 2 3 fig. 21: electronics and connection compartment 1 plug connector for vegaconnect (i²c interface) 2 spring-loaded termin...
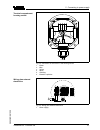
Page 27
1 2 3 4 6 3 4 1 2 5 fig. 22: connection of the sensor in the housing socket 1 brown 2 blue 3 yellow 4 white 5 shielding 6 breather capillaries i2c display 1 1 2 5 6 7 8 fig. 23: wiring plan external electronics 1 power supply terminal compartment, housing socket wiring plan external electronics vega...
Page 28
5.8 switch on phase after vegabar 65 is connected to voltage supply or after voltage recurrence, the instrument carries out a self-check for approx. 30 seconds. The following steps are carried out: l internal check of the electronics l indication of the instrument type, the firmware as well as the se...
Page 29: Module Plicscom
6 set up with the indicating and adjustment module plicscom 6.1 short description the indicating and adjustment module is used for measured value display, adjustment and diagnosis. It can be mounted in the following housing versions and instruments: l all sensors of the plics ® instrument family, in...
Page 30
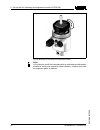
Fig. 24: mounting the indicating and adjustment module note: if you intend to retrofit the instrument with an indicating and adjustment module for continuous measured value indication, a higher cover with an inspection glass is required. 30 vegabar 65 • profibus pa 6 set up with the indicating and adj...
Page 31
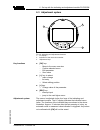
6.3 adjustment system 1.1 2 3 1 fig. 25: indicating and adjustment elements 1 lc display 2 indication of the menu item number 3 adjustment keys l [ok] key: - move to the menu overview - confirm selected menu - edit parameter - save value l [->] key to select: - menu change - list entry - select editi...
Page 32
6.4 setup procedure before starting the actual parameter adjustment of a profibus pa sensor, the address setting must first be carried out. You will find a detailed description in the operating instructions manual of the indicating and adjustment module or in the online help of pactware or dtm. Vegabar...
Page 33
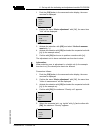
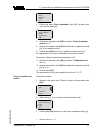
1 push the [ok] button in the measured value display, the menu overview is displayed. ▶ basic adjustment display diagnostics service info 2 confirm the menu "basic adjustment" with [ok], the menu item "unit" will be displayed. Unit unit of measurement bar ▼ temperature unit °c ▼ 3 activate the select...
Page 34
6 enter the requested density value with [->] and [+], confirm with [ok] and move to position correction with [->]. The adjustment unit is hence switched over from bar to m. Proceed as follows to select the temperature unit: 4) à activate the selection with [ok] and select "temperature unit with [->]...
Page 35
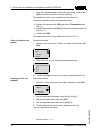
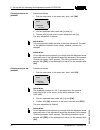
Information: for an adjustment with filling, you simply enter the displayed actual measured value. If the adjustment ranges are exceeded, the message "outside parameter limits" appears. The editing procedure can be aborted with [esc] or the displayed limit value can be accepted with [ok] . Proceed as...
Page 36
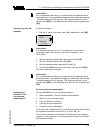
In the menu items "zero" and "span" you determine the span of the sensor, the span corresponds to the end value. Information: the steps 1, 3 and 4 are not necessary for instruments which are already preset according to customer specifications! You can find the data on the type label on the instrument ...
Page 37
▶ basic adjustment display diagnostics service info 2 confirm the menu "basic adjustment" with [ok], the menu item "unit" will be displayed. Unit unit of measurement bar ▼ temperature unit °c ▼ 3 activate the selection with [ok] and select "units of measure- ment with [->]. 4 activate the selection w...
Page 38
Proceed as follows: 1 edit the mbar value in the menu item "zero" with [ok]. Zero adjustment 000.0 % p = +0000 .0 mbar 0000.0 mbar 2 set the requested mbar value with [+] and [->]. 3 confirm with [+] and move to span adjustment with [->]. The zero adjustment is finished. Information: the zero adjustme...
Page 39
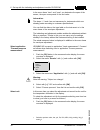
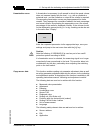
A linearization is necessary for all vessels in which the vessel volume does not increase linearly with the level - e. G. With a cylindrical or spherical tank - and the indication or output of the volume is required. Corresponding linearization curves are preprogrammed for these vessels. They repres...
Page 40
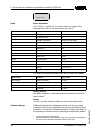
Copy sensor data? Basic adjustment if the "reset" is carried out, the sensor resets the values of the following menu items to the reset values (see chart): 7) menu section function reset value basic settings unit of measurement bar temperature unit °c zero/min. Adjustment measuring range begin span/...
Page 41
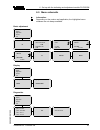
6.5 menu schematic information: depending on the version and application, the highlighted menu windows are not always available. Basic adjustment 1 ▶ basic adjustment display diagnostics service info 1.1 sensor address 126 1.1 unit unit of measurement bar ▼ temperature unit °c ▼ 1.2 position correct...
Page 42
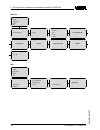
Service 4 basic adjustment display diagnostics ▶ service info 4.1 additional pa value secondary value 1 4.2 out-scale-unit volume l 4.3 pa-out-scale 100.00 lin % = 0.0 l 0.00 lin % = 100.0 l 4.2 simulation start simulation ▼ 4.3 reset select reset ▼ 4.6 language deutsch 4.7 copy sensor data copy sen...
Page 43
6.6 saving the parameter adjustment data it is recommended noting the adjusted data, e.G. In this operating instructions manual and archive them afterwards. They are hence available for multiple use or service purposes. If vegabar 65 is equipped with an indicating and adjustment module, the most imp...
Page 44: Programs
7 setup with pactware and other adjustment programs 7.1 connect the pc via vegaconnect 3 1 2 fig. 26: connection of the pc via vegaconnect directly to the sensor 1 usb cable to the pc 2 vegaconnect 3 sensor 1 2 3 4 open twist usb lock fig. 27: connection via i²c connection cable 1 i²c bus (com.) int...
Page 45
Necessary components: l vegabar 65 l pc with pactware and suitable vega dtm l vegaconnect l power supply unit or processing system 7.2 parameter adjustment with pactware further setup steps are described in the operating instructions manual "dtm collection/pactware" attached to each cd and which can...
Page 46
8 maintenance and fault rectification 8.1 maintain when used in the correct way, no special maintenance is required in normal operation. In some applications, product buildup on the sensor diaphragm can influence the measuring result. Depending on the sensor and application, take precautions to ensure...
Page 47
? Wrong presentation of the measured value in simatic s5 l simatic s5 cannot interpret the number format ieee of the measured value à insert converting component from siemens ? In simatic s7 the measured value is always presented as 0 l only four bytes are consistently loaded in the plc à use functi...
Page 48
? E 041 l hardware error, electronics defective à exchange instrument or return instrument for repair ? E 113 l communication conflict à exchange instrument or return instrument for repair depending on the failure reason and measures taken, the steps described in chapter "set up" must be carried out ...
Page 49
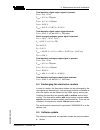
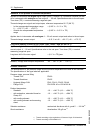
Total deviation digital output signal in percent: f total = f perf + f stab f stab = (0.1 % x td)/year f stab = (0.1 % x 1.25)/year f stab = 0.125 % f total = 0.19 % + 0.125 % = 0.315 % total deviation digital output signal absolute: f total = 0.315 % x 8 bar/100 % = 25.2 mbar basic accuracy analogu...
Page 50
L power supply l vegaconnect l pc with pactware l current sensor software as file at "www.Vega.Com/downloads" go to "software". Select under "plics instruments and sensors" the suitable instrument series. Load the zip file via the right mouse key with "save target as" e.G. On the desktop of your pc. E...
Page 51: 9 Dismounting
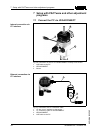
9 dismounting 9.1 dismounting steps warning: before dismounting, be aware of dangerous process conditions such as e.G. Pressure in the vessel, high temperatures, corrosive or toxic products etc. Take note of chapters "mounting" and "connecting to power supply" and carry out the listed steps in rever...
Page 52: 10 Supplement
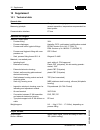
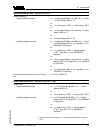
10 supplement 10.1 technical data general data pressure type gauge pressure or gauge pressure measuring principle ceramic-capacitive, temperature-compensated iso- lated system communication interface i ²c bus materials and weights materials, wetted parts - process fitting 316l - process diaphragm has...
Page 53
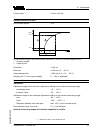
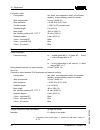
Current value 10 ma, ±0.5 ma dynamic behaviour output run-up time approx. 10 s 90 % 100 % 10 % t t t a t t s 2 1 fig. 28: sudden change of the process variable, dead time t t , rise time t a and step response time t s 1 process variable 2 output signal dead time ≤ 150 ms rise time ≤ 100 ms (10 … 90 ...
Page 54
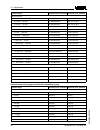
Nominal range overload, max. Pressure overload, min. Pressure gauge pressure 0 … 0.1 bar/0 … 10 kpa 15 bar/1500 kpa -0.2 bar/-20 kpa 0 … 0.2 bar/0 … 20 kpa 20 bar/2000 kpa -0.4 bar/-40 kpa 0 … 0.4 bar/0 … 40 kpa 30 bar/3000 kpa -0.8 bar/-80 kpa 0 … 1 bar/0 … 100 kpa 35 bar/3500 kpa -1 bar/-100 kpa 0...
Page 55
Nominal range overload, max. Pressure overload, min. Pressure -15 … 150 psig 1300 psig -15 psig -15 … 350 psig 1900 psig -15 psig -0.7 … 0.7 psig 200 psig -3 psig -1.5 … 1.5 psig 290 psig -6 psig -3 … 3 psig 430 psig -12 psig -7 … 7 psig 500 psig -15 psig absolute pressure 0 … 15 psi 500 psi 0 psi 0...
Page 56
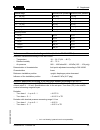
Influence of the product or ambient temperature applies to instruments with digital signal output (hart, profibus pa, foundation fieldbus) as well as to instruments with analogue current output 4 … 20 ma. Specifications refer to the set span. Turn down (td) = nominal measuring range/set span. Thermal c...
Page 57
Electromechanical data - version ip 66/ip 67 cable entry/plug 14) - single chamber housing l 1 x cable gland m20 x 1.5 (cable: ø 5 … 9 mm), 1 x blind stopper m20 x 1.5 or: l 1 x closing cap ½ npt, 1 x blind plug ½ npt or: l 1 x plug (depending on the version), 1 x blind stopper m20 x 1.5 or: l 2 x b...
Page 58
Connection cable - configuration four wires, one suspension cable, one breather capillary, screen braiding, metal foil, mantle - wire cross-section 0.5 mm² (awg 20) - wire resistance 0.036 Ω/m (0.011 Ω/ft) - tensile strength > 1200 n (270 pounds force) - standard length 5 m (16.4 ft) - max. Length 10...
Page 59
Adjustment elements 4 keys protection class - unassembled ip 20 - mounted into the sensor without cover ip 40 materials - housing abs - inspection window polyester foil power supply operating voltage - non-ex instrument 9 … 32 v dc - eex-ia instrument 9 … 24 v dc - eex-id instrument 9 … 32 v dc oper...
Page 60
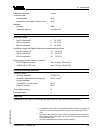
For these instruments, the corresponding approval documents have to be taken into account. These are part of the delivery or can be downloaded under www.Vega.Com via "vega tools" and "serial number search" as well as via "downloads" and "approvals". 60 vegabar 65 • profibus pa 10 supplement 28253 -en...
Page 61
10.2 information on profibus pa instrument master file the instrument master file (gsd) contains the characteristic data of the profibus pa instrument. These data are, e.G. The permissible transmission rates as well as information on diagnostics values and the format of the measured value outputted by t...
Page 62
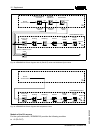
Bar % lin% min-max adjustment linearization profibus pa-output primary value secondary value 1 secondary value 2 target mode failure mode alarms scaling source for scaling t i damping sensor characteristics pa-out tb fb select additional cyclic value sensor mounting correction fig. 29: vegabar 65: b...
Page 63
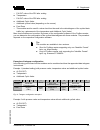
- pa-out value of the fb1 after scaling l temperature - pa-out value of the fb2 after scaling l additional cyclic value - additional cyclical value (depending on the source) l free place - this module must be used if a value should not be used in the data telegram of the cyclical data traffic (e.G. Re...
Page 64
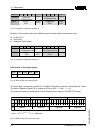
Byte-no. 1 2 3 4 5 6 7 8 9 10 format value ieee-754- flieskommazahl pa-out (fb1) status status (fb1) ieee-754- flieskommazahl temperature (fb2) status status (fb2) fig. 32: telegram configuration example 2 example 3 with pressure value and additional cyclical value without temperature value: l ai (pa...
Page 65
Coding of the status byte associated with the pa output value status code description according to pro- fibus standard possible cause 0x00 bad - non-specific flash-update active 0x04 bad - configuration error l adjustment error l configuration error with pv-scale (pv-span too small) l unit irregularity ...
Page 66
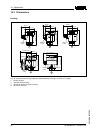
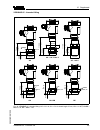
10.3 dimensions housing ~ 69 mm (2.72") ø 77 mm (3.03") 1 1 2 m m (4 13 / 32 ") m20x1,5/ ½ npt ~ 69 mm (2.72") ø 77 mm (3.03") 1 1 7 m m (4 .6 1 ") m20x1,5/ ½ npt ~ 87 mm (3.43") m16x1,5 ø 84 mm (3.31") 1 2 0 m m (4 .7 2 ") m20x1,5/ ½ npt ~ 116 mm (4.57") ø 84 mm (3.31") 1 1 6 m m (4 .5 7 ") m20x1,5...
Page 67
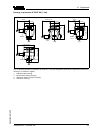
Housing in protection ip 66/ip 68 (1 bar) 1 1 7 mm (4 .6 1 ") 1 2 0 mm (4 .7 2 ") ~ 103 mm (4.06") ~ 105 mm (4.13") ø 77 mm (3.03") 1 1 6 mm (4 .5 7 ") ~ 150 mm (5.91") ø 84 mm (3.31") ø 84 mm (3.31") ~ 93 mm (3.66") ø 80 mm (3.15") 1 1 2 mm (4 .4 1 ") m20x1,5/ ½ npt m20x1,5 m20x1,5/ ½ npt m16x1,5 4...
Page 68
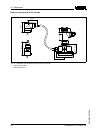
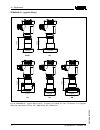
External housing with ip 68 version 1 2 65 mm (2 9 / 16 ") 68 mm (2 43 / 64 ") 92 mm (3 5 / 8 ") 42mm (1 21 / 32 ") 40mm (1 37 / 64 ") 90 mm (3 35 / 64 ") 110 mm (4 21 / 64 ") ~ 66 mm (2 19 / 32 ") 59 mm (2 21 / 64 ") fig. 38: transmitter and external housing with ip 68 version 1 lateral cable outle...
Page 69
Vegabar 65 - threaded fitting gg gl - 180°c gn gg - 180°c/200°c ba / bb be 78 mm (3 5 / 64 ") 118 mm (4 41 / 64 ") 46 mm (1 13 / 16 ") 111 mm (4 3 / 8 ") 55 mm (2 11 / 64 ") 22 mm ( 55 / 64 ") ø 55 mm (2 11 / 64 ") ø 55 mm (2 11 / 64 ") 78 mm (3 5 / 64 ") 22 mm ( 55 / 64 ") ø 55 mm (2 11 / 64 ") ø 84...
Page 70
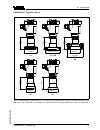
Vegabar 65 - hygienic fitting 1 78 mm (3 5 / 64 ") 78 mm (3 5 / 64 ") ø 64 mm (2 33 / 64 ") 78 mm (3 5 / 64 ") ø 91 mm (3 37 / 64 ") ø 78 mm (3 5 / 64 ") ø 85 mm (3 11 / 32 ") ø 73 mm (2 7 / 8 ") 78 mm (3 5 / 64 ") la ca/cf cb sb sa fig. 40: vegabar 65 - hygienic fitting: ca/cf = tri-clamp 2"/tri-clam...
Page 71
Vegabar 65 - hygienic fitting 2 78 mm (3 5 / 64 ") 78 mm (3 5 / 64 ") 78 mm (3 5 / 64 ") 78 mm (3 5 / 64 ") ø 66 mm (2 19 / 32 ") ø 105 mm (4 9 / 64 ") ø 78 mm (3 5 / 64 ") ø 92 mm (3 5 / 8 ") ø 84 mm (3 5 / 16 ") ø 60 mm (2 23 / 64 ") 78 mm (3 5 / 64 ") ø 64 mm (2 33 / 64 ") aa ta ka ts rv / rw fig....
Page 72
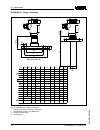
Vegabar 65 - flange connection 3 15 / 32 " 4 1 / 64 " 5 7 / 16 " 1 / 8 " 1 / 8 " 1 / 8 " 4xø 45 / 64 " 4xø 45 / 64 " 8xø 45 / 64 " 4 21 / 64 " 4 59 / 64 " 6 19 / 64 " 7 31 / 64 " 5 29 / 32 " 6 1 / 2 " 7 7 / 8 " 45 / 64 " 25 / 32 " 15 / 16 " fb 40 40 fc 50 40 fh 80 40 6 3 / 8 " 1 / 8 " 8xø 55 / 64 " 9...
Page 73
10.4 industrial property rights vega product lines are global protected by industrial property rights. Further information see http://www.Vega.Com . Only in u.S.A.: further information see patent label at the sensor housing. Vega produktfamilien sind weltweit geschützt durch gewerbliche schutzrechte...
Page 74
74 vegabar 65 • profibus pa 10 supplement 28253 -en -081209.
Page 75
Vegabar 65 • profibus pa 75 10 supplement 28253 - en -081209.
Page 76
Vega grieshaber kg am hohenstein 113 77761 schiltach germany phone +49 7836 50-0 fax +49 7836 50-201 e-mail: info@de.Vega.Com www.Vega.Com printing date: iso 9001 all statements concerning scope of delivery, application, practical use and operating conditions of the sensors and processing systems co...

