- DL manuals
- Vega
- Measuring Instruments
- VEGAFLEX 62
- Operating Instructions Manual
Vega VEGAFLEX 62 Operating Instructions Manual
Summary of VEGAFLEX 62
Page 1
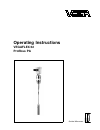
Operating instructions vegaflex 62 profibus pa guided microwave.
Page 2: Content
Content 1 about this document 1.1 function . . . . . . . . . . . . . . . . . . . . . . . . . . . . . 4 1.2 target group . . . . . . . . . . . . . . . . . . . . . . . . . . 4 1.3 symbolism used . . . . . . . . . . . . . . . . . . . . . . . 4 2 for your safety 2.1 authorised personnel . . . . . . . . ...
Page 3
7 setup with pactware and other adjustment programs 7.1 connecting the pc . . . . . . . . . . . . . . . . . . . . . 40 7.2 parameter adjustment with pactware . . . . . . . 40 7.3 parameter adjustment with pdm. . . . . . . . . . . . 41 7.4 saving the parameter adjustment data . . . . . . . 41 8 maint...
Page 4: 1 About This Document
1 about this document 1.1 function this operating instructions manual provides all the information you need for mounting, connection and setup as well as important instructions for maintenance and fault rectification. Please read this information before putting the instrument into operation and keep ...
Page 5: 2 For Your Safety
2 for your safety 2.1 authorised personnel all operations described in this operating instructions manual must be carried out only by trained specialist personnel authorised by the plant operator. During work on and with the device the required personal protection equipment must always be worn. 2.2 ...
Page 6
During the entire duration of use, the user is obliged to determine the compliance of the required occupational safety measures with the current valid rules and regulations and also take note of new regulations. 2.5 safety approval markings and safety tips the safety approval markings and safety tip...
Page 7
L via pactware l on the type label of the electronics l via the indicating and adjustment module you can view all software histories on our website www.Vega. Com. Make use of this advantage and get registered for update information via e-mail. 2.8 safety instructions for ex areas please note the ex-...
Page 8: 3 Product Description
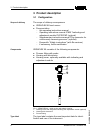
3 product description 3.1 configuration the scope of delivery encompasses: l vegaflex 62 level sensor l documentation - this operating instructions manual - operating instructions manual 27835 "indicating and adjustment module plicscom" (optional) - supplementary instructions manual "plug connector f...
Page 9
L article number l serial number l technical data l article numbers, documentation with the serial number, you can access the delivery data of the instrument via "www.Vega.Com", "vega t ools" and "serial number search". In addition to the type label outside, you can also find the serial number on the...
Page 10
3.3 operation vegaflex 62 can be adjusted with different adjustment media: l with indicating and adjustment module l with the suitable vega dtm in conjunction with an adjustment software according to the fdt/dtm standard, e.G. Pactware and pc l with the adjustment program pdm the entered parameters a...
Page 11
L relative humidity 20 … 85 % vegaflex 62 • profibus pa 11 3 product description 31839 - en -080716.
Page 12: 4 Mounting
4 mounting 4.1 general instructions select an installation position you can easily reach for mounting and connecting as well as later retrofitting of an indicating and adjustment module. The housing can be rotated by 330° without the use of any tools. You can also install the indicating and adjustmen...
Page 13
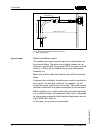
Keep in mind that a min. Distance must be maintained below the reference plane and possibly also at the end of the probe - measurement in these areas is not possible (dead band). Keep in mind that the cable length cannot be used all the way to the end because measurement in the area of the gravity w...
Page 14
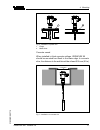
Min. Distance (lower dead band) is stated in chapter "technical data". Fig. 3: vessel with conical bottom in case of difficult installation conditions, the probe can be also mounted laterally. For this purpose, adapt the rod with rod extensions or bow-shaped segments. Rod extensions 14 vegaflex 62 • p...
Page 15
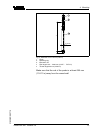
L x ø 16 mm ( 5 / 8 ") 1 2 3 fig. 4: extension rod ø 16 mm (0.63 in) 1 probe 2 retaining ring 3 extension rod l rod length 100 … 2000 mm (3.937 … 78.74 in) x thread length 60 mm (2.362 in) make sure that the rod of the probe is at least 300 mm (11.811 in) away from the vessel wall vegaflex 62 • profi...
Page 16
≥ 300 mm (11 13 / 16 ") 150 mm (5 29 / 32 ") 150 mm (5 29 / 32 ") 1 sw 13 fig. 5: bow-shaped segment ø 16 mm (0.63 in) 1 max. filling height plastic vessel/glass vessel the guided microwave principle requires a metal surface on the process fitting. Therefore use in plastic vessels etc. An instrument v...
Page 17
1 2 fig. 6: installation in plastic silo 1 flange 2 metal sheet concrete vessel when installed in thick concrete ceilings, vegaflex 62 should be mounted front flush to the lower edge. In concrete silos, the distance to the wall should be at least 500 mm (20 in). ø >160 mm ø >(6 19 / 64 ") fig. 7: ins...
Page 18
If possible, avoid sockets. Mount the sensor flush with the vessel top. If this is not possible, use short sockets with small diameter. Higher sockets or sockets with a bigger diameter can generally be used. They simply increase the upper dead band. Check if this is relevant for your measurement. In ...
Page 19
Standpipes or bypass tubes are normally metal tubes with a diameter of 30 … 200 mm (1.18 … 7.87 in). In measurement technology such a tube corresponds to a coax probe. It does not matter if the standpipe is perforated or slotted for better mixing. Lateral inlets with bypass tubes also do not influenc...
Page 20
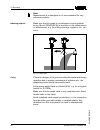
Note: measurement in a standpipe is not recommended for very adhesive products. Make sure that the probe is not subjected to strong lateral forces. Mount vegaflex 62 at a position in the vessel where no disturbances, e.G. From filling openings, agitators, etc., can occur. Fig. 11: lateral load if the...
Page 21
5 connecting to power supply 5.1 preparing the connection always keep in mind the following safety instructions: l connect only in the complete absence of line voltage l if overvoltage surges are expected, overvoltage arresters should be installed according to profibus specifications tip: we recommend...
Page 22
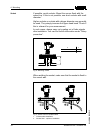
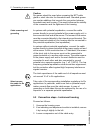
Caution: no grease should be used when screwing the npt cable gland or steel tube into the threaded insert. Standard grease can contain additives that corrode the connection between threaded insert and housing. This would influence the stability of the connection and the tightness of the housing. In ...
Page 23
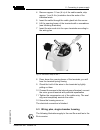
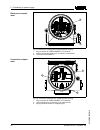
4 remove approx. 10 cm (4 in) of the cable mantle, strip approx. 1 cm (0.4 in) insulation from the ends of the individual wires 5 insert the cable through the cable gland into the sensor 6 lift the opening levers of the terminals with a screwdriver (see following illustration) 7 insert the wire ends...
Page 24
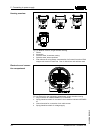
5 5 5 5 1 2 4 3 fig. 13: material versions, single chamber housing 1 plastic 2 aluminium 3 stainless steel, investment casting 4 stainless steel, electro-polished 5 filter element for air pressure compensation of all material versions. Blind stopper with version ip 66/ip 68, 1 bar for aluminium and ...
Page 25
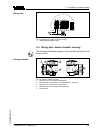
I2c display 1 1 2 5 6 7 8 fig. 15: wiring plan, single chamber housing 1 voltage supply/signal output 5.4 wiring plan, double chamber housing the following illustrations apply to the non-ex as well as to the ex-ia version. 1 2 3 4 5 fig. 16: double chamber housing 1 housing cover, connection compart...
Page 26
1 3 2 display 1 2 5 6 7 8 i2c fig. 17: electronics compartment, double chamber housing 1 plug connector for vegaconnect (i²c interface) 2 internal connection cable to the connection compartment 3 terminals for vegadis 61 3 1 2 display 1 2 i²c fig. 18: connection compartment, double chamber housing 1...
Page 27
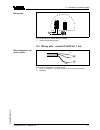
I2c 1 1 2 fig. 19: wiring plan, double chamber housing 1 voltage supply/signal output 5.5 wiring plan - version ip 66/ip 68, 1 bar + - 1 2 fig. 20: wire assignment, connection cable 1 brown (+) and blue (-) to power supply or to the processing system 2 shielding wiring plan wire assignment, con- nec...
Page 28: Adjustment Module Plicscom
6 set up with the indicating and adjustment module plicscom 6.1 short description the indicating and adjustment module is used for measured value display, adjustment and diagnosis. It can be mounted in the following housing versions and instruments: l all sensors of the plics ® instrument family, in...
Page 29
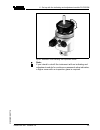
Fig. 21: installation of the indicating and adjustment module note: if you intend to retrofit the instrument with an indicating and adjustment module for continuous measured value indication, a higher cover with an inspection glass is required. Vegaflex 62 • profibus pa 29 6 set up with the indicating...
Page 30
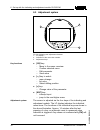
6.3 adjustment system 1.1 2 3 1 fig. 22: indicating and adjustment elements 1 lc display 2 indication of the menu item number 3 adjustment keys l [ok] key: - move to the menu overview - confirm selected menu - edit parameter - save value l [->] key to select: - menu change - list entry - select editi...
Page 31
6.4 setup procedure after vegaflex 62 is connected to voltage supply or after voltage recurrence, the instrument carries out a self-check for approx. 30 seconds. The following steps are carried out: l internal check of the electronics l indication of the instrument type, the firmware as well as the s...
Page 32
Keep in mind that interfaces can cause faulty measurements. If you want to measure the total height of both liquids reliably, please contact our service department or use an instrument specially designed for interface measurement. Start your parameter adjustment with the following menu items of the ...
Page 33
2 enter the appropriate distance value in m (corresponding to the percentage value) for the full vessel. Keep in mind that the max. Level must lie below the dead band. 3 save the settings with [ok]. Each product has different reflective properties. In addition, there are various interfering factors wh...
Page 34
A linearization is necessary for all vessels in which the vessel volume does not increase linearly with the level - e. G. With a cylindrical or spherical tank - and the indication or output of the volume is required. Corresponding linearization curves are preprogrammed for these vessels. They repres...
Page 35
Level measurement. A false echo memory should be created with empty vessel so that all potential interfering reflections will be detected. Gating out of false signals change now? Proceed as follows: 1 move from the measured value display to the main menu by pushing [ok]. 2 select the menu item "servi...
Page 36
L pv-out-scale l channel l additional pa value the following safety-relevant data are not read out or written: l hart mode l pin l sil l sensor length/sensor type l gating out of false signals copy sensor data copy sensor data? Basic adjustment if the function "reset" is carried out, the sensor rese...
Page 37
Factory setting like basic adjustment, furthermore special parameters are reset to default values. 3) pointer the min. And max. Distance values are reset to the actual value. Additional adjustment and diagnosis options such as e.G. Scaling, simulation or trend curve presentation are shown in the fol...
Page 38
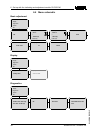
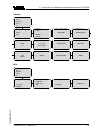
6.5 menu schematic basic adjustment 1 ▶ basic adjustment display diagnostics service info 1.1 sensor address 000 1.2 min. Adjustment 0.00 % = 10.000 m(d) 8.000 m(d) 1.3 max. Adjustment 100.00 % = 1.000 m(d) 2.000 m(d) 1.4 linearisation curve linear 1.5 channel pv lin. Value 1.6 damping 0 s 1.7 senso...
Page 39
Service 4 basic adjustment display diagnostics ▶ service info 4.1 sensor 5.00 m rod 4.2 application liquid standard (dk ≥ 2) 4.3 gating out of false signals change now? 4.4 additional pa value secondary value 1 4.5 out-scale-unit volume hl 4.6 pv-out-scale 0 % = 0.0 m³ 100 % = 100 m³ 4.7 simulation ...
Page 40: Adjustment Programs
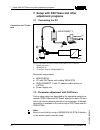
7 setup with pactware and other adjustment programs 7.1 connecting the pc ~ = power supply vegaconnect 3 pactware / tm >pa 2 3 1 fig. 23: connection of the pc directly to the sensor via i²c interface 1 rs232 connection 2 vegaflex 62 3 i²c adapter cable for vegaconnect 3 necessary components: l vegaf...
Page 41
All currently available vega dtms are provided in the dtm collection on cd and can be obtained from the responsible vega agency for a token fee. This cd includes also the up-to- date pactware version. The basic version of this dtm collection incl. Pactware is also available as a free-of-charge downl...
Page 42
8 maintenance and fault rectification 8.1 maintenance when used in the correct way, no special maintenance is required in normal operation. 8.2 remove interferences the operator of the system is responsible for taken suitable measures to remove interferences. A maximum of reliability is ensured. Neve...
Page 43
? Wrong presentation of the measured value in simatic s5 l simatic s5 cannot interpret the number format ieee of the measured value à insert converting component from siemens ? In simatic s7 the measured value is always presented as 0 l only four bytes are consistently loaded in the plc à use functi...
Page 44
? E 017 l adjustment span too small à carry out a fresh adjustment and increase the distance between min. And max. Adjustment ? E 036 l no operable sensor software à carry out a software update or send the instrument for repair ? E 042/e043 l hardware error, electronics defective à exchange instrume...
Page 45
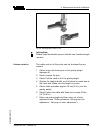
Fig. 24: exchanging the cable or rod information: please keep the stated torque so that the max. Tensile strength remains. The cable and rod of the probe can be shortened by any amount. 1 cable: loosen the three pins on the gravity weight (hexagon 4) 2 cable: remove the pins 3 cable: pull the cable ...
Page 46
Fig. 25: shortening the cable probe 8.4 exchanging the electronics module if the electronics module is defective, it can be replaced by the user. In ex applications only one oscillator with respective ex approval may be used. If there is no electronics module available on site, one can be ordered fr...
Page 47
L fx-e.60px (x = without approvals) l fx-e.60pa (a = approvals ca, da according to product list) l fx-e.60pc (c = approvals xm, cx, cm, ck, gx according to product list) 8.5 instrument repair if a repair is necessary, please proceed as follows: you can download a return form (23 kb) from our interne...
Page 48: 9 Dismounting
9 dismounting 9.1 dismounting steps warning: before dismounting, be aware of dangerous process con- ditions such as e.G. Pressure in the vessel, high temperatures, corrosive or toxic products etc. Take note of chapters "mounting" and "connecting to power supply" and carry out the listed steps in rev...
Page 49: 10 Supplement
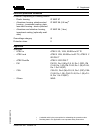
10 supplement 10.1 technical data general data material 316l corresponds to 1.4404 or 1.4435 materials, wetted parts - process fitting 316l and ptfe, hastelloy c22 (2.4602) and ptfe - process seal on the instrument side (cable/rod leadthrough) fkm (viton), ffkm (kalrez 6375), epdm, fkm (viton) fep co...
Page 50
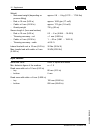
Weight - instrument weight (depending on process fitting) approx. 0.8 … 8 kg (0.176 … 17.64 lbs) - rod: ø 16 mm (0.63 in) approx. 1600 g/m (17 oz/ft) - cable: ø 6 mm (0.236 in) approx. 170 g/m (1.8 oz/ft) - gravity weight 730 g (26 oz) sensor length l (from seal surface) - rod: ø 16 mm (0.63 in) 0.3 ...
Page 51
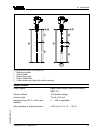
2 4 5 3 1 2 4 3 1 fig. 26: measuring ranges of vegaflex 62 1 reference plane 2 probe length 3 measuring range 4 upper dead band 5 lower dead zone (only with cable versions) output variable output signal digital output signal, format according to ieee-754 sensor address 126 (default setting) current ...
Page 52
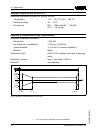
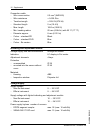
Accuracy (similar to din en 60770-1) reference conditions according to din en 61298-1 - temperature + 18 … +30 °c (+64 … +86 °f) - relative humidity 45 … 75 % - air pressure 860 … 1060 mbar/86 … 106 kpa (12.5 … 15.4 psig) deviation in characteristics and characteristics reference installation condit...
Page 53
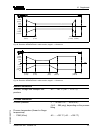
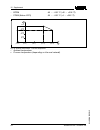
3 mm ( 1 / 8 ") -3 mm (- 1 / 8 ") 10 mm ( 25 / 64 ") -10 mm (- 25 / 64 ") 0,5 m (1.6 ft) 0,15 m (0.5 ft) 0,25 m (0.82 ft) 0,35 m (1.15 ft) l fig. 28: deviation vegaflex 62 in cable version, length l 3 mm ( 1 / 8 ") -3 mm (- 1 / 8 ") 10 mm ( 25 / 64 ") -10 mm (- 25 / 64 ") 0,5 m (1.6 ft) 15 m (49 ft)...
Page 54
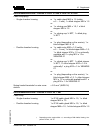
- epdm -40 … +150 °c (-40 … +302 °f) - ffkm (kalrez 6375) -20 … +150 °c (-4 … +302 °f) 0 °c (32 °f) 40 °c (104 °f) 20 °c (58 °f) 60 °c (140 °f) 80 °c (176 °f) 50 °c (122 °f) -40 °c (-40 °f) 100 °c (212 °f) 150 °c (302 °f) 1 2 fig. 30: ambient temperature - process temperature 1 ambient temperature 2...
Page 55
Electromechanical data - version ip 66/ip 67 and ip 66/ip 68; 0.2 bar cable entry/plug 5) - single chamber housing l 1 x cable gland m20 x 1.5 (cable: ø 5 … 9 mm), 1 x blind stopper m20 x 1.5 or: l 1 x closing cap m20 x 1.5; 1 x blind stopper m20 x 1.5 or: l 1 x closing cap ½ npt, 1 x blind plug ½ n...
Page 56
Connection cable - wire cross-section 0.5 mm² (awg 20) - wire resistance 0.036 Ω/m - tensile strength 1200 n (270 lbf) - standard length 5 m (16.4 ft) - max. Length 1000 m (3280 ft) - min. Bending radius 25 mm (0.984 in) with 25 °c (77 °f) - diameter approx. 8 mm (0.315 in) - colour - standard pe bl...
Page 57
Electrical protective measures protection, depending on housing version - plastic housing ip 66/ip 67 - aluminium housing, stainless steel housing - investment casting, stain- less steel housing - electro-polished ip 66/ip 68 (0.2 bar) 6) - aluminium and stainless housing, investment casting (option...
Page 58
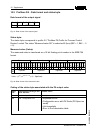
10.2 profibus pa - data format and status byte data format of the output signal byte4 byte3 byte2 byte1 byte0 status value (ieee-754) fig. 31: data format of the output signal status byte: the status byte corresponds to profile 3.0 "profibus pa profile for process control devices" coded. The status "mea...
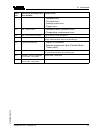
Page 59
Status code description according to pro- fibus standard possible cause 0x0c bad - sensor failure l hardware error l converter error l leakage pulse error l trigger error 0x10 bad - sensor failure l measured value generation error l temperature measurement error 0x1f bad - out of service constant "o ...
Page 60
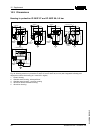
10.3 dimensions housing in protection ip 66/ip 67 and ip 66/ip 68; 0.2 bar ~ 69 mm (2 23 / 32 ") ø 77 mm (3 1 / 32 ") 1 1 2 mm (4 1 3 / 3 2 ") m20x1,5/ ½ npt ~ 69 mm (2 23 / 32 ") ø 77 mm (3 1 / 32 ") 1 1 7 mm (4 3 9 / 6 4 ") m20x1,5/ ½ npt ~ 87 mm (3 27 / 64 ") m16x1,5 ø 84 mm (3 5 / 16 ") 1 2 0 mm...
Page 61
Housing in protection ip 66/ip 68, 1 bar 1 1 7 mm (4 3 9 / 6 4 ") 1 2 0 mm (4 2 3 / 3 2 ") ~ 103mm (4 1 / 16 ") ~ 105mm (4 9 / 64 ") ø 77mm (3 1 / 32 ") 1 1 6 mm (4 9 / 1 6 ") ~ 150mm (5 29 / 32 ") ø 84mm (3 5 / 16 ") ø 84mm (3 5 / 16 ") ~ 93 mm (3 21 / 32 ") ø 80 mm (3 5 / 32 ") 1 1 2 mm (4 1 3 / 3...
Page 62
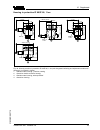
Vegaflex 62 l 60 g1½, 1½ npt 2 2 mm (0 .8 7 ") 7 3 mm (2 .8 7 ") 1 5 0 mm (5 .9 1 ") 5 3 mm (2 .0 9 ") ø 16 mm (0.63") 12 mm (0.47") ø 54 mm (2.13") ø 30 mm (1.18") ø 30 mm (1.18") ø 6 mm (0.24") fig. 35: vegaflex 62 l sensor length, see chapter "technical data" 62 vegaflex 62 • profibus pa 10 supple...
Page 63
10.4 industrial property rights vega product lines are global protected by industrial property rights. Further information see http://www.Vega.Com. Only in u.S.A.: further information see patent label at the sensor housing. Vega produktfamilien sind weltweit geschützt durch gewerbliche schutzrechte....
Page 64
Vega grieshaber kg am hohenstein 113 77761 schiltach germany phone +49 7836 50-0 fax +49 7836 50-201 e-mail: info@de.Vega.Com www.Vega.Com printing date: iso 9001 all statements concerning scope of delivery, application, practical use and operating conditions of the sensors and processing systems co...

