- DL manuals
- Vega
- Measuring Instruments
- VEGAFLEX 62
- Operating Instructions Manual
Vega VEGAFLEX 62 Operating Instructions Manual
Summary of VEGAFLEX 62
Page 1
Operating instructions vegaflex 62 4 … 20 ma/hart - four-wire g uided microwave.
Page 2: Contents
Contents 1 about this document 1.1 f unction . . . . . . . . . . . . . . . . . . . . . . . . . . . . . 4 1.2 t arget group . . . . . . . . . . . . . . . . . . . . . . . . . . 4 1.3 s ymbolism used . . . . . . . . . . . . . . . . . . . . . . . 4 2 for your safety 2.1 a uthorised personnel . . . . . ....
Page 3
7.4 s aving the parameter adjustment data . . . . . . . 38 8 maintenance and fault rectification 8.1 m aintenance . . . . . . . . . . . . . . . . . . . . . . . . . . 39 8.2 r emove interferences . . . . . . . . . . . . . . . . . . . 39 8.3 e xchange or shorten cable/rod . . . . . . . . . . . . . 41 8...
Page 4: 1 About This Document
1 about this document 1.1 function t his operating instructions manual provides all the information you need for mounting, connection and setup as well as important instructions for maintenance and fault rectification. P lease read this information before putting the instrument into operation and kee...
Page 5: 2 For Your Safety
2 for your safety 2.1 authorised personnel a ll operations described in this operating instructions manual must be carried out only by trained specialist personnel authorised by the plant operator. D uring work on and with the device the required personal protection equipment must always be worn. 2....
Page 6
D uring the entire duration of use, the user is obliged to determine the compliance of the required occupational safety measures with the current valid rules and regulations and also take note of new regulations. 2.5 safety approval markings and safety tips t he safety approval markings and safety t...
Page 7
T he parameter adjustment of the basic sensor functions is independent of the software version. The range of available functions depends on the respective software version of the individual components. T he software version of vegaflex 62 can be determined as follows: l via pactware l on the type la...
Page 8: 3 Product Description
3 product description 3.1 configuration t he scope of delivery encompasses: l vegaflex 62 level sensor l d ocumentation - this operating instructions manual - o perating instructions manual - 27835 "indicating and adjustment module plicscom" (optional) - s upplementary instructions manual "plug conne...
Page 9
L a rticle number l s erial number l t echnical data l a rticle numbers documentation w ith the serial number, you can access the delivery data of the instrument via "www.Vega.Com", "vega tools" and "serial number search". In addition to the type label outside, you can also find the serial number on ...
Page 10
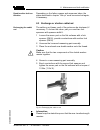
T he entered parameters are generally saved in vegaflex 62, optionally also in the indicating and adjustment module or in pactware. 3.4 packaging, transport and storage y our instrument was protected by packaging during transport. I ts capacity to handle normal loads during transport is assured by a...
Page 11: 4 Mounting
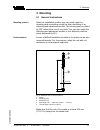
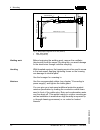
4 mounting 4.1 general instructions s elect an installation position you can easily reach for mounting and connecting as well as later retrofitting of an indicating and adjustment module. The housing can be rotated by 330° without the use of any tools. You can also install the indicating and adjustme...
Page 12
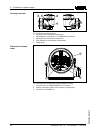
≥ 300 mm (11 13 / 16 ") 150 mm (5 29 / 32 ") 1 5 0 mm (5 2 9 / 3 2 ") 1 sw 13 l fig. 3: bow-shaped segment ø 16 mm (0.63 in) 1 max. filling height l 150 mm (5.91 in) b efore beginning the welding work, remove the oscillator ( electronics) from the sensor. By doing this, you avoid damage to the electr...
Page 13
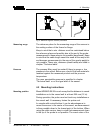
Fig. 4: measures against moisture penetration t he reference plane for the measuring range of the sensors is the sealing surface of the thread or flange. K eep in mind that a min. Distance must be maintained below the reference plane and possibly also at the end of the probe - measurement in these ar...
Page 14
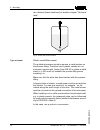
Min. Distance (lower dead band) is stated in chapter "technical data". Fig. 5: vessel with conical bottom p lastic vessel/glass vessel t he guided microwave principle requires a metal surface on the process fitting. Therefore use in plastic vessels etc. An instrument version with flange (from dn 50) o...
Page 15
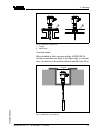
1 2 fig. 6: installation in plastic silo 1 flange 2 metal sheet c oncrete vessel w hen installed in thick concrete ceilings, vegaflex 62 should be mounted front flush to the lower edge. In concrete silos, the distance to the wall should be at least 500 mm (20 in). ø >160 mm ø >(6 19 / 64 ") fig. 7: i...
Page 16
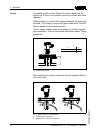
I f possible, avoid sockets. Mount the sensor flush with the vessel top. If this is not possible, use short sockets with small diameter. H igher sockets or sockets with a bigger diameter can generally be used. They simply increase the upper dead band. Check if this is relevant for your measurement. I...
Page 17
S tandpipes or bypass tubes are normally metal tubes with a diameter of 30 … 200 mm (1.18 … 7.87 in). In measurement technology such a tube corresponds to a coax probe. It does not matter if the standpipe is perforated or slotted for better mixing. Lateral inlets with bypass tubes also do not influen...
Page 18
Note: m easurement in a standpipe is not recommended for very adhesive products. M ake sure that the probe is not subjected to strong lateral forces. Mount vegaflex 62 at a position in the vessel where no disturbances, e.G. From filling openings, agitators, etc., can occur. Fig. 11: lateral load i f ...
Page 19
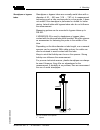
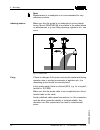
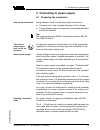
5 connecting to power supply 5.1 preparing the connection a lways keep in mind the following safety instructions: l c onnect only in the complete absence of line voltage l i f overvoltage surges are expected, overvoltage arresters should be installed. Tip: w e recommend using vega overvoltage arrest...
Page 20
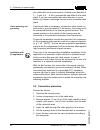
U se cable with round cross-section. A cable outer diameter of 5 … 9 mm (0.2 … 0.35 in) ensures the seal effect of the cable gland. If you are using cable with other diameter or cross- section, you have to exchange the seal or use a suitable cable gland. I f screened cable is necessary, connect the c...
Page 21
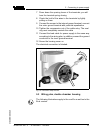
7 p ress down the opening levers of the terminals, you will hear the terminal spring closing 8 c heck the hold of the wires in the terminals by lightly pulling on them 9 c onnect the screen to the internal ground terminal, connect the outer ground terminal with potential equalisation 10 t ighten the...
Page 22
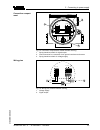
1 2 3 4 5 fig. 13: double chamber housing 1 housing cover, connection compartment 2 blind stopper or plug m12 x 1 for vegadis 61 (optional) 3 housing cover, electronics compartment 4 filter element for air pressure compensation 5 cable gland 1 3 2 display 1 2 5 6 7 8 i²c fig. 14: electronics compart...
Page 23
3 1 2 3 4 1 2 l 1 n 4... 20ma i s gnd fig. 15: connection compartment, double chamber housing 1 spring-loaded terminals for signal output 2 ground terminal for connection of the ground conductor and screen 3 spring-loaded terminals for voltage supply 4 ... 20 ma pe / l / n l1 n gnd 1 2 1 2 3 4 4...2...
Page 24: Adjustment Module Plicscom
6 set up with the indicating and adjustment module plicscom 6.1 short description t he indicating and adjustment module is used for measured value display, adjustment and diagnosis. It can be mounted in the following housing versions and instruments: l a ll sensors of the plics ® instrument family, ...
Page 25
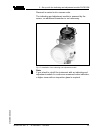
R emoval is carried out in reverse order. T he indicating and adjustment module is powered by the sensor, an additional connection is not necessary. Fig. 17: installation of the indicating and adjustment module note: i f you intend to retrofit the instrument with an indicating and adjustment module f...
Page 26
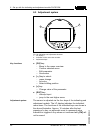
6.3 adjustment system 1.1 2 3 1 fig. 18: indicating and adjustment elements 1 lc display 2 indication of the menu item number 3 adjustment keys l [ok] key: - m ove to the menu overview - c onfirm selected menu - e dit parameter - s ave value l [->] key to select: - menu change - list entry - s elect ...
Page 27
6.4 setup procedure a fter connecting vegaflex 62 to power supply or after a voltage recurrence, the instrument carries out a self-check for approx. 30 seconds: l i nternal check of the electronics l i ndication of the instrument type, the firmware as well as the sensor tags (sensor designation) l o ...
Page 28
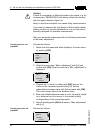
Caution: i f there is a separation of different liquids in the vessel, e.G. By condensation, vegaflex 62 will always detect the medium with the higher dielectric figure (ε r ). K eep in mind that interfaces can cause faulty measurements. I f you want to measure the total height of both liquids reliabl...
Page 29
1 p repare the % value for editing with [ok] and set the cursor to the requested position with [->]. Set the requested percentage value with [+] and save with [ok]. T he cursor jumps now to the distance value. 2 e nter the appropriate distance value in m (corresponding to the percentage value) for t...
Page 30
0 s e nter the requested parameter via the appropriate keys, save your settings and jump to the next menu item with the [->] key. A linearization is necessary for all vessels in which the vessel volume does not increase linearly with the level - e. G. With a cylindrical or spherical tank - and the i...
Page 31
Level measurement. A false echo memory should be created with empty vessel so that all potential interfering reflections will be detected. G ating out of false signals c hange now? P roceed as follows: 1 m ove from the measured value display to the main menu by pushing [ok]. 2 s elect the menu item "...
Page 32
L l anguage l s ensitivity t he following safety-relevant data are not read out or written: l hart mode l pin l sil l s ensor length/sensor type l g ating out of false signals c opy sensor data c opy sensor data? Basic adjustment i f the function "reset" is carried out, the sensor resets the values ...
Page 33
Menu item reset value sil no reset hart mode no reset factory setting l ike basic adjustment, furthermore special parameters are reset to default values. 2) pointer t he min. And max. Values are reset to the actual value. A dditional adjustment and diagnosis options such as e.G. Scaling, simulation ...
Page 34
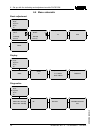
6.5 menu schematic basic adjustment 1 ▶ b asic adjustment d isplay d iagnostics s ervice i nfo 1.1 m in. Adjustment 0.00 % = 10.000 m(d) 8.000 m(d) 1.2 m ax. Adjustment 100.00 % = 1.000 m(d) 2.000 m(d) 1.3 d amping 0 s 1.4 l inearisation curve linear 1.5 s ensor-tag sensor display 2 b asic adjustmen...
Page 35
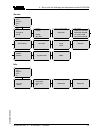
Service 4 b asic adjustment d isplay d iagnostics ▶ s ervice i nfo 4.1 s ensor 5.00 m(d) ▼ rod ▼ 4.2 a pplication liquid ▼ standard (dk ≥ 2) ▼ 4.3 g ating out of false signals change now? 4.4 c urrent output output mode: 4-20 ma ▼ failure mode: 20.5 ma ▼ min. Current: 4 ma ▼ max. Current: 20.5 ma ▼ ...
Page 36: Adjustment Programs
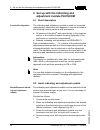
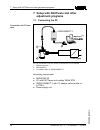
7 setup with pactware and other adjustment programs 7.1 connecting the pc ~ = power supply vegaconnect 3 pactware / tm >pa 2 3 1 fig. 19: connection of the pc directly to the sensor via i²c interface 1 rs232 connection 2 vegaflex 62 3 i²c adapter cable for vegaconnect 3 n ecessary components: l vega...
Page 37
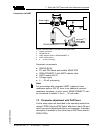
2 3 1 4 5 power supply vegaconnect 3 pactware / tm fig. 20: connecting the pc via hart to the signal cable 1 rs232 connection 2 vegaflex 62 3 hart adapter cable for vegaconnect 3 4 hart resistor 250 Ω 5 4 … 20 ma processing n ecessary components: l vegaflex 62 l pc with pactware and suitable vega dt...
Page 38
Note: k eep in mind that for setup of vegaflex 62, dtm-collection in the actual version must be used. A ll currently available vega dtms are provided in the dtm c ollection on cd and can be obtained from the responsible vega agency for a token fee. This cd includes also the up-to- date pactware vers...
Page 39
8 maintenance and fault rectification 8.1 maintenance w hen used in the correct way, no special maintenance is required in normal operation. 8.2 remove interferences t he operator of the system is responsible for taken suitable measures to remove interferences. A maximum of reliability is ensured. Ne...
Page 40
? 4 … 20 ma signal missing l w rong connection à check connection according to chapter "connection steps" and if necessary, correct according to chapter "w iring plan" l n o power supply à check cables for breaks; repair if necessary l supply voltage too low or load resistance too high à check, adap...
Page 41
D epending on the failure reason and measures taken, the steps described in chapter "set up" must be carried out again, if necessary. 8.3 exchange or shorten cable/rod t he cable or rod (meas. Part) of the probe can be shortened, if necessary. To loosen the meas. Part you need two fork spanners with...
Page 42
T he cable and rod of the probe can be shortened by any amount. 1 c able: loosen the three pins on the gravity weight ( hexagon 4) 2 c able: remove the pins 3 c able: pull the cable out of the gravity weight 4 s horten the cable/rod with a cut-off wheel or metal saw at the lower end. Make sure the le...
Page 43
T he new oscillator must contain the order data of the sensor. T hese can be loaded as follows: l a t the factory by vega l o r on site by the user information: w hen loading on site, first of all the order data must be downloaded from the internet (see operating instructions manual "oscillator"). I ...
Page 44
T o loosen to rod, you require a fork spanner with wrench size 8. 1 l oosen the rod on the flat surfaces with a fork spanner (sw 8), provide counterforce with another fork spanner (sw 8) 2 t wist off the loosened rod manually s ee also chapter "maintenance and fault rectification"/ "e xchange cable/rod...
Page 45: 9 Dismounting
9 dismounting 9.1 dismounting steps warning: b efore dismounting, be aware of dangerous process con- ditions such as e.G. Pressure in the vessel, high temperatures, corrosive or toxic products etc. T ake note of chapters "mounting" and "connecting to power supply" and carry out the listed steps in r...
Page 46: 10 Supplement
10 supplement 10.1 technical data general data m aterial 316l corresponds to 1.4404 or 1.4435 m aterials, wetted parts - p rocess fitting 316l and ptfe, hastelloy c22 (2.4602) and ptfe - p rocess seal on the instrument side ( cable/rod leadthrough) fkm (v iton), ffkm (kalrez 6375), epdm, fkm (v iton)...
Page 47
- c able: ø 6 mm (0.236 in) 1 … 60 m (3.281 … 196.9 ft) - t rimming accuracy - cable ± 0.05 % l ateral load with rod: ø 16 mm (0.63 in) 30 n m (22 lbf ft) m ax. Tensile load with cable: ø 6 mm (0.236 in) 30 kn (6745 lbf) input variable m easured value l evel of liquids and solids m in. Dielectric fig...
Page 48
2 4 5 3 1 2 4 3 1 fig. 23: measuring ranges of vegaflex 62 1 reference plane 2 probe length 3 measuring range 4 upper dead band 5 lower dead zone (only with cable versions) output variable o utput signal 4 … 20 ma/hart s ignal resolution 1.6 µa f ailure signal current output (adjust- able) ma-value ...
Page 49
Accuracy (similar to din en 60770-1) r eference conditions according to din en 61298-1 - t emperature + 18 … +30 °c (+64 … +86 °f) - r elative humidity 45 … 75 % - a ir pressure 860 … 1060 mbar/86 … 106 kpa (12.5 … 15.4 psig) deviation in characteristics and characteristics r eference installation c...
Page 50
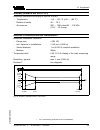
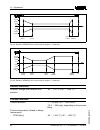
3 mm ( 1 / 8 ") -3 mm (- 1 / 8 ") 10 mm ( 25 / 64 ") -10 mm (- 25 / 64 ") 0,5 m (1.6 ft) 0,15 m (0.5 ft) 0,25 m (0.82 ft) 0,35 m (1.15 ft) l fig. 25: deviation vegaflex 62 in cable version, length l 3 mm ( 1 / 8 ") -3 mm (- 1 / 8 ") 10 mm ( 25 / 64 ") -10 mm (- 25 / 64 ") 0,5 m (1.6 ft) 15 m (49 ft)...
Page 51
- epdm -40 … +150 °c (-40 … +302 °f) - ffkm (k alrez 6375) -20 … +150 °c (-4 … +302 °f) 0 °c (32 °f) 40 °c (104 °f) 20 °c (58 °f) 60 °c (140 °f) 80 °c (176 °f) 50 °c (122 °f) -40 °c (-40 °f) 100 °c (212 °f) 150 °c (302 °f) 1 2 fig. 27: ambient temperature - process temperature 1 ambient temperature ...
Page 52
P rotection - unassembled ip 20 - mounted into the sensor without cover ip 40 m aterials - h ousing abs - i nspection window p olyester foil voltage supply s upply voltage - n on-ex and ex-d instrument 20 … 72 v dc, 20 … 253 v ac, 50/60 h z m ax. Power consumption 4 va; 2.1 w electrical protective m...
Page 53
10.2 dimensions housing ø 84mm ~ 27 / ") 120mm (4 23 / 32 ") * 129mm (5 5 / 64 ") 5 / 16 ") m20x1,5/ ½ npt m12x fig. 28: aluminium double chamber housing (with integrated indicating and adjustment module the housing is 9 mm/ 0.35 in higher) vegaflex 62 • 4 … 20 ma/hart - four-wire 53 10 s upplement ...
Page 54
Vegaflex 62 l 60 g1½, 1½ npt 22 mm ( 55 / 64 ") 73 mm (2 7 / 8 ") 150 mm (5 29 / 32 ") 53 mm (2 3 / 32 ") ø 16 mm ( 5 / 8 ") 12 mm ( 15 / 32 ") ø 54 mm (2 1 / 8 ") ø 30 mm (1 3 / 16 ") ø 30 mm (1 3 / 16 ") ø 6 mm ( 15 / 64 ") fig. 29: vegaflex 62 l sensor length, see chapter "technical data" 54 vega...
Page 55
10.3 industrial property rights vega product lines are global protected by industrial property rights. Further information see http://www.Vega.Com. Only in u.S.A.: further information see patent label at the sensor housing. Vega produktfamilien sind weltweit geschützt durch gewerbliche schutzrechte....
Page 56
Vega g rieshaber kg a m hohenstein 113 77761 s chiltach g ermany p hone +49 7836 50-0 f ax +49 7836 50-201 e- mail: info@de.Vega.Com www.Vega.Com p rinting date: iso 9001 a ll statements concerning scope of delivery, application, practical use and operating conditions of the sensors and processing s...

