- DL manuals
- Yamaha
- Recording Equipment
- AW2816
- Tutorial
Yamaha AW2816 Tutorial
Summary of AW2816
Page 1
Professional audio workstation professional audio workstation e tutorial tutorial.
Page 2: Introduction
1 tutorial introduction welcome to the world of the aw2816! If you have an interest in music production, you prob- ably know that the songs of the artists you see on tele- vision and in magazines are produced in sophisticated recording and mixing studios using lots of expensive equipment, and pass t...
Page 3: Contents
Contents 2 tutorial contents introduction........................................ 1 about this tutorial ......................................... 1 contents ............................................. 2 recording on the aw2816 ................. 3 creating a new song ..................................
Page 4: Recording On The Aw2816
3 tutorial recording on the aw2816 amazingly for its size, the aw2816 conceals potential that rivals the mixing consoles found in large record- ing studios. Although you can of course record a live performance in a single pass, you can also use multi-track record- ing to take full advantage of the a...
Page 5
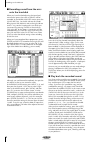
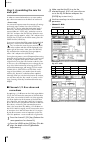
Recording on the aw2816 4 tutorial ■ recording sound from the mics onto the hard disk when you have finished adjusting the input level, connect the input to the track on which it will be recorded. In the work navigate section, press the [quick rec] key. On the left side are the sounds being input to...
Page 6: Machine
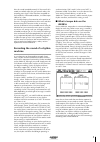
5 tutorial was the sound recorded correctly? If the sound is dis- torted or cracked, adjust the gain control and try the recording once again. If the sound was recorded on the hard disk in a distorted condition, it will be impos- sible to fix it later. You should also pay close attention to the posi...
Page 7: Recorded Into Your Sequencer
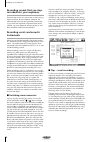
Recording on the aw2816 6 tutorial recording sounds that you step- recorded into your sequencer the basic idea in this case is the same as when using a rhythm machine, discussed above. However, the aw2816 does not have tone generator functionality, so you will have to provide a separate midi sound m...
Page 8: Overdubbing
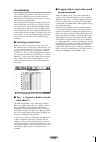
7 tutorial overdubbing the overdubbing procedure is basically the same as when you recorded the rhythm section and vocal. Record each of the backing tracks while you listen to the previously-recorded tracks. We recommend that during the recording stage, you record all the parts you think you will ev...
Page 9: Restoring The Demo Song
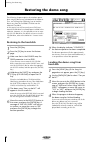
Restoring the demo song 8 tutorial restoring the demo song the following chapter explains the mixdown proce- dure using the demo song included with the aw2816. Thus, we will begin by explaining how to load the demo song from the included cd-rom into the aw2816’s hard disk. In this tutorial, we will ...
Page 10: Mixdown
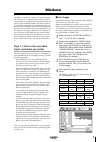
9 tutorial mixdown “mixdown” sounds like it refers to a single operation, but in reality, it is a sequence that consists of numer- ous processes. As you become more experienced, the various steps will blend together into one big process. It is important to keep this in mind, because you must be awar...
Page 11
Mixdown 10 tutorial step 2. Setting up a rough mix the rough mix is just a starting point for the final mix, and does not need to be perfect. The purpose of creat- ing a rough mix by adjusting only level and pan is to have a reference point from which you can make more detailed adjustments, and appl...
Page 12
11 tutorial ■ adding the synthesizer turn channel 10 “on”. If the synthesizer is too loud for the other tracks, use fader 10 to lower the level about 5 db. ■ adding the organ turn channel 11 “on”. Make fine adjustments to the fader so that the sound does not stand out in compari- son with the other ...
Page 13: Each Part
Mixdown 12 tutorial step 3. Assembling the mix for each part in order to create a balanced mix, we now need to pay a bit more attention to the details of each track. • preset scene you can recall a preset scene that contains all settings up through step 3, below. Press the [scene] key (press the [f1...
Page 14
13 tutorial • channel 2: snare dynamics comp eq (att –8 db) ■ channels 3/4: drum overhead mics these tracks contain the cymbals and toms. By adding a 3.5 db boost to the high 14.2 khz region we will clarify the metallic edge. By lowering the h-mid 157 hz region by 6.5 db we give a light touch to the...
Page 15
Mixdown 14 tutorial ■ channel 5: hi-hat by using a hpf (high pass filter) to cut the sound below the low 125 hz point, we will simultaneously remove sounds other than the hi-hat. By adding a 2.5 db boost to the l-mid 595 hz region, we will emphasize the crispness of the hi-hat, clarifying the sense ...
Page 16
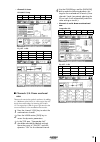
15 tutorial 5 press the mixer section [dyn] key to access the dynamics parameters. 6 press the dyn button, and then press the [f2] key located below the screen. In this screen, load a library whose type field is displayed as “exp.” move the cursor to “on/ off” and turn dynamics “on” for the selected...
Page 17
Mixdown 16 tutorial ■ channel 8: acoustic guitar we will not make any changes to the relaxed feel in the high range of the acoustic guitar, but will apply a slight boost to thicken the low-mid range, and use a compander to even out the loudness. Eq (att –11 db) type compander soft ■ channel 9: piano...
Page 18
17 tutorial ■ channel 10: synthesizer we will use the eq to enhance the high range, emphasizing the tonal hardness characteristic of syn- thesizers. To make the phrasing crisper, we will apply a hard compander. Type compander hard eq (att –7 db) ■ channel 11: organ we will boost the mid range that a...
Page 19
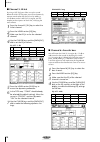
Mixdown 18 tutorial ■ channel 12: electric guitar keeping in mind the balance with other parts, we will lower the low range and boost the mid range of the electric guitar, giving it a brighter sound. To restrain the loudness, we will apply a soft compander with a high ratio setting. • dynamics setti...
Page 20
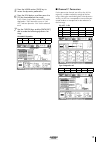
19 tutorial • dynamics settings for chorus 1 and 2 (compander hard) • dynamics settings for chorus 3: off ■ channel 16: lead vocal the lead vocalist on this channel has a strong and rich low-mid range, but in order to give the sound more definition, we will set l-mid to 236 hz and cut it by –5.0 db....
Page 21: Step 4. Adding Ambience
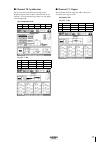
Mixdown 20 tutorial step 4. Adding ambience ambience-type effects such as reverb, delay, and echo can be used to add spaciousness and warmth. Up to this point in the process, you have been working with the “dry” sound, unprocessed by effects, but there are many engineers and artists who prefer to wo...
Page 22
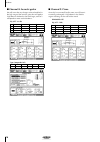
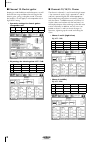
21 tutorial ■ channels 1/2: kick and snare when recording drums, you record the dry sound as on the tracks of the demo song. Adding just a slight amount of reverb will create a dramatically wider sense of space. However, be careful not to apply too much. Sometimes for a ballade you will year fairly ...
Page 23: Making Automation Settings
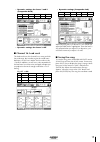
Mixdown 22 tutorial step 5. Completing the mix and making automation settings the basic mix is now nearly complete. Effects have been added, and now it’s time to listen carefully to the entire song and make final adjustments. As you listen to the mix, you may decide that you are not satisfied with h...
Page 24: • Main Contents of Automix
23 tutorial • main contents of automix 1) initial automix scene the automix starts from the “automix” scene mem- ory. 2) guitar “0:10–0:45”: the faders are adjusted to make the gui- tar backing and melody stand out. 3) piano for approximately the first 40 seconds of the song, the level is adjusted b...
Page 25: Mastering
Mastering 24 tutorial mastering once you have completed the mixdown, you will per- form mastering before writing the song to a cd-r disc. Mastering is the process of making overall adjustments to the song mixed to a stereo track. It may seem as though the song itself is essentially complete when you...
Page 26: Track
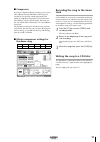
25 tutorial ■ compressor by using a compressor during mastering, you can not only improve the overall balance of the song, but sometimes also give the sound more punch and speed, or emphasize the groove. This may be some- what difficult until you get the knack, but once you do, you will be able to m...
Page 27: The Next Step
The next step 26 tutorial the next step if you have worked through the preceding pages, you now have a basic understanding of the process. The aw2816 supports many other recording methods and mixdown functions that we were not able to introduce in these pages. We hope you will make full use of these...
Page 28: Glossary
27 tutorial glossary ■ a/d converter a circuit that converts an analog audio signal into a digital audio signal. ■ ad/da conversion of an audio signal from analog to digital, or from digital to analog. All processing within the aw2816 is performed in digital form, but when an analog audio signal is ...
Page 29
Glossary 28 tutorial ■ gain a knob that adjusts the sensitivity of the head amp (*see entry) in the input section of the aw2816. If this control is adjusted to keep the input volumes consis- tent at this point, it will be easier to use the faders of each channel to create a balance. ■ head amp (ha) ...
Page 30
29 tutorial ■ punch-in/punch-out when you want to re-record just a specified area of a previously-recorded track, the action of switching from playback into record mode at the beginning of that area is called “punch-in,” and the action of switching from record mode back into playback at the end of t...
Page 31
Yamaha corporation v766850 r1 1 ip 32 pro audio & digital musical instrument division p.O. Box 3, hamamatsu, 430-8651, japan 01 08 3500 ap printed in japan.

