- DL manuals
- Yamaha
- Boating Equipment
- FX140
- Service Manual
Yamaha FX140 Service Manual
Summary of FX140
Page 1
460079 waverunner fx140 f1b-28197-ze-c1 service manual manuel d’entretien wartungshandbuch manual de servicio e f d es d.
Page 2: Notice
E notice this manual has been prepared by yamaha primarily for use by yamaha dealers and their trained mechanics when performing maintenance procedures and repairs to yamaha equipment. It has been written to suit the needs of persons who have a basic understanding of the mechanical and electrical co...
Page 3
F d es avis ce manuel a été préparé par yamaha principalement à l’intention des conces- sionnaires yamaha et de leurs mécani- ciens qualifiés afin de les assister lors de l’entretien et la réparation des produits yamaha. Ce manuel est destiné à des personnes possédant les connaissances de base en mé...
Page 4: How to Use This Manual
E how to use this manual manual format all of the procedures in this manual are organized in a sequential, step-by-step format. The informa- tion has been compiled to provide the mechanic with an easy to read, handy reference that contains comprehensive explanations of all disassembly, repair, assem...
Page 5
F d es utilisation du manuel format du manuel toutes les procédures décrites dans ce manuel sont organisées de manière séquentielle, pas à pas. Les informations ont été rassemblées afin de fournir au mécanicien une référence simple à lire et pratique qui comporte néanmoins toutes les explications né...
Page 6
E important information in this service manual particularly important information is distinguished in the following ways. The safety alert symbol means attention! Become alert! Your safety is involved! Warning failure to follow warning instructions could result in severe injury or death to the machi...
Page 7
F d es informations importantes les informations particulièrement importantes contenues dans ce manuel d’entretien sont signalées de diverses manières. Le symbole d’alerte sécurité signifie attention! Soyez attentif! Votre securite est mena- cee! Avertissement le non-respect d’une instruction averti...
Page 8
E how to use this manual 1 to help identify parts and clarify procedure steps, there are exploded diagrams at the start of each removal and disassembly section. 2 numbers are given in the order of the jobs in the exploded diagram. 3 symbols indicate parts to be lubricated or replaced (see “symbols”)...
Page 9
F d es utilisation du manuel 1 pour vous aider à identifier les diffé- rentes pièces et à comprendre les diverses étapes opératoires, vous trouverez des vues éclatées au début de chaque partie de dépose et de démontage. 2 les chiffres sont indiqués dans l’ordre des opérations à effectuer sur le sché...
Page 10: Gen
E a50001-1-4 symbols symbols 1 to 9 are designed as thumb-tabs to indicate the content of a chapter. 1 general information 2 specifications 3 periodic inspection and adjustment 4 fuel system 5 power unit 6 jet pump unit 7 electrical system 8 hull and hood 9 trouble analysis symbols 0 to e indicate s...
Page 11
F d es a50001-1-4 symboles les symboles 1 à 9 servent d’onglets et indiquent le contenu des différents chapitres. 1 informations générales 2 spécifications 3 inspection périodique et réglage 4 système d’alimentation 5 moteur 6 pompe de propulsion 7 equipement électrique 8 coque et capot 9 dépannage ...
Page 12: Index
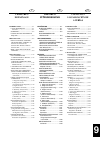
E index general information specifications periodic inspection and adjustment fuel system power unit jet pump unit electrical system hull and hood trouble analysis a30000-0
Page 13: Table Des
F d es table des matieres informations generales specifications inspection periodique et reglage systeme d’alimentation moteur pompe de propulsion equipement electrique coque et capot depannage inhalt allgemeine informationen spezifikationen regelmÄßige inspektionen und einstellungen kraftstoff- anl...
Page 14: Gen
E gen info 1 2 3 4 5 6 7 8 9 chapter 1 general information identification numbers ......................................................................... 1-1 primary l.D. Number ........................................................................... 1-1 engine serial number ......................
Page 15
1 2 3 4 5 6 7 8 9 f d es chapitre 1 informations generales numeros d’identification ... 1-1 numero d’identification primaire ...................................... 1-1 numero de serie du moteur......................................... 1-1 numero de serie de la pompe de propulsion ............ 1-1 nu...
Page 16: Gen
1-1 e gen info identification numbers a60700-0* identification numbers primary l.D. Number the primary l.D. Number is stamped on a label attached to the inside of the engine compart- ment. Starting primary l.D. Number: f1b: 800101 engine serial number the engine serial number is stamped on a label a...
Page 17: Gen
F d es 1- gen info a60700-0* numeros d’identification numero d’identification primaire le numéro d’identification primaire est imprimé sur une étiquette collée à l’inté- rieur du compartiment moteur. Numero de serie du moteur le numéro de série du moteur est imprimé sur une étiquette collée sur le b...
Page 18: Gen
1-2 e gen info safety while working safety while working the procedures given in this manual are those recommended by yamaha to be followed by yamaha dealers and their mechanics. Fire prevention gasoline (petrol) is highly flammable. Gasoline vapor is explosive if ignited. Do not smoke while handlin...
Page 19: Gen
F d es 1- gen info mesures de securite les procédures décrites dans ce manuel sont recommandées par yamaha et doi- vent être respectées par les concession- naires yamaha et leurs mécaniciens. Mesures de securite contre les incendies l’essence est un produit très inflamma- ble. Les vapeurs d’essence ...
Page 20: Gen
1-3 e gen info safety while working under normal conditions of use there should be no hazards from the use of the lubricants mentioned in this manual, but safety is all- important, and by adopting good safety prac- tises any risk is minimized. A summary of the most important precautions is as follow...
Page 21: Gen
F d es 1- gen info en conditions normales d’utilisation, il ne devrait pas y avoir de danger lié à l’utilisation des lubrifiants indiqués dans ce manuel. Néanmoins, il convient de prendre toutes les mesures de sécurité nécessaires afin de minimiser les risques. Observer les principales consignes sui...
Page 22: Gen
1-4 e gen info safety while working 3. Non-reusable items always use new gaskets, packings, o- rings, oil seals, split-pins, circlips, etc., on reassembly. Disassembly and assembly 1. Clean parts with compressed air when dis- assembling. 2. Oil the contact surfaces of moving parts during assembly. 3...
Page 23: Gen
F d es 1- gen info 3. Pièces à usage unique lors du remontage, toujours utili- ser des joints, garnitures, joints toriques, bagues d’étanchéité, gou- pilles fendues, circlips, etc. Neufs. Demontage et remontage 1. Nettoyer les pièces à l’air com- primé lors du démontage. 2. Lors du montage, huiler l...
Page 24: Gen
1-5 e gen info special tools special tools using the correct special tools recommended by yamaha, will aid the work and enable accu- rate assembly and tune-up. Improvisations and using improper tools can damage the equipment. Note: • for u.S.A. And canada, use part numbers starting with “j-”, “yb-”,...
Page 25: Gen
F d es 1- gen info outils speciaux pour une plus grande précision dans votre travail de montage et de mise au point, yamaha vous recommande l’emploi d’outils spéciaux. Les improvi- sations ou l’utilisation d’outils non appropriés peuvent endommager le matériel. N.B.: • pour les etats-unis et le cana...
Page 26: Gen
1-6 e gen info special tools a fuel pressure gauge p/n. Yb-06766 90890-06786 b compression gauge extension p/n. 90890-06582 c cylinder gauge set p/n. Yu-03017 90890-06759 d compression gauge p/n. Yu-33223-1 90890-03160 e peak voltage adapter p/n. Yu-39991 90890-03172 f spark gap tester p/n. Ym-34487...
Page 27: Gen
F d es 1- gen info a manomètre de carburant p/n. Yb-06766 90890-06786 b rallonge de compressiomètre p/n. 90890-06582 c comparateur pour cylindre p/n. Yu-03017 90890-06759 d compressiomètre p/n. Yu-33223-1 90890-03160 e adaptateur de tension de crête p/n. Yu-39991 90890-03172 f testeur d’allumage p/n...
Page 28: Gen
1-7 e gen info special tools m test harness (3 pins) p/n. Yb-06769 90890-06769 n vacuum/pressure pump gauge set p/n. Yb-35956-a 90890-06756 o yamaha diagnostic system for watercraft p/n. 60e-85300-01 p yamaha diagnostic system for watercraft (cd-rom only) p/n. 60e-ws853-00 m p n yb-06769 90890-06769...
Page 29: Gen
F d es 1- gen info m faisceau de test (3 broches) p/n. Yb-06769 90890-06769 n ensemble dépressiomètre/manomè- tre p/n. Yb-35956-a 90890-06756 o système de diagnostic yamaha pour jet ski p/n. 60e-85300-01 p système de diagnostic yamaha pour jet ski (sur cd-rom) p/n. 60e-ws853-00 m prüfkabelbaum (3 po...
Page 30: Gen
1-8 e gen info special tools removal and installation 1 oil filter wrench p/n. Yu-38411 90890-01426 2 coupler wrench p/n. Yw-06551 90890-06551 3 sheave holder p/n. Ys-01880-a 90890-01701 4 rotor puller p/n. Ym-01082 90890-01080 5 rotor holder p/n. Yu-01235 90890-01235 6 valve spring compressor p/n. ...
Page 31: Gen
F d es 1- gen info depose et installation 1 clé pour filtre à huile p/n. Yu-38411 90890-01426 2 clé d’accouplement p/n. Yw-06551 90890-06551 3 outil de maintien de poulie p/n. Ys-01880-a 90890-01701 4 extracteur de rotor p/n. Ym-01082 90890-01080 5 outil de maintien de rotor p/n. Yu-01235 90890-0123...
Page 32: Gen
1-9 e gen info special tools a valve seat cutter intake p/n. 90890-06813 (60°) 90890-06814 (45°) 90890-06815 (30°) exhaust p/n. 90890-06315 (60°) 90890-06312 (45°) 90890-06328 (30°) b valve seat cutter holder p/n. 90890-06811 (ø4.0 mm) 90890-06812 (ø4.5 mm) c valve seat cutter set p/n. Ym-91043-c d ...
Page 33: Gen
F d es 1- gen info a rectificateur de siège de soupape admission p/n. 90890-06813 (60°) 90890-06814 (45°) 90890-06815 (30°) echappement p/n. 90890-06315 (60°) 90890-06312 (45°) 90890-06328 (30°) b support de rectificateur de siège de soupape p/n. 90890-06811 (ø4,0 mm) 90890-06812 (ø4,5 mm) c jeu de ...
Page 34: Gen
1-10 e gen info special tools m ball bearing attachment (jet pump oil seal) p/n. Yb-06085 90890-06634 n driver rod (intermediate shaft and jet pump) p/n. Yb-06071 90890-06606 o bearing inner/outer race attachment (jet pump bearing) p/n. Yb-34474 p shaft holder (intermediate shaft) p/n. Yb-06552 9089...
Page 35: Gen
F d es 1- gen info m outil de montage de roulement à billes (joint étanche à l’huile de la pompe de propulsion) p/n. Yb-06085 90890-06634 n tige d’entraînement (arbre intermédiaire et pompe de propulsion) p/n. Yb-06071 90890-06606 o fixation de cage intérieure/exté- rieure de roulement (roulement de...
Page 36: Spec
E spec 1 2 3 4 5 6 7 8 9 chapter 2 specifications general specifications ....................................................................... 2-1 maintenance specifications ............................................................... 2-3 engine ....................................................
Page 37
1 2 3 4 5 6 7 8 9 f d es chapitre 2 specifications specifications generales ... 2-1 caracteristiques d’entretien .................................. 2-3 moteur .......................................... 2-3 pompe de propulsion ............. 2-6 coque et capot ......................... 2-6 electricite...
Page 38: Spec
2-1 e spec general specifications general specifications item unit model fx140 model code hull f1b engine/jet 60e dimensions length mm (in) 3,340 (131.5) width mm (in) 1,230 (48.4) height mm (in) 1,160 (45.7) dry weight kg (lb) 362 (798) maximum capacity person/kg (lb) 3/240 (530) performance maximu...
Page 39: Spec
2-2 e spec pon*: pump octane number = (motor octane number + research octane number)/2 ron*: research octane number fuel and oil fuel type regular unleaded gasoline minimum fuel rating pon* 86 ron* 90 fuel tank capacity l (us gal, imp gal) 70 (18.5, 15.4) engine oil type 4-stroke motor oil engine oi...
Page 40: Spec
F 2- spec specifications generales specifications generales désignation unité modèle fx140 code du modèle coque f1b moteur/tuyère 60e dimensions longueur mm (in) 3.340 (131,5) largeur mm (in) 1.230 (48,4) hauteur mm (in) 1.160 (45,7) poids à sec kg (lb) 362 (798) capacité maximum personnes/kg (lb) 3...
Page 41: Spec
F 2- spec pon*: indice d’octane pompe = (indice d’octane moteur + indice d’octane de recherche)/2 ron*: indice d’octane recherche carburant et huile type de carburant essence ordinaire sans plomb indice de carburant minimum pon* 86 ron* 90 contenance du réservoir de carburant l (us gal, imp gal) 70 ...
Page 42: Spec
D 2- spec allgemeine technische daten bezeichnung einheit modell fx140 modellcode rumpf f1b motor/düse 60e abmessungen länge mm (in) 3.340 (131,5) breite mm (in) 1.230 (48,4) höhe mm (in) 1.160 (45,7) trockengewicht kg (lb) 362 (798) maximale belastungskapazität personen/kg (lb) 3/240 (530) leistung...
Page 43: Spec
D 2- spec pon*: pumpen oktanzahl = (motoroktanzahl + forschungsoktanzahl)/2 ron*: research oktanzahl kraftstoff und Öl kraftstoffsorte normalbenzin, bleifrei mindeste kraftstoffqualität pon* 86 ron* 90 kapazität des kraftstofftanks l (us gal, imp gal) 70 (18,5, 15,4) motorölsorte 4-takt motoröl moto...
Page 44: Spec
Es 2- spec especificaciones generales Ítem unidad modelo fx140 código de modelo casco f1b motor/propulsor a chorro 60e dimensiones eslora mm (in) 3.340 (131,5) manga mm (in) 1.230 (48,4) puntal mm (in) 1.160 (45,7) peso en seco kg (lb) 362 (798) capacidad máxima plazas/kg (lb) 3/240 (530) prestacion...
Page 45: Spec
Es 2- spec pon*: octanaje pump = (número de octanos de motor + número de octanos de investigación)/2 ron*: octanaje research combustible y aceite tipo de combustible gasolina normal sin plomo graduación mínima del combustible pon* 86 ron* 90 capacidad del depósito de combustible l (us gal, imp gal) ...
Page 46: Spec
2-3 e spec maintenance specifications maintenance specifications engine item unit model fx140 cylinder head warpage limit mm (in) 0.1 (0.004) compression pressure *1 kpa (kgf/cm 2 , psi) 1,350 (13.5, 192) cylinder bore size mm (in) 74.060–74.075 (2.9157–2.9163) taper limit mm (in) 0.08 (0.003) out-o...
Page 47: Spec
F d es 2- spec caracteristiques d’entretien moteur désignation culasse limite de déformation pression de compression *1 cylindre alésage limite de conicité limite de faux-rond limite d’usure arbre à cames système d’entraînement admission a echappement a admission et échappement b diamètre intérieur ...
Page 48: Spec
2-4 e spec maintenance specifications valve seat width c intake mm (in) 0.9–1.1 (0.0354–0.0433) exhaust mm (in) 0.9–1.1 (0.0354–0.0433) valve margin thickness d intake mm (in) 0.5–0.9 (0.0197–0.0354) exhaust mm (in) 0.5–0.9 (0.0197–0.0354) valve stem diameter intake mm (in) 3.975–3.990 (0.1565–0.157...
Page 49: Spec
F d es 2- spec largeur du siège c admission echappement epaisseur de la marge d admission echappement diamètre de la queue admission echappement diamètre intérieur du guide admission echappement jeu entre queue et guide admission echappement faux-rond de la queue ressort de soupape longueur libre ad...
Page 50: Spec
2-5 e spec maintenance specifications piston ring top ring type barrel dimension (b × t) mm (in) 0.90 × 2.75 (0.04 × 0.11) end gap (installed) mm (in) 0.38–0.55 (0.0150–0.0217) ring groove clearance mm (in) 0.030–0.065 (0.0012–0.0026) 2nd ring type taper dimensions (b × t) mm (in) 0.80 × 2.80 (0.03 ...
Page 51: Spec
F d es 2- spec segment segment supérieur type dimension (b × t) ecartement du bec (monté) jeu de la gorge deuxième segment type dimensions (b × t) ecartement du bec (monté) jeu de la gorge segment racleur dimensions (b × t) ecartement du bec (monté) jeu de la gorge bielle jeu de l’huile de tête de b...
Page 52: Spec
2-6 e spec maintenance specifications jet pump unit hull and hood electrical oil filter oil filter type cartridge type oil pump oil pump type trochoid rotor tip clearance mm (in) 0.09–0.15 (0.004–0.006) oil pump housing clearance rotor (feed pump) mm (in) 0.09–0.17 (0.0035–0.0067) rotor (scavenge pu...
Page 53: Spec
F d es 2- spec pompe de propulsion coque et capot electricite filtre à huile type de filtre à huile pompe à huile type de pompe à huile jeu en bout de rotor jeu avec carter de pompe à huile rotor (pompe de refoulement) rotor (pompe de reprise) désignation pompe de propulsion matériau de la turbine n...
Page 54: Spec
2-7 e spec maintenance specifications stator pulser coil (w – b, r – b) output peak voltage @cranking 1 v 4 @cranking 2 v 4 @2,000 r/min v 23 @3,500 r/min v 38 lighting coil (g – g) output peak voltage @cranking 1 v 9 @cranking 2 v 8 @2,000 r/min v 11 @3,500 r/min v 12 pulser coil resistance Ω (colo...
Page 55: Spec
F d es 2- spec stator bobine d’impulsions (w – b, r – b) tension de crête de sortie au démarrage 1 au démarrage 2 à 2.000 tr/mn à 3.500 tr/mn induit d’alternateur (g – g) tension de crête de sortie au démarrage 1 au démarrage 2 à 2.000 tr/mn à 3.500 tr/mn résistance de la bobine d’impulsions résista...
Page 56: Spec
2-8 e spec maintenance specifications thermoswitch on temperature (engine) °c (°f) 84–90 (183–194) off temperature (engine) °c (°f) 70–84 (158–183) on temperature (exhaust) °c (°f) 94–100 (201–212) off temperature (exhaust) °c (°f) 80–94 (176–201) engine temperature sensor engine temperature sensor ...
Page 57: Spec
F d es 2- spec thermocontact temperature de mise en circuit (moteur) température de mise hors circuit (moteur) température de mise en circuit (échappement) température de mise hors circuit (échappement) capteur de température du moteur résistance du capteur de température du moteur (b/y – b/y) à 20 ...
Page 58: Spec
2-9 e spec tightening torques tightening torques specified torques part to tightened part name thread size q’ty tightening torque remarks n•m kgf•m ft•lb fuel system retainer/fuel pump module – fuel tank 1st nut — 9 3.2 0.32 2.3 2nd 6.4 0.64 4.6 fuel filler neck/rubber seal – deck nut — 1 5.9 0.59 4...
Page 59: Spec
F d es 2- spec couples de serrage couples specifies pièce à serrer circuit de carburant dispositif de retenue/module pompe à carburant– réservoir de carburant 1er 2ème goulotte de remplissage de carburant/ joint en caoutchouc – pont sangle pour réservoir de carburant/ réservoir de carburant – coque ...
Page 60: Spec
2-10 e spec tightening torques engine engine unit – engine mount bolt m8 4 17 1.7 12 271 lt oil filter — — 1 17 1.7 12 coupling cover bolt m6 1 7.8 0.78 5.6 572 lt thermoswitch (exhaust) – exhaust pipe 3 bolt m6 2 7.6 0.76 5.5 572 lt outer exhaust joint clamp – exhaust pipe 3/exhaust pipe 2 1st — — ...
Page 61: Spec
F d es 2- spec moteur moteur – fixation du moteur filtre à huile cache d’accouplement thermocontact (échappement) – pipe d’échappement 3 fixation du raccord d’échappement extérieur – pipe d’échappement 3/pipe d’échappement 2 1er 2ème fixation du raccord d’échappement intérieur – pipe d’échappement 3...
Page 62: Spec
2-11 e spec tightening torques exhaust manifold 1 – cylinder head 1st bolt m8 6 22 2.2 16 242 lt 2nd 22 2.2 16 3rd 35 3.5 25 exhaust manifold 2 – cylinder head 1st bolt m8 5 22 2.2 16 242 lt 2nd 22 2.2 16 3rd 35 3.5 25 water jacket – oil tank 1st bolt m6 4 3.7 0.37 2.7 572 lt 2nd 7.6 0.76 5.5 oil ta...
Page 63: Spec
F d es 2- spec collecteur d’échappement 1 – culasse 1er 2ème 3ème collecteur d’échappement 2 – culasse 1er 2ème 3ème chemise d’eau – réservoir d’huile 1er 2ème support de réservoir d’huile/ carter de réducteur – séparateur d’huile 1er 2ème couvercle (fil de masse) – réservoir d’huile file de masse –...
Page 64: Spec
2-12 e spec tightening torques reduction drive gear case – crankcase 1st bolt m6 2 3.7 0.37 2.7 572 lt 2nd 7.6 0.76 5.5 1st bolt m8 7 15 1.5 11 572 lt 2nd 28 2.8 20 holder (relief valve) – reduction drive gear case bolt m6 1 10 1.0 7.2 e bearing housing – reduction drive gear case 1st bolt m8 4 15 1...
Page 65: Spec
F d es 2- spec carter de réducteur – carter 1er 2ème 1er 2ème support (clapet de surcharge) – carter de réducteur logement de roulement – carter de réducteur 1er 2ème câble négatif de la batterie – démarreur fil de démarreur – démarreur démarreur – carter couvercle d’alternateur – carter 1er 2ème ro...
Page 66: Spec
2-13 e spec tightening torques plug (vacuum pressure) bolt m6 4 10 1.0 7.2 engine temperature sensor – crankcase — — 1 15 1.5 11 thermoswitch (engine) – crankcase bolt m6 2 7.6 0.76 5.5 572 lt oil pressure switch — — 1 8.4 0.84 6.1 572 lt anode cover – anode bolt m6 1 12 1.2 8.7 271 lt anode cover –...
Page 67: Spec
F d es 2- spec prise (dépression) capteur de température du moteur – carter thermocontact (moteur) – carter contacteur de pression d’huile couvercle d’anode – anode couvercle d’anode – culasse carter d’huile – carter inférieur carter inférieur – carter supérieur 1er 2ème 3ème tuyau d’huile – carter ...
Page 68: Spec
2-14 e spec tightening torques water inlet cover/water inlet strainer – impeller duct bolt m6 4 6.6 0.66 4.8 572 lt drive shaft nut – drive shaft nut — 1 69 6.9 50 impeller (left-hand threads) – drive shaft impeller m22 1 27 2.7 19 572 lt transom plate – hull nut — 4 26 2.6 19 bilge strainer holder ...
Page 69: Spec
F d es 2- spec couvercle de l’entrée d’eau/filtre d’entrée d’eau – tuyau de la turbine ecrou d’arbre d’entraînement – arbre d’entraînement turbine (filetage à gauche) – arbre d’entraînement varangue de voûte – coque support de crépine de cale – cloison logement intermédiaire – cloison accouplement m...
Page 70: Spec
2-15 e spec tightening torques steering cable locknut (jet thrust nozzle side) nut — 1 6.5 0.65 4.7 steering cable grommet – hull nut — 1 5.9 0.59 4.3 steering cable bracket – steering cable holder nut — 2 5.4 0.54 3.9 steering cable bracket – deck nut — 2 5.4 0.54 3.9 speed sensor lead grommet – hu...
Page 71: Spec
F d es 2- spec contre-écrou de câble de direction (côté tuyère de propulsion) bague du câble de direction – coque support de câble de direction – support de câble de direction support de câble de direction – pont bague du câble du capteur de vitesse – coque ensemble de capot avant – pont tape de vis...
Page 72: Spec
2-16 e spec tightening torques bow eye – hull bolt m6 2 13 1.3 9.4 drain plug/packing – hull bolt m5 4 2.0 0.2 1.4 engine mount – hull bolt m8 8 17 1.7 12 572 lt engine damper – hull bolt m6 4 6.4 0.64 4.6 271 lt electrical battery box – hull bolt m6 2 5.4 0.54 3.9 572 lt battery box/spacer – hull b...
Page 73: Spec
F d es 2- spec oeillet avant – coque bouchon de vidange/garniture – coque support moteur – coque amortisseur de moteur – coque electricité boîtier de batterie – coque boîtier de batterie/entretoise – coque boîtier électrique – cloison couvercles des bornes – boîtier électrique couvercle – boîtier él...
Page 74: Spec
2-17 e spec tightening torques general torque this chart specifies tightening torques for stan- dard fasteners with a standard iso thread pitch. Tightening torque specifications for spe- cial components or assemblies are provided in applicable sections of this manual. To avoid warpage, tighten multi...
Page 75: Spec
F d es 2- spec serrage general ce tableau montre les couples de serrage de la boulonnerie standard à pas de file- tage iso standard. Les couples de ser- rage des éléments ou ensembles spéciaux sont donnés dans les chapitres concernés de ce manuel. Pour éviter les déforma- tions, serrer les ensembles...
Page 76: Spec
2-18 e spec cable and hose routing cable and hose routing down bow 20˚ down up + g f-f e-e g f f c d a e e d c b b a a-a b-b d-d c-c 2 1 1 1 4 3 6 5 7 6 5 1 8 9 0 a b 6 5 c d e f 4 3 2 g 1 fuel tank breather hose 2 qsts cable 3 steering cable 4 shift cable 5 electrical box lead 6 speed sensor lead 7...
Page 77: Spec
F d es 2- spec cheminement des cables et des flexibles 1 flexible de reniflard de réservoir de carburant 2 câble qsts 3 câble de direction 4 câble de sélecteur 5 fil du boîtier électrique 6 fil du capteur de vitesse 7 sortie témoin d’eau de refroidissement 8 flexible de sortie du témoin d’eau de ref...
Page 78: Spec
2-19 e spec cable and hose routing 3a 3a 3a 3a 3a 3a s p a r e 20a 3a 3a main a b c d b c f d 8 6 1 2 3 4 5 5 e e a a b 0 1 c d e f a 3 b g 9 8 7 0 5 0 5 b a 5 e-e f 1 throttle cable 2 handlebar switch lead 3 qsts cable 4 buzzer lead 5 fuel tank breather hose 6 ignition coil lead 7 battery positive ...
Page 79: Spec
F d es 2- spec 1 câble d’accélérateur 2 fil de contacteur de guidon 3 câble qsts 4 fil d’avertisseur sonore 5 reniflard de réservoir de carburant 6 fil de la bobine d’allumage 7 fil positif de la batterie 8 fil du démarreur 9 faisceau de fils 0 flexible de carburant a câble de sélecteur b câble de d...
Page 80: Spec
2-20 e spec cable and hose routing 5 2 a 0 h b c 8 d e f g 2 0 8 1 2 5 9 2 8 6 7 4 6 5 4 3 2 1 È 7 1 cooling water hose (cooling water inlet) 2 bilge hose 1 3 electric bilge pump 4 bilge hose 4 5 cooling water hose (from thermostat) 6 bilge hose 3 7 bilge hose 2 8 cooling water hose (from exhaust pi...
Page 81: Spec
F d es 2- spec 1 flexible d’eau de refroidissement (entrée d’eau de refroidissement) 2 flexible de cale 1 3 pompe électrique de cale 4 flexible de cale 4 5 flexible d’eau de refroidissement (du thermostat) 6 flexible de cale 3 7 flexible de cale 2 8 flexible d’eau de refroidissement (de la pipe d’éc...
Page 82: Spec
2-21 e spec cable and hose routing b c f e a d-d Î Ï Ë Ë Ë Ë Ê È É Õ Ö × Ì Ð Ì Ó Ø Ð Ô Ì Ê Ò Ò Ñ Ð Ë c a f e b 2 4 5 3 1 1 d d Í 1 thermostat 2 pressure control valve 3 cooling water hose (cooling water inlet) 4 battery negative lead 5 breather hose È to cooling water pilot outlet on starboard side ...
Page 83: Spec
F d es 2- spec 1 thermostat 2 soupape régulatrice de pression 3 flexible d’eau de refroidissement (entrée d’eau de refroidissement) 4 fil négatif de la batterie 5 reniflard È vers la sortie témoin d’eau de refroidisse- ment du côté tribord É vers la sortie d’eau de refroidissement du côté tribord à ...
Page 84: Spec
2-22 e spec cable and hose routing b c f e a d-d Î Ï Ë Ë Ë Ë Ê È É Õ Ö × Ì Ð Ì Ó Ø Ð Ô Ì Ê Ò Ò Ñ Ð Ë c a f e b 2 4 5 3 1 1 d d Í Ò to exhaust pipe Ó to install the hose, align the white paint mark on the cooling water hose with the parting line on the hose joint. Ô fasten the cooling water hose and ...
Page 85: Spec
F d es 2- spec Ò vers la pipe d’échappement Ó pour monter le flexible, aligner le repère blanc du flexible d’eau de refroidissement avec le plan de joint du raccord de flexi- ble. Ô serrer le flexible d’eau de refroidissement et le câble négatif de la batterie. Faire cou- lisser le lien dans le sens...
Page 86: Spec
2-23 e spec cable and hose routing b a a a-a b 3 4 5 6 a 1 1 7 8 9 0 2 1 Ë Ê É È 1 wire harness 2 ground lead 3 wire harness coupler 4 cam position sensor coupler 5 thermoswitch (exhaust) 6 thermoswitch (exhaust) coupler 7 oil pressure switch coupler 8 pulser coil coupler 9 thermoswitch (engine) cou...
Page 87: Spec
F d es 2- spec 1 faisceau de fils 2 fil de masse 3 raccord du faisceau de fils 4 connecteur de capteur de position de came 5 thermocontact (échappement) 6 connecteur de thermocontact (échappement) 7 connecteur de contacteur de pression d’huile 8 connecteur de bobine d’impulsions 9 connecteur de ther...
Page 88: Spec
2-24 e spec cable and hose routing b d a a 1 2 4 3 7 5 6 0 9 8 a-a Ê É È Ë Ì Í Î Ï Ð Ñ Î Ï 1 engine temperature sensor coupler 2 lighting coil coupler 3 pulser coil coupler 4 thermoswitch (engine) coupler 5 thermoswitch (engine) 6 starter motor 7 engine temperature sensor 8 engine temperature sensor...
Page 89: Spec
F d es 2- spec 1 connecteur du capteur de température du moteur 2 connecteur de l’induit d’alternateur 3 connecteur de bobine d’impulsions 4 connecteur de thermocontact (moteur) 5 thermocontact (moteur) 6 démarreur 7 capteur de température du moteur 8 fil du capteur de température du moteur 9 fil du...
Page 90: Spec
2-25 e spec cable and hose routing b d a a 1 2 4 3 7 5 6 0 9 8 a-a Ê É È Ë Ì Í Î Ï Ð Ñ Î Ï È to generator É to engine temperature sensor Ê to thermoswitch (engine) Ë to thermoswitch (engine) coupler Ì to engine temperature sensor coupler Í route the starter motor lead to the outside of the engine te...
Page 91: Spec
F d es 2- spec È vers l’alternateur É vers le capteur de température du moteur Ê vers le thermocontact (moteur) Ë vers le connecteur du thermocontact (moteur) Ì vers le connecteur du capteur de tempéra- ture du moteur Í faire cheminer le câble du démarreur à l’extérieur du capteur de température du ...
Page 92: Insp
E insp adj 1 2 3 4 5 6 7 8 9 chapter 3 periodic inspection and adjustment maintenance interval chart .............................................................. 3-1 periodic service ....................................................................................... 3-2 control system ...........
Page 93
1 2 3 4 5 6 7 8 9 f d es chapitre 3 inspection periodique et reglage tableau des intervalles d’entretien .................................. 3-1 entretien periodique ............ 3-2 systeme de commande ......... 3-2 inspection de la direction principale ..................................... 3-2 insp...
Page 94: Insp
3-1 e insp adj maintenance interval chart maintenance interval chart the following chart should be considered strictly as a guide to general maintenance intervals. Depending on operating conditions, the intervals of maintenance should be changed. ( ●) this mark indicates maintenance that you may do ...
Page 95: Insp
F 3- insp adj tableau des intervalles d’entretien le tableau ci-après ne constitue qu’un guide général des intervalles d’entretien. Selon les conditions d’utilisation, les intervalles d’entretien devront être modifiés. ( ●) ce symbole indique un entretien que vous pouvez faire vous-même. ( ❍) ce sym...
Page 96: Insp
D 3- insp adj tabelle fÜr wartungsintervalle die nachstehende tabelle dient als richtlinie für die wartungsintervalle. Je nach betriebsbedingungen kann es erforderlich sein, die wartungsintervalle entsprechend zu ändern. ( ●) diese markierung kennzeichnet wartungsarbeiten, die sie selbst durchführen...
Page 97: Insp
Es 3- insp adj tabla de intervalos de mantenimiento la tabla siguiente debe considerarse estrictamente como una guía de los intervalos de mantenimiento generales. Dependiendo de las condiciones de utilización, deberán modificarse los intervalos de mantenimiento. ( ●) esta marca indica una operación ...
Page 98: Insp
3-2 e insp adj control system periodic service control system steering master inspection 1. Inspect: • steering master excessive play → replace the steering master. Refer to “steering master” in chapter 8. Inspection steps: • move the handlebar up and down and back and forth. • check the excessive p...
Page 99: Insp
F d es 3- insp adj entretien periodique systeme de commande inspection de la direction principale 1. Inspecter: • direction principale jeu excessif → remplacer la direction principale. Se reporter à “direction principale” au chapitre 8. Inspection et réglage du câble de direction 1. Inspecter: • jeu...
Page 100: Insp
3-3 e insp adj control system note: if the steering cable cannot be properly adjusted by the cable joint at the steering mas- ter end, adjust the cable joint at the jet pump end so that the same clearances are obtained. Refer to “remote control cables and speed sensor lead” in chapter 8. Warning the...
Page 101: Insp
F d es 3- insp adj n.B.: s’il n’est pas possible de régler correcte- ment le câble de direction à l’aide du raccord de câble du côté de la direction principale, ajuster le raccord de câble du côté de la pompe de propulsion, de manière à obtenir les mêmes jeux. Se reporter à “cables de telecom- mande...
Page 102: Insp
3-4 e insp adj control system 2. Adjust: • throttle lever free play adjustment steps: note: • when not replacing the throttle cable or removing the cable from the throttle body, adjust the throttle cable free play by fol- lowing steps (f) through (j). • when replacing the throttle cable or removing ...
Page 103: Insp
F d es 3- insp adj 2. Régler: • jeu libre de la manette des gaz etapes du réglage: n.B.: • lorsque le câble d’accélérateur n’est pas remplacé ou n’est pas retiré du corps de papillon, régler sa garde en suivant les étapes (f) à (j). • lorsque le câble d’accélérateur est remplacé ou retiré du corps d...
Page 104: Insp
3-5 e insp adj control system warning after adjusting the free play, turn the han- dlebar to the right and left and make sure that the trolling speed does not increase. J. Install the handlebar cover. T r . . Handlebar cover screw: 1.1 n • m (0.11 kgf • m, 0.8 ft • lb) loctite ® 242 k. Install the f...
Page 105: Insp
F d es 3- insp adj avertissement après avoir réglé la garde, tourner le guidon vers la droite et la gauche et s’assurer que le régime embrayé n’augmente pas. Inspection et réglage du câble qsts 1. Mesurer: • longueur du jeu de tuyères de propulsion a, b différence → régler. J. Remonter le cache du g...
Page 106: Insp
3-6 e insp adj control system 2. Adjust: • qsts cable note: if the qsts cable cannot be properly adjusted by the cable joint at the qsts converter end, adjust the cable joint at the jet pump end so that the same lengths are obtained. Refer to “remote control cables and speed sensor lead” in chapter ...
Page 107: Insp
F d es 3- insp adj 2. Régler: • câble qsts n.B.: s’il n’est pas possible de régler correcte- ment le câble qsts à l’aide du raccord de câble côté convertisseur qsts, ajus- ter le raccord de câble du côté de la pompe de propulsion, de manière à obte- nir les mêmes jeux. Se reporter à “cables de telec...
Page 108: Insp
3-7 e insp adj control system shift cable inspection and adjustment 1. Check: • reverse gate stopper lever position incorrect → adjust. Checking steps: • set the shift lever to the reverse position. • check that the reverse gate 1 contacts the stopper 2 on the bracket and the lever 3 contacts the re...
Page 109: Insp
F d es 3- insp adj inspection et réglage du câble de sélecteur 1. Vérifier: • position du levier de butée de secteur de marche arrière incorrecte → régler. 2. Régler: • raccord de câble de sélecteur etapes de la vérification: • mettre le levier de sélecteur en position de marche arrière. • vérifier ...
Page 110: Insp
3-8 e insp adj control system trolling speed check and adjustment 1. Measure: • trolling speed out of specification → adjust. Trolling speed: 1,600–1,800 r/min checking steps: (watercraft on water) • start the engine and allow it to warm up for a 15 minutes. • check the engine trolling speed using t...
Page 111: Insp
F d es 3- insp adj vérification et réglage du régime embrayé 1. Mesurer: • régime embrayé hors spécifications → régler. 2. Régler: • régime embrayé régime embrayé: 1.600–1.800 tr/mn etapes de la vérification: (jet ski à l’eau) • mettre le moteur en marche et le laisser chauffer pendant 15 minu- tes....
Page 112: Insp
3-9 e insp adj fuel system fuel system warning when removing fuel system parts, wrap them in a cloth and take care that no fuel spills into the engine compartment. Fuel line inspection 1. Inspect: • fuel strainer 1 clog/contaminants → clean. • fuel pump filter clog/contaminants → clean. Refer to “fu...
Page 113: Insp
F d es 3- insp adj circuit de carburant avertissement lors de la dépose d’éléments du cir- cuit de carburant, les envelopper dans un chiffon et veiller à ne pas répandre de carburant dans le compartiment moteur. Fuel line inspection 1. Inspecter: • filtre à carburant 1 bouché/encrassement → net- toy...
Page 114: Insp
3-10 e insp adj power unit power unit valve clearance adjustment the following procedure applies to all of the valves. Note: • valve clearance adjustment should be made on a cold engine, at room temperature. • when the valve clearance is to be measured or adjusted, the piston must be at top dead cen...
Page 115: Insp
F d es 3- insp adj moteur réglage du jeu des soupapes la procédure suivante s’applique à tou- tes les soupapes. N.B.: • le réglage du jeu des soupapes doit être effectué moteur froid, à la tempé- rature de la pièce. • lorsqu’il est nécessaire de mesurer ou régler le jeu des soupapes, le piston doit ...
Page 116: Insp
3-11 e insp adj power unit 4. Measure: • valve clearance out of specification → adjust. Valve clearance (cold): intake valve: 0.11–0.20 mm (0.0043–0.0079 in) exhaust valve: 0.25–0.34 mm (0.0098–0.0134 in) measurement steps: • turn the drive coupling counterclockwise, and then check if cylinder #1 is...
Page 117: Insp
F d es 3- insp adj 4. Mesurer: • jeu des soupapes hors spécifications → régler. Jeu des soupapes (à froid): soupape d’admission: 0,11–0,20 mm (0,0043–0,0079 in) soupape d’échappe- ment: 0,25–0,34 mm (0,0098–0,0134 in) etapes de la mesure: • tourner l’accouplement d’entraî- nement en sens inverse d’h...
Page 118: Insp
3-12 e insp adj power unit 5. Remove: • timing chain tensioner cap bolt 1 • gasket 1 6. Turn the timing chain tensioner rod fully clockwise with a thin screwdriver 1. Note: make sure that the tensioner rod has been fully set clockwise. 1 7. Remove: • intake camshaft caps • exhaust camshaft caps • ti...
Page 119: Insp
F d es 3- insp adj 5. Déposer: • vis de tendeur de chaîne de dis- tribution 1 • joint 6. Tourner la tige du tendeur de chaîne de distribution à fond en sens d’horloge à l’aide d’un tourne- vis fin 1. N.B.: s’assurer que la tige du tendeur a bien été tournée à fond en sens d’horloge. 7. Déposer: • ca...
Page 120: Insp
3-13 e insp adj power unit 8. Adjust: • valve clearance adjustment steps: • remove the valve lifter 1 and the valve pad 2. Note: • cover the timing chain opening with a rag to prevent the valve pad from falling into the crankcase. • make a note of the position of each valve lifter 3 and valve pad 4 ...
Page 121: Insp
F d es 3- insp adj 8. Régler: • jeu des soupapes etapes du réglage: • déposer le poussoir de soupape 1 et sa cale de réglage 2. N.B.: • recouvrir l’orifice de la chaîne de distribution à l’aide d’un chiffon pour éviter toute chute intempes- tive de la cale de réglage de sou- pape dans le carter. • r...
Page 122: Insp
3-14 e insp adj power unit note: the new valve pad number is only an approximation. The valve clearance must be measured again and the above steps should be repeated if the measurement is still incorrect. • install the new valve pad 5 and the valve lifter 6. Note: • lubricate the valve pad with moly...
Page 123: Insp
F d es 3- insp adj n.B.: le numéro de la nouvelle cale de réglage n’est qu’une approximation. Le jeu de soupape doit être de nou- veau mésuré et les étapes ci-dessus doivent être répétées si la mesure est toujours incorrecte. • remonter la nouvelle cale de réglage de soupape 5 et le pous- soir de so...
Page 124: Insp
3-15 e insp adj power unit intake exhaust measured clearance original valve pad number 120 125 130 135 140 145 150 155 160 165 170 175 180 185 190 195 200 205 210 215 220 225 230 235 240 0.00–0.02 120 125 130 135 140 145 150 155 160 165 170 175 180 185 190 195 200 205 210 215 220 225 0.03–0.07 120 1...
Page 125: Insp
F 3- insp adj admission echappement jeu mesure numero de la cale de reglage de soupape d’origine 120 125 130 135 140 145 150 155 160 165 170 175 180 185 190 195 200 205 210 215 220 225 230 235 240 0,00–0,02 120 125 130 135 140 145 150 155 160 165 170 175 180 185 190 195 200 205 210 215 220 225 0,03–...
Page 126: Insp
D 3- insp adj einlaß auslaß gemessene s spiel ursprÜngliche ventilpuffernummer 120 125 130 135 140 145 150 155 160 165 170 175 180 185 190 195 200 205 210 215 220 225 230 235 240 0,00–0,02 120 125 130 135 140 145 150 155 160 165 170 175 180 185 190 195 200 205 210 215 220 225 0,03–0,07 120 125 130 1...
Page 127: Insp
Es 3- insp adj admisión escape holgura medida nÚmero original del taco de la vÁlvula 120 125 130 135 140 145 150 155 160 165 170 175 180 185 190 195 200 205 210 215 220 225 230 235 240 0–0,02 120 125 130 135 140 145 150 155 160 165 170 175 180 185 190 195 200 205 210 215 220 225 0,03–0,07 120 125 13...
Page 128: Insp
3-16 e insp adj power unit 9. Remove: • dial gauge • dial gauge stand • dial gauge needle 10. Install: • all removed parts note: for installation, reverse the removal proce- dure. Engine oil level check 1. Place the watercraft in a horizontal posi- tion. 2. Check: • engine oil level checking steps: ...
Page 129: Insp
F d es 3- insp adj 9. Déposer: • comparateur à cadran • support de comparateur à cadran • pointeau de comparateur à cadran 10. Installer: • toutes les pièces déposées n.B.: pour le remontage, procéder en sens inverse de la dépose. Contrôle du niveau d’huile moteur 1. Placer le jet ski en position ho...
Page 130: Insp
3-17 e insp adj power unit • remove the oil filler cap 1 and check for oil on the dipstick 2. • if there is no oil on the dipstick, pour enough oil so that the tip of the dipstick comes into contact with the oil, and then install the filler cap. • in water a. Place the watercraft in water, and then ...
Page 131: Insp
F d es 3- insp adj • déposer le bouchon de remplissage d’huile 1 et vérifier le niveau d’huile sur la jauge 2. • s’il n’y a pas d’huile sur la jauge, verser de l’huile jusqu’à ce que l’extrémité de la jauge entre en contact avec l’huile, puis remonter le bouchon de remplissage d’huile. • dans l’eau ...
Page 132: Insp
3-18 e insp adj power unit • if the engine oil is below the minimum level mark a, add sufficient oil of the rec- ommended type to raise it to the correct level. • if the engine oil is above the maximum level mark b, extract sufficient oil using an oil changer to lower it to the correct level. Note: ...
Page 133: Insp
F d es 3- insp adj vidange de l’huile moteur — à l’aide d’un dispositif de vidange avertissement eviter de vidanger l’huile moteur immédiatement après avoir arrêté le moteur. L’huile est chaude et doit être manipulée avec soin pour éviter les brûlures. Attention: • ne pas mettre le moteur en route s...
Page 134: Insp
3-19 e insp adj power unit 2. Remove: • oil filler cap 1 1 3. Insert the tube of an oil changer into the oil filler hole. 4. Operate the oil changer to extract the oil. 5. If the oil filter is also to be replaced, per- form the following procedure. Replacing steps: • place a rag under the oil filter...
Page 135: Insp
F d es 3- insp adj 2. Déposer: • bouchon de remplissage d’huile 1 3. Insérer le tube d’un dispositif de vidange dans l’orifice de remplis- sage d’huile. 4. Faire fonctionner le dispositif de vidange pour extraire l’huile. 5. Si le filtre à huile doit également être remplacé, procéder comme suit. Pro...
Page 136: Insp
3-20 e insp adj power unit 6. Pour the specified amount of the recom- mended engine oil into the oil filler hole. 7. Fill: • oil tank (with the specified amount of the recom- mended engine oil) caution: when starting the engine make sure the dipstick is securely fitted into the oil tank. 8. Install:...
Page 137: Insp
F d es 3- insp adj 6. Verser la quantité indiquée d’huile moteur recommandée dans l’orifice de remplissage d’huile. 7. Remplir: • réservoir d’huile (avec la quantité indiquée d’huile moteur recommandée) attention: avant de mettre le moteur en marche, s’assurer que la jauge d’huile est enfoncée à fon...
Page 138: Insp
3-21 e insp adj power unit 2. Remove the air filter element and check it for dirt and oil. Replace the air filter ele- ment if there is any oil buildup. Caution: • make sure that the air filter element is installed in the filter case properly. • do not start the engine with the air filter element re...
Page 139: Insp
F d es 3- insp adj 2. Déposer l’élément de filtre à air et l’examiner en recherchant toute trace de saleté ou d’huile. Rempla- cer l’élément de filtre à air en cas de présence de dépôts d’huile. Attention: • s’assurer que l’élément de filtre à air est correctement monté dans son boîtier. • pour ne p...
Page 140: Insp
3-22 e insp adj power unit 3. Inspect: • electrodes 1 damage/wear → replace. • insulator color 2 distinctly different color → check the engine condition. 4. Clean: • spark plug (with a spark plug cleaner or wire brush) 5. Measure: • spark plug gap a out of specification → regap. Color guide: medium ...
Page 141: Insp
F d es 3- insp adj 3. Inspecter: • electrodes 1 endommagement/usure → rem- placer. • couleur de l’isolant 2 couleur nettement différente → vérifier l’état du moteur. 4. Nettoyer: • bougie (avec un produit de nettoyage de bougie ou une brosse métallique) 5. Mesurer: • ecartement des électrodes a hors...
Page 142: Insp
3-23 e insp adj power unit/electrical 7. Install: • air filter element • air filter case cover t r . . Air filter case cover screw: 2.5 n • m (0.25 kgf • m, 1.8 ft • lb) loctite ® 572 electrical battery inspection warning battery electrolyte is poisonous and dan- gerous, causing severe burns, etc. E...
Page 143: Insp
F d es 3- insp adj 7. Installer: • elément de filtre à air • couvercle de boîtier de filtre à air systeme electrique inspection de la batterie avertissement l’électrolyte de la batterie est un pro- duit nocif et dangereux, provoquant de graves blessures, etc. L’électrolyte contient de l’acide sulfur...
Page 144: Insp
3-24 e insp adj electrical 1. Remove: • bands • battery negative lead 1 • battery positive lead 2 • battery • battery breather hose 3 warning • when removing the battery, disconnect the negative lead first. • remove the battery to prevent acid loss during turning the machine on its side for the impe...
Page 145: Insp
F d es 3- insp adj 1. Déposer: • sangles • câble négatif de la batterie 1 • câble positif de la batterie 2 • batterie • reniflard de la batterie 3 avertissement • lors de la dépose de la batterie, débrancher d’abord le câble négatif. • lorsque la machine est sur le côté pour l’entretien de la turbin...
Page 146: Insp
3-25 e insp adj electrical 3. Inspect: • specific gravity out of specification → charge. 4. Install: • filler caps caution: before installation, rinse off any fluid from the battery box and battery and make sure that the battery is dry before installing it. Specific gravity at 20 °c (68 °f): 1.28 ch...
Page 147: Insp
F d es 3- insp adj 3. Inspecter: • densité spécifique hors spécifications → charger. 4. Installer: • capuchons de remplissage attention: eponger tout liquide présent sur le boîtier et sur la batterie et veiller à ce que la batterie soit sèche avant de la remonter. 5. Installer: • reniflard de la bat...
Page 148: Insp
3-26 e insp adj jet pump unit jet pump unit impeller inspection 1. Check: • impeller 1 damage/wear → replace. Nicks/scratches → file or grind. 2. Measure: • impeller-to-housing clearance a out of specification → replace. Max. Impeller-to-housing clearance: 0.6 mm (0.0236 in) measurement steps: • rem...
Page 149: Insp
F d es 3- insp adj pompe de propulsion inspection de la turbine 1. Vérifier: • turbine 1 endommagement/usure → rem- placer. Coups/rayures → limer ou recti- fier. 2. Mesurer: • jeu entre turbine et carter a hors spécifications → rempla- cer. Espace turbine-boîtier maxi.: 0,6 mm (0,0236 in) etapes de ...
Page 150: Insp
3-27 e insp adj jet pump unit/bilge pump water inlet strainer inspection 1. Inspect: • water inlet strainer contaminants → clean. Cracks/damage → replace. Inspection steps: • remove the ride plate. Refer to “intake grate, ride plate, and intake duct” in chapter 6. • remove the rubber plate. Refer to...
Page 151: Insp
F d es 3- insp adj inspection de la crépine d’admission d’eau 1. Inspecter: • crépine d’admission d’eau encrassement → nettoyer. Fissures/endommagement → remplacer. Pompe de cale inspection de la crépine de cale 1. Inspecter: • crépine de cale encrassement → nettoyer. Fissures/endommagement → rempla...
Page 152: Insp
3-28 e insp adj bilge pump/general electric bilge pump strainer inspection 1. Inspect: • cap • strainer contaminants → clean. Inspection steps: • remove the band 1. • remove the cap 2 and strainer 3. • inspect the cap and strainer. • install the strainer and cap. • install the band. 1 3 2 general dr...
Page 153: Insp
F d es 3- insp adj inspection de la crépine de pompe de cale électrique 1. Inspecter: • capuchon • crépine encrassement → nettoyer. Generalites inspection du bouchon de vidange 1. Inspecter: • bouchons de vidange fissures/endommagement → remplacer. • joints toriques fissures/usure → remplacer. • fil...
Page 154: Insp
3-29 e insp adj general lubrication points 1. Lubricate: • throttle cable (handlebar end) note: before lubricating the throttle cable, squeeze the throttle lever and remove the rubber seal 1. 2. Lubricate: • throttle cable (throttle body end) recommended lubricant: rust inhibitor recommended lubrica...
Page 155: Insp
F d es 3- insp adj points de graissage 1. Lubrifier: • câble d’accélérateur (côté guidon) n.B.: avant de graisser le câble d’accéléra- teur, presser la manette des gaz et dépo- ser le joint en caoutchouc 1. 2. Lubrifier: • câble d’accélérateur (côté corps du papillon) 3. Lubrifier: • câbles de comma...
Page 156: Insp
3-30 e insp adj general 5. Lubricate: • nozzle pivot shaft • steering cable (nozzle end) • qsts cable (nozzle end) recommended grease: yamaha marine grease, yamaha grease a (water resistant grease) 6. Lubricate: • steering cable • steering cable joint • shift cable • shift cable joint note: disconne...
Page 157: Insp
F d es 3- insp adj 5. Lubrifier: • axe d’articulation de la tuyère • câble de direction (côté tuyère) • câble qsts (côté tuyère) 6. Lubrifier: • câble de direction • raccord du câble de direction • câble de sélecteur • raccord de câble de sélecteur n.B.: débrancher les raccords et appliquer une peti...
Page 158: Insp
3-31 e insp adj general 7. Fill: • intermediate housing note: fill the intermediate housing with the recom- mended grease through the grease nipple 1. Recommended grease: yamaha marine grease, yamaha grease a (water resistant grease) grease quantity: initial 10 hours: 33.0–35.0 cm 3 (1.11–1.18 oz) e...
Page 159: Insp
F d es 3- insp adj 7. Remplir: • logement intermédiaire n.B.: garnir le logement intermédiaire de graisse recommandée par le graisseur 1. Graisse recommandée: graisse marine yamaha, graisse a yamaha (graisse hydrofuge) quantité de graisse: les 10 premières heures: 33,0–35,0 cm 3 (1,11–1,18 oz) toute...
Page 160: Fuel
E fuel 1 2 3 4 5 6 7 8 9 chapter 4 fuel system fuel tank and fuel pump module...................................................... 4-1 exploded diagram ............................................................................. 4-1 removal and installation chart .....................................
Page 161
1 2 3 4 5 6 7 8 9 f d es chapitre 4 systeme d’alimentation reservoir de carburant et module pompe a carburant .................................... 4-1 vue en eclate ............................ 4-1 tableau de depose et d’installation ........................ 4-1 points d’entretien.................. ...
Page 162: Fuel
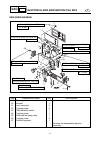
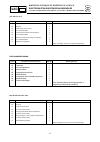
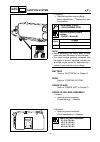
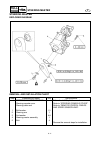
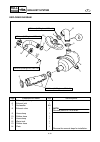
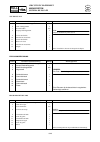
4-1 e fuel fuel tank and fuel pump module fuel tank and fuel pump module exploded diagram removal and installation chart step procedure/part name q’ty service points fuel tank removal follow the left “step” for removal. Service lid 1 refer to “front hood” in chapter 8. Service lid 2 ventilation hose...
Page 163: Fuel
F d es 4- fuel reservoir de carburant et module pompe a carburant vue en eclate tableau de depose et d’installation etape procédé/nom de pièce qté points d’entretien depose du reservoir de carburant suivre l’“étape” de gauche pour la dépose. Tape de visite 1 se reporter à “capot avant” au chapitre 8...
Page 164: Fuel
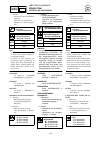
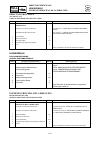
4-2 e fuel fuel tank and fuel pump module exploded diagram step procedure/part name q’ty service points 4 fuel tank breather hose 1 note: make sure that the inner seal of the coupler is installed properly before connecting the coupler. 5 fuel sender coupler 1 6 fuel pump module coupler 1 7 cover 1 8...
Page 165: Fuel
F d es 4- fuel vue en eclate etape procédé/nom de pièce qté points d’entretien 4 reniflard de réservoir de carburant 1 n.B.: veiller à ce que le joint interne du raccord soit monté cor- rectement avant de brancher le raccord. 5 raccord de transmetteur de niveau de carburant 1 6 raccord du module pom...
Page 166: Fuel
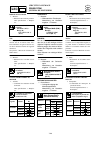
4-3 e fuel fuel tank and fuel pump module exploded diagram step procedure/part name q’ty service points 13 fuel sender assembly 1 14 hose clamp 2 15 fuel filler hose 1 16 nut 1 17 fuel filler neck 1 18 rubber seal 1 19 bolt 2 20 fuel tank assembly 1 21 strainer 1 22 bolt 2 23 fuel tank belt 2 revers...
Page 167: Fuel
F d es 4- fuel vue en eclate etape procédé/nom de pièce qté points d’entretien 13 ensemble transmetteur de niveau de carburant 1 14 collier de flexible 2 15 flexible de remplissage de carburant 1 16 ecrou 1 17 goulotte de remplissage de carburant 1 18 joint en caoutchouc 1 19 vis 2 20 ensemble de ré...
Page 168: Fuel
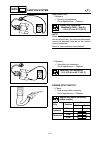
4-4 e fuel fuel tank and fuel pump module service points fuel hose disconnection 1. Disconnect: • fuel hose refer to “fuel injection system”. Fuel pump module removal 1. Remove: • nuts • retainer note: loosen the nuts in the sequence shown. 1 4 9 6 2 3 8 7 5 2. Remove: • fuel pump module 1 note: rem...
Page 169: Fuel
F d es 4- fuel points d’entretien débranchement du flexible de carburant 1. Débrancher: • flexible de carburant se reporter à “circuit d’injection de carbu- rant”. Dépose du module pompe à carburant 1. Déposer: • ecrous • dispositif de retenue n.B.: desserrer les écrous dans l’ordre indi- qué. 2. Dé...
Page 170: Fuel
4-5 e fuel fuel tank and fuel pump module check valve inspection 1. Check: • check valve faulty → replace. Checking steps: • connect a hose to the end of check valve “a” and blow into it. Air should come out from end “b”. • connect the hose to the end of check valve “b” and blow into it. Air should ...
Page 171: Fuel
F d es 4- fuel inspection du clapet antiretour 1. Vérifier: • clapet antiretour défectueux → remplacer. Inspection de la soupape de retournement 1. Vérifier: • soupape de retournement défectueuse → remplacer. Inspection du transmetteur de niveau de carburant se reporter à “circuit de commande de car...
Page 172: Fuel
4-6 e fuel fuel tank and fuel pump module fuel pump filter inspection 1. Inspect: • fuel pump filter 1 clog/contaminants → wash the fuel pump filter in kerosene or gasoline. 1 fuel strainer inspection 1. Inspect: • fuel strainer clog/contaminants → clean. Fuel pump module installation 1. Tighten: • ...
Page 173: Fuel
F d es 4- fuel inspection du filtre de la pompe à carburant 1. Inspecter: • filtre de pompe à carburant 1 bouché/encrassement → laver le filtre de la pompe à carburant dans du kérosène ou de l’essence. Inspection du tamis de filtre à carburant 1. Inspecter: • tamis de filtre à carburant bouché/encra...
Page 174: Fuel
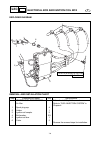
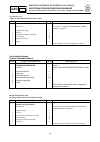
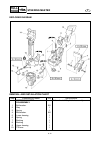
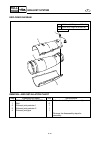
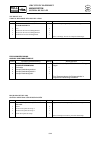
4-7 e fuel fuel injection system fuel injection system exploded diagram removal and installation chart step procedure/part name q’ty service points throttle bodies removal follow the left “step” for removal. 1 screw 2 2 air filter case cover 1 3 air filter 1 4 bolt 4 5 flame arrester 1 note: when re...
Page 175: Fuel
F d es 4- fuel circuit d’injection de carburant vue en eclate tableau de depose et d’installation etape procédé/nom de pièce qté points d’entretien depose des corps de papillon suivre l’“étape” de gauche pour la dépose. 1 vis 2 2 couvercle de boîtier de filtre à air 1 3 filtre à air 1 4 vis 4 5 pare...
Page 176: Fuel
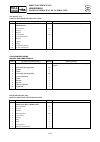
4-8 e fuel fuel injection system exploded diagram step procedure/part name q’ty service points 7 throttle cable 1 8 bolt 2 9 throttle cable holder 1 10 cover 1 11 fuel hose 1 12 bolt 2 13 fuel hose holder 1 14 clamp 1 15 clamp 1 16 bolt 8 a a lt 572 lt lt 572 lt lt 572 lt lt 242 lt e 1 4 5 6 16 22 1...
Page 177: Fuel
F d es 4- fuel vue en eclate etape procédé/nom de pièce qté points d’entretien 7 câble d’accélérateur 1 8 vis 2 9 support de câble d’accélérateur 1 10 cache 1 11 flexible de carburant 1 12 vis 2 13 pièce de tenue du flexible de carburant 1 14 collier 1 15 collier 1 16 vis 8 non réutilisable explosio...
Page 178: Fuel
4-9 e fuel fuel injection system exploded diagram step procedure/part name q’ty service points 17 throttle bodies 1 18 intake air pressure sensor coupler 1 19 intake air temperature sensor coupler 1 20 fuel injector coupler 4 21 throttle position sensor coupler 1 22 joint connector 2 reverse the rem...
Page 179: Fuel
F d es 4- fuel vue en eclate etape procédé/nom de pièce qté points d’entretien 17 corps de papillon 1 18 raccord du capteur de pression d’air d’admission 1 19 raccord du capteur de température d’air d’admission 1 20 raccord d’injecteur de carburant 4 21 raccord du capteur d’accélération 1 22 connect...
Page 180: Fuel
4-10 e fuel fuel injection system exploded diagram removal and installation chart step procedure/part name q’ty service points air filter case removal follow the left “step” for removal. Throttle bodies 1 clamp/breather hose 1/1 2 band 1 unfasten the wire harness. 3 lighting coil coupler 1 from wire...
Page 181: Fuel
F d es 4- fuel vue en eclate tableau de depose et d’installation etape procédé/nom de pièce qté points d’entretien depose du boitier de filtre a air suivre l’“étape” de gauche pour la dépose. Corps de papillon 1 collier/flexible de reniflard 1/1 2 sangle 1 desserrer le faisceau de fil 3 raccord de l...
Page 182: Fuel
4-11 e fuel fuel injection system exploded diagram step procedure/part name q’ty service points 8 wire harness coupler 1 9 bolt 3 10 air filter case 1 11 bolt 2 12 wire harness bracket 1 1 13 sub wire harness 1 14 bolt 2 15 fuel hose bracket 1 16 screw 1 17 wire harness bracket 2 1 3 16 5 15 14 24 2...
Page 183: Fuel
F d es 4- fuel vue en eclate etape procédé/nom de pièce qté points d’entretien 8 raccord du faisceau de fils 1 9 boulon 3 10 boîtier de filtre à air 1 11 boulon 2 12 support de faisceau de fils 1 1 13 faisceau de fils secondaire 1 14 boulon 2 15 support de flexible de carburant 1 16 vis 1 17 support...
Page 184: Fuel
4-12 e fuel fuel injection system exploded diagram step procedure/part name q’ty service points 18 grommet 1 19 throttle body joint 4 20 band 2 21 bolt 2 22 air filter case stay 1 2 23 band 1 24 bolt 1 25 air filter case stay 2 1 reverse the removal steps for installation. 3 16 5 15 14 24 23 25 10 1...
Page 185: Fuel
F d es 4- fuel vue en eclate etape procédé/nom de pièce qté points d’entretien 18 guide 1 19 raccord de corps de papillon 4 20 sangle 2 21 boulon 2 22 entretoise de boîtier de filtre à air 1 2 23 sangle 1 24 boulon 1 25 entretoise de boîtier de filtre à air 2 1 pour l’installation, inverser les étap...
Page 186: Fuel
4-13 e fuel fuel injection system exploded diagram removal and installation chart step procedure/part name q’ty service points throttle body disassembly follow the left “step” for disassembly. 1 screw/washer 3/3 2 spacer 3 3 fuel rail 1 4 intake vacuum hose 3 5 joint 1 6 injector 4 7 grommet 4 8 scr...
Page 187: Fuel
F d es 4- fuel vue en eclate tableau de depose et d’installation etape procédé/nom de pièce qté points d’entretien demontage du corps de papillon suivre l’“étape” de gauche pour le démontage. 1 vis/rondelle 3/3 2 entretoise 3 3 rail d’injection 1 4 flexible de dépression d’admission 3 5 raccord 1 6 ...
Page 188: Fuel
4-14 e fuel fuel injection system exploded diagram step procedure/part name q’ty service points 11 intake air temperature sensor 1 12 screw 1 13 bracket 1 1 14 screw 2 15 fuel pipe 1 16 o-ring 1 17 screw 2 18 bracket 2 1 19 screw 2 20 throttle stop guide 1 21 screw 2 22 throttle stop screw bracket 1...
Page 189: Fuel
F d es 4- fuel vue en eclate etape procédé/nom de pièce qté points d’entretien 11 capteur de température d’air d’admission 1 12 vis 1 13 support 1 1 14 vis 2 15 tuyau de carburant 1 16 joint torique 1 17 vis 2 18 support 2 1 19 vis 2 20 guide de butée de papillon 1 21 vis 2 22 support de vis de buté...
Page 190: Fuel
4-15 e fuel fuel injection system exploded diagram step procedure/part name q’ty service points 23 screw/spring 4/4 24 bypass air screw 4 25 spring 4 26 washer 4 27 o-ring 4 28 screw 2 29 throttle position sensor 1 30 o-ring 1 31 throttle bodies 1 reverse the disassembly steps for assembly. 17 8 9 1...
Page 191: Fuel
F d es 4- fuel vue en eclate etape procédé/nom de pièce qté points d’entretien 23 vis/ressort 4/4 24 vis d’air secondaire 4 25 ressort 4 26 rondelle 4 27 joint torique 4 28 vis 2 29 capteur d’accélération 1 30 joint torique 1 31 corps de papillon 1 pour le montage, inverser les étapes du démontage. ...
Page 192: Fuel
4-16 e fuel fuel injection system service points hose clamps removal 1. Remove: • hose clamps caution: if the hose clamps are removed without cutting the joint first, the fuel hose will be damaged. Hose clamps installation 1. Install: • hose clamps warning do not reuse the hose clamps, always replac...
Page 193: Fuel
F d es 4- fuel points d’entretien dépose des colliers de flexibles 1. Déposer: • colliers de flexibles attention: si les colliers de flexibles sont déposés sans couper au préalable la partie ser- tie, le flexible de carburant sera dété- rioré. Montage des colliers 1. Installer: • colliers de flexibl...
Page 194: Fuel
4-17 e fuel caution: • do not rotate the quick connector tab 1 past the stopper position a, otherwise it could be damaged. • when the fuel hoses are disconnected, quickly remove the retainer 2 from the quick connector, otherwise the retainer could be lost. 2. Disconnect the fuel hose 1 from the fuel...
Page 195: Fuel
F d es 4- fuel attention: • ne pas tourner la patte du connec- teur rapide 1 au-delà de la position de la butée a afin de ne pas l’endommager. • lors du débranchement des flexi- bles de carburant, retirer rapide- ment le dispositif de retenue 2 du connecteur rapide, faute de quoi le dispositif de re...
Page 196: Fuel
4-18 e fuel fuel injection system fuel hose installation (replacing with new fuel hose) 1. Install: • fuel hose 1 note: • to install the fuel hose, be sure to align the white mark a of the fuel hose with the checker tab 2 of the quick connector. • when replacing the fuel hose with a new one, a check...
Page 197: Fuel
F d es 4- fuel remontage du flexible de carburant (remplacement par un flexible neuf) 1. Installer: • flexible de carburant 1 n.B.: • pour remonter le flexible de carburant, veiller à aligner le repère blanc a du flexible avec la patte 2 du connecteur rapide. • lorsque le flexible de carburant est r...
Page 198: Fuel
4-19 e fuel fuel injection system fuel injector inspection caution: the throttle bodies should not be disas- sembled unnecessarily. 1. Check: • injector dirt/residue → clean. Damage → replace. 2. Measure: • fuel injectors resistance out of specification → replace. 3. Check the operation of the fuel ...
Page 199: Fuel
F d es 4- fuel inspection de l’injecteur de carburant attention: les corps de papillon ne doivent pas être démontés inutilement. 1. Vérifier: • injecteur saletés/résidus → nettoyer. Endommagement → remplacer. 2. Mesurer: • résistance des injecteurs de car- burant hors spécifications → rempla- cer. 3...
Page 200: Fuel
4-20 e fuel fuel injection system 2. Check: • fuel passages obstruction → clean. Checking steps: • wash the throttle body in a petroleum based solvent. Do not use any caustic carburetor clean- ing solution. • blow out all of passages with com- pressed air. Throttle body installation 1. Install: • th...
Page 201: Fuel
F d es 4- fuel 2. Vérifier: • passages de carburant obstruction → nettoyer. Remontage du corps de papillon 1. Installer: • corps de papillon attention: ne pas faire de coude dans le tuyau de carburant 1. 2. Installer: • flexible de carburant 1 (côté corps de papillon) • collier n.B.: remonter le fle...
Page 202: Fuel
4-21 e fuel fuel injection system throttle bodies synchronization 1. Remove: • throttle bodies • air filter case 2. Adjust: • throttle bodies synchronization adjustment steps: note: the bypass air screw 1 should not be adjusted. However, if it is necessary to remove the bypass air screw, be sure to ...
Page 203: Fuel
F d es 4- fuel synchronisation des corps de papillon 1. Déposer: • corps de papillon • boîtier de filtre à air 2. Régler: • synchronisation des corps de papillon etapes du réglage: n.B.: la vis d’air secondaire 1 ne néces- site aucun réglage. Toutefois, s’il est nécessaire de déposer la vis d’air se...
Page 204: Fuel
4-22 e fuel fuel injection system c. Turn synchronizing screw #1 3 clock- wise approximately 7 times until it starts to contact the lever. Note: • butterfly valve #1 should be fully closed. Butterfly valves #2 and #3 open if the screw is turned more than 7 times. • if butterfly valves #1, #2, and #3...
Page 205: Fuel
F d es 4- fuel c. Tourner la vis de synchronisation n°1 3 7 fois environ en sens d’horloge jusqu’à ce qu’elle com- mence à toucher le levier. N.B.: • le papillon n°1 doit être complète- ment fermé. Les papillons n°2 et n°3 s’ouvrent si l’on donne plus de 7 tours à la vis. • si les papillons n°1, n°2...
Page 206: Fuel
4-23 e fuel fuel injection system note: for best results, use a vacuum gauge (commercially obtainable), like 9 or 0 shown in the illustration, that has four adapters. È for usa and canada É for worldwide i. Install the throttle bodies. Note: adjust the throttle body synchronization with the air filt...
Page 207: Fuel
F d es 4- fuel n.B.: pour obtenir les meilleurs résultats, utiliser un dépressiomètre (disponible dans le commerce) équipé de 4 adap- tateurs, tel que les dispositifs 9 ou 0 visibles sur l’illustration. È pour les e.-u. Et le canada É pour le reste du monde i. Remonter les corps de papillon. N.B.: r...
Page 208: Fuel
4-24 e fuel fuel injection system throttle position sensor output voltage: pink (p) – black/orange (b/o) 0.8 ± 0.1 v note: • to decrease the output voltage, turn the throttle position sensor clockwise. • slightly tighten the throttle position screw. P. Start the engine and let it run at trolling spe...
Page 209: Fuel
F d es 4- fuel tension de sortie du capteur d’accélération: rose (p) – noir/orange (b/o) 0,8 ± 0,1 v n.B.: • pour diminuer la tension de sortie, tourner le capteur d’accélération en sens d’horloge. • serrer légèrement la vis de position du papillon. P. Mettre le moteur en marche et le laisser tourne...
Page 210: Fuel
4-25 e fuel 3. Remove: • throttle bodies • air filter case 4. Remove: • carburetor synchronizer or vacuum gauge 5. Install: • plugs 6. Install: • air filter case • throttle bodies vacuum pressure at trolling speed: cylinder cylinder difference example #1 –30 ± 10 mmhg (–4.00 ± 1.33 kpa, –1.2 ± 0.4 i...
Page 211: Fuel
F d es 4- fuel 3. Déposer: • corps de papillon • boîtier de filtre à air 4. Déposer: • synchronisateur de carburateurs ou dépressiomètre 5. Installer: • bouchons 6. Installer: • boîtier de filtre à air • corps de papillon dépression au régime embrayé: cylindre différence de cylindre exemple n°1 –30 ...
Page 212: Fuel
4-26 e fuel fuel injection system fuel pressure measurement 1. Disconnect: • fuel hose refer to “fuel hose disconnection”. 2. Install: • fuel pressure gauge adapter 1 • fuel pressure gauge 2 note: to connect the fuel pressure gauge adapter, follow the procedures for connecting a fuel hose. (refer to...
Page 213: Fuel
F d es 4- fuel mesure de la pression de carburant 1. Débrancher: • flexible de carburant se reporter à “débranchement du flexible de carburant”. 2. Installer: • adaptateur de manomètre de carburant 1 • manomètre de carburant 2 n.B.: pour brancher l’adaptateur de manomè- tre de carburant, suivre les ...
Page 214: Powr
E powr chapter 5 power unit engine unit .................................................................................................. 5-1 exploded diagram ............................................................................. 5-1 removal and installation chart ..............................
Page 215
1 2 3 4 5 6 7 8 9 f d es chapitre 5 moteur moteur ............................................. 5-1 vue en eclate ............................ 5-1 tableau de depose et d’installation ........................ 5-1 points d’entretien.................. 5-4 mesure des compressions.............. 5-4 dépos...
Page 216: Powr
E powr 1 2 3 4 5 6 7 8 9 oil pump...................................................................................................... 5-26 exploded diagram ........................................................................... 5-26 removal and installation chart .................................
Page 217
F d es pompe a huile ............................. 5-26 vue en eclate .......................... 5-26 tableau de depose et d’installation ...................... 5-26 points d’entretien................ 5-29 dépose de la pompe à huile ........ 5-29 inspection de la pompe à huile.... 5-29 inspection du...
Page 218: Powr
E powr cylinder head.......................................................................................... 5-60 exploded diagram ........................................................................... 5-60 removal and installation chart ............................................. 5-60 serv...
Page 219
F d es culasse .......................................... 5-60 vue en eclate .......................... 5-60 tableau de depose et d’installation ...................... 5-60 points d’entretien................ 5-62 dépose de la culasse.................... 5-62 inspection de la culasse ............... ...
Page 220: Powr
E powr crankshaft ............................................................................................ 5-100 exploded diagram ......................................................................... 5-100 removal and installation chart ............................................ 5-100 serv...
Page 221
F d es vilebrequin .............................. 5-100 vue en eclate ........................ 5-100 tableau de depose et d’installation .................... 5-100 points d’entretien.............. 5-101 dépose du vilebrequin............... 5-101 inspection du vilebrequin .......... 5-101 remontage d...
Page 222: Powr
5-1 e powr engine unit engine unit exploded diagram removal and installation chart step procedure/part name q’ty service points engine unit removal follow the left “step” for removal. Engine oil drain. Refer to “power unit” in chapter 3. Service lid 1 refer to “front hood” in chapter 8. Battery nega...
Page 223: Powr
F d es 5- powr moteur vue en eclate tableau de depose et d’installation etape procédé/nom de pièce qté points d’entretien depose du moteur suivre l’“étape” de gauche pour la dépose. Huile moteur vidanger. Se reporter à “moteur” au chapitre 3. Couvercle d’entretien 1 se reporter à “capot avant” au ch...
Page 224: Powr
5-2 e powr engine unit exploded diagram step procedure/part name q’ty service points 3 electrical box 1 4 clamp/cooling water hose 1/1 cooling water pilot outlet 5 clamp/cooling water hose 1/1 cooling water pilot outlet 6 clamp/cooling water hose 1/1 cooling water outlet 7 clamp/cooling water hose 1...
Page 225: Powr
F d es 5- powr vue en eclate etape procédé/nom de pièce qté points d’entretien 3 boîtier électrique 1 4 collier/tuyau d’eau de refroidissement 1/1 sortie témoin d’eau de refroidissement 5 collier/tuyau d’eau de refroidissement 1/1 sortie témoin d’eau de refroidissement 6 collier/tuyau d’eau de refro...
Page 226: Powr
5-3 e powr engine unit exploded diagram *: as required. Step procedure/part name q’ty service points 13 bolt/washer 4/4 14 shim * 15 engine unit 1 reverse the removal steps for installation. 4 10 11 12 6 3 7 2 8 1 9 5 9 14 9 13 15 lt 271 lt lt 572 lt 7.8 n • m (0.78 kgf • m, 5.6 ft • ib) 6 × 25 mm 8...
Page 227: Powr
F d es 5- powr vue en eclate *: si nécessaire etape procédé/nom de pièce qté points d’entretien 13 vis/rondelle 4/4 14 cale * 15 moteur 1 pour l’installation, inverser les étapes de la dépose. Explosionszeichnung *: nach bedarf schritt verfahren/teilebezeichnung menge wartungspunkte 13 schraube/unte...
Page 228: Powr
5-4 e powr engine unit service points compression pressure measurement the following procedure applies to all of the cylinders. Note: insufficient compression pressure will result in a loss of performance. 1. Measure: • valve clearance out of specification → adjust. Refer to “power unit” in chapter ...
Page 229: Powr
F d es 5- powr points d’entretien mesure des compressions la procédure suivante s’applique à tous les cylindres. N.B.: une compression insuffisante se traduira par une perte de performances. 1. Mesurer: • jeu des soupapes hors spécifications → régler. Se reporter à “moteur” au chapitre 3. 2. Faire c...
Page 230: Powr
5-5 e powr engine unit 7. Measure: • compression pressure out of specification → refer to steps (b) and (c). 8. Install: • spark plug minimum compression pressure (reference data): 1,080 kpa (10.8 kgf/cm 2 , 157 psi) measurement steps: a. With the throttle wide open, crank the engine until the readi...
Page 231: Powr
F d es 5- powr 7. Mesurer: • pression de compression hors spécifications → se repor- ter aux étapes (b) et (c). 8. Installer: • bougie compression minimale (données de référence): 1.080 kpa (10,8 kgf/cm 2 , 157 psi) etapes de la mesure: a. La manette des gaz ouverte à fond, lancer le moteur jusqu’à ...
Page 232: Powr
5-6 e powr engine unit 9. Install: • air filter element • air filter case cover t r . . Air filter case cover screw: 2.5 n • m (0.25 kgf • m, 1.8 ft • lb) loctite ® 572 oil filter removal and installation 1. Remove: • oil filter 1 note: install the oil filter with the same special tool that was used...
Page 233: Powr
F d es 5- powr 9. Installer: • elément de filtre à air • couvercle de boîtier de filtre à air dépose et remontage du filtre à huile 1. Déposer: • filtre à huile 1 n.B.: remonter le filtre à huile avec le même outillage spécial que celui utilisé pour sa dépose. Dépose du moteur 1. Déposer: • moteur t...
Page 234: Powr
5-7 e powr engine unit shim removal 1. Remove: • shims note: to ease reassembly and coupling alignment, remove the shims and organize them in their respective groups (e.G., front right, rear left) prior to removing the mounting bolts. Engine mount inspection 1. Inspect: • engine mounts cracks/damage...
Page 235: Powr
F d es 5- powr dépose des cales 1. Déposer: • cales n.B.: avant de déposer les boulons de mon- tage, démonter les cales et les disposer dans leurs groupes respectifs (par exem- ple avant droit, arrière gauche) afin de faciliter leur remontage et l’alignement de l’accouplement. Inspection des fixatio...
Page 236: Powr
5-8 e powr exhaust pipe 3 exhaust pipe 3 exploded diagram removal and installation chart step procedure/part name q’ty service points exhaust pipe 3 removal follow the left “step” for removal. Engine unit refer to “engine unit”. Air filter case refer to “fuel injection system” in chapter 4. 1 clamp/...
Page 237: Powr
F d es 5- powr pipe d’echappement 3 vue en eclate tableau de depose et d’installation etape procédé/nom de pièce qté points d’entretien depose de la pipe d’echappement 3 suivre l’“étape” de gauche pour la dépose. Moteur se reporter à “moteur”. Boîtier de filtre à air se reporter à “circuit d’injecti...
Page 238: Powr
5-9 e powr exhaust pipe 3 exploded diagram step procedure/part name q’ty service points 6 exhaust joint clamp 2 slide the outer exhaust joint for exhaust manifold side 7 exhaust joint clamp 2 8 bolt 1 9 bolt 1 10 bolt 2 11 collar 1 12 exhaust pipe 3 1 13 bolt 3 14 exhaust pipe end 1 3 6 18 2 7 17 16...
Page 239: Powr
F d es 5- powr vue en eclate etape procédé/nom de pièce qté points d’entretien 6 collier de raccord d’échappement 2 faire glisser le raccord d’échappement extérieur vers le côté du collecteur d’échappement 7 collier de raccord d’échappement 2 8 vis 1 9 vis 1 10 vis 2 11 bague 1 12 pipe d’échappement...
Page 240: Powr
5-10 e powr exhaust pipe 3 exploded diagram step procedure/part name q’ty service points 15 gasket 1 16 inner exhaust joint 1 17 exhaust joint seal 1 18 outer exhaust joint 1 reverse the removal steps for installation. 3 6 18 2 7 17 16 10 12 11 8 9 13 14 15 5 4 1 lt 572 lt 572 lt 572 lt 572 lt 242 l...
Page 241: Powr
F d es 5- powr vue en eclate etape procédé/nom de pièce qté points d’entretien 15 joint 1 16 joint d’échappement intérieur 1 17 joint de raccord d’échappement 1 18 joint d’échappement extérieur 1 pour l’installation, inverser les étapes de la dépose. Non réutilisable explosionszeichnung schritt verf...
Page 242: Powr
5-11 e powr exhaust pipes 1 and 2 exhaust pipes 1 and 2 exploded diagram removal and installation chart step procedure/part name q’ty service points exhaust pipes 1 and 2 removal follow the left “step” for removal. Exhaust pipe 3 refer to “exhaust pipe 3”. Generator cover refer to “generator and sta...
Page 243: Powr
F d es 5- powr pipes d’echappement 1 et 2 vue en eclate tableau de depose et d’installation etape procédé/nom de pièce qté points d’entretien depose des pipes d’echappement 1 et 2 suivre l’“étape” de gauche pour la dépose. Pipe d’échappement 3 se reporter à “pipe d’echappement 3”. Couvercle d’altern...
Page 244: Powr
5-12 e powr exhaust pipes 1 and 2 exploded diagram step procedure/part name q’ty service points 7 dowel pin 2 8 clamp/cooling water hose 2/2 È from cooling water inlet 9 bolt 4 10 bolt 6 11 exhaust pipe 1 1 12 gasket 1 13 dowel pin 2 reverse the removal steps for installation. E e e lt 242 lt 242 lt...
Page 245: Powr
F d es 5- powr vue en eclate etape procédé/nom de pièce qté points d’entretien 7 pion de centrage 2 8 collier/tuyau d’eau de refroidissement 2/2 È de l’entrée d’eau de refroidissement 9 vis 4 10 vis 6 11 pipe d’échappement 1 1 12 joint 1 13 pion de centrage 2 pour l’installation, inverser les étapes...
Page 246: Powr
5-13 e powr exhaust manifold exhaust manifold exploded diagram removal and installation chart step procedure/part name q’ty service points exhaust manifold removal follow the left “step” for removal. Exhaust pipes 1 and 2 refer to “exhaust pipes 1 and 2”. 1 joint assembly 1 È to pressure control val...
Page 247: Powr
F d es 5- powr collecteur d’echappement vue en eclate tableau de depose et d’installation etape procédé/nom de pièce qté points d’entretien depose du collecteur d’echappement suivre l’“étape” de gauche pour la dépose. Pipes d’échappement 1 et 2 se reporter à “pipes d’echappement 1 et 2”. 1 ensemble ...
Page 248: Powr
5-14 e powr exhaust manifold exploded diagram step procedure/part name q’ty service points 6 bolt 1 7 bolt 4 8 exhaust manifold 2 1 9 gasket 1 10 dowel pin 2 reverse the removal steps for installation. 4 3 2 5 6 7 10 10 9 8 5 lt 242 lt 242 lt 242 lt 242 1 2nd 22 n • m (2.2 kgf • m, 16 ft • ib) 1st 2...
Page 249: Powr
F d es 5- powr vue en eclate etape procédé/nom de pièce qté points d’entretien 6 vis 1 7 vis 4 8 collecteur d’échappement 2 1 9 joint 1 10 pion de centrage 2 pour l’installation, inverser les étapes de la dépose. Non réutilisable explosionszeichnung schritt verfahren/teilebezeichnung menge wartungsp...
Page 250: Powr
5-15 e powr oil tank oil tank exploded diagram removal and installation chart step procedure/part name q’ty service points oil tank removal follow the left “step” for removal. Engine unit refer to “engine unit”. Air filter case refer to “fuel injection system” in chapter 4. Ignition coil box refer t...
Page 251: Powr
F d es 5- powr reservoir d’huile vue en eclate tableau de depose et d’installation etape procédé/nom de pièce qté points d’entretien depose du reservoir d’huile suivre l’“étape” de gauche pour la dépose. Moteur se reporter à “moteur”. Boîtier de filtre à air se reporter à “circuit d’injection de car...
Page 252: Powr
5-16 e powr oil tank exploded diagram step procedure/part name q’ty service points 5 clamp/breather hose 2/1 6 clamp/breather hose 2/1 É to oil pump align the mark a of the breather hose with the parting line of the oil separator. 7 bolt 3 8 collar 2 9 oil separator 1 10 clamp/breather hose 1/1 Ê to...
Page 253: Powr
F d es 5- powr vue en eclate etape procédé/nom de pièce qté points d’entretien 5 collier/flexible de reniflard 2/1 6 collier/flexible de reniflard 2/1 É vers la pompe à huile aligner le repère a du flexible de reniflard avec le plan de joint du séparateur d’huile. 7 vis 3 8 bague 2 9 séparateur d’hu...
Page 254: Powr
5-17 e powr oil tank exploded diagram step procedure/part name q’ty service points 12 clamp/cooling water hose 1/1 Ì from cooling water inlet 13 clamp/cooling water hose 1/1 Í from pressure control valve 14 bolt 1 15 collar 1 16 band 1 17 bolt 3 18 cover 1 19 gasket 1 20 bolt 2 21 ground lead 2 22 b...
Page 255: Powr
F d es 5- powr vue en eclate etape procédé/nom de pièce qté points d’entretien 12 collier/tuyau d’eau de refroidissement 1/1 Ì de l’entrée d’eau de refroidissement 13 collier/tuyau d’eau de refroidissement 1/1 Í de la soupape régulatrice de pression 14 vis 1 15 bague 1 16 sangle 1 17 vis 3 18 cache ...
Page 256: Powr
5-18 e powr oil tank exploded diagram step procedure/part name q’ty service points 23 nut 2 24 oil tank 1 25 pin 2 26 o-ring 4 27 connector 2 28 bolt 2 29 oil tank stay 1 reverse the removal steps for installation. Lt 572 lt 572 lt 572 lt 572 lt 572 lt 572 lt 572 lt 572 lt 572 lt 572 lt 572 lt 572 2...
Page 257: Powr
F d es 5- powr vue en eclate etape procédé/nom de pièce qté points d’entretien 23 ecrou 2 24 réservoir d’huile 1 25 pion 2 26 joint torique 4 27 connecteur 2 28 vis 2 29 support de réservoir d’huile 1 pour l’installation, inverser les étapes de la dépose. Non réutilisable explosionszeichnung schritt...
Page 258: Powr
5-19 e powr oil tank exploded diagram removal and installation chart step procedure/part name q’ty service points oil tank disassembly follow the left “step” for disassembly. 1 bolt/washer 2/2 2 bracket/grommet 2/2 3 bolt 4 4 hunger 2 5 oil filter cap 1 6 packing 1 7 bolt 8 8 oil tank cover 1 9 gask...
Page 259: Powr
F d es 5- powr vue en eclate tableau de depose et d’installation etape procédé/nom de pièce qté points d’entretien demontage du reservoir d’huile suivre l’“étape” de gauche pour le démontage. 1 vis/rondelle 2/2 2 support/bague 2/2 3 vis 4 4 etrier de suspension 2 5 bouchon de filtre à huile 1 6 garn...
Page 260: Powr
5-20 e powr oil tank exploded diagram step procedure/part name q’ty service points 11 oil breather plate 1 1 12 oil breather plate 2 1 13 gasket 1 14 bolt 3 15 baffle plate 1 16 bolt 2 17 oil strainer 1 18 bolt 24 19 oil cooler cover 2 20 gasket 2 e e e e 3 4 9 13 12 11 10 18 19 20 23 2 1 22 20 21 1...
Page 261: Powr
F d es 5- powr vue en eclate etape procédé/nom de pièce qté points d’entretien 11 plaque 1 de reniflard d’huile 1 12 plaque 2 de reniflard d’huile 1 13 joint 1 14 vis 3 15 déflecteur 1 16 vis 2 17 crépine d’huile 1 18 vis 24 19 couvercle de radiateur d’huile 2 20 joint 2 non réutilisable non réutili...
Page 262: Powr
5-21 e powr oil tank exploded diagram step procedure/part name q’ty service points 21 screw 1 22 anode 1 23 oil tank 1 reverse the disassembly steps for assembly. E e e e 3 4 9 13 12 11 10 18 19 20 23 2 1 22 20 21 19 17 15 18 14 16 7 8 6 5 lt 572 lt lt 572 lt lt 572 lt lt 572 lt lt 572 lt 6 × 25 mm ...
Page 263: Powr
F d es 5- powr vue en eclate etape procédé/nom de pièce qté points d’entretien 21 vis 1 22 anode 1 23 réservoir d’huile 1 pour le montage, inverser les étapes du démontage. Explosionszeichnung schritt verfahren/teilebezeichnung menge wartungspunkte 21 schraube 1 22 anode 1 23 Öltank 1 zum zusammenba...
Page 264: Powr
5-22 e powr oil tank service points oil tank removal 1. Remove: • oil tank note: loosen the oil tank bolts and nuts in the sequence shown. 3 1 2 4 5 6 8 7 2. Remove: • oil tank cover • gasket note: loosen the oil tank cover bolts in the sequence shown. 1 2 6 7 3 4 8 5 3. Remove: • oil breather plate...
Page 265: Powr
F d es 5- powr points d’entretien dépose du réservoir d’huile 1. Déposer: • réservoir d’huile n.B.: desserrer les vis et les écrous du réser- voir dans l’ordre indiqué. 2. Déposer: • couvercle du réservoir d’huile • joint n.B.: desserrer les vis du couvercle du réser- voir d’huile dans l’ordre indiq...
Page 266: Powr
5-23 e powr oil tank 4. Remove: • oil cooler covers • gaskets note: loosen the oil cooler cover bolts in the sequence shown. 8 1 9 12 7 6 5 11 10 3 4 2 oil strainer inspection 1. Check: • oil strainer 1 damage → replace. Contaminants → clean with engine oil. Oil tank installation 1. Install: • oil c...
Page 267: Powr
F d es 5- powr 4. Déposer: • couvercles du radiateur d’huile • joints n.B.: desserrer les vis du couvercle du radia- teur d’huile dans l’ordre indiqué. Inspection de la crépine d’huile 1. Vérifier: • crépine d’huile 1 endommagement → remplacer. Encrassement → nettoyer avec de l’huile moteur. Remonta...
Page 268: Powr
5-24 e powr 2. Install: • gasket • oil breather plate 2 • oil breather plate 1 note: tighten the oil breather plate bolts in the sequence shown. T r . . Oil breather plate bolt: 1st: 1.9 n • m (0.19 kgf • m, 1.4 ft • lb) 2nd: 4.4 n • m (0.44 kgf • m, 3.2 ft • lb) 7 5 6 10 2 3 9 1 8 4 3. Install: • g...
Page 269: Powr
F d es 5- powr 2. Installer: • joint • plaque 2 de reniflard d’huile • plaque 1 de reniflard d’huile n.B.: serrer les vis de la plaque du reniflard d’huile dans l’ordre indiqué. 3. Installer: • joint • couvercle du réservoir d’huile n.B.: serrer les vis du couvercle du réservoir d’huile dans l’ordre...
Page 270: Powr
5-25 e powr oil tank 4. Install: • oil tank note: tighten the oil tank nuts and bolts in the sequence shown. T r . . Bolt 1: 1st: 15 n • m (1.5 kgf • m, 11 ft • lb) 2nd: 28 n • m (2.8 kgf • m, 20 ft • lb) nut 2, bolt 3: 1st: 2.0 n • m (0.20 kgf • m, 1.4 ft • lb) 2nd: 15 n • m (1.5 kgf • m, 11 ft • l...
Page 271: Powr
F d es 5- powr 4. Installer: • réservoir d’huile n.B.: serrer les vis et les écrous du réservoir d’huile dans l’ordre indiqué. T r . . Vis 1: 1er: 15 n • m (1,5 kgf • m, 11 ft • lb) 2e: 28 n • m (2,8 kgf • m, 20 ft • lb) ecrou 2, vis 3: 1er: 2,0 n • m (0,20 kgf • m, 1,4 ft • lb) 2e: 15 n • m (1,5 kg...
Page 272: Powr
5-26 e powr oil pump oil pump exploded diagram removal and installation chart step procedure/part name q’ty service points oil pump assembly removal follow the left “step” for removal. Oil tank refer to “oil tank”. 1 clamp/breather hose 1/1 2 drain plug/washer 1/1 drain engine oil. 3 bolt 8 4 bolt 4...
Page 273: Powr
F d es 5- powr pompe a huile vue en eclate tableau de depose et d’installation etape procédé/nom de pièce qté points d’entretien depose de l’ensemble pompe a huile suivre l’“étape” de gauche pour la dépose. Réservoir d’huile se reporter à “reservoir d’huile”. 1 collier/flexible de reniflard 1/1 2 bo...
Page 274: Powr
5-27 e powr oil pump exploded diagram removal and installation chart step procedure/part name q’ty service points oil pump disassembly follow the left “step” for disassembly. 1 bolt 2 2 clamp 1 3 oil pump housing cover 1 1 4 pin 1 5 pin 2 6 gasket 1 7 check valve 1 8 outer rotor (scavenge) 1 9 inner...
Page 275: Powr
F d es 5- powr vue en eclate tableau de depose et d’installation etape procédé/nom de pièce qté points d’entretien demontage de la pompe a huile suivre l’“étape” de gauche pour le démontage. 1 vis 2 2 collier 1 3 couvercle 1 de carter de pompe à huile 1 4 pion 1 5 pion 2 6 joint 1 7 clapet antiretou...
Page 276: Powr
5-28 e powr oil pump exploded diagram step procedure/part name q’ty service points 12 pin 2 13 gasket 1 14 outer rotor (feed) 1 15 inner rotor (feed) 1 16 pin 1 17 oil pump shaft 1 18 check valve seat 1 19 oil seal 1 20 oil pump housing 1 reverse the disassembly steps for assembly. E e e e 11 13 12 ...
Page 277: Powr
F d es 5- powr vue en eclate etape procédé/nom de pièce qté points d’entretien 12 pion 2 13 joint 1 14 rotor extérieur (refoulement) 1 15 rotor intérieur (refoulement) 1 16 goupille 1 17 arbre de pompe à huile 1 18 siège de clapet antiretour 1 19 bague d’étanchéité 1 20 carter de pompe à huile 1 pou...
Page 278: Powr
5-29 e powr oil pump service points oil pump removal 1. Remove: • oil pump assembly note: loosen the oil pump bolts in the sequence shown. 5 6 7 8 9 11 1 12 3 10 4 2 oil pump inspection 1. Check: • oil pump housing cover 1 1 • oil pump housing cover 2 2 • oil pump housing 3 cracks/damage/wear → repl...
Page 279: Powr
F d es 5- powr points d’entretien dépose de la pompe à huile 1. Déposer: • corps de pompe à huile n.B.: desserrer les vis de la pompe à huile dans l’ordre indiqué. Inspection de la pompe à huile 1. Vérifier: • couvercle 1 de carter de pompe à huile 1 • couvercle 2 de carter de pompe à huile 2 • cart...
Page 280: Powr
5-30 e powr oil pump 3. Check: • oil pump operation rough movement → replace the defec- tive part(s). Check valve inspection 1. Check: • check valve body 1 • spring 2 • check valve 3 • check valve seat 4 damage/wear → replace the defective part(s). Oil strainer inspection 1. Check: • oil strainer 1 ...
Page 281: Powr
F d es 5- powr 3. Vérifier: • fonctionnement de la pompe à huile mouvement irrégulier → rem- placer la ou les pièces défectueu- ses. Inspection du clapet antiretour 1. Vérifier: • corps de clapet antiretour 1 • ressort 2 • clapet antiretour 3 • siège de clapet antiretour 4 endommagement/usure → rem-...
Page 282: Powr
5-31 e powr oil pump oil pump installation 1. Install: • oil pump assembly note: • align the projection a on the oil pump assembly with the slit b on the oil pump driven gear shaft. • tighten the oil pump bolts in the sequence shown. T r . . Oil pump assembly bolt: 1st: 1.4 n • m (0.14 kgf • m, 1.0 ...
Page 283: Powr
F d es 5- powr remontage de la pompe à huile 1. Installer: • corps de pompe à huile n.B.: • aligner l’ergot a de la pompe à huile avec la fente b de l’arbre du pignon mené de la pompe à huile. • serrer les vis de la pompe à huile dans l’ordre indiqué. T r . . Vis de montage de la pompe à huile: 1er:...
Page 284: Powr
5-32 e powr reduction drive gear reduction drive gear exploded diagram removal and installation chart step procedure/part name q’ty service points reduction drive gear removal follow the left “step” for removal. Generator cover refer to “generator and starter motor”. Oil pump refer to “oil pump”. 1 ...
Page 285: Powr
F d es 5- powr reducteur vue en eclate tableau de depose et d’installation etape procédé/nom de pièce qté points d’entretien depose du reducteur suivre l’“étape” de gauche pour la dépose. Couvercle d’alternateur se reporter à “alternateur et demarreur”. Pompe à huile se reporter à “pompe a huile”. 1...
Page 286: Powr
5-33 e powr reduction drive gear exploded diagram step procedure/part name q’ty service points 7 reduction drive gear case 1 8 gasket 1 9 pin 2 10 circlip 2 11 reduction drive gear 1 12 washer 2 reverse the removal steps for installation. 9 9 10 12 11 12 10 8 2 4 3 6 5 1 6 5 7 e lt 572 lt lt 572 lt ...
Page 287: Powr
F d es 5- powr vue en eclate etape procédé/nom de pièce qté points d’entretien 7 carter de réducteur 1 8 joint 1 9 pion 2 10 circlip 2 11 réducteur 1 12 rondelle 2 pour l’installation, inverser les étapes de la dépose. Non réutilisable non réutilisable explosionszeichnung schritt verfahren/teilebeze...
Page 288: Powr
5-34 e powr reduction drive gear exploded diagram removal and installation chart *1 : epnoc grease ap #0 step procedure/part name q’ty service points reduction drive gear disassembly follow the left “step” for disassembly. 1 oil pump driven gear 1 2 bolt 1 3 holder 1 4 spring 1 5 relief valve 1 6 bo...
Page 289: Powr
F d es 5- powr vue en eclate tableau de depose et d’installation *1 : graisse epnoc ap n°0 etape procédé/nom de pièce qté points d’entretien demontage du reducteur suivre l’“étape” de gauche pour le démontage. 1 pignon mené de pompe à huile 1 2 vis 1 3 support 1 4 ressort 1 5 clapet de surcharge 1 6...
Page 290: Powr
5-35 e powr reduction drive gear exploded diagram *1 : epnoc grease ap #0 step procedure/part name q’ty service points 9 circlip 2 10 driven gear 1 11 washer 2 12 circlip 1 13 oil seal 2 14 bearing 1 note: remove parts 12 to 15 as a set. 15 drive shaft 1 16 circlip 1 17 circlip 1 e e e e e 15 13 14 ...
Page 291: Powr
F d es 5- powr vue en eclate *1 : graisse epnoc ap n°0 etape procédé/nom de pièce qté points d’entretien 9 circlip 2 10 pignon mené 1 11 rondelle 2 12 circlip 1 13 bague d’étanchéité 2 14 roulement 1 n.B.: déposer les pièces 12 à 15 en tant que sous-ensemble. 15 arbre d’entraînement 1 16 circlip 1 1...
Page 292: Powr
5-36 e powr reduction drive gear exploded diagram *1 : epnoc grease ap #0 step procedure/part name q’ty service points 18 bearing 1 19 circlip 1 20 bearing 1 21 reduction drive gear case 1 reverse the disassembly steps for assembly. E e e e e 15 13 14 16 18 17 12 9 11 10 11 9 8 7 6 1 2 3 4 5 21 20 1...
Page 293: Powr
F d es 5- powr vue en eclate *1 : graisse epnoc ap n°0 etape procédé/nom de pièce qté points d’entretien 18 roulement 1 19 circlip 1 20 roulement 1 21 carter de réducteur 1 pour le montage, inverser les étapes du démontage. Non réutilisable non réutilisable non réutilisable explosionszeichnung *1 : ...
Page 294: Powr
5-37 e powr reduction drive gear service points drive coupling removal 1. Remove: • drive coupling 1 note: while holding the flywheel magneto 2 with the sheave holder 3, loosen the drive coupling with coupler wrench 4. Coupler wrench: yw-06551/90890-06551 sheave holder: ys-01880-a/90890-01701 1 4 2 ...
Page 295: Powr
F d es 5- powr points d’entretien dépose de l’accouplement 1. Déposer: • accouplement 1 n.B.: tout en maintenant le volant magnétique 2 à l’aide de l’outil de maintien de pou- lie 3, desserrer l’accouplement à l’aide de la clé d’accouplement 4. Dépose de l’arbre d’entraînement 1. Déposer: • circlip ...
Page 296: Powr
5-38 e powr reduction drive gear drive shaft installing 1. Install: • drive shaft note: press in the direction of the arrow. 2. Install: • oil seals 1 distance a: 8.9–9.3 mm (0.35–0.37 in) 1 a drive coupling installation 1. Install: • drive coupling 1 note: while holding the flywheel magneto 2 with ...
Page 297: Powr
F d es 5- powr remontage de l’arbre d’entraînement 1. Installer: • arbre d’entraînement n.B.: appuyer dans le sens de la flèche. 2. Installer: • bagues d’étanchéité 1 remontage de l’accouplement 1. Installer: • accouplement 1 n.B.: tout en maintenant le volant magnétique 2 avec l’outil de maintien d...
Page 298: Powr
5-39 e powr generator and starter motor generator and starter motor exploded diagram removal and installation chart step procedure/part name q’ty service points generator cover and flywheel magnet removal follow the left “step” for removal. Engine unit refer to “engine unit”. 1 nut/washer 1/1 2 star...
Page 299: Powr
F d es 5- powr alternateur et demarreur vue en eclate tableau de depose et d’installation etape procédé/nom de pièce qté points d’entretien depose du couvercle d’alternateur et du volant magnetique suivre l’“étape” de gauche pour la dépose. Moteur se reporter à “moteur”. 1 ecrou/rondelle 1/1 2 câble...
Page 300: Powr
5-40 e powr generator and starter motor exploded diagram step procedure/part name q’ty service points 9 bolt 1 10 holder 1 11 bolt 8 12 generator cover 1 13 dowel pin 2 14 packing 1 15 idle gear shaft 1 16 idle gear 1 17 bolt/washer 1/1 18 rotor 1 19 bolt 6 4 3 2 1 5 6 8 7 10 9 11 12 14 13 19 17 18 ...
Page 301: Powr
F d es 5- powr vue en eclate etape procédé/nom de pièce qté points d’entretien 9 vis 1 10 outil de maintien 1 11 vis 8 12 couvercle d’alternateur 1 13 pion 2 14 garniture 1 15 arbre de pignon de renvoi 1 16 pignon de renvoi 1 17 vis/rondelle 1/1 18 rotor 1 19 vis 6 non réutilisable non réutilisable ...
Page 302: Powr
5-41 e powr generator and starter motor exploded diagram step procedure/part name q’ty service points 20 starter clutch 1 21 starter gear 1 22 woodruff key 1 reverse the removal steps for installation. 4 3 2 1 5 6 8 7 10 9 11 12 14 13 19 17 18 20 21 22 16 15 a a e e e lt 572 lt 572 a a a a 8 × 30 mm...
Page 303: Powr
F d es 5- powr vue en eclate etape procédé/nom de pièce qté points d’entretien 20 embrayage de démarreur 1 21 pignon de démarreur 1 22 clavette demi-lune 1 pour l’installation, inverser les étapes de la dépose. Explosionszeichnung schritt verfahren/teilebezeichnung menge wartungspunkte 20 starterkup...
Page 304: Powr
5-42 e powr generator and starter motor exploded diagram removal and installation chart step procedure/part name q’ty service points generator disassembly follow the left “step” for disassembly. 1 bolt/washer 3/3 2 bolt 4 3 pulser coil 2 note: there washers holds the pulser coil lead. Make sure to n...
Page 305: Powr
F d es 5- powr vue en eclate tableau de depose et d’installation etape procédé/nom de pièce qté points d’entretien demontage de l’alternateur suivre l’“étape” de gauche pour le démontage. 1 vis/rondelle 3/3 2 vis 4 3 bobine d’impulsions 2 n.B.: une rondelle maintient le câble de la bobine d’impulsio...
Page 306: Powr
5-43 e powr generator and starter motor exploded diagram step procedure/part name q’ty service points 5 holder 1 6 bolt 3 7 lighting coil 1 reverse the disassembly steps for assembly. 1 7 6 3 2 4 5 lt 242 lt 242 lt 242 lt 242 14 n • m (1.4 kgf • m, 10 ft • ib) 6 × 14 mm 4.9 n • m (0.49 kgf • m, 3.5 ...
Page 307: Powr
F d es 5- powr vue en eclate etape procédé/nom de pièce qté points d’entretien 5 outil de maintien 1 6 vis 3 7 induit d’alternateur 1 pour le montage, inverser les étapes du démontage. Explosionszeichnung schritt verfahren/teilebezeichnung menge wartungspunkte 5 halterung 1 6 schraube 3 7 lichtmasch...
Page 308: Powr
5-44 e powr generator and starter motor service points flywheel magneto removal 1. Remove: • flywheel magneto bolt 1 • washer note: while holding the flywheel magneto 2 with the sheave holder 3, loosen the flywheel magneto bolt. Sheave holder: ys-01880-a/90890-01701 2. Remove: • flywheel magneto 1 •...
Page 309: Powr
F d es 5- powr points d’entretien dépose du volant magnétique 1. Déposer: • vis du volant magnétique 1 • rondelle n.B.: tout en maintenant le volant magnétique 2 à l’aide de l’outil de maintien de pou- lie 3, desserrer la vis du volant magnéti- que. 2. Déposer: • volant magnétique 1 • clavette demi-...
Page 310: Powr
5-45 e powr generator and starter motor 2. Check: • starter clutch 1 • starter gear 2 burrs/chips/roughness/wear → replace the defective part(s). 3. Check: • starter clutch gear’s contacting surfaces a damage/pitting/wear → replace the starter clutch gear. 1 2 a 4. Check: • starter clutch operation ...
Page 311: Powr
F d es 5- powr 2. Vérifier: • embrayage de démarreur 1 • pignon de démarreur 2 bavures/éclats/état rugueux/ usure → remplacer les pièces défectueuses. 3. Vérifier: • surfaces de portage du pignon d’embrayage de démarreur a endommagement/corrosion/ usure → remplacer le pignon d’embrayage de démarreur...
Page 312: Powr
5-46 e powr generator and starter motor flywheel magneto installation 1. Install: • woodruff key • flywheel magneto • washer • flywheel magneto bolt note: • clean the tapered portion of the crankshaft and the flywheel magneto hub. • when installing the flywheel magneto, make sure the woodruff key is...
Page 313: Powr
F d es 5- powr remontage du volant magnétique 1. Installer: • clavette demi-lune • volant magnétique • rondelle • vis de volant magnétique n.B.: • nettoyer la partie conique du vilebre- quin et le moyeu du volant magnéti- que. • lors du remontage du volant magnéti- que, s’assurer que la clavette dem...
Page 314: Powr
5-47 e powr camshafts camshafts exploded diagram removal and installation chart step procedure/part name q’ty service points cylinder head cover removal follow the left “step” for removal. Air filter case refer to “fuel injection system” in chapter 4. 1 spark plug 4 2 clamp/breather hose 1/1 È to oi...
Page 315: Powr
F d es 5- powr arbres a cames vue en eclate tableau de depose et d’installation etape procédé/nom de pièce qté points d’entretien depose du couvre-culasse suivre l’“étape” de gauche pour la dépose. Boîtier de filtre à air se reporter à “circuit d’injection de carbu- rant” au chapitre 4. 1 bougie 4 2...
Page 316: Powr
5-48 e powr camshafts exploded diagram step procedure/part name q’ty service points 7 bolt 1 8 cooling water pipe 1 9 o-ring 1 10 bolt 6 11 rubber mount 6 12 cylinder head cover 1 13 cylinder head cover gasket 1 14 timing chain guide (top side) 1 reverse the removal steps for installation. E 2 4 3 5...
Page 317: Powr
F d es 5- powr vue en eclate etape procédé/nom de pièce qté points d’entretien 7 vis 1 8 tuyau d’eau de refroidissement 1 9 joint torique 1 10 vis 6 11 bague en caoutchouc 6 12 couvre-culasse 1 13 joint de couvre-culasse 1 14 guide de chaîne de distribution (partie haute) 1 pour l’installation, inve...
Page 318: Powr
5-49 e powr camshafts exploded diagram removal and installation chart step procedure/part name q’ty service points camshaft removal follow the left “step” for removal. Cylinder head cover reduction drive gear case refer to “reduction drive gear”. Note: when removing camshafts it is not neces- sary t...
Page 319: Powr
F d es 5- powr vue en eclate tableau de depose et d’installation etape procédé/nom de pièce qté points d’entretien depose des arbres a cames suivre l’“étape” de gauche pour la dépose. Couvre-culasse carter de réducteur se reporter à “reducteur”. N.B.: lors de la dépose des arbres à cames, il n’est p...
Page 320: Powr
5-50 e powr camshafts exploded diagram step procedure/part name q’ty service points 5 timing chain tensioner gasket 1 6 timing chain guide (exhaust side) 1 7 bolt 18 8 intake camshaft cap 3 9 dowel pin 6 note: during removal, the dowel pins may still be connected to the camshaft caps. 10 bolt 10 11 ...
Page 321: Powr
F d es 5- powr vue en eclate etape procédé/nom de pièce qté points d’entretien 5 joint de tendeur de chaîne de distribution 1 6 guide de chaîne de distribution (côté échappement) 1 7 vis 18 8 capuchon d’arbre à cames d’admission 3 9 pion de centrage 6 n.B.: lors de la dépose, les pions d’assemblage ...
Page 322: Powr
5-51 e powr camshafts exploded diagram step procedure/part name q’ty service points 16 exhaust camshaft 1 17 bolt 2 18 exhaust camshaft sprocket 1 19 pin 1 20 timing chain guide (intake side) 1 reverse the removal steps for installation. E e e e e e m m 10 11 10 11 10 11 12 16 17 8 18 8 8 13 9 14 7 ...
Page 323: Powr
F d es 5- powr vue en eclate etape procédé/nom de pièce qté points d’entretien 16 arbre à cames d’échappement 1 17 vis 2 18 pignon d’arbre à cames d’échappement 1 19 goupille 1 20 guide de chaîne de distribution (côté admission) 1 pour l’installation, inverser les étapes de la dépose. Explosionszeic...
Page 324: Powr
5-52 e powr camshafts service points camshaft removal 1. Install: • dial gauge needle • dial gauge stand 1 (into spark plug hole #1) • dial gauge 2 dial gauge stand: 90890-06583 dial gauge needle: 90890-06584 dial gauge stand set: yw-06585/90890-06585 dial gauge: yu-03097/90890-01252 2 1 2. Turn the...
Page 325: Powr
F d es 5- powr points d’entretien dépose des arbres à came 1. Installer: • pointeau de comparateur à cadran • support de comparateur à cadran 1 (dans le trou de bougie n°1) • comparateur à cadran 2 2. Tourner l’accouplement d’entraî- nement en sens inverse d’horloge, puis vérifier à l’aide d’un comp...
Page 326: Powr
5-53 e powr camshafts 4. Remove: • timing chain tensioner 1 • gasket 1 5. Remove: • camshaft caps • dowel pins note: loosen the intake and exhaust camshaft cap bolts in the sequence shown. 1 10 7 6 3 2 14 18 15 11 4 10 7 5 2 8 9 4 5 1 12 16 17 13 6 8 9 3 6. Remove: • intake camshaft 1 • exhaust cams...
Page 327: Powr
F d es 5- powr 4. Déposer: • tendeur de chaîne de distribu- tion 1 • joint 5. Déposer: • capuchons d’arbre à cames • pions de centrage n.B.: desserrer les vis de capuchons des arbres à cames d’admission et d’échappement dans l’ordre indiqué. 6. Déposer: • arbre à cames d’admission 1 • arbre à cames ...
Page 328: Powr
5-54 e powr camshafts 3. Measure: • camshaft runout out of specification → replace. Maximum camshaft runout: 0.03 mm (0.0012 in) 4. Measure: • camshaft-journal-to-camshaft-cap clearance out of specification → measure the camshaft journal diameter. Camshaft-journal-to-camshaft- cap clearance: 0.05–0....
Page 329: Powr
F d es 5- powr 3. Mesurer: • faux-rond de l’arbre à cames hors spécifications → rempla- cer. 4. Mesurer: • jeu entre tourillon et capuchon d’arbre à cames hors spécifications → mesurer le diamètre du tourillon d’arbre à cames. Faux-rond maximum de l’arbre à cames: 0,03 mm (0,0012 in) jeu entre touri...
Page 330: Powr
5-55 e powr camshafts 5. Measure: • camshaft journal diameter a out of specification → replace the cam- shaft. Within specification → replace the cyl- inder head and the camshaft caps as a set. Camshaft journal diameter: 24.44–24.45 mm (0.9622–0.9626 in) camshaft sprockets inspection 1. Check: • cam...
Page 331: Powr
F d es 5- powr 5. Mesurer: • diamètre des tourillons d’arbre à cames a hors spécifications → rempla- cer l’arbre à cames. Conforme aux spécifications → remplacer la culasse et les capu- chons d’arbres à cames en même temps. Inspection des pignons d’arbres à cames 1. Vérifier: • pignon d’arbre à came...
Page 332: Powr
5-56 e powr camshafts camshaft installation 1. Install: • exhaust camshaft sprocket 1 • intake camshaft sprocket 2 (with the special tool 3) note: install the camshaft sprocket with the punch mark a facing outside. Rotor holder: yu-01235/90890-01235 t r . . Camshaft sprocket bolt: 24 n • m (2.4 kgf ...
Page 333: Powr
F d es 5- powr remontage des arbres à cames 1. Installer: • pignon d’arbre à cames d’échap- pement 1 • pignon d’arbre à cames d’admis- sion 2 (avec l’outil spécial 3) n.B.: remonter le pignon d’arbre à cames avec le repère a dirigé vers l’extérieur. 2. Installer: • arbre à cames d’échappement • arbr...
Page 334: Powr
5-57 e powr camshafts • install the exhaust and intake camshaft caps. Note: gradually tighten the intake and exhaust camshaft cap bolts in 2–3 steps in the sequence shown. T r . . Camshaft cap bolt: 10 n • m (1.0 kgf • m, 7.2 ft • lb) note: make sure that the punch marks c on the camshafts are align...
Page 335: Powr
F d es 5- powr 3. Installer: • tendeur de chaîne de distribu- tion • remonter les capuchons d’arbres à cames d’échappement et d’admis- sion. N.B.: serrer progressivement les vis des capuchons d’arbres à cames d’admis- sion et d’échappement en 2–3 étapes dans l’ordre indiqué. T r . . Vis des capuchon...
Page 336: Powr
5-58 e powr camshafts • tighten the timing chain tensioner bolts 3 to the specified torque. Note: the “up” mark on the timing chain ten- sioner should face up. T r . . Timing chain tensioner bolt: 10 n • m (1.0 kgf • m, 7.2 ft • lb) • remove the screwdriver, make sure the timing chain tensioner rod ...
Page 337: Powr
F d es 5- powr 4. Tourner: • accouplement d’entraînement (plusieurs tours en sens inverse d’horloge) 5. Vérifier: tourner l’accouplement d’entraînement en sens inverse d’horloge, puis vérifier à l’aide d’un comparateur si le piston du cylindre n°1 est au pmh de la compression. • repère de l’arbre à ...
Page 338: Powr
5-59 e powr camshafts 7. Install: • cylinder head cover gasket • cylinder head cover note: • apply gasket maker ® onto the mating sur- faces of the cylinder head cover gasket and cylinder head. • tighten the cylinder head cover bolts stages and in a crisscross pattern. T r . . Cylinder head cover bo...
Page 339: Powr
F d es 5- powr 7. Installer: • joint de couvre-culasse • couvre-culasse n.B.: • appliquer du gasket maker ® sur les surfaces de portage du joint de couvre- culasse et de la culasse. • serrer les vis du couvre-culasse selon un motif croisé. T r . . Vis de couvre-culasse: 12 n • m (1,2 kgf • m, 8,7 ft...
Page 340: Powr
5-60 e powr cylinder head cylinder head exploded diagram removal and installation chart step procedure/part name q’ty service points cylinder head removal follow the left “step” for removal. Engine unit refer to “engine unit”. Air filter case refer to “fuel injection system” in chapter 4. Exhaust pi...
Page 341: Powr
F d es 5- powr culasse vue en eclate tableau de depose et d’installation etape procédé/nom de pièce qté points d’entretien depose de la culasse suivre l’“étape” de gauche pour la dépose. Moteur se reporter à “moteur”. Boîtier de filtre à air se reporter à “circuit d’injection de carbu- rant” au chap...
Page 342: Powr
5-61 e powr cylinder head exploded diagram step procedure/part name q’ty service points 4 nut/washer 2/2 5 nut/washer 8/8 6 cylinder head 1 7 cylinder head gasket 1 8 dowel pin 2 reverse the removal steps for installation. E e e e e e 2 4 1 7 5 5 6 8 3 5 5 5 lt 271 2nd 49 n • m (4.9 kgf • m, 35 ft •...
Page 343: Powr
F d es 5- powr vue en eclate etape procédé/nom de pièce qté points d’entretien 4 ecrou/rondelle 2/2 5 ecrou/rondelle 8/8 6 culasse 1 7 joint de culasse 1 8 pion de centrage 2 pour l’installation, inverser les étapes de la dépose. Non réutilisable explosionszeichnung schritt verfahren/teilebezeichnun...
Page 344: Powr
5-62 e powr cylinder head service points cylinder head removal 1. Remove: • cylinder head bolts 1 2. Remove: • cylinder head nuts note: loosen the cylinder head nuts in the sequence shown. Cylinder head inspection 1. Eliminate: • combustion chamber carbon deposits (with a rounded scraper) note: do n...
Page 345: Powr
F d es 5- powr points d’entretien dépose de la culasse 1. Déposer: • vis de culasse 1 2. Déposer: • ecrous de culasse n.B.: desserrer les écrous de culasse dans l’ordre indiqué. Inspection de la culasse 1. Eliminer: • calamine dans les chambres de combustion (avec un grattoir à bout rond) n.B.: ne p...
Page 346: Powr
5-63 e powr cylinder head 3. Measure: • cylinder head warpage out of specification → replace the cyl- inder head. Cylinder head warpage limit: 0.1 mm (0.004 in) measurement steps: • place a straightedge 1 and a thickness gauge 2 across the cylinder head. • measure the warpage. • if the limit is exce...
Page 347: Powr
F d es 5- powr 3. Mesurer: • déformation de la culasse hors spécifications → rempla- cer la culasse. Remontage de la culasse 1. Installer: • culasse n.B.: • introduire la chaîne de distribution dans la cavité correspondante. • graisser les écrous de culasse avec de l’huile moteur. • serrer les écrou...
Page 348: Powr
5-64 e powr cylinder head 2. Tighten: • cylinder head bolts 1 note: lubricate the cylinder head bolts with engine oil. T r . . Cylinder head bolt: 10 n • m (1.0 kgf • m, 7.2 ft • lb).
Page 349: Powr
F d es 5- powr 2. Serrer: • vis de culasse 1 n.B.: graisser les écrous de culasse avec de l’huile moteur. T r . . Vis de culasse: 10 n • m (1,0 kgf • m, 7,2 ft • lb) 2. Festziehen: • zylinderkopfschrauben 1 hinweis: die muttern des zylinderkopfes mit motoröl schmieren. T r . . Zylinderkopfschraube: ...
Page 350: Powr
5-65 e powr valves and valve springs valves and valve springs exploded diagram removal and installation chart step procedure/part name q’ty service points valves and valve springs removal follow the left “step” for removal. Cylinder head refer to “cylinder head”. 1 intake valve lifter 12 2 intake va...
Page 351: Powr
F d es 5- powr soupapes et ressorts de soupapes vue en eclate tableau de depose et d’installation etape procédé/nom de pièce qté points d’entretien depose des soupapes et des ressorts de soupapes suivre l’“étape” de gauche pour la dépose. Culasse se reporter à “culasse”. 1 poussoir de soupape d’admi...
Page 352: Powr
5-66 e powr valves and valve springs exploded diagram step procedure/part name q’ty service points 10 exhaust valve lifter 8 11 exhaust valve pad 8 12 exhaust valve cotter 16 13 exhaust valve upper spring seat 8 14 exhaust valve spring 8 15 exhaust valve oil seal 8 16 exhaust valve lower spring seat...
Page 353: Powr
F d es 5- powr vue en eclate etape procédé/nom de pièce qté points d’entretien 10 poussoir de soupape d’échappement 8 11 cale de réglage de soupape d’échappement 8 12 clavette de soupape d’échappement 16 13 siège de ressort supérieur de soupape d’échappement 8 14 ressort de soupape d’échappement 8 1...
Page 354: Powr
5-67 e powr valves and valve springs service points valve removal 1. Remove: • valve lifter 1 • valve pad 2 note: make a note of the position of each valve lifter and valve pad so that they can be reinstalled in their original place. 2. Remove: • valve cotters 1 note: remove the valve cotters by com...
Page 355: Powr
F d es 5- powr points d’entretien dépose des soupapes 1. Déposer: • poussoir de soupape 1 • cale de réglage de soupape 2 n.B.: relever la position de chaque poussoir de soupape et de chaque cale de réglage de soupape afin de pouvoir les remonter à la bonne position. 2. Déposer: • clavettes de soupap...
Page 356: Powr
5-68 e powr valves and valve springs valve spring inspection 1. Measure: • valve spring free length a out of specification → replace the valve spring. 2. Measure: • valve spring tilt a out of specification → replace the valve spring. Valve spring free length: intake valve spring: 38.90 mm (1.53 in) ...
Page 357: Powr
F d es 5- powr inspection des ressorts de soupape 1. Mesurer: • longueur libre du ressort de sou- pape a hors spécifications → rempla- cer le ressort de soupape. 2. Mesurer: • ecart d’inclinaison du ressort de soupape a hors spécifications → rempla- cer le ressort de soupape. Inspection des soupapes...
Page 358: Powr
5-69 e powr valves and valve springs 4. Measure: • valve stem diameter a out of specification → replace the valve. Valve stem diameter a: intake valve: 3.975–3.990 mm (0.1565–0.1571 in) exhaust valve: 4.460–4.475 mm (0.1756–0.1762 in) 5. Measure: • valve stem runout out of specification → replace th...
Page 359: Powr
F d es 5- powr 4. Mesurer: • diamètre de la queue de soupape a hors spécifications → rempla- cer la soupape. 5. Mesurer: • faux-rond de la queue de sou- pape hors spécifications → rempla- cer la soupape. N.B.: • lors du montage d’une nouvelle sou- pape, toujours remplacer le guide de soupape. • si l...
Page 360: Powr
5-70 e powr valves and valve springs 1. Measure: • valve guide inside diameter a 2. Calculate the valve stem-to-valve guide clearance as follows. Replace the valve guide if out of specification. Valve guide inside diameter: intake: 4.000–4.012 mm (0.1575–0.1580 in) exhaust: 4.500–4.512 mm (0.1772–0....
Page 361: Powr
F d es 5- powr 1. Mesurer: • diamètre intérieur du guide de soupape a 2. Calculer le jeu entre la queue de soupape et le guide de soupape comme suit. Remplacer le guide de soupape si le jeu est hors spécifica- tions. Remplacement du guide de soupape 1. Déposer le guide de soupape 1 en frappant sur l...
Page 362: Powr
5-71 e powr valves and valve springs 2. Install the new valve guide 2 by striking the special service tool from the camshaft side until the valve guide clip 3 contacts the cylinder head. Note: apply engine oil to the surface of the new valve guide. Valve guide remover: intake (4.0 mm): ym-04111/9089...
Page 363: Powr
F d es 5- powr 2. Monter le guide de soupape neuf 2 en tapant avec l’outil d’entretien spécial à partir du côté arbre à cames jusqu’à ce que le jonc d’arrêt 3 touche la culasse. N.B.: appliquer de l’huile moteur sur la sur- face du guide de soupape neuf. 3. Insérer l’outil d’entretien spécial dans l...
Page 364: Powr
5-72 e powr valves and valve springs valve seat inspection 1. Eliminate carbon deposits from the valve with a scraper. 2. Apply a thin, even layer of mechanic’s blueing dye (dykem) onto the valve seat. 3. Lap the valve slowly on the valve seat with a valve lapper (commercially obtainable) as shown. ...
Page 365: Powr
F d es 5- powr inspection du siège de soupape 1. Eliminer la calamine de la soupape à l’aide d’un grattoir. 2. Appliquer sur la soupape une cou- che fine et régulière de colorant bleu de mécanicien dykem. 3. Roder lentement le siège et la sou- pape à l’aide d’un rodoir de sou- pape (disponible dans ...
Page 366: Powr
5-73 e powr valves and valve springs valve seat reface 1. Reface the valve seat with the valve seat cutter. 2. Cut the surface of the valve seat with a 45° cutter by turning the cutter clockwise until the valve seat face has become smooth. A slag or rough surface caution: do not over cut the valve s...
Page 367: Powr
F d es 5- powr rectification du siège de soupape 1. Rectifier le siège de soupape à l’aide du rectificateur de siège de soupape. 2. Rectifier la surface du siège de sou- pape avec un rectificateur à 45° en le tournant en sens d’horloge jusqu’à ce que la face du siège soit lisse. A dépôt ou surface b...
Page 368: Powr
5-74 e powr valves and valve springs 4. Use a 60° cutter to adjust the contact width of the bottom edge of the valve seat. B previous contact width 60˚ b 5. Use a 45° cutter to adjust the contact width of the valve seat to specification. B previous contact width c specified contact width 45˚ b c 6. ...
Page 369: Powr
F d es 5- powr 4. Utiliser un rectificateur à 60° pour ajuster la largeur de contact du bord inférieur du siège de soupape. B largeur de contact précédente 5. Utiliser un rectificateur à 45° pour ajuster la largeur de contact du siège de soupape à la valeur pres- crite. B largeur de contact précéden...
Page 370: Powr
5-75 e powr valves and valve springs 9. Apply a thin, even layer of lapping com- pound onto the valve seat, and then lap the valve using a valve lapper (commer- cially obtainable). Caution: do not get the lapping compound on the valve stem and valve guide. 10. After every lapping procedure, be sure ...
Page 371: Powr
F d es 5- powr 9. Appliquer une couche fine et régu- lière de pâte à roder sur le siège de soupape et roder la soupape à l’aide d’un rodoir de soupape (disponible dans le commerce). Attention: ne pas mettre de pâte à roder sur la queue ou sur le guide de soupape. 10. Après chaque procédure de rodage...
Page 372: Powr
5-76 e powr valves and valve springs 2. Compress the valve spring, and then install the valve cotter 1 using a thin screwdriver with a small amount of grease applied to it. Valve spring compressor: ym-04019/90890-04019 valve spring compressor attachment: (for the intake valve) ym-4114/90890-04114 (f...
Page 373: Powr
F d es 5- powr 2. Comprimer le ressort de soupape puis remonter la clavette de sou- pape 1 en utilisant un tournevis fin sur lequel on aura appliqué une petite quantité de graisse. 3. Taper légèrement sur le dispositif de retenue du ressort de soupape avec un maillet en plastique pour bien mettre en...
Page 374: Powr
5-77 e powr crankcase crankcase exploded diagram removal and installation chart step procedure/part name q’ty service points oil pan and crankcase removal follow the left “step” for removal. Engine unit refer to “engine unit”. Air filter case refer to “fuel injection system” in chapter 4. Exhaust pi...
Page 375: Powr
F d es 5- powr carter vue en eclate tableau de depose et d’installation etape procédé/nom de pièce qté points d’entretien depose du carter d’huile et du vilebrequin suivre l’“étape” de gauche pour la dépose. Moteur se reporter à “moteur”. Boîtier de filtre à air se reporter à “circuit d’injection de...
Page 376: Powr
5-78 e powr crankcase exploded diagram step procedure/part name q’ty service points oil pump refer to “oil pump”. Reduction drive gear case refer to “reduction drive gear”. Cylinder head refer to “camshafts”. 1 timing chain 1 2 engine temperature sensor 1 3 washer 1 4 bolt 2 5 thermoswitch (engine) ...
Page 377: Powr
F d es 5- powr vue en eclate etape procédé/nom de pièce qté points d’entretien pompe à huile se reporter à “pompe a huile”. Carter de réducteur se reporter à “reducteur”. Culasse se reporter à “arbres a cames”. 1 chaîne de distribution 1 2 capteur de température du moteur 1 3 rondelle 1 4 vis 2 5 th...
Page 378: Powr
5-79 e powr crankcase exploded diagram step procedure/part name q’ty service points 8 bolt 1 9 anode cover 1 10 grommet 1 11 anode 1 12 bolt 4 13 bolt 9 14 oil pan 1 15 gasket 1 16 bolt 2 17 bolt 1 18 bolt 7 6 23 22 22 11 10 9 8 7 2 3 4 5 17 19 16 18 20 14 15 12 13 21 1 lt 271 lt lt 572 lt lt 572 lt...
Page 379: Powr
F d es 5- powr vue en eclate etape procédé/nom de pièce qté points d’entretien 8 vis 1 9 cache de l’anode 1 10 bague 1 11 anode 1 12 vis 4 13 vis 9 14 carter d’huile 1 15 joint 1 16 vis 2 17 vis 1 18 vis 7 non réutilisable explosionszeichnung schritt verfahren/teilebezeichnung menge wartungspunkte 8...
Page 380: Powr
5-80 e powr crankcase exploded diagram step procedure/part name q’ty service points 19 cap 4 20 bolt/washer 10/10 21 lower crankcase 1 22 dowel pin 2 23 dowel pin/o-ring 1/1 reverse the removal steps for installation. 6 23 22 22 11 10 9 8 7 2 3 4 5 17 19 16 18 20 14 15 12 13 21 1 lt 271 lt lt 572 lt...
Page 381: Powr
F d es 5- powr vue en eclate etape procédé/nom de pièce qté points d’entretien 19 capuchon 4 20 vis/rondelle 10/10 21 carter inférieur 1 22 pion de centrage 2 23 pion de centrage/joint torique 1/1 pour l’installation, inverser les étapes de la dépose. Non réutilisable explosionszeichnung schritt ver...
Page 382: Powr
5-81 e powr crankcase exploded diagram removal and installation chart step procedure/part name q’ty service points oil pipe and oil filter bolt removal follow the left “step” for removal. Crankshaft refer to “crankshaft”. 1 bolt 1 2 oil pipe 1 3 o-ring 2 4 screw 2 5 cover 1 6 o-ring 1 7 oil filter b...
Page 383: Powr
F d es 5- powr vue en eclate tableau de depose et d’installation etape procédé/nom de pièce qté points d’entretien depose du tuyau d’huile et de la vis de filtre a huile suivre l’“étape” de gauche pour la dépose. Vilebrequin se reporter à “vilebrequin”. 1 vis 1 2 tuyau d’huile 1 3 joint torique 2 4 ...
Page 384: Powr
5-82 e powr crankcase service points crankcase disassembly 1. Remove: • oil pan bolts note: • loosen each bolt 1/4 of a turn at a time, in stages and in a crisscross pattern. After all of the bolts are fully loosened, remove them. • loosen the bolts in decreasing numerical order (refer to the number...
Page 385: Powr
F d es 5- powr points d’entretien démontage du carter 1. Déposer: • vis de carter d’huile n.B.: • desserrer chaque vis d’un quart de tour à la fois, par étapes et de façon décroisée. Une fois toutes les vis des- serrées, les déposer. • desserrer les vis dans un ordre numé- rique décroissant (se repo...
Page 386: Powr
5-83 e powr crankcase 4. Remove: • dowel pins crankcase inspection 1. Thoroughly wash the crankcase halves in a mild solvent. 2. Thoroughly clean all the gasket surfaces and crankcase mating surfaces. 3. Check: • crankcase cracks/damage → replace. • oil delivery passages obstruction → blow out with ...
Page 387: Powr
F d es 5- powr 4. Déposer: • pions de centrage inspection du carter 1. Laver à fond les deux parties du carter dans un solvant doux. 2. Nettoyer à fond toutes les surfaces de portage des joints et du carter. 3. Vérifier: • carter fissures/endommagement → remplacer. • passages de refoulement d’huile ...
Page 388: Powr
5-84 e powr crankcase 2. Apply: • gasket maker ® (onto the crankcase mating surfaces) note: do not allow any gasket maker ® to come into contact with the oil gallery or crankshaft journal bearings. 3. Install: • dowel pins 1 • o-ring 2 gm 1 12 1 4. Install: • crankcase bolts note: • lubricate the bo...
Page 389: Powr
F d es 5- powr 2. Appliquer: • gasket maker ® (sur les surfaces de contact du carter) n.B.: ne pas laisser de produit gasket maker ® venir au contact de la rampe de graissage ou des paliers de tourillons d’arbres à cames. 3. Installer: • pions de centrage 1 • joints toriques 2 4. Installer: • vis de...
Page 390: Powr
5-85 e powr crankcase tightening steps: • tighten the bolts in the tightening sequence cast on the crankcase. T r . . Crankcase bolt 1–0: 1st: 7.8 n • m (0.78 kgf • m, 5.6 ft • lb) • loosen and retighten the crankcase bolts in the proper tightening sequence as shown. T r . . Crankcase bolt 1–0: 2nd:...
Page 391: Powr
F d es 5- powr etapes de serrage: • serrer les vis dans l’ordre figurant sur le carter. T r . . Vis de carter 1–0: 1er: 7,8 n • m (0,78 kgf • m, 5,6 ft • lb) • desserrer puis resserrer les vis du carter dans l’ordre indiqué sur la figure. T r . . Vis de carter 1–0: 2e: 15 n • m (1,5 kgf • m, 11 ft •...
Page 392: Powr
5-86 e powr crankcase 6. Tighten: • crankcase bolts a–j note: tighten the bolts in the tightening sequence cast on the crankcase. T r . . Crankcase bolt a–j: 12 n • m (1.2 kgf • m, 8.7 ft • lb) 8 6 2 4 0 9 3 1 5 7 i c a e g h f b d j 7. Tighten: • oil pan bolts note: tighten the bolts in the tighten...
Page 393: Powr
F d es 5- powr 6. Serrer: • vis de carter a–j n.B.: serrer les vis dans l’ordre figurant sur le carter. 7. Serrer: • vis du carter d’huile n.B.: serrer les vis dans l’ordre figurant sur le carter d’huile. T r . . Vis de carter a–j: 12 n • m (1,2 kgf • m, 8,7 ft • lb) t r . . Vis du carter d’huile: 1...
Page 394: Powr
5-87 e powr connecting rods and pistons connecting rods and pistons exploded diagram removal and installation chart step procedure/part name q’ty service points connecting rods and pistons removal follow the left “step” for removal. Crankcase separate refer to “crankcase”. 1 nut 8 2 connecting rod c...
Page 395: Powr
F d es 5- powr bielles et pistons vue en eclate tableau de depose et d’installation etape procédé/nom de pièce qté points d’entretien depose des bielles et des pistons suivre l’“étape” de gauche pour la dépose. Carter séparer se reporter à “carter”. 1 ecrou 8 2 chapeau de bielle 4 3 coussinet inféri...
Page 396: Powr
5-88 e powr connecting rods and pistons exploded diagram step procedure/part name q’ty service points 8 bolt 8 9 big end upper bearing 4 10 top ring 4 11 2nd ring 4 12 oil ring 4 reverse the removal steps for installation. E e e e 1 2 3 10 11 12 4 5 6 8 7 9 2nd 120 ± 5˚ 1st 20 n • m (2.0 kgf • m, 14...
Page 397: Powr
F d es 5- powr vue en eclate etape procédé/nom de pièce qté points d’entretien 8 vis 8 9 coussinet supérieur de tête de bielle 4 10 segment supérieur 4 11 segment secondaire 4 12 segment racleur 4 pour l’installation, inverser les étapes de la dépose. Non réutilisable explosionszeichnung schritt ver...
Page 398: Powr
5-89 e powr connecting rods and pistons service points connecting rod and piston removal the following procedure applies to all of the connecting rods and pistons. 1. Remove: • connecting rod cap 1 • big end bearings note: identify the position of each big end bearing so that it can be reinstalled i...
Page 399: Powr
F d es 5- powr points d’entretien dépose des bielles et des pistons la procédure suivante s’applique à tou- tes les bielles et à tous les pistons. 1. Déposer: • chapeau de bielle 1 • coussinets de tête de bielle n.B.: identifier la position de chaque coussinet de tête de bielle afin de pouvoir les r...
Page 400: Powr
5-90 e powr connecting rods and pistons 3. Remove: • top ring • 2nd ring • oil ring note: when removing a piston ring, open the end gap with your fingers and lift the other side of the ring over the piston crown. Cylinder and piston inspection the following procedure applies to all of the cylinders ...
Page 401: Powr
F d es 5- powr 3. Déposer: • segment supérieur • segment secondaire • segment racleur n.B.: lors de la dépose d’un segment, ouvrir l’écartement du bec avec les doigts et lever l’autre côté du segment au-dessus de la couronne du piston. Inspection des cylindres et des pistons la procédure suivante s’...
Page 402: Powr
5-91 e powr connecting rods and pistons • if out of specification, replace the piston and piston rings as a set. • measure piston skirt diameter “p” with the micrometer. A 5 mm (0.2 in) from the bottom edge of the piston piston size “p” standard 73.955–73.970 mm (2.9116–2.9121 in) • if out of specif...
Page 403: Powr
F d es 5- powr inspection des segments de piston 1. Mesurer: • jeu latéral des segments hors spécifications → rempla- cer le piston et les segments en même temps. N.B.: avant de mesurer le jeu latéral des seg- ments, éliminer la calamine éventuelle- ment présente dans les gorges des segments et sur ...
Page 404: Powr
5-92 e powr connecting rods and pistons 2. Install: • piston ring (into the cylinder) note: level the piston ring in the cylinder with the piston crown. A 5 mm (0.2 in) 3. Measure: • piston ring end gap out of specification → replace the pis- ton ring. Note: the oil ring expander spacer’s end gap ca...
Page 405: Powr
F d es 5- powr 2. Installer: • segment de piston (dans le cylindre) n.B.: mettre le segment de niveau dans le cylindre à l’aide de la couronne du pis- ton. A 5 mm (0,2 in) 3. Mesurer: • ecartement du bec du segment hors spécifications → rempla- cer le segment. N.B.: il n’est pas possible de mesurer ...
Page 406: Powr
5-93 e powr connecting rods and pistons 2. Measure: • piston pin outside diameter a out of specification → replace the pis- ton pin. Piston pin outside diameter: 16.991–17.000 mm (0.6689–0.6693 in) : 16.971 mm (0.6681 in) 3. Measure: • piston pin bore diameter (in the piston) b out of specification ...
Page 407: Powr
F d es 5- powr 2. Mesurer: • diamètre extérieur de l’axe du piston a hors spécifications → rempla- cer l’axe du piston. 3. Mesurer: • diamètre de l’alésage de l’axe du piston (dans le piston) b hors spécifications → rempla- cer le piston. 4. Calculer: • jeu entre le piston et son axe hors spécificat...
Page 408: Powr
5-94 e powr connecting rods and pistons connecting rod inspection 1. Measure: • crankshaft-pin-to-big-end-bearing clearance out of specification → replace the big end bearings. Crankshaft-pin-to-big-end- bearing clearance: 0.016–0.040 mm (0.0006–0.0016 in) measurement steps: the following procedure ...
Page 409: Powr
F d es 5- powr inspection des bielles 1. Mesurer: • jeu entre maneton et coussinet de tête de bielle hors spécifications → rempla- cer les coussinets de tête de bielle. Jeu entre maneton et coussinet de tête de bielle: 0,016–0,040 mm (0,0006–0,0016 in) etapes de la mesure: la procédure suivante s’ap...
Page 410: Powr
5-95 e powr connecting rods and pistons note: • do not move the connecting rod or crank- shaft until the clearance measurement has been completed. • lubricate the bolts threads and nut seats with molybdenum disulfide grease. • make sure the “y” mark c on the con- necting rod faces towards the front ...
Page 411: Powr
F d es 5- powr 2. Sélectionner: • coussinets de tête de bielle (p1– p4) n.B.: • les numéros estampés sur la toile de vilebrequin et sur les bielles servent à déterminer la taille des coussinets de tête de bielle. • “p1”–“p4” désignent les coussinets repérés sur l’illustration du vilebre- quin. N.B.:...
Page 412: Powr
5-96 e powr connecting rods and pistons for example, if the connecting rod “p 1 ” and the crankshaft web “p 1 ” numbers are “5” and “1” respectively, then the bearing size for “p 1 ” is: bearing size of p 1 : “p 1 ” (connecting rod) – “p 1 ” (crankshaft web) 5 – 1 = 4 (green) bearing color code 1 br...
Page 413: Powr
F d es 5- powr par exemple, si les numéros de la bielle “p1” et ceux de la toile de vilebrequin “p1” sont respectivement “5” et “1”, la taille de coussinet convenant à “p1” est: remontage des bielles et des pistons la procédure suivante s’applique à tou- tes les bielles et à tous les pistons. 1. Ins...
Page 414: Powr
5-97 e powr connecting rods and pistons 3. Offset: • piston ring end gaps a top ring b lower oil ring rail c upper oil ring rail d 2nd ring È intake side 4. Lubricate: • piston • piston rings • cylinder (with the recommended lubricant) recommended lubricant: engine oil 5. Lubricate: • bolt threads •...
Page 415: Powr
F d es 5- powr 3. Décalage: • becs des segments a segment supérieur b rampe du segment racleur inférieure c rampe du segment racleur supérieure d deuxième segment È côté admission 4. Lubrifier: • piston • segments de piston • cylindre (avec le lubrifiant recommandé) 5. Lubrifier: • filetage des vis ...
Page 416: Powr
5-98 e powr connecting rods and pistons 7. Install: • big end bearings • connecting rod assembly 1 (into the cylinder and onto the crankshaft pin) • connecting rod cap (onto the crankshaft pin) note: • align the projections on the big end bearings with the notches in the connecting rods and connecti...
Page 417: Powr
F d es 5- powr 7. Installer: • coussinets de tête de bielle • bielles 1 (dans le cylindre et sur le mane- ton de vilebrequin) • chapeau de bielle (sur le maneton de vilebrequin) n.B.: • aligner l’ergot du coussinet de tête de bielle avec l’encoche de la bielle et du chapeau de bielle. • veiller à re...
Page 418: Powr
5-99 e powr connecting rods and pistons 9. Tighten: • connecting rod nuts warning • replace the connecting rod bolts and nuts with new ones. • clean the connecting rod bolts and nuts. Note: the tightening procedure of the connecting rod nuts is angle controlled, therefore tighten the nuts using the ...
Page 419: Powr
F d es 5- powr 9. Serrer: • ecrous de bielle avertissement • remplacer les vis et les écrous de bielle par des éléments neufs. • nettoyer les vis et les écrous de bielle. N.B.: la procédure de serrage des écrous de bielle étant basée sur les angles, serrer les écrous en procédant comme suit. Etapes ...
Page 420: Powr
5-100 e powr crankshaft crankshaft exploded diagram removal and installation chart step procedure/part name q’ty service points crankshaft removal follow the left “step” for removal. Crankcase separate refer to “crankcase”. Connecting rod caps refer to “connecting rods and pistons”. 1 crankshaft 1 2...
Page 421: Powr
F d es 5- powr vilebrequin vue en eclate tableau de depose et d’installation etape procédé/nom de pièce qté points d’entretien depose du vilebrequin suivre l’“étape” de gauche pour la dépose. Carter séparer se reporter à “carter”. Chapeaux de bielle se reporter à “bielles et pistons”. 1 vilebrequin ...
Page 422: Powr
5-101 e powr crankshaft service points crankshaft removal 1. Remove: • crankshaft 1 • crankshaft journal lower bearings (from the lower crankcase) • crankshaft journal upper bearings (from the upper crankcase) note: identify the position of each crankshaft journal bearing so that it can be reinstall...
Page 423: Powr
F d es 5- powr points d’entretien dépose du vilebrequin 1. Déposer: • vilebrequin 1 • coussinets inférieurs des tou- rillons de vilebrequin (à partir du carter inférieur) • coussinets supérieurs des tou- rillons de vilebrequin (à partir du carter inférieur) n.B.: identifier la position de chaque cou...
Page 424: Powr
5-102 e powr crankshaft caution: do not interchange the crankshaft journal bearings. To obtain the correct crankshaft- journal-to-crankshaft-journal-bearing clear- ance and prevent engine damage, the crankshaft journal bearings must be installed in their original positions. Measurement steps: • clea...
Page 425: Powr
F d es 5- powr attention: ne pas intervertir les coussinets de tourillon de vilebrequin. Pour obtenir le jeu correct entre tourillons et cous- sinets de tourillons de vilebrequin et écarter tout risque de détérioration du moteur,les coussinets de tourillons de vilebrequin doivent être remontés à leu...
Page 426: Powr
5-103 e powr crankshaft • tighten the bolts to specification in the tightening sequence cast on the crank- case. Refer to “crankcase assembly”— “crankcase”. • remove the lower crankcase and the crankshaft journal lower bearings. • measure the compressed plastigauge ® width c on each crankshaft journ...
Page 427: Powr
F d es 5- powr 4. Sélectionner: • coussinets de tourillons de vile- brequin (j1–j5) n.B.: • les numéros estampés sur la toile de vilebrequin et sur le carter inférieur servent à déterminer la taille des cous- sinets de tourillons de vilebrequin. • “j1–j5” désignent les coussinets repé- rés sur l’ill...
Page 428: Powr
5-104 e powr crankshaft crankshaft installation 1. Install: • crankshaft journal upper bearings (into the upper crankcase) • crankshaft journal lower bearings (into the lower crankcase) note: • align the projections a on the crankshaft journal upper bearings with the notches b in the upper crankcase...
Page 429: Powr
F d es 5- powr remontage du vilebrequin 1. Installer: • coussinets supérieurs des tou- rillons de vilebrequin (dans le carter supérieur) • coussinets inférieurs des tou- rillons de vilebrequin (dans le carter inférieur) n.B.: • aligner l’ergot a des coussinets supérieurs de tourillons de vilebrequin...
Page 430: Powr
5-105 e powr thermostat thermostat exploded diagram removal and installation chart step procedure/part name q’ty service points thermostat removal follow the left “step” for removal. 1 band 2 2 clamp/cooling water hose 1/1 È for cooling water outlet on stern side. 3 clamp/cooling water hose 2/1 note...
Page 431: Powr
F d es 5- powr thermostat vue en eclate tableau de depose et d’installation etape procédé/nom de pièce qté points d’entretien depose du thermostat suivre l’“étape” de gauche pour la dépose. 1 sangle 2 2 collier/tuyau d’eau de refroidissement 1/1 È pour la sortie d’eau de refroidissement côté arrière...
Page 432: Powr
5-106 e powr thermostat exploded diagram removal and installation chart step procedure/part name q’ty service points 8 thermostat 1 9 thermostat housing 1 reverse the removal steps for installation. 3 1 3 9 8 7 4 6 5 1 2 lt 572 lt 572 6 × 35 mm 2nd 7.6 n • m (0.76 kgf • m, 5.5 ft • ib) 1st 3.7 n • m...
Page 433: Powr
F d es 5- powr vue en eclate tableau de depose et d’installation etape procédé/nom de pièce qté points d’entretien 8 thermostat 1 9 boîtier de thermostat 1 pour l’installation, inverser les étapes de la dépose. Explosionszeichnung ausbau- und einbautabelle schritt verfahren/teilebezeichnung menge wa...
Page 434: Powr
5-107 e powr thermostat service points thermostat inspection 1. Check: • thermostat 1 does not open at 50–60 °c (123– 141 °f) → replace. 1 thermostat 2 thermometer 3 water 4 container È fully closed É fully open note: if the accuracy of the thermostat is in doubt, replace it. A faulty thermostat cou...
Page 435: Powr
F d es 5- powr points d’entretien inspection du thermostat 1. Vérifier: • thermostat 1 ne s’ouvre pas à 50–60 °c (123– 141 °f) → remplacer. 1 thermostat 2 thermomètre 3 eau 4 récipient È totalement fermé É totalement ouvert n.B.: en cas de doute sur la précision du ther- mostat, le remplacer. Une th...
Page 436: Powr
5-108 e powr pressure control valve pressure control valve exploded diagram removal and installation chart step procedure/part name q’ty service points pressure control valve removal follow the left “step” for removal. Exhaust manifold refer to “exhaust manifold”. 1 clamp/cooling water hose 1/1 È fr...
Page 437: Powr
F d es 5- powr soupape regulatrice de pression vue en eclate tableau de depose et d’installation etape procédé/nom de pièce qté points d’entretien depose de la soupape regulat- trice de pression suivre l’“étape” de gauche pour la dépose. Collecteur d’échappement se reporter à “collecteur d’echappeme...
Page 438: Powr
5-109 e powr pressure control valve exploded diagram removal and installation chart step procedure/part name q’ty service points 9 bolt 3 10 pressure control valve assembly 1 11 gasket 1 reverse the removal steps for installation. 9 1 8 10 11 8 6 7 4 4 5 3 3 2 2 lt 572 lt 572 6 × 45 mm 2nd 7.6 n • m...
Page 439: Powr
F d es 5- powr vue en eclate tableau de depose et d’installation etape procédé/nom de pièce qté points d’entretien 9 vis 3 10 ensemble de la soupape régulatrice de pression 1 11 joint 1 pour l’installation, inverser les étapes de la dépose. Non réutilisable explosionszeichnung ausbau- und einbautabe...
Page 440: Powr
5-110 e powr pressure control valve exploded diagram removal and installation chart step procedure/part name q’ty service points pressure control valve disassembly follow the left “step” for disassembly. 1 bolt 2 2 collar 2 3 pressure control valve housing cover 1 4 spring 1 5 pressure control valve...
Page 441: Powr
F d es 5- powr vue en eclate tableau de depose et d’installation etape procédé/nom de pièce qté points d’entretien depose de la soupape regula- trice de pression suivre l’“étape” de gauche pour le démontage. 1 vis 2 2 collier 2 3 couvercle du boîtier de la soupape régulatrice de pression 1 4 ressort...
Page 442: Powr
5-111 e powr pressure control valve exploded diagram step procedure/part name q’ty service points 8 grommet 1 9 pressure control valve housing 1 reverse the disassembly steps for assembly. Lt 572 lt 572 1 2 3 4 5 6 7 8 6 9 6 × 40 mm 2nd 7.6 n • m (0.76 kgf • m, 5.5 ft • ib) 1st 3.7 n • m (0.37 kgf •...
Page 443: Powr
F d es 5- powr vue en eclate etape procédé/nom de pièce qté points d’entretien 8 bague 1 9 boîtier de la soupape régulatrice de pression 1 pour l’installation, inverser les étapes de la dépose. Explosionszeichnung schritt verfahren/teilebezeichnung menge wartungspunkte 8 dichtungsring 1 9 druckkontr...
Page 444: Powr
5-112 e powr pressure control valve service points pressure control valve inspection 1. Check: • pressure control valve 1 • spring 2 damage/wear → replace the defective part(s). 2. Check: • pressure control valve housing cover • pressure control valve housing cracks/damage → replace. 3. Check: • coo...
Page 445: Powr
F d es 5- powr points d’entretien inspection de la soupape régulatrice de pression 1. Vérifier: • soupape régulatrice de pression 1 • ressort 2 endommagement/usure → rem- placer les pièces défectueuses. 2. Vérifier: • couvercle du boîtier de la sou- pape régulatrice de pression • boîtier de la soupa...
Page 446: Jet
E jet pump chapter 6 jet pump unit intake grate, ride plate, and intake duct.................................... 6-1 exploded diagram ............................................................................. 6-1 removal and installation chart ................................................ 6-1 ...
Page 447
1 2 3 4 5 6 7 8 9 f d es chapitre 6 pompe de propulsion grille d’admission, plaque de fond et conduit d’admission .............. 6-1 vue en eclate ............................ 6-1 tableau de depose et d’installation ........................ 6-1 pompe de propulsion ............... 6-3 vue en eclate ....
Page 448: Jet
E jet pump 1 2 3 4 5 6 7 8 9 transom plate and hoses.................................................................. 6-19 exploded diagram ........................................................................... 6-19 removal and installation chart .............................................. ...
Page 449
F d es varangue de voute et flexibles ..................................... 6-19 vue en eclate .......................... 6-19 tableau de depose et d’installation ...................... 6-19 points d’entretien................ 6-22 inspection de la crépine de cale .. 6-22 inspection de la pompe élect...
Page 450: Jet
6-1 e jet pump intake grate, ride plate, and intake duct exploded diagram removal and installation chart step procedure/part name q’ty service points intake grate, ride plate, and intake duct removal follow the left “step” for removal. 1 bolt 2 2 bolt 2 3 intake grate 1 4 screw 4 5 speed sensor 1 no...
Page 451: Jet
F d es 6- jet pump grille d’admission, plaque de fond et conduit d’admission vue en eclate tableau de depose et d’installation etape procédé/nom de pièce qté points d’entretien grille d’admission, plaque de fond et conduit d’admission suivre l’“étape” de gauche pour la dépose. 1 vis 2 2 vis 2 3 gril...
Page 452: Jet
6-2 e jet pump intake grate, ride plate, and intake duct exploded diagram step procedure/part name q’ty service points 7 ride plate 1 8 bolt 4 9 intake duct 1 10 felt packing 1 reverse the removal steps for installation. Not reusable.
Page 453: Jet
F d es 6- jet pump vue en eclate etape procédé/nom de pièce qté points d’entretien 7 plaque de fond 1 8 vis 4 9 conduit d’admission 1 10 garniture en feutre 1 pour l’installation, inverser les étapes de la dépose. Non réutilisable explosionszeichnung schritt verfahren/teilebezeichnung menge wartungs...
Page 454: Jet
6-3 e jet pump jet pump unit jet pump unit exploded diagram removal and installation chart step procedure/part name q’ty service points jet pump unit removal follow the left “step” for removal. 1 shift cable joint 1 2 qsts cable joint 1 3 bilge hose 1 note: route the speed sensor lead between the je...
Page 455: Jet
F d es 6- jet pump pompe de propulsion vue en eclate tableau de depose et d’installation etape procédé/nom de pièce qté points d’entretien depose de la pompe de propul- sion suivre l’“étape” de gauche pour la dépose. 1 raccord de câble de sélecteur 1 2 raccord de câble qsts 1 3 flexible de cale 1 n....
Page 456: Jet
6-4 e jet pump jet pump unit exploded diagram step procedure/part name q’ty service points 7 bolt 4 8 collar 4 9 rubber plate 2 10 bolt 1 11 bolt 4 12 jet pump unit assembly 1 13 dowel pin 2 14 impeller housing 2 1 15 dowel pin 2 reverse the removal steps for installation. 8 × 24 mm 14 n • m (1.4 kg...
Page 457: Jet
F d es 6- jet pump vue en eclate etape procédé/nom de pièce qté points d’entretien 7 vis 4 8 bague 4 9 plaque en caoutchouc 2 10 vis 1 11 vis 4 12 pompe de propulsion complète 1 13 pion 2 14 carter de turbine 2 1 15 pion 2 pour l’installation, inverser les étapes de la dépose. Explosionszeichnung sc...
Page 458: Jet
6-5 e jet pump jet pump unit exploded diagram removal and installation chart step procedure/part name q’ty service points speed sensor disassembly follow the left “step” for disassembly. 1 paddle wheel set 1 2 speed sensor 1 reverse the disassembly steps for assembly. Fwd 1 2 not reusable.
Page 459: Jet
F d es 6- jet pump vue en eclate tableau de depose et d’installation etape procédé/nom de pièce qté points d’entretien demontage du capteur de vitesse suivre l’“étape” de gauche pour le démontage. 1 roue à palettes complète 1 2 capteur de vitesse 1 pour le montage, inverser les étapes du démontage. ...
Page 460: Jet
6-6 e jet pump reverse gate reverse gate exploded diagram removal and installation chart step procedure/part name q’ty service points reverse gate removal follow the left “step” for removal. 1 clamp/spout hose 1/1 2 bolt 2 3 washer 2 4 collar 2 5 reverse gate assembly 1 6 nut 1 7 bolt 1 8 washer 2.
Page 461: Jet
F d es 6- jet pump secteur de marche arriere vue en eclate tableau de depose et d’installation etape procédé/nom de pièce qté points d’entretien depose du secteur de marche arriere suivre l’“étape” de gauche pour la dépose. 1 collier/flexible d’écoulement 1/1 2 vis 2 3 rondelle 2 4 bague 2 5 secteur...
Page 462: Jet
6-7 e jet pump reverse gate exploded diagram step procedure/part name q’ty service points 9 roller 1 10 bolt 6 11 reverse gate stay 2 12 nut 1 13 washer 1 14 bolt 1 15 lever 1 1 16 spacer 1 17 nut 1.
Page 463: Jet
F d es 6- jet pump vue en eclate etape procédé/nom de pièce qté points d’entretien 9 galet 1 10 vis 6 11 support de secteur de marche arrière 2 12 ecrou 1 13 rondelle 1 14 vis 1 15 levier 1 1 16 entretoise 1 17 ecrou 1 explosionszeichnung schritt verfahren/teilebezeichnung menge wartungspunkte 9 wal...
Page 464: Jet
6-8 e jet pump reverse gate exploded diagram step procedure/part name q’ty service points 18 washer 1 19 bolt 1 20 washer 1 21 collar 1 22 spring 1 23 lever 2 1 24 washer 1 reverse the removal steps for installation..
Page 465: Jet
F d es 6- jet pump vue en eclate etape procédé/nom de pièce qté points d’entretien 18 rondelle 1 19 vis 1 20 rondelle 1 21 bague 1 22 ressort 1 23 levier 2 1 24 rondelle 1 pour l’installation, inverser les étapes de la dépose. Explosionszeichnung schritt verfahren/teilebezeichnung menge wartungspunk...
Page 466: Jet
6-9 e jet pump reverse gate service points lever 1 installation 1. Install: • bolt 1 • lever 1 2 • spacer 3 • reverse gate 4 • washer 5 • nut 6 lever 2 installation 1. Install: • bolt 1 • washer 2 • collar 3 • spring 4 • lever 2 5 • washer 6 note: • when installing the spring, hook the spring end a ...
Page 467: Jet
F d es 6- jet pump points d’entretien remontage du levier 1 1. Installer: • vis 1 • levier 1 2 • entretoise 3 • secteur de marche arrière 4 • rondelle 5 • ecrou 6 remontage du levier 2 1. Installer: • vis 1 • rondelle 2 • bague 3 • ressort 4 • levier 2 5 • rondelle 6 n.B.: • lors du remontage du res...
Page 468: Jet
6-10 e jet pump jet thrust nozzle and nozzle ring jet thrust nozzle and nozzle ring exploded diagram removal and installation chart step procedure/part name q’ty service points jet thrust nozzle and nozzle ring removal follow the left “step” for removal. Jet pump unit refer to “jet pump unit”. Rever...
Page 469: Jet
F d es 6- jet pump tuyere de propulsion et anneau de tuyere vue en eclate tableau de depose et d’installation etape procédé/nom de pièce qté points d’entretien depose de la tuyere de propul- sion et de l’anneau de tuyere suivre l’“étape” de gauche pour la dépose. Pompe de propulsion se reporter à “p...
Page 470: Jet
6-11 e jet pump impeller duct and impeller housing 1 impeller duct and impeller housing 1 exploded diagram removal and installation chart step procedure/part name q’ty service points impeller duct and impeller housing 1 removal follow the left “step” for removal. Nozzle ring refer to “jet thrust noz...
Page 471: Jet
F d es 6- jet pump depose du conduit et du carter de turbine 1 vue en eclate tableau de depose et d’installation etape procédé/nom de pièce qté points d’entretien depose du conduit et du carter de turbine 1 suivre l’“étape” de gauche pour la dépose. Anneau de tuyère se reporter à “tuyere de propulsi...
Page 472: Jet
6-12 e jet pump impeller duct and impeller housing 1 exploded diagram step procedure/part name q’ty service points 7 bolt 4 8 water inlet cover 1 9 packing 1 10 water inlet strainer 1 11 packing 1 reverse the removal steps for installation..
Page 473: Jet
F d es 6- jet pump vue en eclate etape procédé/nom de pièce qté points d’entretien 7 vis 4 8 couvercle d’admission d’eau 1 9 garniture 1 10 crépine d’admission d’eau 1 11 garniture 1 pour l’installation, inverser les étapes de la dépose. Explosionszeichnung schritt verfahren/teilebezeichnung menge w...
Page 474: Jet
6-13 e jet pump impeller duct and drive shaft impeller duct and drive shaft exploded diagram removal and installation chart *1 : epnoc grease ap #0 step procedure/part name q’ty service points impeller duct and drive shaft disassembly follow the left “step” for disassembly. 1 impeller 1 left-hand th...
Page 475: Jet
F d es 6- jet pump conducto del rotor y eje de transmisiÓn flÜgelradrohr und antriebswelle conduit de turbine et arbre d’entrainement vue en eclate tableau de depose et d’installation *1 : graisse epnoc ap n°0 etape procédé/nom de pièce qté points d’entretien demontage du conduit de tur- bine et de ...
Page 476: Jet
6-14 e jet pump impeller duct and drive shaft exploded diagram *1 : epnoc grease ap #0 step procedure/part name q’ty service points 8 drive shaft 1 9 rear bearing 1 10 spacer 1 11 front bearing 1 12 oil seal 1 13 oil seal 1 14 impeller duct 1 reverse the disassembly steps for assembly. Not reusable ...
Page 477: Jet
F d es 6- jet pump vue en eclate *1 : graisse epnoc ap n°0 etape procédé/nom de pièce qté points d’entretien 8 arbre d’entraînement 1 9 roulement arrière 1 10 entretoise 1 11 roulement avant 1 12 bague d’étanchéité 1 13 bague d’étanchéité 1 14 conduit de turbine 1 pour le montage, inverser les étape...
Page 478: Jet
6-15 e jet pump impeller duct and drive shaft service points drive shaft removal 1. Remove: • impeller note: the impeller has left-hand threads. Turn the impeller clockwise to loosen it. 2. Remove: • nut 1 drive shaft holder: yb-06151/90890-06519 drive shaft holder: yb-06151/90890-06519 3. Remove: •...
Page 479: Jet
F d es 6- jet pump points d’entretien dépose de l’arbre d’entraînement 1. Déposer: • turbine n.B.: la turbine a un filetage à gauche. La tourner en sens d’horloge pour la desser- rer. 2. Déposer: • ecrou 1 3. Déposer: • arbre d’entraînement 1 n.B.: déposer l’arbre d’entraînement à l’aide d’une press...
Page 480: Jet
6-16 e jet pump impeller duct and drive shaft 5. Remove: • front bearing note: remove the front bearing with a press. Drive rod: yb-06071 driver rod l3: 90890-06652 needle bearing attachment: yb-06112/90890-06614 6. Remove: • oil seal note: remove the oil seals with press. Impeller inspection refer ...
Page 481: Jet
F d es 6- jet pump 5. Déposer: • roulement avant n.B.: déposer le roulement avant à l’aide d’une presse. 6. Déposer: • bague d’étanchéité n.B.: déposer les bagues d’étanchéité à l’aide d’une presse. Inspection de la turbine se reporter à “pompe de propulsion” au chapitre 3. Inspection de l’arbre d’e...
Page 482: Jet
6-17 e jet pump impeller duct and drive shaft drive shaft installation 1. Install: • oil seals driver rod: yb-06071/90890-06606 ball bearing attachment: yb-06085/90890-06634 distance a: 14.2 ± 0.2 mm (0.56 ± 0.01 in) distance b: 4.7 ± 0.2 mm (0.19 ± 0.01 in) 2. Install: • front bearing • drive shaft...
Page 483: Jet
F d es 6- jet pump remontage de l’arbre d’entraînement 1. Installer: • bagues d’étanchéité 2. Installer: • roulement avant • arbre d’entraînement n.B.: remonter le roulement avant et l’arbre d’entraînement à l’aide d’une presse. 3. Installer: • arbre d’entraînement (avec le roulement avant) • entret...
Page 484: Jet
6-18 e jet pump impeller duct and drive shaft 5. Install: • rear bearing note: • press the bearing inner/outer race at the same time holding the drive shaft and impel- ler duct. • if a bearing inner/outer race attachment is not available, use a washer or pipe with an outer diameter of 46 mm (1.81 in...
Page 485: Jet
F d es 6- jet pump 5. Installer: • roulement arrière n.B.: • appuyer sur la cage intérieure/exté- rieure de roulement en tenant en même temps l’arbre d’entraînement et le conduit de la turbine. • si aucun accessoire pour bague inté- rieure/extérieure de roulement n’est disponible, utiliser une ronde...
Page 486: Jet
6-19 e jet pump transom plate and hoses transom plate and hoses exploded diagram removal and installation chart step procedure/part name q’ty service points transom plate and hoses removal follow the left “step” for removal. Exhaust system refer to “exhaust system” in chapter 8. Jet pump unit assemb...
Page 487: Jet
F d es 6- jet pump varangue de voute et flexibles vue en eclate tableau de depose et d’installation etape procédé/nom de pièce qté points d’entretien depose de la varangue de voute et des flexibles suivre l’“étape” de gauche pour la dépose. Circuit d’échappement se reporter à “circuit d’echappement”...
Page 488: Jet
6-20 e jet pump transom plate and hoses exploded diagram step procedure/part name q’ty service points 6 hose clamp 2 7 cooling water hose 1 cooling water outlet (thermostat) 8 bilge hose 2 1 9 hose clamp 1 10 bilge hose 3 1 11 band 1 12 electric bilge pump assembly 1 13 hose clamp 1 14 bilge hose 4 ...
Page 489: Jet
F d es 6- jet pump vue en eclate etape procédé/nom de pièce qté points d’entretien 6 collier de flexible 2 7 flexible d’eau de refroidissement 1 sortie d’eau de refroidissement (thermostat) 8 flexible de cale 2 1 9 collier de flexible 1 10 flexible de cale 3 1 11 sangle 1 12 pompe électrique de cale...
Page 490: Jet
6-21 e jet pump transom plate and hoses exploded diagram step procedure/part name q’ty service points 16 bilge strainer holder 1 17 bilge strainer 1 18 nut/washer 4/4 19 transom plate 1 20 bilge hose 5 1 reverse the removal steps for installation..
Page 491: Jet
F d es 6- jet pump vue en eclate etape procédé/nom de pièce qté points d’entretien 16 support de crépine de cale 1 17 crépine de cale 1 18 ecrou/rondelle 4/4 19 varangue de voûte 1 20 flexible de cale 5 1 pour l’installation, inverser les étapes de la dépose. Explosionszeichnung schritt verfahren/te...
Page 492: Jet
6-22 e jet pump transom plate and hoses service points bilge strainer inspection refer to “jet pump unit” in chapter 3. Electric bilge pump inspection refer to “bilge pump” in chapter 3. Refer to “electric bilge pump” in chapter 7. Bilge hose inspection 1. Inspect: • bilge hoses cracks/damage/wear →...
Page 493: Jet
F d es 6- jet pump points d’entretien inspection de la crépine de cale se reporter à “pompe de propulsion” au chapitre 3. Inspection de la pompe électrique de cale se reporter à “pompe de cale” au chapitre 3. Se reporter à “pompe elec- trique de cale” au chapitre 7. Inspection du flexible de cale 1....
Page 494: Jet
6-23 e jet pump bearing housing bearing housing exploded diagram removal and installation chart *: as required step procedure/part name q’ty service points bearing housing removal follow the left “step” for removal. Engine unit refer to “engine unit” in chapter 5. 1 rubber coupling 1 2 bolt 3 3 inte...
Page 495: Jet
F d es 6- jet pump boitier de roulement vue en eclate tableau de depose et d’installation *: si nécessaire etape procédé/nom de pièce qté points d’entretien depose du boitier de roulement suivre l’“étape” de gauche pour la dépose. Moteur se reporter à “moteur” au chapitre 5. 1 coupleur en caoutchouc...
Page 496: Jet
6-24 e jet pump bearing housing exploded diagram removal and installation chart step procedure/part name q’ty service points bearing housing disassembly follow the left “step” for disassembly. 1 grease hose 1 2 nipple 1 3 driven coupling 1 4 washer 1 5 intermediate drive shaft 1 6 o-ring 2.
Page 497: Jet
F d es 6- jet pump vue en eclate tableau de depose et d’installation etape procédé/nom de pièce qté points d’entretien demontage du boitier de roulement suivre l’“étape” de gauche pour le démontage. 1 flexible de graissage 1 2 raccord 1 3 accouplement mené 1 4 rondelle 1 5 arbre d’entraînement inter...
Page 498: Jet
6-25 e jet pump bearing housing exploded diagram step procedure/part name q’ty service points 7 oil seal 1 8 oil seal 1 9 oil seal 1 10 circlip 1 11 bearing 1 12 circlip 1 reverse the disassembly steps for assembly. Not reusable not reusable not reusable not reusable.
Page 499: Jet
F d es 6- jet pump vue en eclate etape procédé/nom de pièce qté points d’entretien 7 bague d’étanchéité 1 8 bague d’étanchéité 1 9 bague d’étanchéité 1 10 circlip 1 11 roulement 1 12 circlip 1 pour le montage, inverser les étapes du démontage. Non réutilisable non réutilisable non réutilisable non r...
Page 500: Jet
6-26 e jet pump bearing housing service points driven coupling removal and installation 1. Remove and install: • driven coupling note: • install the driven coupling with the same spe- cial tools that were used for removal. • check that the shaft holder and intermediate drive shaft are properly engag...
Page 501: Jet
F d es 6- jet pump points d’entretien dépose et remontage de l’accouplement mené 1. Déposer et installer: • accouplement mené n.B.: • remonter l’accouplement mené avec le même outillage spécial que celui utilisé pour sa dépose. • vérifier que le porte-arbre et l’arbre d’entraînement intermédiaire so...
Page 502: Jet
6-27 e jet pump bearing housing bearing removal 1. Remove: • bearing note: • install the bearing with the same special tools that were used for removal. • support the intermediate housing with steel blocks 1 and press the bearing. Driver rod: yb-06071/90890-06606 bearing outer race attachment: yb-06...
Page 503: Jet
F d es 6- jet pump dépose du roulement 1. Déposer: • roulement n.B.: • remonter le roulement avec le même outillage spécial que celui utilisé pour sa dépose. • poser le boîtier intermédiaire sur des cales en acier 1 et appuyer sur le rou- lement. Inspection du roulement, de l’arbre d’entraînement in...
Page 504: Jet
6-28 e jet pump bearing housing bearing installation 1. Install: • circlip (rear) 2. Install: • bearing note: support the intermediate housing with steel blocks 1 and press the bearing. Driver rod: yb-06071/90890-06606 bearing outer race attachment: yb-06156/90890-06626 oil seal installation 1. Inst...
Page 505: Jet
F d es 6- jet pump remontage du roulement 1. Installer: • circlip (arrière) 2. Installer: • roulement n.B.: poser le boîtier intermédiaire sur des cales en acier 1 et appuyer sur le roule- ment. Remontage de la bague d’étanchéité 1. Installer: • bague d’étanchéité n.B.: avant de remonter la bague d’...
Page 506: Jet
6-29 e jet pump bearing housing 3. Install: • oil seal 1 [8 mm (0.31 in)] • oil seal 2 [11 mm (0.43 in)] distance a: 10.3–10.7 mm (0.41–0.42 in) distance b: 0.6–1.0 mm (0.02–0.04 in) b a 2 1 intermediate housing installation 1. Install: • intermediate housing • shim note: install the shim(s) to the ...
Page 507: Jet
F d es 6- jet pump 3. Installer: • bague d’étanchéité 1 [8 mm (0,31 in)] • bague d’étanchéité 2 [11 mm (0,43 in)] remontage du boîtier intermédiaire 1. Installer: • boîtier intermédiaire • cale n.B.: remonter la ou les cales à la position d’origine si le boîtier de roulement n’est pas remplacé. Dist...
Page 508: Elec
E – + elec 1 2 3 4 5 6 7 8 9 chapter 7 electrical system electrical components........................................................................ 7-1 electrical box and ignition coil box ............................................. 7-2 exploded diagram ............................................
Page 509
1 2 3 4 5 6 7 8 9 f d es chapitre 7 equipement electrique composants electriques ..... 7-1 boitier electrique et boitier d’allumage ................ 7-2 vue en eclate ............................ 7-2 tableau de depose et d’installation ........................ 7-2 analyse electrique .............. 7...
Page 510: Elec
E – + elec fuel control system ........................................................................... 7-28 wiring diagram ................................................................................. 7-28 fuel pump ...............................................................................
Page 511
F d es circuit de commande de carburant .................................. 7-28 plan de cablage .................... 7-28 pompe a carburant .............. 7-30 transmetteur de niveau de carburant ........ 7-30 injecteur de carburant ... 7-31 relais principal et de pompe a carburant............. 7-31...
Page 512: Elec
E – + elec indication system .................................................................................. 7-44 wiring diagram ................................................................................. 7-44 fuse ...............................................................................
Page 513
F d es circuit d’indication ............. 7-44 plan de cablage .................... 7-44 fusible......................................... 7-45 batterie ..................................... 7-45 induit d’alternateur......... 7-45 redresseur/regulateur ... 7-45 ecm ......................................
Page 514: Elec
7-1 e – + elec electrical components electrical components l k j i h g f e d c b a 0 9 8 7 6 5 4 3 2 1 1 thermoswitch (engine) 2 starter motor 3 engine temperature sensor 4 spark plugs 5 ignition coils 6 electrical box 7 battery 8 speed sensor 9 electric bilge pump 0 cam position sensor a fuel injec...
Page 515: Elec
F d es 7- – + elec composants electriques 1 thermocontact (moteur) 2 démarreur 3 capteur de température du moteur 4 bougies 5 bobines d’allumage 6 boîtier électrique 7 batterie 8 capteur de vitesse 9 pompe électrique de cale 0 capteur de position de came a injecteurs de carburant b thermocontact (éc...
Page 516: Elec
7-2 e – + elec electrical box and ignition coil box electrical box and ignition coil box exploded diagram removal and installation chart step procedure/part name q’ty service points electrical box removal follow the left “step” for removal. 1 battery negative lead 1 2 battery positive lead 1 3 clip/...
Page 517: Elec
F d es 7- – + elec boitier electrique et boitier d’allumage vue en eclate tableau de depose et d’installation etape procédé/nom de pièce qté points d’entretien depose du boitier electrique suivre l’“étape” de gauche pour la dépose. 1 câble négatif de la batterie 1 2 câble positif de la batterie 1 3 ...
Page 518: Elec
7-3 e – + elec electrical box and ignition coil box exploded diagram step procedure/part name q’ty service points 9 battery box 1 10 spacer 2 11 bolt 4 12 screw 4 13 terminal cover 1 14 gasket 1 15 screw 1 16 starter motor lead 1 17 bolt 3 18 cover 1 a a a a 22 23 11 14 13 12 1516 21 20 19 23 23 23 ...
Page 519: Elec
F d es 7- – + elec vue en eclate etape procédé/nom de pièce qté points d’entretien 9 boîtier de batterie 1 10 entretoise 2 11 vis 4 12 vis 4 13 couvercles des bornes 1 14 joint 1 15 vis 1 16 câble du démarreur 1 17 vis 3 18 cache 1 non réutilisable explosionszeichnung schritt verfahren/teilebezeichn...
Page 520: Elec
7-4 e – + elec electrical box and ignition coil box exploded diagram step procedure/part name q’ty service points 19 gasket 1 20 bolt 2 21 ground lead 2 22 holder 1 23 coupler 15 note: disconnect all couplers. Reverse the removal steps for installation. A a a a 22 23 11 14 13 12 1516 21 20 19 23 23 ...
Page 521: Elec
F d es 7- – + elec vue en eclate etape procédé/nom de pièce qté points d’entretien 19 joint 1 20 vis 2 21 fil de masse 2 22 support 1 23 connecteur 15 n.B.: débrancher tous les connecteurs. Pour l’installation, inverser les étapes de la dépose. Non réutilisable explosionszeichnung schritt verfahren/...
Page 522: Elec
7-5 e – + elec electrical box and ignition coil box exploded diagram removal and installation chart step procedure/part name q’ty service points electrical box disassembly follow the left “step” for disassembly. 1 tapping screw 18 2 cover 1 3 gasket 1 4 clamp 3 5 screw 4 6 terminal cover 1 7 gasket ...
Page 523: Elec
F d es 7- – + elec vue en eclate tableau de depose et d’installation etape procédé/nom de pièce qté points d’entretien demontage du boitier electrique suivre l’“étape” de gauche pour le démontage. 1 vis autotaraudeuse 18 2 cache 1 3 joint 1 4 attache de câble 3 5 vis 4 6 couvercles des bornes 1 7 jo...
Page 524: Elec
7-6 e – + elec electrical box and ignition coil box exploded diagram step procedure/part name q’ty service points 9 battery positive lead 1 10 starter motor lead 1 11 wire harness 1 12 tapping screw 1 13 fuse holder stay 1 14 screw 1 15 starter relay 1 16 clamp 2 17 tapping screw/washer 4/4 18 ecm 1...
Page 525: Elec
F d es 7- – + elec vue en eclate etape procédé/nom de pièce qté points d’entretien 9 câble positif de la batterie 1 10 câble du démarreur 1 11 faisceau de fils 1 12 vis autotaraudeuse 1 13 support de porte-fusible 1 14 vis 1 15 relais de démarreur 1 16 collier 2 17 vis autotaraudeuse/rondelle 4/4 18...
Page 526: Elec
7-7 e – + elec electrical box and ignition coil box exploded diagram step procedure/part name q’ty service points 19 tapping screw 1 20 bracket 1 21 joint connector 2 22 tapping screw 2 23 slant detection switch 1 24 tapping screw 1 25 main and fuel pump relay 1 26 tapping screw 2 27 rectifier/regul...
Page 527: Elec
F d es 7- – + elec vue en eclate etape procédé/nom de pièce qté points d’entretien 19 vis autotaraudeuse 1 20 support 1 21 connecteur pour raccord 2 22 vis autotaraudeuse 2 23 contacteur de détection d’inclinaison 1 24 vis autotaraudeuse 1 25 relais principal et de pompe à carburant 1 26 vis autotar...
Page 528: Elec
7-8 e – + elec electrical box and ignition coil box exploded diagram removal and installation chart step procedure/part name q’ty service points ignition coil box removal follow the left “step” for removal. Air filter refer to “fuel injection system” in chapter 4. 1 spark plug cap 4 2 holder 1 3 ign...
Page 529: Elec
F d es 7- – + elec vue en eclate tableau de depose et d’installation etape procédé/nom de pièce qté points d’entretien depose du boitier d’allumage suivre l’“étape” de gauche pour la dépose. Filtre à air se reporter à “circuit d’injection de carbu- rant” au chapitre 4. 1 capuchon de bougie 4 2 suppo...
Page 530: Elec
7-9 e – + elec electrical box and ignition coil box exploded diagram removal and installation chart step procedure/part name q’ty service points ignition coil box disassembly follow the left “step” for disassembly. 1 tapping screw 10 2 holder 2 3 ignition coil cover 1 4 tapping screw 4 5 ignition co...
Page 531: Elec
F d es 7- – + elec vue en eclate tableau de depose et d’installation etape procédé/nom de pièce qté points d’entretien demontage du boitier d’allumage suivre l’“étape” de gauche pour le démontage. 1 vis autotaraudeuse 10 2 support 2 3 couvercle du boîtier d’allumage 1 4 vis autotaraudeuse 4 5 bobine...
Page 532: Elec
7-10 e – + elec electrical box and ignition coil box up 1 4 3 2 1 4 3 2 2 3 4 5 6 7 8 1 9 Ê É È 1 starter relay 2 fuse holder 3 ecm 4 joint connector 5 joint connector 6 main and fuel pump relay 7 rectifier/regulator 8 slant detection switch 9 ignition coil È to ignition coil É to battery positive t...
Page 533: Elec
F d es 7- – + elec 1 relais de démarreur 2 porte-fusible 3 ecm 4 connecteur pour raccord 5 connecteur pour raccord 6 relais principal et de pompe à carburant 7 redresseur/régulateur 8 contacteur de détection d’inclinaison 9 bobine d’allumage È vers la bobine d’allumage É vers la borne positive de la...
Page 534: Elec
7-11 e – + elec electrical analysis electrical analysis inspection caution: • all measuring instruments should be han- dled with special care. Damaged or mis- handled instruments will not measure properly. • on an instrument powered by dry batter- ies, check the battery’s voltage periodi- cally and ...
Page 535: Elec
F d es 7- – + elec analyse electrique inspection attention: • tous les instruments de mesure doi- vent être manipulés avec soin. Un instrument endommagé ou mal uti- lisé ne pourra effectuer de mesures correctes. • sur un instrument alimenté par piles, vérifier périodiquement la tension des piles et ...
Page 536: Elec
7-12 e – + elec electrical analysis low resistance measurement note: • when measuring a resistance of 10 Ω or less with the digital tester, the correct measure- ment cannot be obtained because of the tester’s internal resistance. • to obtain the correct value, subtract the internal resistance from t...
Page 537: Elec
F d es 7- – + elec mesure de résistances de faible valeur n.B.: • lorsqu’on mesure une résistance infé- rieure ou égale à 10 Ω avec le multi- mètre numérique, il n’est pas possible d’obtenir une valeur correcte en raison de la résistance interne de l’appareil de mesure. • pour obtenir la valeur corr...
Page 538: Elec
7-13 e – + elec electrical analysis peak voltage adaptor note: • throughout this chapter the peak voltage adaptor’s part number has been omitted. Refer to the following part number. • the peak voltage adaptor should be used with the digital tester. • when measuring the peak voltage, connect the peak...
Page 539: Elec
F d es 7- – + elec adaptateur de tension de crête n.B.: • dans ce chapitre, le numéro de réfé- rence de l’adaptateur de tension de crête a été omis. Se reporter au numéro de référence suivant. • l’adaptateur de tension de crête doit être utilisé avec le multimètre numéri- que. • pour mesurer la tens...
Page 540: Elec
7-14 e – + elec ignition system ignition system wiring diagram free push w b free push br br free push w b r br p/w p/w p/w k r/y b/w b/w o b/o p/g r l/r r/y r/y b/o b/o b/y b/o b/o b/o b/o b/w r b b/o r/y l/r br l y r/y r/y b g/o g/o r/y r/y b/y b/y b/y b/o b/y b/o b/o b/o w/r w/b w b r b/o b/y o p...
Page 541: Elec
F d es 7- – + elec circuit d’allumage plan de cablage 1 ecm 2 relais principal et de pompe à carburant 3 fusible (20 a) 4 batterie 5 coupe-circuit de sécurité 6 contacteur d’arrêt du moteur 7 contacteur de démarrage 8 thermocontact (échappement) 9 thermocontact (moteur) 0 capteur de température du m...
Page 542: Elec
7-15 e – + elec ignition system wiring diagram free push w b free push br br free push w b r br p/w p/w p/w k r/y b/w b/w o b/o p/g r l/r r/y r/y b/o b/o b/y b/o b/o b/o b/o b/w r b b/o r/y l/r br l y r/y r/y b g/o g/o r/y r/y b/y b/y b/y b/o b/y b/o b/o b/o w/r w/b w b r b/o b/y o p y p r g g g g r...
Page 543: Elec
F d es 7- – + elec plan de cablage b : noir br : brun g : vert l : bleu o : orange p : rose r : rouge w : blanc y : jaune b/o : noir/orange b/r : noir/rouge b/w : noir/blanc b/y : noir/jaune g/o : vert/orange l/b : bleu/noir l/r : bleu/rouge p/g : rose/vert p/w : rose/blanc r/y :rouge/jaune w/b : bl...
Page 544: Elec
7-16 e – + elec ignition system ignition spark gap warning • when checking the spark gap, do not touch any of the connections of the spark gap tester lead wires. • when performing the spark gap test, take special care not to let sparks leak out of the removed spark plug cap. • when performing the sp...
Page 545: Elec
F d es 7- – + elec longueur d’etincelle d’allumage avertissement • lors du contrôle de la longueur d’étincelle, veiller à ne toucher aucune des connexions des fils du testeur de longueur d’étincelle. • lors de l’exécution du test, veiller particulièrement à ce qu’il n’y ait pas de fuite au niveau du...
Page 546: Elec
7-17 e – + elec ignition system ignition system peak voltage warning when checking the electrical components, do not touch any of the connections of the digital tester lead wires. Note: • if there is no spark, or the spark is weak, continue with the ignition system test. • if a good spark is obtaine...
Page 547: Elec
F d es 7- – + elec tension de crete du circuit d’allumage avertissement pendant le contrôle des composants électriques, veiller à ne toucher aucune des connexions des fils du mul- timètre numérique. N.B.: • en cas d’absence d’étincelle ou en présence d’une étincelle faible, conti- nuer le test du ci...
Page 548: Elec
7-18 e – + elec ignition system 2. Measure: • pulser coil output peak voltage below specification → replace the pulser coil. Note: to crank the engine, connect the engine shut- off cord (lanyard), and then press the start switch and engine stop switch simultaneously. 3. Measure: • lighting coil outp...
Page 549: Elec
F d es 7- – + elec 2. Mesurer: • tension de crête de sortie de la bobine d’impulsions en-dessous des spécifications → remplacer la bobine d’impul- sions. N.B.: pour lancer le moteur, brancher le cor- don du coupe-circuit de sécurité puis appuyer simultanément sur le contacteur de démarrage to et sur...
Page 550: Elec
7-19 e – + elec 4. Measure: • rectifier/regulator output voltage below specification → replace the recti- fier/regulator. Note: • before measuring the output peak voltage, make sure that the battery is fully charged. • the output voltage gradually increases after the engine is started, therefore, ma...
Page 551: Elec
F d es 7- – + elec 4. Mesurer: • tension de sortie du redresseur/ régulateur en dessous des spécifications → remplacer le redresseur/régula- teur. N.B.: • avant de mesurer la tension de crête de sortie, s’assurer que la batterie est complètement chargée. • la tension de sortie augmente pro- gressive...
Page 552: Elec
7-20 e – + elec ignition coil 1. Measure: • primary coil resistance out of specification → replace. Note: when measuring a resistance of 10 Ω or less with the digital tester, the correct measurement cannot be obtained because of the tester’s internal resistance. Refer to “low resistance measurement”...
Page 553: Elec
F d es 7- – + elec bobine d’allumage 1. Mesurer: • résistance de la bobine primaire hors spécifications → rempla- cer. N.B.: il n’est pas possible d’obtenir une valeur correcte lors de la mesure d’une résis- tance inférieure ou égale à 10 Ω en rai- son de la résistance interne de l’appareil de mesur...
Page 554: Elec
7-21 e – + elec ignition system engine temperature sensor 1. Measure: • engine temperature sensor resistance (at the specified temperature) out of specification → replace. Engine temperature sensor resistance: 20 °c (68 °f): 54.2–69.0 k Ω 100 °c (212 °f): 3.12–3.48 k Ω measurement steps: • suspend t...
Page 555: Elec
F d es 7- – + elec capteur de temperature du moteur 1. Mesurer: • résistance du capteur de tempé- rature du moteur (à la température spécifiée) hors spécifications → rempla- cer. Capteur de temperature d’admission 1. Mesurer: • résistance du capteur de tempé- rature d’air (à la température spécifiée...
Page 556: Elec
7-22 e – + elec ignition system thermoswitch (engine) 1. Check: • thermoswitch (engine) continuity (at the specified temperature) out of specification → replace. 1 no continuity È temperature 2 continuity É time thermoswitch (exhaust) 1. Check: • thermoswitch (exhaust) continuity (at the specified t...
Page 557: Elec
F d es 7- – + elec thermocontact (moteur) 1. Vérifier: • continuité du thermocontact (moteur) (à la température spécifiée) hors spécifications → rempla- cer. 1 pas de continuité È température 2 continuité É temps thermocontact (echappement) 1. Vérifier: • continuité du thermocontact (échappement) (à...
Page 558: Elec
7-23 e – + elec ignition system main and fuel pump relay 1. Check: • main and fuel pump relay continuity faulty → replace. Checking steps: • connect the tester leads between the main and fuel pump relay terminals 5, 6 and 7. • connect the terminals 2 or 3 to the pos- itive battery terminal. • connec...
Page 559: Elec
F d es 7- – + elec relais principal et de pompe a carburant 1. Vérifier: • continuité du relais principal et de pompe à carburant défectueux → remplacer. Etapes de la vérification: • brancher les fils du multimètre entre les bornes 5, 6 et 7 du relais principal et de pompe à car- burant. • raccorder...
Page 560: Elec
7-24 e – + elec ignition system throttle position sensor 1. Measure: • throttle position sensor output voltage out of specification → adjust the throttle bodies synchronization. Refer to “fuel injection system” in chapter 4. Test harness (3 pins): yb-06793/90890-06793 test connector: yw-06862/90890-...
Page 561: Elec
F d es 7- – + elec capteur d’acceleration 1. Mesurer: • tension de sortie du capteur d’accélération hors spécifications → régler la synchronisation des corps de papillon. Se reporter à “circuit d’injection de carbu- rant” au chapitre 4. Faisceau de test (3 broches): yb-06793/90890-06793 connecteur d...
Page 562: Elec
7-25 e – + elec ignition system cam position sensor 1. Measure: • cam position sensor output voltage out of specification → replace. Note: when operating the yamaha diagnostic sys- tem, electric power is supplied to the cam posi- tion sensor. Test harness (3 pins): yb-06777/90890-06777 cam position ...
Page 563: Elec
F d es 7- – + elec capteur de position de came 1. Mesurer: • tension de sortie du capteur de position de came hors spécifications → rempla- cer. N.B.: lorsqu’on utilise le système de diagnos- tic yamaha, le capteur de position de came est alimenté. Faisceau de test (3 broches): yb-06777/90890-06777 ...
Page 564: Elec
7-26 e – + elec ignition system intake air pressure sensor 1. Measure: • intake air pressure sensor output volt- age out of specification → replace. È: output voltage É: vacuum pressure note: when operating the yamaha diagnostic sys- tem, electric power is supplied to the intake air pressure sensor....
Page 565: Elec
F d es 7- – + elec capteur de pression d’air d’admission 1. Mesurer: • tension de sortie du capteur de pression d’air d’admission hors spécifications → rempla- cer. È: tension de sortie É: dépression n.B.: lorsqu’on utilise le système de diagnos- tic yamaha, le capteur de pression d’air d’admission ...
Page 566: Elec
7-27 e – + elec ignition system slant detection switch 1. Check: • slant detection switch continuity out of specification → replace. Position lead color blue/black (l/b) black/ orange (b/o) normal operation È overturned É up up È É.
Page 567: Elec
F d es 7- – + elec contacteur de detection d’inclinaison 1. Vérifier: • continuité du contacteur de détection d’inclinaison hors spécifications → rempla- cer. Position couleur des fils bleu/noir (l/b) noir/ orange (b/o) fonctionne- ment normal È retourné É neigungssensorschalter 1. Kontrollieren: • ...
Page 568: Elec
7-28 e – + elec fuel control system fuel control system wiring diagram #4 #3 #2 #1 5 7 p/w p/w p/w f o b/o p/g l/r b/o b/o b/o b/y p/g b/o b/o r/y r/y r/y r/y r/y r/y pu/g pu/y pu/b pu/r o o p r/y r/y r/y b/o b/o b/y b/o b/g b/g l/r br l y r/y r/y r b r/y r/y b/y b/y b/y b/o b/y b/o b/o b/o b/y o p ...
Page 569: Elec
F d es 7- – + elec circuit de commande de carburant plan de cablage 1 ecm 2 relais principal et de pompe à carburant 3 fusible (20 a) 4 batterie 5 pompe à carburant 6 compteur multifonction 7 transmetteur de niveau de carburant 8 thermocontact (échappement) 9 thermocontact (moteur) 0 capteur de temp...
Page 570: Elec
7-29 e – + elec fuel control system wiring diagram #4 #3 #2 #1 5 7 p/w p/w p/w f o b/o p/g l/r b/o b/o b/o b/y p/g b/o b/o r/y r/y r/y r/y r/y r/y pu/g pu/y pu/b pu/r o o p r/y r/y r/y b/o b/o b/y b/o b/g b/g l/r br l y r/y r/y r b r/y r/y b/y b/y b/y b/o b/y b/o b/o b/o b/y o p y p o pu/r pu/g pu/b...
Page 571: Elec
F d es 7- – + elec plan de cablage b : noir br : brun g : vert l : bleu o : orange p : rose r : rouge w : blanc y : jaune b/o : noir/orange b/y : noir/jaune g/o : vert/orange l/b : bleu/noir l/r : bleu/rouge p/g : rose/vert p/w : rose/blanc pu/b : pourpre/noir pu/g : pourpre/vert pu/r : pourpre/roug...
Page 572: Elec
7-30 e – + elec fuel control system fuel pump 1. Check: • fuel pump operating sound fuel pump does not sound → measure the fuel pressure. Refer to “fuel injection system” in chapter 4. Note: after the engine is stopped, the fuel pump will operate for 10 seconds. Fuel sender 1. Measure: • fuel sender...
Page 573: Elec
F d es 7- – + elec pompe a carburant 1. Vérifier: • bruit de fonctionnement de la pompe à carburant la pompe à carburant ne fait pas de bruit → mesurer la pression de carburant. Se reporter à “circuit d’injection de carbu- rant” au chapitre 4. N.B.: après l’arrêt du moteur, la pompe à car- burant co...
Page 574: Elec
7-31 e – + elec fuel control system fuel injector refer to “fuel injection system” in chapter 4. Main and fuel pump relay refer to “ignition system”. Oil pressure switch refer to “ignition system”. Thermoswitch (engine) refer to “ignition system”. Thermoswitch (exhaust) refer to “ignition system”. S...
Page 575: Elec
F d es 7- – + elec injecteur de carburant se reporter à “circuit d’injection de carbu- rant” au chapitre 4. Relais principal et de pompe a carburant se reporter à “circuit d’allumage”. Contacteur de pression d’huile se reporter à “circuit d’allumage”. Thermocontact (moteur) se reporter à “circuit d’...
Page 576: Elec
7-32 e – + elec starting system starting system wiring diagram free push br br free push w b r br 4 3 2 1 8 7 6 5 r/y 7 18 r/y l/r br l y r/y r/y b r/y r/y y r br br br br r br r b b r 4 3 2 1 8 7 6 r/y r/y r p p o r r r r r r 1 2 3 4 5 6 7 8 b b b 5 br b b b 1 ecm 2 main and fuel pump relay 3 fuse ...
Page 577: Elec
F d es 7- – + elec circuit de demarrage plan de cablage 1 ecm 2 relais principal et de pompe à carburant 3 fusible (20 a) 4 relais de démarreur 5 démarreur 6 batterie 7 contacteur de démarrage 8 coupe-circuit de sécurité b : noir br : brun r : rouge y : jaune r/y : rouge/jaune startersystem schaltpl...
Page 578: Elec
7-33 e – + elec starting system battery refer to “electrical” in chapter 3. Wiring connections 1. Check: • wiring connections poor connections → properly connect. Fuse 1. Check: • fuse broken broken → replace. Note: 20a fuse is for main relay, engine shut-off switch and rectifier/regulator. 3a fuse ...
Page 579: Elec
F d es 7- – + elec batterie se reporter à “systeme electrique” au chapitre 3. Connexions des cables 1. Vérifier: • connexions des câbles mauvaises connexions → con- necter correctement. Fusible 1. Vérifier: • fusible cassé cassé → remplacer. N.B.: le fusible de 20 a protège le relais prin- cipal, le...
Page 580: Elec
7-34 e – + elec starting system starter relay 1. Inspect: • brown lead terminal • black lead terminal loose → tighten. 2. Check: • starter relay faulty → replace. Checking steps: • connect the tester leads between the starter relay terminals as shown. • connect the brown lead terminal to the positiv...
Page 581: Elec
F d es 7- – + elec relais de demarreur 1. Inspecter: • borne de fil brun • borne de fil noir desserrée → serrer. 2. Vérifier: • relais de démarreur défectueux → remplacer. Etapes de la vérification: • brancher les fils du multimètre entre les bornes du relais de démar- reur comme indiqué. • raccorde...
Page 582: Elec
7-35 e – + elec starter motor starter motor exploded diagram removal and installation chart *: as required step procedure/part name q’ty service points starter motor disassembly follow the left “step” for disassembly. Starter motor refer to “generator and starter motor” in chapter 5. 1 o-ring 1 2 bo...
Page 583: Elec
F d es 7- – + elec demarreur vue en eclate tableau de depose et d’installation *: si nécessaire etape procédé/nom de pièce qté points d’entretien demontage du demarreur suivre l’“étape” de gauche pour le démontage. Démarreur se reporter à “alternateur et demarreur” au chapitre 5. 1 joint torique 1 2...
Page 584: Elec
7-36 e – + elec starter motor exploded diagram *: as required step procedure/part name q’ty service points 8 starter motor rear cover 1 9 o-ring 1 10 shim * t = 0.2 mm, 0.8 mm 11 armature assembly 1 12 nut/spring washer/washer 1/1/4 13 o-ring 1 14 brush holder 1 15 brush spring 4 16 bolt 1 17 brush ...
Page 585: Elec
F d es 7- – + elec vue en eclate *: si nécessaire etape procédé/nom de pièce qté points d’entretien 8 couvercle arrière du démarreur 1 9 joint torique 1 10 cale * t = 0,2 mm, 0,8 mm 11 induit 1 12 ecrou/rondelle élastique/rondelle 1/1/4 13 joint torique 1 14 porte-balais 1 15 ressort de balai 4 16 v...
Page 586: Elec
7-37 e – + elec starter motor exploded diagram step procedure/part name q’ty service points 18 spacer 1 19 holder 1 20 starter motor yoke 1 reverse the disassembly steps for assembly..
Page 587: Elec
F d es 7- – + elec vue en eclate etape procédé/nom de pièce qté points d’entretien 18 entretoise 1 19 support 1 20 boîtier de démarreur 1 pour le montage, inverser les étapes du démontage. Explosionszeichnung schritt verfahren/teilebezeichnung menge wartungspunkte 18 distanzstück 1 19 halterung 1 20...
Page 588: Elec
7-38 e – + elec starter motor service points armature inspection 1. Inspect: • armature shaft 1 damage/wear → replace. 1 2. Inspect: • commutator dirt → clean with 600 grit sandpaper. 3. Measure: • commutator diameter out of specification → replace. Min. Commutator diameter: 27.0 mm (1.06 in) 4. Che...
Page 589: Elec
F d es 7- – + elec points d’entretien inspection de l’induit 1. Inspecter: • axe de l’induit 1 endommagement/usure → rem- placer. 2. Inspecter: • collecteur sale → nettoyer avec du papier de verre n°600. 3. Mesurer: • diamètre de collecteur hors spécifications → rempla- cer. 4. Vérifier: • profondeu...
Page 590: Elec
7-39 e – + elec starter motor 6. Inspect: • armature coil continuity out of specification → replace. Armature coil continuity: commutator segments 1 continuity segment - laminations 2 no continuity segment - armature shaft no continuity brush holder inspection 1. Measure: • brush length a out of spe...
Page 591: Elec
F d es 7- – + elec 6. Inspecter: • continuité de bobine d’induit hors spécifications → rempla- cer. Inspection du porte-balais 1. Mesurer: • longueur de balais a hors spécifications → rempla- cer. 2. Vérifier: • continuité du porte-balais hors spécifications → rempla- cer. Inspection du couvercle av...
Page 592: Elec
7-40 e – + elec charging system charging system wiring diagram b r r 1 2 3 r r r g g g g g g b g b g g g g g 4 1 rectifier/regulator 2 fuse (20a) 3 battery 4 lighting coil b : black g : green r : red.
Page 593: Elec
F d es 7- – + elec circuit de charge plan de cablage 1 redresseur/régulateur 2 fusible (20 a) 3 batterie 4 induit d’alternateur b : noir g : vert r : rouge ladesystem schaltplan 1 gleichrichter/regler 2 sicherung (20a) 3 batterie 4 lichtmaschinenspule b : schwarz g : grün r : rot sistema de carga di...
Page 594: Elec
7-41 e – + elec charging system fuse refer to “starting system”. Battery refer to “electrical” in chapter 3. Lighting coil refer to “ignition system”. Rectifier/regulator refer to “ignition system”..
Page 595: Elec
F d es 7- – + elec fusible se reporter à “circuit d’allumage”. Batterie se reporter à “systeme electrique” au chapitre 3. Induit d’alternateur se reporter à “circuit d’allumage”. Redresseur/regulateur se reporter à “circuit d’allumage”. Sicherung siehe “zÜndsystem”. Batterie siehe “elektrische anlag...
Page 596: Elec
7-42 e – + elec electric bilge pump electric bilge pump wiring diagram 4 3 2 1 8 7 6 5 7 18 l/r br l y r/y r/y r/y r/y r y br br br b b b b b b r r 3 2 1 4 5 r p p o r b r r r 1 2 3 4 5 6 7 8 b b b r/y r/y b br r/y r/y r/y r/y r/y r/y 1 ecm 2 main and fuel pump relay 3 fuse (3a) 4 battery 5 electric...
Page 597: Elec
F d es 7- – + elec pompe electrique de cale plan de cablage 1 ecm 2 relais principal et de pompe à carburant 3 fusible (3 a) 4 batterie 5 pompe électrique de cale b : noir br : brun r : rouge y : jaune r/y : rouge/jaune elektrische bilgenpumpe schaltplan 1 ecm 2 hauptrelais und kraftstoffpumpenre- l...
Page 598: Elec
7-43 e – + elec electric bilge pump electric bilge pump 1. Check: • electric bilge pump operation incorrect → replace. Checking steps: • suspend the electric bilge pump in a con- tainer filled with water. • connect the brown lead terminal to the positive battery terminal. • connect the black lead te...
Page 599: Elec
F d es 7- – + elec pompe electrique de cale 1. Vérifier: • fonctionnement de la pompe électrique de cale incorrect → remplacer. Etapes de la vérification: • suspendre la pompe électrique de cale dans un récipient rempli d’eau. • brancher la borne du fil brun à la borne positive de la batterie. • bra...
Page 600: Elec
7-44 e – + elec indication system indication system wiring diagram g g r 4 3 r br br l/r br l y r/y r/y r b p r o r/y r/y r/y r p w/b r/y b/o r/y r/y r/y r/y y r r p p p 1 2 3 5 6 2 1 b b b 7 6 8 5 b/o b/g p b p b/o p b b/o p p b b w b p b/o p b b/y b/o b/y b/y b/y b/o b/y 9 b/o b/o b/o b/o b/o b/o ...
Page 601: Elec
F d es 7- – + elec circuit d’indication plan de cablage 1 ecm 2 relais principal et de pompe à carburant 3 fusible (20 a) 4 fusible (3 a) 5 batterie 6 pulsations du compte-tours 7 thermocontact (échappement) 8 thermocontact (moteur) 9 capteur de température du moteur 0 compteur multifonction a trans...
Page 602: Elec
7-45 e – + elec indication system fuse refer to “starting system”. Battery refer to “electrical” in chapter 3. Lighting coil refer to “ignition system”. Rectifier/regulator refer to “ignition system”. Ecm refer to “ignition system”. Engine temperature sensor refer to “ignition system”. Thermoswitch ...
Page 603: Elec
F d es 7- – + elec fusible se reporter à “circuit d’allumage”. Batterie se reporter à “systeme electrique” au chapitre 3. Induit d’alternateur se reporter à “circuit d’allumage”. Redresseur/regulateur se reporter à “circuit d’allumage”. Ecm se reporter à “circuit d’allumage”. Capteur de temperature ...
Page 604: Elec
7-46 e – + elec indication system oil pressure switch 1. Measure: • oil pressure switch continuity out of specification → replace. Vacuum/pressure pump gauge set: yb-35956-a/90890-06756 oil pressure switch continuity pressure: 128 kpa (1.28 kgf/cm 2 , 18.2 psi) – 166 kpa (1.66 kgf/cm 2 , 23.6 psi) m...
Page 605: Elec
F d es 7- – + elec contacteur de pression d’huile 1. Mesurer: • continuité du contacteur de pres- sion d’huile hors spécifications → rempla- cer. Compteur multifonction compteur multifonction 1. Vérifier: • compteur multifonction boîtier du compteur fissuré → remplacer le compteur multi- fonction. L...
Page 606: Elec
7-47 e – + elec indication system display function 1. Check: • display function not operate → replace the multifunc- tion meter. L/b l/b b l/r b/y b/y r/w b/g b r/w y y r r w w b b b b/g l/r r b r 1 2 3 4 1 buzzer 2 speed sensor 3 ecm 4 fuel sender b : black r : red w : white y : yellow b/g : black/...
Page 607: Elec
F d es 7- – + elec fonction d’affichage 1. Vérifier: • fonction d’affichage ne fonctionne pas → remplacer le compteur multifonction. 1 avertisseur sonore 2 capteur de vitesse 3 ecm 4 transmetteur de niveau de carburant b : noir r : rouge w : blanc y : jaune b/g : noir/vert b/y : noir/jaune l/b : ble...
Page 608: Elec
7-48 e – + elec indication system speedometer display 1. Check: • speedometer display does not display → measure the speed sensor output voltage and pulses. Without specification → replace the multifunction meter. 2. Measure: • speed sensor output voltage and pulses out of specification → repair or ...
Page 609: Elec
F d es 7- – + elec affichage du compteur de vitesse 1. Vérifier: • affichage du compteur de vitesse pas d’affichage → mesurer la tension de sortie et les pulsations du capteur de vitesse. Hors spécifications → rempla- cer le compteur multifonction. 2. Mesurer: • tension et impulsions de sortie du ca...
Page 610: Elec
7-49 e – + elec indication system tachometer display 1. Check: • tachometer display does not display → check the engine speed using the “engine monitor” of the yamaha diagnostic system. Replace the multifunction meter. Hour meter display 1. Check: • hour meter display does not display → replace the ...
Page 611: Elec
F d es 7- – + elec affichage du compte-tours 1. Vérifier: • affichage du compte-tours pas d’affichage → vérifier le régime moteur à l’aide de la fonction “engine monitor” (sur- veillance du moteur) du système de diagnostic yamaha. Remplacer le compteur multi- fonction. Compteur d’heures 1. Vérifier:...
Page 612: Elec
7-50 e – + elec indication system overheat warning indicator 1. Check: • overheat warning indicator not operating → replace the multifunc- tion meter. Checking steps: • disconnect the thermoswitch (engine) connector 1 (blue) or engine tempera- ture sensor connector 2 (black) or ther- moswitch (exhau...
Page 613: Elec
F d es 7- – + elec indicateur d’avertissement de surchauffe 1. Vérifier: • indicateur d’avertissement de surchauffe ne fonctionne pas → remplacer le compteur multifonction. Indicateur d’avertissement de dysfonctionnement du moteur 1. Vérifier: • indicateur d’avertissement de dysfonctionnement du mot...
Page 614: Elec
7-51 e – + elec indication system diagnostic display 1. Check: • diagnostic display does not display → replace the multi- function meter. Checking steps: • remove the coupler of the sensor indi- cated in the multifunction meter. • check if “irregular” is indicated in the diagnosis record of the yama...
Page 615: Elec
F d es 7- – + elec affichage des diagnostics 1. Vérifier: • affichage des diagnostics pas d’affichage → remplacer le compteur multifonction. Etapes de la vérification: • déposer le connecteur du capteur indiqué par le compteur multifonc- tion. • vérifier si la mention “irregular” figure dans l’enreg...
Page 616: Hull
E hull hood 1 2 3 4 5 6 7 8 9 chapter 8 hull and hood handlebar .................................................................................................. 8-1 exploded diagram ............................................................................. 8-1 removal and installation chart ......
Page 617
1 2 3 4 5 6 7 8 9 f d es chapitre 8 coque et capot guidon .............................................. 8-1 vue en eclate ............................ 8-1 tableau de depose et d’installation ........................ 8-1 points d’entretien.................. 8-6 inspection du guidon ....................
Page 618: Hull
E hull hood front hood ............................................................................................... 8-21 exploded diagram ........................................................................... 8-21 removal and installation chart .............................................. ...
Page 619
F d es capot avant ................................ 8-21 vue en eclate .......................... 8-21 tableau de depose et d’installation ...................... 8-21 cache de la console de direction .................................... 8-25 vue en eclate .......................... 8-25 tableau de d...
Page 620: Hull
E hull hood deck and hull.......................................................................................... 8-47 exploded diagram ........................................................................... 8-47 removal and installation chart .............................................. 8-4...
Page 621
F d es pont et coque ............................ 8-47 vue en eclate .......................... 8-47 tableau de depose et d’installation ...................... 8-47 fixation du moteur ............... 8-49 vue en eclate .......................... 8-49 tableau de depose et d’installation ................
Page 622: Hull
8-1 e hull hood handlebar handlebar exploded diagram removal and installation chart step procedure/part name q’ty service points handlebar cover removal follow the left “step” for removal. 1 screw 4 2 handlebar cover 1 3 pad 1 4 bolt 2 note: position the corrugated tube for the throttle cable as sho...
Page 623: Hull
F d es 8- hull hood guidon vue en eclate tableau de depose et d’installation etape procédé/nom de pièce qté points d’entretien depose du cache de guidon suivre l’“étape” de gauche pour la dépose. 1 vis 4 2 cache de guidon 1 3 rembourrage 1 4 vis 2 n.B.: positionner le tuyau annelé du câble d’accélér...
Page 624: Hull
8-2 e hull hood handlebar exploded diagram removal and installation chart step procedure/part name q’ty service points handlebar removal follow the left “step” for removal. Qsts cable (to jet thrust nozzle) refer to “remote control cables and speed sensor lead”. 1 nut/washer 2/2 2 qsts converter 1 3...
Page 625: Hull
F d es 8- hull hood explosionszeichnung ausbau- und einbautabelle schritt verfahren/teilebezeichnung menge wartungspunkte ausbau des lenkers den punkten der spalte “schritt” links zum ausbau folgen. Qsts-seilzug (zur strahlschubdüse) siehe “fernbedienungskabel und geschwindigkeitssensorkabel”. 1 mut...
Page 626: Hull
8-3 e hull hood handlebar exploded diagram step procedure/part name q’ty service points 10 hose packing 1 11 buzzer 1 12 handlebar assembly 1 note: • pass the qsts cable and handlebar switch lead through the handle boss cover, and then install the handlebar assembly. • install the sponges of the qst...
Page 627: Hull
F d es 8- hull hood explosionszeichnung schritt verfahren/teilebezeichnung menge wartungspunkte 10 schlauchdichtung 1 11 warnsummer 1 12 lenkerbauteil 1 hinweis: • den qsts-seilzug und das kabel des lenkerschal- ters durch die abdeckung der lenkernabe führen und dann das lenker-bauteil montieren. • ...
Page 628: Hull
8-4 e hull hood handlebar exploded diagram removal and installation chart step procedure/part name q’ty service points handlebar disassembly follow the left “step” for disassembly. 1 bolt 2 2 grip end 2 3 spacer 1 4 screw/spring washer/washer 1/1/1 5 qsts grip assembly 1 6 special nut 1 7 screw 2 no...
Page 629: Hull
F d es 8- hull hood explosionszeichnung ausbau- und einbautabelle schritt verfahren/teilebezeichnung menge wartungspunkte demontage des lenkers den punkten der spalte “schritt” links zum zerlegen folgen. 1 schraube 2 2 griffende 2 3 distanzstück 1 4 schraube/federscheibe/unterlegscheibe 1/1/1 5 qsts...
Page 630: Hull
8-5 e hull hood handlebar exploded diagram step procedure/part name q’ty service points 8 handlebar switch assembly 1 9 screw 2 10 throttle lever assembly 1 11 handlebar grip 1 note: apply adhesive to the handlebar and the inner surface of the handlebar grip. 12 handlebar 1 reverse the disassembly s...
Page 631: Hull
F d es 8- hull hood explosionszeichnung schritt verfahren/teilebezeichnung menge wartungspunkte 8 lenkerschalter-bauteil 1 9 schraube 2 10 drosselventilhebel-bauteil 1 11 lenkergriff 1 hinweis: kleber auf den lenker und die innenfläche des len- kergriffs auftragen. 12 lenker 1 zum zusammenbauen die ...
Page 632: Hull
8-6 e hull hood handlebar service points handlebar inspection 1. Inspect: • handlebar bends/cracks/damage → replace. Handlebar switch inspection refer to “starting system” in chapter 7. Handlebar assembly installation 1. Install: • bands 1 note: after inserting the qsts cables, buzzer lead, handleba...
Page 633: Hull
F d es 8- hull hood wartungspunkte inspektion des lenkers 1. Überprüfen: • lenker verbiegung/risse/beschädi- gung → ersetzen. Inspektion des lenkerschalters siehe “startersystem” in kapitel 7. Einbau des lenkerbauteils 1. Einbauen: • bänder 1 hinweis: nach dem einführen der qsts-seil- züge, des warn...
Page 634: Hull
8-7 e hull hood handlebar 3. Install: • throttle cable note: fit the seal into the groove in the bracket. 4. Adjust: • qsts cable length a note: • before adjusting the qsts cables, set the trim grip to the neutral position. • adjust the qsts cable lengths a to the specified length and be sure to tak...
Page 635: Hull
F d es 8- hull hood 3. Einbauen: • gasseilzug hinweis: die dichtung in die nut der halterung einpassen. 4. Einstellen: • qsts-seilzuglänge a hinweis: • vor dem einstellen des qsts- seilzugs, den trimmgriff in die neutralstellung drehen. • die qsts-seilzuglänge a auf die vorgeschriebene länge einstel...
Page 636: Hull
8-8 e hull hood qsts grip qsts grip exploded diagram removal and installation chart step procedure/part name q’ty service points qsts grip disassembly follow the left “step” for disassembly. Qsts grip assembly refer to “handlebar”. 1 screw/washer 1/1 2 cover 1 3 ball 2 4 spring 2 5 qsts cable 1 1 6 ...
Page 637: Hull
F d es 8- hull hood qsts-griff explosionszeichnung ausbau- und einbautabelle schritt verfahren/teilebezeichnung menge wartungspunkte demontage des qsts-griffs den punkten der spalte “schritt” links zum zerlegen folgen. Qsts-griff-baugruppe siehe “lenker”. 1 schraube/unterlegscheibe 1/1 2 abdeckung 1...
Page 638: Hull
8-9 e hull hood qsts grip exploded diagram step procedure/part name q’ty service points 7 screw/washer 2/2 8 spacer 1 9 qsts shift lock lever 1 10 spring 1 11 spacer 1 12 cable housing 1 13 qsts grip 1 reverse the disassembly steps for assembly..
Page 639: Hull
F d es 8- hull hood explosionszeichnung schritt verfahren/teilebezeichnung menge wartungspunkte 7 schraube/unterlegscheibe 2/2 8 distanzstück 1 9 qsts-schaltsperrhebel 1 10 feder 1 11 distanzstück 1 12 kabelgehäuse 1 13 qsts-griff 1 zum zusammenbauen die zerlegenschritte in umgekehrter reihenholge a...
Page 640: Hull
8-10 e hull hood qsts grip service points qsts cable inspection 1. Inspect: • qsts cables frays/kinks/rough movement → replace. Qsts grip inspection 1. Inspect: • qsts grip damage/wear → replace..
Page 641: Hull
F d es 8- hull hood wartungspunkte inspektion des qsts-seilzugs 1. Überprüfen: • qsts-seilzüge durchgescheuerte stellen/ knicke/ungleichmäßige bewegung → ersetzen. Inspektion des qsts-griffs 1. Überprüfen: • qsts-griff beschädigung/verschleiß → ersetzen. Puntos de servicio revisión del cable qsts 1....
Page 642: Hull
8-11 e hull hood steering master steering master exploded diagram removal and installation chart step procedure/part name q’ty service points steering master removal follow the left “step” for removal. Steering console cover refer to “steering console cover”. Steering cable end refer to “remote cont...
Page 643: Hull
F d es 8- hull hood lenkersÄule explosionszeichnung ausbau- und einbautabelle schritt verfahren/teilebezeichnung menge wartungspunkte ausbau der lenkersÄule den punkten der spalte “schritt” links zum ausbau folgen. Abdeckung der steuerkonsole siehe “abdeckung der steuerkonsole”. Steuerseilzugsende s...
Page 644: Hull
8-12 e hull hood steering master exploded diagram removal and installation chart step procedure/part name q’ty service points steering master disassembly follow the left “step” for disassembly. 1 bolt/washer 2/2 2 stay 1 3 spring 1 4 bolt/washer 6/6 5 lower housing 1 6 spring 1 7 bushing 1 8 bushing...
Page 645: Hull
F d es 8- hull hood explosionszeichnung ausbau- und einbautabelle schritt verfahren/teilebezeichnung menge wartungspunkte demontage der lenkersÄule den punkten der spalte “schritt” links zum zerlegen folgen. 1 schraube/unterlegscheibe 2/2 2 strebe 1 3 feder 1 4 schraube/unterlegscheibe 6/6 5 unteres...
Page 646: Hull
8-13 e hull hood steering master exploded diagram step procedure/part name q’ty service points 11 tilt stopper 1 12 bolt/nut/holder 4/4/4 13 retainer 2 14 steering shaft assembly 1 15 steering tube 1 16 bolt/washer/spring washer 2/2/2 17 cap 1 18 shaft 1 1 19 cross piece 1 reverse the disassembly st...
Page 647: Hull
F d es 8- hull hood explosionszeichnung schritt verfahren/teilebezeichnung menge wartungspunkte 11 kippanschlag 1 12 schraube/mutter/halterung 4/4/4 13 käfig 2 14 lenkerwellenbauteil 1 15 steuerröhre 1 16 schraube/unterlegscheibe/ federunterlegscheibe 2/2/2 17 kappe 1 18 welle 1 1 19 kreuzstück 1 zu...
Page 648: Hull
8-14 e hull hood steering master service points steering master components inspection 1. Inspect: • each component part damage/wear → replace the steering master..
Page 649: Hull
F d es 8- hull hood wartungspunkte inspektion der bestandteile der lenkersäule 1. Überprüfen: • jedes bestandteil beschädigung/verschleiß → die lenkersäule ersetzen. Puntos de servicio revisión de los componentes del elemento principal de la dirección 1. Inspeccione: • todas las piezas de los compo-...
Page 650: Hull
8-15 e hull hood remote control cables and speed sensor lead remote control cables and speed sensor lead exploded diagram removal and installation chart step procedure/part name q’ty service points remote control cables and speed sensor lead removal follow the left “step” for removal. Service lid 1 ...
Page 651: Hull
F d es 8- hull hood fernbedienungskabel und geschwindigkeitssensorkabel explosionszeichnung ausbau- und einbautabelle schritt verfahren/teilebezeichnung menge wartungspunkte ausbau der fernbedienungska- bel und des geschwindigkeits- sensorkabels den punkten der spalte “schritt” links zum ausbau folg...
Page 652: Hull
8-16 e hull hood remote control cables and speed sensor lead exploded diagram step procedure/part name q’ty service points 6 nut 1 7 steering cable 1 8 packing 1 9 speed sensor coupler 1 10 nut 1 11 cap 1 12 screw 4 13 speed sensor 1 14 shift cable end 1 15 nut 2.
Page 653: Hull
F d es 8- hull hood explosionszeichnung schritt verfahren/teilebezeichnung menge wartungspunkte 6 mutter 1 7 steuerseilzug 1 8 dichtung 1 9 geschwindigkeitssensorstecker 1 10 mutter 1 11 kappe 1 12 schraube 4 13 geschwindigkeitssensor 1 14 schaltseilzugende 1 15 mutter 2 diagrama detallado paso proc...
Page 654: Hull
8-17 e hull hood remote control cables and speed sensor lead exploded diagram step procedure/part name q’ty service points 16 shift cable holder 2 17 nut 1 18 shift cable 1 19 packing 1 20 nut 1 21 pin 1 22 qsts cable end 1 23 nut 1 24 qsts cable 1 25 packing 1 reverse the removal steps for installa...
Page 655: Hull
F d es 8- hull hood explosionszeichnung schritt verfahren/teilebezeichnung menge wartungspunkte 16 schaltseilzughalterung 2 17 mutter 1 18 schaltseilzug 1 19 dichtung 1 20 mutter 1 21 stift 1 22 qsts-seilzugsende 1 23 mutter 1 24 qsts-seilzug 1 25 dichtung 1 zum einbauen die ausbauschritte in umgeke...
Page 656: Hull
8-18 e hull hood remote control cables and speed sensor lead service points warning when routing the cables, do not grasp the cable by the outer crimped sheath or steel end. This could deform or loosen the cable end due to extreme angles and or pressure. Always hold the cables by the outer cover bel...
Page 657: Hull
F d es 8- hull hood wartungspunkte warnung beim verlegen der kabel, diese nicht an der gefalzten ummante- lung oder am stahlende greifen. Dies könnte die kabelenden auf- grund von zu starker winkelnei- gung oder zu starkem druck deformieren oder lösen. Die kabel immer an der äußeren ummante- lung un...
Page 658: Hull
8-19 e hull hood remote control cables and speed sensor lead qsts cable (jet pump end) installation 1. Install: • qsts cable (jet pump end) warning the qsts cable must be screwed in more than 8 mm (0.31 in). Qsts cable set length a (jet pump end): 13.6 mm (0.54 in) qsts cable stopper installation 1....
Page 659: Hull
F d es 8- hull hood einbau des qsts-seilzugs (jetpumpenende) 1. Einbauen: • qsts-seilzug (jetpumpenende) warnung der qsts-steuerseilzug muß mehr als 8 mm (0,31 in) tief einge- schraubt sein. Einbau des qsts-seilzugan- schlags 1. Einbauen: • qsts-seilzuganschlag warnung darauf achten, den zapfen 1 am...
Page 660: Hull
8-20 e hull hood remote control cables and speed sensor lead shift cable holder installation 1. Install: • shift cable holders note: install the shift cable holders so that mark a and mark b are in the positions shown in the illustration. Shift cable stopper installation 1. Install: • shift cable st...
Page 661: Hull
F d es 8- hull hood einbau der schaltseilzughalterung 1. Einbauen: • schaltseilzughalterung hinweis: die schaltseilzughalterung so mon- tieren, daß die markierung a und die markierung b sich in den in der abbildung dargestellten positionen befinden. Einbau des schaltseilzugan- schlags 1. Einbauen: •...
Page 662: Hull
8-21 e hull hood front hood front hood exploded diagram removal and installation chart step procedure/part name q’ty service points front hood removal follow the left “step” for removal. 1 nut/washer 4/4 2 front hood assembly 1 3 bolt 4 4 bolt 2 5 hinge assembly 1 6 bolt 2 7 hood lock assembly 1 2 7...
Page 663: Hull
F d es 8- hull hood vordere haube explosionszeichnung ausbau- und einbautabelle schritt verfahren/teilebezeichnung menge wartungspunkte ausbau der vorderen haube den punkten der spalte “schritt” links zum ausbau folgen. 1 mutter/unterlegscheibe 4/4 2 vorderes haubenbauteil 1 3 schraube 4 4 schraube ...
Page 664: Hull
8-22 e hull hood exploded diagram step procedure/part name q’ty service points 8 bolt 4 9 service lid 1 1 10 screw 4 11 service lid 2 1 reverse the removal steps for installation. 2 7 6 4 8 9 3 5 1 11 10 6 × 18 mm 6 × 18 mm 5.4 n • m (0.54 kgf • m, 3.9 ft • ib) 6 × 30 mm 5.4 n • m (0.54 kgf • m, 3.9...
Page 665: Hull
F d es 8- hull hood explosionszeichnung schritt verfahren/teilebezeichnung menge wartungspunkte 8 schraube 4 9 deckel für den wartungszugang 1 1 10 schraube 4 11 deckel für den wartungszugang 2 1 zum einbauen die ausbauschritte in umgekehrter reihenfolge ausführen. Diagrama detallado paso procedimie...
Page 666: Hull
8-23 e hull hood front hood exploded diagram removal and installation chart step procedure/part name q’ty service points hinge disassembly follow the left “step” for disassembly. 1 circlip 2 2 pin (long) 1 3 hinge 1 4 pin (short) 1 5 damper stay 1 6 collar 2 7 grommet 2 4 5 1 7 6 10 2 7 6 1 8 9 3.
Page 667: Hull
F d es 8- hull hood explosionszeichnung ausbau- und einbautabelle schritt verfahren/teilebezeichnung menge wartungspunkte demontage des scharniers den punkten der spalte “schritt” links zum zerlegen folgen. 1 sicherungsring 2 2 stift (lang) 1 3 scharnier 1 4 stift (kurz) 1 5 dämpferstrebe 1 6 muffe ...
Page 668: Hull
8-24 e hull hood front hood exploded diagram step procedure/part name q’ty service points 8 clamp 1 9 damper boots 1 10 damper 1 reverse the disassembly steps for assembly. 4 5 1 7 6 10 2 7 6 1 8 9 3 not reusable.
Page 669: Hull
F d es 8- hull hood explosionszeichnung schritt verfahren/teilebezeichnung menge wartungspunkte 8 klemme 1 9 dämpferschutzmanschette 1 10 dämpfer 1 zum zusammenbauen die zerlegenschritte in umgekehrter reihenholge ausführen. Nicht wiederverwendbar diagrama detallado paso procedimiento/denominación d...
Page 670: Hull
8-25 e hull hood steering console cover exploded diagram removal and installation chart step procedure/part name q’ty service points meter and mirror removal follow the left “step” for removal. Handlebar assembly refer to “handlebar”. Service lid 1 refer to “front hood”. 1 clamp 1 2 multifunction me...
Page 671: Hull
F d es 8- hull hood abdeckung der steuerkonsole explosionszeichnung ausbau- und einbautabelle schritt verfahren/teilebezeichnung menge wartungspunkte ausbau des multifunktionsmes- sers und des spiegels den punkten der spalte “schritt” links zum ausbau folgen. Lenkerbauteil siehe “lenker”. Deckel für...
Page 672: Hull
8-26 e hull hood steering console cover exploded diagram step procedure/part name q’ty service points 6 bolt 4 7 multifunction meter 1 8 hose packing 1 9 grommet 1 10 nut/washer 4/4 11 mirror 2 reverse the removal steps for installation. Lt 242 lt 242 5 7 9 5 6 10 11 1 2 3 4 5 × 20 mm 3.9 n • m (0.3...
Page 673: Hull
F d es 8- hull hood explosionszeichnung schritt verfahren/teilebezeichnung menge wartungspunkte 6 schraube 4 7 multifunktionsmesser 1 8 schlauchdichtung 1 9 dichtungsring 1 10 mutter/unterlegscheibe 4/4 11 spiegel 2 zum einbauen die ausbauschritte in umgekehrter reihenfolge ausführen. Nicht wiederve...
Page 674: Hull
8-27 e hull hood steering console cover exploded diagram removal and installation chart step procedure/part name q’ty service points side cover removal follow the left “step” for removal. 1 cup holder 1 2 bolt 8 3 side cover 2 4 nut/washer 4/4 5 bolt 4 6 bracket 2 reverse the removal steps for insta...
Page 675: Hull
F d es 8- hull hood explosionszeichnung ausbau- und einbautabelle schritt verfahren/teilebezeichnung menge wartungspunkte ausbau der seitenabdeckung den punkten der spalte “schritt” links zum ausbau folgen. 1 getränkehalter 1 2 schraube 8 3 seitliche abdeckung 2 4 mutter/unterlegscheibe 4/4 5 schrau...
Page 676: Hull
8-28 e hull hood steering console cover exploded diagram removal and installation chart step procedure/part name q’ty service points steering console cover and glove box assembly removal follow the left “step” for removal. 1 nut/washer 2/2 2 bolt 2 3 nut/washer 2/2 4 bolt 2 5 bolt 2 6 shift handle l...
Page 677: Hull
F d es 8- hull hood explosionszeichnung ausbau- und einbautabelle schritt verfahren/teilebezeichnung menge wartungspunkte ausbau der steuerkonsolenab- deckung des handschuhfach- bauteils den punkten der spalte “schritt” links zum ausbau folgen. 1 mutter/unterlegscheibe 2/2 2 schraube 2 3 mutter/unte...
Page 678: Hull
8-29 e hull hood steering console cover exploded diagram step procedure/part name q’ty service points 7 bolt 2 8 steering console cover 1 note: to remove the console cover easily, pull the tilt lever up. 9 hood lock assembly 1 10 nut/washer 2/2 11 bolt 2 12 glove compartment assembly 1 reverse the r...
Page 679: Hull
F d es 8- hull hood explosionszeichnung schritt verfahren/teilebezeichnung menge wartungspunkte 7 schraube 2 8 abdeckung der steuerkonsole 1 hinweis: um die abdeckung der steuerkonsole leichter aus- bauen zu können, den kipphebel nach oben ziehen. 9 haubenverschluß-bauteil 1 10 mutter/unterlegscheib...
Page 680: Hull
8-30 e hull hood steering console cover exploded diagram removal and installation chart step procedure/part name q’ty service points glove compartment disassembly follow the left “step” for disassembly. 1 glove compartment 1 2 hinge assembly 2 3 lid 1 4 gear assembly 2 5 screw 2 6 latch 1 reverse th...
Page 681: Hull
F d es 8- hull hood explosionszeichnung ausbau- und einbautabelle schritt verfahren/teilebezeichnung menge wartungspunkte demontage des handschuhfachs den punkten der spalte “schritt” links zum zerlegen folgen. 1 handschuhfach 1 2 scharnier-bauteil 2 3 deckel 1 4 getriebe-bauteil 2 5 schraube 2 6 ve...
Page 682: Hull
8-31 e hull hood steering console cover service points glove compartment assembly installation 1. Install: • hinge assembly note: when installing the hinge assembly, make sure that the springs are in the position shown..
Page 683: Hull
F d es 8- hull hood wartungspunkte einbau des handschuhfach- bauteils 1. Einbauen: • scharnier-bauteil hinweis: beim einbau des scharnier-bauteils sicherstellen, daß sich die federn in der dargestellten position befinden. Puntos de servicio montaje del conjunto de la guantera 1. Instale: • conjunto ...
Page 684: Hull
8-32 e hull hood hoses hoses exploded diagram removal and installation chart step procedure/part name q’ty service points hoses removal follow the left “step” for removal. Fuel tank refer to “fuel tank and fuel pump module” in chapter 4. Note: when removing the ventilation hose and fuel tank breathe...
Page 685: Hull
F d es 8- hull hood schlÄuche explosionszeichnung ausbau- und einbautabelle schritt verfahren/teilebezeichnung menge wartungspunkte ausbau der schlÄuche den punkten der spalte “schritt” links zum ausbau folgen. Kraftstofftank siehe “kraftstofftank und kraftstoffpumpenmodul” in kapitel 4. Hinweis: be...
Page 686: Hull
8-33 e hull hood hoses exploded diagram step procedure/part name q’ty service points 4 clamp 2 5 cooling water hose 2 6 nut 2 7 cooling water pilot outlet 2 8 packing 2 reverse the removal steps for installation. (vent) (vent) (vent) 1 2 1 2 7 8 1 6 4 5 3 5 4 6 8 7 fwd 4.2 n • m (0.42 kgf • m, 3.0 f...
Page 687: Hull
F d es 8- hull hood explosionszeichnung schritt verfahren/teilebezeichnung menge wartungspunkte 4 klemme 2 5 kühlwasserschlauch 2 6 mutter 2 7 kühlwasserkontrollauslaß 2 8 dichtung 2 zum einbauen die ausbauschritte in umgekehrter reihenfolge ausführen. Diagrama detallado paso procedimiento/denominac...
Page 688: Hull
8-34 e hull hood shift lever shift lever exploded diagram removal and installation chart step procedure/part name q’ty service points shift lever removal follow the left “step” for removal. Side cover refer to “steering console cover”. Shift cable refer to “remote control cables and speed sensor lea...
Page 689: Hull
F d es 8- hull hood schalthebel explosionszeichnung ausbau- und einbautabelle schritt verfahren/teilebezeichnung menge wartungspunkte ausbau des schalthebels den punkten der spalte “schritt” links zum ausbau folgen. Seitliche abdeckung siehe “abdeckung der steuerkonsole”. Schaltseilzug siehe “fernbe...
Page 690: Hull
8-35 e hull hood shift lever exploded diagram step procedure/part name q’ty service points 6 screw 3 7 base assembly 1 8 nut/washer 3/3 9 screw 3 10 plate 1 reverse the removal steps for installation..
Page 691: Hull
F d es 8- hull hood explosionszeichnung schritt verfahren/teilebezeichnung menge wartungspunkte 6 schraube 3 7 grundbauteil 1 8 mutter/unterlegscheibe 3/3 9 schraube 3 10 platte 1 zum einbauen die ausbauschritte in umgekehrter reihenfolge ausführen. Diagrama detallado paso procedimiento/denominación...
Page 692: Hull
8-36 e hull hood shift lever exploded diagram removal and installation chart step procedure/part name q’ty service points base disassembly follow the left “step” for disassembly. 1 bolt/washer 2/2 2 plate 1 3 spring 1 4 actuator 1 5 roller 1 6 shaft 1 7 shift arm 1 reverse the disassembly steps for ...
Page 693: Hull
F d es 8- hull hood explosionszeichnung ausbau- und einbautabelle schritt verfahren/teilebezeichnung menge wartungspunkte demontage des grundbauteils den punkten der spalte “schritt” links zum zerlegen folgen. 1 schraube/unterlegscheibe 2/2 2 platte 1 3 feder 1 4 aktuator 1 5 walze 1 6 welle 1 7 sch...
Page 694: Hull
8-37 e hull hood shift lever service points base assembly 1. Install: • shift arm • shaft installation steps: • install the shift arm 1 so that it comes in contact with the stopper 2 as shown. • install the shaft 3 to the base so that it come in contact with the stopper 4 as shown. Shift lever 1. In...
Page 695: Hull
F d es 8- hull hood wartungspunkte grundbauteil 1. Einbauen: • schaltarm • welle schalthebel 1. Einbauen: • schalthebel hinweis: um den schalthebel einzubauen, die pfeilmarkierung a auf dem schalt- hebel auf die stanzmarkierung b auf dem grundbauteil ausrichten. Einbauschritte: • den schaltarm 1 so ...
Page 696: Hull
8-38 e hull hood seats and hand grip seats and hand grip exploded diagram removal and installation chart step procedure/part name q’ty service points seats and hand grip removal follow the left “step” for removal. 1 rear seat assembly 1 2 front seat assembly 1 3 bolt 4 4 seat lock assembly 2 5 seat ...
Page 697: Hull
F d es 8- hull hood sitze und handgriff explosionszeichnung ausbau- und einbautabelle schritt verfahren/teilebezeichnung menge wartungspunkte ausbau der sitze und des handgriffs den punkten der spalte “schritt” links zum ausbau folgen. 1 hinterer sitz 1 2 vorderer sitz 1 3 schraube 4 4 sitzverriegel...
Page 698: Hull
8-39 e hull hood seats and hand grip exploded diagram step procedure/part name q’ty service points 9 nut 1 10 projection 1 11 washer 1 12 packing 1 13 nut 4 14 bolt 4 15 rear seat stay 2 16 nut 1 2 1 4 3 21 20 17 18 19 16 18 6 7 9 13 5 15 14 12 11 10 8 4 3 6 × 25 mm 8 × 30 mm 8 × 30 mm 18 n • m (1.8...
Page 699: Hull
F d es 8- hull hood explosionszeichnung schritt verfahren/teilebezeichnung menge wartungspunkte 9 mutter 1 10 vorsprung 1 11 unterlegscheibe 1 12 dichtung 1 13 mutter 4 14 schraube 4 15 strebe des hinteren sitzes 2 16 mutter 1 diagrama detallado paso procedimiento/denominación de la pieza cantidad p...
Page 700: Hull
8-40 e hull hood seats and hand grip exploded diagram step procedure/part name q’ty service points 17 projection 1 18 washer 2 19 nut/washer 4/4 20 bolt 4 21 hand grip 1 reverse the removal steps for installation. 2 1 4 3 21 20 17 18 19 16 18 6 7 9 13 5 15 14 12 11 10 8 4 3 6 × 25 mm 8 × 30 mm 8 × 3...
Page 701: Hull
F d es 8- hull hood explosionszeichnung schritt verfahren/teilebezeichnung menge wartungspunkte 17 vorsprung 1 18 unterlegscheibe 2 19 mutter/unterlegscheibe 4/4 20 schraube 4 21 handgriff 1 zum einbauen die ausbauschritte in umgekehrter reihenfolge ausführen. Diagrama detallado paso procedimiento/d...
Page 702: Hull
8-41 e hull hood seats and hand grip service points seat lock inspection 1. Inspect: • front seat lock • rear seat lock damage/wear → replace..
Page 703: Hull
F d es 8- hull hood wartungspunkte inspektion des sitzverschlusses 1. Überprüfen: • vorderer sitzverschluß • hinterer sitzverschluß beschädigung/verschleiß → ersetzen. Puntos de servicio revisión del cierre del asiento 1. Inspeccione: • cierre del asiento delantero • cierre del asiento trasero daños...
Page 704: Hull
8-42 e hull hood exhaust system exhaust system exploded diagram removal and installation chart step procedure/part name q’ty service points exhaust system removal follow the left “step” for removal. Deck beam refer to “seats and hand grip”. Jet pump unit assembly refer to “jet pump unit” in chapter ...
Page 705: Hull
F d es 8- hull hood abgassystem explosionszeichnung ausbau- und einbautabelle schritt verfahren/teilebezeichnung menge wartungspunkte ausbau des abgassystems den punkten der spalte “schritt” links zum ausbau folgen. Decksbalken siehe “sitze und handgriff”. Jetpumpeneinheit-bauteil siehe “jetpumpenei...
Page 706: Hull
8-43 e hull hood exhaust system exploded diagram step procedure/part name q’ty service points 5 exhaust joint clamp 1 6 exhaust joint 1 7 nut/washer 6/6 8 exhaust valve 1 note: remove parts 8 to 14 as a set. 9 hose clamp 1 10 rubber hose 1 11 hose clamp 1 12 water tank 1 13 rubber hose 1 14 plate 1 ...
Page 707: Hull
F d es 8- hull hood explosionszeichnung schritt verfahren/teilebezeichnung menge wartungspunkte 5 klemme des auspuff-verbindungsstücks 1 6 auspuff-verbindungsstück 1 7 mutter/unterlegscheibe 6/6 8 abgasventil 1 hinweis: die teile 8 bis 14 als ganzen satz ausbauen. 9 schlauchklemme 1 10 gummischlauch...
Page 708: Hull
8-44 e hull hood exhaust system exploded diagram removal and installation chart step procedure/part name q’ty service points exhaust joint disassembly follow the left “step” for disassembly. 1 bolt 6 2 exhaust joint protector 1 1 3 exhaust joint protector 2 1 4 exhaust joint pipe 1 reverse the disas...
Page 709: Hull
F d es 8- hull hood explosionszeichnung ausbau- und einbautabelle schritt verfahren/teilebezeichnung menge wartungspunkte demontage der auspuffverbindung den punkten der spalte “schritt” links zum zerlegen folgen. 1 schraube 6 2 auspuff-verbindungsschutz 1 1 3 auspuff-verbindungsstück 2 1 4 auspuff-...
Page 710: Hull
8-45 e hull hood exhaust system service points exhaust system inspection 1. Inspect: • water lock band cracks/damage → replace. 2. Inspect: • rubber hoses burns/cracks/damage → replace. 3. Inspect: • water lock cracks/leaks → replace. 4. Inspect: • water tank cracks/damage/leaks → replace. Exhaust c...
Page 711: Hull
F d es 8- hull hood wartungspunkte inspektion des abgassystems 1. Überprüfen: • halteriemen der wasser- sperre risse/beschädigung → ersetzen. 2. Überprüfen: • gummischläuche brandstellen/risse/beschädi- gung → ersetzen. 3. Überprüfen: • wassersperre risse/undichtigkeiten → ersetzen. 4. Überprüfen: •...
Page 712: Hull
8-46 e hull hood exhaust system exhaust system installation 1. Install: • exhaust joint note: be sure to fit the slit a on the exhaust joint with the projection b on the exhaust pipe. B a 2. Install: • water lock note: be sure to insert the rubber hose to the line a on the water lock. A.
Page 713: Hull
F d es 8- hull hood einbau des abgassystems 1. Einbauen: • auspuff-verbindungsstück hinweis: sicherstellen, daß der vorsprung a auf dem abgasverbindungsstück auf den vorsprung b auf dem abgas- rohr ausgerichtet wird. 2. Einbauen: • wassersperre hinweis: sicherstellen, daß der gummi- schlauch bis zur...
Page 714: Hull
8-47 e hull hood deck and hull deck and hull exploded diagram removal and installation chart step procedure/part name q’ty service points deck and hull disassembly follow the left “step” for disassembly. 1 nut 1 2 spout 1 3 nut 2 4 cleat 1 5 plate 2 6 bolt 10 7 sponson 2 8 nut/washer 4/4 9 screw/was...
Page 715: Hull
F d es 8- hull hood deck und rumpf explosionszeichnung ausbau- und einbautabelle schritt verfahren/teilebezeichnung menge wartungspunkte demontage von rumpf und deck den punkten der spalte “schritt” links zum zerlegen folgen. 1 mutter 1 2 abfluß 1 3 mutter 2 4 belegklampe 1 5 platte 2 6 schraube 10 ...
Page 716: Hull
8-48 e hull hood deck and hull exploded diagram step procedure/part name q’ty service points 11 packing 2 12 nut 4 note: to remove the cleat, remove the exhaust system first. 13 plate 4 14 cleat 2 15 packing 2 16 nut/washer 3/3 17 bolt 4 18 protector 1 reverse the disassembly steps for assembly. 16 ...
Page 717: Hull
F d es 8- hull hood explosionszeichnung schritt verfahren/teilebezeichnung menge wartungspunkte 11 dichtung 2 12 mutter 4 hinweis: um die belegklampe zu entfernen, zuerst das abgas- system ausbauen. 13 platte 4 14 belegklampe 2 15 dichtung 2 16 mutter/unterlegscheibe 3/3 17 schraube 4 18 schutz 1 zu...
Page 718: Hull
8-49 e hull hood engine mount engine mount exploded diagram removal and installation chart step procedure/part name q’ty service points engine mount removal follow the left “step” for removal. Engine unit refer to “engine unit” in chapter 5. 1 bolt 4 2 damper 1 1 3 damper 2 1 4 bolt 8 5 engine mount...
Page 719: Hull
F d es 8- hull hood motoraufhÄngung explosionszeichnung ausbau- und einbautabelle schritt verfahren/teilebezeichnung menge wartungspunkte ausbau der motoraufhÄngung den punkten der spalte “schritt” links zum ausbau folgen. Motorblock siehe “motorblock” in kapitel 5. 1 schraube 4 2 dämpfer 1 1 3 dämp...
Page 720: Hull
8-50 e hull hood engine mount hull repair shallow scratches 1. Sand the scratches with 400 grit sandpa- per (either wet or dry) until the scratches are smooth. Then, sand the scratches once again with 600 grit sandpaper (either wet or dry). Deep scratches 1. Remove any sharp or rough edges from the ...
Page 721: Hull
F d es 8- hull hood reparaturen am rumpf leichte kratzer 1. Die kratzer mit einem 400-kör- nigen sandpapier (naß oder trocken) glattschmirgeln. Anschließend nochmals mit einem 600-körnigen sandpapier (trocken oder naß) nachschmir- geln. Tiefe kratzer 1. Scharfe oder rauhe kanten von der rumpfoberflä...
Page 722: Hull
8-51 e hull hood engine mount cracks and punctures note: before attempting to repair any cracks or punctures, refer to “watercraft frp repair manual”. 1. Remove any damaged fiberglass. 2. Cut the damaged area and separate it approximately 0.25 inch. 3. On the outside of the hull, grind the sepa- rat...
Page 723: Hull
F d es 8- hull hood risse und lecks hinweis: vor der reparatur von rissen oder lecks, auf das “wasserfahr- zeug frp reparaturhand- buch” bezug nehmen. 1. Beschädigtes fiberglas entfer- nen. 2. Die beschädigte stelle ein- schneiden und auf ca.6,5 mm ausschneiden. 3. An der rumpfaußenseite die separie...
Page 724: Hull
8-52 e hull hood engine mount insert nut note: use the insert nut when: • a pop nut which was attached to the hull slipped off or, • when a bolt which was fastened to an insert nut or pop nut broke. • nut 1 • thread direction 2 • slot to be threaded 3 note: drilling size part no. Part name remarks e...
Page 725: Hull
F d es 8- hull hood gewindeeinsatz hinweis: einen gewindeeinsatz verwenden, wenn: • eine im rumpf eingesetzte mutter sich gelöst hat, oder • wenn eine schraube, die an einem gewindeeinsatz oder in einer alten spannmutter festgeschraubt war, abgebrochen ist. • mutter 1 • gewinderichtung 2 • mit gewin...
Page 726: Hull
8-53 e hull hood engine mount 4. First, apply tape 1 to the inner surface of the hull and then laminate fiberglass mats over the tape with resin. Note: when it is possible to work inside the hull, lam- inate the mats from the inside. 5. Sand the outer surface of the hull until it is smooth. 6. Insta...
Page 727: Hull
F d es 8- hull hood 4. Zuerst das klebeband 1 auf die innenfläche des rumpfes auftragen und anschließend lagenweise die mit kunstharz beschichteten fiberglas-gewe- bestücke anbringen. Hinweis: wenn die stelle von der innenseite des rumpfes her zugänglich ist, die fiberglas-gewebelagen von innen her ...
Page 728: Hull
8-54 e hull hood engine mount 2. To prevent water from entering the ure- thane foam, apply silicone sealant to the inside of the hole as shown. 3. Install the insert nut as explained in “example 1”. • brass insert nut 1 • hull 2 • urethane foam 3 • silicone sealant 4 graphic removal 1. Hold a hair d...
Page 729: Hull
F d es 8- hull hood 2. Um das eindringen von was- ser in den urethanschaum zu verhindern, silikondichtmasse auf die innenseite des loches auftragen, wie dargestellt. 3. Den gewindeeinsatz einbauen, wie in “beispiel 1”. • messing-gewindeeinsatz 1 • rumpf 2 • urethanschaum 3 • silikondichtungsmittel 4...
Page 730: Trbl
E trbl anls chapter 9 trouble analysis introduction.............................................................................................. 9-1 features ............................................................................................... 9-1 functions...................................
Page 731
1 2 3 4 5 6 7 8 9 f d es chapitre 9 depannage introduction ............................... 9-1 caracteristiques.................... 9-1 fonctions ....................................... 9-1 sommaire ..................................... 9-2 configuration materielle requise..............................
Page 732: Trbl
E trbl anls 1 2 3 4 5 6 7 8 9 stationary test ............................................................................... 9-30 sparking ignition coil procedure: ....................................................... 9-30 operating injector procedure:................................................
Page 733
F d es stationary test (test fixe) .... 9-30 procédure d’activation de la bobine d’allumage: .................... 9-30 procédure de fonctionnement d’un injecteur: ............................ 9-35 fonctionnement de la pompe à carburant électrique: .................. 9-37 active test (test actif) ......
Page 734: Trbl
9-1 e trbl anls introduction introduction features the newly developed yamaha diagnostic system provides quicker detection and analysis of engine malfunctions for quicker troubleshooting procedures than traditional methods. By connecting your computer to the ecm (electronic control module) of a wate...
Page 735: Trbl
F d es 9- trbl anls introduction caracteristiques le nouveau système de diagnostic yamaha procure une analyse et une détection plus rapide des dysfonctionne- ments du moteur qui donnent lieu à des procédures de dépannage plus rapides que les méthodes traditionnelles. Une fois l’ecm (electronic contr...
Page 736: Trbl
9-2 e trbl anls introduction 4. Stationary test: with the engine off, ignition, fuel injection, and the electric fuel pump are checked. These tests can be performed quickly. 5. Active test: with the engine running, each firing cylinder drops and the engine speed is checked for changes to determine i...
Page 737: Trbl
F d es 9- trbl anls 4. Stationary test (test fixe): le moteur étant à l’arrêt, vérification de l’allumage, de l’injection de car- burant et de la pompe électrique à carburant. Ces tests peuvent être effectués rapidement. 5. Active test (test actif): le moteur étant en marche, les ratés de cylin- dre...
Page 738: Trbl
9-3 e trbl anls introduction hardware requirements make sure that your computer meets the following requirements before using this software. Computer: ibm-compatible computer operating system: microsoft windows 95, windows 98, windows me, windows 2000, or win- dows xp (english version) cpu: windows ...
Page 739: Trbl
F d es 9- trbl anls erfordernisse der festplatte stellen sie sicher, daß ihr computer die folgenden erfordernisse erfüllt, bevor sie diese software benutzen. Computer: mit ibm kompatibler computer betriebssy- stem: microsoft windows 95, windows 98, windows me, windows 2000, oder windows xp (englisch...
Page 740: Trbl
9-4 e trbl anls introduction note: • the amount of memory and the amount of free space on the hard disk differs depending on the computer. • using this software while there is not enough free space on the hard disk could cause errors and result in insufficient memory. • this software will not run pr...
Page 741: Trbl
F d es 9- trbl anls hinweis: • die speicherkapazität und der ver- fügbare platz auf der festplatte ist unterschiedlich und vom computer abhängig. • wird diese software ohne genü- gend freiem speicherplatz auf die festplatte aufgeladen, könnte dies fehler verursachen und in nicht ausreichender speich...
Page 742: Trbl
9-5 e trbl anls getting started getting started this section provides information on installing the yamaha diagnostic system under windows 95, windows 98, windows me, windows 2000, or windows xp. Installing the yamaha diagnostic system under windows 95, windows 98, windows me, windows 2000, or windo...
Page 743: Trbl
F d es 9- trbl anls wie sie beginnen dieser abschnitt gibt ihnen die infor- mation zum installieren des yamaha diagnosesystems in windows 95, windows 98, windows me, windows 2000 oder windows xp. Das installieren des yamaha diagnosesystems in windows 95, windows 98, windows me, windows 2000 oder win...
Page 744: Trbl
9-6 e trbl anls getting started 4. Click the next button to start the installation process. (fig. 3) fig. 3 note: if the yamaha diagnostic system has already been installed onto your computer, the following dia- log box appears. Click the yes button to update this program, or click the no button to ...
Page 745: Trbl
F d es 9- trbl anls 4. Klicken sie auf next, um den installationsprozess zu begin- nen. (abb. 3) hinweis: wurde das yamaha diagnosesy- stem bereits auf ihrem computer installiert, erscheint das folgende dialogfeld. Klicken sie auf yes, um dieses pro- gramm zu aktualisieren, oder klicken sie auf das ...
Page 746: Trbl
9-7 e trbl anls getting started 5. Check the target directory and the program name for the yamaha diagnostic system which are displayed in the dialog box. Click the next button to start copying the program files. Note: • to go back to the previous dialog box (step 4), click the back button. • to qui...
Page 747: Trbl
F d es 9- trbl anls 5. Das ziel-anwendungsverzeich- nis (target directory) und den programmnamen für das yamaha diagnosesystem kon- trollieren, die im dialogfeld angezeigt werden. Klicken sie auf next, um mit dem kopieren der programm- dateien zu beginnen. Hinweis: • um zum vorhergehenden dialog- fe...
Page 748: Trbl
9-8 e trbl anls getting started 6. After the installation is completed, the following dialog box appears. Click the finish button to quit the installation program. Fig. 9 note: install the database file before using the yamaha diagnostic system, otherwise the program will not operate correctly. For ...
Page 749: Trbl
F d es 9- trbl anls 6. Nachdem die installation been- det ist, erscheint das folgende dialogfeld. Klicken sie auf finish, um das installationsprogramm zu ver- lassen. Hinweis: installieren sie die datenbankdatei, bevor sie das yamaha diagnosesy- stem benutzen, andernfalls wird das programm nicht ric...
Page 750: Trbl
9-9 e trbl anls getting started updating the database note: when installing the yamaha diagnostic system for the first time, be sure to update the database. 1. Turn on your computer and start up windows 95, windows 98, windows me, windows 2000, or windows xp. 2. From the taskbar at the bottom of you...
Page 751: Trbl
F d es 9- trbl anls aktualisieren der datenbank hinweis: nach der erstmaligen installation des yamaha diagnosesystems, müssen sie die datenbank aktualisieren. 1. Schalten sie ihren computer ein und fahren sie windows 95, windows 98, windows me, windows 2000, oder windows xp hoch. 2. Klicken sie in d...
Page 752: Trbl
9-10 e trbl anls getting started 4. Click the update database [f1] button or press the f1 key on your keyboard. (fig. 12) fig. 12 1 first menu 2 click to update database note: • do not click the starting service tool [enter] button or press the enter key on your keyboard until the database has been ...
Page 753: Trbl
F d es 9- trbl anls 4. Klicken sie auf das feld update database [f1] oder drücken sie die f1 taste auf ihrer tastatur. (abb. 12) 1 erstes menü 2 klicken sie auf aktualisieren der datenbank hinweis: • klicken sie nicht auf das feld starting service tool [enter] und drücken sie nicht die enter-taste a...
Page 754: Trbl
9-11 e trbl anls getting started 5. Insert the compact disc into the computer’s cd-rom drive. Note: • all the database files will be copied from the compact disc to the computer’s hard drive automati- cally. • any earlier version of the database saved on the hard drive will be overwritten. 6. Click ...
Page 755: Trbl
F d es 9- trbl anls 5. Die compact disk in das cd- rom laufwerk des computers einlegen. Hinweis: • alle datenbankdateien werden von der cd automatisch auf die fest- platte des computers kopiert. • eine frühere version der daten- bank, die auf der festplatte gespeichert worden ist, wird über- schrieb...
Page 756: Trbl
9-12 e trbl anls getting started 7. When the database is updated a confirmation screen is displayed. To quit, click the ok button or press the enter key on your keyboard. (fig. 15) to return to the first menu screen, click the cancel button or press the esc key on your key- board. Fig. 15 note: if t...
Page 757: Trbl
F d es 9- trbl anls 7. Ist die datenbank aktualisiert, erscheint eine bestätigung auf dem bildschirm. Um den vorgang zu verlassen, klicken sie auf ok oder drük- ken sie die “enter”-taste auf ihrem tastenfeld. (abb. 15) um zum ersten menü zurückzu- kehren, klicken sie auf cancel oder drücken sie die ...
Page 758: Trbl
9-13 e trbl anls operating operating connecting the computer to the watercraft note: be sure to use the enclosed communication cable to connect the computer and adapter to the watercraft. 1. Quit any applications that are running, and then turn off the computer. 2. Connect the communication cable to...
Page 759: Trbl
F d es 9- trbl anls betrieb das anschließen des computers an das wasserfahrzeug hinweis: benutzen sie das beigefügte Über- tragungskabel, um den computer und den adapter an das wasserfahr- zeug anzuschließen. 1. Alle laufenden anwendungen schließen und dann den com- puter ausschalten. 2. Das Übertra...
Page 760: Trbl
9-14 e trbl anls operating connecting the communication cable to the watercraft models: fx140 top view fig. 18 1 3-pin communication coupler 2 wire harness coupler 3 meter coupler note: be careful not to pinch the communication cable between the hood and the deck or to damage it. 3 1 2.
Page 761: Trbl
F d es 9- trbl anls das anschließen des Übertragungskabels an das wasserfahrzeug modelle: fx140 ansicht von oben 1 3-pole Übertragungsstecker 2 kabelbaumstecker 3 stecker des multifunktionsmessers hinweis: sorgfältig darauf achten, daß das Übertragungskabel nicht zwischen der haube und dem deck eing...
Page 762: Trbl
9-15 e trbl anls operating opening the yamaha diagnostic system 1. Push the start switch to start the engine. 2. Turn on your computer and start up windows 95, windows 98, windows me, windows 2000, or windows xp. 3. From the taskbar at the bottom of your computer screen, click the start button (fig....
Page 763: Trbl
F d es 9- trbl anls das Öffnen des yamahadiagnosesystems 1. Den startschalter drücken, um den motor zu starten. 2. Schalten sie ihren computer ein und fahren sie windows 95, windows 98, windows me, windows 2000, oder windows xp hoch. 3. Klicken sie in der task-leiste unten an ihrem computer-bild- sc...
Page 764: Trbl
9-16 e trbl anls operating 5. Click the starting service tool [enter] button or press the enter key on your keyboard. (fig. 21) fig. 21 1 first menu 2 click to start service tool note: • if an error message appears and the program stops operating, follow the error messages. • if the program doesn’t ...
Page 765: Trbl
F d es 9- trbl anls 5. Klicken sie auf das feld star- ting service tool [enter] oder drücken sie die enter-taste auf ihrer tastatur. (abb. 21) 1 erstes menü 2 klicken sie zum starten auf “service tool” hinweis: • erscheint eine fehlermeldung und funktioniert das programm nicht, befolgen sie die anwe...
Page 766: Trbl
9-17 e trbl anls operating 6. Click or press any key to display the main menu. Fig. 22 note: if a diagnosis record is stored in the ecm, “diagnosis record available,” appears as a confirmation message before the main menu is displayed. (fig. 23) fig. 23.
Page 767: Trbl
F d es 9- trbl anls 6. Klicken sie für das hauptmenü auf irgendein feld oder drücken sie auf irgendeine taste. Hinweis: ist in der ecm eine diagnoseauf- zeichnung gespeichert, erscheint “diagnosis record available,” als eine bestätigungsmeldung, bevor das hauptmenü erscheint. (abb. 23) 6. Haga clic ...
Page 768: Trbl
9-18 e trbl anls operating selecting commands from the main menu eight commands appear in the main menu. Select a command in any of the following three ways. Two ways to select command: • move the mouse pointer over the selected command ( a or b) until it appears as a finger mark, and then click the...
Page 769: Trbl
F d es 9- trbl anls das auswÄhlen von befehlen aus dem hauptmenÜ es erscheinen acht befehle im hauptmenü. Einen befehl auf eine der drei folgenden arten auswählen. Zwei arten um einen befehl zu wählen: • den mauszeiger über den ausge- wählten befehl ( a oder b) bewe- gen, bis ein fingersymbol ersche...
Page 770: Trbl
9-19 e trbl anls operating explanation of each command 1. Diagnosis the diagnosis codes, their corresponding part name, the diagnosing results, and the diagnostic cri- teria are listed. List of items: condition of coils (pulser coils) condition of sensors (throttle position sensor, intake air temper...
Page 771: Trbl
F d es 9- trbl anls erklÄrung der befehle 1. Diagnosis (diagnose) es sind die diagnosecodes, ihre kor- respondierenden teilbezeichnun- gen, die diagnoseergebnisse und die diagnosekriterien aufgeführt. Liste der datenfelder: zustand der spulen (geberspulen) zustand der sensoren (drosselklap- pen-posi...
Page 772: Trbl
9-20 e trbl anls operating 6. Data logger two out of six items (engine speed, battery voltage, throttle position, intake air pressure, engine temperature, and oil pressure) are selected and 78 seconds of their recorded data are displayed on a graph. The operating time as compared to the engine speed...
Page 773: Trbl
F d es 9- trbl anls 6. Data logger (datenerfassungssystem) es werden zwei von sechs datenfel- dern (motor-drehzahl, batteriespan- nung, drosselklappenposition, ein- laßluftdruck, motortemperatur und Öldruck) ausgewählt und die aufge- zeichneten daten 78 sekunden lang auf einer graphischen darstellun...
Page 774: Trbl
9-21 e trbl anls operating diagnosis the diagnosis codes of malfunctions recorded in the watercraft’s ecm, the diagnosis codes’ corre- sponding part name, the results of the diagnosis, and the condition of the part are listed. Eight items can be displayed at one time. Fig. 25 1 other than normal wil...
Page 775: Trbl
F d es 9- trbl anls diagnose es sind die diagnosecodes der fehl- funktionen, die in der ecm des was- serfahrzeugs aufgezeichnet worden sind, die korrespondierenden teile- bezeichnungen, die diagnoseresul- tate und der zustand der kompo- nente aufgeführt. Es können gleichzeitig acht datenfel- der auf...
Page 776: Trbl
9-22 e trbl anls operating print by selecting the print command in the diagnosis, diagnosis record, engine monitor, or data logger mode, the data from the corresponding window can be printed. 1. Click the print [f1] button or press the f1 key on your keyboard. The print dialog box is dis- played. (f...
Page 777: Trbl
F d es 9- trbl anls drucken indem sie den print-befehl (druck- befehl) im diagnose-, diagnoseauf- zeichnungs-, motormonitor- oder datenspeicherungssystem-modus wählen, können die daten des korre- spondierenden fensters gedruckt werden. 1. Klicken sie auf das feld print [f1] oder drücken sie die f1 t...
Page 778: Trbl
9-23 e trbl anls operating save by selecting the save command in the diagnosis, diagnosis record, engine monitor, or data logger mode, the corresponding data can be saved on a disk. Operating procedure: 1. Click the save [f2] button or press the f2 key on your keyboard. The save as dialog box is dis...
Page 779: Trbl
F d es 9- trbl anls speichern indem sie den save-befehl im dia- gnose-, diagnoseaufzeichnungs-, motormonitor- oder datenspeiche- rungssystem-modus wählen, kön- nen die daten auf eine diskette gespeichert werden. Verfahren: 1. Klicken sie auf save [f2] oder drücken sie die f2 taste auf ihrer tastatur...
Page 780: Trbl
9-24 e trbl anls operating 2. Select the disk and folder where the data will be saved and specify its file name. (fig. 30) fig. 30 1 choose folder to save in 2 choose type of data 3 input file name 3. Click the save button to save the data. To cancel saving, click the cancel button. (fig. 30) the da...
Page 781: Trbl
F d es 9- trbl anls 2. Wählen sie die diskette und datei in welcher die daten gespeichert werden sollen und geben sie einen dateinamen ein. (abb. 30) 1 wählen sie eine speicher-datei aus 2 wählen sie die datenart 3 geben sie den dateinamen ein 3. Klicken sie auf save, um die daten zu speichern. Um d...
Page 782: Trbl
9-25 e trbl anls operating diagnosis record the diagnosis codes of malfunctions that have been recorded in the watercraft’s ecm, the diagnos- tic codes’ corresponding part name, and the time when the malfunctions occurred are listed. A maximum of five items can be displayed at one time. The oldest o...
Page 783: Trbl
F d es 9- trbl anls diagnoseaufzeichnung es sind die diagnosecodes der fehl- funktionen, die in der ecm des was- serfahrzeugs aufgezeichnet worden sind, die korrespondierenden teile- bezeichnungen und die zeit, in der die fehlfunktion aufgetreten ist, auf- geführt. Es können maximal fünf datenfelder...
Page 784: Trbl
9-26 e trbl anls operating deleting diagnosis record in the ecm: 1. Select the item that you wish to delete by either clicking it or pressing the up or down arrow keys on your keyboard. Note: • the selected code is highlighted in light blue. • check that the items deleted are normal in the diagnosis...
Page 785: Trbl
F d es 9- trbl anls das löschen von diagnoseauf- zeichnungen in der ecm: 1. Dasjenige datenfeld, das sie löschen möchten, entweder durch anklicken oder durch benutzung der pfeiltasten auf ihrer tastatur auswählen. Hinweis: • der gewählte code wird in hellblau hervorgehoben. • Überprüfen sie, daß die...
Page 786: Trbl
9-27 e trbl anls operating 3. Click the ok button or press the enter key on your keyboard. (fig. 35) the selected item is deleted. To cancel deleting the item, click the cancel button or press the esc key on your key- board. Note: if an error occurs while an item is being deleted, an error message a...
Page 787: Trbl
F d es 9- trbl anls 3. Klicken sie auf ok oder drük- ken sie die “enter”-taste auf ihrer tastatur. (abb. 35) das ausgewählte datenfeld ist gelöscht. Um das löschen des datenfeldes abzubrechen, klik- ken sie auf cancel oder drük- ken sie die “esc”-taste auf ihrer tastatur. Hinweis: tritt ein fehler a...
Page 788: Trbl
9-28 e trbl anls operating engine monitor warning do not use the engine monitor function to check the engine condition while operating a watercraft, otherwise you could become distracted, which could result in a collision. Caution: be sure to avoid splashing water on the computer, adapter, and commu...
Page 789: Trbl
F d es 9- trbl anls motormonitor warnung während das wasserfahrzeug betrieben wird, die motormonitor- funktion nicht benutzen, um den motorzustand zu überprüfen, andernfalls könnten sie abgelenkt werden, und ein zusammenstoß könnte die folge sein. Achtung: stellen sie sicher, daß kein was- ser auf d...
Page 790: Trbl
9-29 e trbl anls operating operating procedure: 1. To scroll the display and view other items, click or in the scroll bar, or press the up or down arrow keys on your keyboard. 2. To change a displayed item, click the select [f3] button or press the f3 key on your keyboard. 3. Select an item by eithe...
Page 791: Trbl
F d es 9- trbl anls verfahren: 1. Um die anzeige durchzulaufen und andere datenfelder zu sehen, klicken sie auf oder in der bildlaufleiste oder drücken sie die pfeiltasten auf ihrer tastatur, um den bild- schirm nach oben oder unten zu rollen. 2. Um ein angezeigtes datenfeld zu verändern, klicken si...
Page 792: Trbl
9-30 e trbl anls operating stationary test selecting this command displays a window where stationary tests (spark ignition coil #, operate injector #, and operate electric fuel pump) can be selected. Warning avoid clicking the execute and cancel buttons repeatedly, otherwise the ecm or pc will not w...
Page 793: Trbl
F d es 9- trbl anls test im ruhezustand wird dieser befehl gewählt, wird ein fenster angezeigt, von dem aus tests im ruhezustand (zündspule zünden #, einspritzaggregat betrei- ben #, und elektrische kraftstoff- pumpe betreiben) ausgewählt werden können. Warnung vermeiden sie es ausführen und abbrech...
Page 794: Trbl
9-31 e trbl anls operating 1. Select the test that you wish to perform by either clicking it or pressing the up or down arrow keys on your keyboard. (fig. 39) note: • make sure that the engine is not running. • the selected item is highlighted in light blue. • the details of the selected test are di...
Page 795: Trbl
F d es 9- trbl anls 1. Wählen sie den test, den sie durchführen möchten, entwe- der durch anklicken oder durch benutzung der pfeiltasten auf ihrer tastatur aus. (abb. 39) hinweis: • sicherstellen, daß der motor nicht läuft. • das gewählte datenfeld wird in hellblau hervorgehoben. • die einzelheiten ...
Page 796: Trbl
9-32 e trbl anls operating 5. Click the execute button or press the enter key on your keyboard. (fig. 42) fig. 42 fig. 43.
Page 797: Trbl
F d es 9- trbl anls 5. Klicken sie auf execute oder drücken sie auf die “enter”- taste auf ihrer tastatur. (abb. 42) 5. Haga clic en el botón execute o pulse la tecla intro en el teclado. (fig. 42) exploitation betrieb utilizaciÓn 5. Cliquer sur le bouton execute ou appuyer sur la touche entrée du c...
Page 798: Trbl
9-33 e trbl anls operating note: if the engine is running an error message is displayed. Follow the instructions that appear. (fig. 44) fig. 44 6. While checking the information that appears in the test situation column, follow the test instructions in the messages that are displayed. (see fig. 43.)...
Page 799: Trbl
F d es 9- trbl anls hinweis: läuft der motor wird eine fehlermel- dung angezeigt. Befolgen sie die anweisungen, die in der fehlermel- dung erscheinen. (abb. 44) 6. Während sie die information, die in der test situation spalte erscheint, überprüfen, befolgen sie die angezeigten anleitun- gen für den ...
Page 800: Trbl
9-34 e trbl anls operating 9. To perform the test again to the same cylinder, click the execute button or press the enter key on your keyboard. To perform the test on a different cylinder, click the return [esc] button or press the esc key on your keyboard to return to main menu where a different te...
Page 801: Trbl
F d es 9- trbl anls 9. Um den test nochmals am sel- ben zylinder durchzuführen, klicken sie auf execute oder drücken sie die “enter”-taste auf ihrer tastatur. Um den test an einem anderen zylinder durchzuführen, klicken sie auf return [esc] oder drücken sie die “esc”-taste auf ihrer tasta- tur, um z...
Page 802: Trbl
9-35 e trbl anls operating operating injector procedure: a voltage is applied to the injector of the selected cylinder, the injector is activated, and then the fuel system is checked. The fuel is injected 20 times within two seconds. Warning • do not perform the test with the injector removed from t...
Page 803: Trbl
F d es 9- trbl anls das einspritzaggregat betreiben: strom wird dem einspritzaggregat des ausgewählten zylinders zuge- führt, das einzpitzaggregat wird akti- viert und dann wird das zündsystem überprüft. Kraftstoff wird zwanzigmal innerhalb von zwei sekunden einge- spritzt. Warnung • diesen test nic...
Page 804: Trbl
9-36 e trbl anls operating 3. Click the execute button or press the enter key on your keyboard. (fig. 49) fig. 49 note: if an error occurs while the test is being performed, an error message is displayed. Follow the instructions that appear. 4. Listen to the operating sound of the injector of the cy...
Page 805: Trbl
F d es 9- trbl anls 3. Klicken sie auf execute oder drücken sie die “enter”-taste auf ihrer tastatur. (abb. 49) hinweis: tritt ein fehler auf, während der test durchgeführt wird, erscheint eine fehlermeldung. Befolgen sie die anweisungen, die in der fehlermel- dung erscheinen. 4. Hören sie auf das b...
Page 806: Trbl
9-37 e trbl anls operating 5. To perform the test again on the same cylinder, click the execute button or press the enter key on your keyboard. To perform the test on a different cylinder, click the return [esc] button or press the esc key on your keyboard to return to the window where a different t...
Page 807: Trbl
F d es 9- trbl anls 5. Um den test nochmals am sel- ben zylinder durchzuführen, klicken sie auf execute oder drücken sie die “enter”-taste auf ihrer tastatur. Um den test an einem anderen zylinder durchzuführen, klicken sie auf return [esc]-feld oder drük- ken sie die “esc”-taste auf ihrer tastatur,...
Page 808: Trbl
9-38 e trbl anls operating 1. Select the test to be performed, and then click the select button or press the enter key on your keyboard. (fig. 52) fig. 52 note: • make sure that the engine is not running. • the selected item is highlighted in light blue. • the details of the selected test are displa...
Page 809: Trbl
F d es 9- trbl anls 1. Wählen sie den test aus, der durchgeführt werden soll und klicken sie dann auf select oder drücken sie die “enter”- taste auf ihrer tastatur. (abb. 52) hinweis: • sicherstellen, daß der motor nicht läuft. • das gewählte datenfeld wird in hellblau hervorgehoben. • die einzelhei...
Page 810: Trbl
9-39 e trbl anls operating 2. Click the execute button or press the enter key on your keyboard. (fig. 53) fig. 53 note: if an error occurs while the test is being performed, an error message is displayed. Follow the instructions that appear. 3. Listen to the operating sound of the electric fuel pump...
Page 811: Trbl
F d es 9- trbl anls 2. Klicken sie auf execute oder drücken sie die “enter”-taste ihrer tastatur. (abb. 53) hinweis: tritt ein fehler auf, während der test durchgeführt wird, erscheint eine fehlermeldung. Befolgen sie die anweisungen, die in der fehlermel- dung erscheinen. 3. Hören sie auf das betri...
Page 812: Trbl
9-40 e trbl anls operating active test selecting this command displays a window where active tests can be selected. Warning avoid clicking the execute and cancel buttons repeatedly, otherwise the ecm or pc will not work properly and they could be damaged. Fig. 55 note: the test can be carried out wh...
Page 813: Trbl
F d es 9- trbl anls test im aktivzustand wird dieser befehl ausgewählt, erscheint ein fenster, von dem aus der test im aktivzustand ausge- wählt werden kann. Warnung vermeiden sie es ausführen und abbrechen wiederholt anzuklik- ken, andernfalls wird die ecm oder der pc nicht richtig funktio- nieren ...
Page 814: Trbl
9-41 e trbl anls operating dropping a cylinder: start the engine and observe the changes in engine speed for 20 seconds. For the first ten seconds operate all four cylinders, and then stop one cylinder for five seconds. For the last five seconds operate all four cylinders. A screen that allows you t...
Page 815: Trbl
F d es 9- trbl anls das senken eine zylinders: starten sie den motor und beobach- ten sie 20 sekunden lang die verän- derungen in der motordrehzahl. Betreiben sie die ersten zehn sekunden lang alle vier zylinder und stoppen sie dann einen zylinder fünf sekunden lang. Für die letzten fünf sekunden, b...
Page 816: Trbl
9-42 e trbl anls operating note: if the engine is not running, an error message is displayed. Follow the instructions that appear. (fig. 57) fig. 57 5. While checking the information that appears beside test situation and engine speed, follow the test instructions in the messages that are displayed....
Page 817: Trbl
F d es 9- trbl anls hinweis: läuft der motor nicht, wird eine feh- lermeldung angezeigt. Befolgen sie die anweisungen, die in der fehler- meldung erscheinen. (abb. 57) 5. Während sie die information, die neben der spalte test situation und engine speed erscheint, überprüfen, befol- gend sie die ange...
Page 818: Trbl
9-43 e trbl anls operating data logger monitor item selection a window appears that allows you to select the data comparison graph or the engine operating hours according to engine speed. Fig. 59 1 triangle mark operating procedure: 1. Select the desired item by either clicking it or pressing the up...
Page 819: Trbl
F d es 9- trbl anls datenerfassungssystem auswahl des monitor-datenfeldes es erscheint ein fenster, das es ihnen ermöglicht, data comparison graph (graphische darstellung zum datenvergleich) oder engine opera- ting hours according to engine speed (motorbetriebsstunden ent- sprechend der motordrehzah...
Page 820: Trbl
9-44 e trbl anls operating data display item selection a window appears that allows you to select the items to be graphed. No more than two items can be displayed. Fig. 60 1 selected items operating procedure: 1. Select the desired items by either clicking them or pressing the up or down arrow keys ...
Page 821: Trbl
F d es 9- trbl anls auswahl des datenanzeige- datenfeldes ein fenster erscheint, das es ihnen ermöglicht, datenfelder auszuwäh- len, die dann graphisch dargestellt werden. Es können nur zwei daten- felder auf einmal dargestellt werden. 1 ausgewählte datenfelder verfahren: 1. Die gewünschten datenfel...
Page 822: Trbl
9-45 e trbl anls operating data comparison graph a line graph appears with the items selected in the data display item selection window on the ver- tical axes and the time before engine stop on the horizontal axis. (fig. 61) fig. 61 note: • the item on the left vertical axis is graphed with a solid ...
Page 823: Trbl
F d es 9- trbl anls graphische darstellung für den datenvergleich es erscheint ein strichdiagramm in einem fenster mit den ausgewählten datenfeldern aus der data display item selection (graphischen dar- stellung für den datenvergleich) auf der vertikalen achse und mit der time before engine stop (ze...
Page 824: Trbl
9-46 e trbl anls operating engine operating hours according to engine speed the operating hours as compared to the engine speed and the total operating hours are displayed. (fig. 62) fig. 62 a window is displayed showing the amount of hours that the engine is operated at each engine speed range. Not...
Page 825: Trbl
F d es 9- trbl anls motorbetriebsstunden entsprechend der motordrehzahl es werden die betriebsstunden im verhältnis zur motordrehzahl und den gesamtbetriebsstunden ange- zeigt. (abb. 62) ein fenster erscheint, das aufzeigt, wieviele stunden der motor in jedem drehzahlbereich betrieben worden ist. Hi...
Page 826: Trbl
9-47 e trbl anls operating ecm no. The ecm part number of the watercraft is read from the ecm and is displayed. (fig. 63) fig. 63.
Page 827: Trbl
F d es 9- trbl anls ecm nr. Die ecm-teilenummer des wasser- fahrzeug kann von der ecm abgele- sen werden. (abb. 63) ecm n.° el número de referencia del ecm de la moto de agua se lee en el ecm y se visualiza. (fig. 63) exploitation betrieb utilizaciÓn ecm no. (n° ecm) le numéro de composant du jet sk...
Page 828: Trbl
9-48 e trbl anls operating exit the program is exited. Operating procedure: 1. Click the exit button or press any number key (1–8). Fig. 64 2. Click the ok button or press the enter key on your keyboard to exit the program. To cancel exiting the program, click the cancel button or press the esc key ...
Page 829: Trbl
F d es 9- trbl anls beenden das programm ist beendet. Verfahren: 1. Klicken sie auf exit oder drük- ken sie eine zahlentaste (1–8). 2. Klicken sie auf ok oder drük- ken sie die “enter”-taste auf auf ihrer tastatur um das pro- gramm zu beenden. Um das beenden des pro- gramms abzubrechen, klicken sie ...
Page 830: Trbl
9-49 e trbl anls operating uninstalling the yamaha diagnostic system use the following procedure to uninstall the yamaha diagnostic system. 1. Exit all programs before running the uninstaller. 2. From the taskbar at the bottom of your computer screen, click the start button, point to set- tings, and...
Page 831: Trbl
F d es 9- trbl anls das lÖschen des yamaha diagnosesystems verwenden sie das folgende verfah- ren, um das yamaha diagnosesy- stem zu löschen. 1. Schließen sie alle programme bevor sie den “uninstaller” lau- fen lassen. 2. Klicken sie in der task-leiste unten an ihrem computer-bild- schirm auf start,...
Page 832: Trbl
9-50 e trbl anls operating 5. Click the yes buttonin the confirmation window to uninstall the utility software. To cancel the uninstall operation of the utility software, click the no button. (see figs. 68–70.) fig. 68 fig. 69 fig. 70
Page 833: Trbl
F d es 9- trbl anls 5. Klicken sie auf yes im dem bestätigungs-fenster, daß diese software entfernt werden soll. Um das löschen der software zu annullieren, klicken sie auf no im bestätigungsfenster. (siehe abbildungen. 68–70.) 5. Haga clic en el botón yes de la ventana de confirmación para desinsta...
Page 834: Trbl
9-51 e trbl anls operating 6. If the following message appears, click the details... Button. Fig. 71 1 uninstall completed. Some elements could not be removed. You should manually remove items related to the application. 7. Check the contents of the message. If an element could not be removed, delet...
Page 835: Trbl
F d es 9- trbl anls 6. Erscheint die folgende mittei- lung, klicken sie auf details.... 1 das löschen ist beendet. Einige ele- mente konnten nicht entfernt werden. Sie sollten datenfelder, die mit dieser anwendung zusammenhängen, manu- ell löschen. 7. Überprüfen sie den inhalt der mitteilung. Konnte...
Page 836: Trbl
9-52 e trbl anls troubleshooting troubleshooting error content cause action communication cable related error occurs communication cable is discon- nected. Connect communication cable between the computer’s commu- nication port and 3-pin communi- cation coupler of the watercraft. Battery is disconne...
Page 837: Trbl
F 9- trbl anls depannage depannage erreur cause action une erreur liée au câble de com- munication se produit le câble de communication est débranché. Brancher le câble de communication entre le port de communication de l’ordinateur et le connecteur de communication à 3 broches du jet ski. La batter...
Page 838: Trbl
D 9- trbl anls stÖrungssuche fehlerliste ursache abhilfe ein mit dem datenübertra- gungskabel zusammenhän- gender fehler tritt auf das datenübertragungskabel ist abge- klemmt. Das datenübertragungskabel zwischen der computer-anschlußstelle und dem 3- poligen Übertragungsstecker des was- serfahrzeugs...
Page 839: Trbl
Es 9- trbl anls resoluciÓn de problemas contenido de error causa acción error relacionado con el cable de comunicación el cable de comunicación está desconectado. Conecte el cable de comunicación entre el puerto de comunicación del ordenador y el acoplador de 3 clavijas de la moto de agua. La baterí...
Page 840: Trbl
9-53 e trbl anls appendix appendix setting the desktop area use the following procedure to set the yamaha diagnostic system desktop area. Compatible with vga (640 × 480 pixels) or svga (800 × 600 pixels) or more recommended 1. From the taskbar at the bottom of your computer screen, click the start b...
Page 841: Trbl
F d es 9- trbl anls anhang einrichten des desktop- bereichs verwenden sie das folgende verfah- ren, um das yamaha diagnosesy- stem im desktop-bereich einzurich- ten. Kompatibel mit vga (640 × 480 pixels) oder svga (800 × 600 pixels) oder mehr empfohlen 1. Klicken sie in der task-leiste unten an ihre...
Page 842: Trbl
9-54 e trbl anls appendix 4. Click the ok buttonin the confirmation window to set the display area. To cancel, click the can- cel button. (see figs. 75–76.) fig. 75 fig. 76.
Page 843: Trbl
F d es 9- trbl anls 4. Klicken sie auf ok im dem bestätigungs-fenster, um den display-bereich einzurichten. Um abzubrechen, klicken sie auf cancel. (siehe abbildun- gen. 75–76.) 4. Haga clic en el botón ok en la ventana de confirmación para con- firmar la configuración del área de visualización. Par...
Page 844: Trbl
9-55 e trbl anls trouble analysis trouble analysis note: the following items should be checked before the “trouble analysis chart” is consulted. 1. The battery is charged and its specified gravity is within specification. 2. There are no incorrect wiring connections. 3. Wiring connections are proper...
Page 845: Trbl
9-56 e trbl anls trouble analysis power unit compression 5 cylinder head gaskets 5 cylinder block 5 crankcase 5 piston rings 5 pistons 5 bearings 5 thermostat 5 valve(s) and valve seat(s) 5 valve clearance adjusting pad(s) 3 camshaft(s) 5 timing chain 5 oil pump 5 engine oil 3 oil filter 3 oil press...
Page 846: Trbl
9-57 e trbl anls trouble analysis jet pump unit duct 6 impeller 6 intake grate 6 bearings 6 intake duct 6 water inlet hose 6 bilge hose 6 bilge strainer 3 bilge hose joint 6 electrical ignition system, fuel control system • pulser coils 7 • ecm 7 • ignition coils 7 • slant detector switch 7 • engine...
Page 847: Trbl
9-58 e trbl anls trouble analysis starting system • start switch 7 • starter relay 7 • starter motor 7 charging system • lighting coil 7 • rectifier/regulator 7 • fuses 7 • battery leads — • battery 3 electric bilge pump • electric bilge pump 7 hull and hood steering master 8 water lock 8 exhaust ho...
Page 848: Trbl
F 9- trbl anls depannage depannage n.B.: les éléments suivants doivent être vérifiés avant de consulter le “tableau d’analyse des problemes”. 1. La batterie est chargée et la densité de l’électrolyte correspond aux spécifications. 2. Toutes les connexions de câbles sont correctes. 3. Les différents ...
Page 849: Trbl
F 9- trbl anls depannage moteur compression 5 joints de culasse 5 bloc-moteur 5 carter 5 segments 5 pistons 5 coussinets 5 thermostat 5 soupape(s) et siège(s) de soupape 5 cale(s) de réglage du jeu des soupapes 3 arbre(s) à cames 5 chaîne de distribution 5 pompe à huile 5 huile moteur 3 filtre à hui...
Page 850: Trbl
F 9- trbl anls depannage pompe de propulsion conduit 6 turbine 6 grille d’admission 6 roulements 6 conduit d’admission 6 flexible d’admission d’eau 6 flexible de cale 6 crépine de cale 3 raccord de flexible de cale 6 electricite circuit d’allumage, circuit de commande de carburant • bobines de pulsa...
Page 851: Trbl
F 9- trbl anls depannage circuit de démarrage • contacteur de démarrage 7 • relais de démarreur 7 • démarreur 7 circuit de charge • induit d’alternateur 7 • redresseur/régulateur 7 • fusibles 7 • câbles de batterie — • batterie 3 pompe électrique de cale • pompe électrique de cale 7 coque et capot d...
Page 852: Trbl
D 9- trbl anls stÖrungsanalyse hinweis: die folgenden punkte sollten überprüft werden, bevor sie die “stÖrungsanalysetabelle” zu rate ziehen. 1. Die batterie ist geladen, und die spezifische dichte der batteriesäure ist innerhalb des sollbereichs. 2. Alle kabelverbindungen sind korrekt hergestellt. ...
Page 853: Trbl
D 9- trbl anls motorblock verdichtung 5 zylinderkopfdichtungen 5 zylinder 5 kurbelgehäuse 5 kolbenringe 5 kolben 5 lager 5 thermostat 5 ventil(e) und ventilsitz(e) 5 einstellpuffer des ventilspiels 3 nockenwelle(n) 5 steuerkette 5 Ölpumpe 5 motoröl 3 Ölfilter 3 Öldruckschalter 7 lagergehäuse 5 antri...
Page 854: Trbl
D 9- trbl anls jetpumpeneinheit rohr 6 flügelrad 6 einlaßsieb 6 lager 6 einlaßrohr 6 wassereinlaßschlauch 6 bilgenschlauch 6 bilgensieb 3 bilgenschlauch-verbindungsstück 6 elektrische anlage zündsystem, kraftstoffkontrollsystem • geberspulen 7 • ecm 7 • zündspulen 7 • neigungssensorschalter 7 • moto...
Page 855: Trbl
D 9- trbl anls startersystem • startschalter 7 • anlasser-relais 7 • startermotor 7 ladesystem • lichtmaschinenspule 7 • gleichrichter/regler 7 • sicherungen 7 • batteriekabel — • batterie 3 elektrische bilgenpumpe • elektrische bilgenpumpe 7 rumpf und haube lenkersäule 8 wassersperre 8 abgasschlauc...
Page 856: Trbl
Es 9- trbl anls inspecciÓn de problemas nota: deben comprobarse los elementos siguientes antes de consultar la tabla de “anÁlisis de anomalÍas”. 1. La batería debe estar cargada y su gravedad específica debe estar dentro del valor especificado. 2. Que no haya ninguna conexión eléctrica incorrecta. 3...
Page 857: Trbl
Es 9- trbl anls motor compresión 5 juntas de culata 5 bloque de cilindros 5 cárter 5 aros de pistón 5 pistones 5 cojinetes 5 termostato 5 válvula(s) y asiento(s) de válvula 5 cuñas de ajuste de holgura de válvulas 3 eje(s) de levas 5 cadena de distribución 5 bomba de aceite 5 aceite del motor 3 filt...
Page 858: Trbl
Es 9- trbl anls bomba de chorro conducto 6 rotor 6 rejilla de admisión 6 cojinetes 6 conducto de admisión 6 tubo de entrada de agua 6 tubo de sentina 6 filtro de sentina 3 junta de tubo de sentina 6 sistema elÉctrico sistema de encendido, sistema de control de combustible • bobinas de pulsos 7 • ecm...
Page 859: Trbl
Es 9- trbl anls sistema de arranque • interruptor de arranque 7 • relé de arranque 7 • motor de arranque 7 sistema de carga • bobina de encendido 7 • rectificador/regulador 7 • fusibles 7 • cables de la batería — • batería 3 bomba eléctrica de la sentina • bomba eléctrica de la sentina 7 casco y cap...
Page 860: Trbl
9-59 e trbl anls trouble analysis self-diagnosis with the engine running, press the hour meter/ voltmeter display select switch 1 and the speedometer display switch 2 for 8 seconds and check if an error code is indicated on the multifunction meter. If the yamaha diagnostic system is not used to chec...
Page 861: Trbl
F d es 9- trbl anls selbstdiagnose drücken sie den wahlschalter der stunden-/voltmeteranzeige 1 und den schalter geschwindigkeitsmes- seranzeige 2 8 sekunden lang, während der motor läuft, und kontrol- lieren sie, ob ein fehlercode am multifunktionsmesser anzeigt. Wird das yamaha diagnosesystem nich...
Page 862
1 2 3 4 5 6 7 8 9 10 11 12 13 15 17 18 19 20 21 23 24 25 26 27 28 r r free push free push free push g/o r/y b/o l/b l/r b/g r/y b/w r/y b/r b/w p o o p p o b/o p/g r r b b b b p b l l b w b b r r b y y r/w r/w b/y b/y r/y r/y r/y r/y r/y b/o b/o p/w b/w r b/w r br br br b/y p/w b/y b/y l/b l/r r b b...
Page 863: Wiring Diagram
Wiring diagram fx140 1 fuse (20a) 2 fuse (3a) 3 starter relay 4 slant detection switch 5 main and fuel pump relay 6 ecm 7 rectifier regulator 8 cam position sensor 9 thermoswitch (exhaust) 0 oil pressure switch a thermoswitch (engine) b engine temperature sensor c intake air pressure sensor d intake...
Page 864
R r g/o b/w r/y r/y r r/y r r/y r/y br b br b l b/o y l/r l/b r/y p/w g w b/y b/o b/r w/r w/b g/o p/g p b/y w/b b pu/g pu/b pu/r pu/y r/y r/y r/y r/y o p r p p o r b b/o r/y l r/y w/b g br b b b b/o g g g b p p/g o b b b/y pu/r pu/b pu/y r/y pu/g b/o b/o b/o b/y g g g p w/b w/r b/o p/w p r/y p p/g b...
Page 865
F d es plan de cablage fx140 1 fusible (20 a) 2 fusible (3 a) 3 relais de démarreur 4 contacteur de détection d’inclinaison 5 relais principal et de pompe à carburant 6 ecm 7 redresseur/régulateur 8 capteur de position de came 9 thermocontact (échappement) 0 contacteur de pression d’huile a thermoco...
Page 868
Yamaha motor co., ltd. Printed in japan mar. 2002 – 0.7 × 1 cr f1b-28197-ze-c1 (fx1000-a) (e, f, g, s) printed on recycled paper.


