- DL manuals
- Vega
- Transmitter
- VEGABAR 66
- Operating Instructions Manual
Vega VEGABAR 66 Operating Instructions Manual
Summary of VEGABAR 66
Page 1
Operating instructions vegabar 66 foundation fieldbus document id: 36740 process pressure/ hydrostatic.
Page 2: Contents
Contents 1 about this document 1.1 function. . . . . . . . . . . . . . . . . . . . . . . . . . . . . . . . . . 4 1.2 target group . . . . . . . . . . . . . . . . . . . . . . . . . . . . . . 4 1.3 symbolism used. . . . . . . . . . . . . . . . . . . . . . . . . . . . 4 2 for your safety 2.1 authorised...
Page 3
6.5 menu schematic . . . . . . . . . . . . . . . . . . . . . . . . . . . . 45 6.6 saving the parameter adjustment data . . . . . . . . . . . . 47 7 set up with pactware and other adjustment programs 7.1 connect the pc . . . . . . . . . . . . . . . . . . . . . . . . . . . . 48 7.2 parameter adjustmen...
Page 4: About This Document
1 about this document 1 .1 function this operating instructions manual provides all the information you need for mounting, connection and setup as well as important instructions for maintenance and fault rectification. Please read this information before putting the instrument into operation and keep...
Page 5: For Your Safety
2 for your safety 2 .1 authorised personnel all operations described in this operating instructions manual must be carried out only by trained specialist personnel authorised by the plant operator. During work on and with the device the required personal protective equipment must always be worn. 2 ....
Page 6
2 .5 safety label on the instrument the safety approval markings and safety tips on the device must be observed. 2 .6 ce conformity this device fulfills the legal requirements of the applicable ec guidelines. By attaching the ce mark, vega provides a confirmation of successful testing. You can find the...
Page 7: Product Description
3 product description 3 .1 structure the scope of delivery encompasses: l vegabar 66 pressure transmitter with suspension cable l straining clamp (optionally available with screwed fitting) l external electronics l or vegabar 66 pressure transmitter with connection tube l documentation - this operati...
Page 8
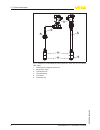
1 2 3 4 4 5 6 fig. 1: example of a vegabar 66 with suspension cable (left) and connection tube (right) 1 housing with integrated electronics 2 suspension cable 3 connection tube 4 threaded fitting 5 transmitter 6 protective cap 8 vegabar 66 • foundation fieldbus 3 product description 36740 -en -12032...
Page 9
The type label contains the most important data for identification and use of the instrument: 2 1 11 10 5 4 3 6 7 8 9 fig. 2: structure of the type label (example) 1 instrument type 2 product code 3 approvals 4 electronics 5 protection rating 6 measuring range 7 process and ambient temperature, proce...
Page 10
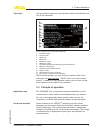
The certec ® measuring cell is also equipped with a temperature sensor. The temperature value can be displayed via the indicating and adjustment module as well as processed via the signal output (with digital versions). As a standard feature, the certec ® measuring cell is equipped with a lateral, r...
Page 11
3 .4 packaging, transport and storage your instrument was protected by packaging during transport. Its capacity to handle normal loads during transport is assured by a test according to din en 24180. The packaging of standard instruments consists of environment- friendly, recyclable cardboard. For s...
Page 12
Vegadis 61 is suitable for external measured value indication and adjustment of plics® sensors. It is connected to the sensor with an up to 25 m long, four-wire, screened standard cable. You can find further information in the operating instructions "vegadis 61" (document-id 27720). Flanges are avail...
Page 13: Mounting
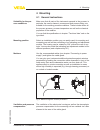
4 mounting 4 .1 general instructions make sure that all parts of the instrument exposed to the process, in particular the sensor element, process seal and process fitting, are suitable for the existing process conditions. These include above all the process pressure, process temperature as well as th...
Page 14
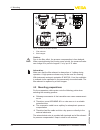
2 1 2 1 2 1 1 2 fig. 4: position of the filter element 1 filter element 2 blind stopper caution: due to the filter effect, the pressure compensation is time delayed. When opening/closing the housing cover quickly, the measured value can change for a period of approx. 5 s by up to 15 mbar. Information: ...
Page 15
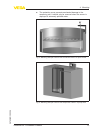
L the protective cover prevents mechanical damage to the measuring cell. It should only be removed when the sensor is deployed in extremely polluted water. Fig. 5: mounting example: version with connection tube in an open vessel fig. 6: mounting example: version with suspension cable in a pump shaft...
Page 16
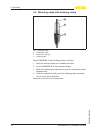
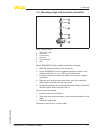
4 .3 mounting steps with straining clamp 2 3 1 fig. 7: straining clamp 1 suspension cable 2 suspension opening 3 clamping jaws mount vegabar 66 with straining clamp as follows: 1 hang the straining clamp on a suitable wall hook 2 lower vegabar 66 to the requested height 3 slide the clamping jaws upw...
Page 17
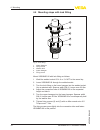
4 .4 mounting steps with screwed connection 1 2 3 4 5 6 fig. 8: threaded fitting 1 suspension cable 2 seal screw 3 cone bushing 4 seal cone 5 threaded fitting 6 seal mount vegabar 66 with screwed connection as follows: 1 weld the welded socket into the vessel top 2 lower vegabar 66 to the requested he...
Page 18
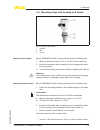
4 .5 mounting steps with lock fitting 1 3 2 4 5 fig. 9: lock fitting 1 upper hexagon 2 fixing screw 3 washer disk 4 lower hexagon 5 fixing screw mount vegabar 66 with lock fitting as follows: 1 weld the welded socket g1½ a or 1½ npt to the vessel top 2 lower vegabar 66 through the welded socket. 3 turn...
Page 19
4 .6 mounting steps with housing and thread fig. 10: housing and thread 1 housing 2 seal 3 thread mount vegabar 66 with housing and thread in the following way: 1 weld the welded socket g1½ a or 1½ npt to the vessel top 2 insert the transmitter with connection tube or suspension cable into the openi...
Page 20
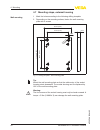
4 .7 mounting steps, external housing 1 mark the holes according to the following drilling template 2 depending on the mounting surface, fasten the wall mounting plate with 4 screws 90 mm (3.54") r 3,5 mm (0. 14 ") 3mm (0.12") 70 mm (2.76") 8 mm (0.32") 9 3 mm (3 .6 6 ") 1 1 0 mm (4 .3 3 ") fig. 11:...
Page 21
5 connecting to power supply 5 .1 preparing the connection always keep in mind the following safety instructions: l connect only in the complete absence of line voltage l if overvoltage surges are expected, overvoltage arresters should be installed according to foundation fieldbus specification tip: ...
Page 22
In systems without potential equalisation, connect the cable screen directly to ground potential at the power supply unit and at the sensor. In the connection box or t-distributor, the screen of the short stub to the sensor must not be connected to ground potential or to another cable screen. The ca...
Page 23
The electrical connection is finished. Fig. 12: connection steps 6 and 7 proceed as follows: 1 loosen the four screws on the housing base with an allen key size 4 2 remove the housing socket from the mounting plate 3 2 1 fig. 13: components of the external housing 1 screws 2 wall mounting plate 3 cab...
Page 24
3 loop the connection cable through the cable entry on the housing base 2) information: the cable gland can be mounted in three positions each displaced by 90°. Simply exchange the cable gland against the blind plug in the suitable thread opening. 4 connect the wire ends as described under "single/d...
Page 25
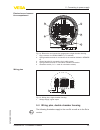
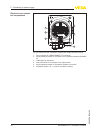
I²c 3 4 5 1 2 display typ: 1 2 5 6 7 8 bus s im. Fig. 14: electronics and connection compartment, single chamber housing 1 plug connector for vegaconnect (i²c interface) 2 spring-loaded terminals for connection of the external indication vegadis 61 3 ground terminal for connection of the cable scree...
Page 26
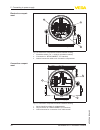
I²c 2 3 1 display typ: 1 2 5 6 7 8 bus si m. Fig. 16: electronics compartment, double chamber housing 1 simulation switch ("on" = mode for simulation release) 2 connection for vegaconnect (i²c interface) 3 internal connection cable to the connection compartment 1 2 3 d isp la y 1 2 i2c fig. 17: conn...
Page 27
I2c 1 1 2 fig. 18: wiring plan, double chamber housing 1 voltage supply, signal output 5 .5 wiring plan, double chamber housing ex d i²c 2 3 1 display typ: 1 2 5 6 7 8 bus si m. Fig. 19: electronics compartment, double chamber housing 1 simulation switch ("on" = mode for simulation release) 2 connec...
Page 28
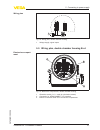
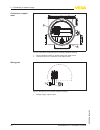
1 2 1 2 fig. 20: connection compartment, ex-d double chamber housing 1 spring-loaded terminals for power supply and cable screen 2 ground terminal for connection of the cable screen 1 1 2 fig. 21: wiring plan, ex-d double chamber housing 1 voltage supply, signal output connection compart- ment wirin...
Page 29
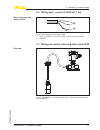
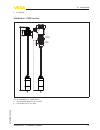
5 .6 wiring plan - version ip 66/ip 68, 1 bar 1 2 fig. 22: wire assignment connection cable 1 brown (+) and blue (-) to power supply or to the processing system 2 shielding 5 .7 wiring plan, external housing with version ip 68 fig. 23: vegabar 66 in ip 68 version 25 bar, non-ex and axial cable outle...
Page 30
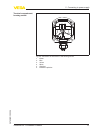
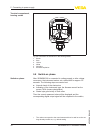
I²c display typ: 1 2 5 6 7 8 bus sim. 4 5 6 1 2 3 fig. 24: electronics and connection compartment, single chamber housing 1 plug connector for vegaconnect (i²c interface) 2 spring-loaded terminals for connection of the external indication vegadis 61 3 cable gland to the sensor 4 ground terminal for ...
Page 31
1 2 3 4 6 3 4 1 2 5 fig. 25: connection of the sensor in the housing socket 1 brown 2 blue 3 yellow 4 white 5 shielding 6 breather capillaries terminal compartment, housing socket vegabar 66 • foundation fieldbus 31 5 connecting to power supply 36740 - en -120324.
Page 32
1 2 3 4 6 3 4 1 2 5 fig. 26: connection of the sensor in the housing socket 1 brown 2 blue 3 yellow 4 white 5 shielding 6 breather capillaries 5 .8 switch-on phase after vegabar 66 is connected to voltage supply or after voltage recurrence, the instrument carries out a self-check for approx. 30 seco...
Page 33: Module Plicscom
6 set up with the indicating and adjustment module plicscom 6 .1 short description the indicating and adjustment module is used for measured value display, adjustment and diagnosis. It can be mounted in the following housing versions and instruments: l all sensors of the plics ® instrument family, i...
Page 34
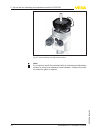
Fig. 27: insert indicating and adjustment module note: if you intend to retrofit the instrument with an indicating and adjustment module for continuous measured value indication, a higher cover with an inspection glass is required. 34 vegabar 66 • foundation fieldbus 6 set up with the indicating and ...
Page 35
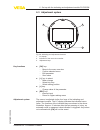
6 .3 adjustment system 2 3 1 1.1 fig. 28: indicating and adjustment elements 1 lc display 2 indication of the menu item number 3 adjustment keys l [ok] key: - move to the menu overview - confirm selected menu - edit parameter - save value l [->] key to select: - menu change - select list entry - sele...
Page 36
6 .4 setup steps vegabar 66 can be used for level as well as for process pressure measurement. Default setting is level measurement. The mode can be changed in the adjustment menu. Depending on the application only the respective subchapter "level or process pressure measurement" is of importance. T...
Page 37
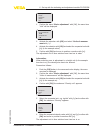
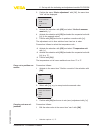
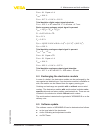
▶ basic adjustment display diagnostics service info 2 confirm the menu "basic adjustment" with [ok], the menu item "unit" will be displayed. Unit unit of measurement bar ▼ temperature unit °c ▼ 3 activate the selection with [ok] and select "units of measure- ment with [->]. 4 activate the selection w...
Page 38
Proceed as follows to select the temperature unit: 5) à activate the selection with [ok] and select "temperature unit with [->]. à activate the selection with [ok] and select the requested unit with [->] (e.G. °f). à confirm with [ok]. The temperature unit is hence switched over from °c to °f. Procee...
Page 39
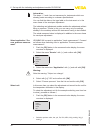
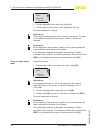
If the adjustment ranges are exceeded, the message "outside parameter limits" appears. The editing procedure can be aborted with [esc] or the displayed limit value can be accepted with [ok]. Proceed as follows: 1 edit the % value in the menu item "max. Adjustment" with [ok]. Max. Adjustment +100 .0 ...
Page 40
Information: the steps 1, 3 and 4 are not necessary for instruments which are already preset according to customer specifications! You can find the data on the type label on the instrument or in the menu items of the zero/span adjustment. The indicating and adjustment module enables the adjustment wit...
Page 41
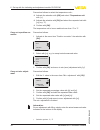
2 confirm the menu "basic adjustment" with [ok], the menu item "unit" will be displayed. Unit unit of measurement bar ▼ temperature unit °c ▼ 3 activate the selection with [ok] and select "units of measure- ment with [->]. 4 activate the selection with [ok] and select the requested unit with [->] (in...
Page 42
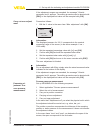
Zero 000 .0 % p = +0000 .0 mbar 0000.0 mbar 2 set the requested mbar value with [+] and [->]. 3 confirm with [+] and move to span adjustment with [->]. The zero adjustment is finished. Information: the zero adjustment shifts the value of the span adjustment. The span, i.E. The difference between these ...
Page 43
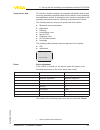
This function enables reading out parameter adjustment data as well as writing parameter adjustment data into the sensor via the indicating and adjustment module. A description of the function is available in the operating instructions manual "indicating and adjustment module". The following data ar...
Page 44
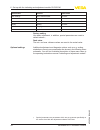
Menu section function reset value basic settings unit of measurement no reset temperature unit no reset position correction no reset display lighting no reset service language no reset application no reset factory setting like basic adjustment, in addition, special parameters are reset to default va...
Page 45
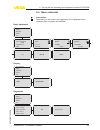
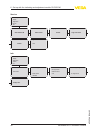
6 .5 menu schematic information: depending on the version and application, the highlighted menu windows may not always be available. Basic adjustment 1 ▶ basic adjustment display diagnostics service info 1.1 unit unit of measurement bar ▼ temperature unit °c ▼ 1.2 position correction offset p = 0.2 m...
Page 46
Service 4 basic adjustment display diagnostics ▶ service info 4.2 simulation start simulation ▼ 4.3 reset select reset ▼ 4.3 language german 4.4 copy sensor data copy sensor data? 4.5 pin enable? 4.6 application level info 5 basic adjustment display diagnostics service ▶ info 5.1 device-id sensor-ta...
Page 47
6 .6 saving the parameter adjustment data we recommended noting the adjusted data, e.G. In this operating instructions manual, and archiving them afterwards. They are thus available for multiple use or service purposes. If vegabar 66 is equipped with an indicating and adjustment module, the most imp...
Page 48: Programs
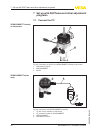
7 set up with pactware and other adjustment programs 7 .1 connect the pc 3 1 2 fig. 29: connection of the pc via vegaconnect directly to the sensor 1 usb cable to the pc 2 vegaconnect 3 sensor 1 2 3 4 open twist usb lock fig. 30: connection via vegaconnect externally 1 i²c bus (com.) interface on th...
Page 49
Necessary components: l vegabar 66 l pc with pactware and suitable vega dtm l vegaconnect l power supply unit or processing system 7 .2 parameter adjustment with pactware further setup steps are described in the operating instructions manual "dtm collection/pactware" attached to each cd and which ca...
Page 50
8 maintenance and fault rectification 8 .1 maintenance if the instrument is used properly, no special maintenance is required in normal operation. In some applications, product buildup on the diaphragm can influence the measuring result. Depending on the sensor and application, take precautions to ens...
Page 51
Error cause rectification when an additio- nal instrument is connected, the h1 segment fails. Max. Supply cur- rent of the seg- ment coupler exceeded measure the current consumption, reduce size of segment measured value on the indicating and adjustment module does not correspond to the value in the ...
Page 52
? E 113 l communication conflict à exchange the instrument or send it in for repair 8 .3 calculation of total deviation (according to din 16086) the total deviation f total according to din 16086 is the sum of basic accuracy f perf and longterm stability f stab . F total is also called maximum practi...
Page 53
F stab = 0.1 %/year x 1.4 f stab = 0.14 % f total = 0.17 % + 0.14 % = 0.31 % total deviation digital output signal absolute: f total = 0.35 % x 147 mbar/100 % = 0.46 mbar = 4.7 mm basic accuracy analogue output signal in percent: f perf = √((f t ) 2 + (f kl ) 2 + (f a ) 2 ) f t = 0.05 %/10 k x td f ...
Page 54
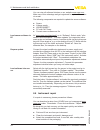
You can view all software histories on our website www.Vega.Com. Make use of this advantage and get registered for update information via e-mail. The following components are required to update the sensor software: l sensor l voltage supply l vegaconnect l pc with pactware l current sensor software ...
Page 55
L please ask the agency serving you for the address of your return shipment. You can find the respective agency on our website www.Vega.Com under: "company - vega worldwide" vegabar 66 • foundation fieldbus 55 8 maintenance and fault rectification 36740 - en -120324.
Page 56: Dismounting
9 dismounting 9 .1 dismounting steps warning: before dismounting, be aware of dangerous process conditions such as e.G. Pressure in the vessel, high temperatures, corrosive or toxic products etc. Take note of chapters "mounting" and "connecting to power supply" and carry out the listed steps in reve...
Page 57: Supplement
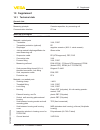
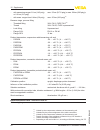
10 supplement 10 .1 technical data general data measured variable level measuring principle ceramic-capacitive, dry measuring cell communication interface i ²c bus materials and weights material 316l corresponds to 1.4404 or 1.4435 materials, wetted parts - transmitter 316l, pvdf - transmitter prote...
Page 58
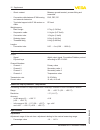
- ohmic contact between ground terminal, process fitting and transmitter - connection cable between ip 68 housing and external electronics pur, fep, pe - type label support with ip 68 version on cable pe hard weight approx. - basic weight 0.7 kg (1.543 lbs) - suspension cable 0.1 kg/m (0.07 lbs/ft) -...
Page 59
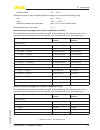
- pressure value -20 … 120 % adjustment range of the zero/span adjustment relating to the nominal measuring range: - zero -20 … +95 % - span -120 … +120 % 11) - difference between zero and span max. 120 % of the nominal range recommended max. Turn down 10 : 1 nominal measuring ranges and overload cap...
Page 60
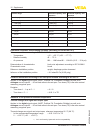
Nominal range overload capacity, max. Pressure overload capacity, min. Pressure 0 … +70 psig +950 psig -15 psig 0 … +150 psig +1300 psig -15 psig 0 … +350 psig +1900 psig -15 psig 0 … +900 psig +2900 psig -15 psig absolute pressure 0 … 15 psi 500 psi 0 psi 0 … 35 psi 700 psi 0 psi 0 … 70 psi 900 psi...
Page 61
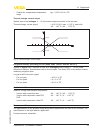
- outside the compensated temperature range typ. Thermal change, current output applies also to the analogue 4 … 20 ma current output and refers to the set span. Thermal change, current output -40 … +80 °c (-40 … +176 °f) 0,15 % -0,15 % -40°c -20°c 20°c 40°c 60°c 80°c fig. 31: thermal change, curren...
Page 62
- with measuring ranges 0.1 bar (1.45 psig) or 0.2 bar (2.9 psig) max. 15 bar (217.6 psig) or max. 20 bar (290 psig) 13) - with meas. Ranges from 0.4 bar (5.8 psig) max. 25 bar (363 psig) 14) pressure stage, process fitting - threaded fitting 316l pn 3, pvdf pn 5 15) - thread 316l pn 25, pvdf unpressu...
Page 63
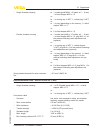
- single chamber housing l 1 x cable gland m20 x 1.5 (cable: ø 5 … 9 mm), 1 x blind stopper m20 x 1.5 or: l 1 x closing cap ½ npt, 1 x blind plug ½ npt or: l 1 x plug (depending on the version), 1 x blind stopper m20 x 1.5 or: l 2 x blind stopper m20 x 1,5 - double chamber housing l 1 x cable entry ...
Page 64
- diameter approx. 8 mm (0.315 in) - colour - non-ex version black - colour - ex-version blue electromechanical data - version ip 68 cable entry/plug 19) - external housing l 1 x cable gland m20 x 1.5 (cable: ø 5 … 9 mm), 1 x blind stopper m20 x 1.5 or: l 1 x closing cap ½ npt, 1 x blind plug ½ npt ...
Page 65
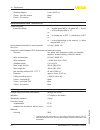
- inspection window polyester foil voltage supply operating voltage - non-ex instrument 9 … 32 v dc - ex ia instrument 9 … 24 v dc - ex d instrument 9 … 32 v dc operating voltage with illuminated indicating and adjustment module - non-ex instrument 12 … 32 v dc - ex-ia instrument 12 … 24 v dc ex d i...
Page 66
10 .2 information on foundation fieldbus block diagram, measured value processing the following illustration shows the transducer block and function block in simplified form. T i s imu la te alar ms out pv field-value m od e & s ta tu s p vf -t ime l o w -c u to f f l-t yp e ou t -sc ale p v -s cale ...
Page 67
L primary_value - process value after min/max-adjustment and linearization. Selected as input to aifb by setting 'channel' = 1. Unit derives from 'primary_value_unit' l primary_value_unit - unit code of 'primary_value' - % l secondary_value_1 - process pressure. Selected as input to aifb by setting ...
Page 68
- result of table plausibility check - "0: ""uninitialized"" 1: ""good"" 2: ""not monotonous increasing"" 3: ""not monotonous decreasing"" 4: ""not enough values transmitted"" 5: ""too many values transmitted"" 6: ""gradient of edge too high"" 7: ""values not excepted"" 8: ""table currently loaded""...
Page 69
L max_peak_temperature_value - holds the maximum process temperature. Write access resets to current value. Unit derives from 'temperature.Unit' - write access resets to current value l min_peak_temperature_value - holds the minimum process temperature. Write access resets to current value. Unit der...
Page 70
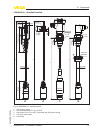
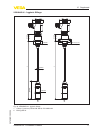
10 .3 dimensions the following dimensional drawings represent only an extract of the possible versions. Detailed dimensional drawings can be downloaded on www.Vega.Com under "d ownloads" and "drawings". Plastic housing ~ 69 mm (2.72") ø 79 mm (3.03") 1 1 2 mm (4 .4 1 ") m20x1,5/ ½ npt ~ 84 mm (3.31"...
Page 71
Aluminium housing in protection rating ip 66/ip 68, 1 bar 1 2 0 mm (4 .7 2 ") ~ 105 mm (4.13") 1 16 m m (4.57 ") ~ 150 mm (5.91") ø 84 mm (3.31") ø 84 mm (3.31") m20x1,5/ ½ npt m16x1,5 2 m20x1,5 m20x1,5 1 1 single chamber version 2 double chamber version stainless steel housing ~ 69 mm (2.72") ø 79 ...
Page 72
Stainless steel housing in protection rating ip 66/ip 68, 1 bar 1 17 m m (4.61 ") ~ 103 mm (4.06") ø 77 mm (3.03") 1 20 m m (4. 7 2 ") ~ 105 mm (4.13") ø 84 mm (3.31") ~ 93 mm (3.66") ø 80 mm (3.15") 1 12 m m (4.41 ") m20x1,5/ ½ npt m20x1,5 3 m20x1,5/ ½ npt m16x1,5 2 1 1 single chamber version, elec...
Page 73
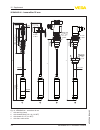
Vegabar 66 - standard version 1 2 3 4 5 1 7 5 mm (6 5 7 / 6 4 ") 5 2 mm (2 3 / 6 4 ") 1 3 2 mm (5 1 3 / 6 4 ") ø 8 mm ( 5 / 16 ") ø 21,3 mm ( 27 / 32 ") ø 44 mm (1 47 / 64 ") ø 40 mm (1 37 / 64 ") 48-52 mm (1 57 / 64 " - 2 3 / 64 ") 22 mm ( 55 / 64 ") 1 4 mm ( 3 5 / 6 4 ") 3 8 ,5 mm (1 3 3 / 6 4 ") ...
Page 74
Vegabar 66 - transmitter 32 mm 1 2 3 4 5 1 7 5 mm (6 5 7 / 6 4 ") 5 2 mm (2 3 / 6 4 ") 1 7 8 mm (7 1 / 6 4 ") ø 8 mm ( 5 / 16 ") ø 21,3 mm ( 27 / 32 ") ø 32 mm (1 17 / 64 ") 48-52 mm (1 57 / 64 " - 2 3 / 64 ") 22 mm ( 55 / 64 ") 1 4 mm ( 3 5 / 6 4 ") 3 8 ,5 mm (1 3 3 / 6 4 ") 2 2 mm ( 5 5 / 6 4 ") 2...
Page 75
5 lock fitting vegabar 66 - pvdf version 1 2 l l 2 0 mm ( 2 5 / 3 2 ") 2 2 mm ( 5 5 / 6 4 ") 4 0 mm (1 3 7 / 6 4 ") sw 46 mm (1 13 / 16 ") g1½a / 1½”npt sw 46 mm (1 13 / 16 ") g1½a / 1½”npt fig. 42: vegabar 66 - pvdf version 1 with threaded fitting g1½ a (1½ npt) 2 with thread g1½ a (1½ npt) vegabar 6...
Page 76
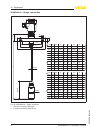
Vegabar 66 - flange connection 2 43 / 64 " 3 15 / 32 " 4 1 / 64 " 5 7 / 16 " 6 3 / 8 " 3 5 / 64 " 5 / 64 " 5 / 64 " 1 / 8 " 1 / 8 " 1 / 8 " 1 / 8 " 4xø 35 / 64 " 4xø 45 / 64 " 4xø 45 / 64 " 4xø 45 / 64 " 8xø 45 / 64 " 8xø 55 / 64 " 4 21 / 64 " 4 59 / 64 " 6 19 / 64 " 9 29 / 64 " 3 15 / 16 " 3 11 / 32...
Page 77
Vegabar 66 - hygienic fittings ø 78 mm (3 5 / 64 ") ø 92 mm (3 5 / 8 ") 51 mm (2 1 / 64 ") l 51 mm (2 1 / 64 ") l ø 64 mm (2 33 / 64 ") ø 40 mm (1 37 / 64 ") ø 8 mm ( 5 / 16 ") 132 mm (5 13 / 64 ") 1 2 fig. 44: vegabar 66 - hygienic fittings 1 clamp 2" (ø64 mm) pn16 din 32676, iso 2852/316l 2 bolting ...
Page 78
10 .4 industrial property rights vega product lines are global protected by industrial property rights. Further information see http://www.Vega.Com . Only in u.S.A.: further information see patent label at the sensor housing. Vega produktfamilien sind weltweit geschützt durch gewerbliche schutzrecht...
Page 79: Index
Index a accessory - external indicating and adjustment unit 12 - flanges 12 - indicating and adjustment module 11 - interface adapter 11 - measuring instrument holder 12 - protective cover 12 application area 9 c check signal 50 connection compartment 28 - double chamber 26 connection vegaconnect - ...
Page 80
Vega grieshaber kg am hohenstein 113 77761 schiltach germany phone +49 7836 50-0 fax +49 7836 50-201 e-mail: info.De@vega.Com www.Vega.Com printing date: iso 9001 all statements concerning scope of delivery, application, practical use and operating conditions of the sensors and processing systems co...

