- DL manuals
- Vega
- Transmitter
- VEGABAR 66
- Operating Instructions Manual
Vega VEGABAR 66 Operating Instructions Manual
Summary of VEGABAR 66
Page 1
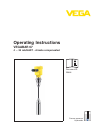
Operating instructions vegabar 67 4 ... 20 ma/hart - climate compensated d ocument id: 39444 p rocess pressure/ h ydrostatic.
Page 2: Contents
Contents 1 about this document 1.1 f unction. . . . . . . . . . . . . . . . . . . . . . . . . . . . . . . . . . 4 1.2 t arget group . . . . . . . . . . . . . . . . . . . . . . . . . . . . . . 4 1.3 s ymbolism used. . . . . . . . . . . . . . . . . . . . . . . . . . . . 4 2 for your safety 2.1 a uthor...
Page 3
6.5 m enu schematic . . . . . . . . . . . . . . . . . . . . . . . . . . . . 47 6.6 s aving the parameter adjustment data . . . . . . . . . . . . 49 7 set up with pactware and other adjustment programs 7.1 c onnect the pc via vegaconnect . . . . . . . . . . . . 50 7.2 p arameter adjustment with pactw...
Page 4: About This Document
1 about this document 1 .1 function t his operating instructions manual provides all the information you need for mounting, connection and setup as well as important instructions for maintenance and fault rectification. Please read this information before putting the instrument into operation and kee...
Page 5: For Your Safety
2 for your safety 2 .1 authorised personnel a ll operations described in this operating instructions manual must be carried out only by trained specialist personnel authorised by the plant operator. D uring work on and with the device the required personal protective equipment must always be worn. 2...
Page 6
2 .5 safety label on the instrument t he safety approval markings and safety tips on the device must be observed. 2 .6 ce conformity t his device fulfills the legal requirements of the applicable ec guidelines. By attaching the ce mark, vega provides a confirmation of successful testing. You can find t...
Page 7: Product Description
3 product description 3 .1 structure t he scope of delivery encompasses: l vegabar 67 pressure transmitter with suspension cable l s training clamp (optionally available with screwed fitting) l e xternal electronics l or vegabar 67 pressure transmitter with connection tube l d ocumentation - this ope...
Page 8
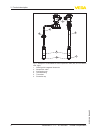
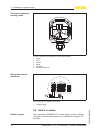
1 2 3 4 4 5 6 fig. 1: example of a vegabar 67 with suspension cable (left) and connection tube (right) 1 housing with integrated electronics 2 suspension cable 3 connection tube 4 threaded fitting 5 transmitter 6 protective cap 8 vegabar 67 • 4 ... 20 ma/hart - climate compensated 3 p roduct descript...
Page 9
T he type label contains the most important data for identification and use of the instrument: 2 1 11 10 5 4 3 6 7 8 9 fig. 2: structure of the type label (example) 1 instrument type 2 product code 3 approvals 4 electronics 5 protection rating 6 measuring range 7 process and ambient temperature, proc...
Page 10
T he hydrostatic pressure of the medium or the process pressure causes a capacitance change in the measuring cell via the metal process diaphragm and the isolating liquid. This change is converted into an electrical signal, compared with an integrated reference pressure measurement and outputted as ...
Page 11
T he delivery must be checked for completeness and possible transit damage immediately at receipt. Ascertained transit damage or concealed defects must be appropriately dealt with. U p to the time of installation, the packages must be left closed and stored according to the orientation and storage m...
Page 12
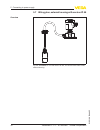
Y ou will find additional information in the supplementary instructions manual "flanges according to din-en-asme-jis" (document-id 31088). T he measuring instrument holder is used for wall/tube mounting of vegabar series 50 pressure transmitters and vegawell 52 suspension pressure transmitters. Suppl...
Page 13: Mounting
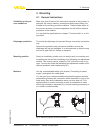
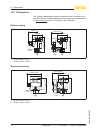
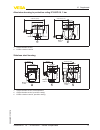
4 mounting 4 .1 general instructions m ake sure that all parts of the instrument exposed to the process, in particular the sensor element, process seal and process fitting, are suitable for the existing process conditions. These include above all the process pressure, process temperature as well as t...
Page 14
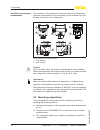
T he ventilation of the electronics housing as well as the atmosperic pressure compensation for the measuring cell are realised via a filter element in the area of the cable gland. 2 1 2 1 2 1 1 2 fig. 4: position of the filter element 1 filter element 2 blind stopper caution: d ue to the filter effect,...
Page 15
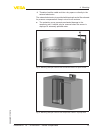
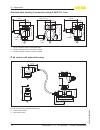
à therefore lead the cable end into a dry space or directly to the external electronics t he external electronics is provided with terminals and a filter element for pressure compensation. Keep in mind for all versions: l t he protective cover prevents mechanical damage to the measuring cell. It shou...
Page 16
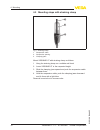
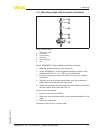
4 .3 mounting steps with straining clamp 2 3 1 fig. 7: straining clamp 1 suspension cable 2 suspension opening 3 clamping jaws m ount vegabar 67 with straining clamp as follows: 1 h ang the straining clamp on a suitable wall hook 2 l ower vegabar 67 to the requested height 3 s lide the clamping jaws...
Page 17
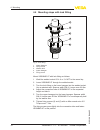
4 .4 mounting steps with screwed connection 1 2 3 4 5 6 fig. 8: threaded fitting 1 suspension cable 2 seal screw 3 cone bushing 4 seal cone 5 threaded fitting 6 seal m ount vegabar 67 with screwed connection as follows: 1 w eld the welded socket into the vessel top 2 l ower vegabar 67 to the requested...
Page 18
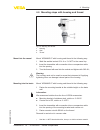
4 .5 mounting steps with lock fitting 1 3 2 4 5 fig. 9: lock fitting 1 upper hexagon 2 fixing screw 3 washer disk 4 lower hexagon 5 fixing screw m ount vegabar 67 with lock fitting as follows: 1 w eld the welded socket g1½ a or 1½ npt to the vessel top 2 l ower vegabar 67 through the welded socket. 3 t...
Page 19
4 .6 mounting steps with housing and thread fig. 10: housing and thread 1 housing 2 seal 3 thread m ount vegabar 67 with housing and thread in the following way: 1 w eld the welded socket g1½ a or 1½ npt to the vessel top 2 i nsert the transmitter with connection tube or suspension cable into the op...
Page 20
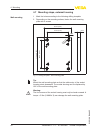
4 .7 mounting steps, external housing 1 m ark the holes according to the following drilling template 2 d epending on the mounting surface, fasten the wall mounting plate with 4 screws 90 mm (3.54") r 3,5 mm (0. 14 ") 3mm (0.12") 70 mm (2.76") 8 mm (0.32") 9 3 mm (3 .6 6 ") 1 1 0 mm (4 .3 3 ") fig. 1...
Page 21
5 connecting to power supply 5 .1 preparing the connection a lways keep in mind the following safety instructions: l c onnect only in the complete absence of line voltage l i f overvoltage surges are expected, overvoltage arresters should be installed tip: w e recommend using vega overvoltage arrest...
Page 22
Caution: n o grease should be used when screwing the npt cable gland or steel tube into the threaded insert. Standard grease can contain additives that corrode the connection between threaded insert and housing. This would influence the stability of the connection and the tightness of the housing. I ...
Page 23
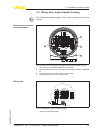
2 i f an indicating and adjustment module is installed, remove it by turning it slightly to the left. 3 l oosen compression nut of the cable entry 4 r emove approx. 10 cm of the cable mantle, strip approx. 1 cm insulation from the individual wires 5 i nsert the cable into the sensor through the cabl...
Page 24
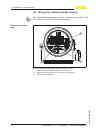
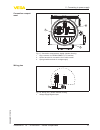
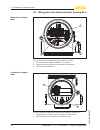
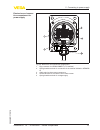
2 r emove the housing socket from the mounting plate 3 2 1 fig. 13: components of the external housing 1 screws 2 wall mounting plate 3 cable gland 3 l oop the connection cable through the cable entry on the housing base 2) information: t he cable gland can be mounted in three positions each displac...
Page 25
5 .3 wiring plan, single chamber housing t he following illustrations apply to the non-ex as well as to the ex-ia version. I²c display 1 2 5 6 7 8 3 4 1 2 fig. 14: electronics and connection compartment, single chamber housing 1 plug connector for vegaconnect (i²c interface) 2 spring-loaded terminal...
Page 26
5 .4 wiring plan, double chamber housing t he following illustration apply to non-ex as well as ex ia versions. The e xd version is described in the next subchapter. 1 3 2 display 1 2 5 6 7 8 i²c fig. 16: electronics compartment, double chamber housing 1 plug connector for vegaconnect (i²c interface...
Page 27
1 2 3 d isp la y 1 2 i2c fig. 17: connection compartment, double chamber housing 1 plug connector for vegaconnect (i²c interface) 2 ground terminal for connection of the cable screen 3 spring-loaded terminals for voltage supply i2c 1 1 2 fig. 18: wiring plan, double chamber housing 1 voltage supply/...
Page 28
5 .5 wiring plan with double chamber housing ex d 1 3 2 display 1 2 5 6 7 8 i²c fig. 19: electronics compartment, double chamber housing 1 plug connector for vegaconnect (i²c interface) 2 internal connection cable to the connection compartment 3 terminals for vegadis 61 1 2 1 2 fig. 20: connection c...
Page 29
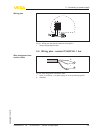
1 1 2 fig. 21: wiring plan with double chamber housing ex d 1 voltage supply/signal output 5 .6 wiring plan - version ip 66/ip 68, 1 bar + - 1 2 fig. 22: wire assignment connection cable 1 brown (+) and blue (-) to power supply or to the processing system 2 shielding wiring plan wire assignment con-...
Page 30
5 .7 wiring plan, external housing with version ip 68 fig. 23: vegabar 67 in ip 68 version 25 bar, non-ex and axial cable outlet, external housing overview 30 vegabar 67 • 4 ... 20 ma/hart - climate compensated 5 c onnecting to power supply 39444 -en -110916.
Page 31
5 6 7 8 1 2 d ispl ay i²c 2 1 5 4 3 fig. 24: electronics and connection compartment 1 plug connector for vegaconnect (i²c interface) 2 spring-loaded terminals for connection of the external indication vegadis 61 3 cable gland to the process component 4 ground terminal for connection of the cable scr...
Page 32
1 2 3 4 6 3 4 1 2 5 fig. 25: connection of the sensor in the housing socket 1 brown 2 blue 3 yellow 4 white 5 shielding 6 breather capillaries i2c display 1 1 2 5 6 7 8 fig. 26: wiring plan external electronics 1 voltage supply 5 .8 switch on phase a fter connecting vegabar 67 to power supply or aft...
Page 33
L i nternal check of the electronics l i ndication of the instrument type, the firmware as well as the sensor tags (sensor designation) l o utput signal jumps briefly (approx. 10 seconds) to the set fault current t hen the corresponding current is outputted to the cable (the value corresponds to the a...
Page 34: Module Plicscom
6 set up with the indicating and adjustment module plicscom 6 .1 short description t he indicating and adjustment module is used for measured value display, adjustment and diagnosis. It can be mounted in the following housing versions and instruments: l a ll continuously measuring sensors in single ...
Page 35
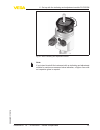
Fig. 27: insert indicating and adjustment module note: i f you intend to retrofit the instrument with an indicating and adjustment module for continuous measured value indication, a higher cover with an inspection glass is required. Vegabar 67 • 4 ... 20 ma/hart - climate compensated 35 6 s et up wit...
Page 36
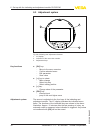
6 .3 adjustment system 1.1 2 3 1 fig. 28: indicating and adjustment elements 1 lc display 2 indication of the menu item number 3 adjustment keys l [ok] key: - m ove to the menu overview - c onfirm selected menu - e dit parameter - s ave value l [->] key to select: - m enu change - s elect list entry ...
Page 37
6 .4 setup steps i n hart-multidrop mode (several sensors on one input) the address must be set before continuing with the parameter adjustment. You will fi nd a detailed description in the operating instructions manual "indicating and adjustment module" or in the online help of pactware or dtm. Hart...
Page 38
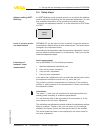
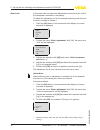
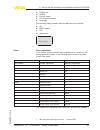
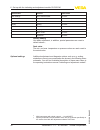
I n this menu item you select the adjustment unit as well as the unit for the temperature indication in the display. T o select the adjustment unit (in the example switching over from bar to mbar), proceed as follows: 3) 1 p ush the [ok] button in the measured value display, the menu overview is dis...
Page 39
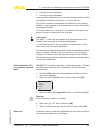
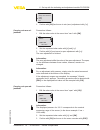
5 s elect the requested unit, e.G. Kg/dm³ with [->] and confirm with [ok] , the submenu "density" appears. U nit of measurement d ensity 0001000 kg/dm³ 6 e nter the requested density value with [->] and [+], confirm with [ok] and move to position correction with [->]. T he adjustment unit is thus swit...
Page 40
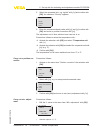
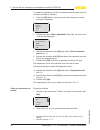
2 s et the requested percentage value with [+] and [->]. 3 e dit the requested mbar value with [ok]. 4 s et the requested mbar value with [+] and [->]. 5 c onfirm with [+] and move to max. Adjustment with [->]. T he min. Adjustment is finished. Information: f or an adjustment with filling, simply enter...
Page 41
4 c arrying out zero adjustment 5 c arrying out span adjustment i n the menu item "adjustment unit" you select the physical unit in which the adjustment should be carried out, e.G. Mbar, bar, psi… t he position correction compensates the influence of the mounting position or static pressure on the me...
Page 42
T o select the adjustment unit (in the example switching over from bar to mbar), proceed as follows: 5) 1 p ush the [ok] button in the measured value display, the menu overview is displayed. ▶ b asic adjustment d isplay d iagnostics s ervice i nfo 2 c onfirm the menu "basic adjustment" with [ok], the...
Page 43
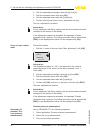
P osition correction a ccept current measured value? ▶ a ccept e dit 3 c onfirm with [ok] and move to min.(zero) adjustment with [->]. P roceed as follows: 1 e dit the mbar value in the menu item "zero" with [ok]. Z ero 000 .0 % p = +0000 .0 mbar 0000.0 mbar 2 s et the requested mbar value with [+] a...
Page 44
T he span adjustment is finished. Information: f or an adjustment with pressure, simply enter the actual measured value indicated at the bottom of the display. I f the adjustment ranges are exceeded, the message "outside parameter limits" appears. The editing procedure can be aborted with [esc] or th...
Page 45
L d isplay unit l s caling l c urrent output l u nit of measurement l l anguage t he following safety-relevant data are not read out or written: l sil l hart mode 7) l pin l a pplication c opy sensor data c opy sensor data? Basic adjustment i f the "reset" (sensor-specific basic adjustment) is carrie...
Page 46
Menu section function reset value b asic settings u nit of measurement n o reset t emperature unit n o reset p osition correction n o reset d isplay l ighting n o reset s ervice sil n o reset l anguage n o reset hart mode 8) n o reset a pplication n o reset factory setting l ike basic adjustment, in...
Page 47
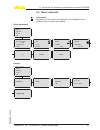
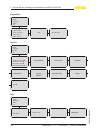
6 .5 menu schematic information: d epending on the version and application, the highlighted menu windows may not always be available. Basic adjustment 1 ▶ b asic adjustment d isplay d iagnostics s ervice i nfo 1.1 u nit u nit of measurement bar ▼ t emperature unit °c ▼ 1.2 p osition correction off se...
Page 48
Diagnostics 3 b asic adjustment d isplay ▶ d iagnostics s ervice i nfo 3.1 p eak value p-min.: -5.8 mbar p-max.: 167.5 mbar t- min.: -12.5 °c t- max.: +85.5 °c 3.2 s ensor status ok 3.3.1 t rend curve s tart trend curve? Service 4 b asic adjustment d isplay d iagnostics ▶ s ervice i nfo 4.1 c urrent...
Page 49
6 .6 saving the parameter adjustment data i t is recommended noting the adjusted data, e.G. In this operating instructions manual and archive them afterwards. They are hence available for multiple use or service purposes. I f vegabar 67 is equipped with an indicating and adjustment module, the most ...
Page 50: Programs
7 set up with pactware and other adjustment programs 7 .1 connect the pc via vegaconnect 3 1 2 fig. 29: connection of the pc via vegaconnect directly to the sensor 1 usb cable to the pc 2 vegaconnect 3 sensor 1 2 3 4 open twist usb lock fig. 30: connection via vegaconnect externally 1 i²c bus (com.)...
Page 51
N ecessary components: l vegabar 67 l pc with pactware and suitable vega dtm l vegaconnect l p ower supply unit or processing system 1 2 4 3 open twist usb lo ck fig. 31: connecting the pc via hart to the signal cable 1 vegabar 67 2 hart resistance 250 Ω (optional depending on processing) 3 connecti...
Page 52
Note: k eep in mind that for setup of vegabar 67, dtm-collection in the actual version must be used. A ll currently available vega dtms are included as a dtm collection on a cd. They can be purchased for a token fee from the responsible vega agency. In addition, the actual pactware version is also a...
Page 53
8 maintenance and fault rectification 8 .1 maintenance i f the instrument is used properly, no special maintenance is required in normal operation. I n some applications, product buildup on the diaphragm can influence the measuring result. Depending on the sensor and application, take precautions to e...
Page 54
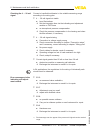
C onnect a handheld multimeter in the suitable measuring range according to the wiring plan. ? 4 … 20 ma signal not stable l l evel fluctuations à set the integration time via the indicating and adjustment module or pactware l no atmospheric pressure compensation à check the pressure compensation in ...
Page 55
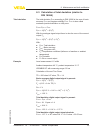
8 .3 calculation of total deviation (similar to din 16086) t he total deviation f total according to din 16086 is the sum of basic accuracy f perf and longterm stability f stab . F total is also called maximum practical deviation or utility error. F total = f perf + f stab f perf = √((f t ) 2 + (f k...
Page 56
Basic accuracy analogue output signal in percent: f perf = √((f t ) 2 + (f k l ) 2 + (f a ) 2 ) f t = (0.15 + 0.4 x td) % f k l = 1 % f a = 0.15 % f perf = √((0.15 % + 0.4 % x 1.4) 2 + (1 %) 2 + (0.15 %) 2 ) f perf = 1.24 % total deviation analogue output signal in percent: f total = f perf + f stab...
Page 57
A t "www.Vega.Com/downloads" go to "software". Select under "plics instruments and sensors" the suitable instrument series. Load the zip fi le via the right mouse key with "save target as" e.G. On the desktop of your pc. Extract all files available in the zip file, e.G. To the desktop. C onnect the sen...
Page 58: Dismounting
9 dismounting 9 .1 dismounting steps warning: b efore dismounting, be aware of dangerous process conditions such as e.G. Pressure in the vessel, high temperatures, corrosive or toxic products etc. T ake note of chapters "mounting" and "connecting to power supply" and carry out the listed steps in re...
Page 59: Supplement
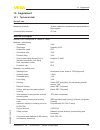
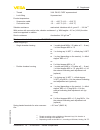
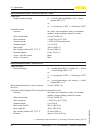
10 supplement 10 .1 technical data general data m easured variable l evel m easuring principle ceramic-capacitive, temperature-compensated iso- lated system c ommunication interface i ²c bus materials and weights m aterial 316l corresponds to 1.4404 or 1.4435 m aterials, wetted parts - t ransmitter ...
Page 60
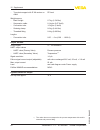
- t ype plate support with ip 68 version on cable pe hard w eight approx. - b asic weight 0.7 kg (1.543 lbs) - s uspension cable 0.1 kg/m (0.07 lbs/ft) - c onnection tube 1.5 kg/m (1 lbs/ft) - s training clamp 0.2 kg (0.441 lbs) - t hreaded fitting 0.4 kg (0.882 lbs) l engths - c onnection tube 0.25 ...
Page 61
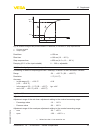
90 % 100 % 10 % t t t a t t s 2 1 fig. 32: sudden change of the process variable. T t : dead time; t a : rise time; t s : jump response time 1 process variable 2 output signal d ead time ≤ 150 ms r ise time ≤ 100 ms (10 … 90 %) s tep response time ≤ 250 ms (ti: 0 s, 10 … 90 %) d amping (63 % of the ...
Page 62
- d ifference between zero and span max. 120 % of the nominal range r ecommended max. Turn down 10 : 1 nominal measuring ranges and overload capability in bar/kpa t he specifications are only an overview and refer to the measuring cell. Limitations due to the material and process fitting version are po...
Page 63
Deviation determined according to the limit point method according to iec 60770 13 ) a pplies to the digital signal output (hart, profibus pa, foundation fieldbus) as well as to analogue current output 4 … 20 ma and refers to the set span. Turn down (td) is the ratio nominal measuring range/set span....
Page 64
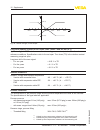
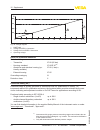
0,15 % -0,15 % -40°c -20°c 20°c 40°c 60°c 80°c fig. 33: thermal change, current output long-term stability (similar to din 16086, dinv 19259-1 and iec 60770-1) a pplies to digital hart interface as well as to analogue current output 4 … 20 ma under reference conditions. Specifications refer to the se...
Page 65
- t hread 316l pn 25, pvdf unpressurized - l ock fitting u npressurized p roduct temperature - s uspension cable -12 … +100 °c (+10 … +212 °f) - c onnection tube -12 … +100 °c (+10 … +212 °f) v ibration resistance mechanical vibrations with 4 g and 5 … 100 hz 17) w ith version with connection tube, v...
Page 66
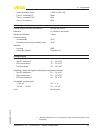
Electromechanical data - version ip 66/ip 68 (1 bar) c able entry - s ingle chamber housing l 1 x ip 68 cable gland m20 x 1.5; 1 x blind stopper m20 x 1.5 or: l 1 x closing cap ½ npt, 1 x blind plug ½ npt c onnection cable - s tructure four wires, one suspension cable, one breather capillary, screen...
Page 67
- c able extraction force 21) ≥ 650 n (146.1 lbf) - c olour - standard pe b lack - c olour - standard pur b lue - c olour - ex-version b lue indicating and adjustment module v oltage supply and data transmission through the sensor i ndication lc display in dot matrix a djustment elements 4 keys p ro...
Page 68
1000 750 500 250 12 18 16 14 20 22 24 26 28 30 32 34 36 Ω v 4 1 2 3 fig. 34: voltage diagram 1 hart load 2 voltage limit eex-ia instrument 3 voltage limit non-ex/ex-d instrument 4 operating voltage electrical protective measures p rotection rating - t ransmitter ip 68 (25 bar) - h ousing, standard i...
Page 69
Approvals i nstruments with approvals can have different technical data depending on the version. T hat's why the associated approval documents have to be noted with these instruments. They are part of the delivery or can be downloaded under www.Vega.Com via "vega tools" and "serial number search" as...
Page 70
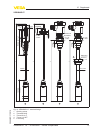
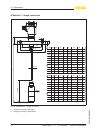
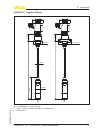
10 .2 dimensions t he following dimensional drawings represent only an extract of the possible versions. Detailed dimensional drawings can be downloaded on www.Vega.Com under "downloads" and "drawings". Plastic housing ~ 69 mm (2.72") ø 79 mm (3.03") 1 1 2 mm (4 .4 1 ") m20x1,5/ ½ npt ~ 84 mm (3.31"...
Page 71
Aluminium housing in protection rating ip 66/ip 68, 1 bar 1 2 0 mm (4 .7 2 ") ~ 105 mm (4.13") 1 16 m m (4.57 ") ~ 150 mm (5.91") ø 84 mm (3.31") ø 84 mm (3.31") m20x1,5/ ½ npt m16x1,5 2 m20x1,5 m20x1,5 1 1 single chamber version 2 double chamber version stainless steel housing ~ 69 mm (2.72") ø 79 ...
Page 72
Stainless steel housing in protection rating ip 66/ip 68, 1 bar 1 17 m m (4.61 ") ~ 103 mm (4.06") ø 77 mm (3.03") 1 20 m m (4. 7 2 ") ~ 105 mm (4.13") ø 84 mm (3.31") ~ 93 mm (3.66") ø 80 mm (3.15") 1 12 m m (4.41 ") m20x1,5/ ½ npt m20x1,5 3 m20x1,5/ ½ npt m16x1,5 2 1 1 single chamber version, elec...
Page 73
Vegabar 67 1 2 3 4 5 175 mm (6 57 / 64 ") 52 mm (2 3 / 64 ") 163 mm (6 27 / 64 ") ø 8 mm ( 5 / 16 ") ø 21,3 mm ( 27 / 32 ") sw 30 mm (1 3 / 16 ") ø 40 mm (1 37 / 64 ") 48-52 mm (1 57 / 64 " - 2 3 / 64 ") 22 mm ( 55 / 64 ") 14 mm ( 35 / 64 ") 38,5 mm (1 33 / 64 ") 22 mm ( 55 / 64 ") 22 mm ( 55 / 64 "...
Page 74
Vegabar 67 - flange connection dn pn d k b fa 25 40 115 18 85 ea 40 40 150 18 110 fb 50 40 165 20 125 d2 4xø14 4xø18 4xø18 d4 68 88 102 f 2 3 3 fe 80 40 200 24 160 8xø18 138 3 fc 32 40 140 18 100 4xø18 78 2 fm 150 16 285 22 240 8xø22 162 3 fk 100 16 220 20 180 8xø18 158 3 mm inch 1 2 1 2 2 43 / 64 " ...
Page 75
Vegabar 67 - hygienic fittings ø 78 mm (3 5 / 64 ") ø 92 mm (3 5 / 8 ") 51 mm (2 1 / 64 ") l 51 mm (2 1 / 64 ") l ø 64 mm (2 33 / 64 ") ø 40 mm (1 37 / 64 ") ø 8 mm ( 5 / 16 ") 163 mm (6 27 / 64 ") 1 2 fig. 43: vegabar 67 - hygienic fittings 1 clamp 2" pn16 (ø64 mm) din 32676, iso 2852/316l 2 bolting ...
Page 76
10 .3 industrial property rights vega product lines are global protected by industrial property rights. Further information see http://www.Vega.Com . Only in u.S.A.: further information see patent label at the sensor housing. Vega produktfamilien sind weltweit geschützt durch gewerbliche schutzrecht...
Page 77: Index
Index a a ccessory - external indicating and adjustment unit 11 - flanges 11 - indicating and adjustment module 11 - interface adapter 11 - measuring instrument holder 12 - protective cap 12 c c able entry 21 c able screening 22 c heck output signal 54 c onnection cable 21 c onnection compartment 28...
Page 78
78 vegabar 67 • 4 ... 20 ma/hart - climate compensated i ndex 39444 -en -110916.
Page 79
Vegabar 67 • 4 ... 20 ma/hart - climate compensated 79 i ndex 39444 - en -110916.
Page 80
Vega g rieshaber kg a m hohenstein 113 77761 s chiltach g ermany p hone +49 7836 50-0 f ax +49 7836 50-201 e- mail: info.De@vega.Com www.Vega.Com p rinting date: iso 9001 a ll statements concerning scope of delivery, application, practical use and operating conditions of the sensors and processing s...

