- DL manuals
- Vega
- Transmitter
- VEGABAR 54
- Operating Instructions Manual
Vega VEGABAR 54 Operating Instructions Manual
Summary of VEGABAR 54
Page 1
O perating i nstructions vegabar 54 4 … 20 m a / hart p.
Page 2: Ontents
C ontents 1 a bout this document 1 . 1 f unction . . . . . . . . . . . . . . . . . . . . . . . . . . . . . 5 1 . 2 t arget group . . . . . . . . . . . . . . . . . . . . . . . . . . 5 1 . 3 s ymbolism used . . . . . . . . . . . . . . . . . . . . . . . 5 2 f or your safety 2 . 1 a uthorised personnel ...
Page 3
6 . 2 i nstalling the indicating and adjustment module plicscom . . . . . . . . . . . . . . . . . . . . . . . . . . . 32 6 . 3 a djustment system . . . . . . . . . . . . . . . . . . . . . 34 6 . 4 s etup procedure . . . . . . . . . . . . . . . . . . . . . . . 35 6 . 5 m enu schematic . . . . . . . ....
Page 4
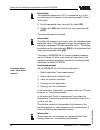
S upplementary operating instructions manuals i nformation : vegabar 54 is available in di ff erent versions and is supplied order - speci fi cally . D epending on the selected version , sup - plementary operating instructions manuals come with the shipment . T he supplementary operating instructions ...
Page 5: Bout This Document
1 a bout this document 1 . 1 f unction t his operating instructions manual has all the information you need for quick setup and safe operation of vegabar 54 . P lease read this manual before you start setup . 1 . 2 t arget group t his operating instructions manual is directed to trained personnel . ...
Page 6: Or Your Safety
2 f or your safety 2 . 1 a uthorised personnel a ll operations described in this operating instructions manual must be carried out only by trained , specialised personnel authorised by the operator . F or safety and warranty reasons , any internal work on the instruments must be carried out only by ...
Page 7
2 . 6 c ompatibility acc . To namur ne 53 vegabar 54 meets namur recommendation ne 53 . Vega instruments are generally upward and downward compatible : l sensor software for dtm - vegabar 54 hart , pa or ff l dtm vegabar 54 for adjustment software pact ware ™ l adjustment module plicscom for sensor ...
Page 8: Roduct Description
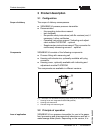
3 p roduct description 3 . 1 c on fi guration t he scope of delivery encompasses : l vegabar 54 process pressure transmitter l d ocumentation - this operating instructions manual - test certi fi cate - e x - speci fi c safety instructions ( with e x versions ) and , if necessary , further certi fi cates...
Page 9
Used for level , gauge , absolute pressure or vacuum meas - urement . M easured products are gases , vapours and liquids , also those containing abrasive substances . T he sensor element is the small certec ® measuring cell with fl ush , abrasion resistant ceramic diaphragm . T he hydrostatic pressur...
Page 10
L s torage and transport temperature see " s upplement – t echnical data – a mbient conditions " l r elative humidity 20 … 85 % s torage and transport tem - perature 10 vegabar 54 - 4 … 20 m a / hart p roduct description 29694 - en - 051004.
Page 11: Ounting
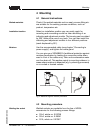
4 m ounting 4 . 1 g eneral instructions c heck if the wetted materials such as seal , process fi tting etc . Are suitable for the existing process conditions , such as product , temperature etc . S elect an installation position you can easily reach for mounting and connecting as well as later retro ...
Page 12
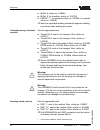
L m 30 x 1 . 5 , article no . 2 . 30444 l m 30 x 1 . 5 , for headbox , article no . 2 . 30739 l pasve 2 ) 1 " , for pipelines article no . 2 . 29934 , for vessels article no . 2 . 29642 à n ote the applicable welding standards ( segment welding procedure ) when welding the socket . U se the appropri...
Page 13
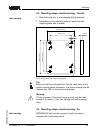
4 . 3 m ounting steps , remote housing - n on - e x 1 m ark the holes acc . To the following drilling template 2 d epending on the mounting surface , fasten the wall mounting plate with 4 screws 90mm (3 35 / 64 ") r3 ,5m m ( 9 / 64 ") 3mm ( 1 / 8 ") 70mm (2 3 / 4 ") 8mm ( 5 / 16 ") 93mm (3 21 / 32 "...
Page 14
1 m ark the holes acc . To the following drilling template 2 d epending on the mounting surface , fasten the wall mounting plate with 4 screws 62mm (2 7 / 16 ") 12mm ( 15 / 32 ") 7mm ( 9 / 32 ") 85mm (3 11 / 32 ") f ig . 4 : vegabar 54 for wall mounting , bottom view of mounting plate . 1 d rill dim...
Page 15: Onnecting To Power Supply
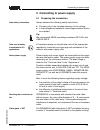
5 c onnecting to power supply 5 . 1 p reparing the connection a lways observe the following safety instructions : l c onnect only in the complete absence of line voltage l i f overvoltages are expected , overvoltage arresters should be installed . T ip : w e recommend vega overvoltage arresters Ü s ...
Page 16
C aution : n o grease should be used when screwing the npt cable gland or steel tube into the threaded insert . S tandard grease can contain additives a ff ecting the connection between threaded insert and housing . T his will in fl uence the stability of the connection and the tightness of the housin...
Page 17
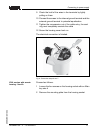
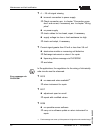
9 c heck the hold of the wires in the terminals by lightly pulling on them 10 c onnect the screen to the internal ground terminal and the external ground terminal to potential equalisation 11 t ighten the compression nut of the cable entry , the seal ring must completely encircle the cable 12 s crew...
Page 18
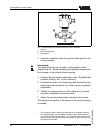
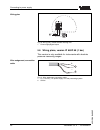
3 2 1 f ig . 7 : c omponents of the remote housing for plics instruments 1 s crews 2 w all mounting plate 3 c able gland 3 l ead the connection cable through the cable gland on the housing socket 3 ) i nformation : t he cable gland can be mounted in three positions each displaced by 90 ° . S imply e...
Page 19
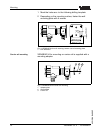
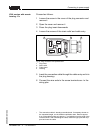
P roceed as follows : 1 l oosen the screw in the cover of the plug connector and remove it 2 o pen the cover and remove it 3 p ress the plug insert downwards 4 l oosen the screws of the strain relief and cable entry 4 3 2 1 3 2 1 f ig . 8 : p lug connector with opened cover 1 p lug insert 2 s train ...
Page 20
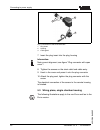
3 1 2 f ig . 9 : c onnection to the screw terminals 1 p lug insert 2 h ousing 3 c able gland 7 i nsert the plug insert into the plug housing i nformation : n ote correct alignment , see fi gure " p lug connector with open cover " ! 8 t ighten the screws on the strain relief and cable entry 9 h ook in...
Page 21
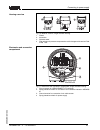
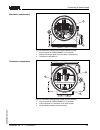
1 4 4 4 2 3 f ig . 10 : m aterial versions , single chamber housing 1 p lastic 2 a luminium 3 s tainless steel 4 f ilter element for pressure compensation or blind stopper with version ip 66 / ip 68 , 1 bar i2c display 1 2 5 6 7 8 3 4 1 2 f ig . 11 : e lectronics and connection compartment , single ...
Page 22
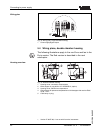
I2c display 1 1 2 5 6 7 8 f ig . 12 : w iring plan , single chamber housing 1 p ower supply / s ignal output 5 . 4 w iring plans , double chamber housing t he following illustrations apply to the non - e x as well as to the e x ia version . T he e xd version is described in the next subchapter . 1 2...
Page 23
1 3 2 display 1 2 5 6 7 8 i2c f ig . 14 : e lectronics compartment , double chamber housing 1 p lug connector for vegaconnect ( i ² c interface ) 2 i nternal connection cable to the connection compartment 3 t erminals for vegadis 61 3 1 2 display 1 2 i2c f ig . 15 : c onnection compartment , double ...
Page 24
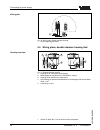
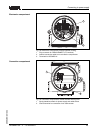
I2c 1 1 2 f ig . 16 : w iring plan , double chamber housing 1 p ower supply / s ignal output 5 . 5 w iring plans , double chamber housing e xd 1 2 3 4 5 f ig . 17 : d ouble chamber housing 1 h ousing cover , connection compartment 2 b lind stopper or plug m 12 x 1 for vegadis 61 ( option ) 3 h ousin...
Page 25
1 3 2 display 1 2 5 6 7 8 i2c f ig . 18 : e lectronics compartment , double chamber housing 1 p lug connector for vegaconnect ( i ² c interface ) 2 i nternal connection cable to the connection compartment 3 t erminals for vegadis 61 1 2 1 2 f ig . 19 : c onnection compartment , double chamber housin...
Page 26
1 1 2 f ig . 20 : w iring plan , double chamber housing e xd 1 p ower supply / s ignal output 5 . 6 w iring plans , version ip 66 / ip 68 ( 1 bar ) t his version is only available for instruments with absolute pressure measuring ranges . + - 1 2 f ig . 21 : w ire assignment , connection cable 1 br (...
Page 27
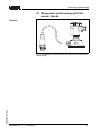
5 . 7 w iring plans , remote housing with ip 68 version - n on - e x f ig . 22 : vegabar 54 in ip 68 version 25 bar non - e x and axial cable outlet , remote housing o verview vegabar 54 - 4 … 20 m a / hart 27 c onnecting to power supply 29694 - en - 051004.
Page 28
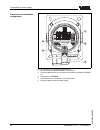
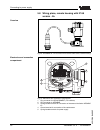
5 6 7 8 1 2 ejtqmb z i2c 4 5 1 2 3 f ig . 23 : e lectronics and connection compartment 1 p lug connector for vegaconnect ( i ² c interface ) 2 s pring - loaded terminals for connection of the external indication vegadis 61 3 c able gland to vegabar 4 g round terminal for connection of the cable scre...
Page 29
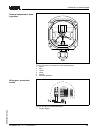
1 2 3 4 6 5 3 4 1 2 f ig . 24 : c onnection of the sensor in the housing socket 1 b rown 2 b lue 3 y ellow 4 w hite 5 s creen 6 b reather capillaries i2c display 1 1 2 5 6 7 8 f ig . 25 : w iring plan , remote electronics 1 s upply voltage t erminal compartment , hous - ing socket w iring plan , rem...
Page 30
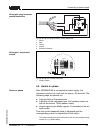
5 . 8 w iring plans , remote housing with ip 68 version - e x f ig . 26 : vegabar 54 in ip 68 version e x and axial cable outlet , remote housing 5 6 7 8 1 2 display i2c 1 2 3 4 5 f ig . 27 : e lectronics and connection compartment 1 p lug connector for vegaconnect ( i ² c interface ) 2 p lug connec...
Page 31
1 2 3 5 1 2 3 4 f ig . 28 : w iring plan plug connector , remote electronics 1 b rown 2 b lue 3 y ellow 4 s creen 5 b reather capillaries i2c display 1 1 2 5 6 7 8 f ig . 29 : w iring plan , remote electronics 1 s upply voltage 5 . 9 s witch on phase a fter vegabar 54 is connected to power supply , ...
Page 32: Adjustment Module
6 s etup with the indicating and adjustment module plicscom 6 . 1 s hort description t he indicating and adjustment module plicscom is used for measured value display , adjustment and diagnosis . I t can be mounted in the following housing versions and instruments : l a ll sensors of the plics ® ins...
Page 33
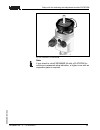
F ig . 30 : i nstallation of plicscom n ote : i f you intend to retro fi t vegabar 54 with a plicscom for continuous measured value indication , a higher cover with an inspection glass is required . Vegabar 54 - 4 … 20 m a / hart 33 s etup with the indicating and adjustment module plicscom 29694 - en...
Page 34
6 . 3 a djustment system 1.1 2 3 1 f ig . 31 : i ndicating and adjustment elements 1 lc display 2 i ndication of the menu item number 3 a djustment keys l [ ok ] key : - move to the menu overview - con fi rm selected menu - edit parameter - save value l [– > ] key to select : - menu change - list ent...
Page 35
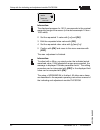
6 . 4 s etup procedure i n hart - m ultidrop mode ( several sensors on one input ) the address must be set before continuing with the parameter adjustment . Y ou will fi nd a detailed description in the operating instructions manual of plicscom or in the online help of pact ware ™ or dtm . Hart mode ...
Page 36
I nformation : t hese steps are not necessary for instruments which are already preset acc . To customer speci fi cations ! Y ou can fi nd these data on the type label on the instrument and in the menu items of the zero / span adjustment . Plicscom enables the adjustment without fi lling or pressure . ...
Page 37
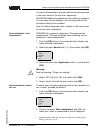
P osition correction p o ff set = + 0000 . 0 mbar 53 . 0 mbar 2 s et the requested o ff set value , e . G . The actual measured value with reciprocal sign with [– > ] and [ + ] . 3 c on fi rm with [ ok ] and move to min . ( zero ) adjustment with [– > ] . P roceed as follows : 1 e dit the mbar value in...
Page 38
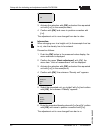
I nformation : t he displayed pressure for 100 % corresponds e . G . To the nominal range of the sensor ( in the above example 1 . 0 bar = 1000 mbar ). 2 s et the requested mbar value with [– > ] and [ ok ] . 3 c on fi rm with [ ok ] and move to the menu overview with [ esc ] . T he span adjustment i...
Page 39
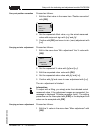
Y ou can fi nd these data on the type label on the instrument and in the menu items of the min ./ max . Adjustment . Plicscom enables the adjustment without fi lling or pressure . Y ou can carry out the settings in the workshop without the instrument having to be installed . A lso the current measured...
Page 40
U nits of measurement bar 3 a ctivate the selection with [ ok ] and select the requested unit with [– > ] ( in the example mbar ). 4 c on fi rm with [ ok ] and move to position correction with [– > ] . T he adjustment unit is now changed from bar to mbar . I nformation : w hen changing over to a heig...
Page 41
P roceed as follows : 1 e dit the o ff set value in the menu item " p osition correction " with [ ok ] . P osition correction p o ff set = + 0000 . 0 mbar 53 . 0 mbar 2 s et the requested o ff set value , e . G . The actual measured value with reciprocal sign with [– > ] and [ + ] . 3 c on fi rm with [ ...
Page 42
M ax . Adjustment + 100 . 0 % = + 1000 . 0 mbar 0000 . 0 mbar i nformation : t he displayed pressure for 100 % corresponds to the nominal measuring range of the sensor ( in the above example 1 . 0 bar = 1000 mbar ). 2 s et the requested % value with [– > ] and [ ok ] . 3 e dit the requested mbar val...
Page 43
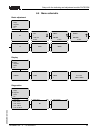
6 . 5 m enu schematic b asic adjustment 1 ▶ b asic adjustment d isplay d iagnostics s ervice i nfo 1 . 1 u nits of measurement bar 1 . 2 p osition correction o ff set p = + 0000 mbar 53 mbar 1 . 3 z ero 000 . 0 % p = 000 mbar 53 mbar 1 . 4 s pan 100 . 00 % p = 1000 mbar 53 mbar 1 . 5 d amping 1 s 1 ....
Page 44
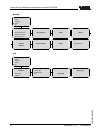
S ervice 4 b asic adjustment d isplay d iagnostics ▶ s ervice i nfo 4 . 1 c urrent output o utput mode 4 - 20 m a f ailure mode : 3 . 6 m a m in - current 3 . 8 m a 4 . 2 s imulation s tart simulation ? 4 . 3 r eset r eset ? 4 . 4 l anguage d eutsch 4 . 5 hart mode s tandard a ddress 0 4 . 6 c opy s...
Page 45
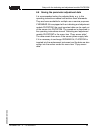
6 . 6 s aving the parameter adjustment data i t is recommended noting the adjusted data , e . G . In this operating instructions manual and archive them afterwards . T hey are hence available for multiple use or service purposes . I f vegabar 54 is equipped with an indicating and adjustment module p...
Page 46: Etup With
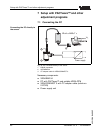
7 s etup with pact ware ™ and other adjustment programs 7 . 1 c onnecting the pc ~ = power supply vegaconnect 3 pactware / tm >pa 2 3 1 f ig . 32 : pc connected directly to the sensor 1 rs 232 connection 2 vegabar 54 3 i ² c adapter cable for vegaconnect 3 n ecessary components : l vegabar 54 l pc w...
Page 47
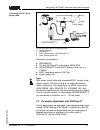
2 3 1 4 ~ = power supply vegaconnect 3 pactware / tm f ig . 33 : c onnecting the pc to the signal cable 1 rs 232 connection 2 vegabar 54 3 hart adapter cable for vegaconnect 3 4 hart resistance 250 o hm n ecessary components : l vegabar 54 l pc with pact ware ™ and suitable vega - dtm l vegaconnect ...
Page 48
N ote : k eep in mind that for parameter adjustment of a vegabar 54 , dtm c ollection 04 / 2004 or a newer version is required . A ll currently available vega - dtm s are provided in the dtm c ollection on cd and can be obtained from the responsible vega agency for a token fee . T his cd includes al...
Page 49: fi
8 m aintenance and fault recti fi cation 8 . 1 m aintenance w hen used as directed in normal operation , vegabar 54 is completely maintenance - free . 8 . 2 f ault recti fi cation vegabar 54 o ff ers maximum reliability . N evertheless faults can occur during operation . T hese may be caused by the fol...
Page 50
? 4 … 20 m a signal missing l incorrect connection to power supply à c heck connection acc . To chapter " c onnection proce - dure " and correct , if necessary , acc . To chapter " w iring plans " l no power supply à check cables for line break , repair , if necessary l supply voltage too low or loa...
Page 51
? E 041 l h ardware error à e xchange instrument or return it for repair 8 . 3 e xchanging the electronics t he electronics of vegabar 54 consists of the measuring cell electronics and the processing electronics . T he measuring cell electronics in the process fi tting is not accessible to the user ....
Page 52
L a ttach the completed form and possibly also a safety data sheet to the instrument . L s end the instrument to the respective address of your agency . I n g ermany to the vega headquarters in s chiltach . 52 vegabar 54 - 4 … 20 m a / hart m aintenance and fault recti fi cation 29694 - en - 051004.
Page 53: Ismounting
9 d ismounting 9 . 1 d ismounting procedure w arning : b efore dismounting , be aware of dangerous process con - ditions such as e . G . Pressure in the vessel , high temperatures , corrosive or toxic products etc . T ake note of chapters " m ounting " and " c onnecting to power supply " and carry o...
Page 54: Unctional Safety Acc
10 f unctional safety acc . To iec 61508 - 4 ( sil ) 10 . 1 g eneral t his safety manual applies to measuring systems consisting of vegabar series 50 and series 60 pressure transmitter in two - wire version – 4 … 20 m a / hart : vegabar 52 , 54 vegabar 61 ( up to 60 bar ), 64 , 65 , 66 , 67 v alid h...
Page 55
L iec 61508 ( also available as din en ) - f unctional safety of electrical / electronic / programmable electronic safety - related systems l iec 61511 - 1 - f unctional safety – safety instrumented systems for the process industry sector – p art 1 : f ramework , de fi ni - tions , system , hardware ...
Page 56
10 . 2 p lanning t he measuring system generates on the current output a signal between 3 . 8 m a and 20 . 5 m a proportional to the process pressure or level . T his analogue signal is transmitted to a connected processing unit for monitoring the following conditions : l e xceeding or falling below...
Page 57
I f this is not the case , the appropriate shares of the failure rates must be assigned to the dangerous failures . T herefore the stated values in chapter " s afety - relevant characteristics " can deteriorate . I f the demand rate is only once a year , then the measuring system can be used as safe...
Page 58
L t he repair time ( exchange of the meas . System ) after a fail - safe error is eight hours ( mttr = 8 h ) l t he scanning interval of a connected control and pro - cessing unit is max . 1 hour to react on dangerous , detectable errors l t he communication via the hart interface is not used for tr...
Page 59
L a fter connecting the instrument , the output signal jumps to the set interference current ( at the end of the switch on phase ) l i n mode " s imulation " , the signal current can be simulated independent of the current pressure or level t o avoid unwanted or unauthorized modi fi cation , the set ...
Page 60
I f due to the detected failure , the electronics or the complete sensor is interchanged , the manufacturer must be informed ( incl . A fault description ). 10 . 6 r ecurring function test t he recurring function test serves to reveal potential danger - ous errors that are otherwise not discernible ...
Page 61
Values relate to an average ambient temperature during operation of + 40 ° c ( 104 ° f ). T he calculations are further based on the instructions stated in chapter " p lanning " . O ver fi ll protection / monitoring upper pressure value i nterference current " fail high " " fail low " λ sd 378 fit 20...
Page 62
S ingle channel architecture 1 oo 1 d sil sil 2 hft 0 s ensor type t ype b o ver fi ll protection / monitoring upper pressure value sff 81 % pfd avg t p roof = 1 year t p roof = 5 years t p roof = 10 years 0 . 080 x 10 - 2 / h 0 . 399 x 10 - 2 / h 0 . 796 x 10 - 2 / h pfh 0 . 183 x 10 - 6 / h d ry ru...
Page 63
1 5 10 t proof pfd avg 1 2 3 4 f ig . 34 : t ime - dependent process of pfd avg 11 ) 1 pfd avg = 0 2 pfd avg after 1 year 3 pfd avg after 5 years 4 pfd avg after 10 years d ouble channel architecture i f the measuring instrument is used in double channel architecture , the safety - relevant characte...
Page 64: Upplement
11 s upplement 11 . 1 t echnical data g eneral data m anufacturer vega g rieshaber kg , d - 77761 s chiltach t ype name vegabar 54 p arameter , pressure g auge pressure , absolute pressure , vacuum m easuring principle ceramic - capacitive , dry measuring cell c ommunication interface i ² c bus m at...
Page 65
W eight 0 , 8 … 8 kg ( 1 . 8 … 17 . 6 lbs ), depending on the process fi tting m ax . Torque threaded fi ttings 25 n m o utput variable o utput signal 4 … 20 m a / hart r esolution 1 . 6 µ a f ault signal current output unchanged ; 20 . 5 m a ; 22 m a ; 3 . 6 m a ( adjustable ) c urrent limitation 22 ...
Page 66
N ominal range o verload resistance 13 ) v acuum resistance g auge pressure 0 … 0 . 1 bar / 0 … 10 k p a 15 bar / 1500 k p a - 0 . 5 bar /- 50 k p a 0 … 0 . 2 bar / 0 … 20 k p a 25 bar / 2 . 500 k p a - 1 . 0 bar /- 100 k p a 0 … 0 . 4 bar / 0 … 40 k p a 35 bar / 3500 k p a - 1 . 0 bar /- 100 k p a ...
Page 67
R eference conditions and in fl uencing variables ( similar to din en 60770 - 1 ) r eference conditions acc . To din en 61298 - 1 - t emperature + 18 … + 30 ° c ( + 64 . 4 … + 86 ° f ) - r elative humidity 45 … 75 % - a tmospheric pressure 860 … 1060 mbar ( 86 … 106 k p a / 12 . 5 … 15 . 4 psi ) d et...
Page 68
P rocess conditions t he speci fi cations of the pressure stage are used as an overview . T he speci fi cations on the type plate are applicable . P ressure stage , process fi tting - t hread 316 l pn 60 - t hread 316 l 1 " for pasve pn 40 - pmc 316 l pn 10 - f lange 316 l pn 40 p roduct temperature de...
Page 69
E lectromechanical data - version ip 66 / ip 67 c able entry / plug 16 ) - s ingle chamber housing l 1 x cable entry m 20 x 1 . 5 ( cable - ø 5 … 9 mm ), 1 x blind stopper m 20 x 1 . 5 or : l 1 x closing cap ½ npt , 1 x blind stopper ½ npt or : l 1 x plug depending on the version , 1 x blind stopper...
Page 70
C able entry - s ingle chamber housing l 1 x ip 68 cable entry m 20 x 1 . 5 ; 1 x blind stopper m 20 x 1 . 5 or : l 1 x closing cap ½ npt , 1 x blind stopper ½ npt - d ouble chamber housing l 1 x ip 68 cable entry m 20 x 1 . 5 ; 1 x blind stopper m 20 x 1 . 5 ; plug m 12 x 1 for vegadis 61 ( option ...
Page 71
S pring - loaded terminals for wire cross sections up to 2 . 5 mm ² c onnection cable between ip 68 instrument and remote housing : - c on fi guration four cores , one suspension cable , one breather capillary , screen braiding , foil , mantle - wire cross section 0 . 5 mm ² - wire resistance 0 . 036...
Page 72
1000 750 500 250 12 18 16 14 20 22 24 26 28 30 32 34 36 Ω v 4 1 2 3 f ig . 35 : v oltage diagram 1 hart load 2 v oltage limit ee x ia instrument 3 v oltage limit non - e x / e xd instrument 4 s upply voltage e lectrical protective measures p rotection - h ousing , standard ip 66 / ip 67 18 ) - a lu ...
Page 73
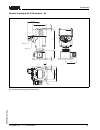
11 . 2 d imensions h ousing in protection ip 66 / ip 67 112mm (4 13 / 32 ") 117mm (4 39 / 64 ") 116mm (4 9 / 16 ") 120mm (4 23 / 32 ") ~ 69mm (2 23 / 32 ") ø 77mm (3 1 / 32 ") ~ 69mm (2 23 / 32 ") ~ 116mm (4 9 / 16 ") ~ 87mm (3 27 / 64 ") ø 77mm (3 1 / 32 ") ø 84mm (3 5 / 16 ") ø 84mm (3 5 / 16 ") m...
Page 74
Ip 68 version - with remote housing - non - e x 1 2 90mm (3 35 / 64 ") 110mm (4 21 / 64 ") ~ 66mm (2 19 / 32 ") 59mm (2 21 / 64 ") 65mm (2 9 / 16 ") 68mm (2 43 / 64 ") 92mm (3 5 / 8 ") 42mm (1 21 / 32 ") 40mm (1 37 / 64 ") f ig . 38 : t ransmitter and remote housing with ip 68 version ip 68 version ...
Page 75
R emote housing with ip 68 version - e x 85 62 12 7 r 7,5 m20x1,5 m20x1 6,5 ca. 69,5 117 ø 77 51 5 59 f ig . 40 : r emote housing with ip 68 version vegabar 54 - 4 … 20 m a / hart 75 s upplement 29694 - en - 051004.
Page 76
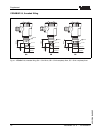
Vegabar 54 , threaded fi tting ø 32mm (1 17 / 64 ") ga gb gc 22mm ( 55 / 64 ") 44mm (1 47 / 64 ") g ¾ a sw36 ø 23,8mm ( 15 / 16 ") ø 27mm (1 1 / 16 ") 20,8mm ( 13 / 16 ") 45mm (1 49 / 64 ") g ½a sw27 ø 18,4mm ( 23 / 32 ") ø 40mm (1 37 / 64 ") 21mm ( 53 / 64 ") 44mm (1 47 / 64 ") g 1a sw41 ø 30mm (1 3...
Page 77
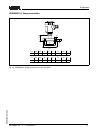
Vegabar 54 , fl ange connection 25 40 115 18 85 4xø14 68 2 d2 d4 k d f b fa 47,8mm (1 7 / 8 ") 2 43 / 64 " 5 / 64 " 4xø 35 / 64 " 3 11 / 32 " 4 17 / 64 " 45 / 64 " dn inch pn d k b d2 d4 f fa 25 40 dn mm pn d k b d2 d4 f fa f ig . 42 : vegabar 54 , fl ange connection form b 1 , en 1092 - 1 vegabar 54 ...
Page 78
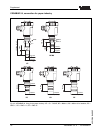
Vegabar 54 , connection for paper industry pc pd pe 45,5mm (1 51 / 64 ") ø 26,3mm (1 1 / 32 ") 43,7mm (1 23 / 32 ") ø 34,6mm (1 23 / 64 ") ø 36mm (1 27 / 64 ") 43,7mm (1 23 / 32 ") ø 40,4mm (1 19 / 32 ") bf/bs vp ø 27,4mm (1 5 / 64 ") 29mm (1 9 / 64 ") 48mm (1 57 / 64 ") ø 25mm ( 63 / 64 ") ø 29,3mm...
Page 79
11 . 3 c erti fi cates ce declaration of conformity f ig . 44 : ce declaration of conformity vegabar 54 - 4 … 20 m a / hart 79 s upplement 29694 - en - 051004.
Page 80
M anufacturer declaration f ig . 45 : m anufacturer declaration 80 vegabar 54 - 4 … 20 m a / hart s upplement 29694 - en - 051004.
Page 81
Sil declaration of conformity vegabar 54 - 4 … 20 m a / hart 81 s upplement 29694 - en - 051004.
Page 82
11 . 4 i ndustrial property rights 82 vegabar 54 - 4 … 20 m a / hart s upplement 29694 - en - 051004.
Page 83
Vegabar 54 - 4 … 20 m a / hart 83 s upplement 29694 - en - 051004.
Page 84
Vega g rieshaber kg a m h ohenstein 113 77761 s chiltach g ermany p hone + 49 7836 50 - 0 f ax + 49 7836 50 - 201 e - mail : info @ de . Vega . Com www . Vega . Com iso 9001 a ll statements concerning scope of delivery , application , practical use and operating conditions of the sensors and process...

