- DL manuals
- Vega
- Transmitter
- VEGABAR 54
- Operating Instructions Manual
Vega VEGABAR 54 Operating Instructions Manual
Summary of VEGABAR 54
Page 1
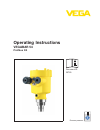
Operating instructions vegabar 54 profibus pa document id: 36729 process pressure.
Page 2: Contents
Contents 1 about this document 1.1 function. . . . . . . . . . . . . . . . . . . . . . . . . . . . . . . . . . 4 1.2 target group . . . . . . . . . . . . . . . . . . . . . . . . . . . . . . 4 1.3 symbolism used. . . . . . . . . . . . . . . . . . . . . . . . . . . . 4 2 for your safety 2.1 authorised...
Page 3
7 set up with pactware and other adjustment programs 7.1 connect the pc via vegaconnect . . . . . . . . . . . . 41 7.2 parameter adjustment with pactware . . . . . . . . . . . . 42 7.3 parameter adjustment with pdm . . . . . . . . . . . . . . . . 42 7.4 saving the parameter adjustment data . . . . ....
Page 4: About This Document
1 about this document 1 .1 function this operating instructions manual provides all the information you need for mounting, connection and setup as well as important instructions for maintenance and fault rectification. Please read this information before putting the instrument into operation and keep...
Page 5: For Your Safety
2 for your safety 2 .1 authorised personnel all operations described in this operating instructions manual must be carried out only by trained specialist personnel authorised by the plant operator. During work on and with the device the required personal protective equipment must always be worn. 2 ....
Page 6
2 .5 safety label on the instrument the safety approval markings and safety tips on the device must be observed. 2 .6 ce conformity this device fulfills the legal requirements of the applicable ec guidelines. By attaching the ce mark, vega provides a confirmation of successful testing. You can find the...
Page 7: Product Description
3 product description 3 .1 structure the scope of delivery encompasses: l vegabar 54 pressure transmitter l documentation - this operating instructions manual - test certificate for pressure transmitters - test certificate - ex specific safety instructions (with ex versions), if necessary further certi...
Page 8
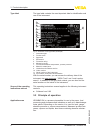
The type label contains the most important data for identification and use of the instrument: 2 1 11 10 5 4 3 6 7 8 9 fig. 2: structure of the type label (example) 1 instrument type 2 product code 3 approvals 4 electronics 5 protection rating 6 measuring range 7 process and ambient temperature, proce...
Page 9
Sensor element is the certec ® measuring cell with robust, dependent on the process fitting also front-flush, abrasion-resistant ceramic diaphragm. The process pressure causes a capacitance change in the measuring cell via the ceramic diaphragm. This change is converted into an appropriate output sign...
Page 10
L with the suitable vega dtm in conjunction with an adjustment software according to the fdt/dtm standard, e.G. Pactware and pc l with the adjustment program pdm 3 .4 packaging, transport and storage your instrument was protected by packaging during transport. Its capacity to handle normal loads dur...
Page 11
The interface adapter vegaconnect 4 enables the connection of communication-capable instruments to the usb interface of a pc. For parameter adjustment of these instruments, an adjustment software such as pactware with vega-dtm is required. You can find further information in the operating instruction...
Page 12: Mounting
4 mounting 4 .1 general instructions make sure that all parts of the instrument exposed to the process, in particular the sensor element, process seal and process fitting, are suitable for the existing process conditions. These include above all the process pressure, process temperature as well as th...
Page 13
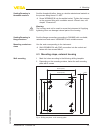
Seal the thread with teflon, hemp or a similar resistant seal material on the process fitting thread 1½ npt. à screw vegabar 54 into the welded socket. Tighten the hexagon on the process fitting with a suitable wrench. Wrench size, see chapter "dimensions". Warning: the housing must not be used to scre...
Page 14
Tip: mount the wall mounting plate so that the cable entry of the socket housing points downward. The socket housing can be displaced by 180° to the wall mounting plate. Warning: the four screws of the socket housing must only be hand screwed. A torque > 5 nm (3.688 lbf ft) can damage the wall mount...
Page 15
5 connecting to power supply 5 .1 preparing the connection always keep in mind the following safety instructions: l connect only in the complete absence of line voltage l if voltage surges are expected, overvoltage arresters should be installed according to profibus specifications tip: we recommend ve...
Page 16
In systems without potential equalisation, connect the cable screen directly to ground potential at the power supply unit and at the sensor. In the connection box or t-distributor, the screen of the short stub to the sensor must not be connected to ground potential or to another cable screen. The ca...
Page 17
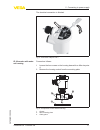
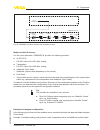
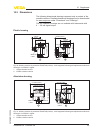
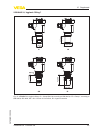
The electrical connection is finished. Fig. 5: connection steps 6 and 7 proceed as follows: 1 loosen the four screws on the housing base with an allen key size 4 2 remove the housing socket from the mounting plate 3 2 1 fig. 6: components of the external housing 1 screws 2 wall mounting plate 3 cable...
Page 18
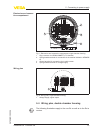
3 loop the connection cable through the cable entry on the housing base 1) information: the cable gland can be mounted in three positions each displaced by 90°. Simply exchange the cable gland against the blind plug in the suitable thread opening. 4 connect the wire ends as described under "single/d...
Page 19
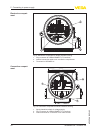
I²c display 1 2 5 6 7 8 3 4 1 2 fig. 7: electronics and connection compartment, single chamber housing 1 plug connector for vegaconnect (i²c interface) 2 spring-loaded terminals for connection of the external indication vegadis 61 3 ground terminal for connection of the cable screen 4 spring-loaded ...
Page 20
1 3 2 display 1 2 5 6 7 8 i2c fig. 9: electronics compartment, double chamber housing 1 plug connector for vegaconnect (i²c interface) 2 internal connection cable to the connection compartment 3 terminals for vegadis 61 1 2 3 d isp la y 1 2 i2c fig. 10: connection compartment double chamber housing ...
Page 21
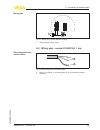
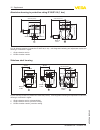
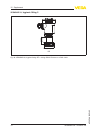
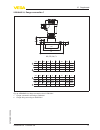
I2c 1 1 2 fig. 11: wiring plan, double chamber housing 1 voltage supply, signal output 5 .5 wiring plan - version ip 66/ip 68, 1 bar 1 2 fig. 12: wire assignment connection cable 1 brown (+) and blue (-) to power supply or to the processing system 2 shielding wiring plan wire assignment con- nection...
Page 22
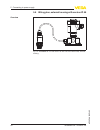
5 .6 wiring plan, external housing with version ip 68 fig. 13: vegabar 54 in ip 68 version 25 bar and axial cable outlet, external housing overview 22 vegabar 54 • profibus pa 5 connecting to power supply 36729 -en -120324.
Page 23
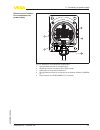
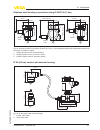
5 6 7 8 1 2 d ispl ay i²c 2 1 5 4 3 fig. 14: electronics and connection compartment 1 spring-loaded terminals for voltage supply 2 ground terminal for connection of the cable screen 3 cable gland to the process component 4 spring-loaded terminals for connection of the external indication vegadis 61 ...
Page 24
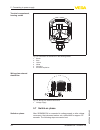
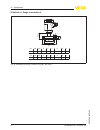
1 2 3 4 6 3 4 1 2 5 fig. 15: connection of the sensor in the housing socket 1 brown 2 blue 3 yellow 4 white 5 shielding 6 breather capillaries i2c display 1 1 2 5 6 7 8 fig. 16: wiring plan external electronics 1 voltage supply 5 .7 switch-on phase after vegabar 54 is connected to voltage supply or ...
Page 25
L internal check of the electronics l indication of the instrument type, the firmware as well as the sensor tags (sensor designation) l status byte goes briefly to fault value then the current measured value will be displayed and the corresponding digital output signal will be outputted to the cable. ...
Page 26: Module Plicscom
6 set up with the indicating and adjustment module plicscom 6 .1 short description the indicating and adjustment module is used for measured value display, adjustment and diagnosis. It can be mounted in the following housing versions and instruments: l all sensors of the plics ® instrument family, i...
Page 27
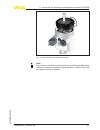
Fig. 17: insert indicating and adjustment module note: if you intend to retrofit the instrument with an indicating and adjustment module for continuous measured value indication, a higher cover with an inspection glass is required. Vegabar 54 • profibus pa 27 6 set up with the indicating and adjustmen...
Page 28
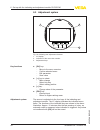
6 .3 adjustment system 2 3 1 1.1 fig. 18: indicating and adjustment elements 1 lc display 2 indication of the menu item number 3 adjustment keys l [ok] key: - move to the menu overview - confirm selected menu - edit parameter - save value l [->] key to select: - menu change - select list entry - sele...
Page 29
6 .4 setup steps before starting the actual parameter adjustment of a profibus pa sensor, the address setting must first be carried out. You will find a detailed description in the operating instructions manual of the indicating and adjustment module or in the online help of pactware or dtm. Vegabar 54...
Page 30
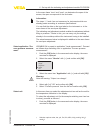
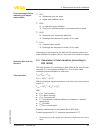
1 push the [ok] button in the measured value display, the menu overview is displayed. ▶ basic adjustment display diagnostics service info 2 confirm the menu "basic adjustment" with [ok], the menu item "unit" will be displayed. Unit unit of measurement bar ▼ temperature unit °c ▼ 3 activate the select...
Page 31
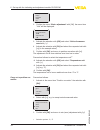
6 enter the requested density value with [->] and [+], confirm with [ok] and move to position correction with [->]. The adjustment unit is thus switched over from bar to m. Proceed as follows to select the temperature unit: 4) à activate the selection with [ok] and select "temperature unit with [->]....
Page 32
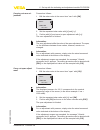
Information: for an adjustment with filling, simply enter the actual measured value indicated at the bottom of the display. If the adjustment ranges are exceeded, the message "outside parameter limits" appears. The editing procedure can be aborted with [esc] or the displayed limit value can be accept...
Page 33
In the menu items "zero" and "span" you determine the span of the sensor, the span corresponds to the end value. Information: the steps 1, 3 and 4 are not necessary for instruments which are already preset according to customer specifications! You can find the data on the type label on the instrument ...
Page 34
▶ basic adjustment display diagnostics service info 2 confirm the menu "basic adjustment" with [ok], the menu item "unit" will be displayed. Unit unit of measurement bar ▼ temperature unit °c ▼ 3 activate the selection with [ok] and select "units of measure- ment with [->]. 4 activate the selection w...
Page 35
Proceed as follows: 1 edit the mbar value in the menu item "zero" with [ok]. Zero 000 .0 % p = +0000 .0 mbar 0000.0 mbar 2 set the requested mbar value with [+] and [->]. 3 confirm with [+] and move to span adjustment with [->]. The zero adjustment is finished. Information: the zero adjustment shifts ...
Page 36
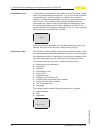
A linearization is necessary for all vessels in which the vessel volume does not increase linearly with the level - e.G. In a horizontal cylindrical or spherical tank - and the indication or output of the volume is required. Corresponding linearization curves are preprogrammed for these vessels. The...
Page 37
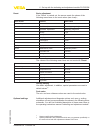
Basic adjustment if the "reset" is carried out, the sensor resets the values of the following menu items to the reset values (see chart): 7) menu section function reset value basic settings sensor address 126 zero/min. Adjustment measuring range begin span/max. Adjustment measuring range end density...
Page 38
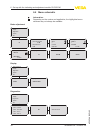
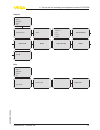
6 .5 menu schematic information: depending on the version and application, the highlighted menu windows may not always be available. Basic adjustment 1 ▶ basic adjustment display diagnostics service info 1.1 sensor address 126 1.1 unit unit of measurement bar ▼ temperature unit °c ▼ 1.2 position cor...
Page 39
Service 4 basic adjustment display diagnostics ▶ service info 4.1 additional pa value secondary value 1 4.2 out-scale-unit volume l 4.3 pa-out-scale 100.00 lin % = 0.0 l 0.00 lin % = 100.0 l 4.2 simulation start simulation ▼ 4.3 reset select reset ▼ 4.6 language german 4.7 copy sensor data copy sens...
Page 40
6 .6 saving the parameter adjustment data we recommended noting the adjusted data, e.G. In this operating instructions manual, and archiving them afterwards. They are thus available for multiple use or service purposes. If vegabar 54 is equipped with an indicating and adjustment module, the most imp...
Page 41: Programs
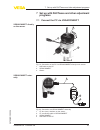
7 set up with pactware and other adjustment programs 7 .1 connect the pc via vegaconnect 3 1 2 fig. 19: connection of the pc via vegaconnect directly to the sensor 1 usb cable to the pc 2 vegaconnect 3 sensor 1 2 3 4 open twist usb lock fig. 20: connection via vegaconnect externally 1 i²c bus (com.)...
Page 42
Necessary components: l vegabar 54 l pc with pactware and suitable vega dtm l vegaconnect l power supply unit or processing system 7 .2 parameter adjustment with pactware further setup steps are described in the operating instructions manual "dtm collection/pactware" attached to each cd and which ca...
Page 43
8 maintenance and fault rectification 8 .1 maintenance if the instrument is used properly, no special maintenance is required in normal operation. In some applications, product buildup on the diaphragm can influence the measuring result. Depending on the sensor and application, take precautions to ens...
Page 44
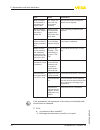
Error cause rectification when an additio- nal instrument is connected, the segment fails. Max. Supply cur- rent of the seg- ment coupler exceeded measure the current consumption, reduce size of segment wrong presenta- tion of the measu- red value in simatic s5 simatic s5 can- not interpret the numbe...
Page 45
? E 017 l adjustment span too small à repeat with modified values ? E 036 l no operable sensor software à carry out a software update or send instrument for repair ? E 041 l hardware error, electronics defective à exchange the instrument or send it in for repair ? E 113 l communication conflict à exch...
Page 46
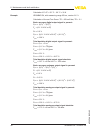
Calculation Δt: Δt = 50 °c - 20 °c = 30 k vegabar 54, with measuring range 25 bar, version 0.2 % calculation of the set turn down: td = 25 bar/8 bar, td = 3.1 basic accuracy digital output signal in percent: f perf = √((f t ) 2 + (f kl ) 2 ) f t = (0.1 %/10 k x Δt) f kl = 0.2 % f perf = √((0.1 %/10 ...
Page 47
8 .4 exchanging the electronics module in case of a defect, the electronics module can be exchanged by the user against an identical type. If no electronics module is available on side, the module can be ordered from the agency serving you. Ordering and exchange are possible with or without sensor s...
Page 48
Push the button "update software" and select the previously extracted hex file. Then the software update can be started. The additional files are installed automatically. Depending on the sensor, this procedure lasts up to 1 h. Then the message appears ""software update successfully executed". 8 .6 in...
Page 49: Dismounting
9 dismounting 9 .1 dismounting steps warning: before dismounting, be aware of dangerous process conditions such as e.G. Pressure in the vessel, high temperatures, corrosive or toxic products etc. Take note of chapters "mounting" and "connecting to power supply" and carry out the listed steps in reve...
Page 50: Supplement
10 supplement 10 .1 technical data general data parameter, pressure gauge pressure, absolute pressure, vacuum measuring principle ceramic-capacitive, dry measuring cell communication interface i ²c bus materials, weights, torque material 316l corresponds to 1.4404 or 1.4435 materials, wetted parts -...
Page 51
- screws for pmc 1½" 5 nm - g ½ a, g¾ a 30 nm - g 1 a, m30 x 1.5 50 nm - g 1" for pasve 100 nm output variable output signal digital output signal, format according to ieee-754 sensor address 126 (default setting) current value 10 ma, ±0.5 ma dynamic behaviour output run-up time approx. 10 s 90 % 10...
Page 52
- in the range of -50 … 0 °c (-58 … +32 °f) and +100 … +150 °c (+212 … +302 °f) typ. ±4 k input variable adjustment adjustment range of the min./max. Adjustment relating to the nominal measuring range: - percentage value -10 … 110 % - pressure value -20 … 120 % adjustment range of the zero/span adju...
Page 53
Nominal range overload capacity, max. Pressure overload capacity, min. Pressure absolute pressure 0 … 1 bar/0 … 100 kpa 35 bar/3500 kpa 0 bar abs. 0 … 2.5 bar/0 … 250 kpa 50 bar/5000 kpa 0 bar abs. 0 … 5 bar/0 … 500 kpa 65 bar/6500 kpa 0 bar abs. 0 … 10 bar/0 … 1000 kpa 90 bar/9000 kpa 0 bar abs. 0 ...
Page 54
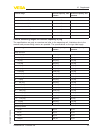
Nominal range overload capacity, max. Pressure overload capacity, min. Pressure 0 … 350 psi 1900 psi 0 psi 0 … 900 psi 2900 psi 0 psi reference conditions and actuating variables (according to din en 60770-1) reference conditions according to din en 61298-1 - temperature + 15 … +25 °c (+59 … +77 °f)...
Page 55
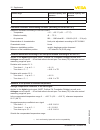
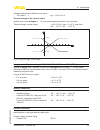
Average temperature coefficient zero signal - turn down 1 : 1 typ. Thermal change of the current output applies also to the analogue 4 … 20 ma current output and refers to the set span. Thermal change, current output 0.05 %/10 k, max. -40 … +80 °c (-40 … +176 °f) 0,15 % -0,15 % -40°c -20°c 20°c 40°c 6...
Page 56
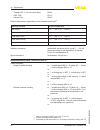
- thread 316l 1" for ball valve fitting pn 40 - pmc 316l pn 10 - flange 316l pn 40 product temperature depending on the measuring cell seal 12) measuring cell seal product temperature fkm (vp2/a) -20 … +120 °c (-4 … +248 °f) epdm (a+p 75.5/kw75f) -40 … +120 °c (-40 … +248 °f) ffkm (kalrez 6375) -20 …...
Page 57
L 1 x plug (depending on the version), 1 x blind stopper m20 x 1.5; plug m12 x 1 for the external indicating and adjustment unit (op- tional) or: l 2 x blind stoppers m20 x 1.5; plug m12 x 1 for the external indicating and adjustment unit (optional) spring-loaded terminals for wire cross-sec- tion 2...
Page 58
- colour blue cable entry/plug 15) - external housing l 1 x cable gland m20 x 1.5 (cable: ø 5 … 9 mm), 1 x blind stopper m20 x 1.5 or: l 1 x plug (depending on the version), 1 x blind stopper m20 x 1.5 spring-loaded terminals for wire cross-sec- tion up to 2.5 mm² (awg 14) indicating and adjustment ...
Page 59
- aluminium and stainless housing (op- tionally available) ip 68 (1 bar) 17) - process component in ip 68 version ip 68 (25 bar) - external housing ip 65 overvoltage category iii protection class ii approvals instruments with approvals can have different technical data depending on the version. That'...
Page 60
10 .2 information on profibus pa instrument master file the instrument master file (gsd) contains the characteristic data of the profibus pa instrument. These data are, e.G. The permissible transmission rates as well as information on diagnostics values and the format of the measured value outputted by ...
Page 61
Profibus pa-output target mode failure mode alarms scaling source for scaling t i damping sensor characteristics pa-out °c tb fb 2 fig. 24: vegabar 54: block diagram with temperature value module of the pa sensors for the cyclic data traffic, vegabar 54 provides the following modules: l ai (pa-out) - ...
Page 62
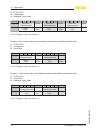
L ai (pa-out) l temperature l additional cyclic value byte-no. 1 2 3 4 5 6 7 8 9 10 11 12 13 14 15 format value ieee-754- flieskommazahl pa-out (fb1) status status (fb1) ieee-754- flieskommazahl temperature (fb2) ieee-754- flieskommazahl additional cyclic value status status (fb2) status status fig....
Page 63
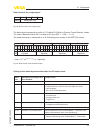
Data format of the output signal byte4 byte3 byte2 byte1 byte0 status value (ieee-754) fig. 28: data format of the output signal the status byte corresponds to profile 3.0 "profibus pa profile for process control devices" coded. The status "measured value ok" is coded as 80 (hex) (bit7 = 1, bit6 … 0 = ...
Page 64
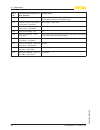
Status code description according to pro- fibus standard possible cause 0 x 4c uncertain - initial value failsafe replacement value (failsafe-mode = "last valid value" and no valid measured value since switching on) 0 x 51 uncertain - sensor; conversion not accurate - low limited sensor value 0 x 52 ...
Page 65
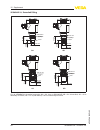
10 .3 dimensions the following dimensional drawings represent only an extract of the possible versions. Detailed dimensional drawings can be downloaded on www.Vega.Com under "d ownloads" and "drawings". The two chamber housings are not available with instruments with 4 … 20 ma signal output plastic ...
Page 66
Aluminium housing in protection rating ip 66/ip 68 (1 bar) 1 2 0 mm (4 .7 2 ") ~ 105 mm (4.13") 1 16 m m (4.57 ") ~ 150 mm (5.91") ø 84 mm (3.31") ø 84 mm (3.31") m20x1,5/ ½ npt m16x1,5 2 m20x1,5 m20x1,5 1 fig. 32: housing versions in protection ip 66/ip 68 (1 bar) - with integrated indicating and a...
Page 67
Stainless steel housing in protection rating ip 66/ip 68 (1 bar) 1 17 m m (4.61 ") ~ 103 mm (4.06") ø 77 mm (3.03") 1 20 m m (4. 7 2 ") ~ 105 mm (4.13") ø 84 mm (3.31") ~ 93 mm (3.66") ø 80 mm (3.15") 1 12 m m (4.41 ") m20x1,5/ ½ npt m20x1,5 3 m20x1,5/ ½ npt m16x1,5 2 1 fig. 34: housing versions in ...
Page 68
Vegabar 54 , threaded fitting ga gd gb 2 2 mm (0 .8 7 ") 5 9 mm (2 .3 2 ") 4 0 mm (1 .5 8 ") 4 4 mm (1 .7 3 ") ø 24 mm (0.95") ø 27 mm (1.06") 2 1 mm (0 .8 3 ") 4 5 mm (1 .7 7 ") ø 18 mm (0.71") ø 40 mm (1.58") gc 4 4 mm (1 .7 3 ") 2 1 mm (0 .8 3 ") ø 40 mm (1.58") ø 30 mm (1.18") sw 36 mm (1.42") g¾...
Page 69
Vegabar 54 , hygienic fitting 1 ri 4 4 ,5 mm (1 .7 5 ") g1 a gk 6 7 ,5 mm (2 .6 6 ") ø 52 mm (2.05") sw41 ci cd 4 4 ,5 mm (1 .7 5 ") 4 5 mm (1 .7 7 ") ø 50,5 mm (1.99") ø 36 mm (1.42") fig. 37: vegabar 54, hygienic fitting: ci = clamp dn15-20 according to din 32676, cd = clamp 1" according to din 3267...
Page 70
Vegabar 54 , hygienic fitting 2 ø 62,5 mm (2.46") 4 5 mm (1 .7 7 ") re fig. 38: vegabar 54, hygienic fitting: re = bolting dn 25 pn 40 acc. To din 11851 70 vegabar 54 • profibus pa 10 supplement 36729 -en -120324.
Page 71
Vegabar 54 , flange connection 1 db, fz, da, f1 d4 k d2 d f b 5 0 mm (1 .9 7 ") dn mm pn d k b db 15 40 95 16 65 fz 20 40 105 18 75 d2 4 x ø14 4 x ø14 d4 45 58 f 2 2 da f1 25 40 115 18 14,2 85 4 x ø14 68 2 1,6 1“ 150 lbs 1 2 50,8 4 x ø15,7 79,2 108 dn mm pn d k b db 15 40 fz 20 40 d2 4 x ø0,55" 4 x ø...
Page 72
Vegabar 54 , flange connection 2 d2 d4 k d f b fa 47,8 mm (1 7 / 8 ") 2 43 / 64 " 5 / 64 " 4xø 35 / 64 " 3 11 / 32 " 4 17 / 64 " 45 / 64 " dn inch pn d k b d2 d4 f fa 25 40 dn mm pn d k b d2 d4 f fa 25 40 115 18 85 4xø14 68 2 fig. 40: vegabar 54, flange connection form b1, en 1092-1 72 vegabar 54 • pr...
Page 73
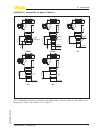
Vegabar 54 , connection for paper industry 1 4 5 ,5 mm (1 5 1 / 6 4 ") ø 26,3 mm (1 1 / 32 ") ø 36 mm (1 27 / 64 ") m8 ø 27,4 mm (1 5 / 64 ") 2 9 mm (1 9 / 6 4 ") 4 8 mm (1 5 7 / 6 4 ") ø 25 mm ( 63 / 64 ") m30x1,5 sw32 5 2 mm (2 3 / 6 4 ") 2 1 mm ( 5 3 / 6 4 ") 46 m44x1,25 pc pd pe 4 3 ,7 mm (1 2 3...
Page 74
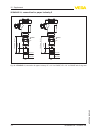
Vegabar 54 , connection for paper industry 2 vp vr ø 29,3 mm (1 5 / 32 ") 30 mm (1 3 / 16 ") 104,8 mm (4 1 / 8 ") g1" sw36 ø 24,7 mm ( 31 / 32 ") ø 29,3 mm (1 5 / 32 ") 30 mm (1 3 / 16 ") ø 24,7 mm ( 31 / 32 ") 104,8 mm (4 1 / 8 ") g1" sw36 fig. 42: vegabar 54, connection for paper industry: vp = g1...
Page 75
10 .4 industrial property rights vega product lines are global protected by industrial property rights. Further information see http://www.Vega.Com . Only in u.S.A.: further information see patent label at the sensor housing. Vega produktfamilien sind weltweit geschützt durch gewerbliche schutzrecht...
Page 76: Index
Index a accessory - external indicating and adjustment unit 11 - flanges 11 - indicating and adjustment module 10 - interface adapter 11 - measuring instrument holder 11 - protective cover 11 application area 8 b bus communication 9 c check signal 43 connection compartment - double chamber 20 connec...
Page 77
Vegabar 54 • profibus pa 77 index 36729 - en -120324.
Page 78
78 vegabar 54 • profibus pa index 36729 -en -120324.
Page 79
Vegabar 54 • profibus pa 79 index 36729 - en -120324.
Page 80
Vega grieshaber kg am hohenstein 113 77761 schiltach germany phone +49 7836 50-0 fax +49 7836 50-201 e-mail: info.De@vega.Com www.Vega.Com printing date: iso 9001 all statements concerning scope of delivery, application, practical use and operating conditions of the sensors and processing systems co...

