- DL manuals
- Vega
- Radar
- VEGAPULS 63
- Operating Instructions Manual
Vega VEGAPULS 63 Operating Instructions Manual
Summary of VEGAPULS 63
Page 1
Operating instructions vegapuls 66 profibus pa document id: 36521 radar.
Page 2: Contents
Contents 1 about this document 1.1 function. . . . . . . . . . . . . . . . . . . . . . . . . . . . . . . . . . 4 1.2 target group . . . . . . . . . . . . . . . . . . . . . . . . . . . . . . 4 1.3 symbolism used. . . . . . . . . . . . . . . . . . . . . . . . . . . . 4 2 for your safety 2.1 authorised...
Page 3
8 set up with other systems 8.1 dd adjustment programs . . . . . . . . . . . . . . . . . . . . . 50 9 diagnosis, asset management and service 9.1 maintaining . . . . . . . . . . . . . . . . . . . . . . . . . . . . . . . 51 9.2 measured value and event memory . . . . . . . . . . . . . . 51 9.3 asset ...
Page 4: About This Document
1 about this document 1 .1 function this operating instructions manual provides all the information you need for mounting, connection and setup as well as important instructions for maintenance and fault rectification. Please read this information before putting the instrument into operation and keep...
Page 5: For Your Safety
2 for your safety 2 .1 authorised personnel all operations described in this operating instructions manual must be carried out only by trained specialist personnel authorised by the plant operator. During work on and with the device the required personal protective equipment must always be worn. 2 ....
Page 6
Depending on the instrument version, the emitting frequencies are in the c or k band range. The low emitting frequencies are far below the internationally approved limit values. When used correctly, there is no danger to health. 2 .5 ce conformity the device fulfills the legal requirements of the app...
Page 7
2 .9 environmental instructions protection of the environment is one of our most important duties. That is why we have introduced an environment management system with the goal of continuously improving company environmental protection. The environment management system is certified according to din ...
Page 8: Product Description
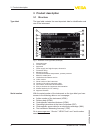
3 product description 3 .1 structure the type label contains the most important data for identification and use of the instrument: 2 1 13 14 15 16 12 11 5 3 6 4 7 8 9 10 fig. 1: structure of the type label (example) 1 instrument type 2 product code 3 approvals 4 power supply and signal output, electr...
Page 9
This operating instructions manual applies to the following instrument versions: l hardware from 2.1.1 l software from 4.4.0 the scope of delivery encompasses: l radar sensor l documentation - this operating instructions manual - test certificate measuring accuracy, depending on the instrument vegapu...
Page 10
3 .3 packaging, transport and storage your instrument was protected by packaging during transport. Its capacity to handle normal loads during transport is assured by a test according to din en 24180. The packaging of standard instruments consists of environment- friendly, recyclable cardboard. For s...
Page 11
Vegadis 61 is an external indicating and adjustment unit for sensors with single chamber housing and ex-d double chamber housing. It is suitable for measured value indication and adjustment of plics ® sensors and is connected to the sensor with a four-wire, screened standard cable up to 50 m long. Y...
Page 12: Mounting
4 mounting 4 .1 general instructions with instruments with threaded process fitting, suitable tools must be applied for tightening the hexagon. Warning: the housing must not be used to screw the instrument in! Applying tightening force can damage internal parts of the housing. Use the recommended cab...
Page 13
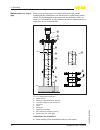
The position of the polarisation plane is marked on the process fitting of the instrument. 1 fig. 2: position of the polarisation plane of vegapuls 66 1 marking hole when mounting the vegapuls 66, keep a distance of at least 500 mm (19.69 in) to the vessel wall. If the sensor is installed in the cent...
Page 14
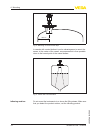
> 500 mm (19.69") fig. 3: mounting on round vessel tops in vessels with conical bottom it can be advantageous to mount the sensor in the center of the vessel, as measurement is then possible down to the lowest point of the vessel bottom. Fig. 4: vessel with conical bottom do not mount the instrument...
Page 15
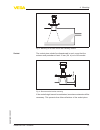
Fig. 5: mounting of the radar sensor with inflowing medium the socket piece should be dimensioned in such a way that the antenna end protrudes at least 10 mm (0.4 in) out of the socket. Ca . 1 0 mm fig. 6: recommended socket mounting if the socket height cannot be maintained, an antenna extension wil...
Page 16
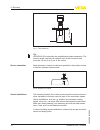
Ca . 1 0 mm fig. 7: tube extension tip: vegapuls 66 is optionally also available with antenna extension. The antenna length can thus be selected such that the antenna end protrudes 10 mm (0.4 in) out of the socket. Align the sensor in liquids as vertical as possible to the product surface to achieve...
Page 17
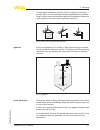
If large vessel installations such as struts or supports cause false echoes, these can be attenuated through supplementary measures. Small, inclined sheet metal baffles above the installations scatter the radar signals and prevent direct interfering reflections. Fig. 9: cover smooth profiles with deflect...
Page 18
When using a surge pipe in a vessel, influences from vessel installations and turbulences can be excluded. Under these prereq- uisites, the measurement of products with low dielectric values (ε r value ≥ 1.6) is possible. In very adhesive products, measurement in a surge pipe is not recommended. 0% 1...
Page 19
L with threaded fitting, the marking is on the hexagon, with flange connection between the two flange holes l all holes in the surge pipe must be in one plane with this marking instructions for the measurement: l the 100 % point must be below the upper vent hole and the antenna edge l the 0 % point is ...
Page 20
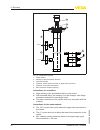
0 % 100 % 1 2 5 4 3 6 fig. 12: configuration bypass 1 radar sensor 2 marking of the polarisation direction 3 instrument flange 4 distance sensor reference plane to upper tube connection 5 distance of the tube connections 6 ball valve with complete opening instructions for orientation: l note marking o...
Page 21
L the tube diameter must be at least dn 40 or 1½" with antenna size 40 mm (1½") l for the parameter adjustment, select "application standpipe" and enter the tube diameter to compensate errors due to running time shift l a false signal suppression with integrated sensor is recommended but not mandato...
Page 22
Ma x. 5 0 mm (1 .9 7 ") 1 2 3 fig. 13: mounting of the instrument with insulated vessels. 1 electronics housing 2 distance piece 3 vessel insulation 22 vegapuls 66 • profibus 4 mounting 36521 -en -120301.
Page 23
5 connecting to the bus system 5 .1 preparing the connection always keep in mind the following safety instructions: l connect only in the complete absence of line voltage l if voltage surges are expected, install overvoltage arresters the voltage supply is provided by a profibus dp /pa segment couple...
Page 24
Connected to ground potential or to another cable screen. The cable screens to the power supply unit and to the next distributor must be connected to each other and also connected to ground potential via a ceramic capacitor (e.G. 1 nf, 1500 v). Low-frequency potential equalisation currents are thus ...
Page 25
Information: solid cores as well as flexible cores with cable end sleeves are inserted directly into the terminal openings. In case of flexible cores without end sleeves, press the terminal head with a small screwdriver; the terminal opening is freed. When the screwdriver is released, the terminal clo...
Page 26
5 .4 wiring plan, double chamber housing the following illustrations apply to the non-ex as well as to the ex-ia version. 1 1 5 0 0 5 1 6 2 7 3 8 4 9 0 5 1 6 2 7 3 8 4 9 1 0 1 6 7 8 bus 2 3 1 2 + ( ) (-) fig. 16: electronics compartment, double chamber housing 1 internal connection to the connection...
Page 27
1 bus usb status test sim-card 1 2 + ( ) (-) fig. 18: cconnection of the voltage supply of the radio module 1 voltage supply you can find detailed information for connection in the supplementary instructions "plicsmobile gsm/gprs radio module". 5 .5 wiring plan with double chamber housing ex d 4 1 5 ...
Page 28
+ bus 2 1 2 ( ) (-) 1 fig. 20: connection compartment, double chamber housing ex d 1 voltage supply, signal output 2 ground terminal for connection of the cable screen 3 4 1 2 fig. 21: top view of the plug connector 1 pin 1 2 pin 2 3 pin 3 4 pin 4 contact pin colour connection cable in the sensor te...
Page 29
5 .6 wiring plan - version ip 66/ip 68, 1 bar 1 2 fig. 22: wire assignment fix-connected connection cable 1 brown (+) and blue (-) to power supply or to the processing system 2 shielding 5 .7 set instrument address an address must be assigned to each profibus pa instrument. The approved addresses are ...
Page 30
The hardware addressing is effective if an address with the address selection switches on the instrument. Hence the software addressing is no longer effective, the adjusted hardware address is valid. 5 0 0 5 1 6 2 7 3 8 4 9 0 5 1 6 2 7 3 8 4 9 1 0 1 6 7 8 bus 2 1 3 1 2 + ( ) (-) fig. 23: address selec...
Page 31: Module
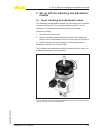
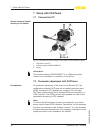
6 set up with the indicating and adjustment module 6 .1 insert indicating and adjustment module the indicating and adjustment module can be inserted into the sensor and removed any time. Four positions displaced by 90° can be selected. It is not necessary to interrupt the power supply. Proceed as fo...
Page 32
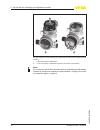
1 2 fig. 25: insertion of the indicating and adjustment module with double chamber housing 1 in the electronics compartment 2 in the connection compartment (with ex d version not possible) note: if you intend to retrofit the instrument with an indicating and adjustment module for continuous measured ...
Page 33
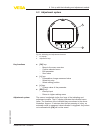
6 .2 adjustment system 1 2 fig. 26: indicating and adjustment elements 1 lc display 2 adjustment keys l [ok] key: - move to the menu overview - confirm selected menu - edit parameter - save value l [->] key: - presentation change measured value - select list entry - select editing position l [+] key:...
Page 34
6 .3 parameter adjustment through the parameter adjustment the instrument is adapted to the application conditions. The parameter adjustment is carried out via an adjustment menu. The main menu is divided into five sections with the following functions: setup: settings, for example, to measurement lo...
Page 35
Through this selection, the sensor is adapted perfectly to the product and measurement reliability, particularly in products with poor reflective properties, is considerably increased. Enter the requested parameters via the appropriate keys, save your settings with [ok] and jump to the next menu item...
Page 36
L vessel: small laterally mounted or large top mounted stirrer l process/measurement conditions: - relatively smooth product surface - max. Requirement to the measurement accuracy - condensation - slight foam generation - overfilling possible storage tank on ships (cargo tank): l product speed: slow ...
Page 37
- condensation - buildup bypass: l product speed: - fast up to slow filling with short up to long bypass tube possible - often the level is hold via a control facility l vessel: - lateral outlets and inlets - joins like flanges, weld joints - shifting of the running time in the tube l process/measurem...
Page 38
- ice and condensation on the antenna possible - spiders and insect nestle in the antennas - smooth water surface - exact measurement result required - distance to the water surface normally relatively high rain water overfall (weir): l gauge rate of change: slow gauge change l process/measurement c...
Page 39
L vessel of concrete or metal: - structured vessel walls - installations present l process/measurement conditions: - large distance to the medium - large angles of repose bunker with fast filling: l vessel of concrete or metal, also multiple chamber silo: - structured vessel walls - installations pre...
Page 40
With this selection, the operating range of the sensor is adapted to the vessel height and the reliability with different frame conditions is increased considerably. Independent from this, the min. Adjustment must be carried out. Enter the requested parameters via the appropriate keys, save your sett...
Page 41
2 edit the percentage value with [ok] and set the cursor to the requested position with [->]. 3 set the requested percentage value with [+] and save with [ok]. The cursor jumps now to the distance value. 4 enter the suitable distance value in m for the empty vessel (e.G. Distance from the sensor to ...
Page 42
5 save settings with [ok] min. And max. Measured values are saved in the sensor. The values are displayed in the menu item "peak values". When non-contact level sensors are used, the measurement can be influenced by the respective process conditions. In this menu item, the measurement reliability of ...
Page 43
A comparison of echo curve and false signal suppression allows a more accurate conclusion on measurement reliability. The selected curve is continuously updated. With the [ok] key, a submenu with zoom functions is opened: l "x -zoom": zoom function for the meas. Distance l "y -zoom": 1, 2, 5 and 10x...
Page 44
3 confirm again with [ok]. 4 confirm again with [ok] and enter the actual distance from the sensor to the product surface. 5 all interfering signals in this section are detected by the sensor and stored after confirming with [ok]. Note: check the distance to the product surface, because if an incorrect...
Page 45
A linearization is necessary for all vessels in which the vessel volume does not increase linearly with the level - e.G. In a horizontal cylindrical or spherical tank - and the indication or output of the volume is required. Corresponding linearization curves are preprogrammed for these vessels. The...
Page 46
L basic settings: resetting of the parameter settings incl. Special and laboratory parameters to the default values of the respective instrument. Any created false signal suppression, user program- mable linearization curve, measured value memory as well as event memory will be deleted. L setup: res...
Page 47
Menu menu item default value lighting switched off further settings distance unit m temperature unit °c unit sv2 m probe length length of the standpipe ex factory linearisation cur- ve linear sensor address 126 6 .4 saving the parameter adjustment data it is recommended noting the adjusted data, e.G....
Page 48: Setup With Pactware
7 setup with pactware 7 .1 connect the pc 3 1 2 fig. 27: connection of the pc directly to the sensor via the interface adapter 1 usb cable to the pc 2 interface adapter vegaconnect 4 3 sensor information: the interface adapter vegaconnect 3 or additional previous versions are not suitable for connec...
Page 49
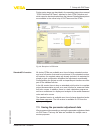
Further setup steps are described in the operating instructions manual "dtm c ollection/pactware" attached to each dtm collection and which can also be downloaded from the internet. Detailed descriptions are available in the online help of pactware and the dtms. Fig. 28: example of a dtm view all de...
Page 50
8 set up with other systems 8 .1 dd adjustment programs device descriptions as enhanced device description (edd) are available for dd adjustment programs such as, for example, ams™ and pdm. A free-of-charge download of these files is available via internet. Move via www.Vega.Com and "downloads" to "s...
Page 51
9 diagnosis, asset management and service 9 .1 maintaining if the device is used correctly, no maintenance is required in normal operation. 9 .2 measured value and event memory the instrument has several memories which are available for diagnosis purposes. The data remain even with voltage interrupt...
Page 52
Further echo curves: up to 10 echo curves can be stored in a ring buffer in this memory section. Additional echo curves are stored via: l pc with pactware/dtm l control system with edd 9 .3 asset management function the instrument features self-monitoring and diagnosis according to ne 107 and vdi/vde...
Page 53
Maintenance: due to external influences, the instrument function is limited. The measurement is affected, but the measured value is still valid. Plan in maintenance for the instrument because a failure is expected in the near future (e.G. Due to buildup). This status message is inactive by default. Ac...
Page 54
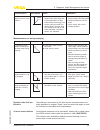
Code text mes- sage cause rectification pa dev- spec diagnosis f 105 determine measured value l the instrument is still in the start phase, the measured value could not yet be de- termined l wait for the warm-up phase l duration depending on the version and parameter adjust- ment up to approxi- matel...
Page 55
Code text mes- sage cause rectification c 700 simulation l simulation active l finish simulation l wait for the automatic end after 60 mins. The following table shows the error codes and text messages in the status message "out of specification" and provides information on causes as well as corrective...
Page 56
Code text mes- sage cause rectification m 503 reliability too low l the echot/noise ratio is the small for a reliable measu- rement l check installation and pro- cess conditions l clean the antenna l change polarisation direc- tion l use instrument with higher sensitivity m 504 error on an device int...
Page 57
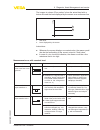
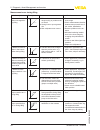
The images in column "error pattern" show the actual level with a broken line and the level displayed by the sensor as a continuous line. 1 2 l e ve l time 0 1 real level 2 level displayed by the sensor instructions: l wherever the sensor displays a constant value, the reason could also be the fault...
Page 58
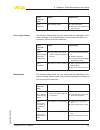
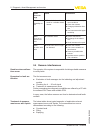
Measurement error during filling fault description error pattern cause rectification 4. Measured value re- mains unchanged du- ring filling level time 0 l false echoes in the close range too big or product echo too small l strong foam or spout genera- tion l max. Adjustment not correct l remove false e...
Page 59
Fault description error pattern cause rectification 10. Measured value jumps to ≥ 100 % or 0 m distance le ve l time 0 l level echo is no longer de- tected in the close range due to foam generation or false echoes in the close range. The sensor goes into overfill pro- tection mode. The max. Level (0 m...
Page 60
Since we offer this service worldwide, the support is in english language. The service is free-of-charge, only the standard telephone costs will be charge. 9 .5 exchanging the electronics module if the electronics module is defective, it can be replaced by the user. In ex applications only one instru...
Page 61
L connecting the sensor to voltage supply and via the interface adapter to the pc l start pactware and go via the menu "project" to the vega project assistant l select "usb", "create new project" and "set instrument online" l activate the project assistant with "start"; the connection to the sensor ...
Page 62: Dismounting
10 dismounting 10 .1 dismounting steps warning: before dismounting, be aware of dangerous process conditions such as e.G. Pressure in the vessel, high temperatures, corrosive or toxic products etc. Take note of chapters "mounting" and "connecting to power supply" and carry out the listed steps in re...
Page 63: Supplement
11 supplement 11 .1 technical data general data 316l corresponds to 1.4404 or 1.4435 materials, wetted parts - process fitting 316l, hastelloy c22 plated, pp - process seal on site - antenna 316l, hastelloy c22 - antenna impedance cone ptfe, ceramic (99.7 % al 2 o 3 ) - seal, antenna system fkm (a+p ...
Page 64
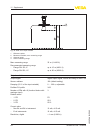
3 4 2 1 fig. 43: data of the input variable 1 reference plane 2 measured variable, max. Measuring range 3 antenna length 4 useful measuring range max. Measuring range 35 m (114.83 ft) recommended measuring range - flange dn 150, 6" up to 15 m (49.21 ft) - flange dn 250, 10" up to 20 m (65.62 ft) out...
Page 65
Accuracy (according to din en 60770-1) process reference conditions according to din en 61298-1 - temperature + 18 … +30 °c (+64 … +86 °f) - relative humidity 45 … 75 % - air pressure 860 … 1060 mbar/86 … 106 kpa (12.5 … 15.4 psig) installation reference conditions - min. Distance to installations >...
Page 66
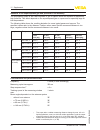
Influence of the superimposed gas and pressure to the accuracy the propagation speed of the radar impulses in gas or vapour above the medium is reduced by high pressure. This effect depends on the superimposed gas or vapour and is especially large at low temperatures. The following table shows the res...
Page 67
- ø 196 mm (7.717 in) 17° - ø 242 mm (9.528 in) 14° emitted hf power (depending on the parameter adjustment) 3) - average spectral transmission power density -31 dbm/mhz eirp - max. Spectral transmission power den- sity + 24 dbm/50 mhz eirp - specific absorption rate (sar) 0.47 mw/kg ambient conditio...
Page 68
Air flow without reflux valve - 0.1 bar (1.45 psi) 4.2 m 3 /h - 1.2 bar (7.25 psi) 10.2 m 3 /h air flow with reflux valve - 0.2 bar (2.9 psi) 2.0 m 3 /h - 0.55 bar (7.98 psi) 4.2 m 3 /h - 1.2 bar (17.4 psi) 7.2 m 3 /h thread g¼ a catch - with non-ex dust protection cover of pe - with ex threaded plug of...
Page 69
L 1 x closing cap ½ npt, 1 x blind stopper ½ npt , 1 x blind stopper m16 x 1.5 or optionally 6) 1 x plug m12 x 1 for external indicating and adjustment unit or: l 1 x plug (depending on the version), 1 x blind stopper m20 x 1.5; 1 x blind stopper m16 x 1.5 or optionally 7) 1 x plug m12 x 1 for exter...
Page 70
Adjustment elements 4 keys protection rating - unassembled ip 20 - mounted into the sensor without cover ip 40 materials - housing abs - inspection window polyester foil integrated clock date format day.Month.Year time format 12 h/24 h time zone ex factory cet measurement electronics temerature reso...
Page 71
Protection class ii approvals instruments with approvals can have different technical data depending on the version. That's why the associated approval documents have to be noted with these instruments. They are part of the delivery or can be downloaded under www.Vega.Com via "vega t ools" and "seria...
Page 72
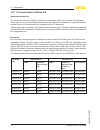
11 .2 communication profibus pa instrument master file the instrument master file (gsd) contains the characteristic data of the profibus pa instrument. These data are, e.G. The permissible transmission rates as well as information on diagnostics values and the format of the measured value outputted by t...
Page 73
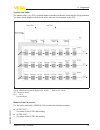
Cyclical data traffic the master class 1 (e.G. Plc) cyclically reads out measured values from the sensor during operation. The below block diagram below shows which data can be accessed by the plc. Fig. 45: vegapuls 66: block diagram with ai fb 1 … ai fb 3 out values tb transducer block fb 1 … fb 3 fu...
Page 74
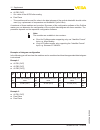
L ai fb 3 (out) - out value of the ai fb3 after scaling l free place - this module must be used if a value in the data telegram of the cyclical data traffic should not be used (e.G. Replacement of temperature and additional cyclic value) a maximum of three modules can be active. By means of the configu...
Page 75
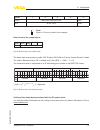
Byte-no. 1 2 3 4 5 format ieee-754-floating point value status value ai fb 1 (out) ai fb 1 note: bytes 6-15 are not used in this example. Data format of the output signal byte4 byte3 byte2 byte1 byte0 status value (ieee-754) fig. 46: data format of the output signal the status byte corresponds to pr...
Page 76
Status code description according to profibus standard possible cause 0 x 00 bad - non-specific flash-update active 0 x 04 bad - configuration error l adjustment error l configuration error with pv-scale (pv-span too small) l unit irregularity l error in the linearization table 0 x 0c bad - sensor failu...
Page 77
Status code description according to profibus standard possible cause 0 x 8e good (non-cascade) - ac- tive critical alarm - high limited hi-hi-alarm vegapuls 66 • profibus 77 11 supplement 36521 - en -120301.
Page 78
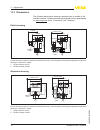
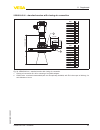
11 .3 dimensions the following dimensional drawings represent only an extract of the possible versions. Detailed dimensional drawings can be downloaded on www.Vega.Com under "d ownloads" and "drawings". Plastic housing ~ 69 mm (2.72") ø 79 mm (3.03") 1 1 2 mm (4 .4 1 ") m20x1,5/ ½ npt ~ 84 mm (3.31"...
Page 79
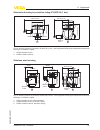
Aluminium housing in protection rating ip 66/ip 68 (1 bar) 1 2 0 mm (4 .7 2 ") ~ 105 mm (4.13") 1 16 m m (4.57 ") ~ 150 mm (5.91") ø 84 mm (3.31") ø 84 mm (3.31") m20x1,5/ ½ npt m16x1,5 2 m20x1,5 m20x1,5 1 fig. 50: housing versions in protection ip 66/ip 68 (1 bar) - with integrated indicating and a...
Page 80
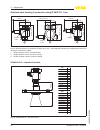
Stainless steel housing in protection rating ip 66/ip 68, 1 bar 1 17 m m (4.61 ") ~ 103 mm (4.06") ø 77 mm (3.03") 1 20 m m (4. 7 2 ") ~ 105 mm (4.13") ø 84 mm (3.31") ~ 93 mm (3.66") ø 80 mm (3.15") 1 12 m m (4.41 ") m20x1,5/ ½ npt m20x1,5 3 m20x1,5/ ½ npt m16x1,5 2 1 fig. 52: housing versions in p...
Page 81
Vegapuls 66 - standard version with rinsing air connection 1 2 1 3 6 mm (5 .3 5 ") y 2 1 ,5 m m (0 .8 5 ") 55 mm (2.17") 67 mm (2.64") y dn 50 pn 40 - dn 80 pn 40 68 dn 100 pn 16 113 dn 150 pn 16 205 dn 200 pn 16 296 dn 250 pn 16 380 2" 150 lb - 3" 150 lb 68 4" 150 lb 113 6" 150 lb 205 8" 150 lb 296...
Page 82
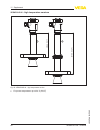
Vegapuls 66 - high temperature versions 2 0 0 mm (7 .8 7 ") 3 3 7 mm (1 3 .2 7 ") 2 1 fig. 55: vegapuls 66 - high temperature version 1 for process temperatures up to 250 °c (482 °f) 2 for process temperatures up to 400 °c (752 °f) 82 vegapuls 66 • profibus 11 supplement 36521 -en -120301.
Page 83
11 .4 industrial property rights vega product lines are global protected by industrial property rights. Further information see http://www.Vega.Com . Only in u.S.A.: further information see patent label at the sensor housing. Vega produktfamilien sind weltweit geschützt durch gewerbliche schutzrecht...
Page 84: Index
Index . ... - id number 72 a accessory - external indicating and adjustment unit 11 - external radio unit 11 - flanges 11 - indicating and adjustment module 10 - interface adapter 10 - protective cap 11 adjustment 40 - max. Adjustment 41 - min. Adjustment 40 adjustment system 33 application - bulk s...
Page 85
Status messages 52 storage 10 t telegram configuration 74 type label 8 v vessel form 40 vessel height 40 vessel installations 16 vessel insulation 21 vegapuls 66 • profibus 85 index 36521 - en -120301.
Page 86
86 vegapuls 66 • profibus index 36521 -en -120301.
Page 87
Vegapuls 66 • profibus 87 index 36521 - en -120301.
Page 88
Vega grieshaber kg am hohenstein 113 77761 schiltach germany phone +49 7836 50-0 fax +49 7836 50-201 e-mail: info.De@vega.Com www.Vega.Com printing date: iso 9001 all statements concerning scope of delivery, application, practical use and operating conditions of the sensors and processing systems co...

