Oki MC770 series Setup Manual

Manual is about: Controller Unit

Summary of MC770 series

  • Page 1

    1 / 9 gn-1060 with gn-3010 gn-1060 with gn-3010 for mc760/mc770/mc780/es7460/es7470/es7480/mps3537/mps4242 set-up guide warnings points • the unpacking and setup procedure shall be done by a qualified service technician. • be sure to unplug the power cable of the equipment before installing and sett...

  • Page 2

    2 / 9 gn-1060 with gn-3010 setup 1. Take out the accessories. 2. Take off the cover. * you must wear gloves for this procedure. 1) remove [b] and [e]. • b: 1 • e: 1 2) open [f]. 3) push the locking button to open [g]. 4) remove [b]. 5) remove [e]. F g b e b e.

  • Page 3

    3 / 9 gn-1060 with gn-3010 6) open the covers in the order of (a) and (b). 7) close [g]. 8) release the latches (a) of the cover. • a: 2 * as shown in the figure, insert a flathead screwdriver into the groove and push it in the direction of the arrow to release the latches. When using tools, be sure...

  • Page 4

    4 / 9 gn-1060 with gn-3010 10) release the latch (d) of the cover. • d: 1 * as shown in the figure, insert a flathead screwdriver into the groove and push it in the direction of the arrow to release the latches. When using tools, be sure not to put your face and hands in the direction in which force...

  • Page 5

    5 / 9 gn-1060 with gn-3010 4. Loosen the screws and take off the cover. • screws: 15 places 5. Set [a] as shown in the figure. * making sure that its terminal contacts that of [a], fully insert the connector and push it to the board side to set it. 6. Wire the cable of [d] as shown in the figure, an...

  • Page 6

    6 / 9 gn-1060 with gn-3010 8. Wire the cable of [d] inside the product as shown in the figure. 9. Attach [e] and [h]. • e: 1 • h: 2 10. Set [j] to the position of the cable indicated in the figure, and fix it with [h]. • h: 2 11. Loop the cable twice as shown in the figure, and fix it with [e]. • e:...

  • Page 7

    7 / 9 gn-1060 with gn-3010 12. Pass the cable through the hole as shown in the figure, and connect it with [a]. 13. Attach the cover and tighten the screws. • screws: 15 places 14. Insert its latch (e) and then the parts indicated by the arrows as shown in the figure. Perform this operation with car...

  • Page 8

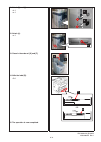
    8 / 9 gn-1060 with gn-3010 16. Open [f]. 17. Insert the latch (d) of the cover. 18. Close the covers in the order of (a) and (b). 19. Push the locking button to open [g]. 20. Attach [b]. • b: 1 g b b a f d.

  • Page 9

    9 / 9 gn-1060 with gn-3010 21. Attach [b] and [e]. • b: 1 • e: 1 22. Attach [e]. • e: 1 23. Close in the order of [g] and [f]. 24. Affix the label [b]. • b: 1 25. The operation is now completed. G f b e e 45564403ee rev.1 or 1mm 1mm b b.