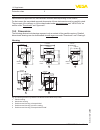
- DL manuals
- Vega
- Transmitter
- VEGABAR 82
- Operating Instructions Manual
Vega VEGABAR 82 Operating Instructions Manual
Summary of VEGABAR 82
Page 1
Operating instructions pressure transmitter with ceramic measuring cell vegabar 82 4 … 20 ma document id: 45027.
Page 2: Contents
2 contents vegabar 82 • 4 … 20 ma 45027-en-131010 contents 1 about this document 1.1 function ........................................................................................................................... 4 1.2 target group ..................................................................
Page 3
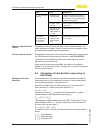
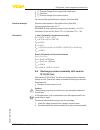
3 contents vegabar 82 • 4 … 20 ma 45027-en-131010 8.4 rectify faults ................................................................................................................... 49 8.5 calculation of total deviation (according to din 16086) .................................................. 5...
Page 4: 1 About This Document
4 1 about this document vegabar 82 • 4 … 20 ma 45027-en-131010 1 about this document 1.1 function this operating instructions manual provides all the information you need for mounting, connection and setup as well as important instruc- tionsformaintenanceandfaultrectification.Pleasereadthisinforma- ...
Page 5: 2 For Your Safety
5 2 for your safety vegabar 82 • 4 … 20 ma 45027-en-131010 2 for your safety 2.1 authorised personnel all operations described in this operating instructions manual must be carried out only by trained specialist personnel authorised by the plant operator. During work on and with the device the requi...
Page 6
6 2 for your safety vegabar 82 • 4 … 20 ma 45027-en-131010 radiated emissions must be taken into account, as is usual with a class a instrument according to en 61326-1. If the instrument is used inadifferentenvironment,theelectromagneticcompatibilitytoother instruments must be ensured by suitable me...
Page 7: 3 Product Description
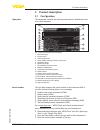
7 3 product description vegabar 82 • 4 … 20 ma 45027-en-131010 3 product description 3.1 configuration thenameplatecontainsthemostimportantdataforidentificationand use of the instrument: 2 1 13 14 15 16 12 11 5 3 6 4 7 8 9 10 fig. 1: layout of the type label (example) 1 instrument type 2 product cod...
Page 8
8 3 product description vegabar 82 • 4 … 20 ma 45027-en-131010 this operating instructions manual applies to the following instrument versions: • hardware from 1.0.0 • software version from 1.0.0 the scope of delivery encompasses: • pressure transmitter • documentation – this operating instructions ...
Page 9
9 3 product description vegabar 82 • 4 … 20 ma 45027-en-131010 sensor element is the certec ® measuring cell with robust ceramic diaphragm.Theprocesspressuredeflectstheceramicdiaphragm and causes a capacitance change in the measuring cell. This capaci- tance change is converted into an electrical si...
Page 10
10 3 product description vegabar 82 • 4 … 20 ma 45027-en-131010 2 3 4 1 5 fig. 4: front-flish mounting of the certec ® measuring cell 1 seal for the process fitting 2 measuring cell 3 seal for the measuring cell 4 process fitting 5 diaphragm 1 2 3 4 5 fig. 5: front-flush installation of the certec ®...
Page 11
11 3 product description vegabar 82 • 4 … 20 ma 45027-en-131010 3.3 packaging, transport and storage your instrument was protected by packaging during transport. Its capacity to handle normal loads during transport is assured by a test based on iso 4180. The packaging of standard instruments consist...
Page 12
12 3 product description vegabar 82 • 4 … 20 ma 45027-en-131010 youcanfindfurtherinformationintheoperatinginstructions"ve- gadis 62" (document-id 36469). The protective cover protects the sensor housing against soiling and intense heat from solar radiation. Youwillfindadditionalinformationinthesuppl...
Page 13: 4 Mounting
13 4 mounting vegabar 82 • 4 … 20 ma 45027-en-131010 4 mounting 4.1 general instructions to use the instrument make sure that all parts of the instrument exposed to the process are suitable for the existing process conditions. These are mainly: • active measuring component • processfitting • process...
Page 14
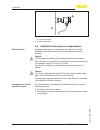
14 4 mounting vegabar 82 • 4 … 20 ma 45027-en-131010 1 2 fig. 7: temperature ranges 1 process temperature 2 ambient temperature 4.2 ventilation and pressure compensation ventilation and pressure compensation are carried out with ve- gabar82viaafilterelement.Itisairpermeableandmoisture- blocking. Cau...
Page 15
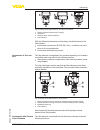
15 4 mounting vegabar 82 • 4 … 20 ma 45027-en-131010 1 2 3 4 4 4 fig. 8: position of the filter element - non-ex, ex-ia version 1 plastic, stainless steel precision casting 2 aluminium 3 stainless steel, electro-polished 4 filter element with the following instruments a blind plug is installed inste...
Page 16
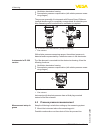
16 4 mounting vegabar 82 • 4 … 20 ma 45027-en-131010 • ventilation electronics housing • atmospheric pressure compensation (with relative pressure meas- uring ranges) the process assembly of instruments with second line of defense (gastight leadthrough) is completely encapsulated. An absolute pres- ...
Page 17
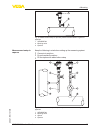
17 4 mounting vegabar 82 • 4 … 20 ma 45027-en-131010 1 2 3 fig. 12: measurement setup for process pressure measurement of gases in pipelines 1 vegabar 82 2 blocking valve 3 pipeline keep the following in mind when setting up the measuring system: • connect via a siphon • do not insulate the siphon •...
Page 18
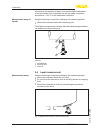
18 4 mounting vegabar 82 • 4 … 20 ma 45027-en-131010 a protective accumulation of water is formed through condensation in the pipe bends. Even in applications with hot steam, a medium temperature keep the following in mind when setting up the measuring system: • mount the instrument below the measur...
Page 19
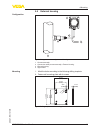
19 4 mounting vegabar 82 • 4 … 20 ma 45027-en-131010 4.5 external housing 1 2 3 4 5 fig. 16: setup process assembly, external housing 1 process assembly 2 connection cable process assembly - external housing 3 external housing 4 signal cable 1. Mark the holes according to the following drilling temp...
Page 20
20 5 connecting to power supply vegabar 82 • 4 … 20 ma 45027-en-131010 5 connecting to power supply 5.1 preparing the connection always keep in mind the following safety instructions: • connect only in the complete absence of line voltage • if overvoltage surges are expected, overvoltage arresters s...
Page 21
21 5 connecting to power supply vegabar 82 • 4 … 20 ma 45027-en-131010 this can lead to unacceptably high shield currents if the cable shield is grounded at both ends. Information: themetallicpartsoftheinstrument(processfitting,transmitter,con- centric tube, etc.) are conductively connected with the...
Page 22
22 5 connecting to power supply vegabar 82 • 4 … 20 ma 45027-en-131010 information: solidcoresaswellasflexiblecoreswithwireendsleevesareinsert- eddirectlyintotheterminalopenings.Incaseofflexiblecoreswithout end sleeves, press the terminal from above with a small screwdriver; the terminal opening is ...
Page 23
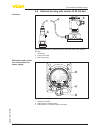
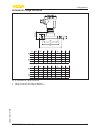
23 5 connecting to power supply vegabar 82 • 4 … 20 ma 45027-en-131010 5.5 external housing with version ip 68 (25 bar) 1 2 3 fig. 21: vegabar 82 in ip 68 version 25 bar with axial cable outlet, external housing 1 transmitter 2 connection cable 3 external housing 1 2 3 5 1 2 ( ) + (-) 6 7 8 4...20ma...
Page 24
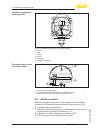
24 5 connecting to power supply vegabar 82 • 4 … 20 ma 45027-en-131010 1 2 3 4 6 3 4 1 2 5 fig. 23: connection of the sensor in the housing base 1 brown 2 blue 3 yellow 4 white 5 shielding 6 breather capillaries 1 2 + ( ) (-) 4...20ma 2 3 1 fig. 24: electronics and connection compartment, single cha...
Page 25
25 5 connecting to power supply vegabar 82 • 4 … 20 ma 45027-en-131010 then the actual measured value is outputted to the signal cable. The value takes already carried out settings, e.G. Default setting into ac- count..
Page 26: Module
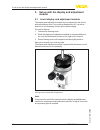
26 6 set up with the display and adjustment module vegabar 82 • 4 … 20 ma 45027-en-131010 6 set up with the display and adjustment module 6.1 insert display and adjustment module the display and adjustment module can be inserted into the sensor and removed any time. Four positions displaced by 90° c...
Page 27
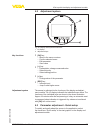
27 6 set up with the display and adjustment module vegabar 82 • 4 … 20 ma 45027-en-131010 6.2 adjustment system 1 2 fig. 26: display and adjustment elements 1 lc display 2 adjustment keys • [ok] key: – move to the menu overview – confirmselectedmenu – edit parameter – save value • [->] key: – presen...
Page 28
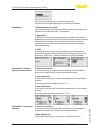
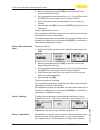
28 6 set up with the display and adjustment module vegabar 82 • 4 … 20 ma 45027-en-131010 carry out the following steps in the below sequence. Youcanfind"extended adjustment" in the next sub-chapter. 1. Measurement loop name inthefirstmenuitemyouassignasuitablemeasurementloopname. Permitted are name...
Page 29
29 6 set up with the display and adjustment module vegabar 82 • 4 … 20 ma 45027-en-131010 enter the percentage value and the corresponding value for the max. Level. 6. Min. Adjustment in this menu item you carry out the min. Adjustment for level enter the percentage value and the corresponding value...
Page 30
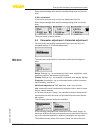
30 6 set up with the display and adjustment module vegabar 82 • 4 … 20 ma 45027-en-131010 plete menus "display", "diagnosis", "additional settings" and "info" are described in the operating instructions of the master sensor. In the menu item "sensor tag" you edit a twelve digit measurement loop desi...
Page 31
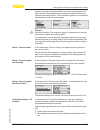
31 6 set up with the display and adjustment module vegabar 82 • 4 … 20 ma 45027-en-131010 unit of measurement: if the level should be adjusted in a height unit, the density of the me- dium must also be entered later during the adjustment. Inaddition,thetemperatureunitoftheinstrumentisspecified.These...
Page 32
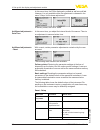
32 6 set up with the display and adjustment module vegabar 82 • 4 … 20 ma 45027-en-131010 vegabar 82 always measures pressure independently of the pro- cess variable selected in the menu item "application". To output the selected process variable correctly, an allocation to 0 % and 100 % of the outp...
Page 33
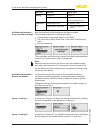
33 6 set up with the display and adjustment module vegabar 82 • 4 … 20 ma 45027-en-131010 3. Set the requested mbar value with [+] and store with [ok]. 4. Move with [esc] and [->] to the span adjustment thezeroadjustmentisfinished. Information: thezeroadjustmentshiftsthevalueofthespanadjustment.The ...
Page 34
34 6 set up with the display and adjustment module vegabar 82 • 4 … 20 ma 45027-en-131010 2. Edit the percentage value with [ok] and set the cursor to the requested position with [->]. 3. Set the requested percentage value (e.G. 10 %) with [+] and save with [ok]. The cursor jumps now to the pressure...
Page 35
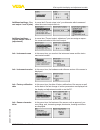
35 6 set up with the display and adjustment module vegabar 82 • 4 … 20 ma 45027-en-131010 required.Correspondinglinearizationcurvesarepreprogrammedfor these vessels. They represent the correlation between the level per- centageandvesselvolume.Thelinearizationappliestothemeasured value indication and...
Page 36
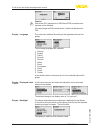
36 6 set up with the display and adjustment module vegabar 82 • 4 … 20 ma 45027-en-131010 caution: with active pin, adjustment via pactware/dtm as well as other systems is also blocked. You can change the pin number under "additional adjustments - pin". This menu item enables the setting of the requ...
Page 37
37 6 set up with the display and adjustment module vegabar 82 • 4 … 20 ma 45027-en-131010 in this menu item, the device status is displayed. The respective min. And max. Measured value is saved in the sensor. The two values are displayed in the menu item "peak values, pres- sure". In another window ...
Page 38
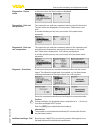
38 6 set up with the display and adjustment module vegabar 82 • 4 … 20 ma 45027-en-131010 inthismenuitem,thepinisdisplayedoreditedaswellasmodified. However, it is only available when the adjustment is released in the menu "setup/ lock/release adjustment ". In delivery status, the pin is "0000". In t...
Page 39
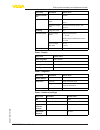
39 6 set up with the display and adjustment module vegabar 82 • 4 … 20 ma 45027-en-131010 menu item parameter default value position correc- tion 0.00 bar adjustment zero/min. Adjust- ment 0.00 bar 0.00 % span/max. Adjust- ment nominal measuring range in bar 100.00 % damping integration time 0.0 s c...
Page 40
40 6 set up with the display and adjustment module vegabar 82 • 4 … 20 ma 45027-en-131010 menu item parameter default value scaling scalingsize volume in l scaling format 0 % corresponds to 0 l 100 % corresponds to 0 l current out- put currentoutput-size lin. Percent - level current output - adjustm...
Page 41
41 6 set up with the display and adjustment module vegabar 82 • 4 … 20 ma 45027-en-131010 in menu item"current output, size" you determine which measured value the current output refers to. In menu item "current output, adjustment" you can assign a respec- tive measured value to the current output. ...
Page 42
42 6 set up with the display and adjustment module vegabar 82 • 4 … 20 ma 45027-en-131010 6.5 saving the parameter adjustment data we recommended noting the adjusted data, e.G. In this operating instructions manual, and archiving them afterwards. They are thus available for multiple use or service p...
Page 43: 7 Setup With Pactware
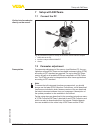
43 7 setup with pactware vegabar 82 • 4 … 20 ma 45027-en-131010 7 setup with pactware 7.1 connect the pc 3 1 2 fig. 28: connection of the pc directly to the sensor via the interface adapter 1 usb cable to the pc 2 interface adapter vegaconnect 3 sensor 7.2 parameter adjustment for parameter adjustme...
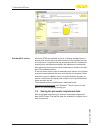
Page 44
44 7 setup with pactware vegabar 82 • 4 … 20 ma 45027-en-131010 fig. 29: example of a dtm view all device dtms are available as a free-of-charge standard version and as a full version that must be purchased. In the standard version, all functions for complete setup are already included. An assistant...
Page 45
45 8 diagnosis, asset management and service vegabar 82 • 4 … 20 ma 45027-en-131010 8 diagnosis, asset management and service 8.1 maintenance if the instrument is used properly, no special maintenance is required in normal operation. Insomeapplications,productbuilduponthediaphragmcaninfluence the me...
Page 46
46 8 diagnosis, asset management and service vegabar 82 • 4 … 20 ma 45027-en-131010 the following tables there are more detailed error messages available under the menu item "diagnostics" via the display and adjustment module, pactware/dtm and edd. The status messages are divided into the following ...
Page 47
47 8 diagnosis, asset management and service vegabar 82 • 4 … 20 ma 45027-en-131010 code text mes- sage cause rectification f013 no measured value avail- able – no valid measured value available – gauge pressure or low pressure, measuring cell defective f017 adjustment span too small – adjustment no...
Page 48
48 8 diagnosis, asset management and service vegabar 82 • 4 … 20 ma 45027-en-131010 code text mes- sage cause rectification f265 measurement function dis- turbed – sensor no longer carries out a measurement – carry out a reset – separate operating voltage briefly f266 impermissi- ble operating volta...
Page 49
49 8 diagnosis, asset management and service vegabar 82 • 4 … 20 ma 45027-en-131010 code text mes- sage cause rectification m501 error in the non-active linearization table – index markers are not con- tinuously rising, for examle unlogical value pairs – checklinearizationtable – delete table/create...
Page 50
50 8 diagnosis, asset management and service vegabar 82 • 4 … 20 ma 45027-en-131010 error cause rectification 4 … 20 ma signal missing – electrical con- nection faulty – check connection according to chapter "connection steps" and if necessary, correct according to chapter "wiring plan" – voltage su...
Page 51
51 8 diagnosis, asset management and service vegabar 82 • 4 … 20 ma 45027-en-131010 • f t :thermalchangeofzerosignalandoutputspan • f kl : deviation • f a : thermal change of the current output youcanfindthespecificationsinchapter"technical data". Pressure measurement in the pipeline 8 bar (800 kpa)...
Page 52
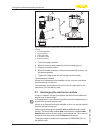
52 8 diagnosis, asset management and service vegabar 82 • 4 … 20 ma 45027-en-131010 1 2 5 3 4 fig. 31: vegabar 82 in ip 68 version, 25 bar and lateral cable outlet, external housing 1 process assembly 2 plug connector 3 cable assembly 4 connection cable 5 external housing 3. Loosen the plug connecto...
Page 53
53 8 diagnosis, asset management and service vegabar 82 • 4 … 20 ma 45027-en-131010 youcanfinddetailedinformationontheelectronicsexchangeinthe booklet "operating instructions for electronics module vegabar series 80". 8.8 software update the following components are required to update the sensor sof...
Page 54: 9 Dismounting
54 9 dismounting vegabar 82 • 4 … 20 ma 45027-en-131010 9 dismounting 9.1 dismounting steps warning: before dismounting, be aware of dangerous process conditions such as e.G. Pressure in the vessel or pipeline, high temperatures, cor- rosive or toxic products etc. Take note of chapters "mounting" an...
Page 55: 10 Supplement
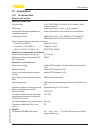
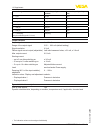
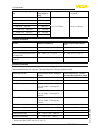
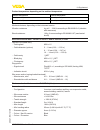
55 10 supplement vegabar 82 • 4 … 20 ma 45027-en-131010 10 supplement 10.1 technical data materials and weights materials, wetted parts processfitting 316l, pvdf, alloy c-22, alloy c-276, duplex 1.4462, titanium grade 2 diaphragm sapphire-ceramic ® (> 99.9 % al 2 o 3 ceramic) joining material diaphr...
Page 56
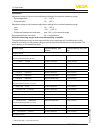
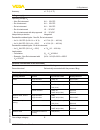
56 10 supplement vegabar 82 • 4 … 20 ma 45027-en-131010 input variable adjustment adjustment range of the min./max. Adjustment relating to the nominal measuring range: Ʋ percentage value -10 … 110 % Ʋ pressure value -20 … 120 % adjustmentrangeofthezero/spanadjustmentrelatingtothenominalmeasuringrang...
Page 57
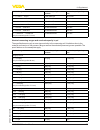
57 10 supplement vegabar 82 • 4 … 20 ma 45027-en-131010 nominal range overload capacity, max. Pressure overload capacity, min. Pres- sure 0 … 0.1 bar/0 … 10 kpa 15 bar/1500 kpa 0.8 bar abs. 0 … 1 bar/0 … 100 kpa 35 bar/3500 kpa 0 bar abs. 0 … 2.5 bar/0 … 250 kpa 50 bar/5000 kpa 0 bar abs. 0 … 10 bar...
Page 58
58 10 supplement vegabar 82 • 4 … 20 ma 45027-en-131010 nominal range overload capacity, max. Pressure overload capacity, min. Pres- sure 0 … 5 psi 435 psi 0 psi 0 … 15 psi 510 psi 0 psi 0 … 30 psi 725 psi 0 psi 0 … 150 psi 1300 psi 0 psi 0 … 300 psi 1900 psi 0 psi 0 … 900 psi 2900 psi 0 psi 0 … +14...
Page 59
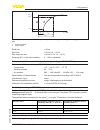
59 10 supplement vegabar 82 • 4 … 20 ma 45027-en-131010 90 % 100 % 10 % t t t a t t s 2 1 fig. 32: behaviour in case of sudden change of the process variable. T t : dead time; t a : rise time; t s : jump response time 1 process variable 2 output signal dead time > 45 ms rise time > 35 ms (10 … 90 %)...
Page 60
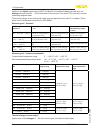
60 10 supplement vegabar 82 • 4 … 20 ma 45027-en-131010 applies to the digitalsignaloutput(hart,profibuspa,foundationfieldbus)aswellastothe analogue current output 4 … 20 ma and refers to the set span. Turn down (td) is the ratio nominal measuring range/set span. Thethermalchangeofzerosignalandoutpu...
Page 61
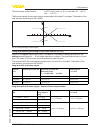
61 10 supplement vegabar 82 • 4 … 20 ma 45027-en-131010 thermal change, current output (-40 … +176 °f) the thermal change of the current output corresponds to the value f a in chapter "calculation of the total deviation (according to din 16086)". 0,15 % -0,15 % -40°c -20°c 20°c 40°c 60°c 80°c fig. 3...
Page 62
62 10 supplement vegabar 82 • 4 … 20 ma 45027-en-131010 nominal measuring range in bar/ kpa nominal meas- uring range in psig measuring cell ø 28 mm measuring cell ø 17.5 mm 0 … 10 bar/0 … 1000 kpa 0 … 150 psig 0 … 25 bar/0 … 2500 kpa 0 … 350 psig 0 … 60 bar/0 … 6000 kpa 0 … 900 psig 0 … 100 bar/0 …...
Page 63
63 10 supplement vegabar 82 • 4 … 20 ma 45027-en-131010 product temperature depending on the ambient temperature ambient temperature product temperature +50 °c (+122 °f) +150 °c (+302 °f) +80 °c (+176 °f) +100 °c (+212 °f) mechanical stress, depending on the instrument version vibration resistance 4...
Page 64
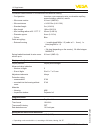
64 10 supplement vegabar 82 • 4 … 20 ma 45027-en-131010 electromechanical data - version ip 68 (25 bar) connection cable between ip 68 instrument and external housing Ʋ configuration four wires, one suspension wire, one breather capillary, screen braiding, metal foil, mantle Ʋ wire cross-section 0.5...
Page 65
65 10 supplement vegabar 82 • 4 … 20 ma 45027-en-131010 accuracy ±1 °c (1.8 °f) voltage supply operating voltage u b Ʋ non-ex instrument 9.6 … 35 v dc Ʋ ex-d instrument 9.6 … 35 v dc Ʋ ex-ia instrument 9.6 … 30 v dc Ʋ ex-d-ia instrument 15 … 35 v dc Ʋ ex-d-ia instrument with ship approval 15 … 35 v ...
Page 66
66 10 supplement vegabar 82 • 4 … 20 ma 45027-en-131010 protection class ii approvals instrumentswithapprovalscanhavedifferenttechnicaldatadependingontheversion. For that reason the associated approval documents of these instruments must be carefully noted. They are part of the delivery or can be do...
Page 67
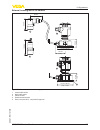
67 10 supplement vegabar 82 • 4 … 20 ma 45027-en-131010 external housing with ip 68 version 1 2 3 4 5 82 mm (3.23") 80 mm (3.15" ) 108 mm (4.25") 41,6 mm (1.64") ~ 66 mm (2.60") 59 mm (2.32" ) 110 mm x 90 mm (4.33" x 3.54") 110 mm x 90 mm (4.33" x 3.54") 51 mm (2.01" ) 41,6 mm (1.64") fig. 35: ip 68...
Page 68
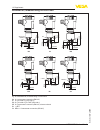
68 10 supplement vegabar 82 • 4 … 20 ma 45027-en-131010 vegabar82,threadedfittingnotfront-flush dd dl du c2 dq di g½ g¼ g½ g¼ sw 27 mm (1.06") g½ 23 mm (0.91 ") 73 mm (2.87 ") 70 mm (2.76 ") 17 mm (0.67 ") 85 mm (3.35 ") 17 mm (0.67 ") 3 mm (0.12" ) 20 mm (0.79 ") 3 mm (0.12 ") 20 mm (0.79 ") 2 mm (...
Page 69
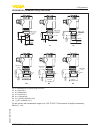
69 10 supplement vegabar 82 • 4 … 20 ma 45027-en-131010 vegabar82,threadedfittingfront-flush c1 c3 22 mm (0.87" ) 44 mm (1.73" ) ø 24 mm (0.95") ø 27 mm (1.06") 21 mm (0.83" ) 45 mm (1.77" ) ø 18 mm (0.71") sw 36 mm (1.42") g¾ sw 27 mm (1.06") g½ c5 44 mm (1.73" ) 21 mm (0.83" ) ø 40 mm (1.58") ø 30...
Page 70
70 10 supplement vegabar 82 • 4 … 20 ma 45027-en-131010 vegabar82,hygienicfitting ar aa es fr ez/e1 e3 50 mm (1.97") 51 mm (2.01" ) 51 mm (2.01" ) ø 78 mm (3.07") ø 92 mm (3.62") ø 92 mm (3.62") ø 84 mm (3.31") ø 48 mm (1.89") sw 46 mm (1.81") 51 mm (2.01" ) 60 mm (2.36" ) ø 64 mm (2.52 ") ø 78 mm (...
Page 71
71 10 supplement vegabar 82 • 4 … 20 ma 45027-en-131010 vegabar82,flangeconnection 3.46" 4.02" 5.43" 0.12" 0.12" 0.12" 4xø 0.71" 4xø 0.71" 8xø 0.71" 4.33" 4.92" 6.30" 5.91" 6.50" 7.87" 0.71" 0.79" 0.95" 5” 0.13" 8xø 0.75" 6" 0.94" 7.5" dn mm pn d k b a8 40 40 150 18 110 b2 50 40 165 20 125 d2 4xø18 ...
Page 72
72 10 supplement vegabar 82 • 4 … 20 ma 45027-en-131010 vegabar82,extensionfitting f1 f2 af/ag f9 ø 32...60 mm (1.26...2.36") ø 48...90 mm (1.89...3.54") 30...300 mm (1.18...11.81" ) 40 mm (1.58" ) 25...300 mm (0.98...11.81" ) 40 mm (1.58" ) m 44 x 1,25 sw 46 mm (1.81") 21 mm (0.83" ) 52 mm (2.05" )...
Page 73
73 10 supplement vegabar 82 • 4 … 20 ma 45027-en-131010 10.3 industrial property rights vega product lines are global protected by industrial property rights. Further information see www.Vega.Com. Only in u.S.A.: further information see patent label at the sensor housing. Vega produktfamilien sind w...
Page 74: Index
74 index vegabar 82 • 4 … 20 ma 45027-en-131010 index a adjust date/time 38 adjustment – level 33, 34 – menu 29 – process pressure 32, 33 – system 27 – unit 30 adjust the current output 35, 41 adjust the indication 36 c change the language 36 check output signal 49 connecting – mechanically 13 – to ...
Page 75
75 notes vegabar 82 • 4 … 20 ma 45027-en-131010
Page 76
Printing date: vega grieshaber kg am hohenstein 113 77761 schiltach germany 45027-en-131010 all statements concerning scope of delivery, application, practical use and operat- ing conditions of the sensors and processing systems correspond to the information available at the time of printing. Subjec...

