- DL manuals
- Vega
- Measuring Instruments
- VEGAPULS 66
- Operating Instructions Manual
Vega VEGAPULS 66 Operating Instructions Manual
Summary of VEGAPULS 66
Page 1
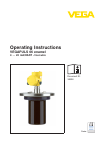
Operating instructions vegapuls 66 enamel 4 … 20 ma/hart - four-wire document id: 36528 radar.
Page 2: Contents
Contents 1 about this document 1.1 function. . . . . . . . . . . . . . . . . . . . . . . . . . . . . . . . . . 4 1.2 target group . . . . . . . . . . . . . . . . . . . . . . . . . . . . . . 4 1.3 symbolism used. . . . . . . . . . . . . . . . . . . . . . . . . . . . 4 2 for your safety 2.1 authorised...
Page 3
9 diagnosis, asset management and service 9.1 maintaining . . . . . . . . . . . . . . . . . . . . . . . . . . . . . . . 49 9.2 measured value and event memory . . . . . . . . . . . . . . 49 9.3 asset management function . . . . . . . . . . . . . . . . . . . 50 9.4 remove interferences . . . . . . . ...
Page 4: About This Document
1 about this document 1 .1 function this operating instructions manual provides all the information you need for mounting, connection and setup as well as important instructions for maintenance and fault rectification. Please read this information before putting the instrument into operation and keep...
Page 5: For Your Safety
2 for your safety 2 .1 authorised personnel all operations described in this operating instructions manual must be carried out only by trained specialist personnel authorised by the plant operator. During work on and with the device the required personal protective equipment must always be worn. 2 ....
Page 6: .5 Ce Conformity
Depending on the instrument version, the emitting frequencies are in the c or k band range. The low emitting frequencies are far below the internationally approved limit values. When used correctly, there is no danger to health. 2 .5 ce conformity the device fulfills the legal requirements of the app...
Page 7
Modifications not expressly approved by the manufacturer will lead to expiry of the operating licence according to fcc/ic. The instrument is in conformity with rss-210 of the ic regulations. The instrument may only be operated in closed vessels made of metal, concrete, or fibre-reinforced plastic. 2 ....
Page 8: Product Description
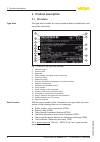
3 product description 3 .1 structure the type label contains the most important data for identification and use of the instrument: 2 1 13 14 15 16 12 11 5 3 6 4 7 8 9 10 fig. 1: structure of the type label (example) 1 instrument type 2 product code 3 approvals 4 power supply and signal output, electr...
Page 9: .2 Principle Of Operation
This operating instructions manual applies to the following instrument versions: l hardware from 2.1.1 l software from 4.4.0 the scope of delivery encompasses: l radar sensor l documentation - this operating instructions manual - test certificate measuring accuracy, depending on the instrument vegapu...
Page 10
Transport must be carried out under consideration of the notes on the transport packaging. Nonobservance of these instructions can cause damage to the device. The delivery must be checked for completeness and possible transit damage immediately at receipt. Ascertained transit damage or concealed def...
Page 11
Vegadis 62 is suitable for measured value indication and adjustment of sensors with hart protocol. It is looped into the 4 … 20 ma/hart signal cable. You can find further information in the operating instructions "vegadis 62" (document-id 36469). The plicsmobile t61 is an external gsm/gprs radio unit...
Page 12: Mounting
4 mounting 4 .1 general instructions with instruments with threaded process fitting, suitable tools must be applied for tightening the hexagon. Warning: the housing must not be used to screw the instrument in! Applying tightening force can damage internal parts of the housing. Use the recommended cab...
Page 13
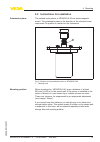
4 .2 instructions for installation the emitted radar pulses of vegapuls 66 are electromagnetic waves. The polarisation plane is the direction of the electrical wave component. Its position is marked on the instrument. 1 fig. 2: position of the polarisation plane of vegapuls 66 1 marking hole when mo...
Page 14
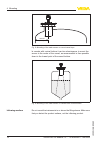
> 500 mm (19.69") fig. 3: mounting of the radar sensor on round vessel tops in vessels with conical bottom it can be advantageous to mount the sensor in the center of the vessel, as measurement is then possible down to the lowest point of the vessel bottom. Fig. 4: mounting of the radar sensor on ve...
Page 15
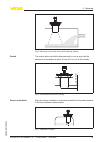
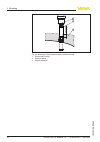
Fig. 5: mounting of the radar sensor with inflowing medium the socket piece should be dimensioned in such a way that the antenna end protrudes at least 10 mm (0.4 in) out of the socket. Ca . 1 0 mm fig. 6: recommended socket mounting align the sensor in liquids as vertical as possible to the product ...
Page 16
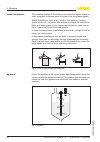
The mounting location of the radar sensor should be a place where no other equipment or fixtures cross the path of the microwave signals. Vessel installations, such as e.G. Ladders, limit switches, heating spirals, struts, etc., can cause false echoes and impair the useful echo. Make sure when planni...
Page 17
Through the action of filling, stirring and other processes in the vessel, dense foams which considerably damp the emitted signals may form on the product surface. If foams are causing measurement errors, the biggest possible radar antenna should be used. As an alternative, sensors with guided microw...
Page 18
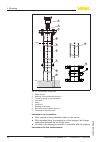
0% 100% 4 5 5 6 7 8 10 1 2 3 8 fig. 10: configuration surge pipe 1 radar sensor 2 marking of the polarisation direction 3 thread or flange on the instrument 4 vent hole 5 holes 6 weld joint 7 welding neck flange 8 ball valve with complete opening 9 fastening of the surge pipe instructions for orientati...
Page 19
L the 100 % point must be below the upper vent hole and the antenna edge l the 0 % point is the end of the surge pipe l the tube diameter must be at least dn 40 or 1½" with antenna size 40 mm (1½") l for the parameter adjustment, select "application standpipe" and enter the tube diameter to compensa...
Page 20
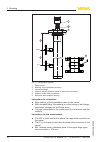
0 % 100 % 1 2 5 4 3 6 fig. 11: configuration bypass 1 radar sensor 2 marking of the polarisation direction 3 instrument flange 4 distance sensor reference plane to upper tube connection 5 distance of the tube connections 6 ball valve with complete opening instructions for orientation: l note marking o...
Page 21
L the tube diameter must be at least dn 40 or 1½" with antenna size 40 mm (1½") l for the parameter adjustment, select "application standpipe" and enter the tube diameter to compensate errors due to running time shift l a false signal suppression with integrated sensor is recommended but not mandato...
Page 22
Ma x. 5 0 mm (1 .9 7 ") 1 2 3 fig. 12: mounting of the instrument with insulated vessels. 1 electronics housing 2 distance piece 3 vessel insulation 22 vegapuls 66 enamel • 4 … 20 ma/hart - four-wire 4 mounting 36528 -en -120301.
Page 23
5 connecting to power supply 5 .1 preparing the connection always keep in mind the following safety instructions: l connect only in the complete absence of line voltage l if voltage surges are expected, install overvoltage arresters in this case, the instrument is designed in protection class ii. To...
Page 24: .2 Connect
If potential equalisation currents are expected, the connection on the processing side must be made via a ceramic capacitor (e. G. 1 nf, 1500 v). The low frequency potential equalisation currents are thus suppressed, but the protective effect against high frequency interfer- ence signals remains. War...
Page 25
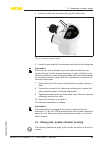
5 insert the cable into the sensor through the cable entry fig. 13: connection steps 5 and 6 6 insert the wire ends into the terminals according to the wiring plan information: solid cores as well as flexible cores with cable end sleeves are inserted directly into the terminal openings. In case of fle...
Page 26
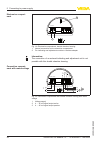
5 6 7 8 4...20ma 2 1 2 + ( ) (-) 1 fig. 14: electronics compartment, double chamber housing 1 internal connection to the connection compartment 2 for indicating and adjustment module or interface adapter information: the connection of an external indicating and adjustment unit is not possible with t...
Page 27: .4 Switch-On Phase
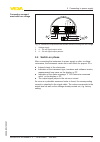
1 3 2 power supply 4...20ma act ive pass iv e common is gn d 5 1 /l /n 2 + ( ) (-) 6 7 8 fig. 16: connection compartment with double chamber housing with low voltage 1 voltage supply 2 4 … 20 ma signal output active 3 4 … 20 ma signal output passive 5 .4 switch-on phase after connecting the instrume...
Page 28: Module
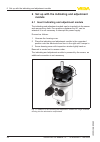
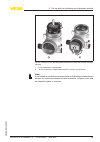
6 set up with the indicating and adjustment module 6 .1 insert indicating and adjustment module the indicating and adjustment module can be inserted into the sensor and removed any time. Four positions displaced by 90° can be selected. It is not necessary to interrupt the power supply. Proceed as fo...
Page 29
1 2 fig. 18: insertion of the indicating and adjustment module with double chamber housing 1 in the electronics compartment 2 in the connection compartment (with ex d version not possible) note: if you intend to retrofit the instrument with an indicating and adjustment module for continuous measured ...
Page 30: .2 Adjustment System
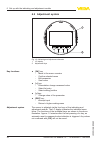
6 .2 adjustment system 1 2 fig. 19: indicating and adjustment elements 1 lc display 2 adjustment keys l [ok] key: - move to the menu overview - confirm selected menu - edit parameter - save value l [->] key: - presentation change measured value - select list entry - select editing position l [+] key:...
Page 31: .3 Parameter Adjustment
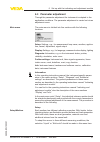
6 .3 parameter adjustment through the parameter adjustment the instrument is adapted to the application conditions. The parameter adjustment is carried out via an adjustment menu. The main menu is divided into five sections with the following functions: setup: settings, e.G., for measurement loop nam...
Page 32
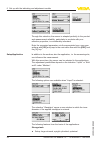
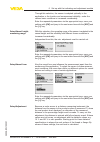
Through this selection, the sensor is adapted perfectly to the product and measurement reliability, particularly in products with poor reflective properties, is considerably increased. Enter the requested parameters via the appropriate keys, save your settings with [ok] and jump to the next menu item...
Page 33
L product speed: slow filling and emptying l process/measurement conditions: - condensation - smooth product surface - max. Requirement to the measurement accuracy storage tanke with product circulation: l setup: large-volumed, upright cylindrical, spherical l product speed: slow filling and emptying ...
Page 34
Standpipe: l product speed: very fast filling and emptying l vessel: - vent hole - joins like flanges, weld joints - shifting of the running time in the tube l process/measurement conditions: - condensation - buildup bypass: l product speed: - fast up to slow filling with short up to long bypass tube p...
Page 35
- ice and condensation on the antenna possible - spiders and insect nestle in the antennas - floating material and animals sporadically on the water surface open flume (flow measurement): l gauge rate of change: slow gauge change l process/measurement conditions: - ice and condensation on the antenna ...
Page 36
L vessel of metal: weld joints l process/measurement conditions: - filling too close to the sensor - system noise with completely empty silo increased - automatic false signal suppression with partly filled vessel bunker (large-volumed): l vessel of concrete or metal: - structured vessel walls - inst...
Page 37
Through this selection, the sensor is adapted optimally to the application or the location and measurement reliability under the various basic conditions is increased considerably. Enter the requested parameters via the appropriate keys, save your settings with [ok] and jump to the next menu item wi...
Page 38
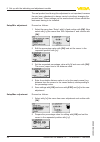
The real product level during this adjustment is not important, because the min./max. Adjustment is always carried out without changing the product level. These settings can be made ahead of time without the instrument having to be installed. Proceed as follows: 1 select the menu item "setup" with [...
Page 39
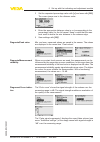
3 set the requested percentage value with [+] and save with [ok]. The cursor jumps now to the distance value. 4 enter the appropriate distance value in m (corresponding to the percentage value) for the full vessel. Keep in mind that the max. Level must lie below the min. Distance to the antenna edge...
Page 40
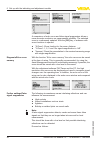
A comparison of echo curve and false signal suppression allows a more accurate conclusion on measurement reliability. The selected curve is continuously updated. With the [ok] key, a submenu with zoom functions is opened: l " x-zoom": zoom function for the meas. Distance l " y-zoom": 1, 2, 5 and 10x...
Page 41
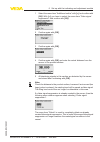
1 select the menu item "additional settins" with [->] and confirm with [ok] . With [->] you have to select the menu item "false signal suppression" and confirm with [ok]. 2 confirm again with [ok]. 3 confirm again with [ok]. 4 confirm again with [ok] and enter the actual distance from the sensor to the p...
Page 42
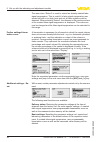
The menu item "extend" is used to extend an already created false signal suppression. This is useful if a false signal suppression was carried out with a too high level and not all false signals could be detected. When selecting "extend", the distance to the product surface of the created false sign...
Page 43
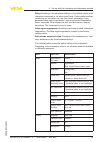
Setup: resetting of the parameter settings to the default values of the respective instrument in the menu item setup. Order-related settings remain but are not taken over into the current parameters. User- generated false signal suppression, user-programmed linearization curve, measured value memory...
Page 44
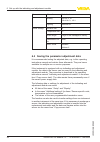
Menu menu item default value scaling 0.00 lin %, 0 l 100.00 lin %, 100 l lighting switched off further settings distance unit m temperature unit ° c probe length length of the standpipe ex factory linearisation cur- ve linear hart mode standard address 0 6 .4 saving the parameter adjustment data it i...
Page 45: Setup With Pactware
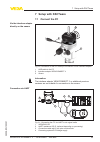
7 setup with pactware 7 .1 connect the pc 3 1 2 fig. 20: connection of the pc directly to the sensor via the interface adapter 1 usb cable to the pc 2 interface adapter vegaconnect 4 3 sensor information: the interface adapter vegaconnect 3 or additional previous versions are not suitable for connec...
Page 46
Necessary components: l vegapuls 66 l pc with pactware and suitable vega dtm l vegaconnect 4 l hart resistance approx. 250 Ω l power supply unit or processing system note: with power supply units with integrated hart resistance (internal resistance approx. 250 Ω), an additional external resistance i...
Page 47
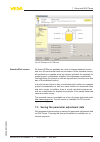
Fig. 22: example of a dtm view all device dtms are available as a free-of-charge standard version and as a full version that must be purchased. In the standard version, all functions for complete setup are already included. An assistant for simple project configuration simplifies the adjustment consid...
Page 48: .1 Dd Adjustment Programs
8 set up with other systems 8 .1 dd adjustment programs device descriptions as enhanced device description (edd) are available for dd adjustment programs such as, for example, ams™ and pdm. A free-of-charge download of these files is available via internet. Move via www.Vega.Com and "downloads" to "s...
Page 49: .1 Maintaining
9 diagnosis, asset management and service 9 .1 maintaining if the device is used correctly, no maintenance is required in normal operation. 9 .2 measured value and event memory the instrument has several memories which are available for diagnosis purposes. The data remain even with voltage interrupt...
Page 50
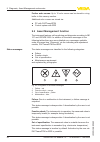
Further echo curves: up to 10 echo curves can be stored in a ring buffer in this memory section. Additional echo curves are stored via: l pc with pactware/dtm l control system with edd 9 .3 asset management function the instrument features self-monitoring and diagnosis according to ne 107 and vdi/vde...
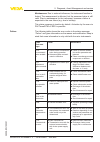
Page 51
Maintenance: due to external influences, the instrument function is limited. The measurement is affected, but the measured value is still valid. Plan in maintenance for the instrument because a failure is expected in the near future (e.G. Due to buildup). This status message is inactive by default. Ac...
Page 52
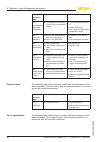
Code text mes- sage cause rectification f 125 unpermissible electronics temperature l temperature of the elect- ronics in the non-specified section l check ambient temperatu- re l isolate electronics l use instrument with higher temperature range f 260 error in the calibration l error in the calibrati...
Page 53
Code text mes- sage cause rectification s 600 unpermissible electronics temperature l temperature of the elect- ronics in the non-specified section l check ambient temperatu- re l isolate electronics l use instrument with higher temperature range s 601 overfilling l danger of vessel overfilling l make s...
Page 54: .4 Remove Interferences
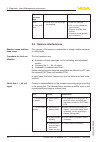
Code text mes- sage cause rectification m 505 no echo avai- lable l level echo can no longer be detected l clean the antenna l use a more suitable an- tenna/sensor l remove possible false echoes l optimize sensor position and orientation 9 .4 remove interferences the operator of the system is respons...
Page 55
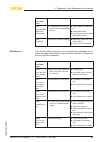
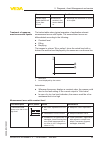
Error cause rectification current signal greater than 22 ma or less than 3.6 ma l electronics module in the sensor defecti- ve l exchange the instrument or send it in for repair the below tables show typical examples of application-relevant measurement errors with liquids. The measurement errors are ...
Page 56
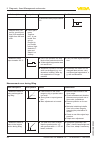
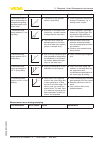
Fault description error pattern cause rectification 2. Measured value jumps towards 0 % level time 0 l multiple echo (ves- sel top, product sur- face) with amplitude higher than the level echo l check para- meter " applica- tion", in par- ticular ves- sel top, product ty- pe, dished bottom, high diel...
Page 57
Fault description error pattern cause rectification 6. Measured value re- mains momentarily un- changed during filling and then jumps to the correct level level time 0 l turbulence on the product surface, quick filling l check application parameters, change if necessary, e.G. In dosing vessel, reactor ...
Page 58
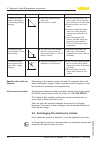
Fault description error pattern cause rectification 11. Measured value remains unchanged in the close range during emptying level time 0 l false echo larger than the level echo l level echo too small l remove false echoes in the close range. Check: antenna must protrude out of the socket l remove pol...
Page 59: .6 Software Update
If there is no electronics module available on site, the electronics module can be ordered through the agency serving you. The electronics modules are adapted to the respective sensor and differ in signal output or voltage supply. The new electronics module must be loaded with the default settings of...
Page 60
L select the sensor in the project with the right mouse key and go to "a dditional functions" l click to "software update", the window "sensor # software update" opens pactware now checks the sensor data and shows the actual hardware and software version of the sensor. This procedure lasts approx. 6...
Page 61: Dismounting
10 dismounting 10 .1 dismounting steps warning: before dismounting, be aware of dangerous process conditions such as e.G. Pressure in the vessel, high temperatures, corrosive or toxic products etc. Take note of chapters "mounting" and "connecting to power supply" and carry out the listed steps in re...
Page 62: Supplement
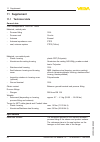
11 supplement 11 .1 technical data general data 316l corresponds to 1.4404 or 1.4435 materials, wetted parts - process fitting 316l - process seal on site - antenna enamel - antenna impedance cone ptfe - seal, antenna system ptfe (teflon) materials, non-wetted parts - plastic housing plastic pbt (poly...
Page 63
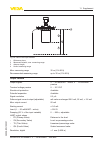
3 4 2 1 fig. 38: data of the input variable 1 reference plane 2 measured variable, max. Measuring range 3 antenna length 4 useful measuring range max. Measuring range 35 m (114.83 ft) recommended measuring range up to 35 m (114.83 ft) output variable output signals 4 … 20 ma/hart - active; 4 … 20 ma...
Page 64
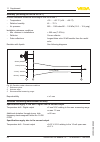
Accuracy (according to din en 60770-1) process reference conditions according to din en 61298-1 - temperature + 18 … +30 °c (+64 … +86 °f) - relative humidity 45 … 75 % - air pressure 860 … 1060 mbar/86 … 106 kpa (12.5 … 15.4 psig) installation reference conditions - min. Distance to installations >...
Page 65
Deviation on the current output by analogue/ digital conversion 15 µa deviation on the current output by strong, high frequency electromagnetic fields within en 61326 150 µa influence of the superimposed gas and pressure to the accuracy the propagation speed of the radar impulses in gas or vapour abov...
Page 66
- antenna ø 145 mm (dn 150) 20° - antenna ø 195 mm (dn 200) 17° emitted hf power (depending on the parameter adjustment) 3) - average spectral transmission power density -31 dbm/mhz eirp - max. Spectral transmission power den- sity + 24 dbm/50 mhz eirp - specific absorption rate (sar) 0.47 mw/kg ambi...
Page 67
2 reflux valves - enclosed unassembled (with non-ex optional, with ex included in the scope of delivery) - material 316ti - seal fkm (viton), ffkm (kalrez 6375) - for tube diameter 10 mm - opening pressure 0.5 bar (7.252 psi) - nominal pressure stage pn 250 electromechanical data - version ip 66/ip 6...
Page 68
- unassembled ip 20 - mounted into the sensor without cover ip 40 materials - housing abs - inspection window polyester foil integrated clock date format day.Month.Year time format 12 h/24 h time zone ex factory cet measurement electronics temerature resolution 1 °c (1.8 °f) accuracy ± 1 °c (1.8 °f)...
Page 69: .2 Dimensions
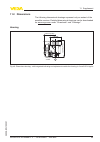
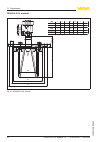
11 .2 dimensions the following dimensional drawings represent only an extract of the possible versions. Detailed dimensional drawings can be downloaded on www.Vega.Com under "d ownloads" and "drawings". Housing 1 ~ 87 mm (3.43") m16x1,5 ø 84 mm (3.31") 1 2 0 mm (4 .7 2 ") m20x1,5/ ½ npt fig. 40: dim...
Page 70
Vegapuls 66 , enamel d b k y d dn 150 pn 16 dn 200 pn 16 285 22 240 8xø22 340 24 295 12xø22 276 226 d1 d2 212 144 268 162 d b k y d dn 150 pn 16 dn 200 pn 16 d1 d2 mm inch 11.22" 13.39" 9.45" 11.61" 8.35" 10.55" 8.90" 10.87" 5.67" 6.38" 0.87" 0.95" 8x ø 0.87" 12x ø 0.87" 8 0 mm (3 .1 5 ") k d d1 d2 ...
Page 71: .4 Trademark
11 .3 industrial property rights vega product lines are global protected by industrial property rights. Further information see http://www.Vega.Com . Only in u.S.A.: further information see patent label at the sensor housing. Vega produktfamilien sind weltweit geschützt durch gewerbliche schutzrecht...
Page 72: Index
Index a accessory - external indicating and adjustment unit 10- 11 - external radio unit 11 - indicating and adjustment module 10 - interface adapter 10 - protective cap 11 adjustment 37 - max. Adjustment 38 - min. Adjustment 38 adjustment system 30 agitator 16 application - bulk solid 35 - liquid 3...
Page 73
V vessel form 37 vessel height 37 vessel installations 16 vessel insulation 21 voltage supply 23, 68 vegapuls 66 enamel • 4 … 20 ma/hart - four-wire 73 index 36528 -en -120301.
Page 74
74 vegapuls 66 enamel • 4 … 20 ma/hart - four-wire index 36528 -en -120301.
Page 75
Vegapuls 66 enamel • 4 … 20 ma/hart - four-wire 75 index 36528 -en -120301.
Page 76
Vega grieshaber kg am hohenstein 113 77761 schiltach germany phone +49 7836 50-0 fax +49 7836 50-201 e-mail: info.De@vega.Com www.Vega.Com printing date: iso 9001 all statements concerning scope of delivery, application, practical use and operating conditions of the sensors and processing systems co...

