- DL manuals
- Native Instruments
- Telephone
- Maschine
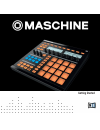
- Getting Started
Native Instruments Maschine Getting Started
Summary of Maschine
Page 1
Getting started.
Page 2
The information in this document is subject to change without notice and does not repre- sent a commitment on the part of native instruments gmbh. The software described by this document is subject to a license agreement and may not be copied to other media. No part of this publication may be copied...
Page 3
Germany native instruments gmbh schlesische str. 29-30 d-10997 berlin germany www.Native-instruments.De usa native instruments north america, inc. 6725 sunset boulevard 5th floor los angeles, ca 90028 usa www.Native-instruments.Com © native instruments gmbh, 2011. All rights reserved. Contact.
Page 4
Table of contents 1 welcome to maschine! ............................................................................................8 1.1 the maschine documentation ................................................................................................... 9 1.1.1 manual conventions ..........
Page 5
4.2 selecting sounds and creating a group ..................................................................................... 41 4.3 creating patterns ....................................................................................................................... 42 4.3.1 adjusting quantiza...
Page 6
5.6 automating effects and sampler parameters ............................................................................. 70 6 the input module and advanced routing ....................................................................72 6.1 applying an effect to an external audio source ..............
Page 7
10.5 use note repeat ......................................................................................................................... 102 10.6 set up your own multi-effect groups ........................................................................................... 102 10.7 use a limit...
Page 8
1 welcome to maschine! Thank you for buying maschine! Maschine is essentially the synergy of the maschine controller hardware and the ma- schine software combining the advantages of both worlds for making music, live as well as in the studio. The intuitive, hands-on qualities of a dedicated instrume...
Page 9
1.1 the maschine documentation 1.1.1 manual conventions this section introduces you to the signage and text highlighting used in this manual. This manual uses particular formatting to point out special facts and to warn you of potential issues. The icons introducing these notes let you see what kind...
Page 10
1.1.2 where to start? Maschine provides you with many information sources. The main sources are meant to be read in the following sequence: 1. Maschine setup guide 2. Maschine getting started guide (this document) and online video tutorials 3. Maschine reference manual 4. Maschine hardware control r...
Page 11
Video tutorials the native instruments website provides you with a lot of video tutorials that give you a hands-on approach to many sides of the maschine workflow. To see them, point your fa- vorite browser to following url: http://native-instruments.Com/maschinemedia. Controller editor reference ma...
Page 12
▪ chapter 9 provides an overview of how to efficiently manage maschine project, by saving different elements independently so you can easily use and find them in other projects. ▪ chapter 10 provides some hands-on tips for producing music with maschine as well as for performing live. Welcome to masc...
Page 13
2 overview this mini-chapter will quickly introduce you to the main areas and concepts of ma- schine, both on your maschine hardware controller and in the maschine software. By now you should have read the printed setup guide included in the product box and will have setup maschine by making the nec...
Page 14
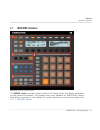
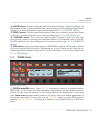
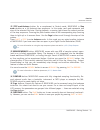
2.1 maschine hardware maschine hardware controller overview (1) control section: provides instant access to all sound, group and master parameters via the knobs and encoders. The displays offer visual feedback on maschine's current state which is mirrored in the software. For more information on thi...
Page 15
(2) master section: contains dedicated knobs that control volume, tempo and swing. The note repeat button is also positioned here, ready to help with the creative process of mak- ing beats. For more information on this section please view ↑ 2.1.2, master section . (3) groups section: the dedicated g...
Page 16
(2) step mode/instance button: as a complement to control mode, maschine in step mode doubles as a full-featured step sequencer. In this mode, each pad represents one step of the selected grid size. During playback, a running light shows the current position of the step sequencer. Pressing the pads ...
Page 17
(7) auto write button: in maschine, automation of almost any parameter on the sound and group level is achieved with one-touch simplicity. Press and hold this button while turning any of the eight knobs (or any combination) to record automation for the corre- sponding parameter(s). (8) buttons 1-8: ...
Page 18
2.1.3 groups section group section overview (1) group buttons: press the one of the eight dedicated group buttons to select the group you want to work in. These buttons are also used to solo and mute groups on the fly when solo or mute buttons are pressed — great for jamming out your project and per...
Page 19
(4) grid button: select grid sizes for quantization when recording single events, for chang- ing pattern lengths or switching scenes. Turn the grid off completely for a direct groove without quantization. (5) play button: press the play button to activate playback. Press play a second time to stop p...
Page 20
2.1.5 pads section pads section overview (1) scene: create scenes to work out the structure of your track. During playback, you can switch to other scenes for quick on-the-fly arrangement. Dimmed pads represent scenes that contain clips, while a fully lit pad represents the selected scene. (2) patte...
Page 21
To transpose up an octave at a time. In 16 velocities mode, the pads represent 16 levels from the softest to the full velocity — this is especially useful for building up dynamic grooves. (4) navigate: when working on large projects, it is sometimes necessary to look at the computer screen. With mas...
Page 22
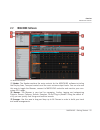
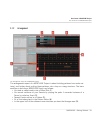
2.2 maschine software the maschine software (1) header: the header contains the main controls for the maschine software including the display area, transport controls and the main volume output levels. You can also use this area to toggle the browser, connect to maschine controller and monitor your ...
Page 23
(4) control area: the control area allows you control parameters and settings for each of the four modules at each project level (sound, group and master). This area can hold set- tings for samples, sounds, plug-ins, internal fx, midi and routing. (5) pattern editor: the pattern editor features both...
Page 24
(7) cpu meter: the cpu meter represents the current load on your computer's processor and is constantly measured; it should not go above 70% to avoid clicks and interruptions. You can save cpu power by sampling the audio output of maschine if necessary using export. Please refer to the reference man...
Page 25
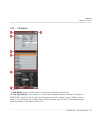
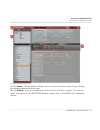
2.2.2 the browser the browser (1) disk button: use the disk button to access your computer hard drives. (2) file type selector: this contains 7 icons each representing the different files types of maschine. From the left to right the file types are project, group, sound, pattern, instru- ment, fx, a...
Page 26
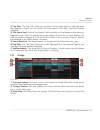
(3) tag filter: the tag filter allows you to search for file types based on tags that have been applied to them. You can quickly find files based on the bank, type and subtype categories. (4) text search field: use the text search field to quickly find files based on their name or tagged attribute. ...
Page 27
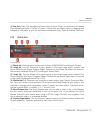
(4) clip area: each clip represents a pattern from a given group. A combination of several clips stacked vertically is called a scene. A scene can be moved freely by dragging and dropping it into place, or you can use more conventional copy, paste and delete functions. 2.2.4 control area the control...
Page 28
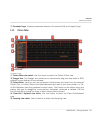
(7) parameter pages:displays parameters based on theselected tab and property page. 2.2.5 pattern editor the pattern editor (1) pattern editor view switch: use this button to select the pattern editor view. (2) dragger icon: the dragger icon allows you to conveniently drag and drop audio or midi pat...
Page 29
(6) sound slots: sounds slots 1-16 of a selected group are listed here. Click a sound slot to bring it into focus. (7) automation lane: the automation lane provides a visual overview of the each parame- ters automation. (8) automation view switch: the automation view switch allows you to toggle the ...
Page 30
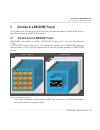
3 overview of a maschine project this chapter will familiarize you with the core concepts and terms of maschine and ex- plain the structure of a maschine project. 3.1 the structure of a maschine project maschine's file format is called a maschine project, and it has the file extension ".Mprj." a mas...
Page 31
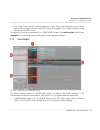
▪ the project also contains the arrangement of your song, how patterns are built from events which trigger sounds, and how they are arranged into a song structure using scenes and pattern clips. So basically there are two aspects to a maschine project: the sound content and the ar- rangement. The fo...
Page 32
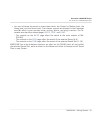
▪ you can influence the sound on these three levels: the project (or master) level, the group level, and the sound level. The relevant controls are situated in the parameter area (4), which is your one-stop mixer, routing, effects, and plug-in section. The pa- rameter area has three tabbed pages: ma...
Page 33
3.1.2 arrangement the arrangement aspect of a maschine project. The arrangement aspect of a maschine project is about building patterns from audio ma- terial, and further about putting those patterns into a loop or a song structure. The basic workflow in building a maschine song is as follows: ▪ you...
Page 34
▪ here you combine your patterns — represented by pattern clips (7) — into scenes (6). ▪ several scenes add up to a song (...Or a beat, or an arrangement, or whatever you want to call it). An awful lot of terminology here, but it sounds more complicated than it is, you'll see. For completeness... No...
Page 35
The header and the browser area. (1) the header: contains global settings such as the main volume output, tempo, swing and viewing modes are also set here. (2) the browser: here you manage your audio content and effect presets. For more de- tailed information on the maschine browser, please refer to...
Page 36
(3) the modules: maschine contains four module slots on each of the three maschine project levels sound, group, and master. Apart from hosting samplers, internal ma- schine effects, they host vst and au plug-ins too. These will be explained in more detail in chapter ↑ 4.5.1, module slots . 3.2 unlab...
Page 37
The controller mode buttons on the maschine controller. These buttons represent different maschine mikro controller modes, e.G., when press- ing the pad mode button, the displays will show pad-specific control options. When re- leased, the controller switches back to standard controller mode. You ca...
Page 38
→ the controller will remain in pad mode until you press button 1 again. For more detailed information on controller modes, please refer to the reference manual. Overview of a maschine project controller modes and mode locking maschine - getting started - 38.
Page 39
4 creating a pattern the following tutorials are workflow-oriented and start with the simplest tasks and progres- sively lead you to more complex operation, helping you familiarize yourself with ma- schine. In order to get you started let’s lay out a basic pattern with some drums, a bass line and a ...
Page 40
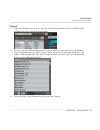
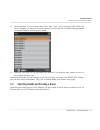
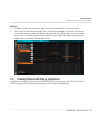
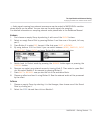
Software 1. Click the browser button in the top row to show the browser within the maschine window (the button becomes highlighted): 2. We will start by finding a bass drum for our pattern: in the top row of the browser, click the sample icon on the far right to get a list of all the available sampl...
Page 41
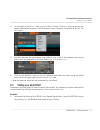
4. Since we want to find a bass drum first, type “kick” into the empty field above the list of samples. As soon as you start typing, you will see the list below being updated to display samples matching your query. 5. Now you can listen to the available bass drums by clicking on their names in the l...
Page 42
Hardware on the maschine controller, you were just browsing through the samples using knob 5. Found a bass drum that matches your taste? Okay, then load it by pressing button 8 on your maschine controller. It will be loaded into the focused sound slot and playable by pressing the respective pad. Sof...
Page 43
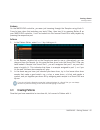
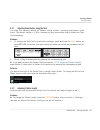
4.3.1 adjusting quantization using the grid the step grid property affects all pattern editing actions, including quantization (note snap). The default setting is 1/16th, however you may use another one or disable the step grid completely. Hardware 1. To change the step grid's quantization settings,...
Page 44
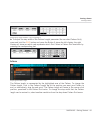
Adjusting the length of pattern 1 by turning knob 1 ► to adjust the step width of the pattern length parameter (the so-called pattern grid), press and hold the grid button and press the button 3 above the left display; the right display will show you which pad represents which grid. Select a pattern...
Page 45
The pattern grid menu. 4.3.3 recording a pattern with the controller now that you have chosen the grid, let’s get going with the pattern, starting with some drums! Recording live first, lets record some beats with the pads: press the play button, then the record but- ton ( rec ) to enable record mod...
Page 46
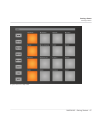
Recording a pattern: press play & rec and then play some pads! 4.3.4 step sequencer if you are familiar with classic drum machines, you may want to program your pattern us- ing the step sequencer: 1. Press the pad with the sound you want to record to select it. 2. Press the step button. Each pad now...
Page 47
A typical 4/4 kick in step mode. Creating a pattern creating patterns maschine - getting started - 47.
Page 48
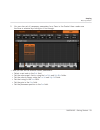
4.3.5 recording a pattern with the software ► in the maschine software, set a step by double-clicking into the grid to the right of the respective sound. ► to clear the step, right-click (on mac os x: [ctrl]+click) it. You may also drag it to the right or left, or stretch it by dragging its right bo...
Page 49
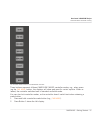
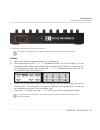
The backside of the maschine controller with the midi in. For details on making audio and midi settings please refer to the printed setup guide. Hardware 1. Select your sound by pressing the pad it is assigned to. 2. Now press and hold the pad mode (keyboard) button. On the left display, you can cho...
Page 50
Software 1. In order to select the sound you want to record a melody with, click on its name. 2. Now click the piano roll/keyboard icon: the grid that showed all sounds of the group in one row now only shows the sound you selected: by adding steps, you can choose their pitch in halftones depending o...
Page 51
4.5.1 module slots module slot 1 containing native instruments kontakt. Maschine contains four module slots on each of the three maschine project levels sound, group, and master. Apart from hosting samplers and maschine effects, module slots can host instrument and effect type plug-ins in the follow...
Page 52
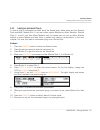
4.5.3 loading an instrument plug-in to load a plug-in instrument we must be at the sound level, where there are four module slots available. Module slot 1 can host either source modules or effect modules. Module slots 2, 3 and 4 can host effect modules only (of course you can put an effect module be...
Page 53
12. Edit the plug-in parameters using the knobs 1-8. 13. Press > of the plug-in. To play the instrument plug-in chromatically using the pads on the maschine hardware; hold shift then press the pad mode button to quickly toggle to keyboard mode. For information on changing and assigning plug-in param...
Page 54
3. Click on the first module slot (only module slot 1 can host instrument plug-ins) and click the drop-down arrow at the right end of it. 4. Select plug-ins from the menu to get a list of all available instrument plug-ins. Creating a pattern creating patterns with plug-in instruments maschine - gett...
Page 55
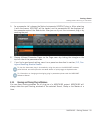
5. As an example: let’s choose the native instruments kontakt plug-in. After selecting it with the mouse, kontakt will be loaded, and its parameters will be displayed on the parameter area of the module tab: now you can try out the instrument plug-in by pressing the pad. 6. Choose different paramete...
Page 56
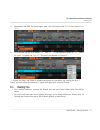
4.1 maschine with guitar rig and massive plug-in user interfaces opened. You can open or close floating windows for plug-ins as described in the following. Hardware 1. Select a module slot with a plug-in loaded by pressing buttons 5-8. 2. Press the selected module slot button to open the plug-in win...
Page 57
An edit icon appears when the mouse curser is placed over the reaktor logo to open a floating window for the plug-in: 1. Place your mouse cursor over the plug-in icon; an edit button appears. 2. Click the edit button to open the plug-in in a separate floating window. A second click on the edit butto...
Page 58
4.6.2 software solo ► to solo a sound, right-click (on mac os x: [ctrl]+click) on the pad icon in the pattern editor: ► to unsolo it, right-click (on mac: [ctrl]+click) on the pad icon again. ► to solo a group, right-click (on mac: [ctrl]+click) on the group icon in the arranger: ► to unsolo it, rig...
Page 59
► to mute a group, click on the group icon in the arranger: ► to unmute the sound, click on the group icon again. In the next chapter, you will learn how to add effects and get to know the powerful routing system of maschine. Creating a pattern mute & solo maschine - getting started - 59.
Page 60
5 using effects & routing now that we have created the pattern, let’s spice it up with some effects. Maschine pro- vides a healthy selection of effects (fx) that can be applied on sounds, groups and the master, all as insert effects. In addition, you may also use 32-bit and 64-bit plug-in ef- fects ...
Page 61
▪ filter: this filter has selectable characteristics that can be modulated via an lfo or envelope follower. 5.1.3 modulation ▪ chorus: the chorus is useful to “thicken” signals and enhance the stereo content. It is most effective on melodic sounds. ▪ flanger: this is a standard flanger with lfo and ...
Page 62
5.1.6 distortion ▪ distortion: combining overdrive, feedback and modulation, the distortion produces a heavy distortion/fuzz effect. ▪ lofi: the lofi effect reduces the bitrate and sample rate of the audio signal for an interesting “vintage” effect at subtle settings, and heavy digital distortion at...
Page 63
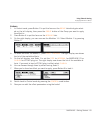
5. To select an effect for module 2, press shift + browse . 6. On the left display, use knob 1 to set the type to internal for maschine fx or plug-in for vst/au plug-ins. The right display now shows the list of the available ef- fects. If you want to load a vst/au plug-in effect select plug-in . 7. ...
Page 64
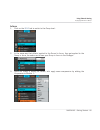
2. Select one of the modules (in this case we select module 2) and click the arrow to the right to get a list of all available effects: 3. As an example, let’s choose the reverb effect. After selecting it with the mouse, you will find the parameters displayed in the control area of module 2: 4. Now ...
Page 65
Hardware 1. In control mode, press button 2 to put the focus on the group tab which gets select- ed on the left display, then press the group button of the group you want to apply the effect to. 2. Press button 4 to put the focus on the modules tab. 3. On the right display, you can now see the modul...
Page 66
Software 1. Click on the group tab to switch to the group level: 2. In the same way that effects applied to the sound in focus, they get applied to the group in focus, so make sure to have your group in focus in the arranger: 3. Since our group is mainly for drums, let’s apply some compression by ad...
Page 67
4. Play around with the parameters of the compressor to get used to it! If you have vst/au effect plug-ins installed you may also load them from the effects menu by selecting plug-ins from the list. 5.4 applying effects to the master you can apply four effects to the master so that all your sounds a...
Page 68
Since we want to fine-tune the frequencies of the song, let's choose the eq. The list of available effects for the master. ► use the mouse to turn the knobs on the eq module. By using the page selector, you can access the other parameter page(s), if any: the page selector in the software. 5.5 bypass...
Page 69
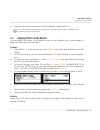
2. Now the right display shows the modules containing effects. To bypass one of the ef- fects, press shift followed by either button 5 (for module 1), button 6 (for module 2), button 7 (for module 3) or button 8 (for module 4). 3. To hear the effect again, press shift followed by the respective butt...
Page 70
5.6 automating effects and sampler parameters one of the really cool features of maschine is the ability to automate parameters from the effect modules and the sampler modules both on the hardware and on the software in a very easy way. Hardware ► to automate a parameter with the hardware, first mak...
Page 71
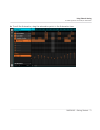
► to edit the automation, drag the automation points in the automation lane. Using effects & routing automating effects and sampler parameters maschine - getting started - 71.
Page 72
6 the input module and advanced routing the routing features allow for a flexible way to handle routings within maschine and to- gether with external instruments. Since the routing capabilities are quite powerful, we will focus on two common usage scenarios: routing external audio into the effects a...
Page 73
→ audio signals coming from external sources are now be routed to maschine’s modules where effects can be added. You can also use the audio signals for sampling. For detailed information on sampling external audio please refer to the reference manual. Hardware 1. First choose an empty group by selec...
Page 74
3. On the right of the module 1 tab, you will find an arrow. Click on it and you will be pre- sented with several options in the dropdown menu: sampler, input and midi out. Se- lect input. 4. You will now see two parameters: one knob for the level of the external input and a button that lets you sel...
Page 75
2. Now select an empty group with an empty sound slot, let’s say sound 1. Select it by pressing its pad. 3. Press button 5 to select the source tab ( src ). After that press shift + browse . 4. By using buttons 5 & 6 or knob 5 you can select between sampler , input or midi out . Select input and pre...
Page 76
Software 1. Select the first sound slot of an empty group. Load the reverb into the sound slot’s effects tab. 2. On the source tab ( src ), select input and leave the source at internal: the input module and advanced routing setting up a send effect maschine - getting started - 76.
Page 77
3. Now select the 909 kit group again and click the output tab ( out ) of the sound snare 909 1 : 4. You can see the two aux sends, aux 1 and aux 2 . In the dropdown menu of aux 1 , select b: input 1 to send the snare 909 1 sound to the reverb in sound 1: → as you can hear, the snare is already bein...
Page 78
Please be aware using too many effects may cause a high load on your computers cpu, as a result the amount of effects you should use is dependant on the processing power of your computer. ▪ since you can save patterns together with your group, you can also prerecord automa- tion for your effects, fo...
Page 79
7 creating a song using scenes creating a song on maschine is easy and straightforward. The basic concept is this: groups and their patterns are combined in clips, a clip being a representation of a group with a specific pattern. The patterns are automatically named by their pattern number, but clip...
Page 80
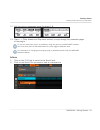
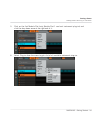
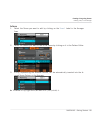
Software 1. Select the scene you want to edit by clicking on the scene 1 label in the arranger area. 2. Select the pattern you want to use in the scene by clicking on it in the pattern editor: 3. A clip, representing the selected pattern, will be automatically inserted into the fo- cused scene colum...
Page 81
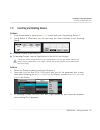
7.2 inserting and deleting scenes hardware 1. Enter scene mode by pressing the scene button and lock it by pressing button 1. 2. Using button 3 (duplicate) you can now copy the scene selected to the following scene. ► to delete a scene, press button 4. ► to rearrange scenes, use the page buttons at ...
Page 82
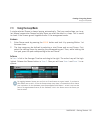
7.3 using the loop mode a single selected scene is always looping automatically. The loop mode allows you to se- lect several consecutive scenes and play them one after the other in a loop. This is useful to check if the scenes go well together and/or if the arrangement works. Hardware 1. Enter scen...
Page 83
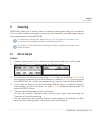
8 sampling maschine allows you to record internal or external audio signals using your soundcard. This is a useful feature if you want to record your own samples or rearrange loops that you have created yourself using maschine. For information on routing audio please refer to ↑ 6, the input module a...
Page 84
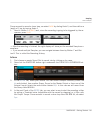
Since we want to record a drum loop, we select sync by dialing knob 3, and then define a length of 1 bar by turning knob 4. 1. Now hit button 5 ( start ) and, since the recording is going to be triggered by the se- quencer, press play . → after the recording is finished, the right display will show ...
Page 85
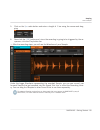
5. Click on the sync radio button and enter a length of 1 bar using the mouse and drag- ging: 6. Now click the start button and, since the recording is going to be triggered by the se- quencer, click the play button too. → after the recording stops, you will see the waveform of your sample: under th...
Page 86
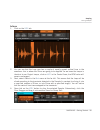
8.2 editing a sample hardware with button 2 you can reach the edit tab to edit the recorded sample. 1. Change the start and end point of the sample with knob 1 and 2. 2. Enable loop mode by pressing the right page button to navigate to the second page and then turn knob 1. 3. Adjust the start and en...
Page 87
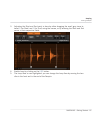
3. Adjusting the start and end point is done by either dragging the small grey icons la- beled s (for start) and e (for end) using the mouse, or by entering the start and end points in their respective fields. 4. Enable loop by clicking on the loop button. 5. The loop area is now highlighted: you ca...
Page 88
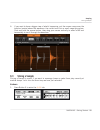
6. If you want to have a bigger view of what’s happening, put the mouse cursor over the timeline located above the waveform: the cursor turns into a small magnifying glass. Click and hold the mouse button, then drag your mouse vertically to zoom in/out and horizontally to scroll through the waveform...
Page 89
2. You can now see the slices of the sample represented by vertical lines in the wave- form on the right display. As we know the tempo is identical to our project tempo, we select auto using knob 3. 3. There are three slice modes: split slices the sample into a predefined number of sli- ces, grid sl...
Page 90
Software 1. Click on the slice tab. 2. You can see that the loop now has a couple of equally spread vertical lines in the waveform: this is where the slices are going to be applied. As we know the tempo is identical to our project tempo, click on auto in the control area; the bpm value will remain u...
Page 91
→ the piano roll / keyboard editor will open automatically after that, and you will see a couple of notes: play around with the slicing feature by removing some of these notes, quantizing or com- pletely rearranging them! These notes represent the slices and trigger them in order to play the loop ju...
Page 92
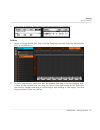
5. If you want to delete a zone, select it and press button 6 to remove it. Software 1. Select an empty sound slot, then click the sampling icon and enter the mapping tab ( map ) by clicking on it: 2. To add a new sample, select one from the browser and drag it into the mapping area. A zone will be ...
Page 93
3. You can also set all necessary parameters for a zone in the control area: make sure the zone is selected by clicking on it first though. → now you can set the selected zone’s parameters: ▪ select a root note in the root field. ▪ set the note range’s limits, using the low note and high note fields...
Page 94
9 managing projects in this chapter you will learn how to save different elements of projects independently so that you can easily use and find them for other projects. Some of these functions are only available in the maschine software. You will also learn how to export audio files from groups, sou...
Page 95
9.1.2 saving a group ► to save a group, right-click (on mac os x: [ctrl]+click) on the groups slot in the ar- ranger and select save as… from the dropdown menu: 9.1.3 saving a pattern ► to save a pattern, right-click (on mac os x: [ctrl]+click) on the pattern label in the arranger and select save as...
Page 96
9.2 saving and recalling module presets 9.2.1 saving module presets all settings and assignments of a maschine module slot can be saved as module pre- sets. Once saved, module presets can be accessed from the maschine browser. This is a very quick and convenient way to recall plug-ins as well as par...
Page 97
4. Use knob 3 to set the type to the name of the plug-in presets you want to browse. 5. On the right display, you can view all module presets that were saved for the selected plug-in. 6. Browse through the list of module presets with knob 5. 7. Load the selected module preset by pressing button 8. S...
Page 98
Instrument presets in the maschine browser. 9.3 exporting audio there are several ways to export audio files in maschine: managing projects exporting audio maschine - getting started - 98.
Page 99
1. From the file menu, select export audio…: 2. The export window opens up. 3. In the export window’s region dropdown menu you can select the region you want to export: all scenes or the current loop range. 4. From the output menu, select what you want to export: the master, groups or sounds. If you...
Page 100
5. In the folder field, you can choose the destination folder of the exported audio. 6. In the options section, you can additionally select a bit depth , enable normalization ( normalize ) and choose whether you wish to optimize the loop for looped playback ( loop optimize ). 7. When you are done, c...
Page 101
10 tips for playing live since maschine is a very hands-on tool for producing music as well as for performing live, we figured we would gather some tips for you to get you started playing live. If you are used to playing live, you may not need them, but maybe you will find some new ideas to integrat...
Page 102
10.5 use note repeat note repeat is a very useful tool for playing live: use it to add some additional drums, drop in some effect sounds, play a bass line or a melody. 10.6 set up your own multi-effect groups as described in chapter ↑ 6, the input module and advanced routing , you can set up mul- ti...
Page 103
11 glossary browser the browser is the front end for accessing all the elements of your maschine projects: projects, groups, sounds, samples, patterns, instruments and fx presets. Each of these can be stored and “tagged”, and categorized in a way that allows you easy access to all of them. Maschine'...
Page 104
Modules maschine contains four module slots on each of the three maschine project levels sound, group, and master. Maschine modules are the maschine sampler, vst/au plug-in instruments or fx, internal maschine fx, as well as the external input module and the midi out module. Scenes a scene represent...

